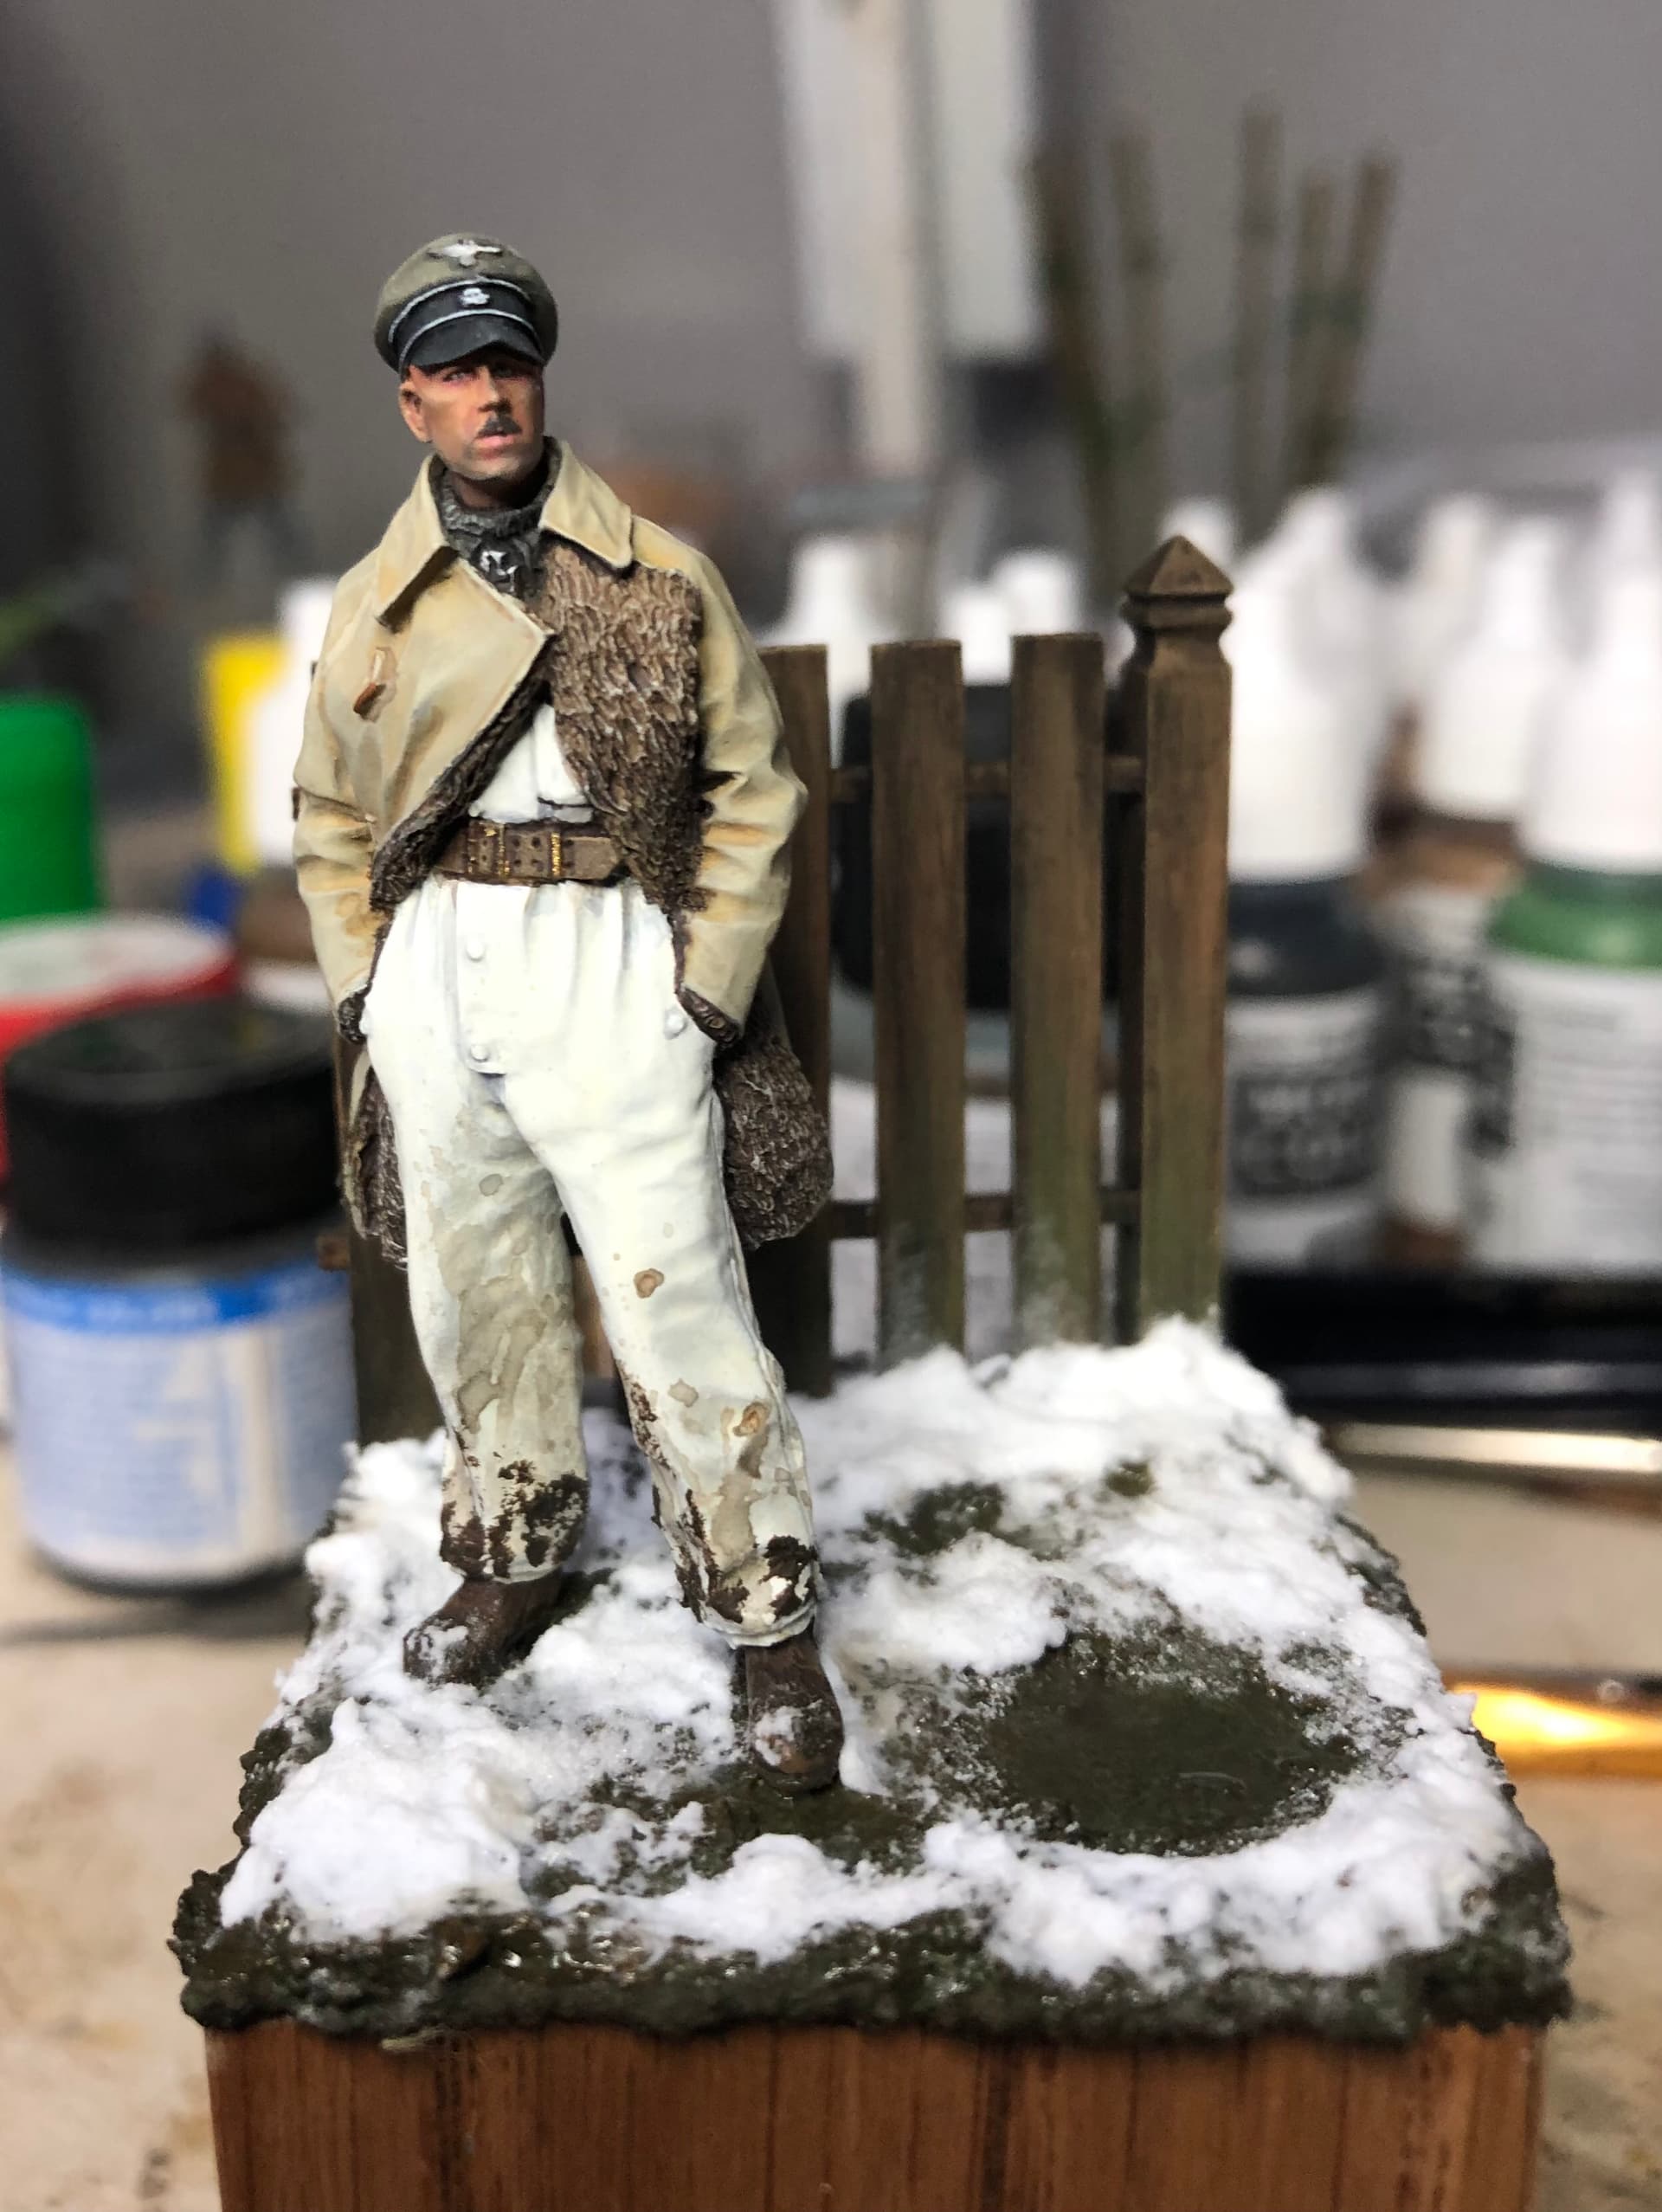
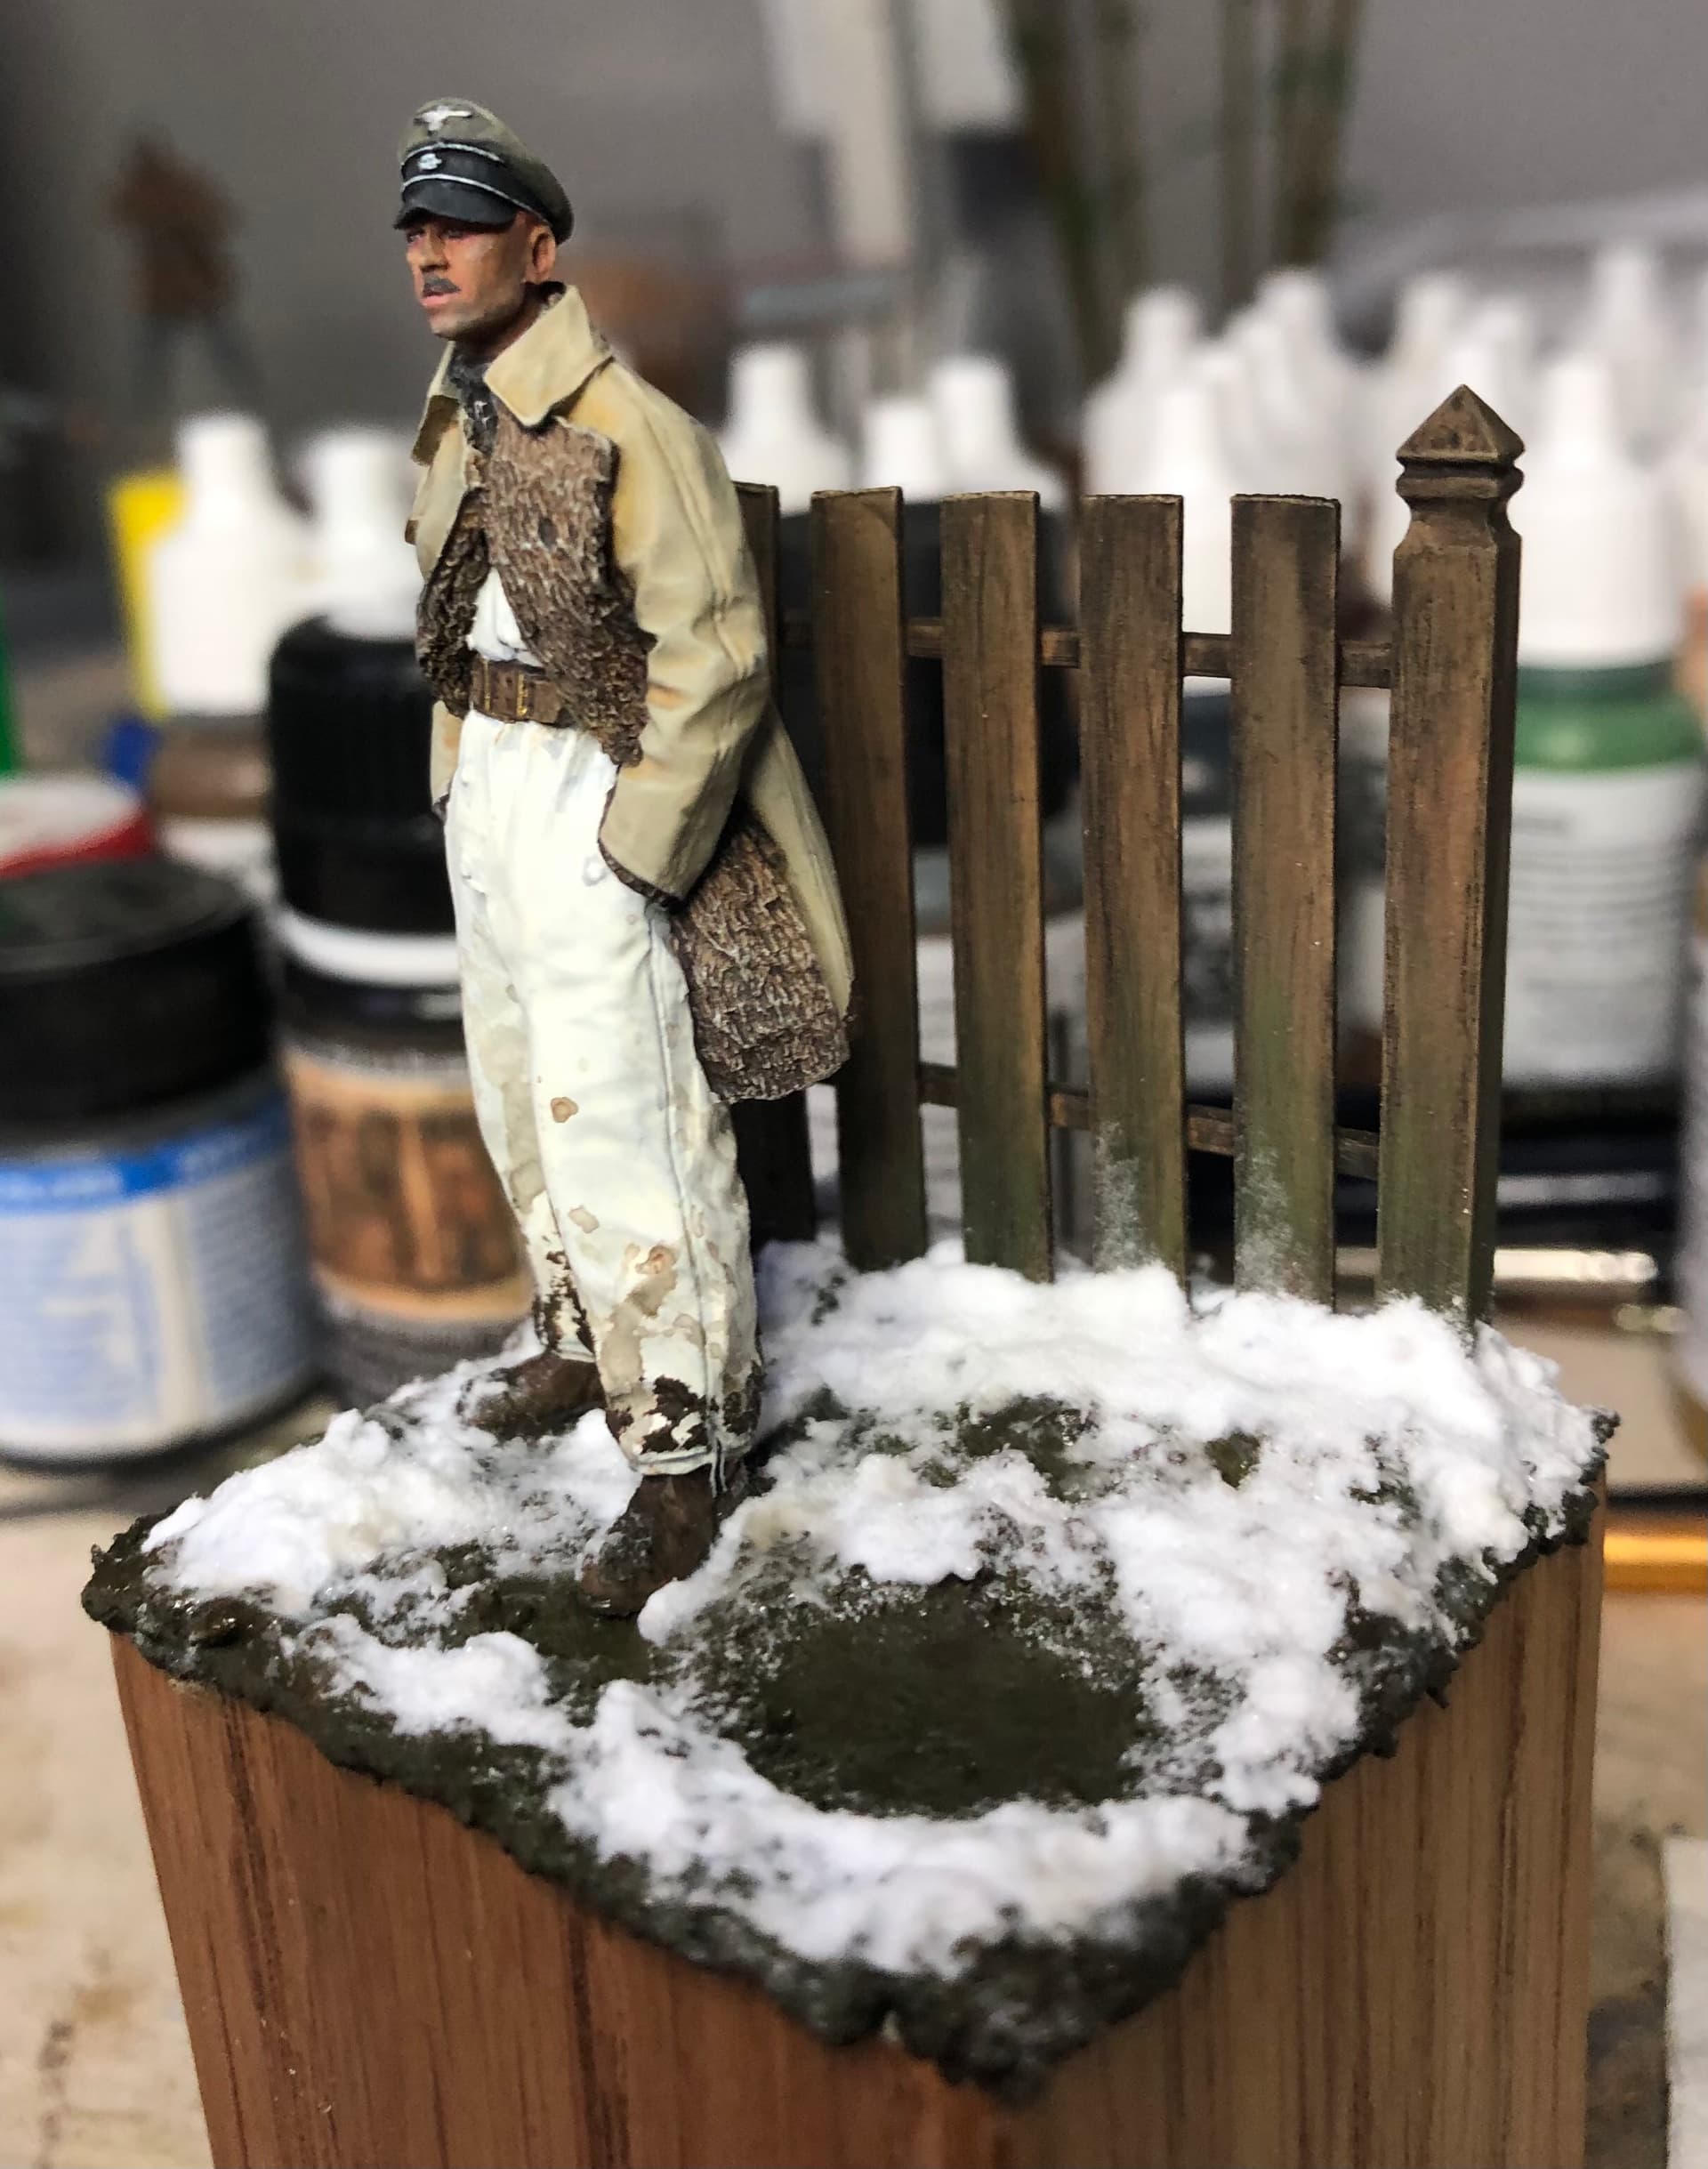
Afternoon Gents, just thought I’d throw this one in. I’ve been doing this as bit of stress release at the same time as the 1/16 MMM Marine. It’s a straight up-and-down figure, about 10 minutes to put together, then paint, as opposed to the Marine!
lol … You know I’m kidding, its bl***y brilliant !! is it 1/16 or 1/35 ? And how did you do the silver piping on the cap ? thats perfectly straight and a practically uniform width all the way ? that part alone looks amazing
No worries John, I know your sense of humour. Same as mine . It’s the 1/35 one. The piping on the cap was raised so, it was pretty easy to do. A thin wash of black, either side of the piping, then stroke on a thinned mix of white with the side of the brush. Much the same way as I do highlights. HTH.
G.
lol … my SoH can be a bit dry and sometimes downright impossible to get lol …
Back to PanzerMeyer, it is seriously epic. You have a gift mate thats for sure. I think I might invest in a generic WW2 German figure from Alpine now I am a bit more at ease painting them, and I think their detailing helps a lot as well. I have several Verlinden Waffen SS ones but their details are not as sharp as those Alpine ones.
Edit. just remembered I have a warrior set of 3 modern UK troops so might have a bash at them as I did one for my Striker …
Outstanding as usual Lazarus. You just keep on cranking out beautiful figures! And Alpine figures are a joy to paint imo because of the crisp detail. I did one more figure myself after that Italian guy, I will post pics as soon as I take some .
Can you tell us how you painted the fence section? Incredible as well as the groundwork.
Hi Rich, the fence was painted by first giving it a base coat of Vallejo Khaki, then drybrush with Deck Tan. It does look pretty crappy at this point but, then comes the magic ingredient, AK enamel wash for wood! Apply a coat of it, let it dry for a few minutes, then use a brush just dampened with thinners and remove the wash gradually, cleaning the brush after a few strokes and starting again until you get the effect you want. Dead easy! Thin wash of Olive Green for the weathering, coat of Ultra Matte and done! Took about an hour in total to do the fence.
Looking forward to seeing your figure pics. Your Italian Para inspired me to do my last figure in the campaign.
G.
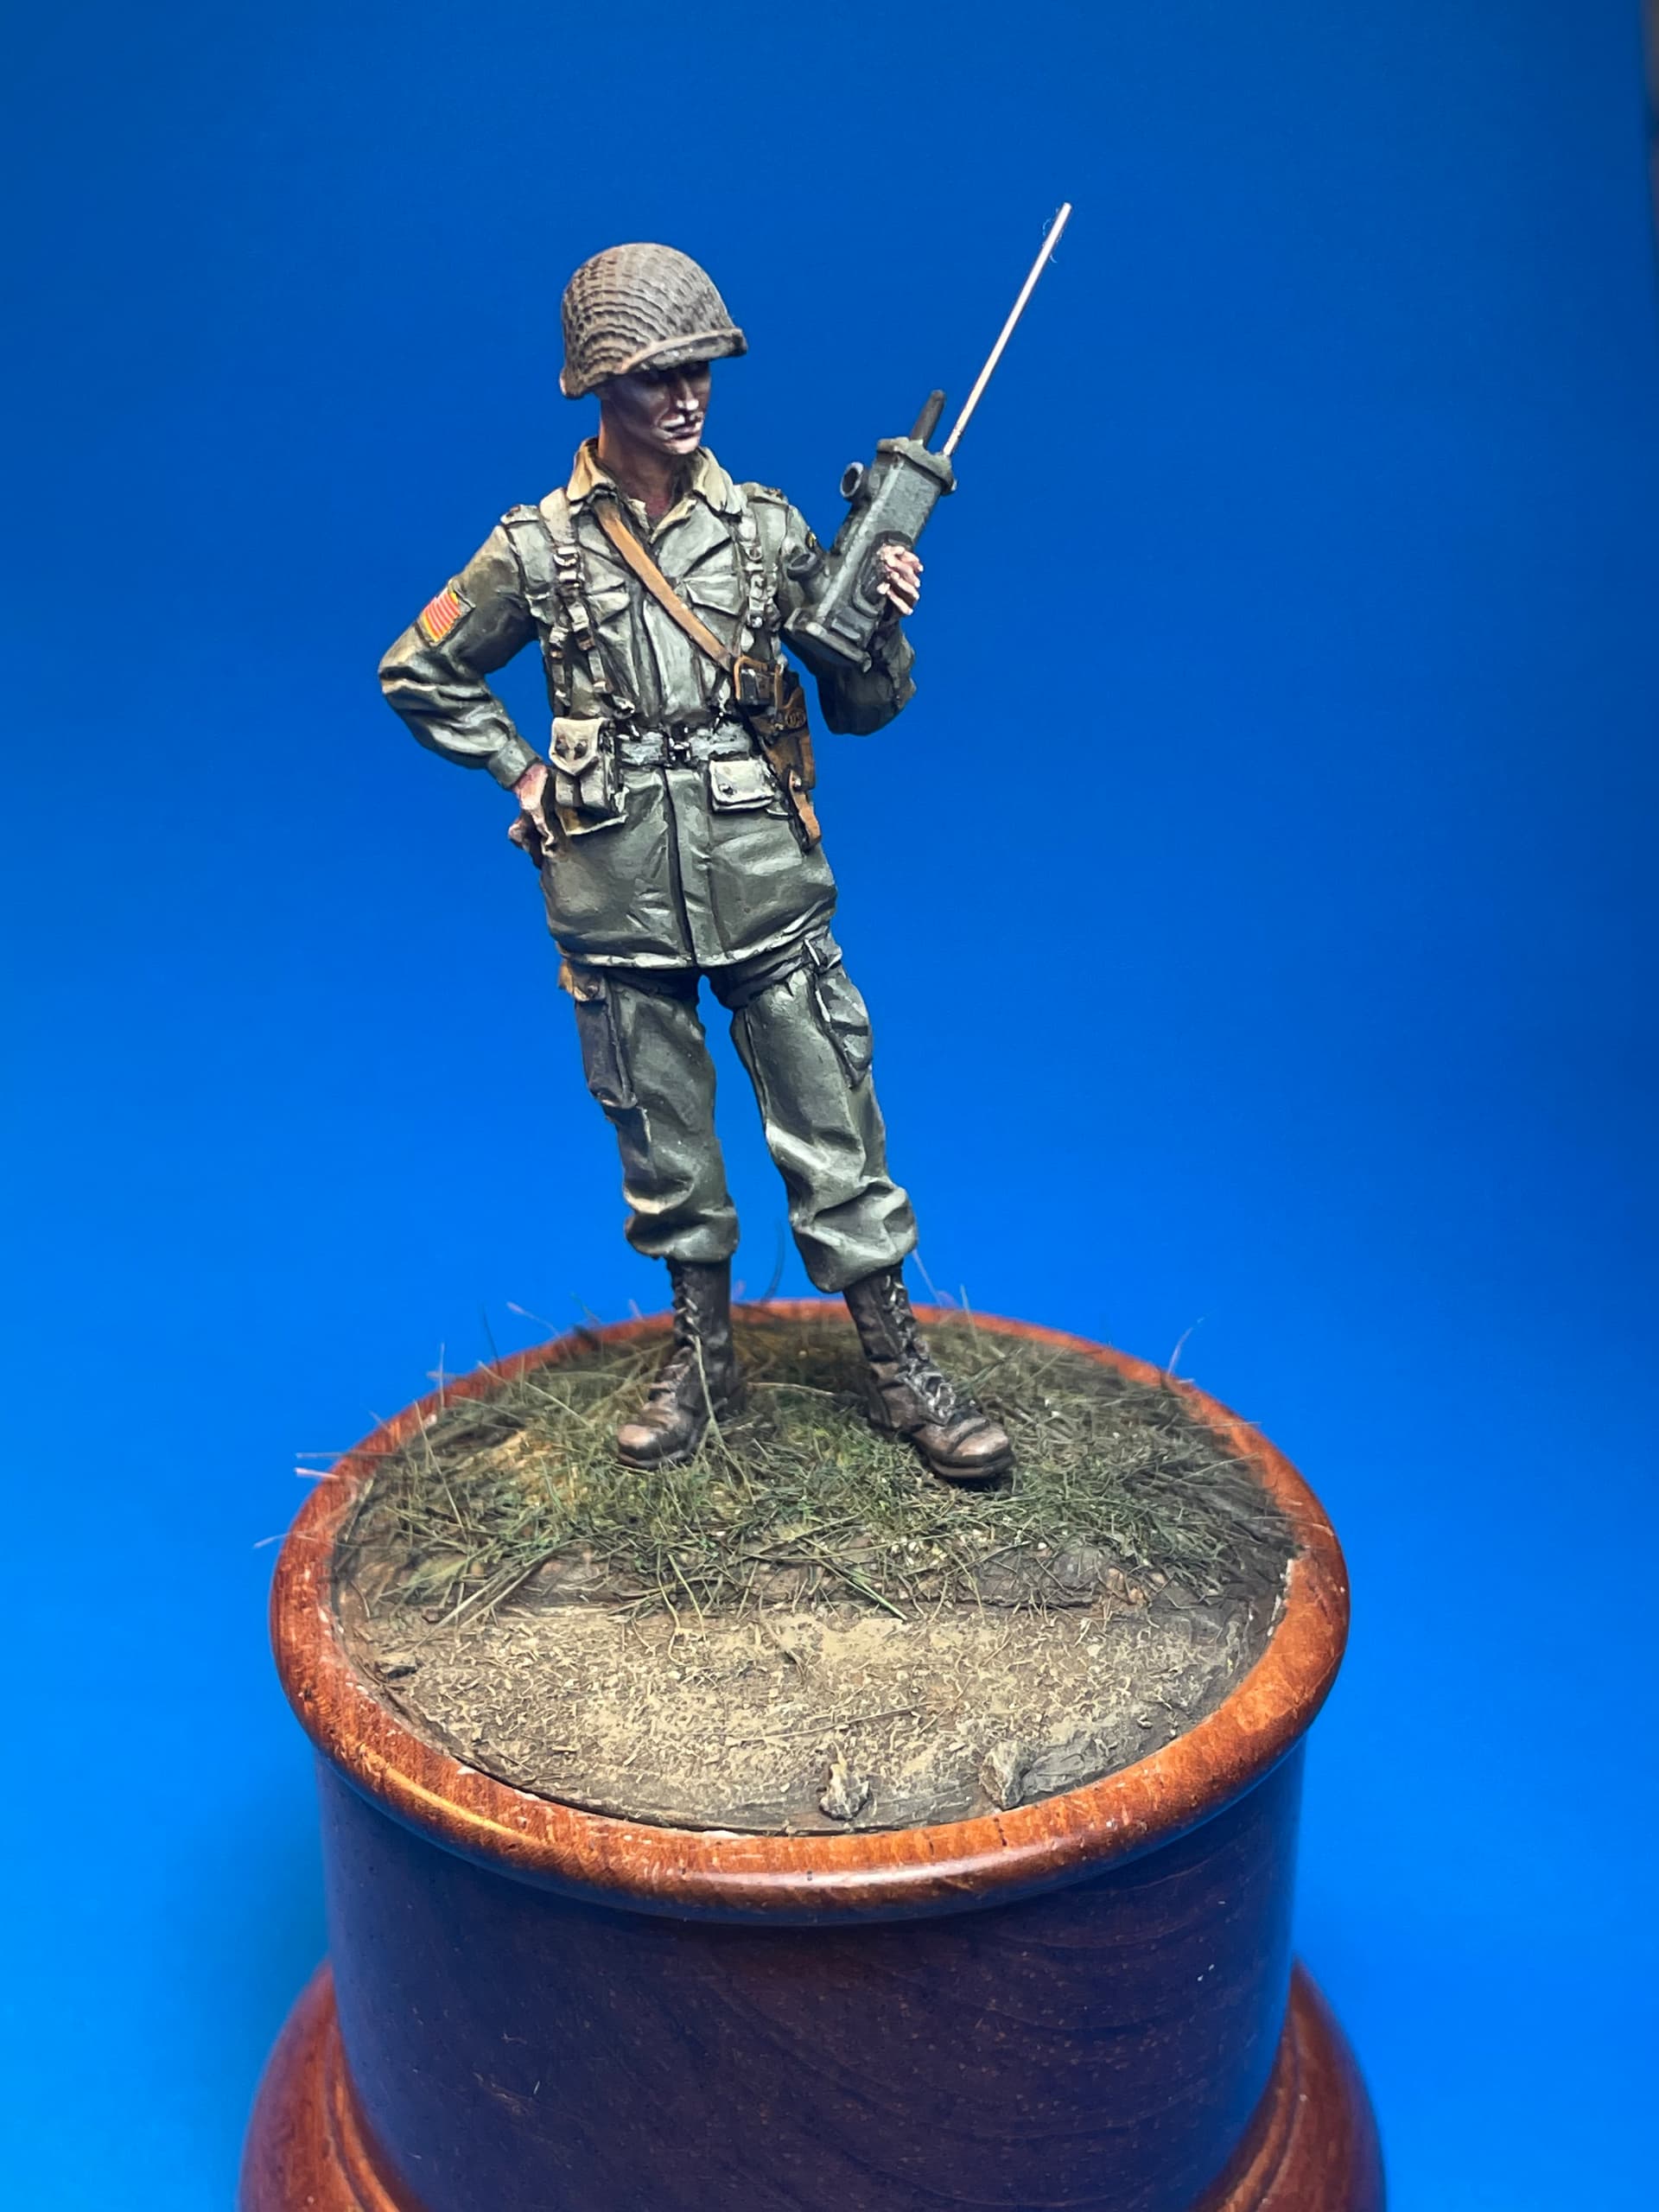
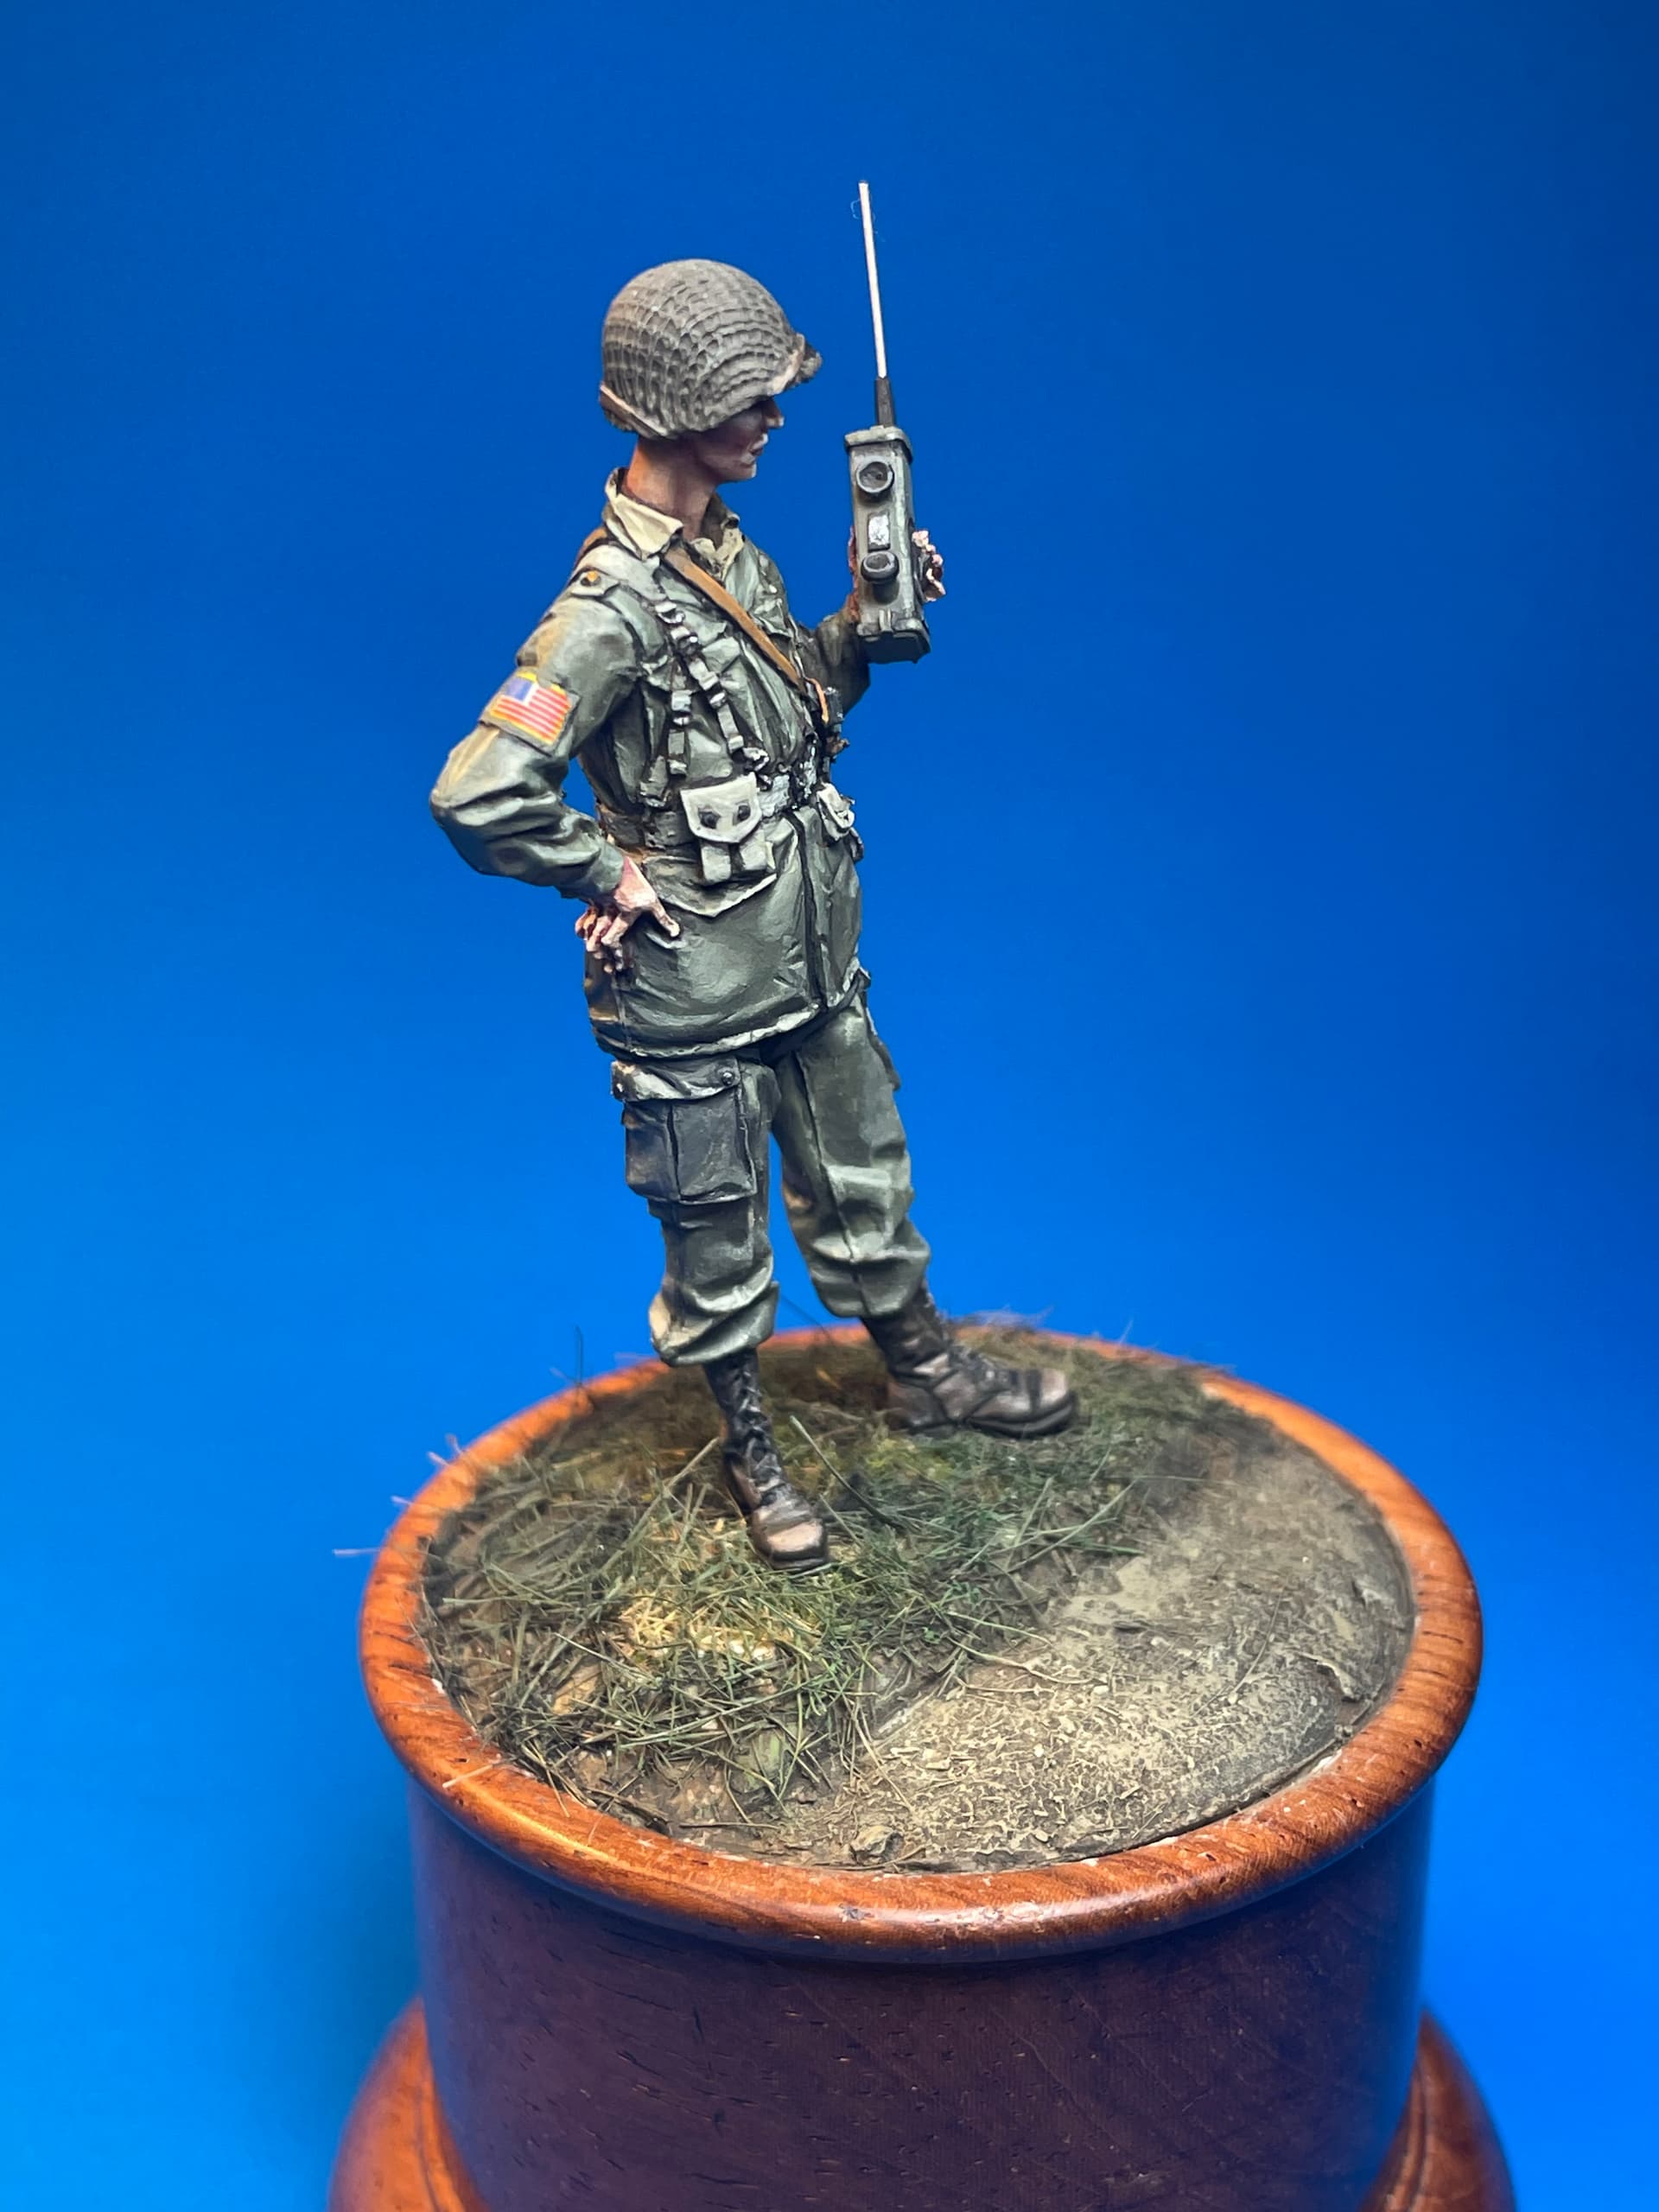
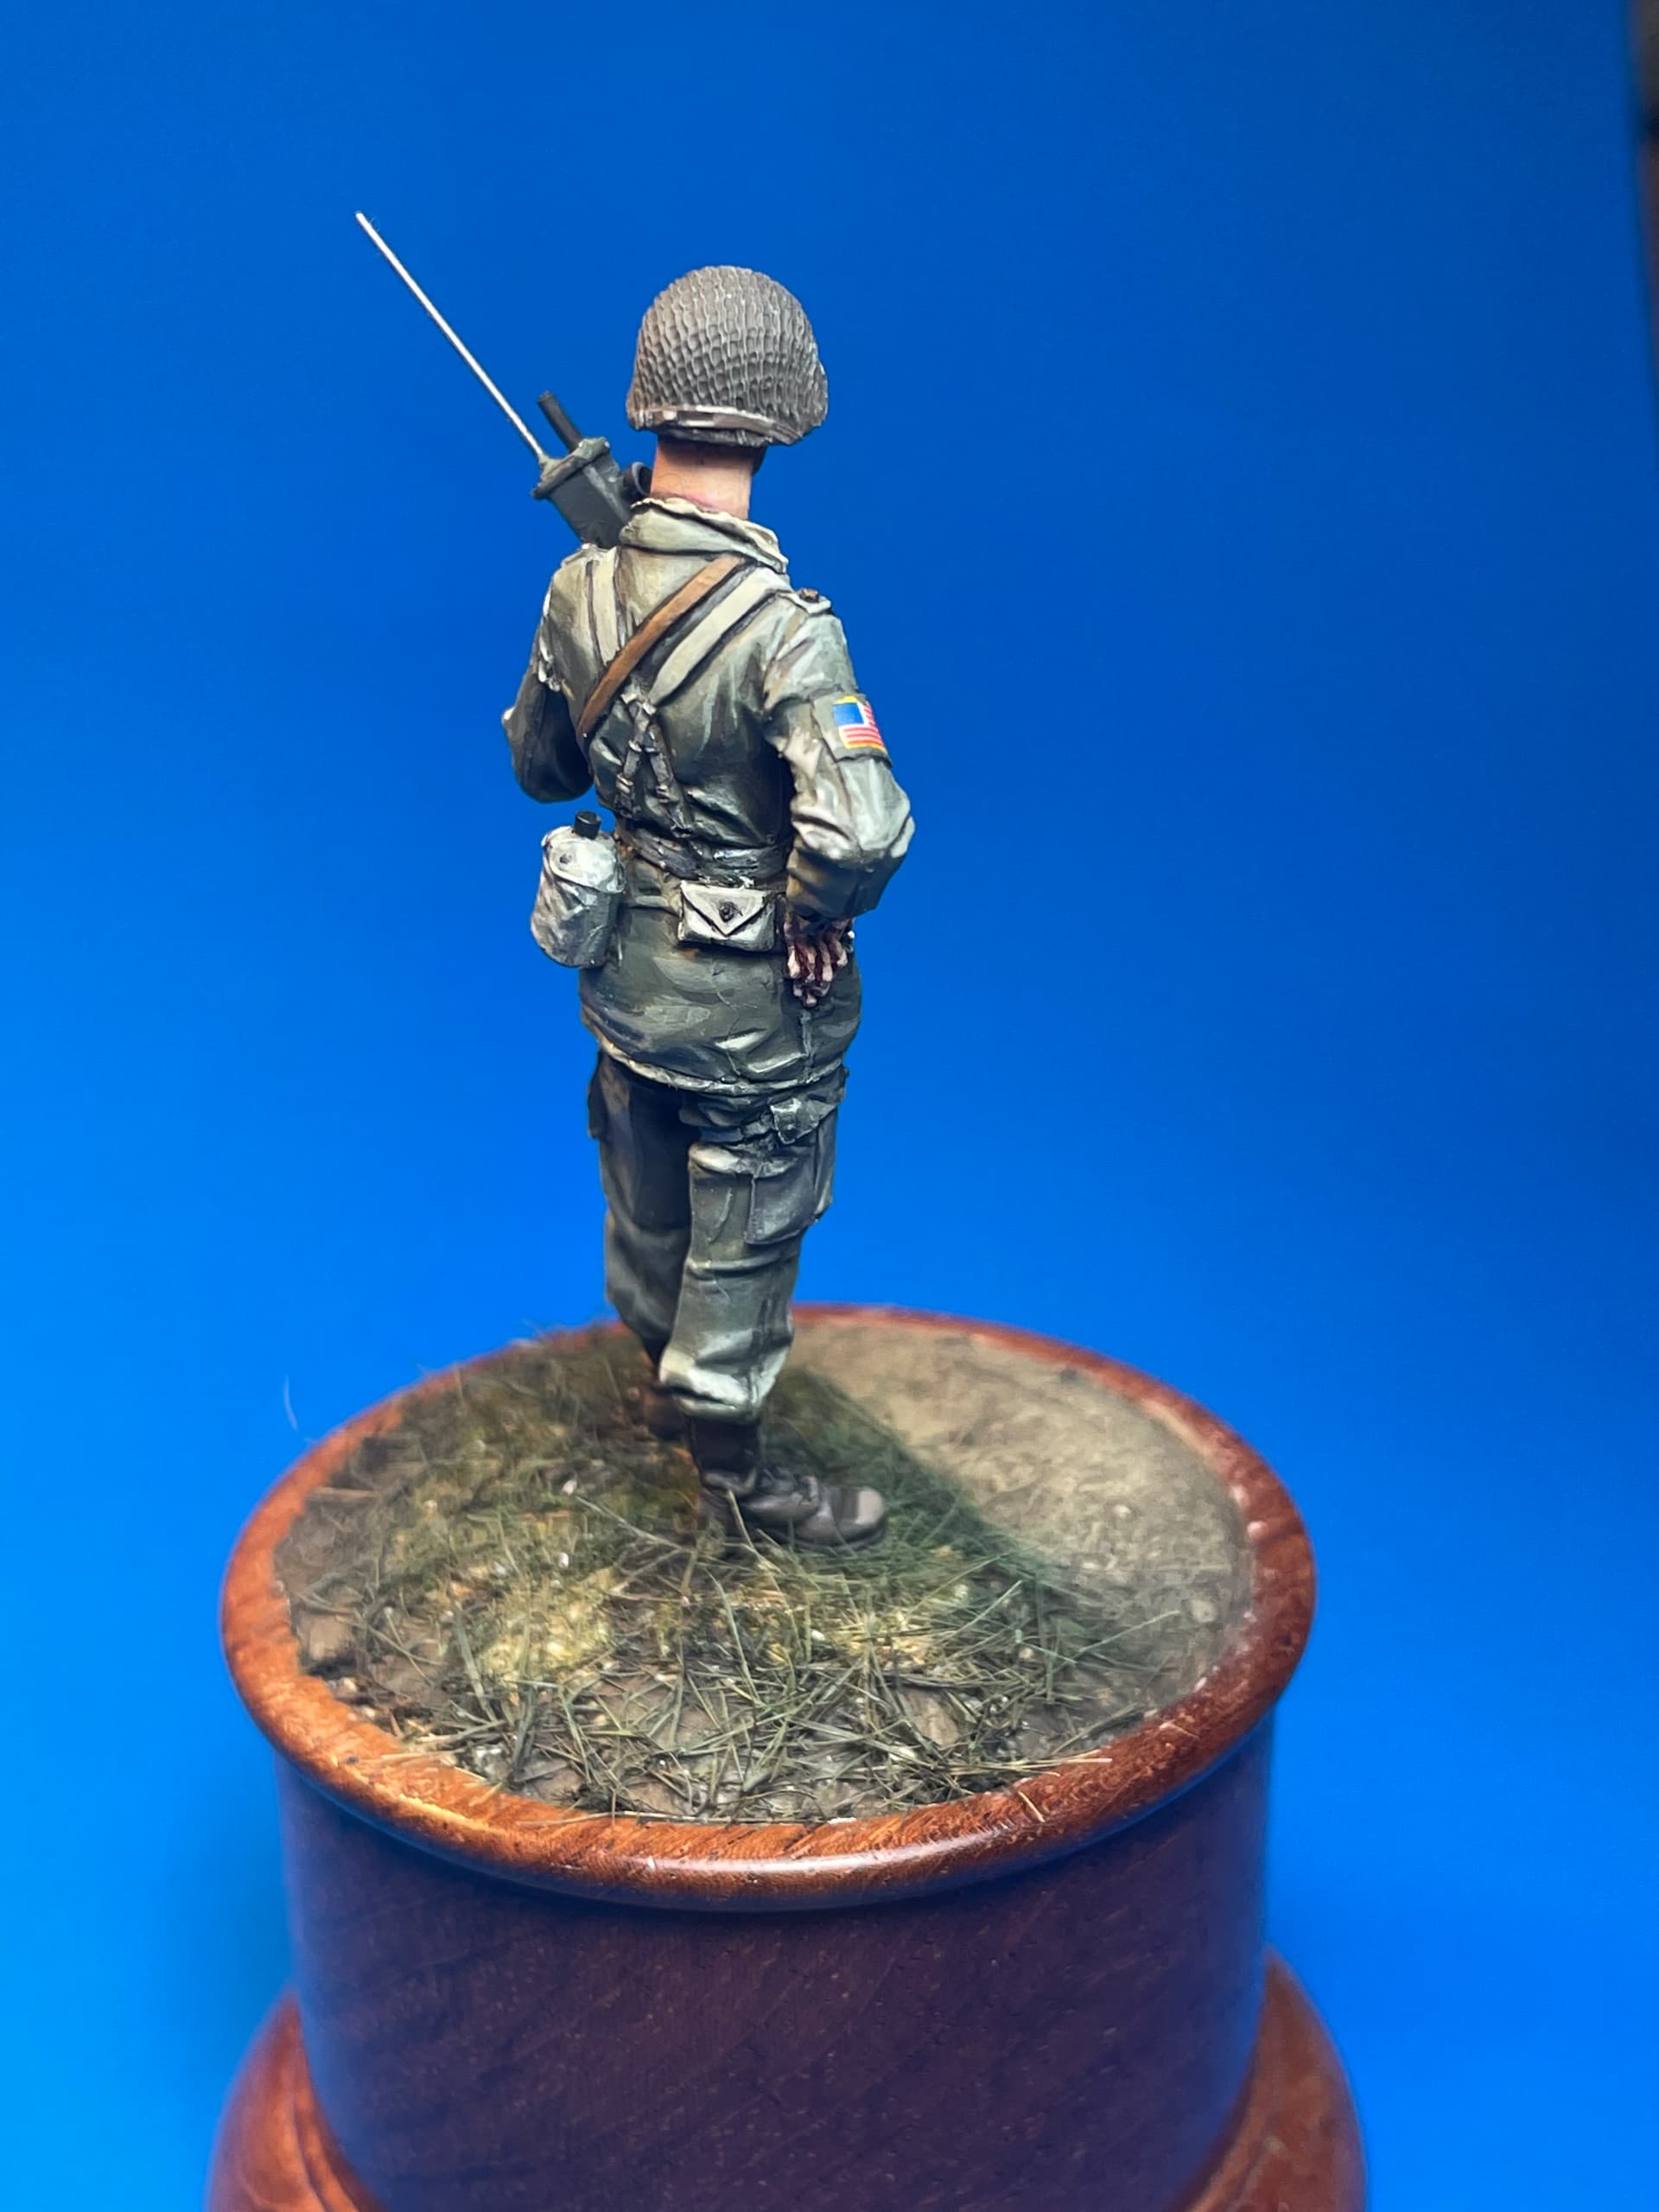
Here’s my latest fig completed two weeks ago. It’s from Stalingrad miniatures and it’s a beautiful figure with crisp details and little to no cleanup. Not many US paras out there with the late war uniform. Painted with Vallejo’s acrylics. Comments welcome.
Now that is really nicely done, mate. The colours look spot on. How did you do the groundwork? I’ve tried a few times to get that effect and always failed miserably.
G.
Thanks for the kind words Lazarus. I still need to blend the transitions better but I’m getting there. Probably the best figure I’ve done except for the Alpine Falschirmjaeger.
As far as the groundwork goes, I was up to 11pm on Friday May 12 getting it ready for a show the next day. It was definitely a rush job and I’m a bit disappointed in it but as I said I was under a deadline ! I used Apoxy sculpt to form the base and just raised the grass area a little to add some interest. Then I sprinkled various sizes of earth to the path and various size static grass. I painted it with Vallejo’s using different greens and browns and then a bunch of dark brown and black washes. I followed it with dry brushing lighter brown on the pathway and yellowish green on the grass.