Hi everyone, I thought i’d share my progress on this P51D build.
I’m not new to aircraft builds, but have taken a long break from them to concentrate on WWII German Armour. My last was the RFM 1/35 Panther G with full interior, and after that ball breaker, I needed something a little less involved and decided that a couple of aircraft projects would fit the bill.
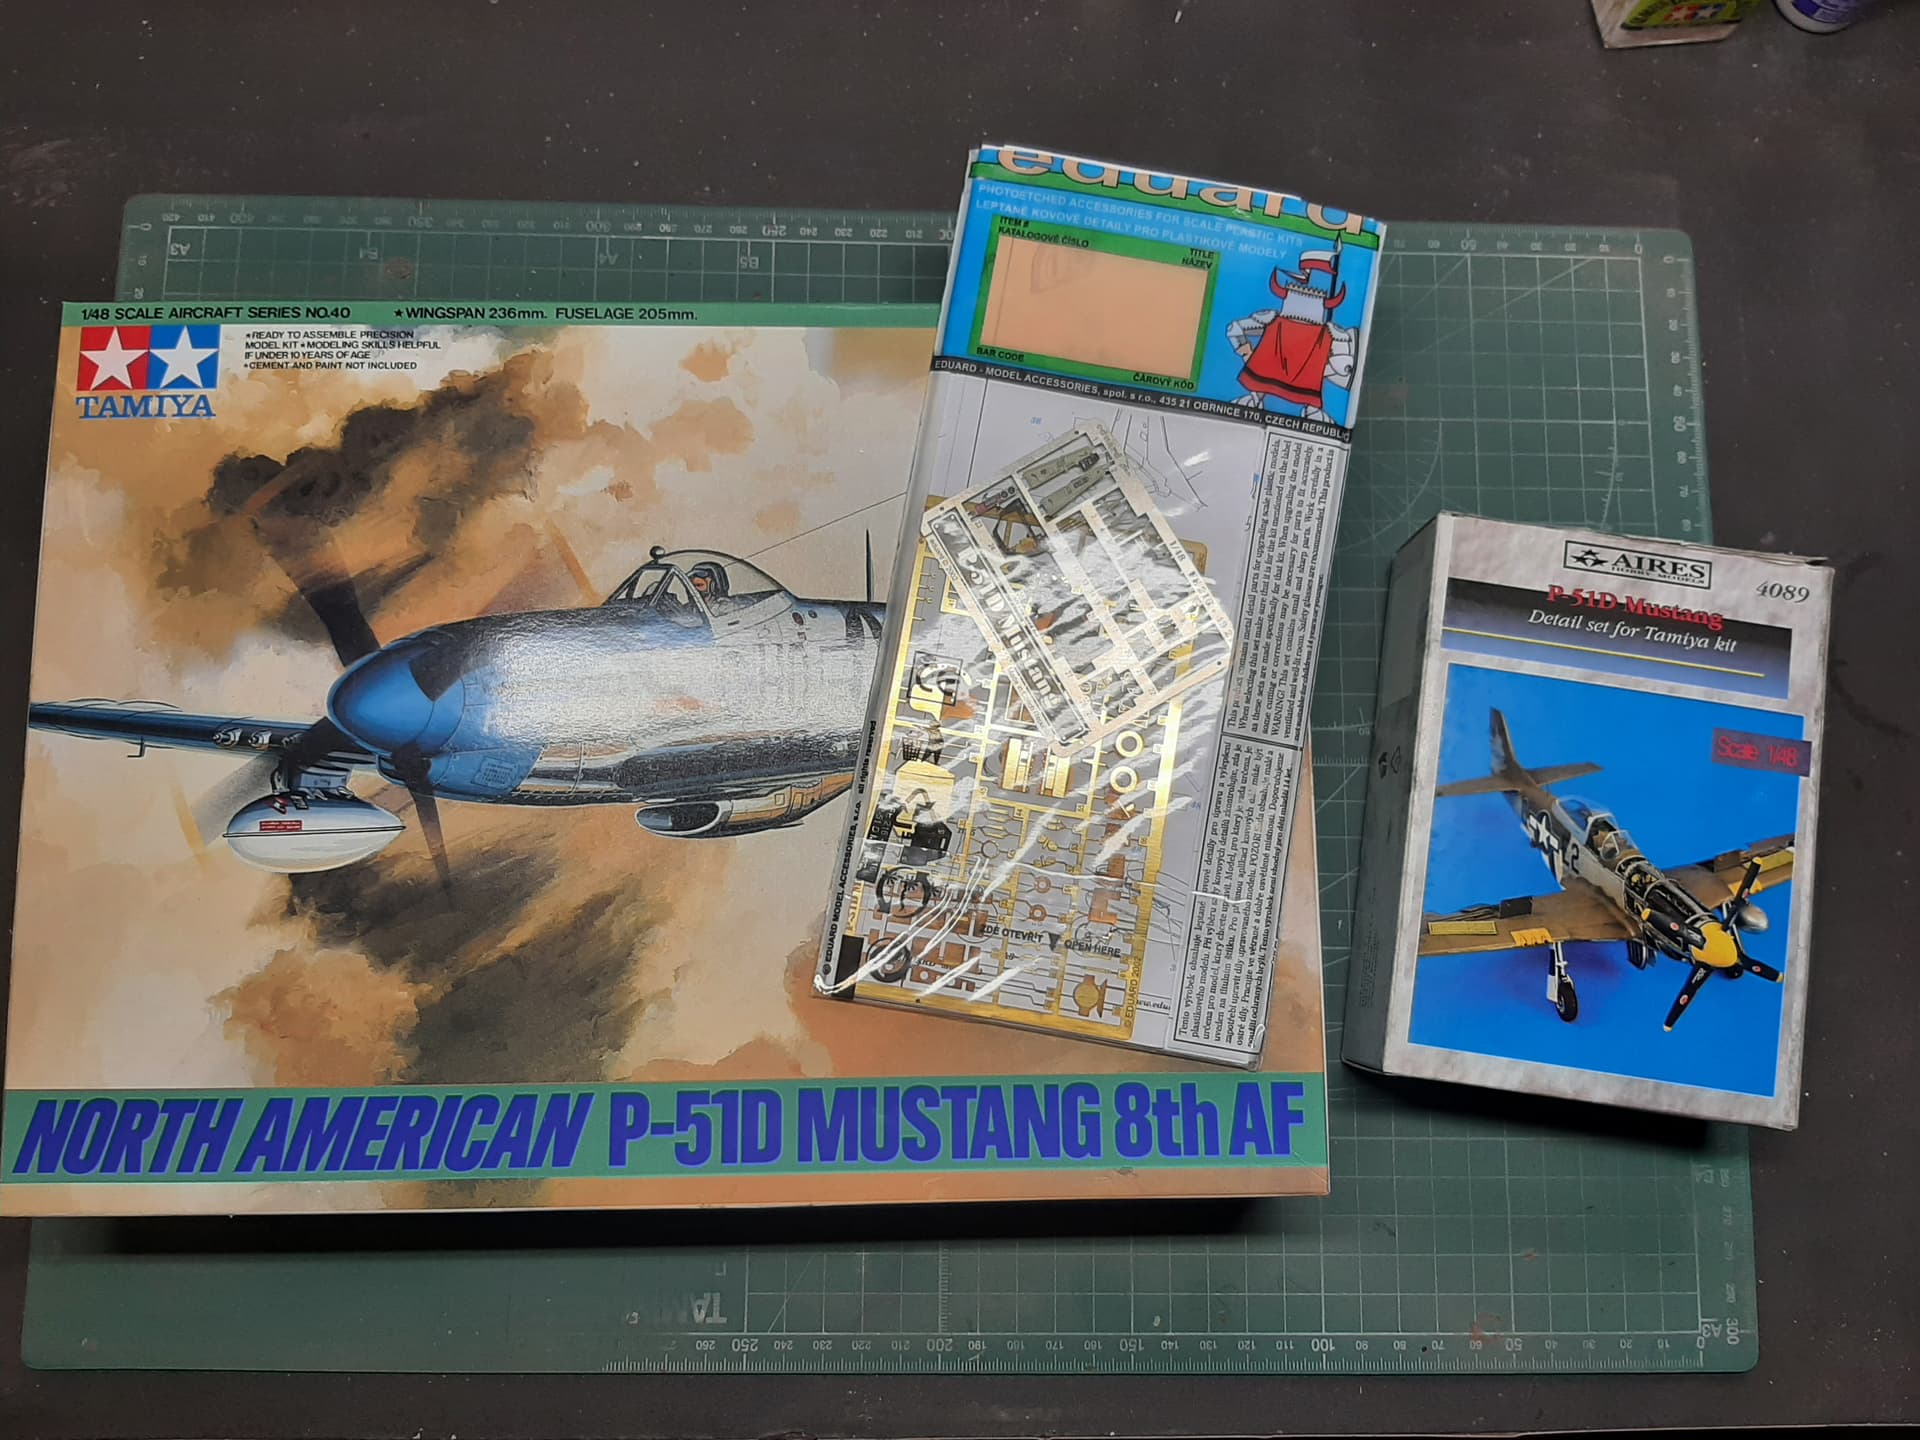
I took inspiration from Frank Dargies’s build of this kit (P51)
I’ve used the same kits as him, although I added the Eduard PE set too.
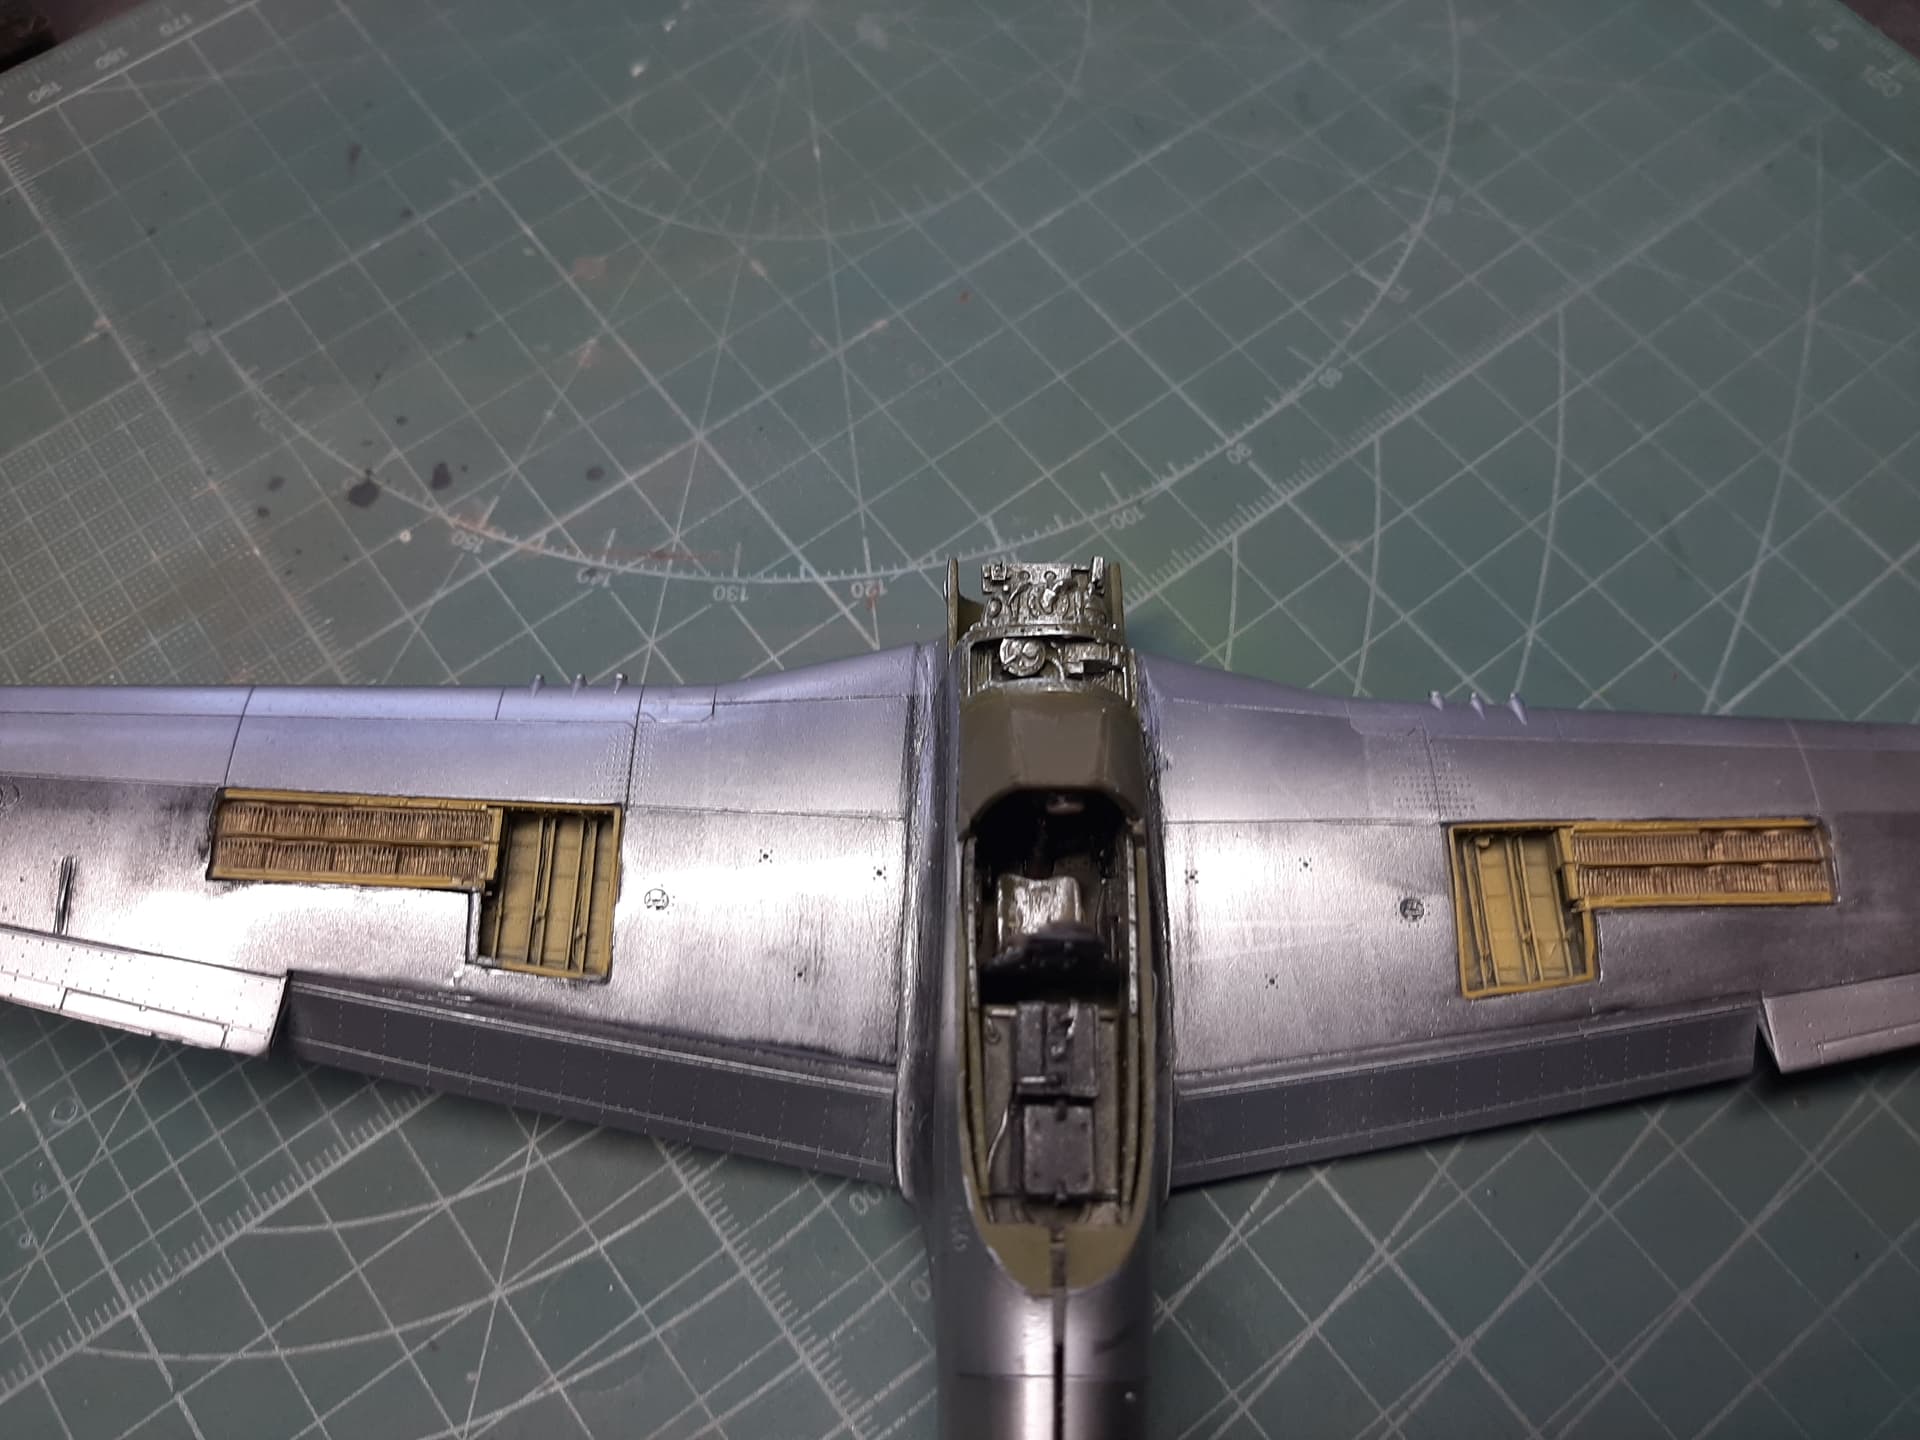
The Eduard set has been useful so far for things like cockpit panel detail, as these come pre-painted (although they are a bit ‘Noddy’) - however, for a kit in this scale, its fine. Aires have you build the cockpit from scratch using resin parts, whereas Eduard have you use the kit parts with some modification required. The two aren’t really compatible, but as i said, there is scope for mix and match.
As is typical with Aires, a serious amount of butchery, filing and sanding is required to get the parts to fit, and the instructions could be clearer to be honest.
Anyway, this is my progress so far. i’m not a quick builder, so this may take some time. I welcome constructive criticism.
If anyone knows of a quick, efficient way of thinning down the fuselage sidewalls from within without going through, i’d be most grateful for that advice.
Well, it has been quite a while since I posted here.
I havent documented my progress in minute detail - this aircraft, in this scale, has been done to death, and you don’t need my amateurish effort influencing anyone’s build.
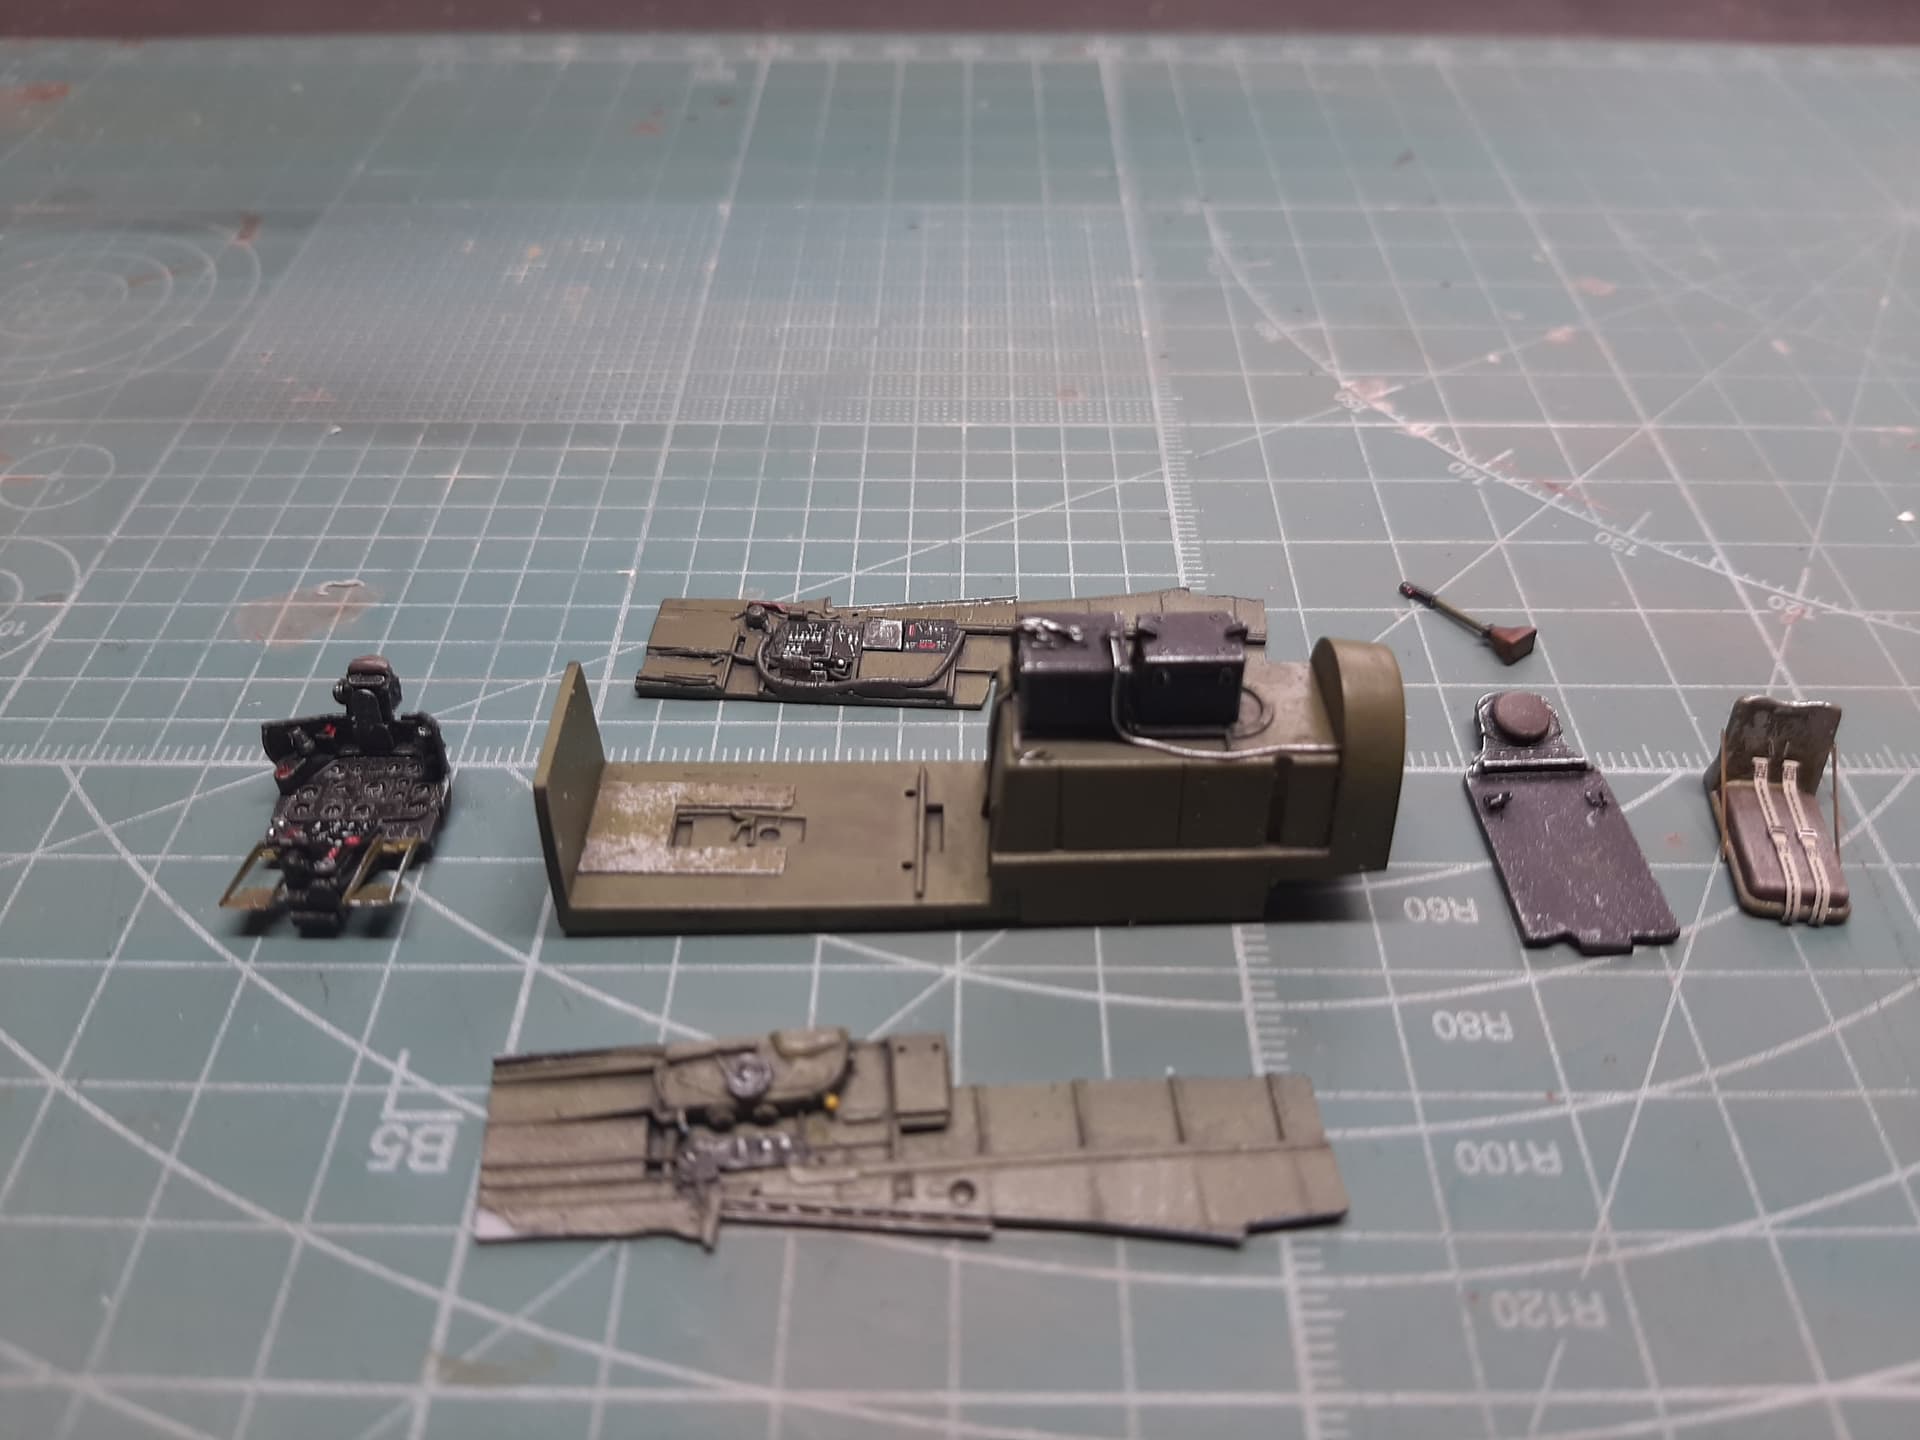
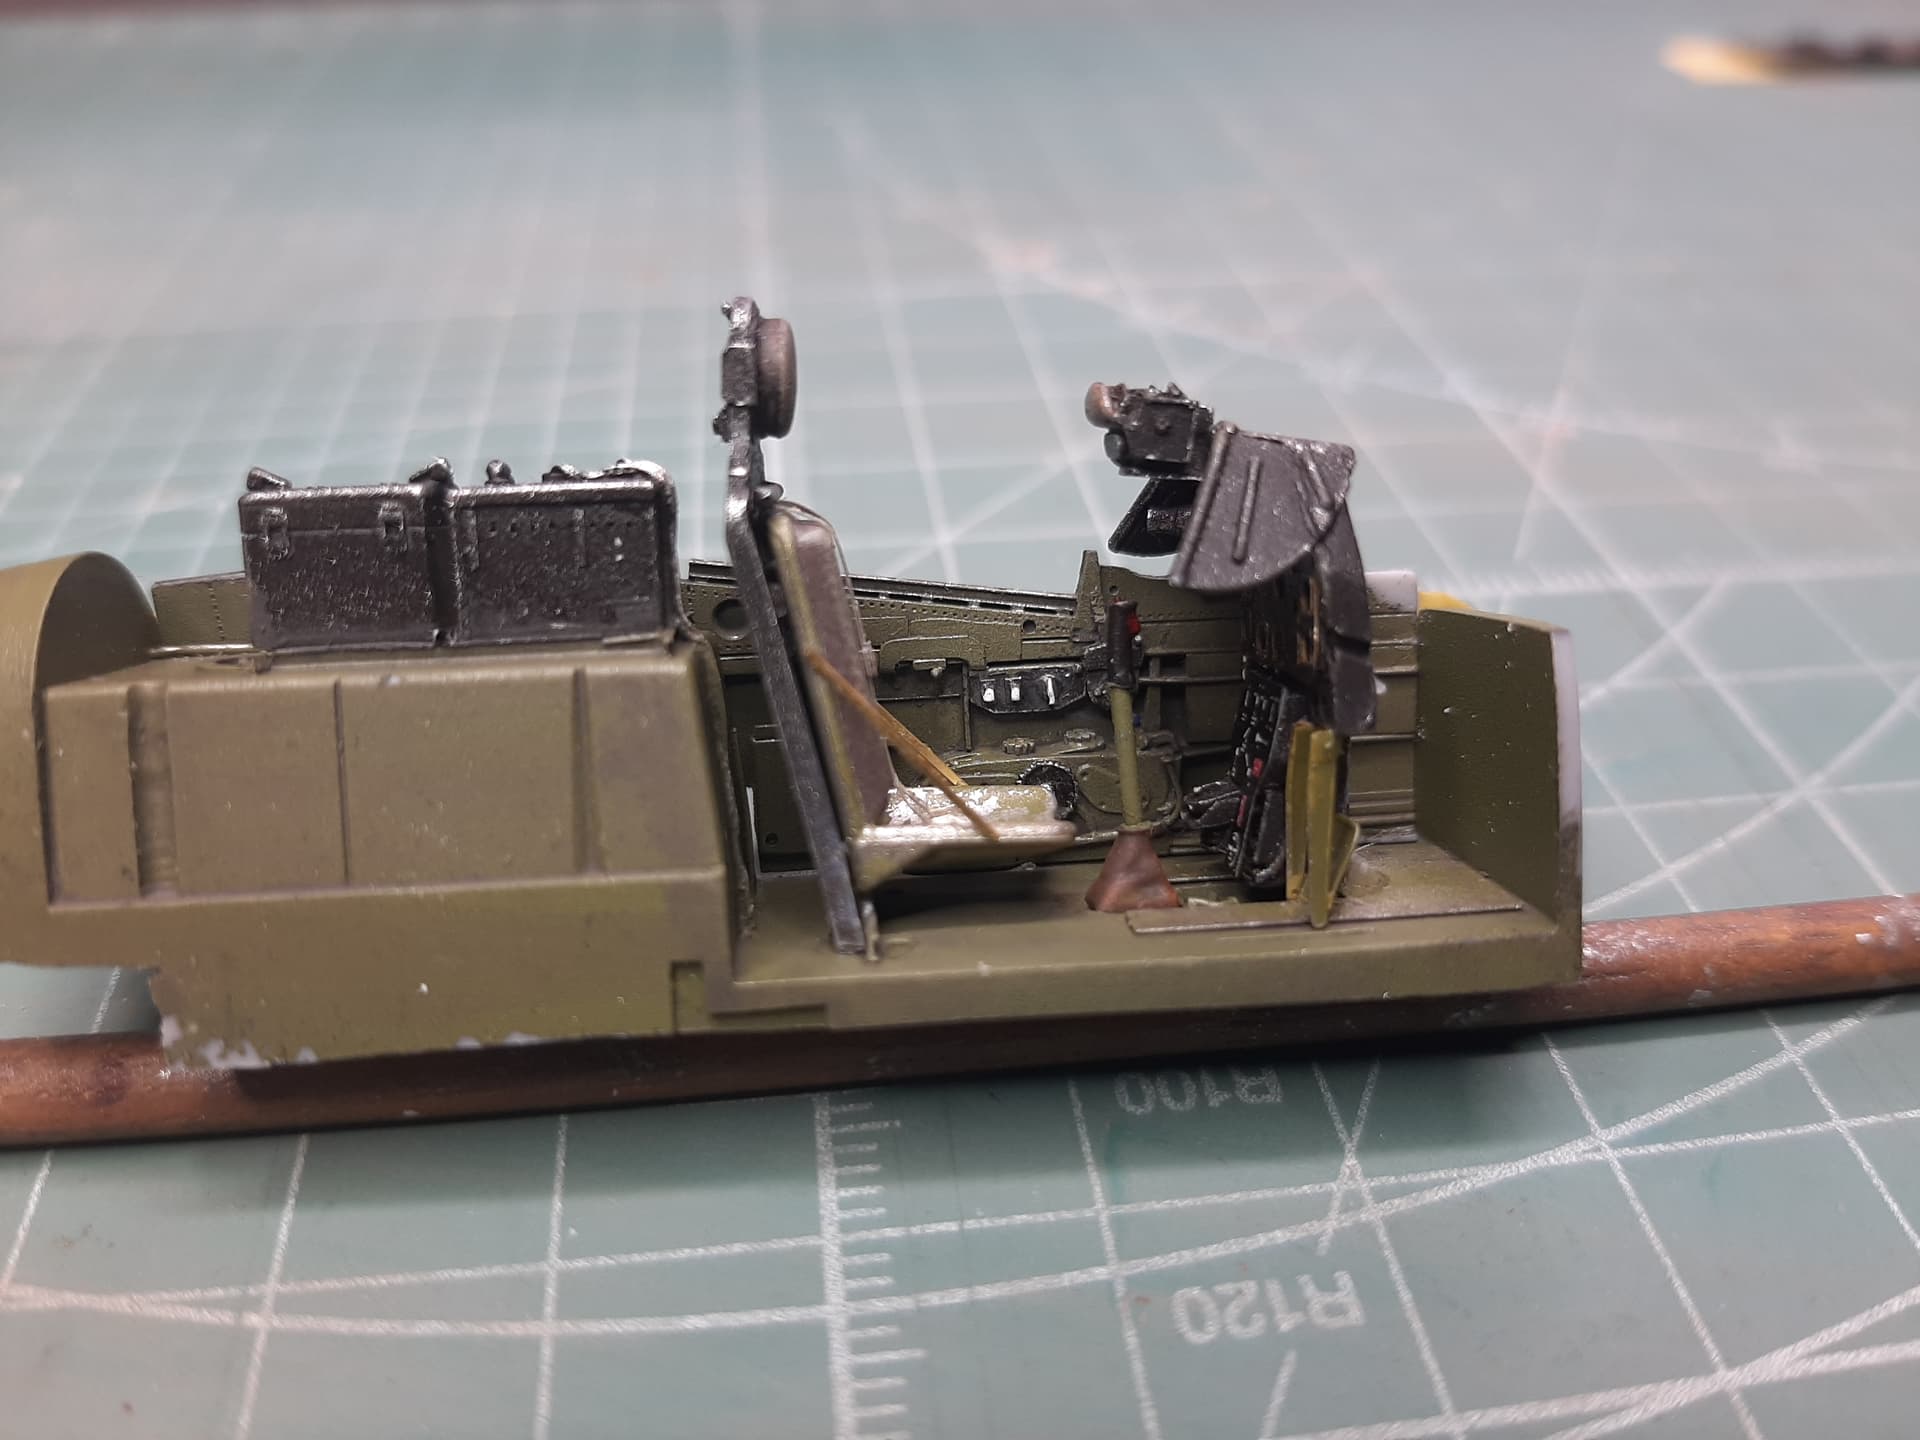
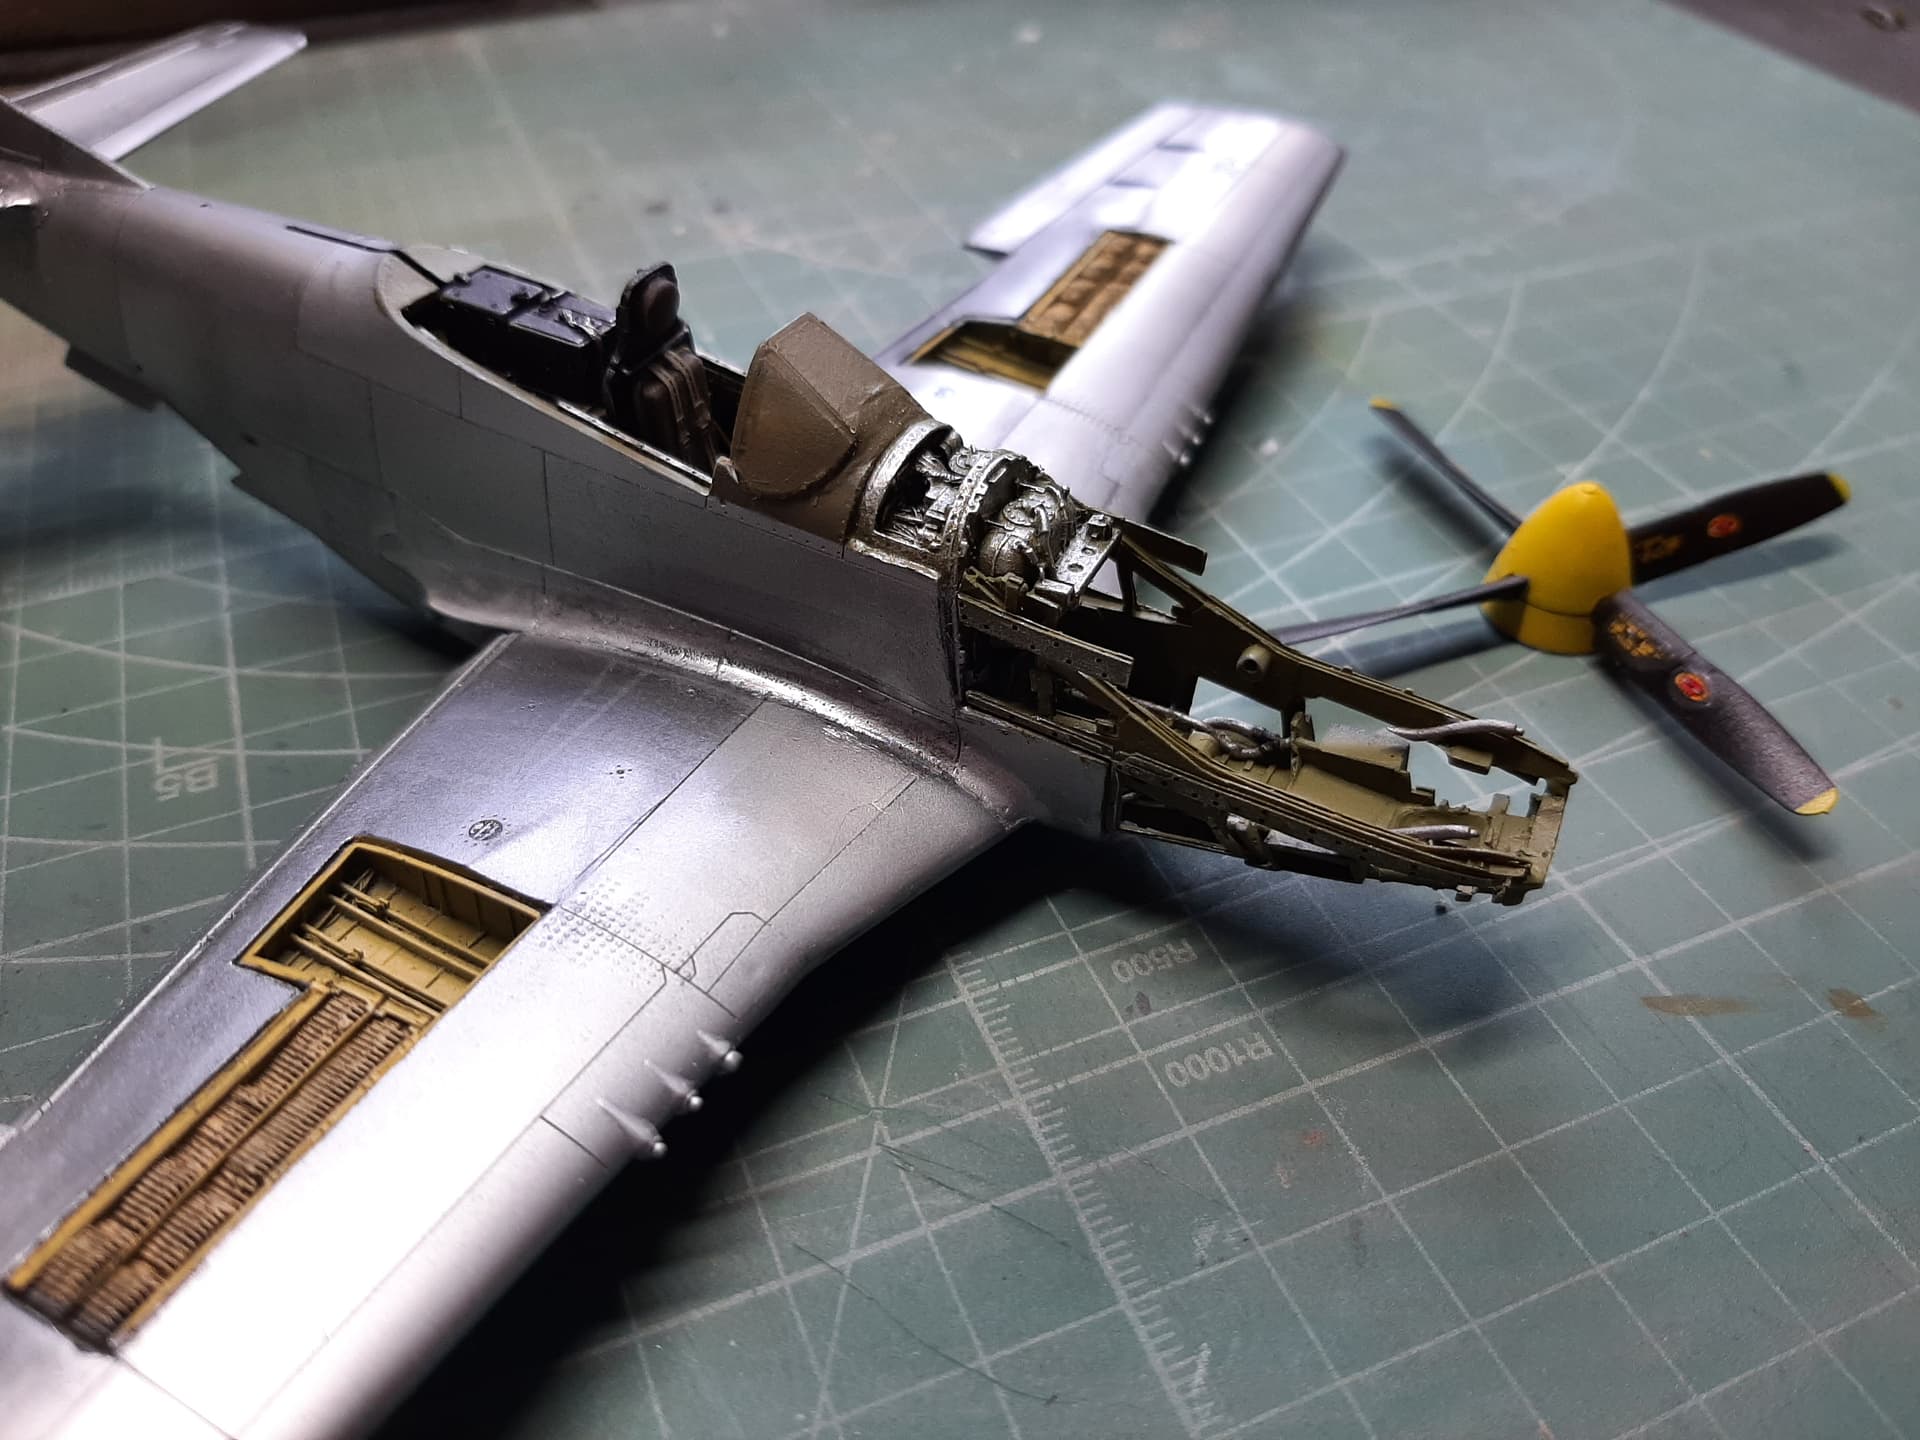
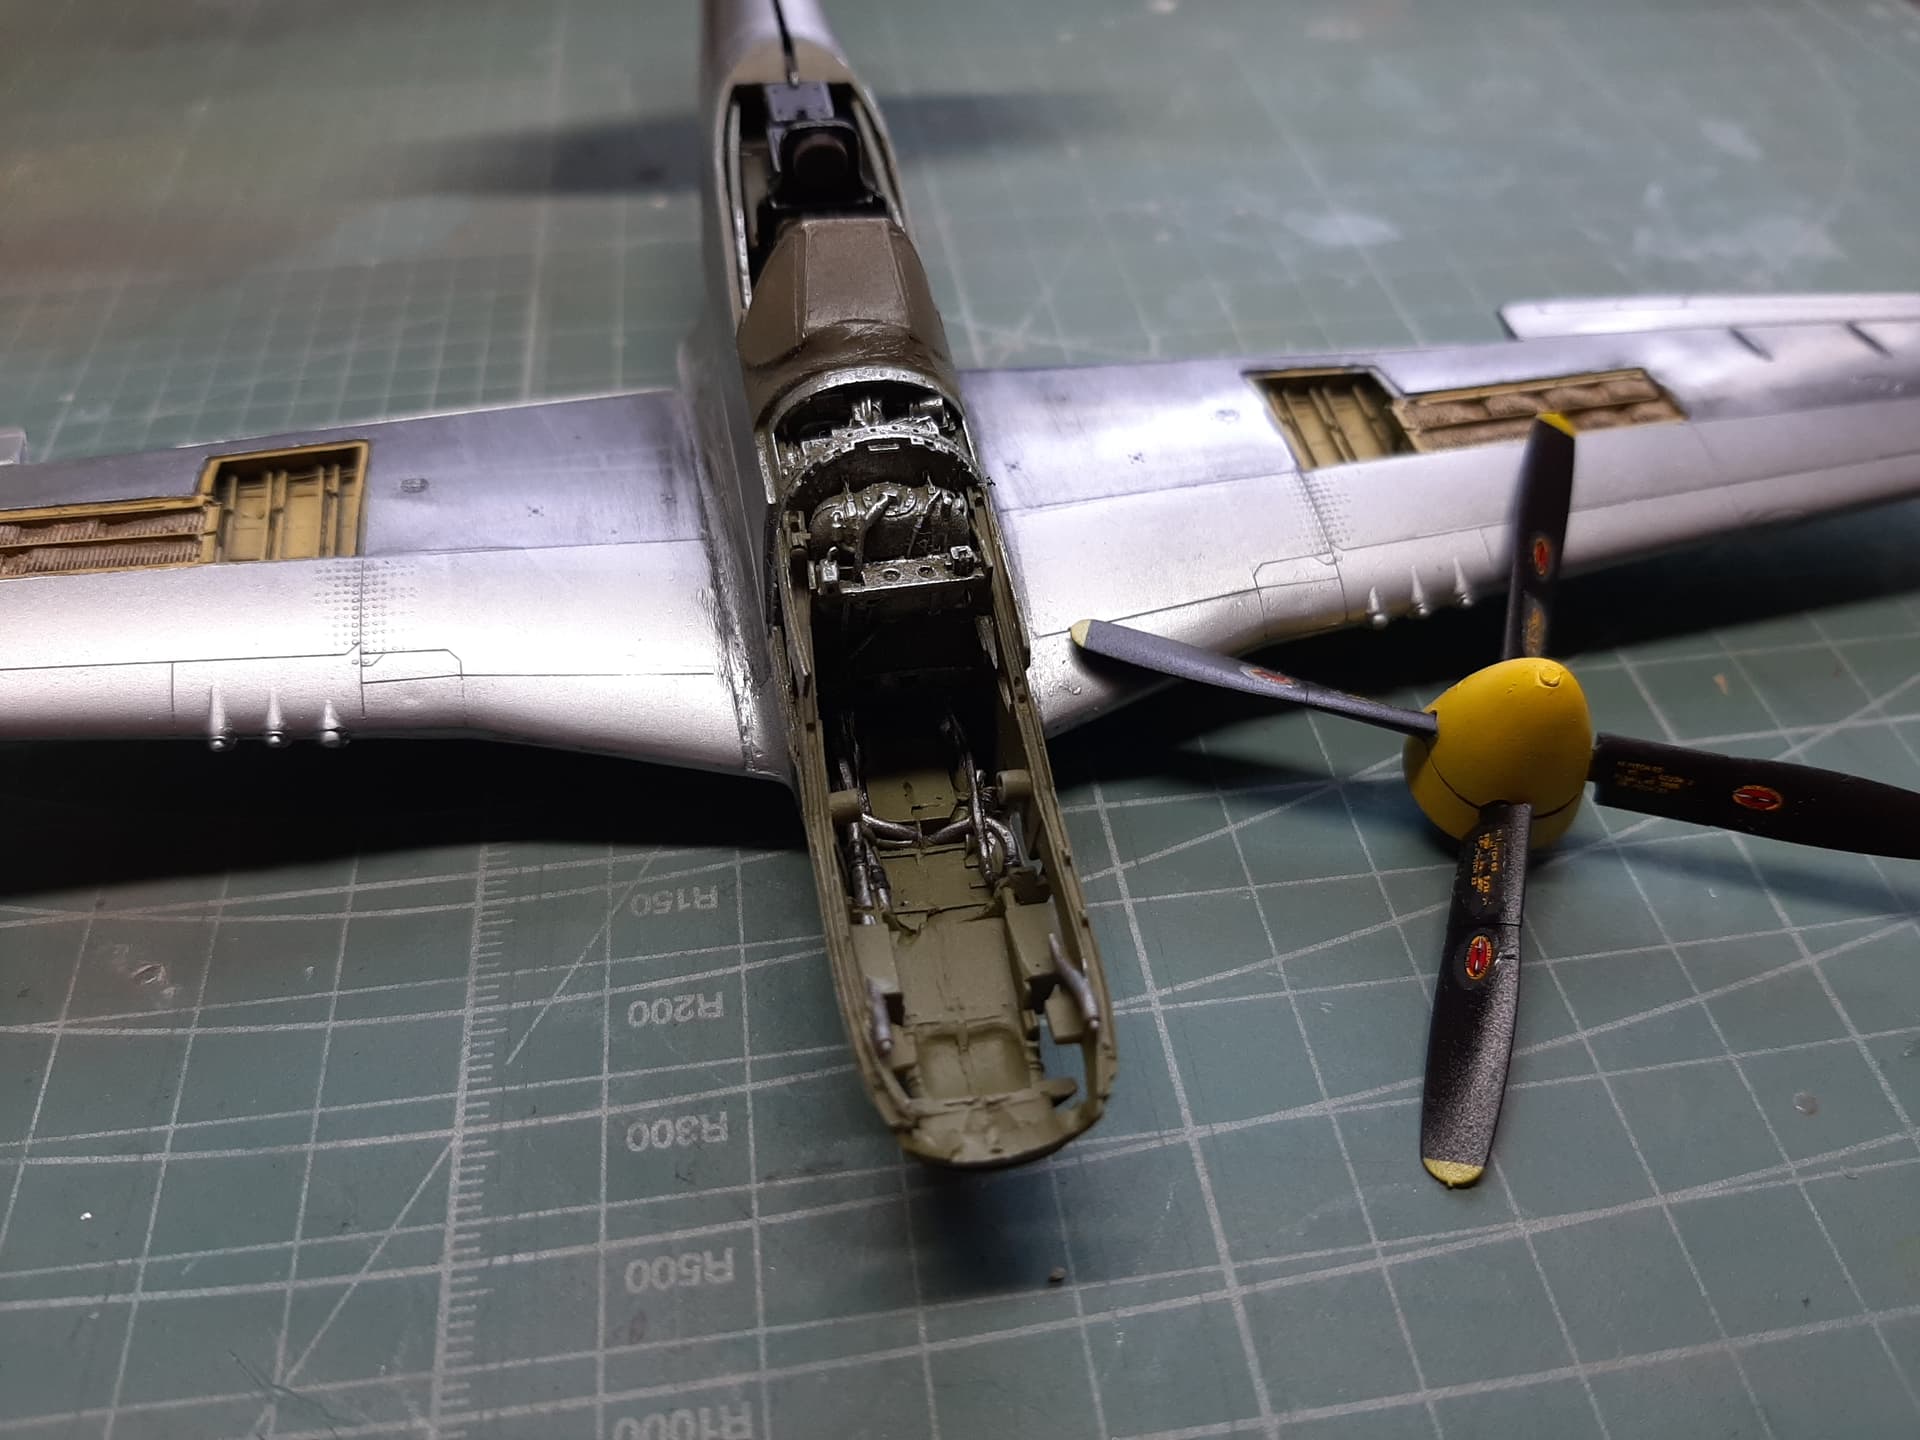
The insides are all done. As usual with Aires, loads of filing, cutting and sanding is required and even then, you need a lot of filler. I just wish they’d make it that little bit easier for us, i’d happily pay a bit more.
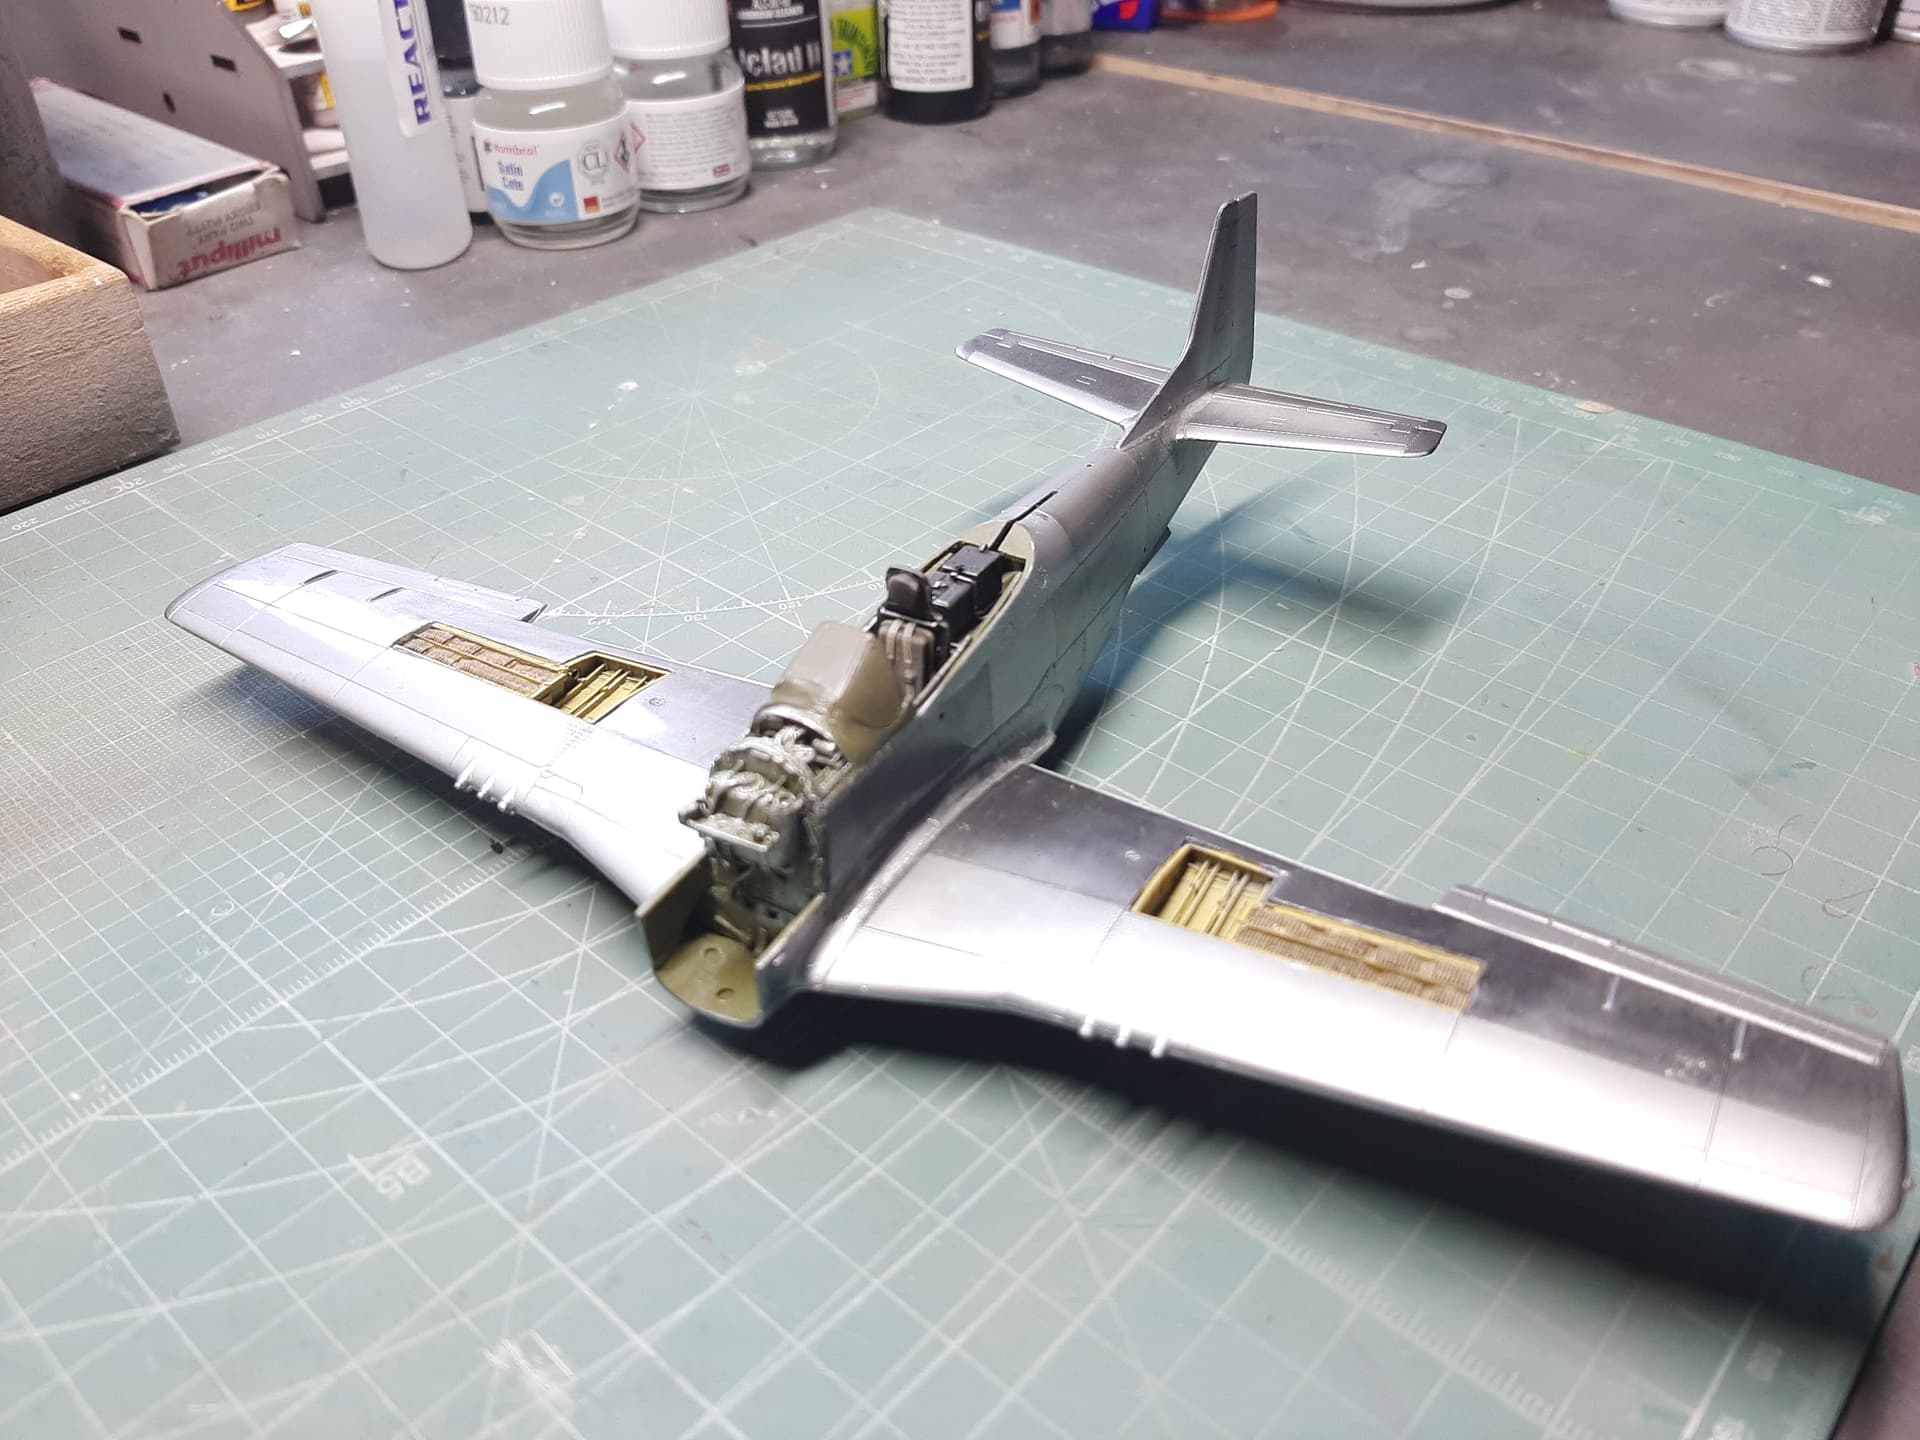
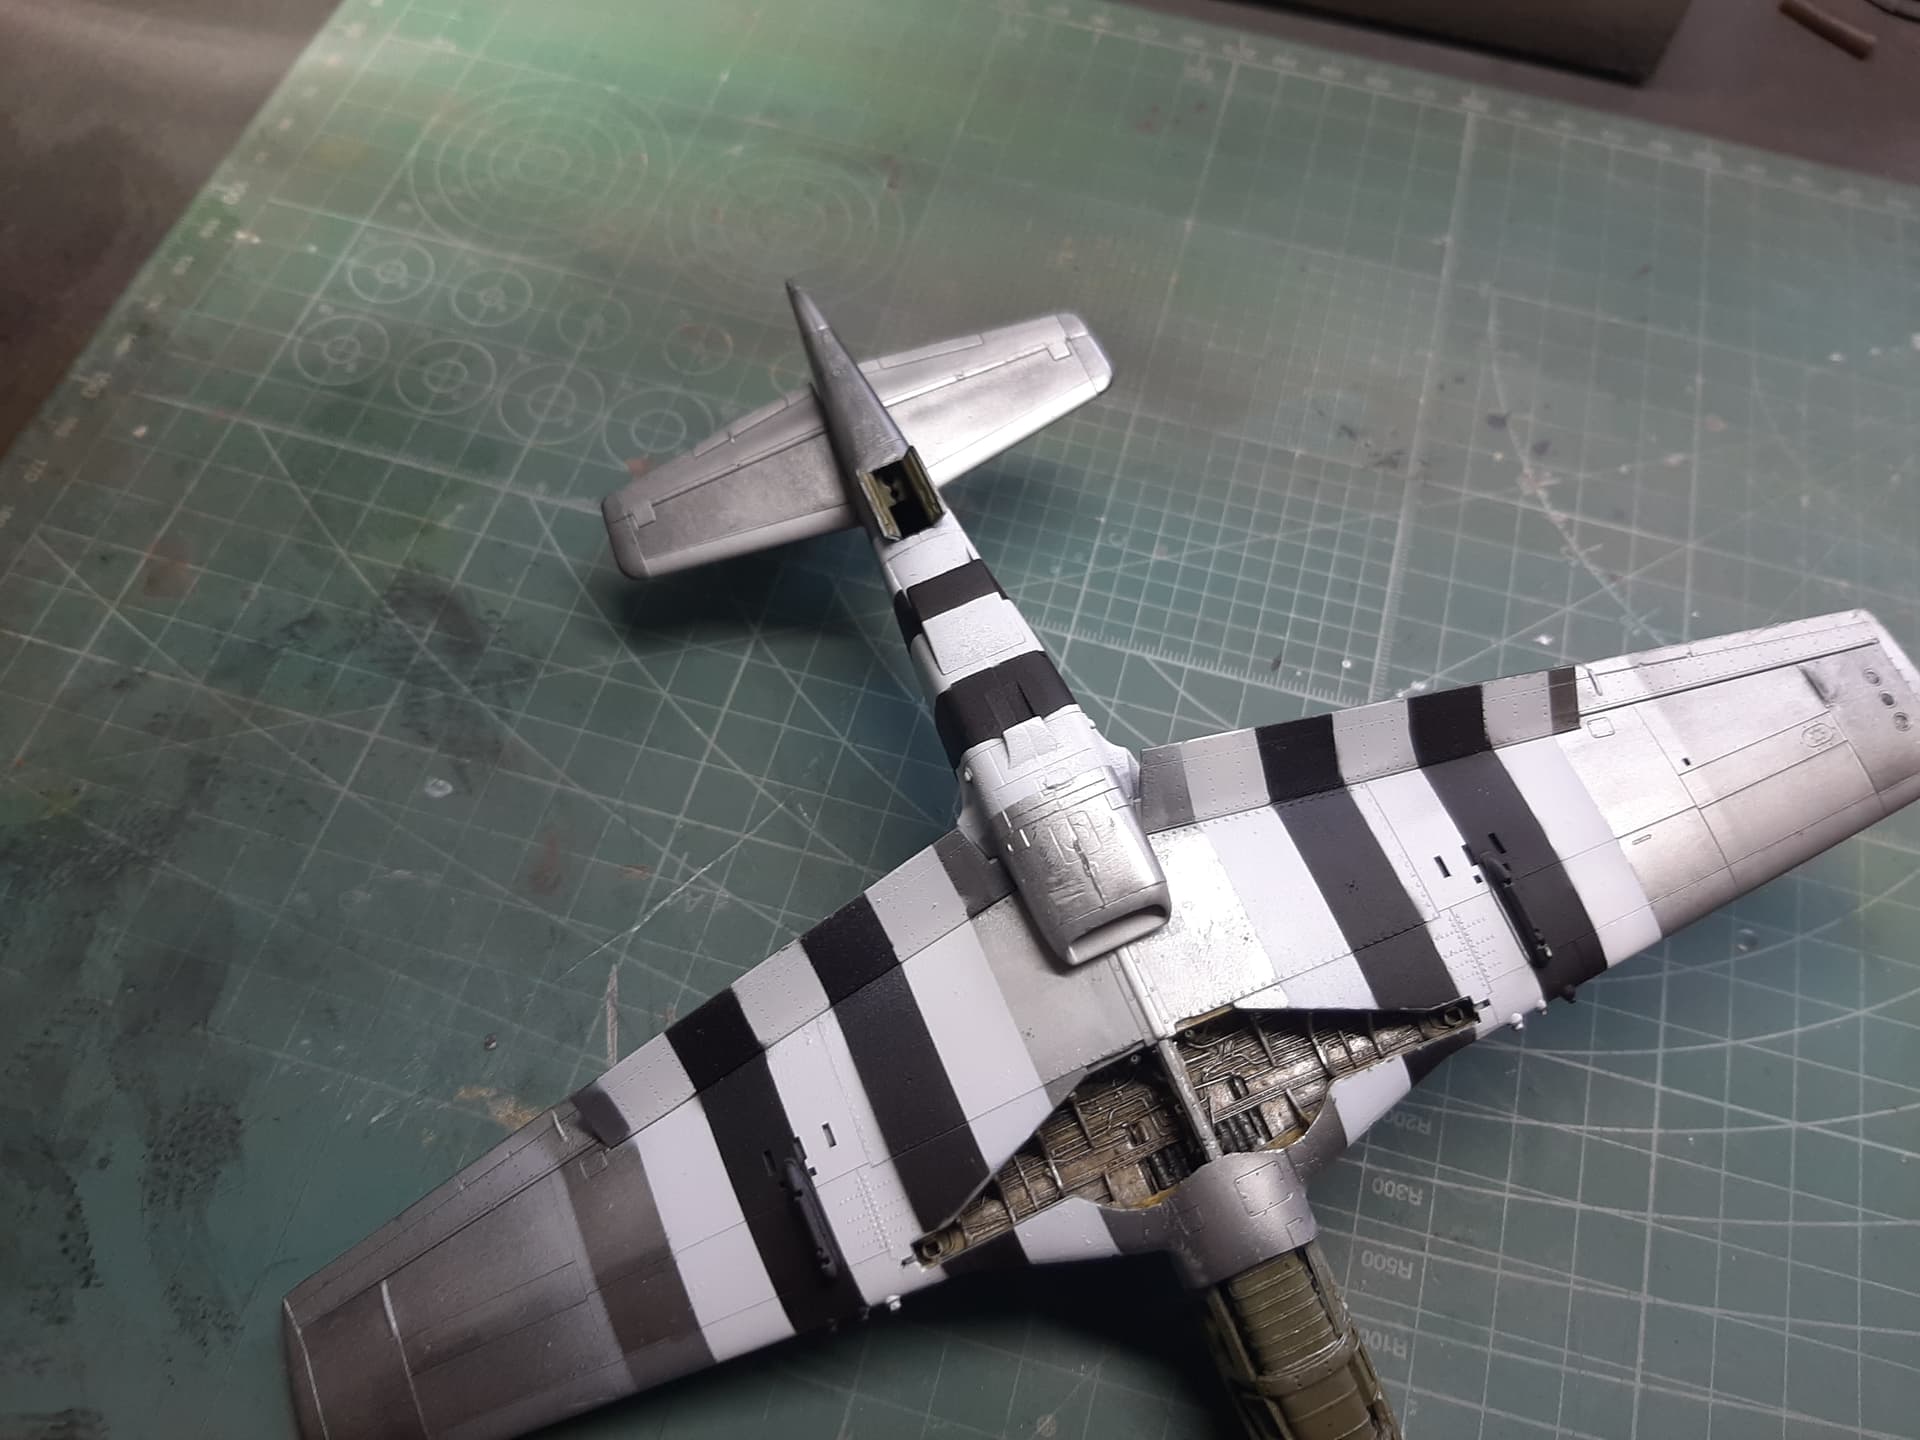
Gun bays are in, but no guns yet. Wheel wells came as one replacement piece and are superior in detail to the kit parts. Fuselage is painted with three different tones of Alclad II Alluminium (Alluminium, Airframe Alluminium and Dark Alluminium) and sealed in with several Gloss Cotes in anticipation of the decals. Lots of masking, airbrush cleaning and patience needed, but the result is pretty good really. I’m not going to get anal about AMF, since the real aircraft were hardly perfect in that respect and besides, the Invasion Stripes will hide a multitude of sins.
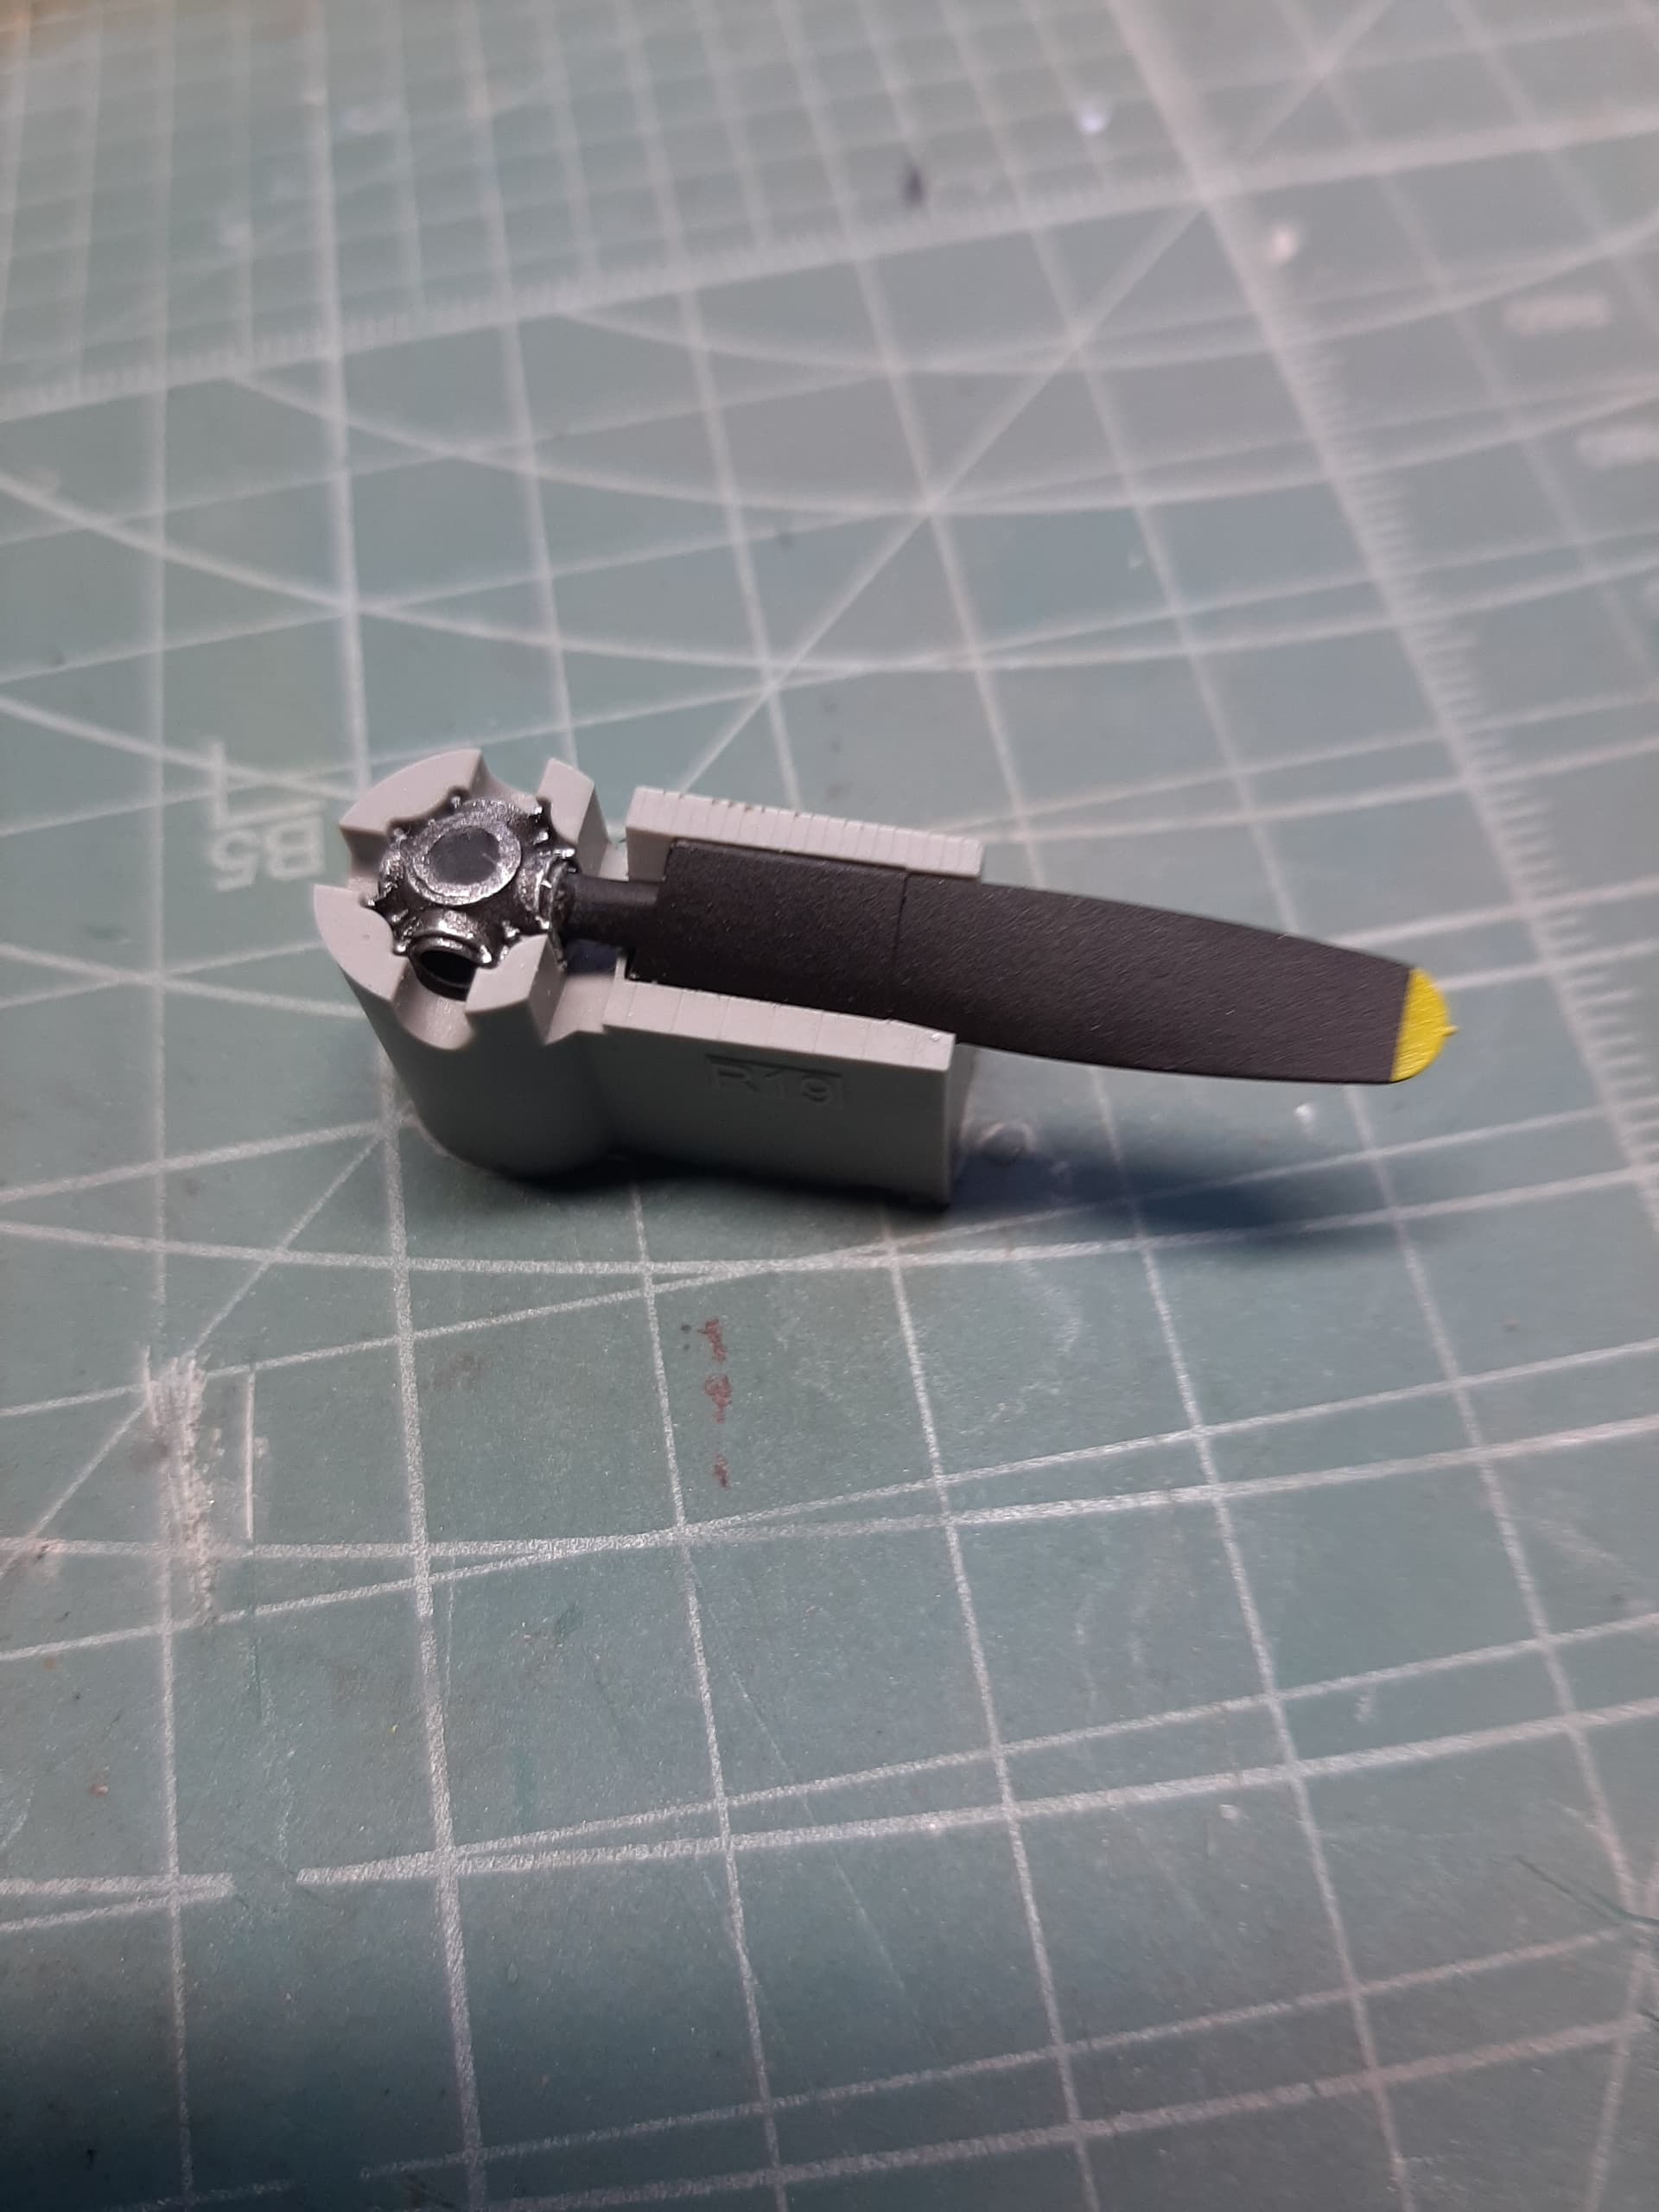
I’d done some work on the prop in parallel with the fuselage (what else do you do whilst waiting for Gloss Cote to dry?).
The kit one was okay, a little… ‘leggy’ but okay. It was difficult to fit the blades so that they were all sitting at the correct pitch.
I painted it and built it up and fell at the last hurdle. Instead of airbrushing Gloss cote on the blades (there are some decals that need to be applied) I used a Humbrol rattle can gloss varnish on it. It didn’t turn out well, with much ‘fogging’ etc.
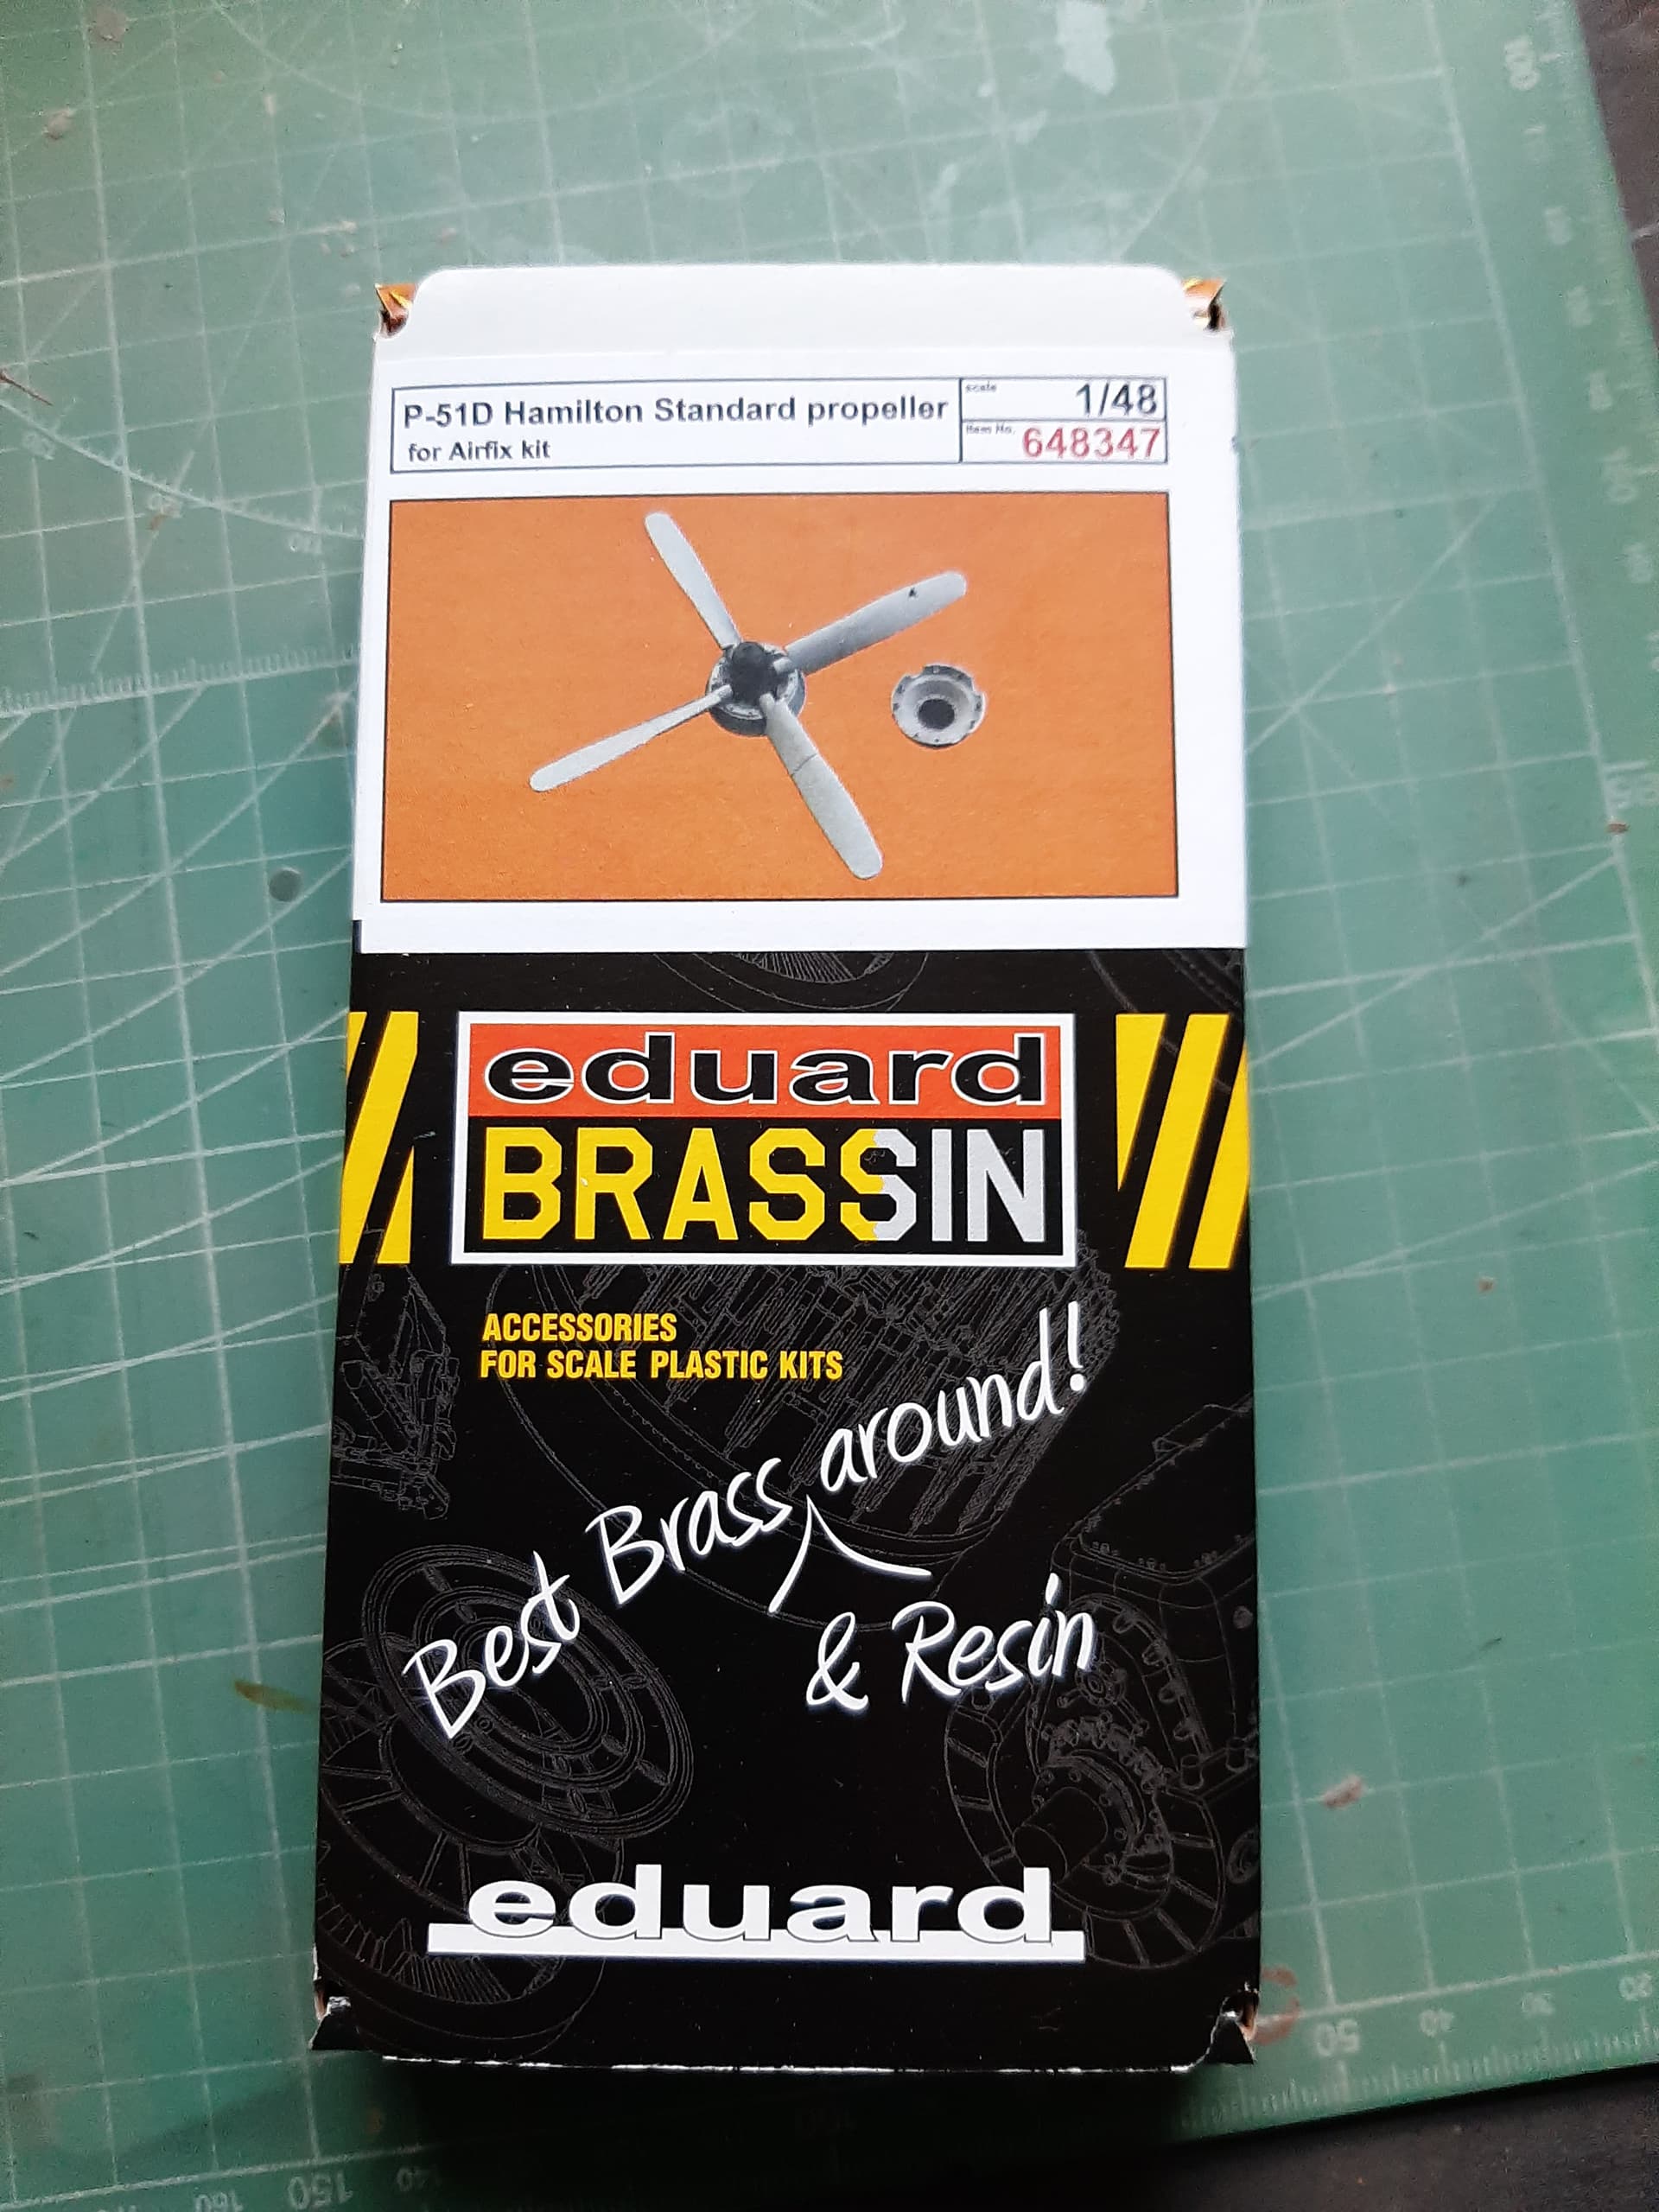
So, I bought this - from Eduard. Its for the Airfix kit (£6), but this will fit the Aires output shaft just fine.
What I love about this is it comes with a really elegant little jig that allows you set the blade angle just perfectly. Some careful sawing to remove parts from the resin cast was required, and some drilling too (this is where the jig also helped) but it went much better this time.
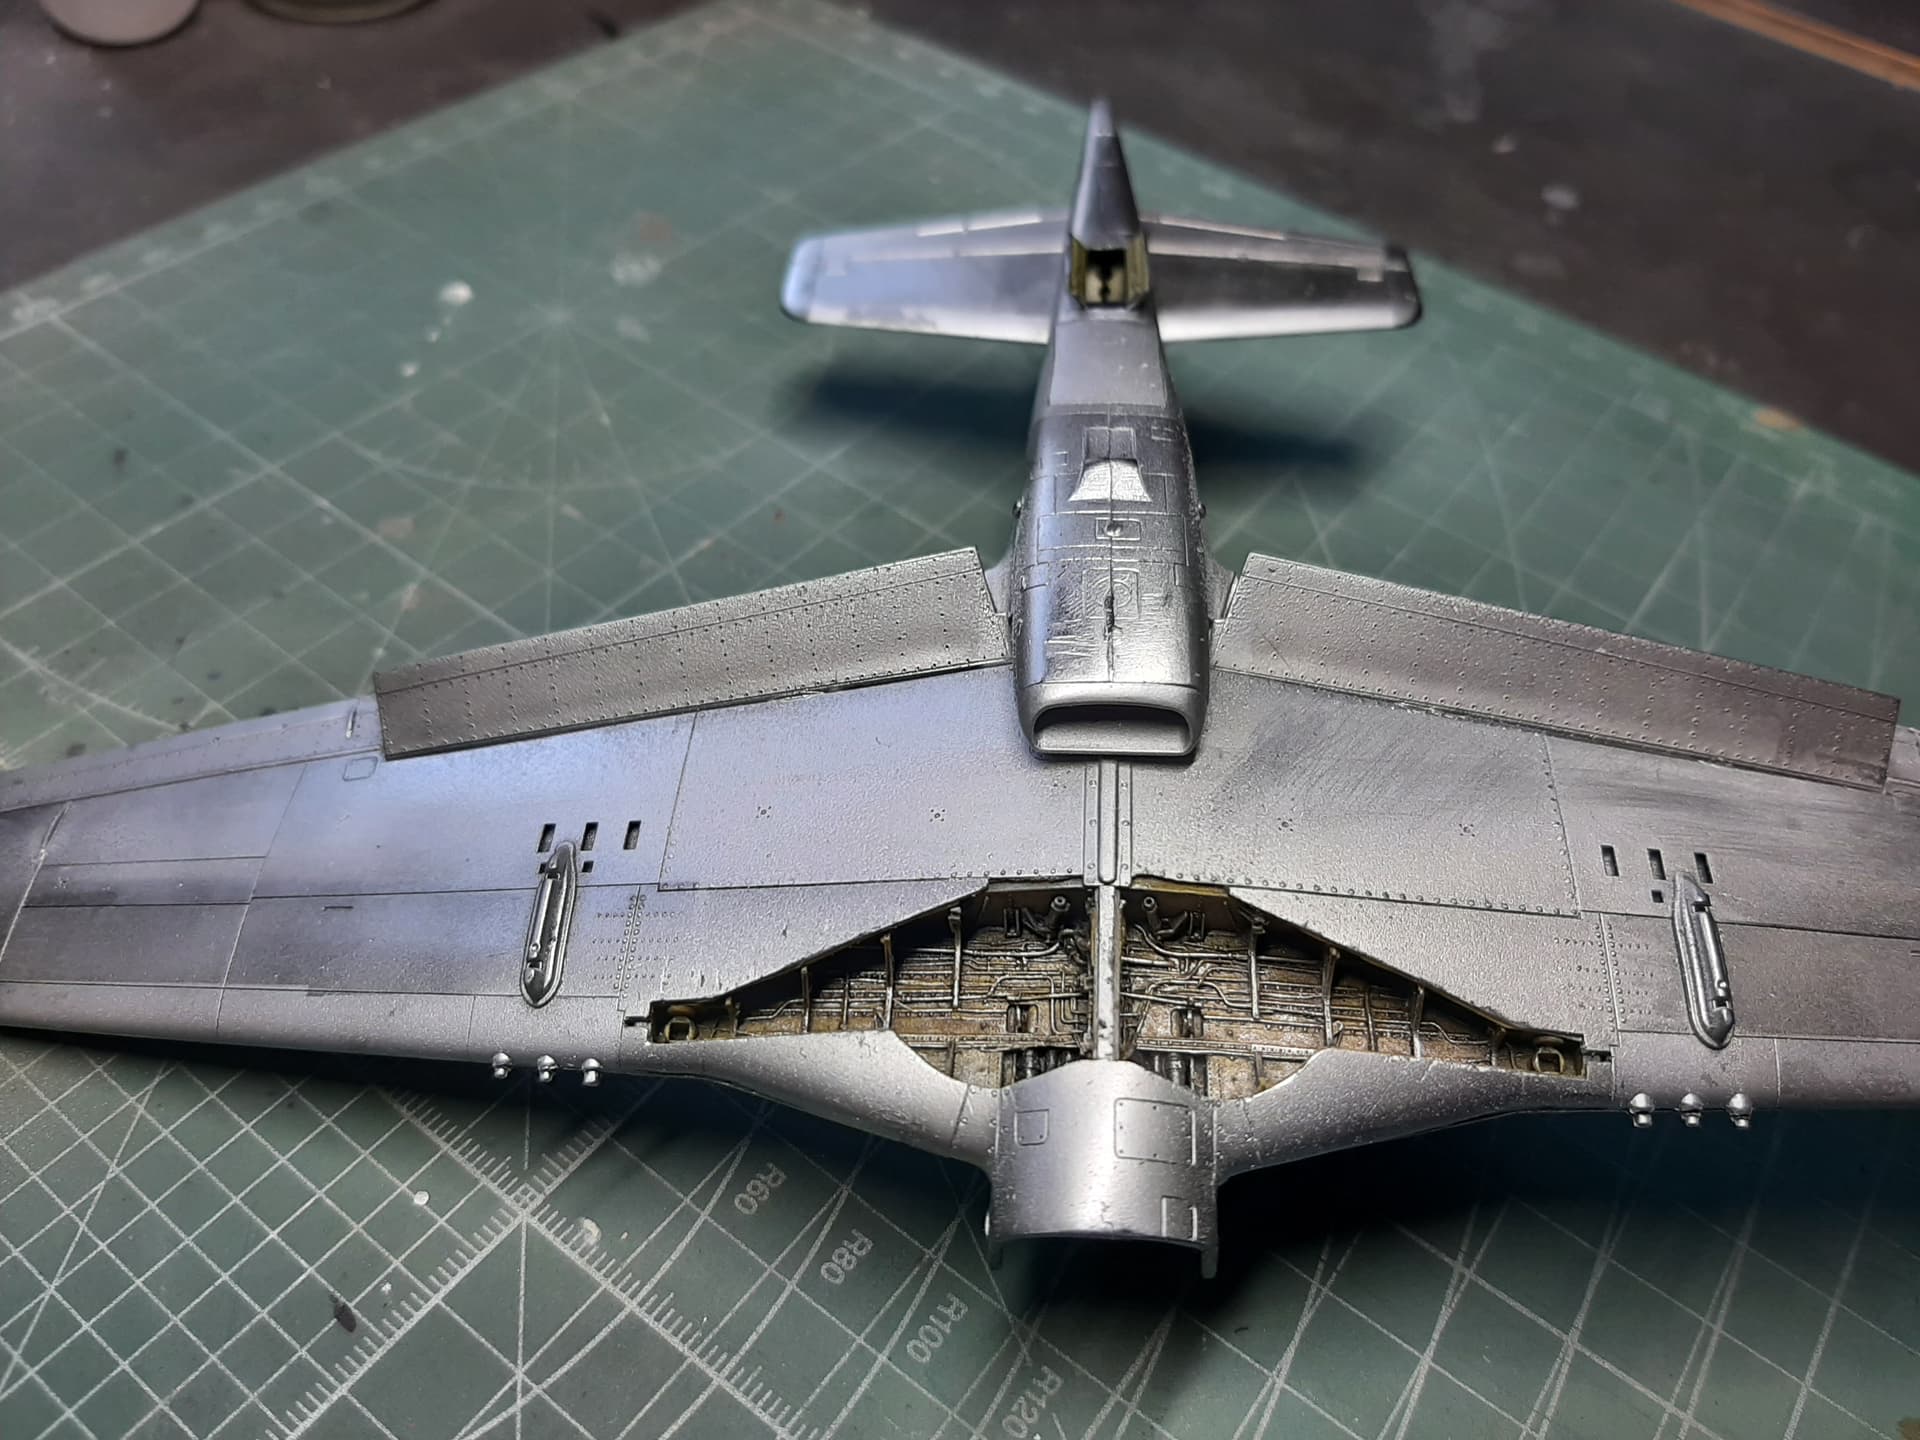
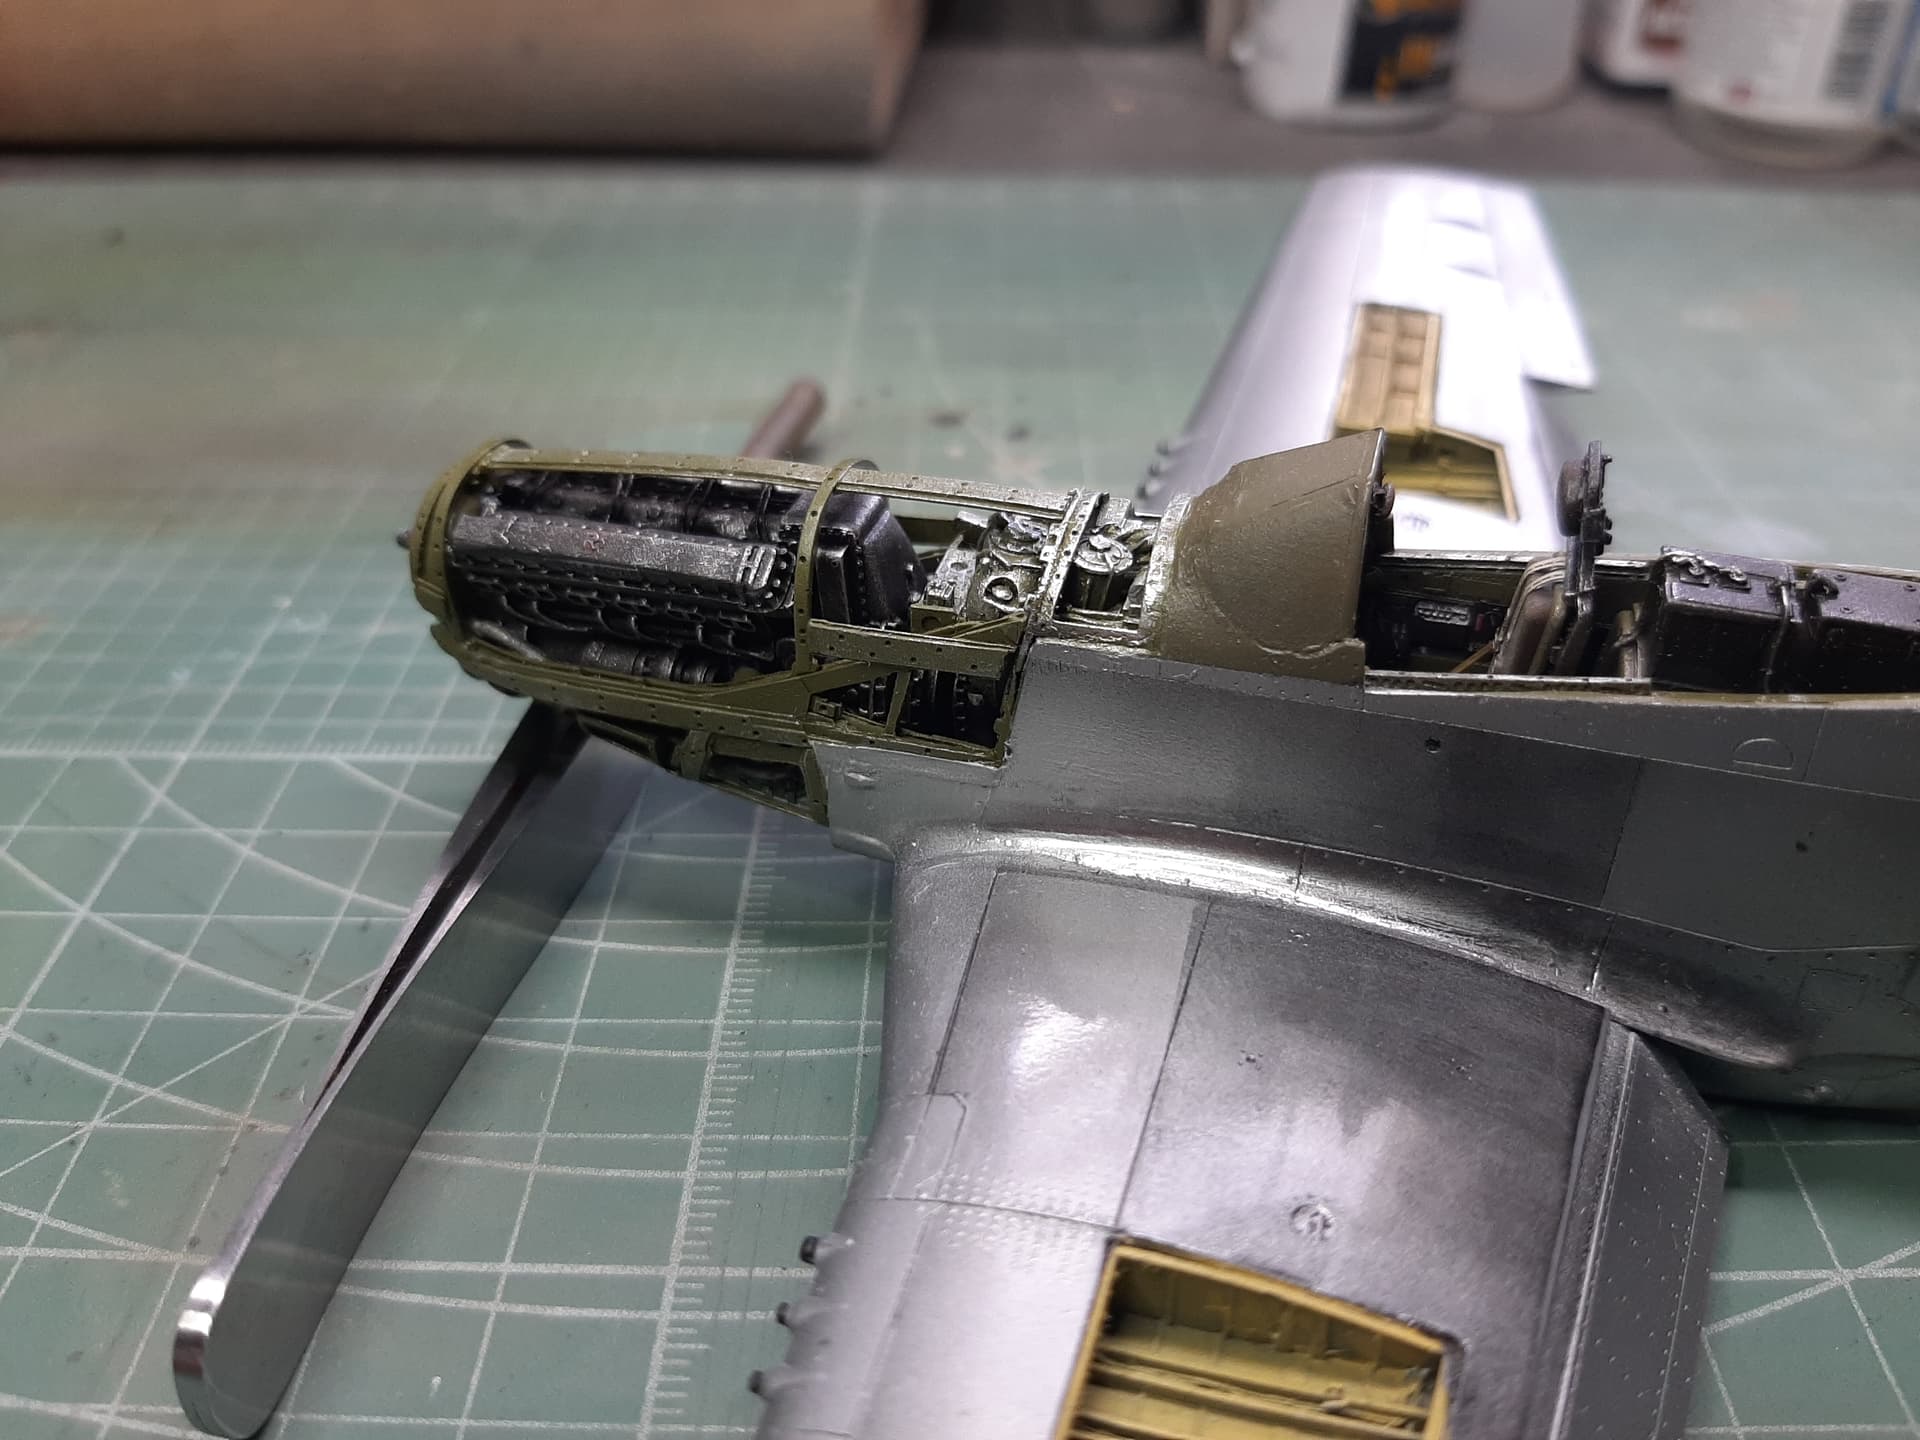
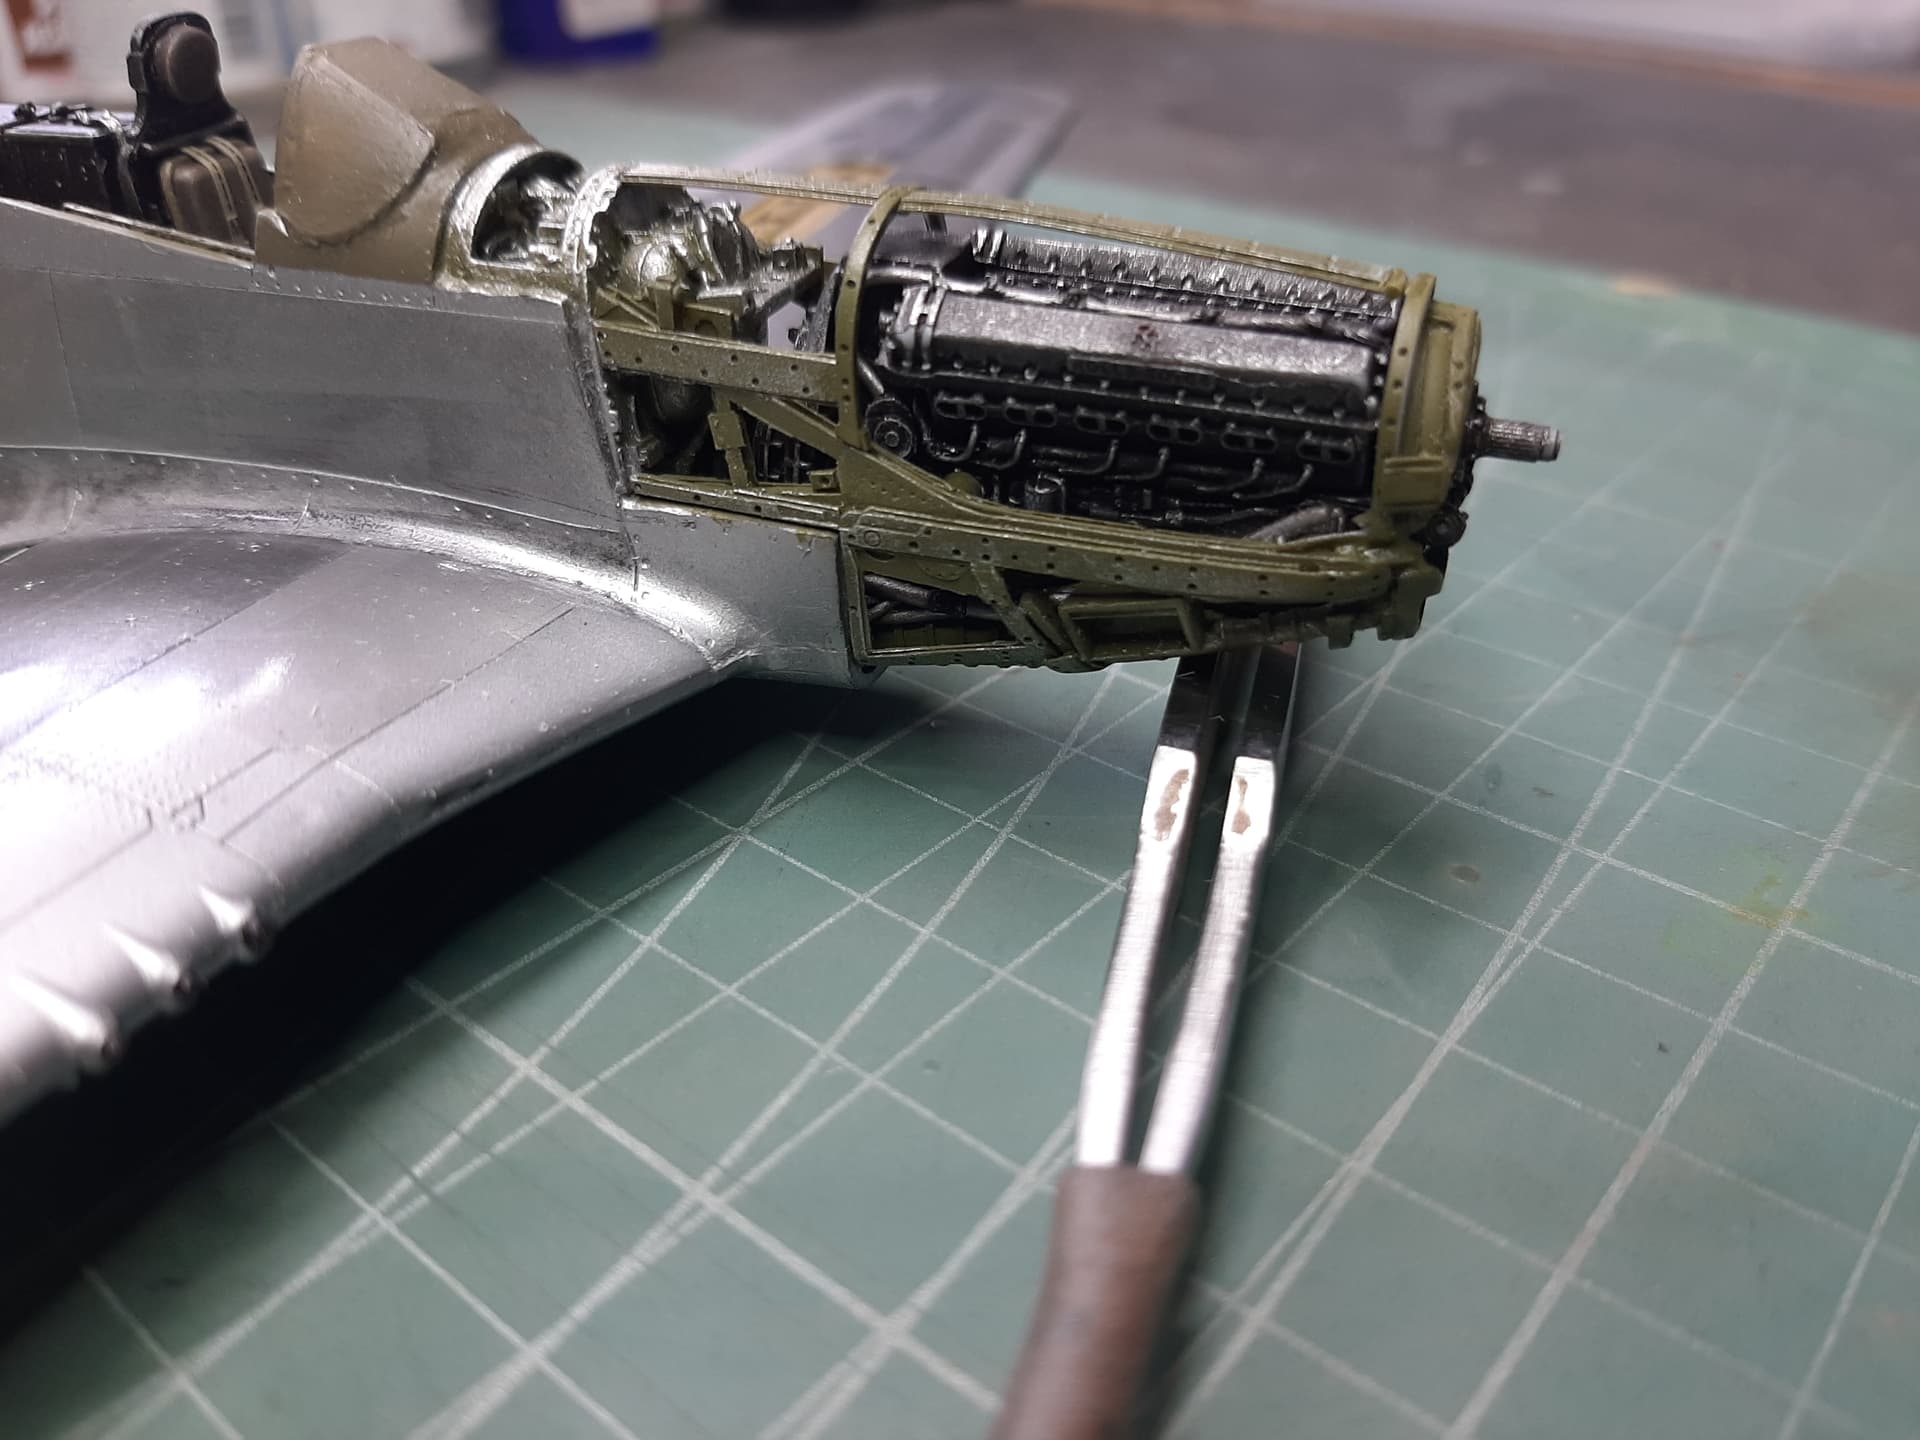
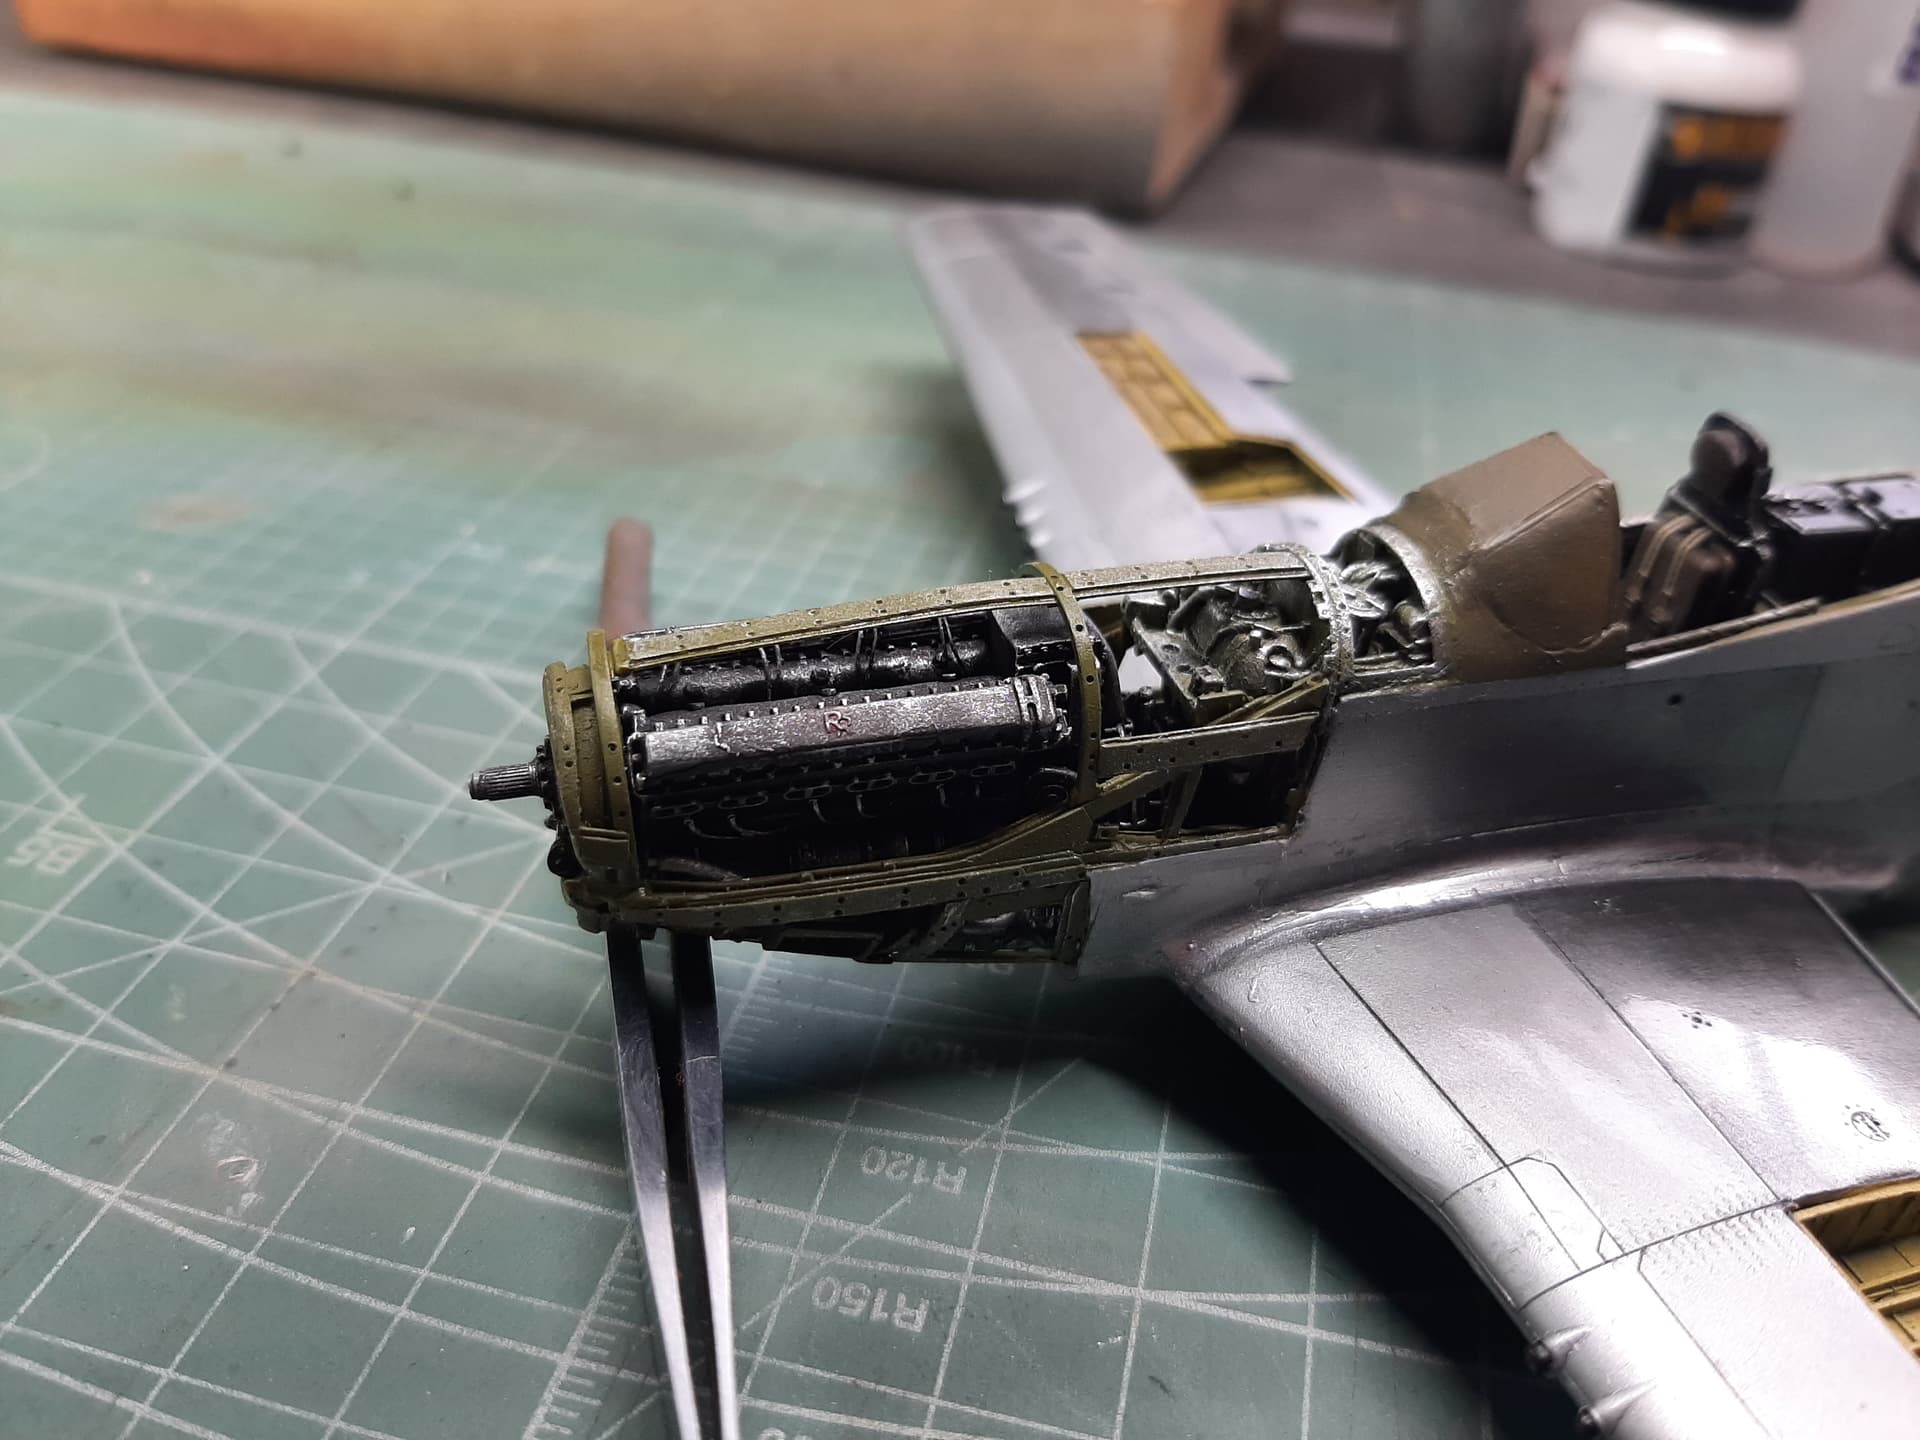
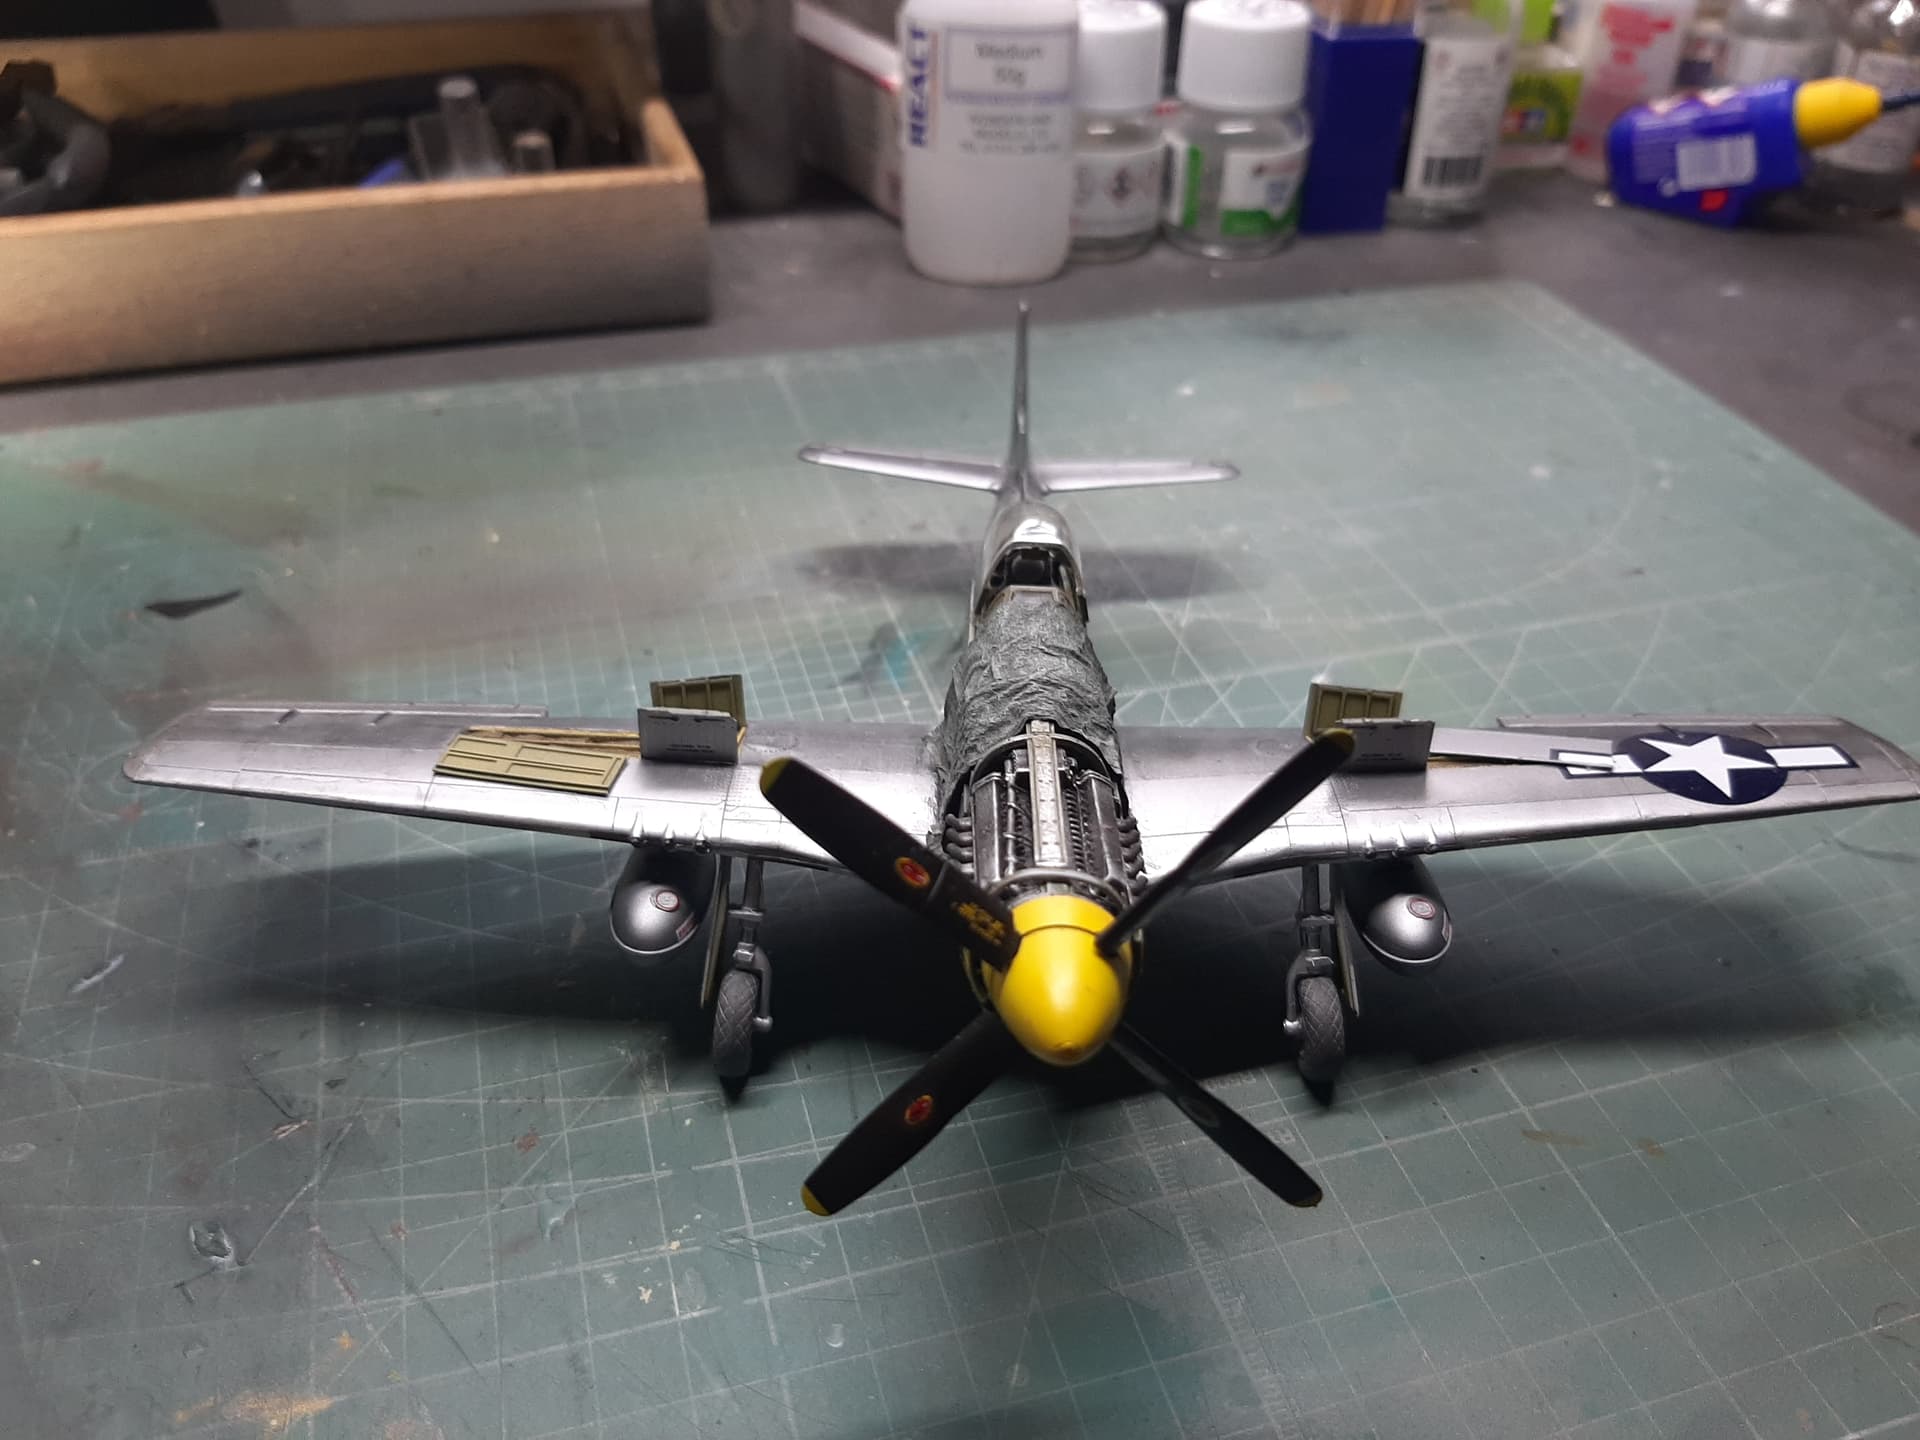
More progress. Starting to build up the engine compartment and the prop is finished.
The engine compartment was a real pain. Unless you sand down the fuselage side walls paper thin (something the instructions simply don’t explain), then the resin parts just wont fit. Aires, why do you do this!
Serious amount of butchery required, but in the end, I got it together. now just have to see whether the engine will fit!
First, a bit of reparation on the fuselage, filling etc.
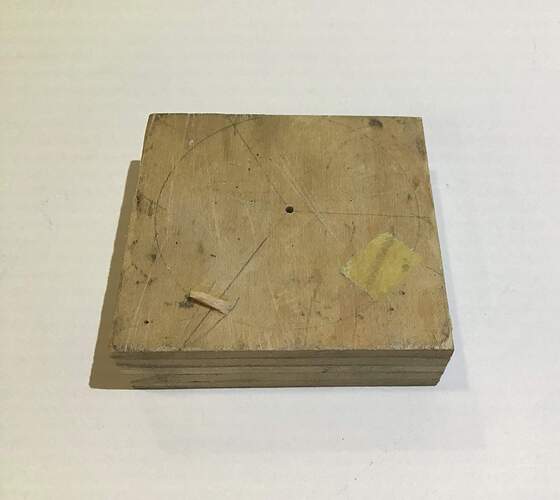
Nice work Khouli . I wish all manufacturers would cast props in one piece. Here is a simple fixture easily made for gluing up the blades to insure they are all at the same pitch . Scribe a circle on a block of wood slightly less than the prop diameter and divide it up into the number of blades . This one is for three so 120 degrees of arc .
Cut a wedge of the appropriate pitch and glue it to one blade location and drill and pin the center to accept the prop hub . Then glue up blades one at a time , rotating completed blade to the next location. HTH
It was pretty frustrating at times, nothing seemed to fit as it should and the instructions aren’t particularly helpful. After much effort, I got it more or less as it should be. lots of surgery required - the real trick is to perform it where it wont easily be seen.
It isn’t perfect, but it isn’t going to get any better either.
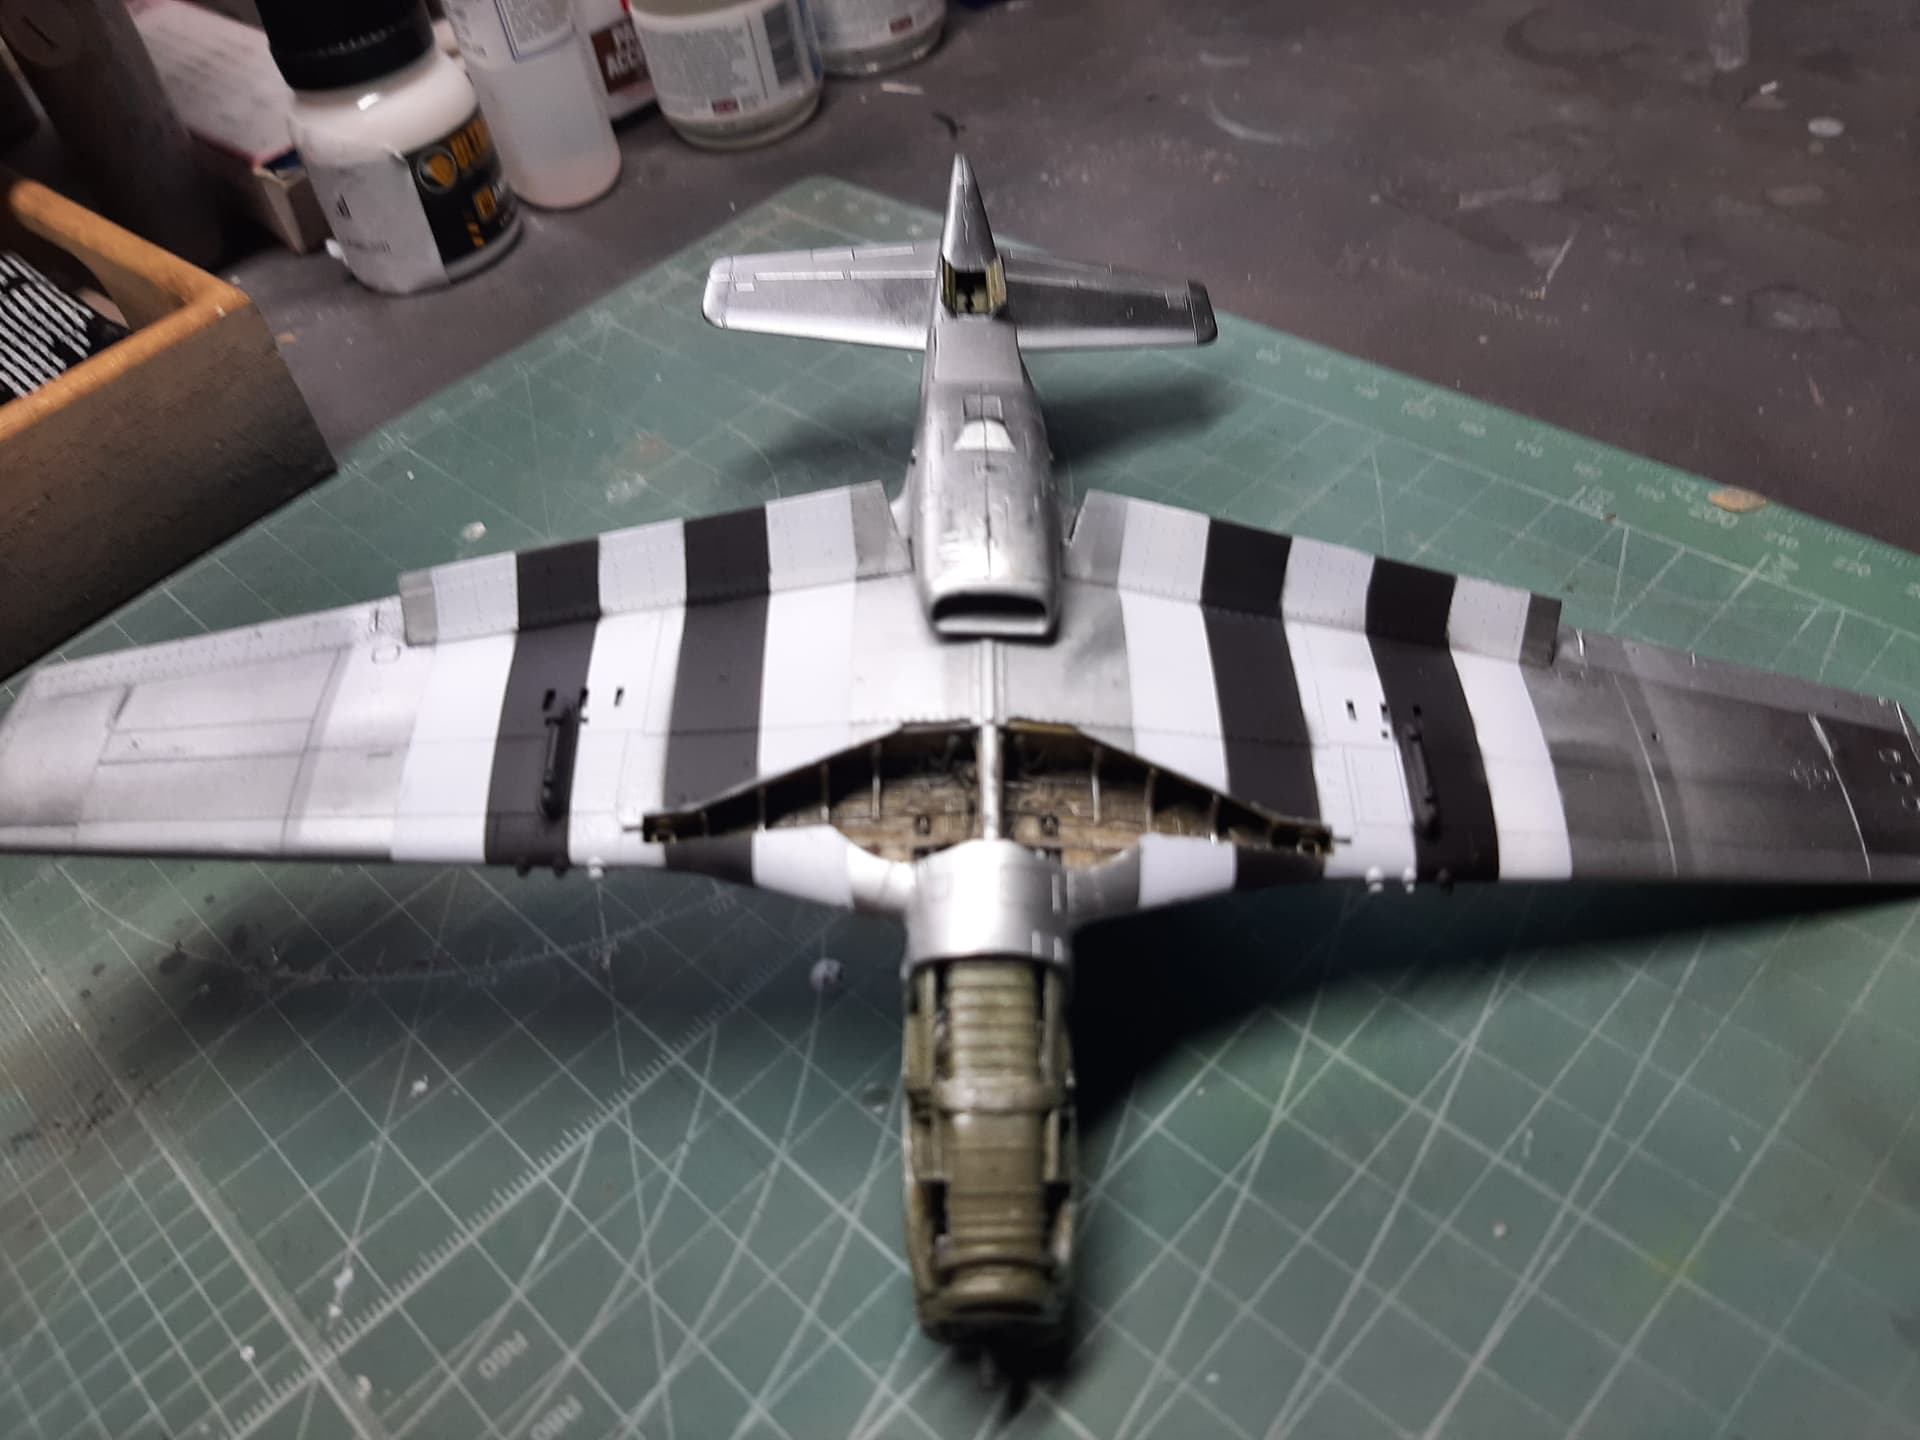
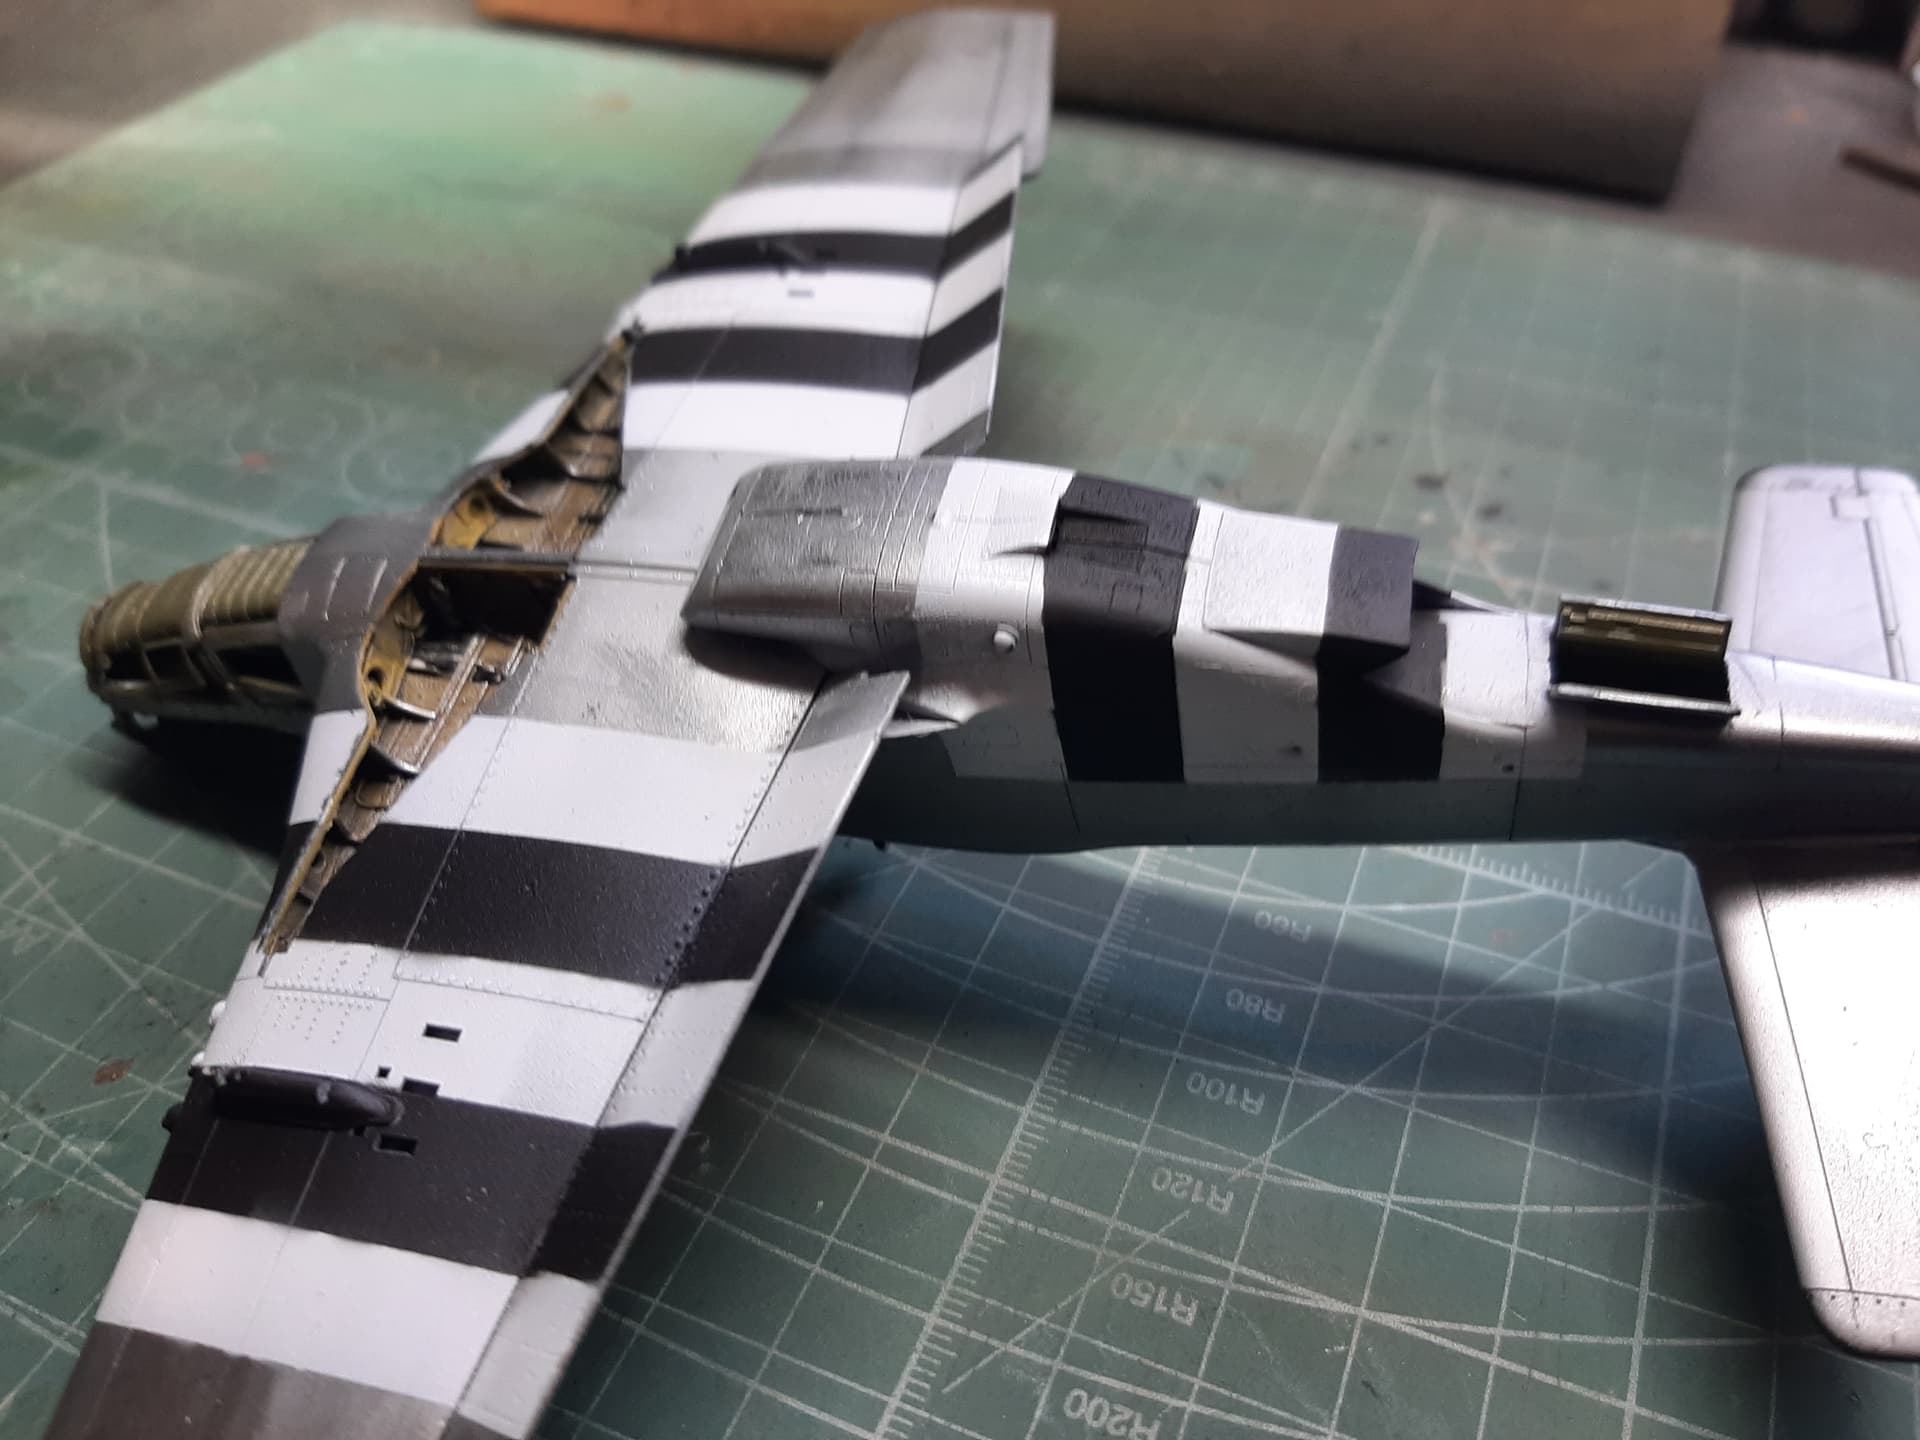
The version i’m building calls for invasion stripes, which tamiya provide as part of the kit. Only there’s a problem. The underwing decals don’t take into account the protruding hard points used for fuel tanks/bombs. And, these being large, one-piece decals, they just simply are going to be a nightmare to fit and conform. That’s just really bad execution from Tamiya in my opinion.
So, i did what seemed like the sensible thing to do, and painted them on. The results look pretty good.
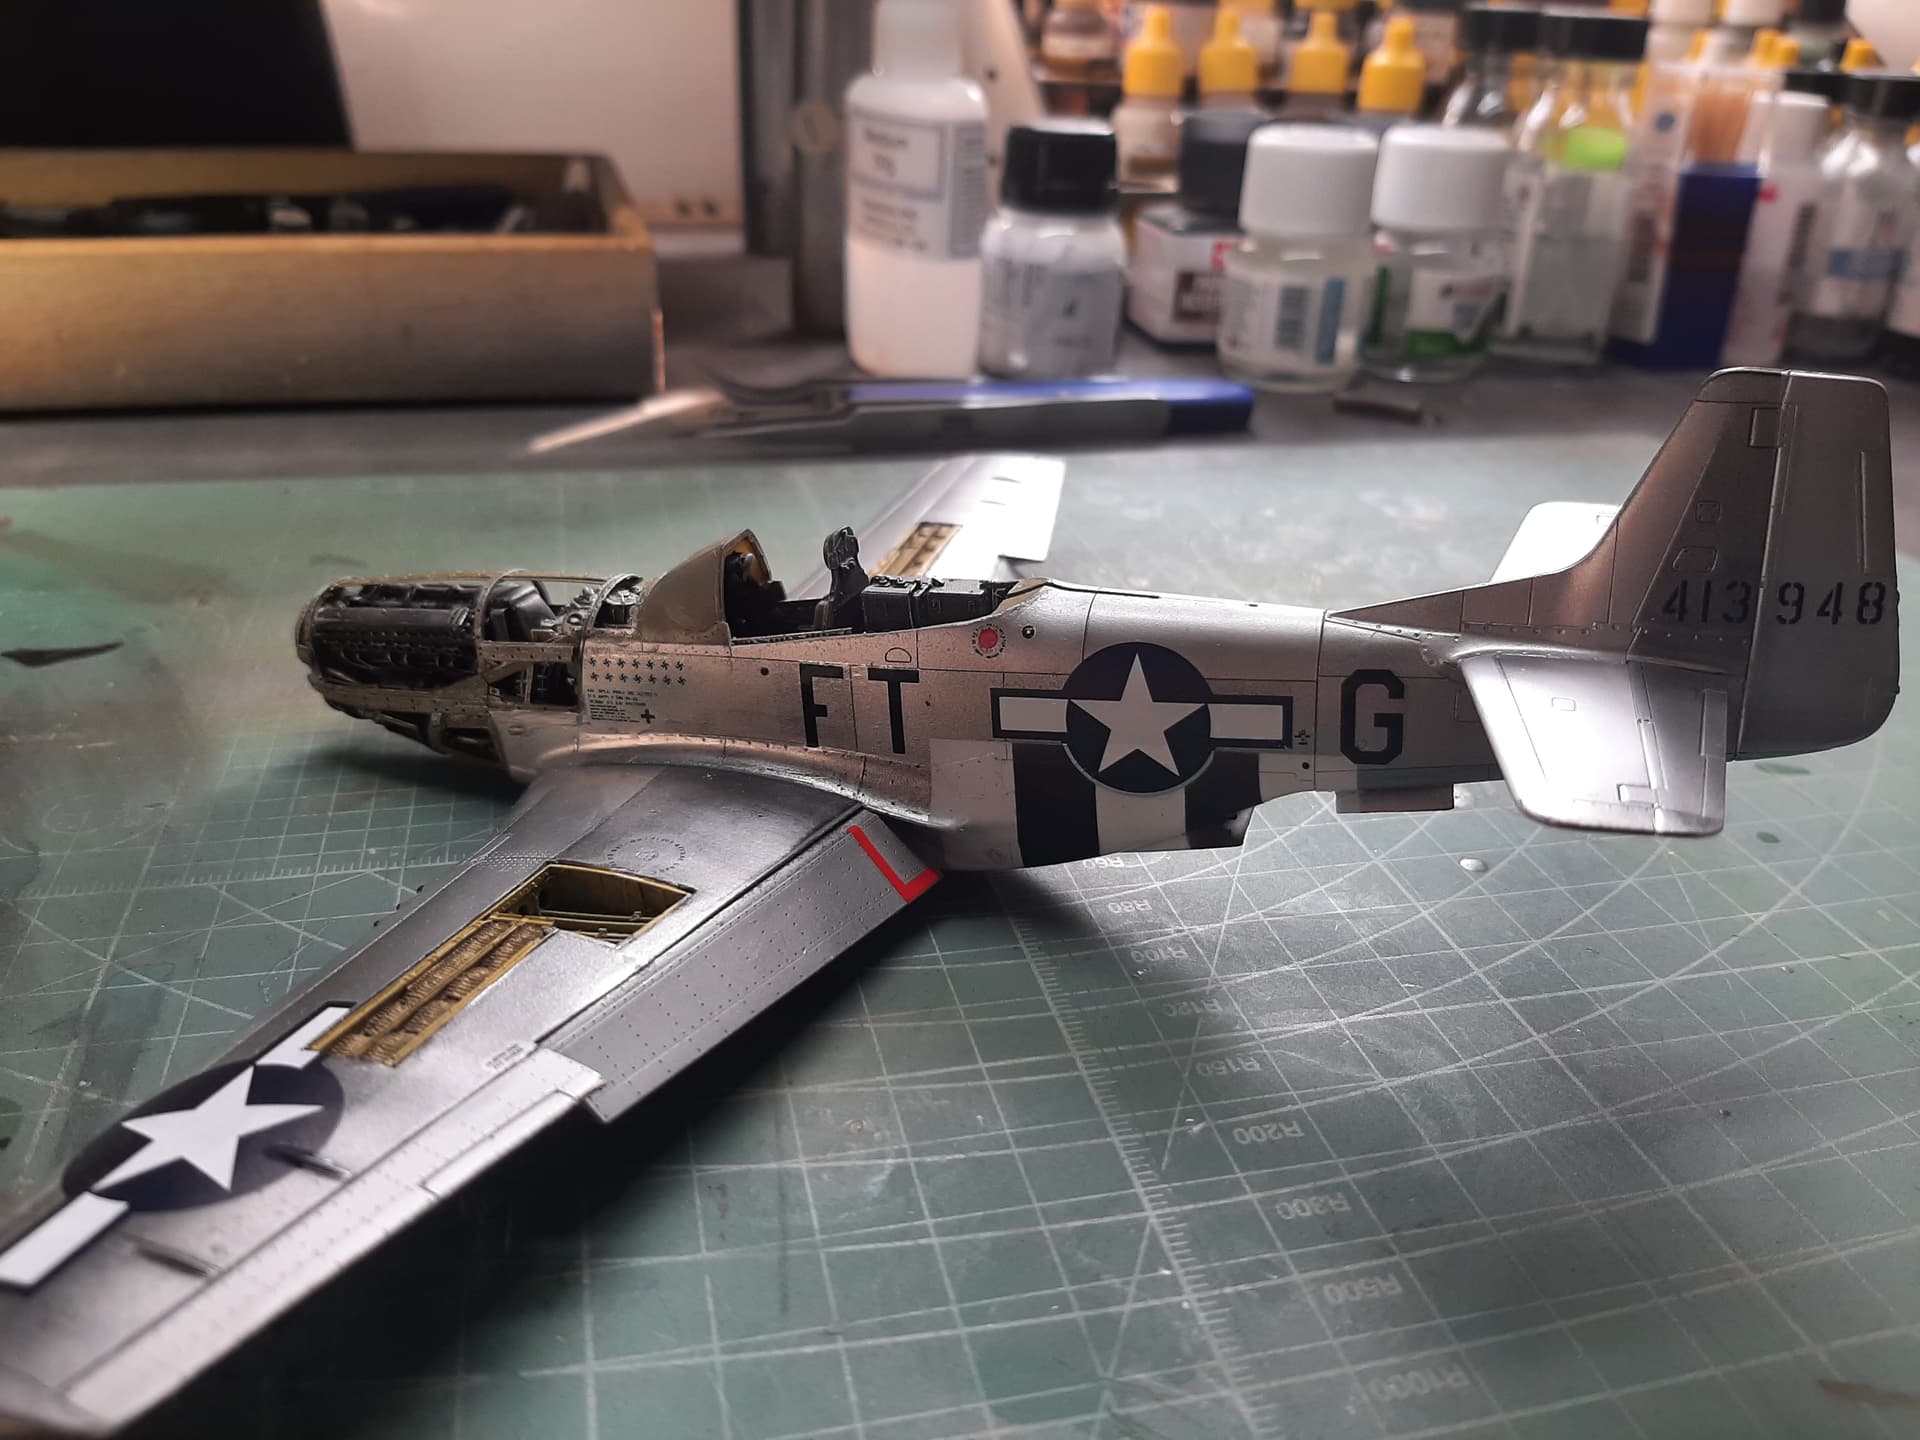
Now, it is going to be nearly impossible to paint the lateral invasion stripes on, mainly because there’s a curve to be added that accommodates the ‘Star’ insignia. Again, the kit comes with decals for these, but there are about 20 of them, split up so that all the curves and indentations in the fuselage can be accommodated, and the instructions are not clear at all.
So i’m stuck between figuring out a way to paint them on, or tackling the Gordian Knot of the kit’s decals…
Many thanks. Its pretty useful, but i’m going to stick with painstaking masking and painting to maintain the textural continuity with the underwing stripes already painted.
I don’t normally do aircraft, and perhaps this one wasn’t the best test bed, but actually it looks alright,
So I masked off and painted the lateral invasion stripes. Some minor touching up required, but it turned out quite well, and it wasn’t too painful to set up either.
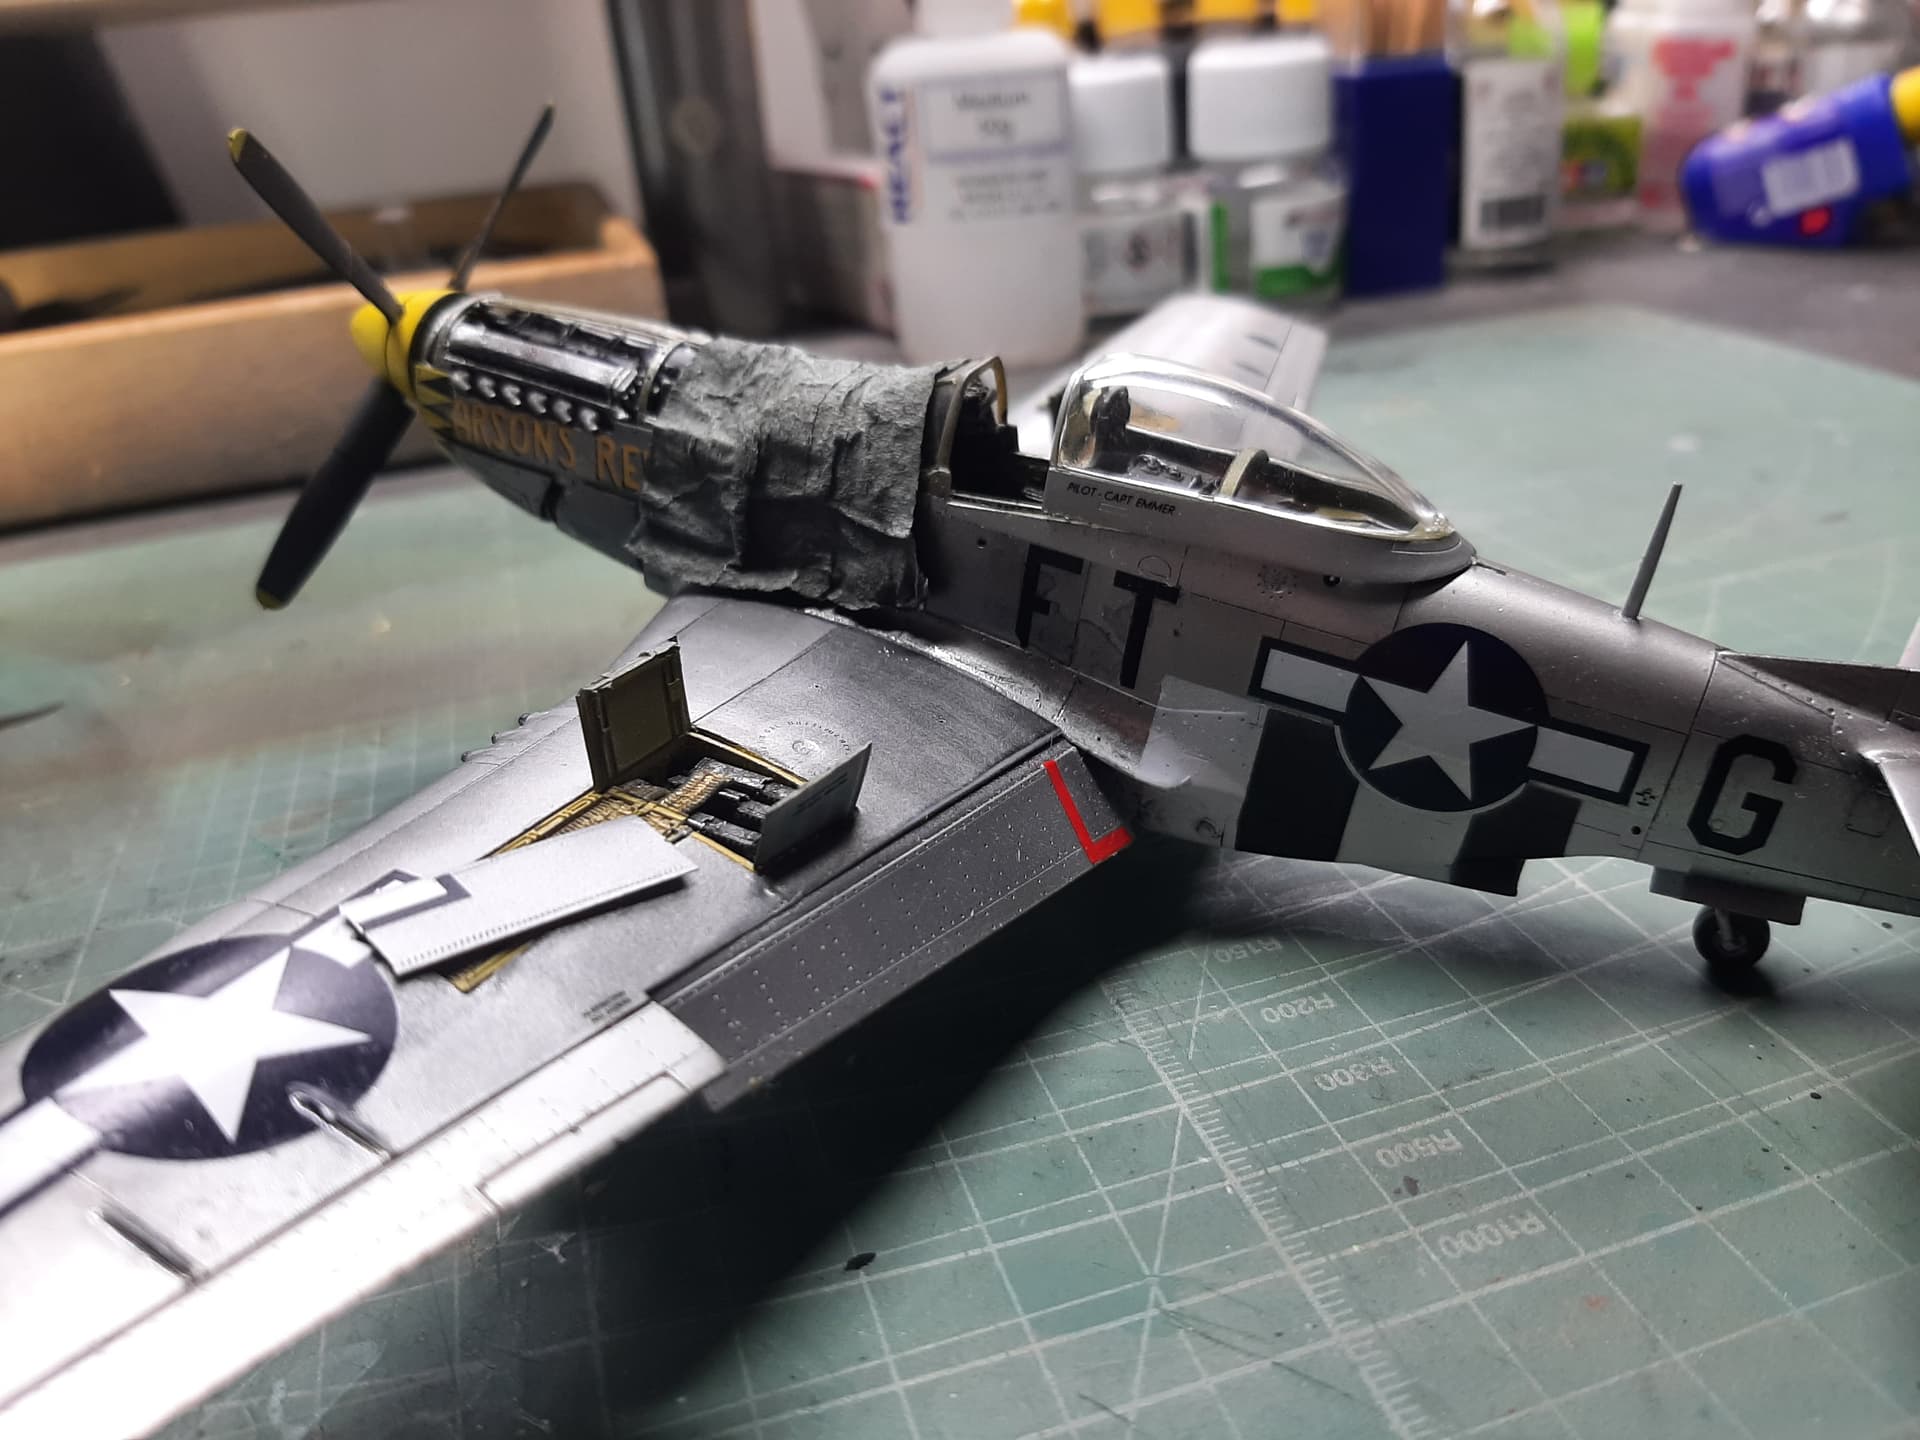
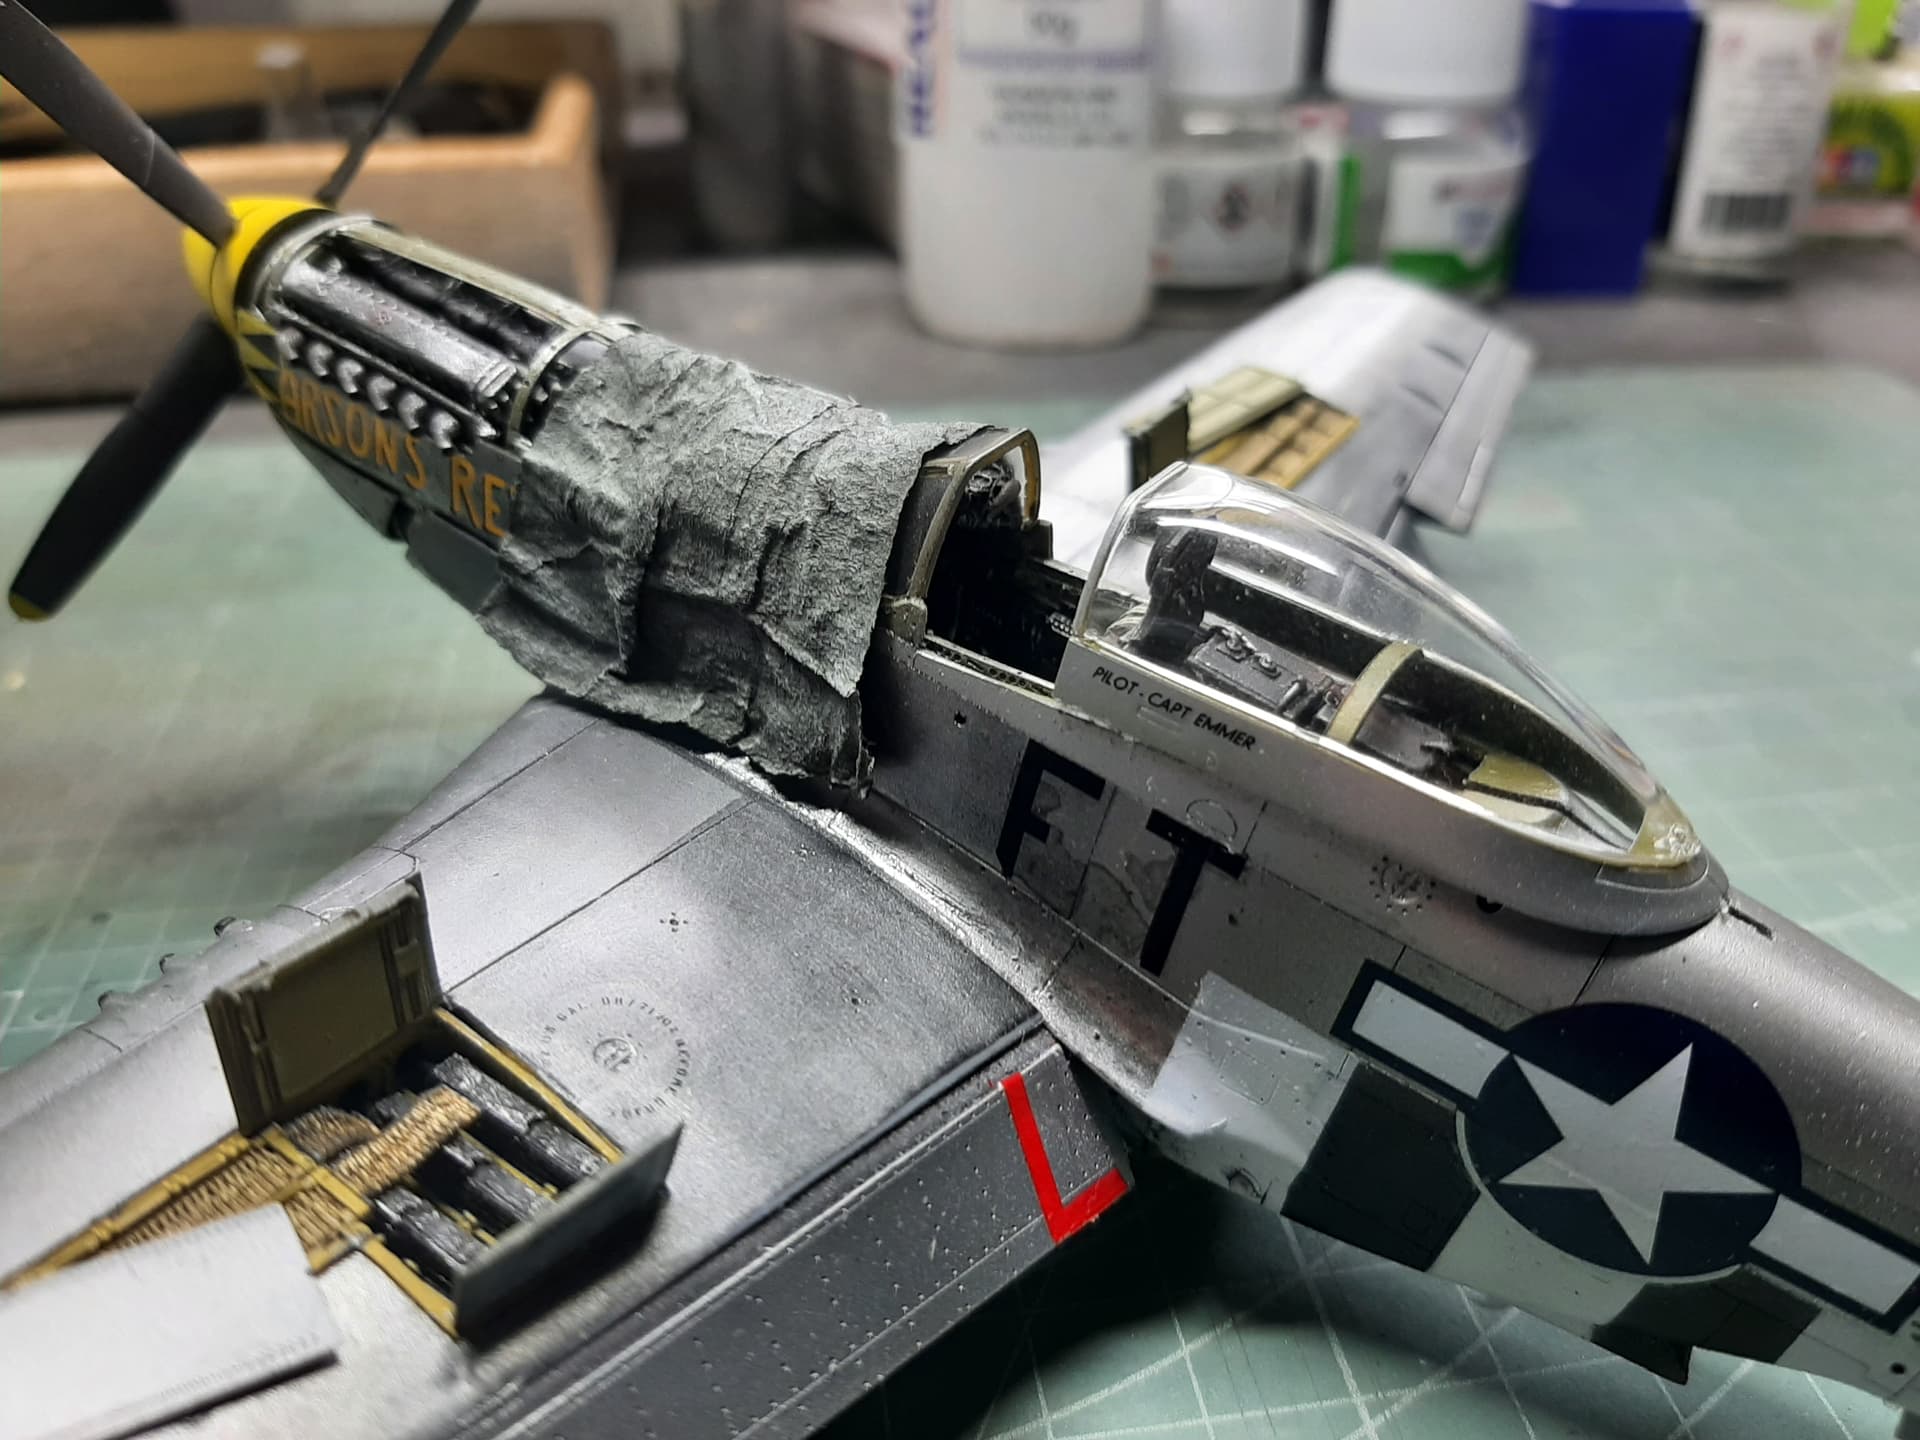
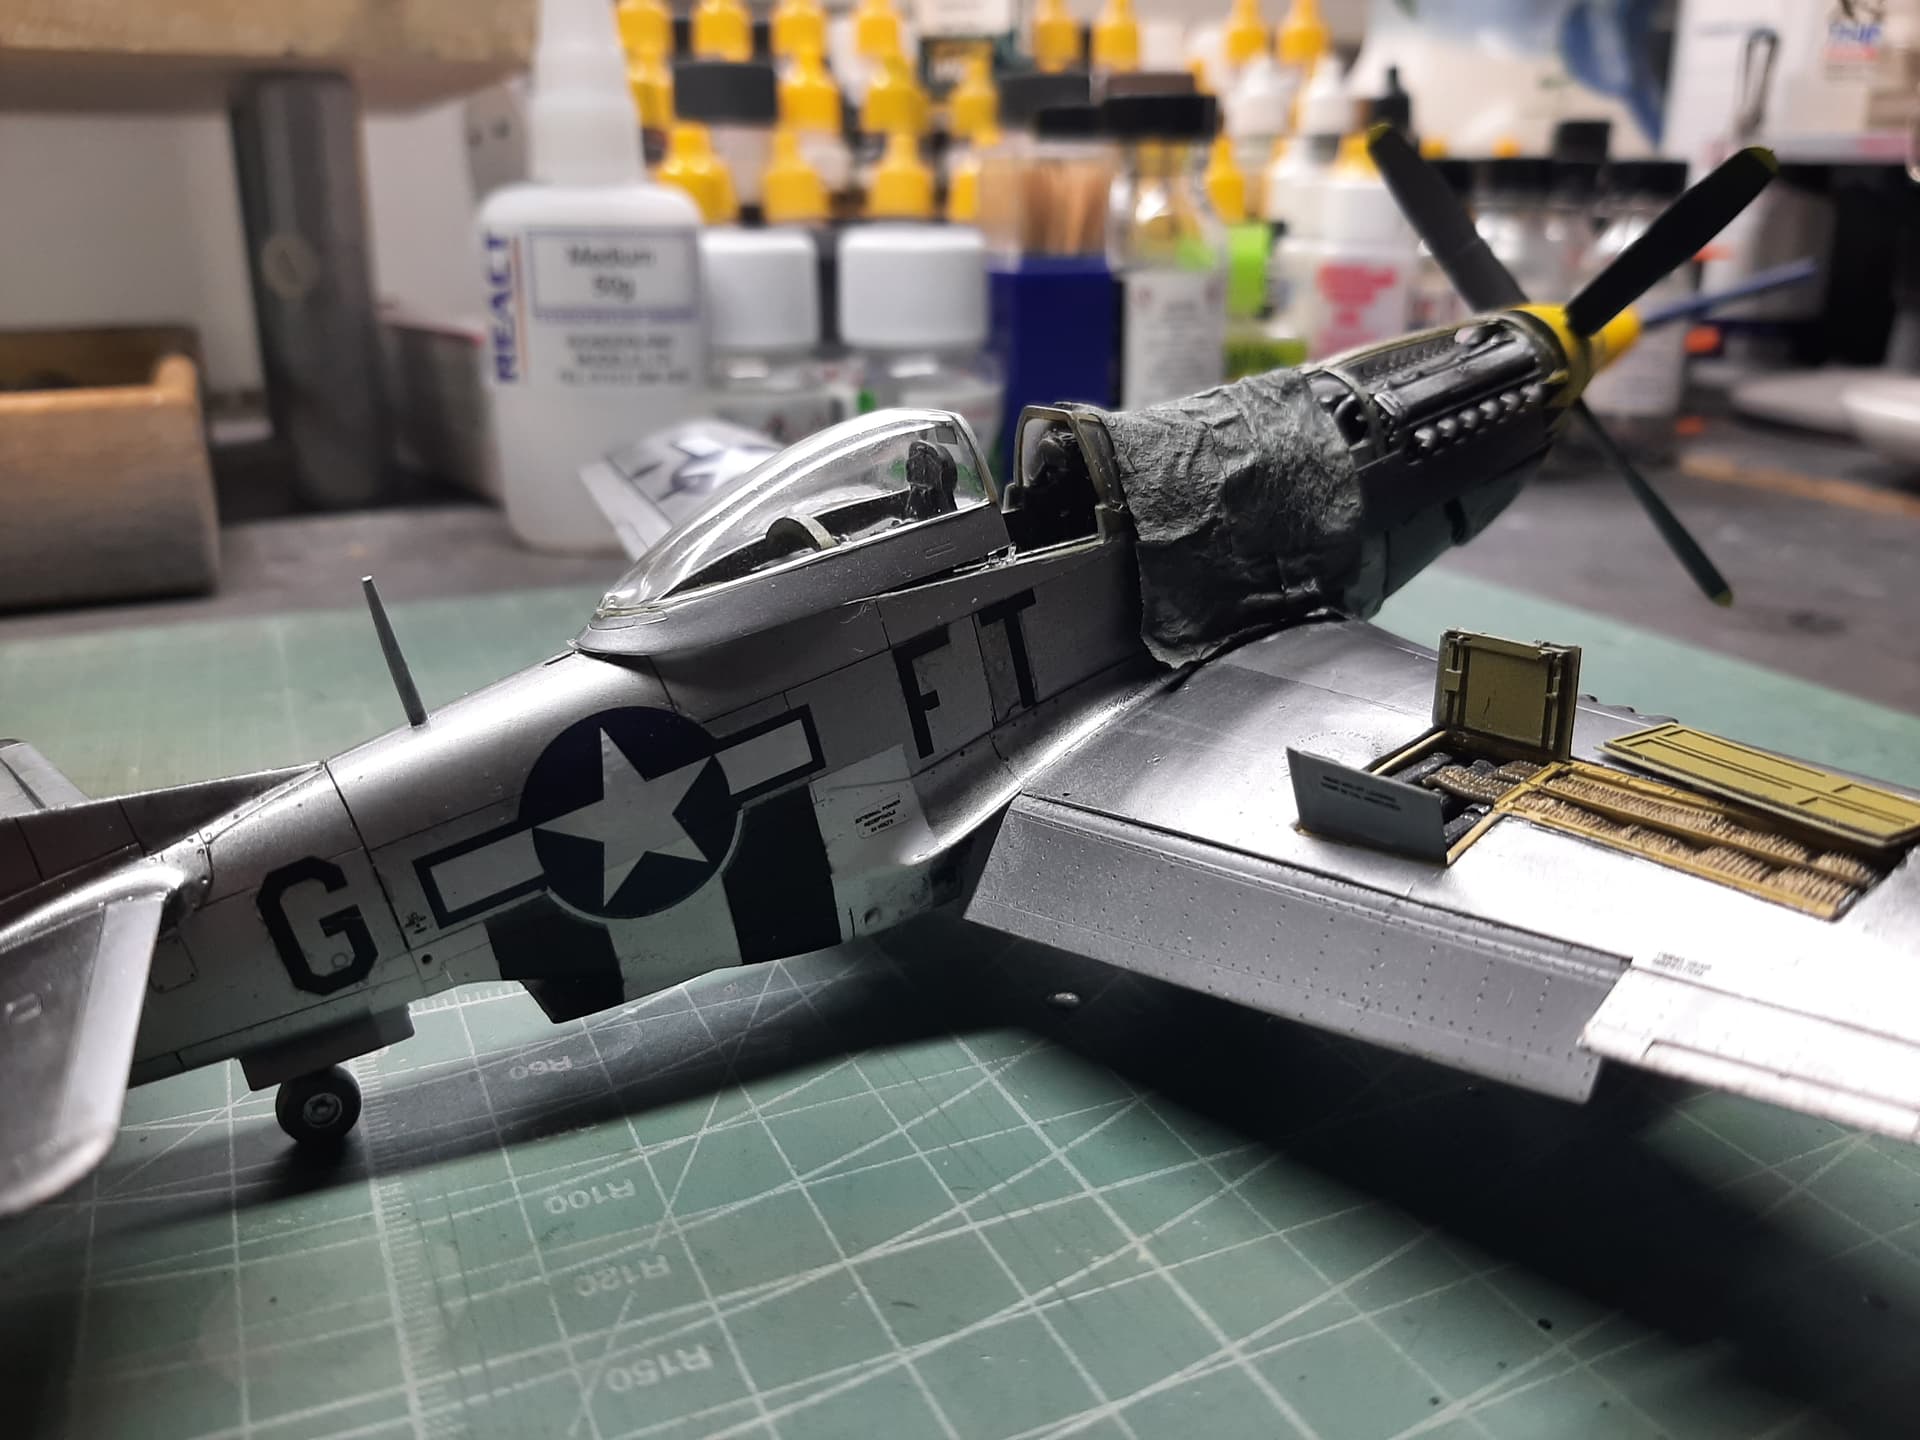
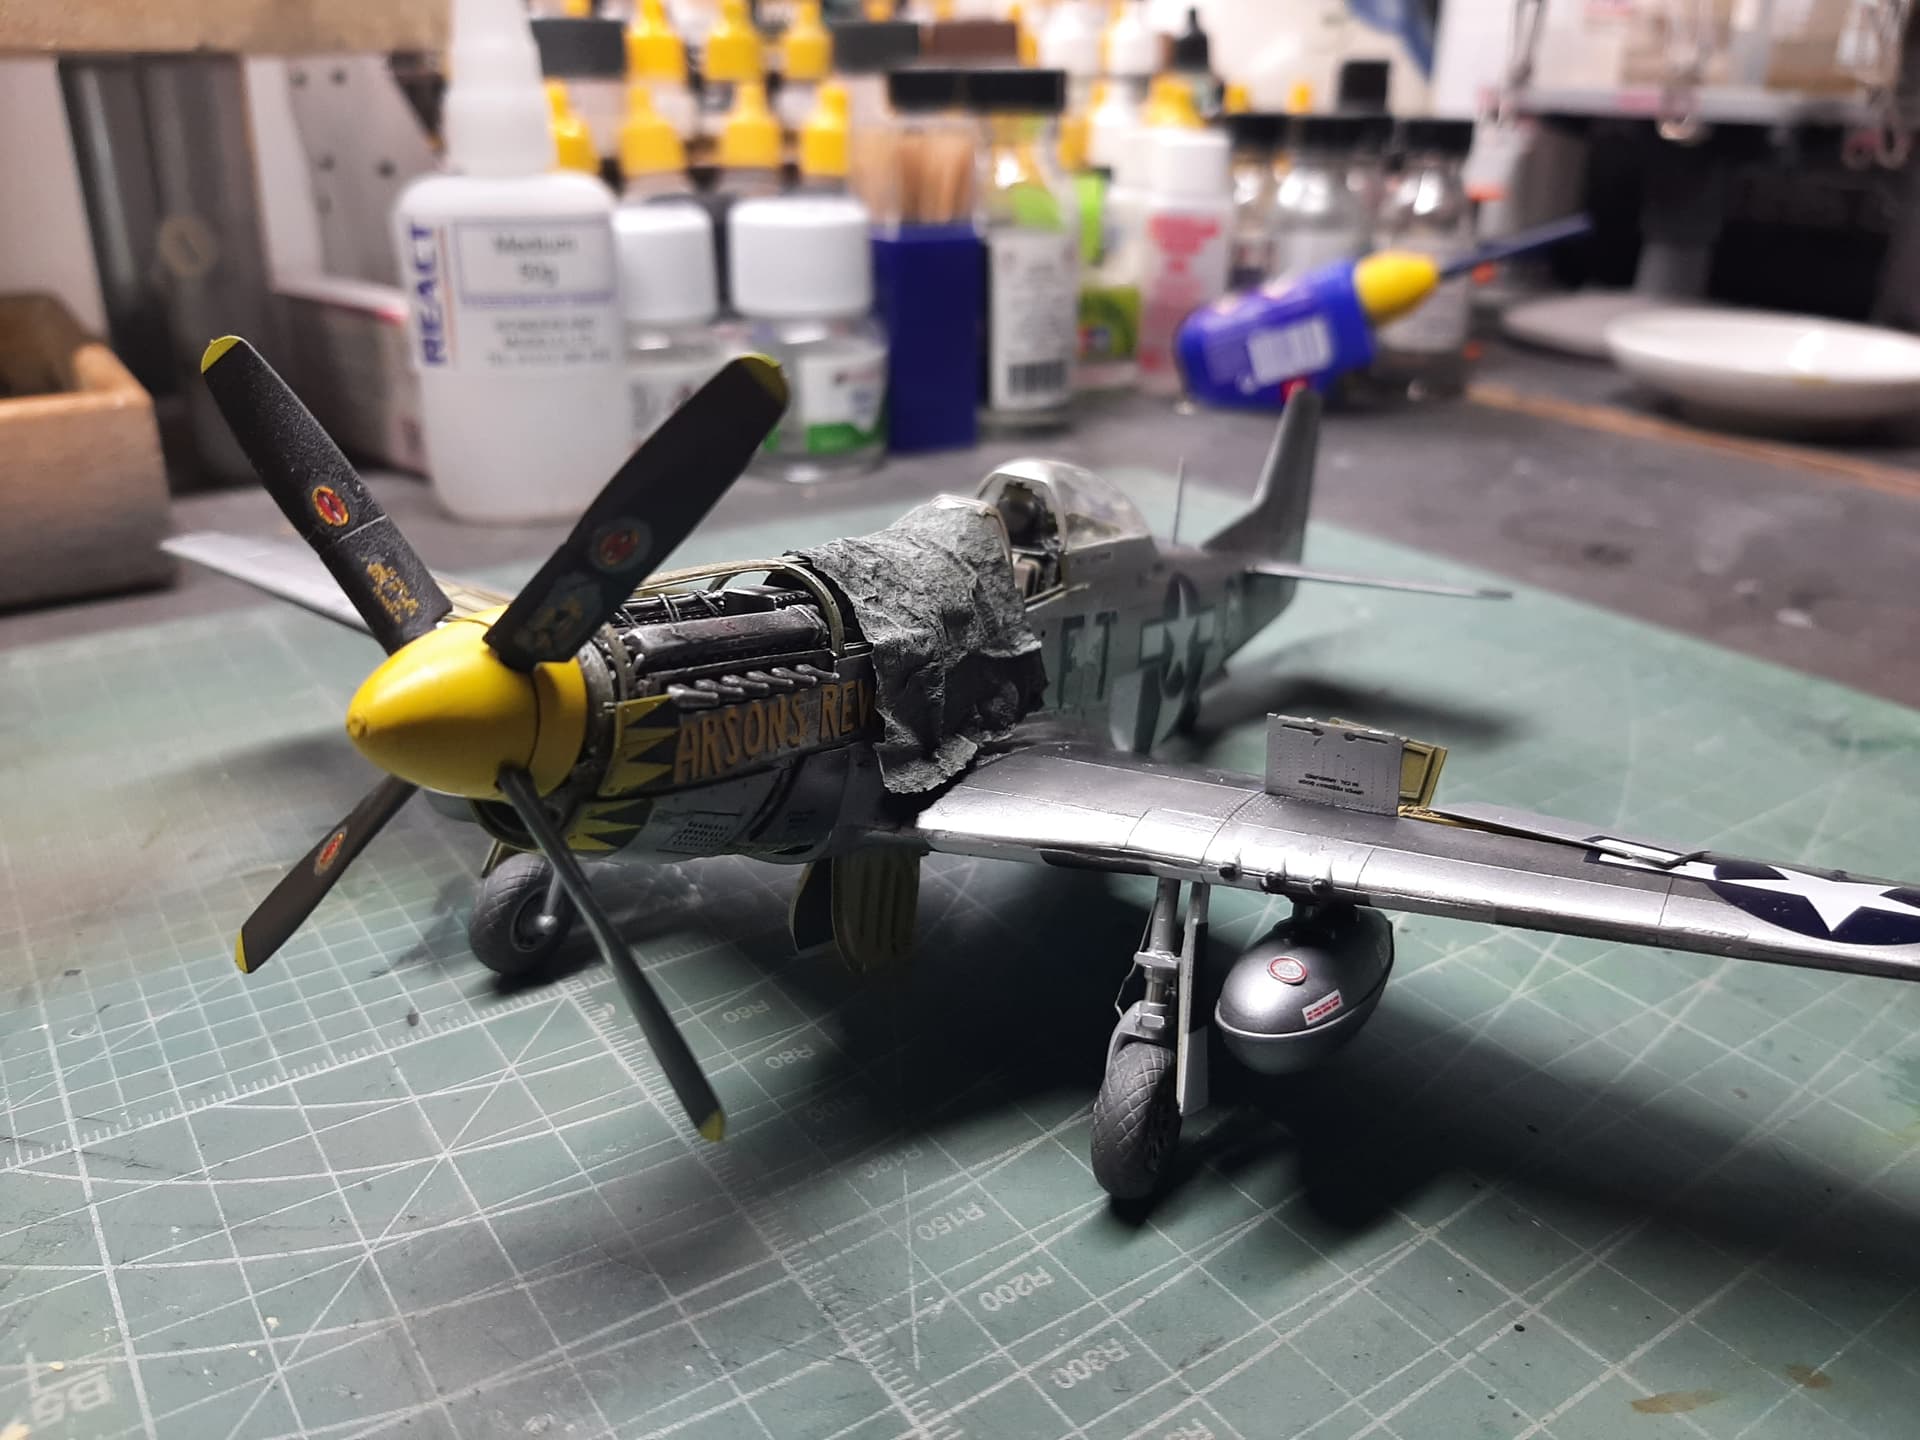
Okay, i need to make a tarpaulin to cover the rear part of the engine compartment.
I never did it before, but I know how to and will give it a go.
Problem is, how do i do the old PVA method on an already painted aircraft? How do I stop gloop getting everywhere whilst molding it in and ssurely painting it in situ will be a nightmare?
To make the tarpaulin, i covered the area to be used with cling film, secured by blu-tack. I then used the standard PVA + Water method on some regular bog paper. When it was dry, I carefully removed it, painted it and replaced it. It doesn’t look too bad, considering it was my first effort.
This build isn’t perfect, in fact, its pretty bad in places - but, still display worthy in my opinion. It was a return to aircraft after a long while building AFV, so I would argue this was something of a test bed for future aircraft. I must say, i’m starting to prefer 1/48 aircraft to 1/35 AFV, although I do go through ‘phases’ of preferring one over the other.
Let me know what you think.
Next up is a 1/48 Tamiya Mosquito FB Mk VI and a load of aftermarket.
Certainly looks the part to me. I like the painting and finish and the detailing looks great. The metal finish came out nice as well.
The cling film method is my go to way for doing things like a tarpaulin etc. Works every time and its a quick simple way to do it.
Will be waiting for the Mossie build as its one of my fav WW2 aircraft. A good job well done