What a great and well thought out and executed build. That could be the scene stealer though… Don’t make it to outstanding !!
Well, it is an intrical part of the narrative, btw ![]()
1 Like
Well, s##t happens ![]()
![]()
![]()
2 Likes
Oh man, since Quatre Bras your model-making’s been so in the toilet - presumably you used a No. 2 blade? OK that’s all I got, that’s a great shed-load of shed ![]()
2 Likes
Thank heavens for small mercy’s lol ![]()
![]()
3 Likes
Ya killin me Smalls, ya killin me,…again!
Well no SH@T, Johnny! What’s ya think we gotz goin here, a bordello?
4 Likes
OPR, Oil Paint Rendering
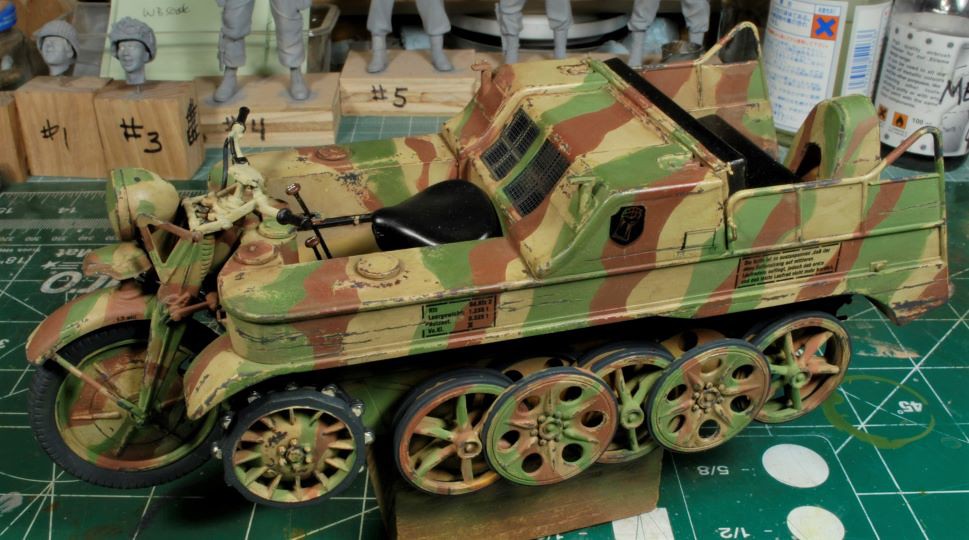
This trac-bike has been on the bench for a few weeks now getting a work over. I won’t go into too much detail on this portion of the dio, but just a minor update on progress. The real issue with this kit is the forks and the tracks, they are weak, IMHO. No worries, the worst is past, now the fun part, painting and weathering.
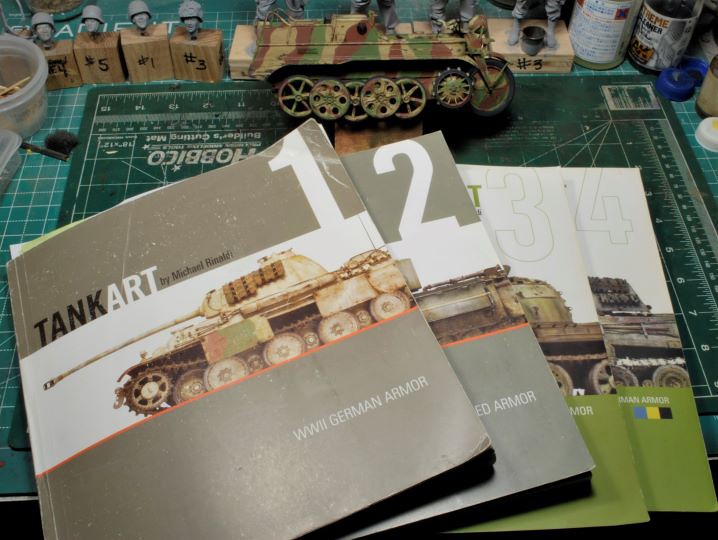
Using Mike Rinaldi’s “Tank Art” book series I am stepping away from the traditional weathering approach and trying something new, or at least to me it is. Oil Paint Rendering, or OPR for short, which is very thoroughly explained in book #4, German Armor. The SBS sequence is located at the end of chapter in each book for quick reference making for a pretty slick arrangement of the steps to follow.
Being an oiler at figure painting already, this OPR method is right up my alley. This really is a simple process, but it just takes a bit of practice, like everything else in this “Sport”.
I picked up the first four books a few years back, so now I’m ready to give it a go and see if I can incorporate this OPR method to its fullest. Kudos to Mike for such a well written and illustrated set of what I would consider essential volumes for armor geeks. Mike’s books can be found here: https://www.rinaldistudiopress.com/
Off we go,………… This current camo pattern is not exactly accurate, but close enough for my purposes. My airbrush talents are lacking, so a true hand sprayed on pattern would have been a dismal disaster. I’ll run with this one and carry on. I did use elastic masking putty from AK Interactive. This stuff is great, my first time using it, but it’s rather tricky in tight spaces or on delicate details, so be aware of that if you’ve never used it. I also used the hairspray method for the chipping sequence. I still have a long way to go to feel comfortable with this method, but the possibilities are incredible. The biggest issue being “less is more” when it comes to chipping. It’s too easy to get carried away with the process and trash all that prior work only to end up with a redo.

So, as you can see there has been appreciable progress, but’s it’s slow going, especially learning a new technique and not wanting to jack it up, lol. I will use some pigments for mud work, but not much. I want to blend and fade using the oils and get the rust and dirt streaks down correctly. I’ll post the end results when it’s finished, but remember, I’m working to get to the AB figures, this is just a necessary next step to reach that goal.
Thanks for watchin. Cheers, Ski.
8 Likes
I like Mike’s books (have a few). I think Mike’s and NightShift small chipping is a better representation of the theory, up to each modeler if that is what they are going for in their project.
I like what you have done so far, will that be carried over to the seats?
1 Like
Ski, outstanding work on the Kettenkrad! Don’t downplay it, it looks fantastic! I already know your figure work is A+, so this should be an incredible diorama. I have all 4 of Mike’s TankArt books, and I consider them essential learning tools. Not only is Mike a Master, he is a damn good teacher. Some guys do incredible work but can’t convey the process. Mike is a wealth of great techniques.
Looking excellent Ski, can’t wait to see your next steps.
1 Like
Tanks, Tank! Excellent question. I was pondering how to roughen up the seats. One way is to glue on some tissue on to give it a rougher texture and emulate usage, done it before. I will add that to the punch list.
As for Mike’s method, excellent, but my issue has always been over-kill, something I would like to remedy. Nothing worse than an unrealistic chipping job.
Thanks, Matt! Yes, the books are very easy to understand and great for learning new techniques. They are very well laid out and the final SBS pics are ingenious, IMHO. I like his techniques for one simple reason, he clearly states that the old tried and true methodical methods don’t show much improvement with each build, whereas OPR breaks the ceiling and leads to unique results with every build, thereby showing improvements in presentation with every rig built. The last thing I want to do is cookie cutter work, boring,…
3 Likes
Very very good… The KKrad looks lovely
1 Like
Tanks, Johnny!
1 Like
Only just caught up with this one - outstanding as always. At least on this one, I won’t be nagging you re British webbing.
The toilet made me laugh - or rather wince; my maternal grandmother had one of these in - or rather outside - her house; I used to dread having to use it as a child. Fast forward a miliion years, and what do I encounter in Iraq? the dreaded Portaloo - as they were known in Brit circles. In that heat! Of course, the night-time drills (with a head-torch) included the very useful advice of “Whatever you do, don’t look down”.
2 Likes
Nasty stuff, yep Boots. Years of construction makes one appreciate the indoor water closets. Now, when we responded to Hurricane Katrina back in '05, the porta-potties got so bad the guys were leaving cups full of you know what on the leading edge of the bench, so if you didn’t look before entering, you got wet, disgusting.
I had to add a little visual humor in there for comic relief, HA!
2 Likes
Are there two versions of volume 1? I’ve seen one with a Tiger on the cover and one with a Panther on the cover. Looking to purchase volume 1 but I’m confused.
It looks like he’s updated the covers, but there does appear to be some different material in some of the issues. You can always send an email and verify.
1 Like
Yeah I’ll do that Ski. I think one volume has been updated with about 80 additional pages just not sure which one.
I saw that, wishing I had the new one now, sheesh!
1 Like
Trackin it Now!
The Trak-bike has been completed, finally. Ok, for the technically inclined, it’s really a German Sd.kfz.2 Kettenkraftrad Typ HK 101. That’s a mouthful, so it shall henceforth be referred to as a “Trak-bike” for purposes of this article.
Note: As mentioned before, these tracks for this kit are pathetic and have a real tendency to break at the most inopportune time, while being installed. I painted, weathered, and left the sprockets uninstalled, so I could install the tracks over the sprockets, place the back end of the link over the rear running wheel, and carefully slip the sprocket into place. HA, ya right, they still broke. I had to “pin” each side in at least one link to keep these buggers from coming apart during installation. The design team gets a “swift kick in the pants” for that brain dead maneuver, IMHO! Ok, onward.
After using Mike Rinaldi’s “Oil Paint Rendering”, or OPR, I was decently happy with the results. This was, after all, my first attempt at weathering a vehicle using oils only,…………well almost. I did use Mig’s pigments to add a bit of mud crusty above the running gear and I also used a mix of pigments to form a Euro-earth tone and added thinner to splatter a bit on the rig lower sections. All in all, I do like the OPR method and will be using this quite a bit from here on out. Like I said before, I’m an oiler anyway, so what’s the big deal, right?
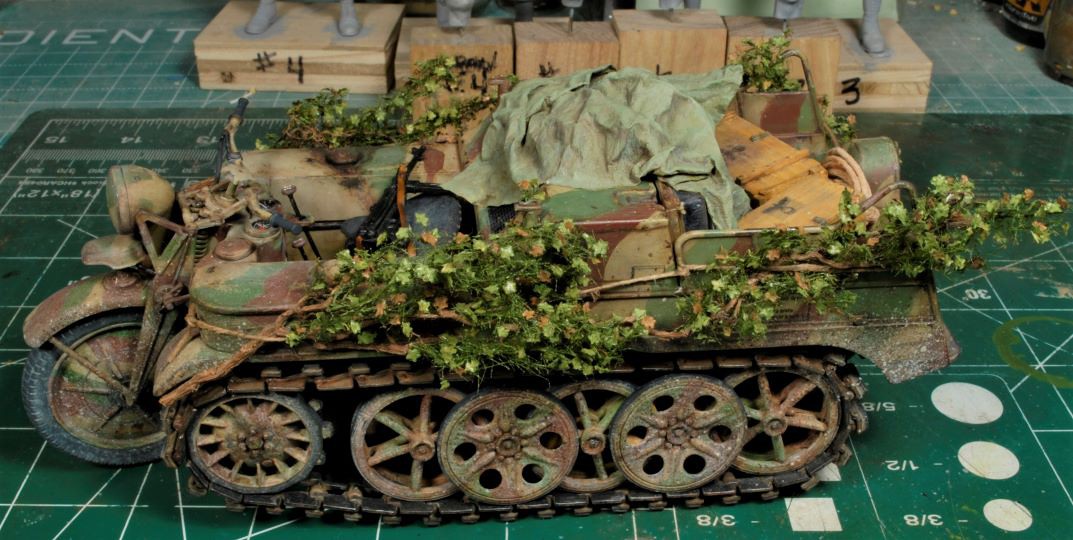
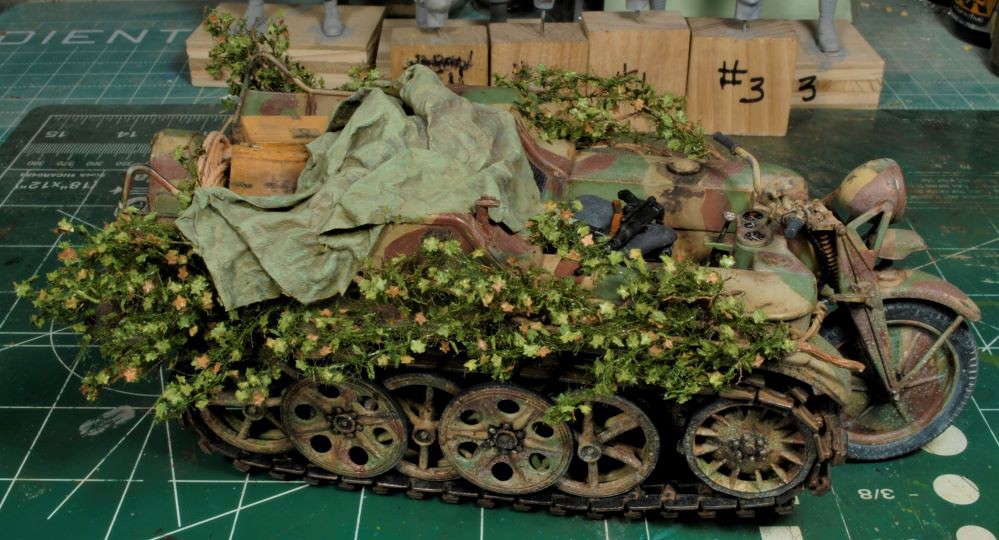
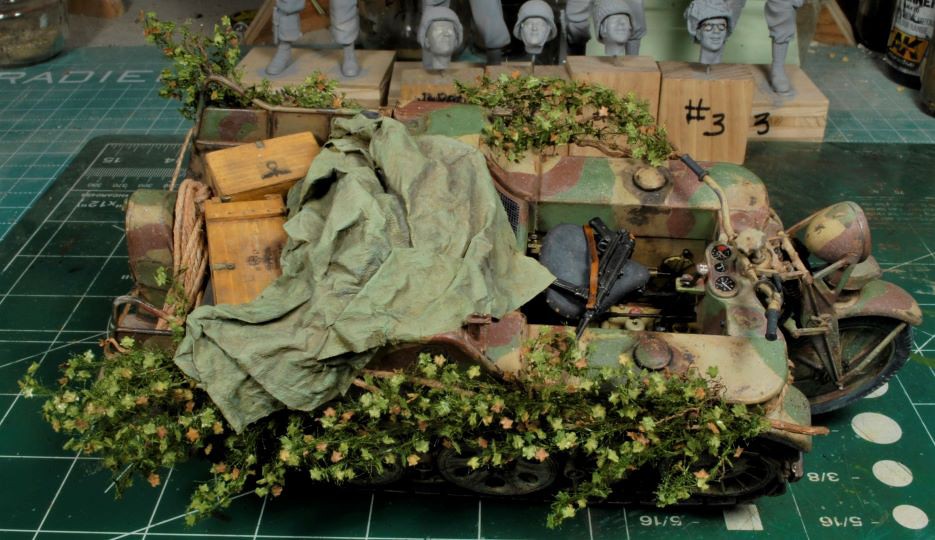
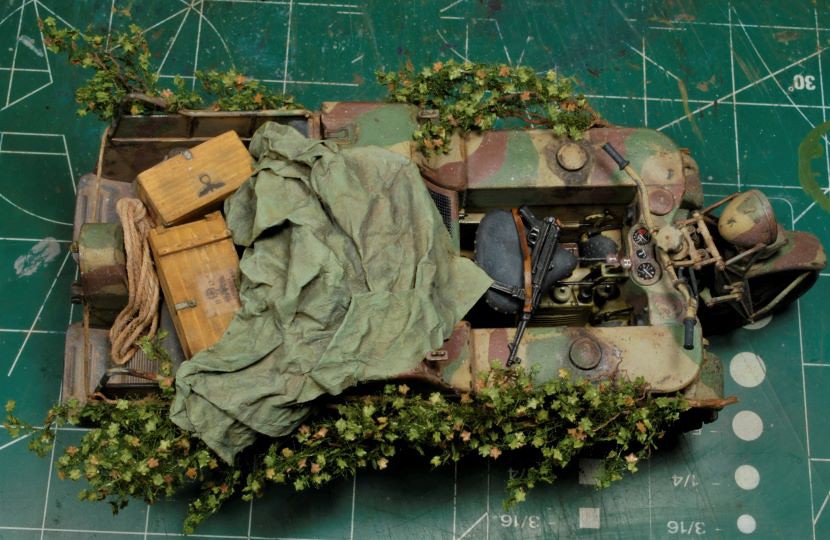
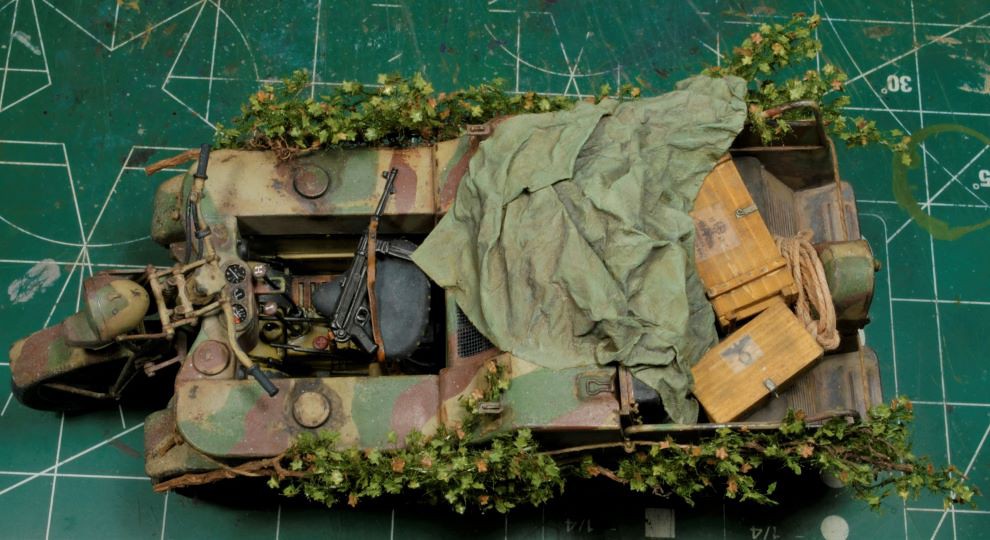
As you can see from the photos, I added some foliage using MiniNatur Plant tree foliage from Germany, to add interest and help support the story line. This stuff is great and I now need to replenish my stock, it’s very handy. I also made a few crates and some rope for the back end of the trak-bike as well as a cover tarp that has been drawn over by some of our characters. More on that later.
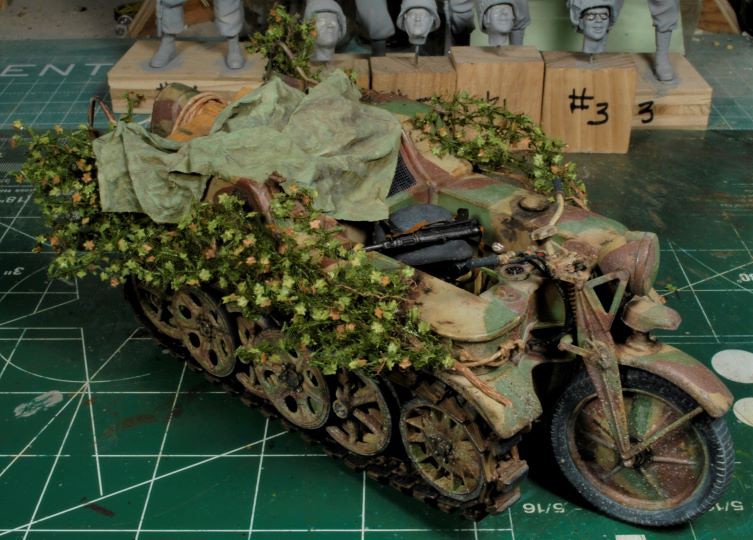
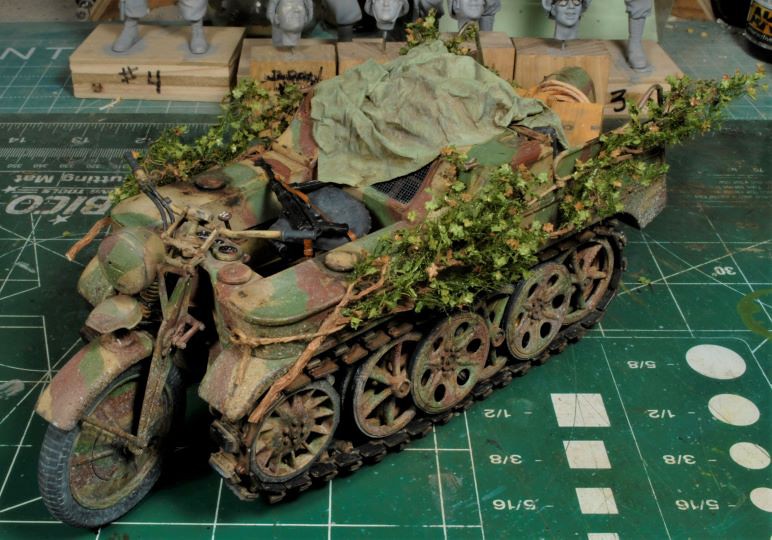
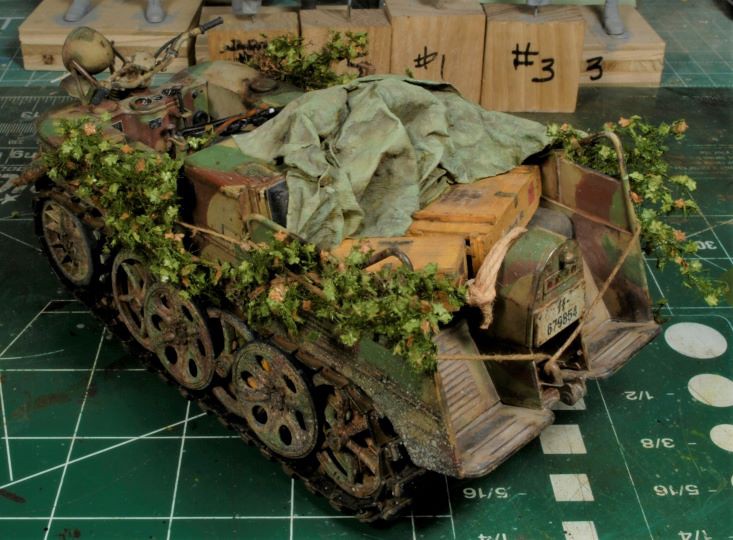
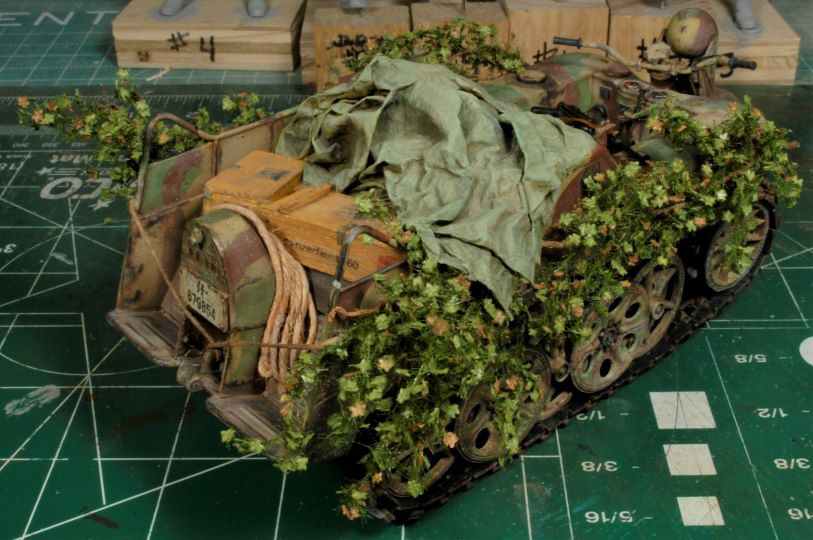
It might seem a bit odd having that MP40 sitting on the driver’s seat, but that will become obvious later, HA! I’m really not going to give up the story line just yet, but I’m sure there a few that have already figured this out.
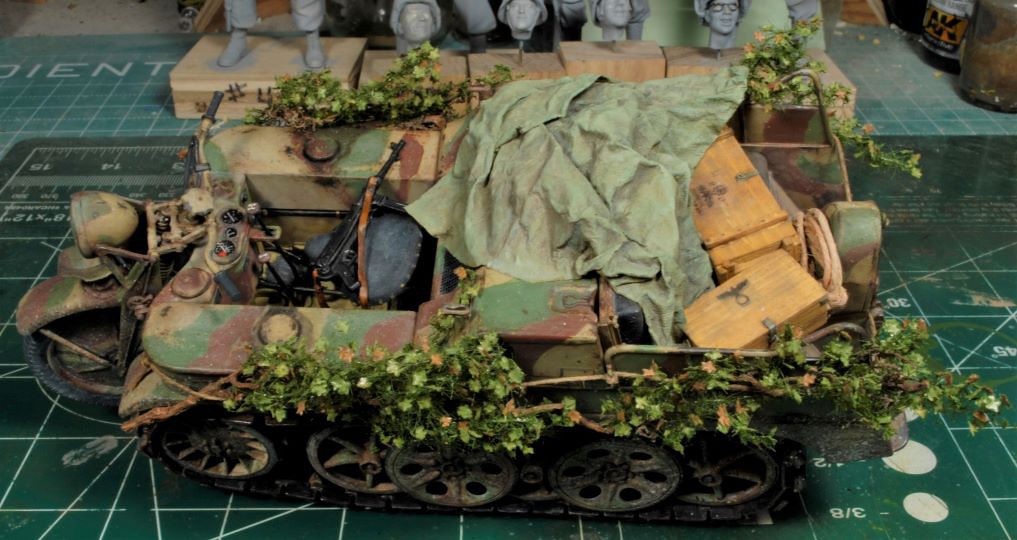
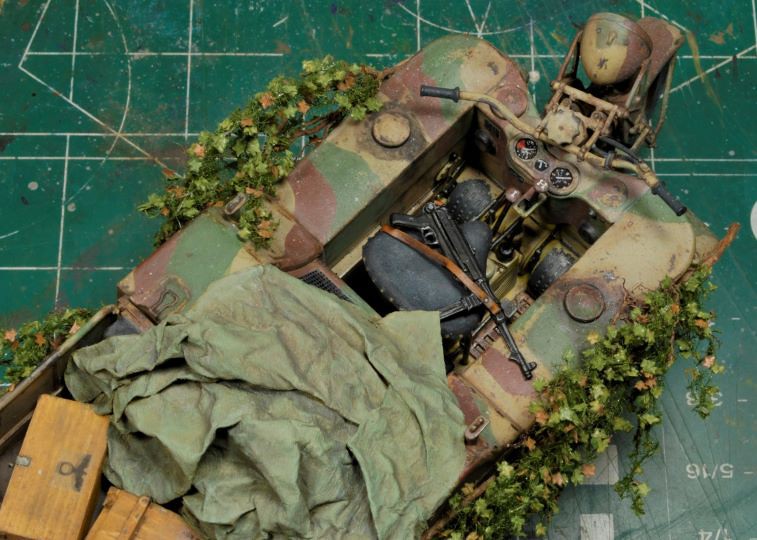
Now that this trak-bike has been finished it will sit safely in the curio cabinet until the final dio placement. Next up, changing gears and painting faces, Yehaaaa!
Thanks for watchin. Cheers, Ski.
10 Likes
Beautiful! Love the attention to detail ![]()
![]()
![]()
—mike
1 Like