Great work once again, Steve!
I know how hard the camo can be, even in1:35. But 1:16 is much more unforgiving and you nailed it!
1 Like
More brilliant work, Ski! That smock looks perfect. Bob doesn’t look too miserable. Great results with the bottles. Are the GI’s going to share some with Bob?
1 Like
Ah, Grasshopper, you must first cross the rice paper without tearing it before this secret can be revealed. ![]()
![]()
![]() Thanks, Matt.
Thanks, Matt.
Thanks, Erwin, veggies coming up soon.
2 Likes
Sensational work Ski … Bob looks resplendent !!. beautiful finished colouring not only on the smock, uniform and face … but the belt kit is equally perfect… Top work…in fact it’s beyond top work …
1 Like
You are too kind, Johnny, thanks, Man!
Collar correction;

5 Likes
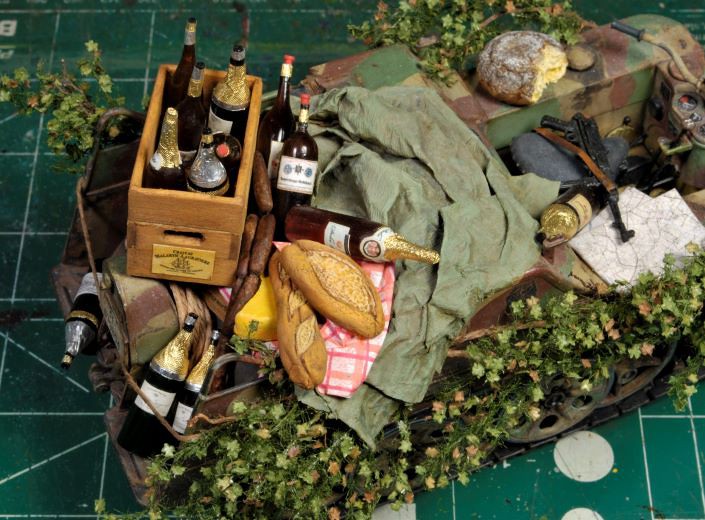
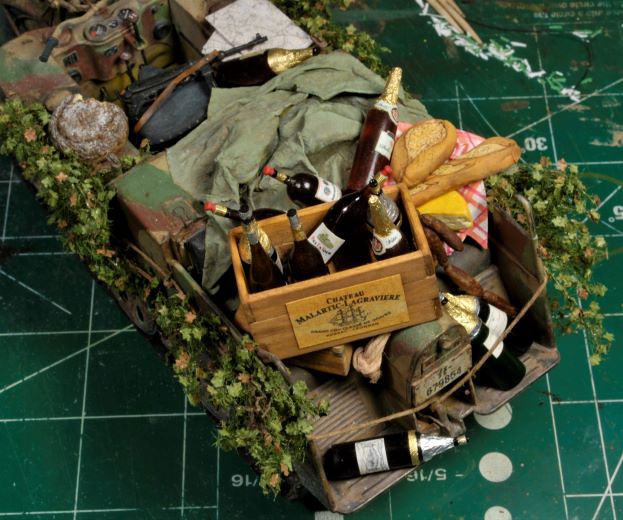
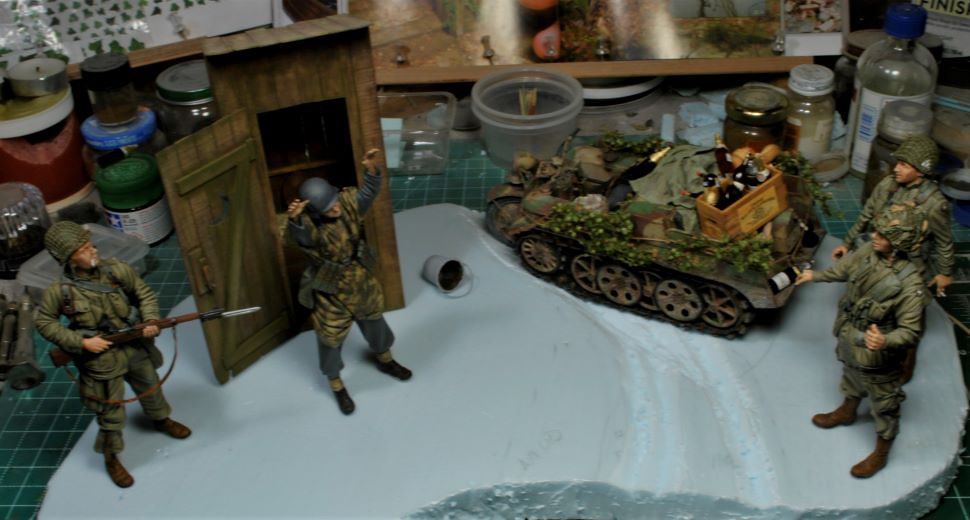
Loaded Up with Booty
Now that all the figures are basically done until I weather them to match the base it’s veggie time. But first, here’s a few pics of Bob’s booty haul from the local neighborhood. He’s loaded alright; sausage links, cheese, bread, wine, and even a few bottles of some really good cognac.
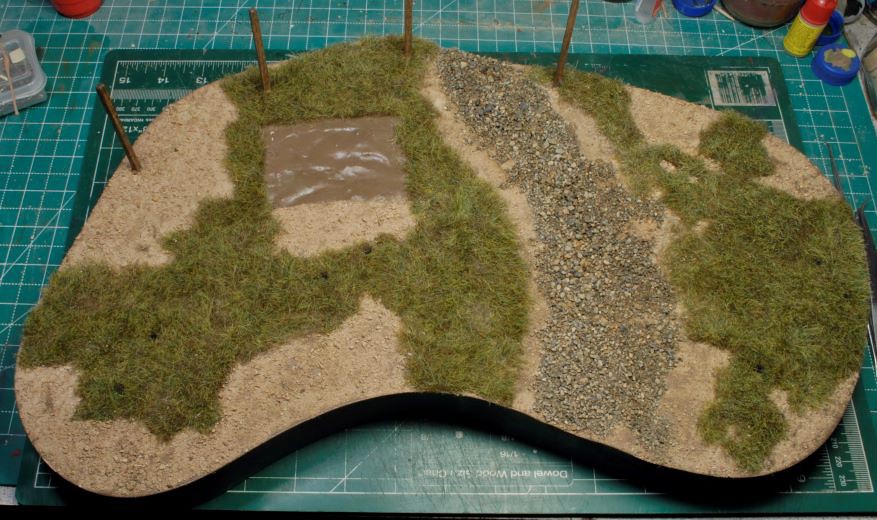
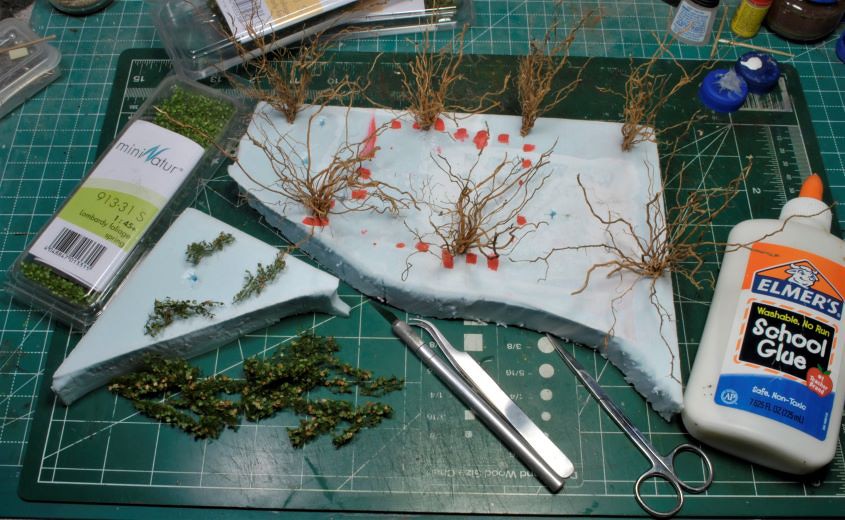
The base work is straight forward using some 3/16th inch MDF (medium density fiber board) under standard blue construction foam glued with good old Elmer’s wood glue. Once the foam and MDF were solid I cut some slight elevation features and then mixed some wall putty, Elmer’s glue, rocks, and sand. Then I poured the base layer and smoothed everything out. I also added fence posts in place to make sure they were solid. The perimeter of the base is a thin strip of styrene for easy painting and also to retain the wall putty.

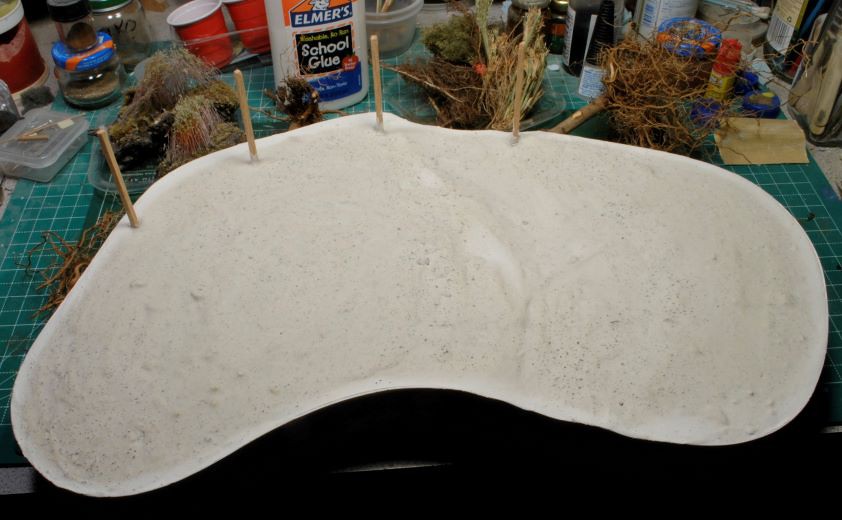
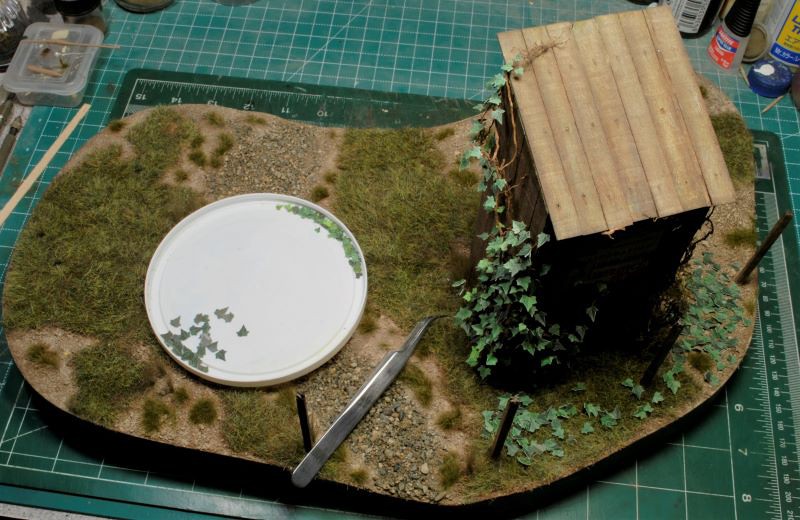
The veggie work is underway and so far, so good. I had left several tomato plant roots in the green house to dry over the winter for this very job and it looks like they will do just fine. The plan is to add some bushes, ivy, and summer grass on the base. I’m going for a semi-hedge appearance as a backdrop for the scene.
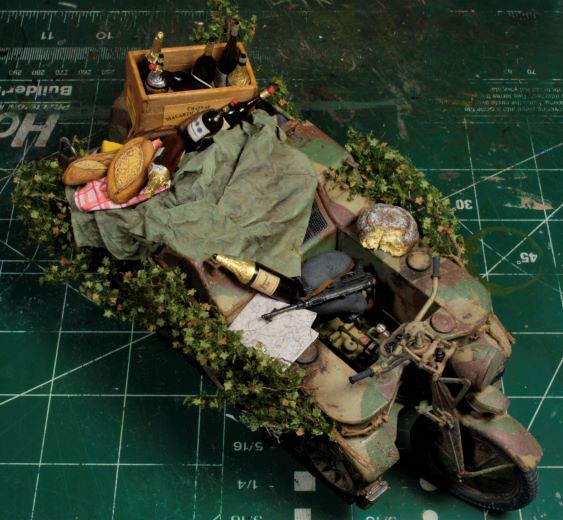
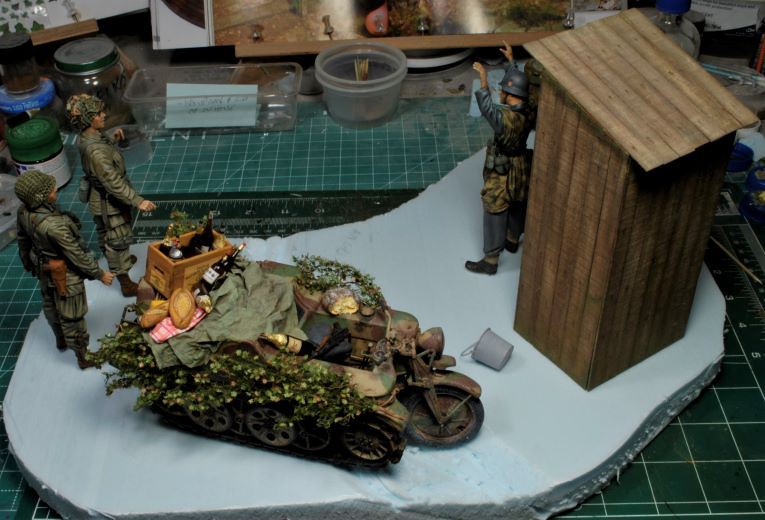
As you can see from the pics this will be the basic layout. I didn’t want to give away the plot already, but you can pretty much tell by the placement of the figures that Bob is not in a good position to argue about anything, HA!
The first photo is rather blurry, I caught that one too late, my bad.
More to follow soon and thanks for watching. Cheers, Ski.
8 Likes
You should have Bob with his pants down ![]()
Looking really great buddy. The loot on the Kettenkrad really is great. Just the real deal!!!
4 Likes
Out-freakin-standing!!!
1 Like
Can’t wait to see this thing finished. Brilliant work
2 Likes
great start to the base display … I am surprised Bob could even manage to walk to the thunder box with all that booze to hand lol …
2 Likes
Lol, thanks Gents! Sorry Erwin, droppin Bobs drawers would require more alterations than I care to imagine, HA!
In my attempt to keep my dios compact, this one had to have a bit more space than I wanted. Ya see, I need to make my wife a curio cabinet so I can recover “my” space. Until then, it’s tight spacing.
Thanks for the kind words, Gentlemen.
2 Likes
Gentlemen? Where?
4 Likes
Look in the mirror, Sir! ![]()
2 Likes
Ground Work in Full Swing
Continuing on with the base work, I began with a basic acrylic earth tone painted over the entire base. Next, I added Heki Grass, #1576 Wild Grass, sheets placed in the desired areas. I found pulling and stretching the sheets gave a decent appearance for my purposes. After the Heki grass was set I scattered crushed cat litter over a wash of water thinned Elmer’s glue onto the open areas, but leaving the outhouse area clear. Before going any further with any more grass effects, I gave the cat litter a thinned oil wash of Burnt Umber for depth, then finishing off by highlighting all the gravel with an acrylic light earth tone. Placing sand and small stones in the small wash area was the last step until minor water effect is added. Time to work the brush.
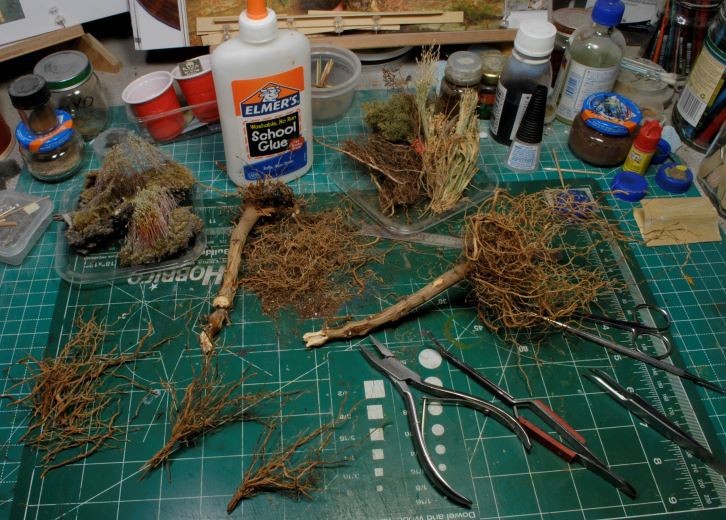
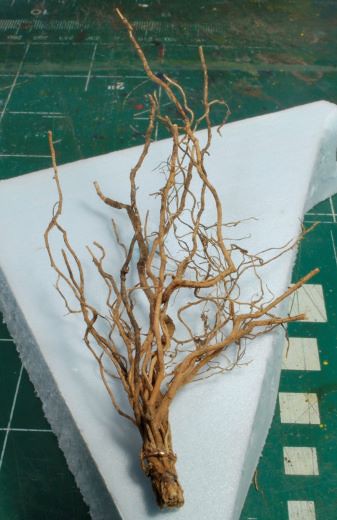
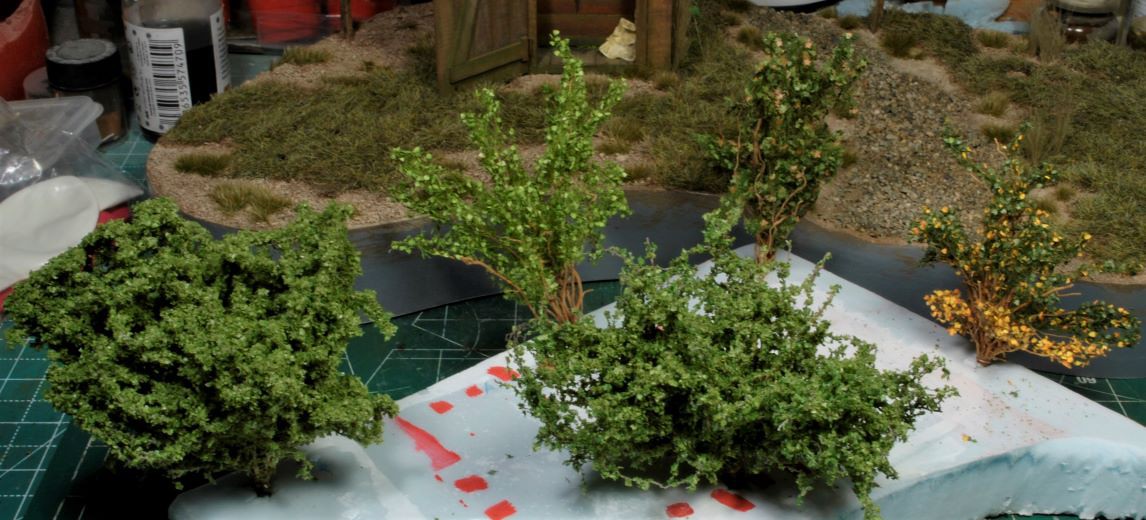
As mentioned before, tomato and even rosemary, roots seem to work really well when making these bushes and shrubs. Pretty much any dried roots will work, but I preferred the tighter clusters for making the shrubs. Mini-Natur has a full line of useful vegetation for what I’m attempting here, even for the larger scale of this diorama. If it looks natural it will work. The root clusters were placed on scrap foam board for easier manipulation. Now it’s just a matter of making the bushes and shrubs look as realistic as possible.
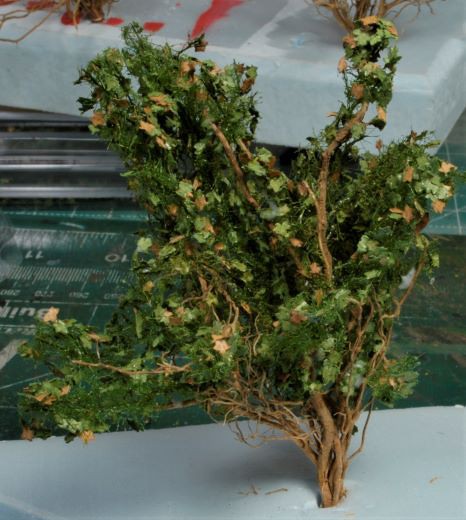
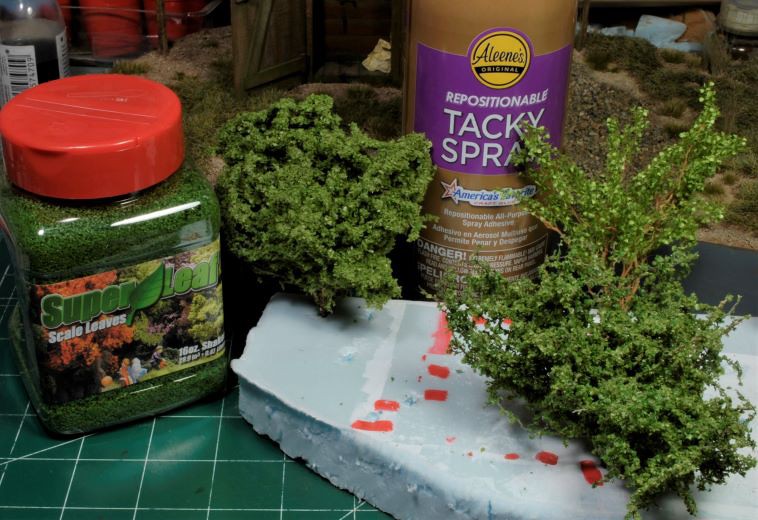
I also tried out Super Leaf from Scenic Express. These tiny leaves are more in the 1/35th scale but I wanted to see how they would work for shrubs which would have a tighter foliage than the other bushes. I still need a bit more experience with this material, but I think these two shrubs will work well with my planned placement.
Next on the list in the sequence was the ivy crawling up the sides of the outhouse. Using some of the more open pattern dried roots I placed the skeletal frame work in the desired locations and then went back and filled in some areas with tighter root clusters. There is no easy way to make a realistic ivy vine without printing up leaves and cutting each and every one out with an Xacto knife. This is very time-consuming and tedious.
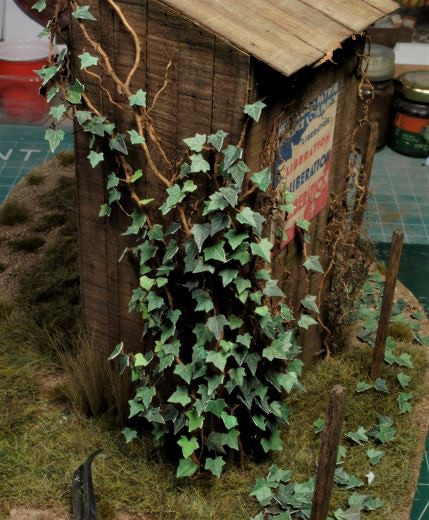
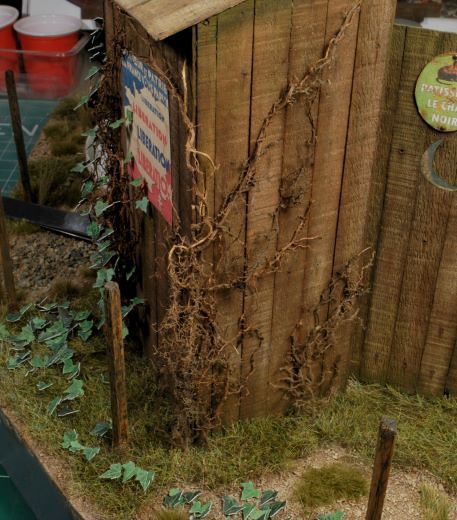
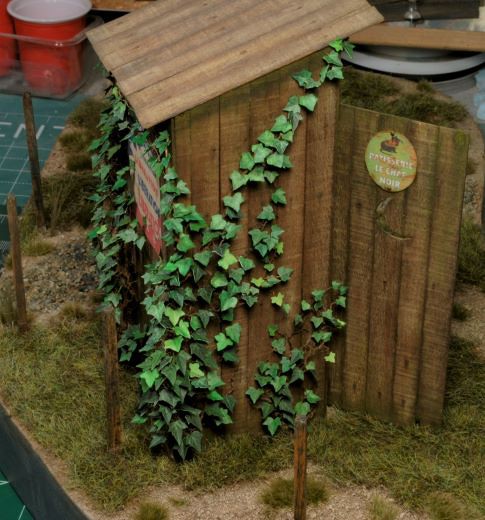
After I cut and pasted the desired leaf photos to a Word doc and printed them onto heavy paper, I painted the back sides of each sheet a dark green tone. Save a step and do it now, right? Once all the leaves are glued to the vines you still need to go back with a light green acrylic tone and touch up each exposed edge. If not, you’ll have quite a few white lines showing all throughout the structure. This too was time consuming and required a steady hand. The ivy work was close to two weeks in the making, but I just had to have that old over growth appearance.
There is still quite a bit more veggie work to do, but the major heavy lifting is done. Once all the bushes and shrubs are in place I will go through and add plant debris and more grass clusters as well as alter grass tones where needed.
More to follow and thanks for watchin. Cheers, Ski.
13 Likes
Loving the vegetation work. ![]()
![]()
3 Likes
Excellent shwubbewy! And killer ivy too, your sniper’s eye for colour/tone is scoring bulls-eyes every time. ![]()
![]()
4 Likes
I love each and every detail of it. I would not know where to start or to end…
2 Likes
Thank you, Gents. Ya know, it’s really just been a crap shoot, HA! I don’t have Glenn directing me, so I’ll do the best I can. He’s the Veggie King, IMHO!
2 Likes
The groundwork is taking it to a whole new level of cool … The ivy really stands out. Great effect ![]()
2 Likes
Thank ya, Johnny!
1 Like