Yeah, be careful with that. Around here they post signs along the road to warn motorcycle riders. A few years ago, guy coming home from work hit the stripped grooved patch just over the hill from our house, threw him out of control and killed him.
Thanks for the feedback on the award design. I think we should just go with it to have it done.

Paul
Part of the appeal to me of airliners of the 1930s is the romance of traveling in a luxurious “Pullman” of the air. Imagine how the public must have viewed it in the time when it was new & fresh. Pilots were romantic figures, full of daring do and having an almost knightley aire about them. Now flying is more like getting on a bus and there is little feel of adventure. At one time I hoped my own flying would develop into a career but I now feel I really didn’t miss much.
These are some photos pulled from the internet of a 1936 United DC-3. Looking at these photos, I can just feel the pull of glamorous travel at the time. Adventure awaits!
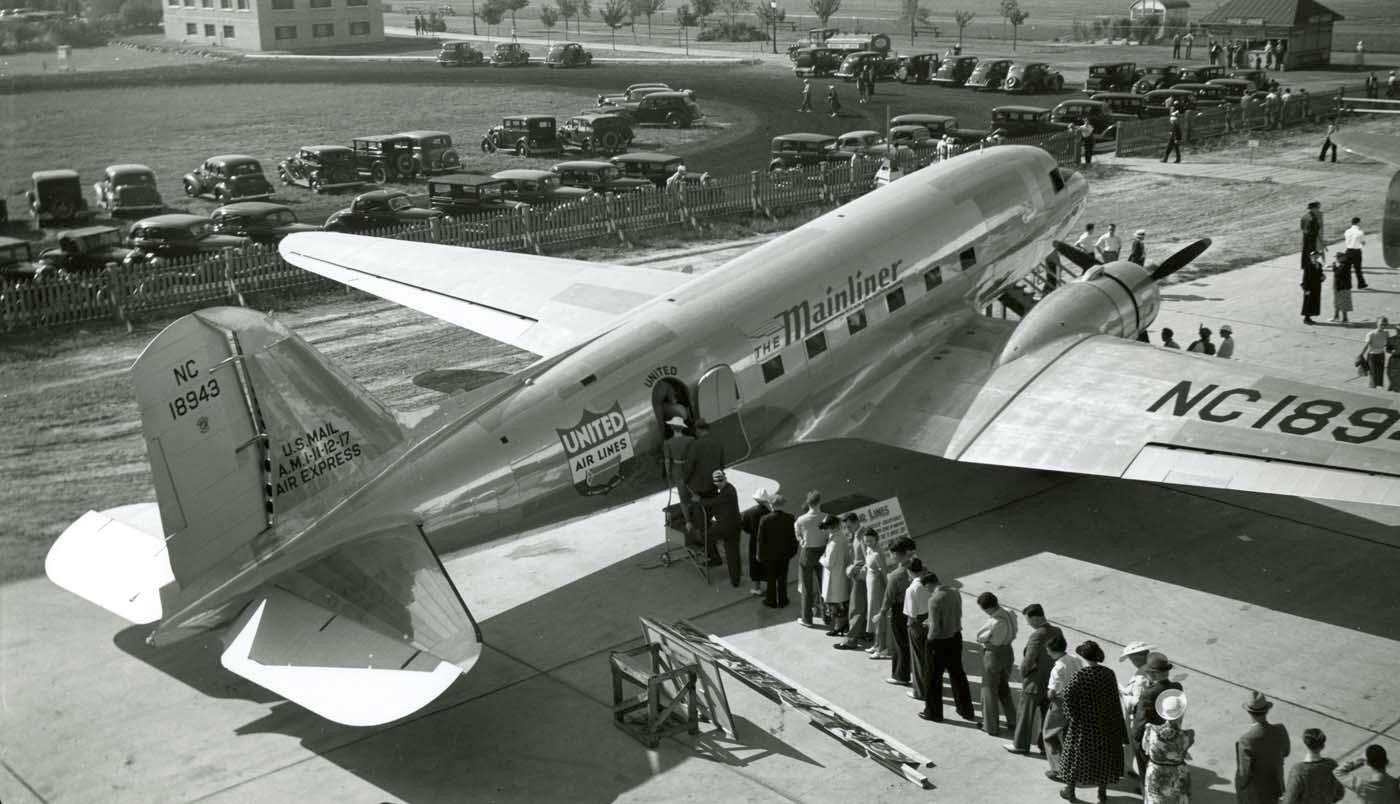
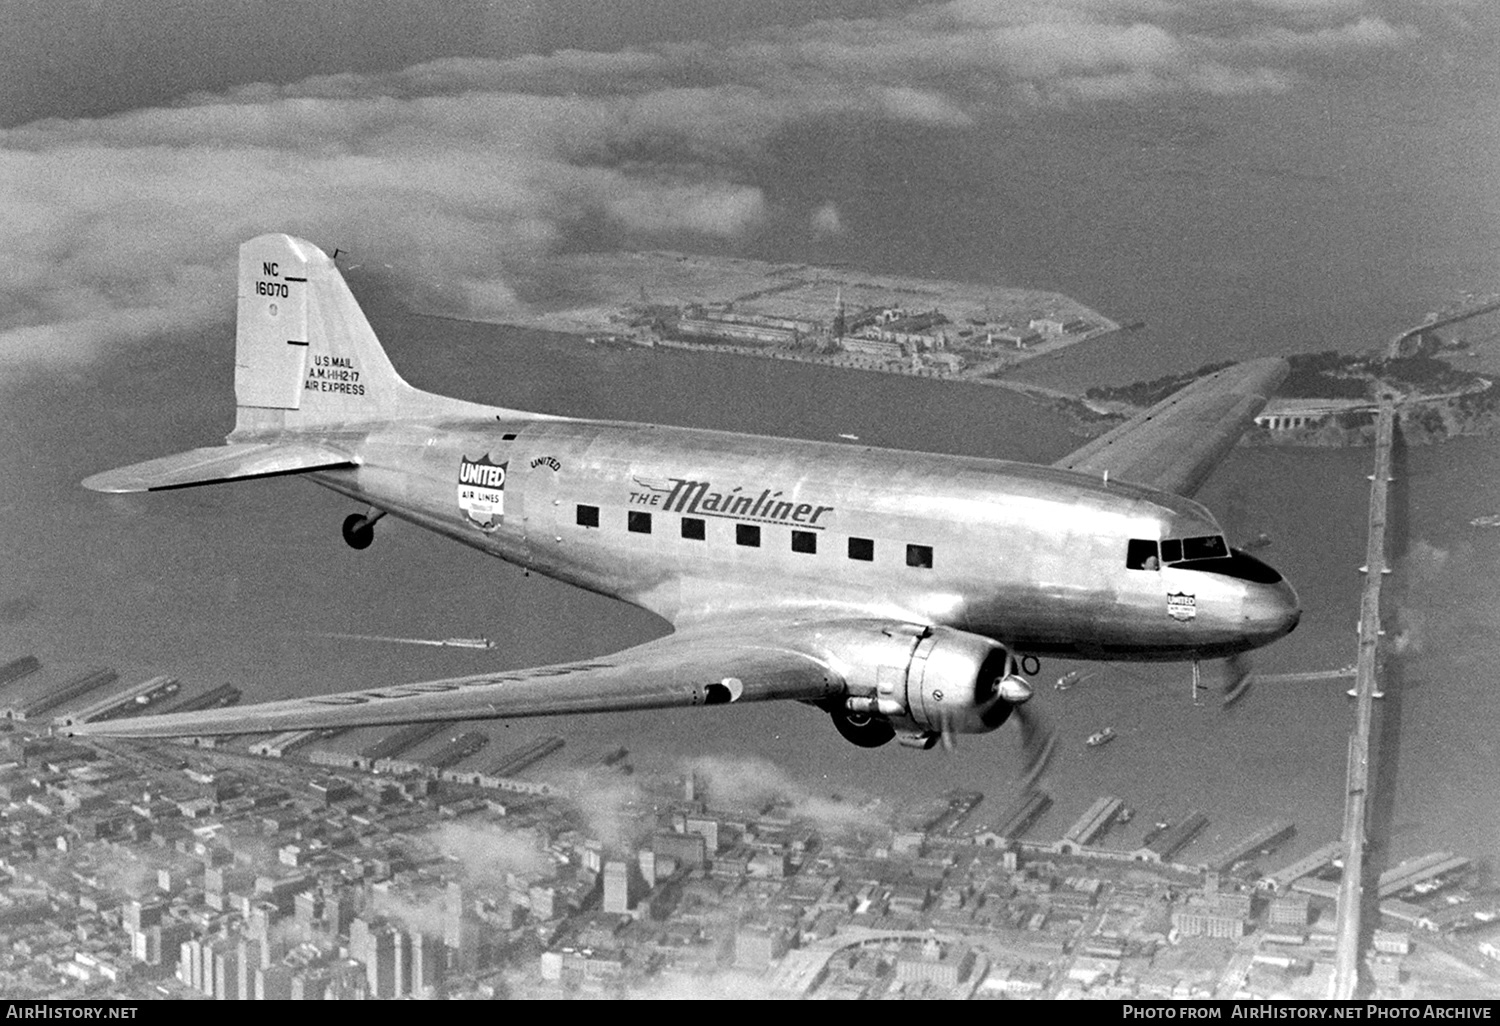
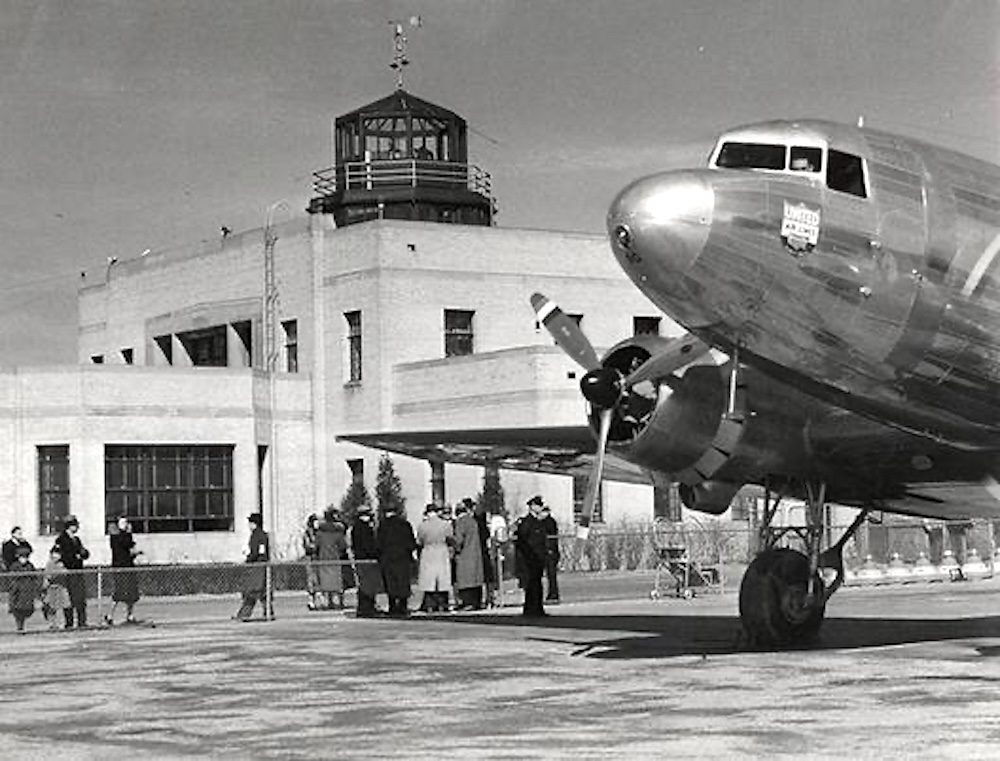
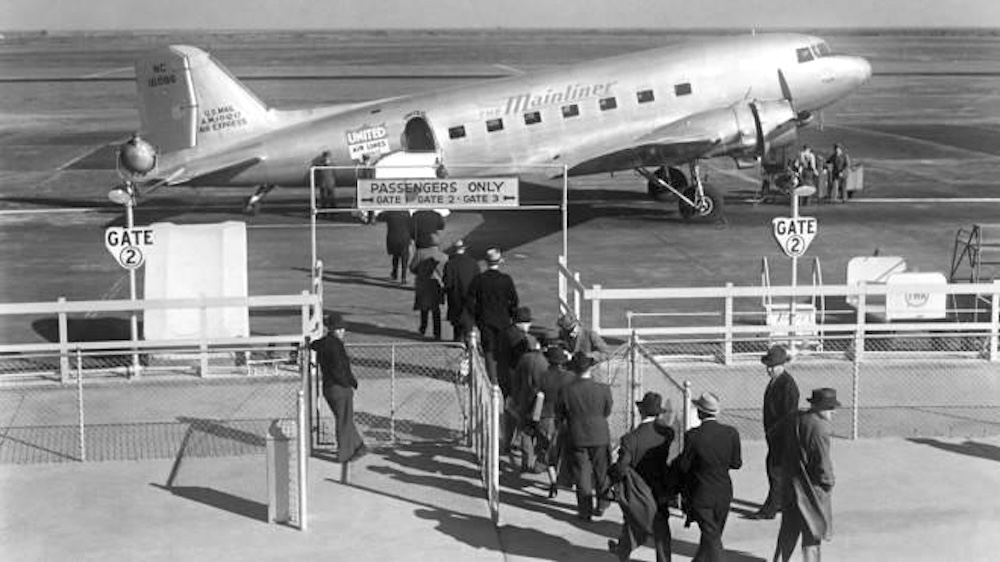
I don’t have a way back machine but I do have a Roden DC-3 in a Karaya boxing. I didn’t care for the ca 1960 markings but thought it would be a great place to use a set of Pointerdog decals. I’m so sorry this company is gone, they put out many sets of decals no one else is doing.
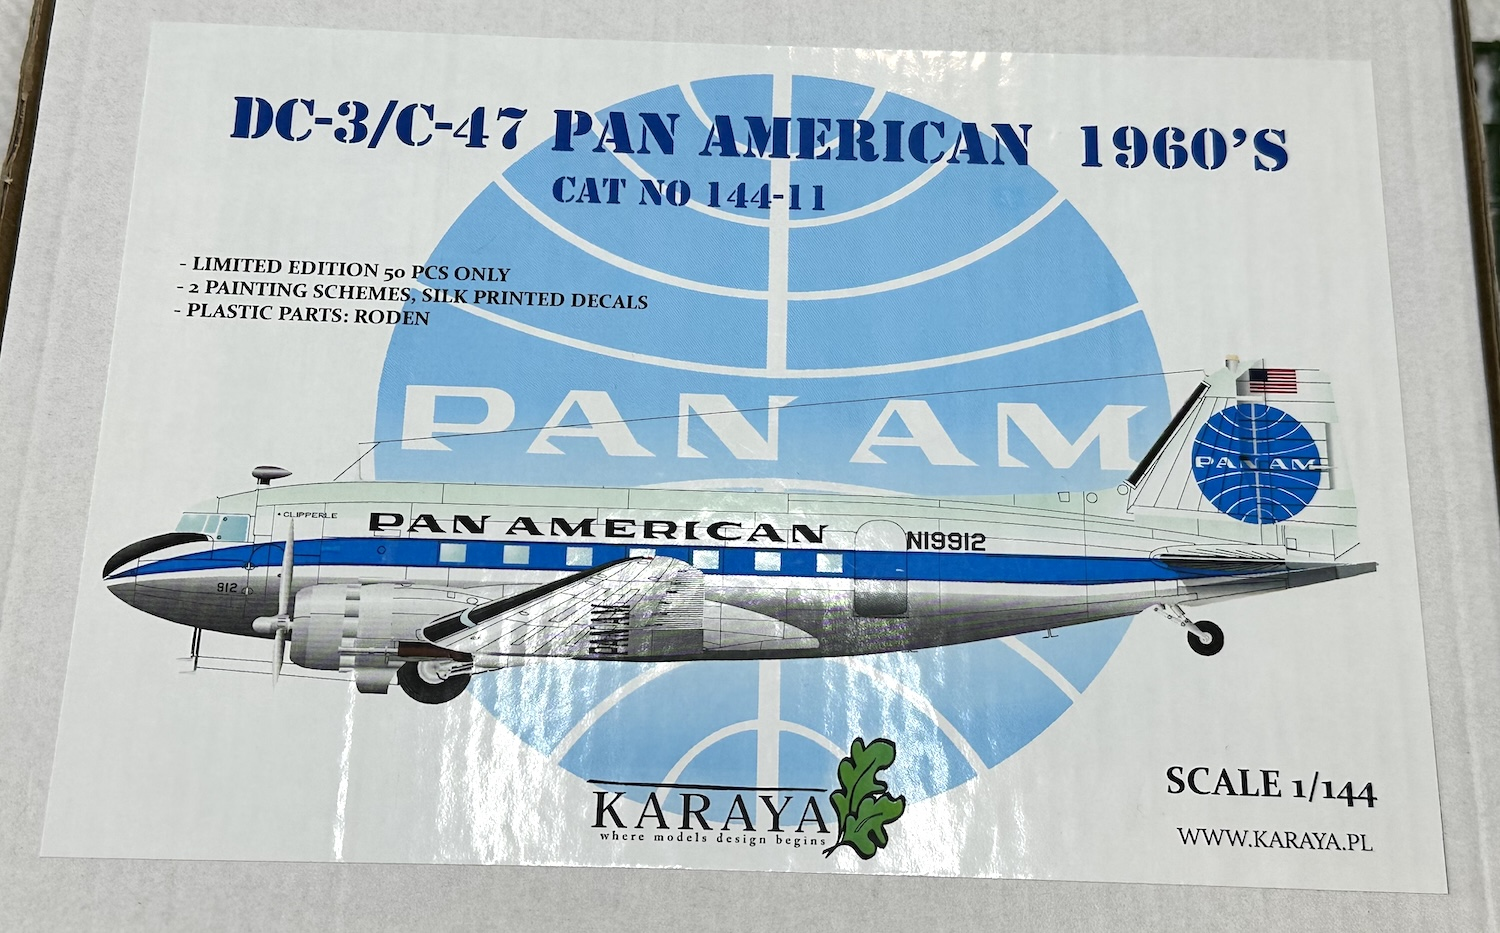
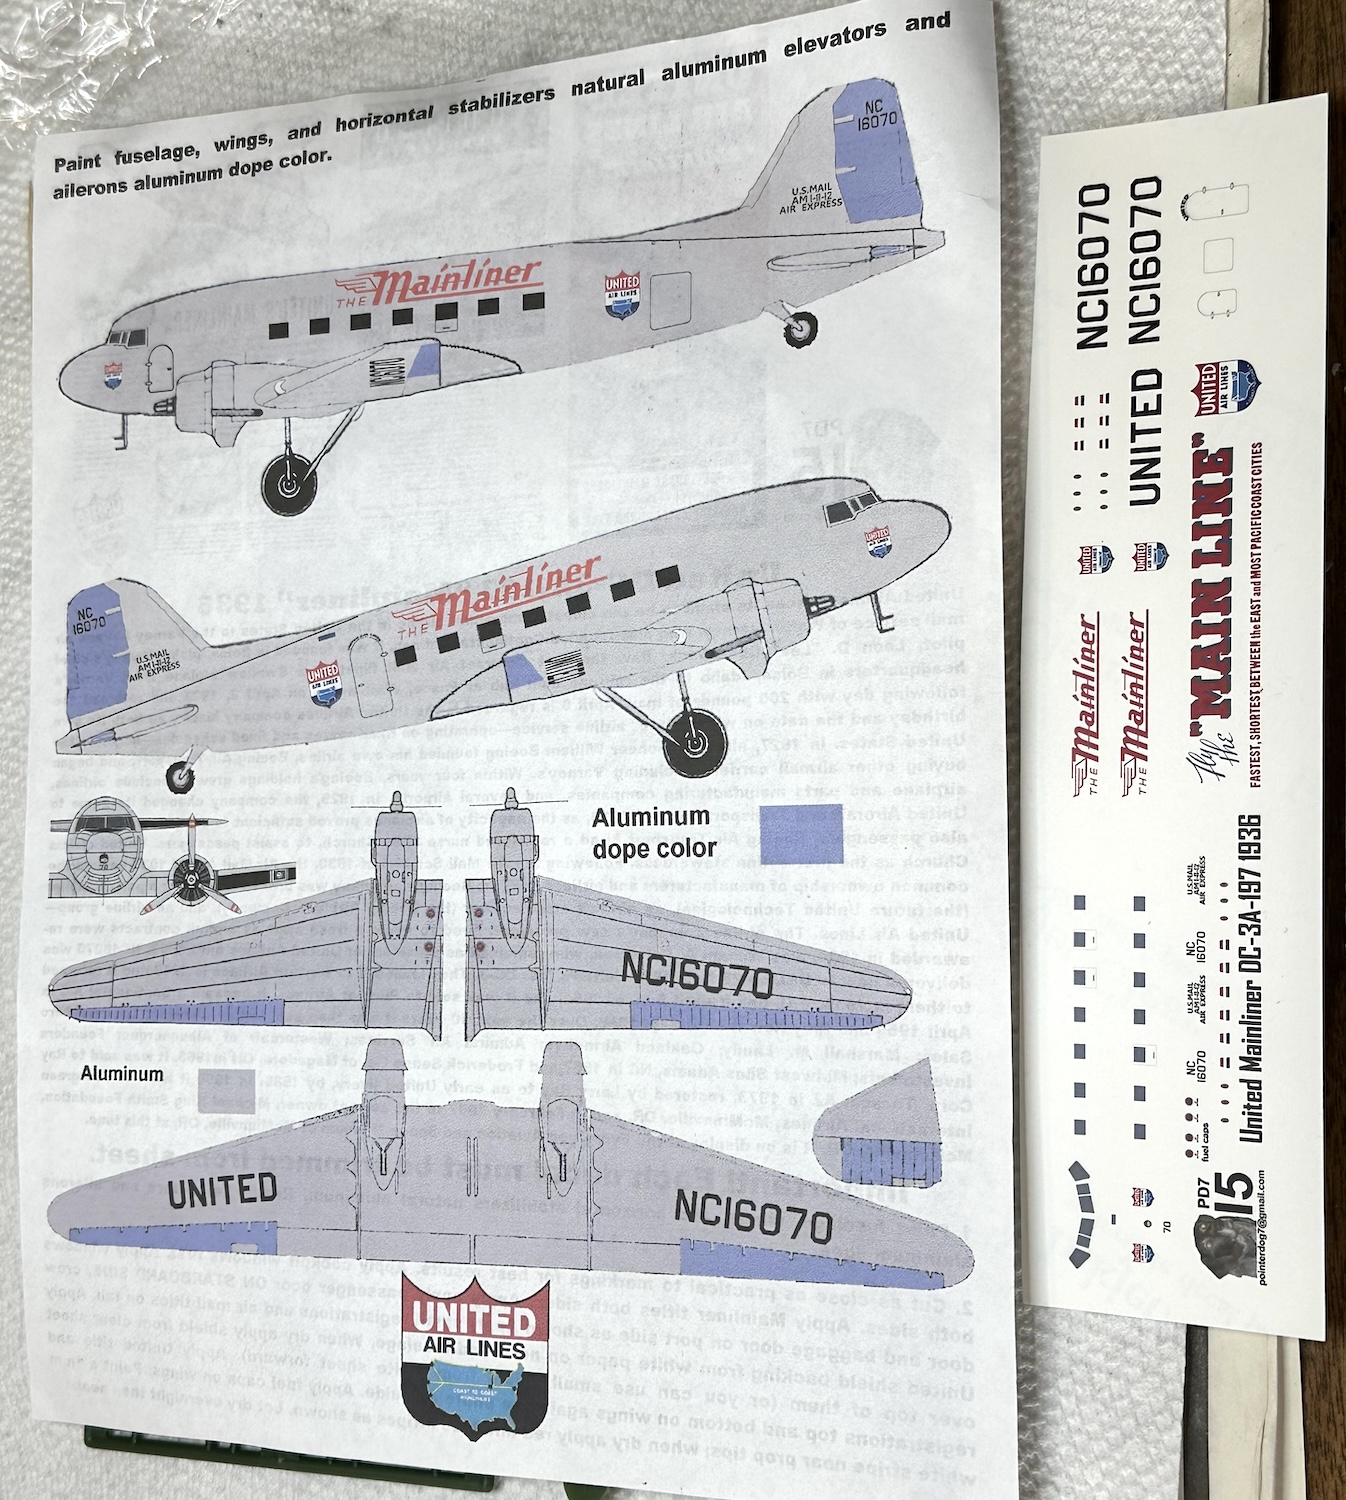

This kit is very nice and a step up from the MiniCraft DC-3 built earlier to start this campaign.
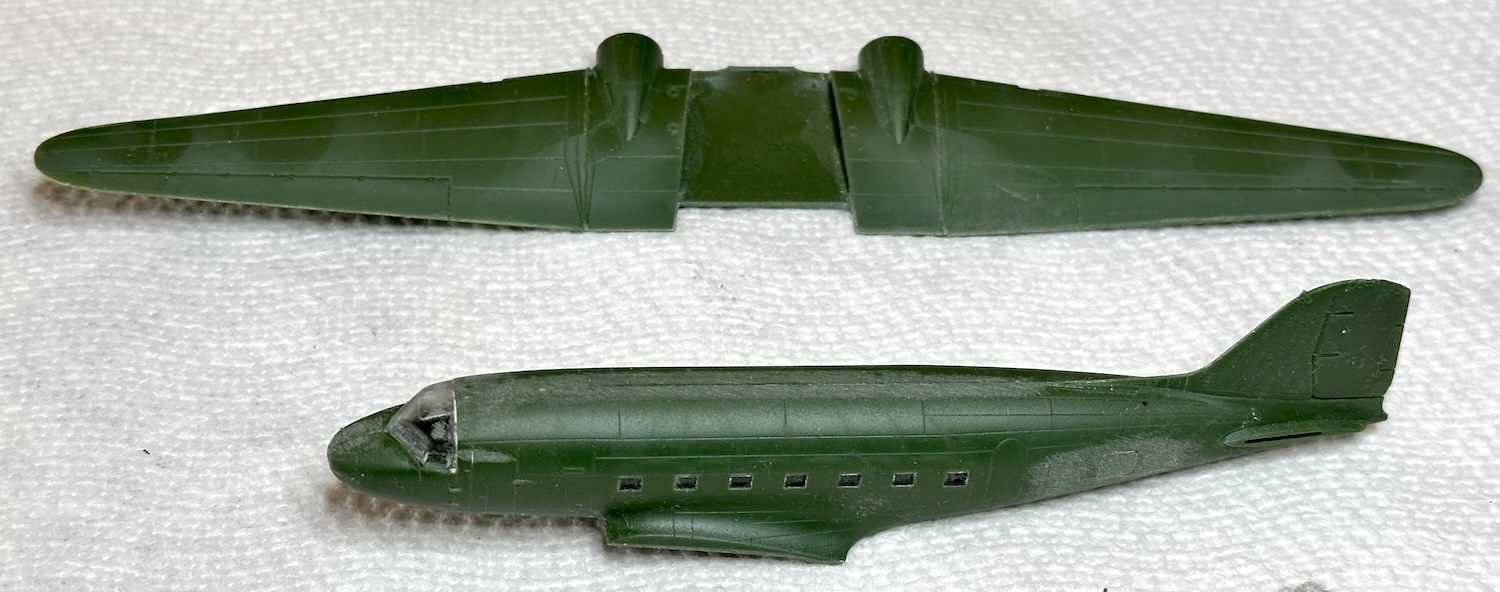

For reasons I can’t fathom, Roden still goes to the trouble & expense of providing clear plastic windows on these 1/144 kits. The builder must spend extra time puttying these up and sanding them down, a multi-step process.
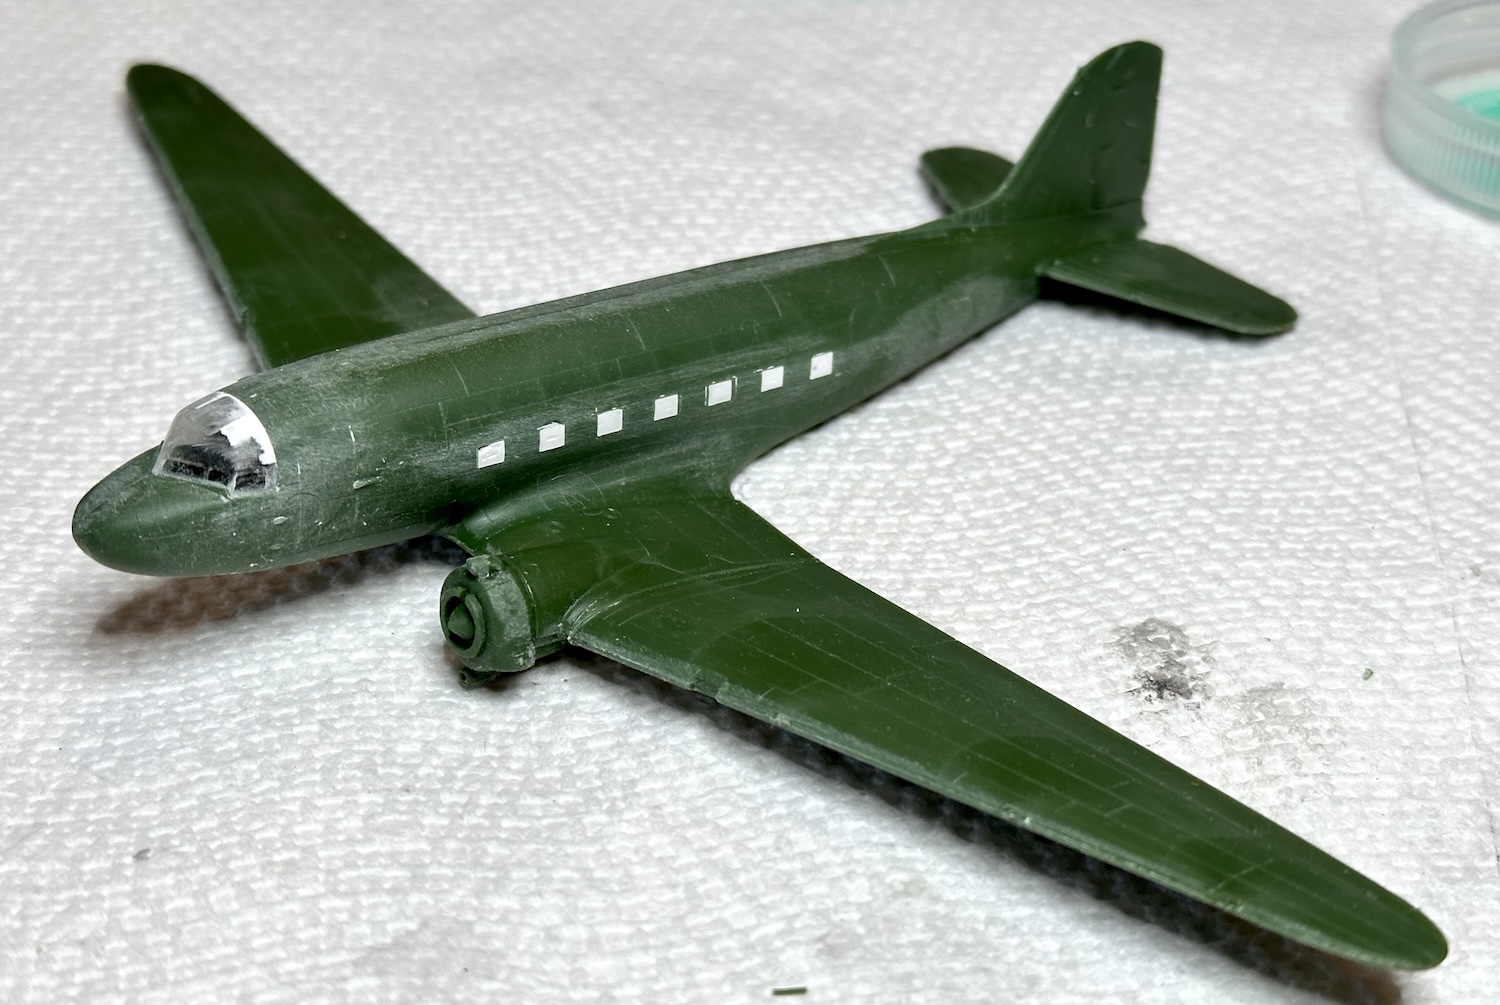
The fit of the parts is really very good and little filler is needed. The Pointerdog decals are sharp with good colors. The are of the continuous film type and need careful trimming. Opacity is not great and they can look a bit metallic. Also, they must be carefully applied, adhesion is only a little better than Airfix decals. Micro Set is needed to get them to stick. Once they are down, they do stay.

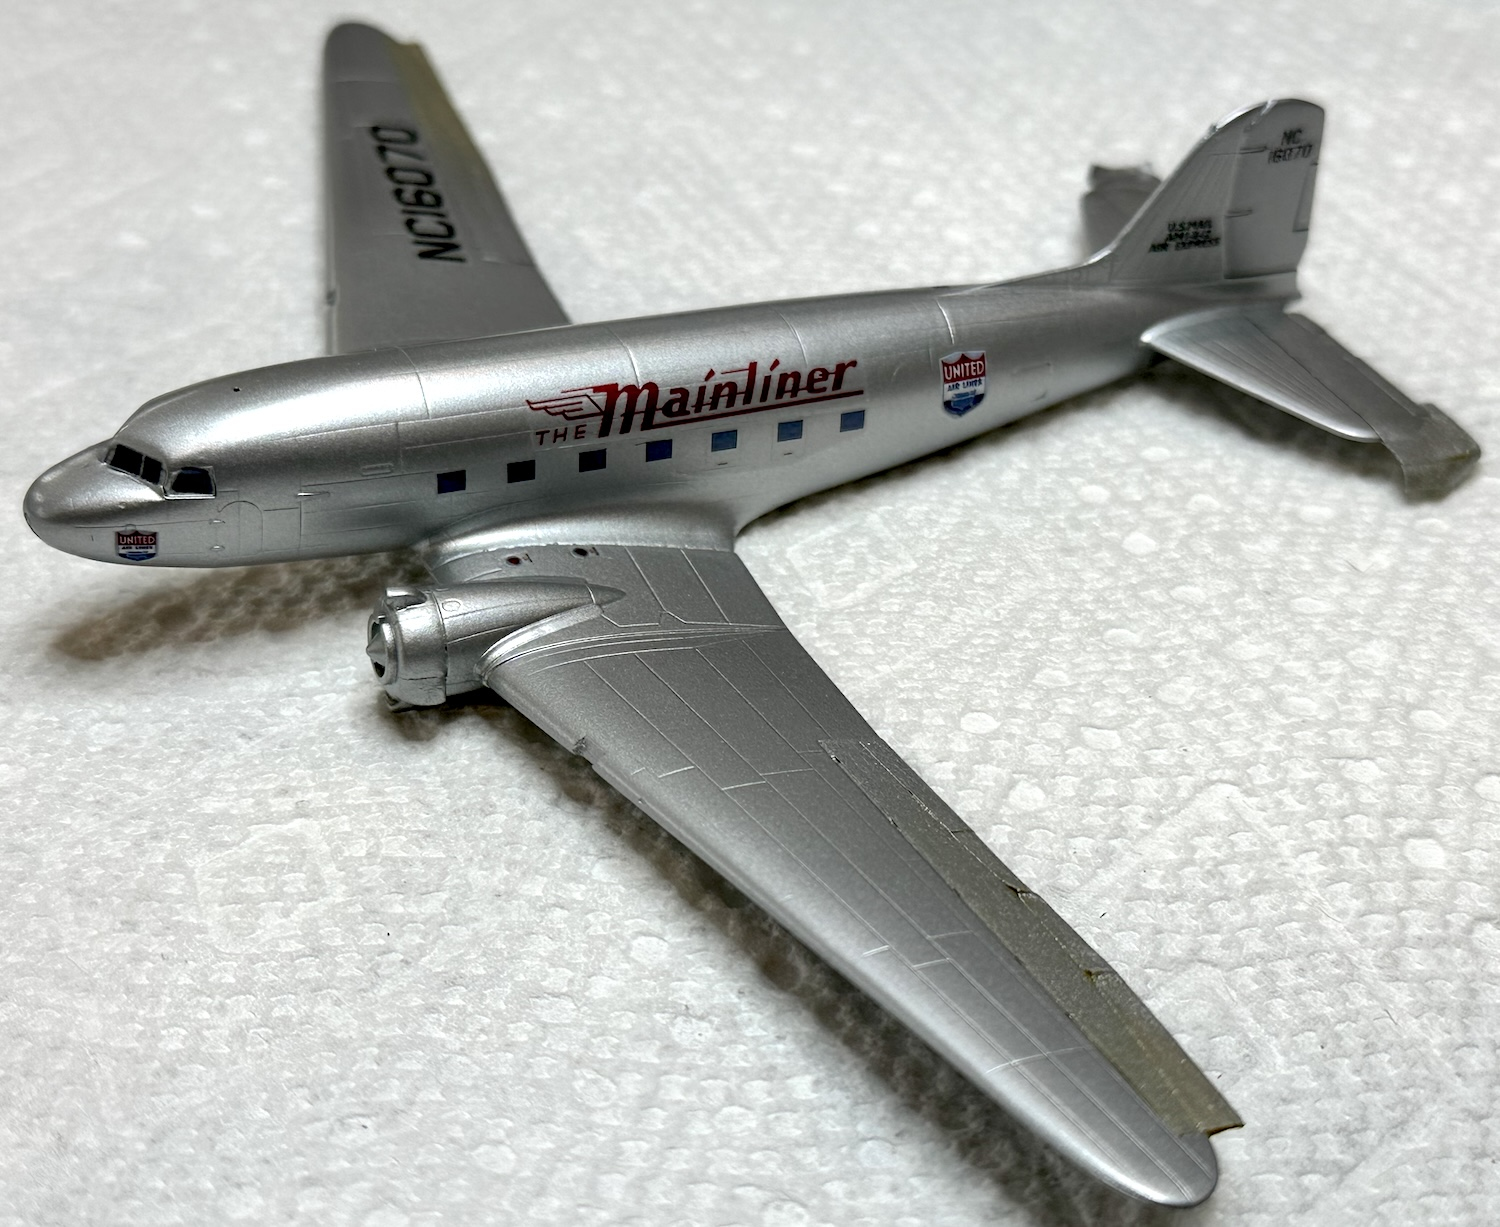
I painted the model with Tamiya Gloss Aluminum in a rattlecan. It was coated with Tamiya Semi Gloss except where the fabric control surfaces got a coat of flat.
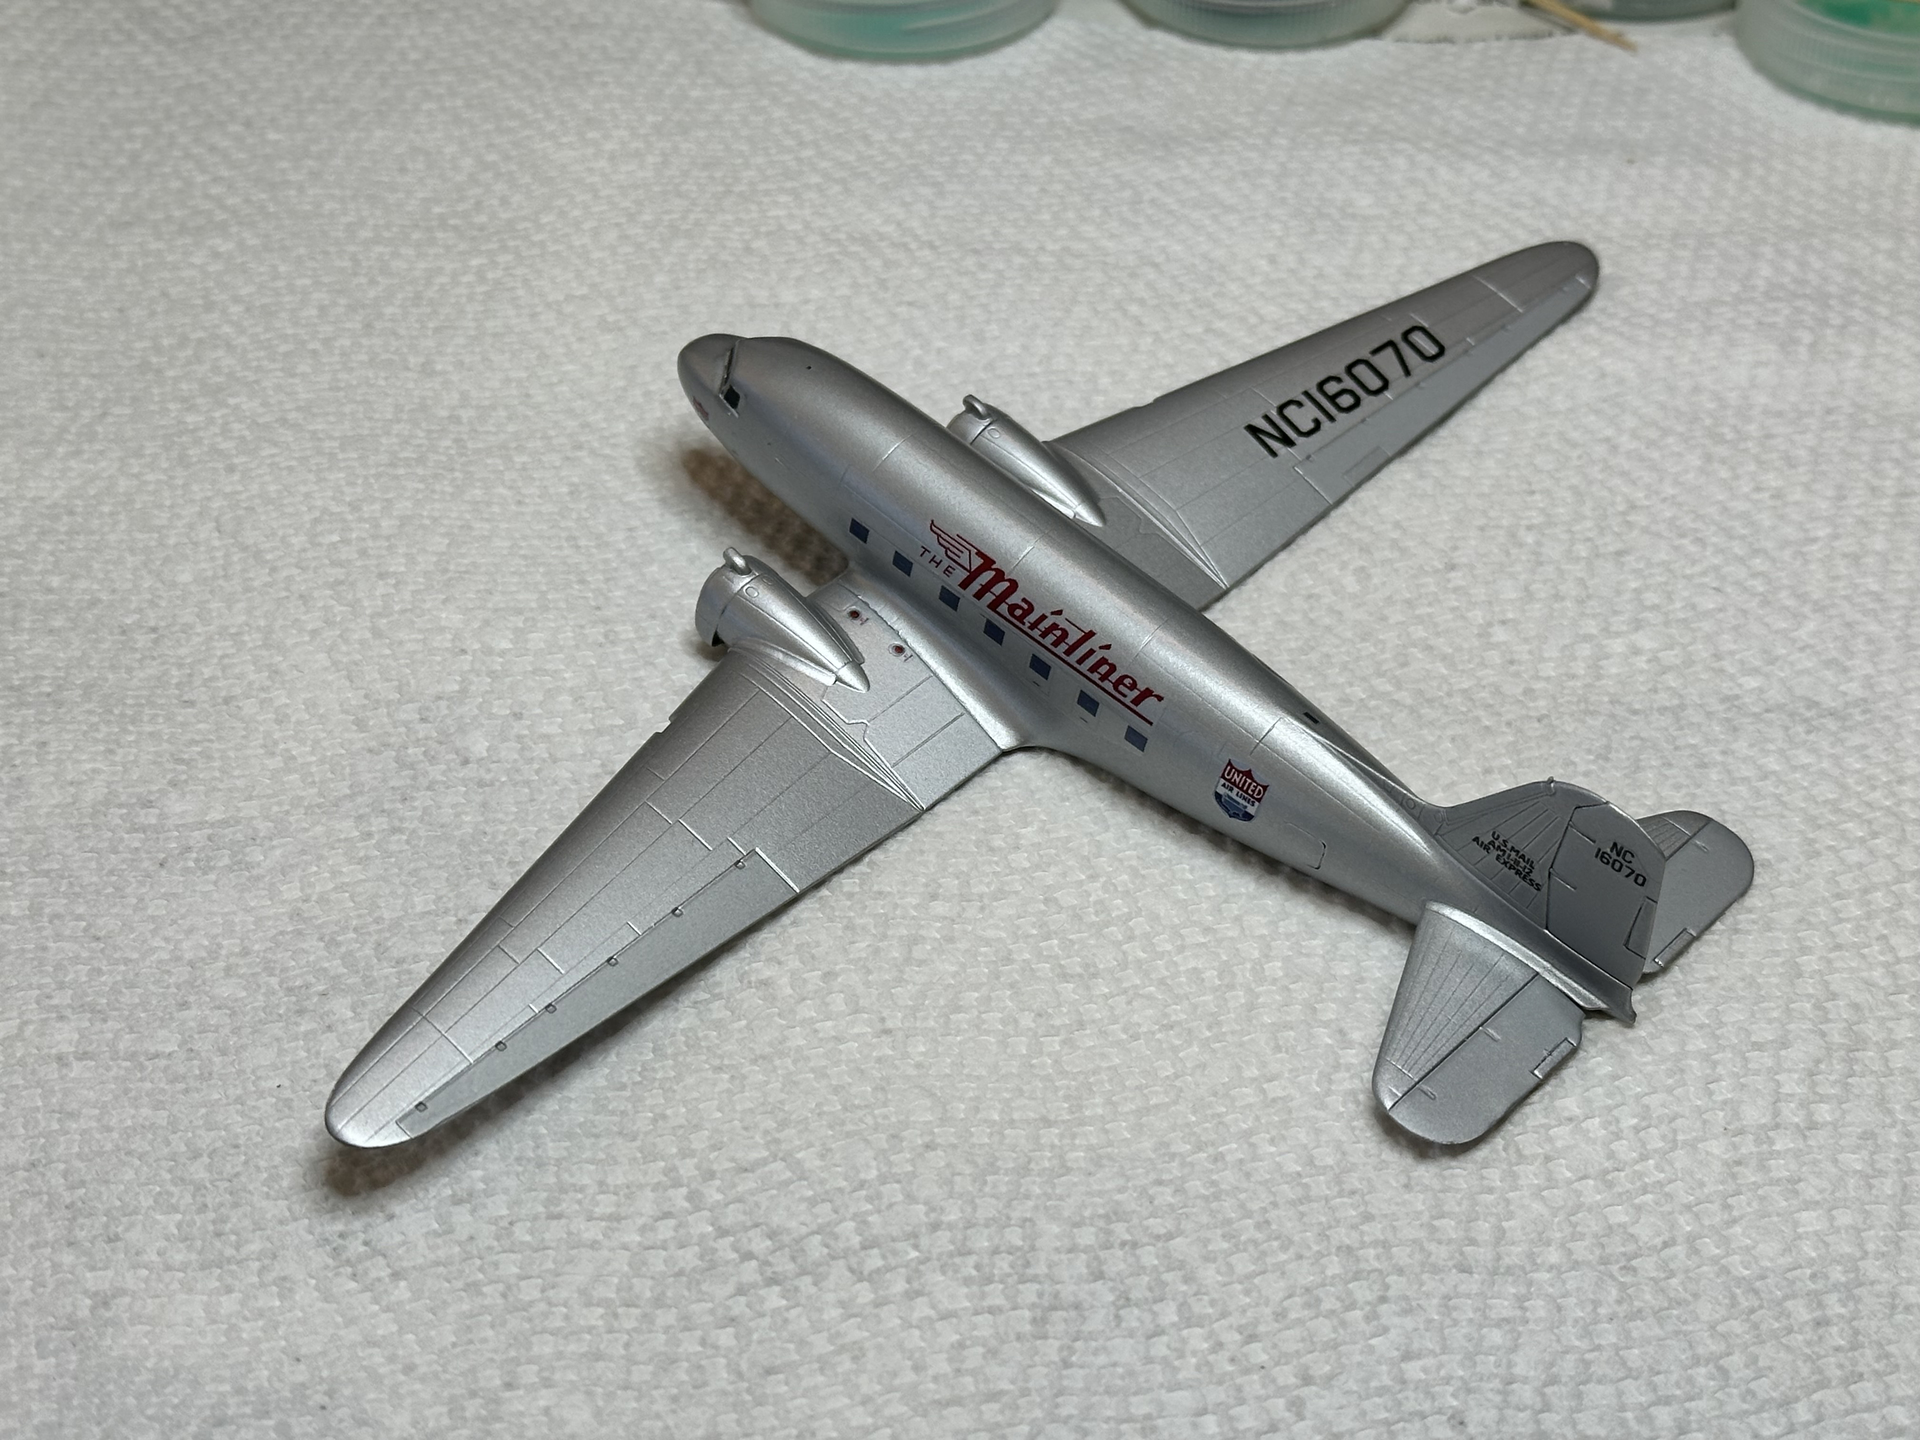
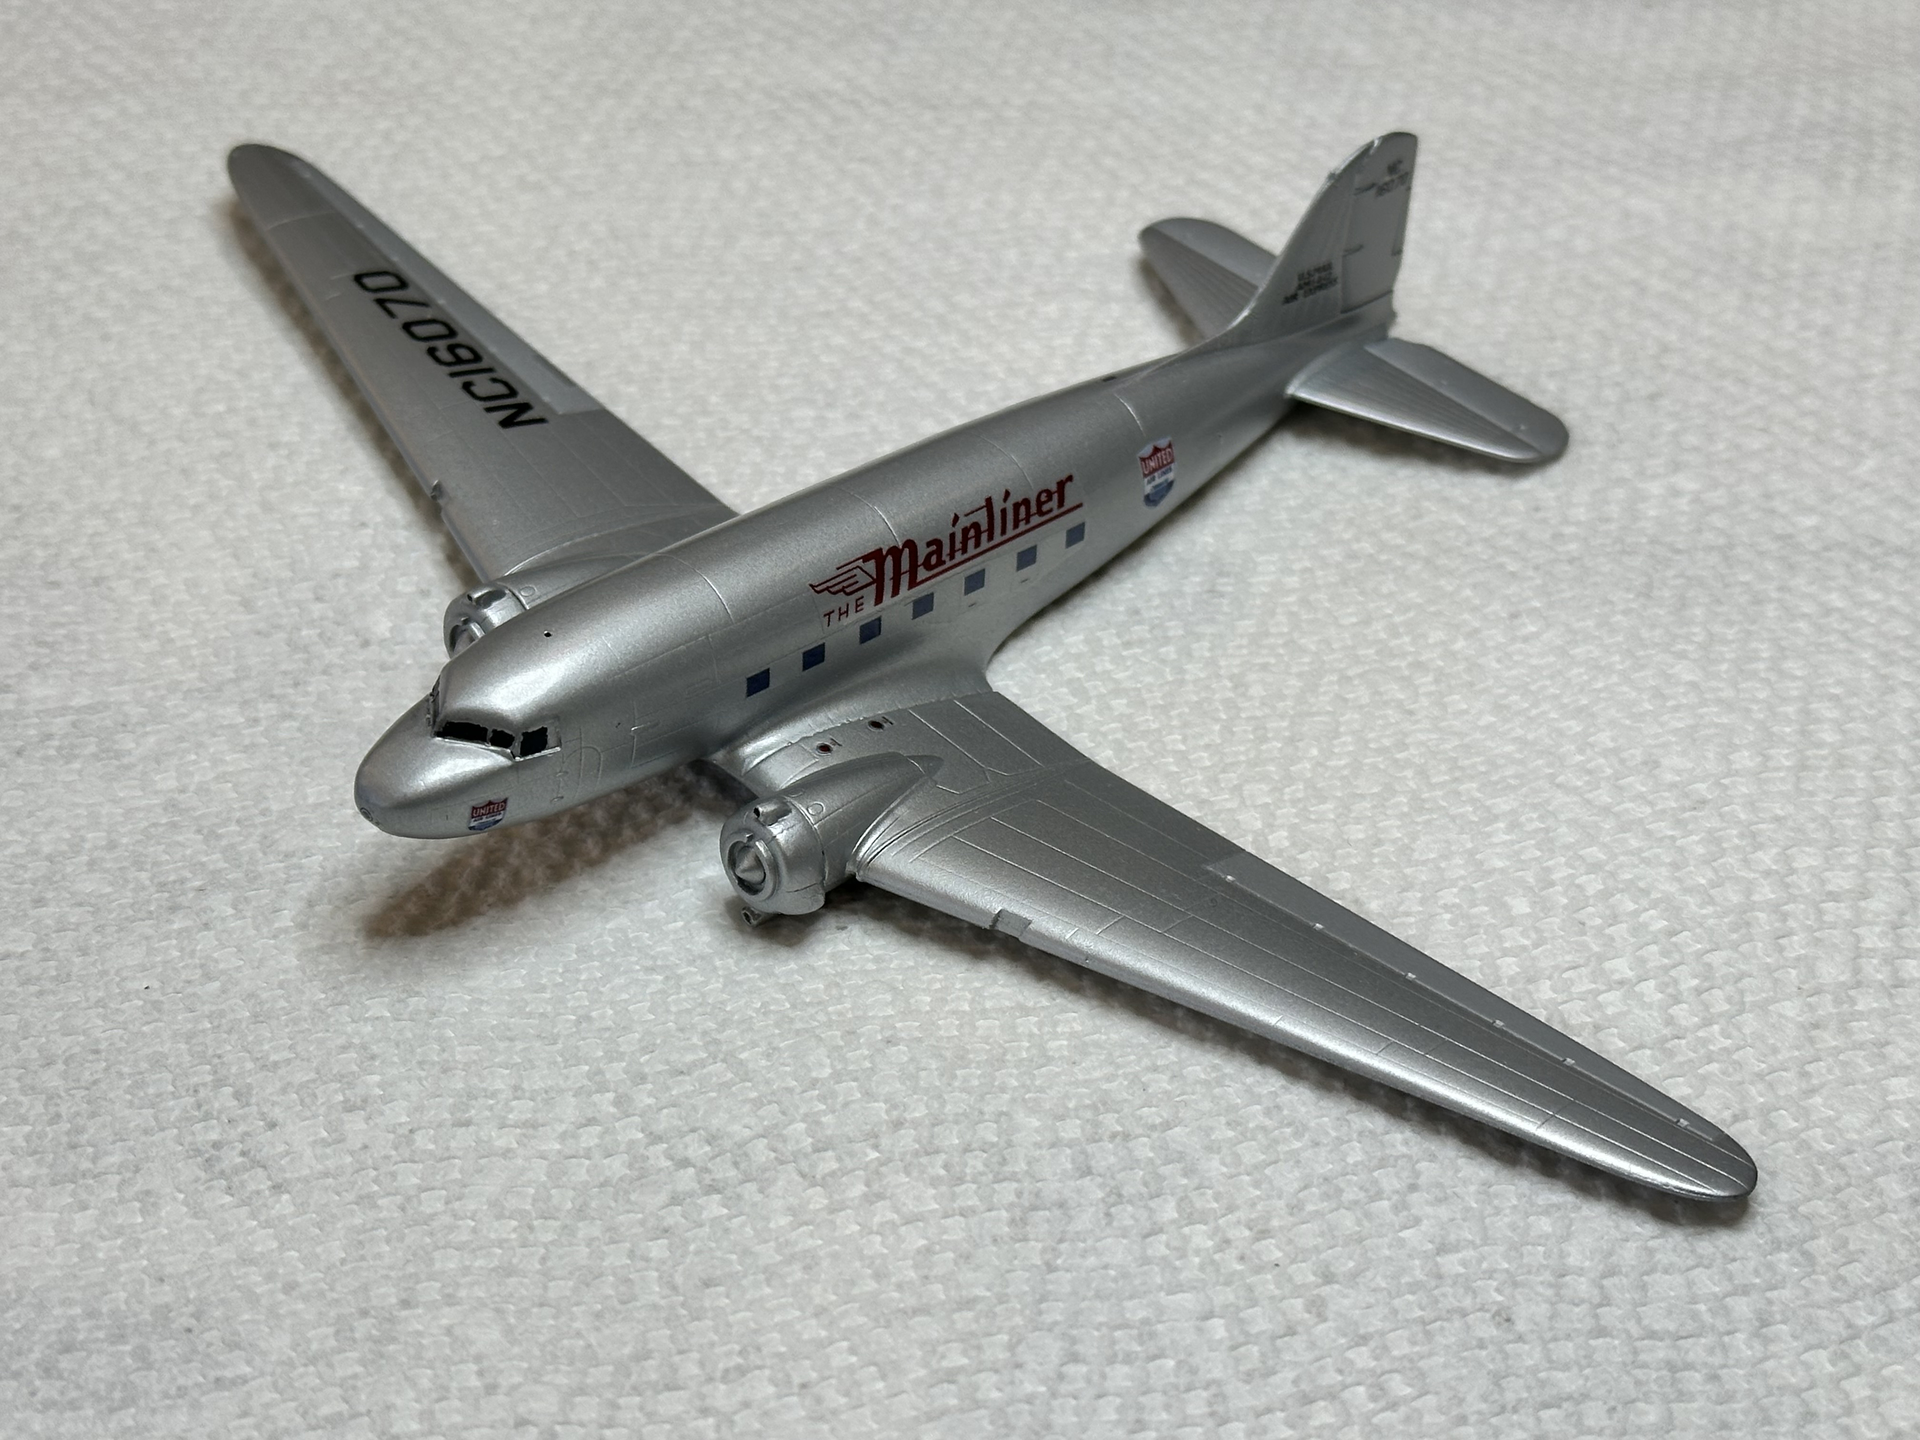
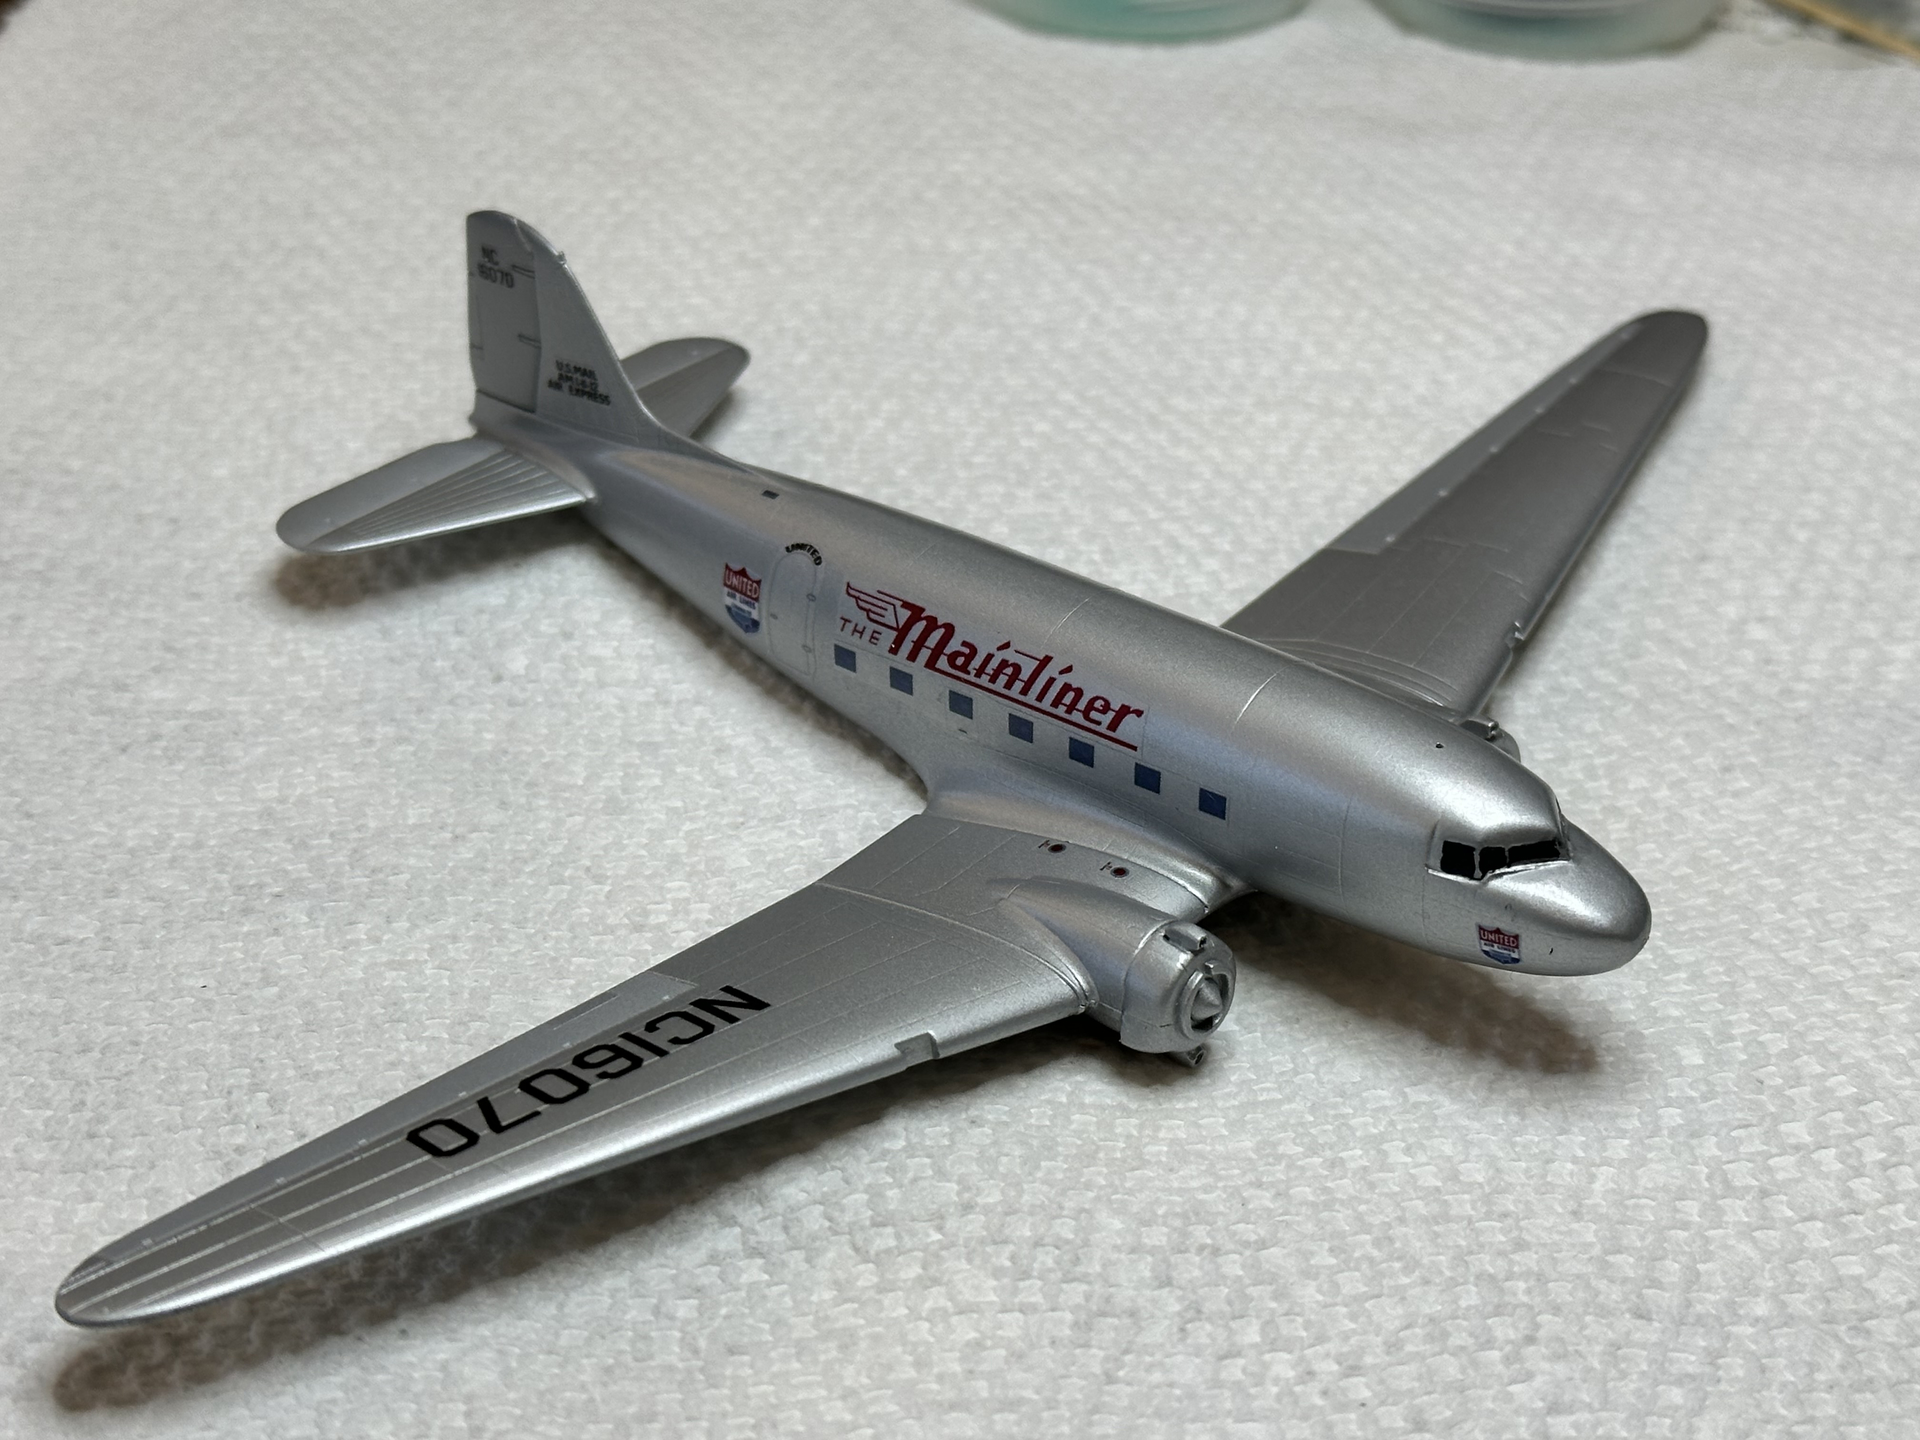
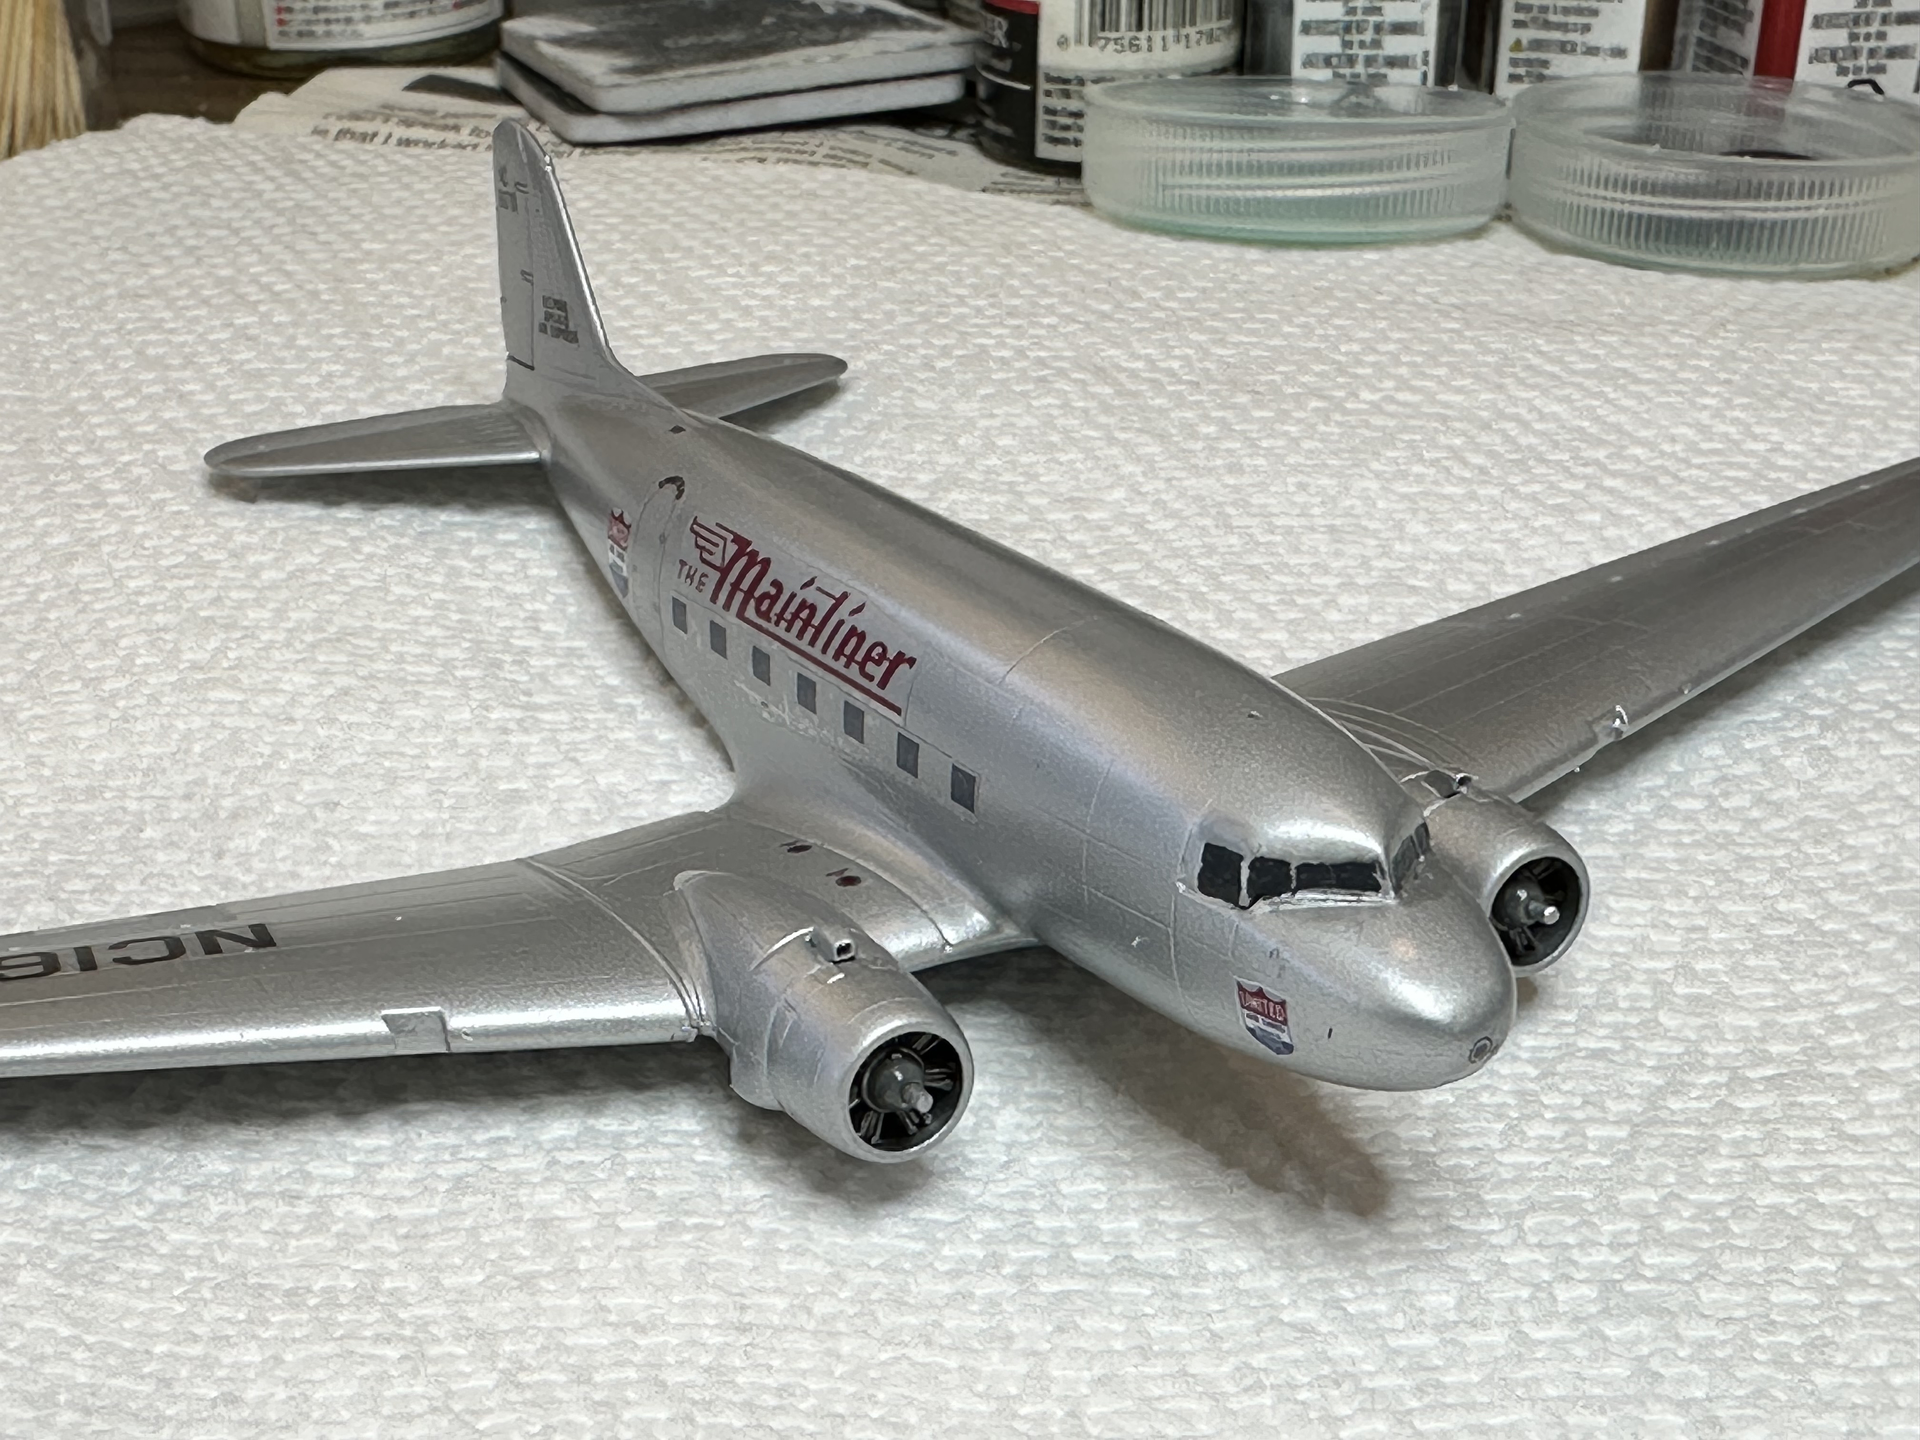
The pointerdog decals for the cockpit didn’t fit well at all and I removed them. I tried the Karaya decals with no better result and ended up hand painting those windows.
Paul
3 Likes
A little off topic, but not much:
Pan Am is looking to make a comeback. They already have Pan AM Journeys up and running. They plan on scheduled commercial airline service this year, with their hub in Miami. Fortuitous. My old friend from Berlin who flew for them lives there now.
I hope they make it. I’d like to see TWA, Western & Eastern back again also.
Paul
1 Like
Too bad there’s probably no record of the voucher they owed me for a flight that went very wrong. And very right.
1 Like
And not only that, look what they’ve signed a contract to buy 46 of:
Sounds like a story there. Want to tell us?
Flew from Berlin to JFK direct. Was supposed to anyway. The last year of Pan Am’s flights out of Berlin. We made an unscheduled stop in Brussels and watched as they took an engine apart to replace a generator. After a few hours, it didn’t work so they did it again. We were not allowed off the plane. After four hours they opened the bar. After six hours, admitting defeat, they got some sort of provisional visas for us, drove us straight to a hotel at about 11 pm, and made us promise no to go anywhere. The part about the six foot tall Norwegian woman who sat in front of me, well… I wrote about it an a novel. We did see a total eclipse together in Hawaii later that year.
I got some sort of voucher - hung onto it for years. I don’t remember throwing it away. Maybe I’ll run across it sometime, Maybe it’s with the American Express bill from that month that I saved. It proves I did not stay in the hotel…
1 Like
Greetings!
It has been some time since my last post, due to relocation and I had to pack up all my tools and the stash of kits to another lodgement. After setting up my lair, I can get my act together and start the project for this group build I signed up for.
The C-47 “Skytrain” is well known globally as a work horse for airforces and civilian transport around the world.
My subject for this C-47B built by Douglas in 1945, currently registered as N41CQ. It’s been carefully restored and painted in the livery of the “China National Aviation Corporation” to participate in the re-enactment of the “Two airlines Uprising” (China National Aviation Corporation, CNAC and Central Air Transport, CAT) which took place on 9th November 1949. As the embattled Kuomingtang retreated across all fronts and moving all movable assets to Taiwan Island, the General Managers of the two comapnies moved majority of the serviceable aircraft to Hong Kong. As they pondered on the future of the companies, as a patriotic act, they decided to enlist brave pilots and aircrew to commandeer 12 aircraft (10 CNAC and 2 CAT) and fly North to territory secured by the advancing Communist forces. On 10th November, they reached Beijing and Tianjin respectively, a total of 56 airmen joined this act and they were welcomed and hosted by Premier Zhou Enlai and Chairman Mao as heroes in Beijing. As Chairman Mao said these airmen were the cornerstone to the development of Chinese civil aviation and will be remembered by all throughout history.
The kit is built from the 1/72 Italeri No.127 “C-47 Skytrain”, although it’s a re-box of the old Italeri kit with new decals, the molding is very good considering the age of the kit. Construction was done straight out of the box and I’ve purchased after-market decals to represent the CNAC XT-125 (N41CQ) that flew from Hong Kong to Beijing on 4th December 2019 to honour the 70th Anniversary of the feat.
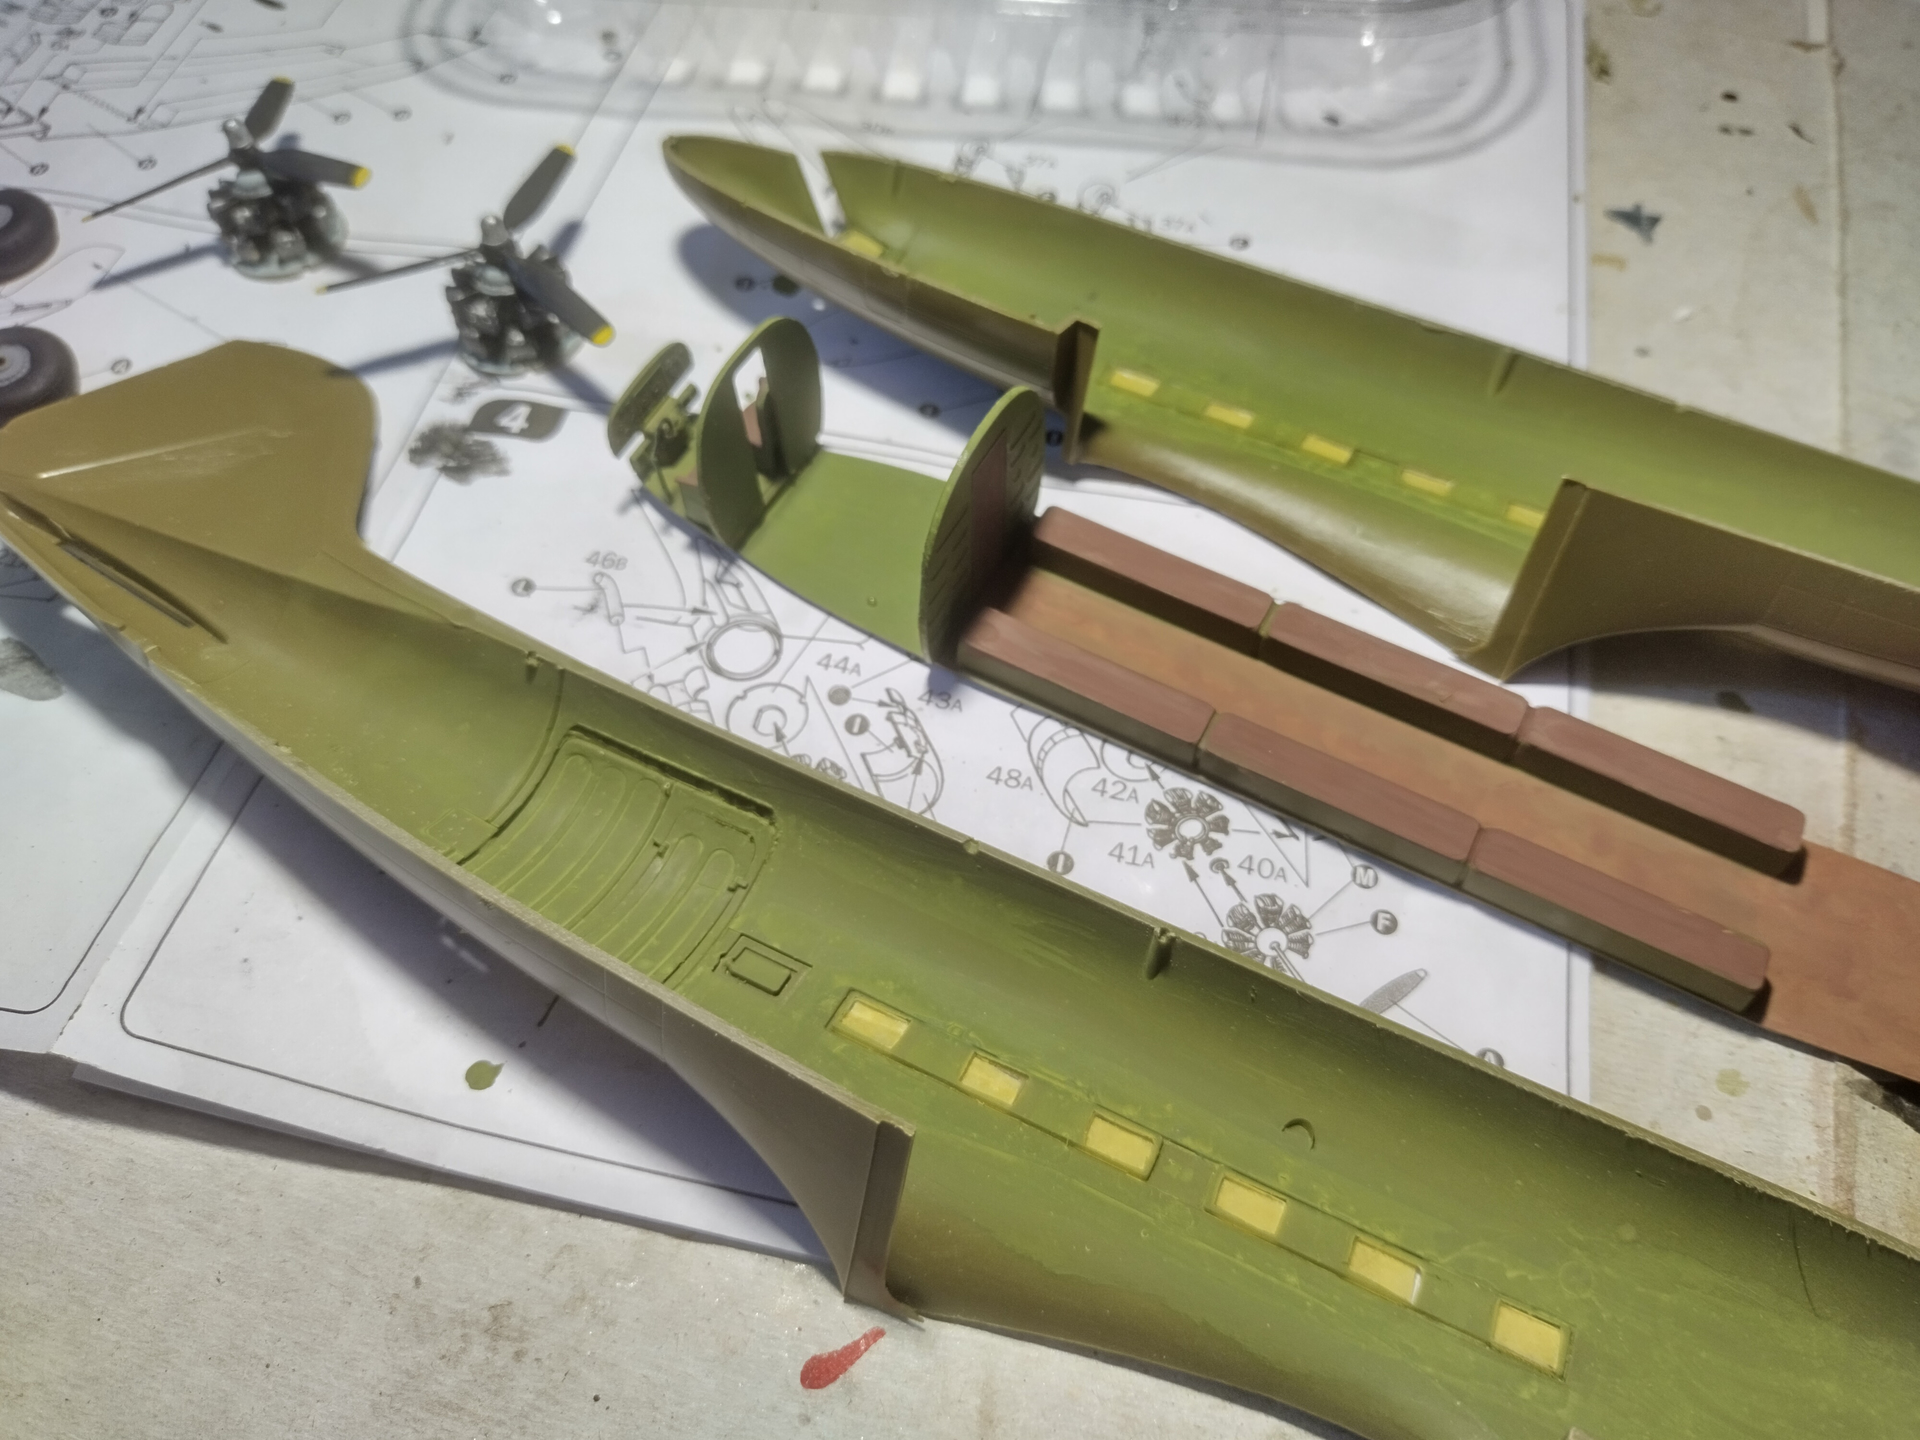
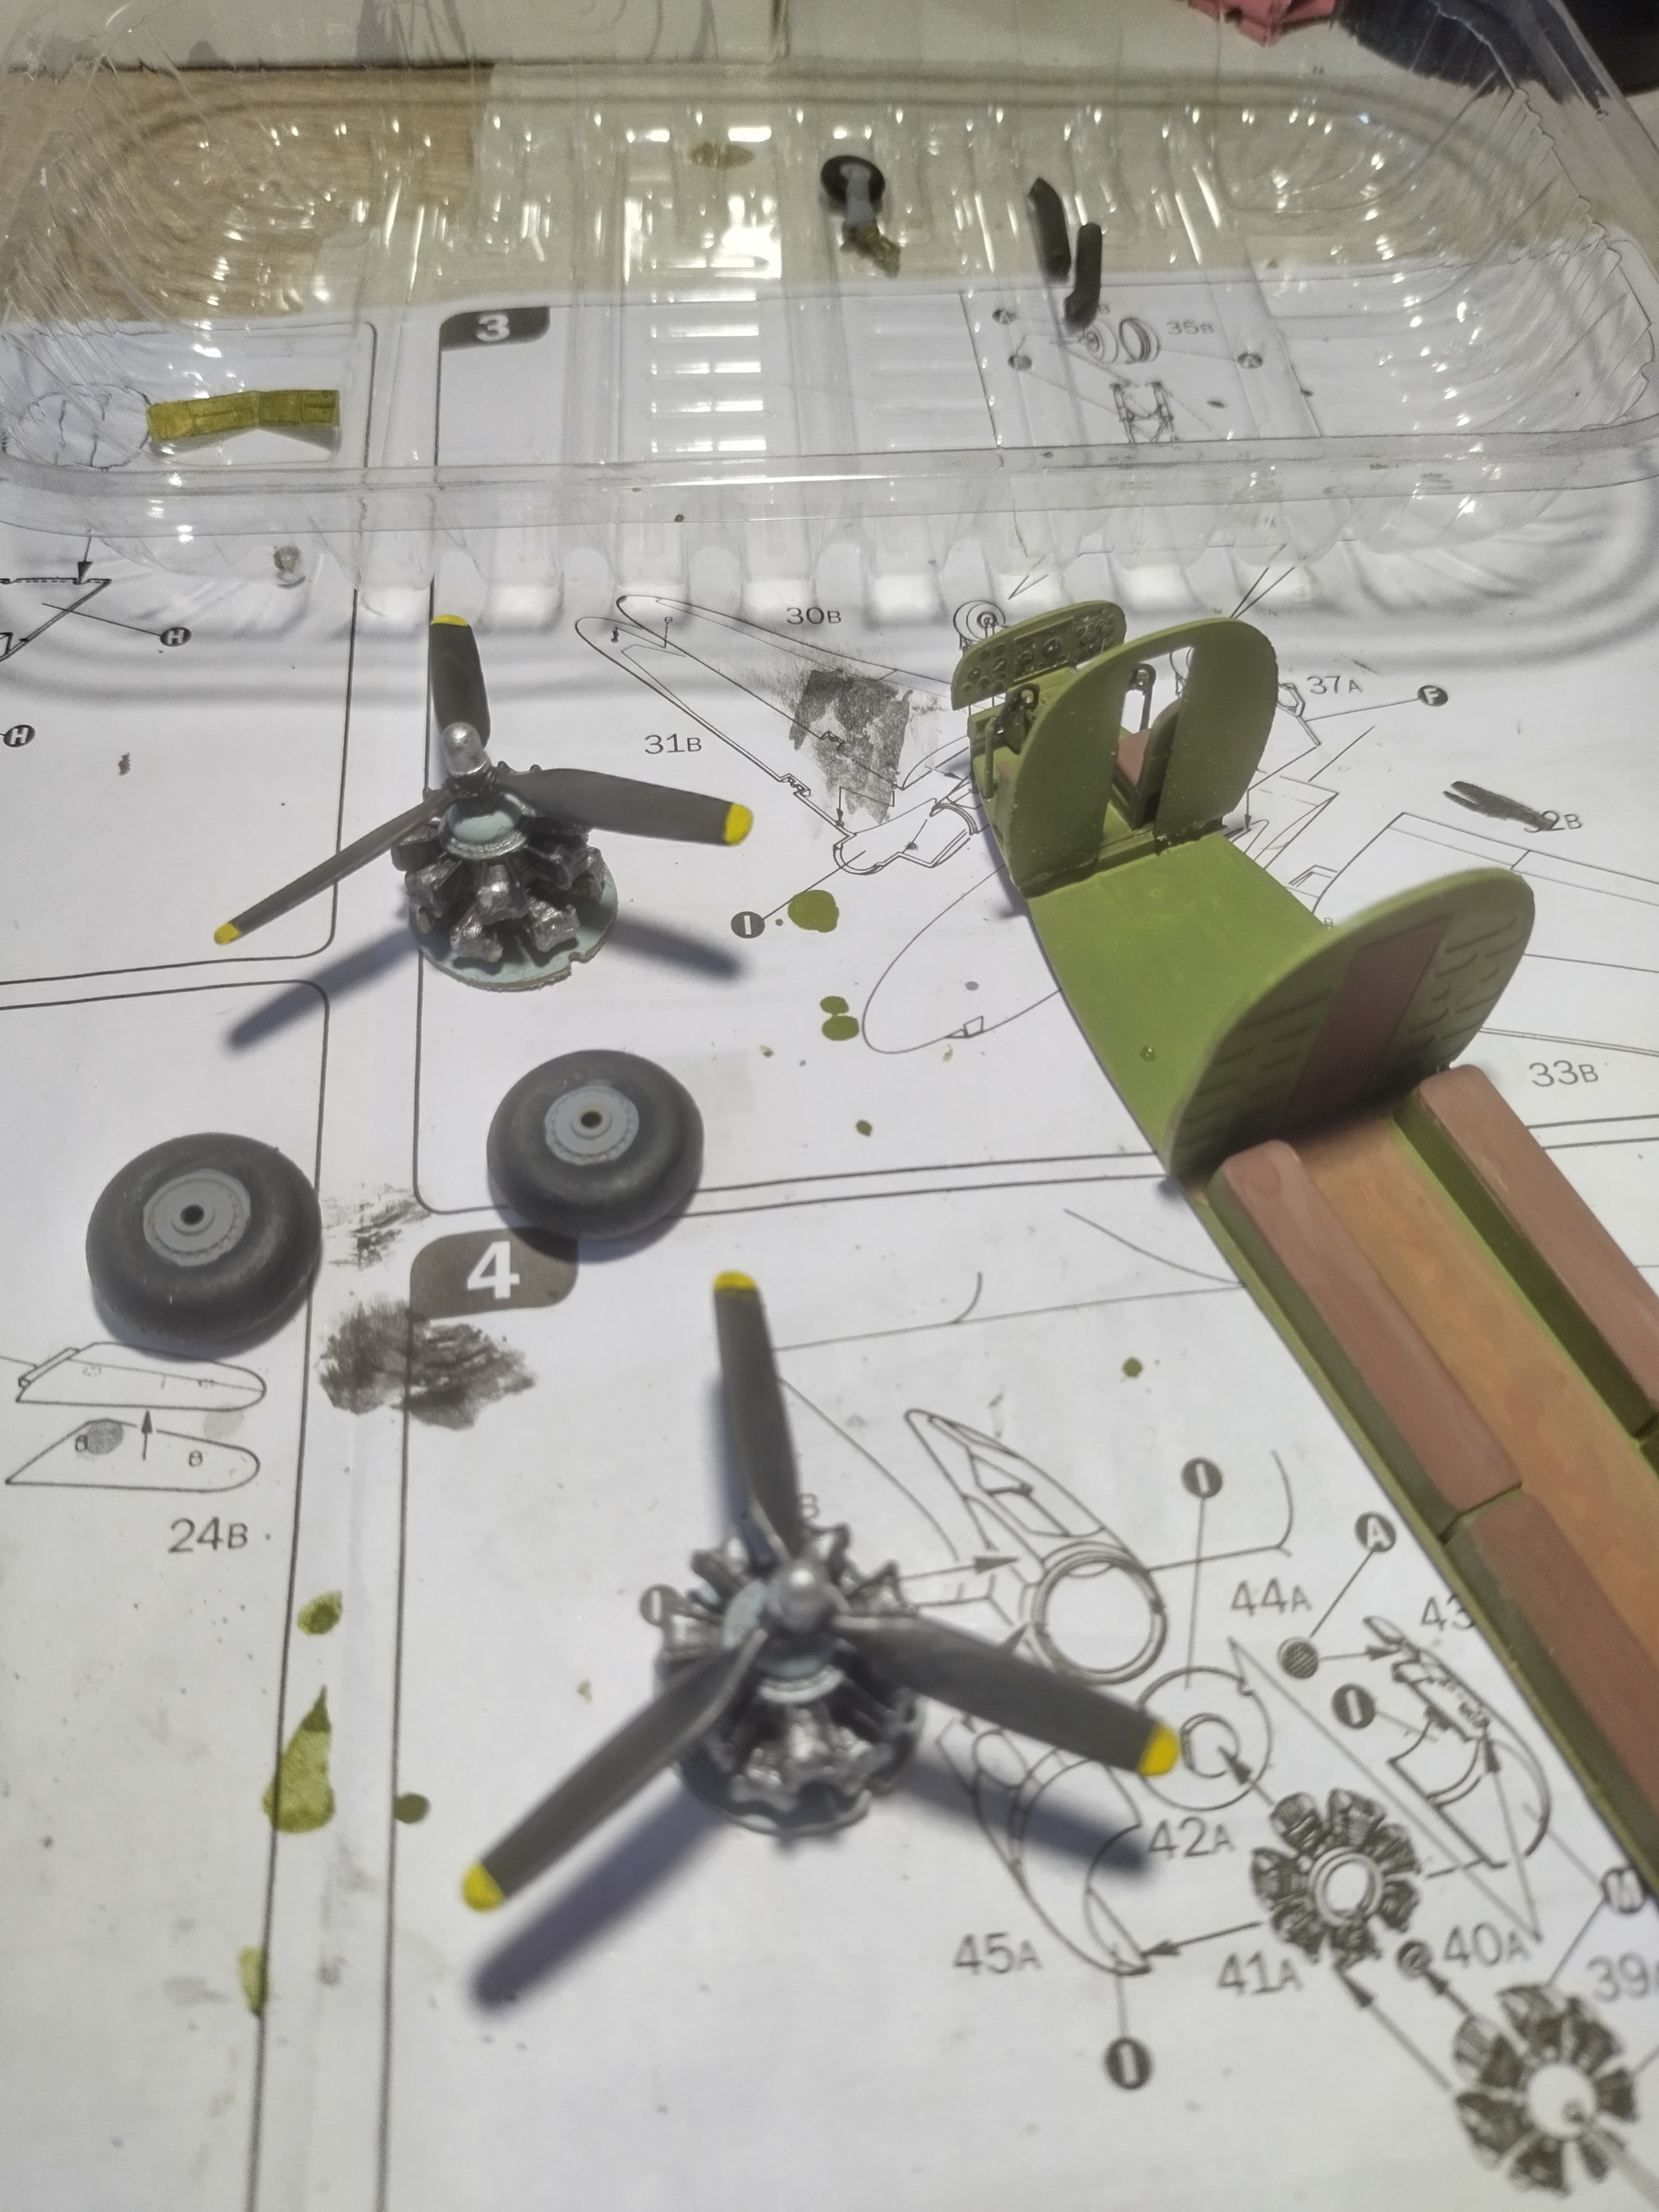
The major issue I faced was with the Tamiya XF-16 Aluminum paint, for some reason has become “lumpy” no matter how hard I tried to dilute/shake and stir the paint and it clogged up my airbrush badly, so in the end I’ve given up and hand brushed the entire model. The after-market decals were also quite brittle and broke up even after just a quick dip in water, so the cheatlines were not the best I’ve hoped for.
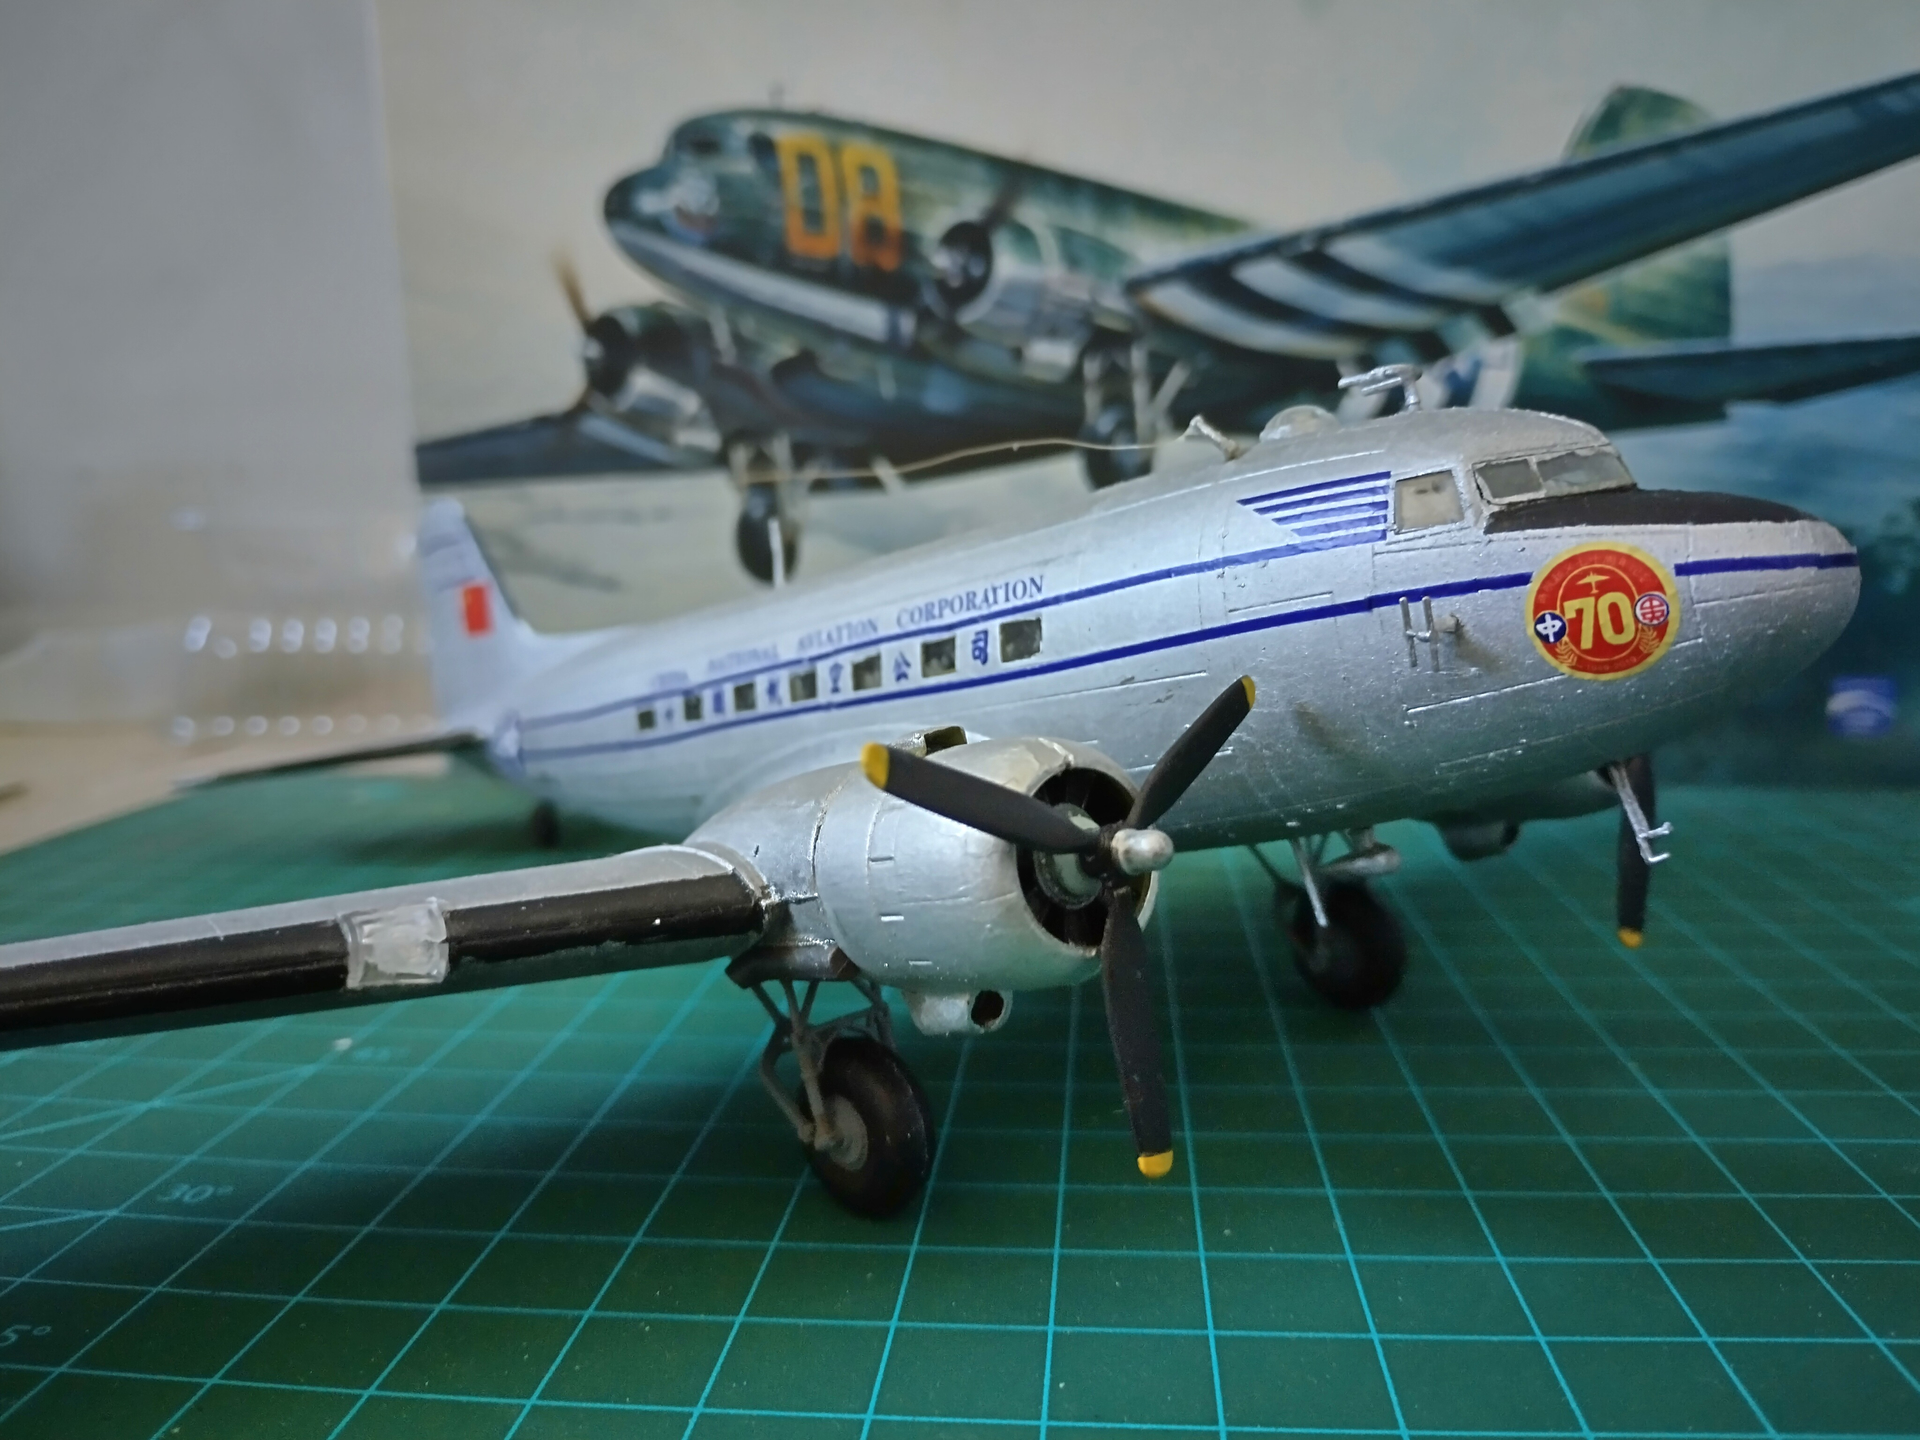

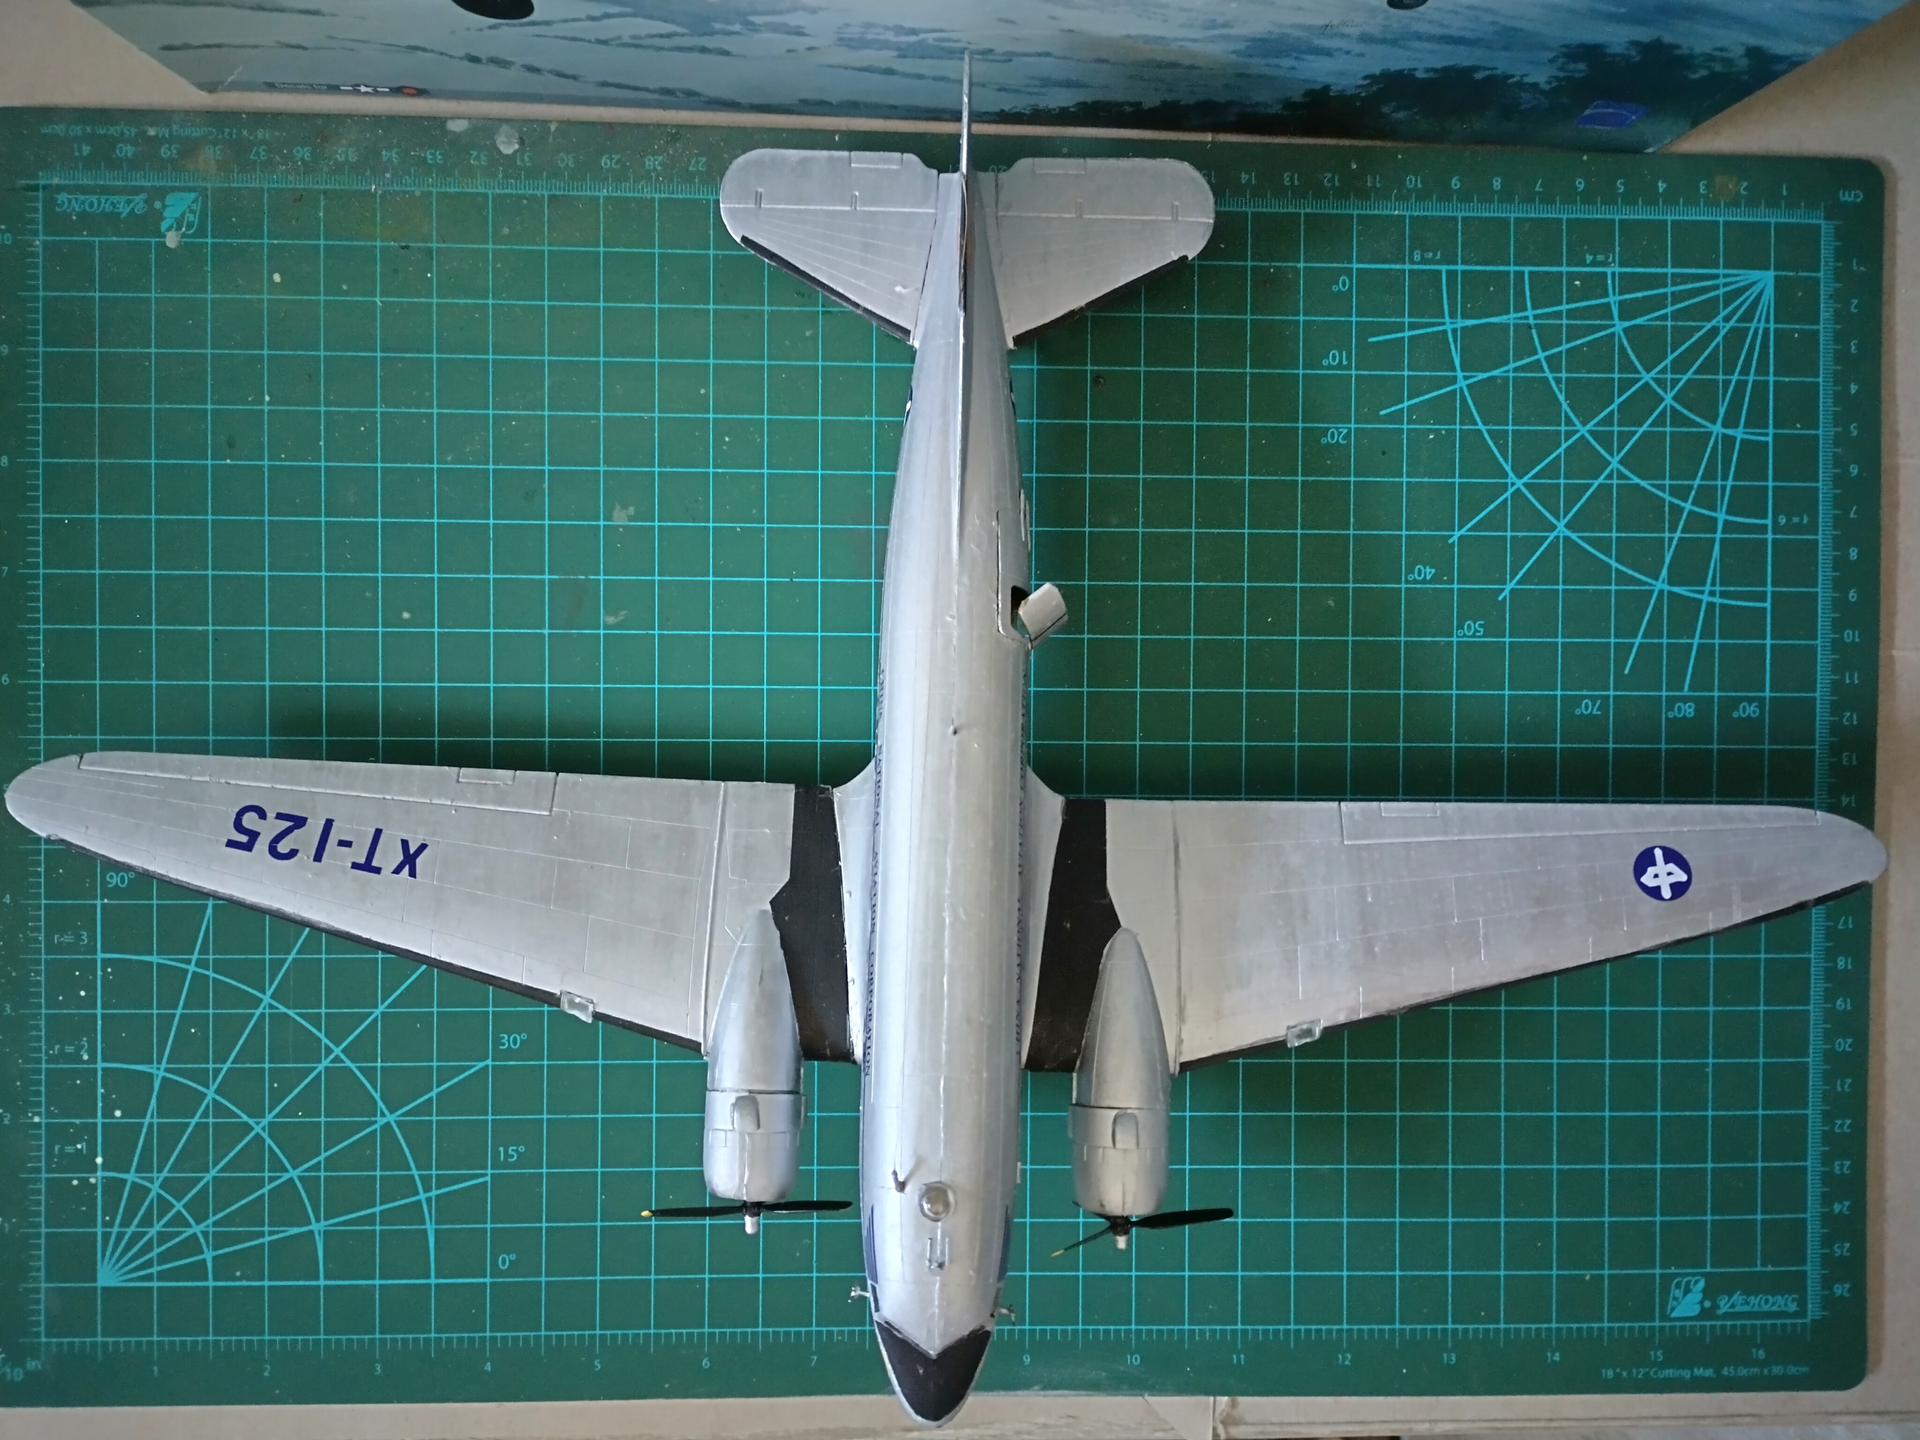
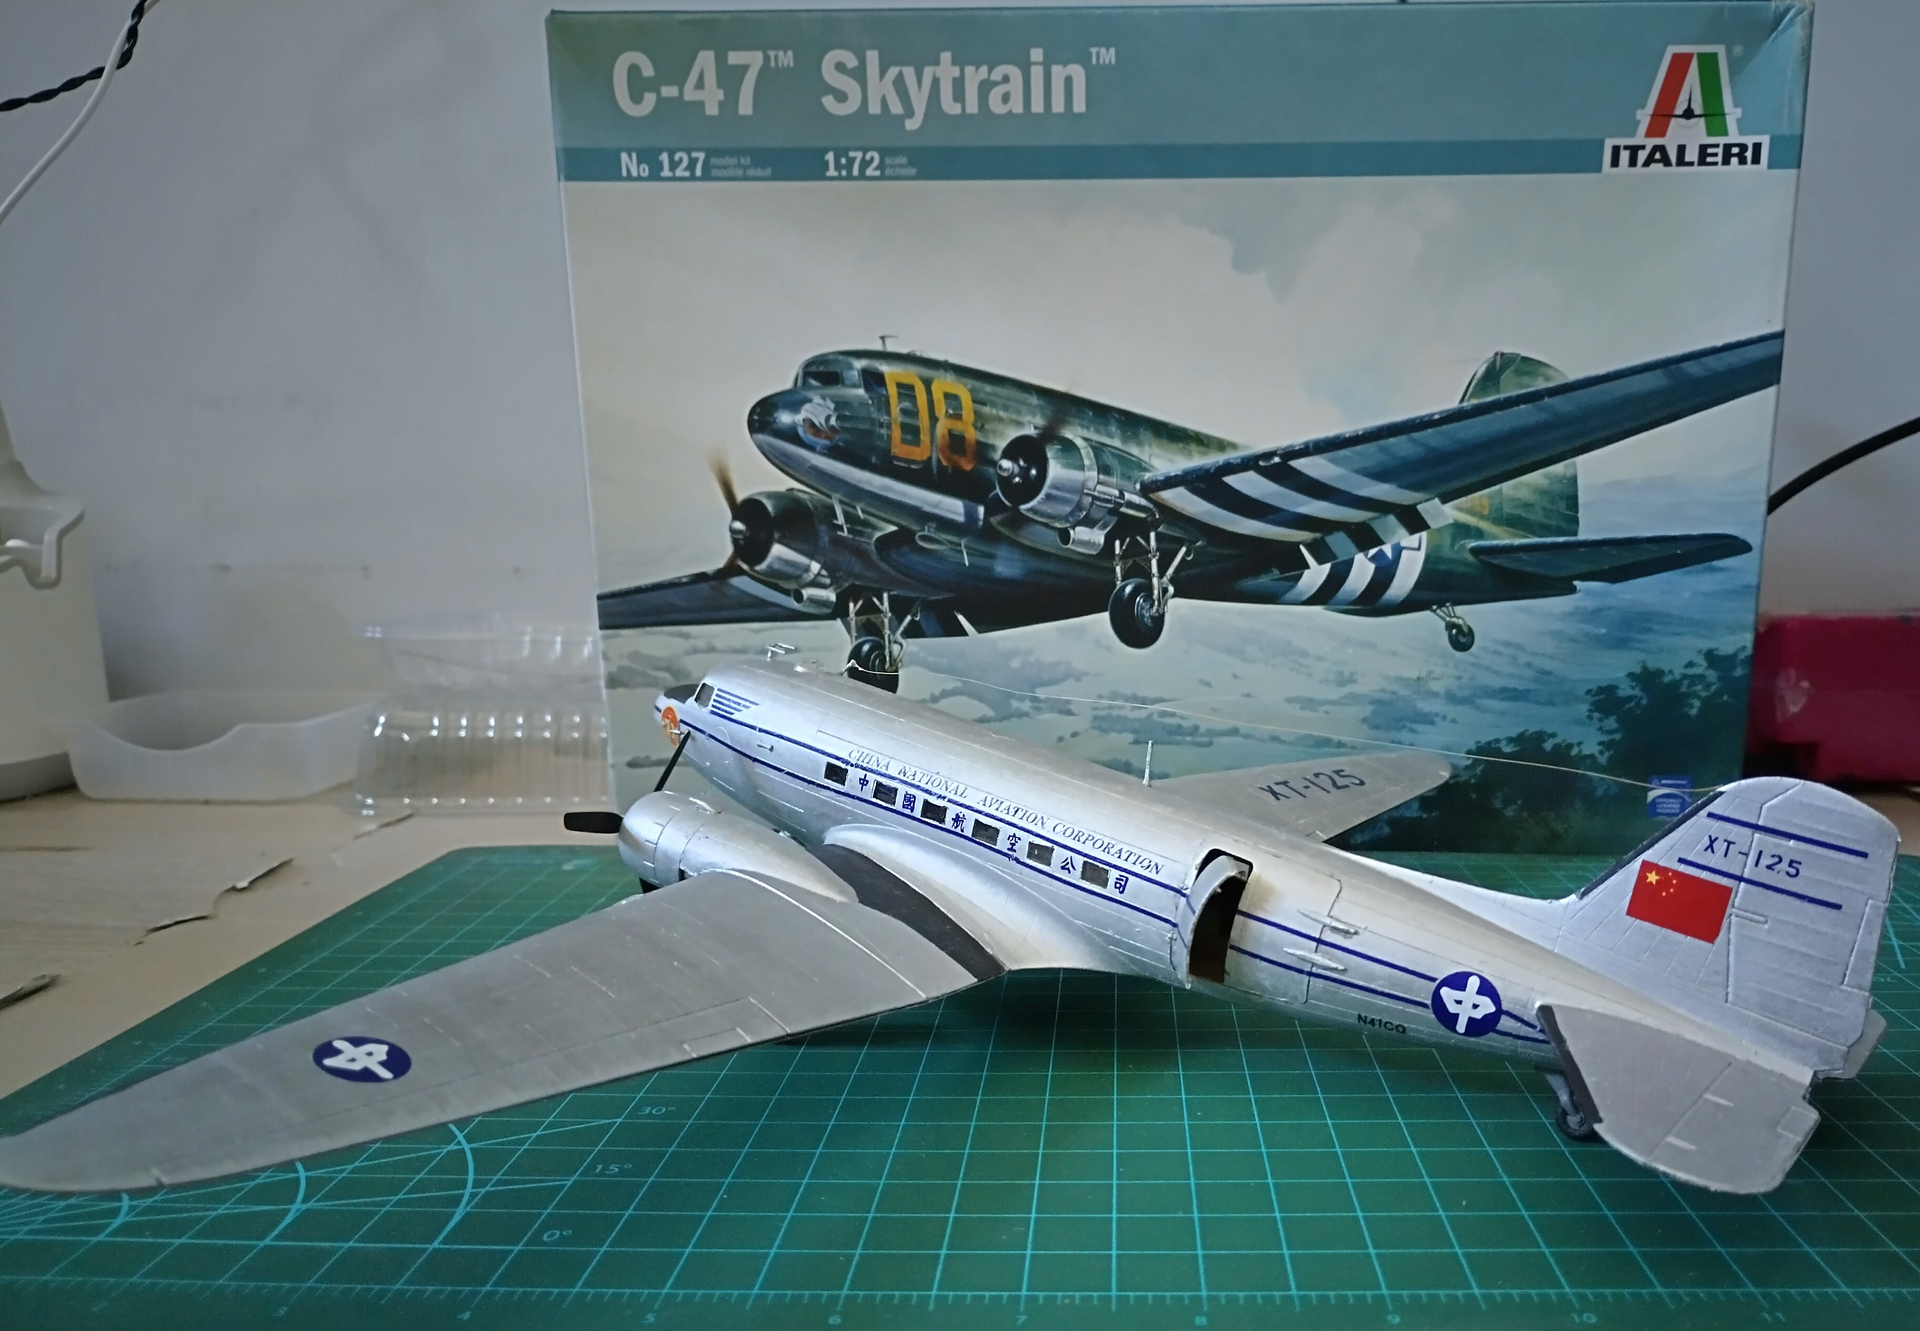
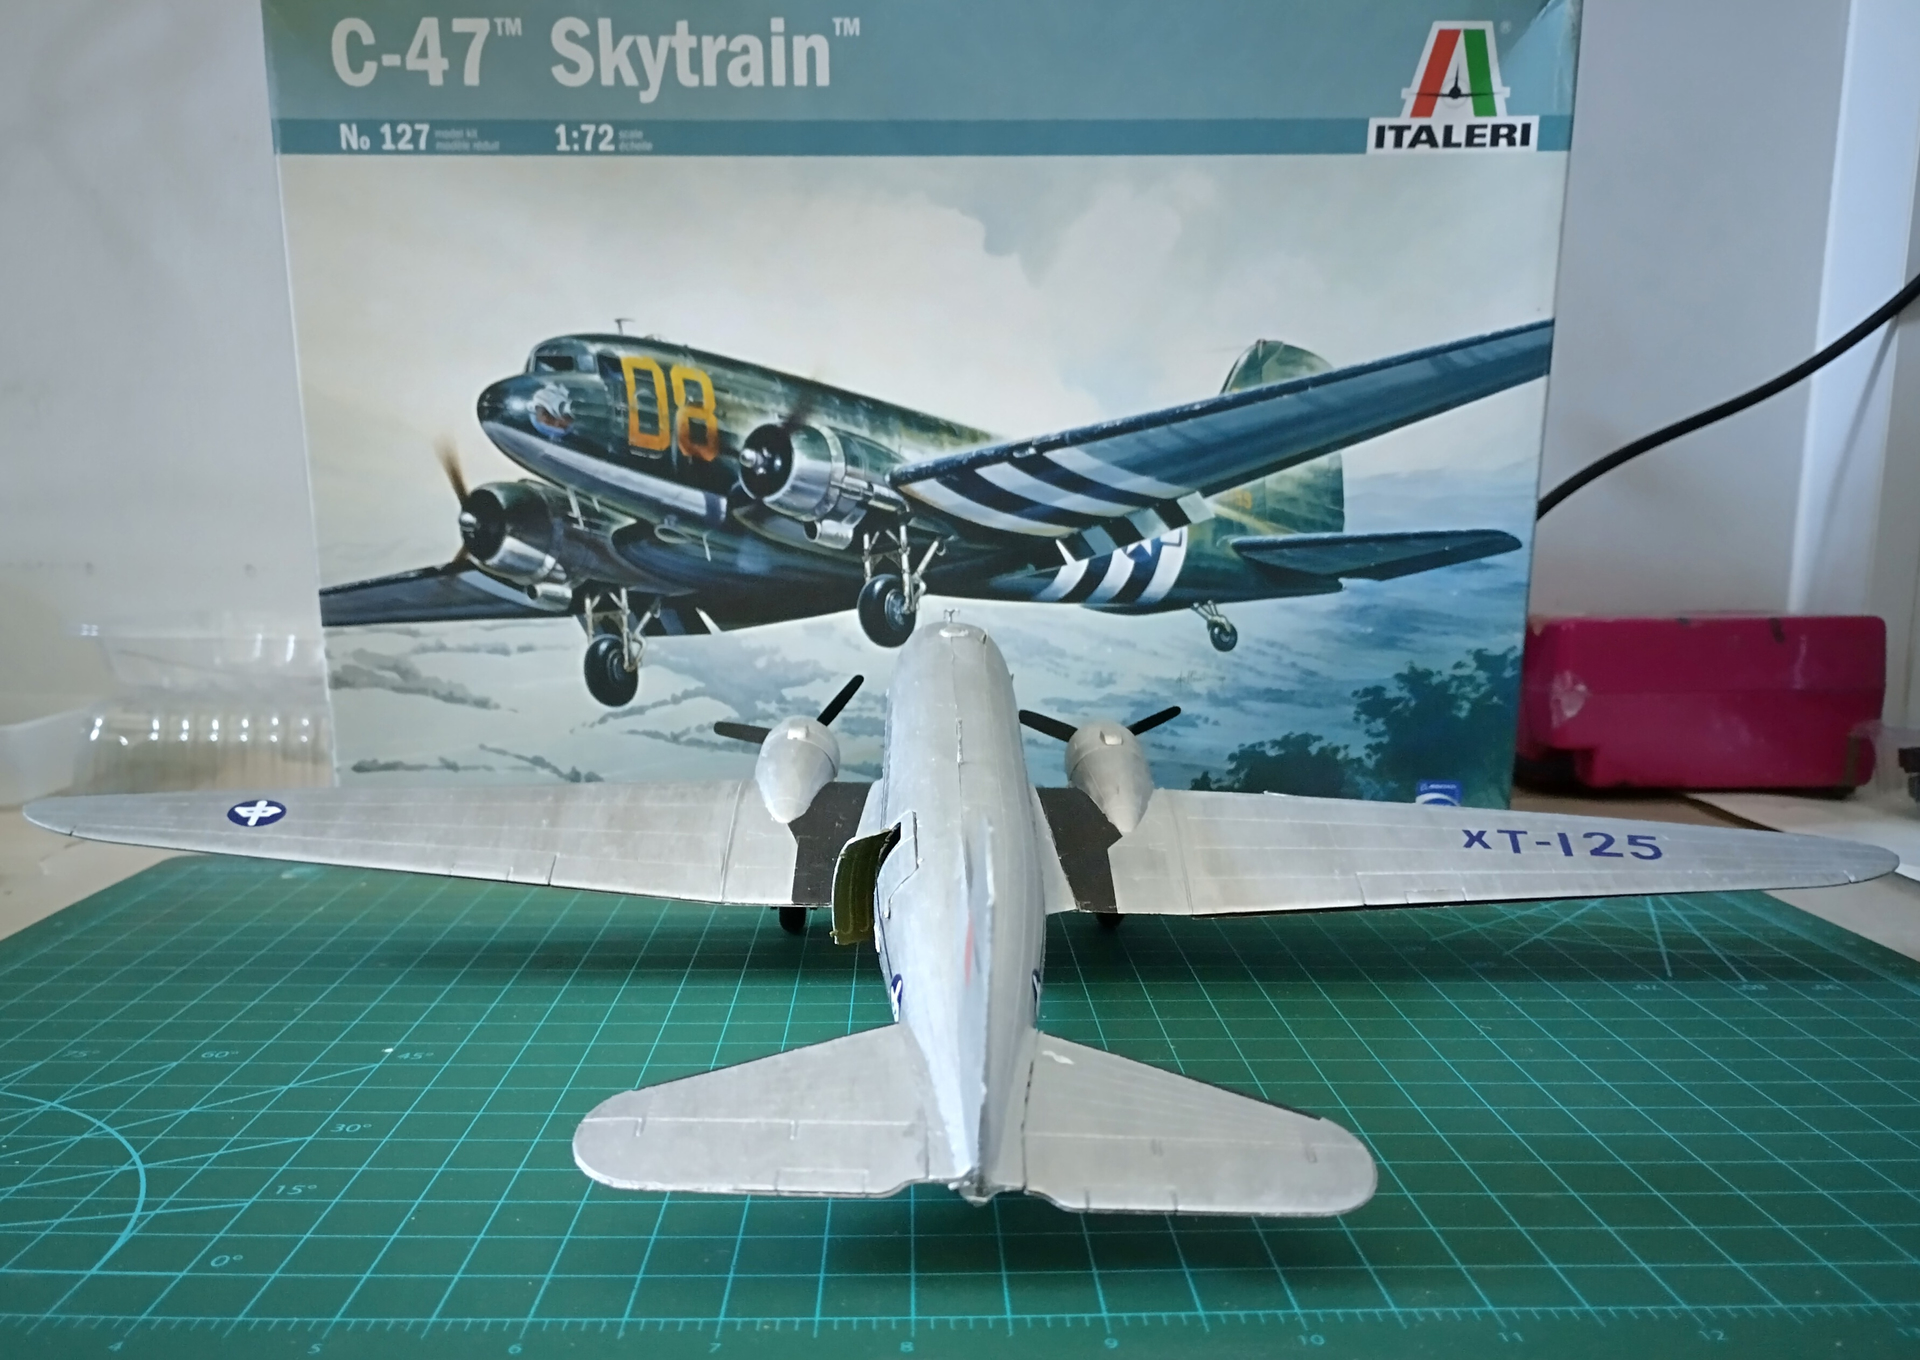
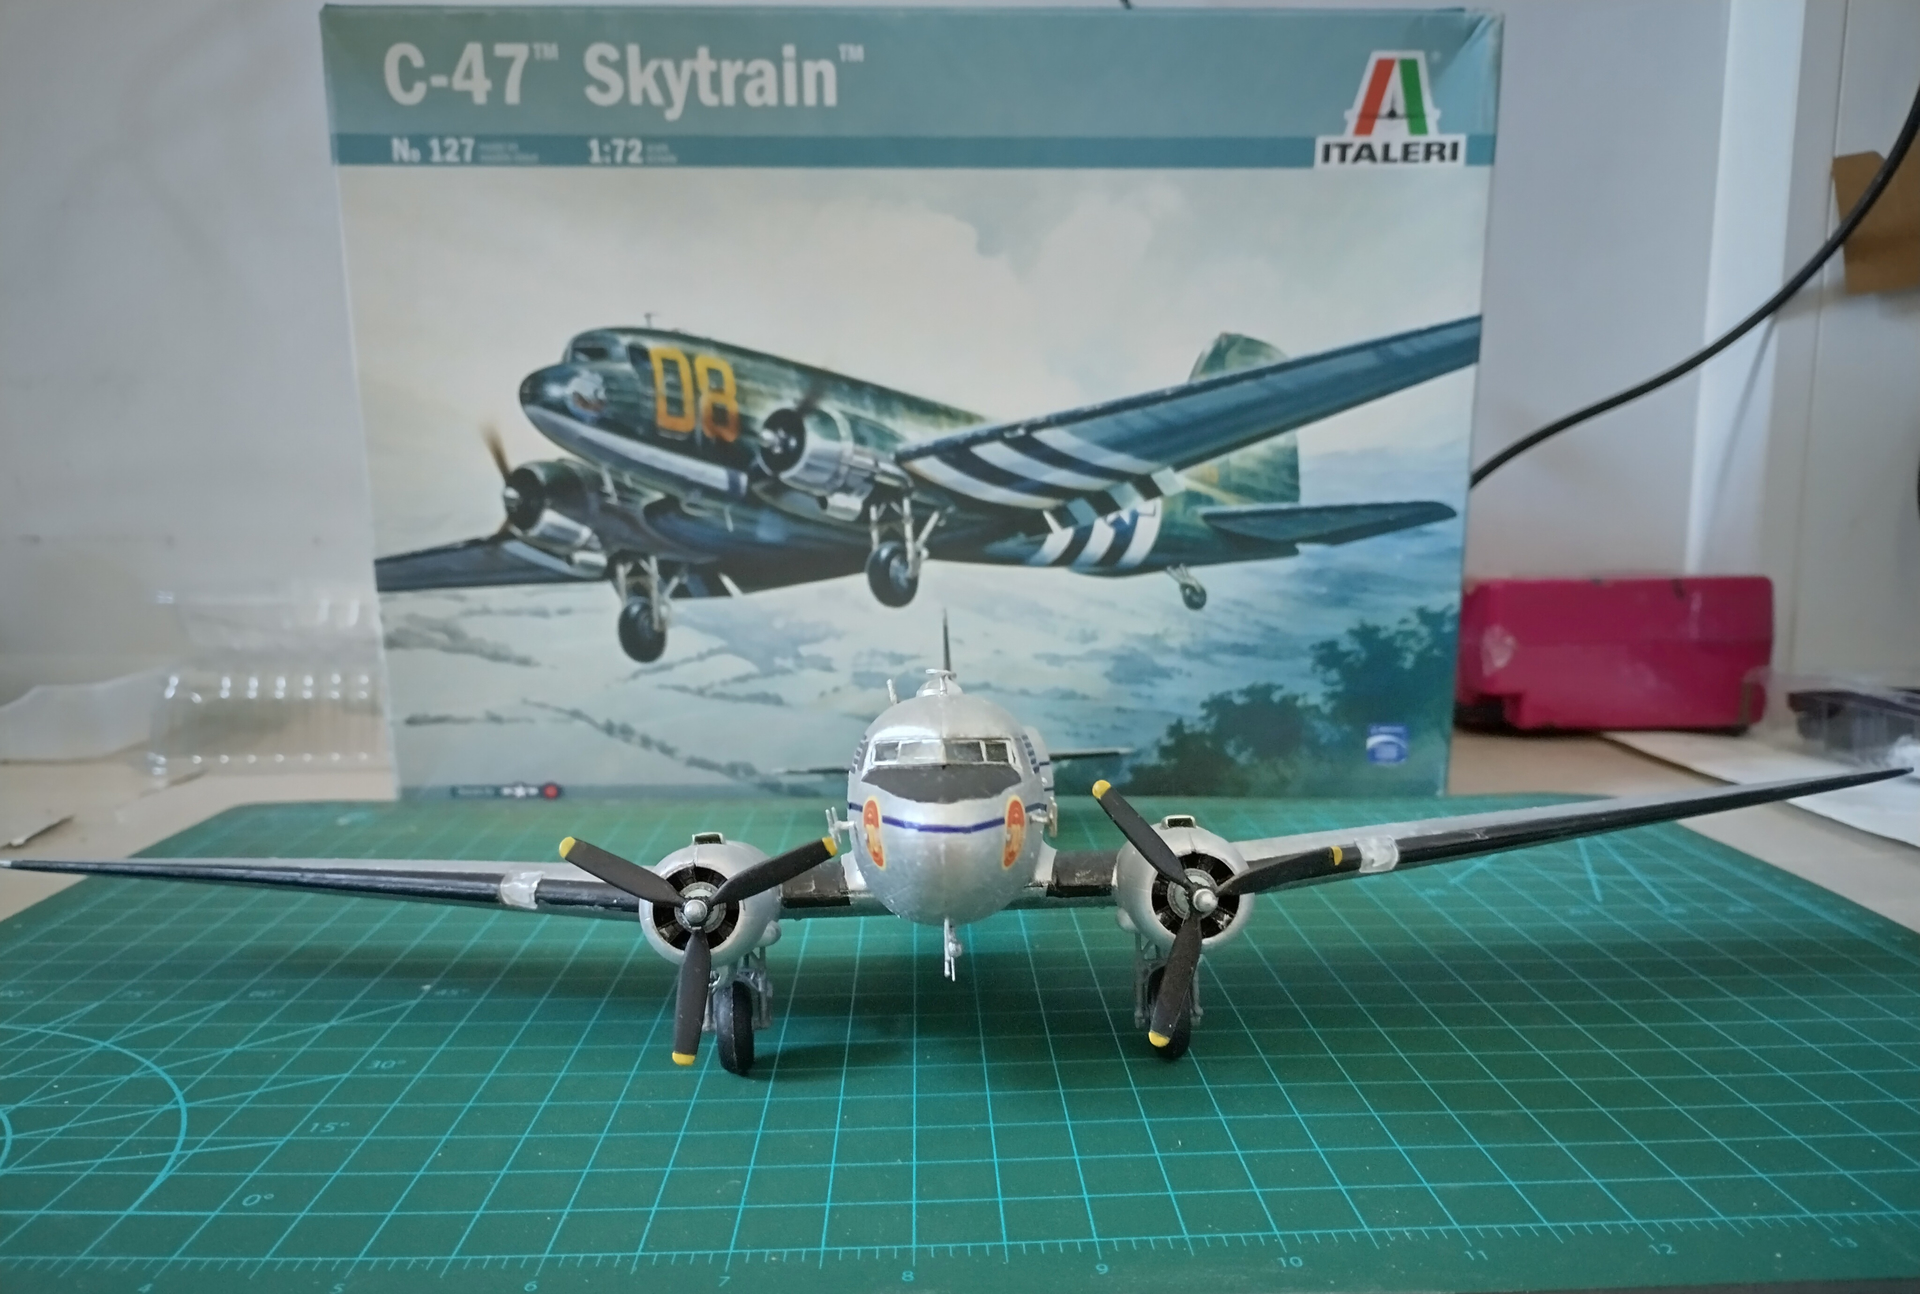


Anyway, it’s been a while since I last finished a kit and hopefully I can be exempt from another house move for sometime!
5 Likes
It’s great to see you have built the Italeri kit into such an interesting historical specimen. I have never heard of this small part of a much larger story. Thanks so much for bringing it to life for us.
I too an working on the Italeri kit and have found it to be much nicer than I expected. The fit of the parts has been pretty good and the detail not bad at all. More on this project later!
Paul
Dear Paul,
Thanks for your compliments and good to know that the history of these lesser known airlines is of interest to you.
I’m planning to build the sister aircraft of the mentioned “Two airlines”- Central Air Transport, which the decal sheet also includes a version of, but with the dreaded lumpy paint problem, I think I’ll buy a rattle can and spray for this 2nd attempt, hopefully the overall finish will be much better!
Eric
1 Like
I’m great to hear that you have a second project in mind. I have had reasonably good results with Tamiya rattlecans, in particular, Bare Metal & Gloss Aluminum. I seal the decals with more Tamiya rattlecans, Semi Gloss or Clear. These do not produce a perfect natural metal finish but a good presentable one.
Paul
1 Like
A couple of years ago I bought 4 sets of decals on eBay from a seller called Pointerdog. He had a lot a great looking early airliner sets available and I choose a few to try. Once they arrived and I got a close look at them, I wanted more but Pointerdog was gone from eBay and they have never responded to emails. Too bad, they had sets not available anywhere else.
This set depicts a transitional time just after Western Air Express changed its name to become Western Airlines. This DC-3 was originally ordered by United in 1941 hence its P&W engines and right hand door.
United had been in a combine with several other airlines, Boeing, Pratt & Whitney, Hamilton Standard propellors and some other aviation outfits. They were “encouraged” by the government to combine. Later such combinations that had been required were forbidden and were broken up. The leverage was airmail contracts, the life’s blood of early aviation.
Western Air Express had formed an alliance with United in the 1930s. When United bought DC-3s, WAE got their old Boing 247s and they also commingled routes which served both carriers well.
In 1942 while the United birds were being constructed, the USAAC drafted them still on the production line. The ARMY thought they knew all they needed to know about air transport and that they could move freight & passengers faster than the airlines. That did not prove to be the case and after drafting aircraft and flight crew into USAAC service decided it would be better to turn as much of those duties back to the airlines. To do this, they doled aircraft back to the airlines in the manner they thought fit their own needs.
The DC-3 NC33644 was one of those. It is unclear whether or not it ever actually served in USAAC use but they did take formal ownership and then delivered it to WAE/WA to be used transporting ARMY loads. At some point during the war, an airliner interior was fitted. It is unclear how much pure frieght duty was done but as it did not have the big C-47 door, it would have only been of limited use as a freight dog.
This model depicts a time after it had the airline interior installed by WA. I had no information on interior colors so I put on my swami hat and guessed that the WA interior decorator would have used colors derived from the indian head/arrow logo. The cabin interior was given a cream & reddish brown treatment.
The kit is Italeri’s DC-3 which was derived from their C-47 kit. Happily, it has a nice plug where the cargo door would have been with a nice arched airline door molded in. I hated to sand this nice detail off. Being derived from a United ordered bird, this aircraft had the door on the right. Pointerdog provided a door decal with the correct forward hinges with the decal set. There will be some putting & rescribing needed.
The kit itself is surprisingly good. The panel lines are WAY exaggerated, more like troughs than panel lines. The new tool Airfix kit has the same problem! The parts fit has been very good with only a little work needed. They supply an impressive number of marking options and the decals they supply look terrific on the sheet. Also impressive is the wide variety of antennas provided with clear instructions as to which ones go on which airline decal choice. First rate on this!

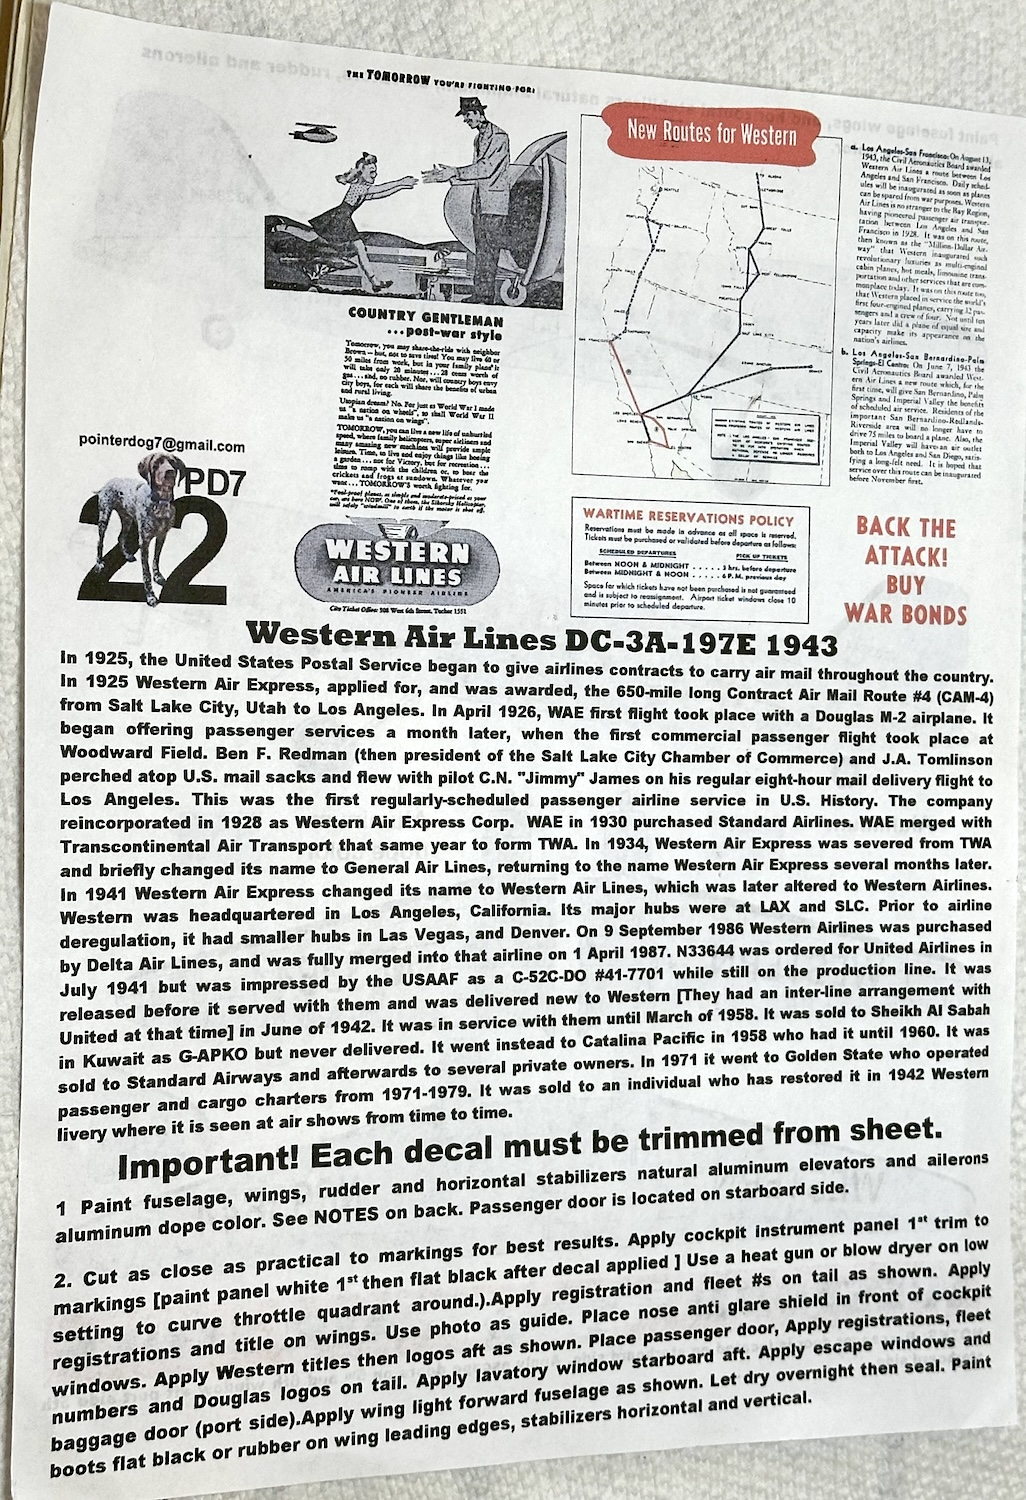
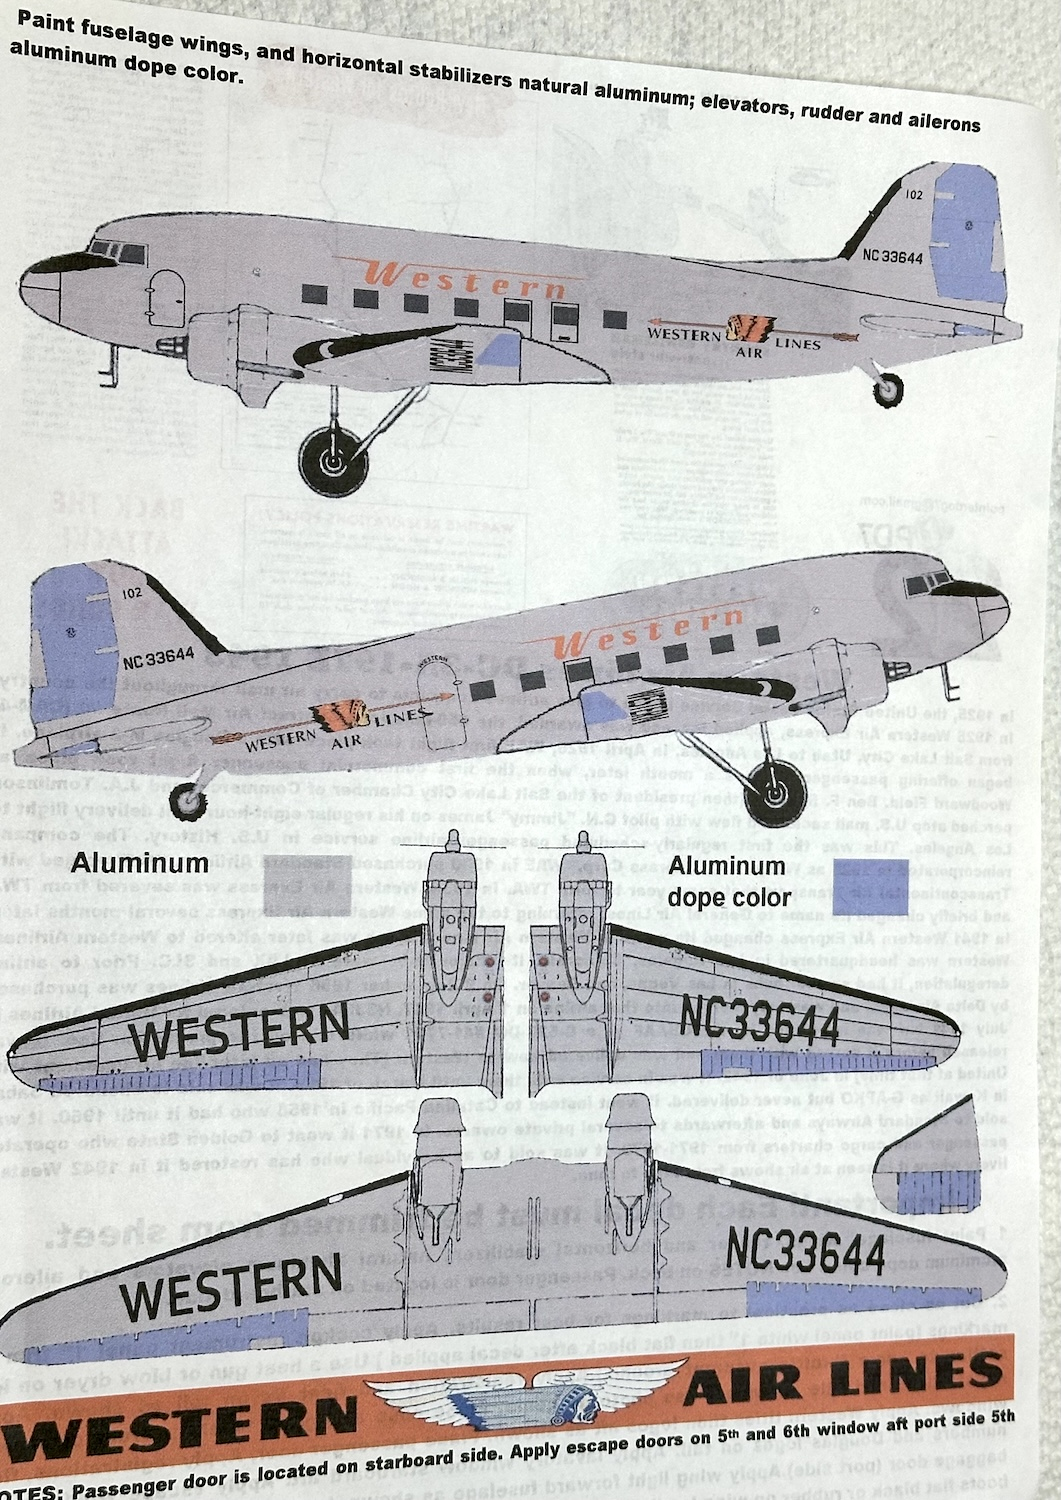
Too bad Pointerdog didn’t give us info on the antenna fit . . .
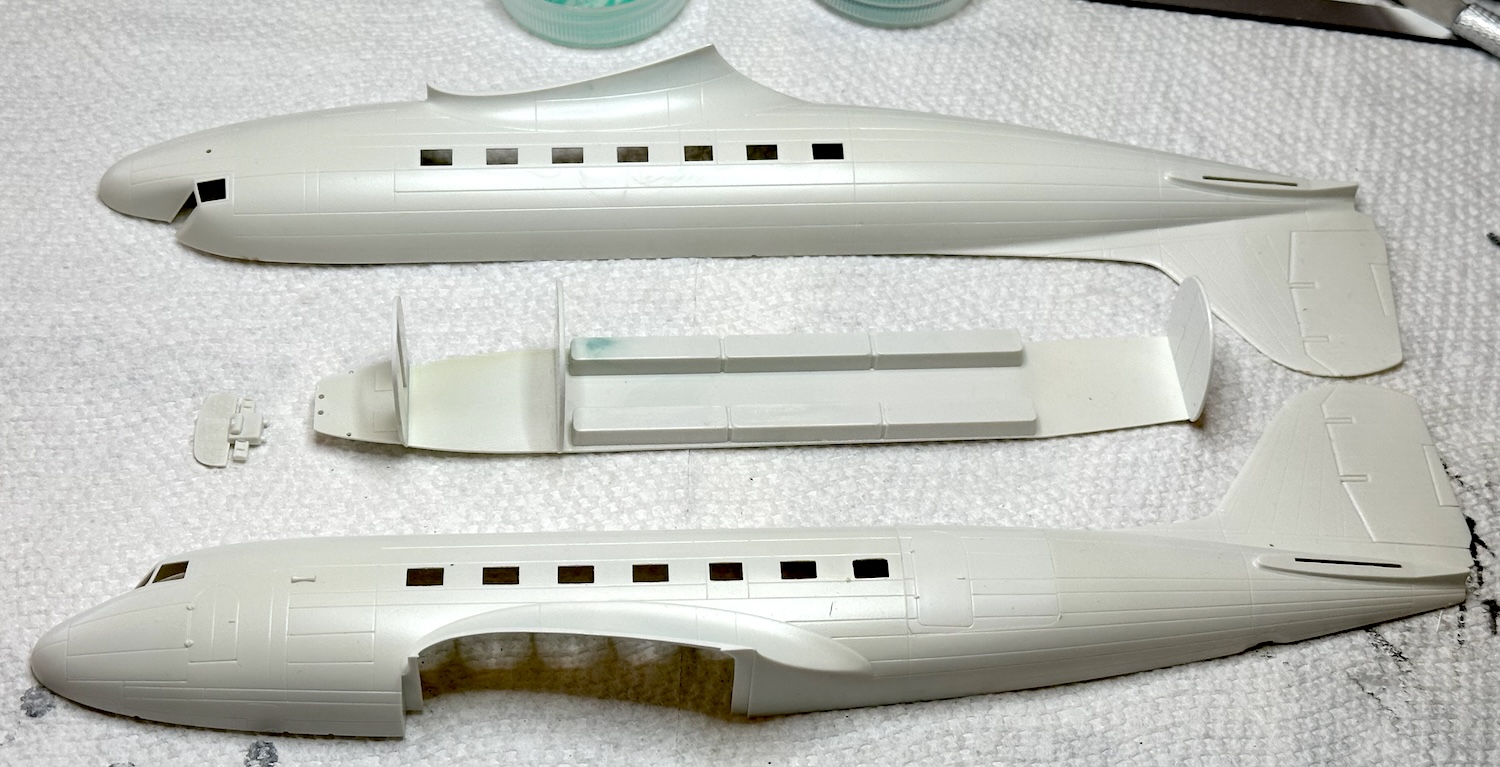
The left fuselage side had the seventh window outlined on the inside of the molding and it required only a few minutes with a No. 11 blade to add that rear window back in. The plug can be seen in this picture already installed.

The flight deck is very nice and it has nice airline looking seats only needing belts. I’m guessing that by this time, airlines would have installed shoulder belts. Only a few years before it would have been lap belts only. The instrument panel is a decal provided on the Pointerdog sheet. I used it with the paper backing left on and glued it onto the plastic instrument panel. Too bad almost none of this will ever be seen again!


With no real information to guide me, I guessed a light green for the cockpit and cargo compartment. The cabin interior got a cream base with reddish brown seats. The windows are so thick and distorted that only vague impressions of the interior will be visible anyway. The curtains were made from craft paper and attached with School Glue.
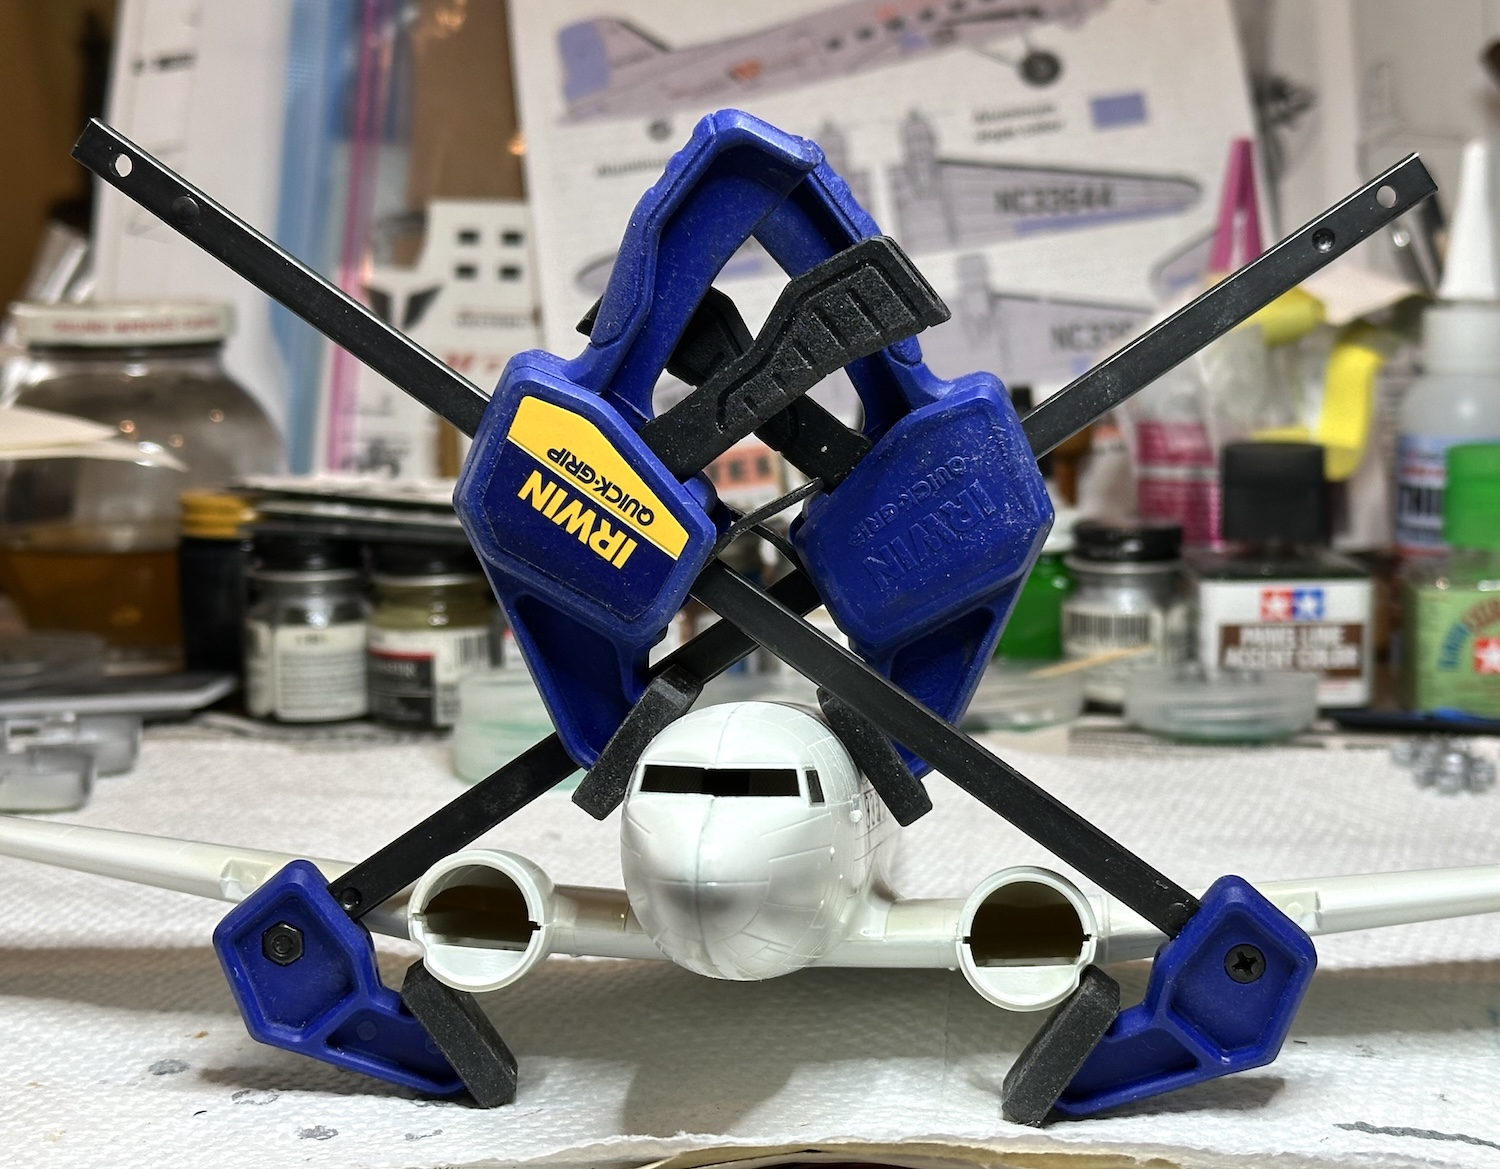
About the only appreciable gap anywhere was a the wing roots. A couple of clamps closed the gap and liquid cement sealed it.
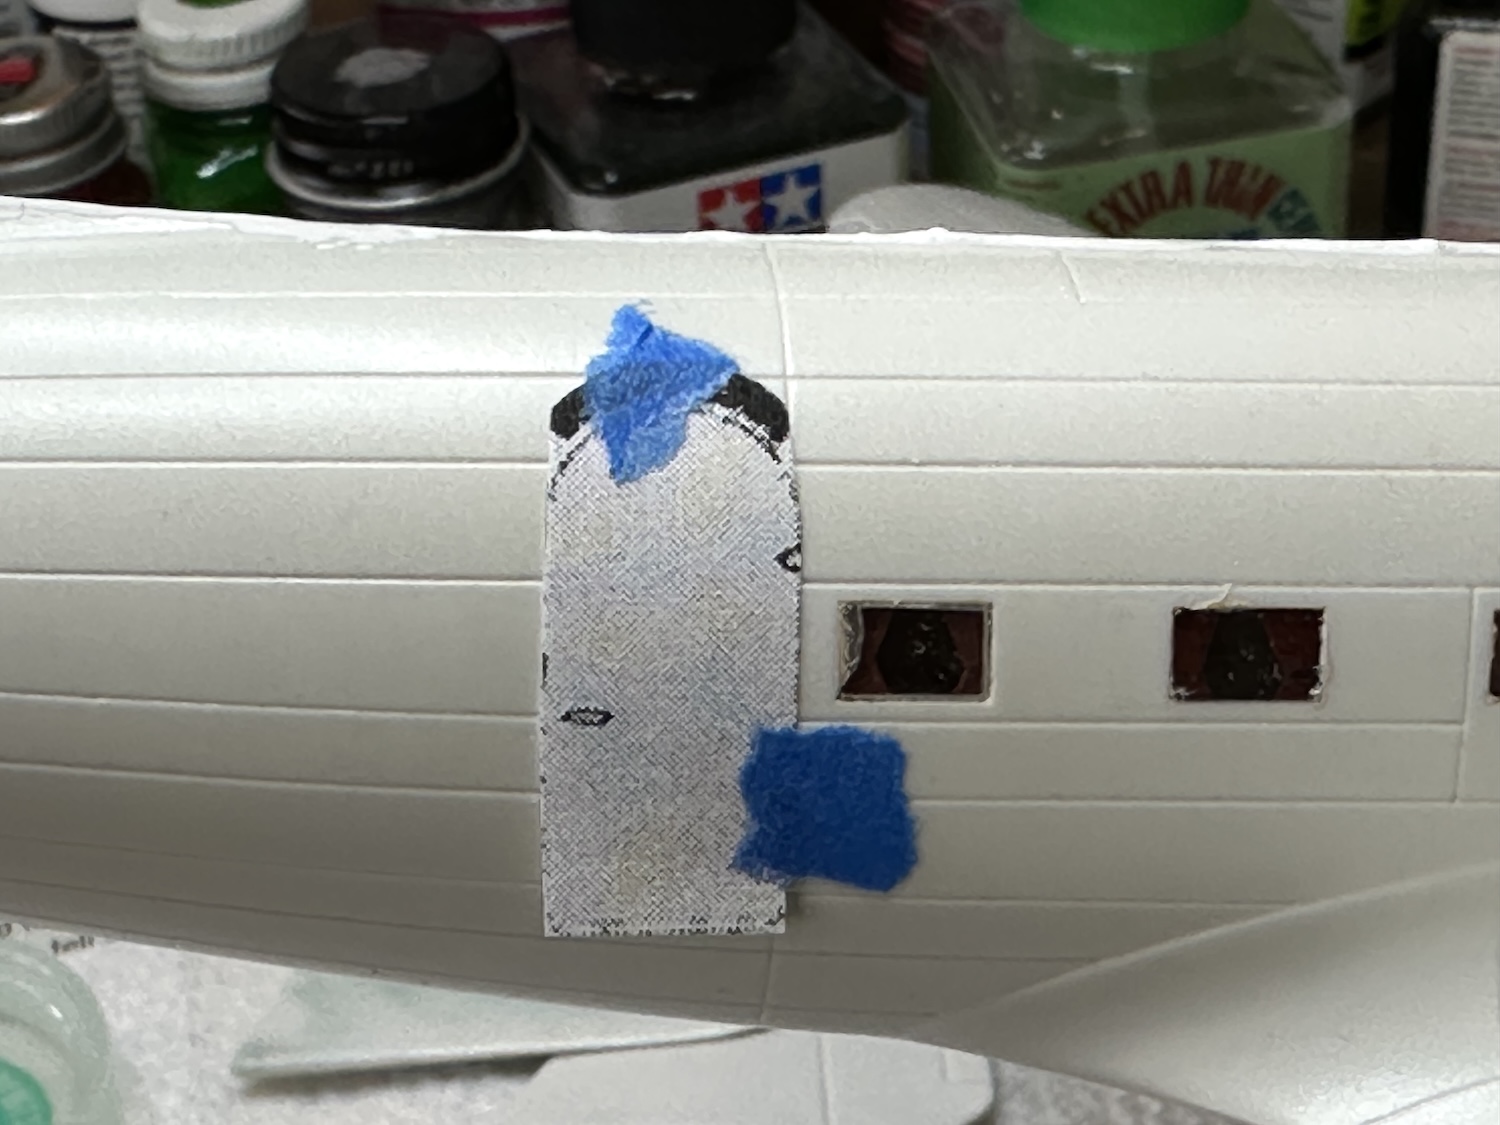
Here is where the door decal will go. I used a photocopy of the decal sheet to make a template then marked the edges so I would know where to putty up the panel lines.
Paul
3 Likes
Guys,
I wonder if those of us in this group build should call ourselves “Dougies”? “Goonies” is already taken by a movie.
Last time I said I participate probably 6 months ago. Still have three months to go. Maybe I will be able to break loose and all things going on holding me back and finally completed build. I’m not giving up!
1 Like
Fred, I do hope you can get a build going. With your special insight you have a lot to share with us.
Here is the logo again:
Paul
A lot more progress on the 1943 Western DC-3 in 1/72 by Italeri. I have to say that I am very impressed with this kit. It is an older kit but the moldings are sharp with almost no flash and the fit of the parts is excellent. I have two more of these kits in the planning stages and will add wing spars & tabs to beef up the internal wing outer/inner panel join & the wing/fuselage joint. I actually had some of these joints give way under the stress of building, decalling & painting.
Here it is with the primer polished down with Tamiya 1500 sanding cloth and the AS-12 Bare metal paint:

The deicer boots were masked and sprayed on this time with Tamiya’s Rubber Black:
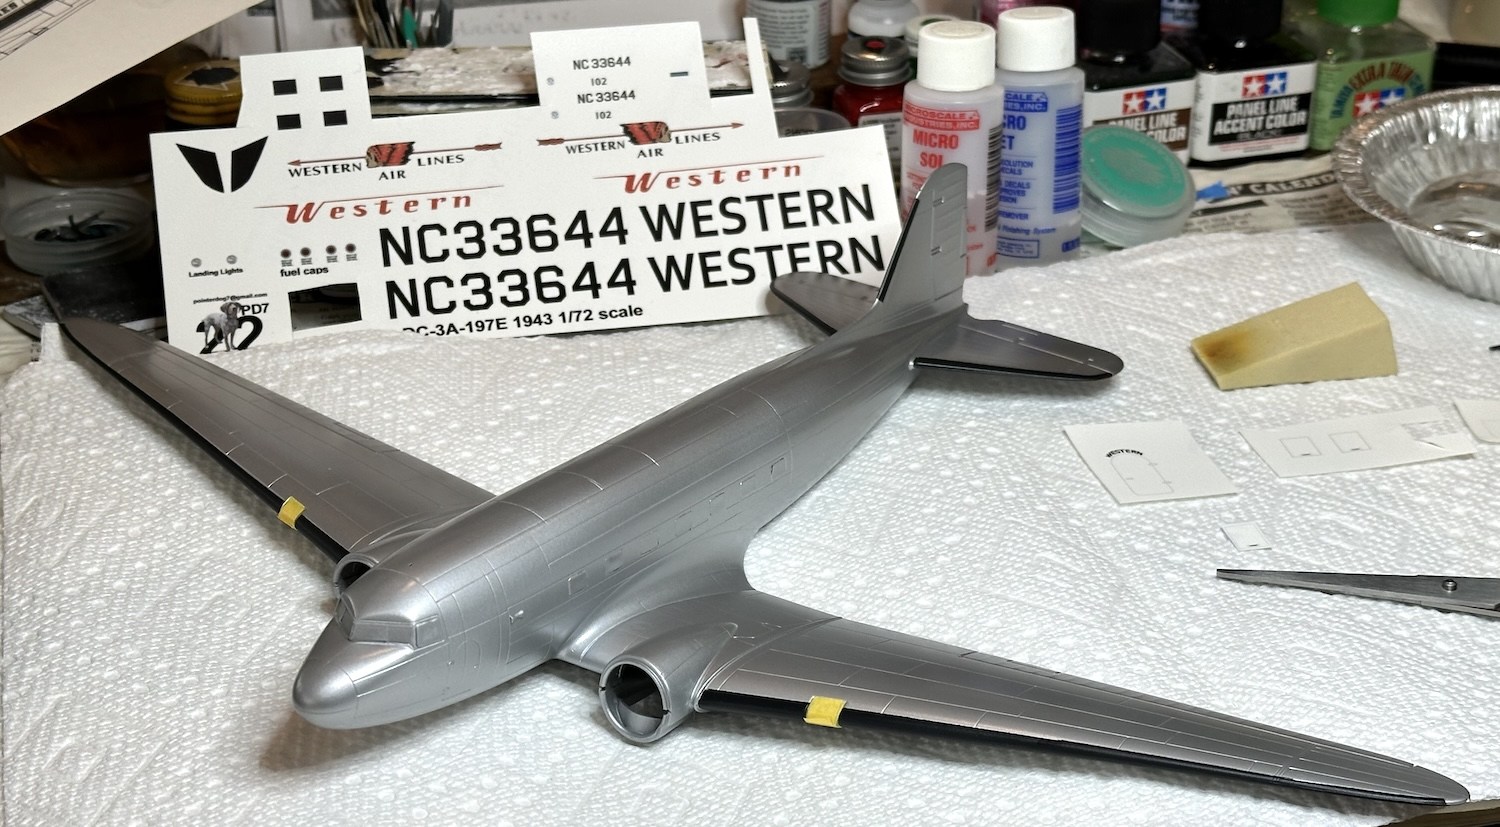
I decided to try something new this time to try to get the Pointerdog decals to lay down better and have to decal film be less visible. After the AS-12 Bare Metal, it got a light coat of clear gloss and then the decals were applied. They seemed happier than in previous attempts:
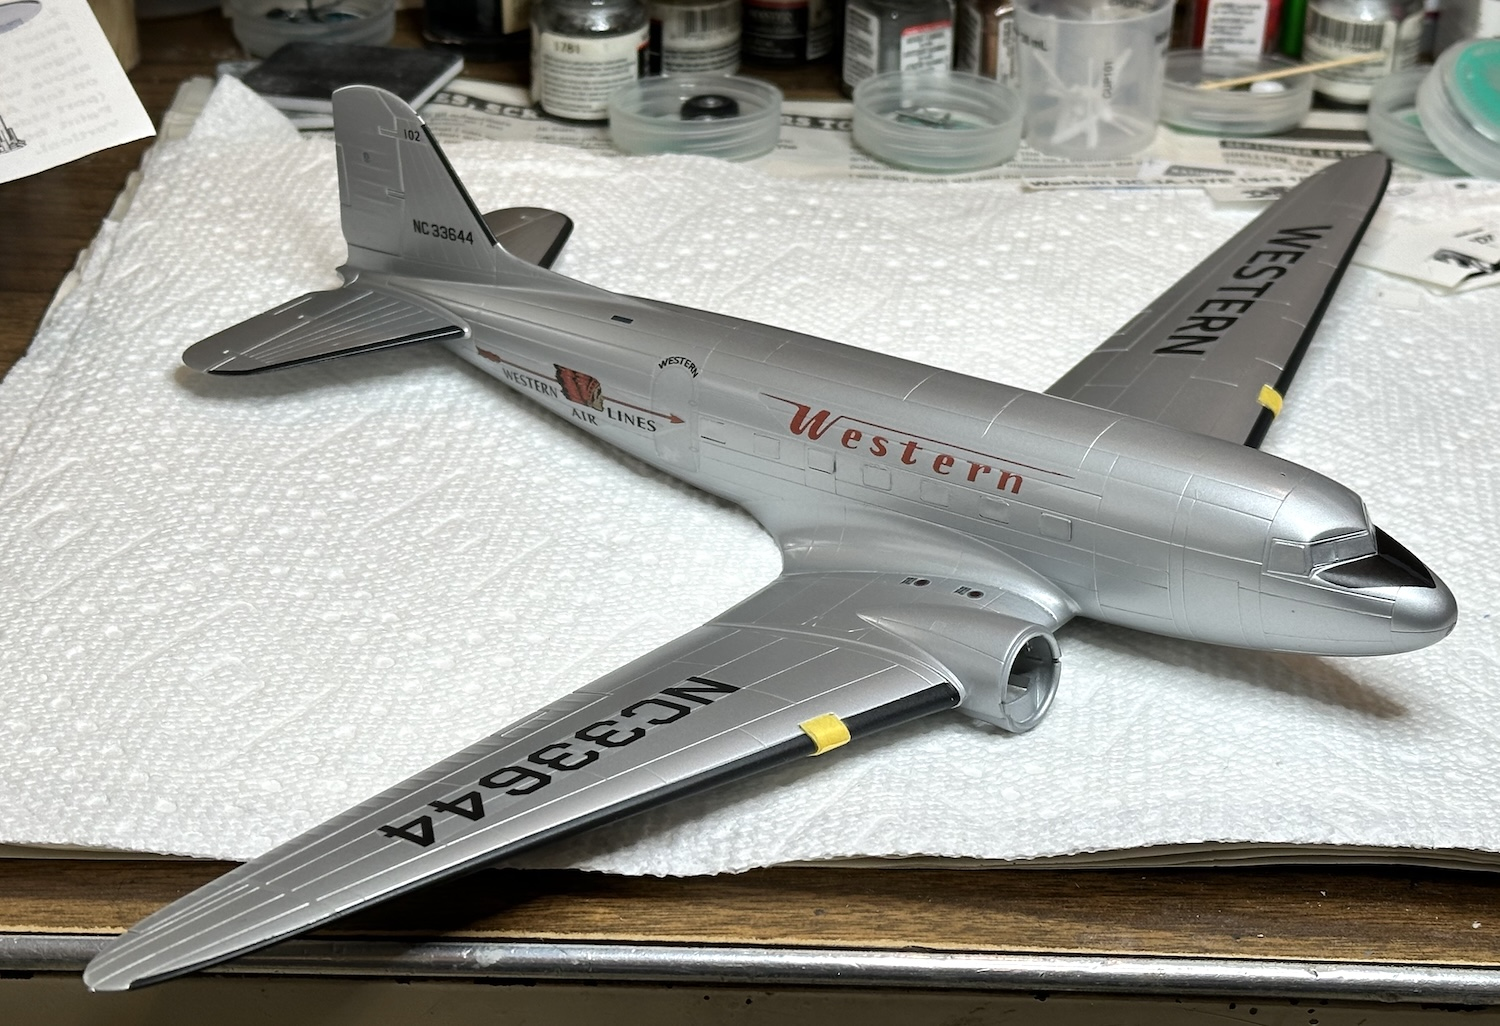


A light coat of semi gloss clear sealed the decals. I liked the way the natural metal finish looked on this model with this multi layered approach. The “frosted” look I have gotten on other builds did not happen this time.
While paint was drying, I made up a DF loop with a tool I bought some years ago and have rarely used:
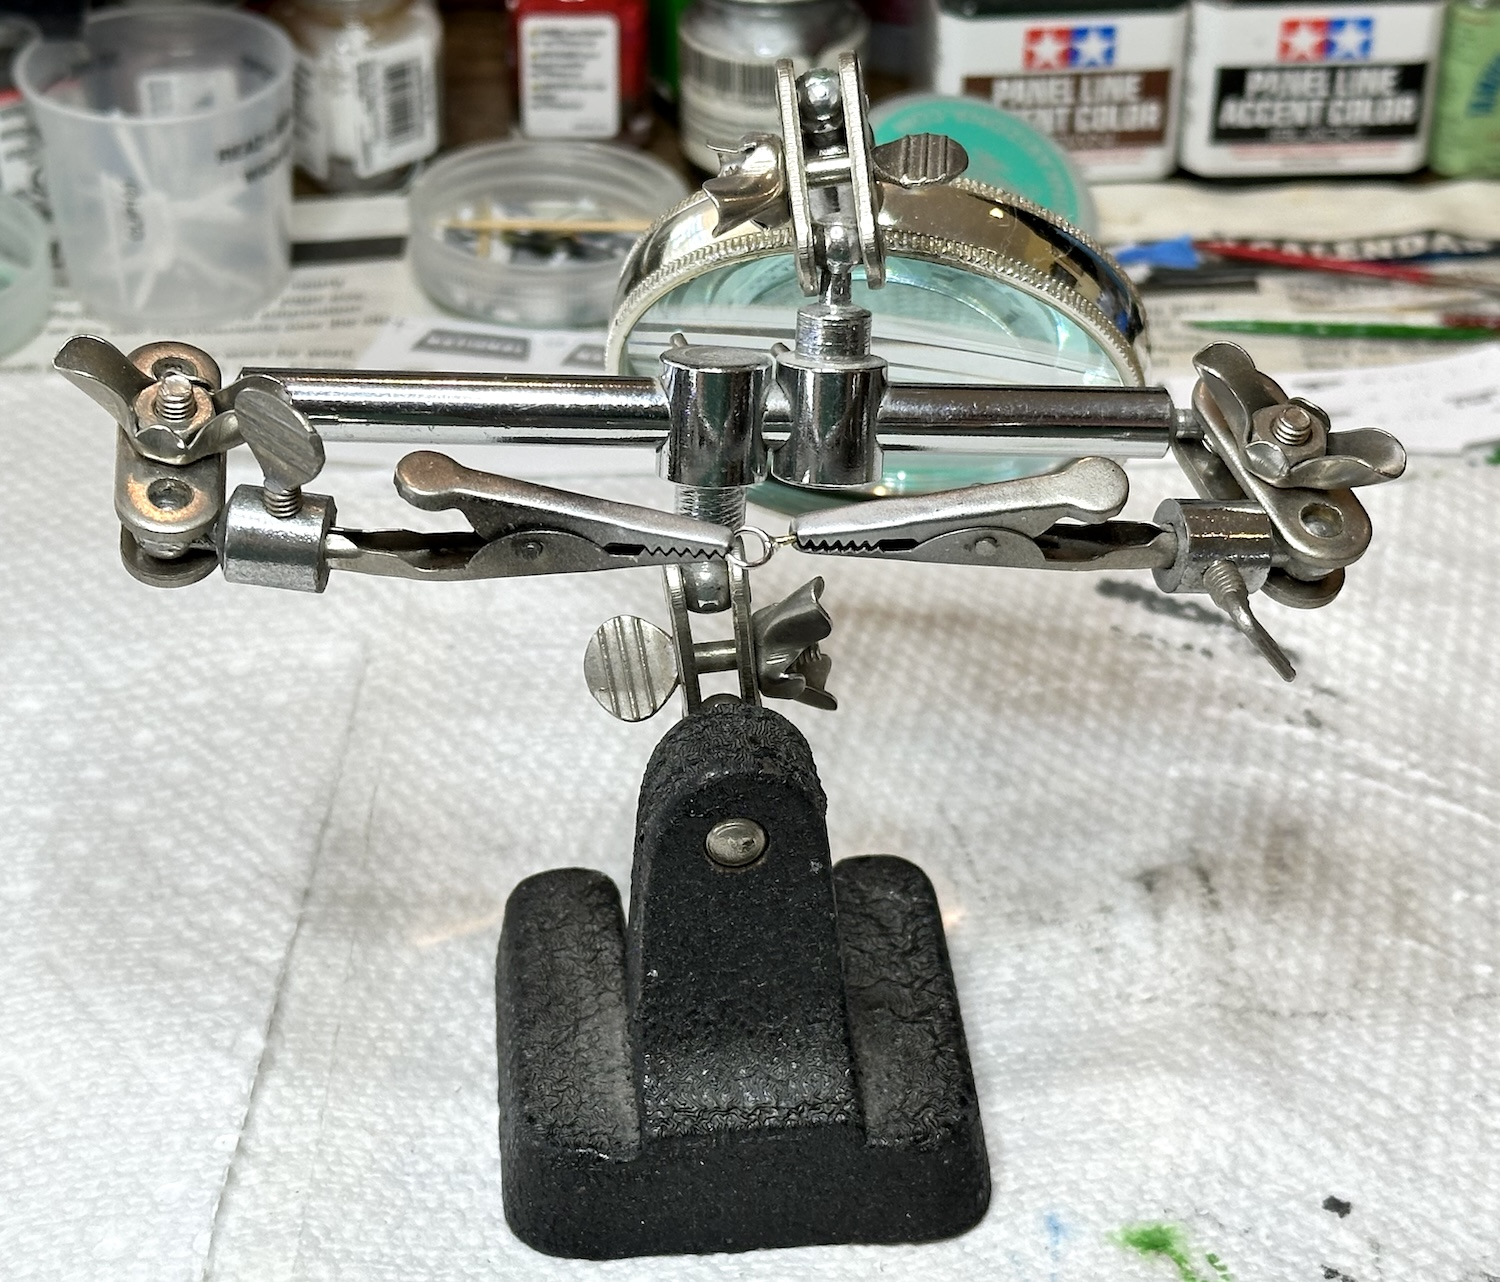
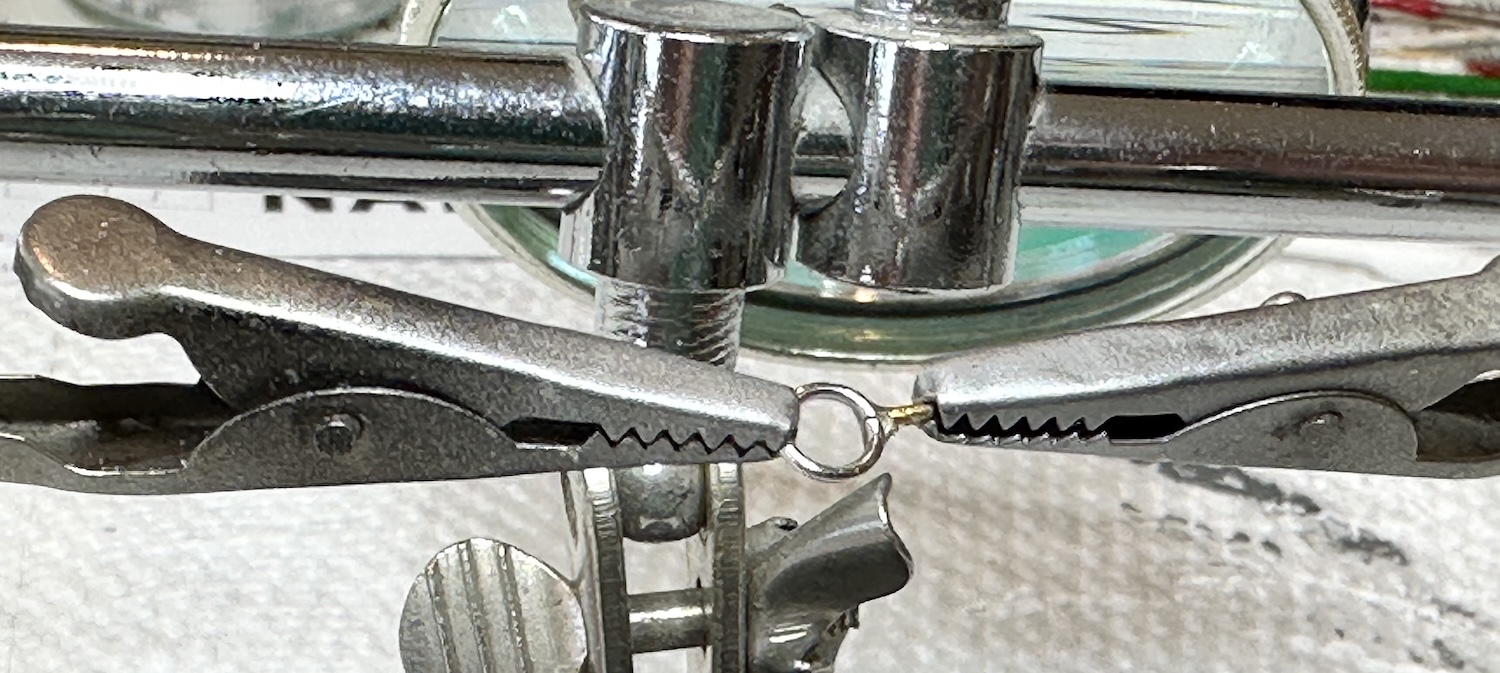
This tool made a difficult job much easier! I could find no references that indicated for sure if this bird had a DF loop or an ADF football. I employed ChatGPT over the course of a week or so trying to find out what was likely in 1942 when this aircraft was delivered to Western. In this time period, many aircraft had the footballs but not all. I found some good pictures of United birds from the same period with the loops. I suspect wartime shortages may have resulted in this United ordered but delivered to Western DC-3 having older equipment. Yes, that is a guess and if I find clear evidence the other way, the loop can be replaced with a football.
The work on the fuselage sides to swap the door to the right from the left came out pretty well. Note the door decal has the hinges toward the nose rather than at the bottom as a C-47 or postwar DC-3 conversion would have had:

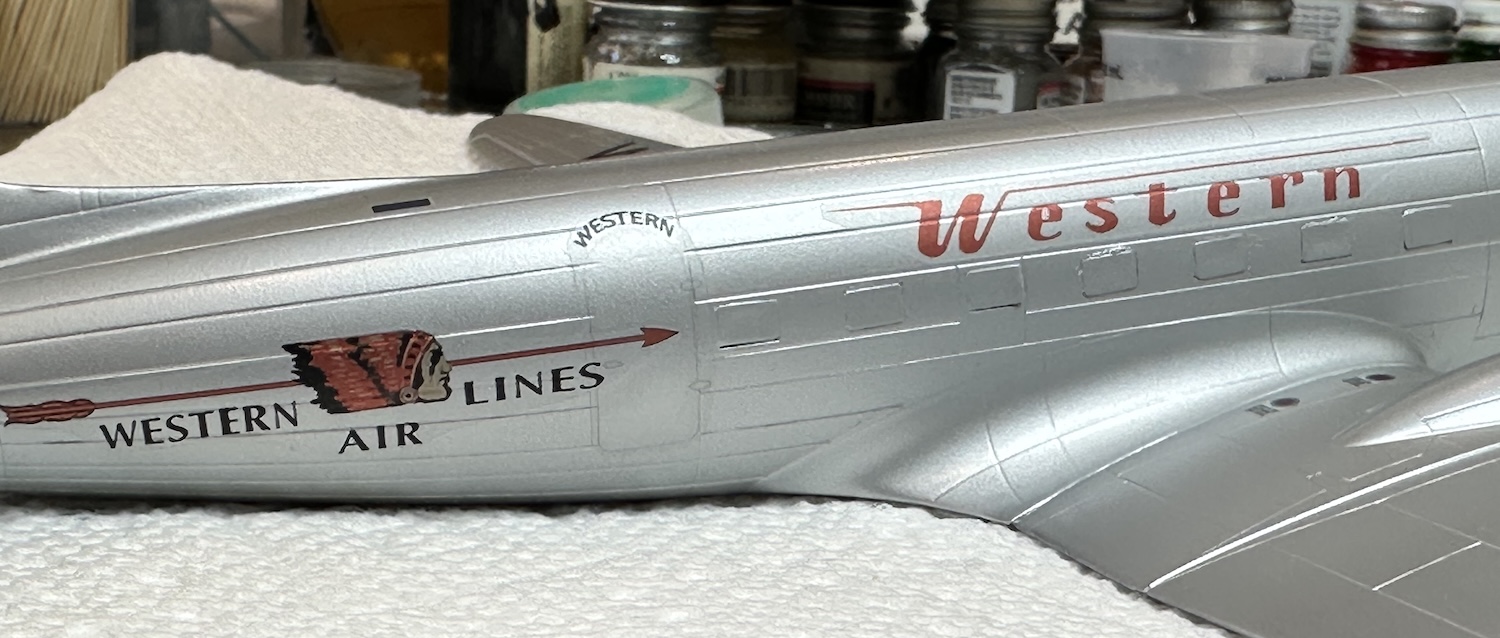
Here it is rigged and with the landing gear added:

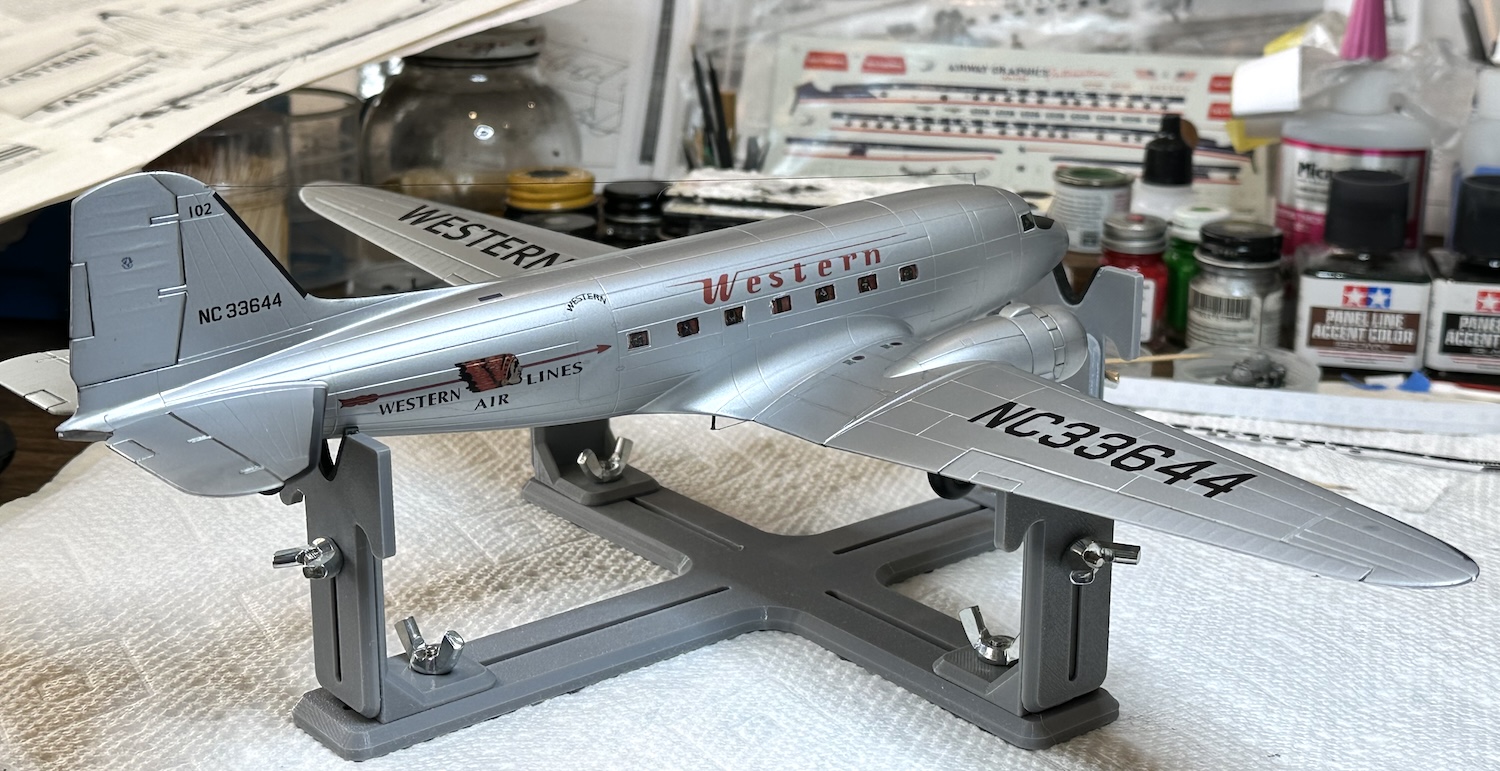

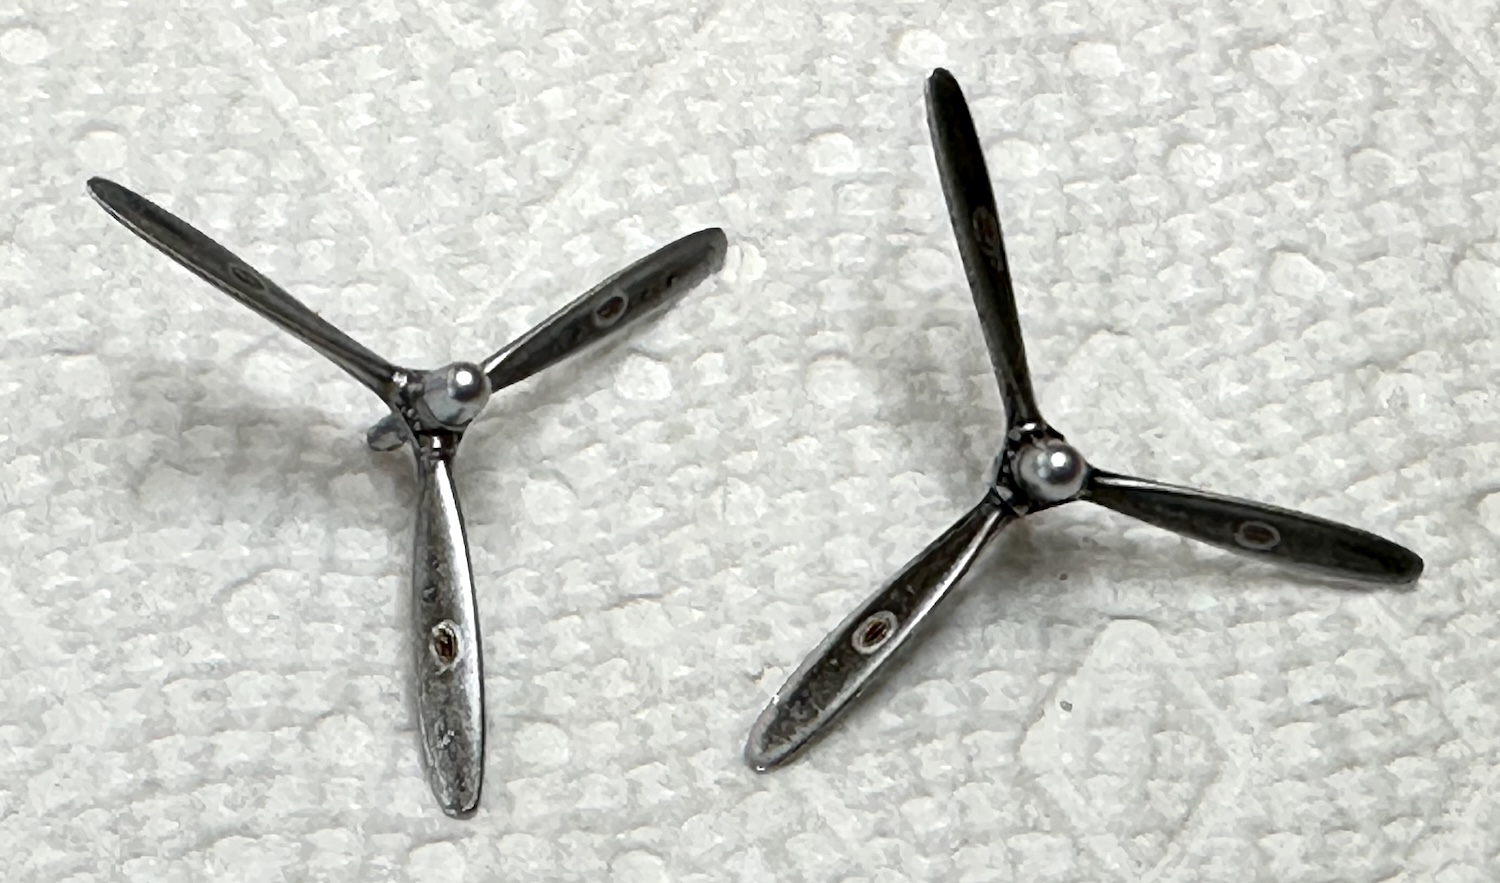
All that is left to do is the propellers & the exhaust streaking. I used a very old rattle can of Tamiya clear gloss and it wrecked the finish on the propellers. That can went into the bin. They are back in the paint shop now:
Paul
1 Like
I found this image on the Northwest Airlines history site and thought it extremely revealing of what the exhaust streaking of a fairly new but well used & well maintained DC-3 looked like. Note the heavier streaking on one side than the other. Also, the stains appear quite dark, not a light to medium grey that I would have expected. I guess those engines must have been fed on a regular diet of avgas & lubricating oil . . .

The caption: 1940 departure of NC25621 from Chicago Midway Airport, taken by J. Sherwin Murphy and provided by the Chicago Historical Society. In the Borden collection at the NWAHC.
Paul