A34 Comet Cruiser Tank - Vespid kit build

Here we are again then. :relaxed:
Following the review that is here and the build log that is (was) here I will continue with the build here.
The work on the kit’s etched metal parts, including the very fiddly sighting vane, is done, but only for now, prior to the start of painting, as there is still the tow cable racking to add to the front plate, which I will do once the hull halves are cemented together.
Apart from that the sprues are empty and the kit is assembled. Having studied a number of wartime photos, I decided this otherwise very nice kit needed some additional details. Photos below show what I think is the configuration of the added stowage, though currently none of it except the bag on the front is fixed in place.
The resin boxes and cans are all from the ‘British AFV Stowage’ set from Dan Taylor Modelworks. The three jerrycans in the rack are from the Bronco plastic ‘Jerry Can and Fuel Drum’ set. The two racks on the back are adapted (made shorter in height) from the Dan Taylor ‘Petrol or Water Carrier Frames’ set. The other stuff, so the two bags, the tarp, rag, and the rolls, are made from A+B putty with masking tape straps. Not sure yet if the rolls on the back will be tied on just like that, or whether to cover most of it over with a tarp cover as I originally planned - that might cover up some of the less good efforts, I quite like the one flapping open near the smaller rack next to the oil can, some of the others not so much.


(Awesome photo upload :smiling_face_with_three_hearts:)

10 Likes

Very nice work. The kit and the work look excellent. I am looking forward to the painting and weathering.

1 Like

These are the kinds of builds I love watching. Incredible job! Can’t wait to see her all done up!

I’m considering adding a Cromwell and Comet to the build list and this just sealed the deal!

1 Like

Thanks guys. Tracks and wheels have been basically painted and now masked off. Photos of that layer. Currently working on trying to make up for the lack of tow cables. The kit came with two cable ends, but no cable, so I used a length of Eureka 0.4mm cable I already had and added it to the ends, in the correct style, which is double cables that loop around the eye end. Then I lost it, two evenings searching, but no sign. So I have one length of cable with ends which will have to do (for a Pz.Kpfw III) Photos seem to show that there should two double cables which each have binding in their central section, presumably where the continuous loop of cable is joined. They then seen to be linked together at one end with a steel ring. As that’s all too complicated for me to reproduce, I’m using what I have and augmenting with more home made cable, to at least make it look like there’s enough cable, and will then bury the two non existent ends under stowage which was going to go there anyway.
Eureka XXL, or someone, need to make a cable set for this, and include the mantlet cover as well (and then get a proper UK stockist…).
Anyway, this is the mess in progress

3 Likes

Very good work.

1 Like

Looking good! I had a similar issue with my build having a piece pull a disappearing act! It was on a strut assembly on the HVSS bogie, so I’ll just chunk a wad of mud on it! :joy:

Very much ready to see this one all done up! I absolutely love the Comet!

1 Like

Matthew, nice to see this build going on here in the new forums. :wink: That PE for the periscopes looks positively daunting let alone that sight on the turret top.! :flushed: Positively marvellous results on this build.

Cheers,
Jan :beers: :tumbler_glass:

1 Like

Definitely like the the buil!
Excellent work!

1 Like

Thanks to those that have commented. I almost lost another part, half a turret hatch that fell off; I had a heart stopping moment when I realised that I hadn’t put it somewhere sensible the day before, but there it was right on the table. Jan, inevitably one of the PE periscope tops has detached itself as well, but that went straight back on. If I can get through the whole build without destroying the sighting vane I will be pleased.

I’ve gone for my usual method of priming and base painting the tracks, wheels and sides before assembling the hull into one piece. The joining surfaces are taped off and the turret gets primed at the same time, with black Mr Surfacer 1500.


I failed to photograph the primed and base coated wheels before they were also taped off and the tracks painted in a basic way. I think I based them with LifeColor Worn Black and then did some lighter bits with Ammo Oilbrushers.

In contemplating how I would attach those bedding rolls etc. on the engine deck I thought I’d better replace the handle tabs with wires while the hull top was still separate; I didn’t bother with the ones that will be under the turret bin.

The rolls were glued in place and then a tarpaulin cover added and wired on to the handles and elsewhere while the putty was still soft - in fact I should have waited for it to be a bit less soft probably as it got a little rough and stretchy. The hull upper and lower were joined together, and a new haversack (I think that’s the correct name) was made to cover one end of the ‘fake’ cable end on the front. The Dan Taylor stowage frames were glued on, along with the first two oil cans.


I had some debate elsewhere about whether the gun travel lock should be there if the single piece exhaust cowl is in place, since it could not be used, but it seems that the lock was already designed and fitted before the whole issue of the exhaust cowls came up, and there is a very clear photo showing a single cowl Comet with the travel lock in place.
Primed:


Also in a discussion “elsewhere”, as a result of Vespid’s release of the new iteration of this kit, the Mk Ib, it was pointed out that the rectangular plate on the turret bin was only fitted by the Irish Army to their post war Comets. Once you see these things it is hard to unsee them, so I knew I had to remove that plate, fortunately not too hard to do.


The green paint is AK Real Colors SCC15 Olive Drab.
The tarpaulin and mantlet cover have been based in Tamiya Khaki.


These photos and summary belie the fact that I spent all week sanding and recoating the tarpaulin to remove various blemishes that were impossible to see in either the original grey putty colour or the black primer, until the khaki was on which made everything highly visible.
Today I coated the decal areas with Klear, and have now added all the decals; in the photos they have yet to be overcoated with Klear. The decals went on OK, being fairly thick and all the surfaces dead flat - certainly no flopping around or folding over as some very thin ones can do. A few minor issues are apparent: there is a small sliver of white on the left and bottom edges of the red 52 patches, I think due to misregistration of the printing.

The word “Cobra” might be a little small but at least fits above the T335042 on the front plate (“Cobra” should be slightly to the left, not dead centre). “Therese” on the other hand is a bit too big, bigger than “Cobra” when it should be about the same size; I think the original may have had accents over the Es, but it is quite hard to see, while this decal is quite prominent.

Looking at the above photo I have doubts over whether the numbers were applied to the turret sides, although it does look as if all markings have perhaps been covered over, certainly they are quite obscured by a mix of dry and wet dust and mud, so it could be that they are there. I added them anyway. As to the Allied white star on the turret bin, I guess that it was there has been deduced from other tanks in the same regiment.

3 Likes

Few quick photos of the crew progress, mostly done, some details to do still.


4 Likes

Looking really nice!

1 Like

Decided to have a break from the less than stunning Airfix Tiger and pick up the Vespid Comet again, which is really in a different league.
Decided before Xmas that I wasn’t happy with my first attempt at the tarpaulin, so broke it off and tried again. This time I tried to give it some fabric texture and pressed the cord tie impressions under cling film to try to get a more realistic shape. Also allowed the Magic Sculp to set a little more to help avoid any ragged edges.

I think it is better this time, this is it part painted.

Turret has had some detail painting and a first pin lining.

4 Likes

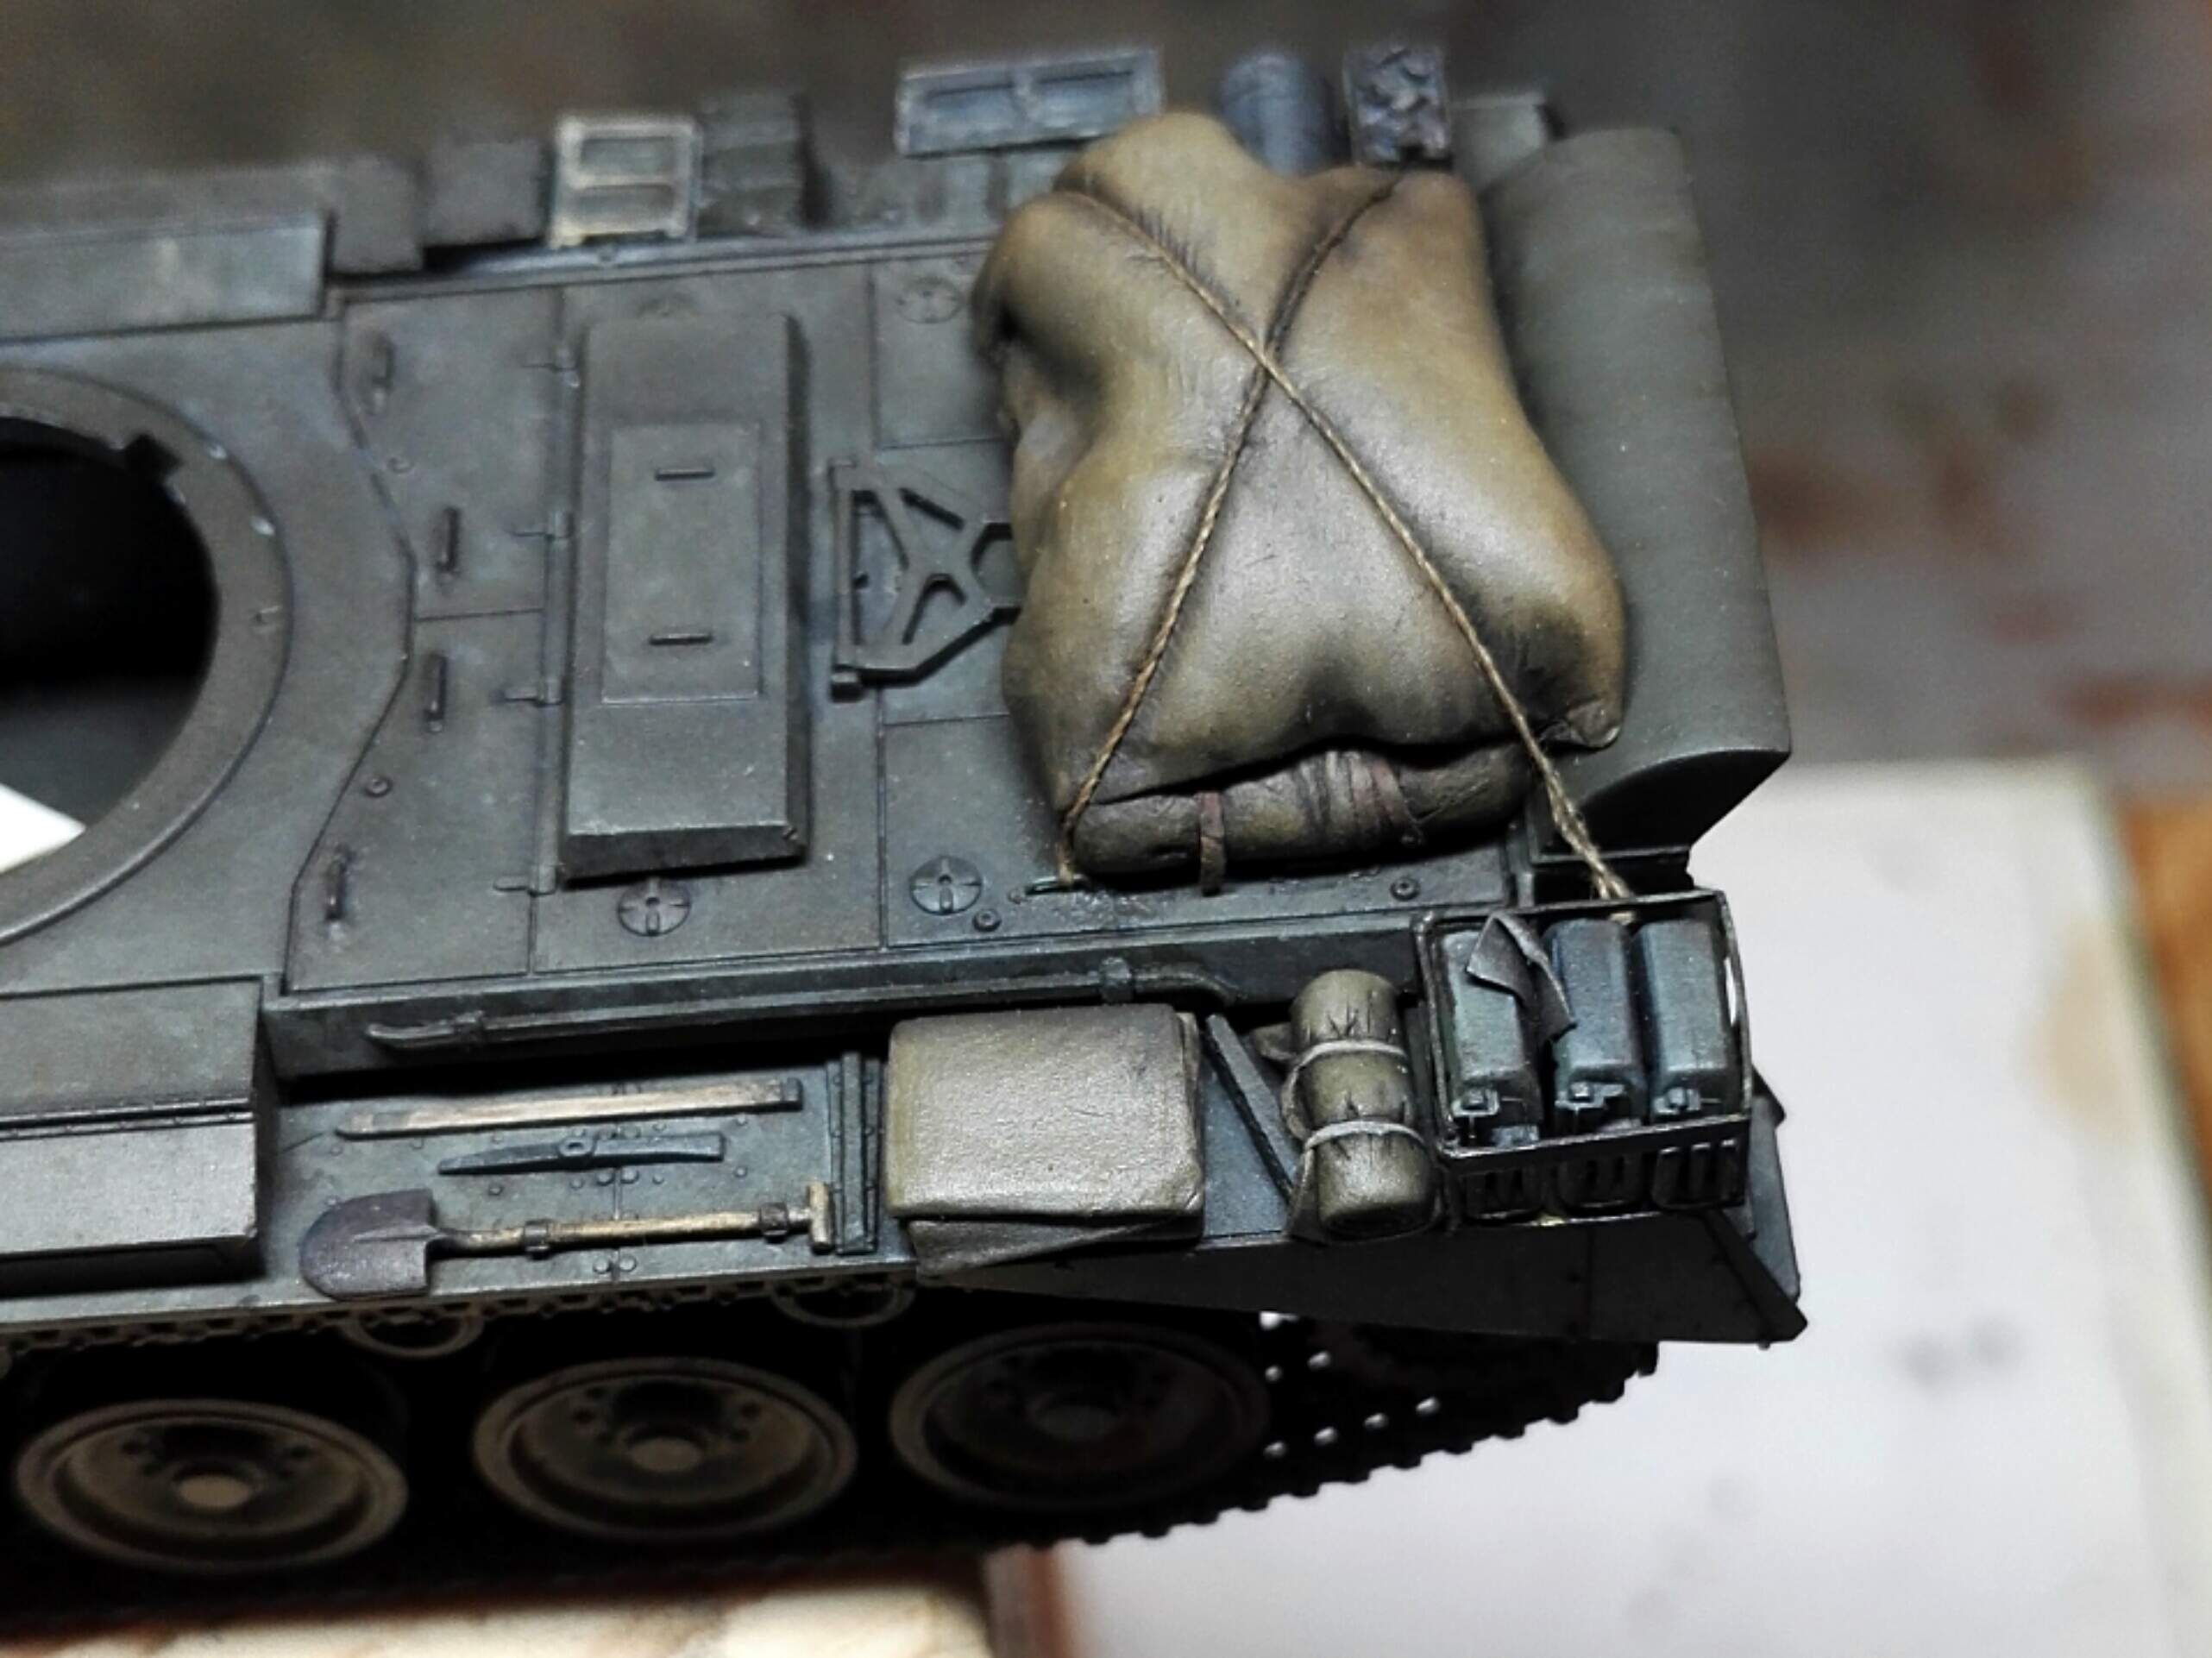
That new stowage has been glued to the deck and tied down with polyester thread. Hopefully I can get it and the other bits matted down towards the end.

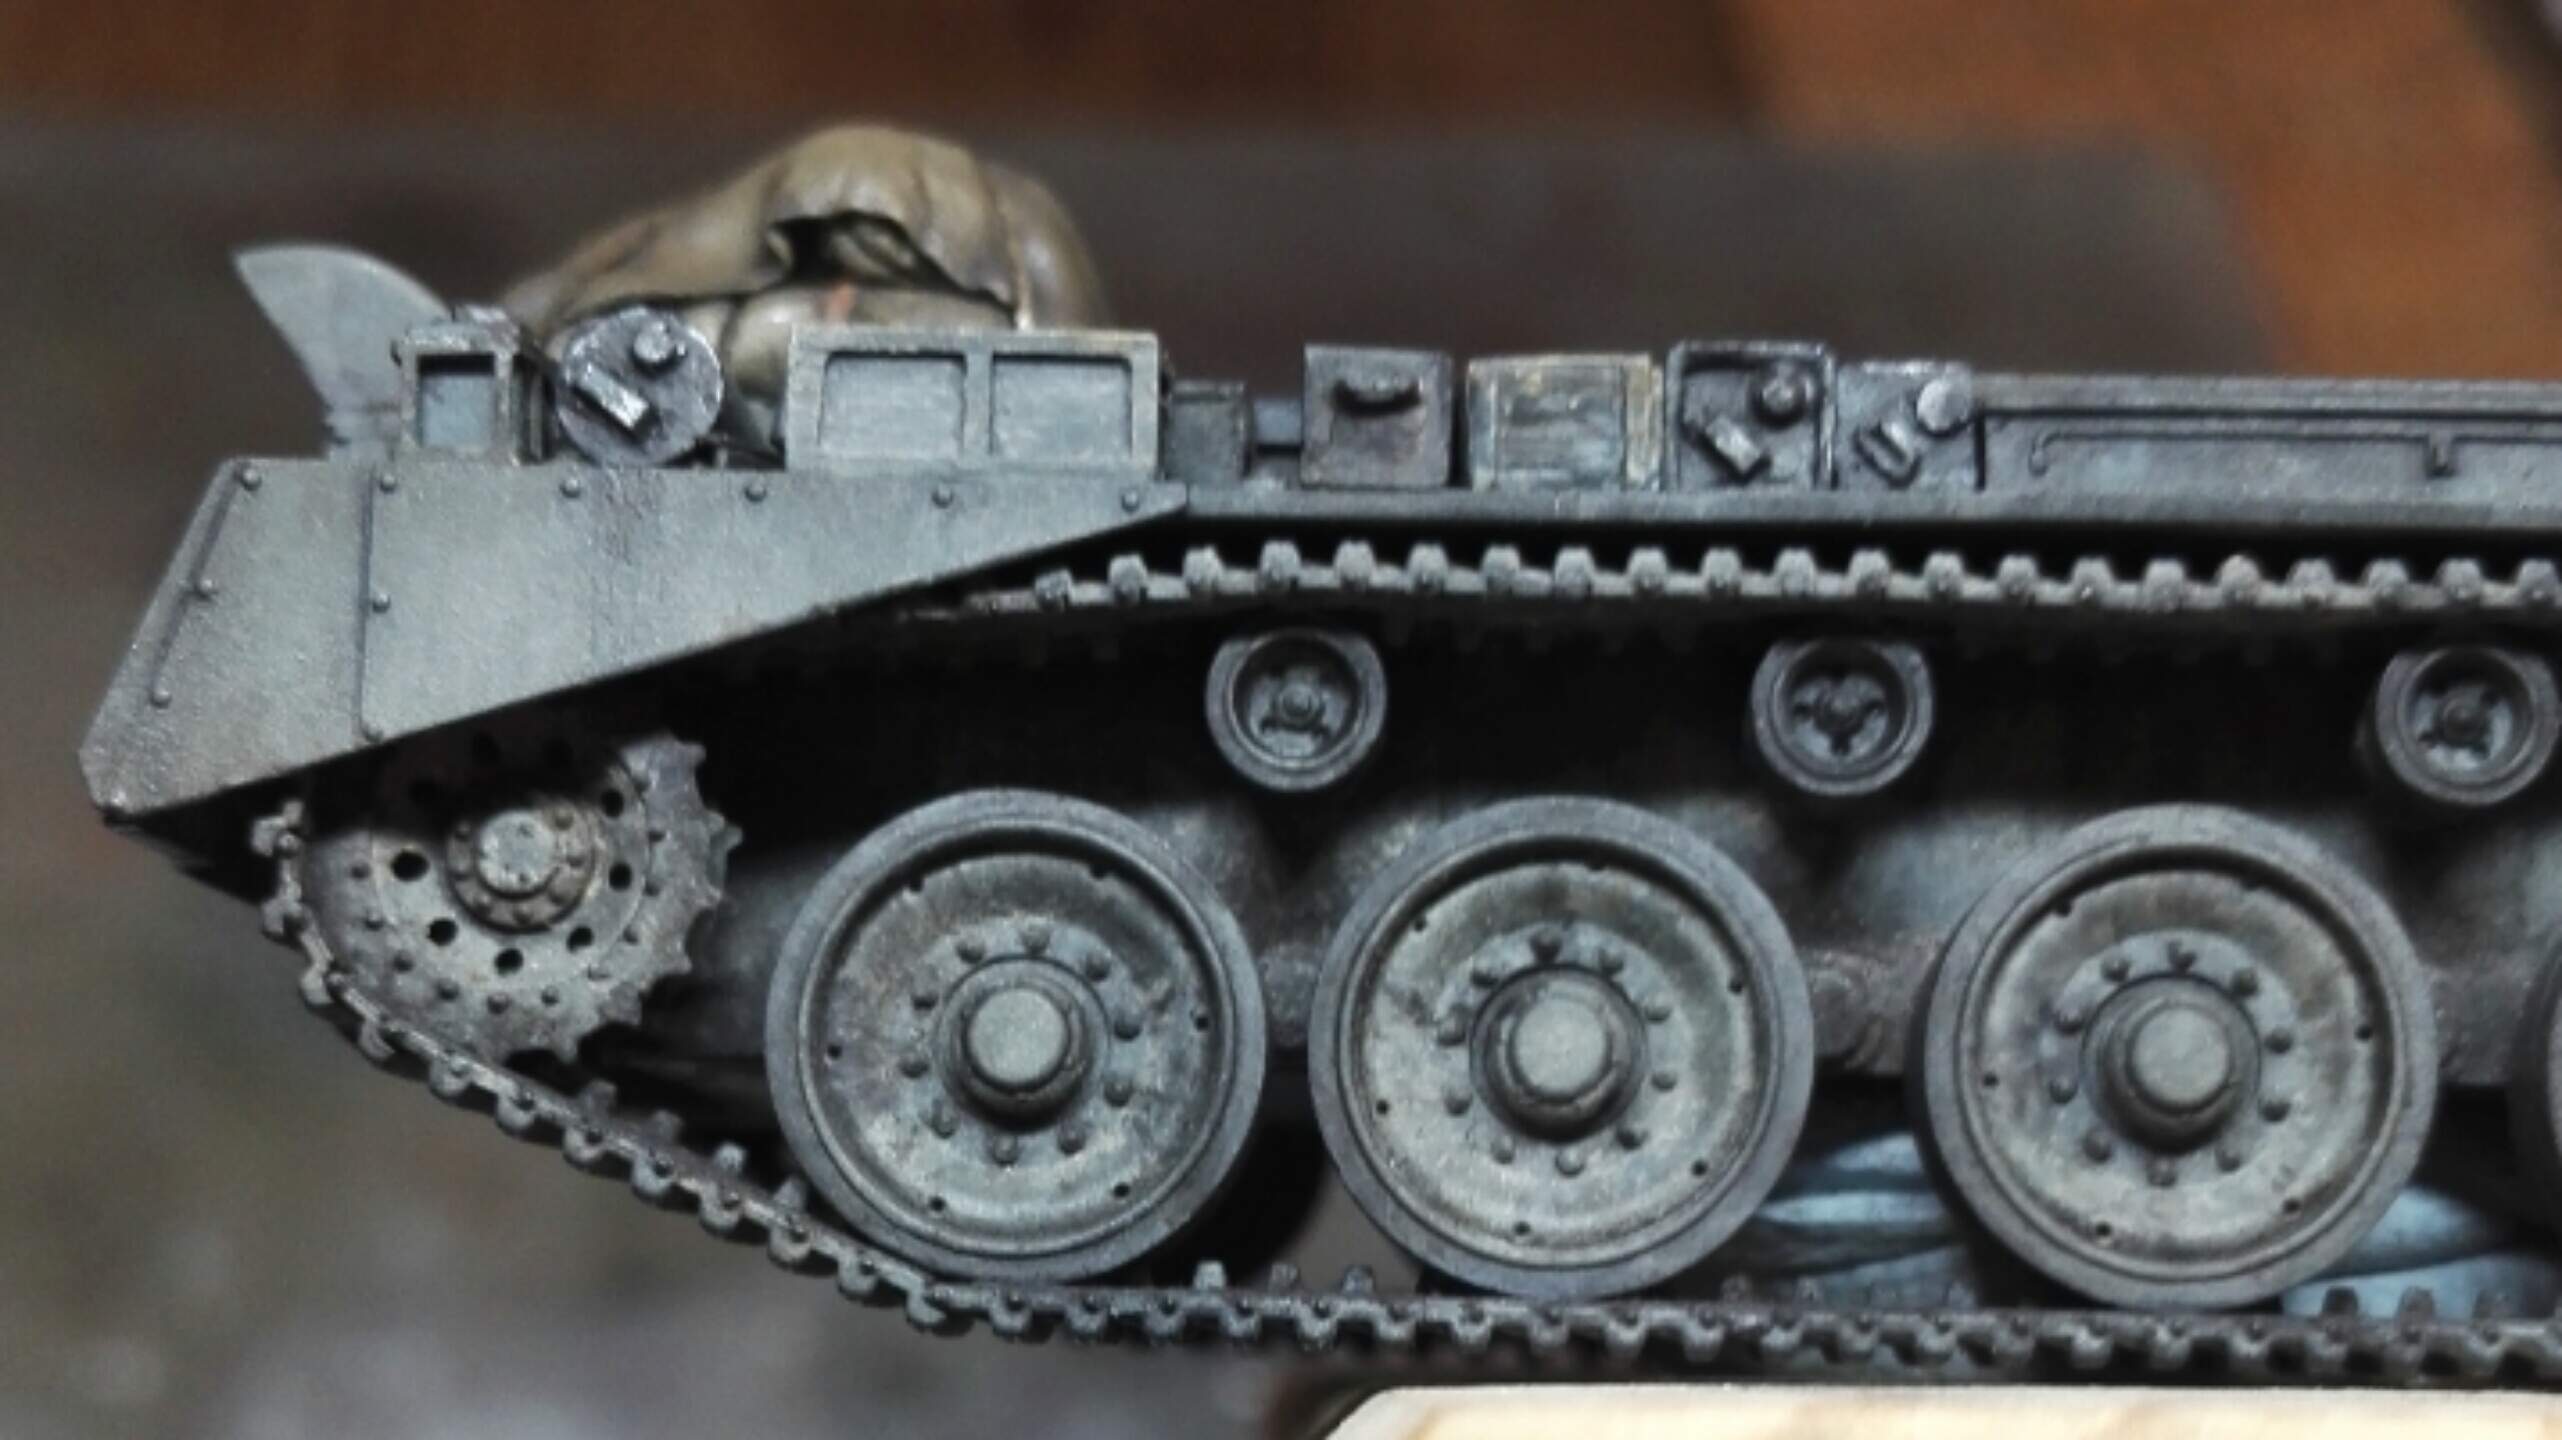
The weathering of the tracks, wheels and hull sides occupied me this week, I think it’s mostly done, just going to do a bit of light grey highlighting on worn track treads when I get the right paint.

The driver is in place (this was before further track weathering)

… and the turret crew are going in too - the loader is in place while the commander waits in the background for the epoxy glue to set. Perhaps the commander should really be the one with the bins, but this is the way round that they fit best.

1 Like

So this is now finished, instead of posting any more here, there are photos on the Armorama site… Right here

1 Like