No arm twisting required. Unlike Gino, I don’t have any opinions on how you should build your own model. I just present the facts and leave it to everyone to decide on their own whether or not the juice is worth the squeeze. In the case of the shot trap armor though, if you can see it on a grainy photograph, you’ll definitely notice its absence on your kit.
Speaking of which, there is no doubt - Pawel’s build reviews are the best out there. bar none.
His M2A2 article was available when I started my build in '08 (the one I linked to) but I was absolutely unaware of it. I actually started it in Iraq, hence my statement that I had no putty available to me at the start of the build.
My build photos had actually shown those armor plates in the rear that he mentions. Our builds were very close in a lot of areas, but differed in others - primarily because we built two vastly different versions of the same vehicle. Several features on the front of the hull that Pawel caught with his eagle eye are not even visible on mine due to the ERA blocks. And some of the details I mention were not in his article simply because he worked from photographs and had no way of seeing them, i.e. bolts along the upper inside portion of the side armor. I had a slight advantage as I had two of these parked about 1/4 mile from my hooch on the US side of the COP. (I lived on the Iraqi side) You have to climb up on top to even see them.
So if any of you readers can combine his excellent article with the very few additions in my own build, you’ll have quite the build. If you choose. ![]()
@HeavyArty, Gino, thanks for the links. I had completely forgotten about Vodnik having the Bradley reference as well as the Abrams. I checked out the one on here as well to see what might be helpful.
@18bravo, thanks in advance for your assist with this project. Seeing how I have never even been on a Bradley, let alone even very close to one, I don’t know all the nuances of the family, just a few major ones. I’ll pick and choose any upgrades. I’m sure that I’m looking right at those shot trap armor increases, and not knowing what I am seeing.
Gino helped me out greatly with my M2A2 build. If anyone knows anything about the Bradley, is Gino. ![]()
Whatever makes you happy.
I could care less how he builds it. Its his model. I am merely providing info and educated opinions. Unlike you, I have no preconceived notions of how/what people are thinking.
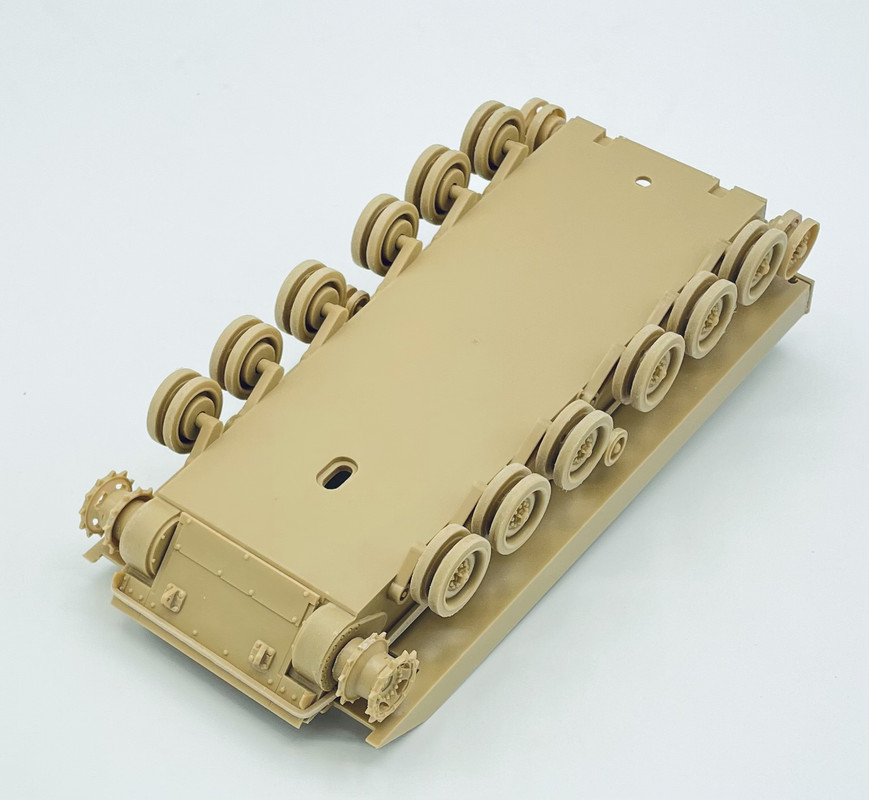
So here we go, construction has begun! As usual with most armor kits, this one started with the suspension and running gear. I have not yet closed up the motorization holes, but that is easy to do at this point. All the road wheels, the sprockets, and idler wheels are all removable due to their poly caps. I just put ‘em all on for this photo.
Using Vodnik’s site as reference, I started dealing with the biggest goof on this kit in my eyes, the shape of the rear hull plate and cut off the box like side portions of that part.
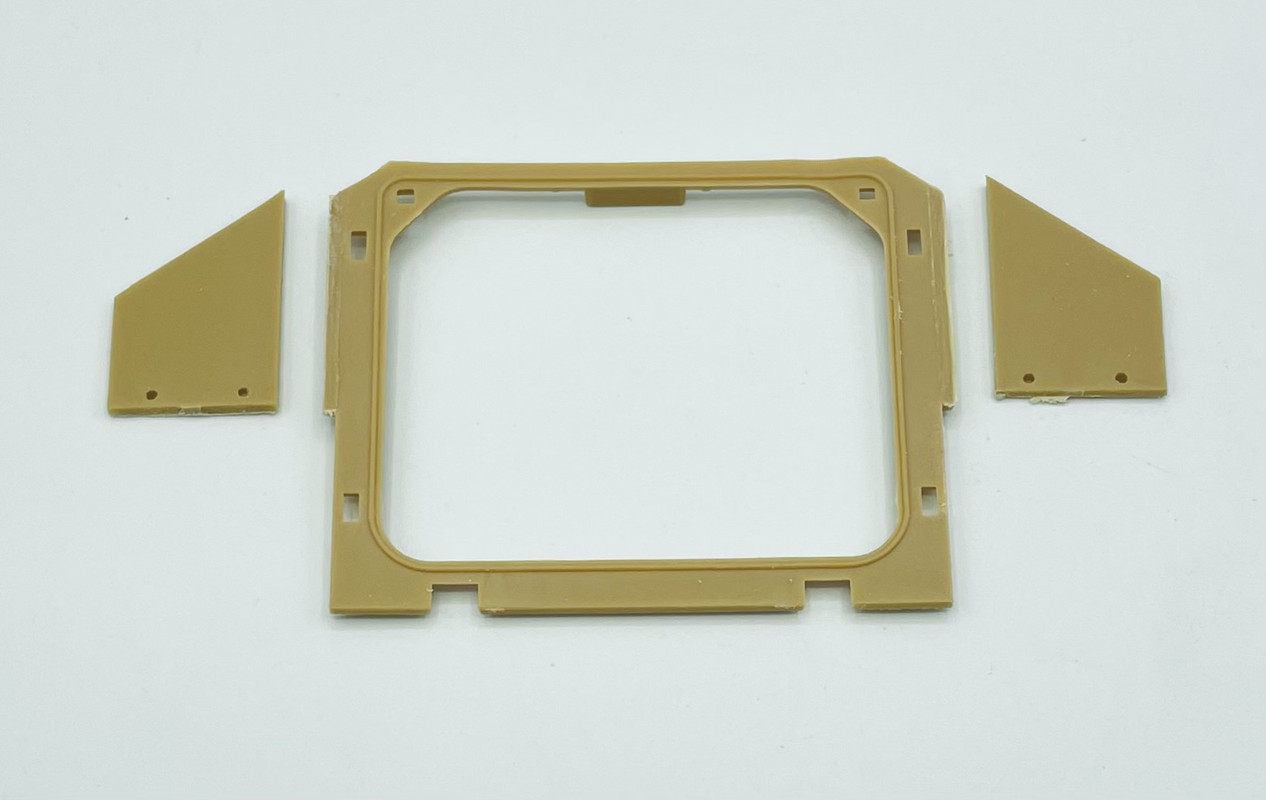
A bit of sanding and other trim work on the upper hull and I had the area looking much more accurate. And again following Vodnik’s guidance, I scratched up the rear spaced armor plates that go on that area.
More to come in a few days….
Looking great. Nice job on the rear plate.
Thanks Gino. It was not as difficult to do as worried it might have been. And I know that I’ll have to do it again someday for my Tamiya ‘91 Gulf War M2A2 kit.
Did the original A0 or A1 Bradleys have those box extensions on the rear plate? Or was that an all around goof by Tamiya that was copied by Academy?
No, all Bradley’s had the flat rear plate. Tamiya screwed that up, and copied by Academy, as you said.

i neglected to fix the back plate issue on my M2A2 build, but I’m too far into the build to turn back and fix it, not without throwing that build up for a loop. Might have to get a saw in there and make some corrective surgery on the rear of my build.
Understandable. That is certainly something that needs to be addressed before that rear plate is attached to the hull, or it will then become a much bigger challenge.
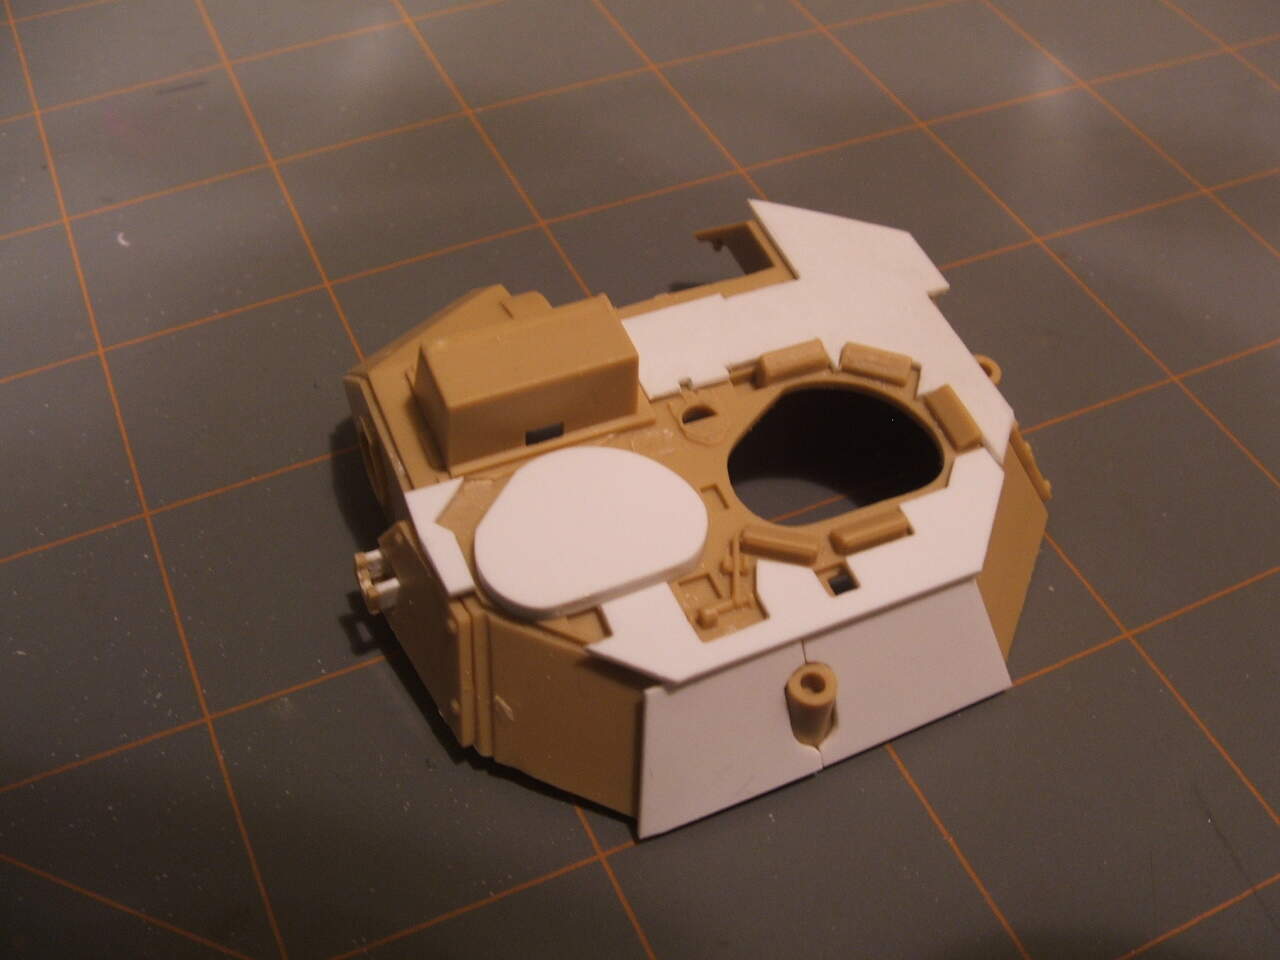
Actually, I tried another correction method. As long as you left the top and bottom hulls separate (as Tamiya and Academy allow), you can do this one easily. I have gone back and corrected all my earlier Tamiya/Academy Bradley builds this way.
M2/M3 Bradley Reference - Easy Tamiya/Academy Rear Hull Fix
I plan to fix any future builds how Stik has done above.
That’s actually more doable. I will check if I can do that on my build. I haven’t started with the interior, so adding the flat plates and moding the top of the hull should be an easy fix. ![]()
Gino, your fix does look fairly simple to pull off as well. I was following the Vodnik fix as a guide. Yours looks to use a bit less surgery, and mostly on the hull top.
It is simpler, but not as accurate since the bottom of the openings between the rear hull and plates that mount the boxes aren’t open. Once painted, you can’t really see through that area though, so all is good. The only cutting/sanding is on the little wings on the upper hull. For the lower, you only remove a couple triangle supports just inside the lower hull and add the new rear side walls, then paint it all to match.
I managed to find some of those old build photos from that thread without having to pay the Photobucket ransom. This one won’t help for your build, but I’m on the right track.
This one is back on deck also. I will have some updates in the next few days.
I’ll be looking forward to it.
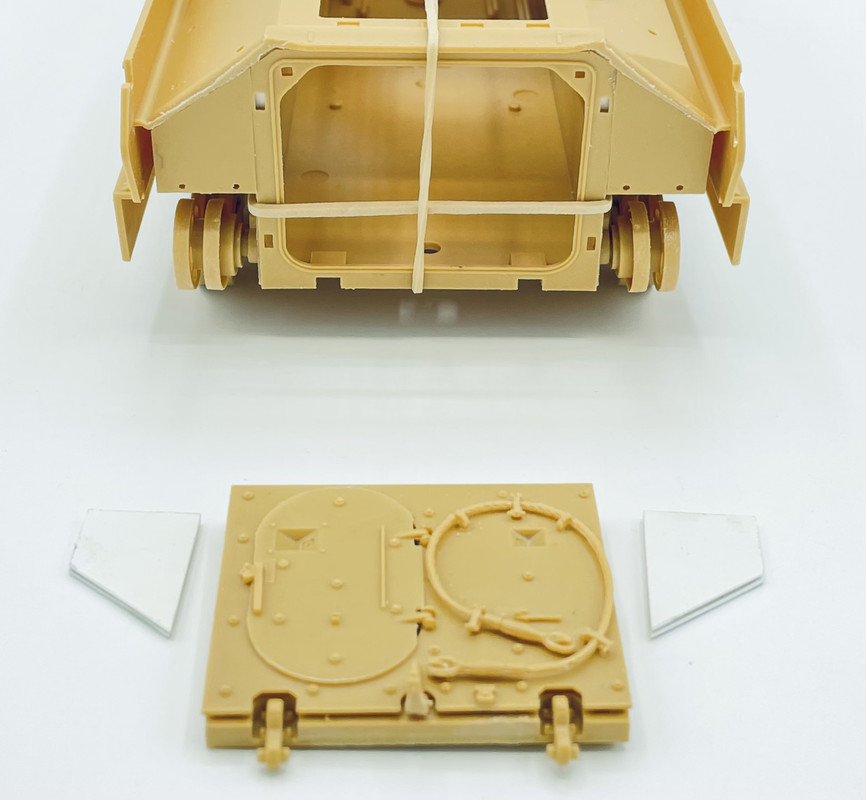
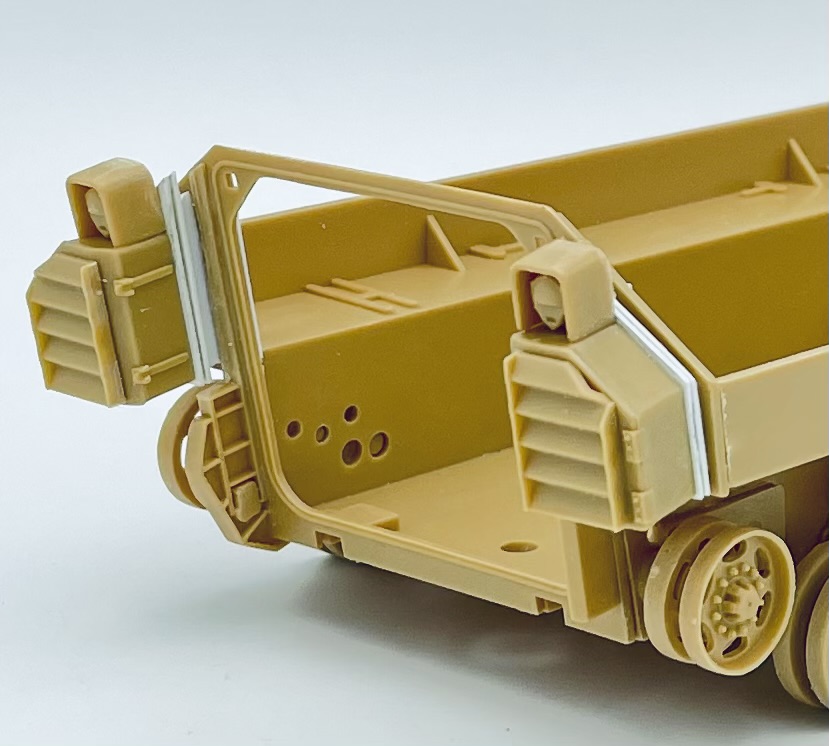
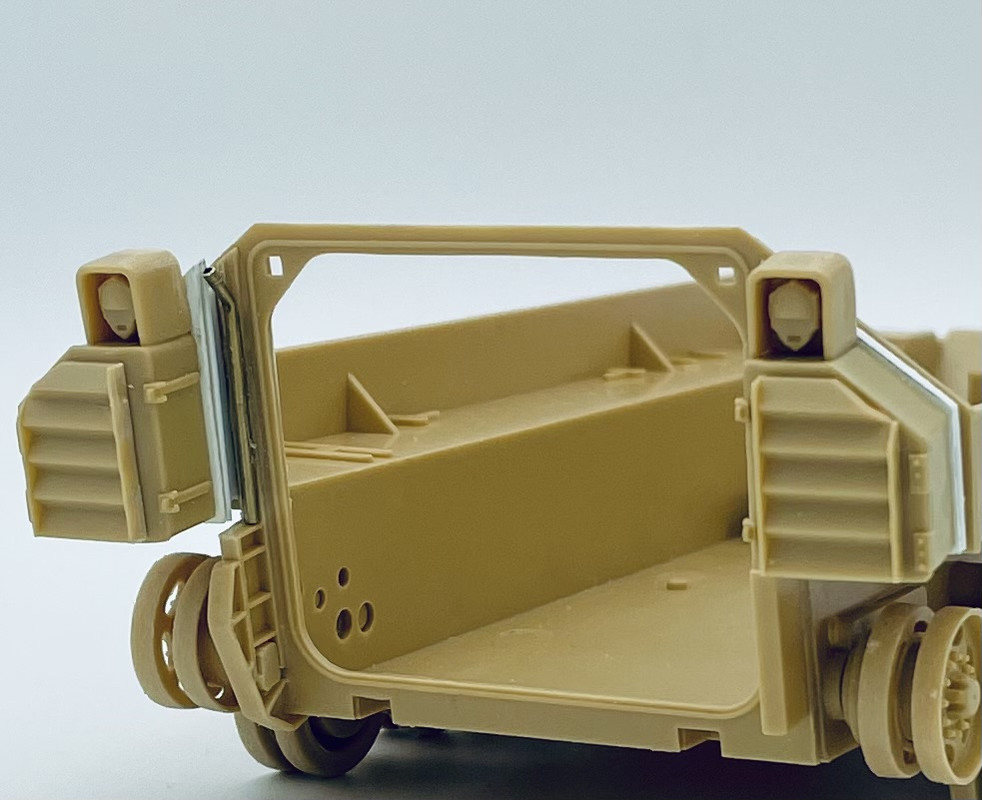
After being repeatedly sidelined for the past year, I have gotten this one going again. I followed Vodnik’s mods on the rear plate area, adding the spaced armor plates behind the stowage bins, and the angled spacers behind those onto the hull
Next I added some pipes (bilge pump drains?) onto each side of the ramp using some brass tubing
Lastly I glued the troop ramp into place

I’ve also been adding some of the small bits onto the upper hull
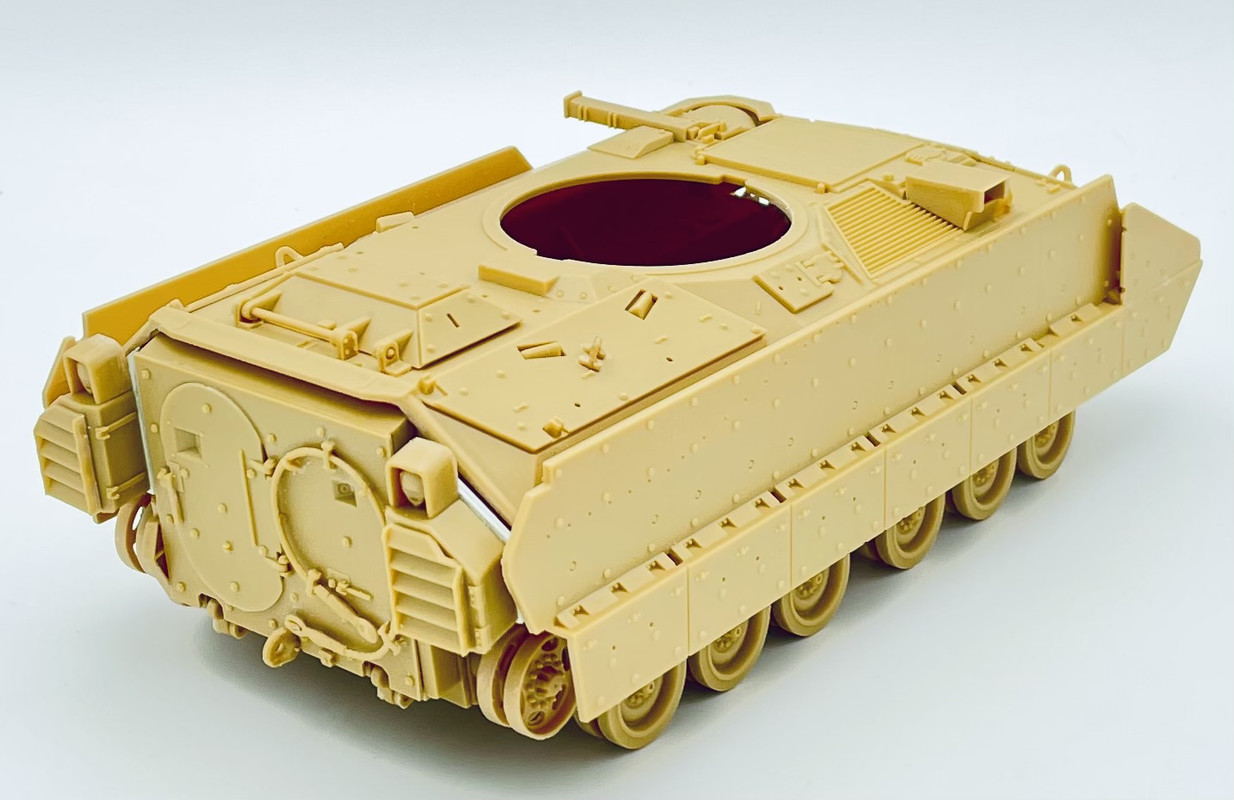
More to come in a few days…
The double armor plated are legit. That detail gets missed by a lot of folks.