Airbrush practice

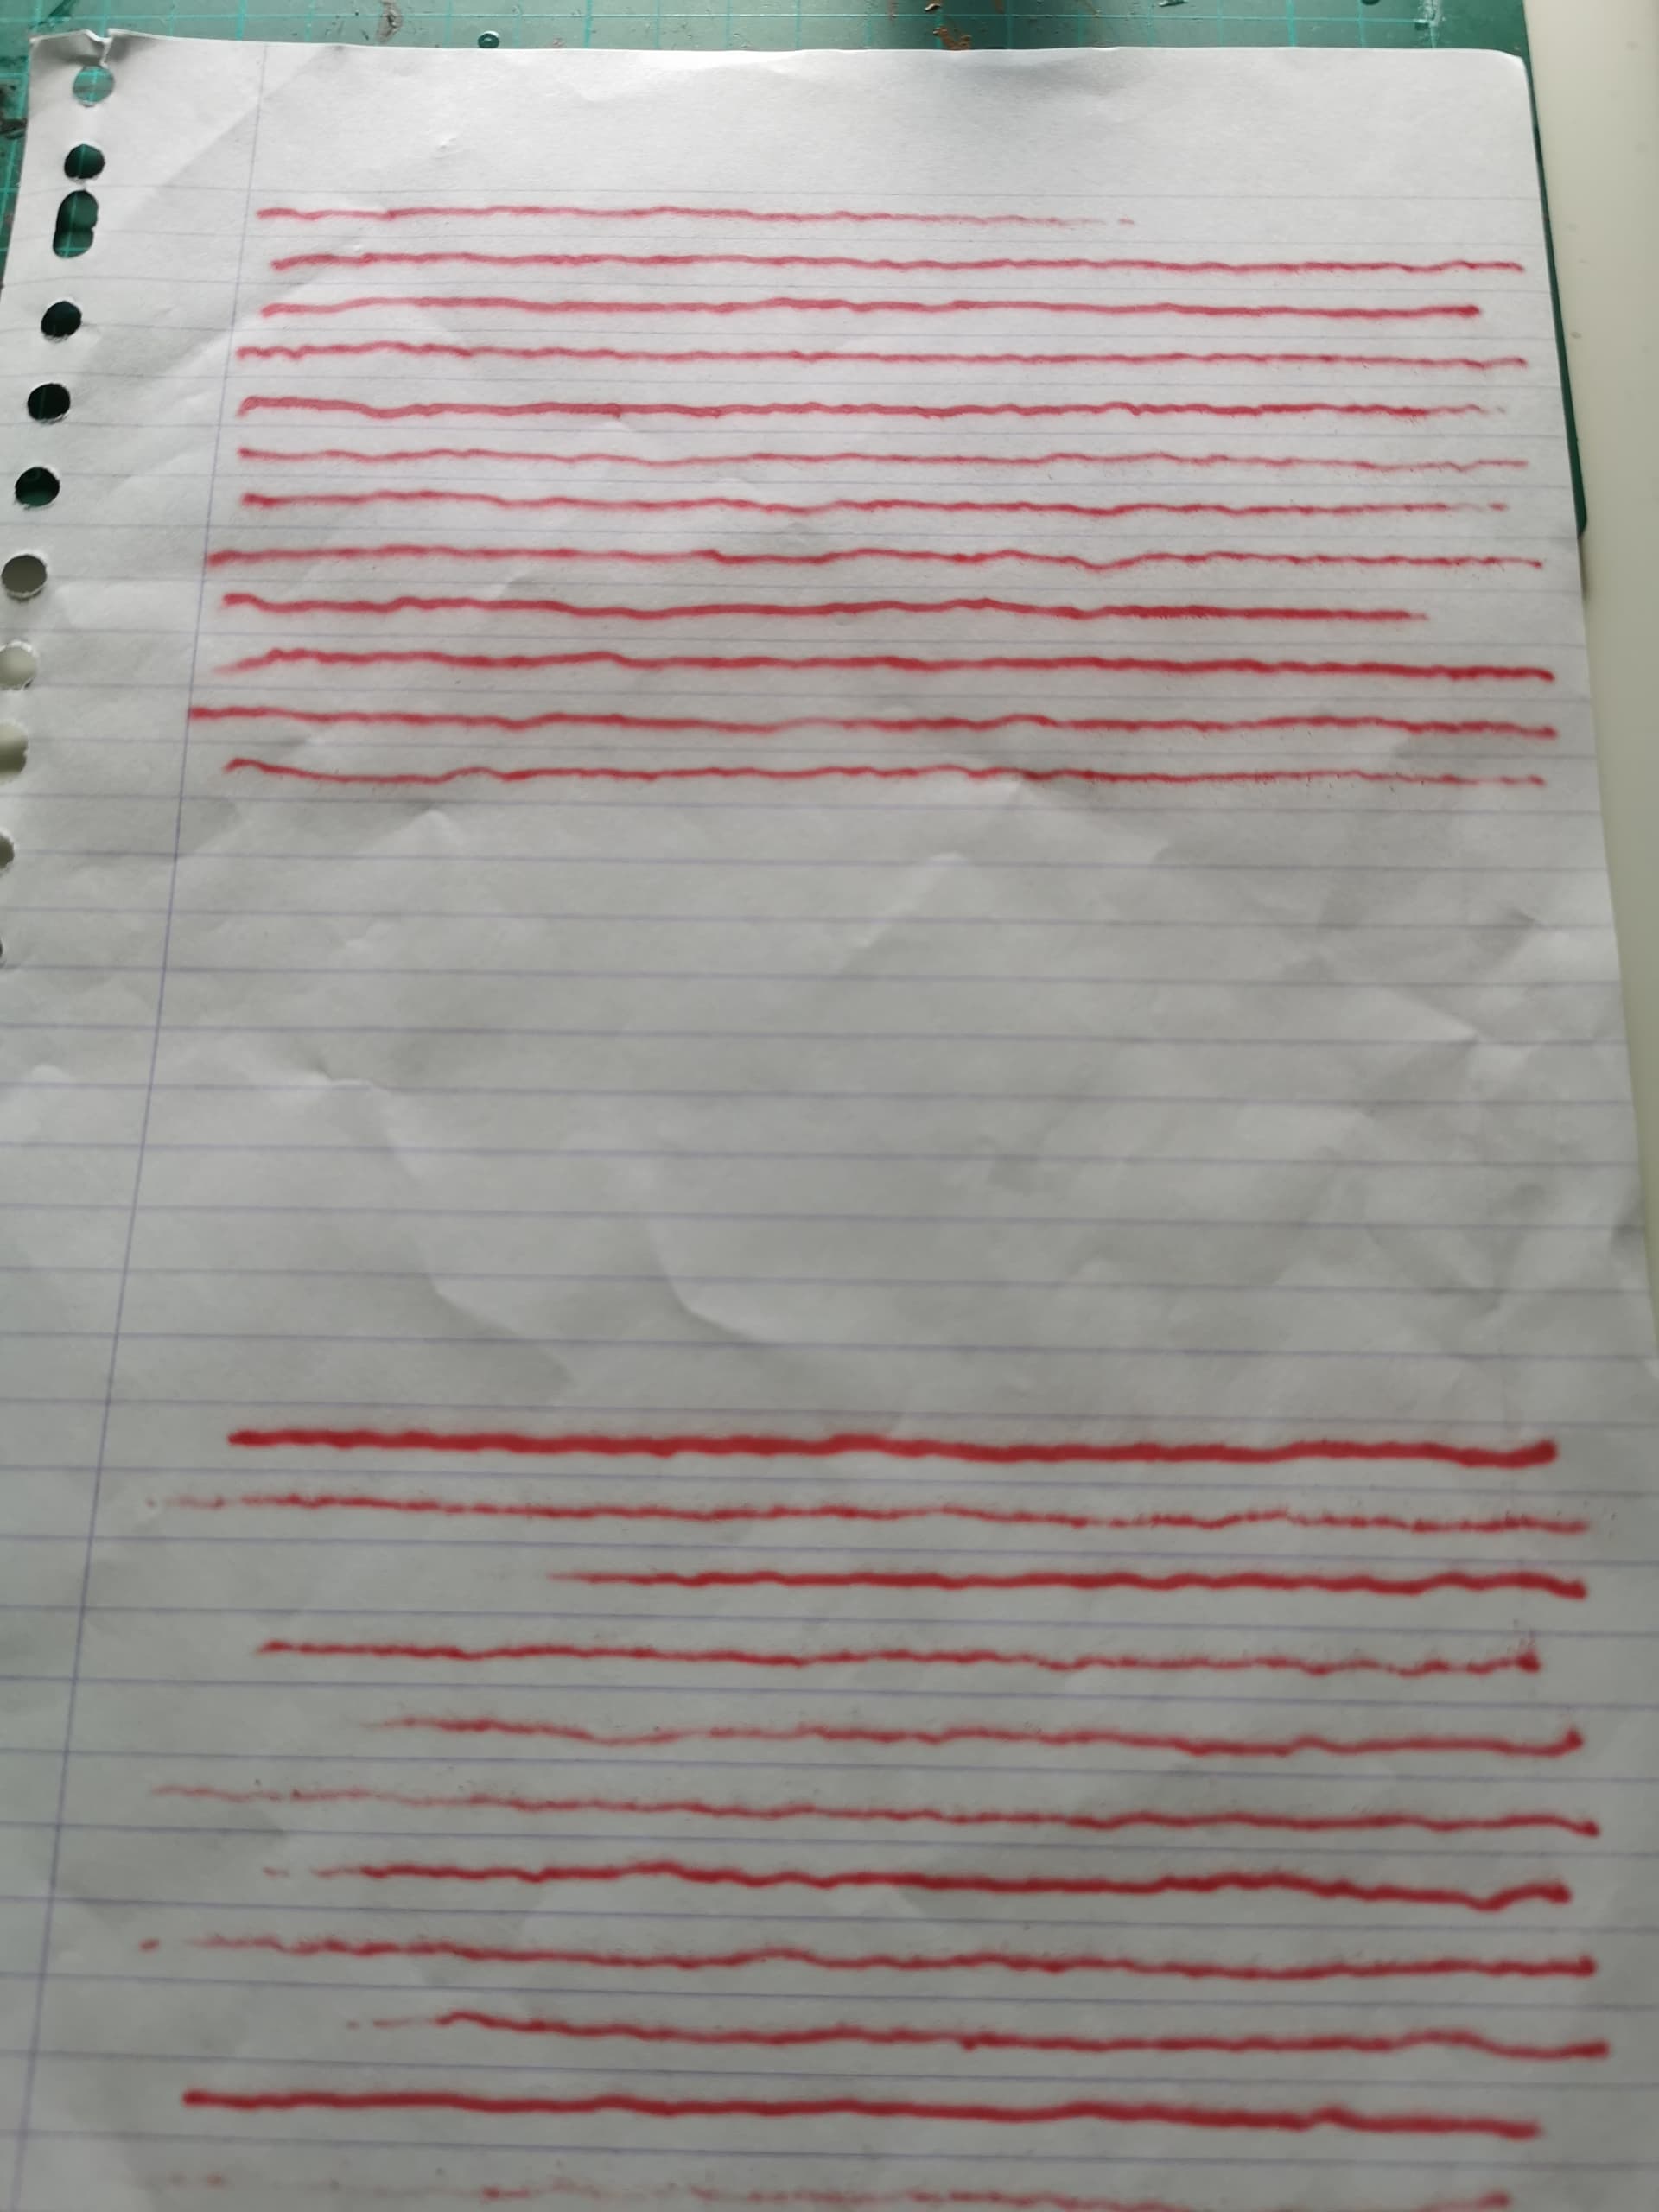
Today I have been practicing with my airbrushes and here are the results:


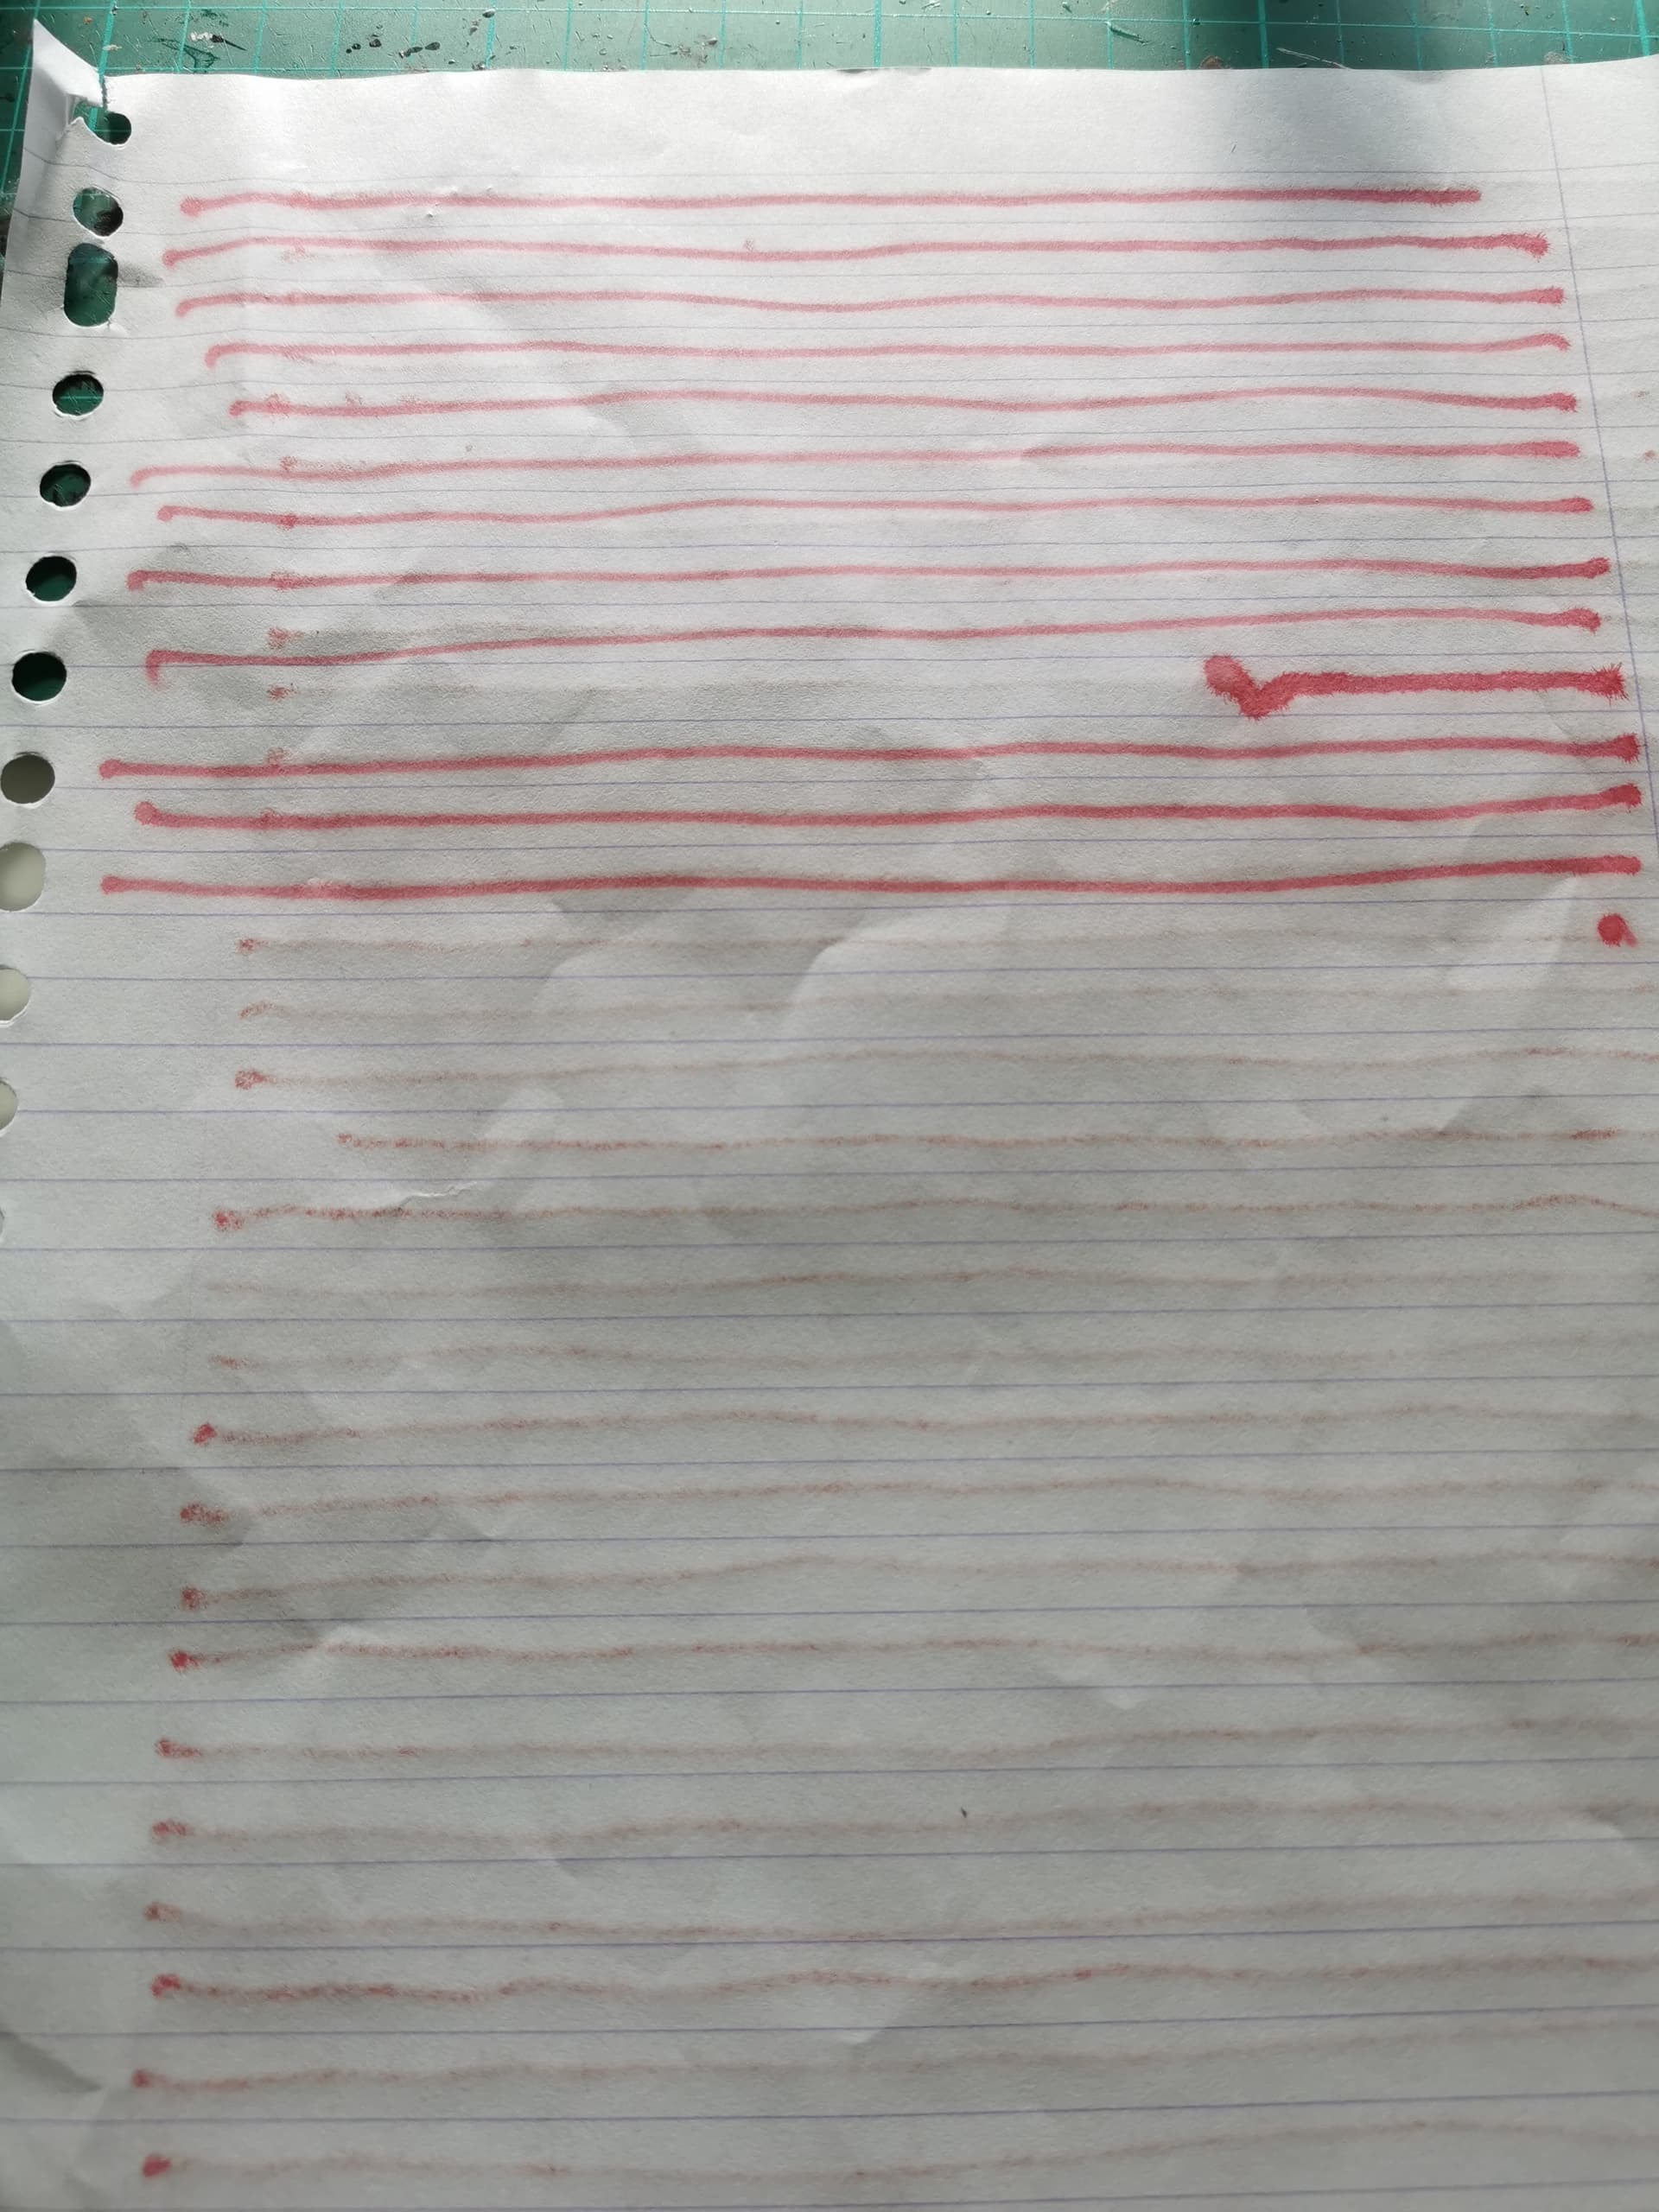
Unfortunately, I have a major problem with my new Harder en Steenbeck airbrush.
It shoots paint of any other fluid that’s in the paint cup when you are not pulling back on the trigger.
And it is a double action gravity feed airbrush.
I did check the instruction manual one more time, and I saw that I was forgotten one more thing that was in the instructions:
Step number six, while inserting the needle back into the airbrush I didn’t press down on the trigger.
And I’m wondering if that might be causing the problem. And if it has done any damage to the airbrush and so what damage then?
I’m hoping with this one single mistake I can think of, didn’t destroy my new piece of kit.
Because it was very expensive.
About on the end of the practicing I have done the same excercises from the same manual with my Fengda gravity feed airbrush and that did work better without the same trouble.
But there it seemed that the paint dried to fast on the needle and it was splattering? paint.
But, I was pleased with that I did come so far with the Fengda airbrush and that I could even practice.
I’m sorry that I’m placing so many topics on airbrushing and with my problems, for people that have read multiple topics about my airbrushing and tried to help me out.
But I’m just finding it difficult and the learning process is a long and slow one, so I hope you still want to help me out.
Thank you in advance, it is much appreciated.

I do not believe you damaged your airbrush. If the air is flowing, and the needle is not seated against the nozzle , paint will flow. If your airbrush is spraying paint without pulling pulling back it is probably because the needle is not seated against the nozzle when the trigger is forward. With the trigger in the most forward position, just loosen the nut holding the needle, ease the needle forward until it seats against the nozzle and you should be OK.
The drying paint on the needle tip is a common issue with acrylic paint. They sell paint acrylic paint retarder that slows the drying time and helps reduce “tip dry”. Try a few drops in with the paint in your airbrush paint bowl should help. Some people use a Q-tip to gently clean the tip while working.

Thank you.
Hearing that I’ve probably not damaged my airbrush is a relieve for me.
I was afraid that that one forgotten step just had ruined my airbrush.
Because I didn’t really know what pressing the trigger while inserting the needle back into the airbrush really did.
What do you suggest to check if the needle is properly sitting against the needle?
Because I’m so gently and carefull with inserting the needle, until I just feel a 'stop’and don’t go any further.
I’m assuming that the needle is alright.
I did think of an article that I had read at airbrush solutions I believe.
An article that I got from someone here.
I was thinking I needed some product for that and add that to the pre-mixed paint that I make before I’m going to airbrush.
How much should I add to my mix? How much milliliter or so?
I will write the things down you have said in your reply and I will check it when it is Monday afternoon here.

In my honest opinion you are being a bit too cautious. Airbrushes need some care but they are durable. Push the needle in till you feel a stop; and then push a tiny bit more will tighten the needle retaining nut. That should seat the needle just fine

The fact that I’m extra carefull, is that I did brake my first airbrush.
Since then, I’m so carefull not to break another spray gun.
Because they have to come from a far distance, and it isn’t easy or cheap to get them fixed.
And when something breaks down, it can be weeks or months before ‘a solution’ is found for the problem.
I will see what I can do with your advice and be a little less carefull.
And check if the needle is indeed incorrect positioned in the spray gun.
I will do this first on Monday afternoon.

I can understand that, and I am definitely not saying don’t be careful but their is a fine line between caution and be so cautious you have trouble as you are finding with seating the needle.

Also make sure the nozzle is 100% clean before inserting the needle. It’s possible some gunk was in there so when you seated the needle it felt seated but really wasn’t.

I will check that as well.

Today I have checked my airbrush.
And it seemed indeed that the needle wasn’t firmly sitting against the nozzle.
When I checked and tried that, I got one step further.
Then there seemed to come no fluid out of the airbrush just by pressing down on the trigger for air.
But bubbles appeared in the paint cup, so I did read this article: https://www.airbrushmodeler.com/why-airbrush-bubble/
And I thought it was the first one that was causing it, so I shot airbrush cleaner through my airbrush.
And that seemed to do the trick.
After testing numerous times with water, it seems that the problem is getting solved very slowly.
I may be spraying the airbrush through with airbrush cleaner a couple of times when I would have been doing airbrush excercising.
Since I was probably experiencing a lot of airbrush tip dry while excercising, I read this article: https://www.airbrushmodeler.com/what-is-airbrush-tip-dry/
And the symptoms sounded familair, especially with keeping my last airbrush practicing session in mind.
Where some of the things occured that were described in the article.
Just an update on the topic, thank you for the assistance in this matter for the people that have helped me out. And I’m finding this website that I have provided links to articles very helpful and useful.
It is a joy to read the articles of them and I highly recommend others like me to read the articles of this website as well.

It has been many many years since I used an airbrush. And as I remember it it was always a struggle. Since moving from model railroading to 1/35 scale I needed an air brush. So Once again I purchased an airbrush. A cheap one. I don’t like throwing expensive stuff at the wall!! Well to start with I had all sorts of issues. Then I purchased an ultra sonic cleaner. Bingo. It seems that despite my best efforts the gun wasn’t as clean as I thought it was. Especially the nozzle/cone.

Now I spray a job and dump all the bits in the ultra sonic cleaner asap. Give it 10 minutes and I’m all set to go next time. I’ve read all the concerns about ultra sonic cleaners but with a cheap air brush I really don’t care if there is long term damage.

The lesson for me was a clean air brush. And don’t be tempted to push the needle too hard into the tip. Just a nice snug fit.

bruce

I’m thinking that I still need a couple of spray throughs with Mr. Airbrush cleaner to get the nozzle really clean.
I thought as well, that I did clean my airbrush good enough with one of my excercicing sessions with my airbrush.
Where I did encounter problems as well.
Probably I didn’t mixed my paints good enough to make them flow really well through my airbrush.
Monday, yesterday thus.
I discovered there was for some reason still a large amount of dry paint left over on my needle.
Which literally prevented me from pulling the needle backwards like the manual showed me to do to get it out and clean it.
So I pushed it forward and got it out through the front.
I did let it stay for a little while, a couple of minutes in my Mr. Airbrush Cleaner.
But even that didn’t seemed to do the trick fully.
As there are still really little remnants of the last paint I used with my practice session left on it.
So still need to do a lot more cleaning before I can use my airbrush properly again to excercise with it.

Get some airbrush brushes and an old toothbrush, thy gunk won’t come off your airbrush just by sitting it in som thinner.

When I have a stubborn airbrush I’ll soaks the nozzle, tip and needle in hardware lacquer thinner for about 10 mins and then a light scrub with a toothbrush and the paint melts off.

While this is sitting I’ll squirt some lacquer thinner in the airbrush body and let it sit, I then gently brush it out with a small airbrush cleaning brush and assemble.

I do have airbrush cleaning brushes, but I’m fearing that I might damage the inside of the airbrush.
Like the seals, because the Fengda cleaning brushes and threads to clean my airbrush are pretty hard.
Not that soft and flexible and the least I want to do is damage my airbrush by this.
I’m assuming that you mean by getting some cleaner in the airbrush body and let it soak.
You just put something in, like through the paint intake where the color cup would normally be.
And just keep your finger in front of the opening to stop the cleaner from getting out.
And then just let it sit there for a few minutes.
And then let the cleaner out and round up with cleaning brushes?
I hope I undersand it right, because then I can try this tomorrow when I would be normally practicing with airbrushing.
Not tomorrow, because I’m planning to buy paint retarder from Tamiya to see if that solves the Tip Dry problem I’m experiencing.

I squirt lacquer thinner into the body where the nozzle attaches. It doesn’t matter if most of it drips out, the contact of the thinner with the paint will soften it enough over time

How much time before the paint softened enough?
Can I just get it out with a cotton swab?

Maybe 5 to 10 minutes. You can use a cotton swab but I don’t use them on the inside of airbrushes as they are prone to leaving fuzzies behind.

1 Like

It always is worthwhile to inspect at each stage of cleaning.

I use Q-tip brand cotton swabs regularly cleaning my Paasche H, VL, Iwata Micron & Harder-Steenbeck. Mead is correct, swabs can leave fuzzies. So can pipe cleaners.

Typically a good wipe with thinner and flush with thinner eliminates any remaining fuzzies. It always is worthwhile to inspect at each stage of cleaning. Testing airbrush with thinner after cleaning helps ensure all is good for next time.

With acrylic paints, a good Ultrasonic cleaner really helps get airbrush parts clean. They are pretty inexpensive. I have a cheapo and it rocks for cleaning even with just water or water a little Dawn dish detergent.

Airbrush cleaning brushes are more recommended for cleaning the inside of the airbrush body?

I do check after I have cleaned my entire airbrush by spraying a couple of times Mr. Airbrush Cleaner through and also water afterwards.
What would I be checking on after each clean up?
I don’t really know, I just look at spraying pattern and if it works like it should do.

I’m hoping to be able to practice with airbrushing again on Saturday.
But as I’m typing I remember I firstly need Tamiya paint retarder, to hopefully solve the issue of tip dry.
That I’ve probably experienced countless times, without even knowing.

Let’s see when the problems are finally fixed and when I have the knowledge I need to happily use my airbrush at least once a week without problem.

To see if the parts that have been cleaned are actually clean and free of contamination. :slight_smile:

Checking tip of needle to make sure it’s perfectly straight after cleaning and before reassembly.

Checking to make sure the needle is seated fully is good too.

Checking spray pattern is good :+1:

Etc

AB cleaning brushes are nice. I seldom use mine but it’s nice to have them. As with many things there’s more than one way to complete a task in a satisfactory manner :grinning:.

I got my airbrush cleaning brushes on Amazon, they were pretty cheap, you do have to be careful not to scratch things as they are on a metal rod.

As @Armor_Buff said I don’t use them every time I clean but they are nice for stubborn gunk. I would play around with your thinning ratio a bit. I rarely get tip dry with acrylics and I live in a very dry climate