Excellent pics!
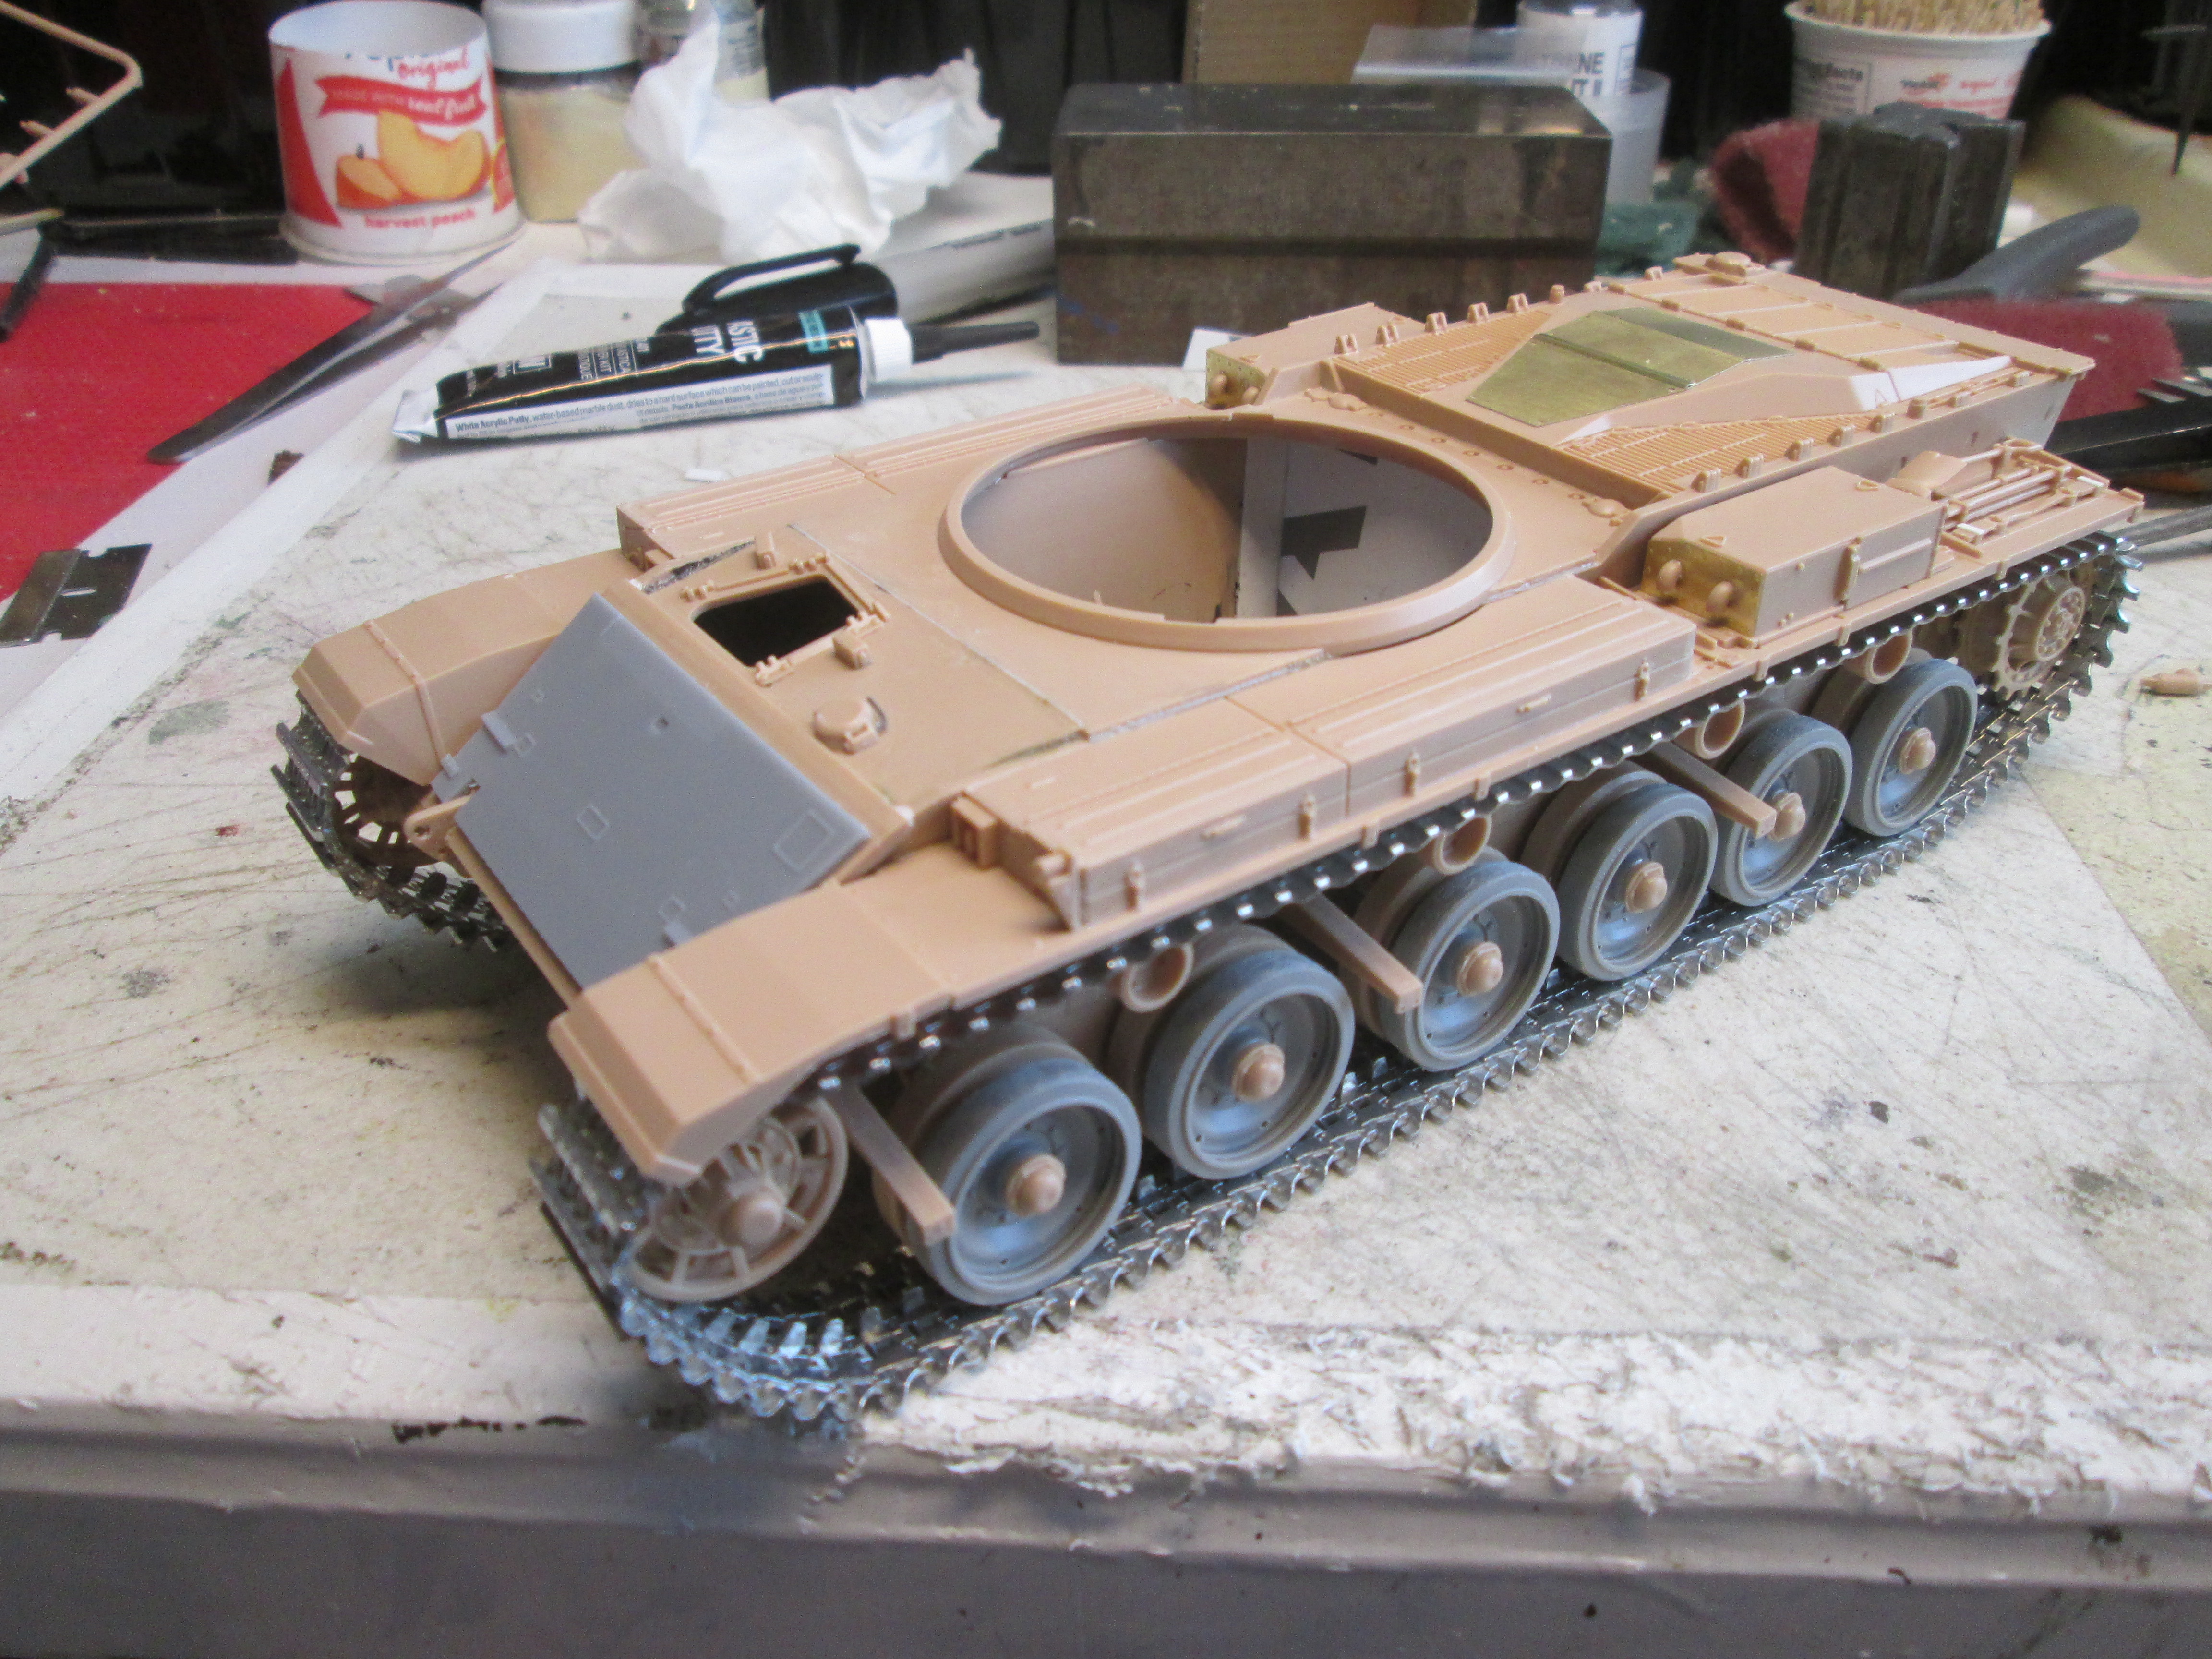
All I have is more basic construction. I boxed in the area visible with an open driver’s hatch since I plan on using a half-fig there, but other than that just enjoying the assembly process.
 IMG_4008 by Russel Baer, on Flickr
 IMG_4009 by Russel Baer, on Flickr
It’s a big tank. The pic below id next to an M60 Slick/Magach 6 I’m doing…
 IMG_4011 by Russel Baer, on Flickr
5 Likes
Still just the basics but I do need to look for pics of how that big slab of additional armor on the glacis is welded on. The books I have don’t show that well, if it’s a long continuous bead or several smaller ones. I would think several spaced beads would be the best way to do it so I may do that on the model.
 IMG_4012 by Russel Baer, on Flickr
In the meantime, just doing this OOB. Some of the parts locations on the fenders have been vague and just flat out wrong in the instructions but it’s no biggie.
2 Likes

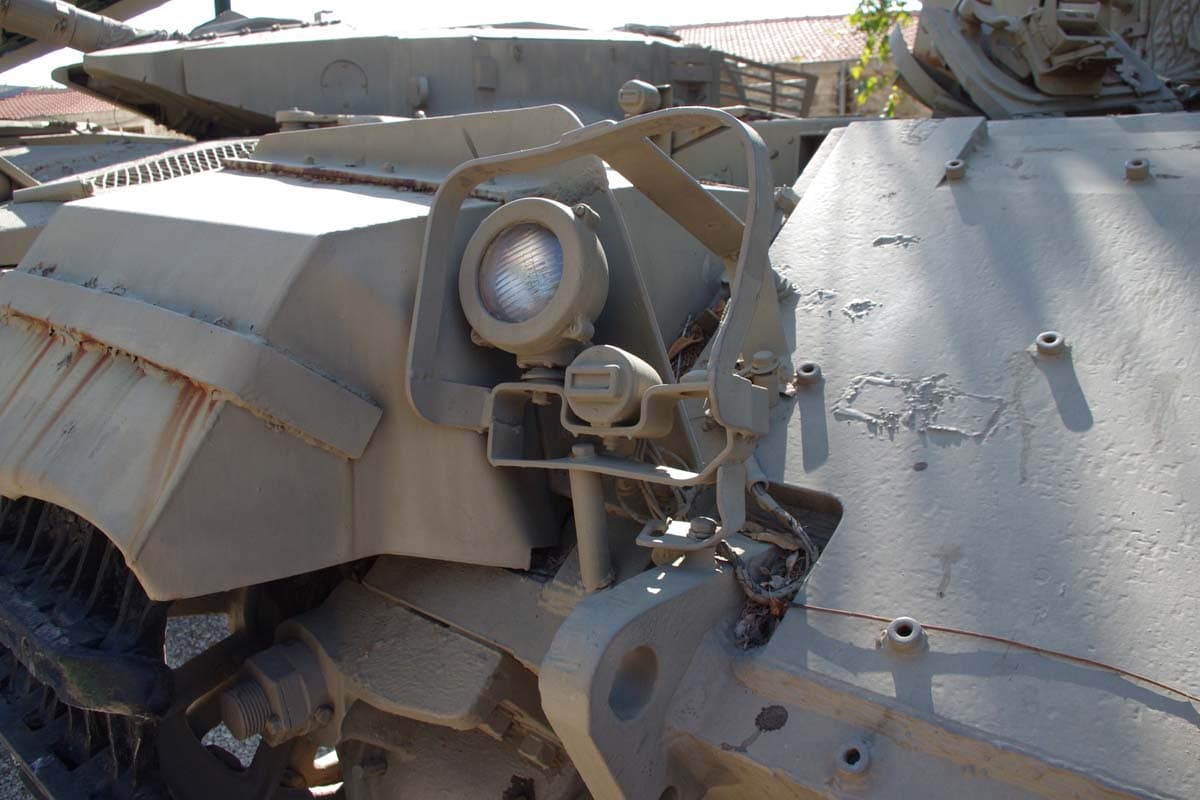
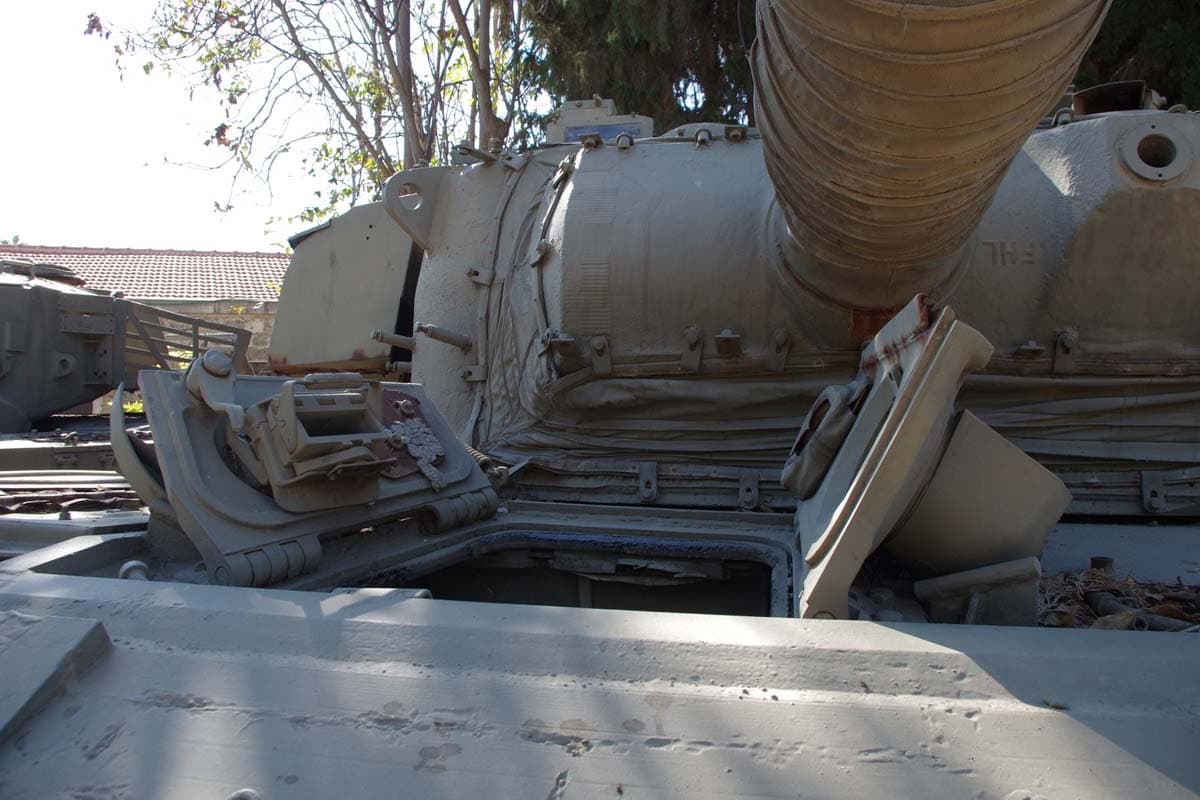
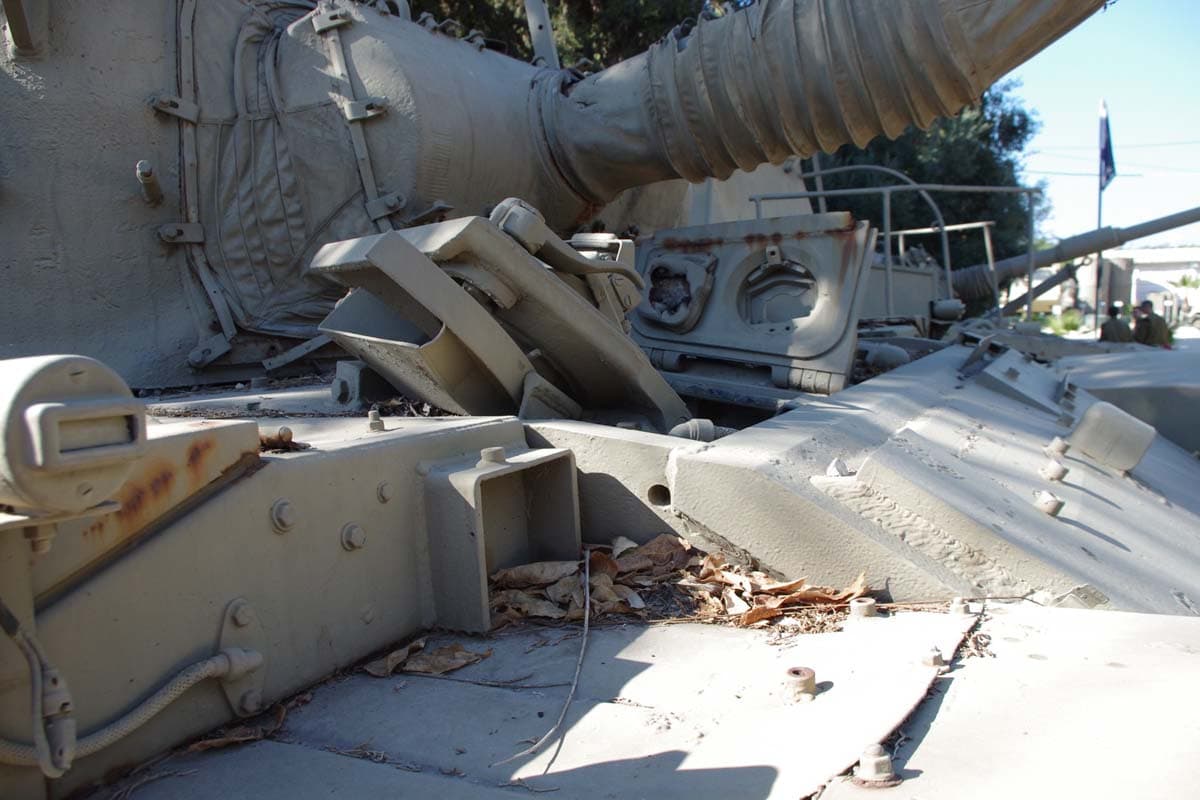
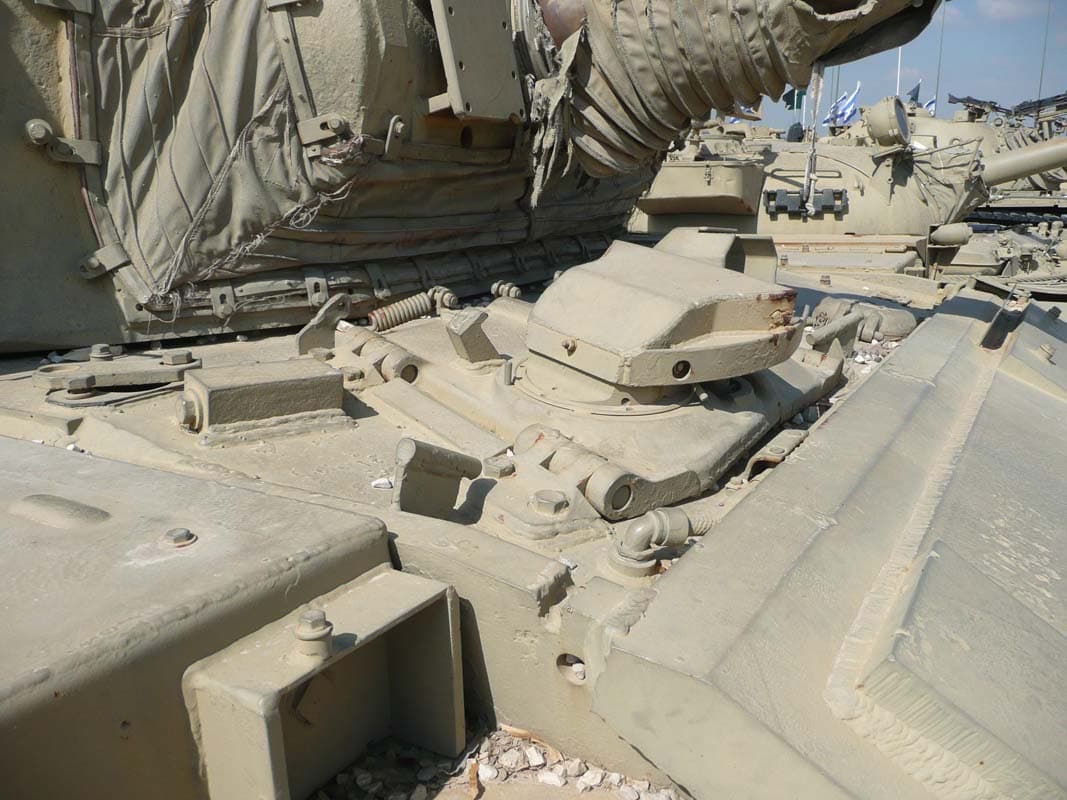
Long continuous layers of beads. Note that the variants in the photos are later Gimel and Dalet upgrades of the Shot Cal, so the lights and other details are different.
2 Likes
Thanks!
1 Like
Just for a break, I started the turret yesterday. I’m using a DEF Models mantlet cover which was a pretty good fit and the kit’s gun tube. The fit between the turret top and the two lower pieces was okay but left a step, so I smoothed that, then fixed the lost texture with MrSurfacer 500. Tie downs are core tag wire.
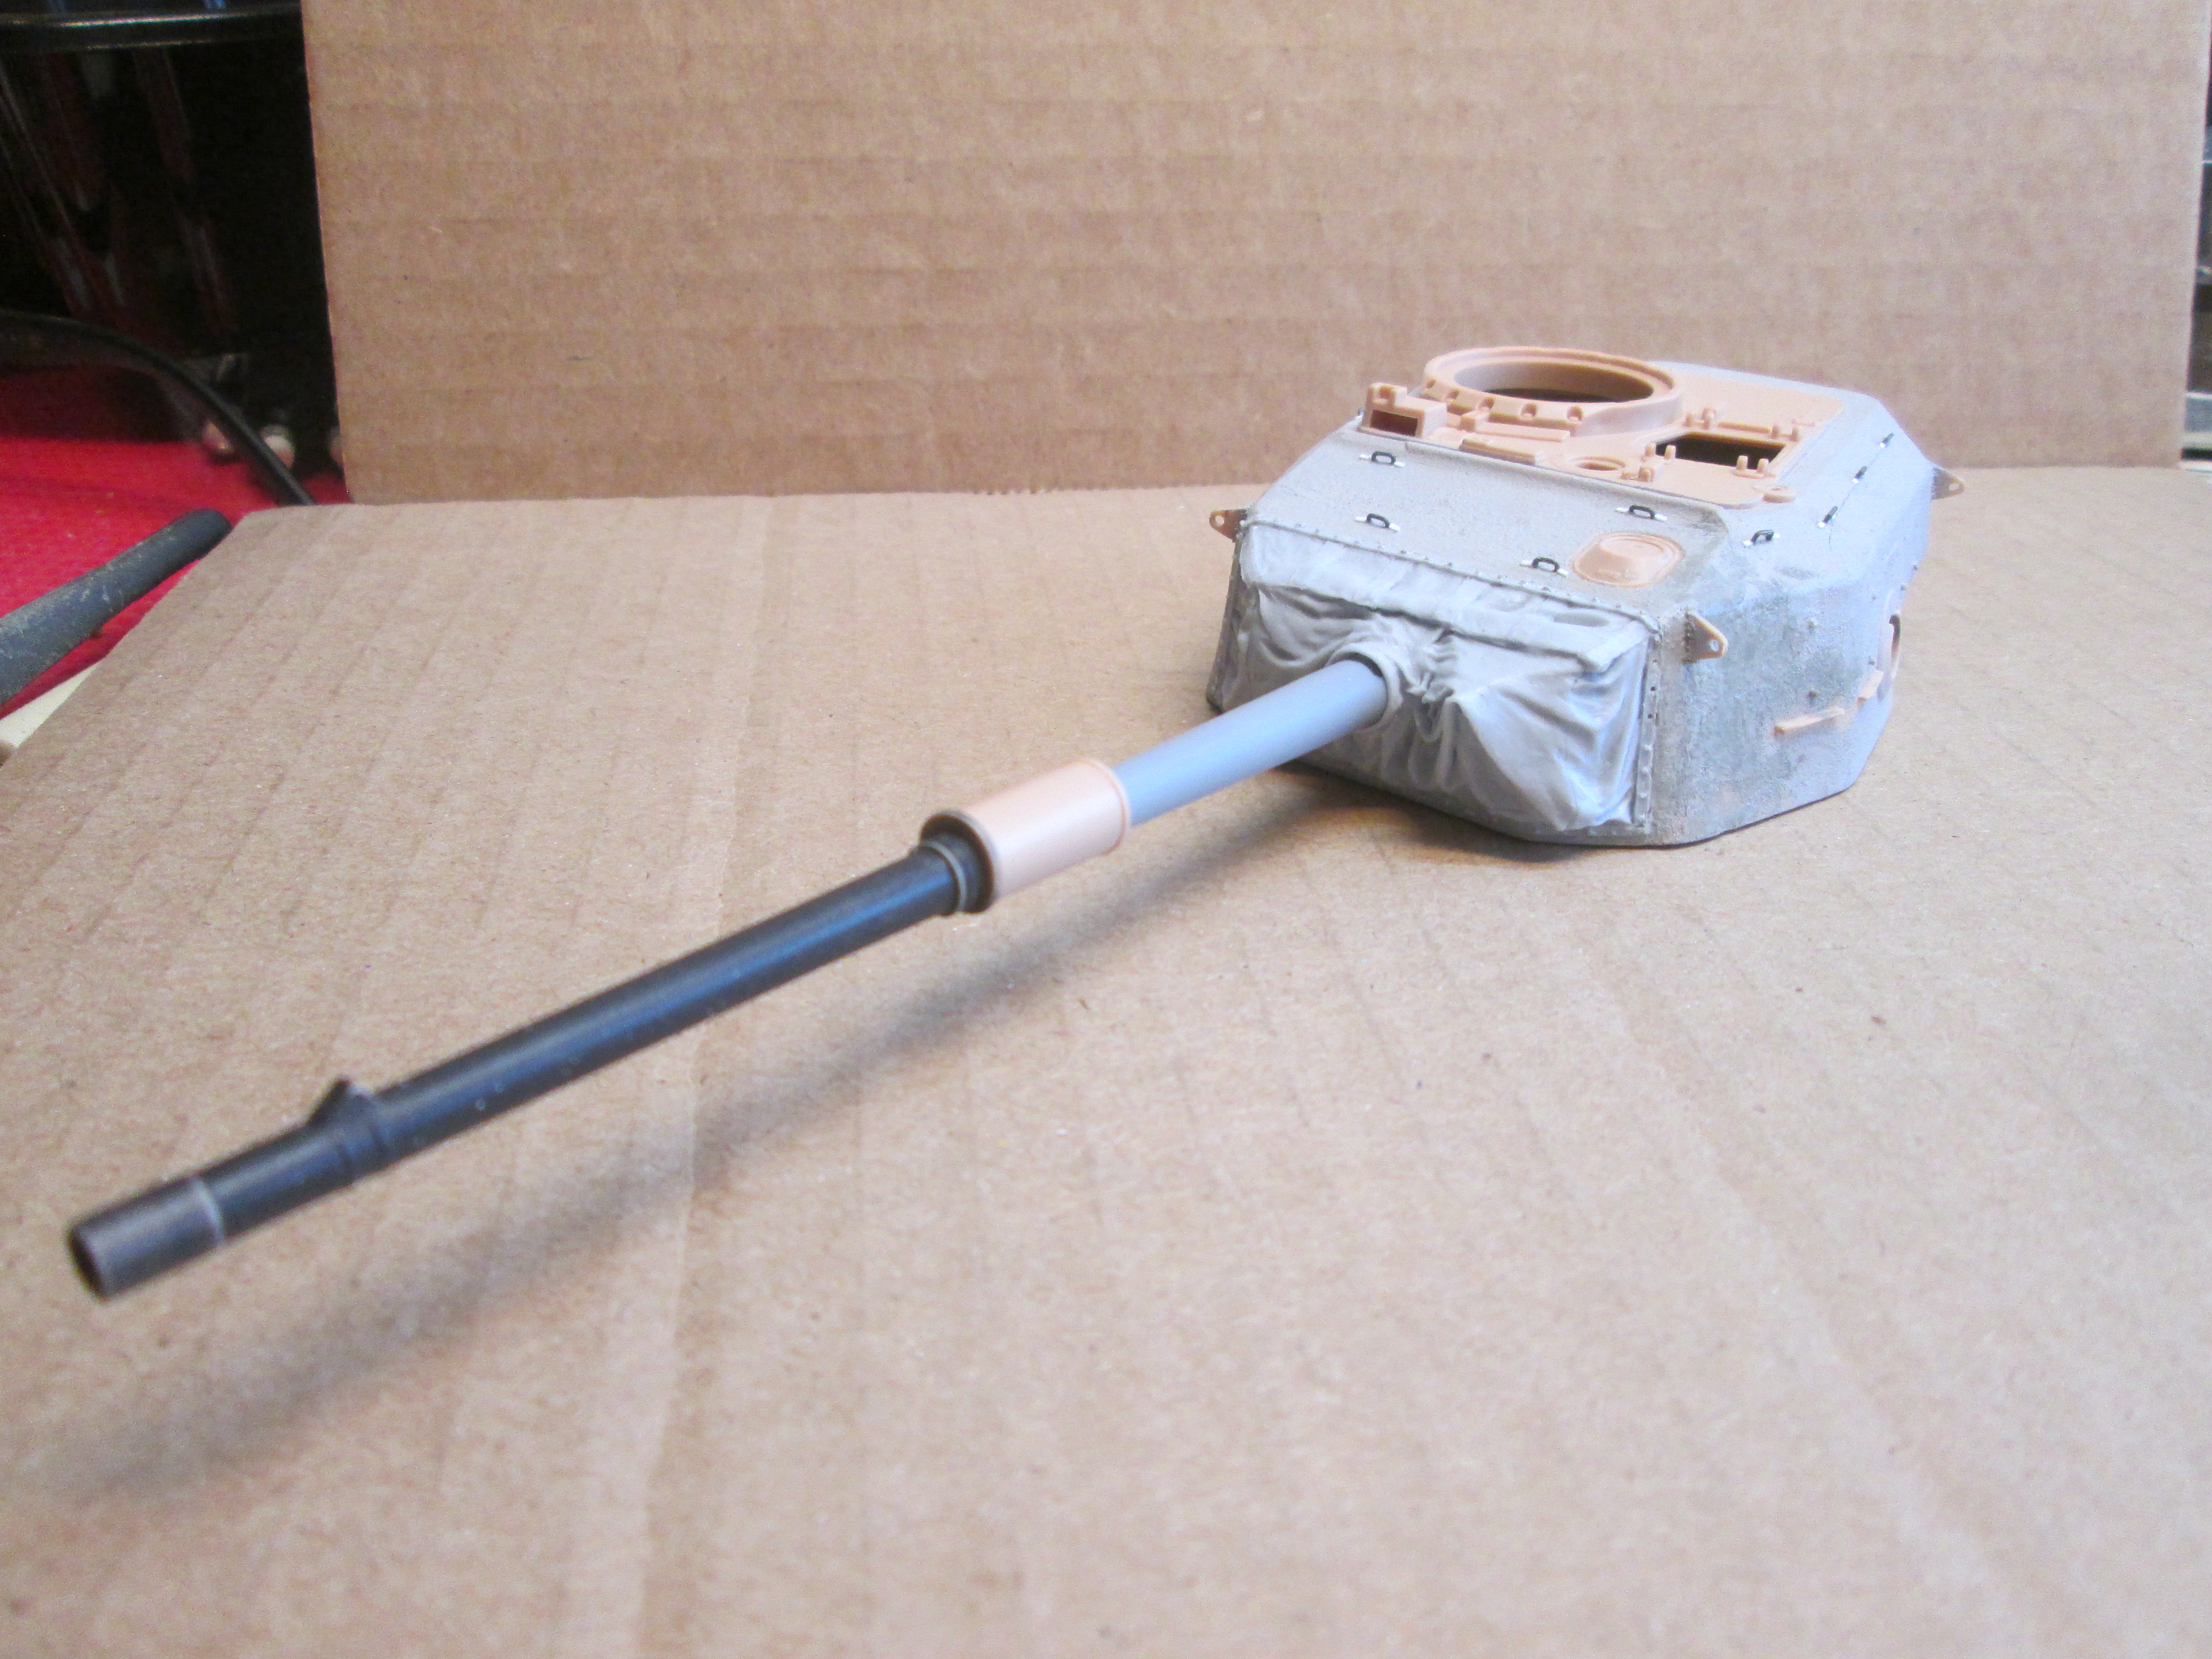 IMG_4014 by Russel Baer, on Flickr
I’ll be adding the weld bead around the top center of the turret later, as well as pondering all the tie downs on the turret storage bins… while I ponder, I poke around with this:
 IMG_4000 by Russel Baer, on Flickr
So far, it’s a Magach 6, AFV Club hull with the forward return rollers relocated and a DEF Models turret.
It’s soothing, and while I don’t have the complete hull, I have a heck of a parts stash.
5 Likes
I like it. You’re using the same tiedown method I ujsed thirty years ago, and I still it’s one of the best. Especially if you actuyally want to tie something down without PE tiedowns popping off.

Ah. And I remembered the weld bead. Yours will be so much nicer than this old Tamiya 'Dog."

3 Likes
I like to actually be able to tie stuff down, or at least make it look like it’s tied down. My pet peeve is floating stowage.
And that old Tamiya “dog” was a lot of fun back in the day, built more than one myself. ![]()
2 Likes
Russ, those tie downs (footman’s loops) look fantastic. I don’t think I’ve seen them done this way before. What is “core tag wire”, where do I get it, and how do you make those and get them on? TIA!
1 Like
Thanks!
In a parts store or dealer parts dept, when a reman part is sold, a “core”, or original, failed part is exchanged, to be returned and rebuilt or reconditioned. This part is tagged, and the tag is normally attached to the bad part with soft steel wire, hence “core tag wire”. It’s like bailing wire but softer and a dull gray color, right at .020" in diameter. It’s a touch big but very easy to work with and holds paint pretty well too. It can be cleanly cut with cheap sprue cutters or an end cutter and even sanded on the cut for a rounded or blunt end.
I can’t remember exactly where I got the roll I’m currently using, but it’s over 10 years old and I’ve used maybe half of it.
I would imagine it’s available at a big hardware store or similar, as I would think it has many applications.
2 Likes
Florists use wire that is fairly soft too. Good for small loops.
I have some of that too, the green stuff, but the green is paint and of course I scrape the paint off and there’s that bright silver. I still use it though as it is very fine, about .012", and can be easily bent but still holds a shape.
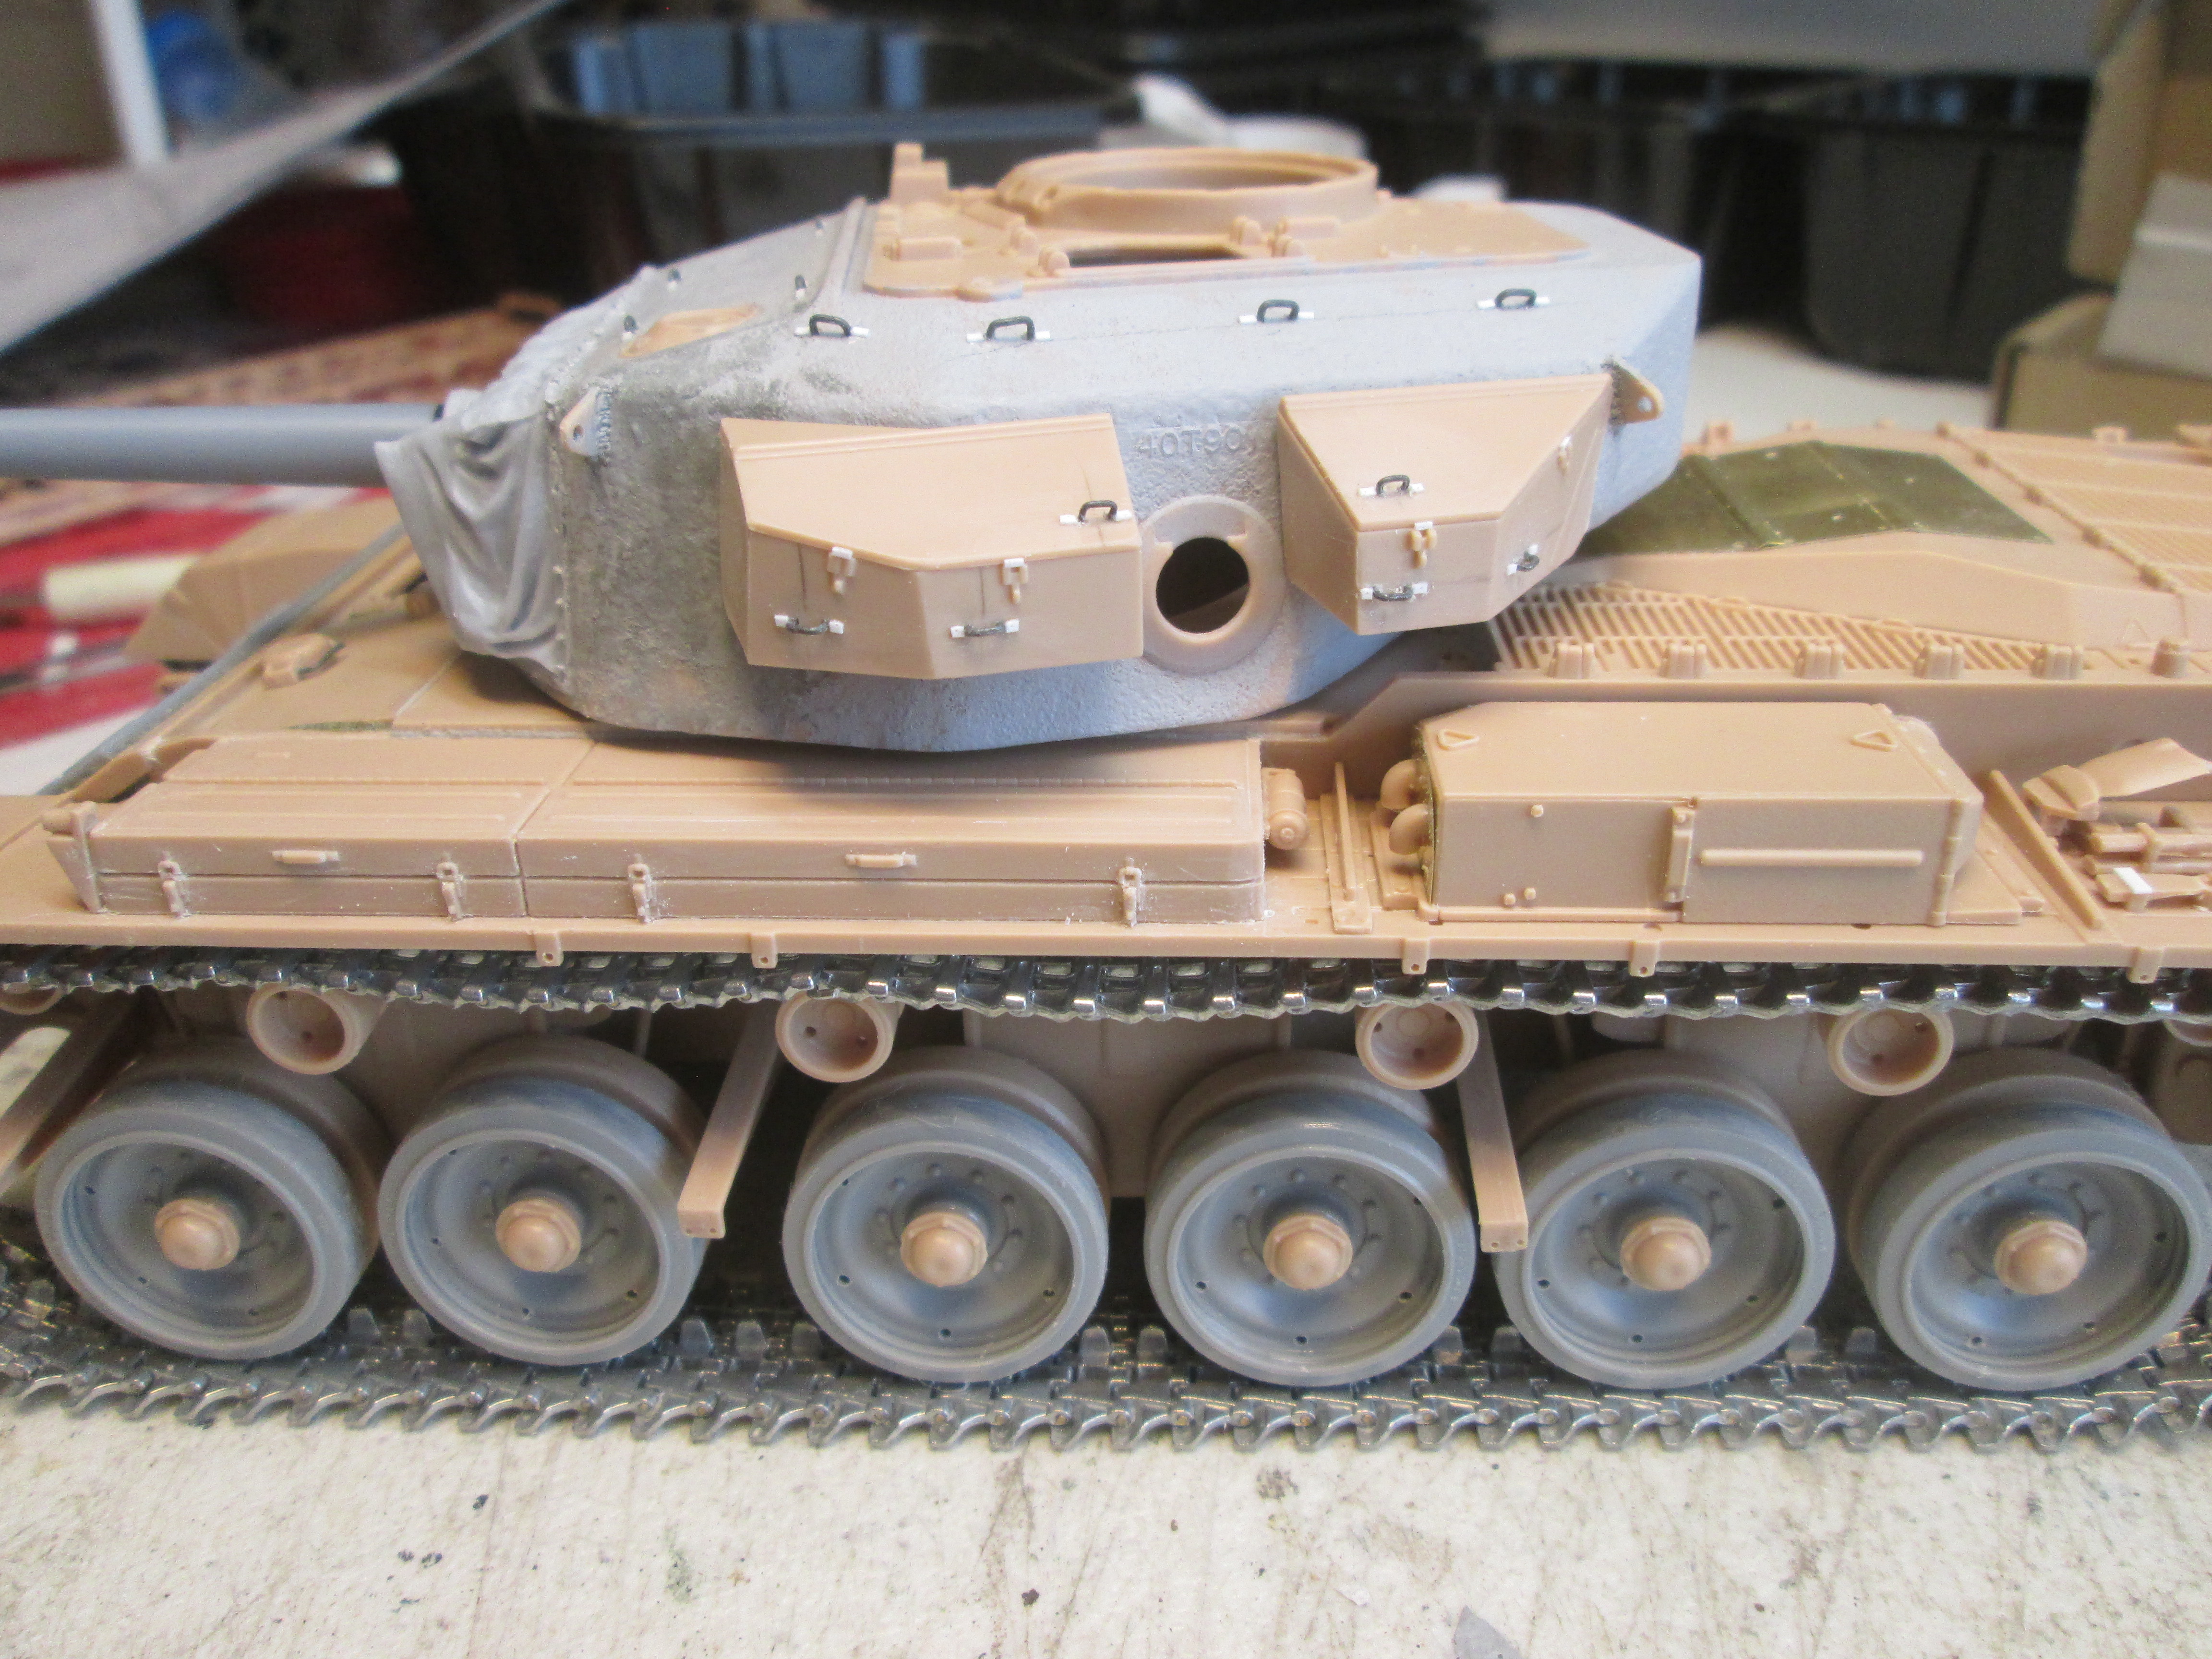
So tonight I did the rest of the tie downs on the storage bins and mounted them up. It’s looking like a Centurion now.
 IMG_4015 by Russel Baer, on Flickr
 IMG_4016 by Russel Baer, on Flickr
I used smaller wire on the bins, looked like those tie downs were smaller than the ones on the turret itself in the pics I have.
4 Likes
You may as well do the tiedowns on the fender bins as well. You know you want to.
1 Like
Aw man. I missed that. Gotta do it otherwise I won’t sleep tonight.
2 Likes
Pleased to meet you. Won’t you guess my name?
![]()
2 Likes
Bwahaha!
I did them last night. What’s six more? I’ve still got all the hatch covers to do though.
2 Likes
Just bits and pieces but the hull is nearing completion.
 IMG_4017 by Russel Baer, on Flickr
I used the kits links for the stored tracks on the glacis, no particular reason other than the holders were both broken in my kit and I needed to be able to glue them to the links. The kit’s tracks are actually pretty good so no foul, I think. The left side headlight guard fragmented into four pieces as I removed it from the sprue so thinning it was not an option. I also redid some details in strip that I thought were soft on the kit parts.
And the other end:
 IMG_4018 by Russel Baer, on Flickr
Tow cables will be fun. Here I have a comment about the AH instructions: parts locations are iffy in places, so reference pics of the actual thing are very helpful.
7 Likes
Yeah, I forgot that about those instructions… They are a bit iffy in some places…
2 Likes
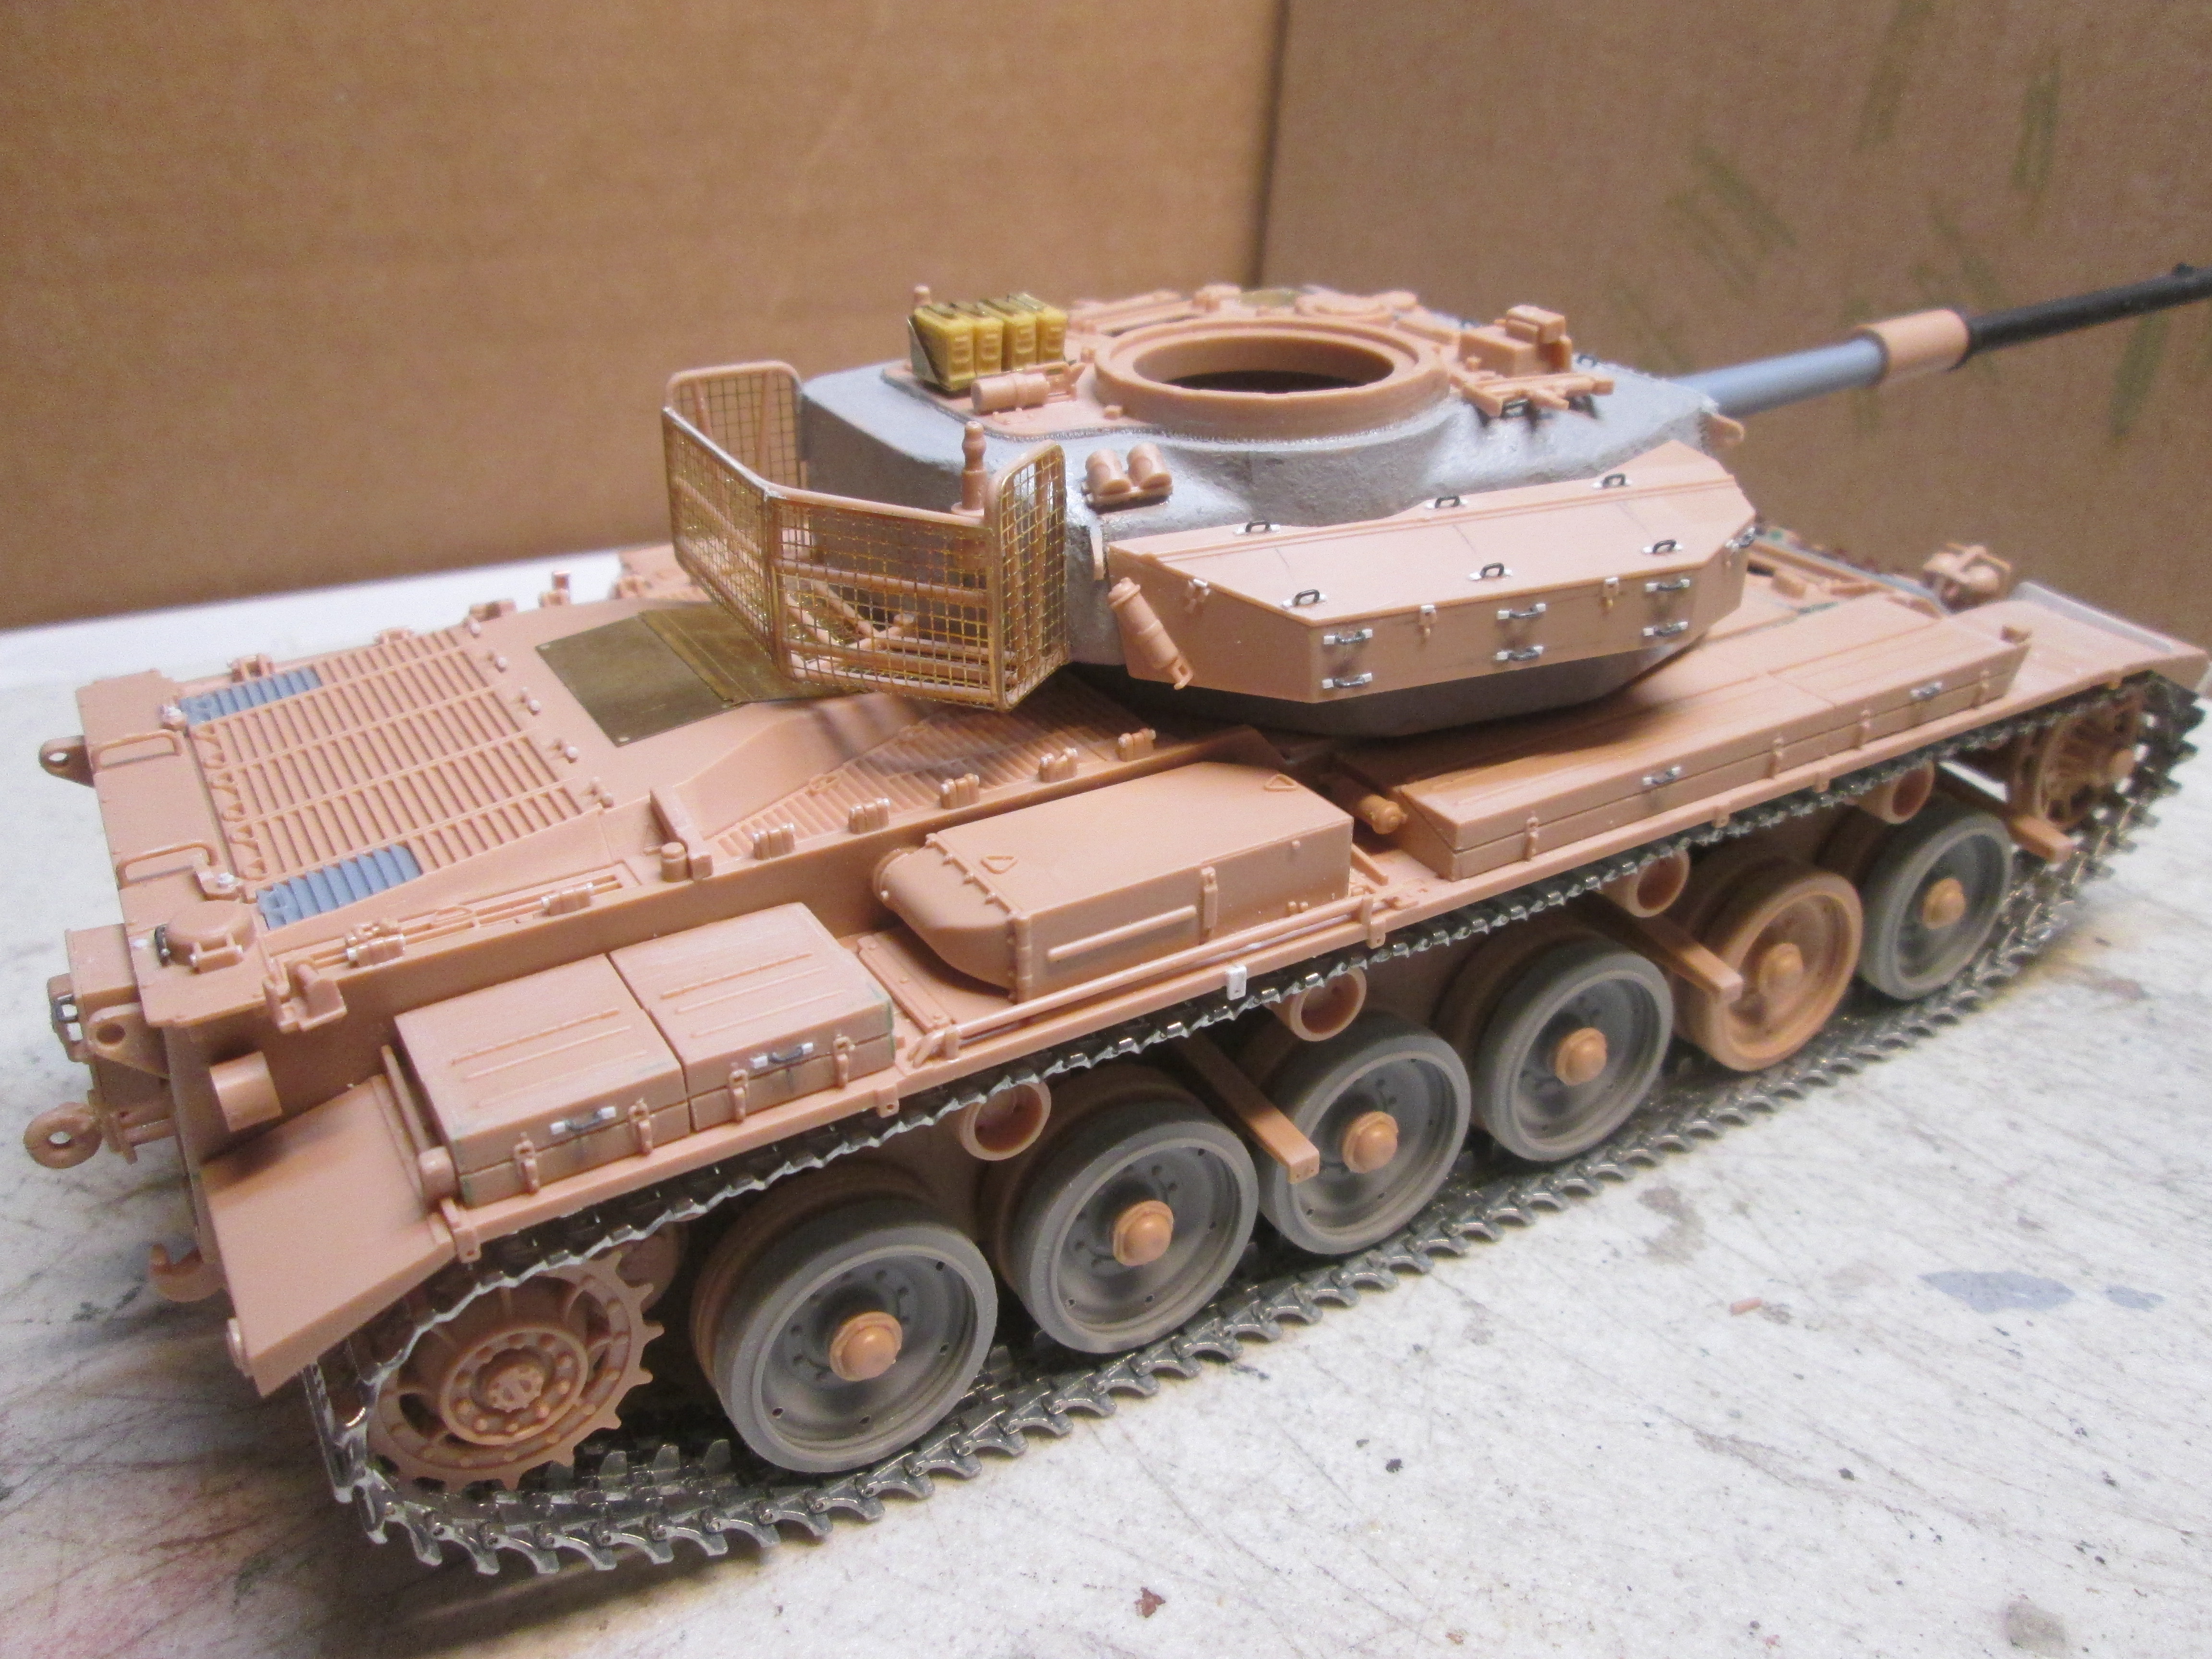
Still playing…
 IMG_4025 by Russel Baer, on Flickr
Turret basket was a lot easier, relatively speaking, than I was expecting, PE is first class.
I also repositioned the idlers and took a link out of each track run, looks better, less like it’s about to throw a track.
7 Likes
Did they torch the ends off of every sixth link back then or was that a later mod?
1 Like