Best Tank that Never Was - Part 3!

Thanks Tom - I’ll build it anyway but the Campaign-ethos might make me stick to it a bit more(!)

It was a very innovative design; fuel tanks were incorporated into the rather sleek hull. Where I think I’ll sort of Sovietize it - wrong word but you’ll know what I mean - is to add those equipments we normally get used to seeing: headlights, IR lights, a “normal” 30mm cannon, not the over-sized one shown in the concept, a replacement gun barrel (which would not need a fume extractor with the weapon outside the crew, but I thought for a prototype they’d use one from 125mm stock) and the ubiquitous fuel drums on the hull rear. I imagine it would also have been very fast; automotively it was based on the T-64 and that didn’t hang about; sans turret I imagine it would have been exceptionally mobile.

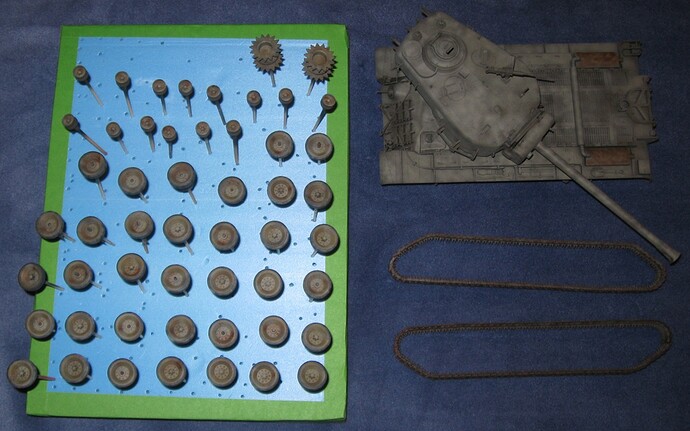
As I’ve hinted above, I plan to produce a model as if a prototype or two, were made, and show it on trials. This would all be around the mid 70s I think; I would imagine, were it accepted, it wouldn’t enter service until around the early 80s, whereupon as I believe Morozov himself prophesied, “NATO will have puppies!” - as indeed they might have. By then, an in-service vehicle would probably have a few more extras (smoke dischargers certainly) and probably a 130mm gun which was within the original concept.

I’ve amassed all the accessories I think I’ll need, and as I thought I’d portray it on trials, some crew figures having a break; surely even Soviet soldiers stopped for lunch? Anyway, I’ve identified 3 x figures (crew of 3 only) from these two sets:
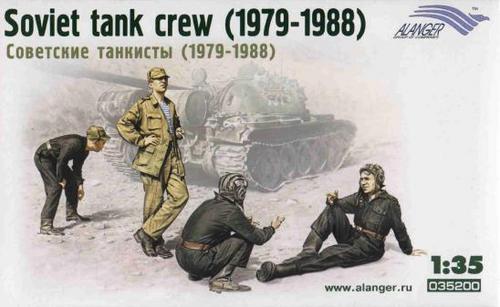
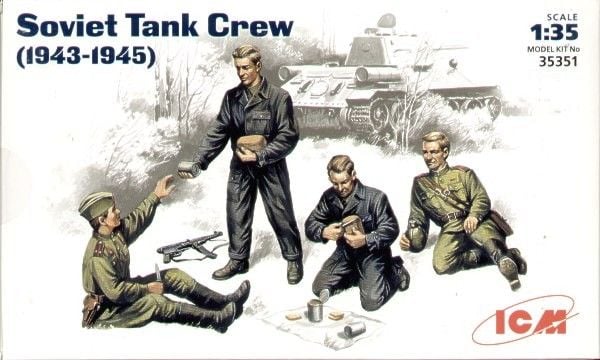
Figs (1)

Figs (2)

That’s the plan; however, there’s the Bundeswehr What-If stuff to complete first.
4 Likes

Takom 1/35 American T30 heavy tank

Back in the game. One color left to spray. Hoping to put on decals tomorrow.

4 Likes

It’s green…
IMG_4377 by Russel Baer, on Flickr
Some detail painting is done and there’s a coat of clear on it, but I really need to decide on an overall scheme before I do markings. I’m really leaning towards the original “sales tool” with maybe a simple serial number and nothing else. If I try and do the Thai scheme, what in the world am I going to do for markings?
And then there’s this:
IMG_4379 by Russel Baer, on Flickr
I slapped the basic Takom Marksman turret together and mounted it to a M41 turret base, slapped it on the hull I started this whole adventure with and by golly if it just doesn’t make me laugh out loud looking at it. All it needs is a couple of those goofy eyeballs on springs. I WILL finish this. It just works.
IMG_4375 by Russel Baer, on Flickr
It’s Sid from Ice Age.

8 Likes

Hi Russel,

The Green Machine is looking great! As for that Marksman, I’d advise the crew to go easy on corners as it looks top-heavy. But again a great-looking monstrosity…

2 Likes

And be careful using the guns on a side slope too…

1 Like

Takom 1/35 American T30 heavy tank

So…in predictable fashion, I borked the decal step. After putting down clear gloss in preparation for decals, I noticed a small run on the right side of the turret. My attempt to sand out the run resulted in collateral damage because of course it did. Now I need to prime that spot, paint three colors I will never match, and put down another layer of gloss. :face_with_diagonal_mouth: Given my painting speed, that alone puts this project back two or three months.

Having screwed that up, I went ahead with the rest of the decal work. A 1/72 scale Wildcat provided stars for the sides of the turret, hull front, and turret back. A Panzer I provided the number, “1”, for both sides of the turret. One big star for the turret side tore. It was unrecoverable. I had to throw out the opposite star, too. Now I have 15mm stars on the front of the hull and back of the turret. The turret sides need 15mm or larger stars. I do not have them. :face_with_diagonal_mouth:

For the registration numbers, I considered using a set of dry transfer markings for train projects. Upon consideration, that is a guaranteed fail. The place they need to go is really busy. They will never line up straight and probably smear.

Microscale Decals makes a sheet with US stars and registration numbers. Cutting stars from white decal film is another possibility.

So, I now have yet another difficult, screwed up, not fun model, this time with no decals. Yay. My ability to pick good models within my skill range is amusingly terrible. I may put this back into the closet until 2030 or so because, right now, I kinda want to play Godzilla and smash it.

Edit: ScaleMates really is a fantastic tool. Using that website, I looked for models in my possession with stars and registration numbers. Eventually, I found the stars in a Dragon M4A3E8 Thunderbolt VII. A Tamiya M8 Armored Car will provide the registration numbers. I also primed over the boo boo so that step is done.

3 Likes

Ouch that story is painful! You could go old-school and get (or make) stencils for the stars and spray them on. I’m the wrong side of the Atlantic, but there must be US members that can offer some star decals? The build is too good to smash, so step away from it for a few days…

2 Likes

It’s been a rather difficult day at the Robotech Factory. Thankfully, no friendly mecha were destroyed in the recent Zentraedi attack. All can be recovered.

After a couple hours of searching, I found usable stars and registration numbers of the ‘good enough’ variety. Golf clap.

Something in my possession, somewhere, has masks for US stars. I remember seeing them a few months back. Something else in my possession has German division symbol masks. Where are these masks? No clue.

Onward! (…to the next minor disaster…)

1 Like

There used to be a guy on the old forums whose strapline was “Improving my modelling one mistake at a time”… :grin:

Glad you have enough decals to soldier on!

4 Likes

I’m afraid my stuff is closer to another version: “Mad Scientists Inc., building tomorrow one hideously deformed mutant at a time”…

Cheers,

M

3 Likes

My strapline would be, “…and then, disaster.”

1 Like

I am getting ready to get started on my build for this campaign.

More to follow later :slightly_smiling_face:

IMG_5928

5 Likes

I’m making progress on the sales tool. It’s all green, basic markings are on and I’ve done a couple of washes. I expect the next steps will some light weathering. Tracks are painted, ready for dusting.
IMG_4398 by Russel Baer, on Flickr
I just haven’t had much modeling time lately, and I’m a slow painter.

5 Likes

Glaciers move faster than me at the paint booth! It’s looking great! Bear in mind I haven’t even started my build yet…

3 Likes

Then I feel okay not having started my build for the current IDF campaign. :slight_smile: :grin:

3 Likes

Basic weathering and detail painting is done. I went with the original “sales tool” idea, and it will stay clean.
Some of the pics make the gun tube look ridiculously long, but I think it’s actually pretty close.
IMG_4417 by Russel Baer, on Flickr
IMG_4419 by Russel Baer, on Flickr
IMG_4421 by Russel Baer, on Flickr
IMG_4422 by Russel Baer, on Flickr
IMG_4423 by Russel Baer, on Flickr

5 Likes

It must have been a wild ride when it recoiled!

2 Likes

I’m re-thinking the barrel length…

1 Like

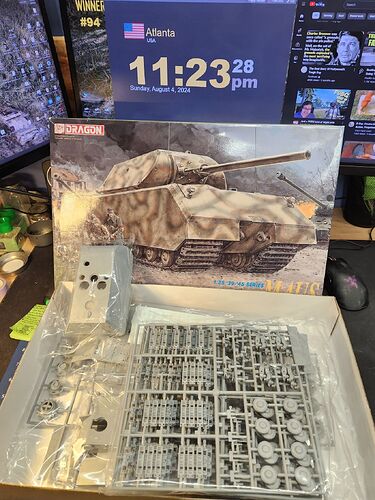
Just realized I never posted my start pic but I began with the Dragon Maus kit. This is strictly OOB as I eventually plan on obtaining the Takom kit sometime; they were not available for a while so I grabbed this one in case they never returned (which they eventually did of course).

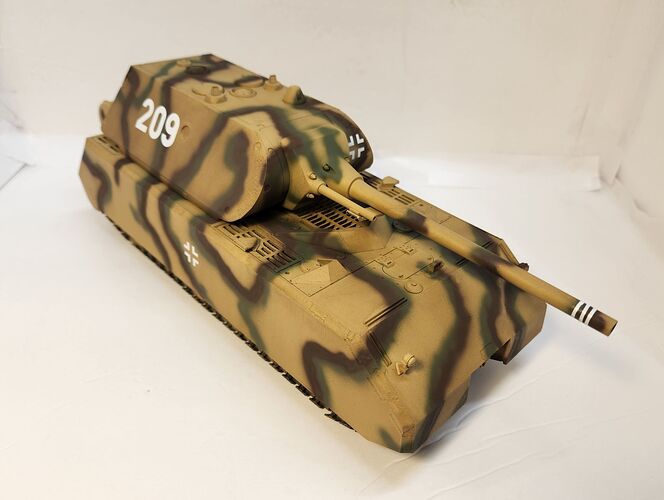
And it’s done:
Scheme is imaginary; unit number is my oldest daughter’s birth date.

4 Likes

Dang that’s a fast build! Looks good but pretty clean - are you planning to weather it or leave it factory-fresh?

2 Likes