Absolutely beautiful work!
If it weren’t for the giant hand I’d have thought it was the real thing!
By the way, my dad also has Parkinsons and still cranks away on his woodworking projects too, just a little more slowly. Full respect to you both!
![]()
![]()
Absolutely beautiful work!
If it weren’t for the giant hand I’d have thought it was the real thing!
By the way, my dad also has Parkinsons and still cranks away on his woodworking projects too, just a little more slowly. Full respect to you both!
![]()
![]()
Thanks Russelle,
She will be a nice ship and I can’t thank those who helped enough to make this happen. Forever grateful.
Best wishes to YOU and your dad. The kind words keep me going. I LOVE your work.
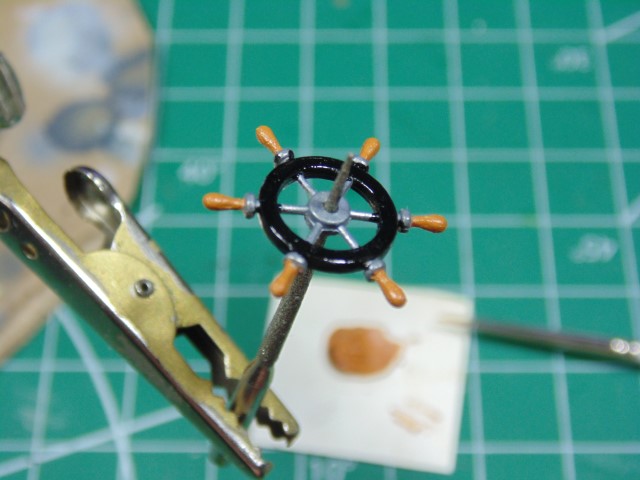
Hi Sailors,
Brace yourselves for calm seas.
I used some deck tan color as a base for the oil.
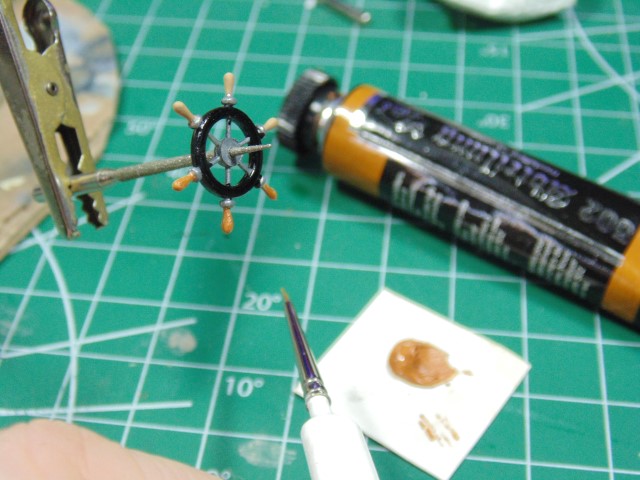
The light rust color or ocher artist oil being feathered on the handles adds some stained richness.
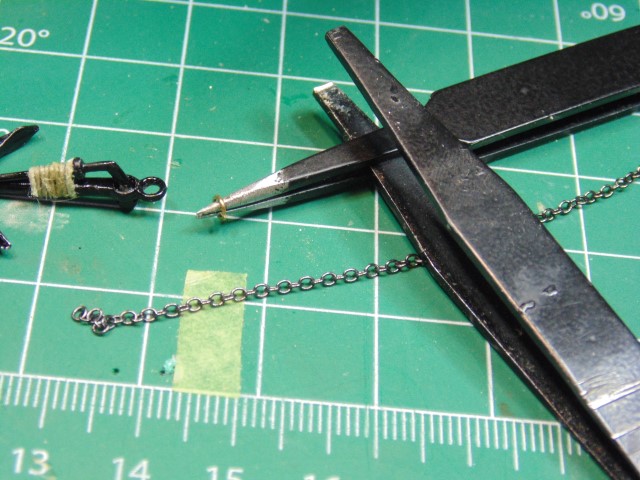
You have to separate the ball tips to get them to fit through the anchor ring slots. Use CA glue later to reattach then repaint them.
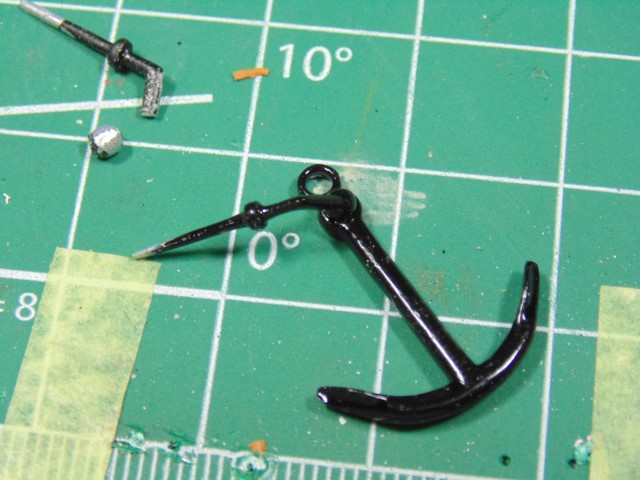
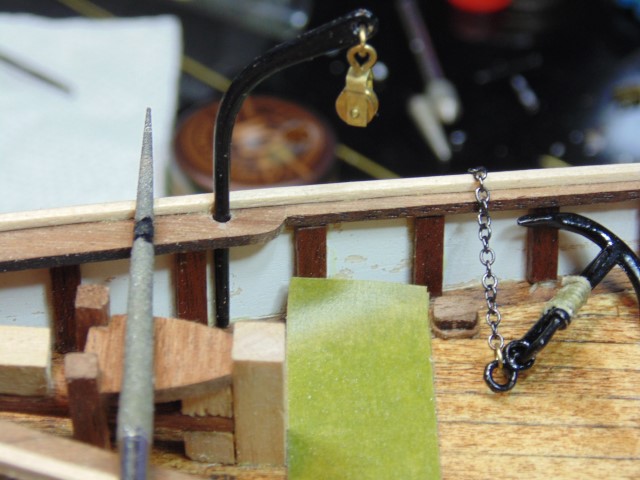
Do your best to test fit where the parts need to be glued.
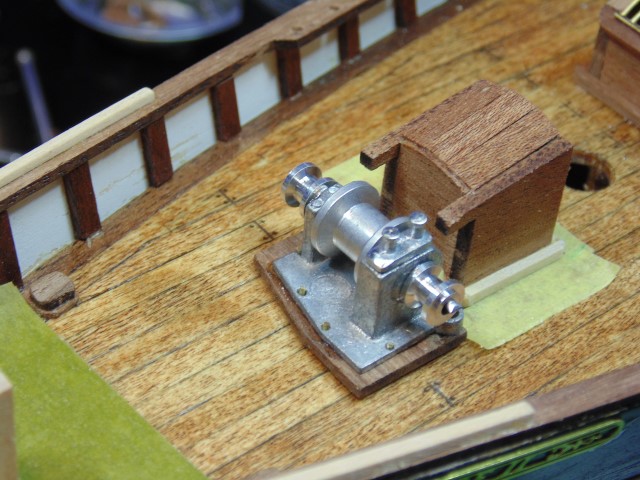
The included rings for the anchors have to be widened, note the simple adjustment.
A basic reaming tool will open up the hole for the lift parts.
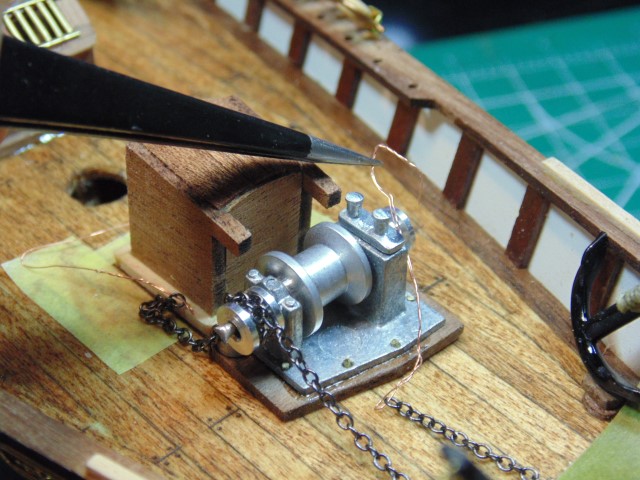
Use a tiny wire at the end of the chain to slip it through the stern points and make your life a lot easier. Here, I’ve double wound the chain, but that’s your call.
Huge thanks to Sunward Hobbies for the sending the kit for this build series. Please consider visiting their website should you need kits or supplies at https://www.sunwardhobbies.ca it’s where I buy mine.
More soon and happy holidays.
Nice update… She is coming along very well indeed … Lovely work ![]()
Here’s another update on a super cool Artesania Latina kit.
The planks will form to the shape you want when they are soft and wet. The wood glue sticks faster and dries quicker, just a suggestion.
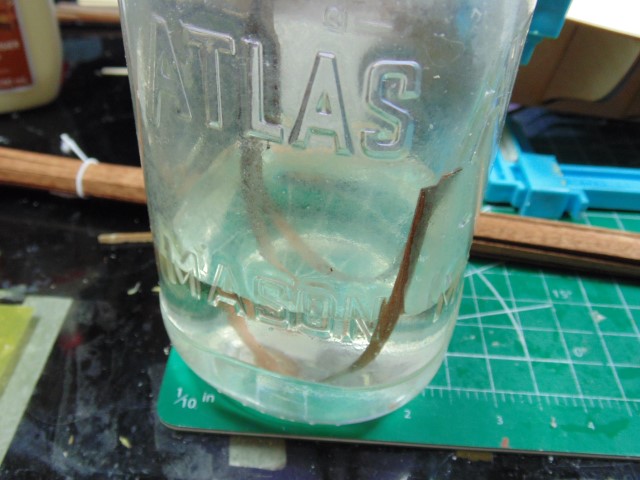
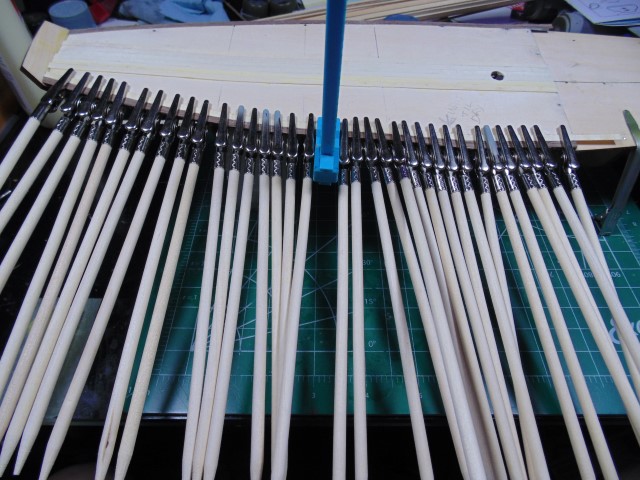
Use some well made clips (I use Mr. Hobby and AK) to bind and secure the points. Don’t rush this process, let it sit for a little bit before moving on.
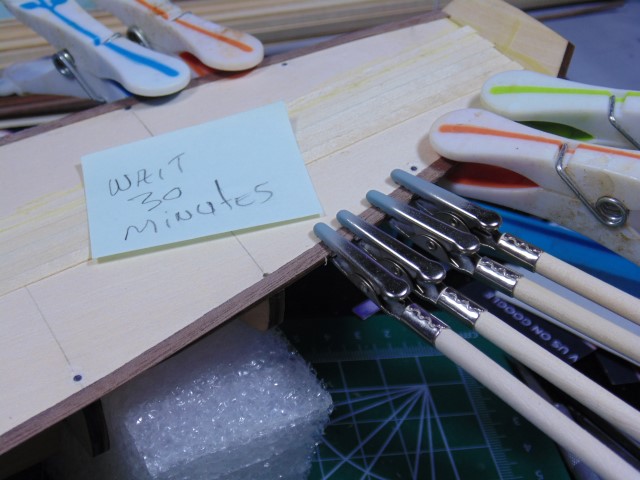
Yes, it looks like a gong show, but only took a few hours to pull off.
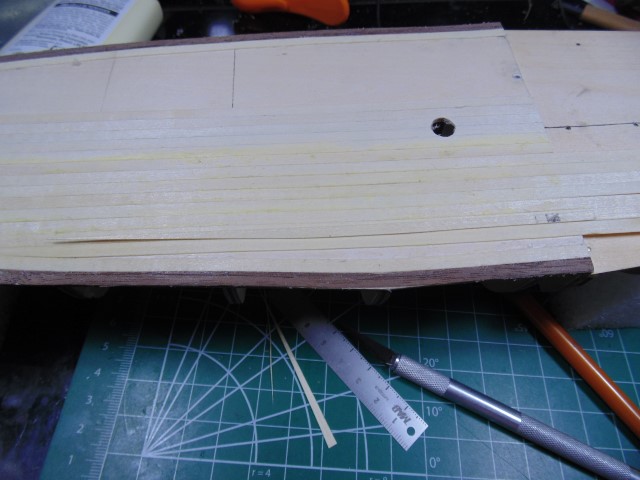
Gently and lightly sand down the surface for a nicer appearance and easier gluing later.

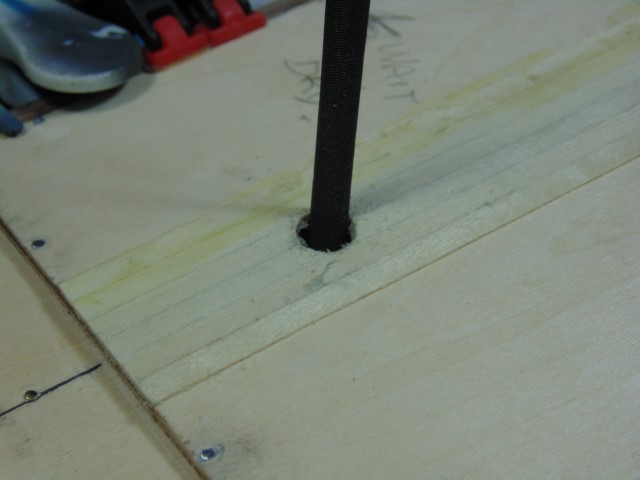
Knock in your opening for the masts as you work your way from port or starboard.
A basic round file will save loads of time and do a fine job with clearing, accurately, this opening.
Many thanks to https://www.sunwardhobbies.ca/ for sending this project my way and equally for all of you who have supported them with your orders and me with the kind words. Again, the full build blog is on the Sunward Hobbies website.
God bless.
The detailing makes these wooden ones really jump out … the different finishes and tones just make them look real. And that is a lot of clamps lol …
The nice thing about working with wood glue is that it has no smell. The model maker made the wood stripes really thin and easy to work with, just a bit of skill is all that’s needed. Thank you for the kind words Sir.
Amazing work HG ![]()
Looking forward to seeing more in the New Year ![]()
All the best for New Year’s ![]()
Thanks a lot brother. Every single view, like and comment is appreciated and seriously motivating for a disabled man.
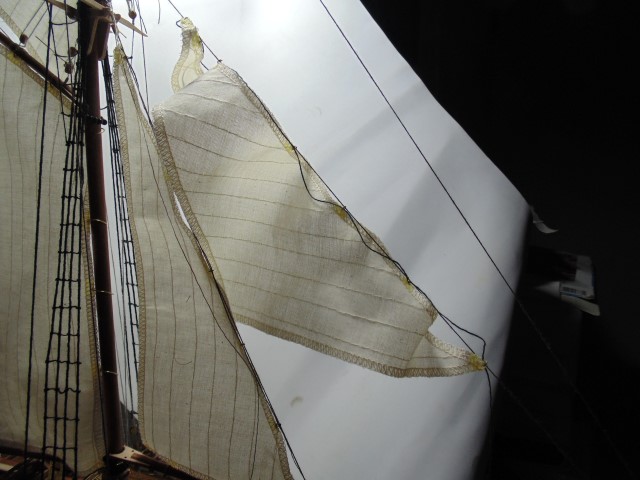
Hi Friends.
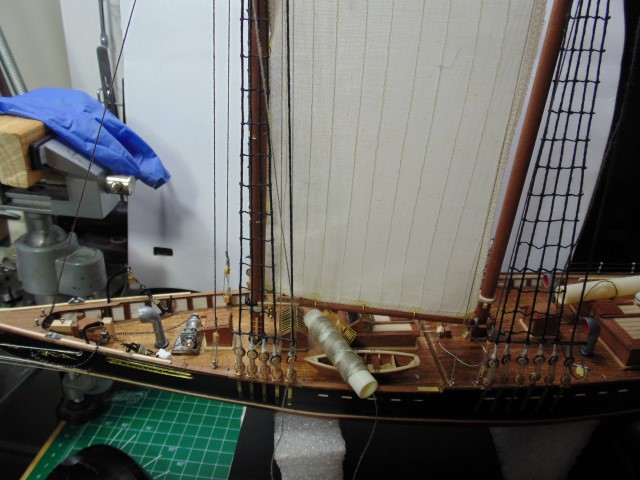
Updating the article for the Sunward Hobbies Bluenose II.
The sails are different from the ones in the instructions. Shame on them for this, yet that shouldn’t dissuade you from building this kit. Send them an appropriately worded e-mail instead.
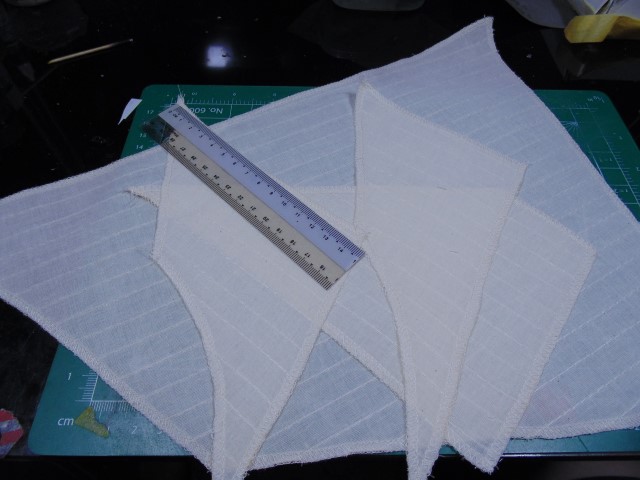
Just make sure to measure out the cloth lengths. It only takes a few minutes, yet is critical for the overall look.
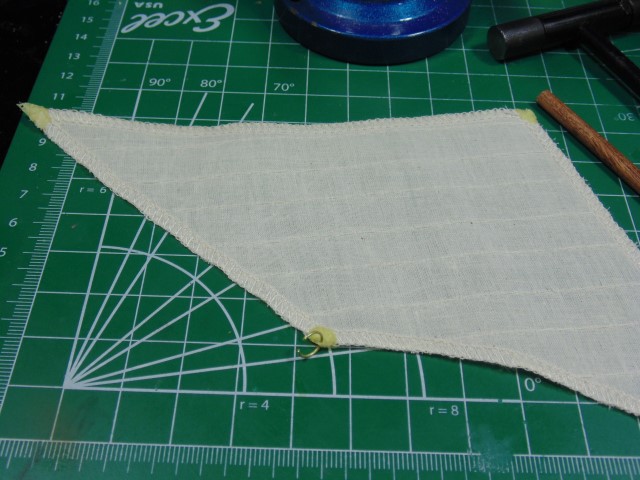
It is entirely your call as to attach the brass rings. My choice was to add a dab of wet glue then let it dry and drill an equally sized hole for the metal to fit.
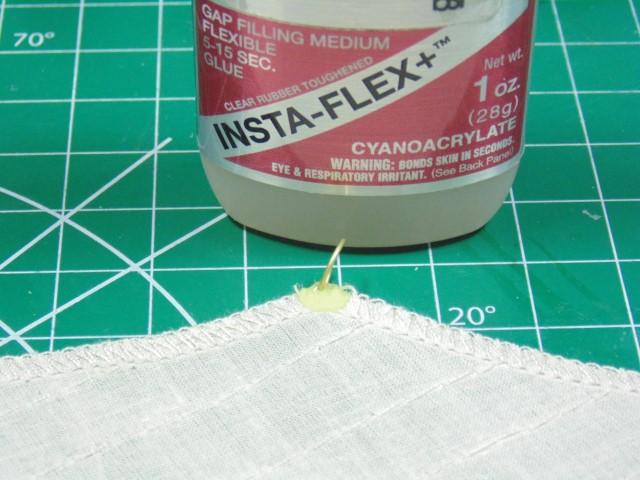
Some CA glue will secure the bond of the ring to the worked on sail point. This also helps when doing the rigging threading because the ring will not flip around constantly.
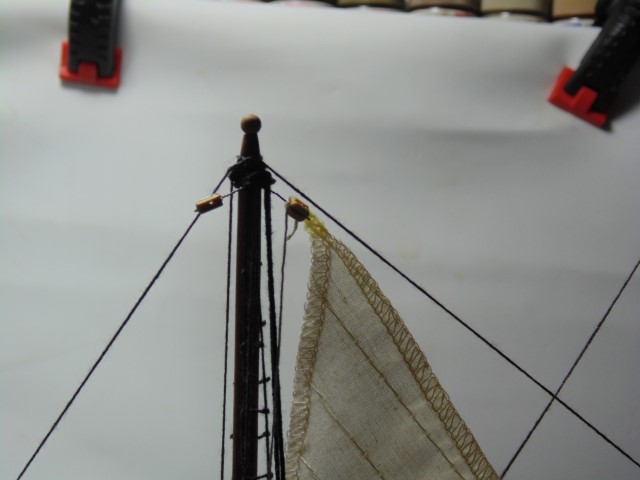
Make your line long enough to a proper threading length through the blocks. The maker didn’t include enough of these lengths for beginners, so if you are, be mindful of wastage.
This is a marvelous project and one you can easily do. Good grief, if I can do it than anyone can!!!
Huge thanks to the Kind people at https://www.sunwardhobbies.ca/ for allowing me to present this subject to you and when I buy my supplies they ship it quick!
Thanks Guys and More later.
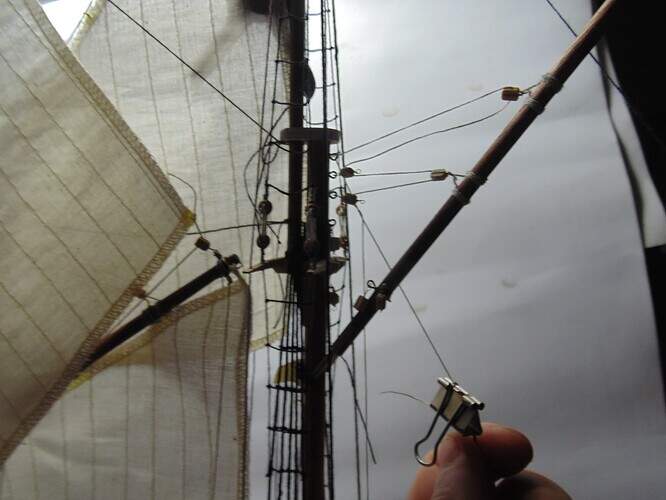
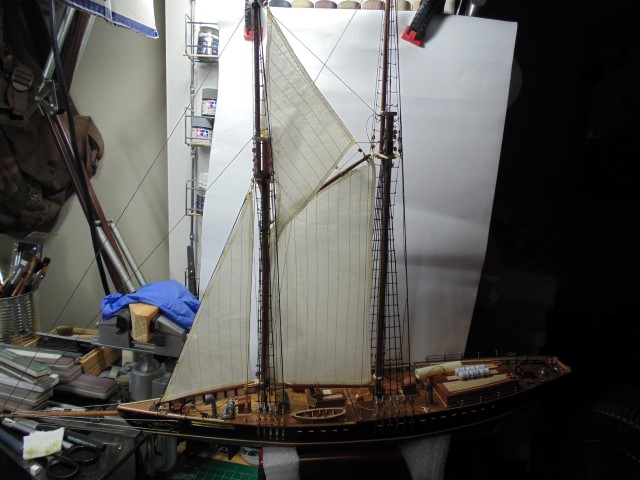
Ahoy Mates,
Another summery update

Loosely tie the storm sail and then tighten each point until you’re happy.

Wind your rope around the plugs and use your finger to hold it.
Looks good when done.
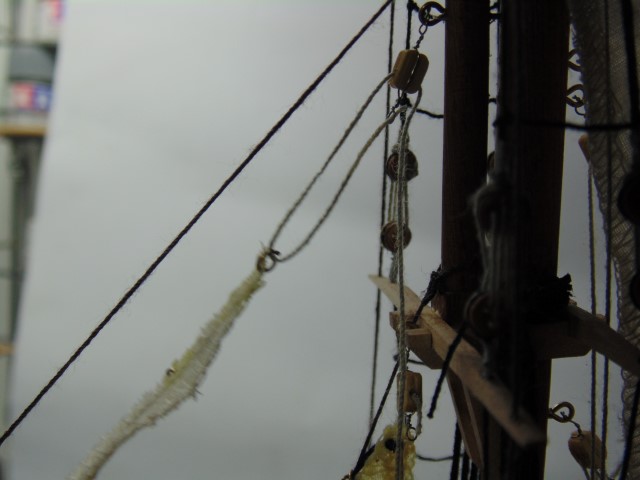
Make sure to ream out ALL the holes in the blocks.
Slowly inch worm the trysails in to place.
Thanks guys.
This really is very nice. there is always something a bit appealing from old style sailing ships. Lovely intricate work throughout as we know we will get from you HG… along with all the other numerous builds you have on the go … ![]()
![]()
Most kind John, most kind indeed.
Really nice job on the Bluenose II. Your rigging looks fantastic. Tried a wooden ship model. Epic fail.
Jim
Thanks Jim!
Which ship did you try to build?
It was the Pilot Boat Phantom from Model Shipways. Never got past the hull, which on that kit is solid.
Jim
The Canadian flag was approved in 1964. Adopted in 1965.
Thanks. Wasn’t sure about the timing.
Jim
