Beautiful build, Nick! Great details and finish!
Cheers Nick, it is surprising with just a bit of prep and just using the basics with what I had laying about, you can get some good results with a not much time spent on it… And I have to say again, I have learnt so much from watching some of the very skilled craftsmen like yourself mate who really push the boundaries on their builds … Seeing those get done gives you the confidence to try it yourself… , Well that’s my take on it … ![]()
2 Likes

4 Likes
That umbrella is a great touch! Now you just need a beach ball.
Paul
3 Likes
You ain’t seen nothing yet lol…
1 Like
A few more steps forward… But no umbrella yet lol…you can wait ![]()
Lots of little fiddly bits during this stage.
Painted up the M19 ready ammo boxes and rounds, did a chain through a shackle and the start of a lifting strap for the 2nd spare wheel, did a vice for the work table… And painted up an L85A2 as a crew personal weapon.
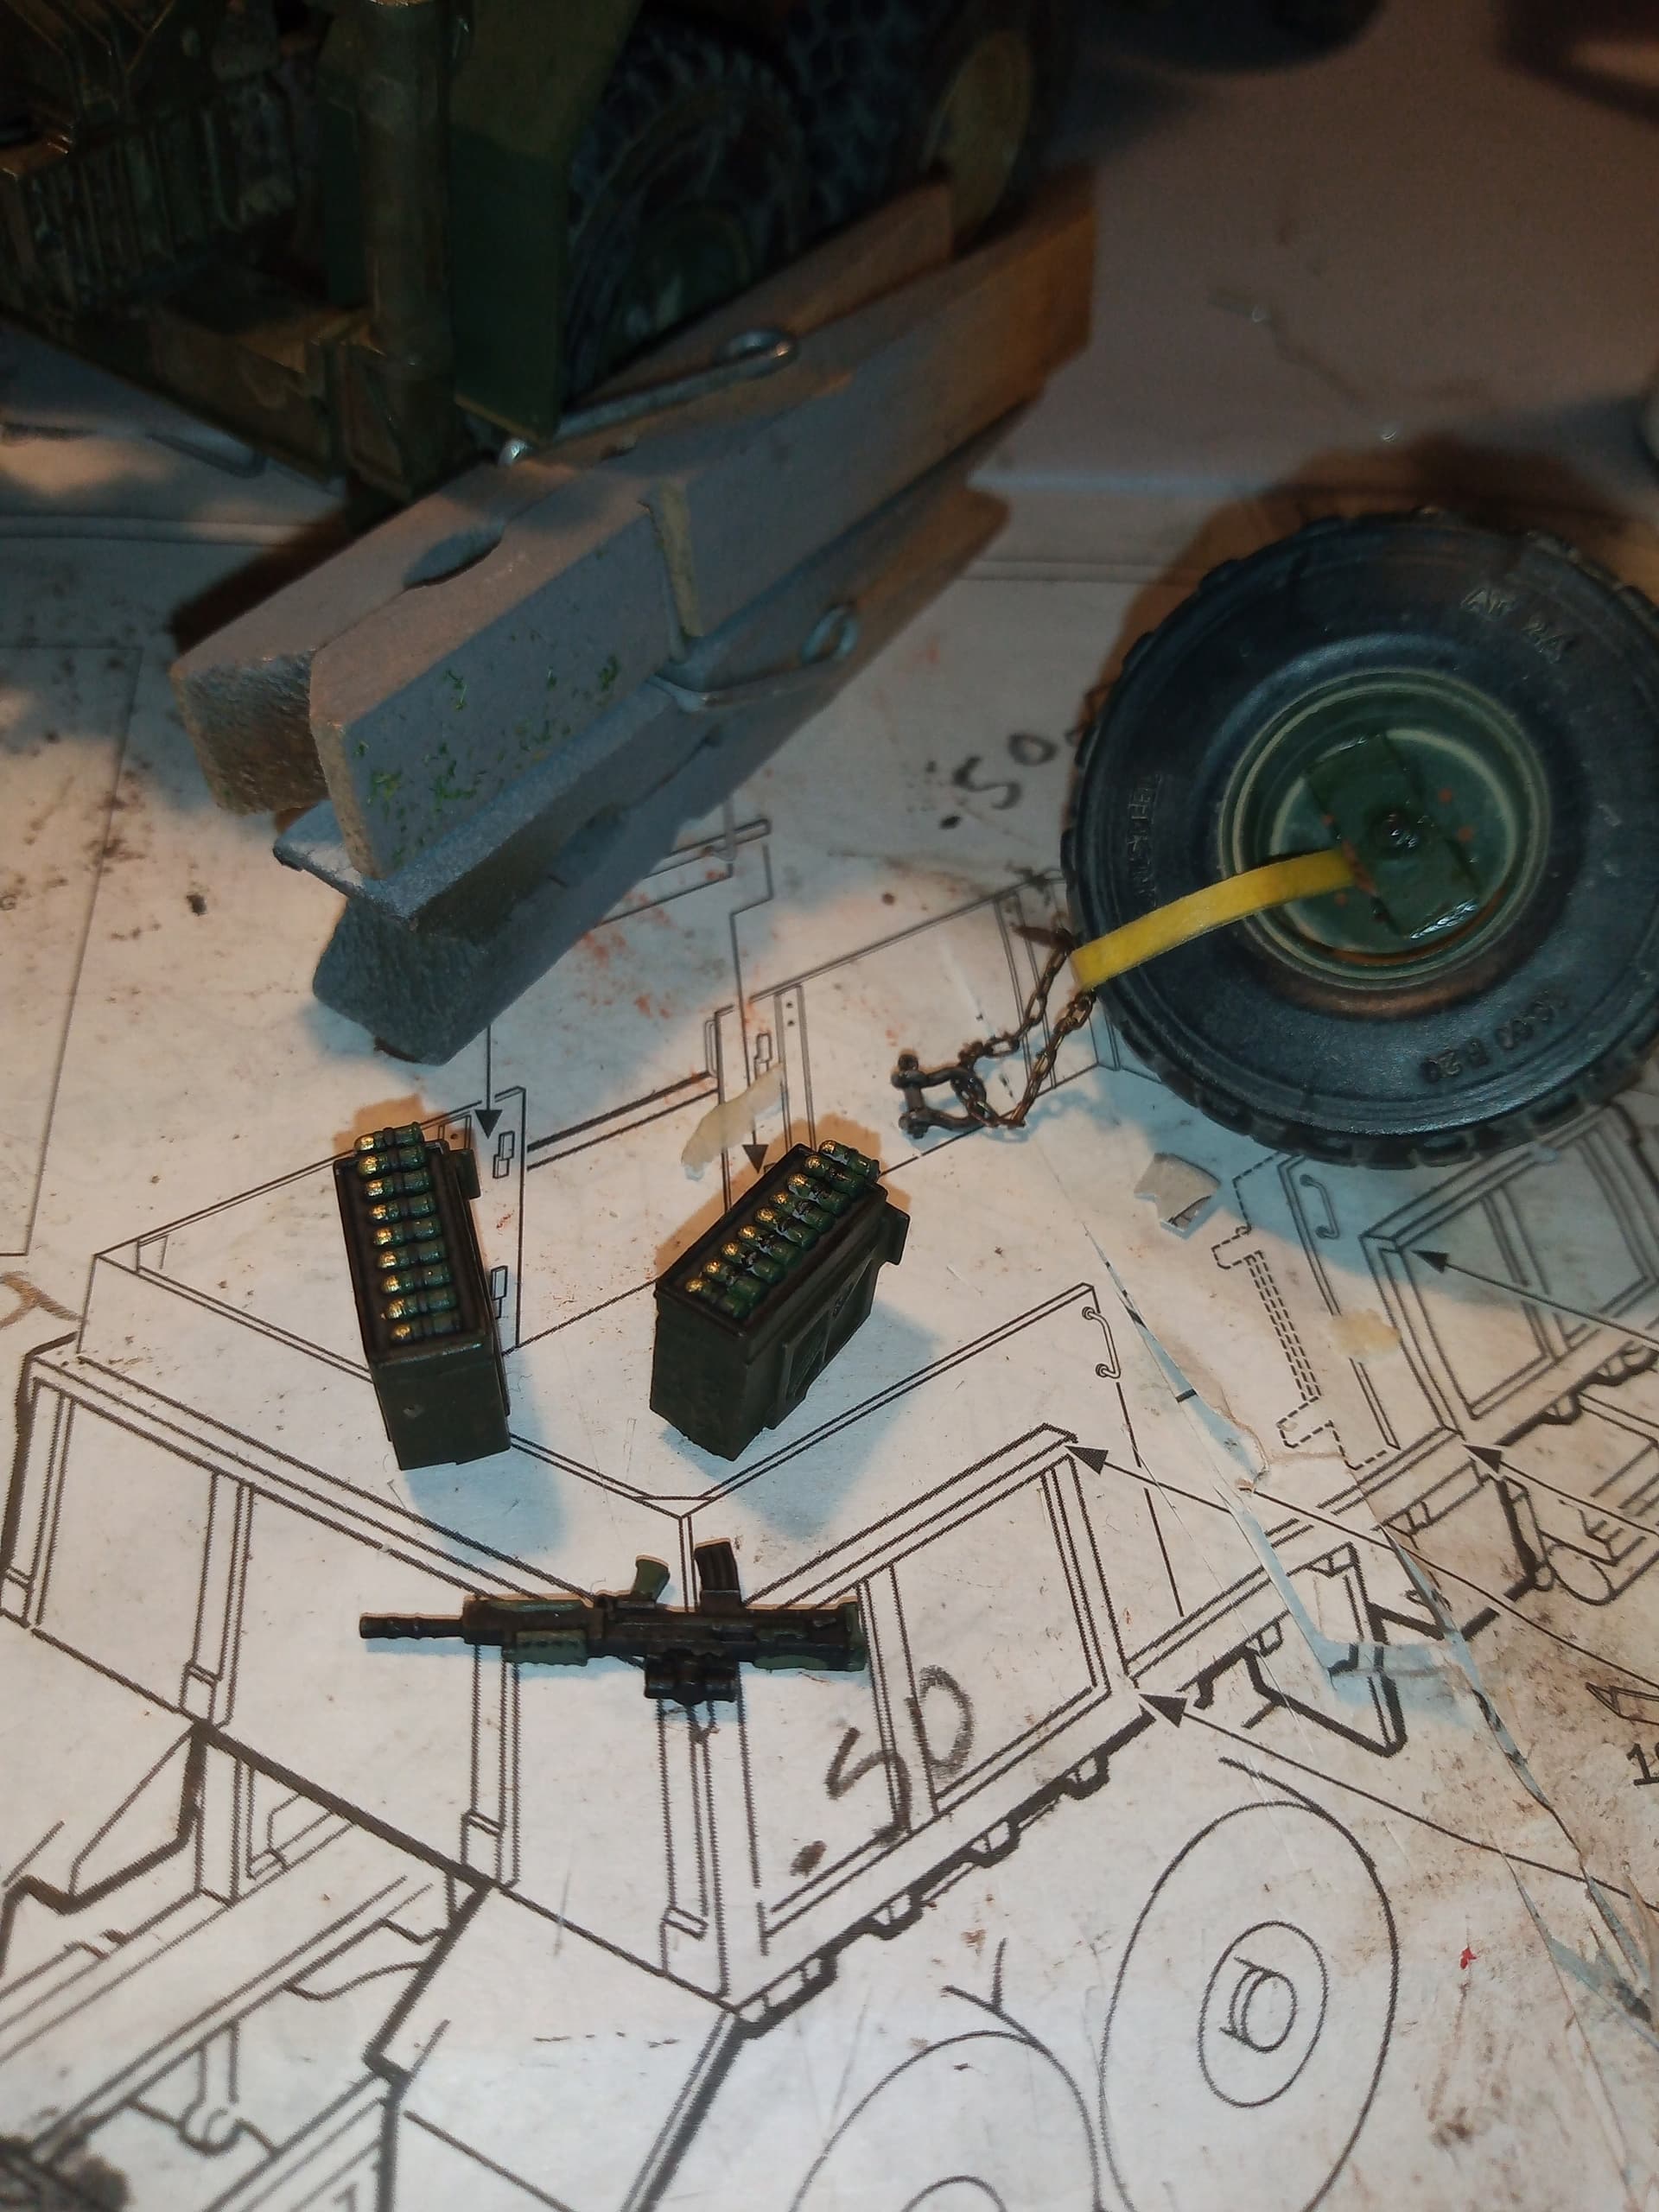
The spare, lifting strap, chain and shackle.

The L85A2, needs some graphite wear on it.

And the vice.

Should be able to have the 2nd spare mounted tomorrow, then I can fit the crane to the back.
7 Likes
Someone park illegally?
4 Likes
It will make sense once you see it mounted ![]()
1 Like
Ahem… “vices.” ![]()
—mike
5 Likes
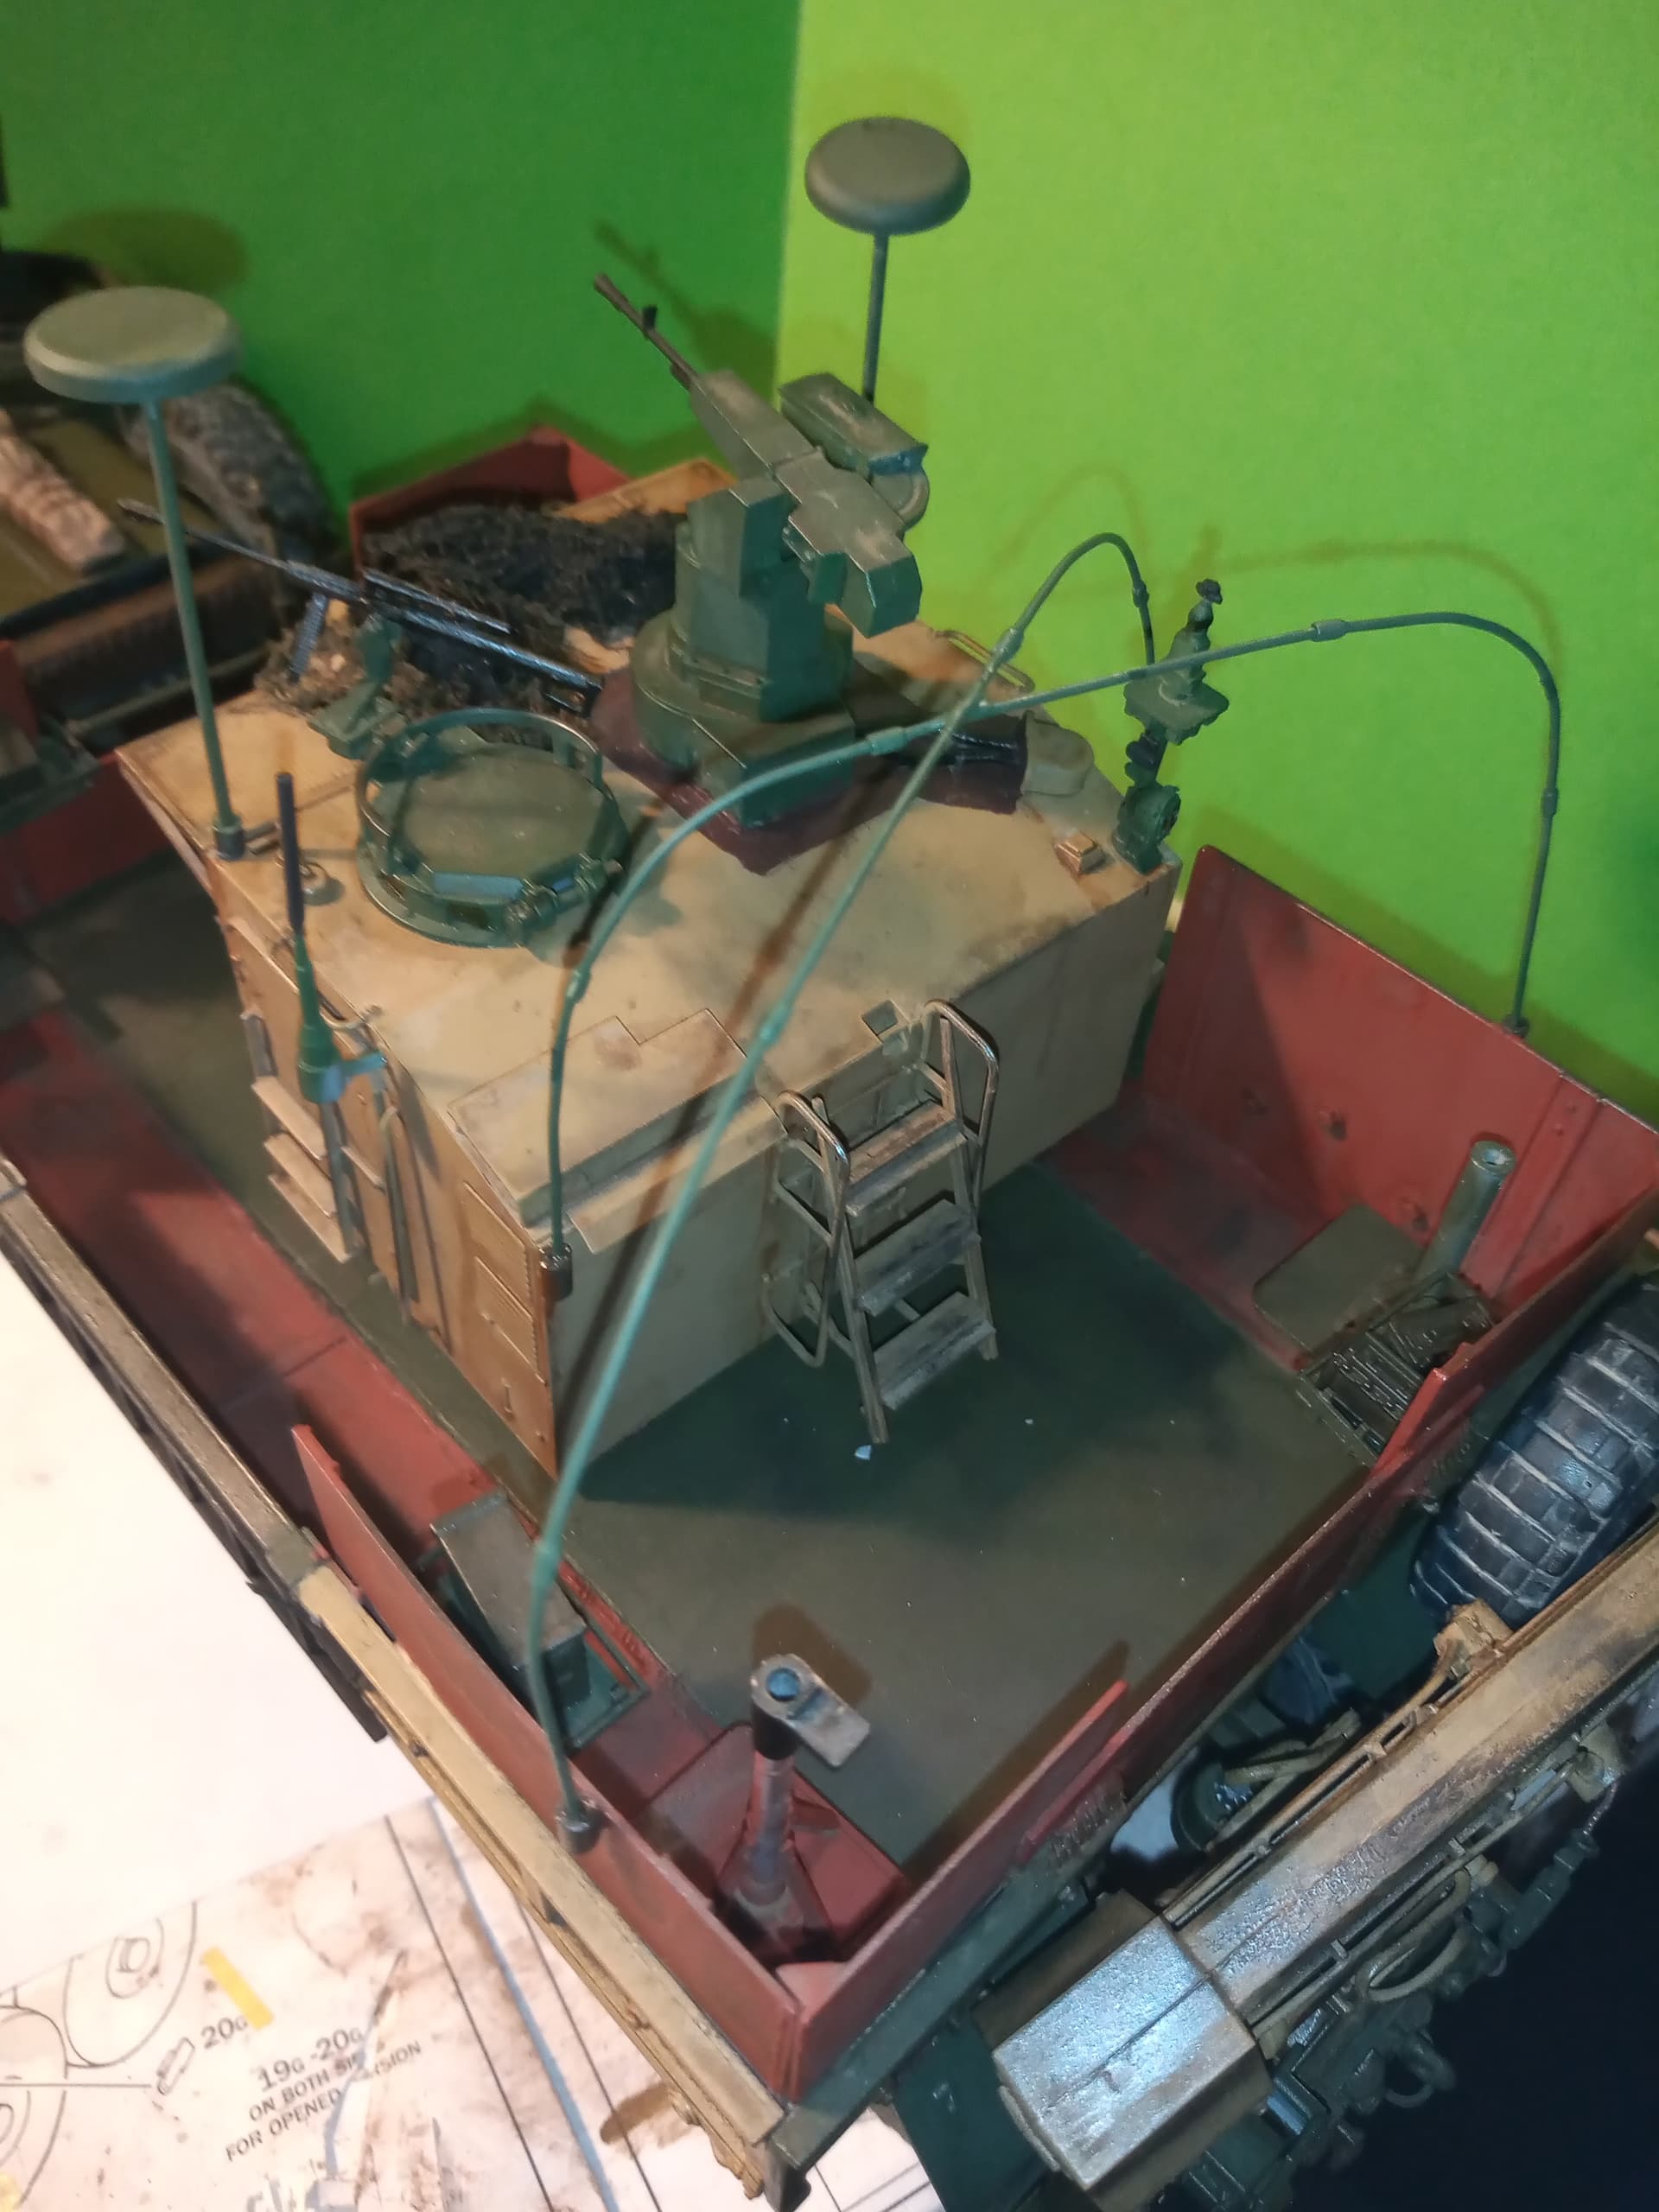
This is how the 2nd spare is mounted.
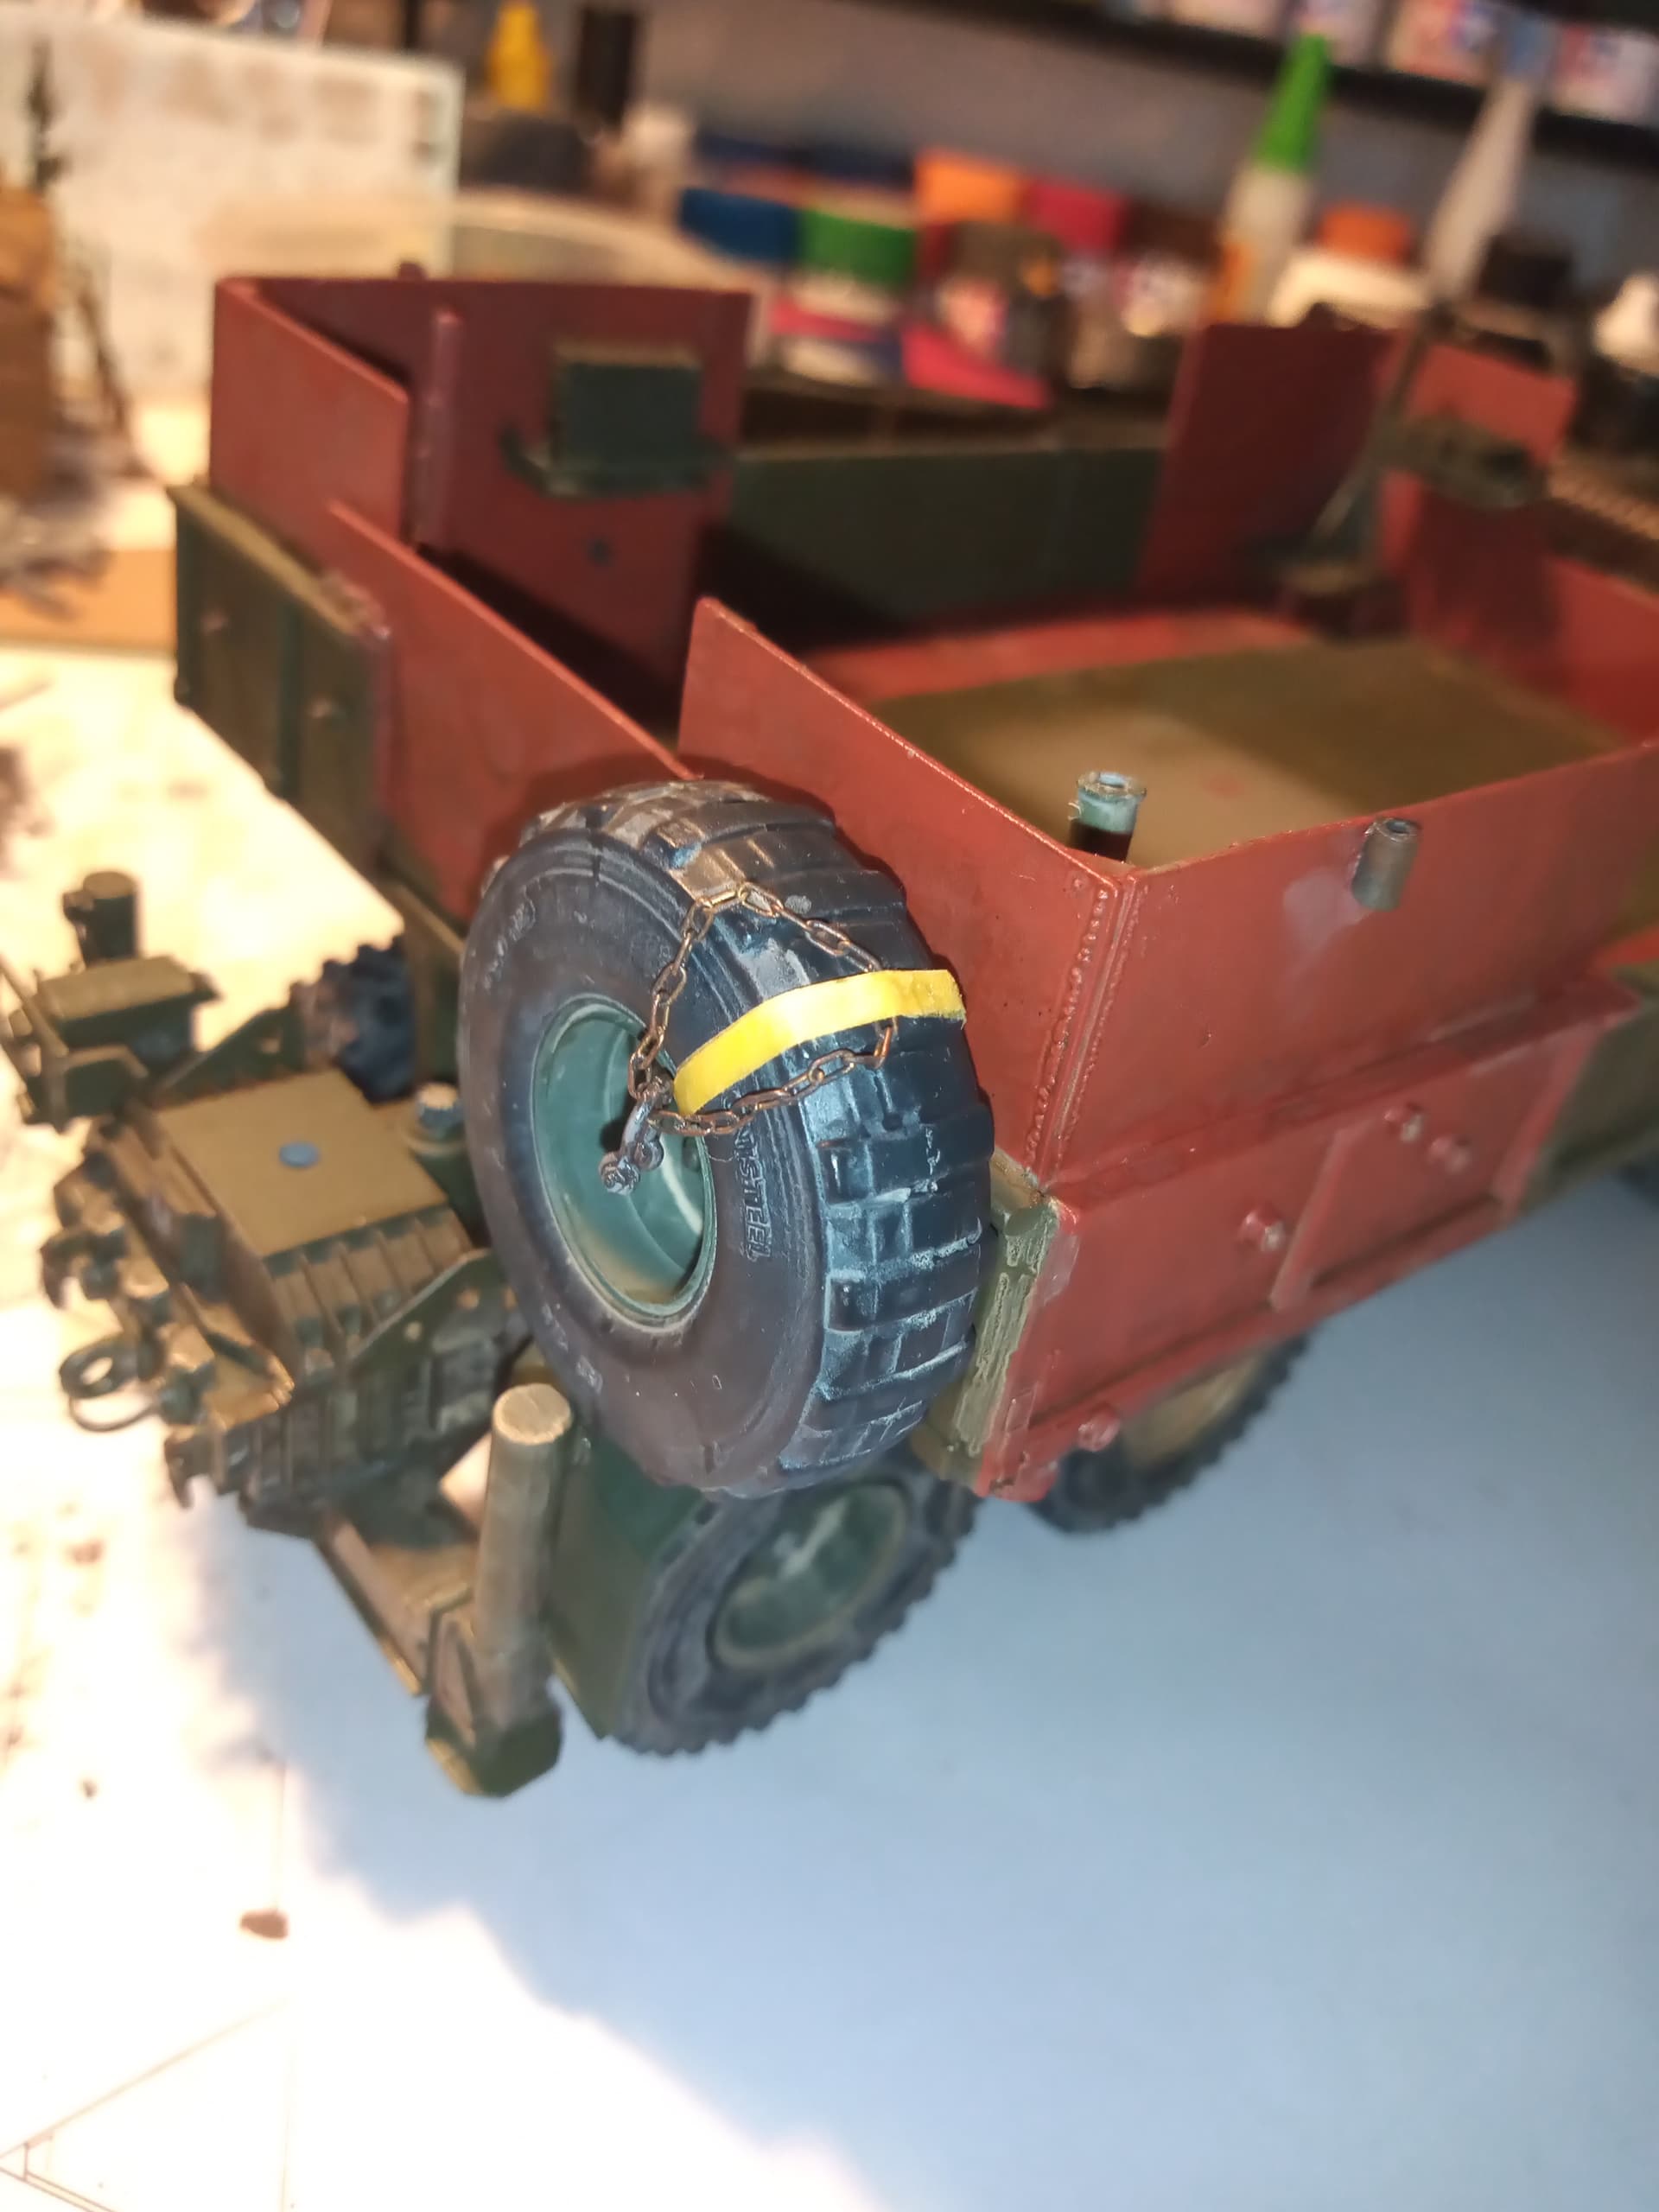
A strap (masking tape) runs through the centre and around the wheel. The chain is looped under the strap and that has a shackle through it.

I’m going to thread the crane cable through the chain and then secure the cable into its hook assembly so the crane cable and the crane boom will help secure the spare as well the centre bolt that is holding it.
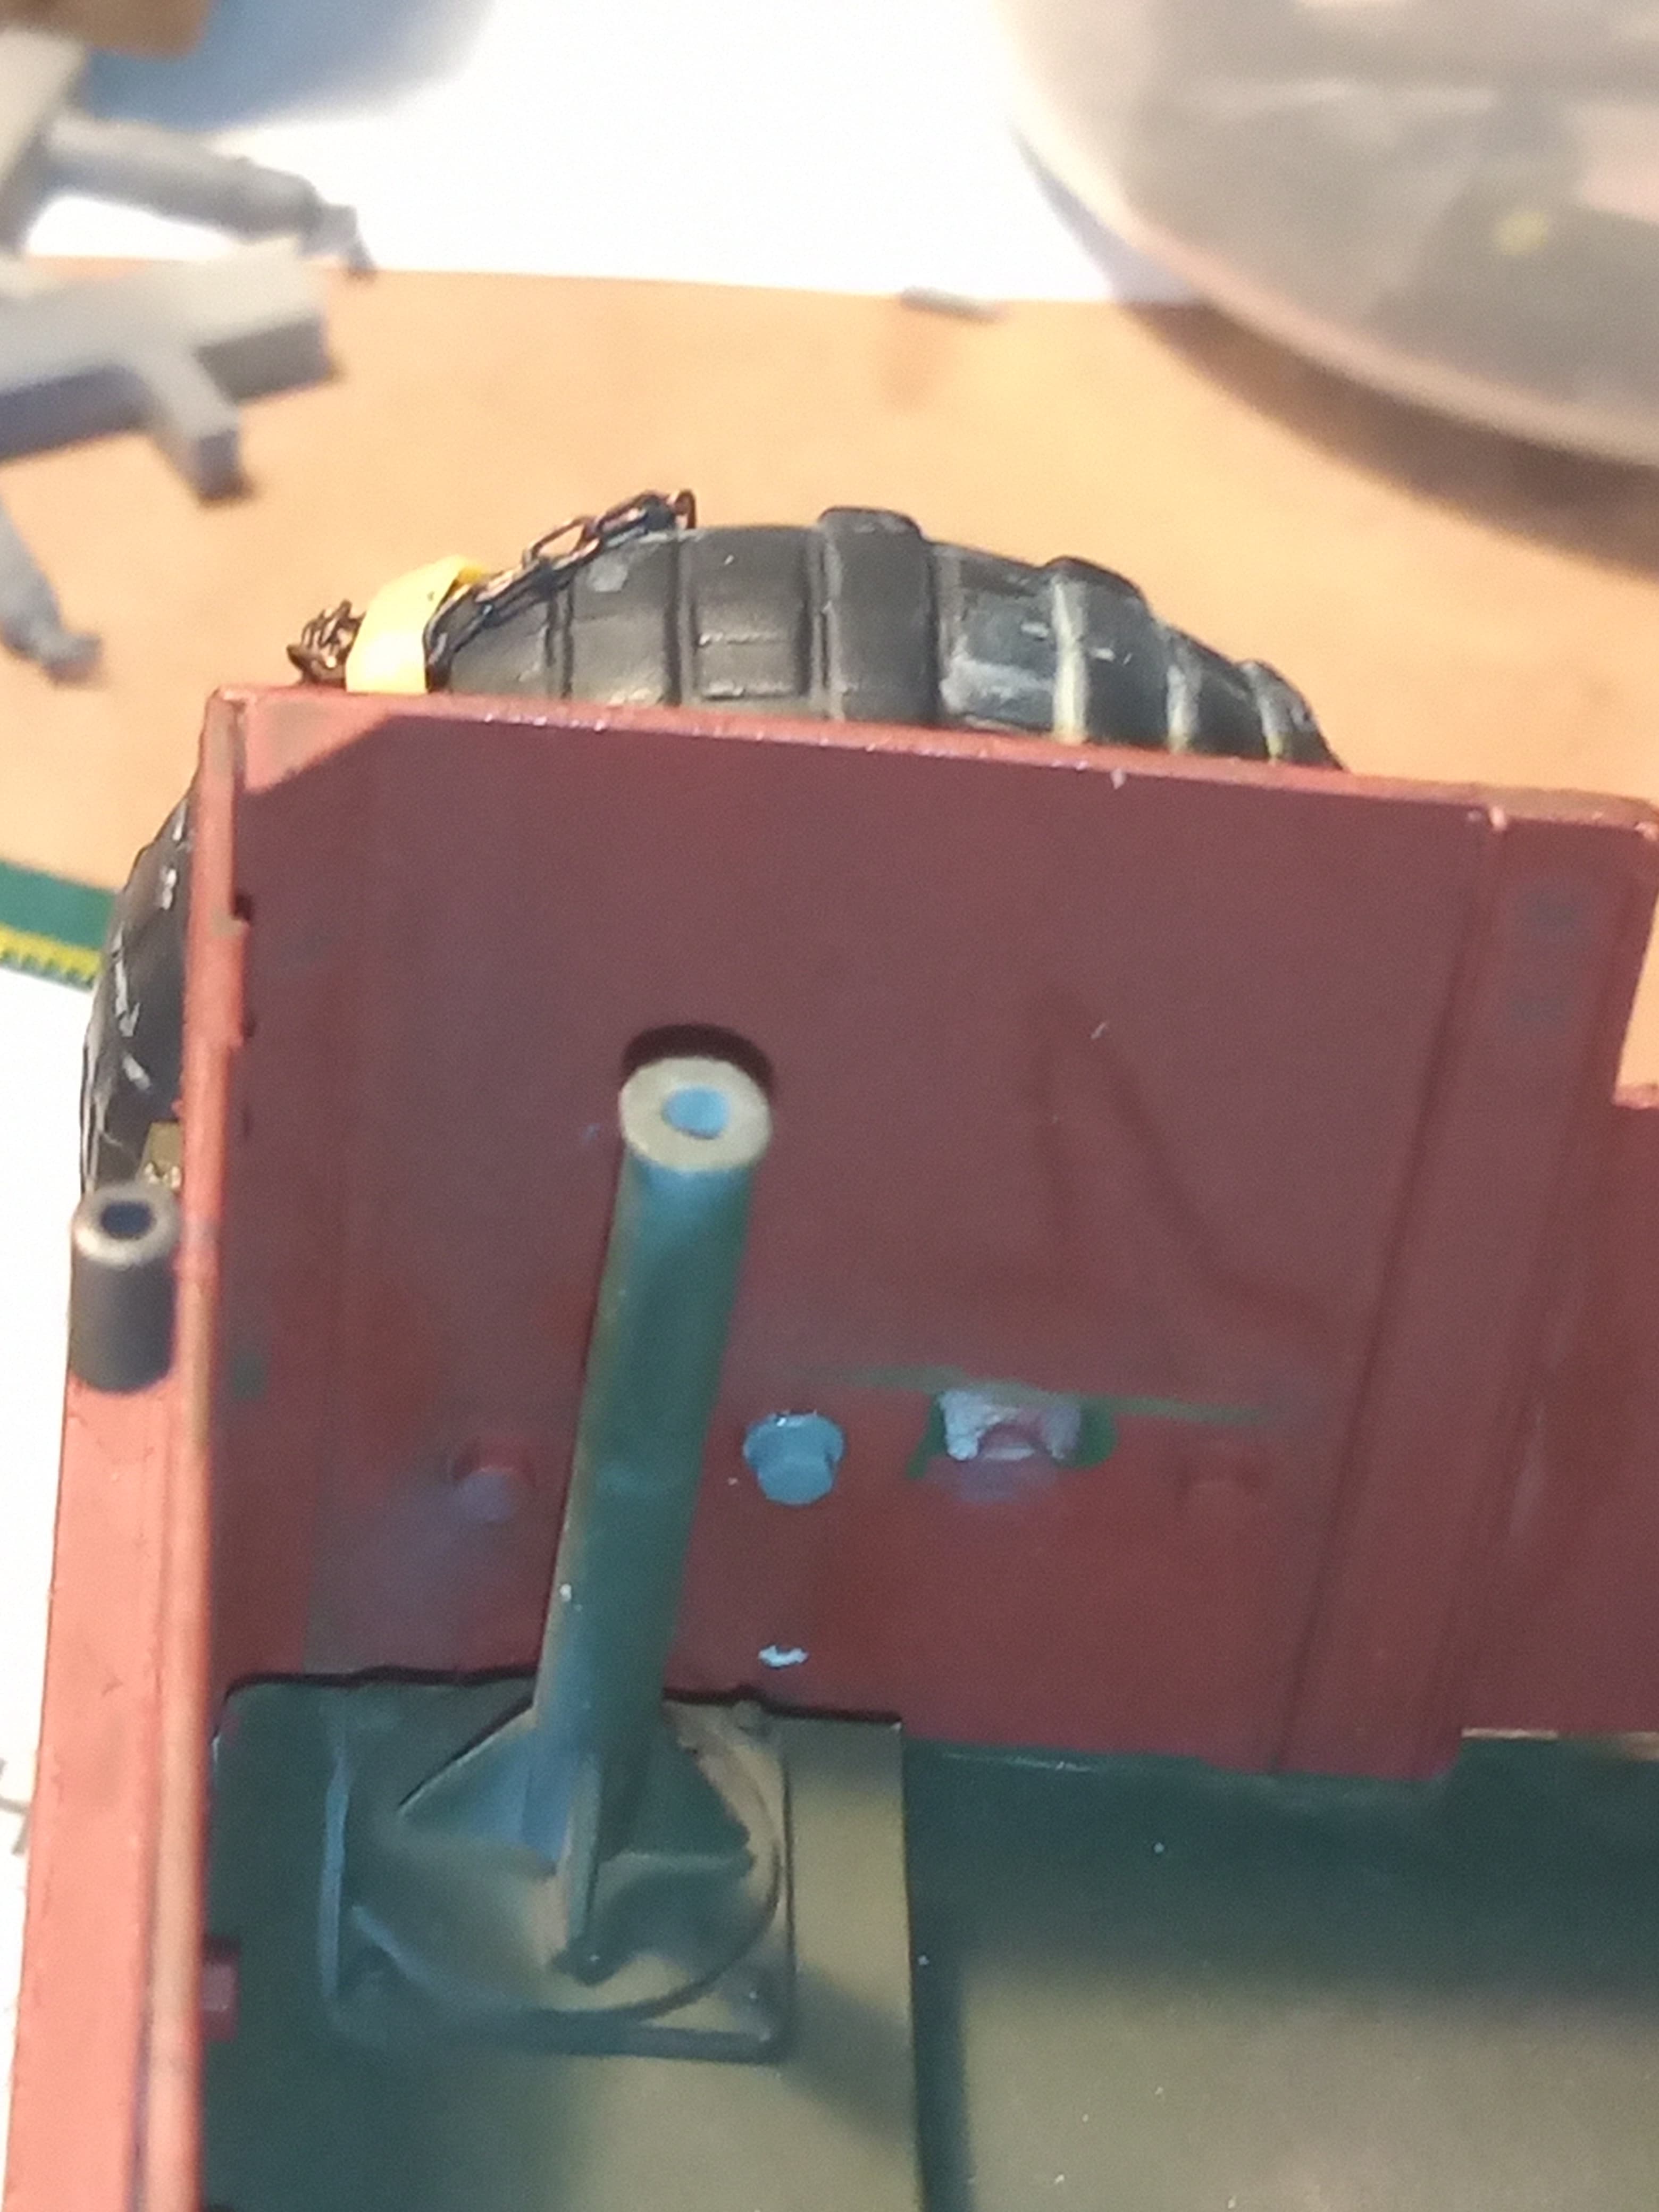
MENG bolt head to be painted that holds the securing centre bolt.
And now the crane is fitted. Just letting the base fully cure as I need to use a bit pressure to make sure the boom pushes against the wheel.

I decided to go heavy with the wear and tear on the crane as it would be a real work horse.
9 Likes
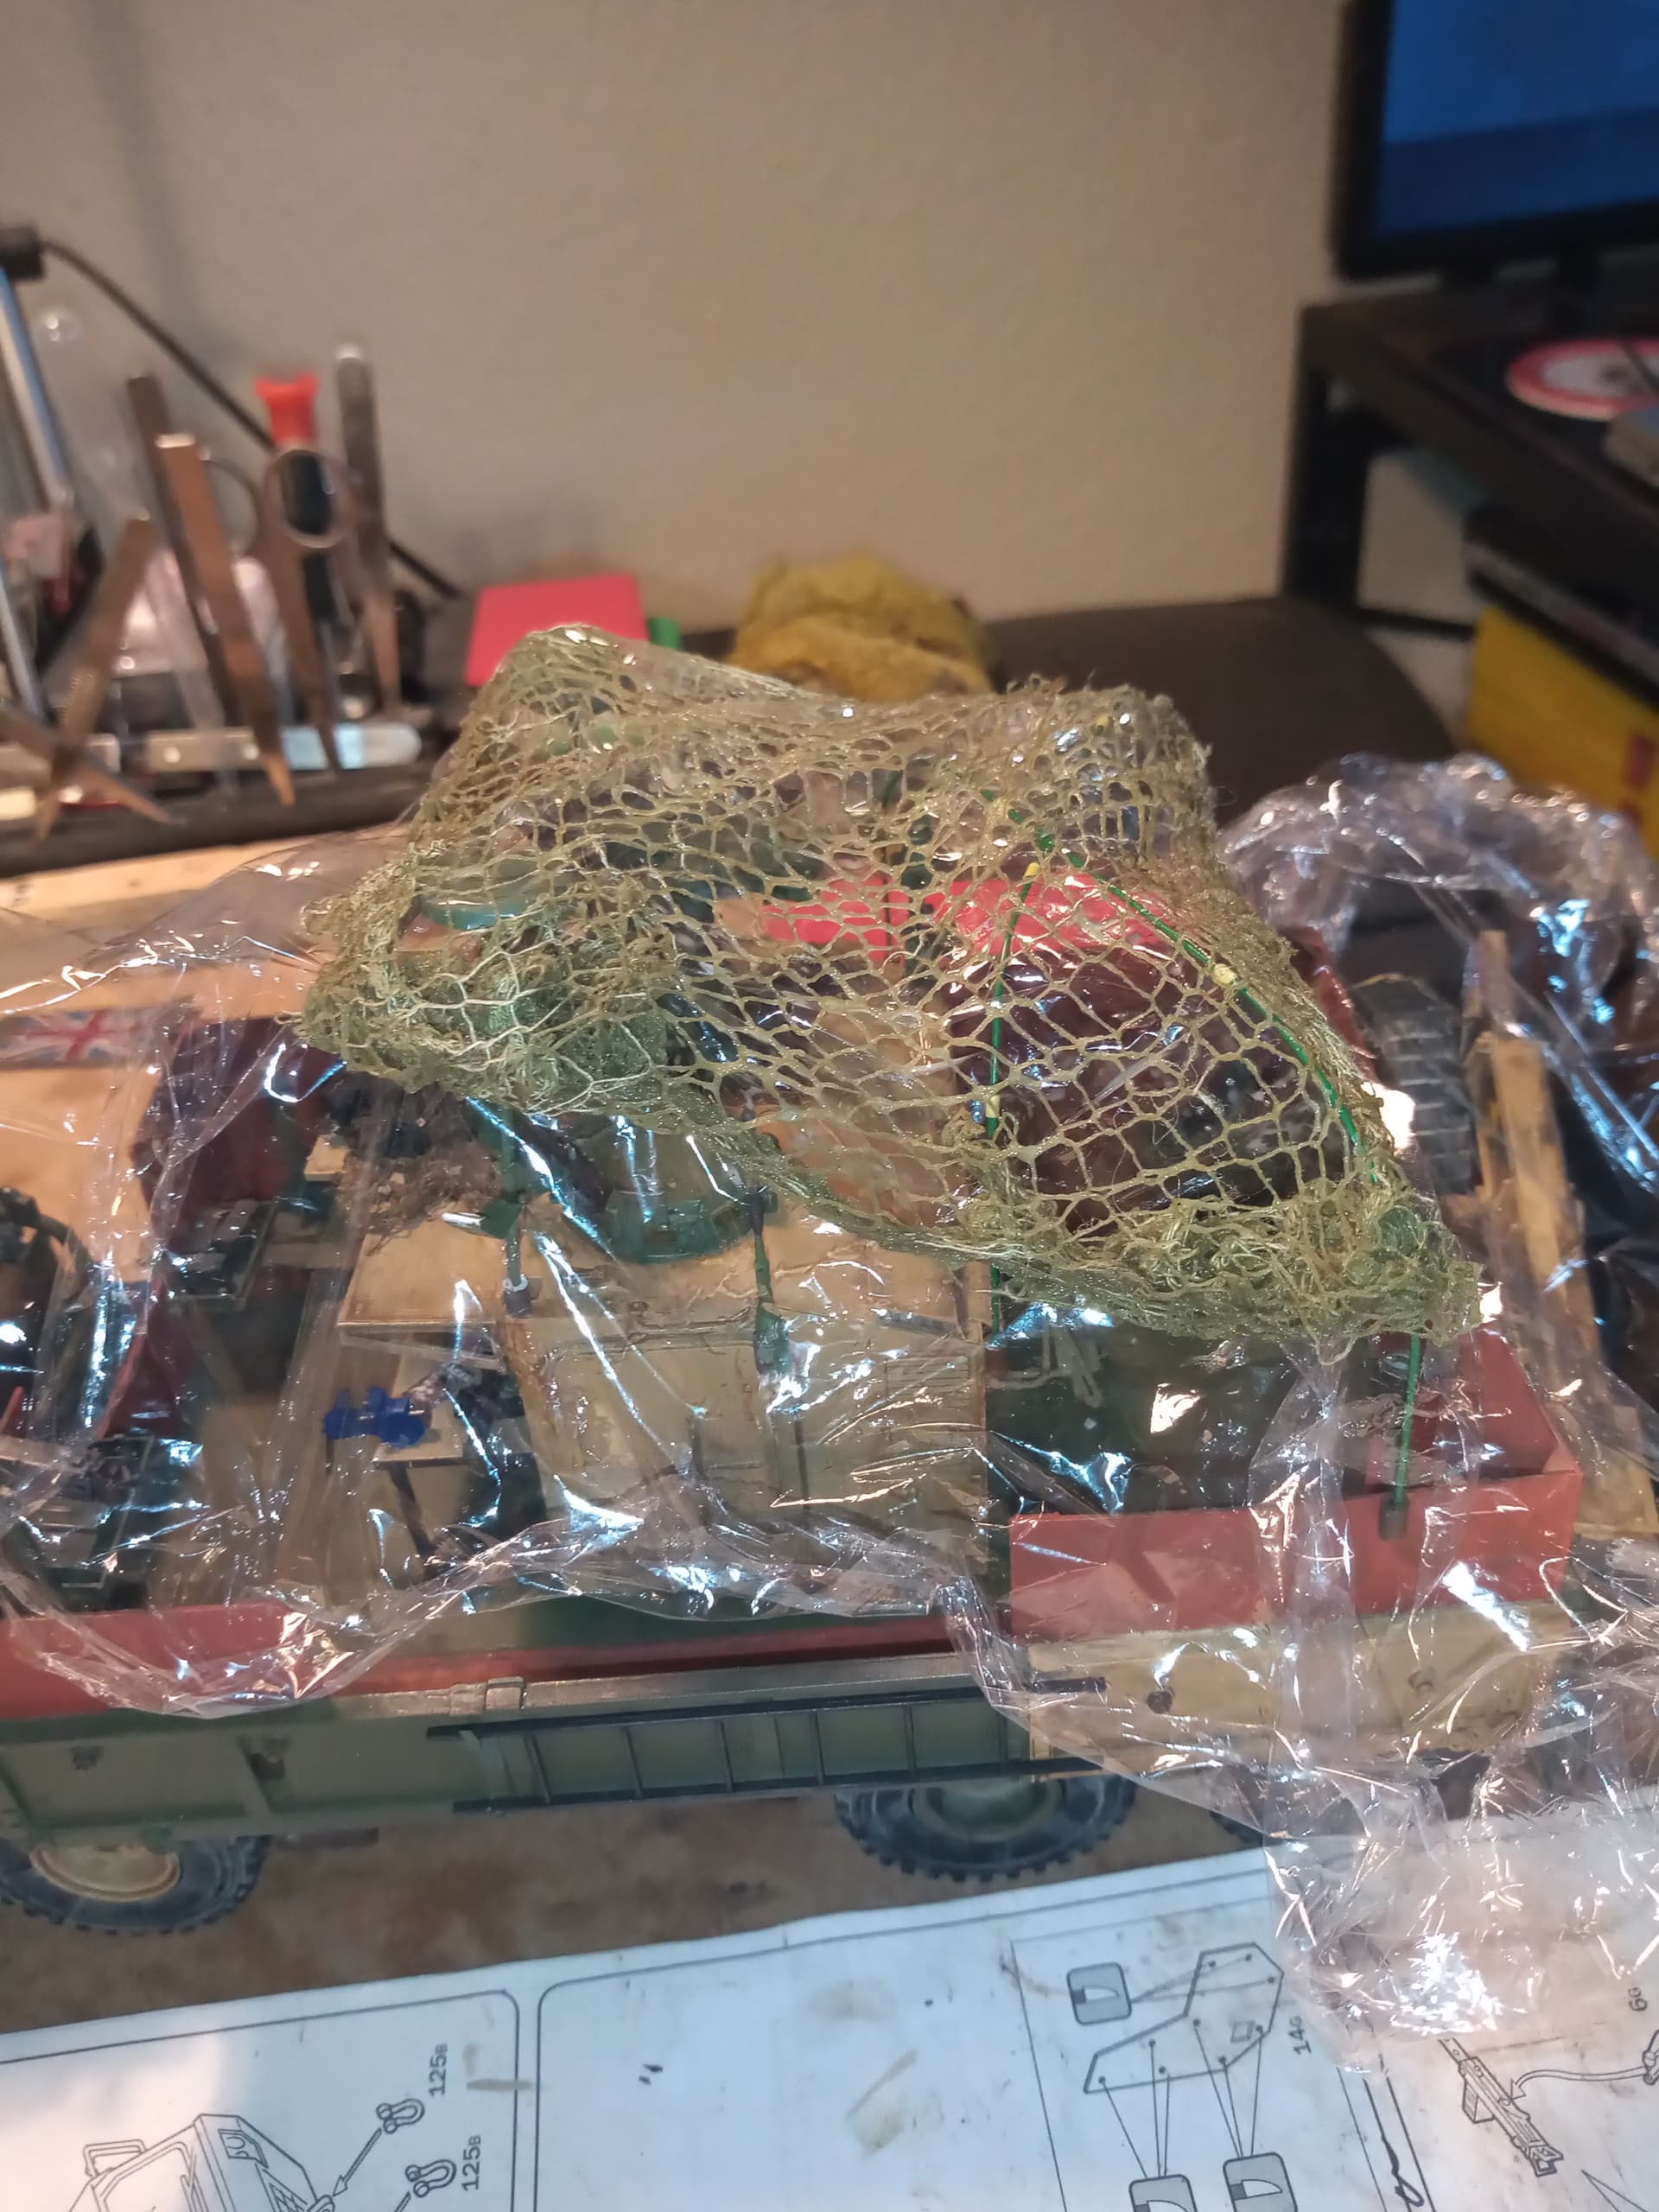
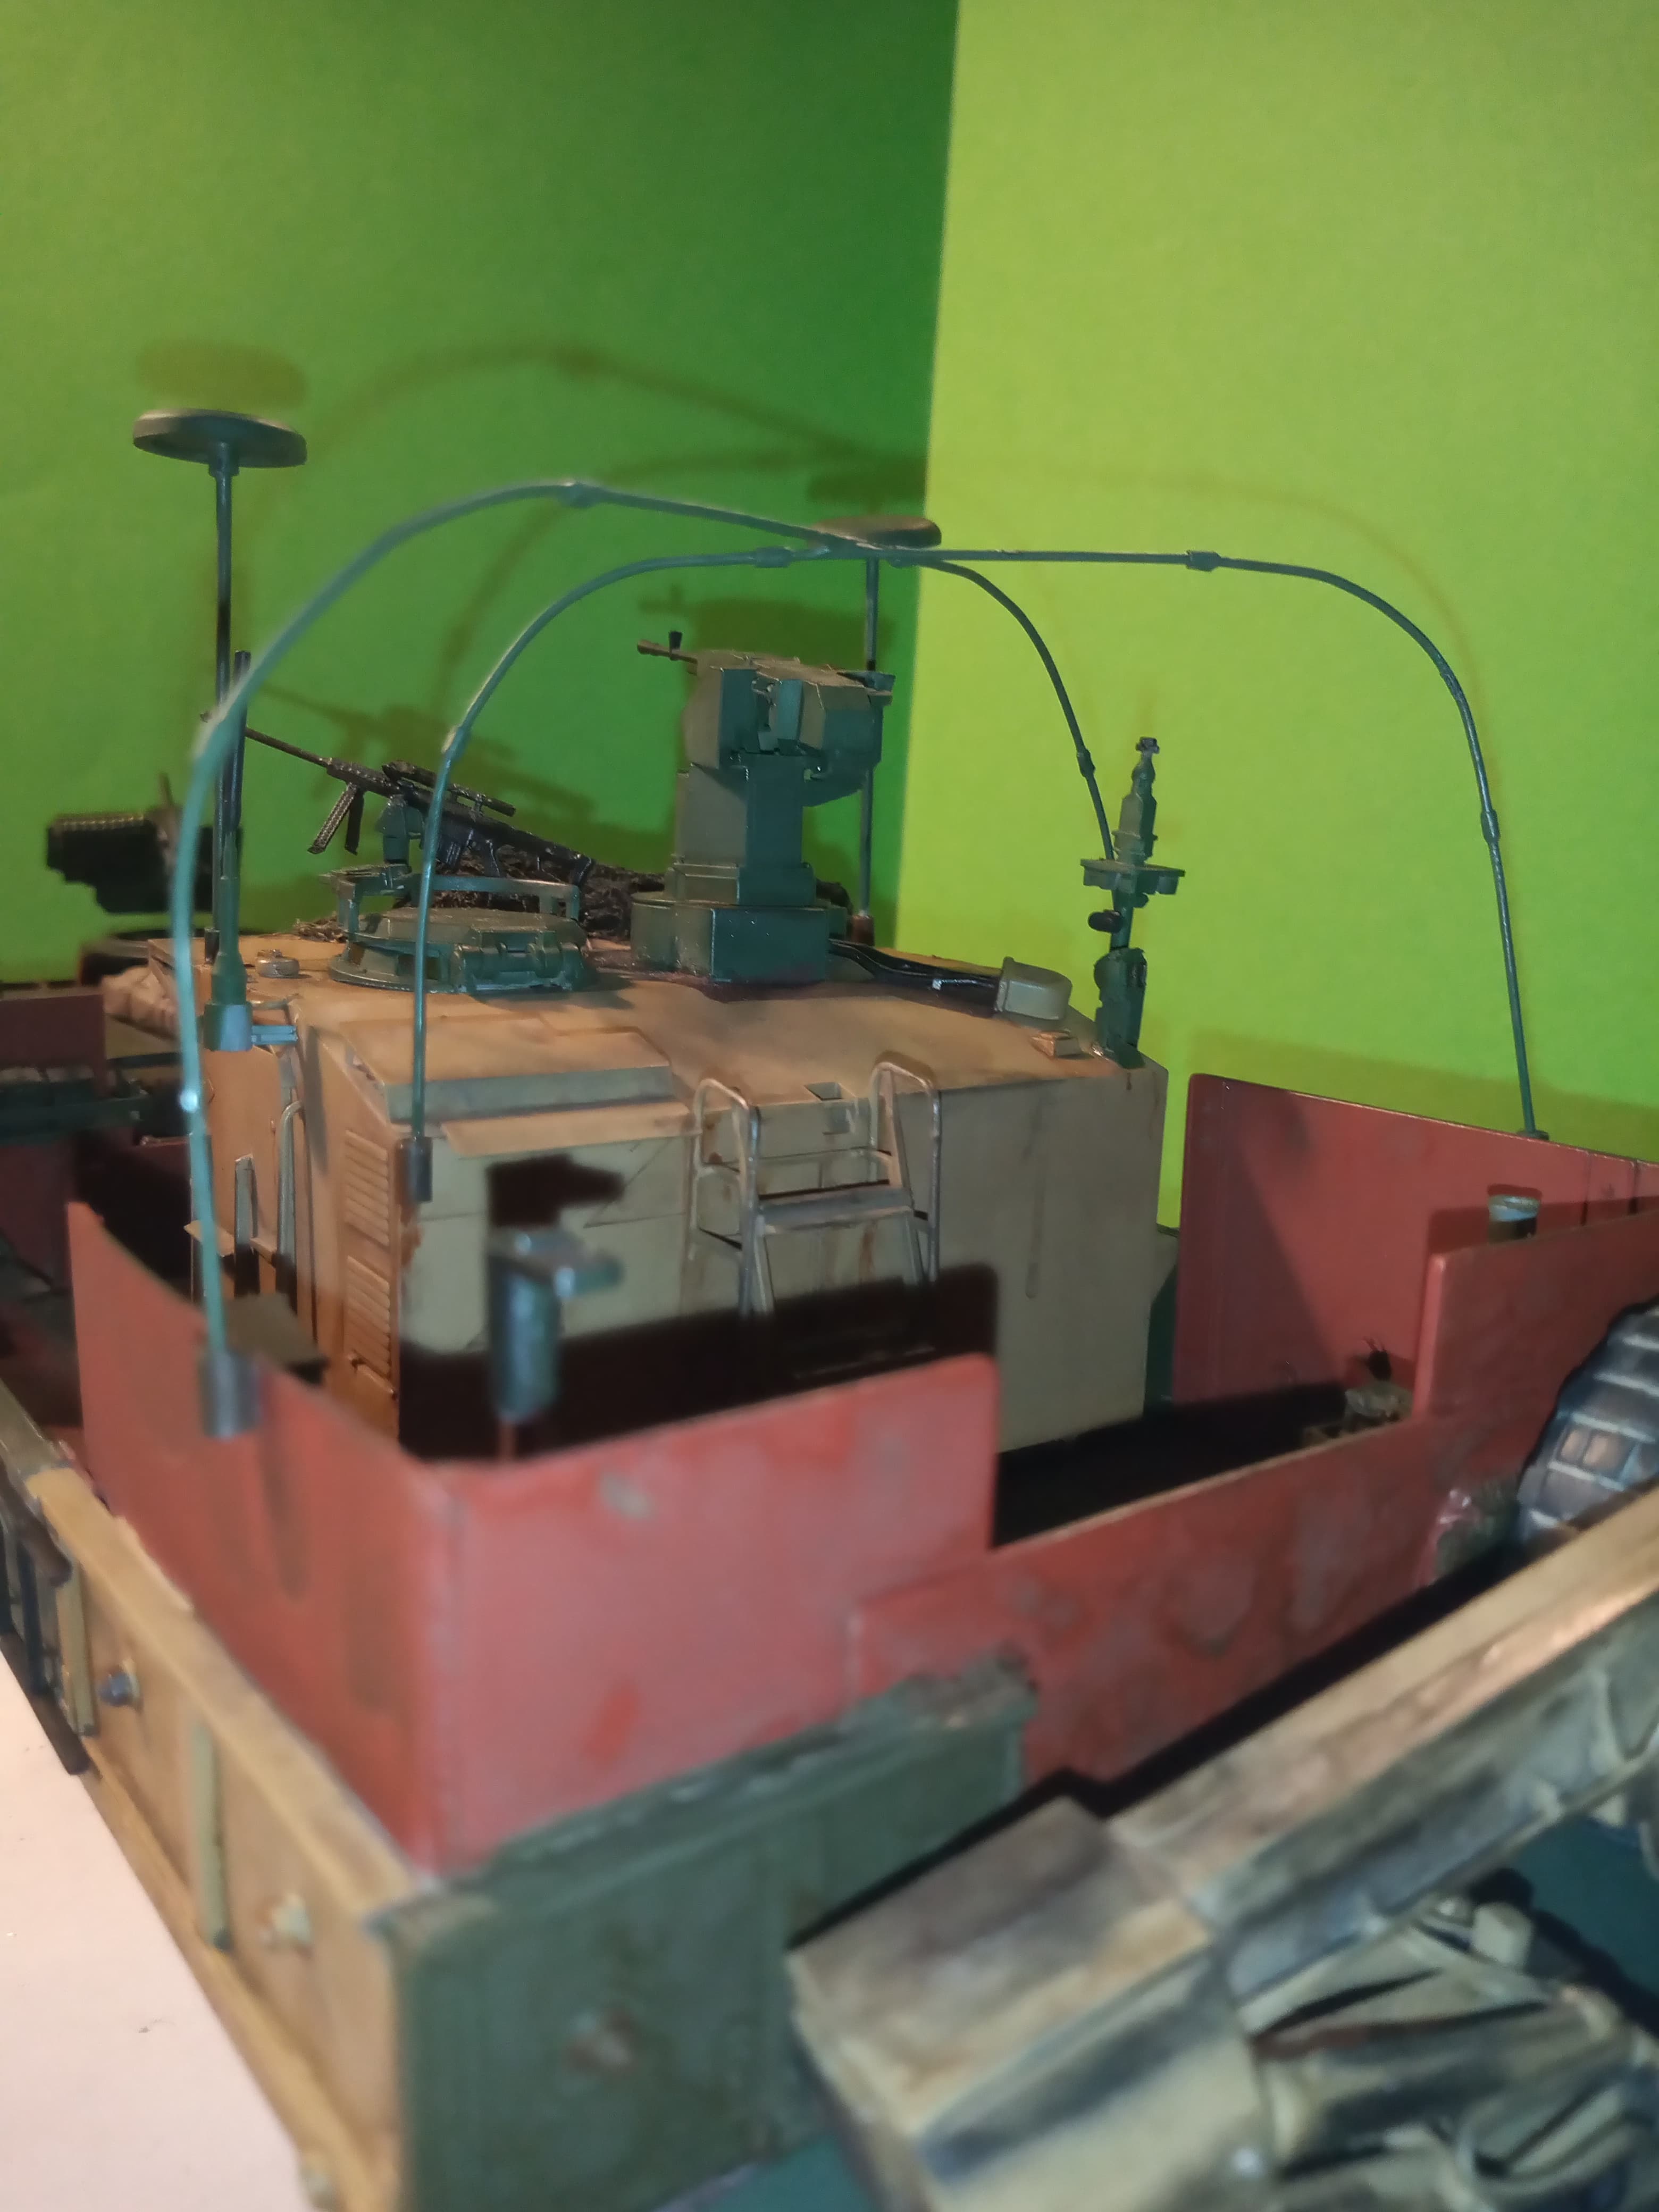
Trying to get the cam net sorted on top.
Laid it out on kitchen foil, and brushed it with PVA glue.
Laid cling film over the cam pole frame and the 2 individual cam poles (which I forgot to take pictures of ![]() ) then placed the net over the cling film. Then tried to get a basic draped shape.
) then placed the net over the cling film. Then tried to get a basic draped shape.

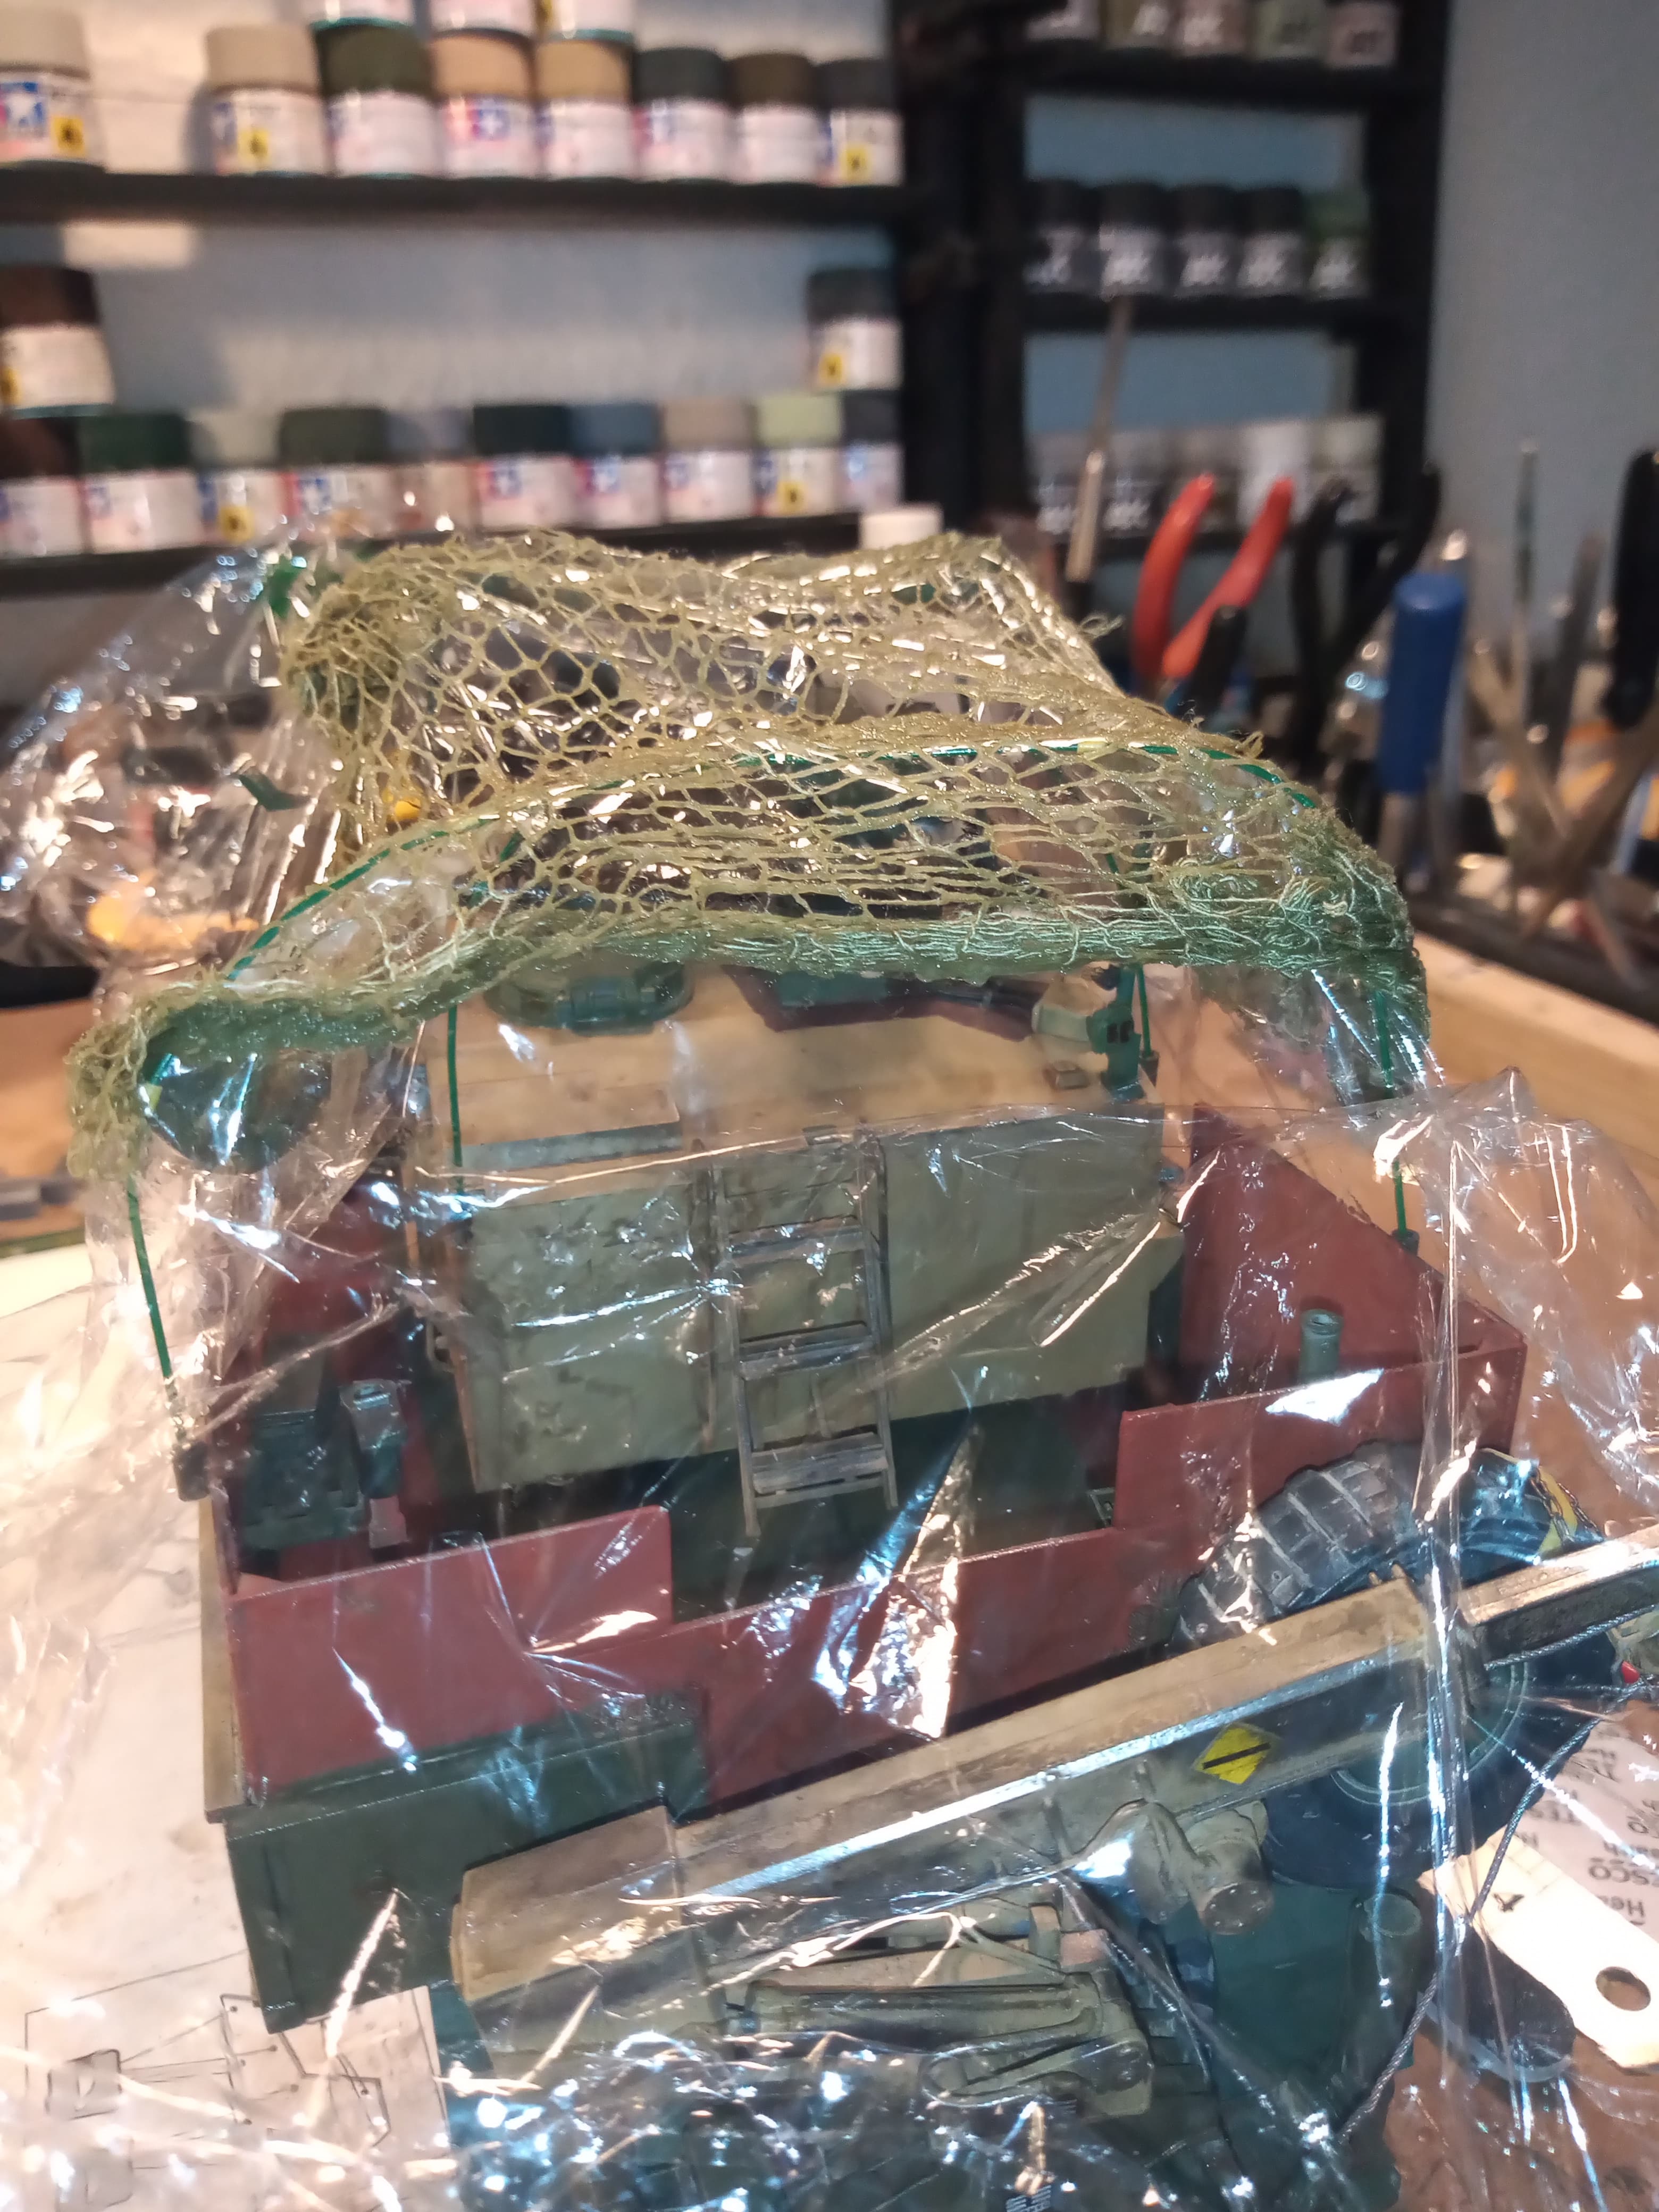
Once that partially dries, I will shape it some more and add a few smaller sections of different coloured cam net onto it and some securing ropes.
6 Likes
Hi Johnny,
that boom looks great! Very nice indeed! The idea you’re using for the net is pretty cool too - looking forward to seeing that!
Cheers
Nick
Hi model builders,
I’m going to try and convert a Scammell Pioneer, which is a 6x4 to a Scammell Explorer, which is a 6x6. I’m starting with the Thunder Models kit, and will go from there. If you’re not familiar with this truck, please see below:
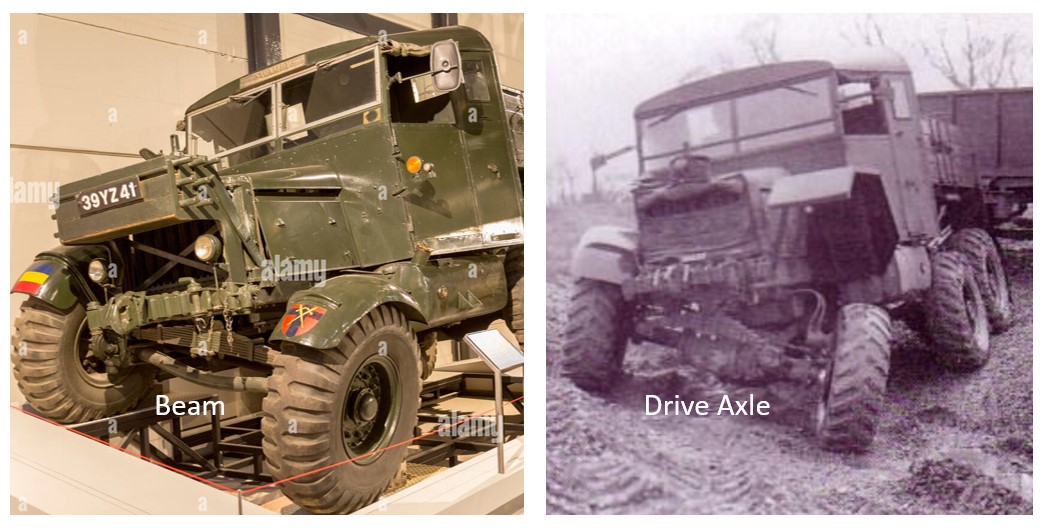
I’ve always like this rig - the three link front end is pretty wild, and the looks are cool. As you can see on the left, the Pioneer has a solid beam up front, while on the right you can see the Explorer has a drive axle! Awesome! It’s a big truck, which was used for heavy recovery, powered by a big Gardner 8.4 L diesel engine. For mine, Ill be using a Cummins L10, which is 8.9 L and turbocharged - why not? I found a story on-line about a guy who did just this - but no turbo.
Back to the truck:
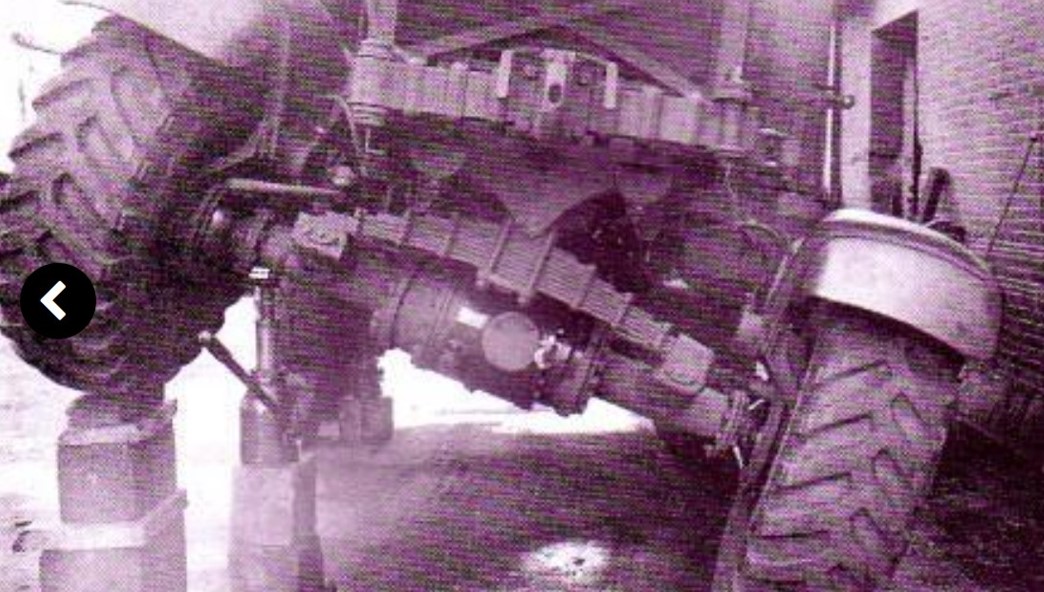
As you can see there’s a lot of flex up front!
And where the build sits today:
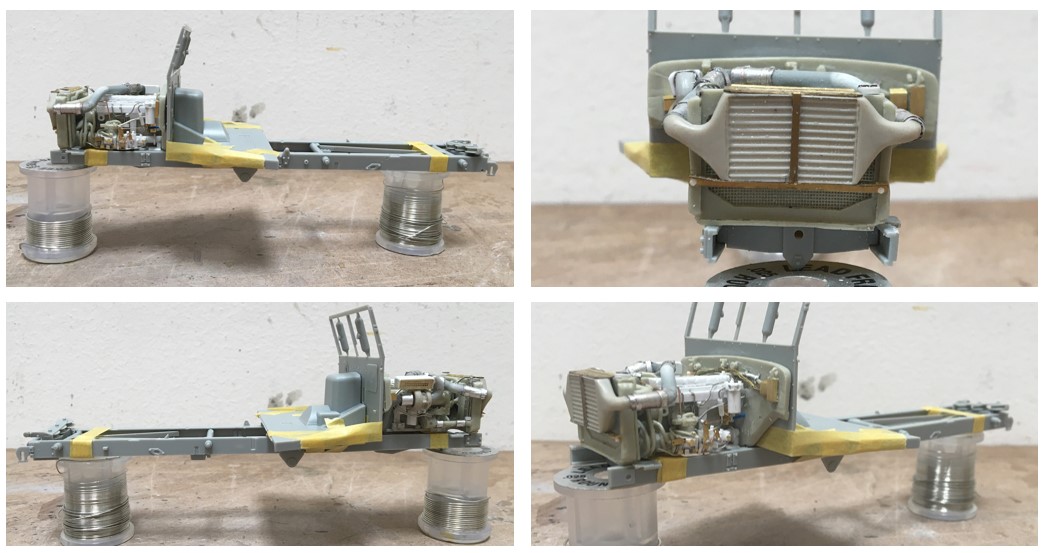
Pretty early in the process - I converted a CMK M939 engine to look, well, something like an L10 - just don’t look too closely - specifically at the top of the engine - yeah…the 10L head is nothing like the donor. This is fine with me, as there will be a hood on top but I will keep the sides open, which is evidently fairly common practice - and for this I’m hoping will look pretty cool too!
I’m going to scratch build the front leaf spring pack and adapt an extra axle, with the intent of it being posable, like in the photo above… ![]()
![]()
I won’t clog up this thread with lots of pics, and will instead start a thread in the truck section of Automodeler if you’d like to see how ![]()
![]() this all comes together! I’ll post milestones here.
this all comes together! I’ll post milestones here.
So, on we go - happy model building.
Cheers
Nick
6 Likes
Great idea Nick and where you are at the mo is looking fantastic. So much great work going into it. The actual truck looks a beast though …I like the idea about keeping the supports in the windscreen frame, thats a great idea to keep it rigid.
I was pretty happy with that boom on the gun truck and the extra detailing that I decided to do … gives it a bit more realism I think. I remembered the one Michael @165thspc did a while back and thought I would give it a go.
2 Likes
Never knew there was a 6x6 version of the Scammell so immediately I like your thinking here!
Always loved that big transverse mounted leaf spring in the front, had intended to make mine workable as well if I ever built this model.
Check out that period reference photo there. They have one motorcycle style fender (attached on the vehicle’s right, just as in the production model) and one sky high, solid mounted fender attached on the vehicle’s left.
The individual cam poles and mushrooms…
And the cam frame
Fairly happy with the cam net and how it kept the shape I gave it… The PVA did leave a bit of residue which shines, but I am going brush over some brown and green and also some PVA’d darker green pieces of cam net.
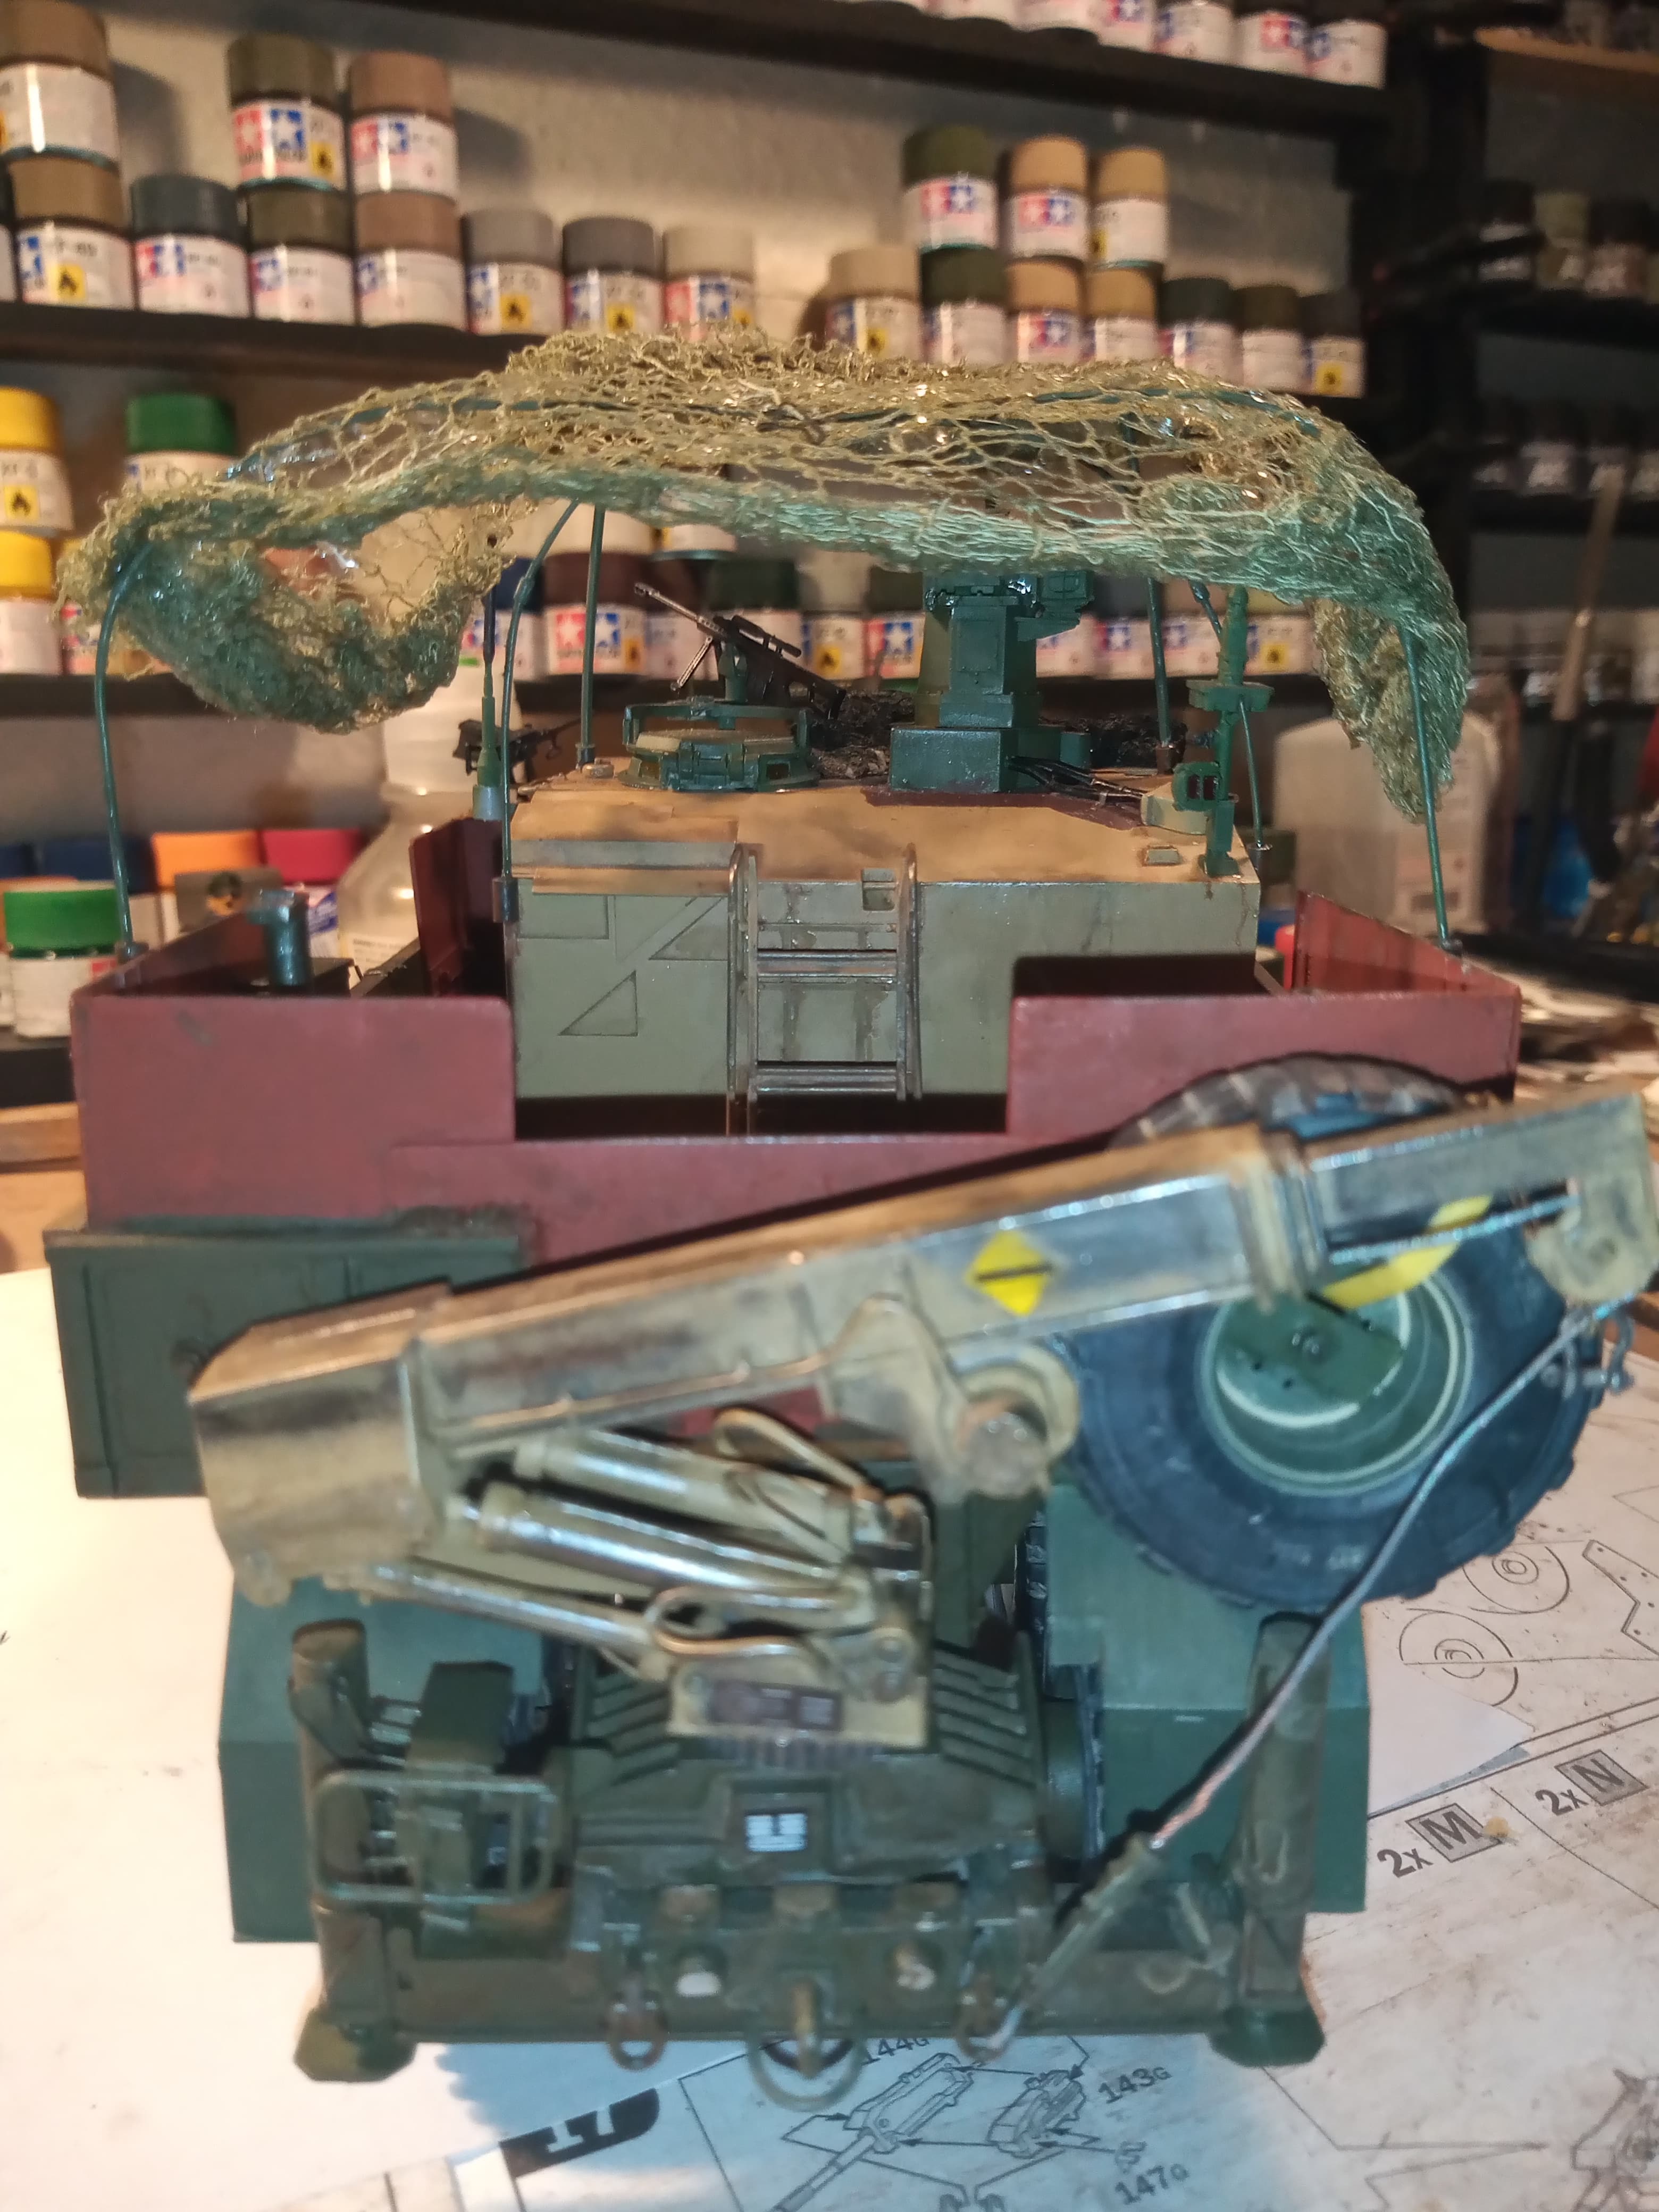
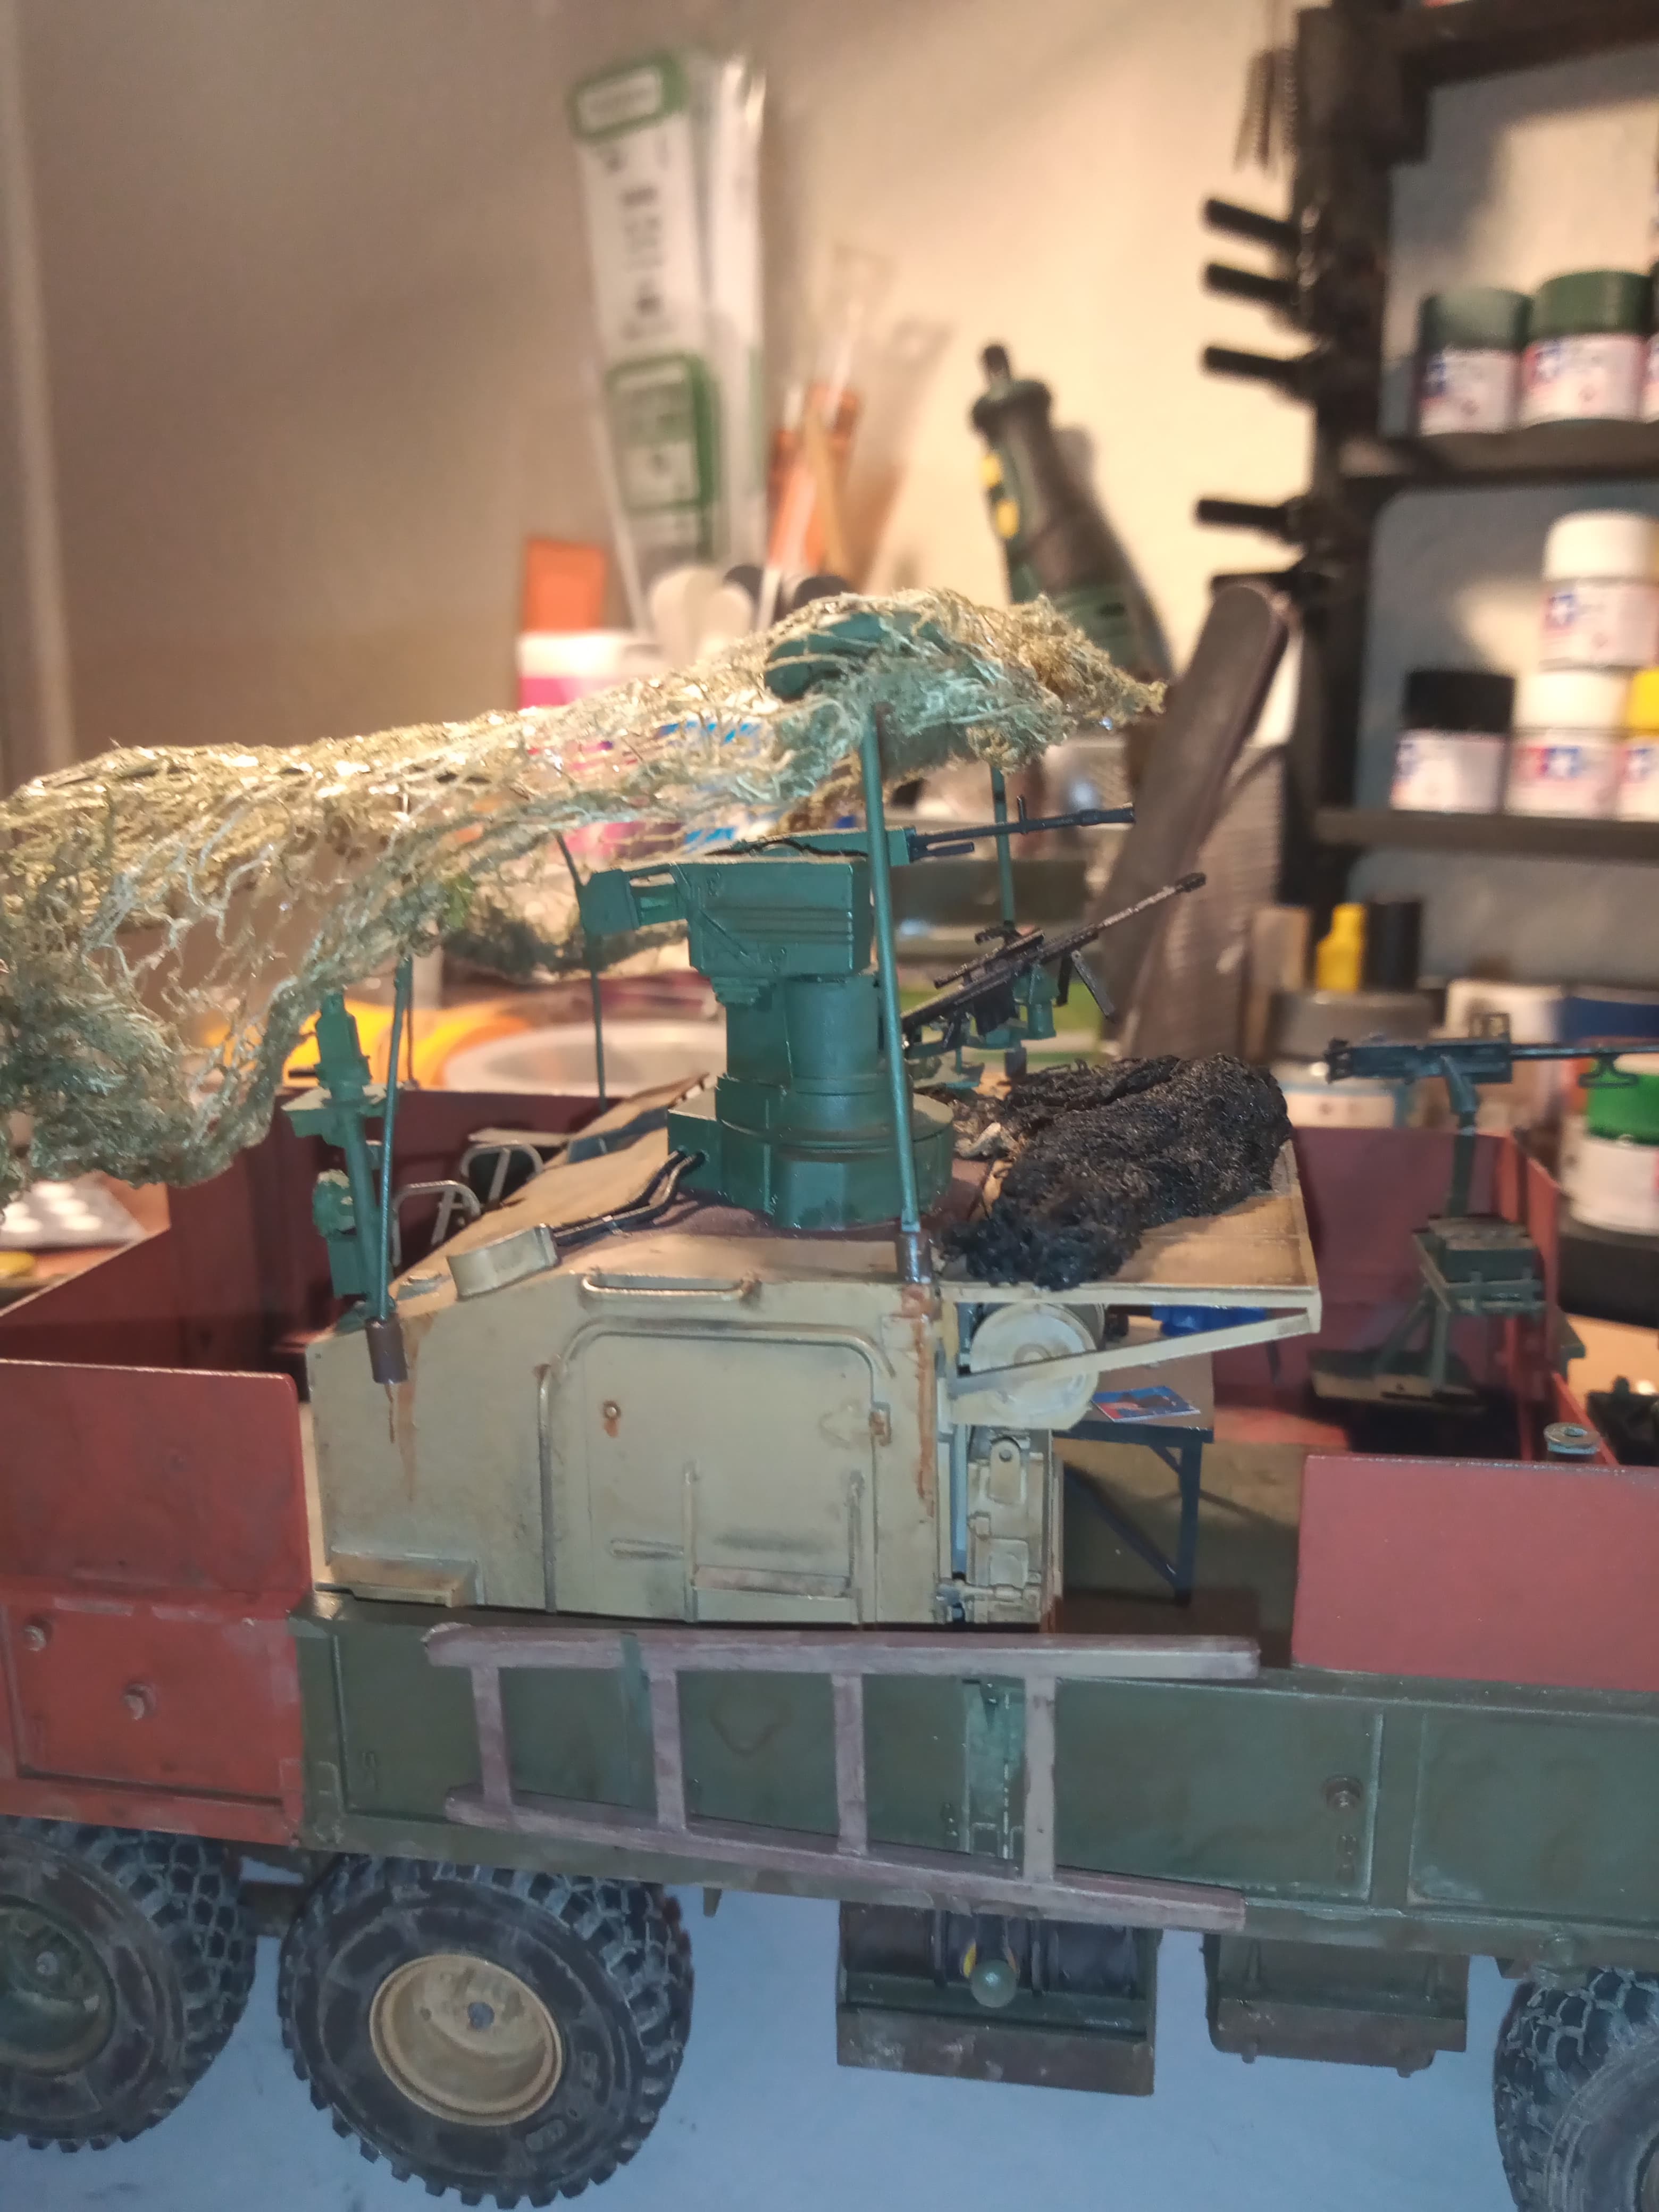
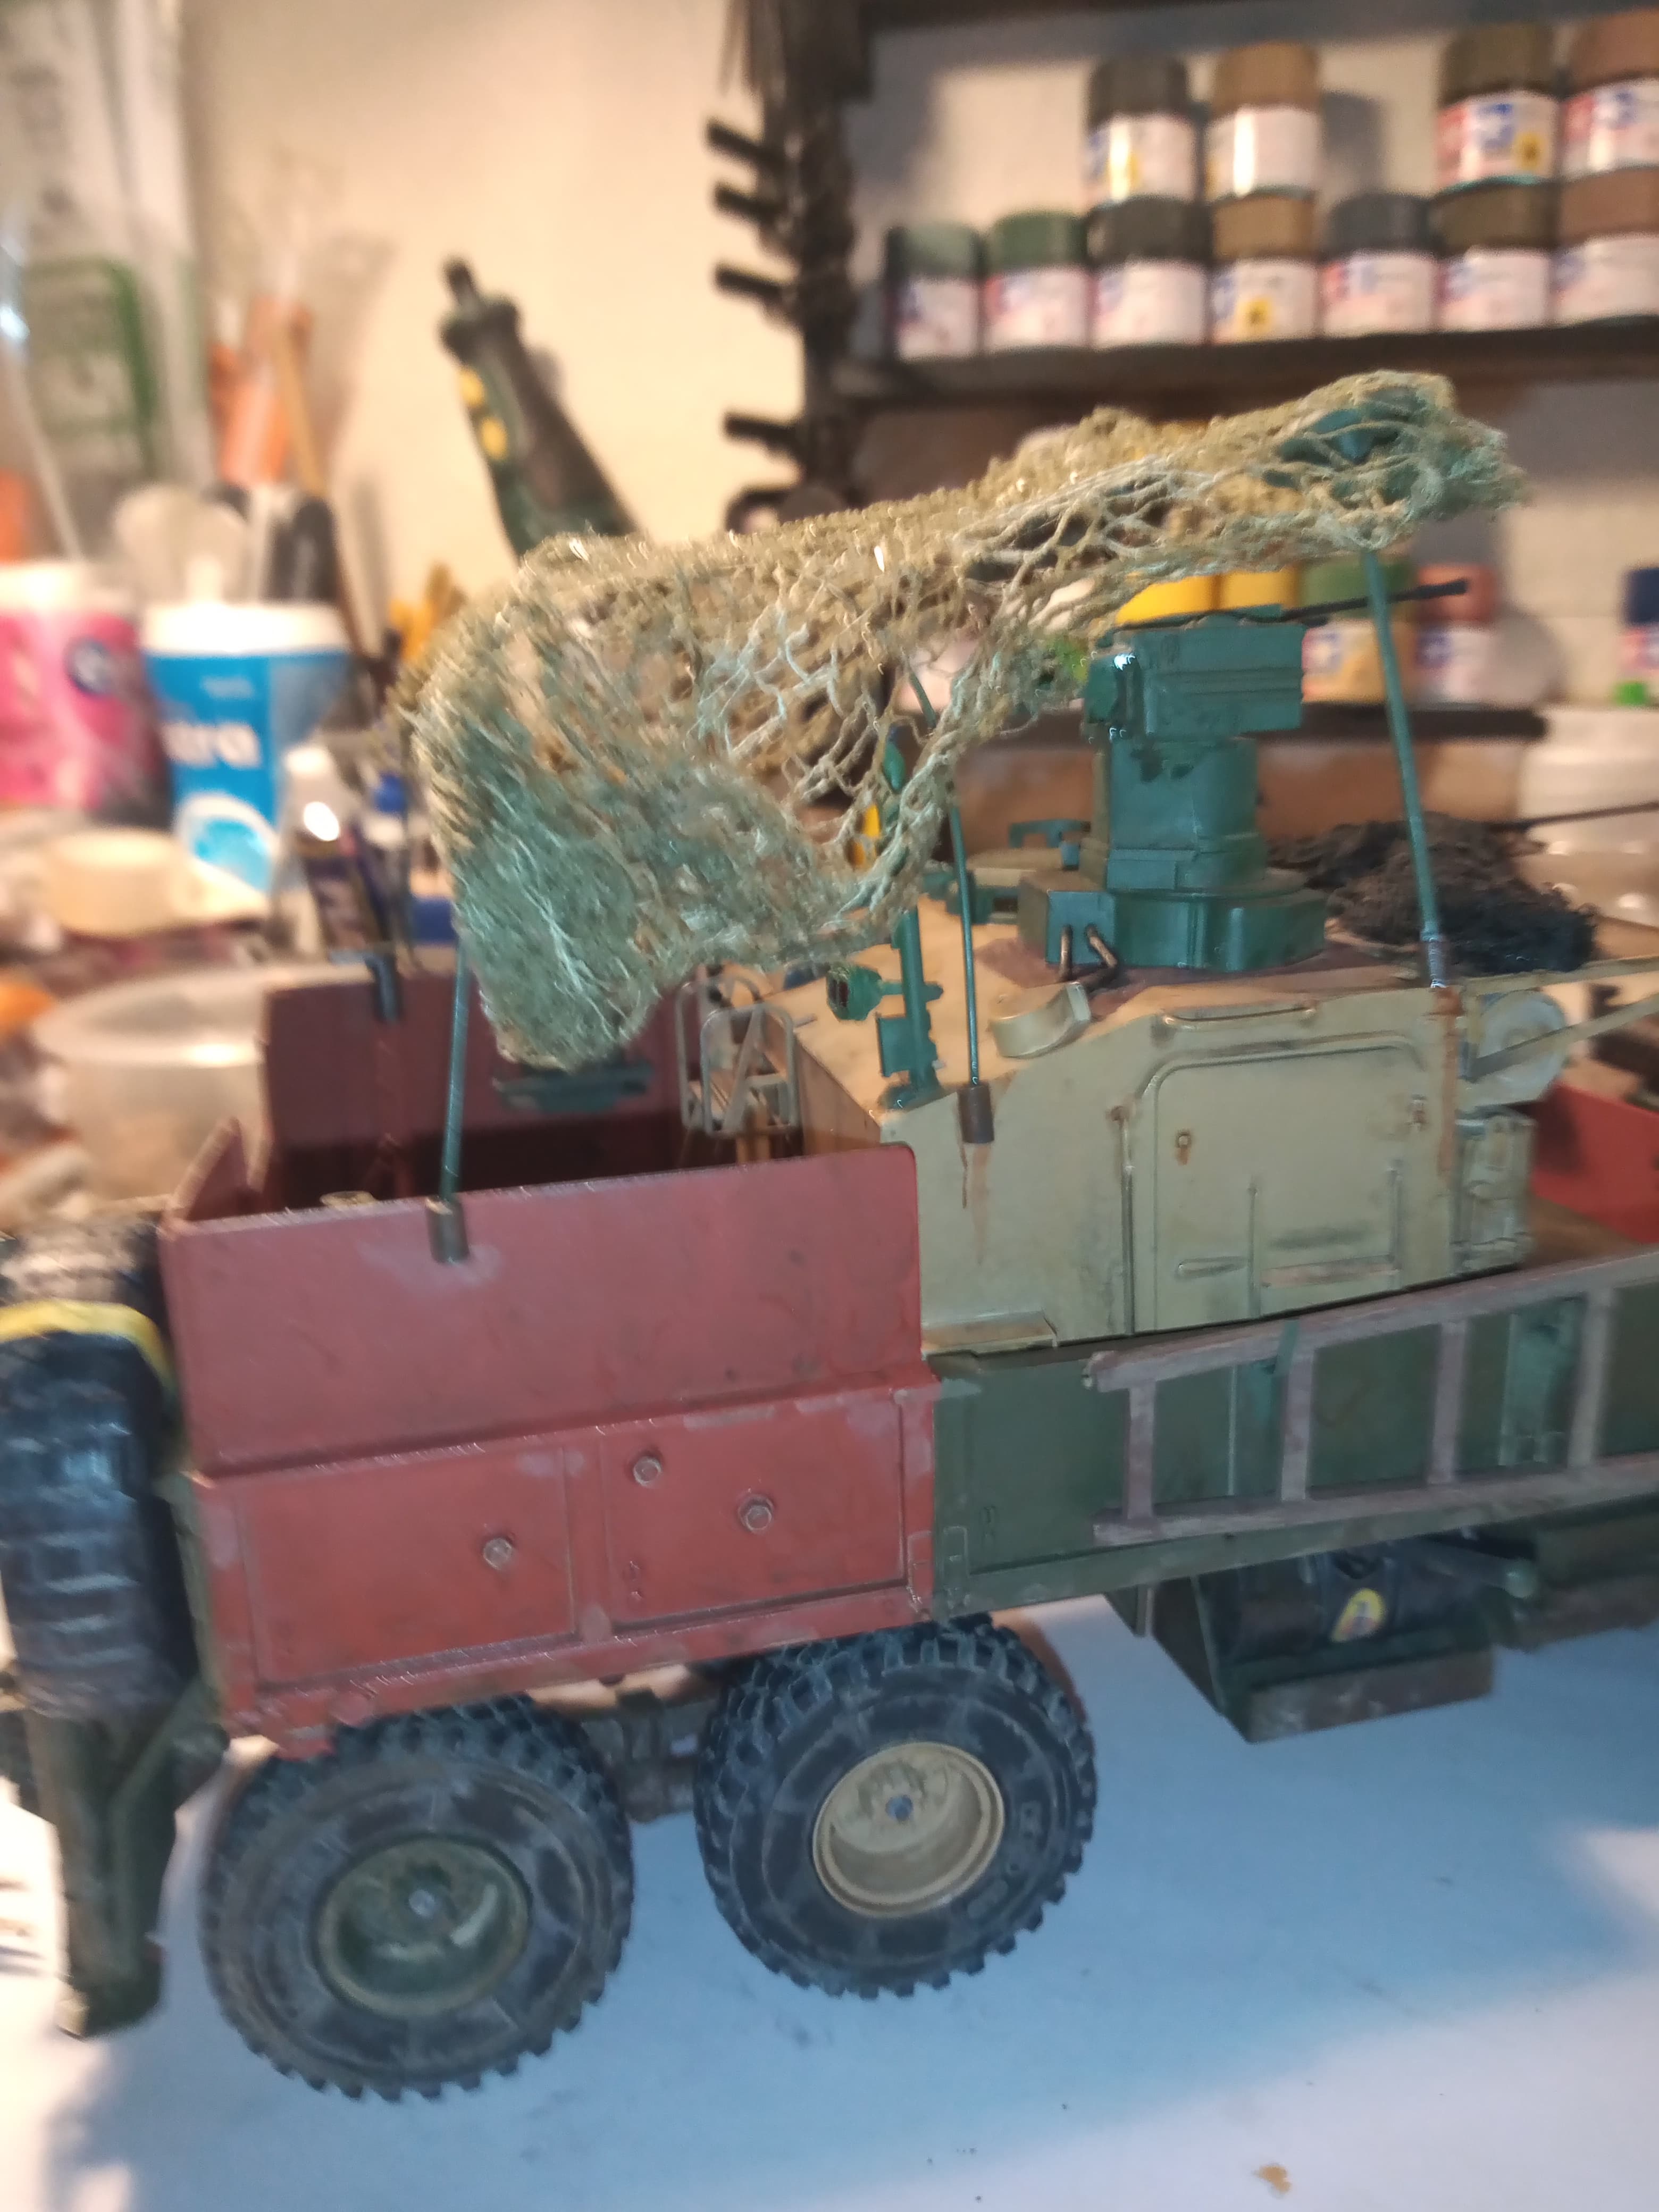
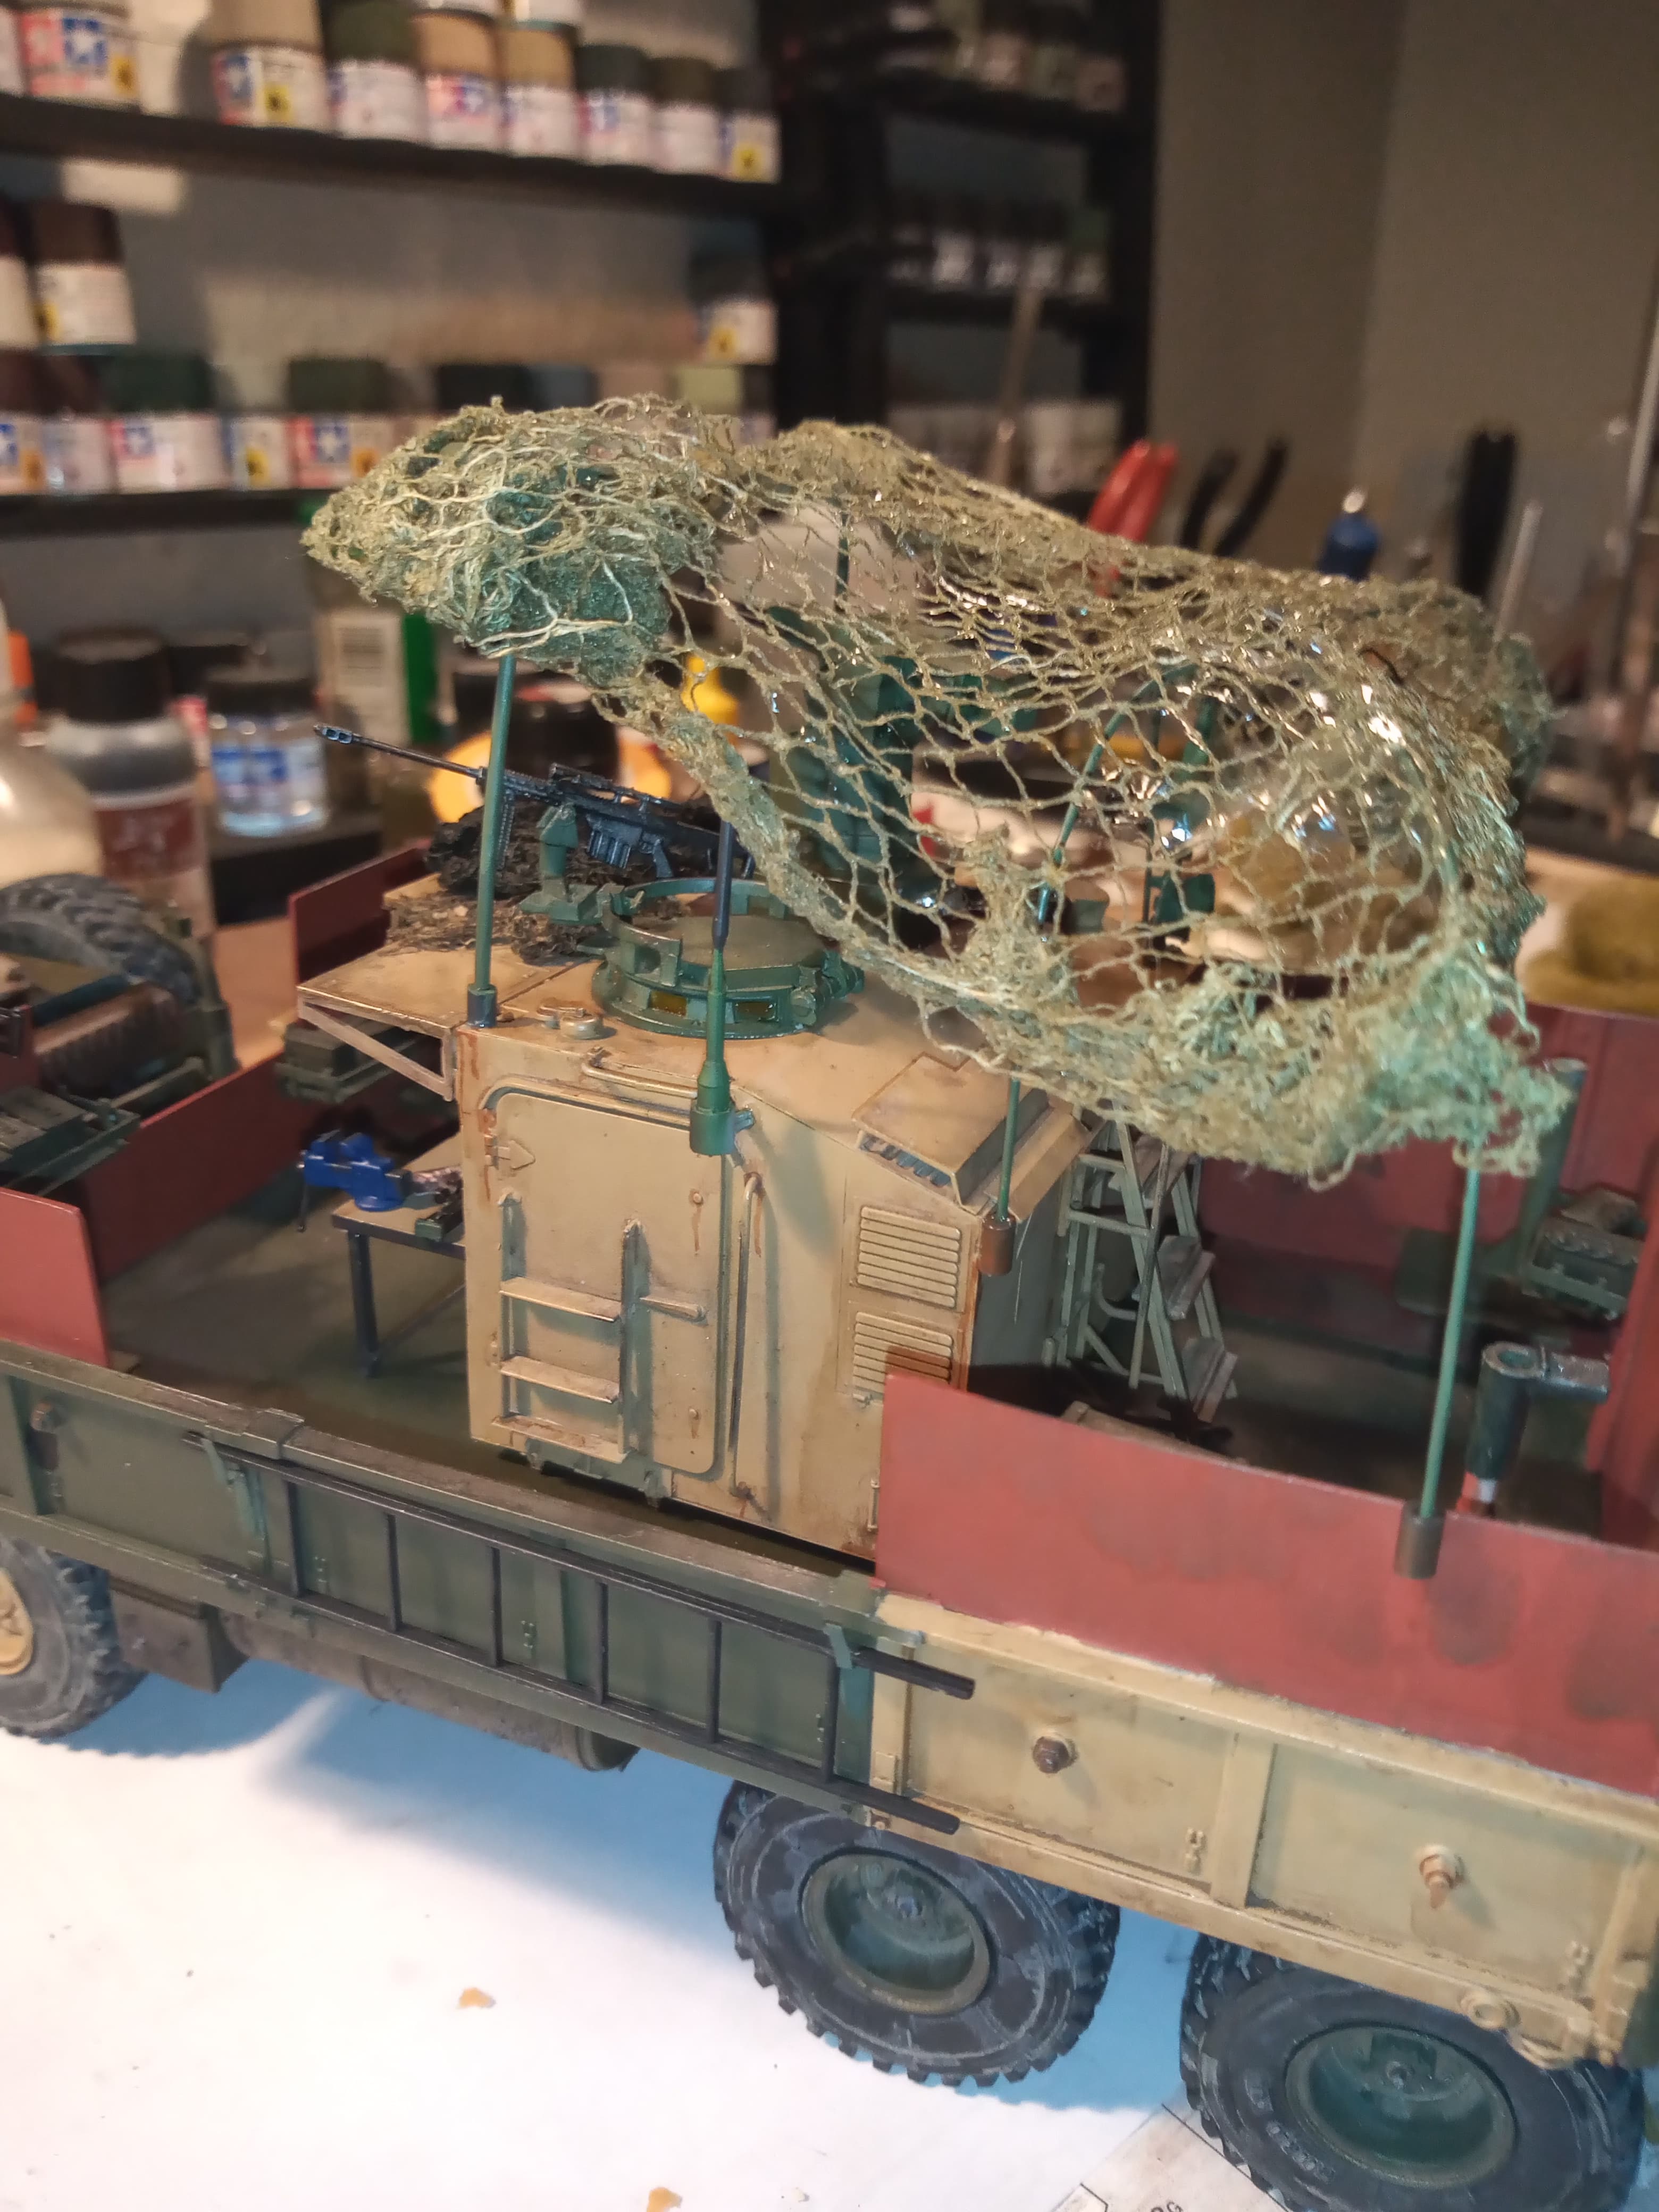

Will tack down some of the net onto the frame where it sits a bit proud, and also tie down some areas onto parts of the armoured sides.
6 Likes
It’s really coming together John. ![]()
![]()
It’s about time I nailed some colours to the mast. For my first entry I’ll be re-starting a conversion of the good old CCKW truck with radio shelter.
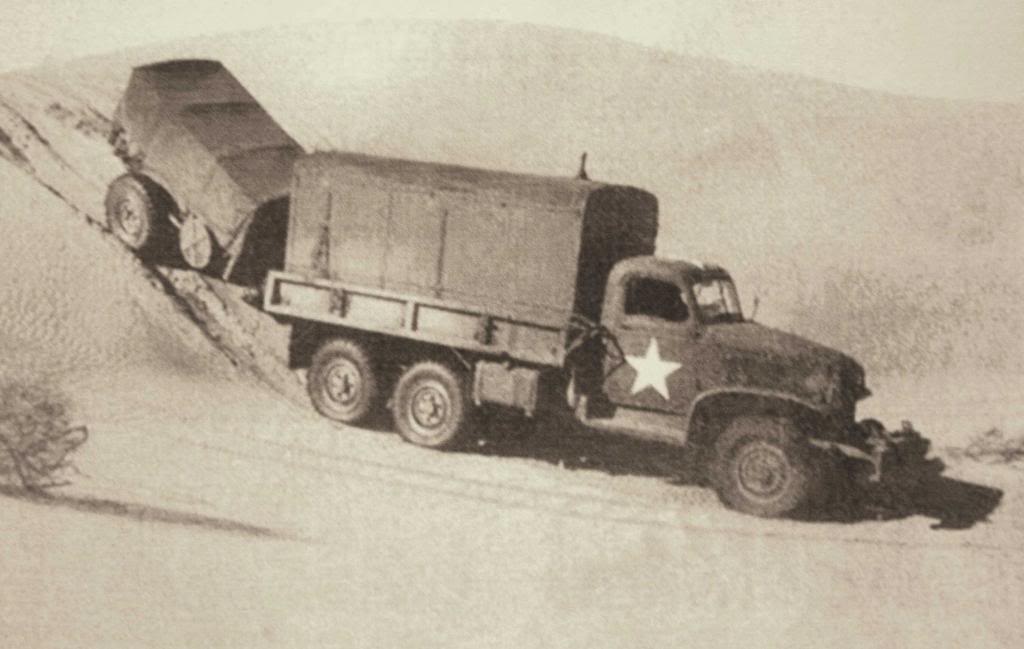
It’s based on this single pic, but you can clearly see the big DUKW-style Military Desert (MD) tyres on both the truck and the trailer. That meant it needed the GMC “corporation” or “banjo” axles that none of the 1:35 kits have. I designed a set in CAD and uploaded them to Shapeways to print (both for Italeri and for Tamiya kits, as the details are different) and as part of the testing I built an Italeri chassis to put them on. Then while looking for a use for the chassis with these big wheels I found the photo - a plan was born! Azimut offered a resin kit for the radio shelter and generator that has a complete interior and I was lucky to score one from another “Big A” member. I got as far as building the bed and cab from the cargo truck kit, but I wasn’t happy with the bed sides or the gun ring in the cab roof, as the pic clearly shows neither. It then sat in a box for ages, until the other evening when I pulled out a cab from the water tank truck (kit 201) and another bed from my stock of Italeri trucks - a solid hour of plastic surgery and I had replacements built. (I’ve done so many I can build them in my sleep…)
So here’s where it stands. The trailer was a scratch-build project based on measurements from the tech manual.
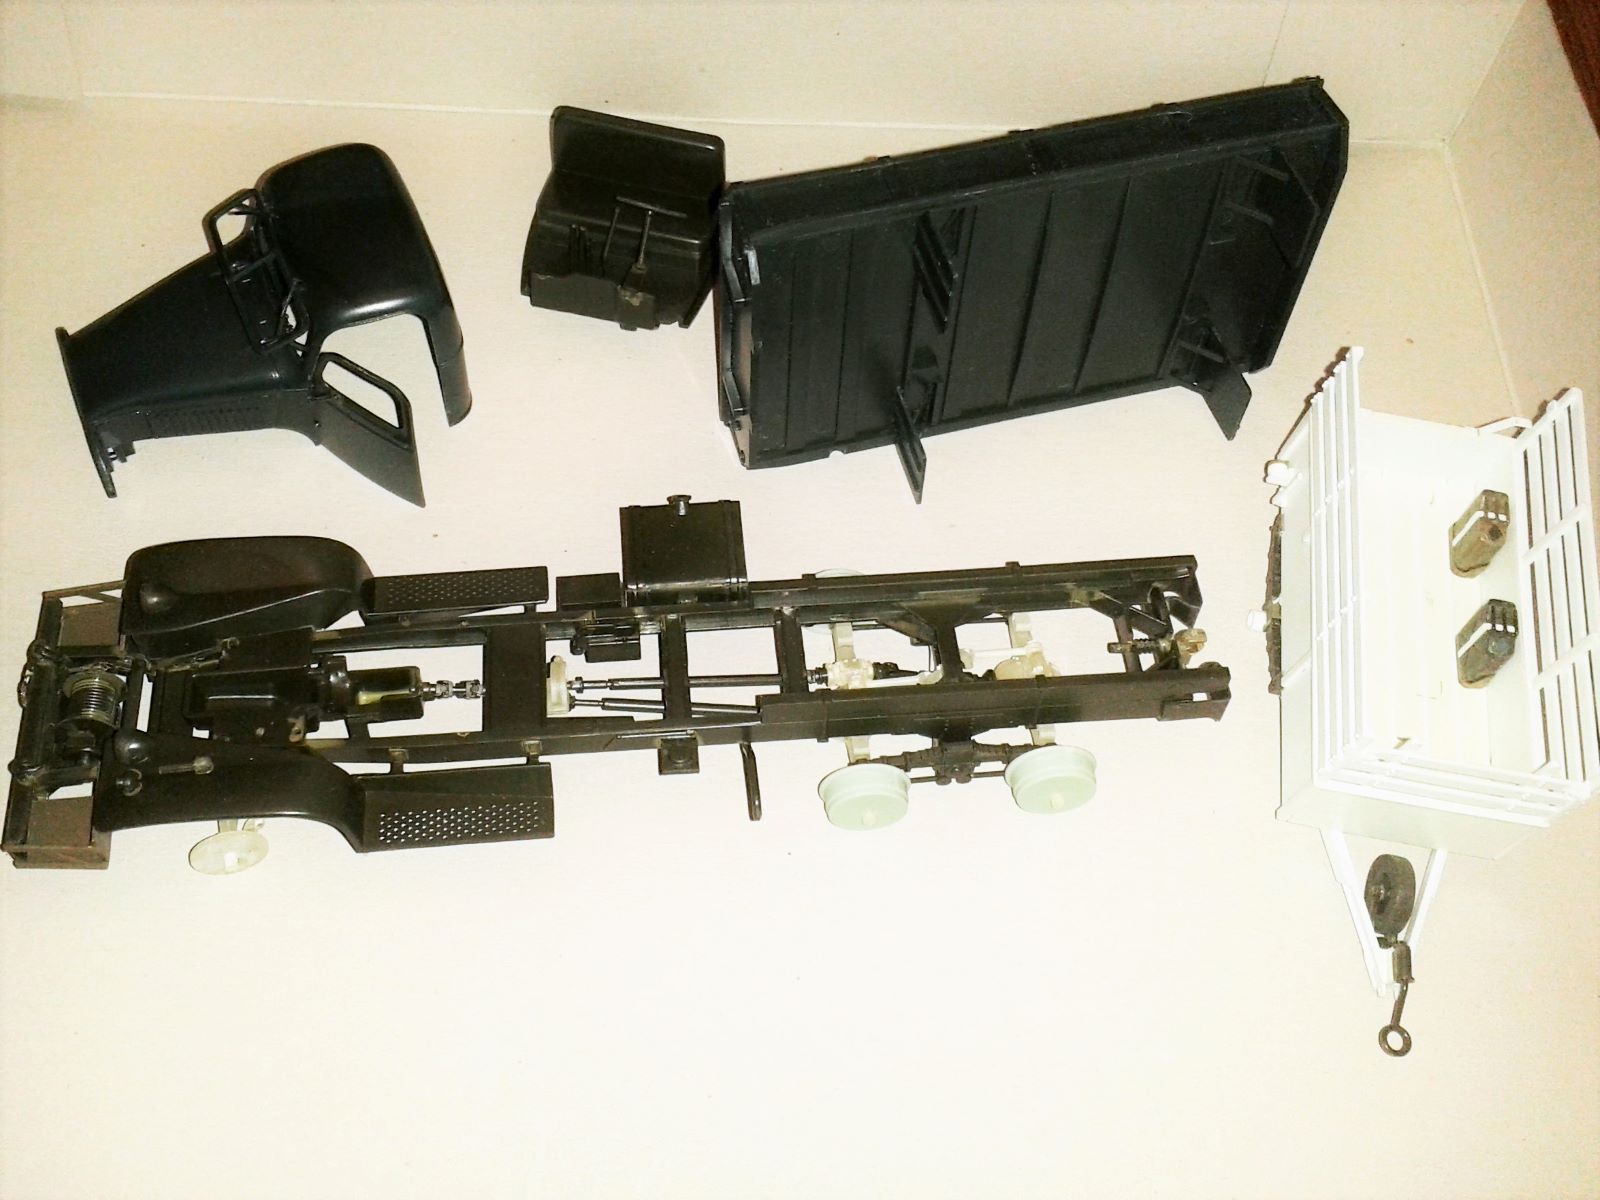
(Sorry about the rubbish photos - I need to get it into my lightbox.)
And for those interested, the wheels are the DEF Models DUKW set. They lack the CTIS inflation hubs and linkage, so are useless for a wartime DUKW (they all left the factory with the CTIS gear), but are ideal for my purposes!
The radio hut is going to be a major build…
6 Likes
Holy heck Pete, that was a fast “Like”! ![]()
1 Like
Ha ha. I must have opened it as soon as you posted.
1 Like