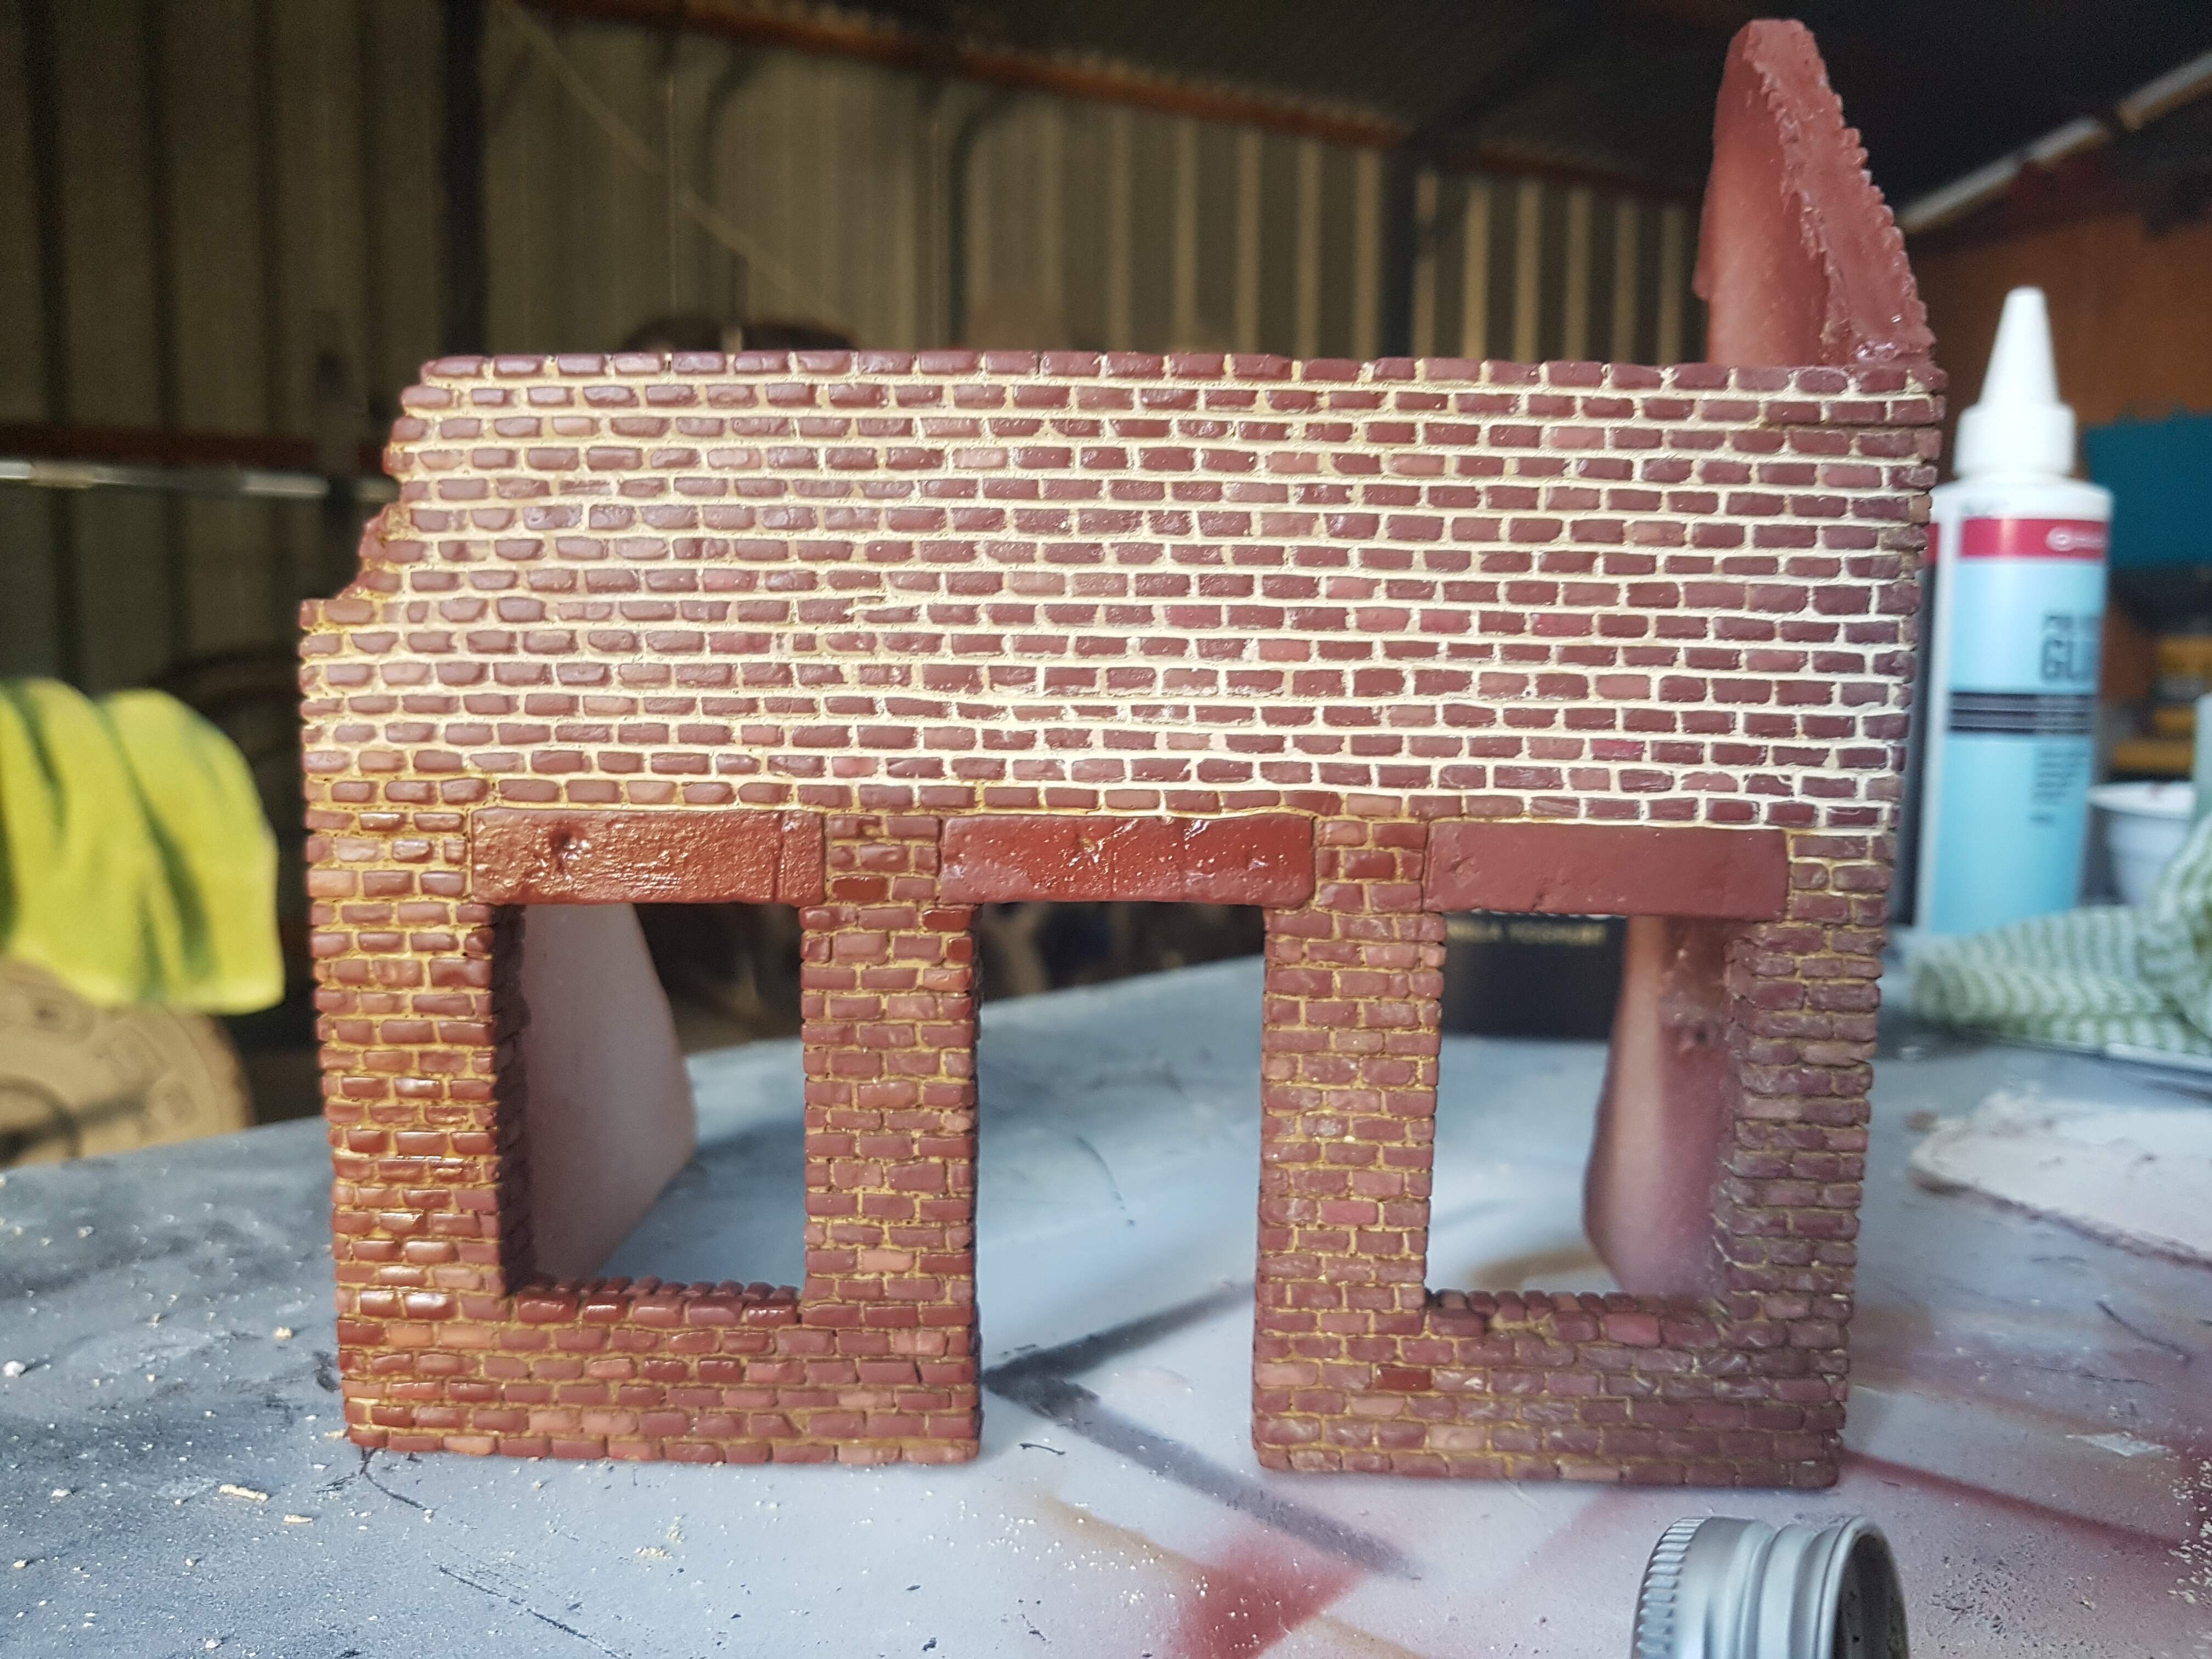
After losing some motivation I decided to go back to what I enjoy building. I have started a 1/35 building. It is a plaster kit by Rue35 and has gone together well so far. I rescribed all the brick lines to make the grout line deeper so I could add a grout mix once the bricks were painted.
This is still a slow work in process. I have added a poster and am currently working on the wallpaper.
15 Likes
Who are Rue55? When I googled that I got a bunch of Roller monorail guidance systems diagrams…anyhow that’s excellent brick painting Nick, suggest most brick walls show darkish damp stains at ground level. Is there a grand plan or all improv? 
1 Like
Nick, looks great so far with what you are doing. When you get time, could you run through what paints you have used to get the brick work like that. Thanks and looking forward to seeing more.
1 Like
Rue35!!! not 55  No more Whiskey for you
2 Likes
@Dioramartin Rue35 are a Qld company i stumbled across who make plaster buildings , diorama accessories and tools. I can highly recommend them.
The plan is is for a NW Europe '44 diorama with a vineyard. Thats all I have planned so far. There will be an allied vehicle but not sure what yet.
1 Like
Awww and it tasted so goocccc
2 Likes
@Johnnych01 I will run through the paints I used and how i did it over the weekend as they are out in the shed. I like working with plaster as it’s quick drying and easy to alter.
Thanks for the compliments.
1 Like
Went to the Rue35 website. Really liked some of the stuff they are offering. Filled my shopping cart with goodies and started the checkout process only to find that they don’t ship to the states 
Oh well, maybe they will sometime in the future.
Cheers,
C.
1 Like
@creading I guess you could email and ask, especially if it is a larger order? No harm in trying I guess.
So this is how I achieved the brickwork @Johnnych01
I started by rescribing and deepening the grout lines as the detail was very subtle and i wanted to put a mortar blend in there. I then primed the plaster with an all over gret surface primer from SMS by airbrush to create a solid base so that paint won’t be sucked into the plaster too much. I then painted and preshaded the exterior walls flat black focussing on the grout lines. I did this by airbrush and made sure i got good coverage in the grout lines.
Next i used Tamiya’s Fine Surface Primer rattle can to prime the bricks. I held this at an angle above the model and painted down so i minimised the amount of white paint going into the grout lines.
I then used a whole over base coat of Aqueous Hobby Colour Red Brown (H47) through the airbrush, again painting from an angle above to avoid flooding the grout lines with unwanted paint. I painted 2 coats to get a good coverage.
Once dry i made up a palette with the base colour, and around the plate i added a few drops of gloss white, gloss red, smoke, clear orange and clear red. While this seems an odd blend of colours the clears provide more tonal changes and subtle shades. I mixed these a little bit at a time as I painted. I started picking out random bricks with one colour, then blended one of the clear colours and kept picking out random bricks on all the walls. I kept doing this with all the colours on the palette. This created a random brick effect, with no large area of bricks the same.
At this point the bricks look very fresh and new. Once I picked out all the bricks and let dry, i made up a thick mix of dry Sand pigments and water. I used Ammo mig Sand pigments and made to a thick but pliable consistency. I then generously brushed this into the mortar joins. You dont need to be too careful or worried about the brick surfaces as any excess can be cleaned up with a damp sponge or cloth. Once the pigments were dry i used a damp flat sponge to gently wipe across the exterior surface. This is to mainly remove any unwanted pigments from the brick faces. I rinsed the sponge after every pass and rung out well before the next pass. The sponge doesnt want to rewet the pigments.
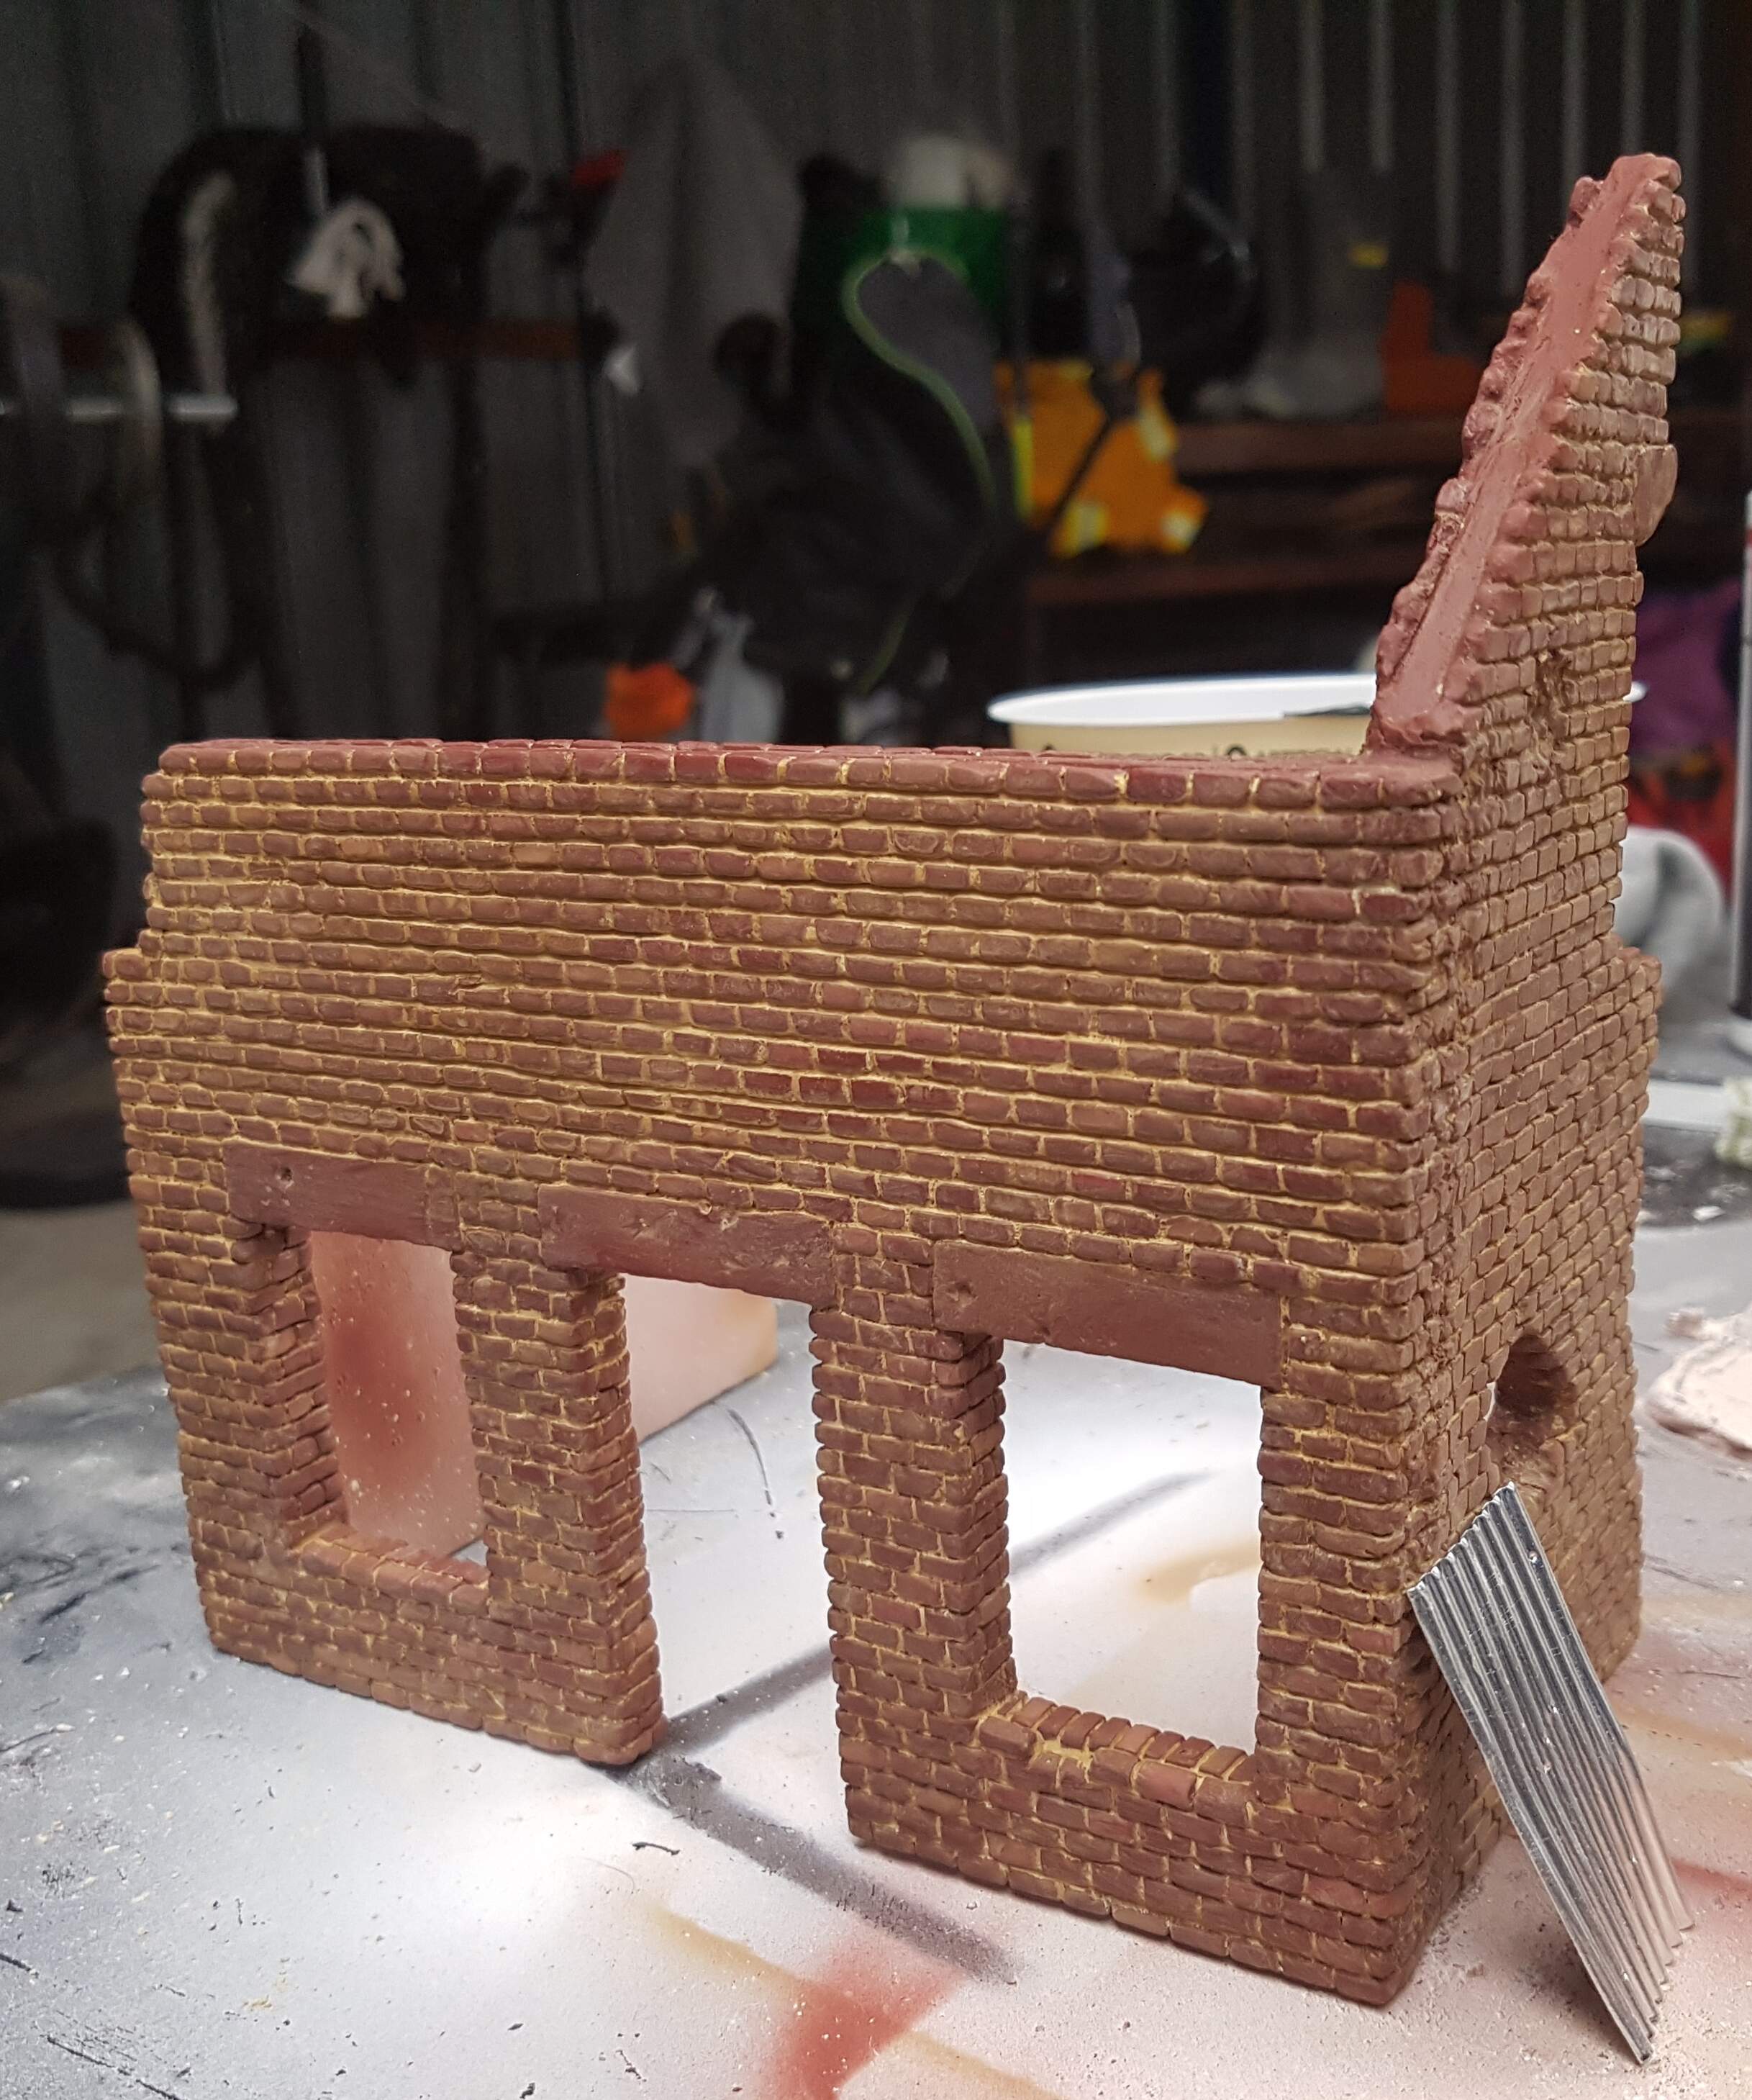
With the pigments completely dry the building looked “brand new”, like it was just built. The sand colour was very bright and too consistent for a damaged older building. The upper half of the second photo is this look. To dull this down i used a Brown Wash from SMS and applied by brush to the whole exterior surface, even the bricks. This soaked into the mortar lines and added shading to the bricks and the joins. It also blended everything together making the tonal changes in the bricks a little more subtle. In some random areas i added a 2nd wash to create some darker areas. The wash is the lower half of the 2nd photo i posted.
1 Like
Thanks Nick that was really helpful and also nice that we can compare your explanation against the photo you reference it to. It does look really good 
1 Like
No worries at all John. I hope it all made sense haha. I started working on the window frames today and also worked on the wallpaper but no pics to show yet.
Nice work Nick , looking good !!
1 Like
Emailed. Rue35 responded quickly and said he’d be willing to ship to the US but Aussie Post would be exorbitant for any ‘Hydrostone’ kits due to their weight, which is understandable. I guess to ship a 4.5lb. package would be roughly $50 USD.
He does have some other interesting items that shouldn’t weight a lot so I still may be ordering some things.
Cheers,
C.
@creading Aussie Post is expensive even inside Australia. Rue35’s prices are really good though, when I do an order through them I buy uo big so I dont have to pay numerous postage fees. Hopefully you can still get some things you are after.
Thanks for the compliments @Cheyenne and @JoseCesar67 !!
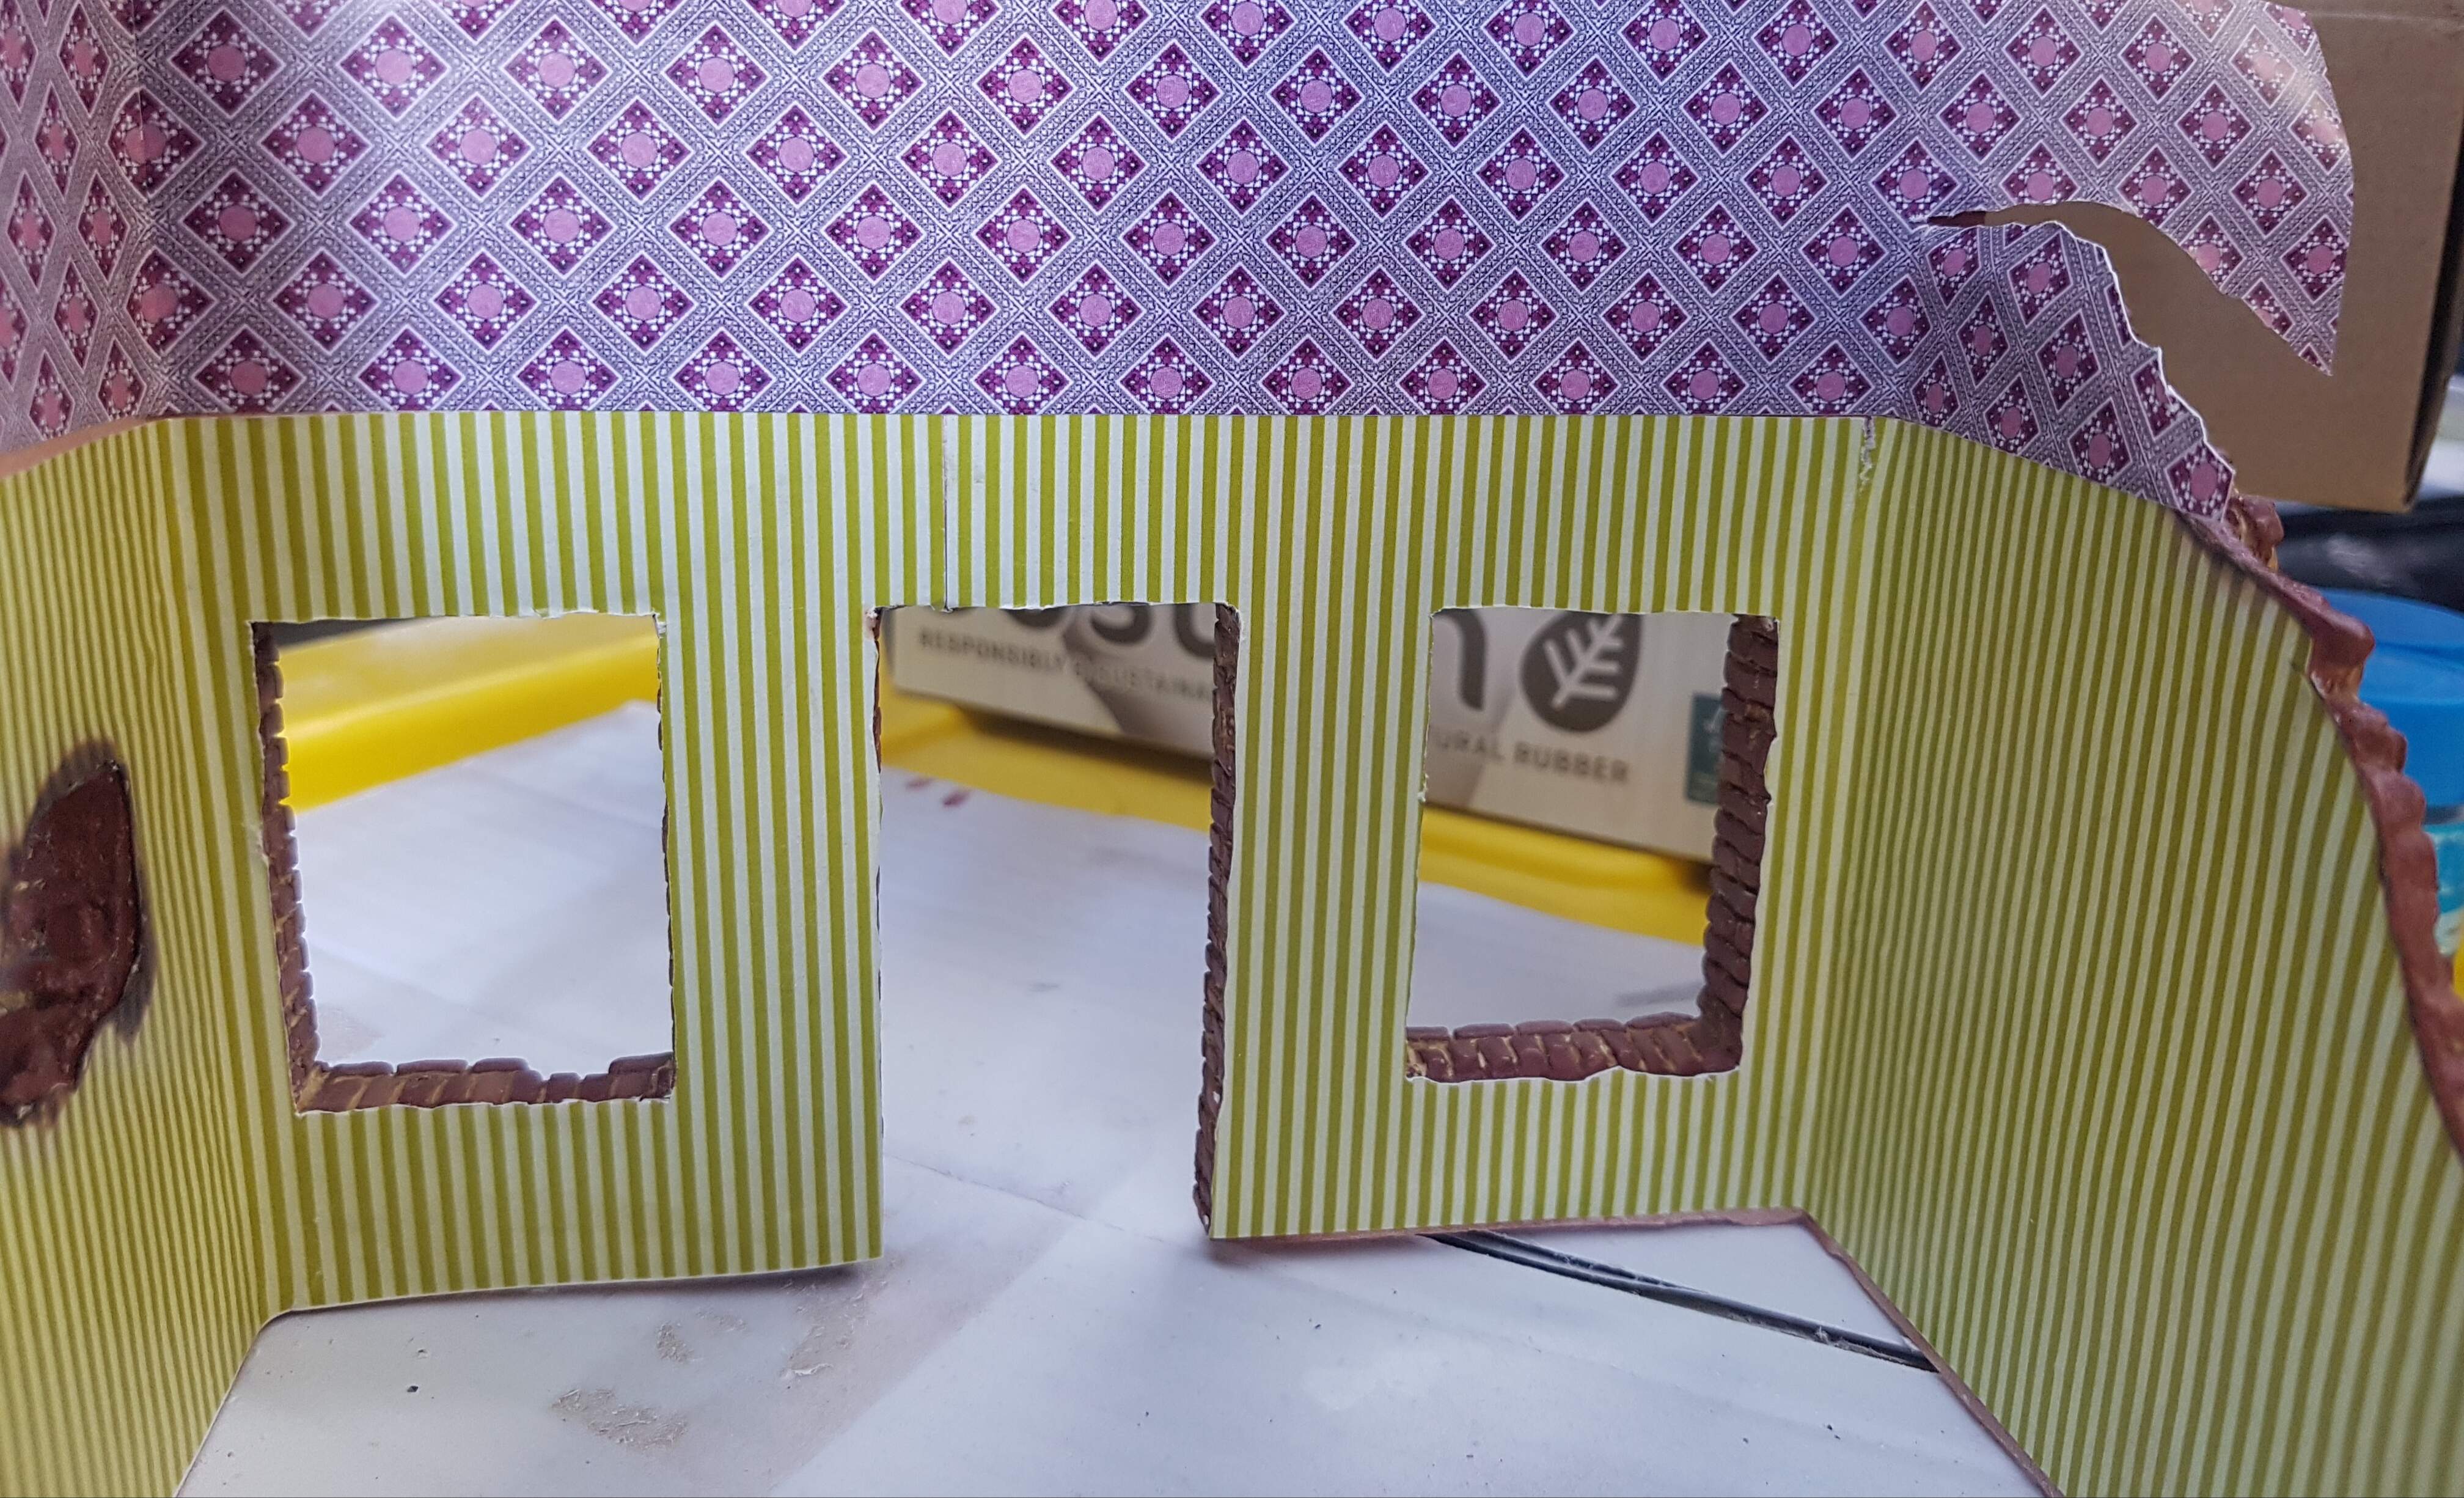
Only a small update as work has got in the way of some decent bench time. I have added the 2 different pattern wallpapers for the lower and upper floors. This hasn’t been trimmed yet, I will let the glue dry for a few days 1st. I will add beams where the 2 wallpapers meet for the upper floor. I have some different thickness balsa I will use for the beams and floorboards. These will be blown apart in respect to the damaged structure. I also plan on adding a dividing wall upstairs to create 2 small rooms.
2 Likes
Excellent brickwork but wow that’s some serious wallpaper, I can’t imagine living in a room with either of those patterns if still sane, suggest maybe hanging some pictures or putting in some wood panelling & a dado rail?
(P.S. for a while Australia Post charged only by dimension not weight, sounds like they’ve woken up now. I remember asking at a Post Office counter a few years ago “So in this A4 sized envelope I could be sending a gold ingot (12.5 kilos/27 lbs) overseas and it’ll cost me $3.50?” “Yep…although you ought to insure it & fill out a customs dec…”…  )
)
1 Like
@Dioramartin thanks for the compliments. The wallpaper is very “loud”, but as is just out of the packet is new and still has a sheen. I plan on weathering it with the damaged brick dust and some charing. I was planning on adding some pictures upstairs and downstairs some vertical lining boards once i have the botom floor in. The wallpaper is from 4FX.
As per Aus post I definitely think they have woken up. The cost of sending an kit or 2 in the post now is half as much as the average new release armour kit.
1 Like