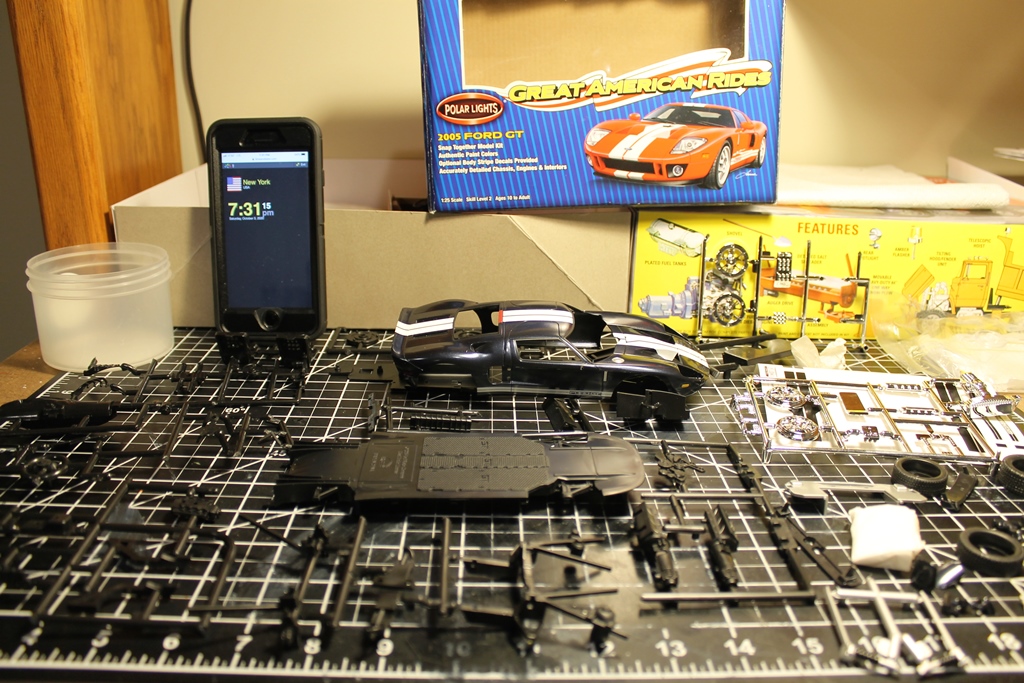
The body in this iteration came pre-painted. It wasn’t too bad, but there are mold seams and the color is wrong anyway.
I let it sit in 91% Iso overnight and most of it came off okay, but not all. It is now in a bath of Purple Power/Superclean. If that doesn’t remove the rest it will get the Ovencleaner when the chrome gets stripped.
Ford is releasing a new Heritage Edition GT, this time of Ken Miles’ 24Hr Daytona winning White with Black hood and the red patches. I only found out about it a few days ago when I was searching as I was going to be doing this to mine for the paint job.
David, great to see build #4 hit the bench here, excellent choice! Hopefully the paint comes away without too much more trouble and you can get stuck in properly.
I don’t think we’ve had any suggestions yet, I will trawl back through the lead-up thread and check. Definitely open to ideas!
David,
Looking forward to following along with your build. The highlight for me will be your Ken Miles paint scheme. So a little more work now, and a way better paint job that will have just that much more meaning.
Michael & D,
I’ll start to really give the ribbon some thought and see what comes to mind. Of course I totally forgot how to resize what I come up with to work as a ribbon.
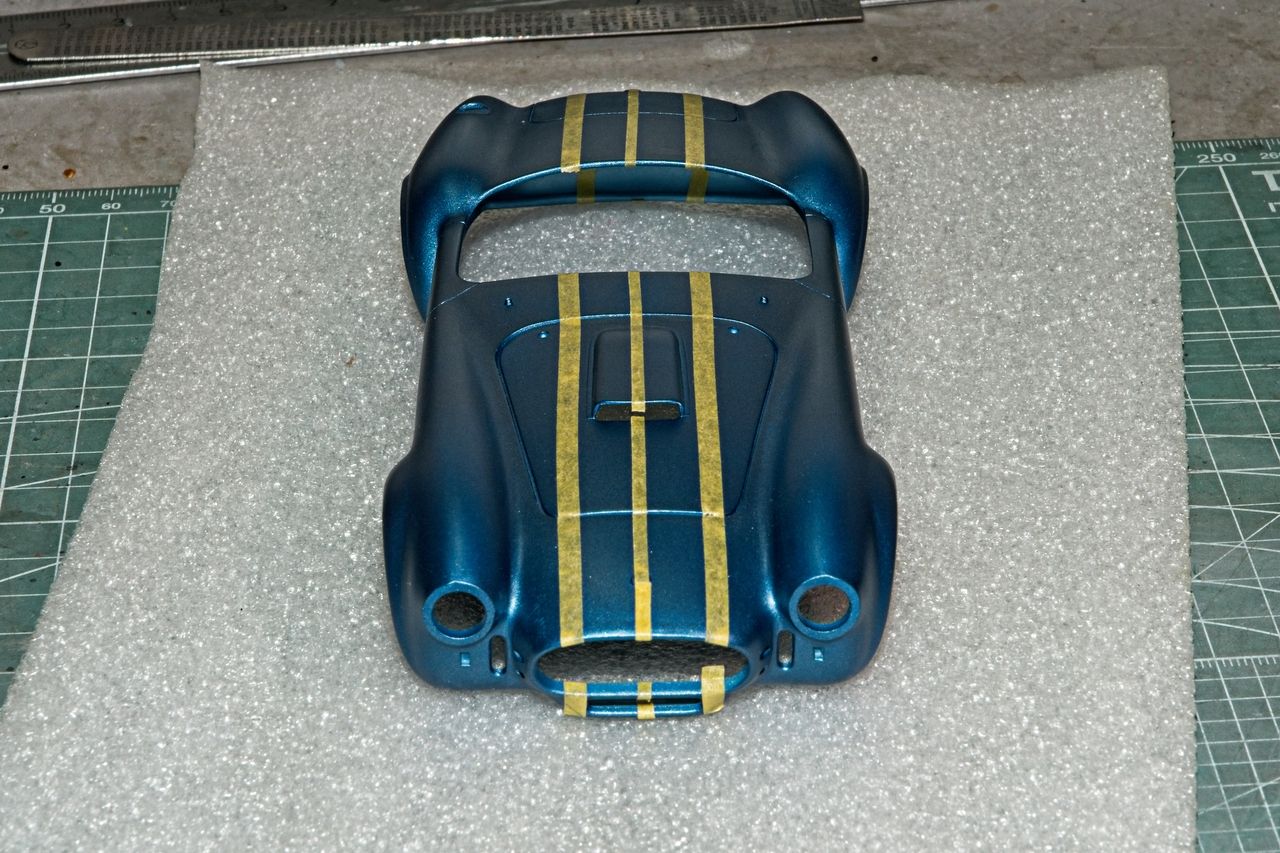
With the primer on and lightly rubbed out with a piece of Tamiya #3,000 Sponge, I air brushed on the Gravity GS 215 Ford Shelby Guardsman Blue @ 15 psi. Two tack coats, 2 color coats, and 2 wet coats. Then right into the drying bin. Totally forgot to take a few grab pictures the next day.
The next step was to mask out the Shelby double White Stripes that all 1965 Shelby 427 Cobras came with. I thought about using decals, but there’s just no way to get a generic decal to lay down correctly over the engine hood scoop, so I opted to paint the stripes on. The center line was easy as I cut a piece of Tamiya tape 2mm wide, then starting with the hood emblem as one point, and the trunk emblem as the other marker. To ensure that the tape was still straight to the bottom of both clips, I just laid down a piece of tape along edge of the 2mm tape as a guide. The really hard part was going to be getting both white stripes the same exact width, and both have the exact width for the full length. Using a ruler didn’t work, so I cut a piece of Tamiya tape the proper width of the stripes and then laid it down in sections along the center 2mm piece. I used this as a guide to lay down the outer edge tape. Worked like a charm. The hardest part of the masking was the front radiator opening and the chin section below it. I had to eye ball it, and it’s not exactly perfect, but as close to it as I can get it. Finally I taped and covered the rest of the body with paper towel.
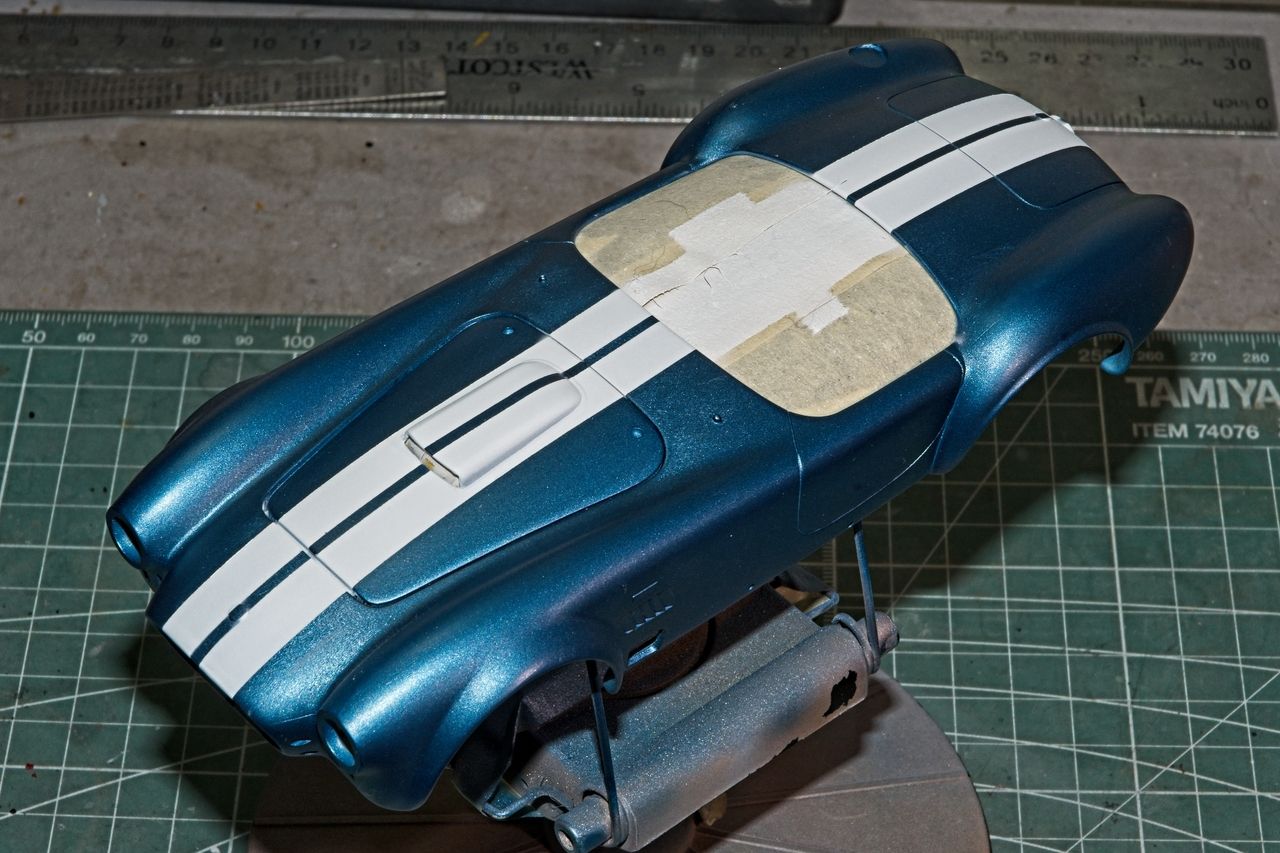
As you can tell, I opted to paint the stripes on after the main color, rather then before which goes against the usual preferred method of lighter to darker. The reason for this is to duplicate exactly how the paint lip would have looked on the real car with the White edge higher then the Blue paint. I spent considerable time burnishing down the Tamiya tape but still had concerns about paint bleeding under it. I’ve seen many a paint job that had clean up issues, so I came up with a plan that hopefully would work. I primed with Tamiya White primer thinned 1:1. 2 tack coats to seal the tape edges, and two color coats. Gave it 30 min to cure. I opted not to use Gravity White but rather Tamiya XF-2 Flat white thinned 1:1 not my usual 2:3 ratio. 2 tack coats, 4 light color coats and called it a day. Cleaned out my Grex Air Brush, and then it was time for the moment of truth. Off came tape.
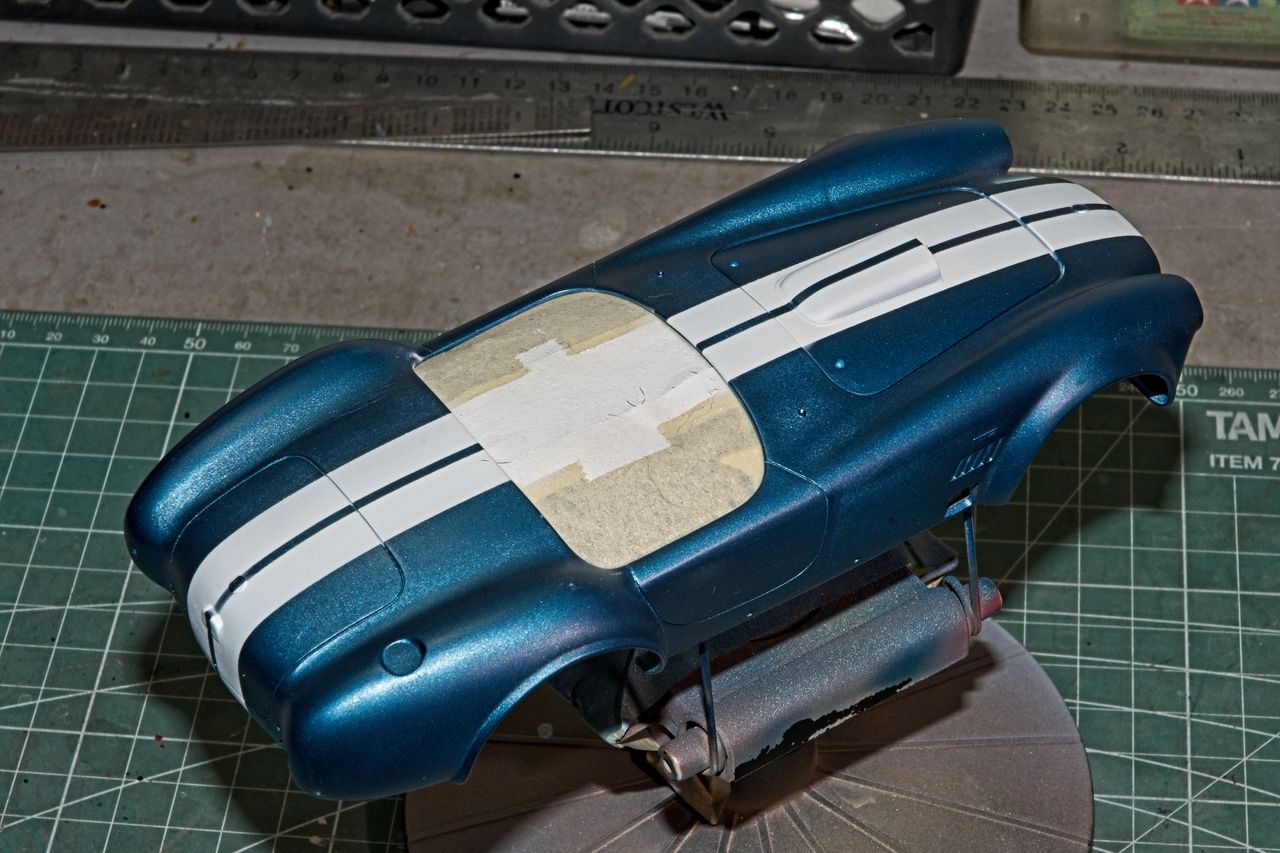
To my amazement, not a drop of bleed through, and the color is consistent from front to end. Here’s what the body shell now looks like. None of the paint has been rubbed out or prepared in any way as yet. That’s the next step. I’m thinking of adding white number circles by the front of the doors since this is a time trail car, not meant for the street.
Beautiful work Joel, your approach to applying the white stripes was carefully considered and worked perfectly. The Guardsman Blue is really striking and the stripes set it off nicely.
Looking forward to the overall picture with the clear gloss down.
My desk is a whole mess of parts racks with black primer everywhere!
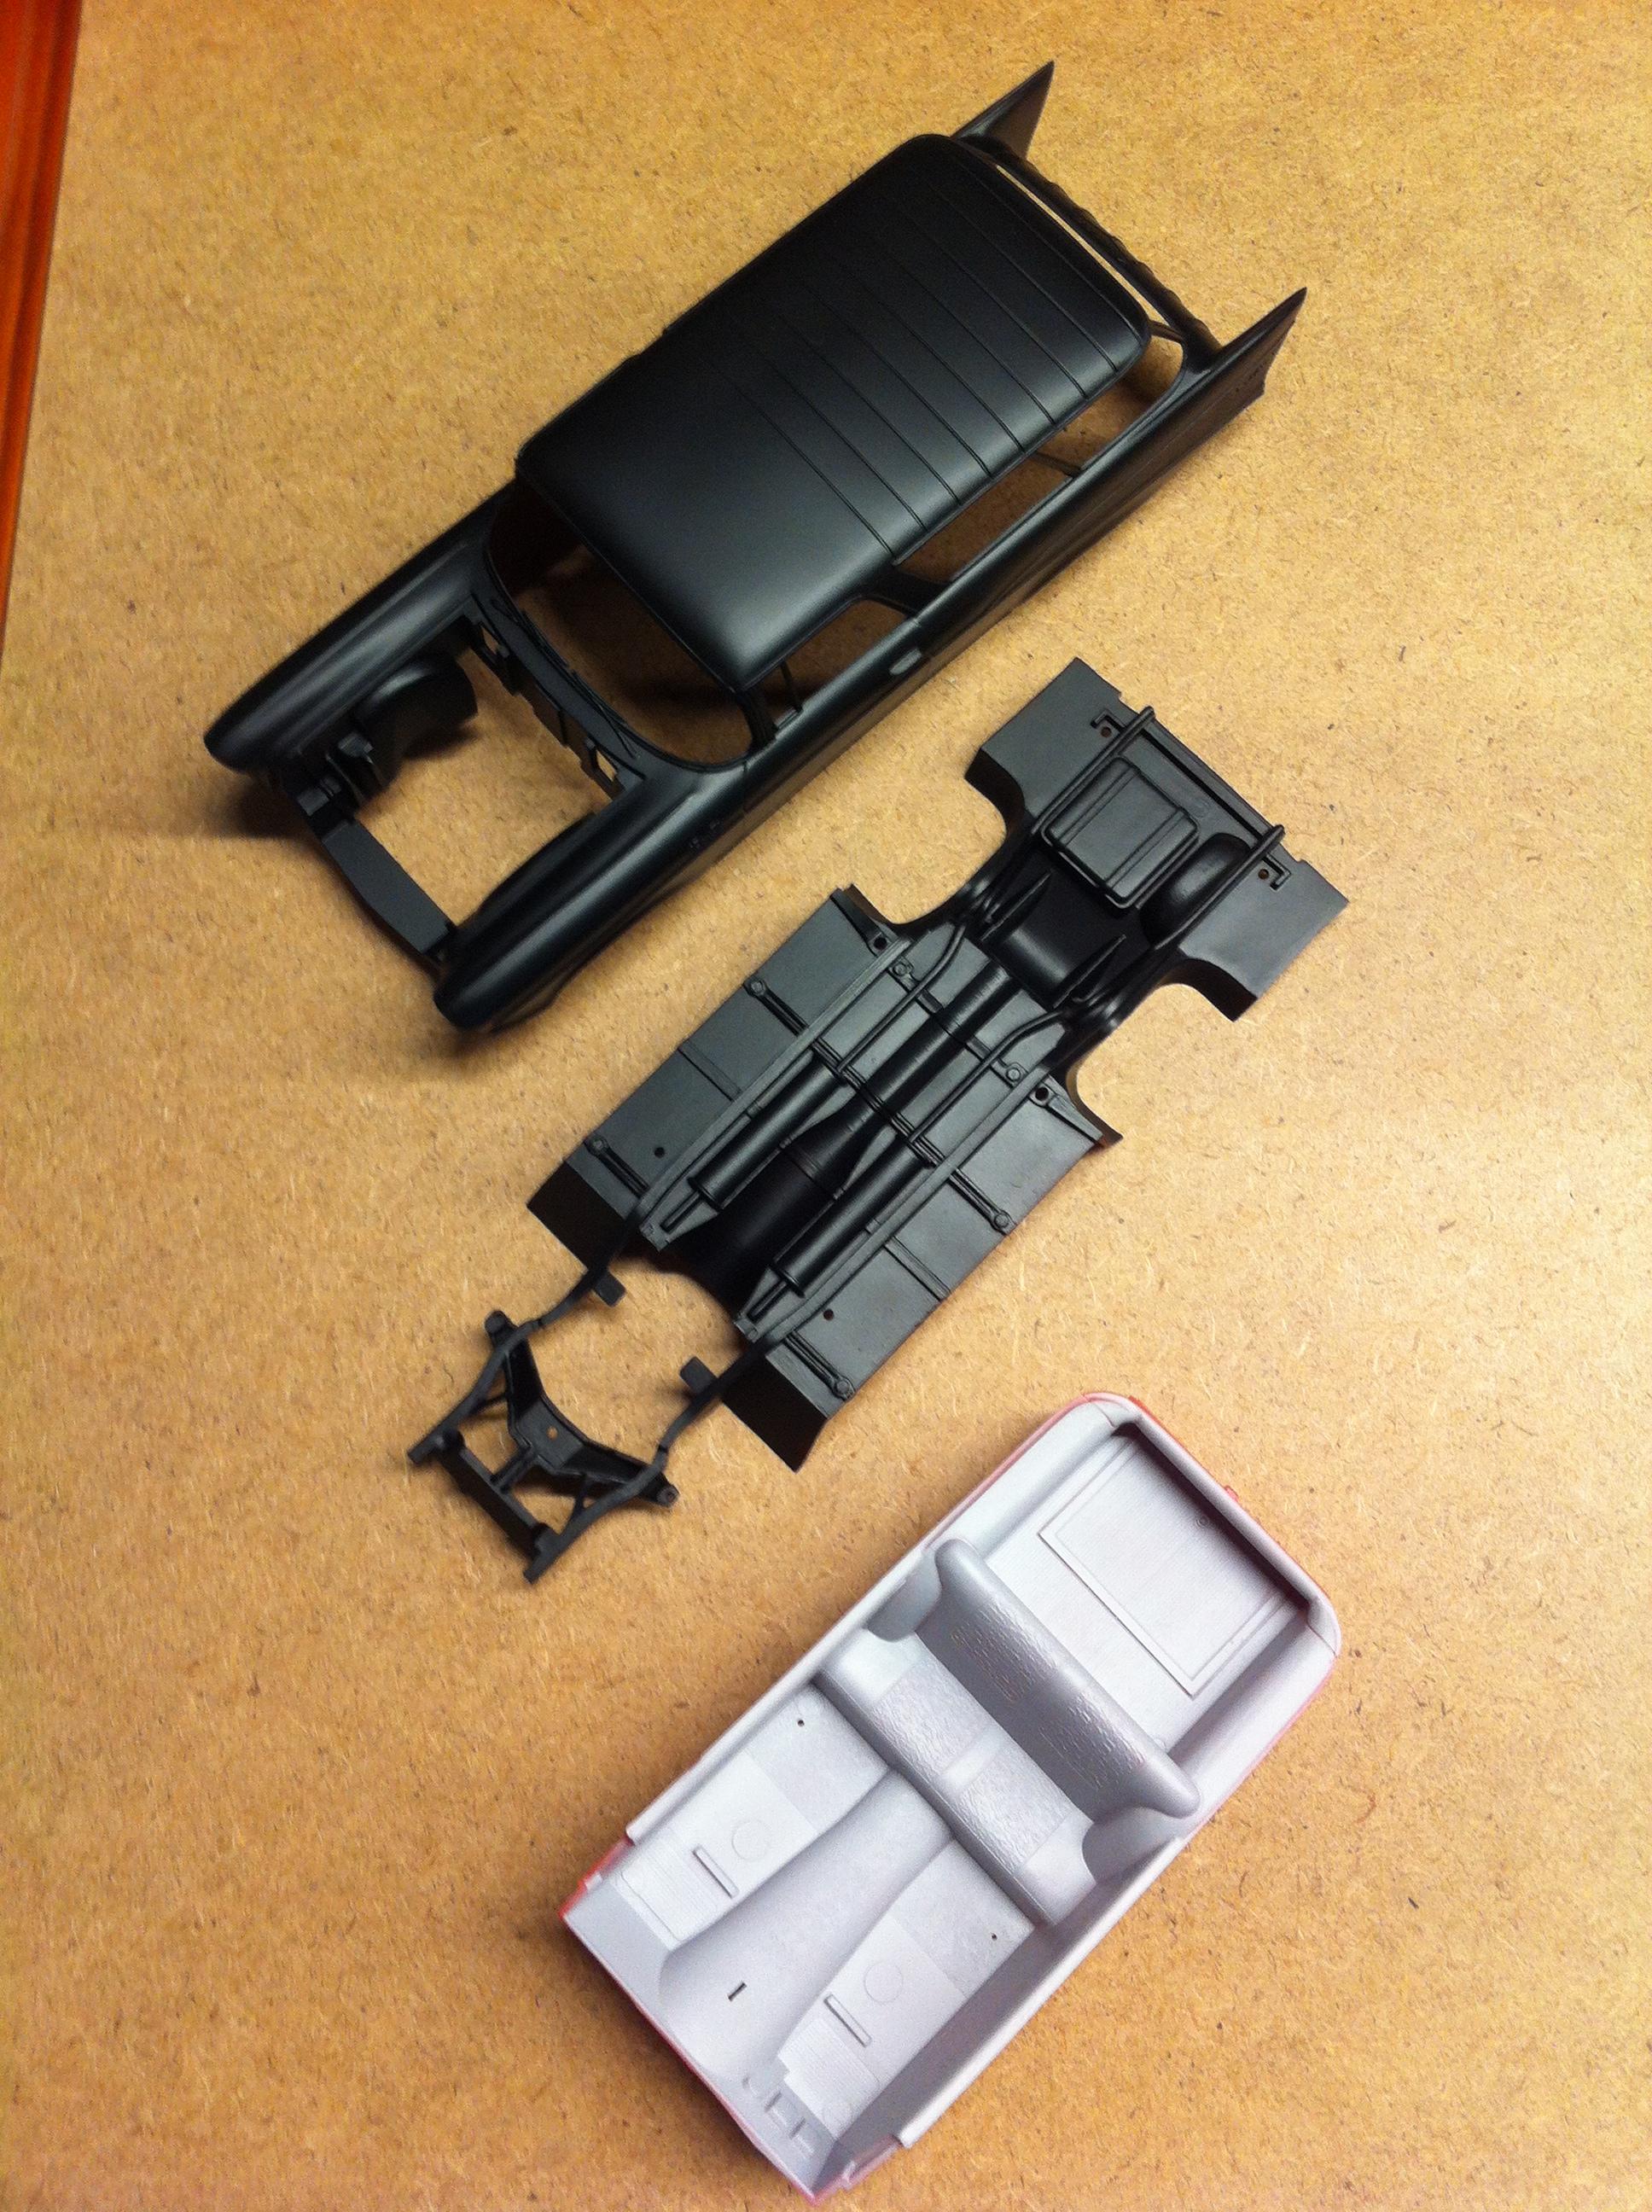
My progress isn’t as good. Body is stripped, cleaned up and ready for primer.
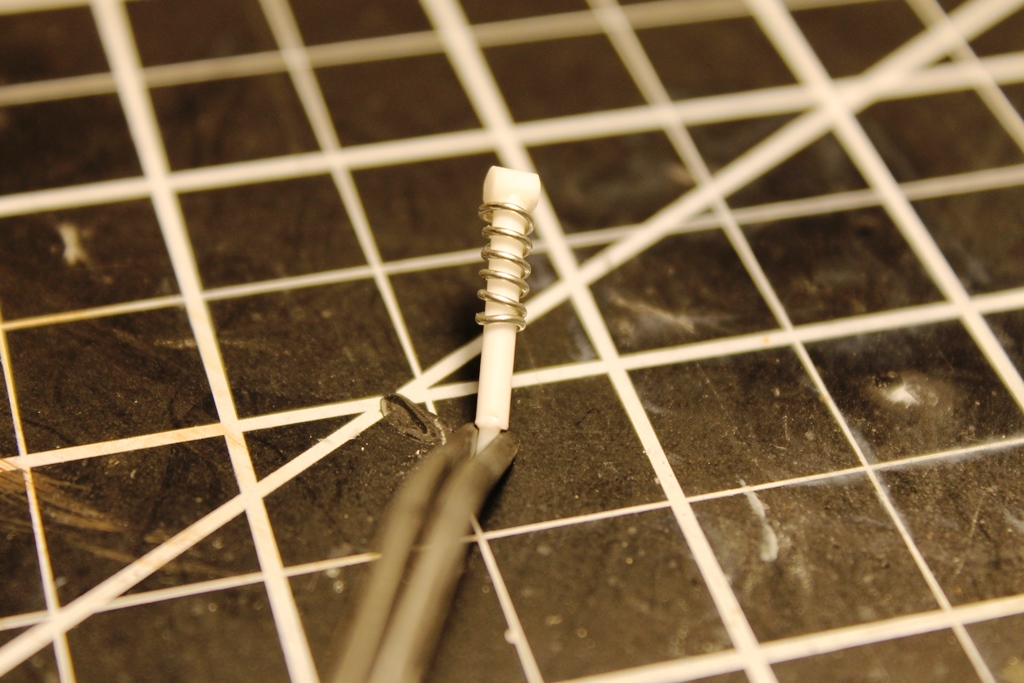
But, somewhere in all the paint stripping of the prepainted suspension, one of the front coil over shocks has gone missing. I believe it may have gone down the drain when I was moving the strainer at the bottom of the kitchen sink. I’m going to attempt to build a replacement, at least it won’t be all that visible behind the tire and with the low clearance between the tire and wheel well.
David
Oh, and it seems I forgot the music, and in remembrance of Eddie Van Halen (VH was the first concert I ever went to). Eruption would be what would be blaring while driving this.
David
I’m really thrilled that you like the entire look of the white stripes. Agreed that decals usually don’t come close to the actual look and feel of paint, but 9 times out of 10 I can’t come close to what a talented decal designer can accomplish.
For me, modeling as a whole really took on a whole new meaning when I switched from military aircraft and some armor to race and sports cars. It just became all that much more personal. The White stripe is a perfect example. I’ve run my fingers over those stripes in real life, and know how the lip was formed and why.
Oh, and it seems I forgot the music, and in remembrance of Eddie Van Halen (VH was the first concert I ever went to). Eruption would be what would be blaring while driving this.
I’m with you there David, I haven’t been this gutted since we lost SRV. Eddie was one of my earliest influences in guitar playing and I still listen to their music almost every day.
An amazing talent, a true innovator on the electric guitar, and a rock legend.
My choice of VH songs for today - Where have all the good times gone? (Diver Down), followed by “Happy Trails” from the same album.
D,
Thanks for your Aussie Thumbs up. As usual, it means a great deal to me.
I’m trying to think more rather then jumping in and regretting it afterwards. So far it’s working out for me, but at my age, the thought process doesn’t always work to well
Next update will hopefully be the basic shell glossed and waxed, minus the chrome parts, etc.
Some how I don’t see you as a messy worker especially considering that you always have multiple builds going on from Aircraft to cars. I’m really curious to see how you balance all of these builds now as you have so many going on.
I did the jump instead of thinking and the first coat of Frozen White is applied over two coats of 1500 Gray. In hindsight, I should have done the second coat of 1500 as white, the Frozen is still slightly gray after the first coat.
I’m hoping that after the rub out and second coat that is becomes whiter.
Primer going on the chassis and interior with my backup airbrush tomorrow. I damaged the fine nozzle on my Krome, ordered the replacement so the Frozen White will have to wait until I get back from my Jeeping trip this weekend and a drive to Florida to see my in-laws the after that. Basically, after tomorrow, no model building for two weeks.
David
David,
the scratched out coil over shock looks great. I’d even consider building 3 more to replace the kit ones.
As for the Ford Frozen White issue, a white basecoat would certainly require less color coats, but you’ll get really close to the chip color with an extra wet color coat as Gunze #1500 is a very light Gray, much lighter then Tamiya Primer Sealer.
Looking at your pictures, the white color stripes on your cutting matt on my (color corrected monitor) aren’t really white, but more of a off white shade. I also pulled up a Ford Color Chip of the Frozen White and it’s a shade off white of bright white that I used as a comparison. So I’d say that you’re very close.
Have a safe trip to Florida and wear your masks. Cya when you get back.
David, I’m with Joel here mate. Another good shot of the Frozen White should brighten it right up! It’s looking very nice so far, and a good save on the coil-over, neat work.
Some progress on the Nomad, we had a Primer Party a few days back.
Once I mask and spray the rear seat panels, door panels and transmission tunnel, and add some chrome detail for bling, I think this will look nice and retro.
I also shot the engine with Chevy Orange/Red, and the headers in white.
Great work going here.
The Ford GT looks great David but I agree with the wise ones and put on another coat.
Damian, the Nomad is moving along well. The black has done a good job of toning down the red and the interior is very sharp.
I am still fighting the last campaign but hope to be here in a few days