The Buffalo Western (BW) is a fictitious railroad set in Buffalo, NY. A jointly owned industrial and belt line it represents a rationalization of infrastructure by owners Erie (Erie Lackawanna), Lehigh Valley and the Nickel Plate (Norfolk and Western). Shops Yard on the SW side of Buffalo is the major classification facility and sets along side a double track main. East Shops Tower (ES) controls the interlocking at the yards east end. The Erie Lackawanna Historical Society has released kits for two different Erie RR Towers. This build log will focus on the construction of the Waldwick Tower kit as built by the BW.
2 Likes
The real Waldwick Tower was constructed in 1890 and was one of six similar structures constructed by the New York, Lake Erie and Western Railroad in New York and New Jersey. The Tower was in continuous use until 1986 when it was abandoned by Conrail. The Tower has since been acquired and restored by The Waldwick Historical Society and is open to the public as a museum.
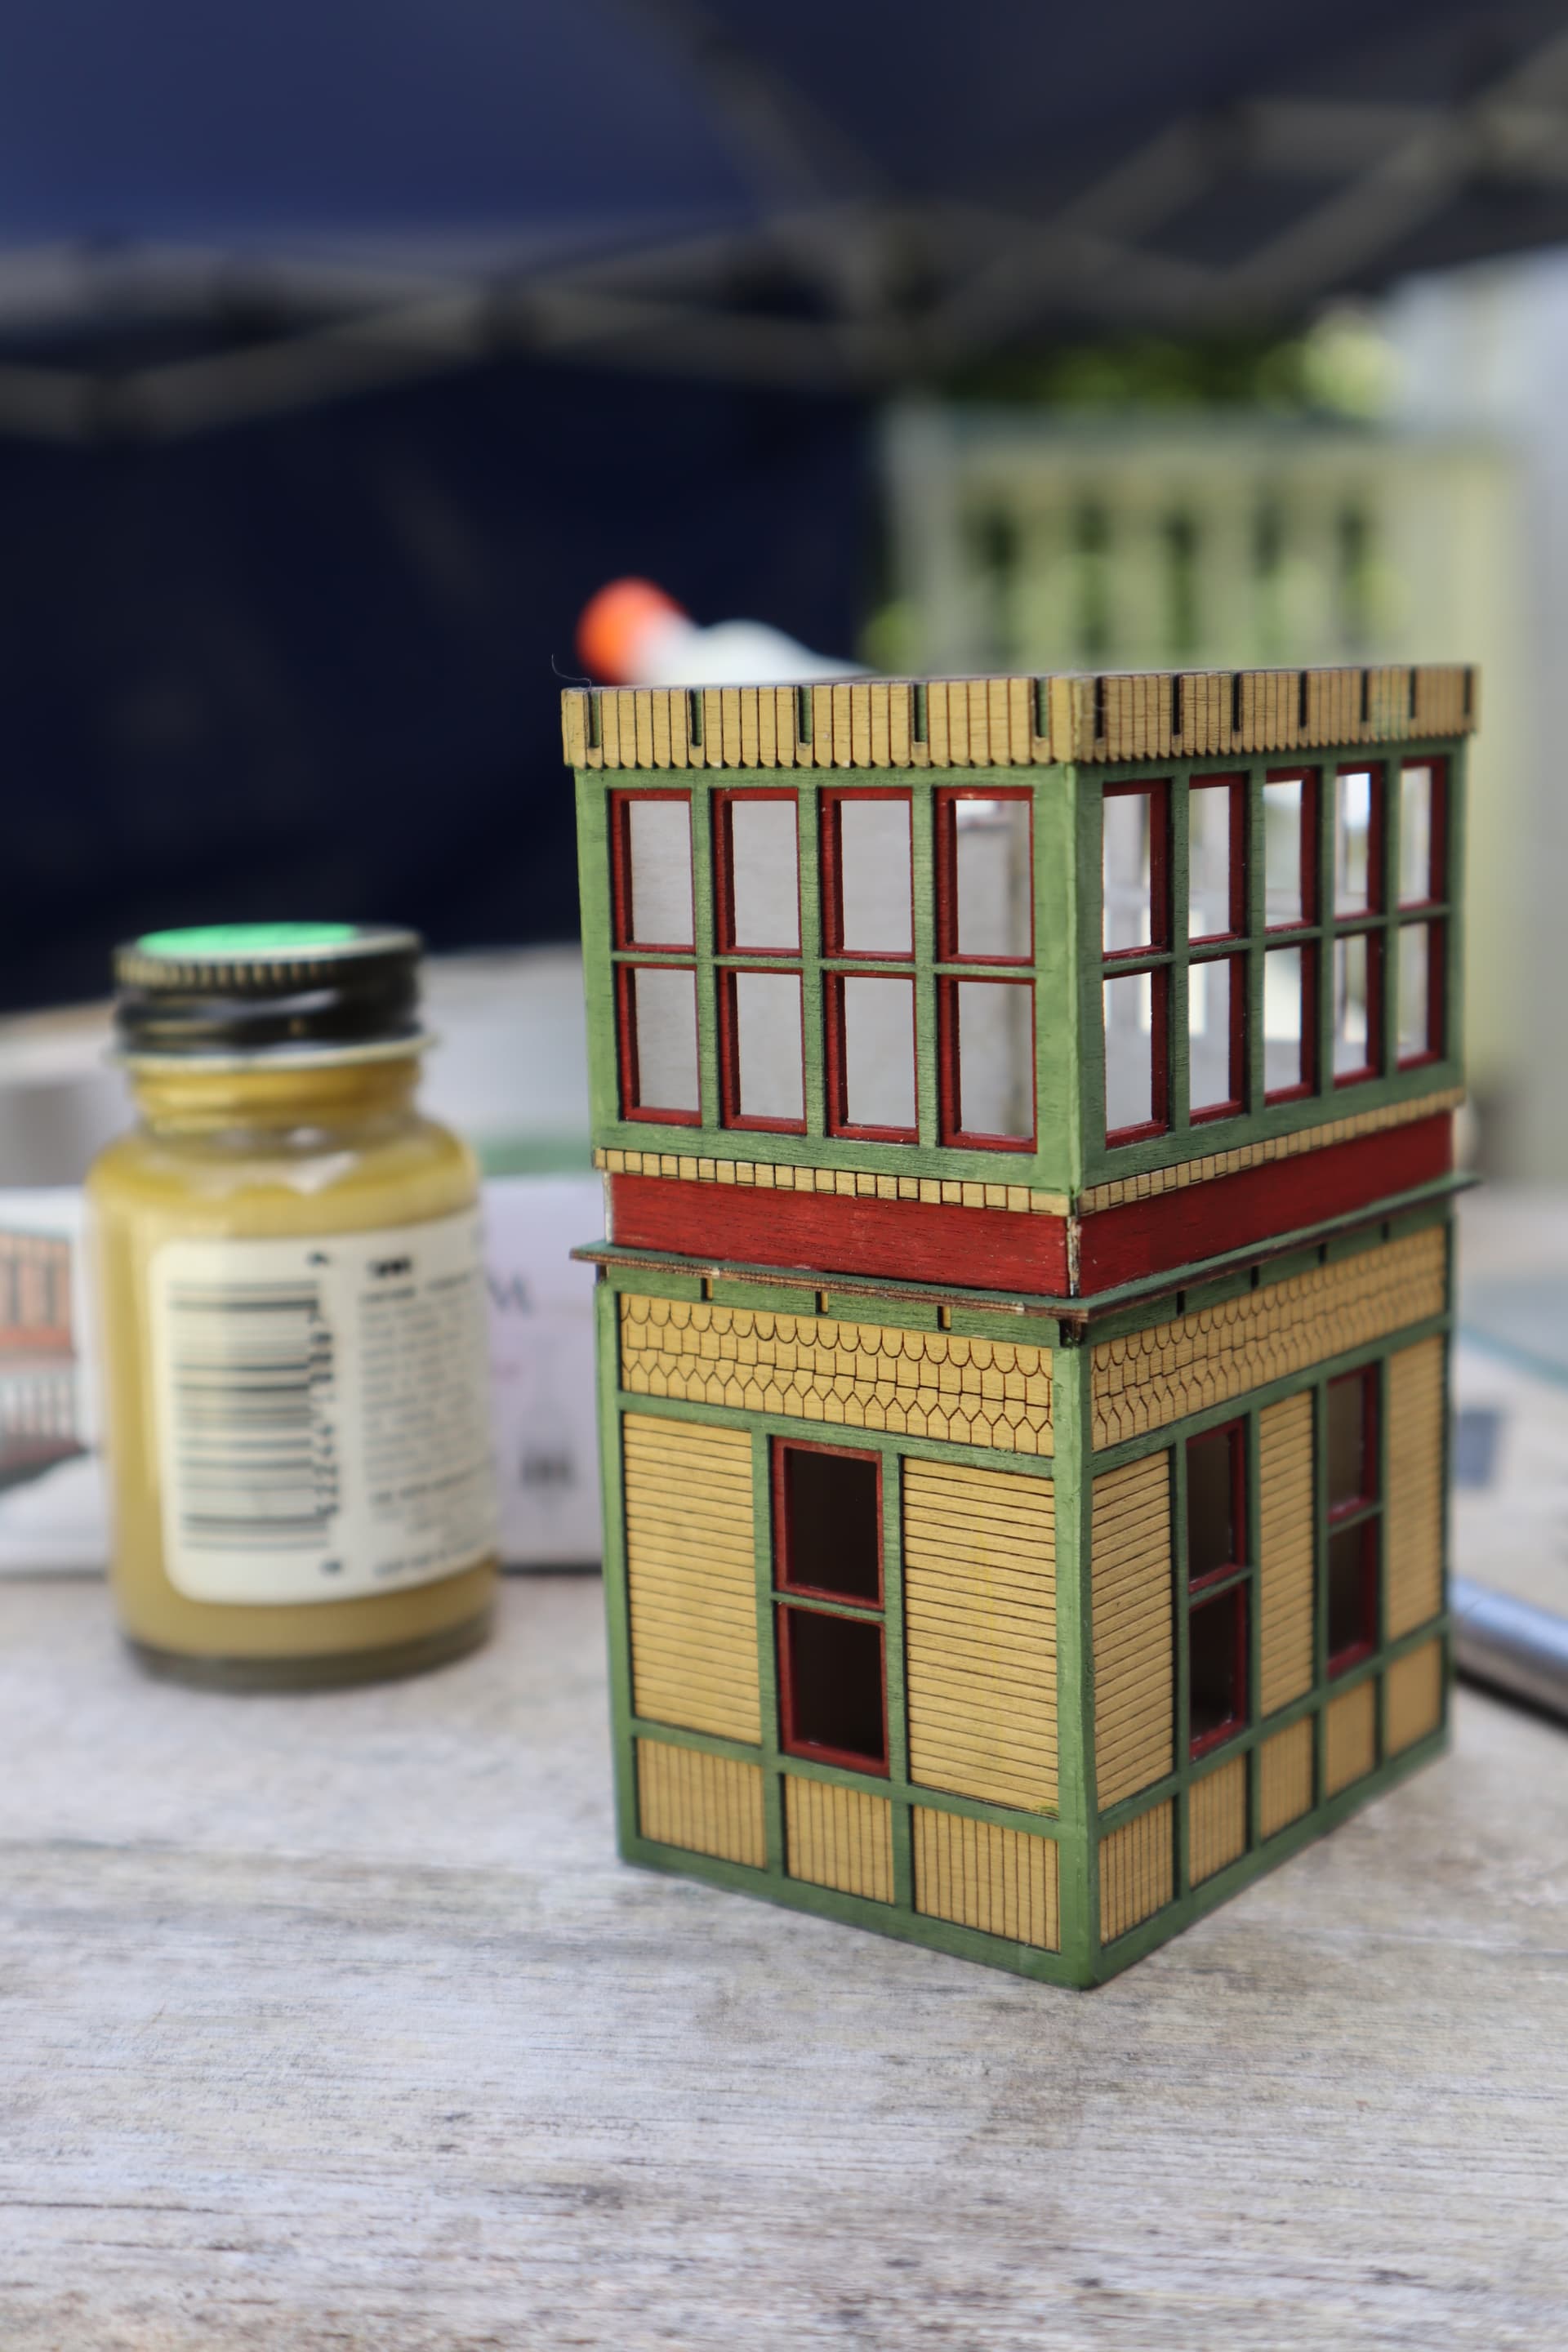
We have had a couple of nice afternoons and evenings here in Seattle and I was able to work out on the deck and begin construction of my tower. I started with basic painting. This is a wood kit and I prefer to use solvent based paints rather then water based. While the kit instructions suggest air brushing I prefer to brush paint as I can more easily vary the intensity of the color which is the beginning of the weathering process. The instructions would also have you remove all the parts from the plates prior to painting. I prefer to leave them attached until needed and do any paint touch up later.
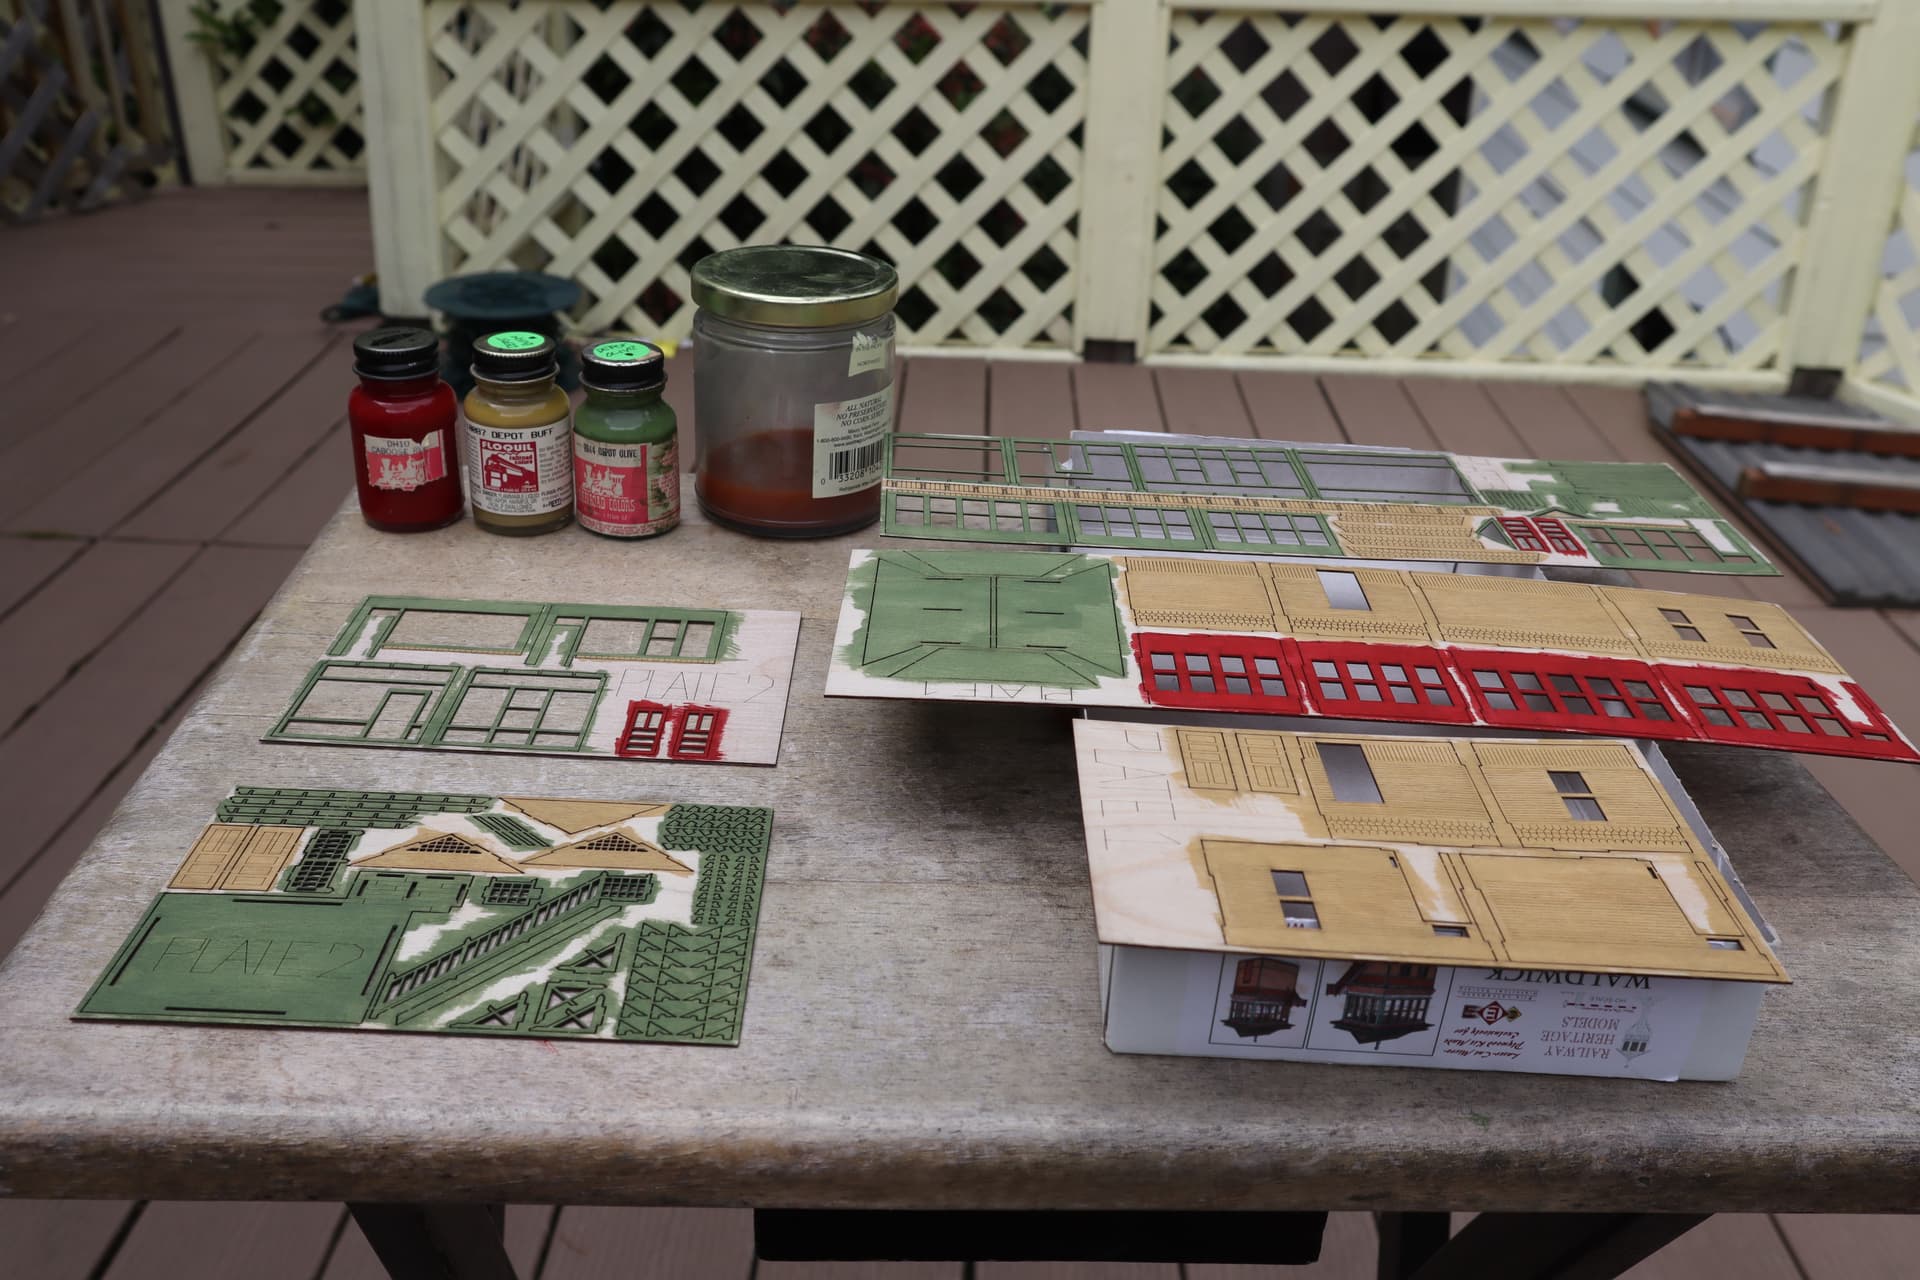
One item not called out on the paint color chart/diagrams is the detail painting around the windows on the lower wall pieces. While alluded to in the written directions it required a careful study of the assembly drawings to determine the limits and color of the area to be painted.

I also painted the surfaces that will be the inside walls of the structure white. Again I did not make an effort to achieve a dense solid color coat on these surfaces.

Once the paint cures we can begin actual assembly.
Thanks for reading and looking
Tim
2 Likes
Watching this with interest- something different. What scale is the structure?
This is an HO scale kit. It is also available as a N scale kit.
1 Like
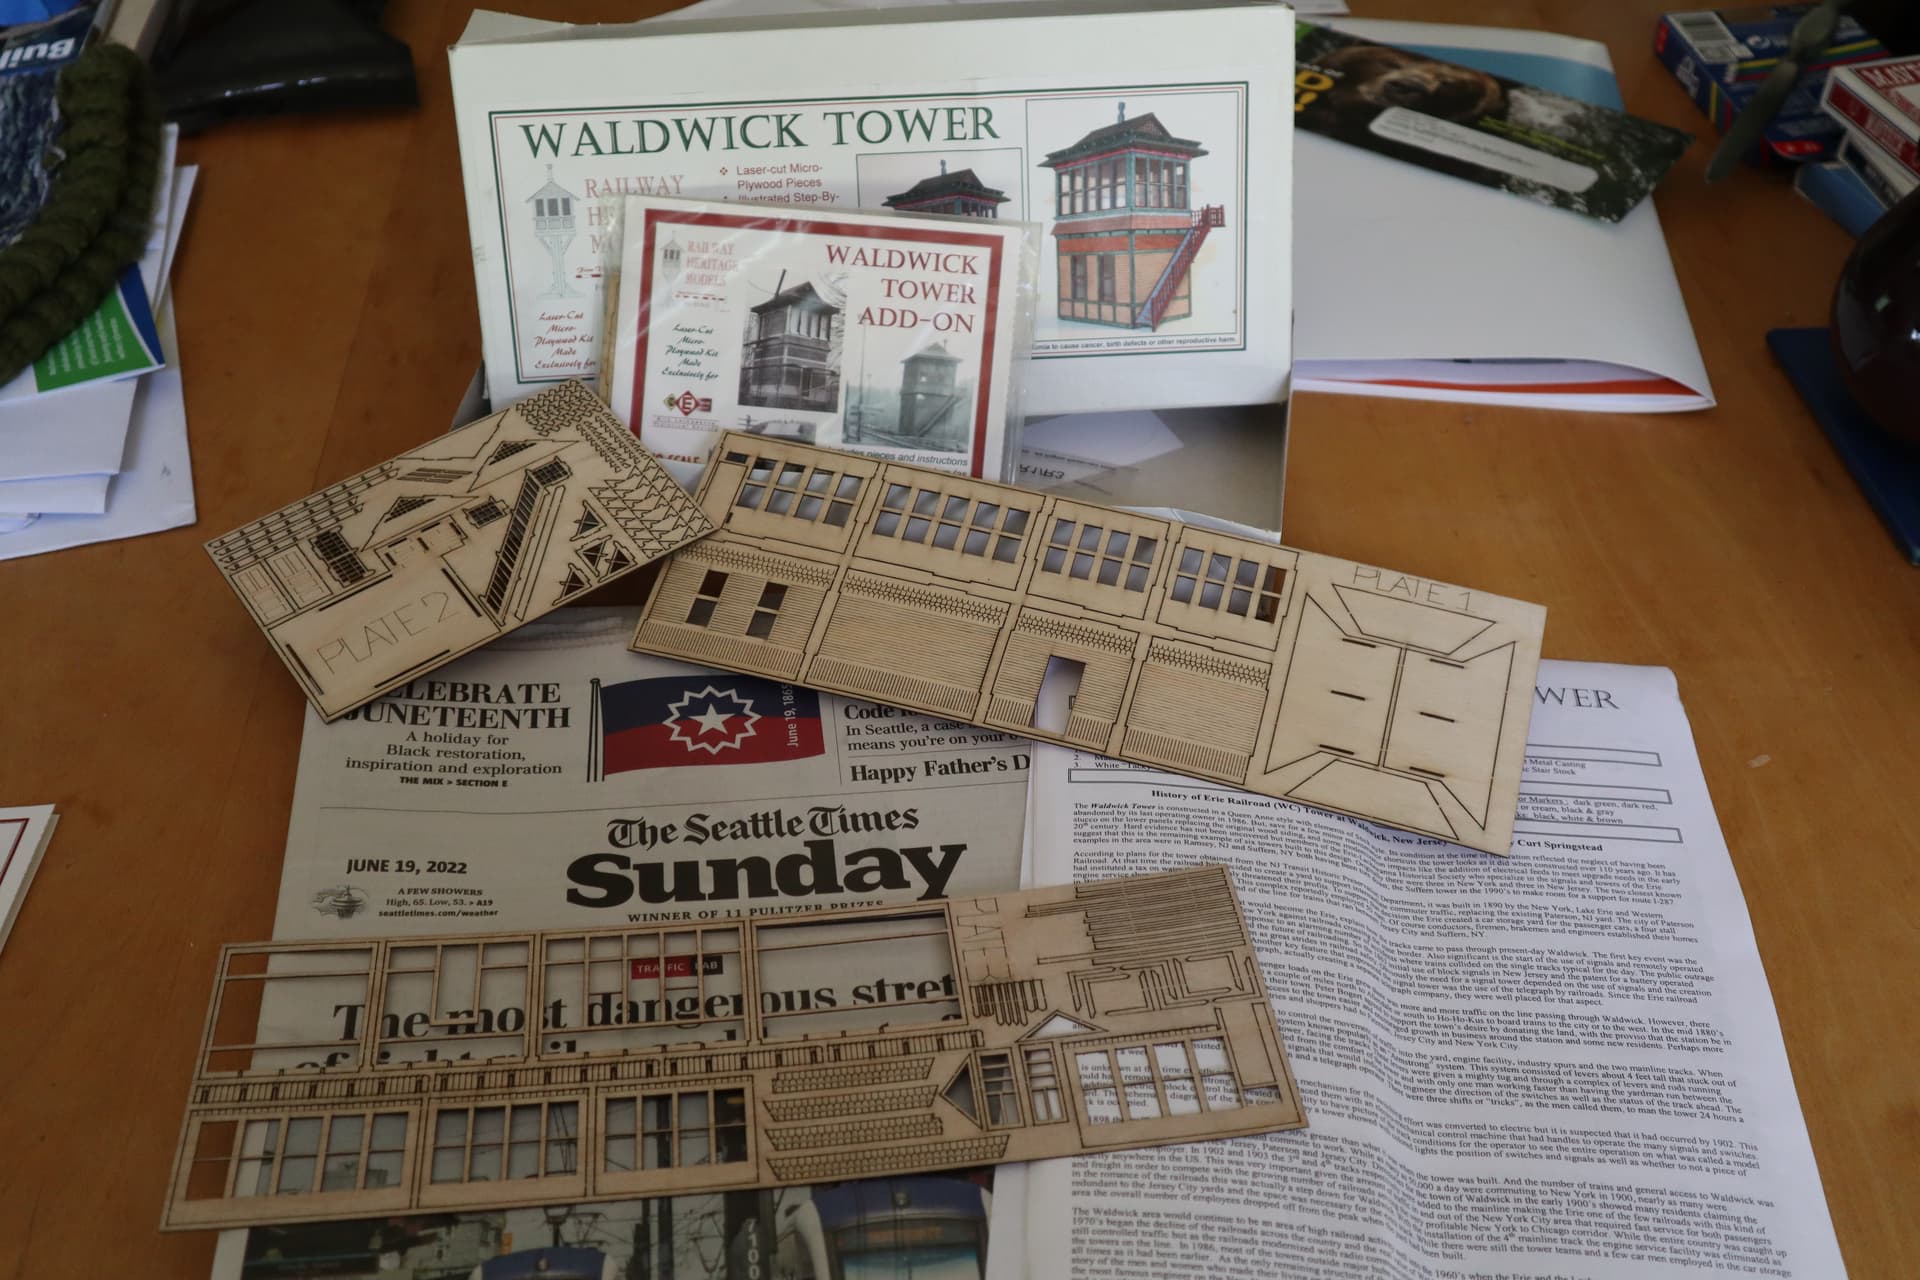
So it has been a fairly productive week as the weather has stayed nice and it is light until 9pm. The deck is a true carpet monster however. It’s a really good thing that extra small components are included.
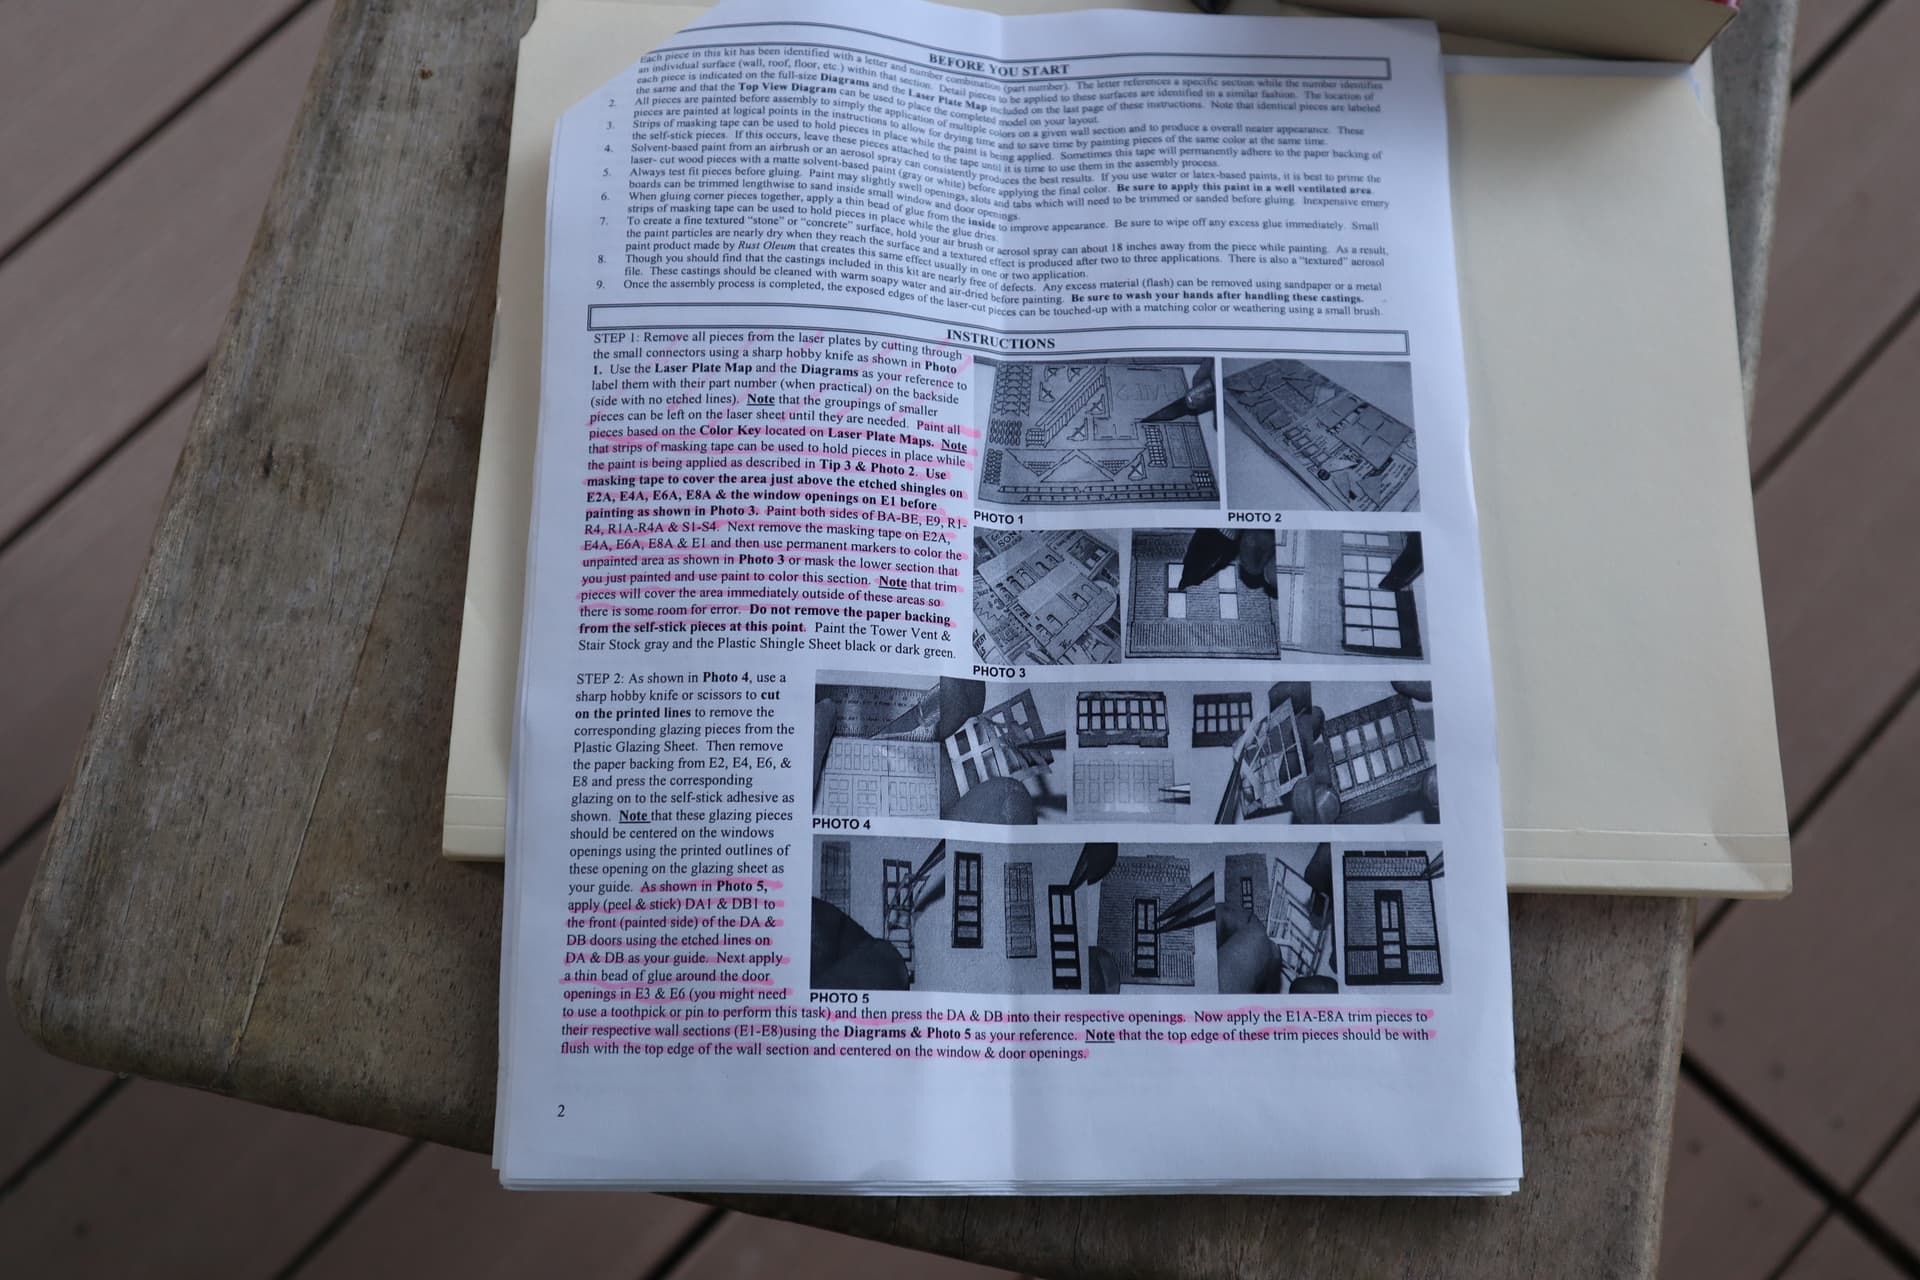
The kit is comprised primarily of a thin plywood and a thinner veneer w/a self-adhesive backing. For assembly I prefer to use an aliphatic resin glue as it is strong, drys fairly quickly and also gives me time to position the parts. Most manufacturers of these kits recommend using an X-acto blade to remove the parts from the carrier plates. I prefer to use a single edge razor blade as it has a finer profile, causing less distortion of delicate components. Like a plastic model kit, there are “sprue” attachment points that need to be trimmed. For me that single edge razor blade works best.
This kit has an acetate sheet for the windows. As the first step they cut these out and glue them to the back surface of the wall components. I prefer to do this later in the construction sequence and will use glass cover slips instead of the acetate.
Construction begins w/the attachment of the trim pieces to the wall pieces.

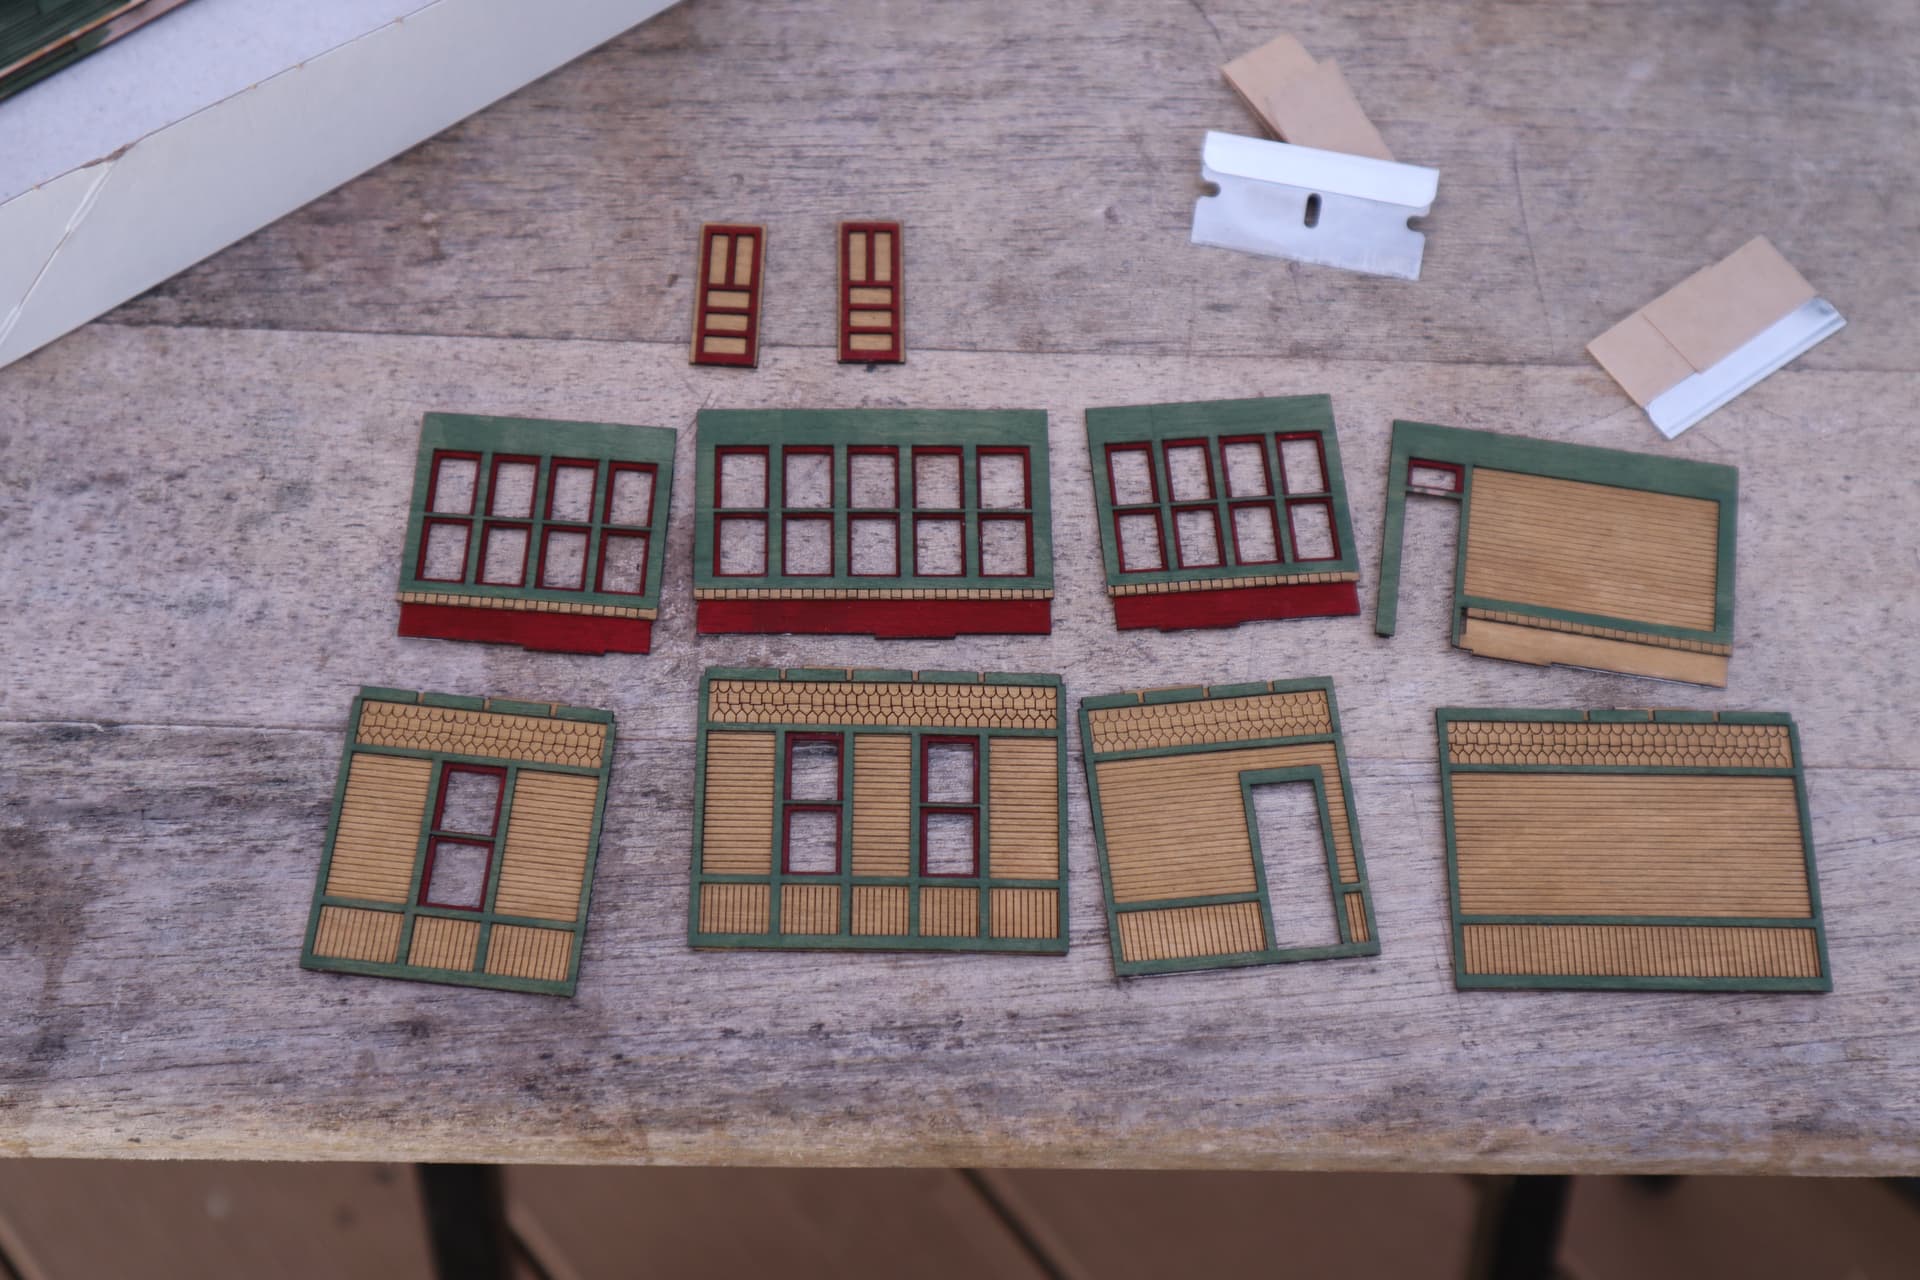
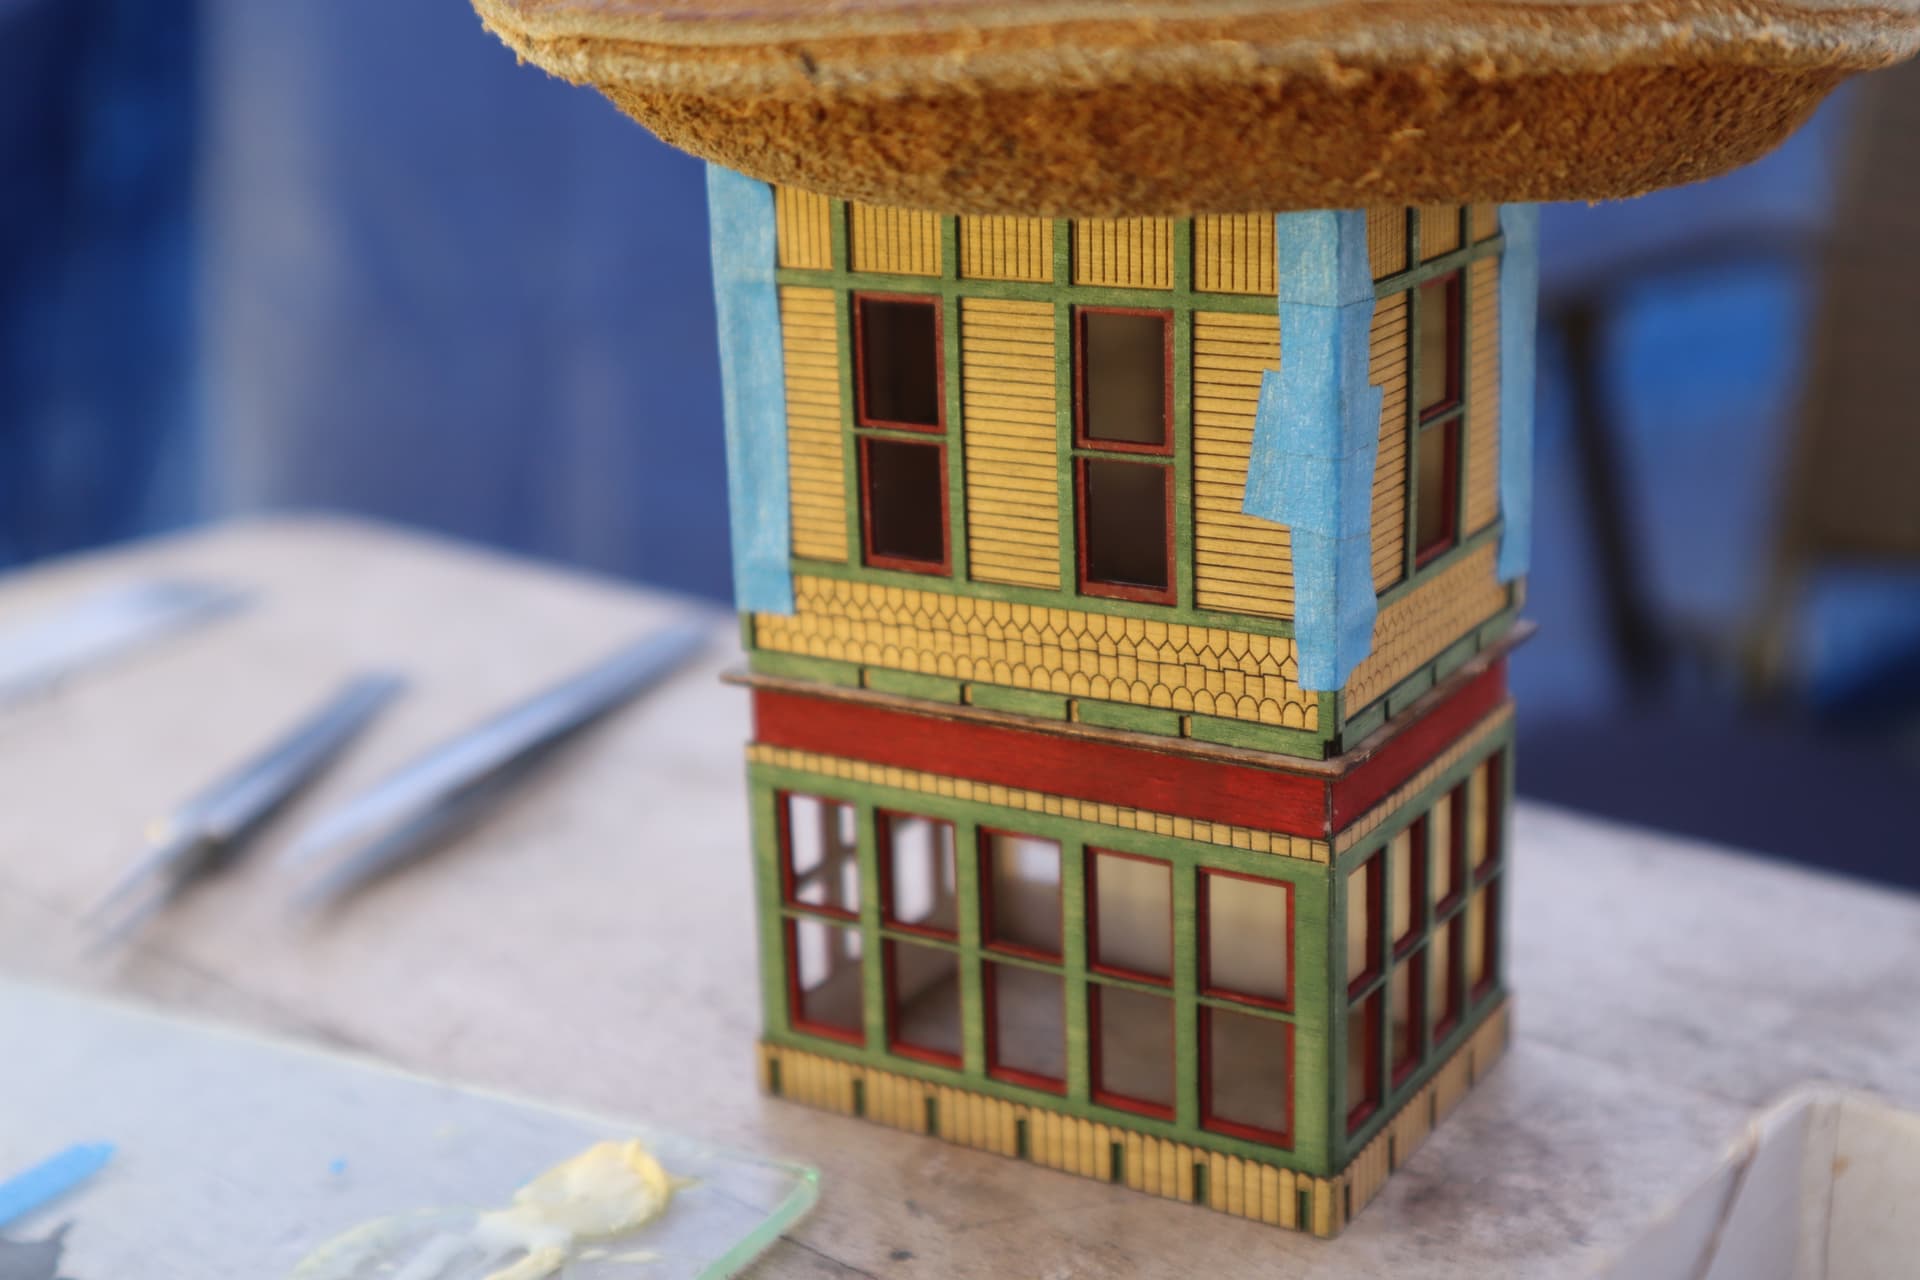
There are no alignment marks . You need to center the trim components, which have the self-adhesive backing, on the wall and press them in to place. Once placed, you have very little chance for adjustment. How well they are centered, or not, affects construction in several ways down line. I did fairly well w/those wall section that had a number of openings. The rear wall piece, with no openings, however suffered from a badly out of adjustment mark one eyeball. This did not become apparent until later on.
The completed wall sections are now glued together using the floor of the tower, with slots for corresponding tabs on the walls, as an assembly jig.

Once things had dried and the tape removed I painted the edge of the trim sections where they come together at the corners. The problems with the trim replacement became apparent at this point. Trimming, filling and sanding required.

The structure is then turned over and the bottom story completed.
That’s it for now. Thanks for looking and reading,
Tim
3 Likes
So having some extra free time this afternoon I will bring things up to where they are today.
The instructions are typical for a kit of this type. You get a parts diagram:

An architectural/assembly drawing:
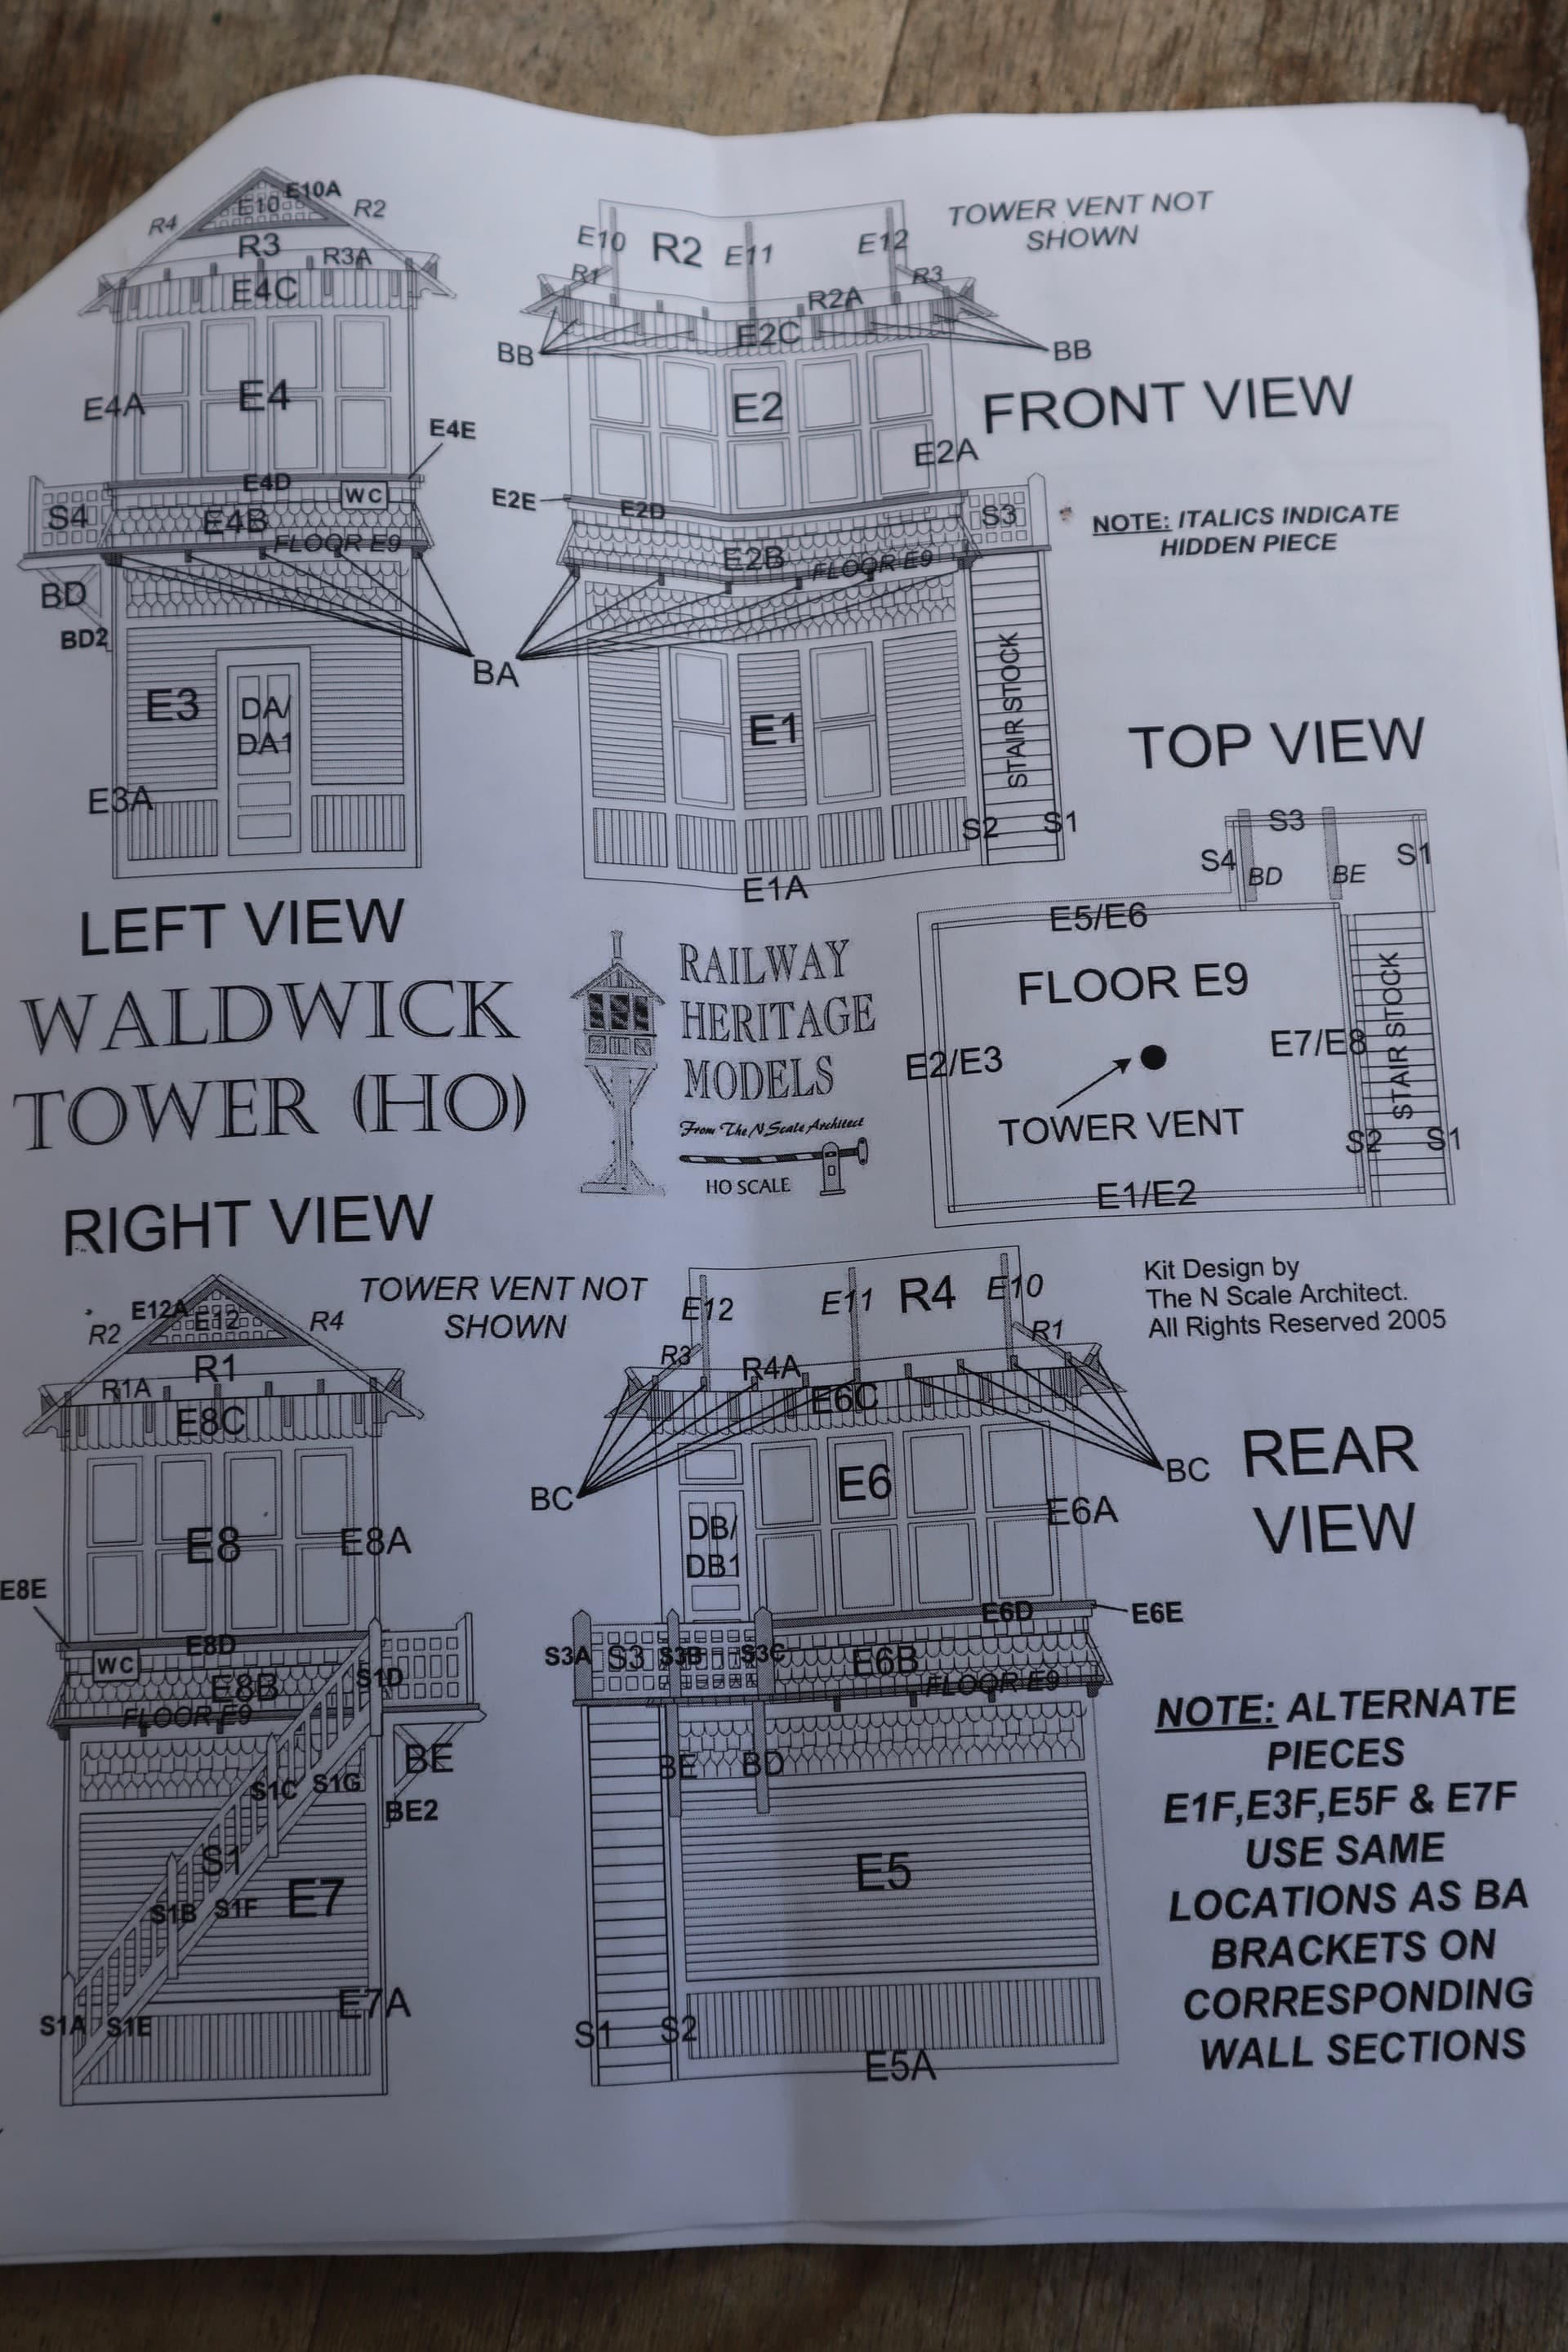
And pages of instructions w/little black and white photos and lots and lots of words in tiny type.
Did I mention that I am rapidly becoming a grumpy old guy w/all of the associated memory and vision issues and that there are lots of tiny little words. Consequently I high light each step as I complete it. This also helps as I do jump around some.
So the balance of the detail has been added to the basic box.
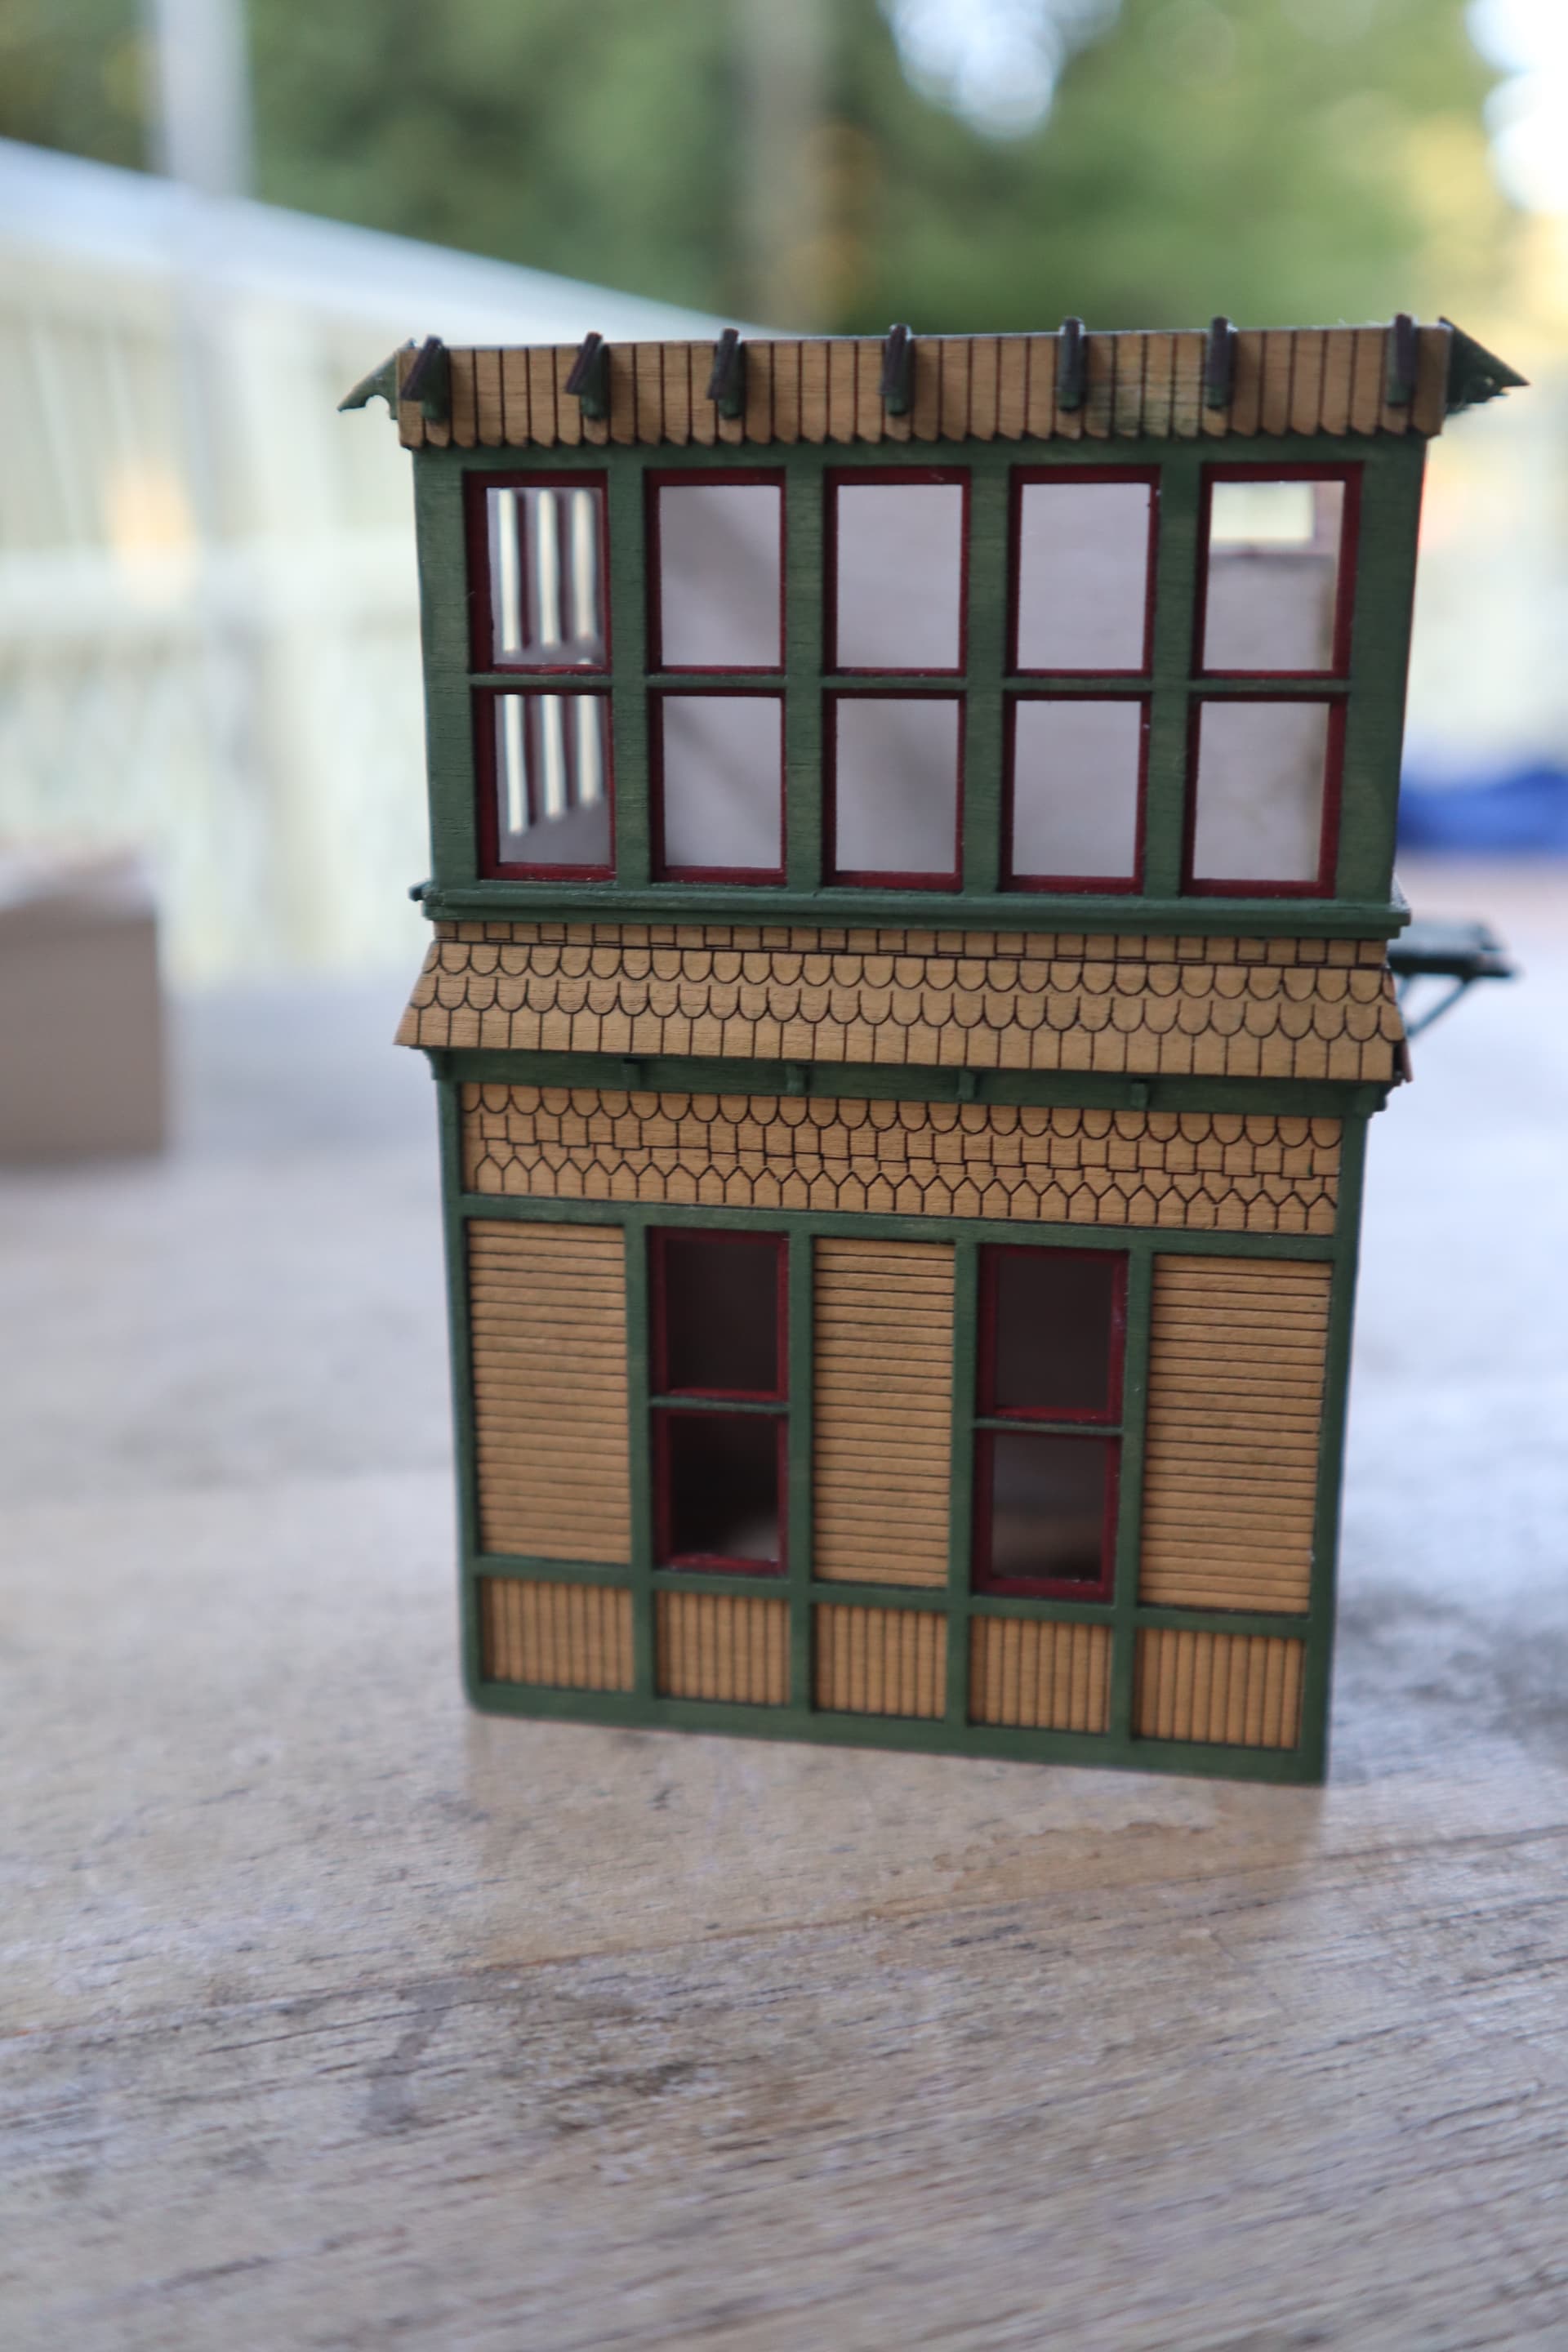

The next picture shows the issues I had from not getting the trim piece centered on the lower rear wall. The trim on the right side over hung by .012" or so and was shaved/sanded off. This also narrowed the slot in the top of the trim that locates the corbels for the lower sloped portion of the upper wall. This slot was shaved and relocated a portion of the distance to the left. On the left side there is a corresponding gap to be filled.
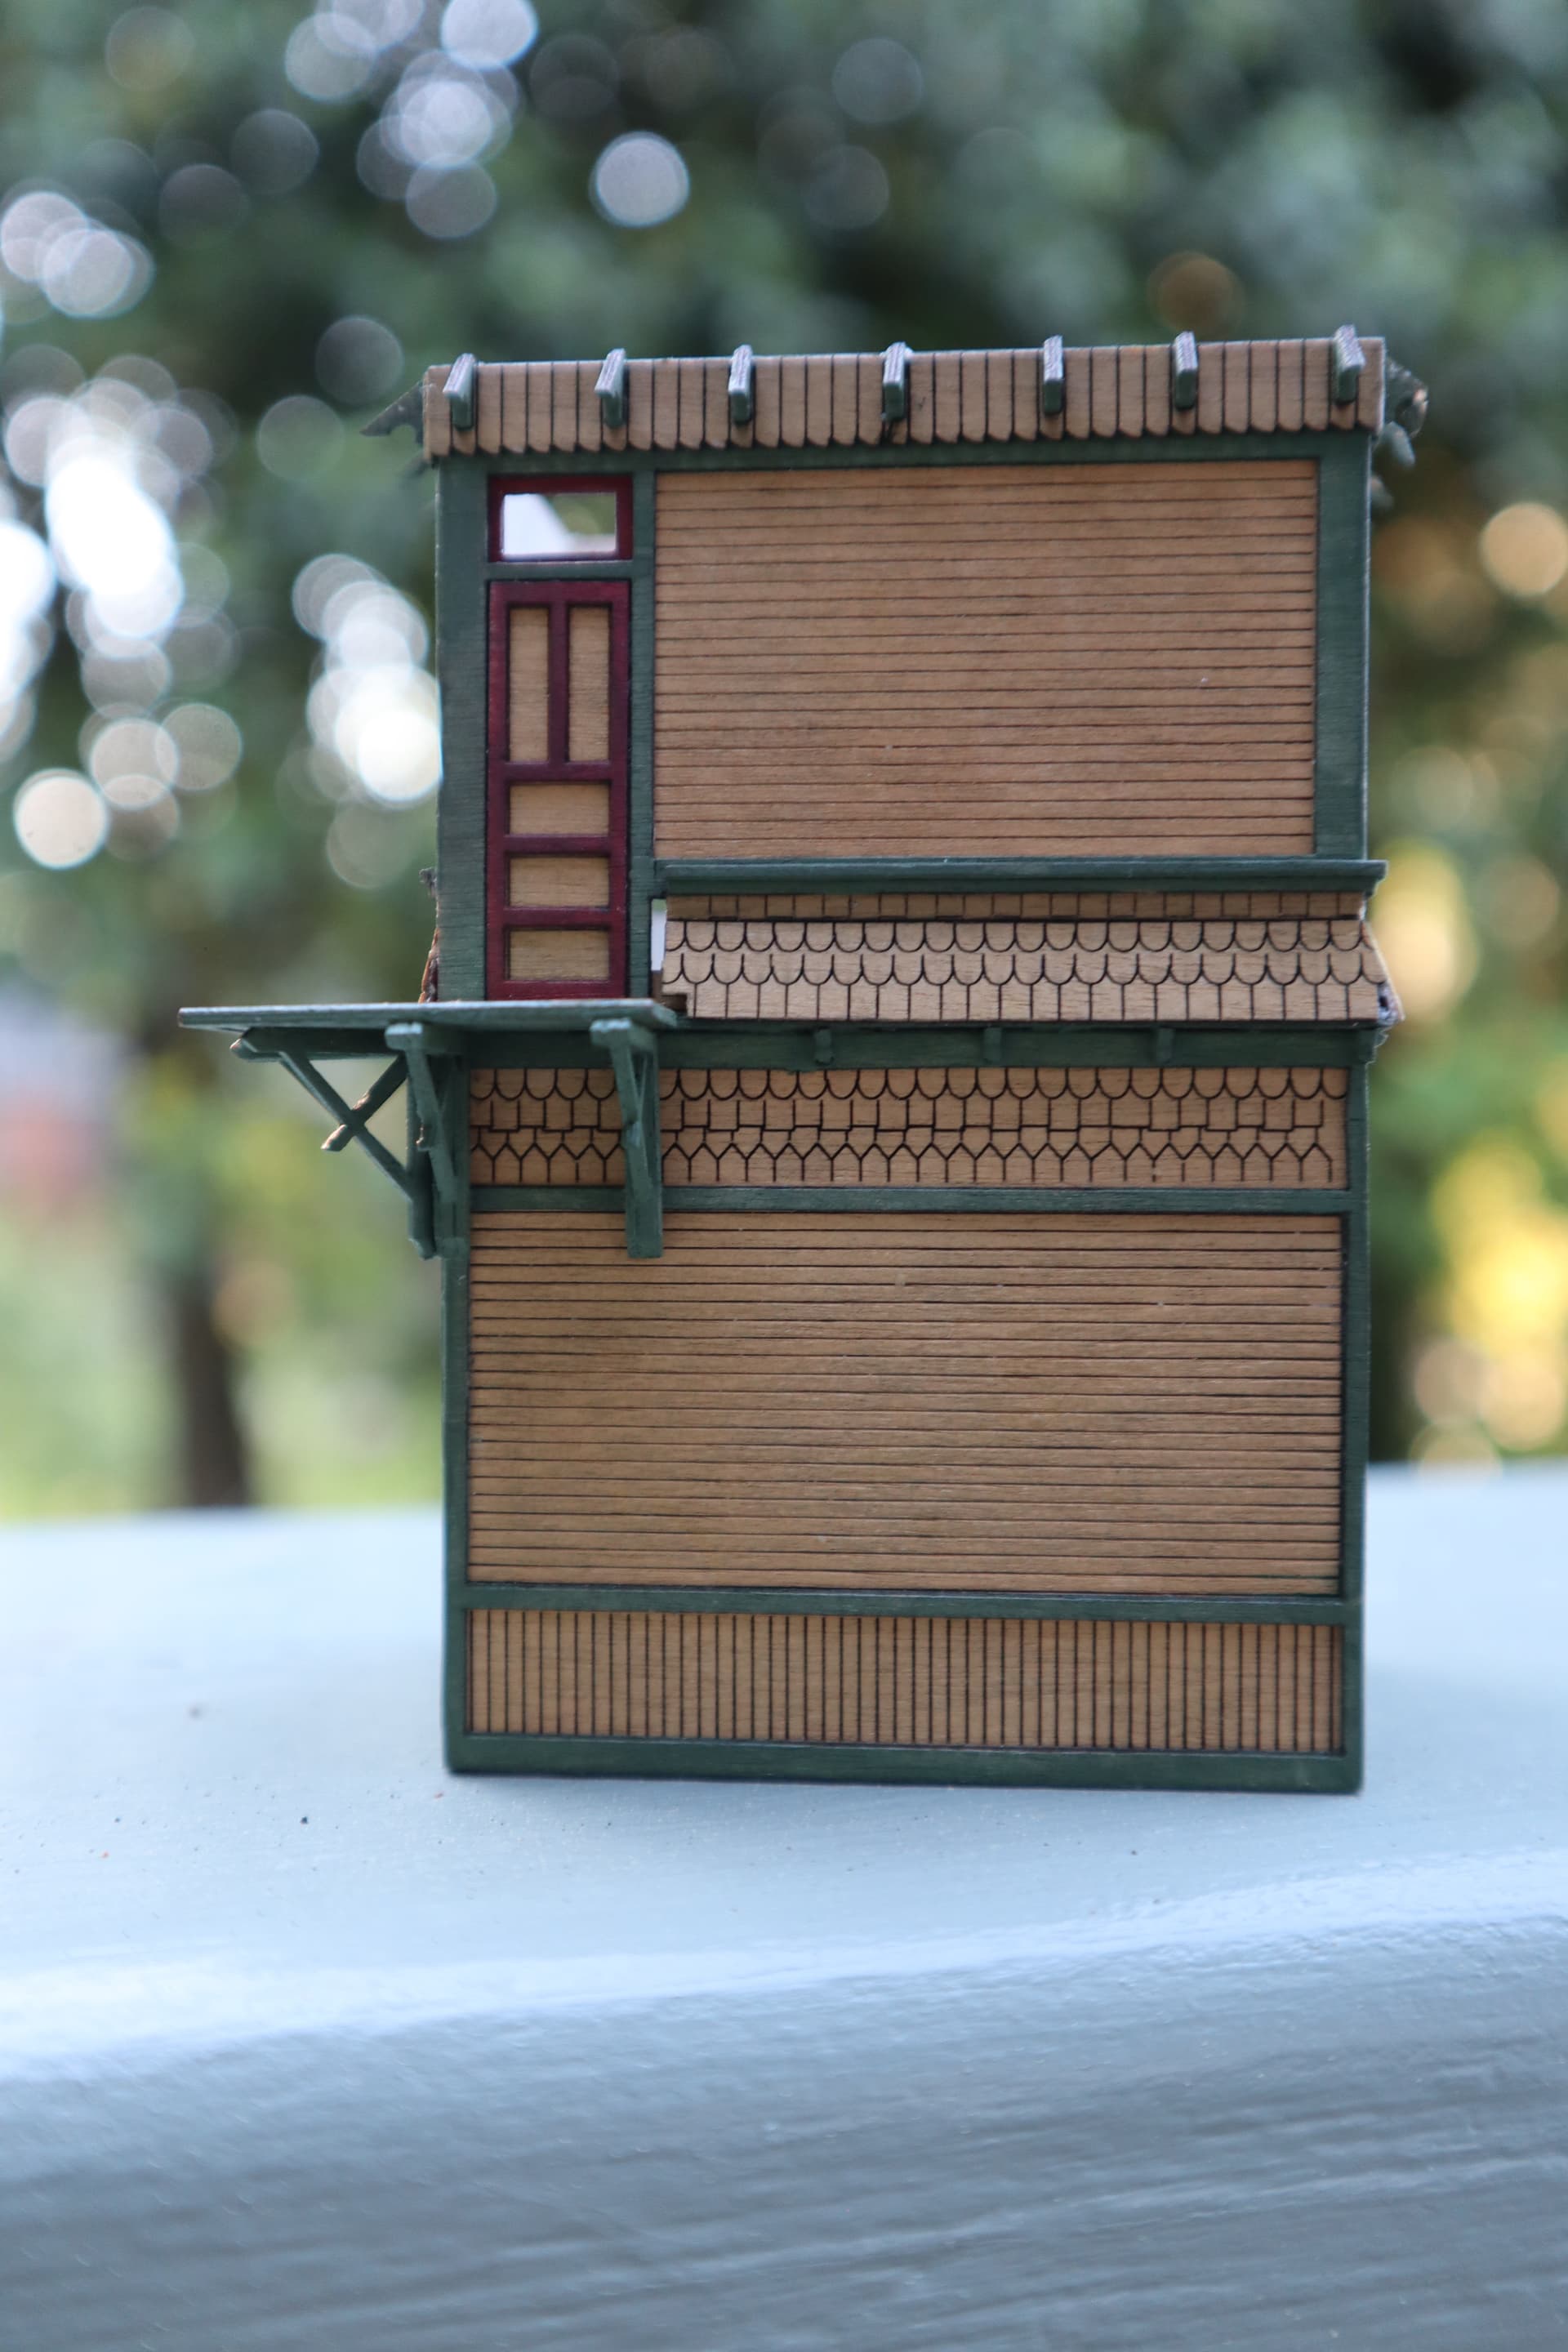
I didn’t make much effort to fill this gap in. The upper third is hidden by the support brackets for the stair platform. The balance of the issue will be in shadow from the platform and stairs. The structure will also be placed away from the front of the layout and that will be the back wall.
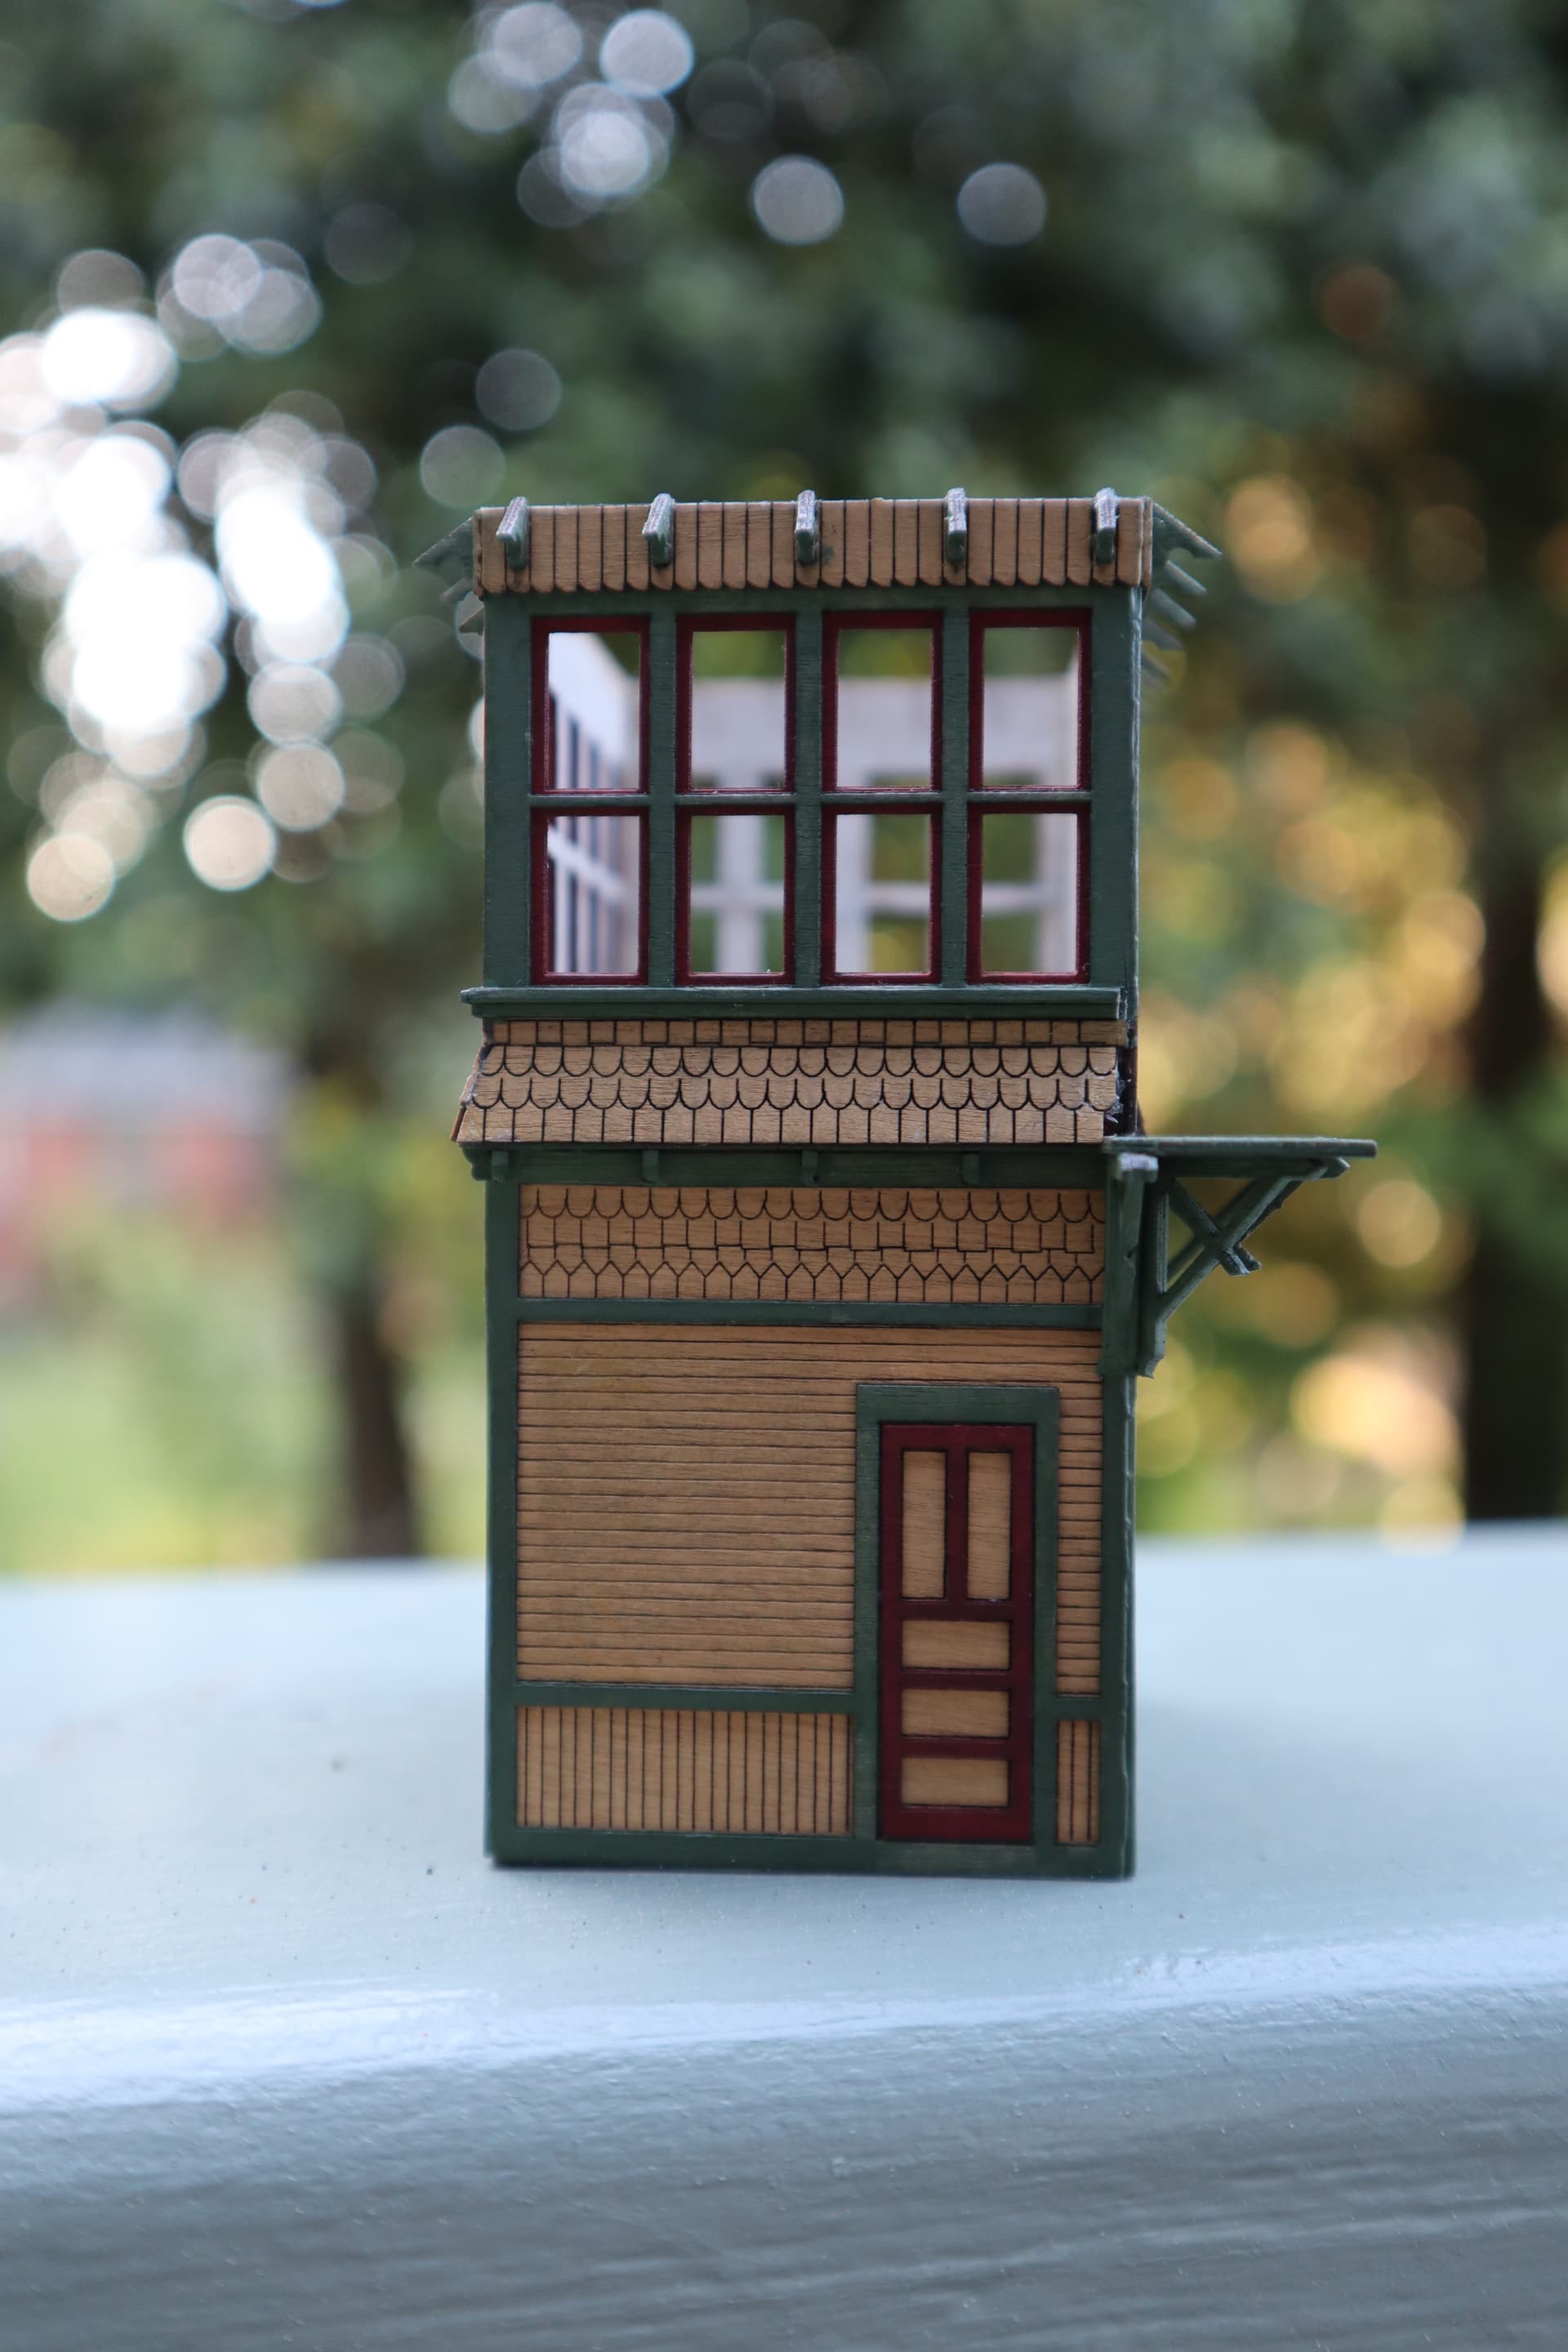
I have a few repairs to make to the shingles mid-structure and to the upper corbels. The building took a dive to the floor but survived surprisingly well.
That’s all for now. Thanks for stopping by.
Tim
4 Likes
Tim, great build blog. Your color scheme is highly appealing to me. Yours or a particular prototype?
Tape on the wood? Gutsy. I’d be afraid to do so. A shame about the gaps. I’ve not tried to fill wood that I recall.
Looking awesome.
The paint scheme is a modification of what the Erie used. The Erie green was darker/deeper and the red was brighter. They also used a light green instead of the buff. The BW uses what you see here on buildings w/public exposure like towers and stations. On company buildings that are usually only seen by employees we delete the red on the window sashes and use the olive green trim color instead.
As for the blue tape, it is painters tape. Low tack and not a problem while enough grip to hold things in place. For filling the gaps I generally use a paste mix of CA and talc that I can carve and sand.
2 Likes
Nice. Thank you for the details of how you approach this model. Gives me ideas for tackling a similar model.
2 Likes
Hi Christina, welcome to Railroad Modeling. Small but growing group. Some world-class modelers. And those that make glue bombs like me. Always a friendly and helpful group.
What models are you working on? Which scale? We have another thread called Show Us your Rolling Stock or something along that line. If you want to post some of your models, we’d all be glad to see them.
If I can answer any questions about this site or the kitmaker network in general, please contact me. Here in a form or even in a message. Again, welcome aboard!
2 Likes
Very aesthetically appealing and authentic paint Scheme you have there. I forgot that Erie used a lot of green. Where I lived up in indiana, driving around Decatur there’s a Erie concrete coalng tower. I can’t remember seeing any of their depots standing. Might be a few but I don’t remember finding one. But I recall I always liked Erie buildings and the colors they used. I have to admit I really like the buff and brown of the Pennsy, but I want something a little more unique for my freelance railroad.
I settled on a hooker-hunter green hue (“Pennyrile Green”) for the main color, with dark red/burgundy trim. A few of the fancier stations receive a yellow and maybe even fourth color, but I haven’t really nailed that down yet. I decided that the non-public buildings, like you, we receive it more work a day Paint job. That may be where the buff and brown comes in. Or maybe Barn red. I can’t remember which railroad it is, Burlington maybe? But they’re out buildings and section buildings tended to be a regular old Caboose/barn red, while stations were more colorful.
Continuing the discussion from East Shops Tower on the Buffalo Western:
In the later years of the Erie Lackawanna all company structures were painted a dark red color. That is definitely something you would have seen on the western end of the system in Indiana and Illinois.
1 Like
Thank you for the welcome. I attempted modeling structures long ago and am just getting back into it again. I will be retiring soon and then can really devote more time to exploring the hobby. Christy
2 Likes
Christy, happy retirement when the time comes. That will be nice. I look forward to your retirement structures. Those that are being built on the site right now are incredible. I’m out of action till probably after August the 1st and maybe a little after that (trying to move out of a house to get ready to sell it for ) but afterwards, I have several structure kits raring to get built.
What kind did you build? What scale do you model? It’s amazing what’s available today. Really looking forward to seeing your models.
All my best, Fred
1 Like
So while I am waiting on some replacement materials for the East Shops project this arrived in the mail.

Another tower kit from the ELHS. This time of the Erie tower at Maitland, Ohio. This tower was constructed to the same general plans as the Waldwick Tower but at a slightly later date w/simplification of the gingerbread. The real tower protected the crossing of the Erie/EL with the Detroit, Toledo & Ironton, Henry Ford’s railroad from Detroit to Cincinnati, Ohio and Ironton. The EL line was the Dayton branch which left the Chicago main line at Marion, Ohio. This was EL’s line to Cincinnati as well using a haulage agreement with the Baltimore & Ohio where major interchange was with the Southern RR and the Louisville & Nashville.
On the BW this kit will become West Shops Tower. Construction of the two kits is virtually identical. I did make a change in my assembly process related to some problems I had w/the first kit. As noted above, the walls consist of two components with the top overlay being a self adhesive trim piece. This trim piece must be centered on the underlying wall and pressed in to place. The end wall pieces and their associated trim pieces are the same width so this is not too difficult. The front and rear trim pieces are wider then the wall pieces however to accommodate the thickness of the trim on the end walls. You need to balance this extra width side to side and the last time my calibrated eye balls didn’t do too good a job. This time I left the trim overlays off of the front and rear walls until after the “box” was constructed. Then applied the remaining trim pieces. Much nicer job all around.
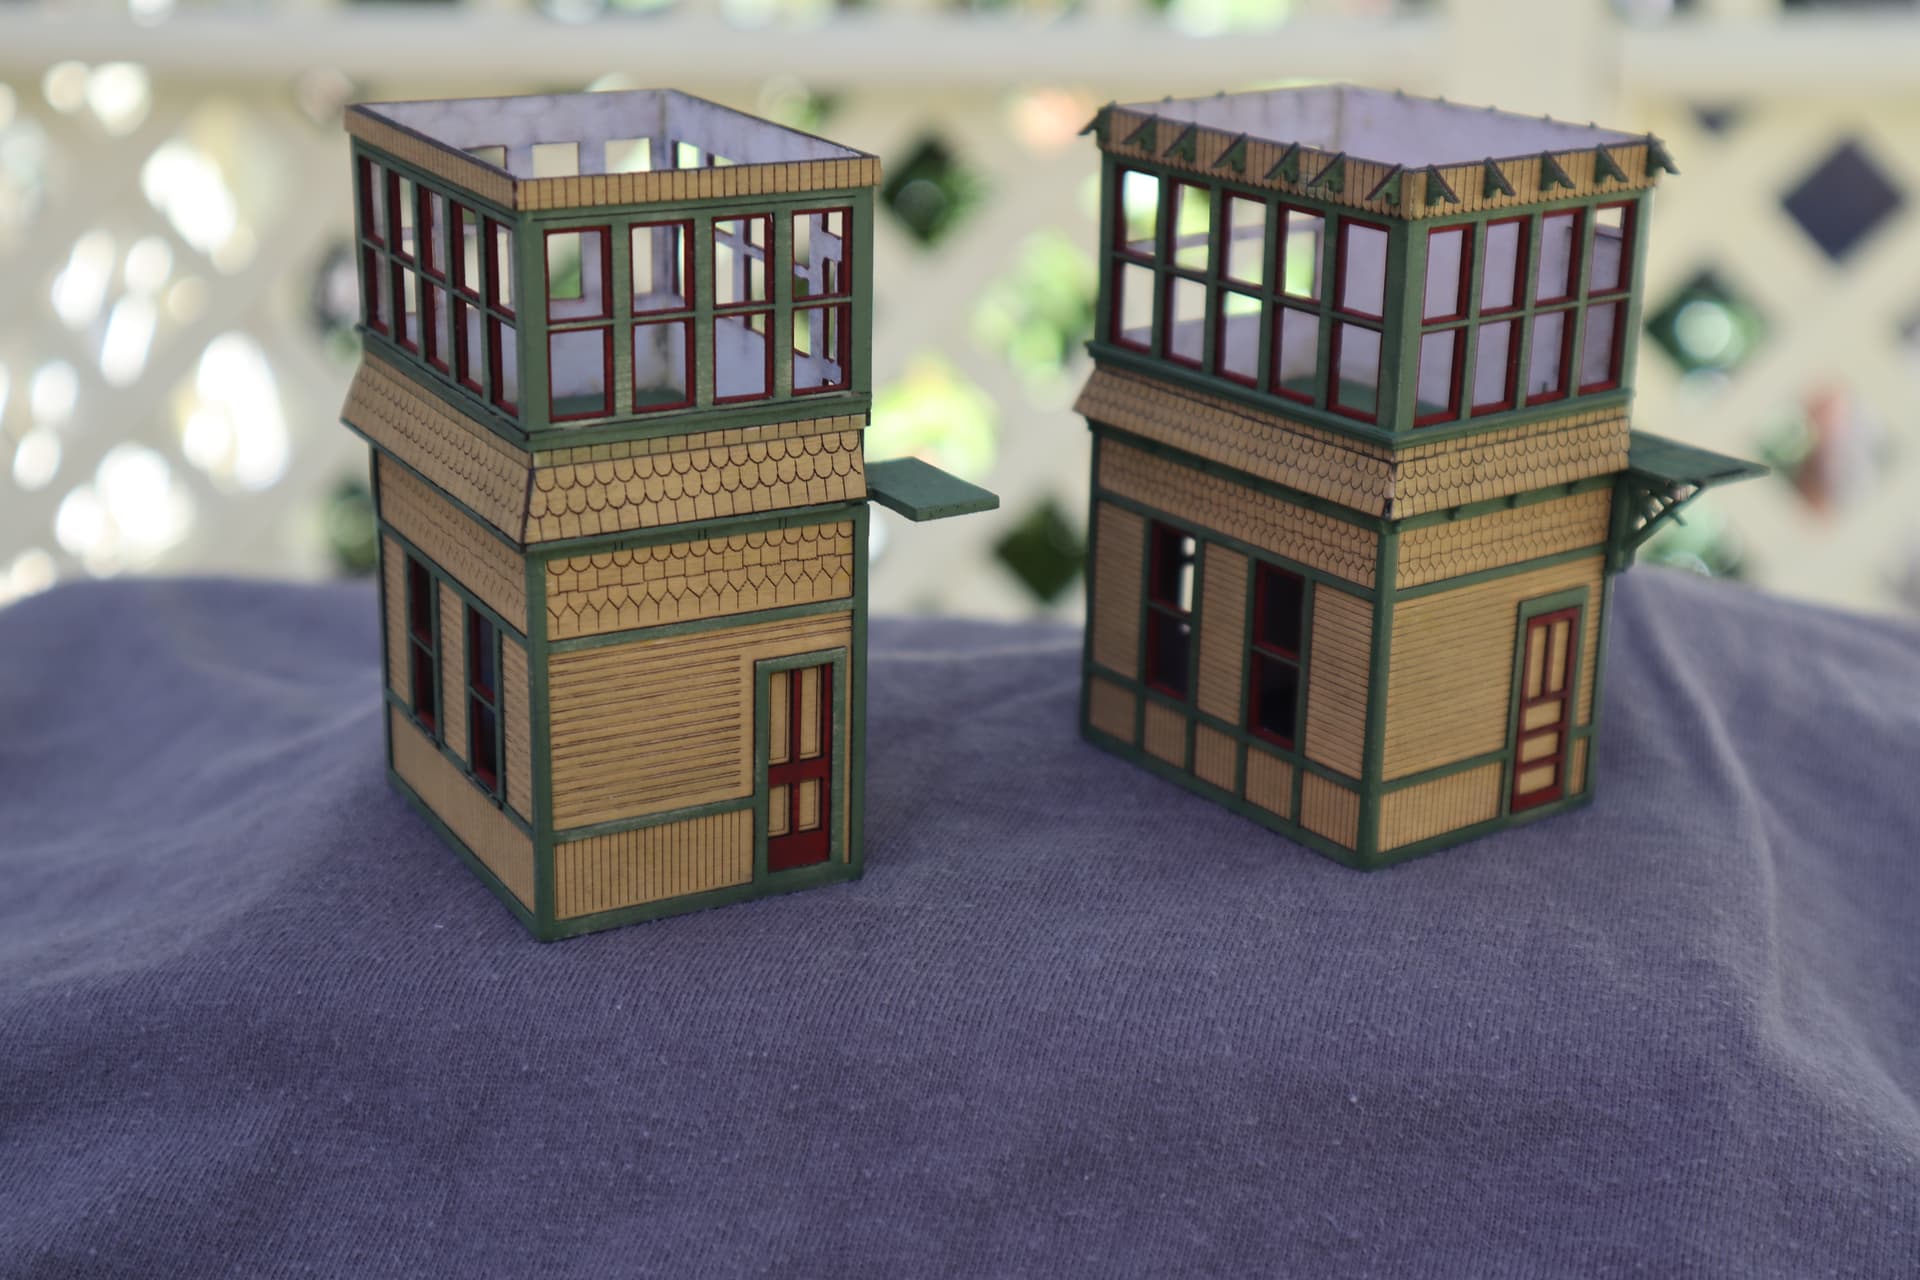
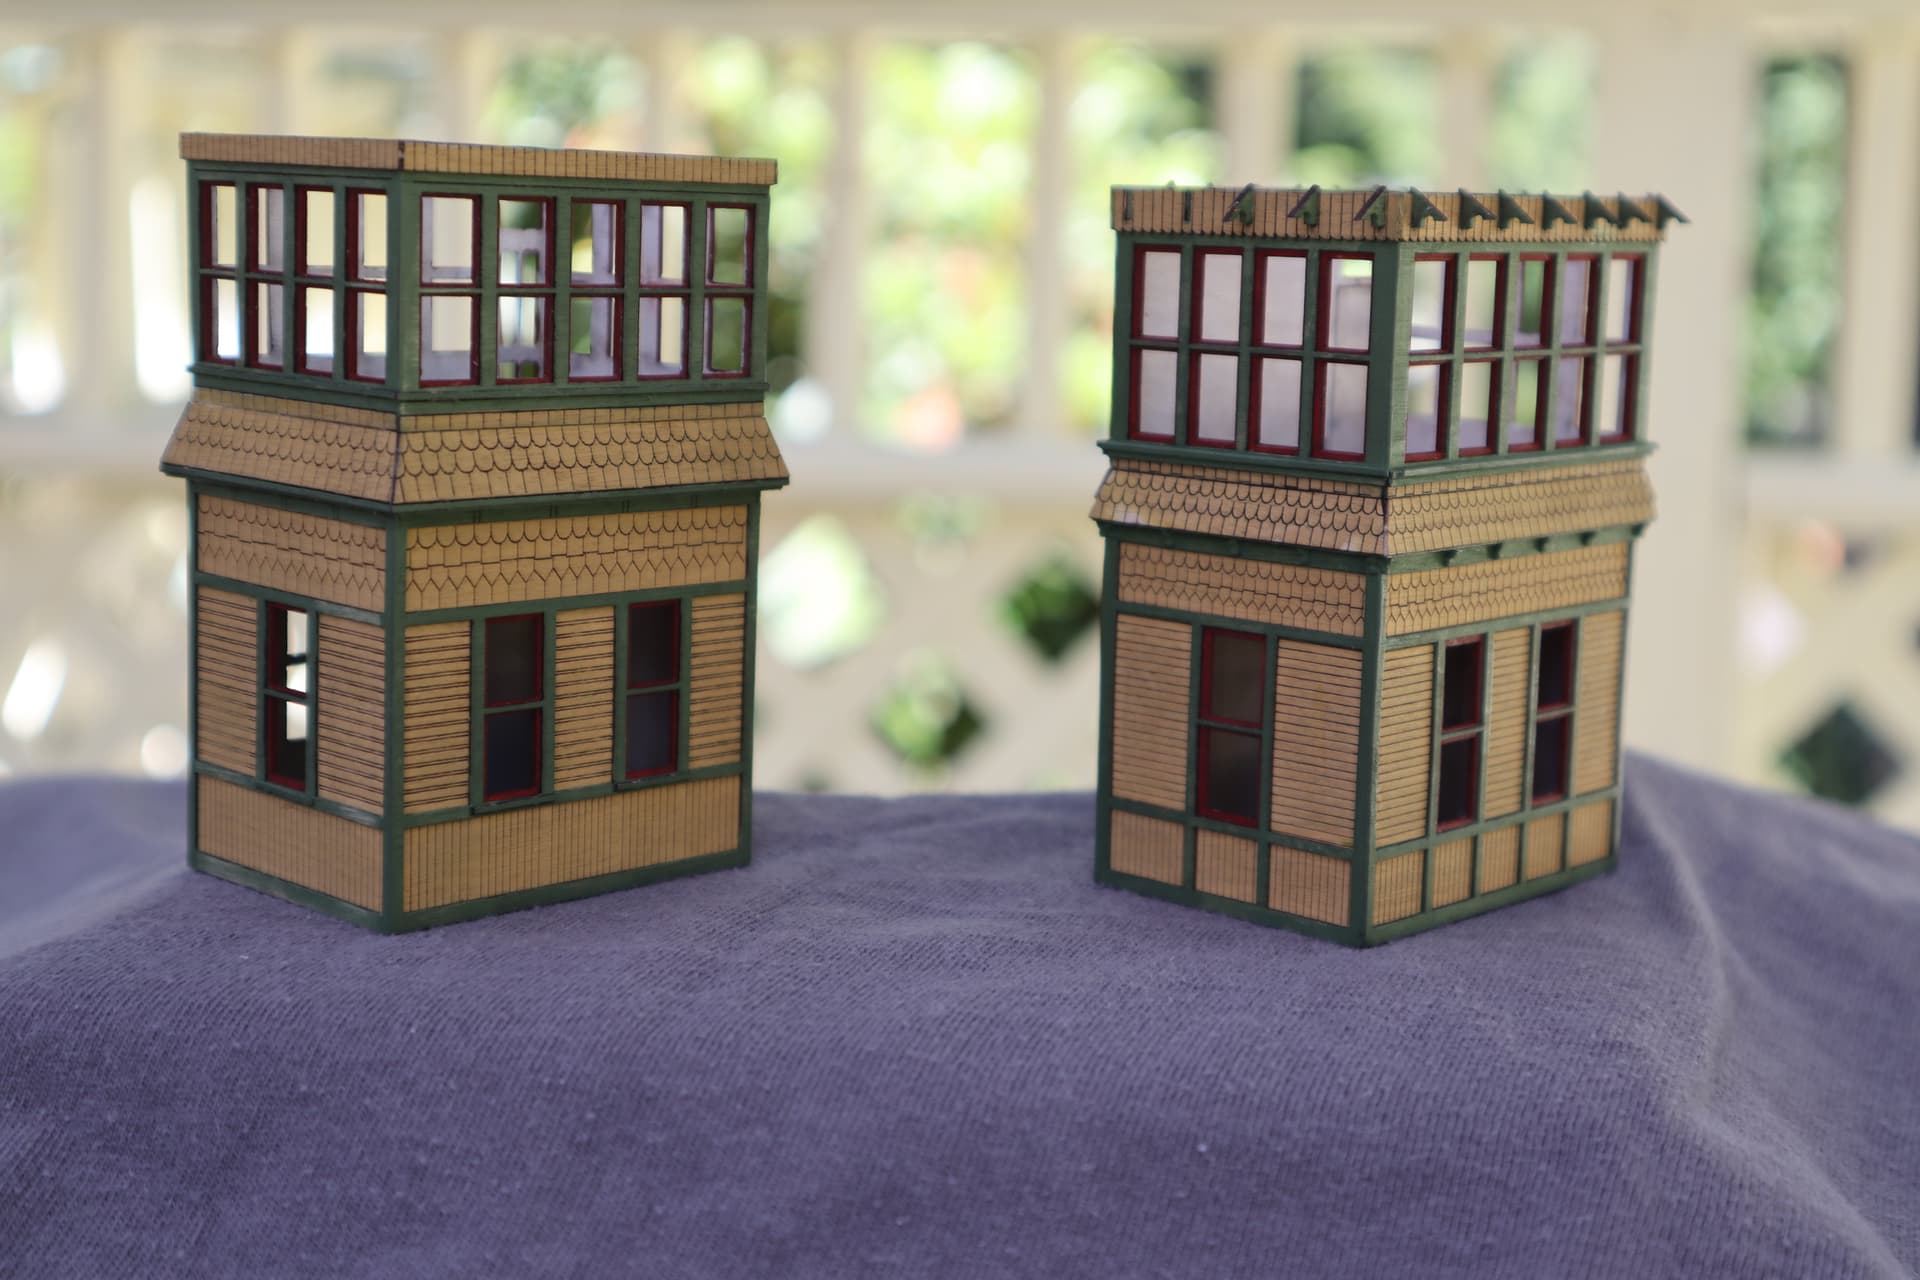

Both towers are now more or less complete to the same stage. At this point I am waiting on materials to replace the plastic stair and shingle moldings included in the kits.
Thanks for reading and looking,
Tim
4 Likes
So this project has been on hiatus for a while and unfortunately it is going to stay that way for a while longer. Another bit of life has finally caught up w/me and shortly after the first of the year I will acquire another bit of implanted metal. This time I come out w/a fused left wrist. I’ve been ducking this for 20+ years but the pain levels have gotten to the point where I can’t hardly use the hand. Recovery is 3 months for the joint to fully fuse and 6 months for full strength. I’m quite sure that model building is going to present a new set of challenges but at least I should be able to return to it where today … well I haven’t touched anything in 5 months so challenges or not that should be an improvement.
Take care,
Tim
4 Likes
Hi Tim, only just now seeing this thread. I very much enjoyed going through and seeing your builds of two classic Erie towers, and very much appreciate your re-branding and backstory for your railroad. I hope you are healing well from your wrist surgery and just wanted to send healing thoughts and hope you will be able to pick back up after your recuperation.
Jimbo
1 Like
Tim,
Sorry about the surgery. I look forward to your next installment. Love your work.
2 Likes
Well I will not complete these for the campaign. Just back from the surgeon and x-rays of the wrist. There are 6 screws that hold a narrow 5" long plate in place. The 3 that are anchored in the arm are good however of the 3 that are anchored in the back of my hand, 1 has broken off and another has pulled out of the bone. He agreed not to put me back in a cast but the brace stays as I have apparently been to aggressive in using the hand and need to back off. Holding tools and small parts is a challenge that I need to avoid for another while. Looking at some time in June before I can get back into things.