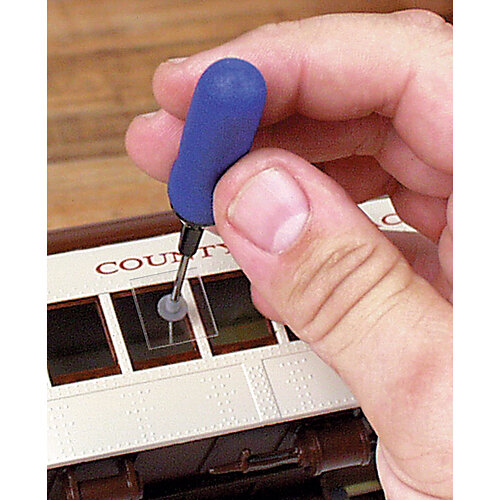
No problem. I use it all the time for gluing things like periscopes and headlight lens in place. Works like a charm
I thought you used it on the other truck to stop super glue from fogging the glass?
I’ve used Vallejo clears lately, after hearing of people using Future.
I do believe Future will dry smoother.
I used the Vallejo because I know it dries fast and was not sure how fast Future dries.
Future doesn’t dry super fast, maybe 5-10 minutes, but the surface tension of it will hold the part in place while it dries
They don’t always release when you’d like them to. And I wouldn’t recommend using them on clear parts as they tend to leave a waxy residue. Still, they’re handy to have around for some tasks.
—mike
No, I got a bottle of Testors Clear Parts Cement for that. And this.
Obi-Wan, that sounds like an excellent plan that Yoda would like. 
Not sure if you can get it in the US but there is a product from Deluxe Materials called ‘Glue N’ Glaze’ which is a type of white glue- it will glue clear parts but it can also fill and glaze small openings. Biggest thing I’ve tried it on was a turret ring periscope but if I had lost this part as you have then I would give it a go with this stuff. The end result does tend to look different from a clear moulding though so it might not be totally suitable. Hoping the ‘Pic-N-Stik’ plan works  !
!
Yoda says…Darth fix…hmmmmmmmmmm…you will like!
Can you remove the door making everyhing easier to fix?
No, the door is well cemented to the body with Tamiya Extra Thin Quick Setting, so it’s welded in. Good thought, though.
Matt,
I’m not familiar with HEMMT vehicles, so excuse me for a possiby quite a dumb question… but isn’t that triangular window a vent window?
If yes- you can pose it open(once you fish it out of the interior, which- to the best of my knowledge- would be the easiest part of the repair job).
You’ll also need to imitate the rubber sealer.This can be done with any suitable size of Evergreen rod- unlike Plastruct’s styrene, it will bend under slight and steady pressure to 90 degrees without breaking.
HTH,
Cheers,
Angel
Thanks Angel, I don’t know either if those windows open, but I’ll have to check out that possibility. 
To re-install once you get it out - two pieces of blu-tack either side of the window opening. A piece of sprue long enough to go over the the two blobs beside the window. Blu-tack in the middle of the sprue and press onto the window to hold it but not all the way up to the sprue. Now place the window over the opening and gently push the ends of the sprue into the blu-tac until the window is almost in the right place. Add whatever clear parts glue you use to the edge of the window, then gently push into place. Let that set up and remove the blue tack and sprue later. Your window will not fall in while you try and place it this way.
Brilliant,Peter! 
Matt, this will work even for gluing the window from inside the cab.
You’ll only need to add big blobs of blu-tac outside and another big blob to hold the window to the sprue.When you apply the clear glue, just squeeze both outside blobs so that they rise and press the blu-tacked window into the window frame. 
Okay thank you Peter this sounds like an awesome plan! 
Glad its sorted out! Please keep us updated with the repairs.
I’ve seen model ship builders at MSW use Future to affix p/e railings.
Success with the rescue!
Matt,
You’re not alone, mate…
I have the same fail since yesterday!
While filling a huge gap on my Bedford QLD build(Land Lease Campaign) with Tamiya Epoxy Putty, I managed to press the mate(left side) window and it fell inside the firmly glued cab…
I fished it out of the cab, but now I too have a window outside, that must be glued from the inside.
Will follow Peter’s(@petbat) advice and dully report the outcome.

