Excellent figure work James , beautifully done !!!
2 Likes
This is absolutely stunning work
2 Likes
Thanks, Glenn. Now all I need to do is try to make the building facade look half as good as your structures look and the diorama should be OK.
3 Likes
Thank you.
1 Like
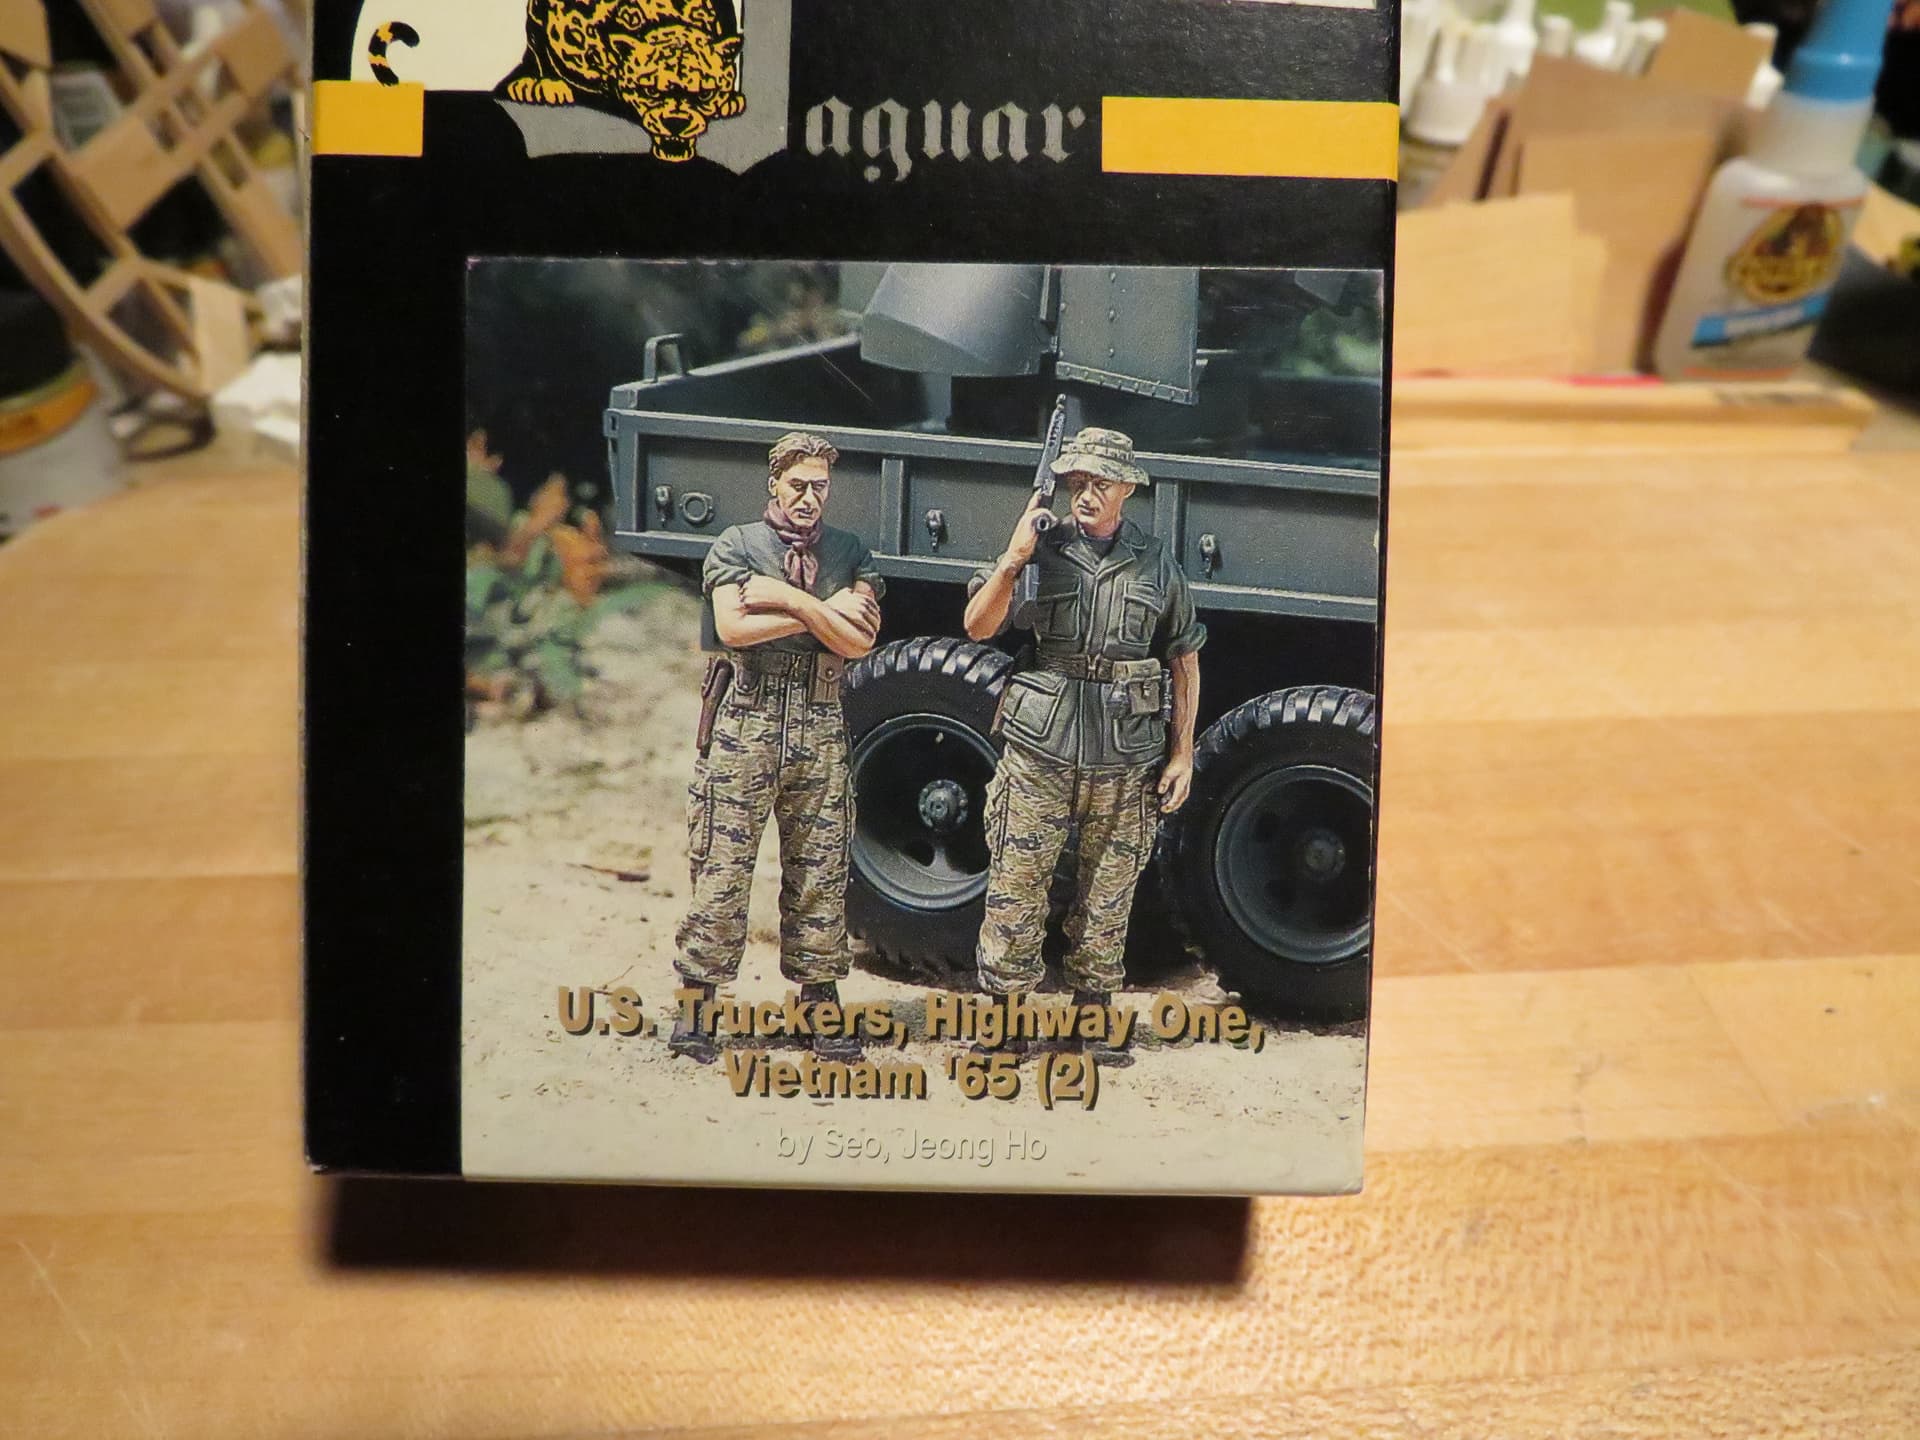
James , you want these guys ?
I’ve got no use for them and they fit your genre .
PM me an address and they’re yours .
4 Likes
Wow those are nice. Never knew Jaguar made them.
3 Likes
Thanks,Glenn. I would like these figures. I had this set years ago and when I was working on the FNGs standing at ease I had thought about the figure with his arms crossed as being someone who was scrutinizing the FNGs, but I hadn’t seen this kit in a while. I greatly appreciate it. PM will be on the way.
2 Likes
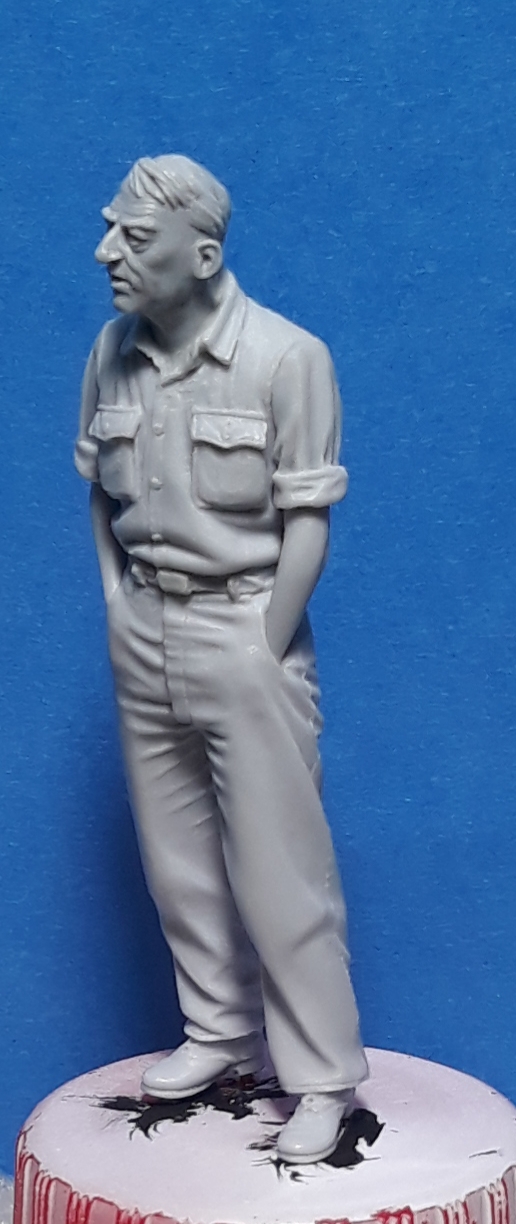
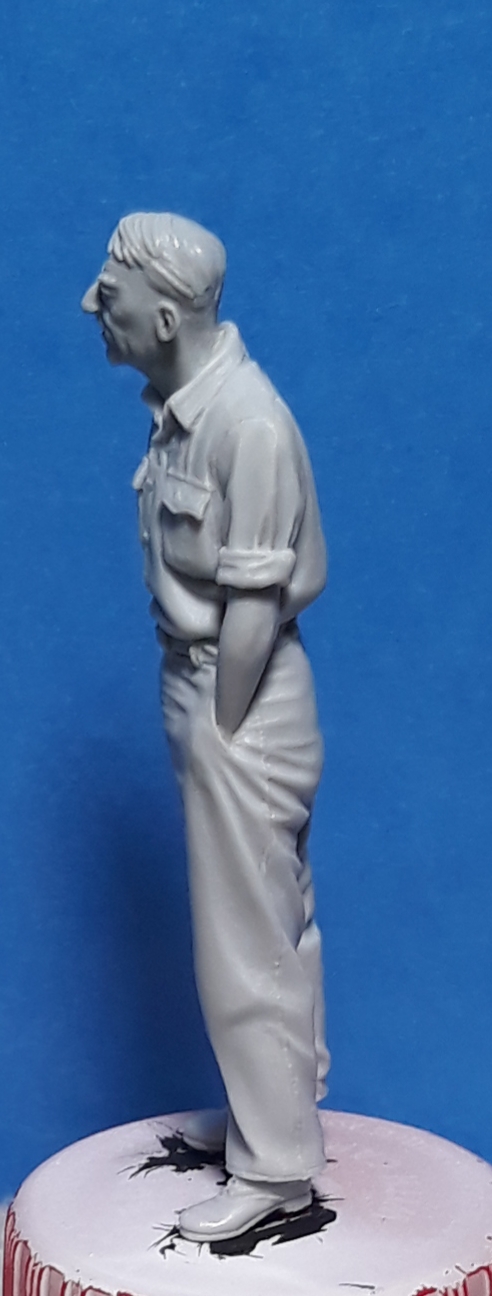
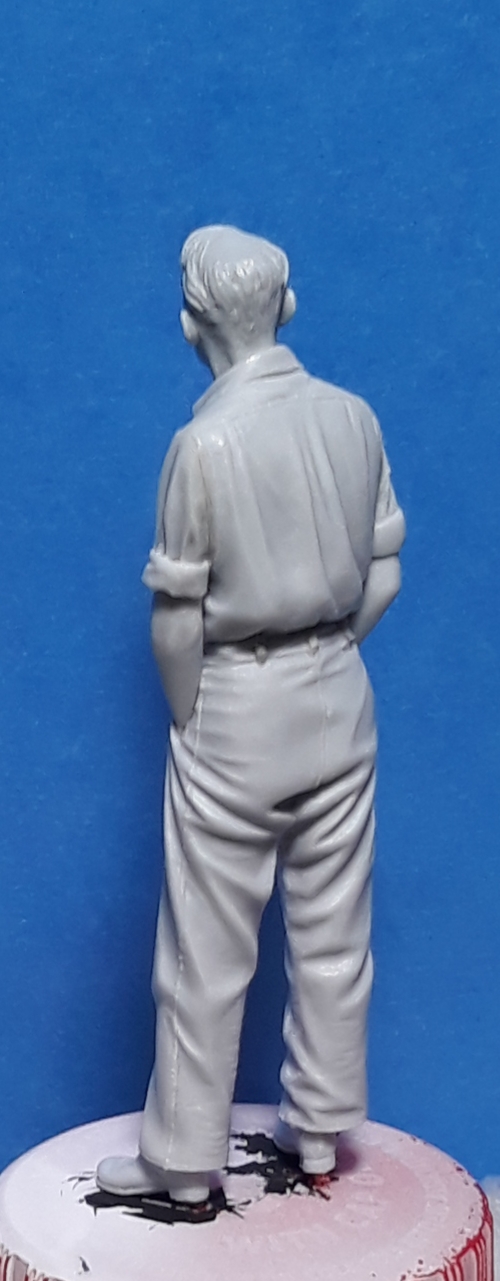
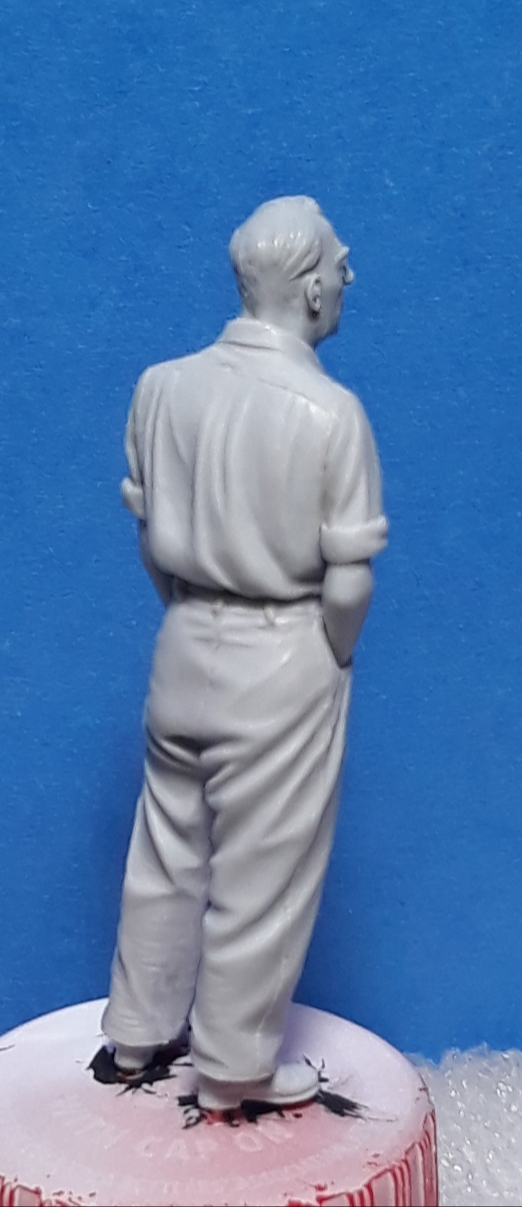
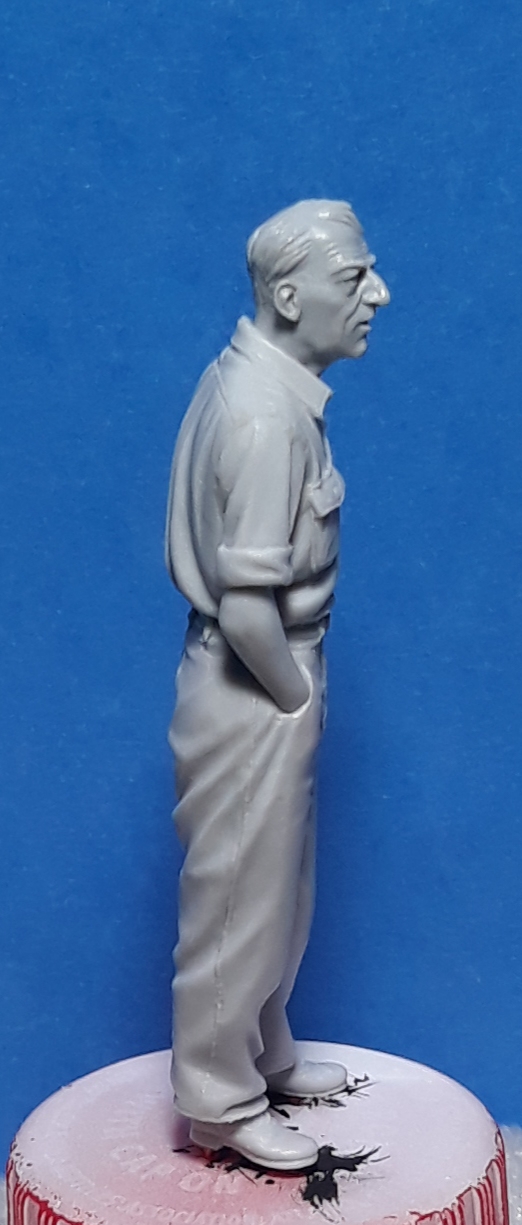
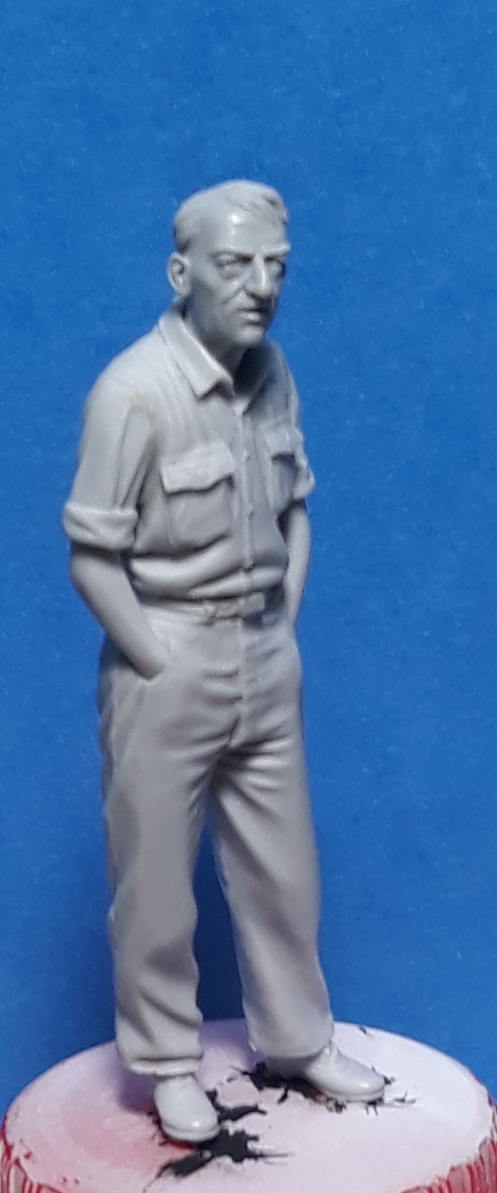
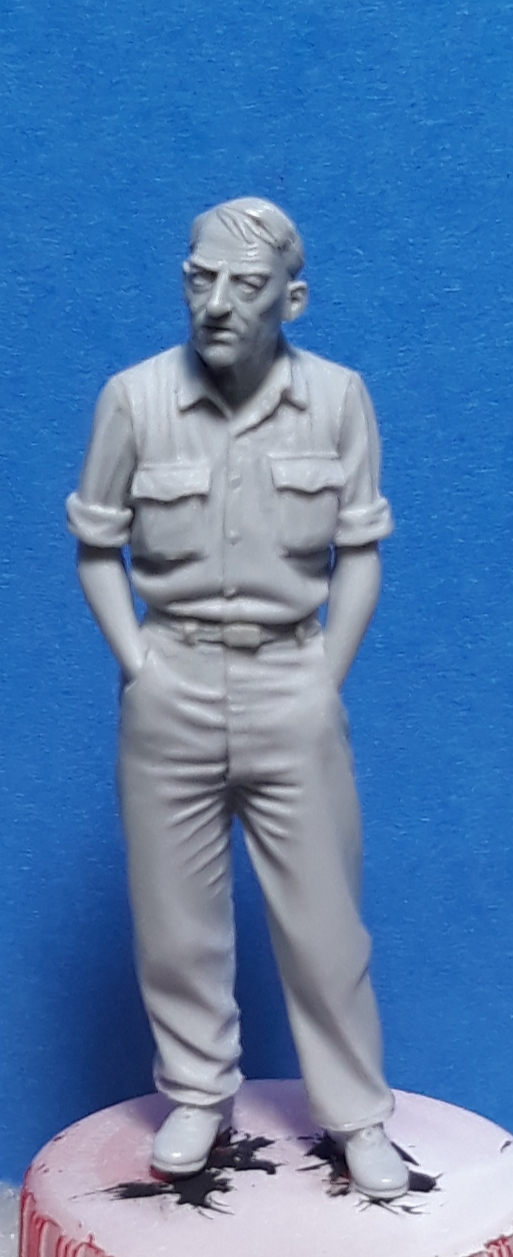
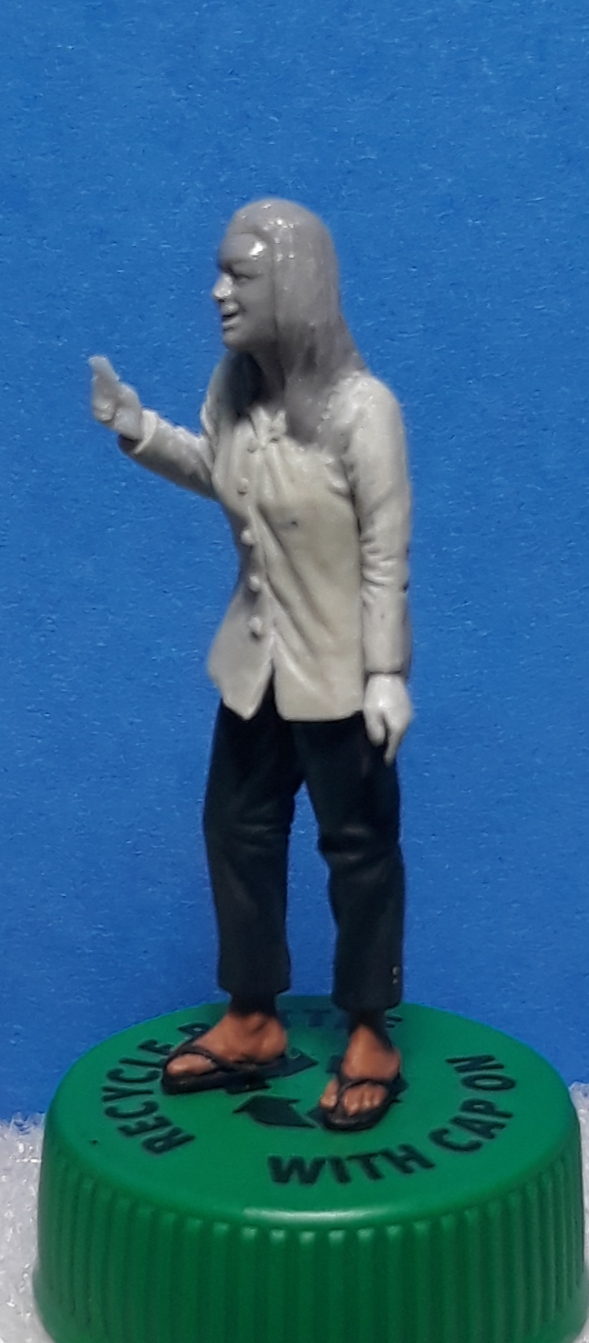
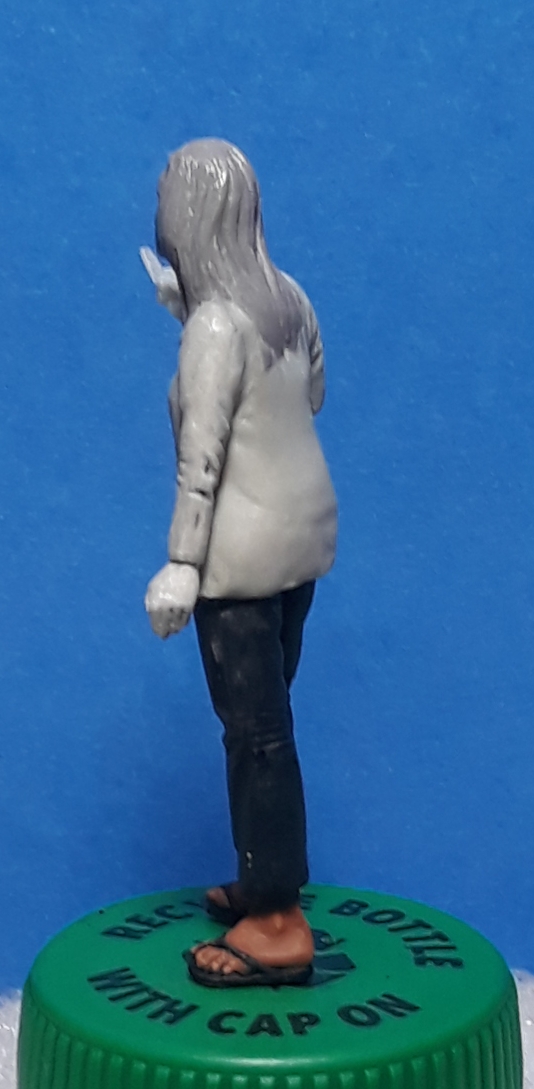
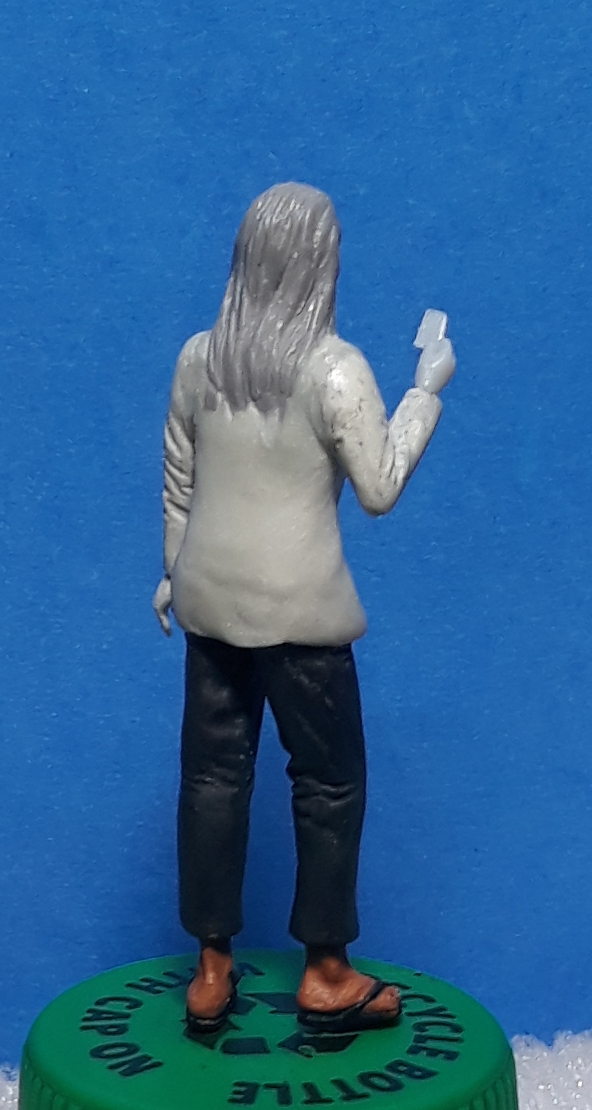
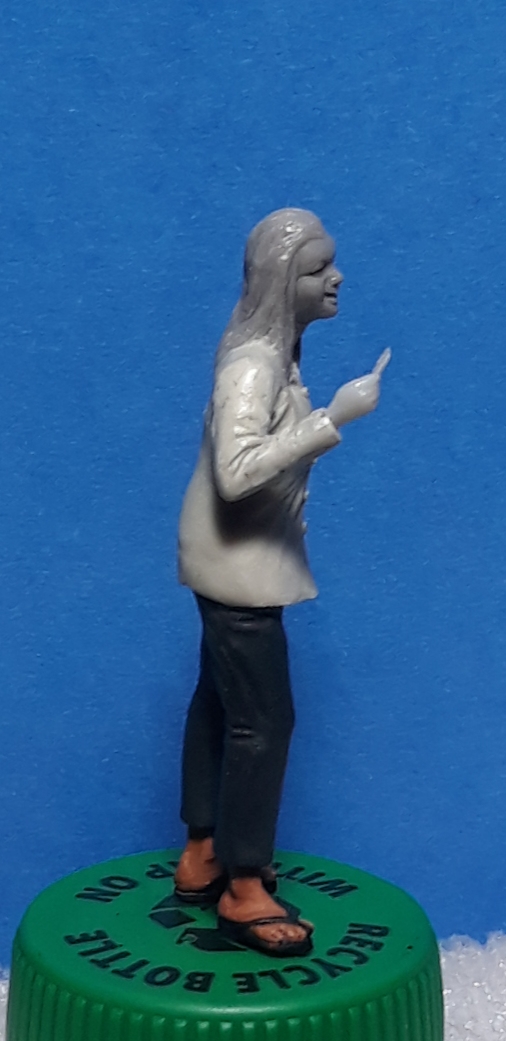
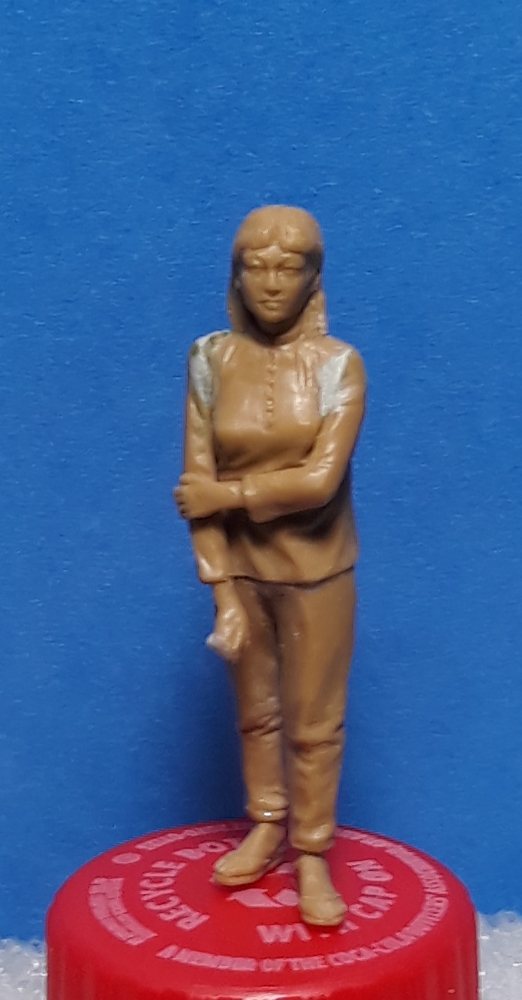
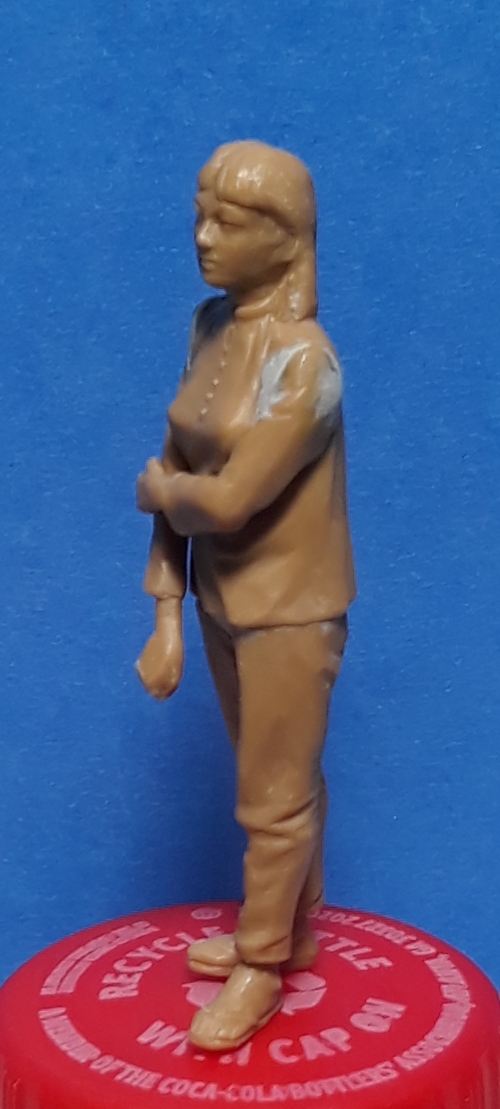
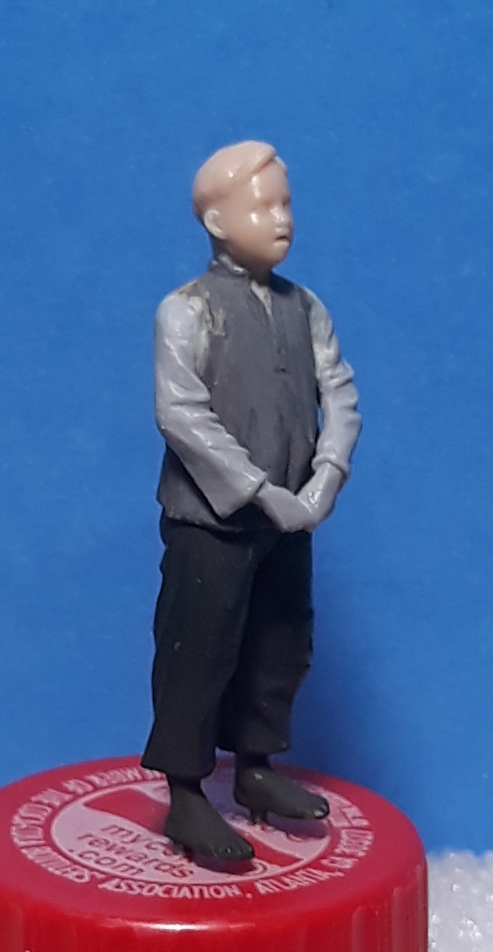
This week’s conversions are of a senior USAID representive and two Vietnamese women.
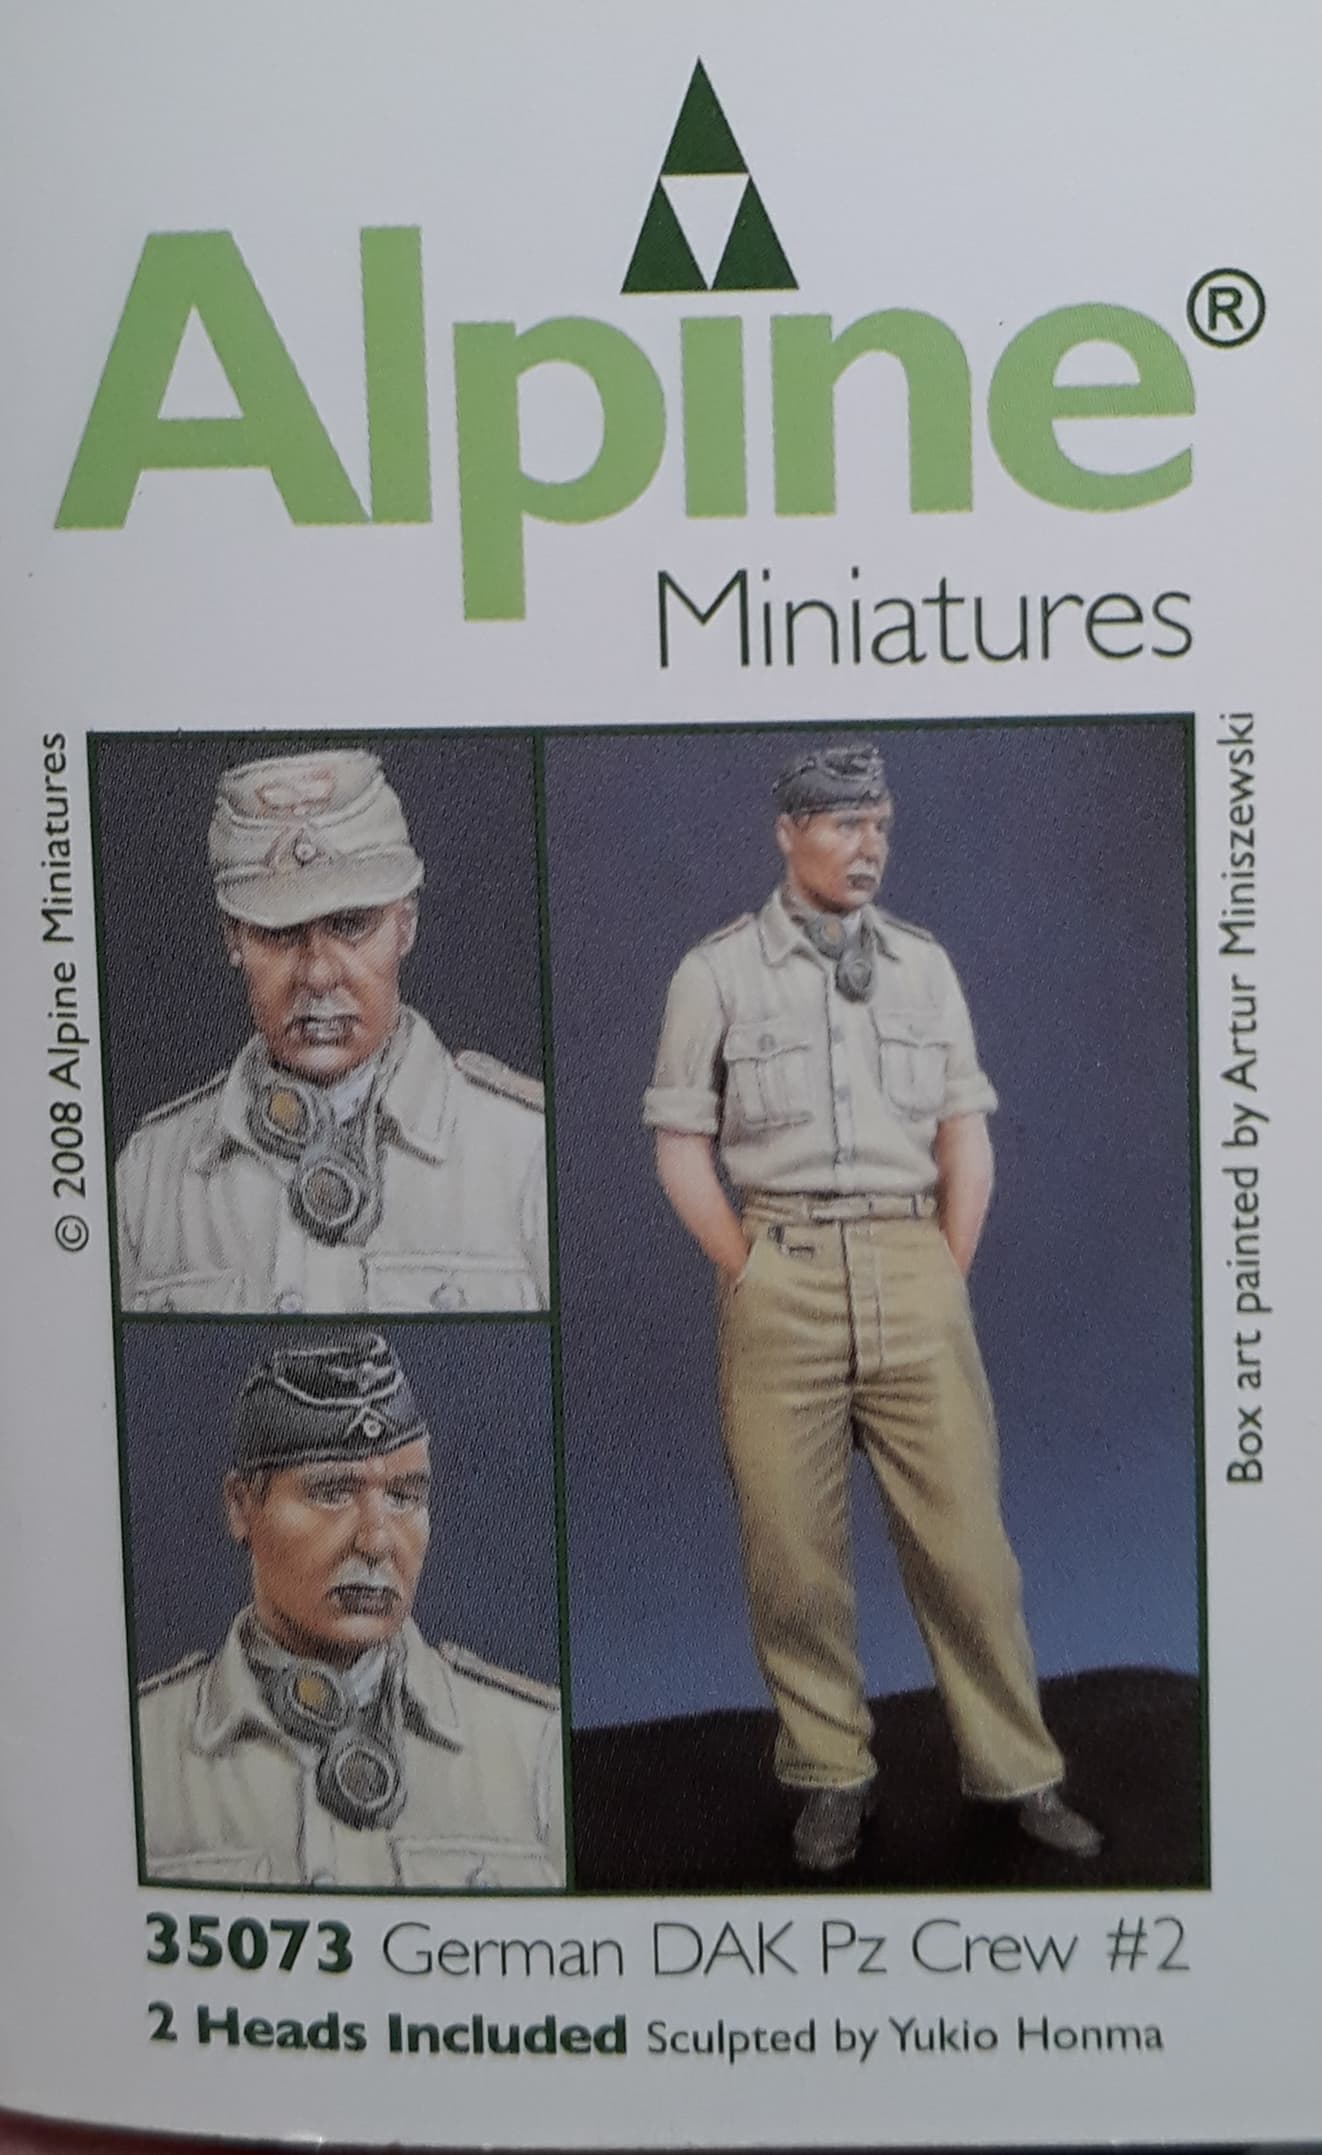
The senior USAID representative was a simple conversion of Alpine’s 35073 DAK Pz Crew 2. Since the figure is going to be a civilian in civilian clothing, the pose and clothing of the DAK figure worked well as a base figure for the conversion. I used a Hornet head of an older guy with a comb over to hide his bald spot. I removed the epaulets and goggles as well as the bellows on the breast pockets. I added a belt buckle and belt loops with Magic Sculpt. I like how he turned out.
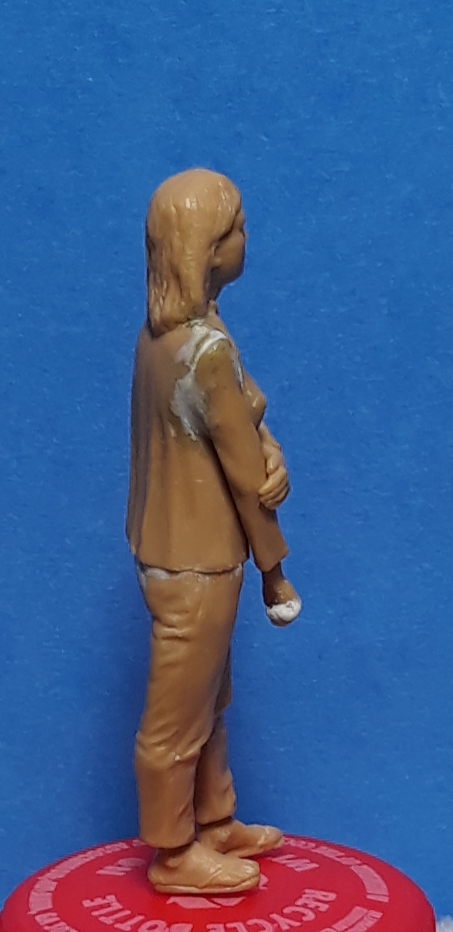
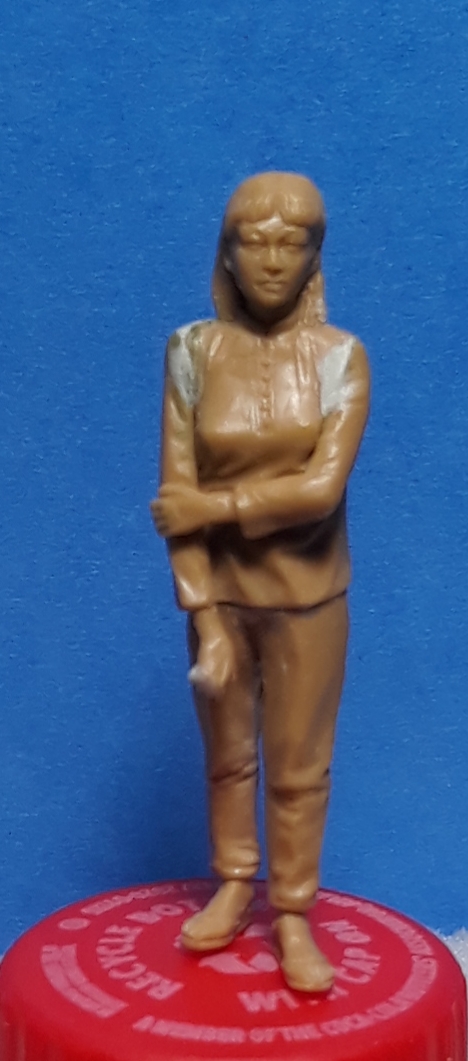
Both Vietnamese women are conversions of Masterbox figures. The first started with the torso of one of the prostitutes from the “Somewhere in Saigon” kit with legs salvaged from a figure I had built back in 1999. I had started sculpting the shirt when the torso was still attached to the rest of the prostitute figure with excess putty left over after sculpting some pockets on some other figures, so it was just the front. As I was looking for some feet that were wearing sandals I came across the legs of a figure that I had used in a previous diorama that had been damaged in the move from Alaska to Texas back in 2000. I ended up cutting the torso away from the legs of the prostitute and attaching the torso to the salvaged legs. I then used Magic Sculpt to sculpt the rest of the shirt. The arms are from Callsign miniatures and the right hand holding a piece od paper is from some 1/48 scale kit from Dragon.

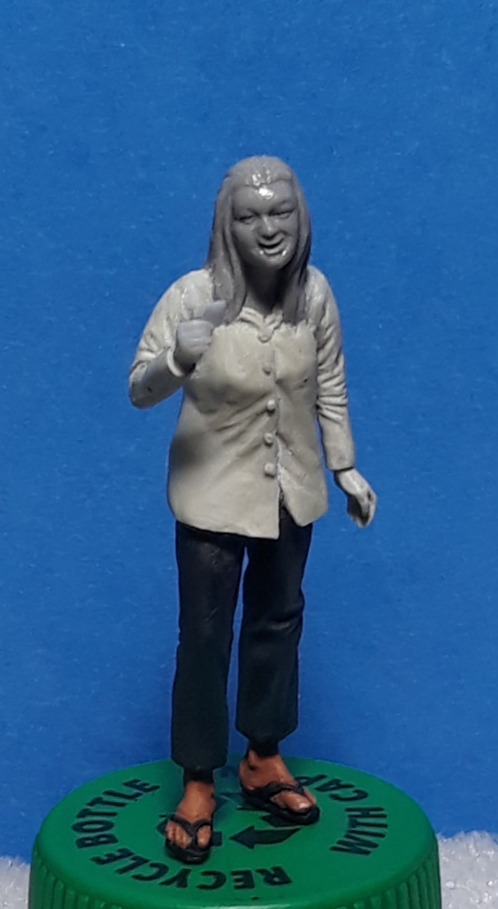
The other Vietnamese woman was built pretty much stock. The only thing I really did was remove the bag she was carrying and resculpt the fingers that needed to be built back up after removing the bag.

Thanks for looking.
Cheers,
James
7 Likes
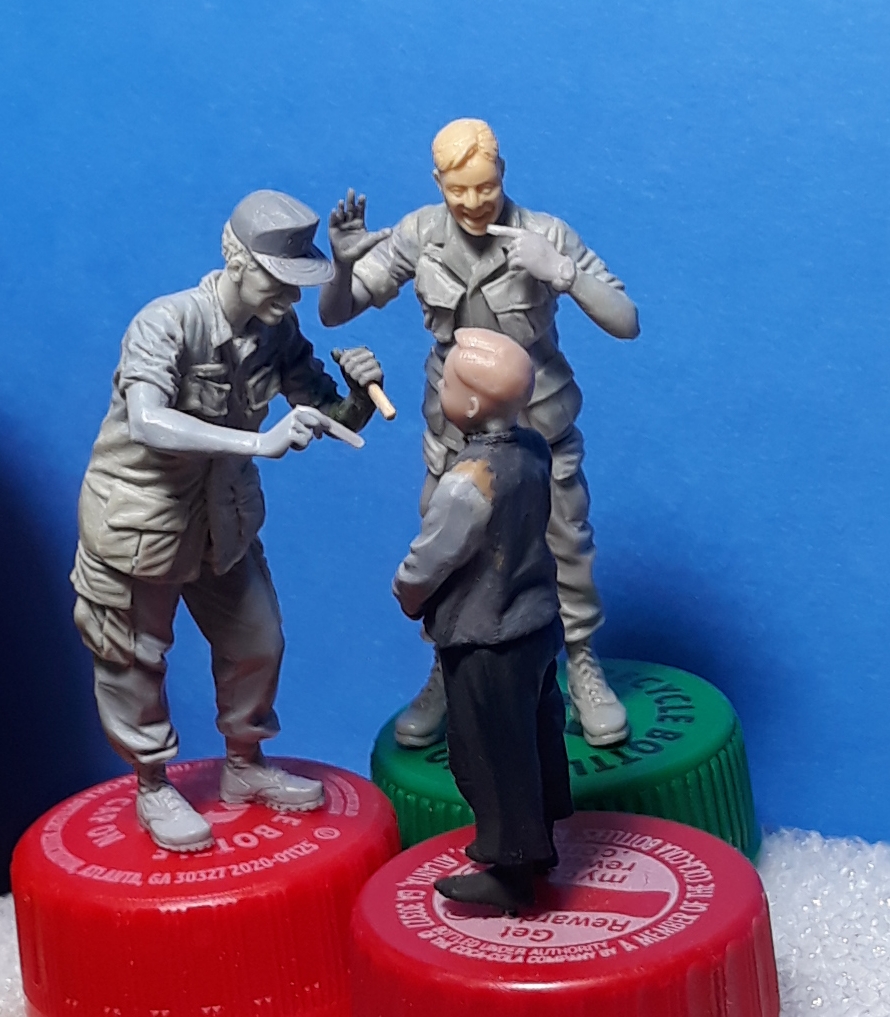
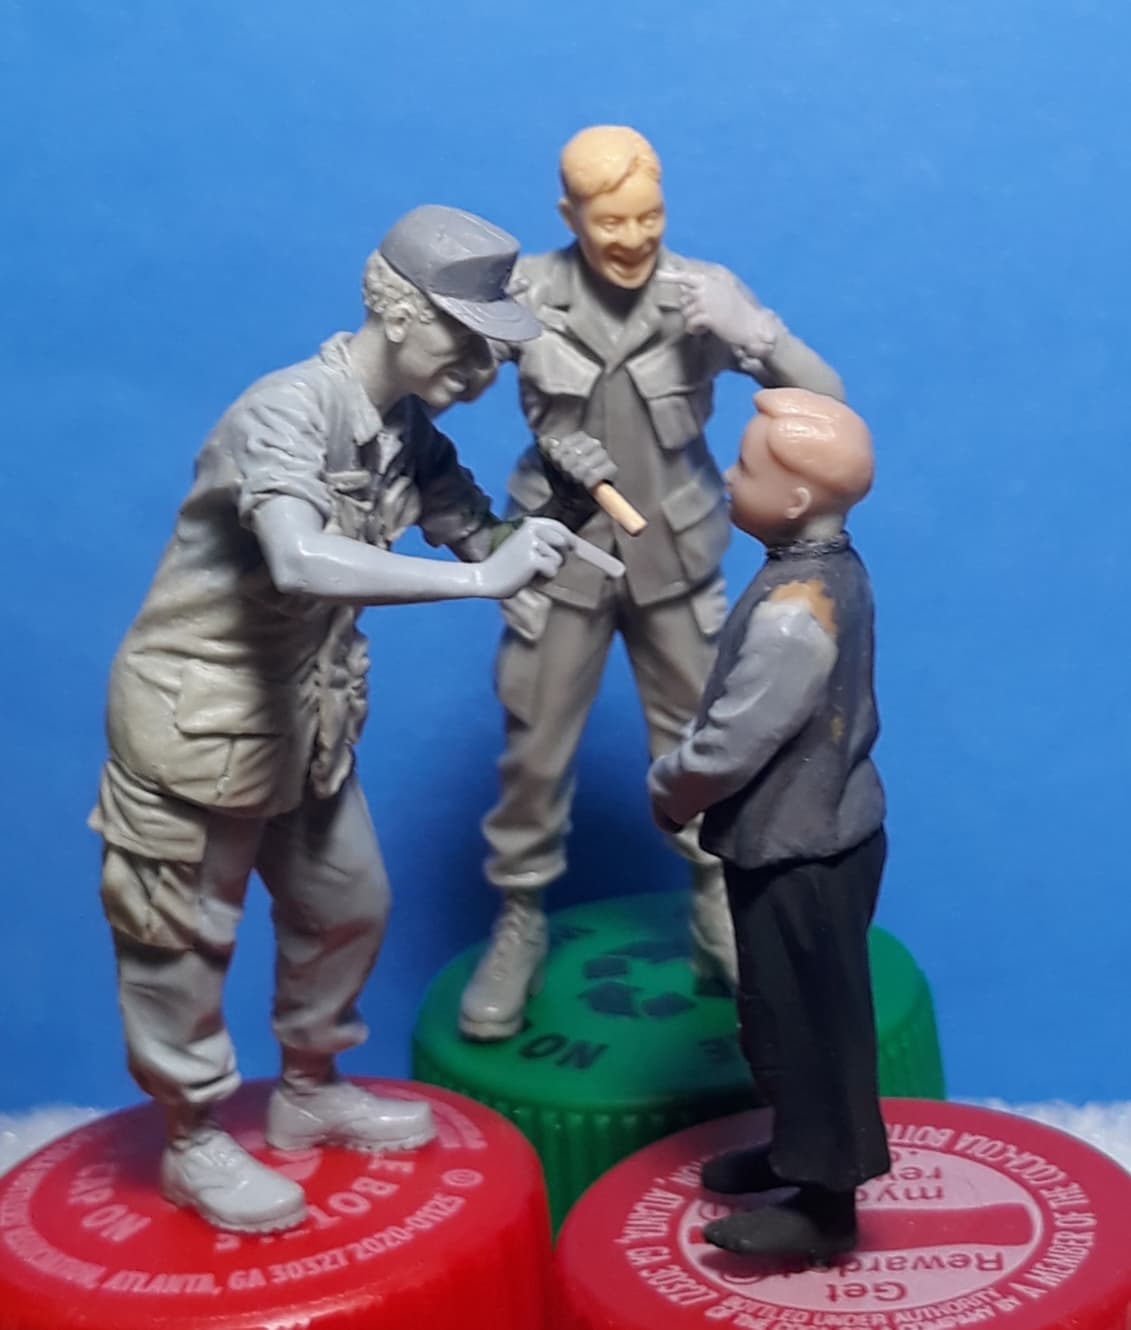
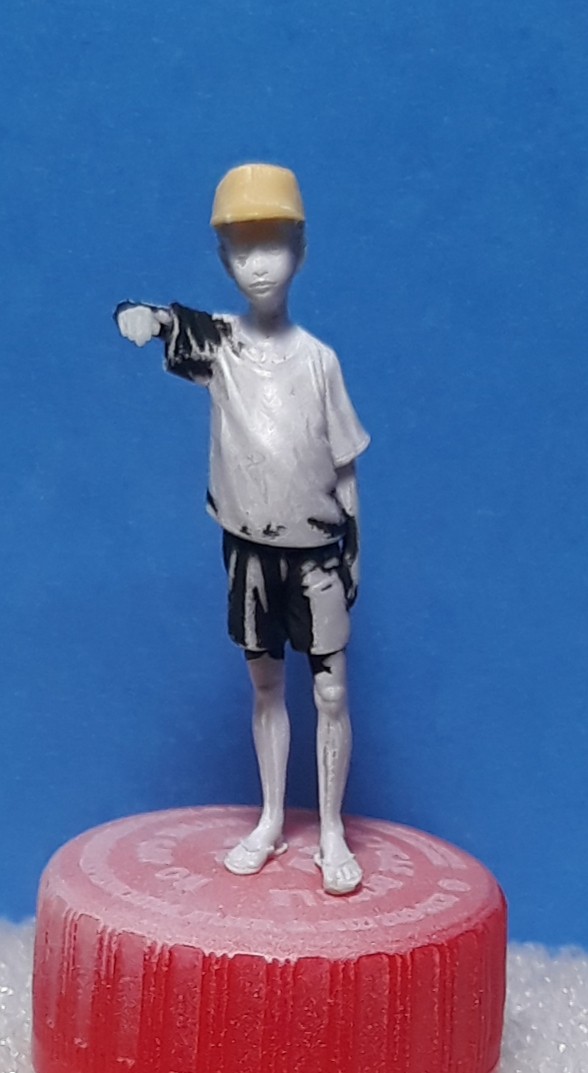
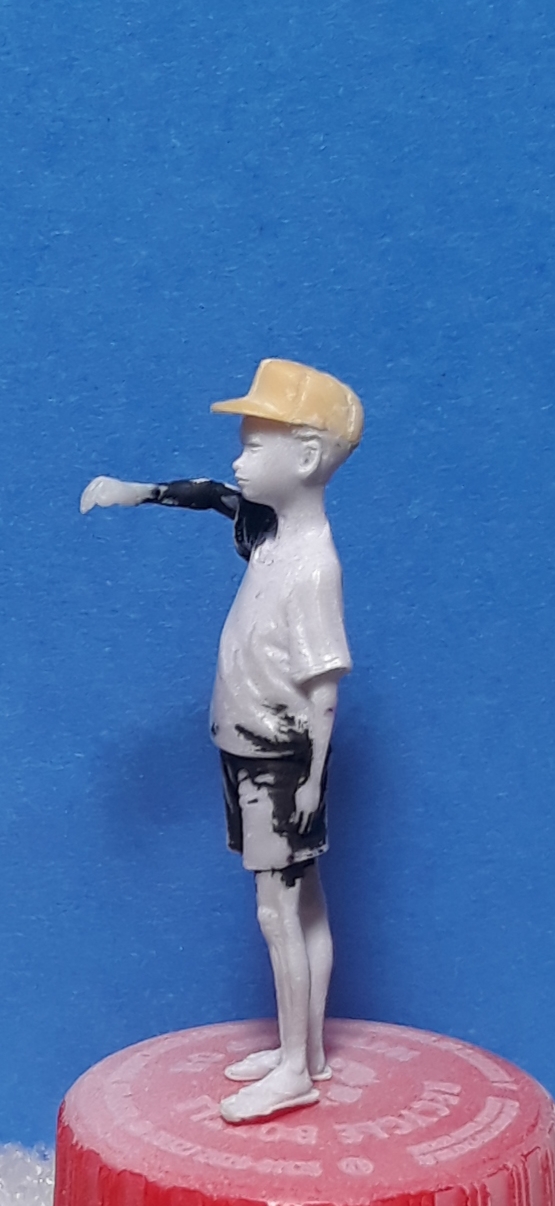
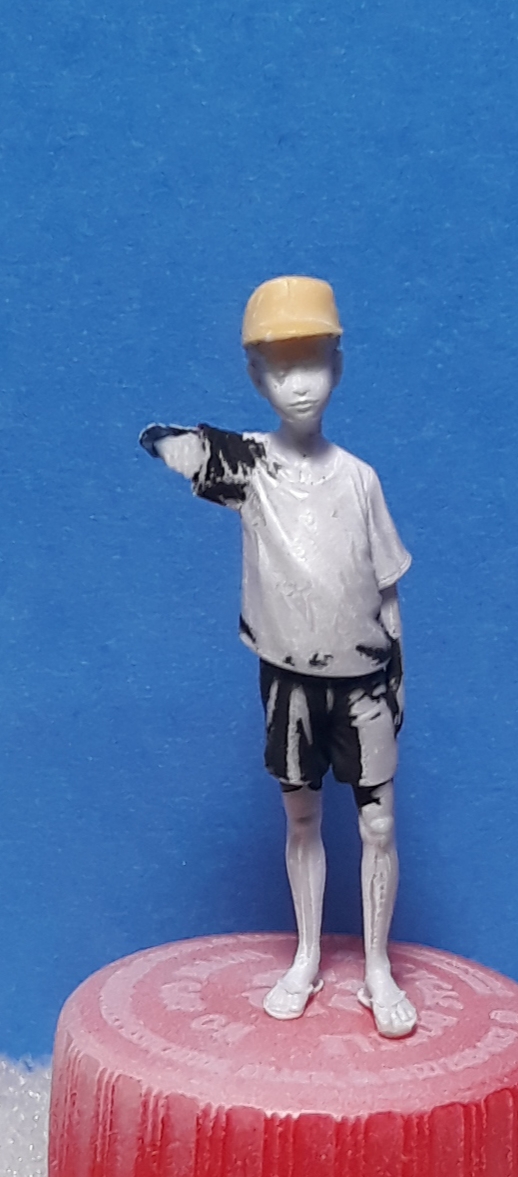
Since my last post I have converted a few more figures - two Vietnamese boys and a Kit Carson Scout/Interpreter.
The Kit Carson Scout/Interpreter is trying to explain to one of the boys, both vebally and visually, that the doctor needs for the boy to open his mouth wide so he can check his throat. He is a conversion of a Hobby Fan figure from the kit of two Soldiers with a 105 round that I replaced the head with one from Warriors. The arms are from Bravo 6, right hand is from Royal Models, and the breast pockets and the cargo pocket flaps were sculpted with Magic Sculpt.
The first two photos show approximately how the figure trio will interact.
Then here he is by himself.
The boy being examined by the doctor is a figure from Masterbox’s Eastern European Civilians figure kit with a head from Paracel Miniatures.
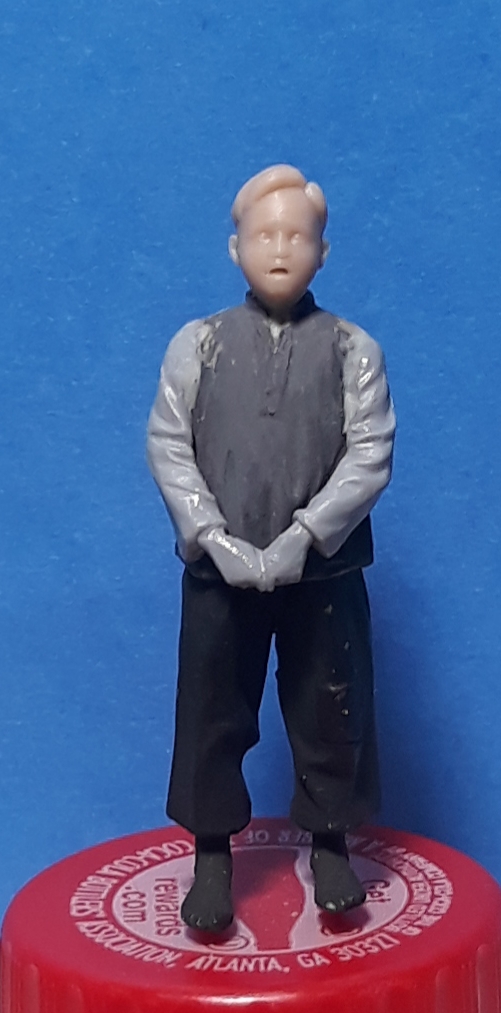
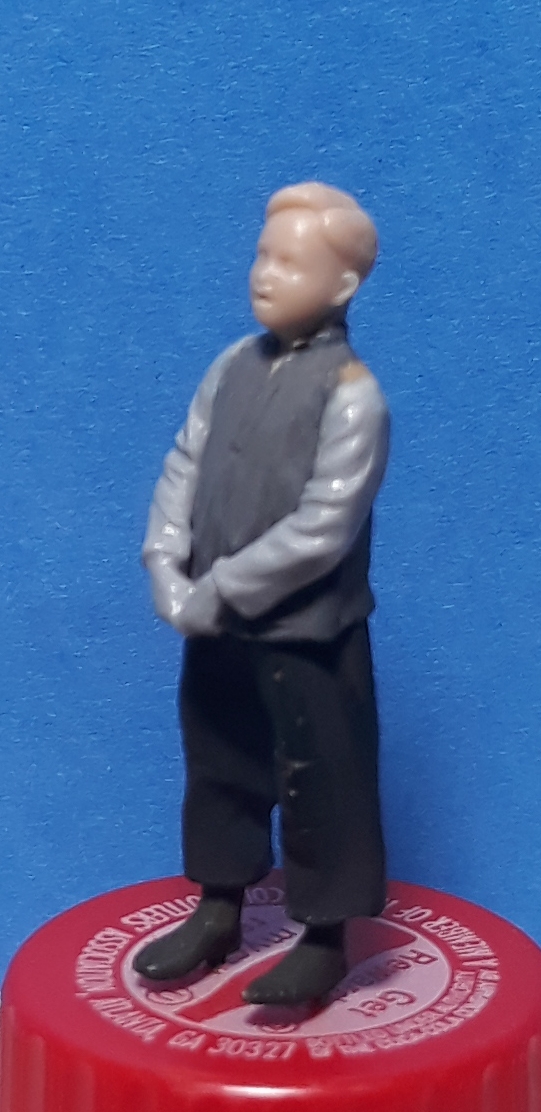
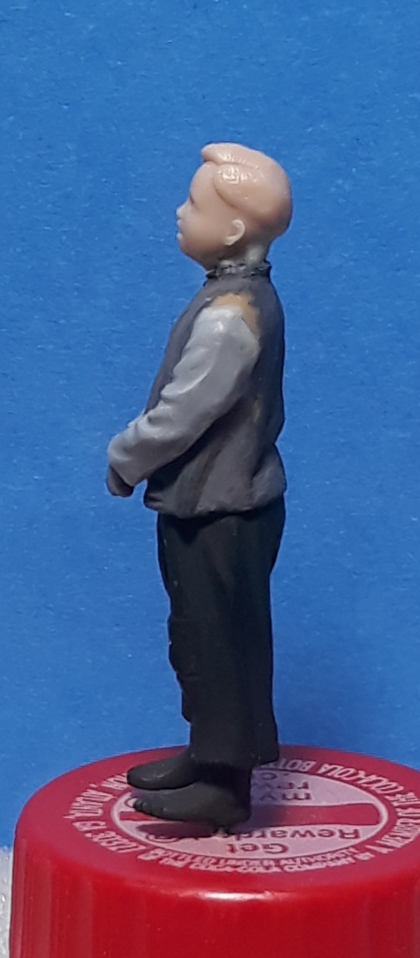
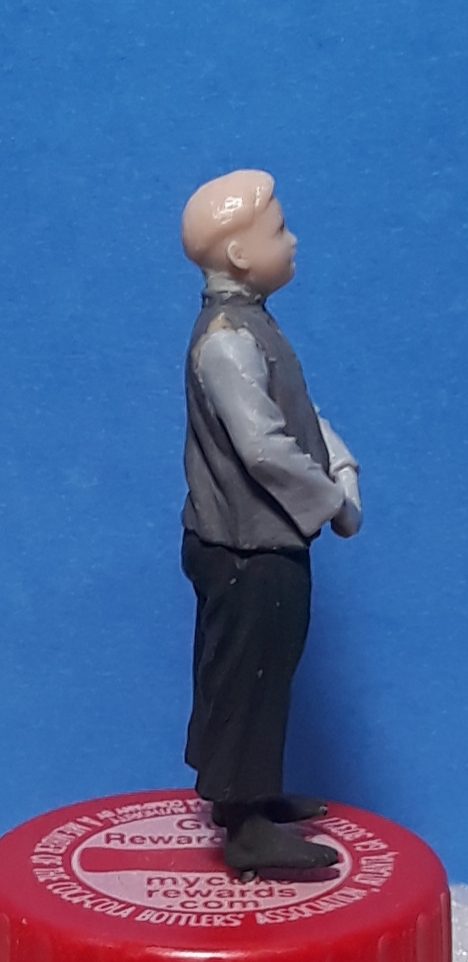
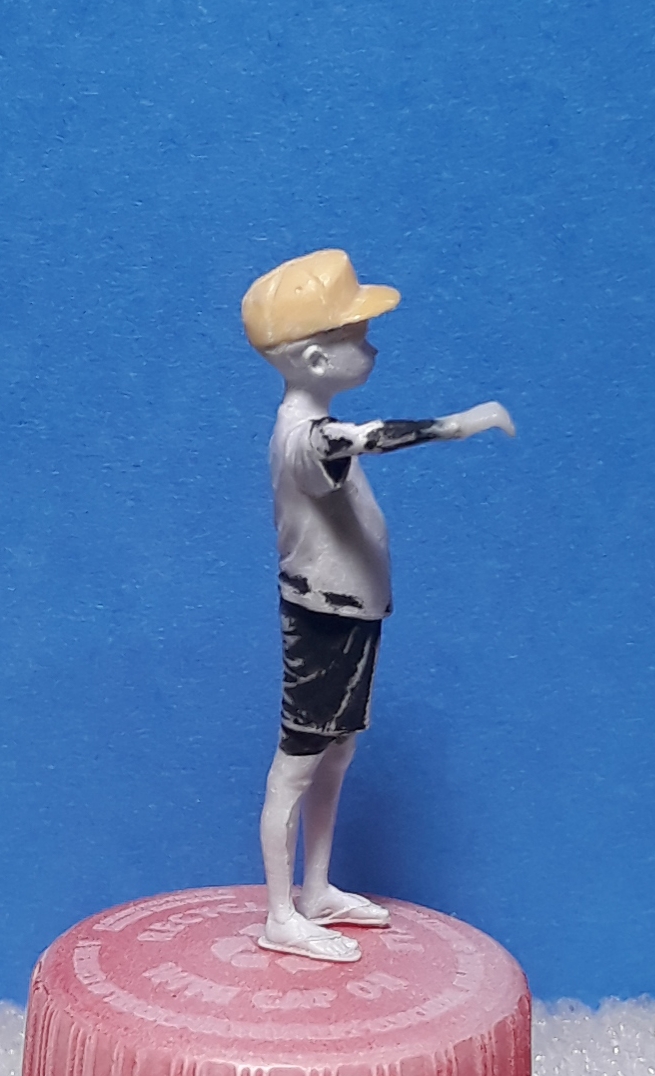
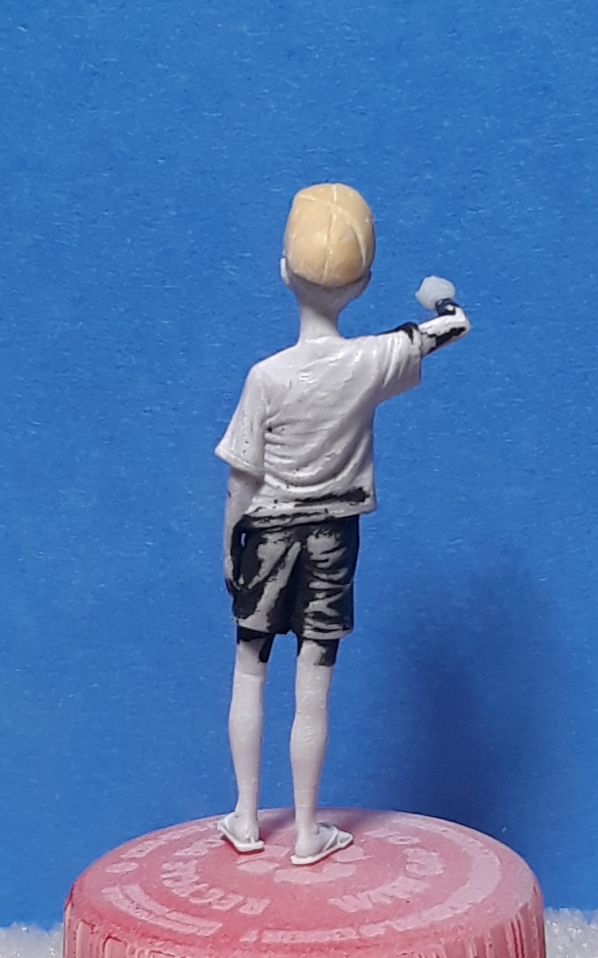
The other boy is from Paracel Miniatures and will be getting his arm checked by a medic. There was a basket on his head that I cut off and replaced with a cap. I cut his right arm off at the end of the sleeve and rotated it. I added a hand from a 1/48 scale figure.
Thanks for looking.
Cheers,
James
8 Likes
Amazing stuff. Have you considered writing a book on converting figures?
Mario
3 Likes
Thanks, Mario.
I have thought about writing a book about Vietnam modeling, but one about my methods of converting figures might be more helpful for new modelers who are hesitant to do their first conversion.
5 Likes
I think it might work… you are showing step-by-step photos and providing very detailed explanation of the process here on the forums, so I really think you could do it.
Mario
2 Likes
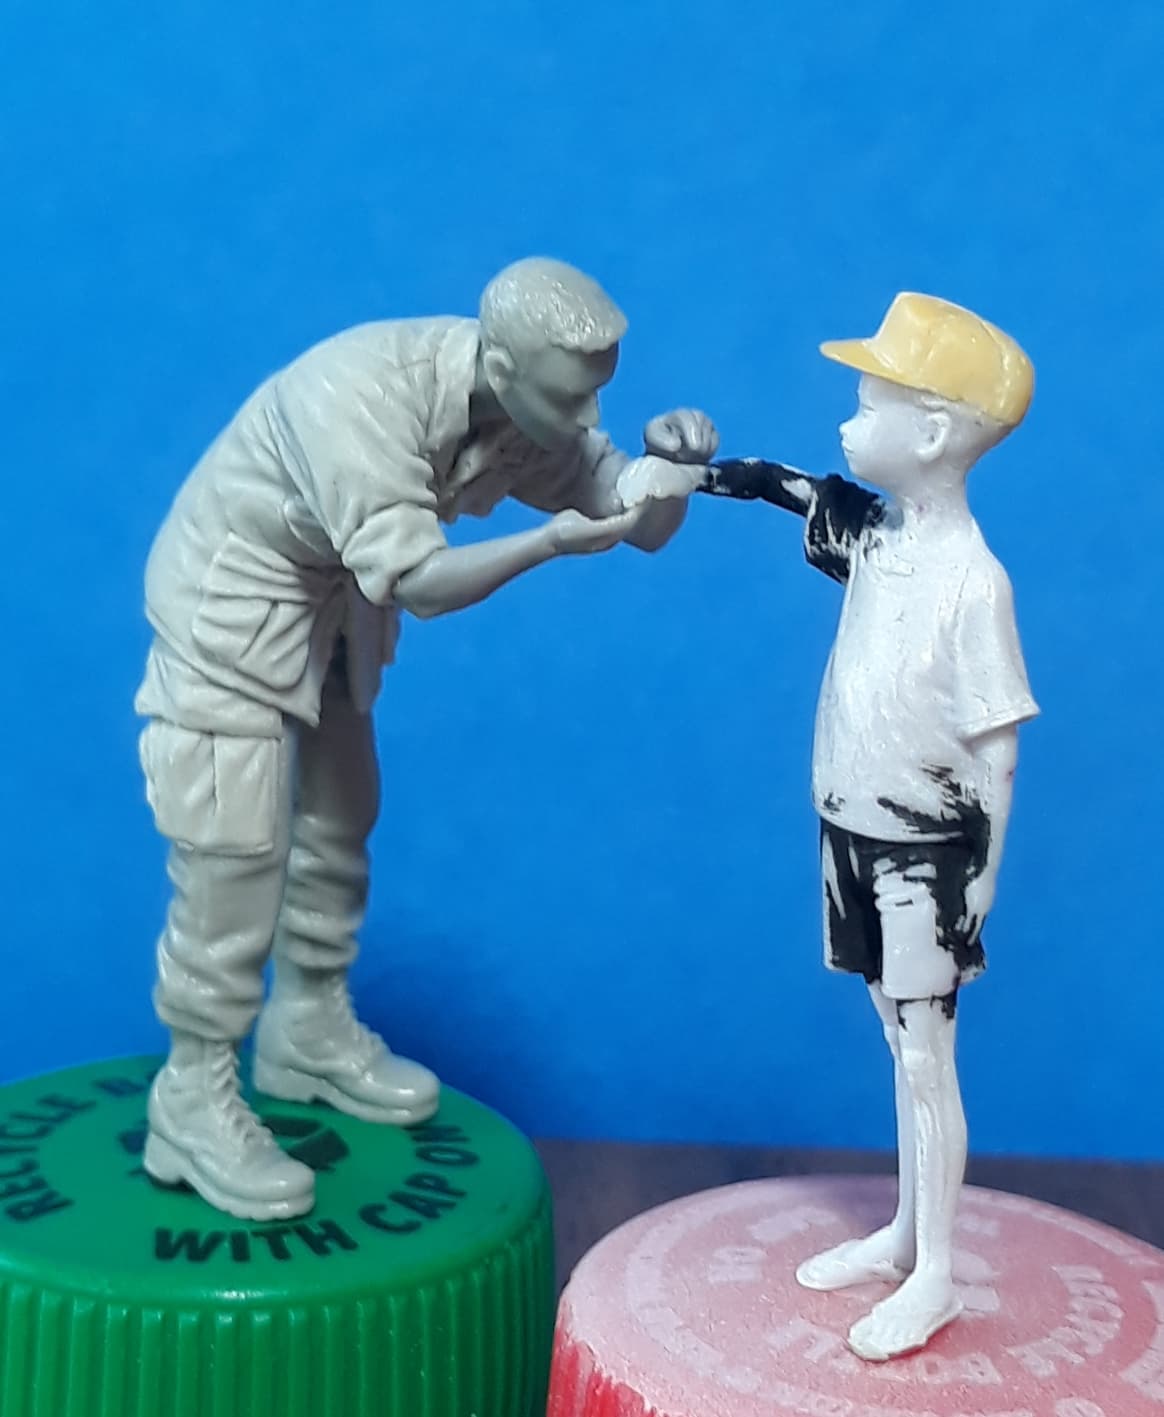
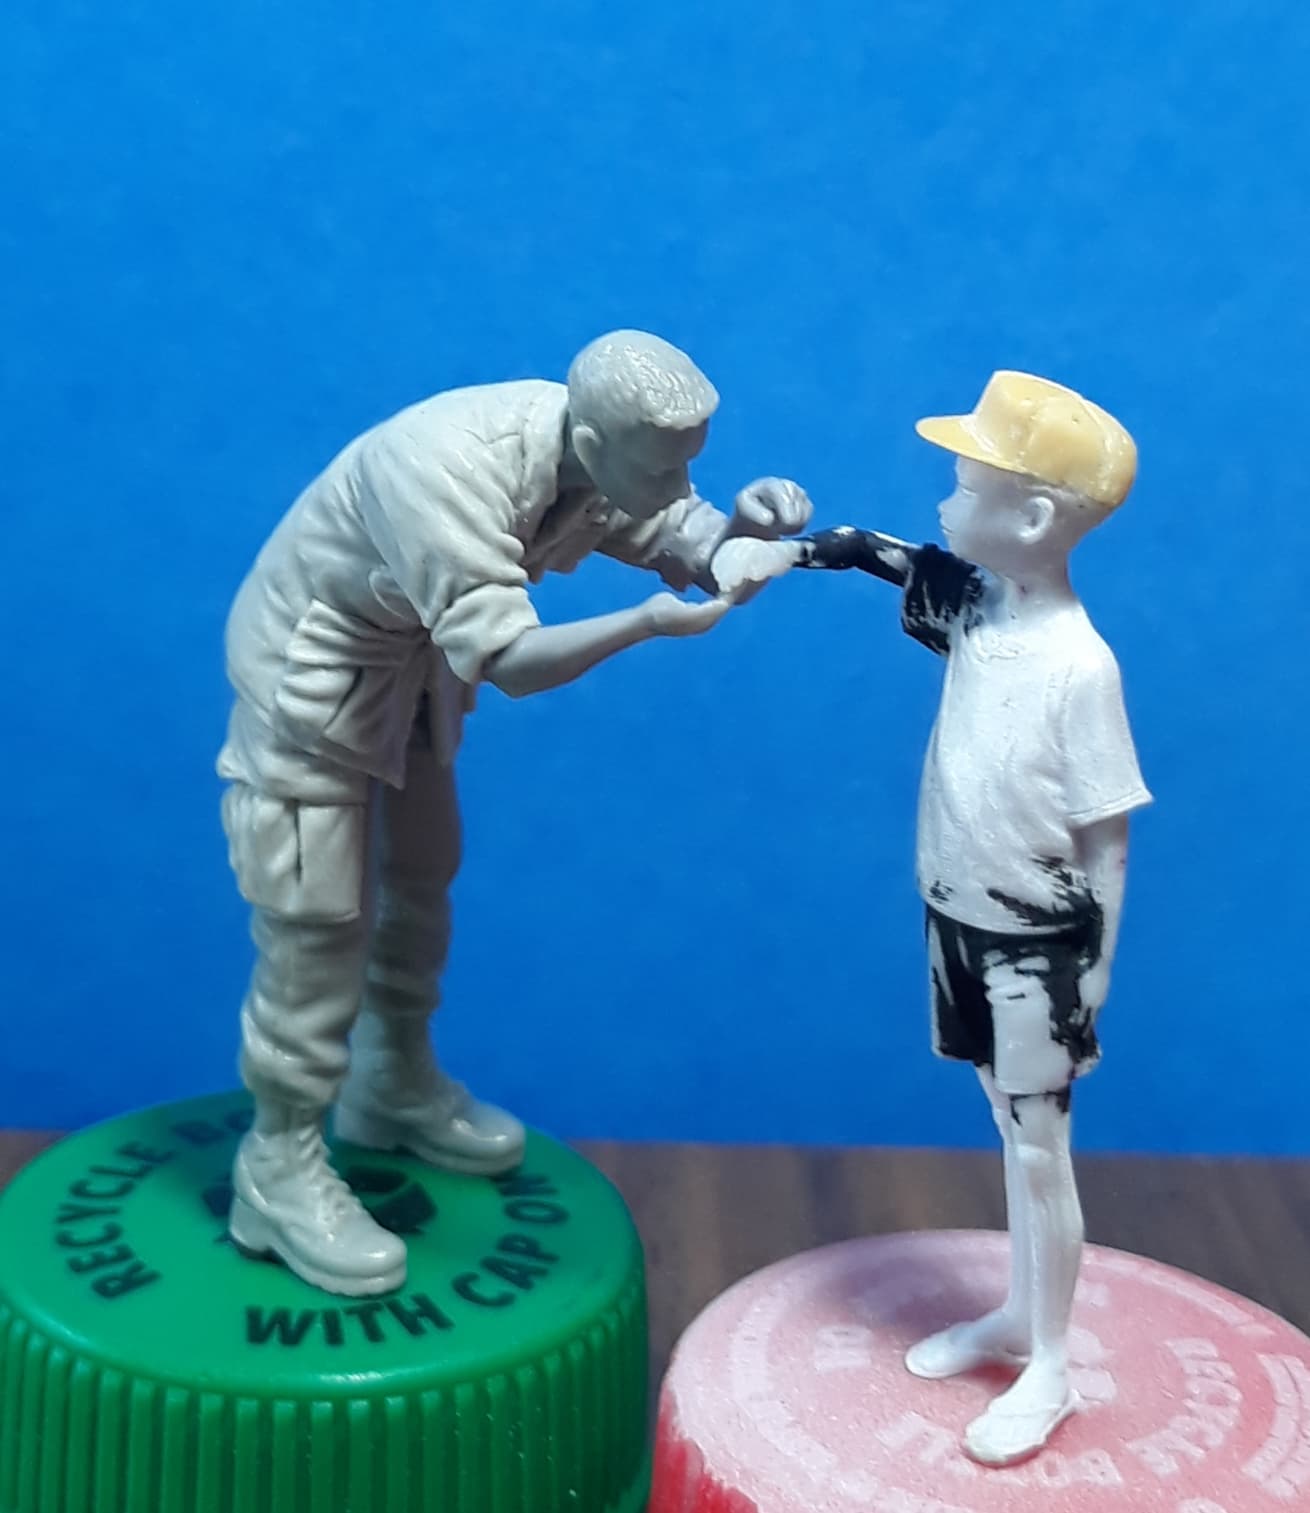
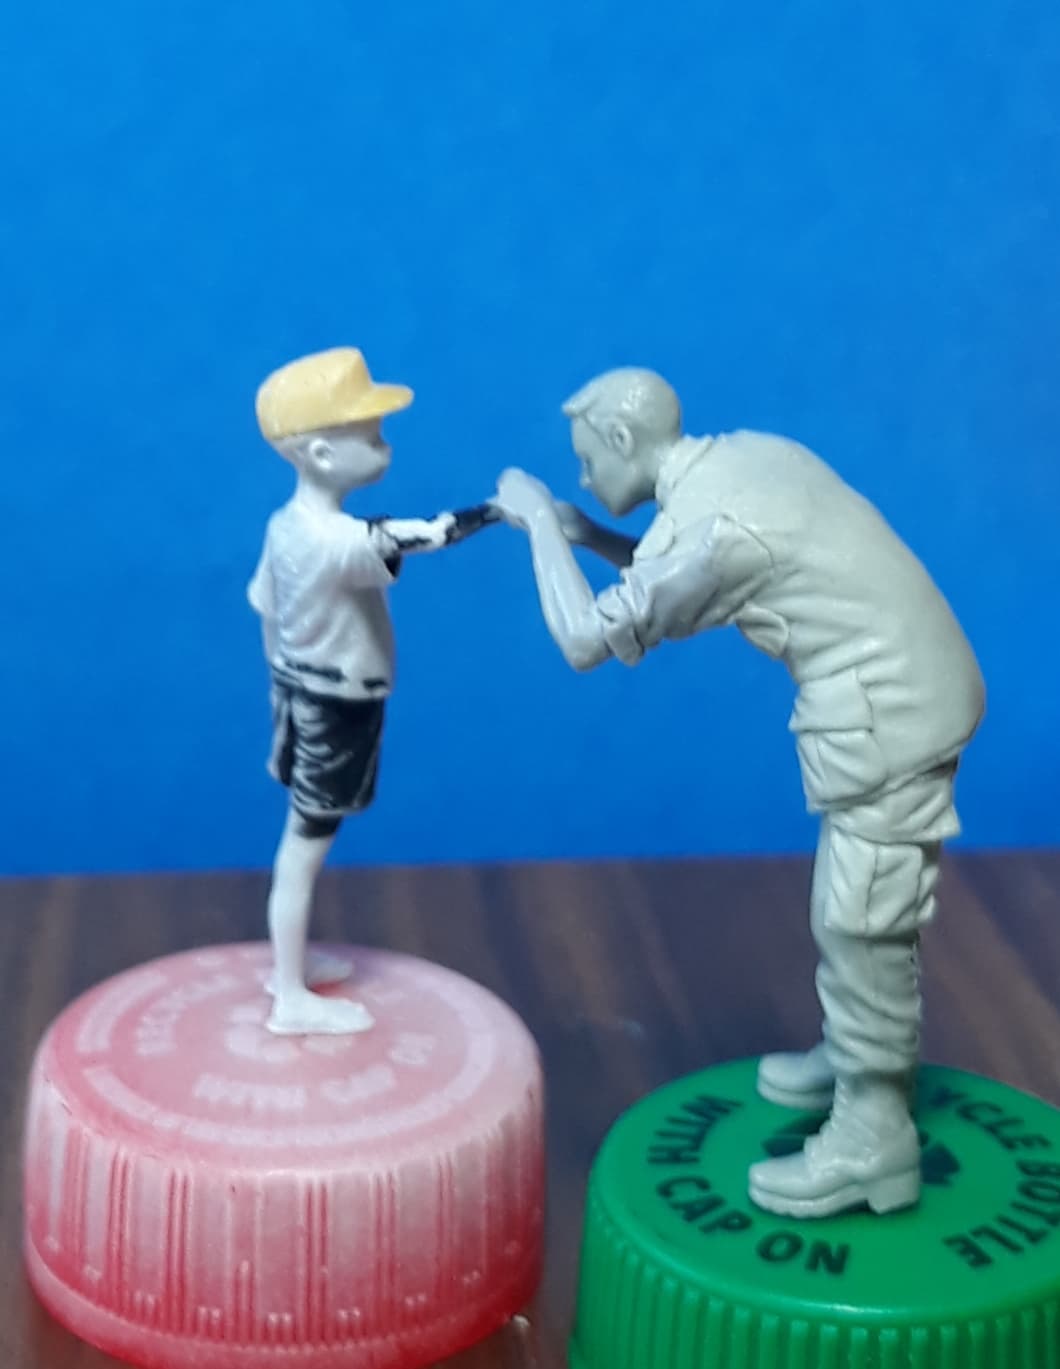
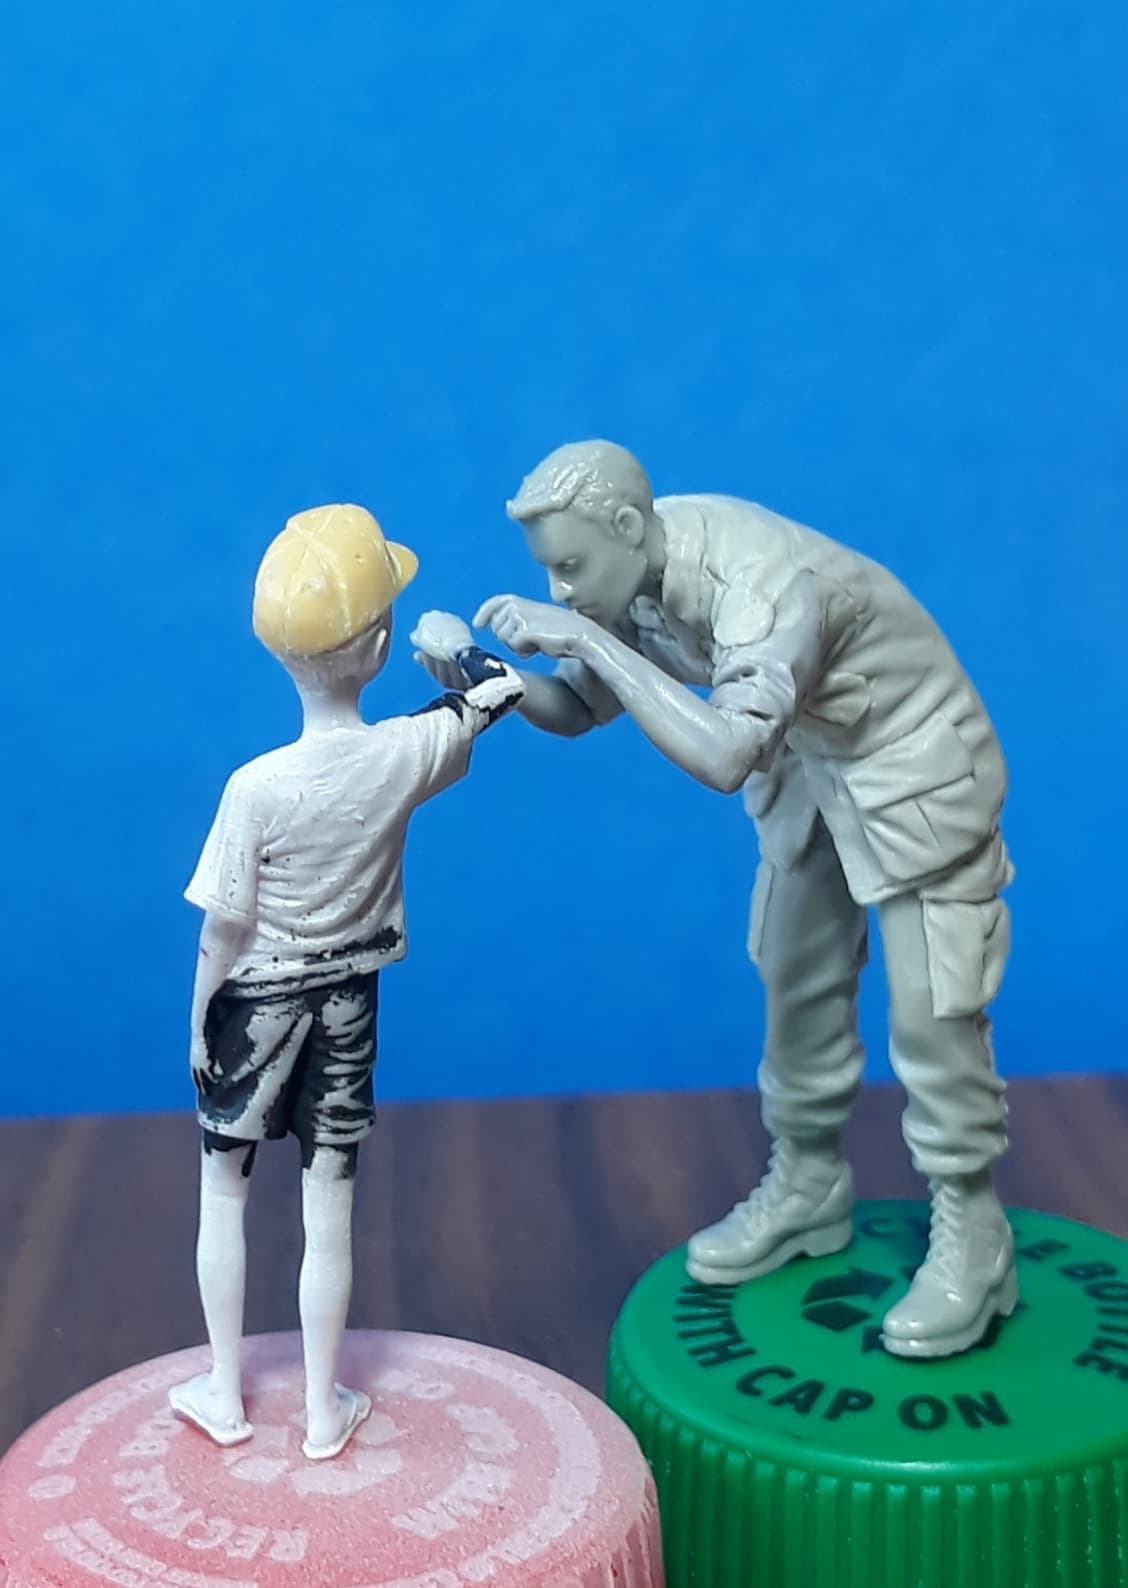
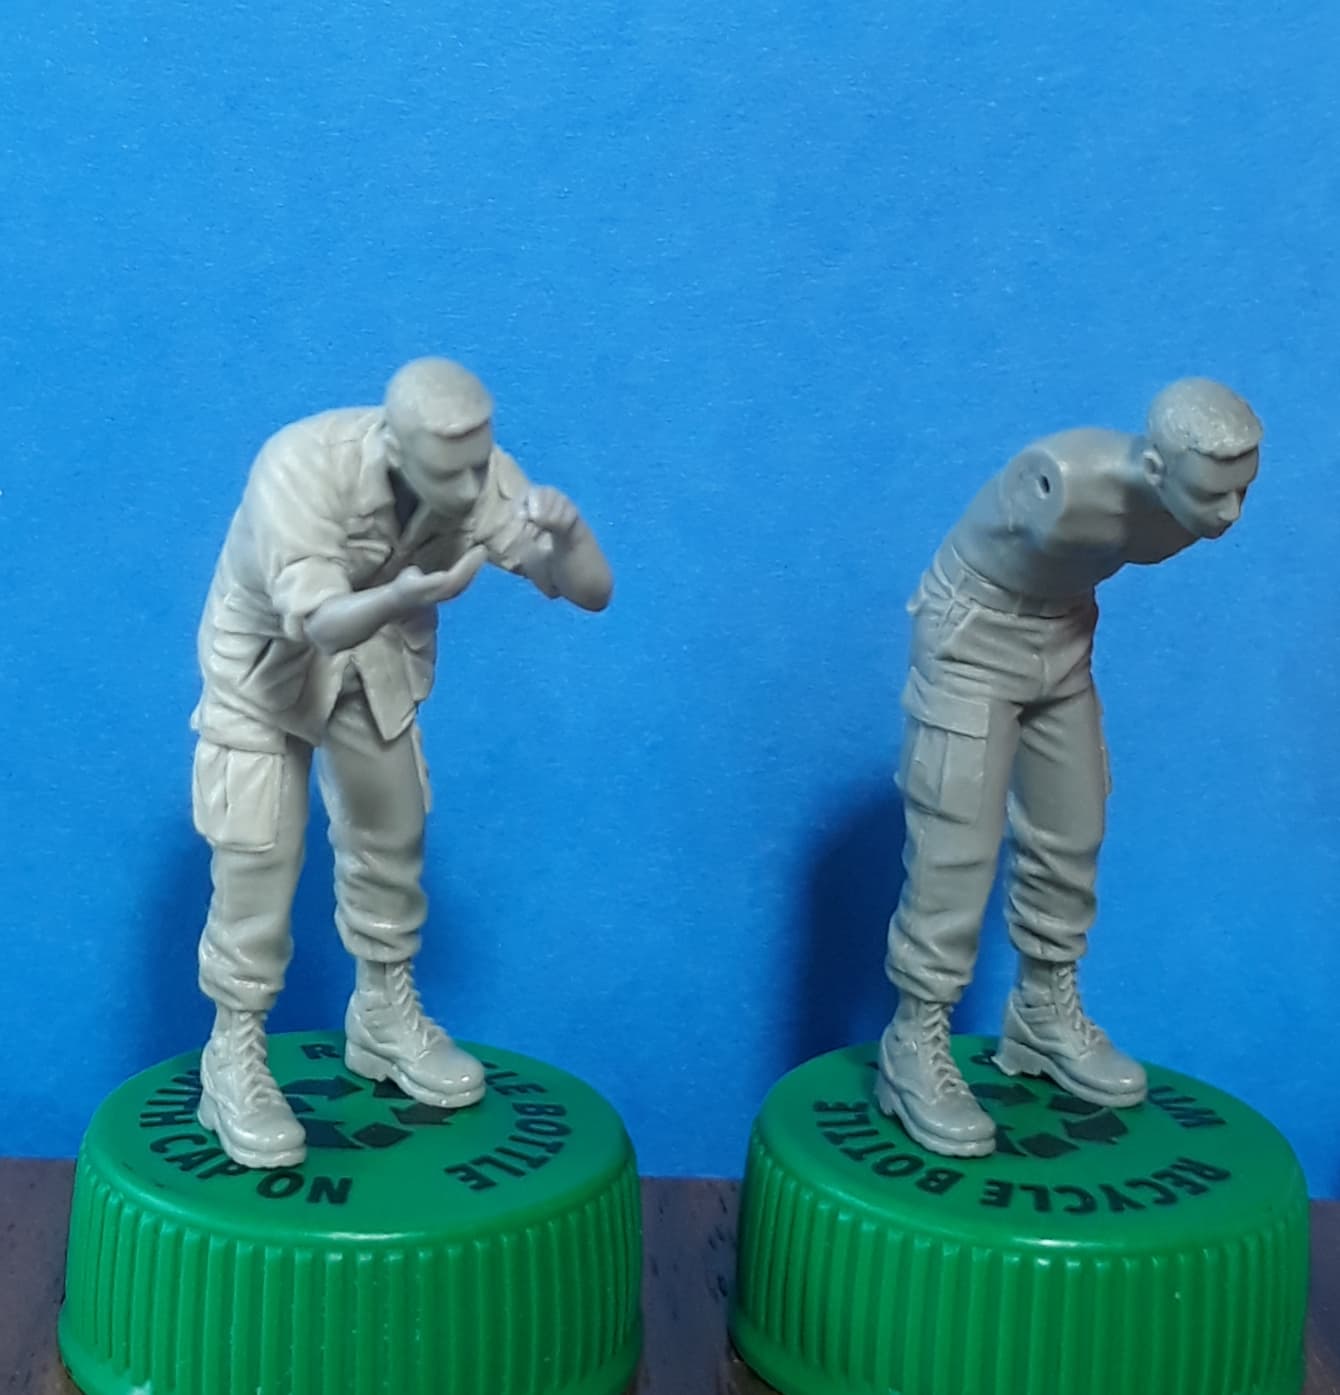
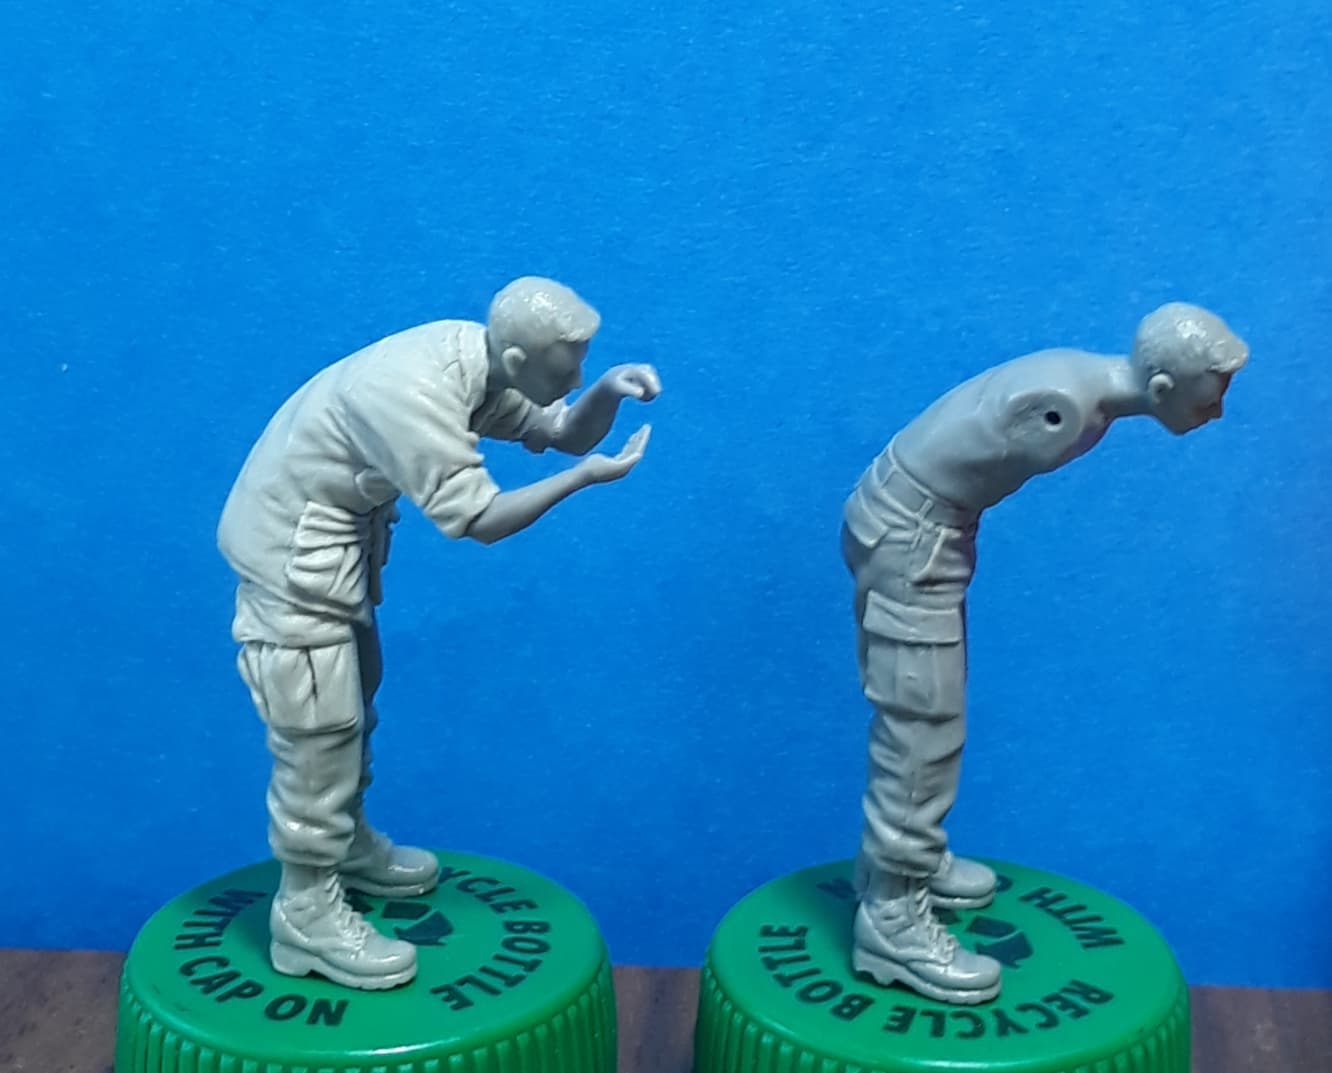
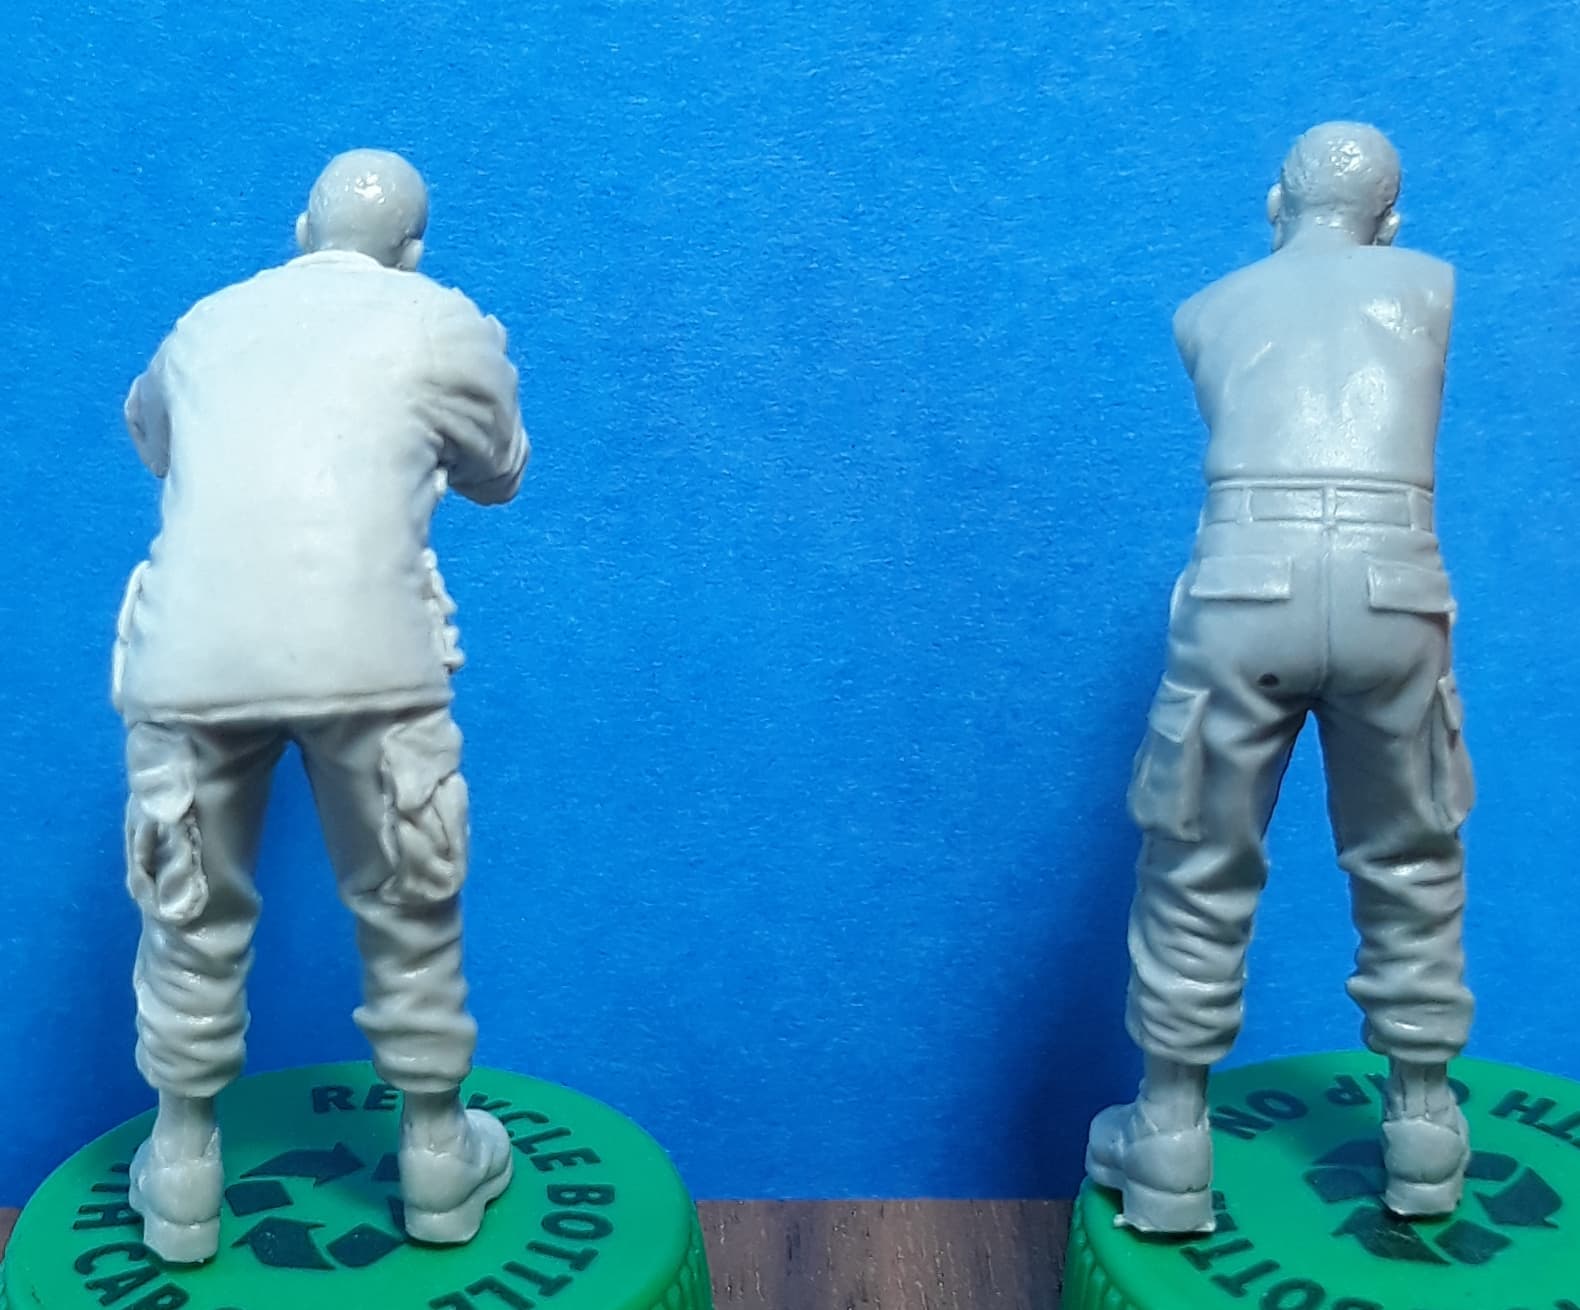
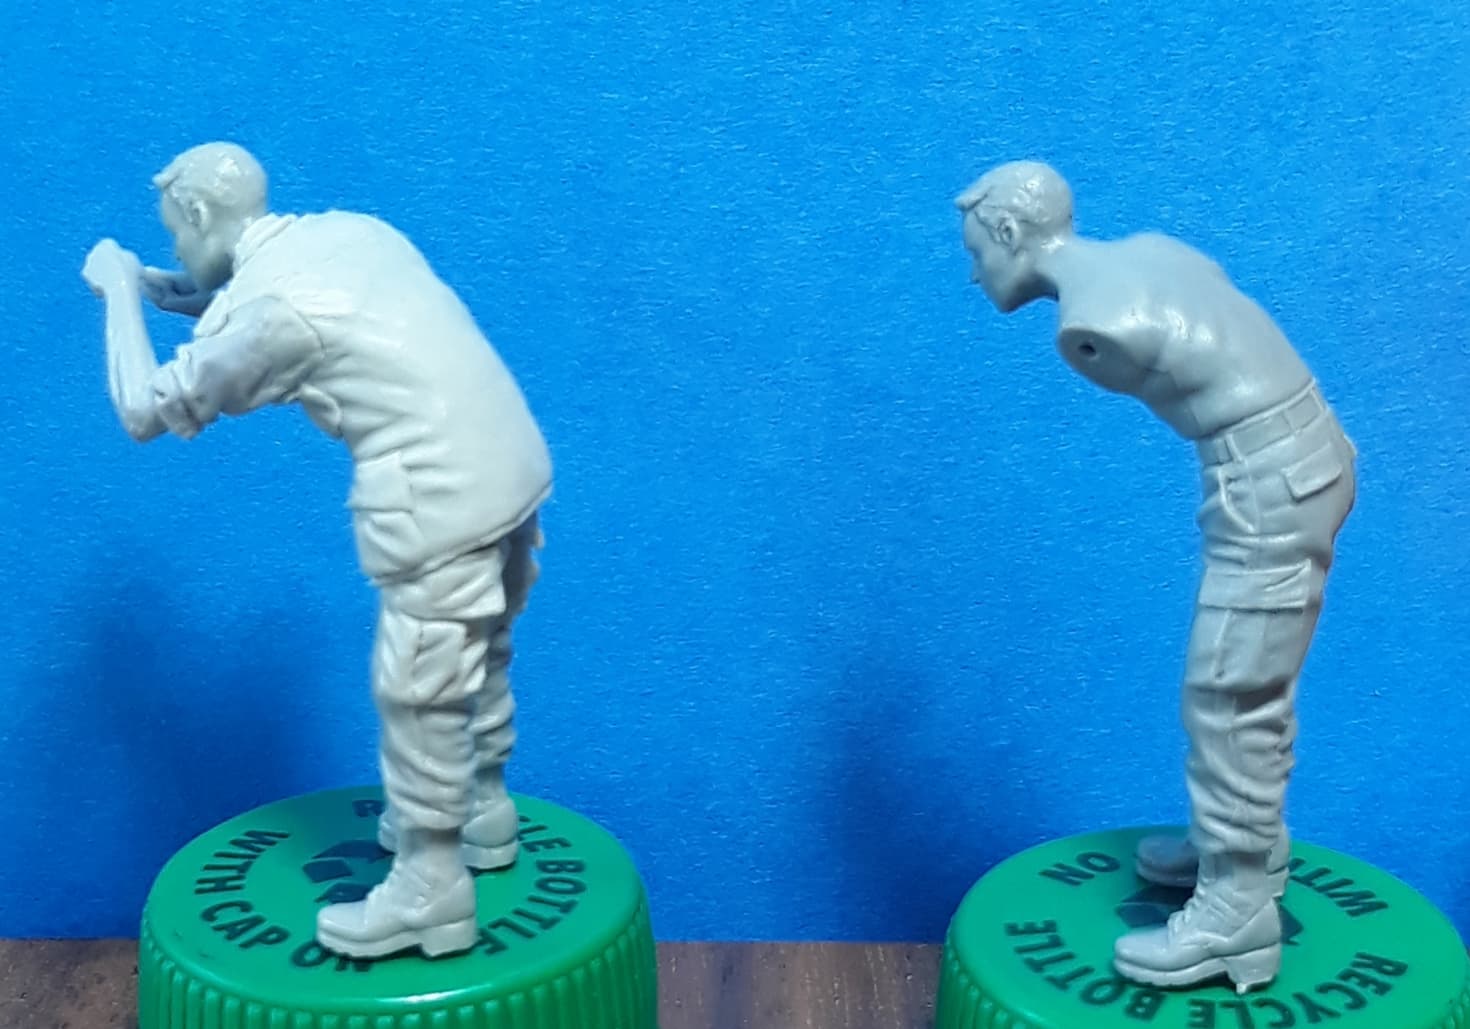
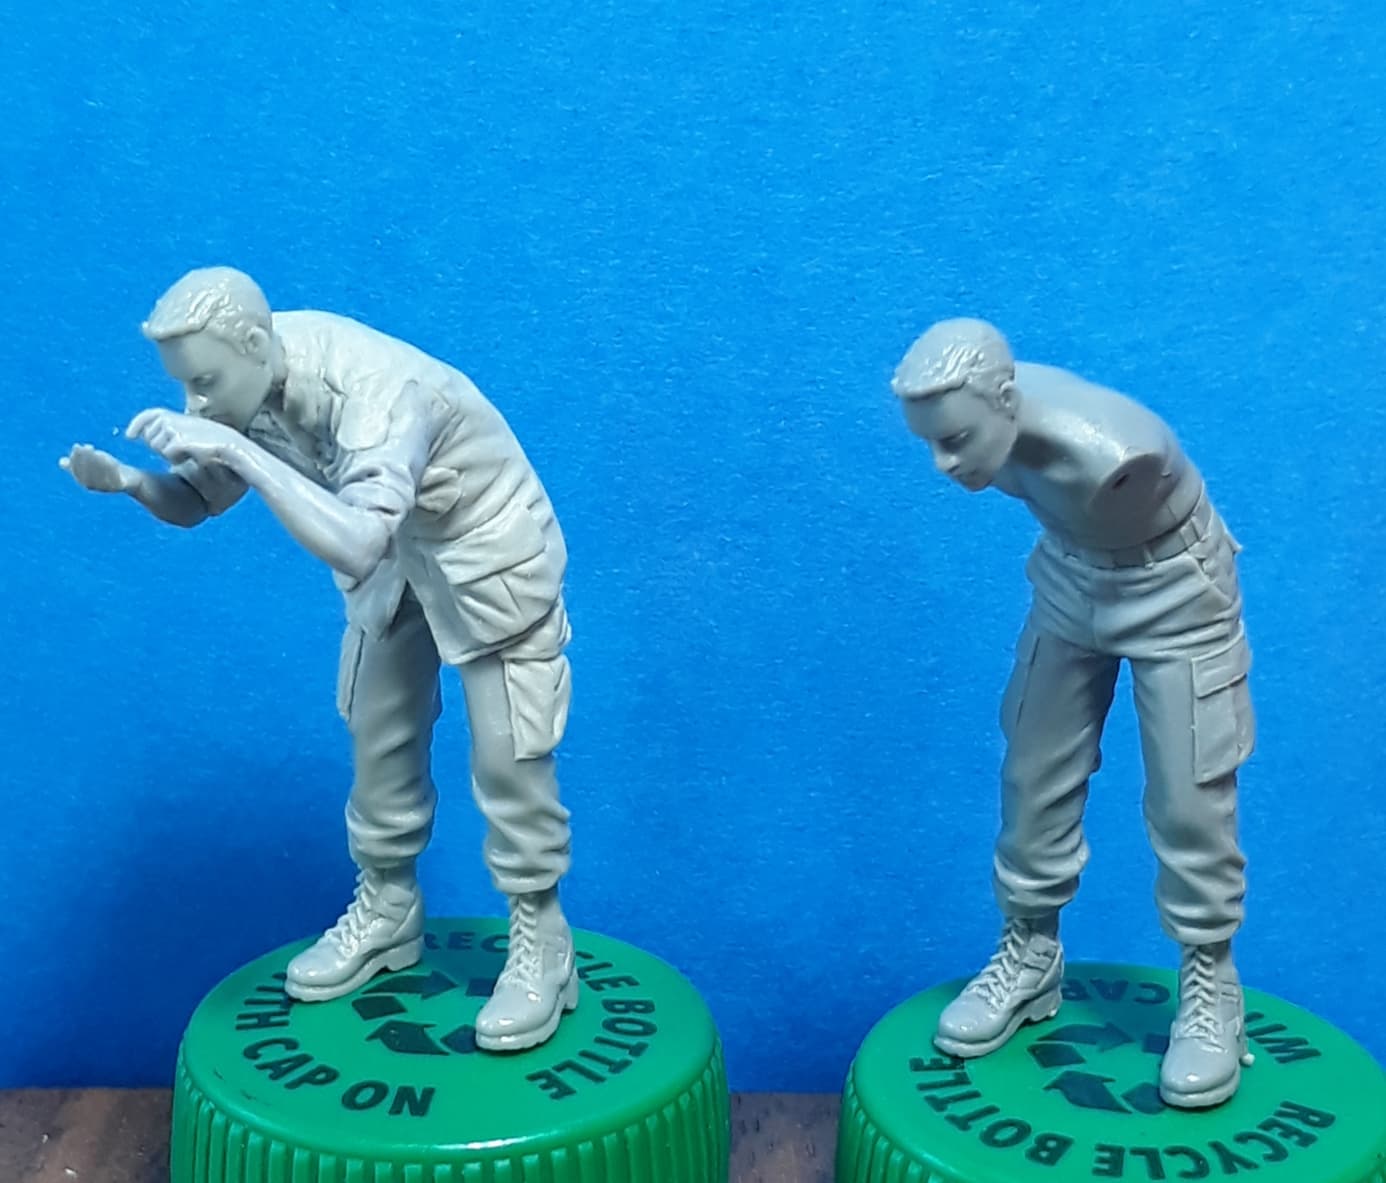
Here is another conversion that I just completed for the MEDCAP diorama - a medic holding a boy’s arm while he cleans a wound with a gauze sponge (I still need to make that part). I had moved the right arm on the boy several days ago and as I was posing the medic, I thought the boy should be looking at either his arm or the medic, so I cut the head of and glued it into it’s new position. The medic is a conversion of a Hobby Fan Artilleryman. The right arm is from Royal Models and the left arm is from Bravo 6. First I resculpted the cargo pockets on the trousers. Then I sculpted a jungle fatigue shirt onto the figure along with the right sleeve. Once that had cured, I added the pockets to the shirt. The photos show how the figure of the medic will interact with the figure of the boy.
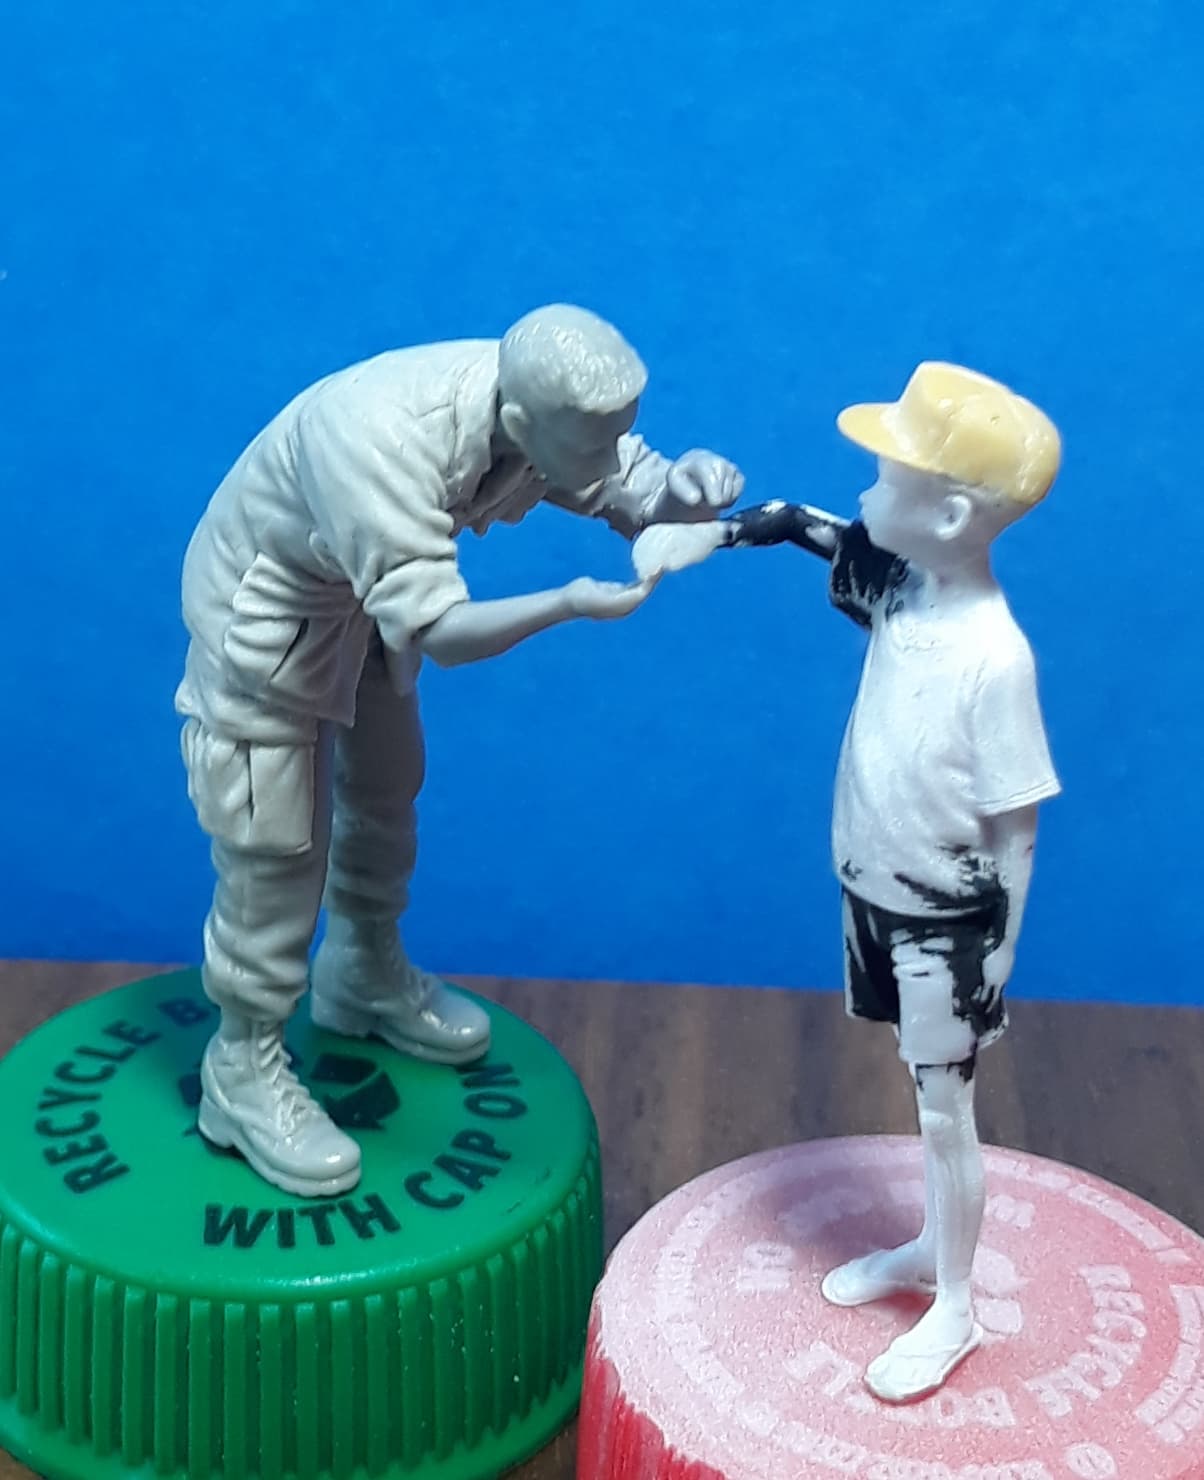
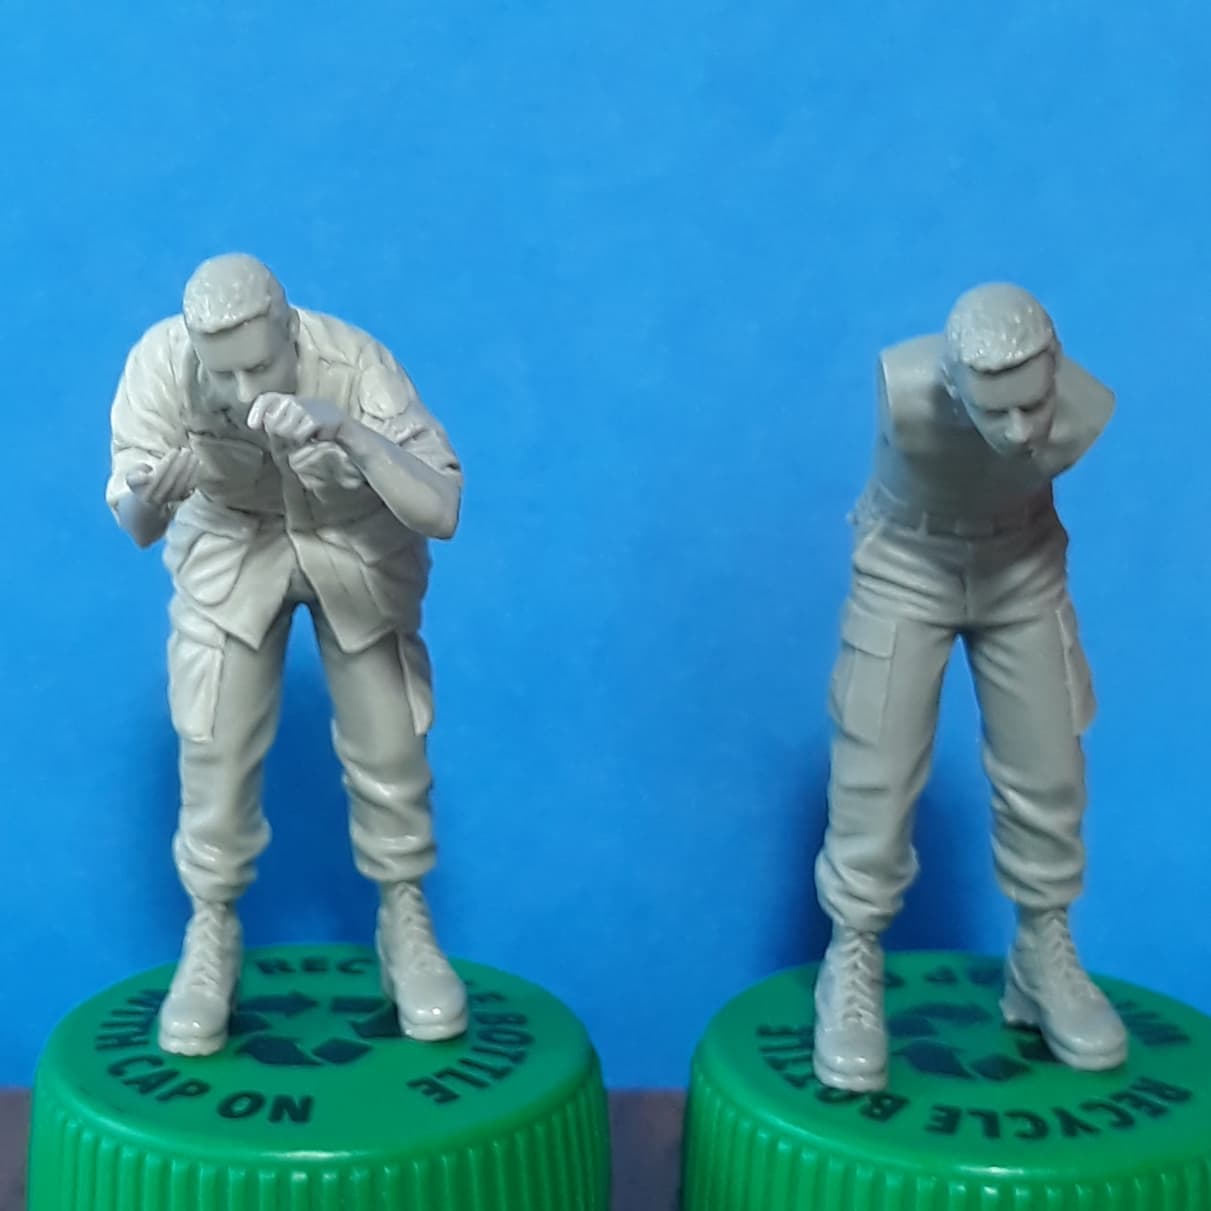
Here are some photos of a side by side comparisons of the medic conversion and the original figure.
A modeler can open themselves and their figures and dioramas to all kinds of possibilities by learning how to convert figures, and if so inclined, learning how to sculpt. Just starting off with something like changing heads or arms can help make one’s figures somewhat unique and they will not look like other people’s figures who use them straight out of the box. Conversions allow you to build up and pose your figures to support the storyline of your diorama offering you more flexibility and giving you a better possibilty of creating a more solid composition for your diorama or vignette. When you solely use stock figures with no variation, you end up limiting yourself plus there may be more than one other person using the same figures for their dioramas if you are displaying at a show. The more unique your figures are, even from just a subtle change of head direction or position of an arm, the more memorable they can be.
10 Likes
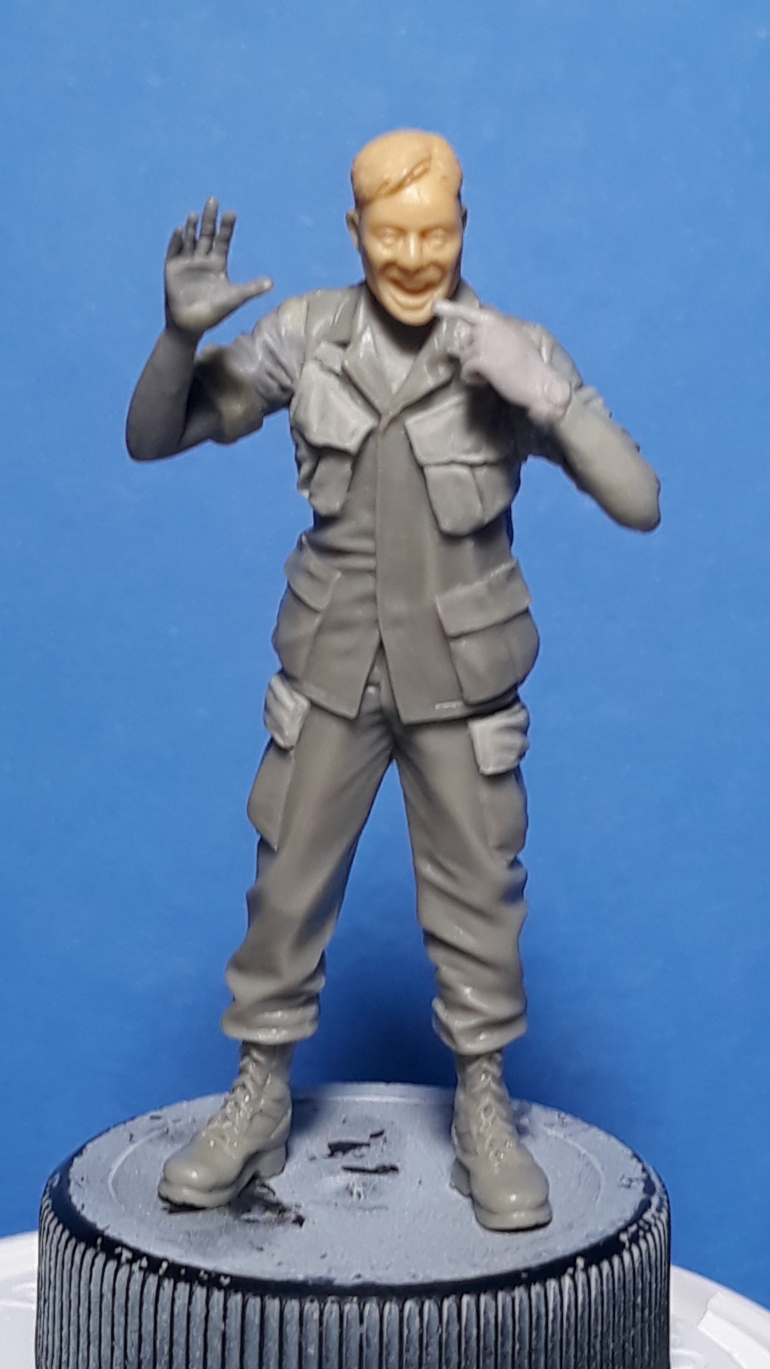
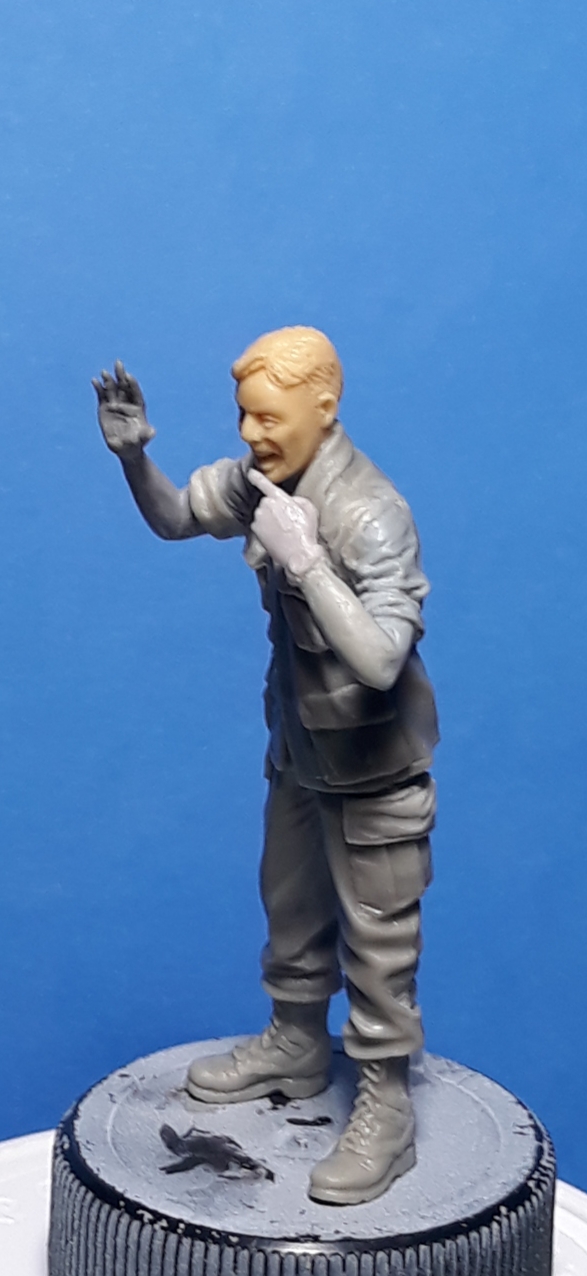
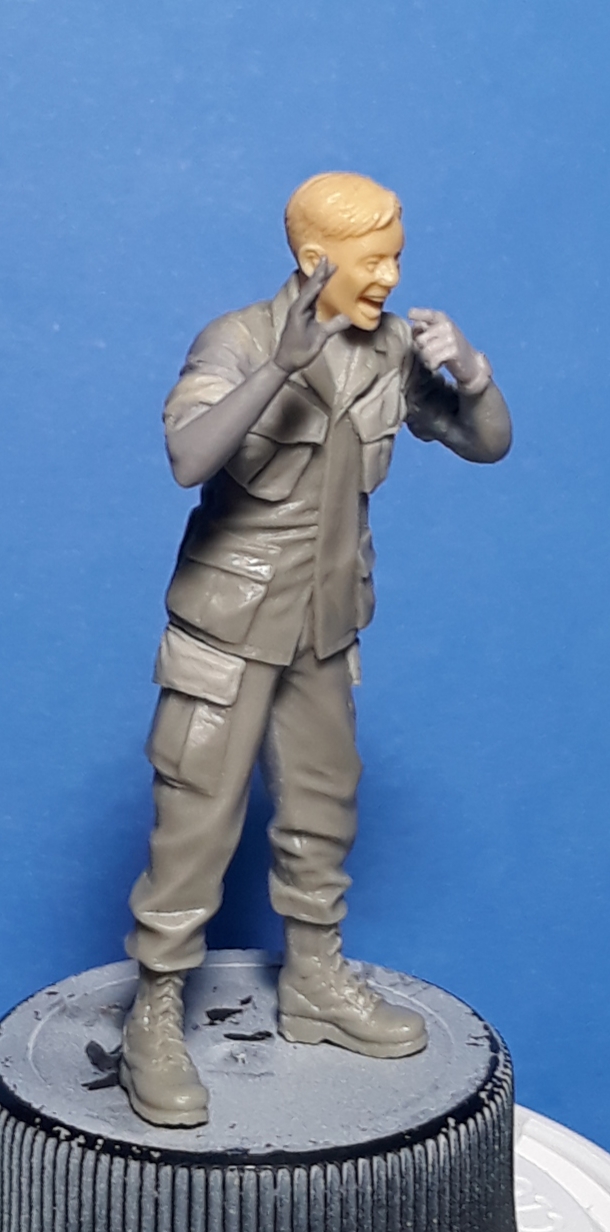
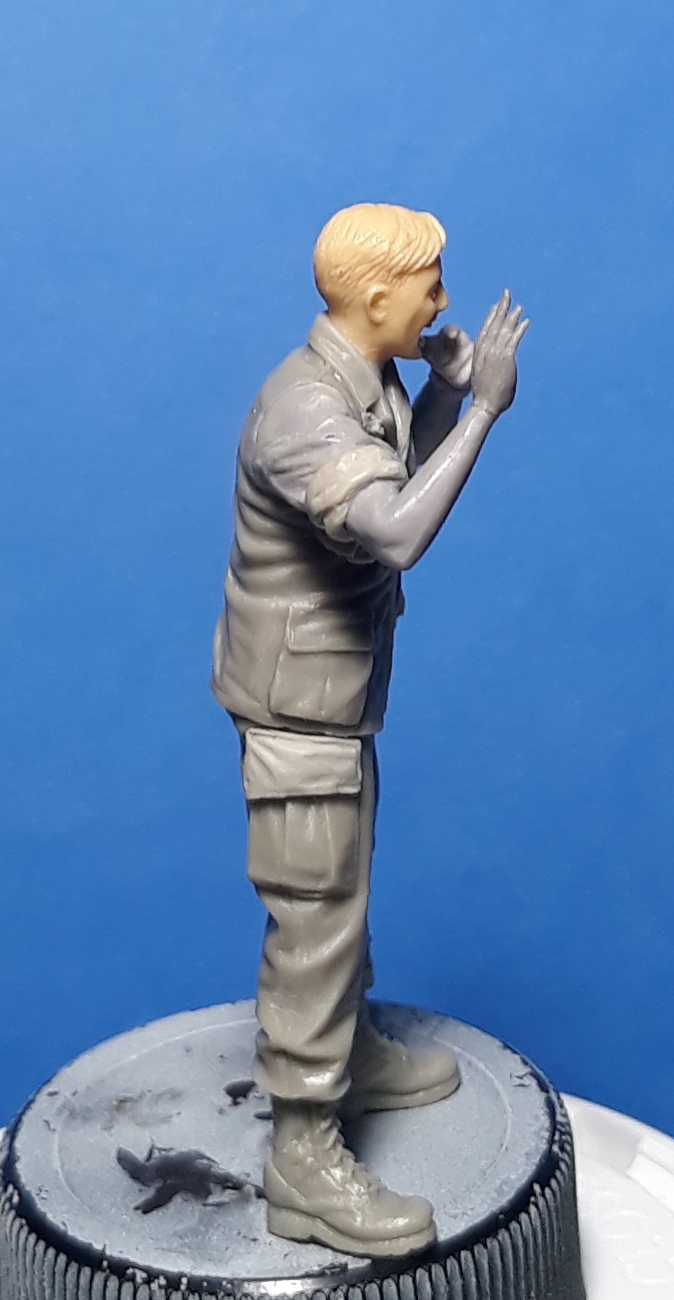
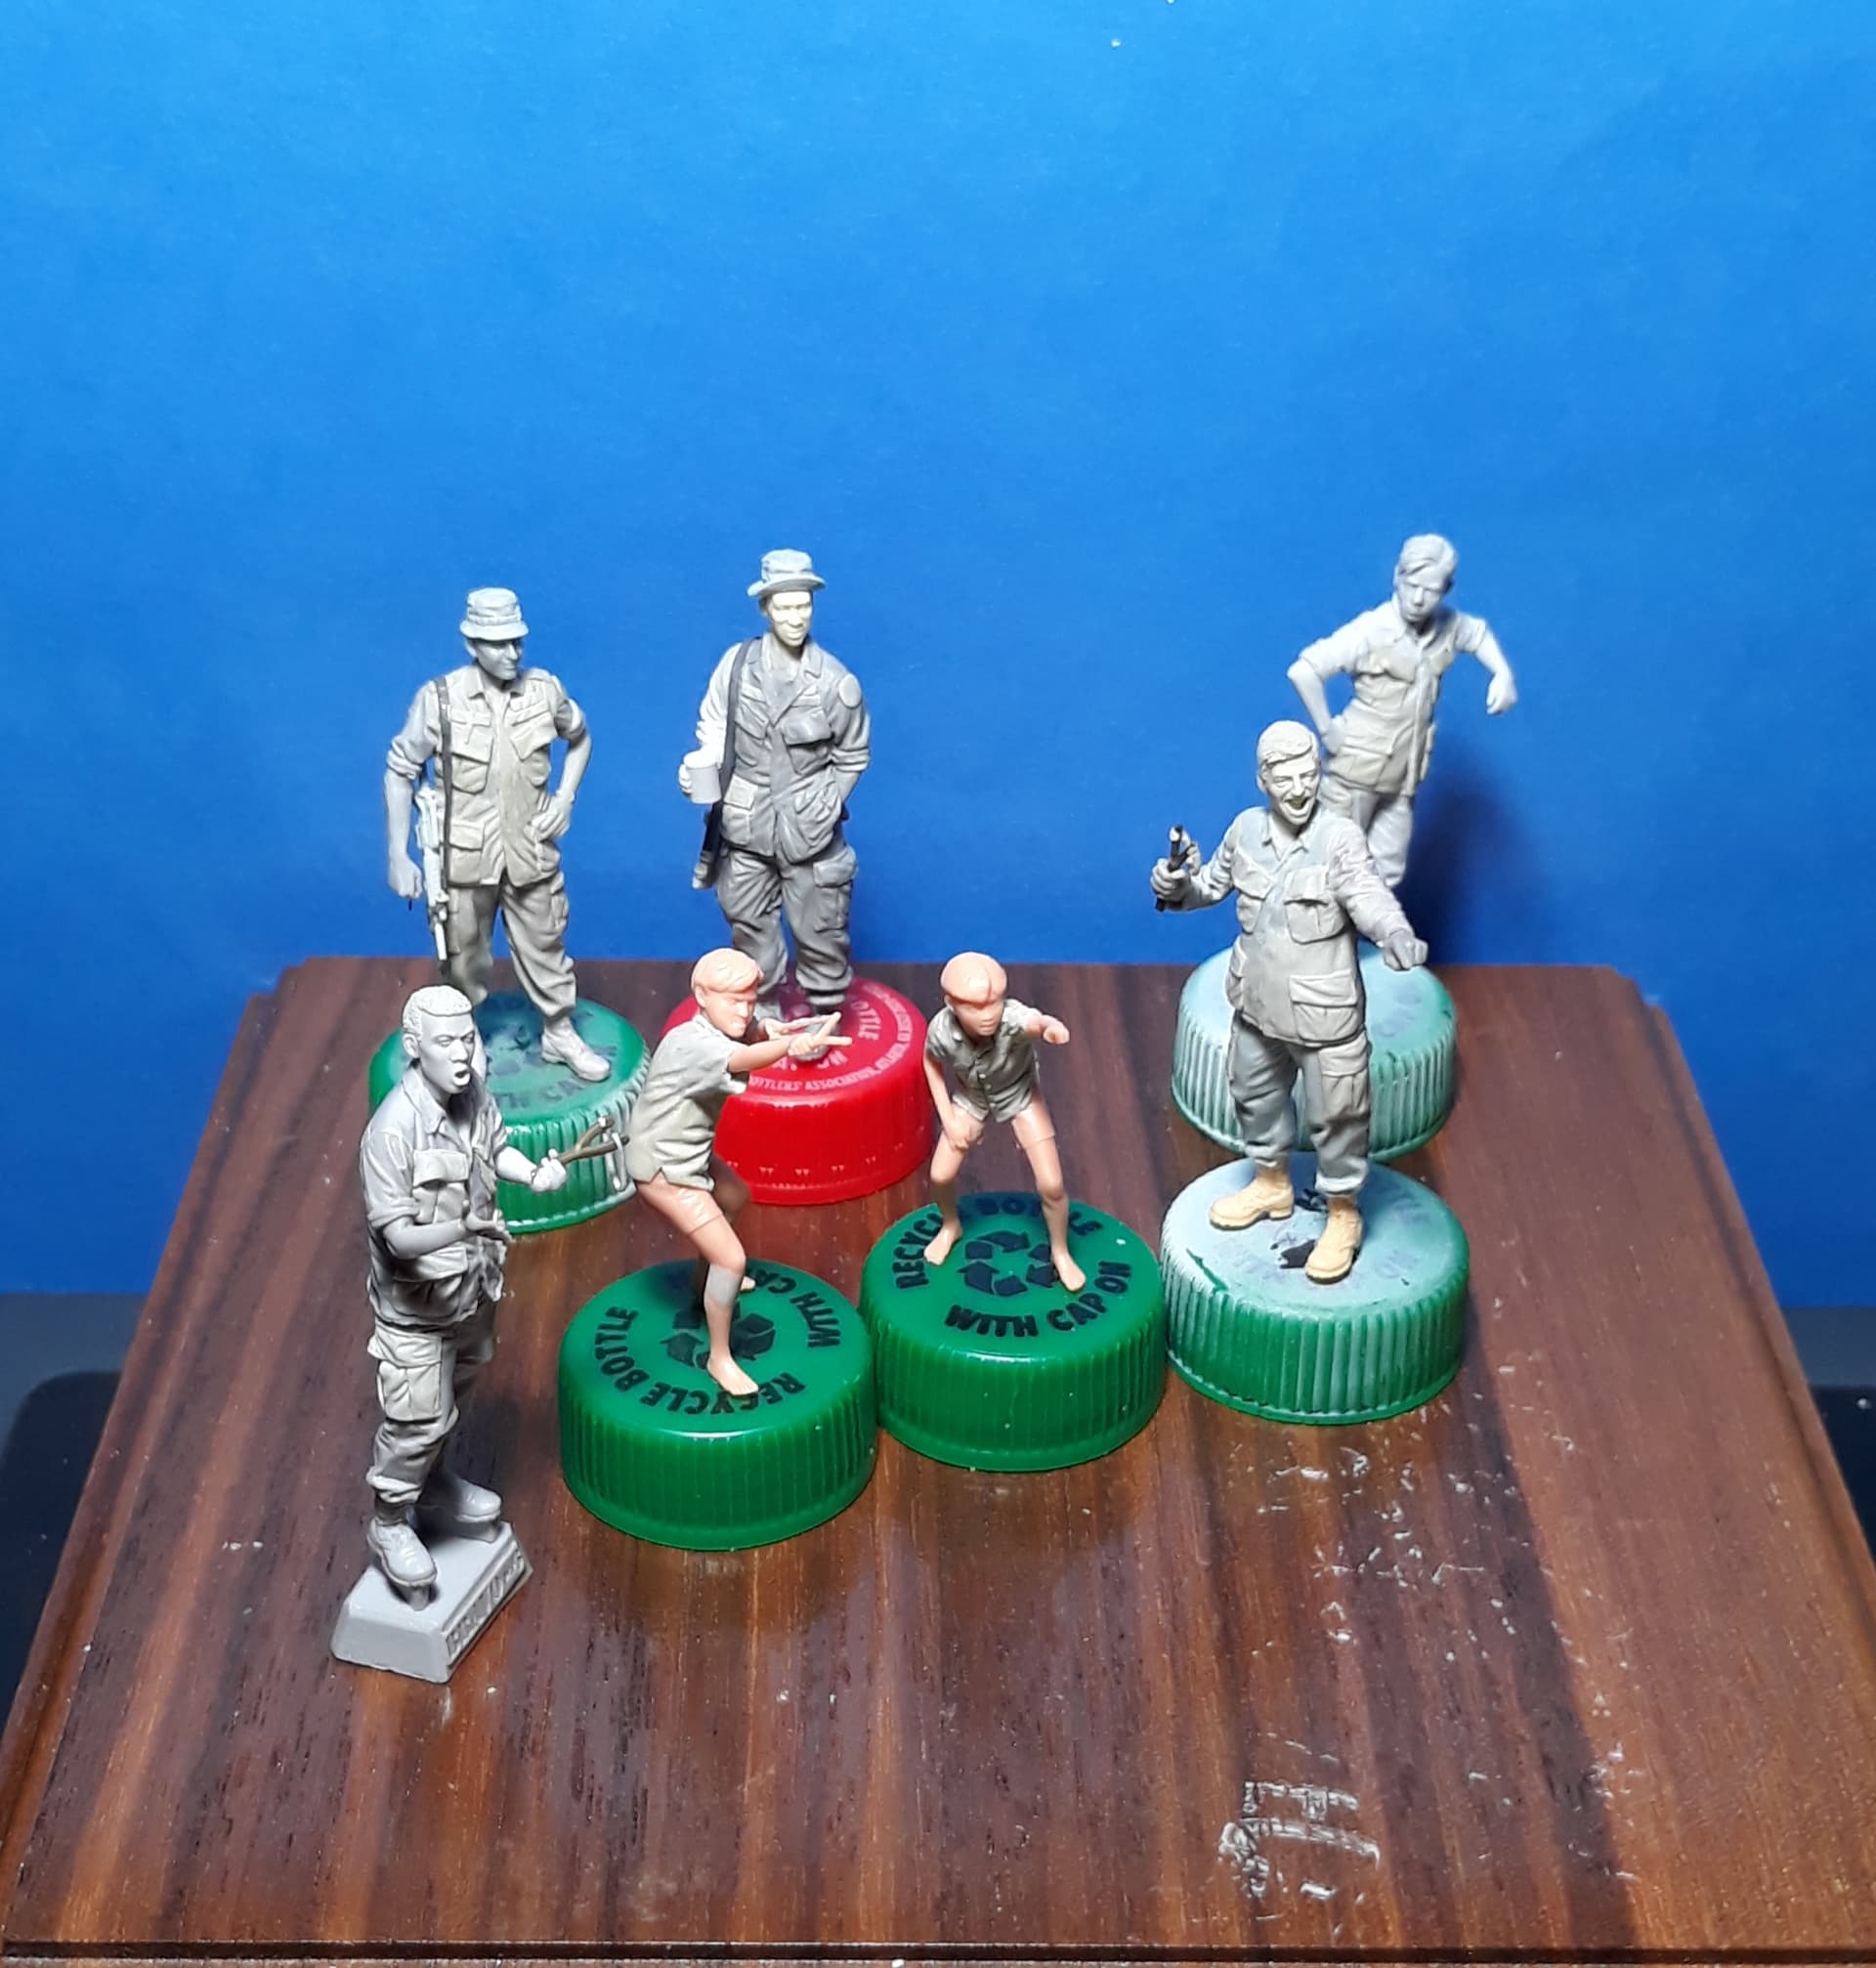
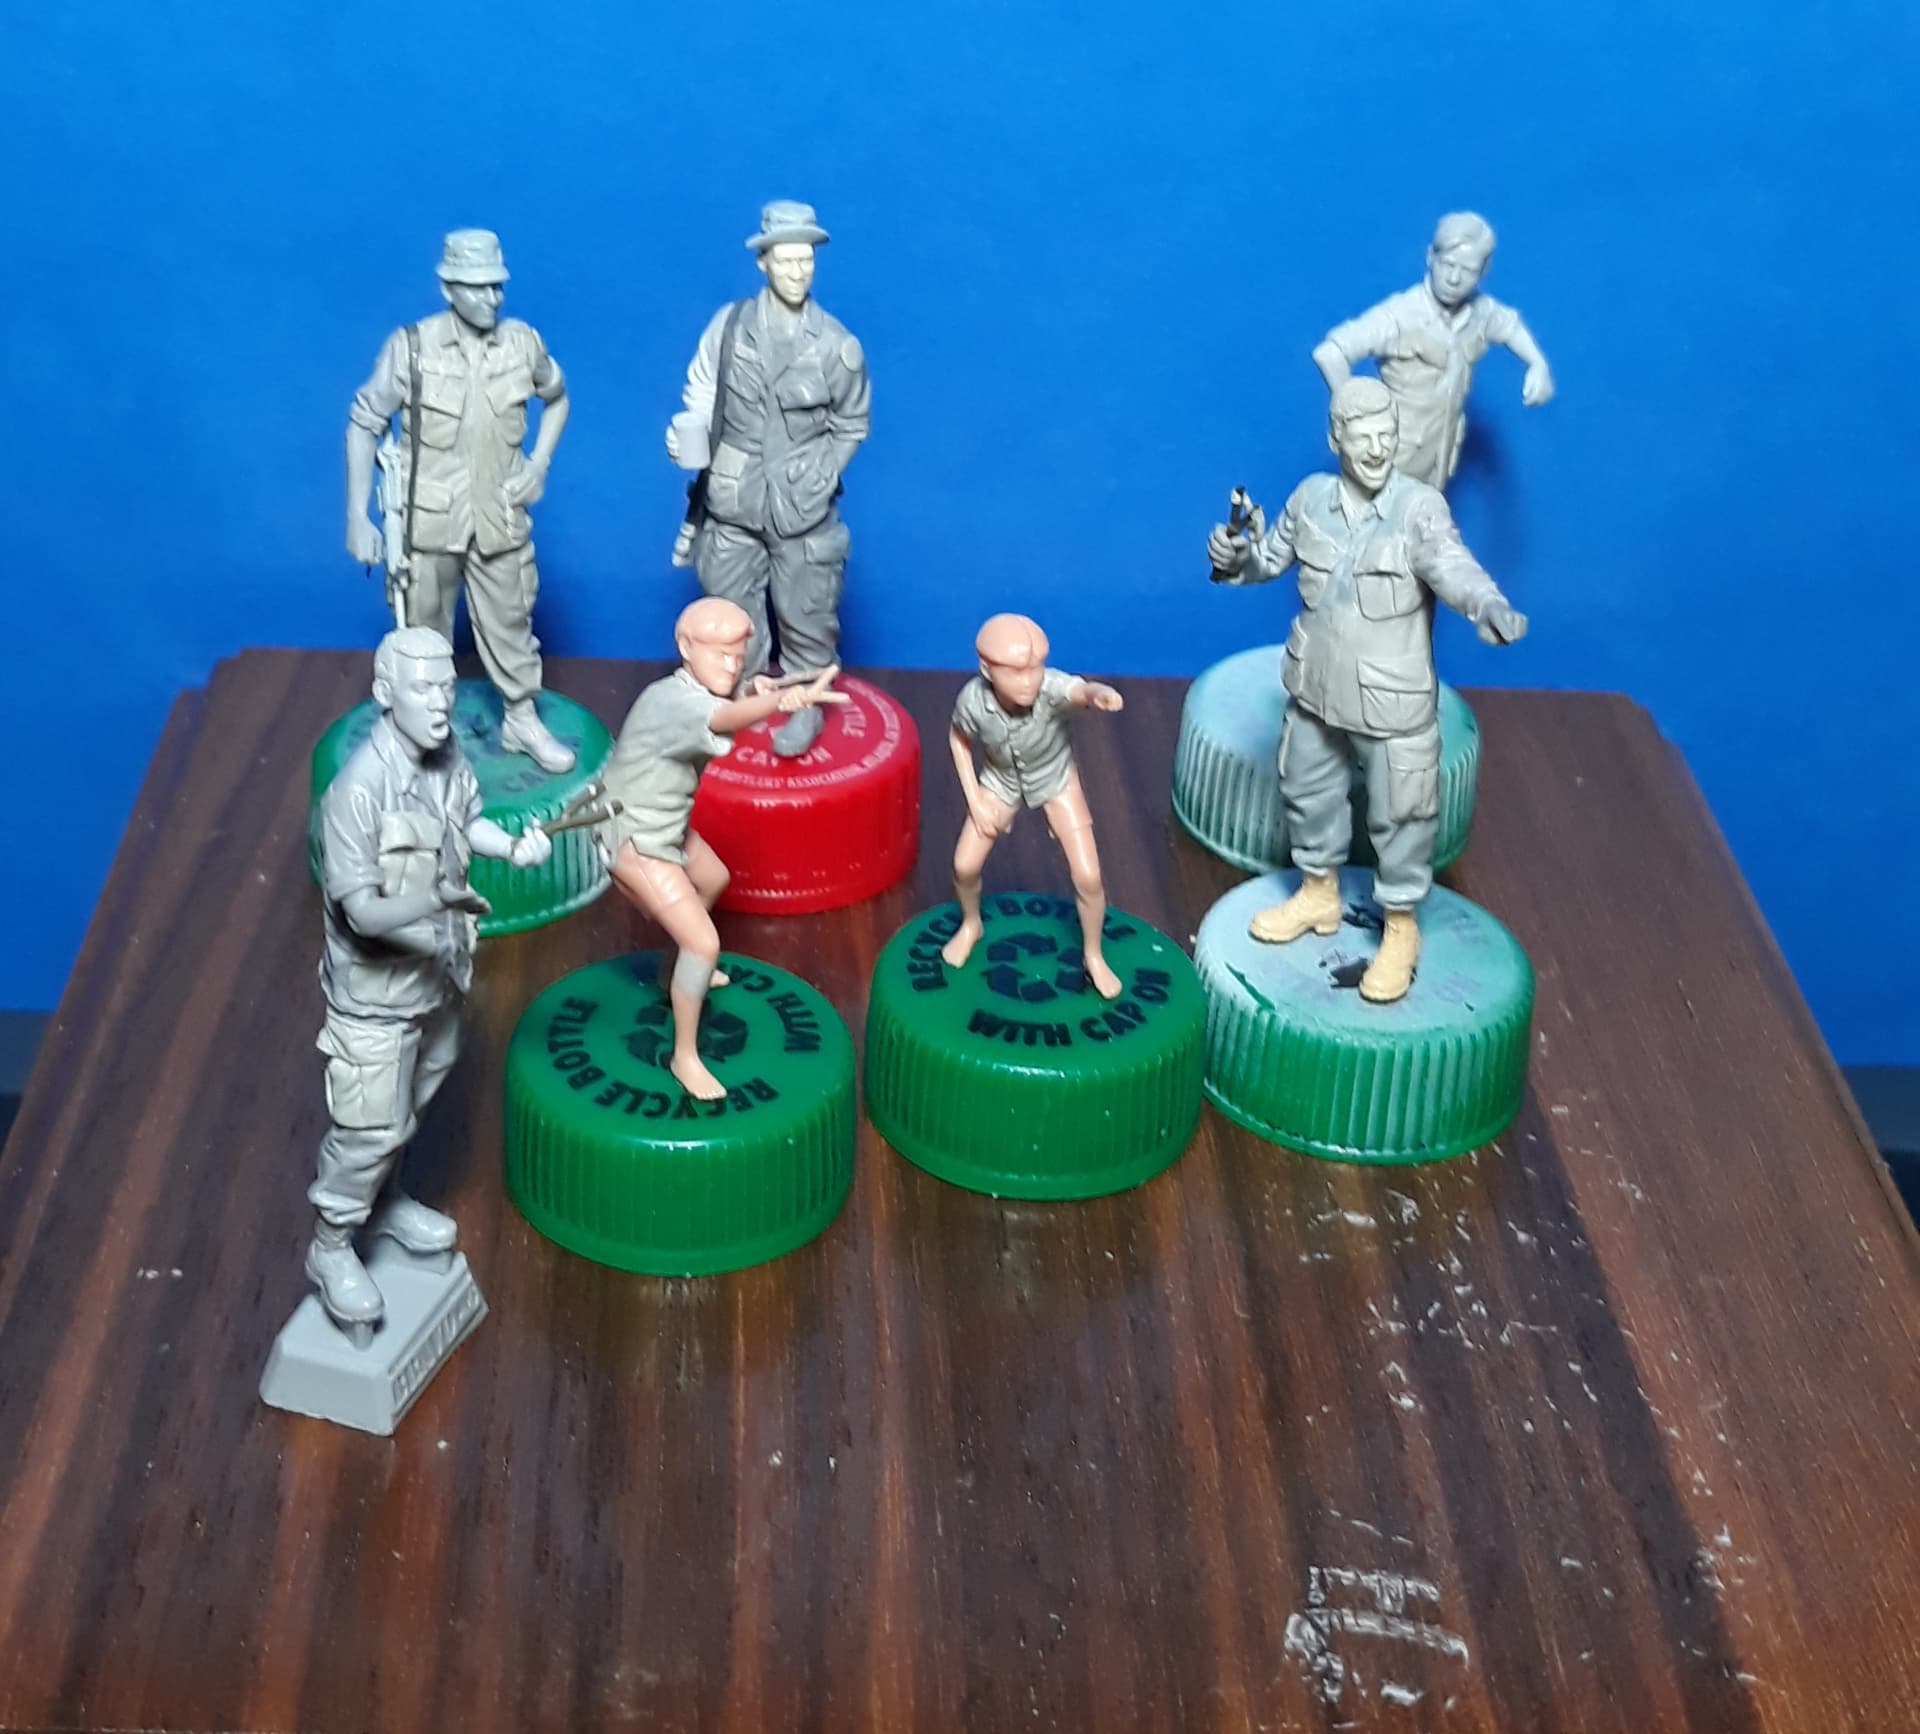
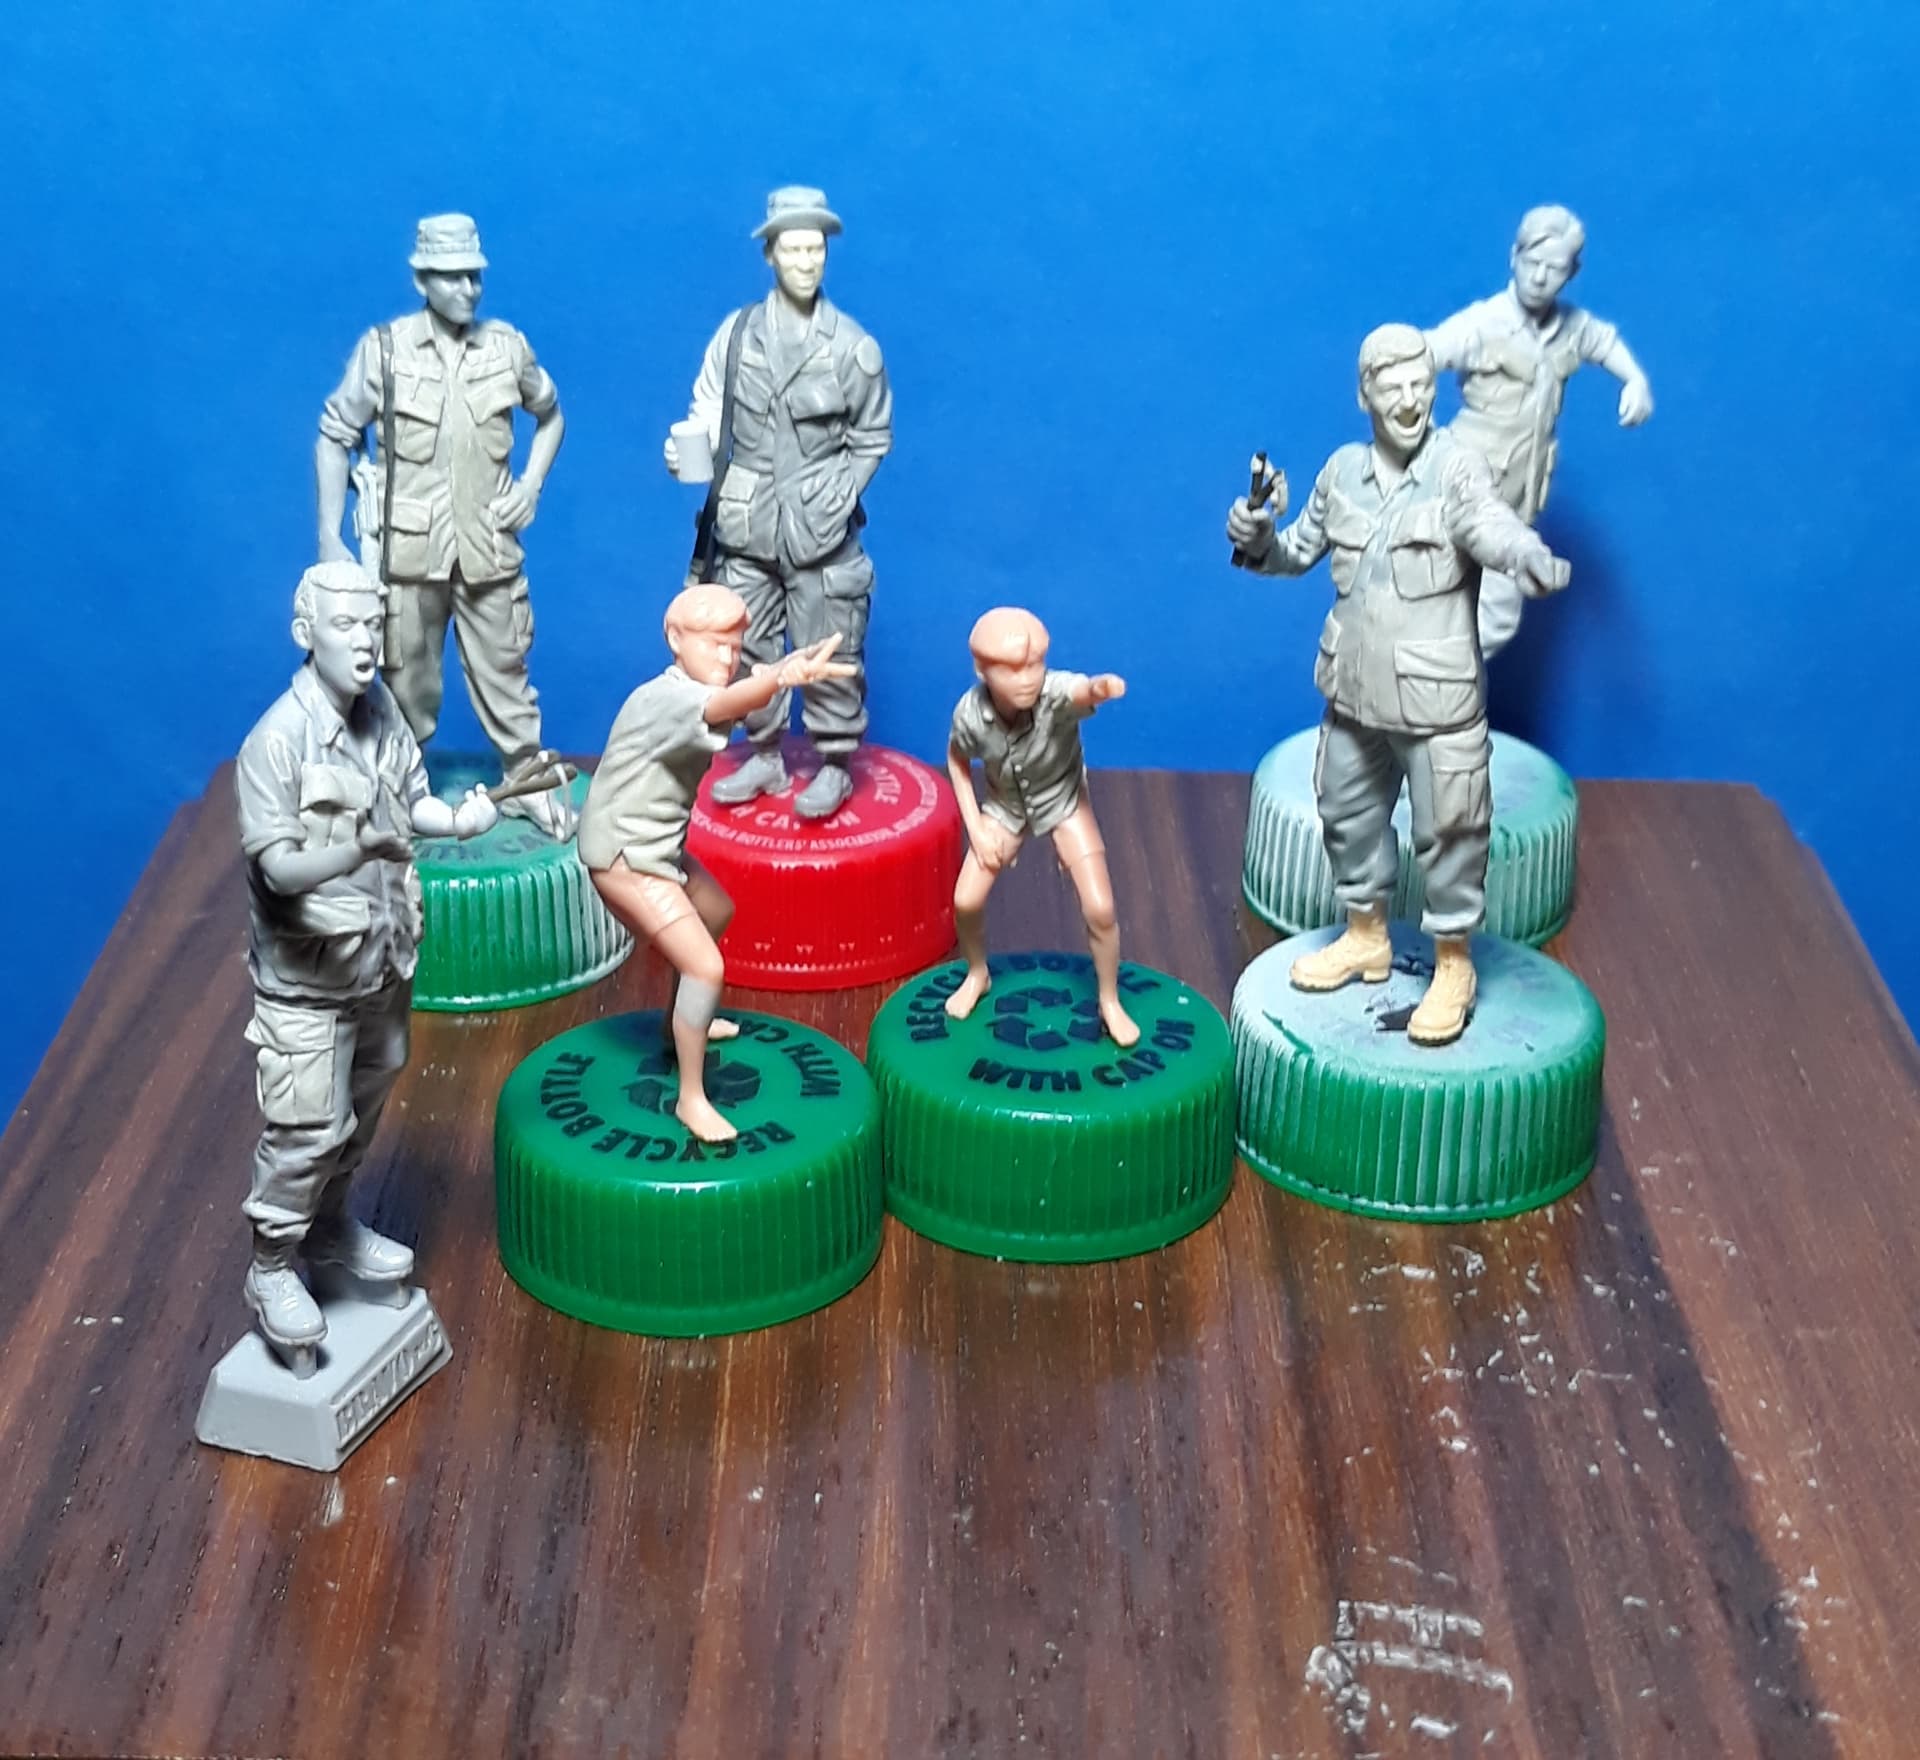
Here is a figure conversion that will go with the group of figures involved in target practice with slingshots. The figure just missed a can being used as a target and is expressing his astonishment of missing something at such a close distance. The base figure is from Bravo 6’s “Rubber Lady” kit. I drilled out the neck and scraped off the original pockets and sculpted new ones so they would be the same size and will be compatible with the uniforms of the other figures. I selected a head from Hornet and sculpted hair on it. The right arm and hand are from Royal Models and the left arm is from Bravo 6. The slingshot is made from a shovel handle with the sling made from Magic Sculpt.
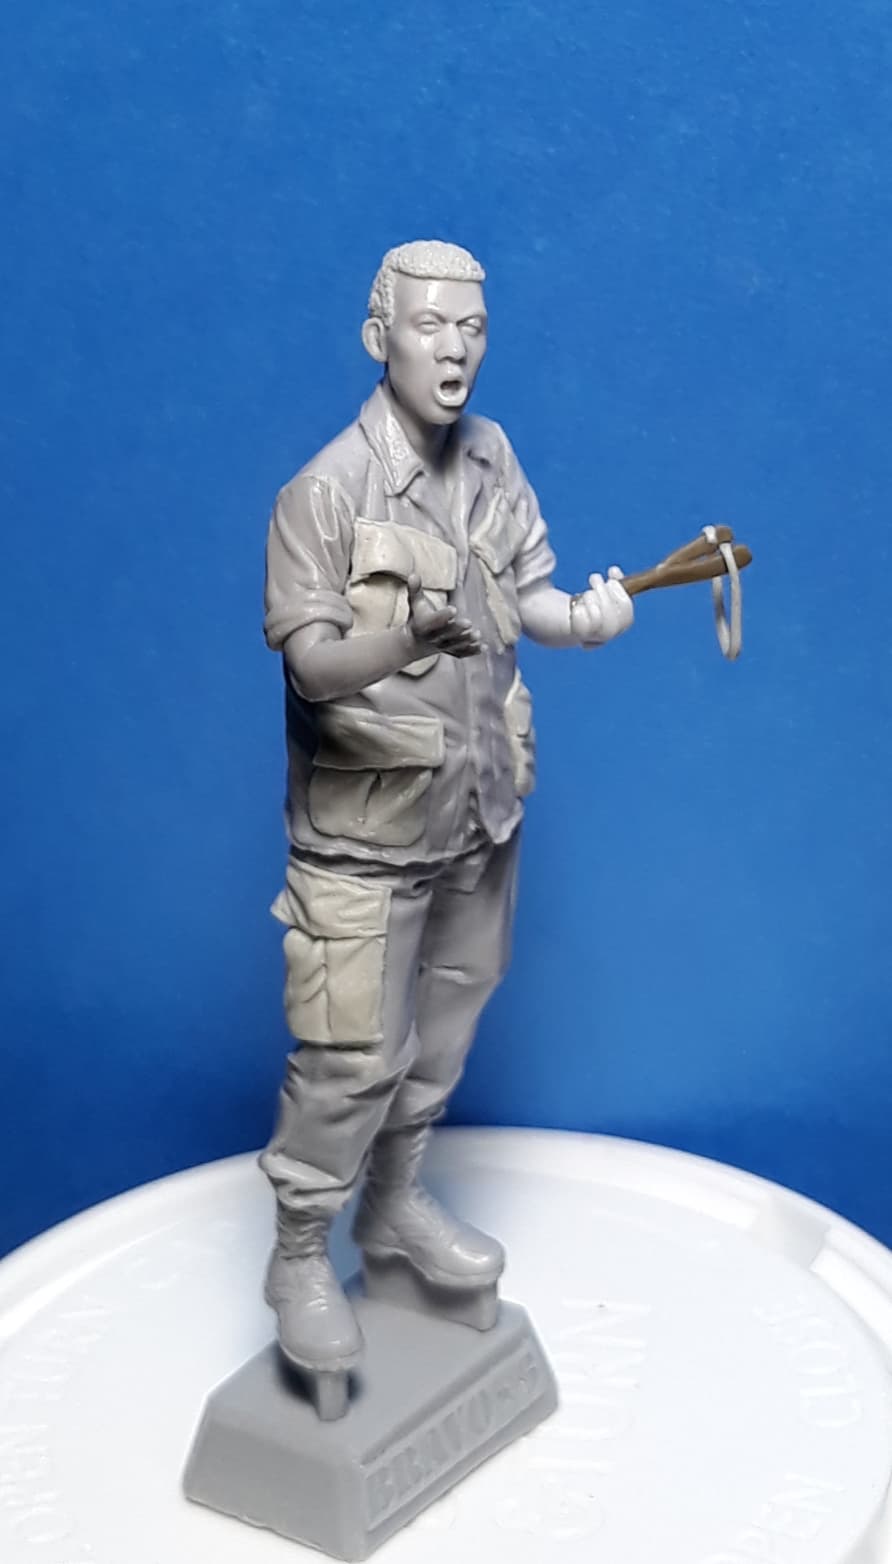
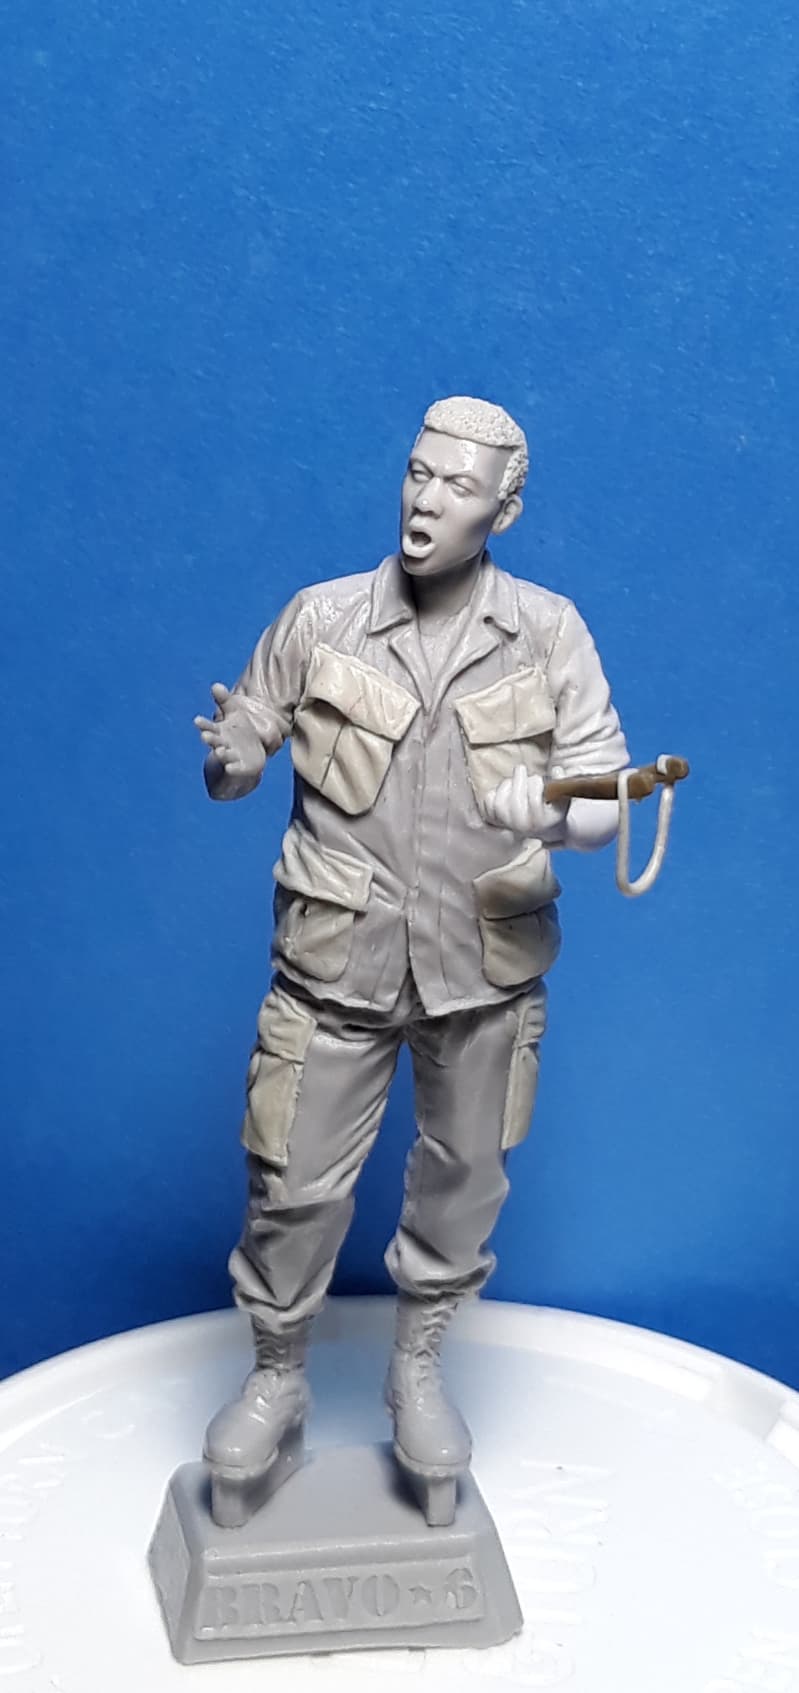
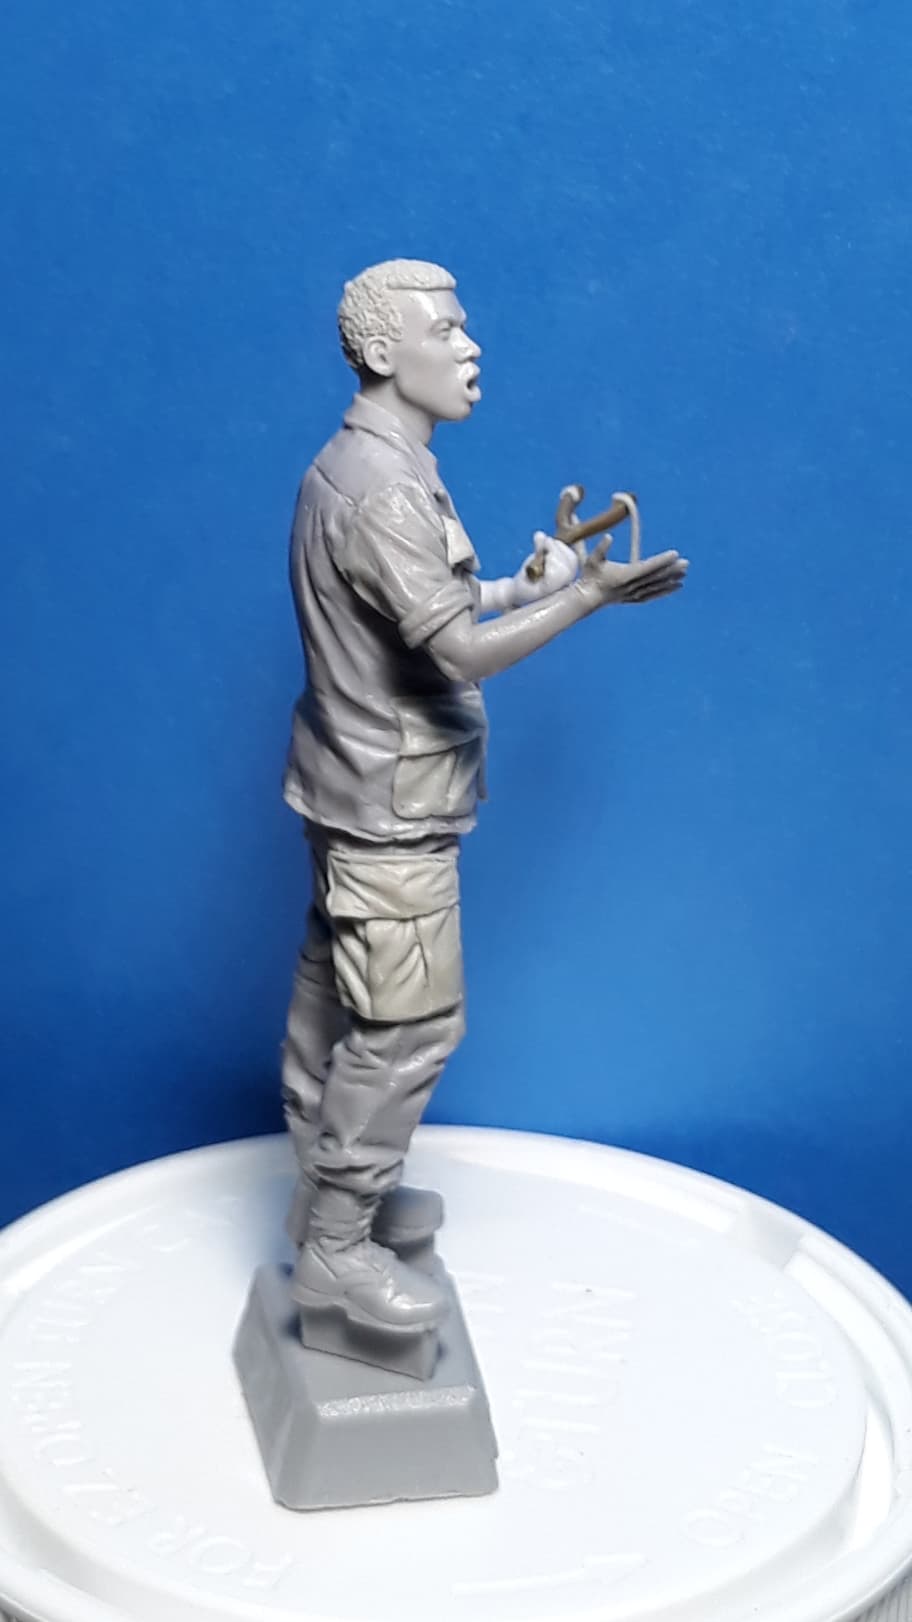

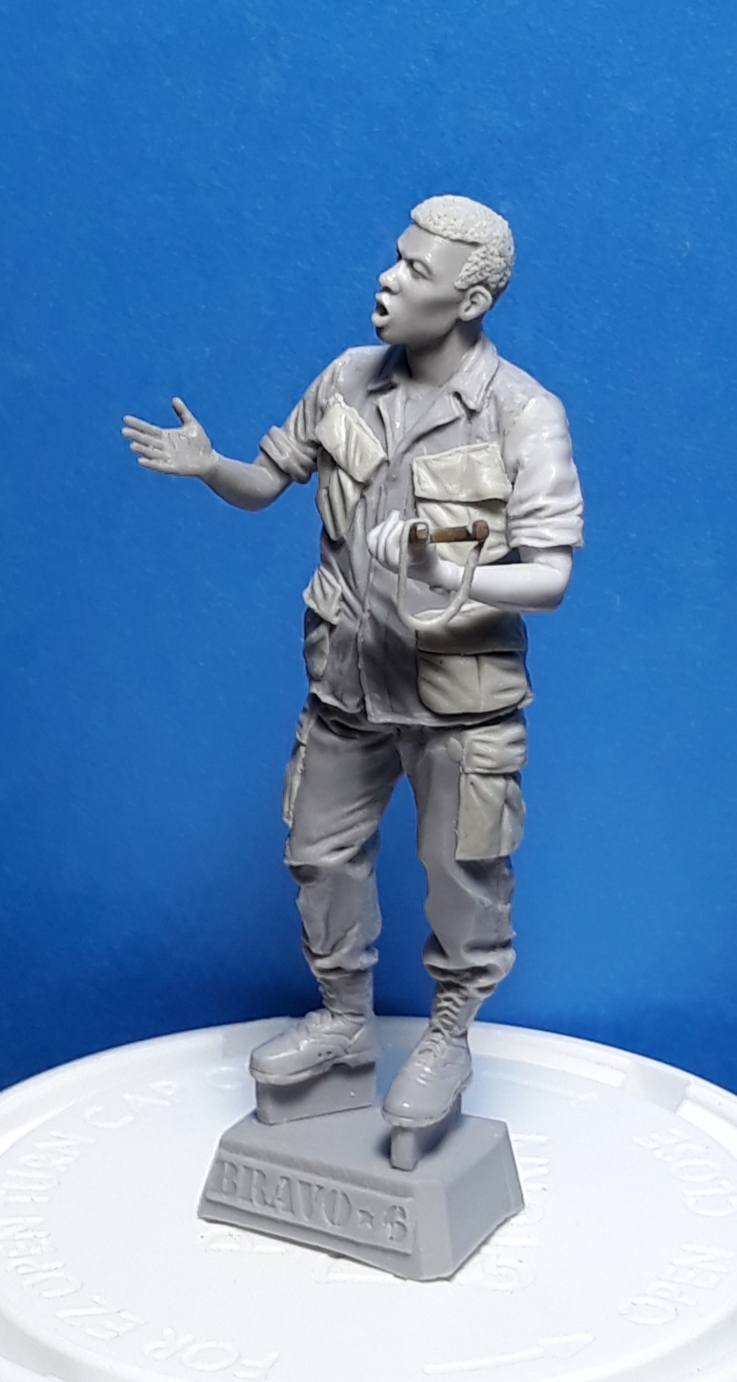

And this is pretty much how he will fit in with this group of figures. I think I may handle this MEDCAP project much like I did my “Shopping in Long Thanh” project - break it down into several smaller vignettes that when displayed together can be a larger scene and that will be easier to transport to shows
Thanks for looking.
Cheers,
James
9 Likes
Brilliant figure work James !!!
2 Likes
Great work on the Nam BDU’s, and the kids, excellent!
2 Likes
Thanks, Glenn.
1 Like
Thanks, Bro. There are several more kids. Most are well animated, so if I have to do anything to them it would only involve replacing or changing the position of a head or adding clothing. Hopefully I will have time to start painting soon.
3 Likes