I love this scheme. Looks awesome ![]()
![]()
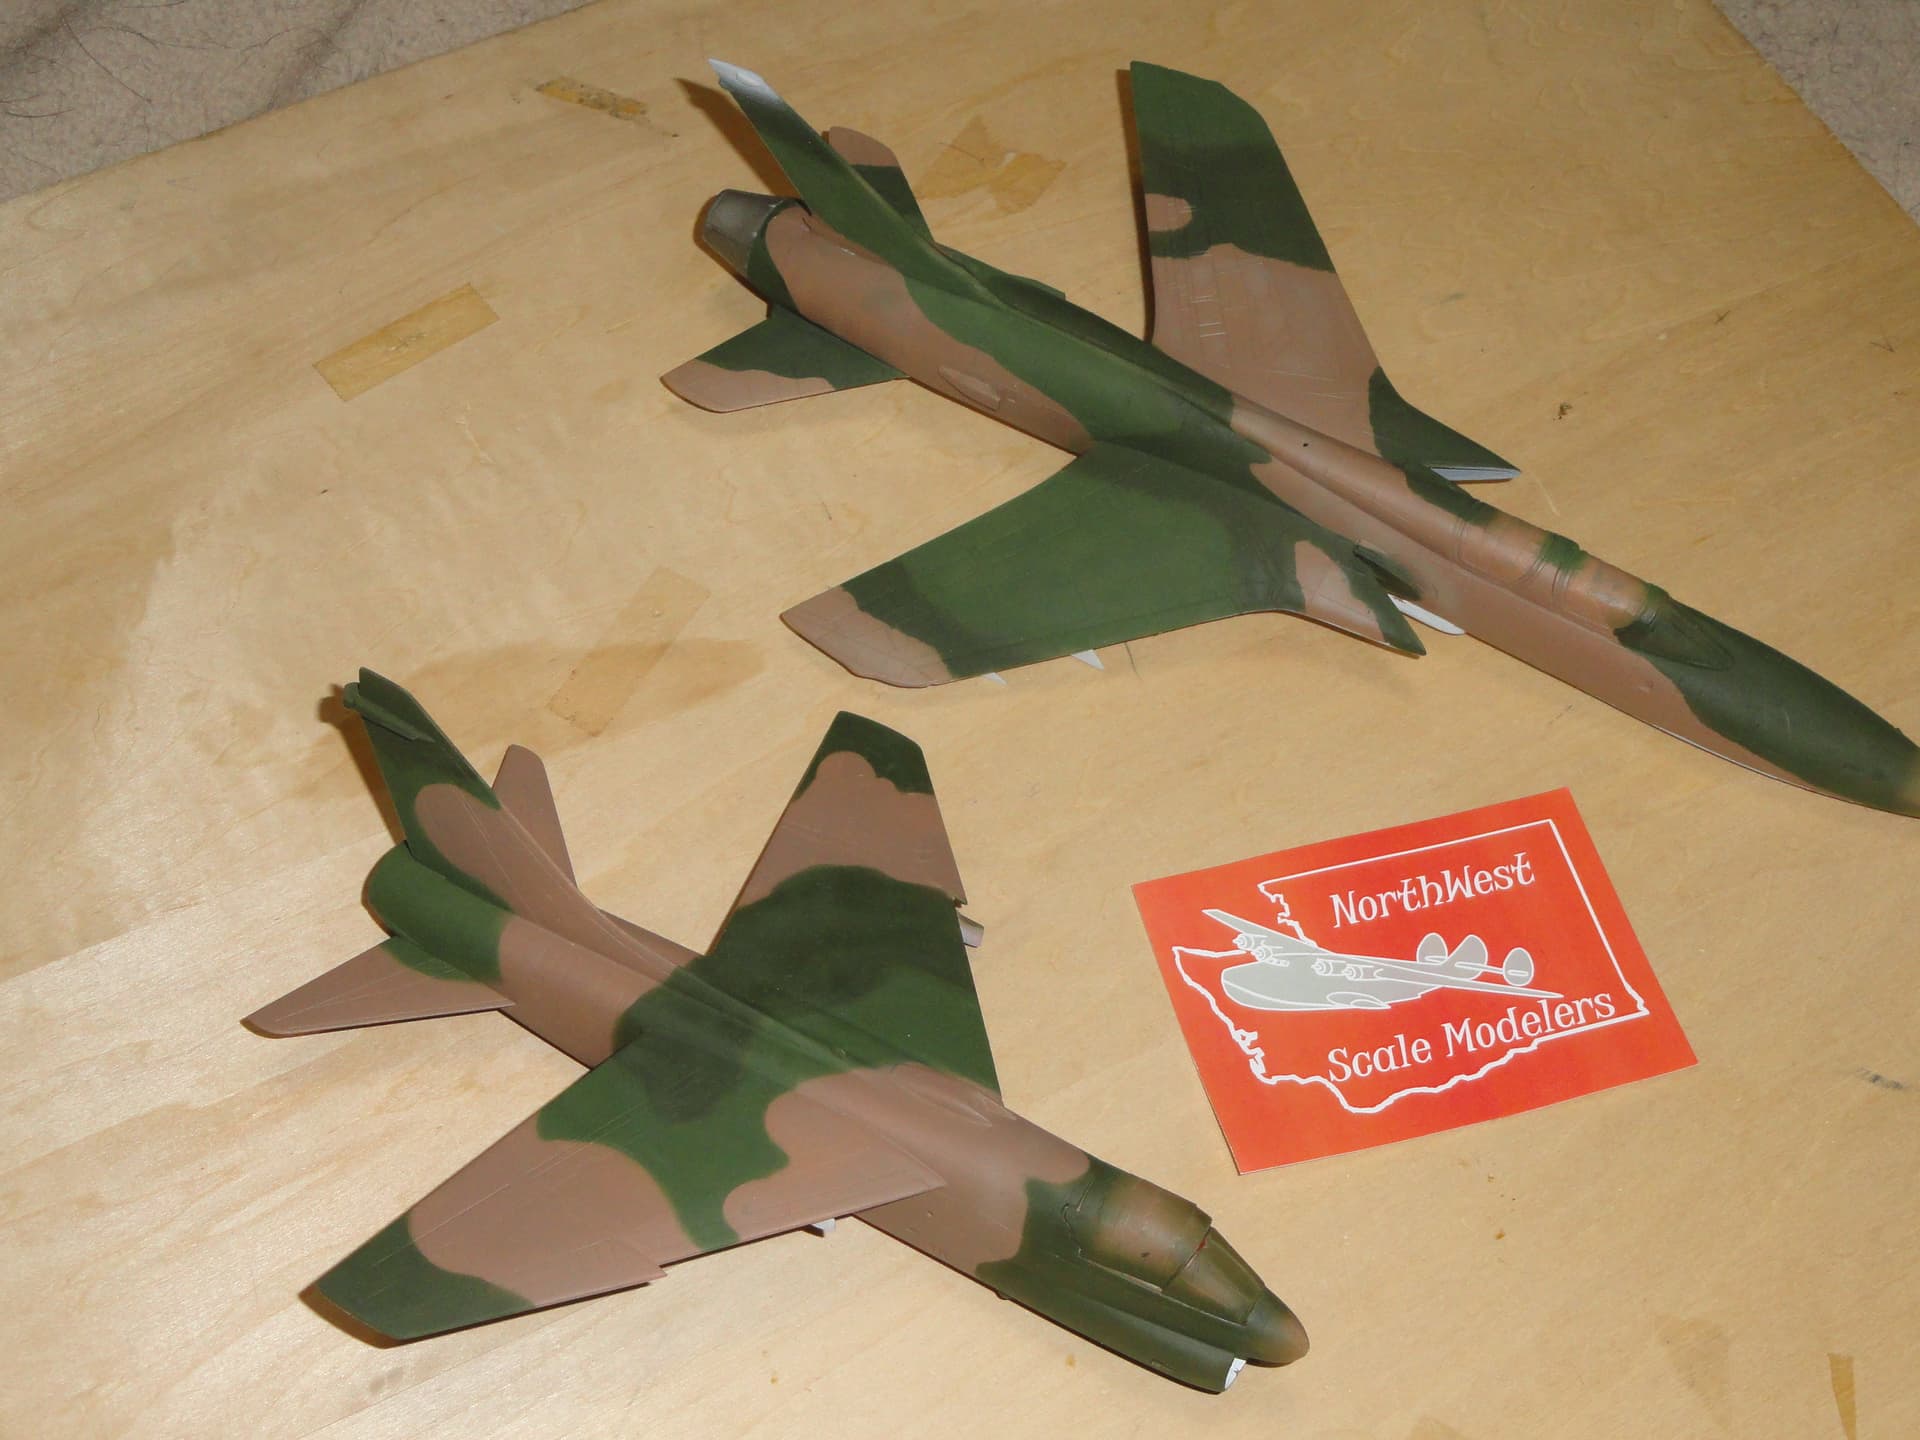
OK, for the first time in a couple of tries, I’m not hoping to finish the Monogram 1/72 F8F-1 I started too many years ago. This time it’s the Airfix F-105G wild Weasel that I started even more years ago. Just year, I got the camo on. Now I need to paint the fiddly bits, get the decals on and hang all the fiddly bits. Easy, right? ![]()
3 Likes
Great finish on Stearman, @Spitfire
@md72 nice choice, I bet I have some unfinished A7 also somewhere in my stash … seems like sharing same camo pattern ![]() Good luck with fiddly btis
Good luck with fiddly btis ![]()
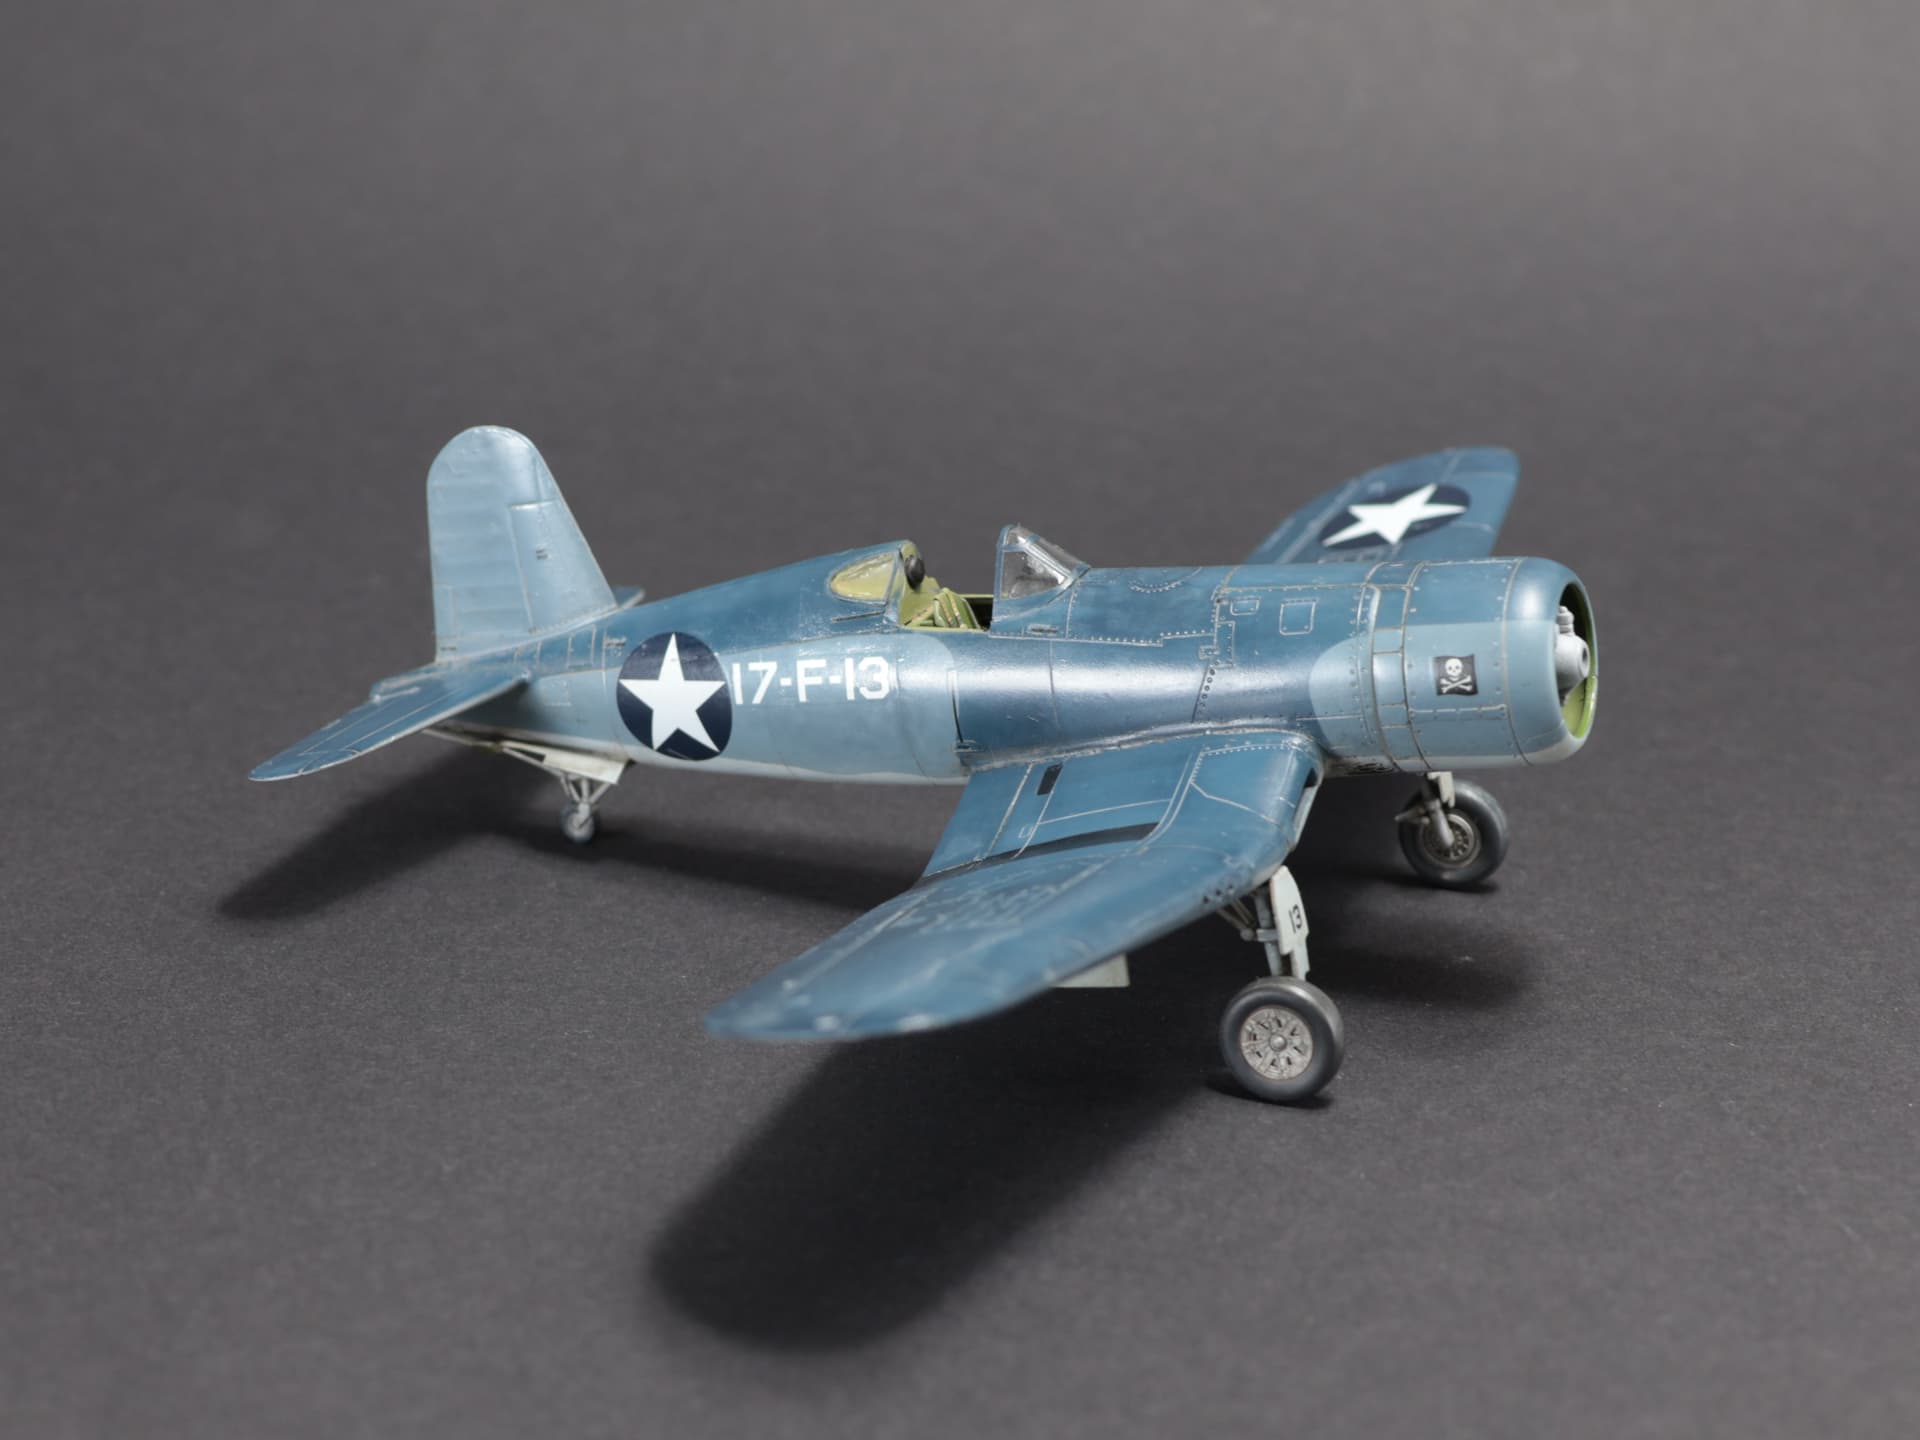
During weekend I manged to push forward F4. Cleaned paint here and there, but I decided not to wash, just sanded down areas with overspray or badly covered). Later resprayed with black Tamiya XF-1 to get it all ![]() Painted black
Painted black![]() . Made some marbling and later covered first camo paint to bottom of plane - Hataka Orange Insignia White. So here’s the current condition:
. Made some marbling and later covered first camo paint to bottom of plane - Hataka Orange Insignia White. So here’s the current condition:

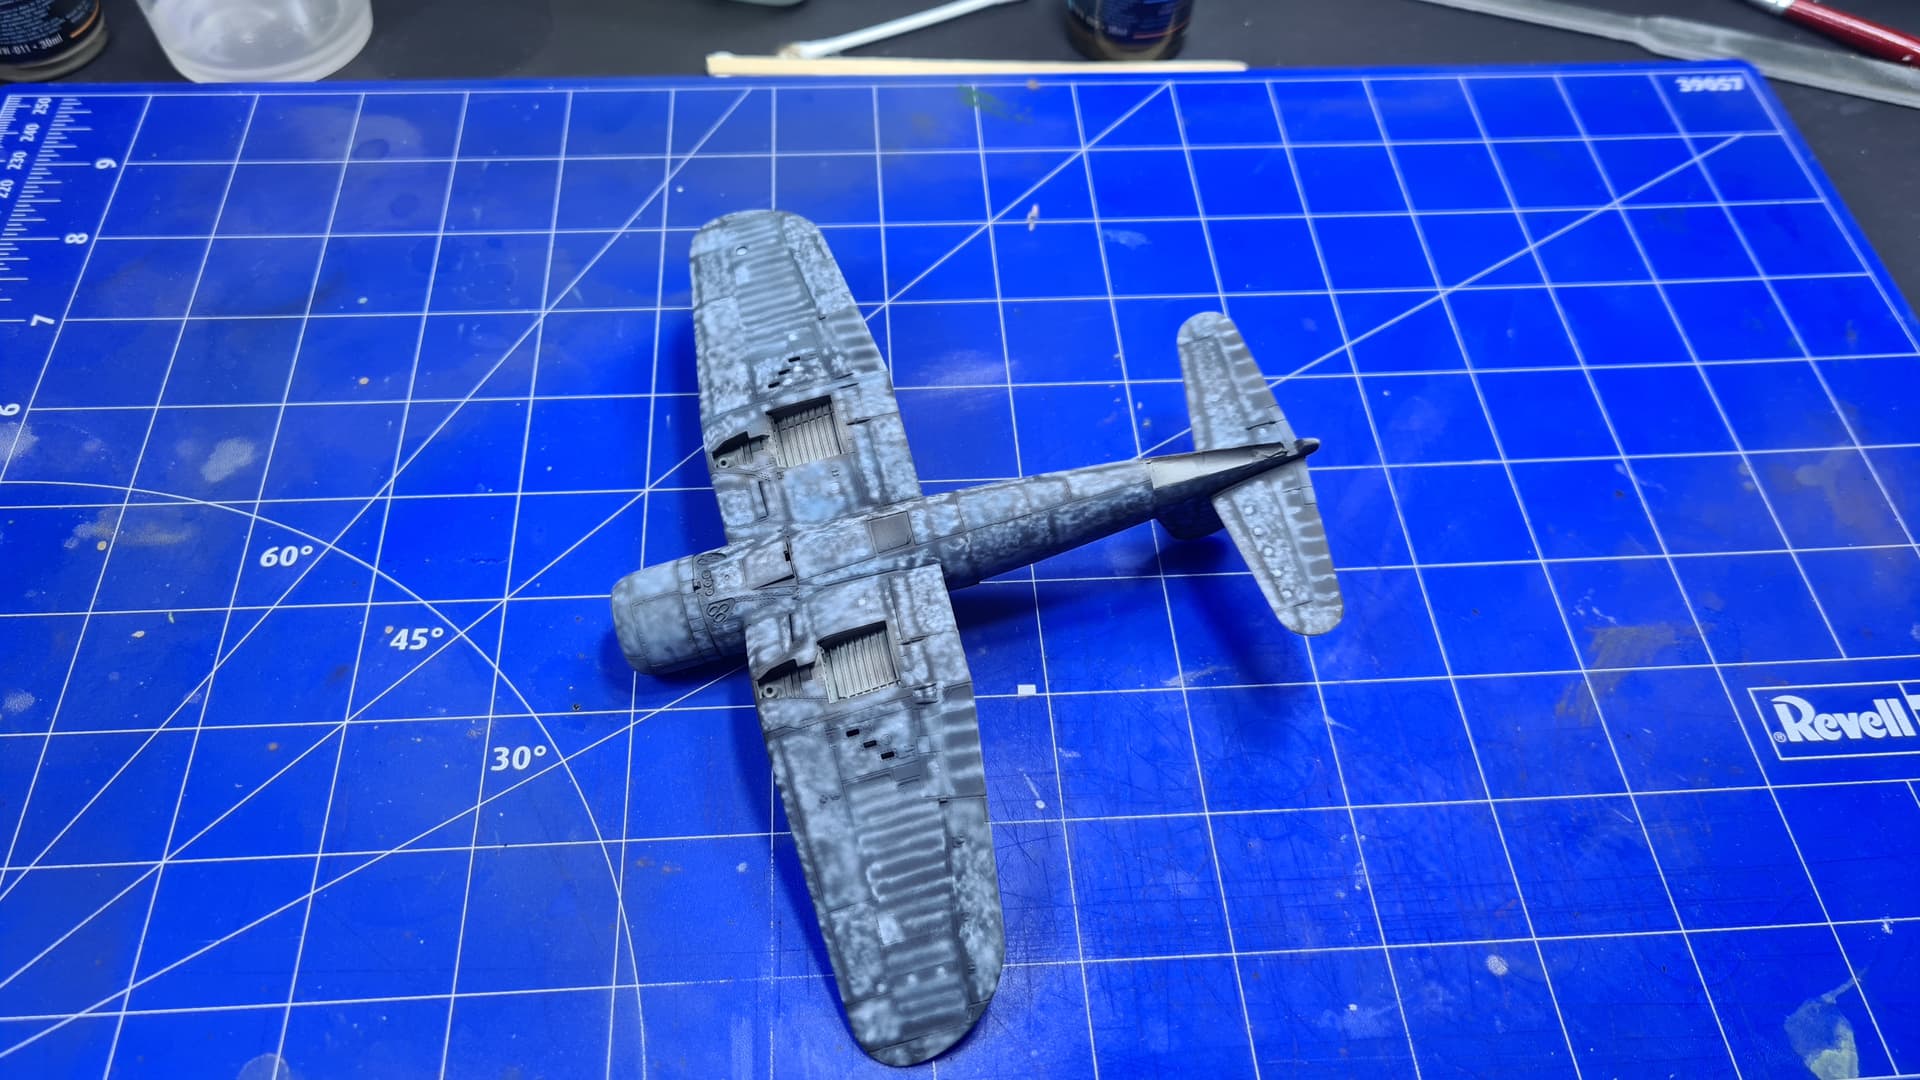

Next step - masking of white and play with first blue paint. I’m going to try Hataka’s paints directly from the bottle (maybe slighthly lightened) I wonder if they’re any close to my imagination of US Navy colours ![]()
2 Likes
Spitfire, nice finish on the Stearman, it looks like you might be ready to attempt some rigging on your next one!
Mark, was hoping for the Bearcat, but, nice choices!
Radek, I really like the mottling, it looks good so far, have fun with the paint. I’ve heard of it, though no experience, is it any good?
Soon as I download my pics, I’ll post my Queen (one of them!). Have fun modeling
Thanks. Yes that’s my one regret on this build.
Will probably try it on the Airfix Tiger Moth or the Amodel Gypsy Moth.
1 Like
Cool! I’m gonna give it a whirl on my Great War Build, not sure what, but it’s going to rigged. Gotta keep building my skill sets!
I’m using their Orange series (cellulose lacquers) for quite some time, @john41492 and I’m quite happy with them. They required some practice because they need to be sprayed in thin layers as it’s super easy to overspray them, but overall they’re strong and have quite nice colours finishes.
But … their dark sea blue shade was somehow not fitting the pattern for me , so I added few drops of plain blue & few drops of white to get this result:
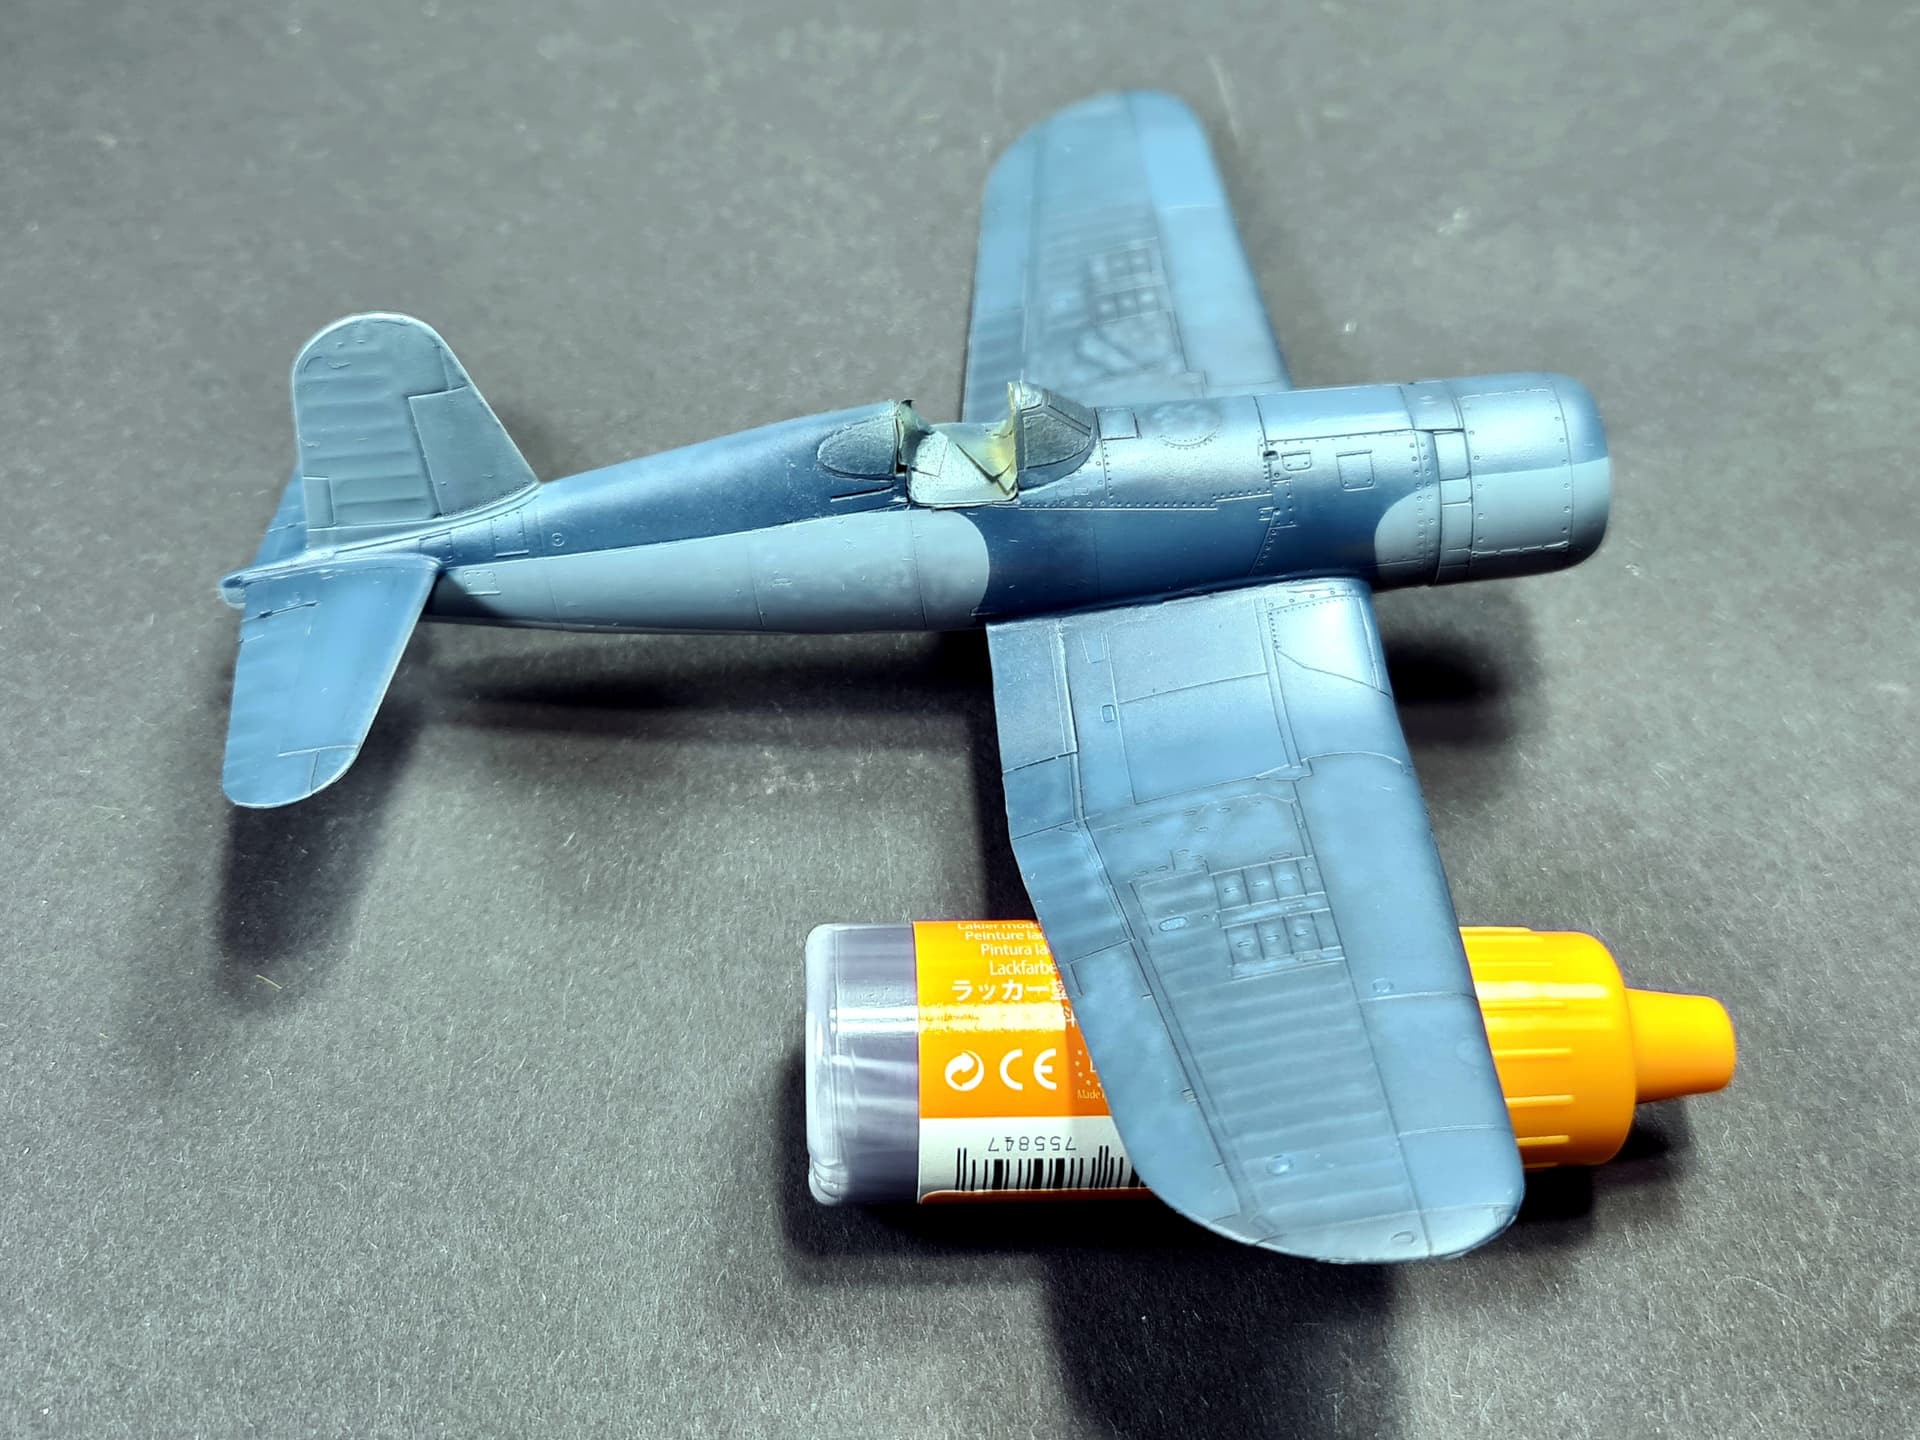
Considering all weathering and stuff that’s still ahead I think that the blue is too dark. Next time I will try to do better mottling, more subtle, more into gray scale rather than black, so I can use less light coats of lighter shades.
So it’s time for clear coat and decals, hopefully by end of weekend ![]()
3 Likes
Looks like good progress all around and some nice looking builds. Looking forward to more updates during this weekend ![]()
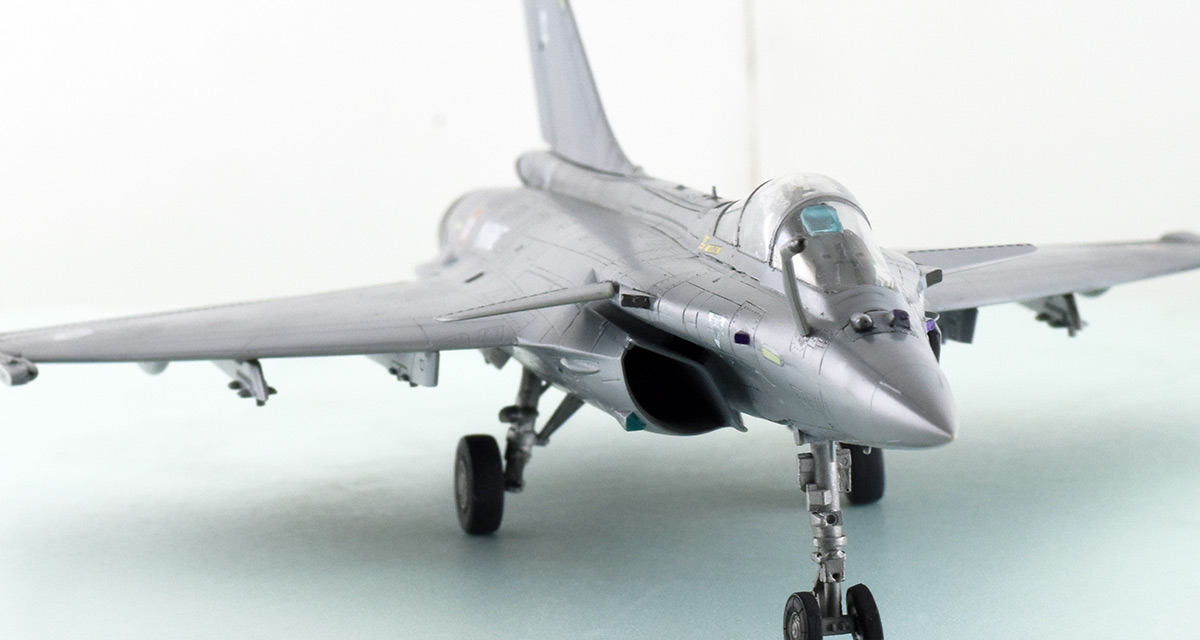
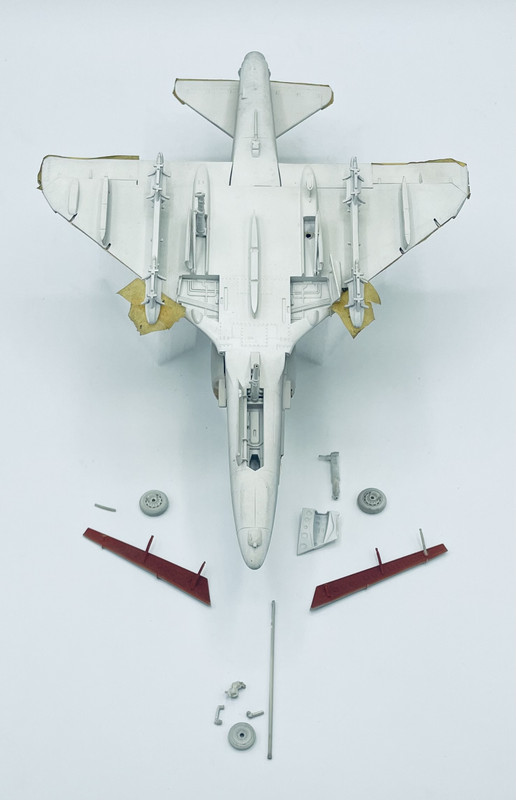
My Rafale build is progressing very slow. I managed to strip only the top section and managed to keep the under carriage area intact. I used IPA and cleaned using q tip and paper towel. It worked great.
This time I primed using Mr. Surfacer very thin and did a base coat…
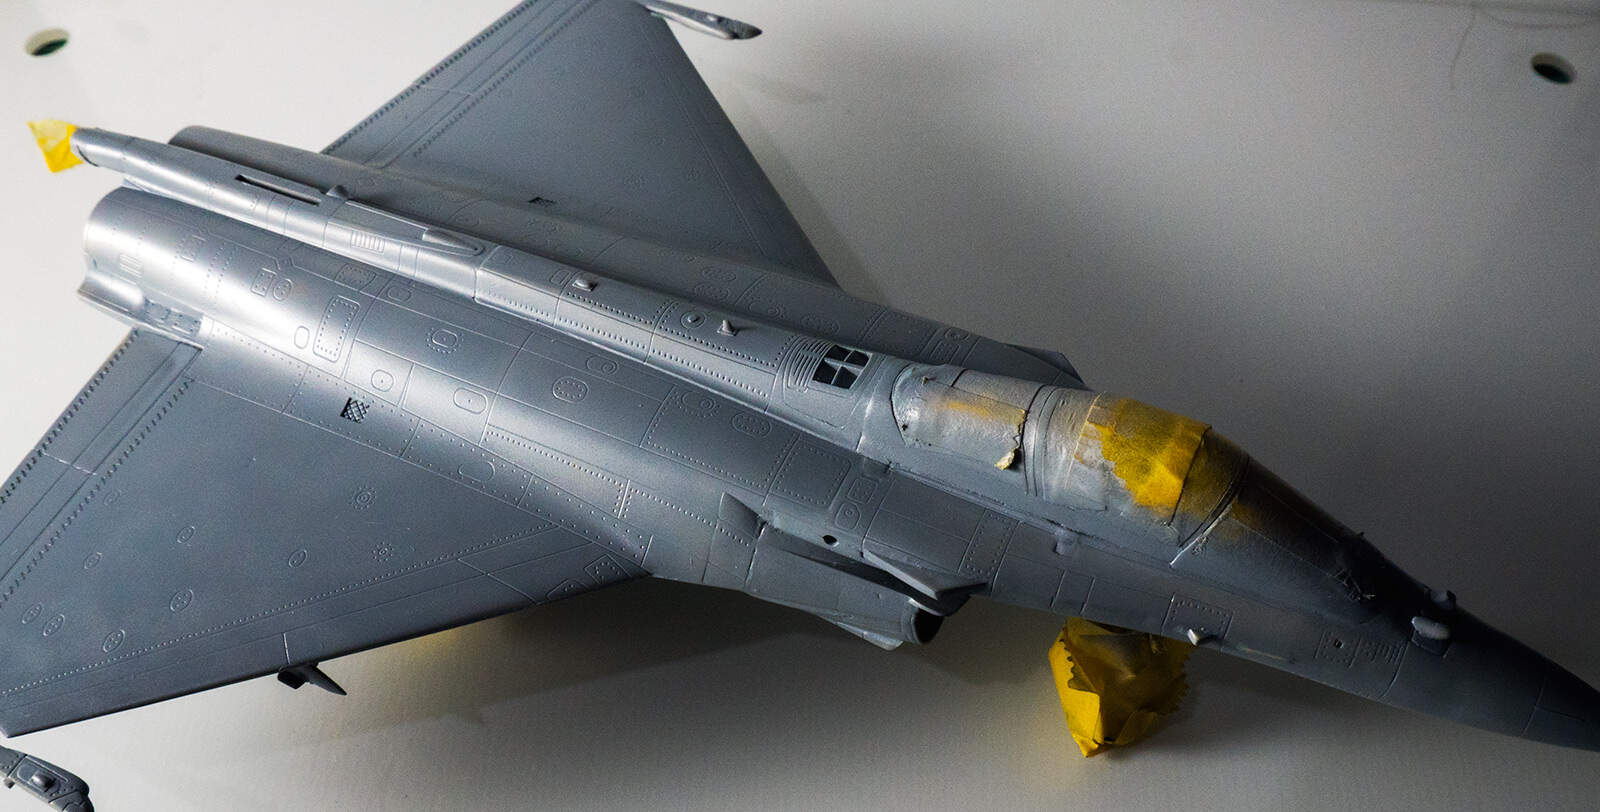
I am happy how this is progressing… No detail is lost and I am sure this model could be completed without much issue…
Thanks for looking and Have a Great Day
Mukund
4 Likes
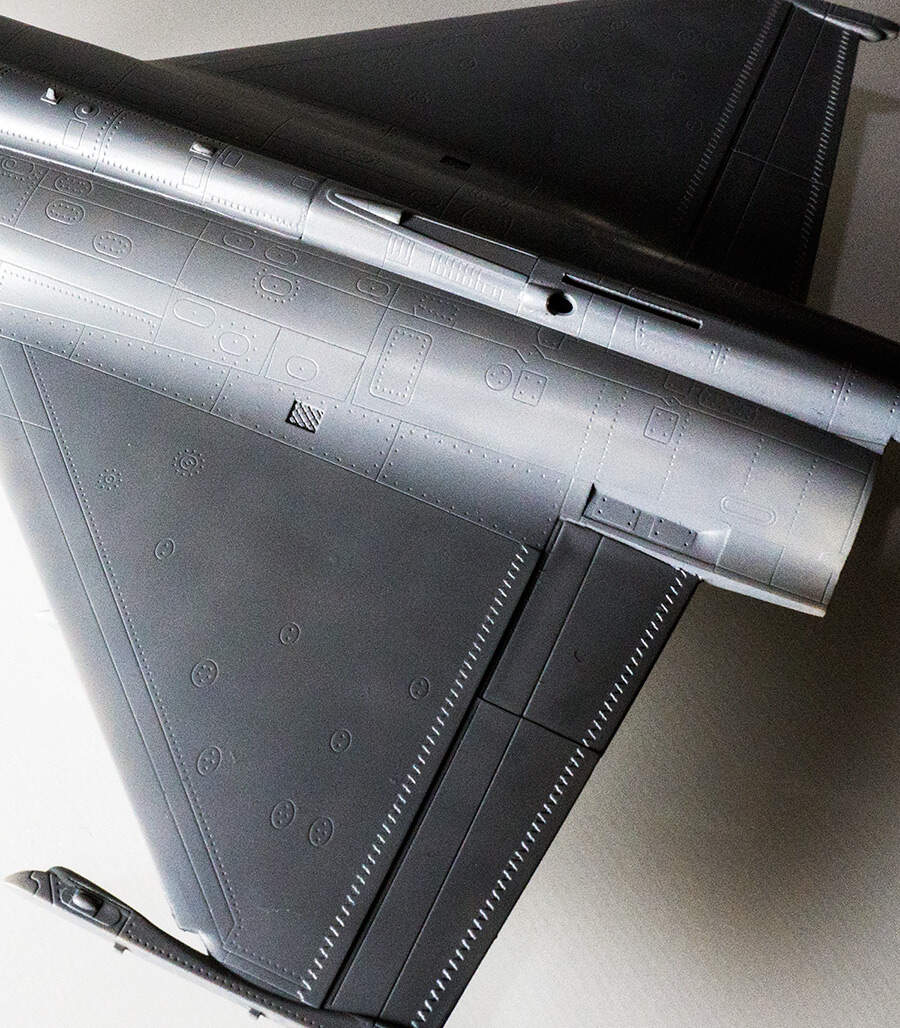
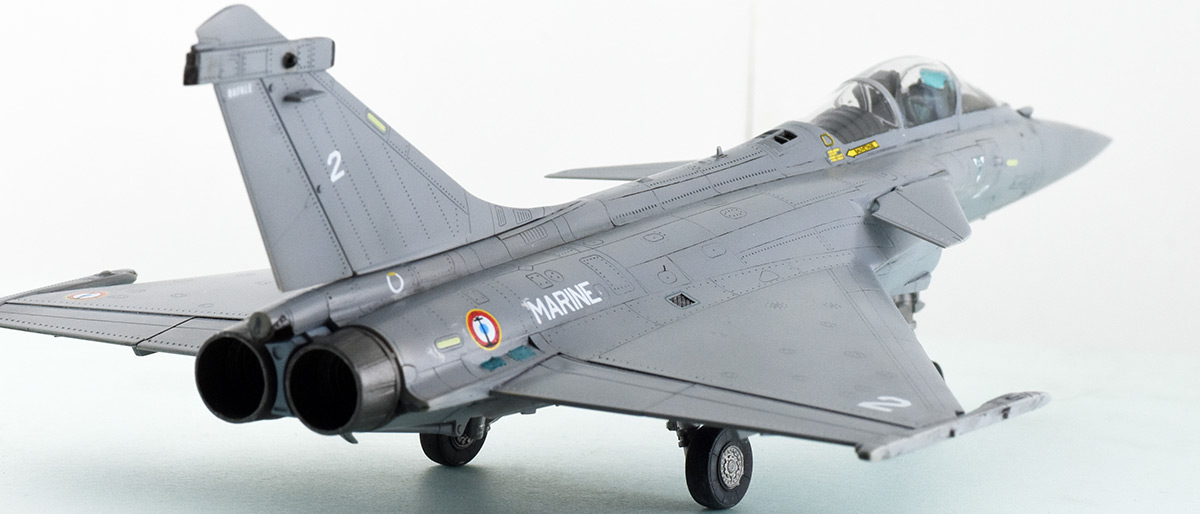
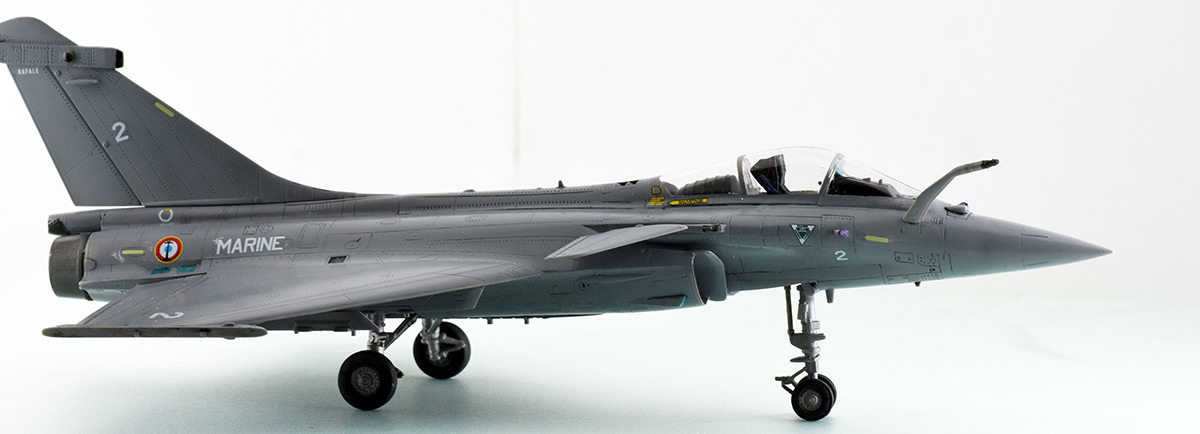
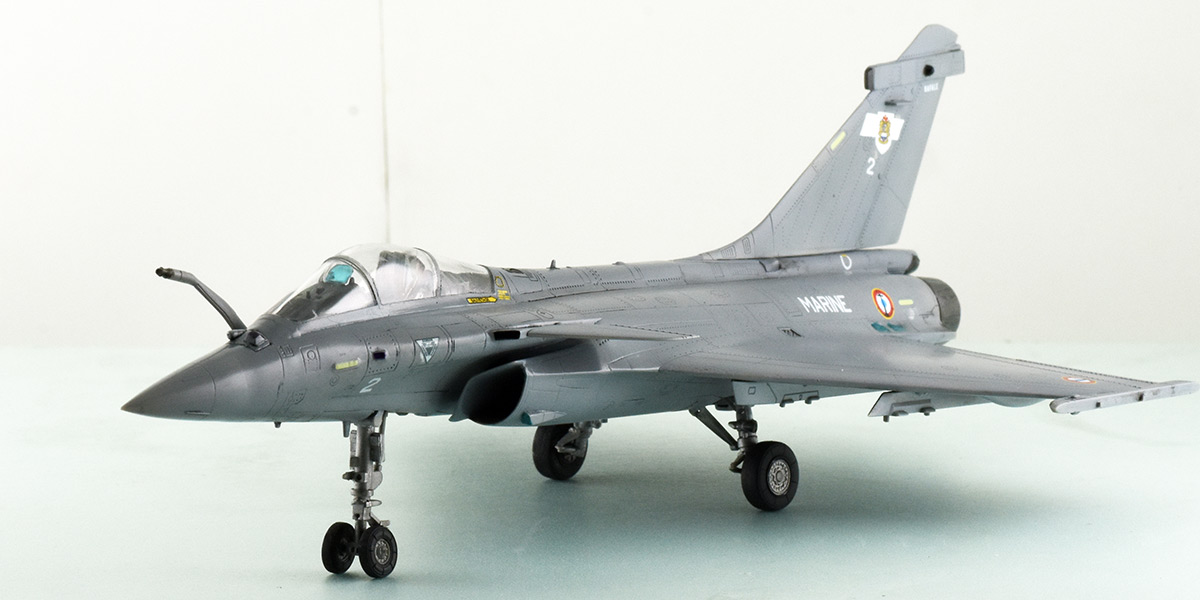
Hi Friends, A small work in-progress update… As mentioned earlier, I was trying to convert Rafale M into a C and realized that this requires much more work and replacement parts etc… So I am changing the plan to make it as a non-existing fictional representation and trying to learn in the process…
I printed my own decals that have not turned out well. Trying to use some old decals and just having fun… Below are some pictures taken… Identified hand-painting issues, glue smudges. Trying out some black glue that remains flexible etc… Canopy masking need to be improved and noticed seepage in one area…All the under-carriage doors are yet to be fixed…
None of the landing gear part are correct for marine version. Some of the sensors I tried to modify to C… Just using this as test bed… for my 1/48 Revell Rafale build that I am starting soon…
Please feel free to comment and let me know what you think and share similar experience if any… I just do not want to lose my Mojo so moving on so that I can concentrate on other builds…

Thanks for looking and Have a Great Day
Mukund
6 Likes
@Mukund Nice progress on Mirage, it looks very nice.
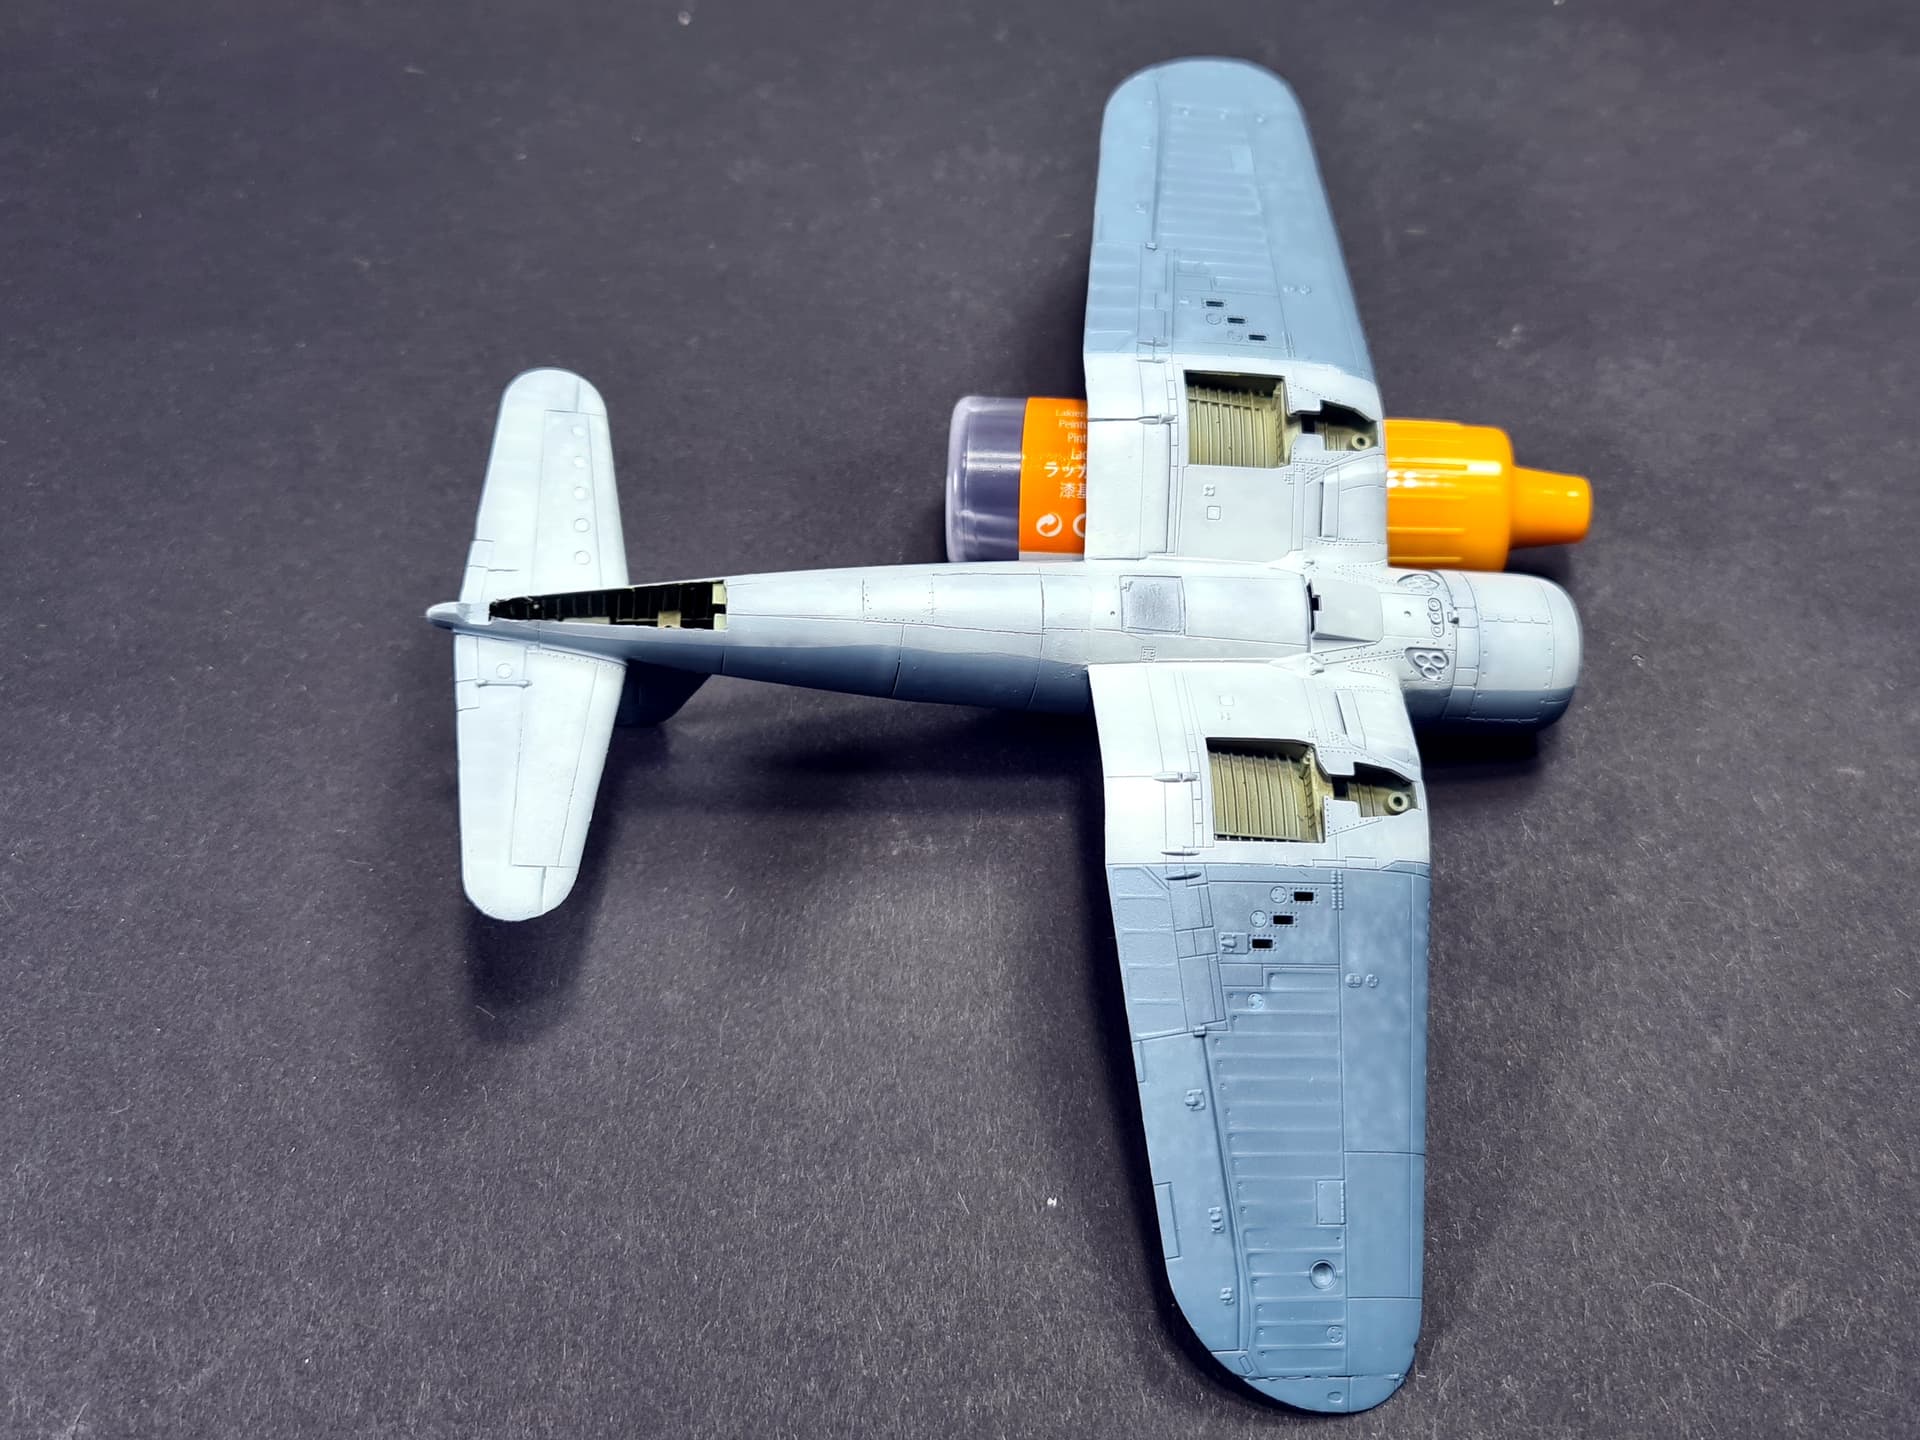
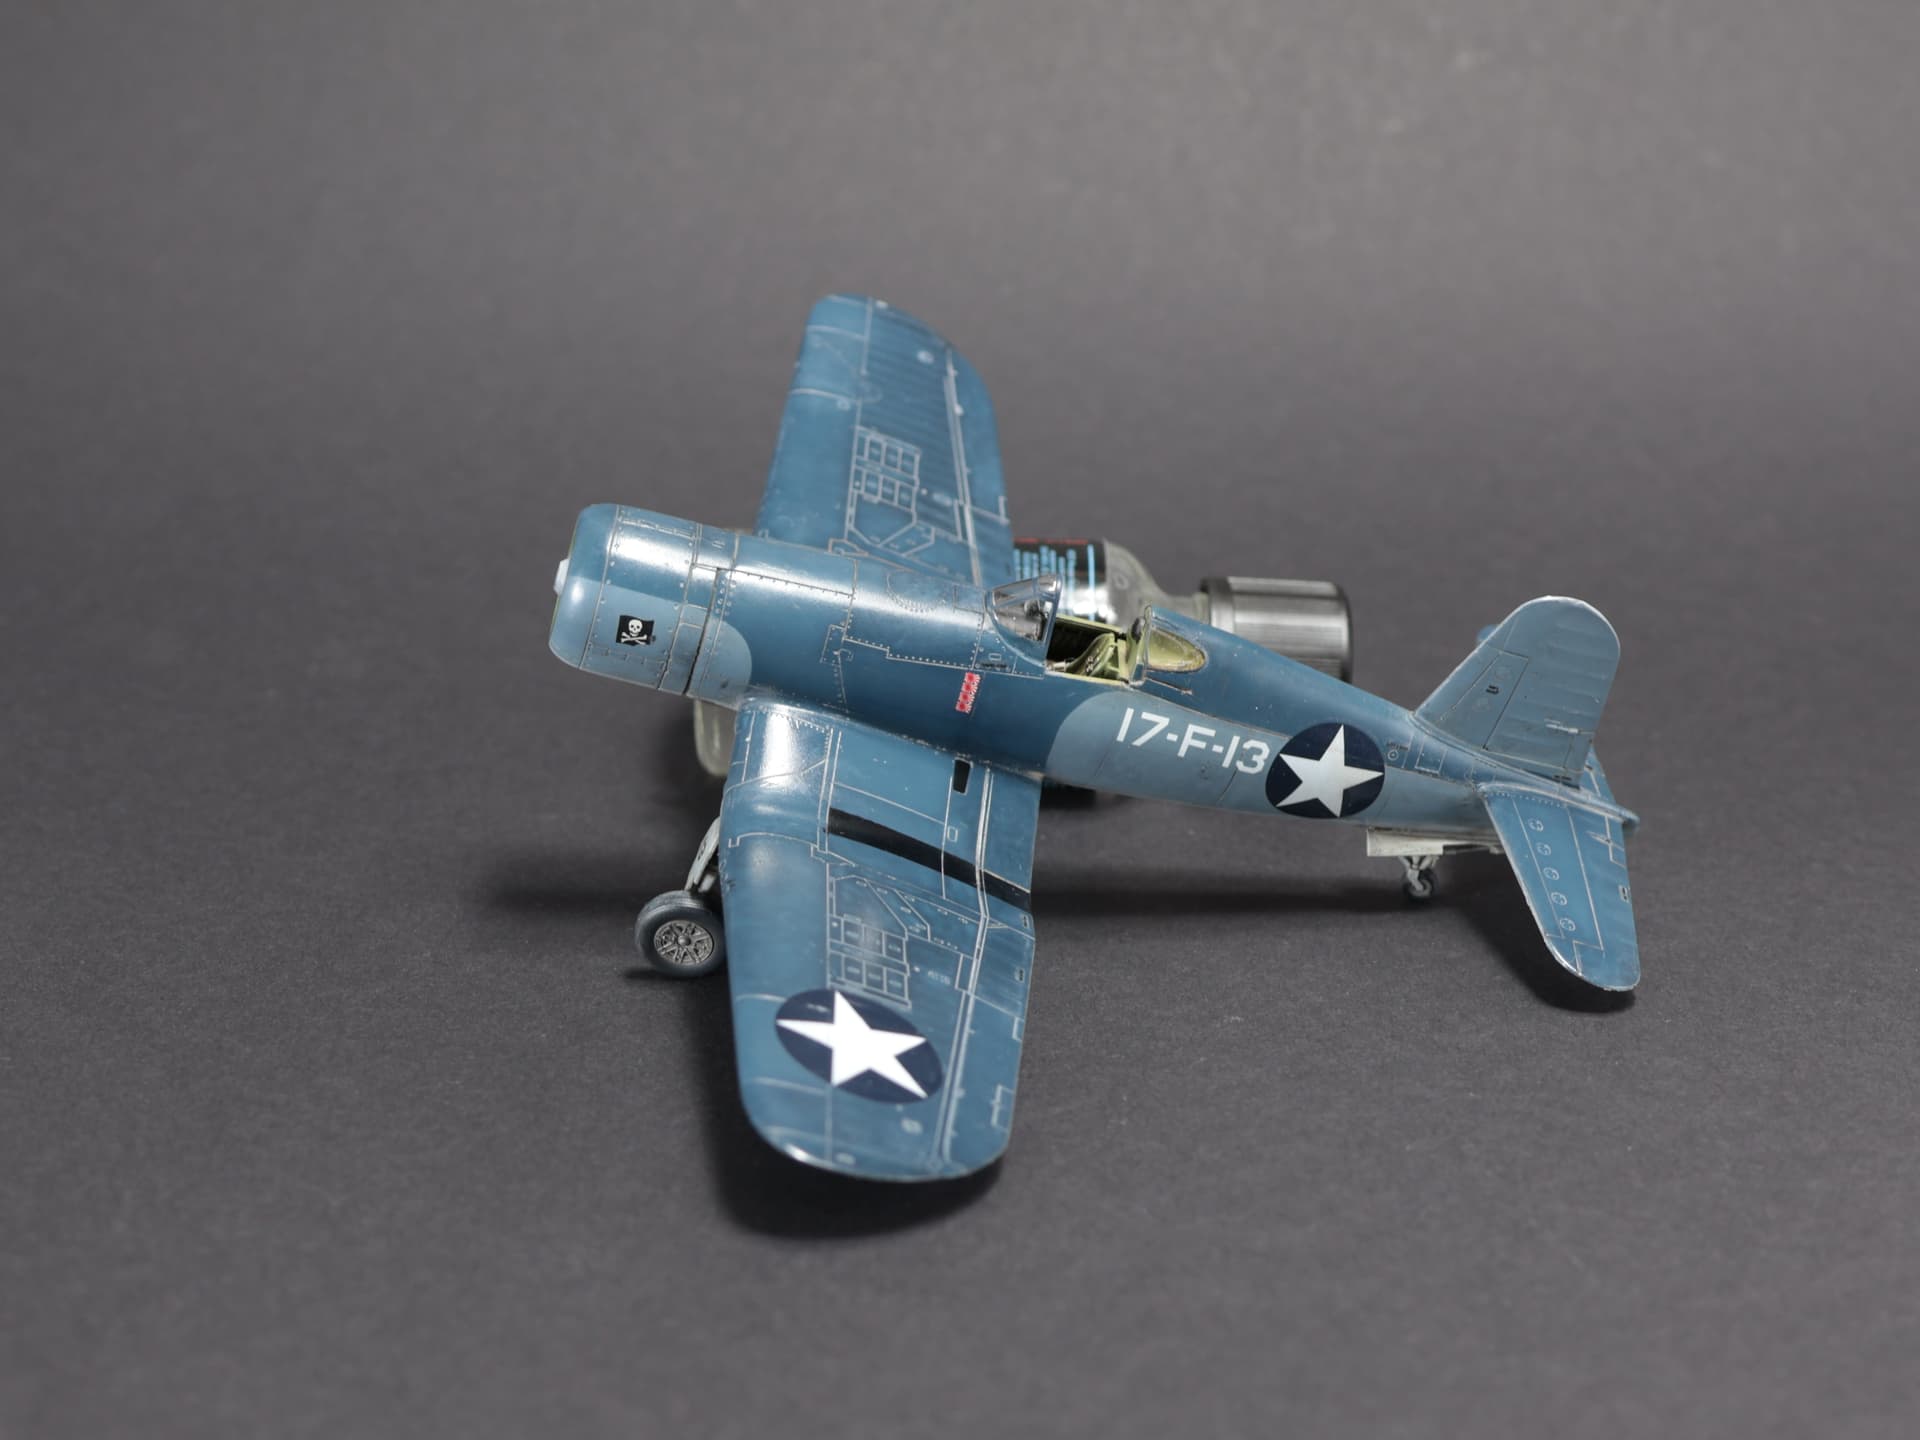
Almost there with my F4, after fighting with landing gear doors falling off (they’re all now superguled ![]() ) I’m pretty much few steps from finish. Decalling complete, panel washes (made from handmade oil concotion) complete.
) I’m pretty much few steps from finish. Decalling complete, panel washes (made from handmade oil concotion) complete.
I’ll wait a day or two, put matt varnish to secure and maybe add some finishing touches like small scratches (got AK weathering pencils recently, so would be nice to check how they work), fuel stains and engine soot. So hopefully Corsair will see finish line by end of the next week ![]()
4 Likes
Oh I’ve got several for this one… ![]()
2 Likes
Well, I missed the vote and official sign up, but I’ll show this project here…
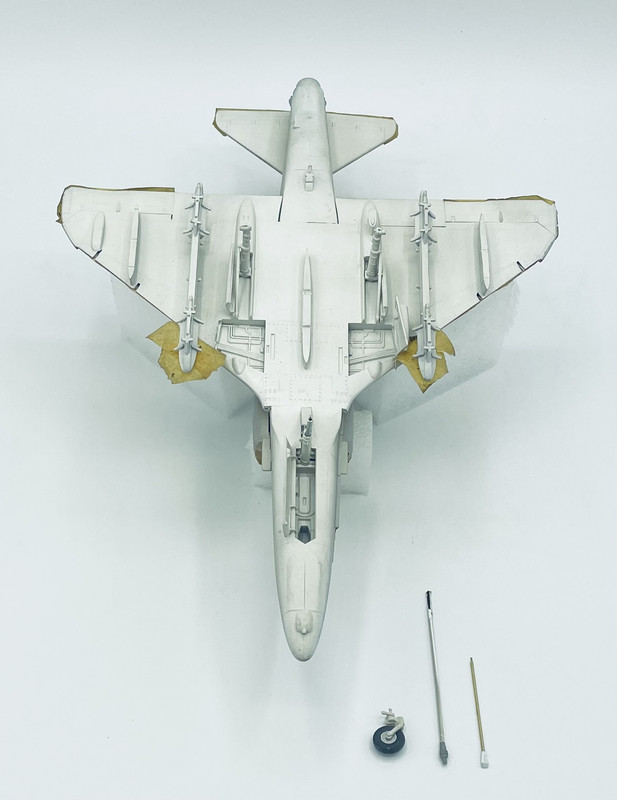
This is an old 1/48 ESCI A-4E that I started sometime prior to 2004 and had gotten to the painting stage when I was mobilized and deployed. During my time away, the build was damaged to where it could not be completed upon my return. The front landing gear strut had snapped and the nose gear fork broken, the left side main gear strut had broken off, the slat extension struts had broken off and a couple of those disappeared, the refueling probe had broken off and connecting tip disappeared, and half of the tailhook had broken off and been lost…
In the years since then, I had acquired new tools, skills, and learned how to repair such damages…
Today I fixed up the nose gear fork, but ended up doing extra work with the strut using brass and aluminum rod & tubing
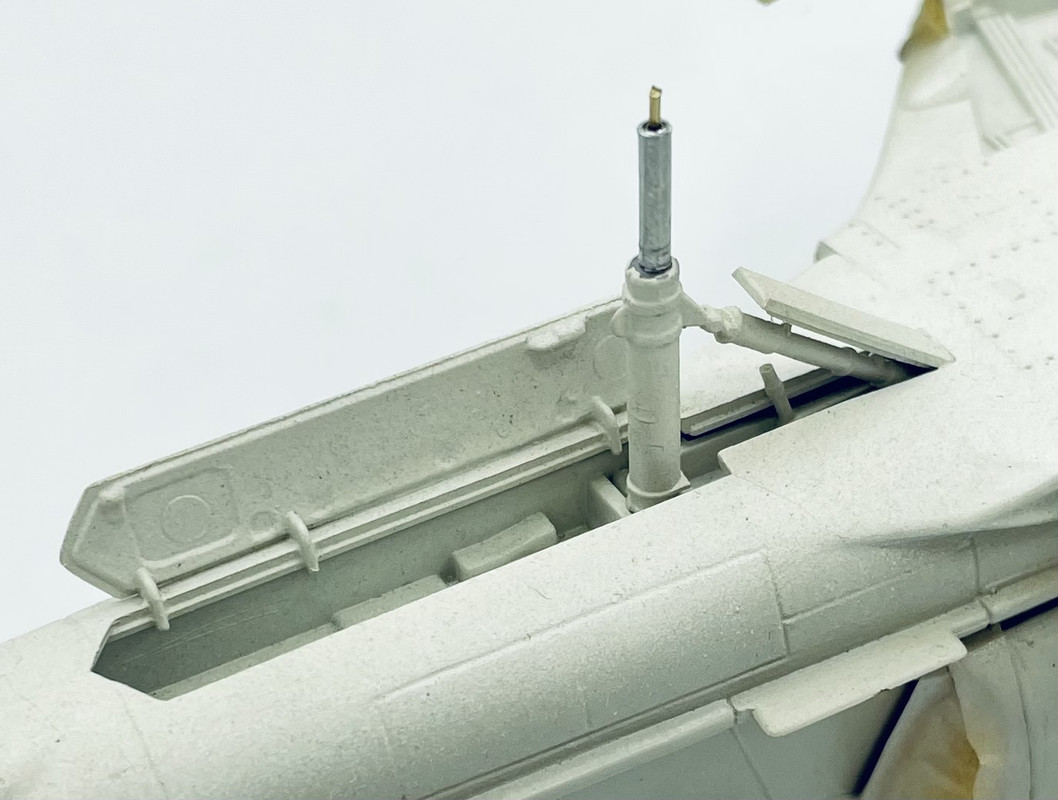
I also scratch built a new tailhook, and made up the refueling probe using a blend of old parts and some from my spares bin
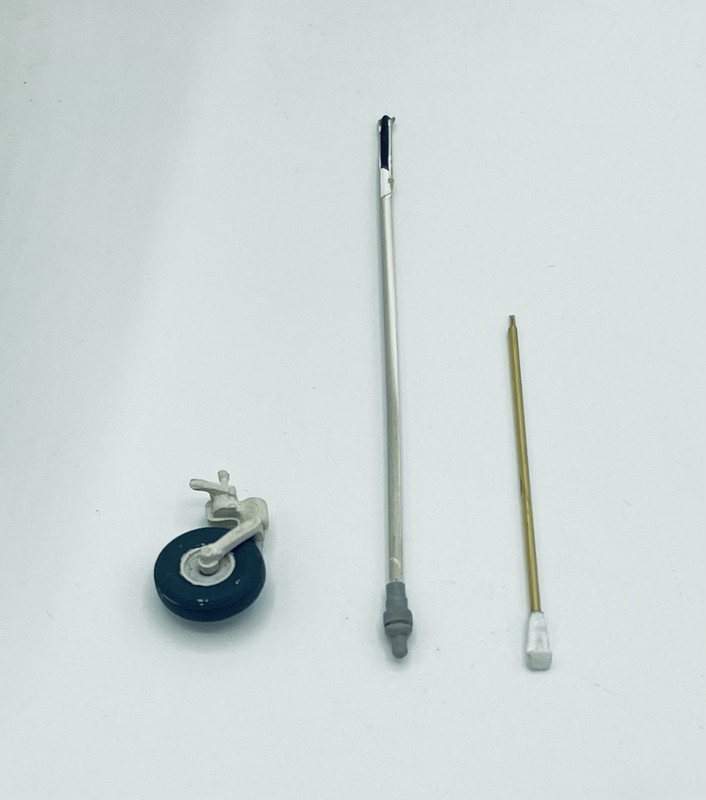
So now, it’s almost to the point that it was before it was damaged…
More to come over the next week or two….
6 Likes
This is kinda where I left off on my Tamiya F-4 and will complete it for this campaign. Or at least that’s what I intend to do…

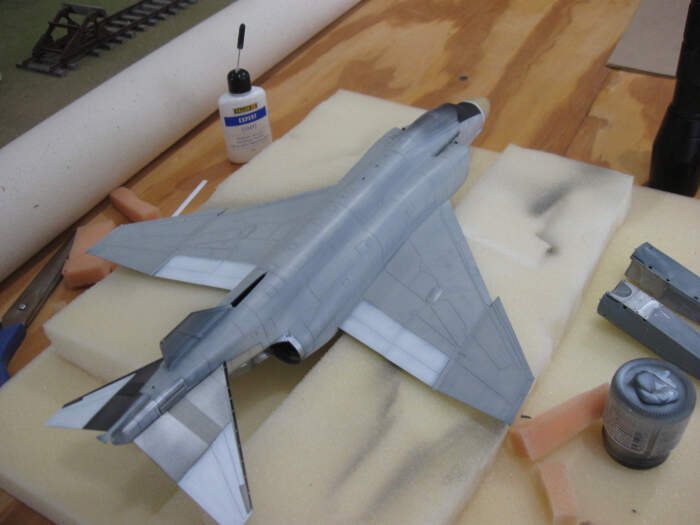
The tail is also painted. I need to do some underwing bits and then it will be ready for gloss and a …load of decals.
3 Likes
Now ready for decals and decals, and more decals…

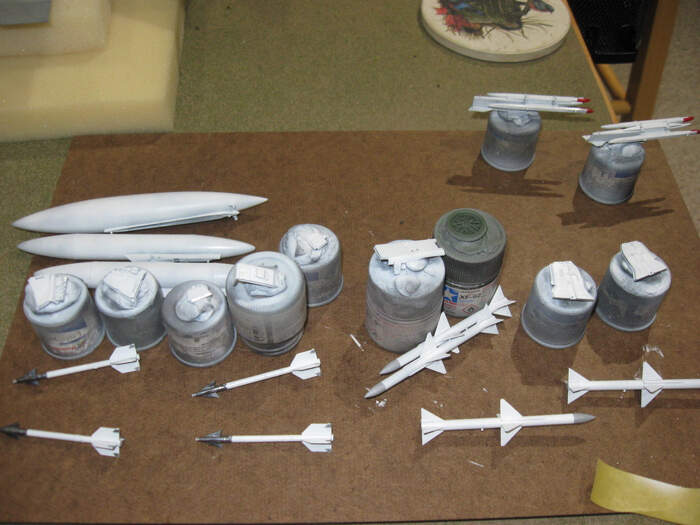
Just ignore that wheel. The pilot is pretty new to the f-4 and he needs a training wheel to keep it from tipping over when he’s taxiing to the runway…
2 Likes
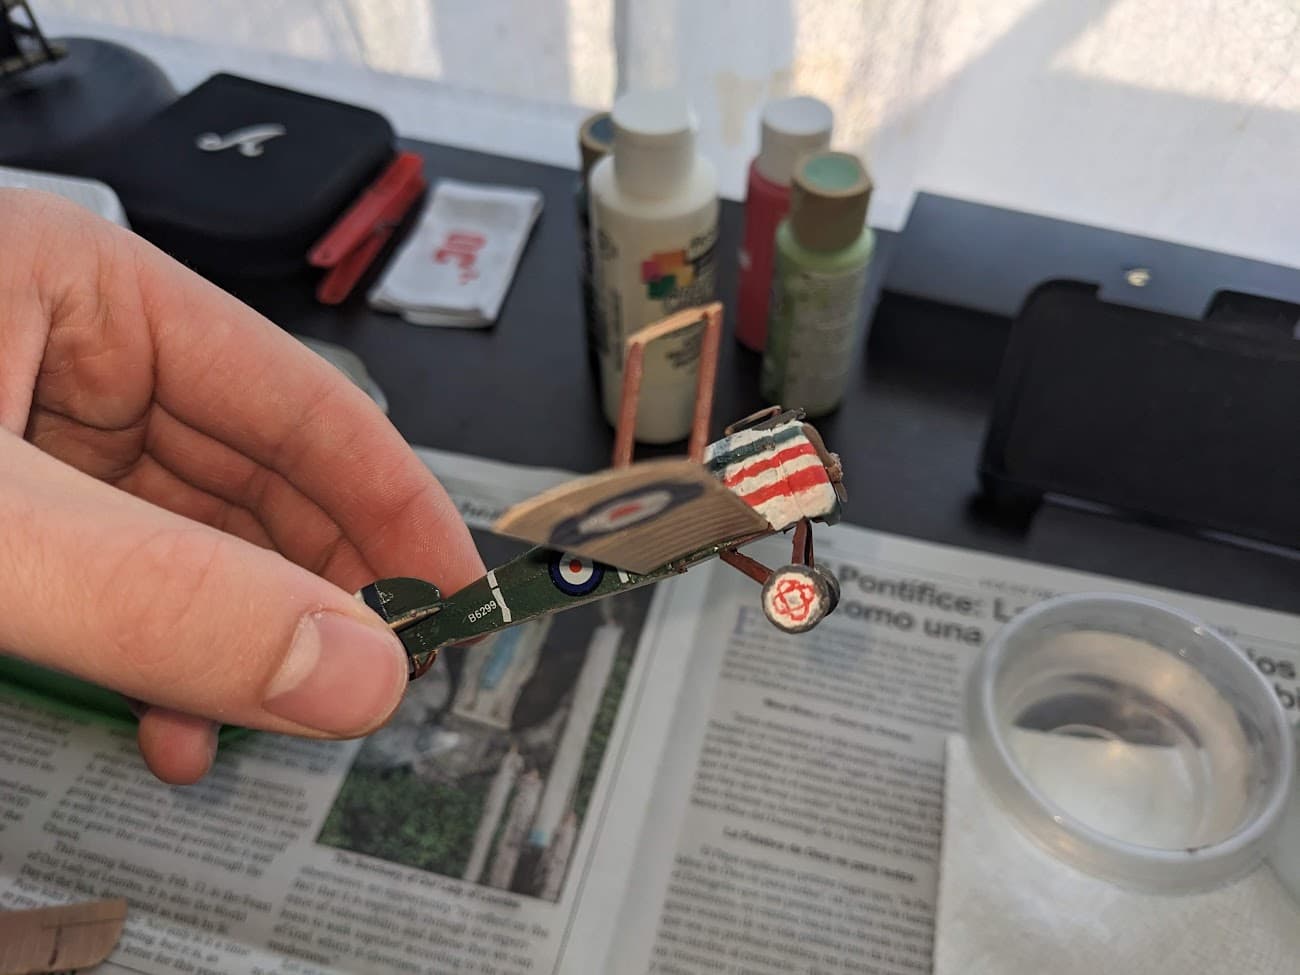
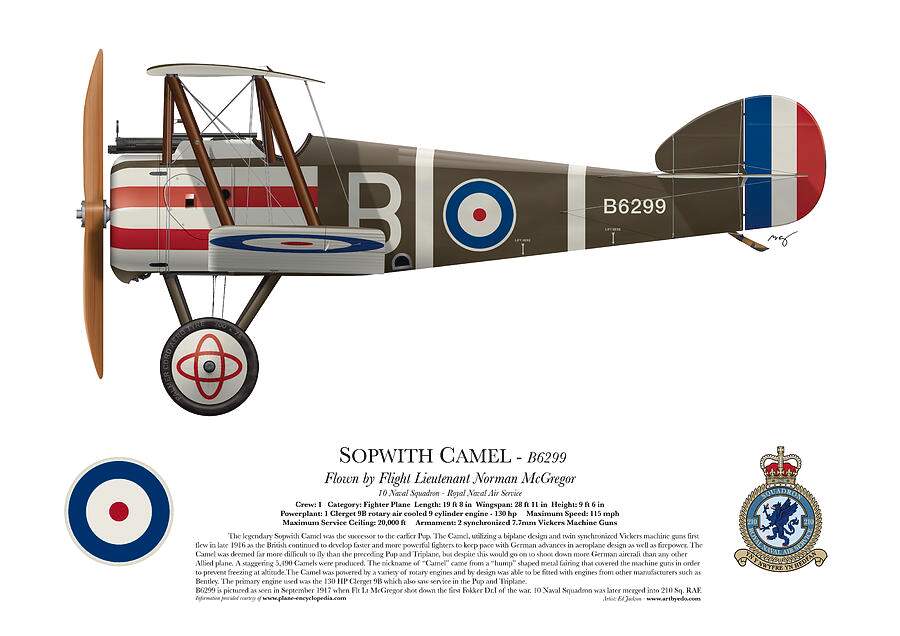
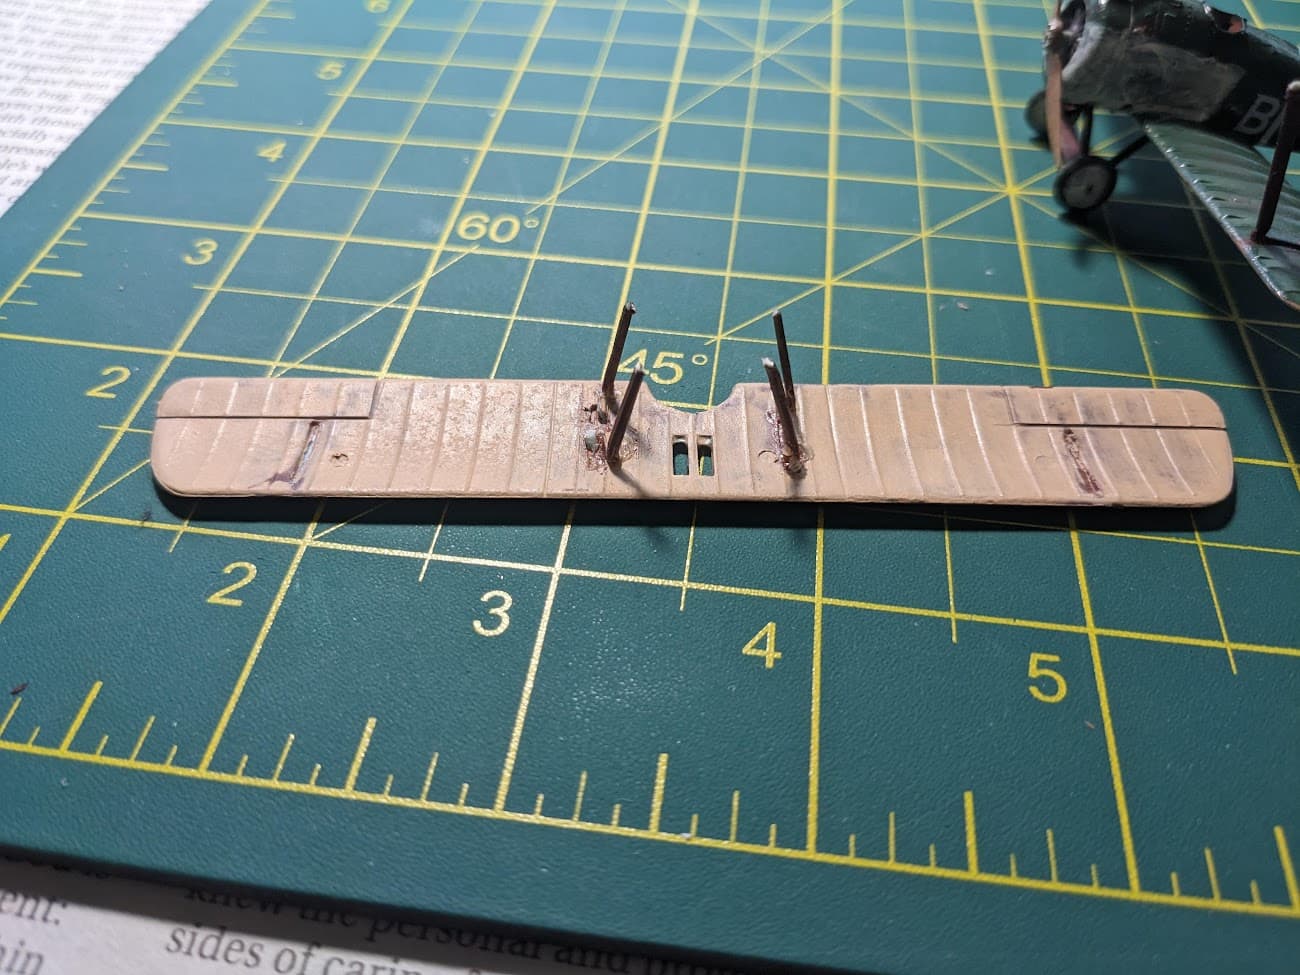
Is it too late to join yet? I’ve got this Sopwith Camel that’s been troubling me for a while. I originally glued on the central supports backward (old, super simple, and unclear instructions), but then when I tried to turn them around, they snapped, and I’ve relegated this dude to the shelf until now. The little guy also has some paint to touch up and finish.

3 Likes
It’s never too late to join this campaign! The goal here is to get them off the shelf of doom! Welcome aboard and good luck getting the strut thing worked out.
1 Like
Thanks! I figured more experienced air modelers would be able to give some suggestions, but it might just be an afternoon of sitting with patience.
I’ve been able to get the struts mostly in place. I’ll have to fiddle with them a bit when I attach the top wing, so that the struts touch the cockpit area. Next I’m going to have to touch up the paint job and add some details that used to be decals that I messed up really bad.
1 Like
So I’m kinda stuck here. Perhaps stuck isn’t the right word, but intimidated by the enormous number of markings I need to do. I realize just start moving and I will get there.
But, I’m curious. Should I do the big markings first, then the stencils? I’m wondering if some of the stencils land on any of the big markings (e.g., stars, NAVY, etc.). If so, there should be no stencil where those markings are?