Early on, I considered making a cookie cutter but could not figure out how to get a precise square. It never occurred to me to solder it. I actually own a soldering iron, solder and flux, but those experiments did not go so well.
Important Safety Tip: If you attempt to solder a metal fantasy miniature, you will quickly create a puddle of hot metal and burned jeans. Also, it hurts.
All right. Back to YouTube to look for videos on soldering. Burning the house down is not an option.
1 Like
Would something like this work for the brass?
K&S Brass Strip
K&S also have angles (L)
Make one square to the exact size
Glue angle bars to the sides (square plate inside the angle, angle bar needs to have sides wider than the thickness of the square).
Use epoxy, roughen the surfaces with 120 grit.
One edge of the angle bar will now stick out above (or below) the square.
Press into the Milliput “cake”. If the cut doesn’t go all the way through you need
larger dimensions on the angle bar or use steel straight edge (non flexible ruler, large kitchen knife, razor blade, similar) to deepen the cut.
1 Like
Oh. Okay. That makes sense. Sort of like a picture frame.
Let’s say I purchase a Miter Box and Coping Saw.
- Clamp a stop onto the Miter Box exactly 1.71 inches from 45 degree cut mark.
- Feed in L stock and clamp.
- Cut end to 45 degrees.
- Feed in the L stock until it hits the stop and clamp it.
- Cut the L stock at 45 degrees. Make sure cuts mirror one another.
- Go to (2) making 4 pieces.
- Clamp two L pieces together on 1.71" x 1.71" master.
- Solder corner.
- Go to (7) making 2 pieces.
- Clamp frame sides to master. Solder remaining two corners.
- Solder X onto back of frame.
- Solder rod into center of X forming a handle.
- Make handle out of Milliput or maybe a piece of round wood.
Does that seem about right? If I balk on the soldering I can use epoxy instead but I just watched those videos and now want to burn down my house.
I’ll need Calipers, too. So, Calipers, Miter Box, Coping Saw, L Brass Stock, Round Brass Stock, Fire Extinquisher.
Should I make the square master out of brass?
If I learn to solder, maybe I could make something neat for my sister, too, like a candle holder or rocket launcher.
At any point I could drop a piece into the cutter to make sure it remains true.
Huh. I could try making one this evening if I use sheet plastic. No. I cannot make correct cuts without the Miter Box and cannot test tolerance without Calipers.
Edit: Would this Miter Box work?
A good miter box can be a good purchase
BUT
some of them has a bit too much wiggle in them
which allows the saw to wander a bit.
I would use a drawing square to mark the cut lines on
the sheet material.
The cuts in the angle bar don’t need to be mitered.
The part that cuts the Milliput needs to meet in the corners,
the rest is just cosmetic
Things are getting complicated. Complicated things and I usually don’t get along well. At some point I resort to the use of a BFR.
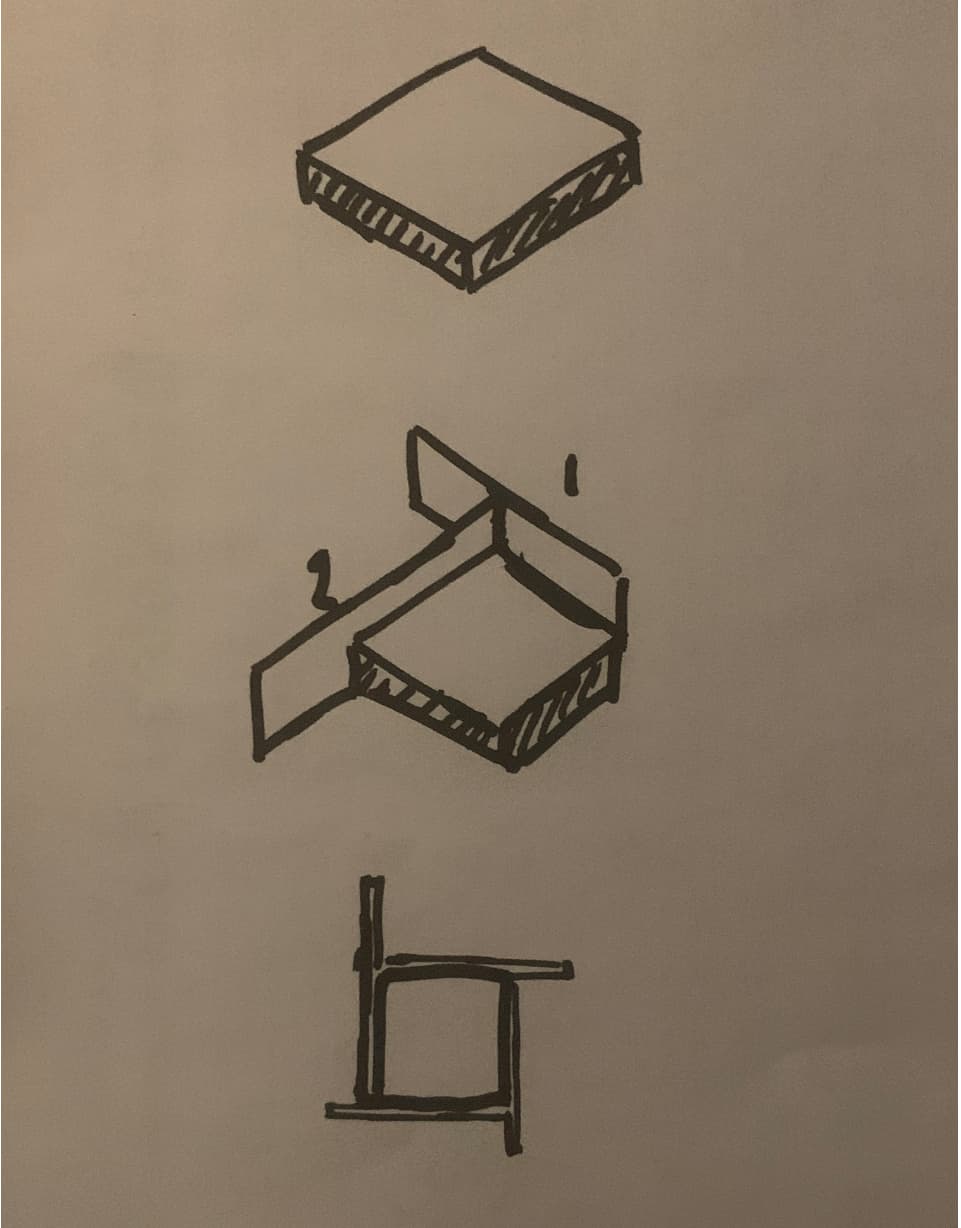
Take a look below. Start with the most perfect master you can make. Secure it to your work surface. Add a metal side to it. You can do this by adding modeling clay to the outside, or hot glue it.
You don’t even have to measure the side - just make it longer than the side on the master.
Add the next one, butted against the first. Again, as long as it’s longer than the master, length doesn’t matter.
Do all four sides as shown in the top view. Solder, braise. Or, if you’ve scuffed up the pieces in advance, use Milliput. It works wonders, as you know by now.
A quick aside - the first gun I ever bought my wife was a Browning Buckmark. We went to the range, and she ejected the magazine exactly as I taught her. From a height of about eighteen inches, it fell out of the magazine well and hit the table, and came apart. I was pretty pissed. A replacement was $45.00, plus shipping. So… I put it back together using Milliput. Nothing else worked. It has lasted ever since then.
1 Like