I Love Kit M53

This is a very cool discussion and I think we’re having too little of them in general. Most of the time we sem to forget we’re doing SCALE models and we would like them to be ACCURATE.
So by discussing this we’re showing the manufacturers that we actually care about scale and accuracy, and this is a good thing.
dwnrng44 felt the model is too high and now we can show it in numbers and prove it right, cool!

I also think I have an explanation for the missing hubs - 3D drawings can be faulty here. Sometimes when you 3D print something, some features just disappear - just like it happened here. Thing is nobody has caught it. Person checking it probalby didn’t have a good idea what an armored vehicle looks like…

I wanted to buy this kit when it came out, but now I’m not so sure… Maybe I will if I can see the way to fix it’s problems, at least most of them. I sure wish something similar would happen like with the M103 - I have both Dragon and Takom kits and the Takom is plainly superior.

dwnrng44, good luck with your build, you’re doing a great job for all of us, thanks and have a nice day

Paweł

4 Likes

I was thinking the same. I remember using Pawel’s and another gentleman’s blog on the A2 in trying to improve my Black Plague kit. It was just one problem after another until you realize you can’t get there from here. It was such a pleasure to build the Takom M103 in comparison. Speaking of Takom, they were who I had hoped would do an M53/M55 duo, considering their track record with Cold War US stuff.

1 Like

I find it to be generally easier to use something like the measuring tool in Photoshop. Especially coupled to perspective-warping and resizing the photo first in order to remove the perspective from it and get those wheels circular even when they’re not quite that in the photo.

Furthermore, you should always use the longest dimension you can reliably measure. Wheelbase is a far better baseline than wheel diameter, for example, and just as easy to use: just measure from hub centre to hub centre, or if you can’t make out the centre, from the front of the first tyre to the front of the last tyre.

2 Likes

I am working on the Takom M103A2 at the moment; complex enough but fit is amazing. I also have their A1 version and was thinking of building it alongside the Dragon A1, but when I was comparing them, as you identify, I’m just not sure it’s feasible(!)

2 Likes

Thanks Pawel,
I think we’ve been pretty lucky as of late by the quality of most new releases. It’s just too bad we had to see these problems on a subject that was on my top five wish list. :smiling_face_with_tear: It’s good to get input from the community here.

1 Like

To be honest, I HAVE used those same dividers on my monitor screen but only occasionally and always VERY carefully.

Made some good progress last night. Trying to finish this weekend:


It will be a 2-part affair for 3D printing.

7 Likes

Oooohhh!
PRETTY !!!

1 Like

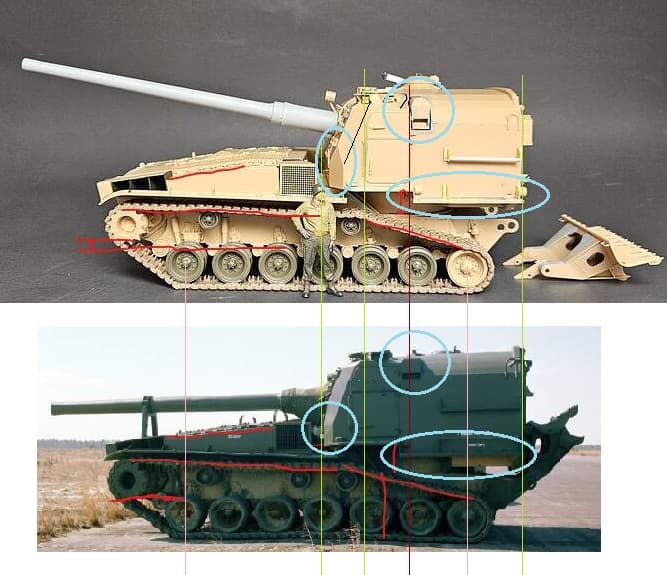
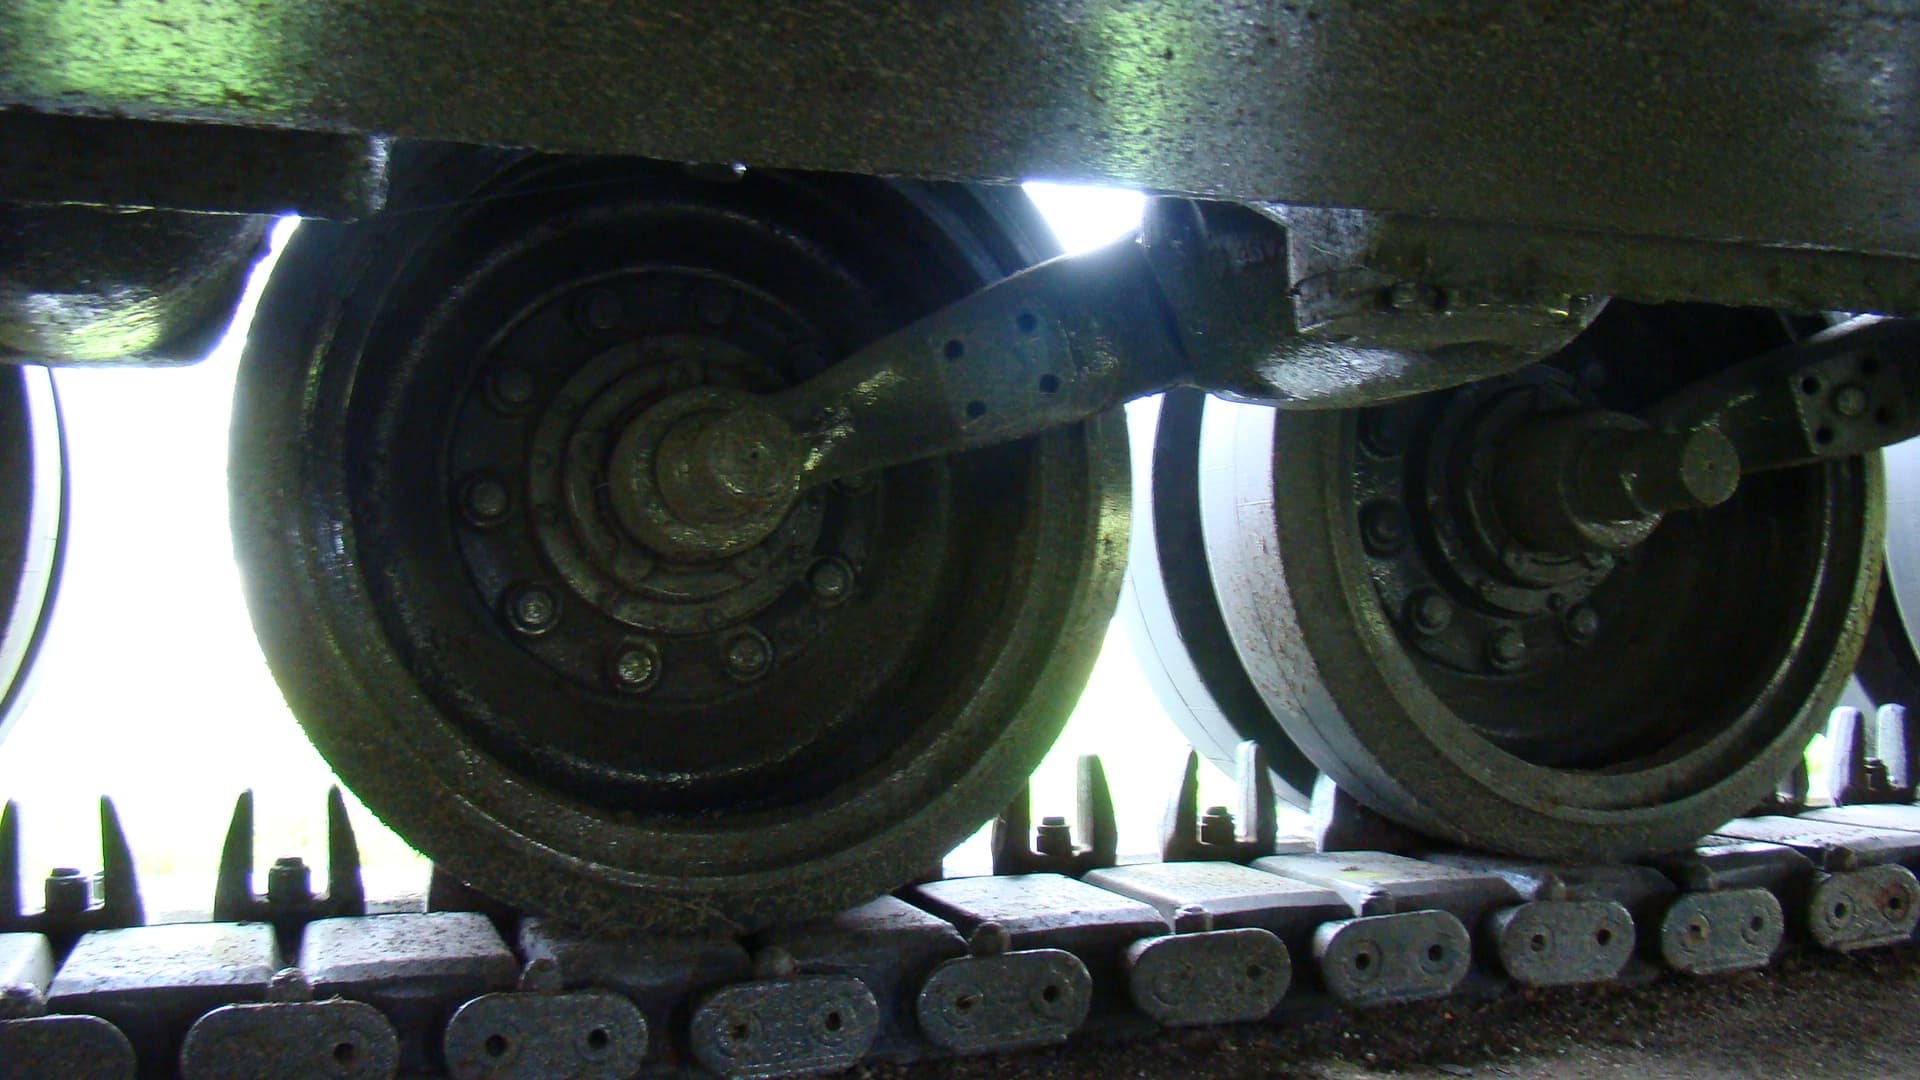
Taking just the photos used as a reference and disregarding perspective, etc for the moment (the kit is slightly angled front to rear in the pic), the wheel spacing actually seems okay when you resize the photo to match. Even with the round shape of the road wheels & Idler pretty much okay:
image

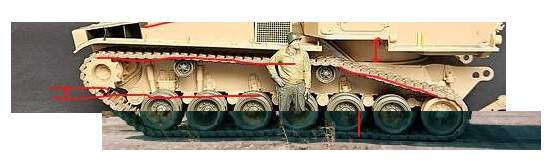
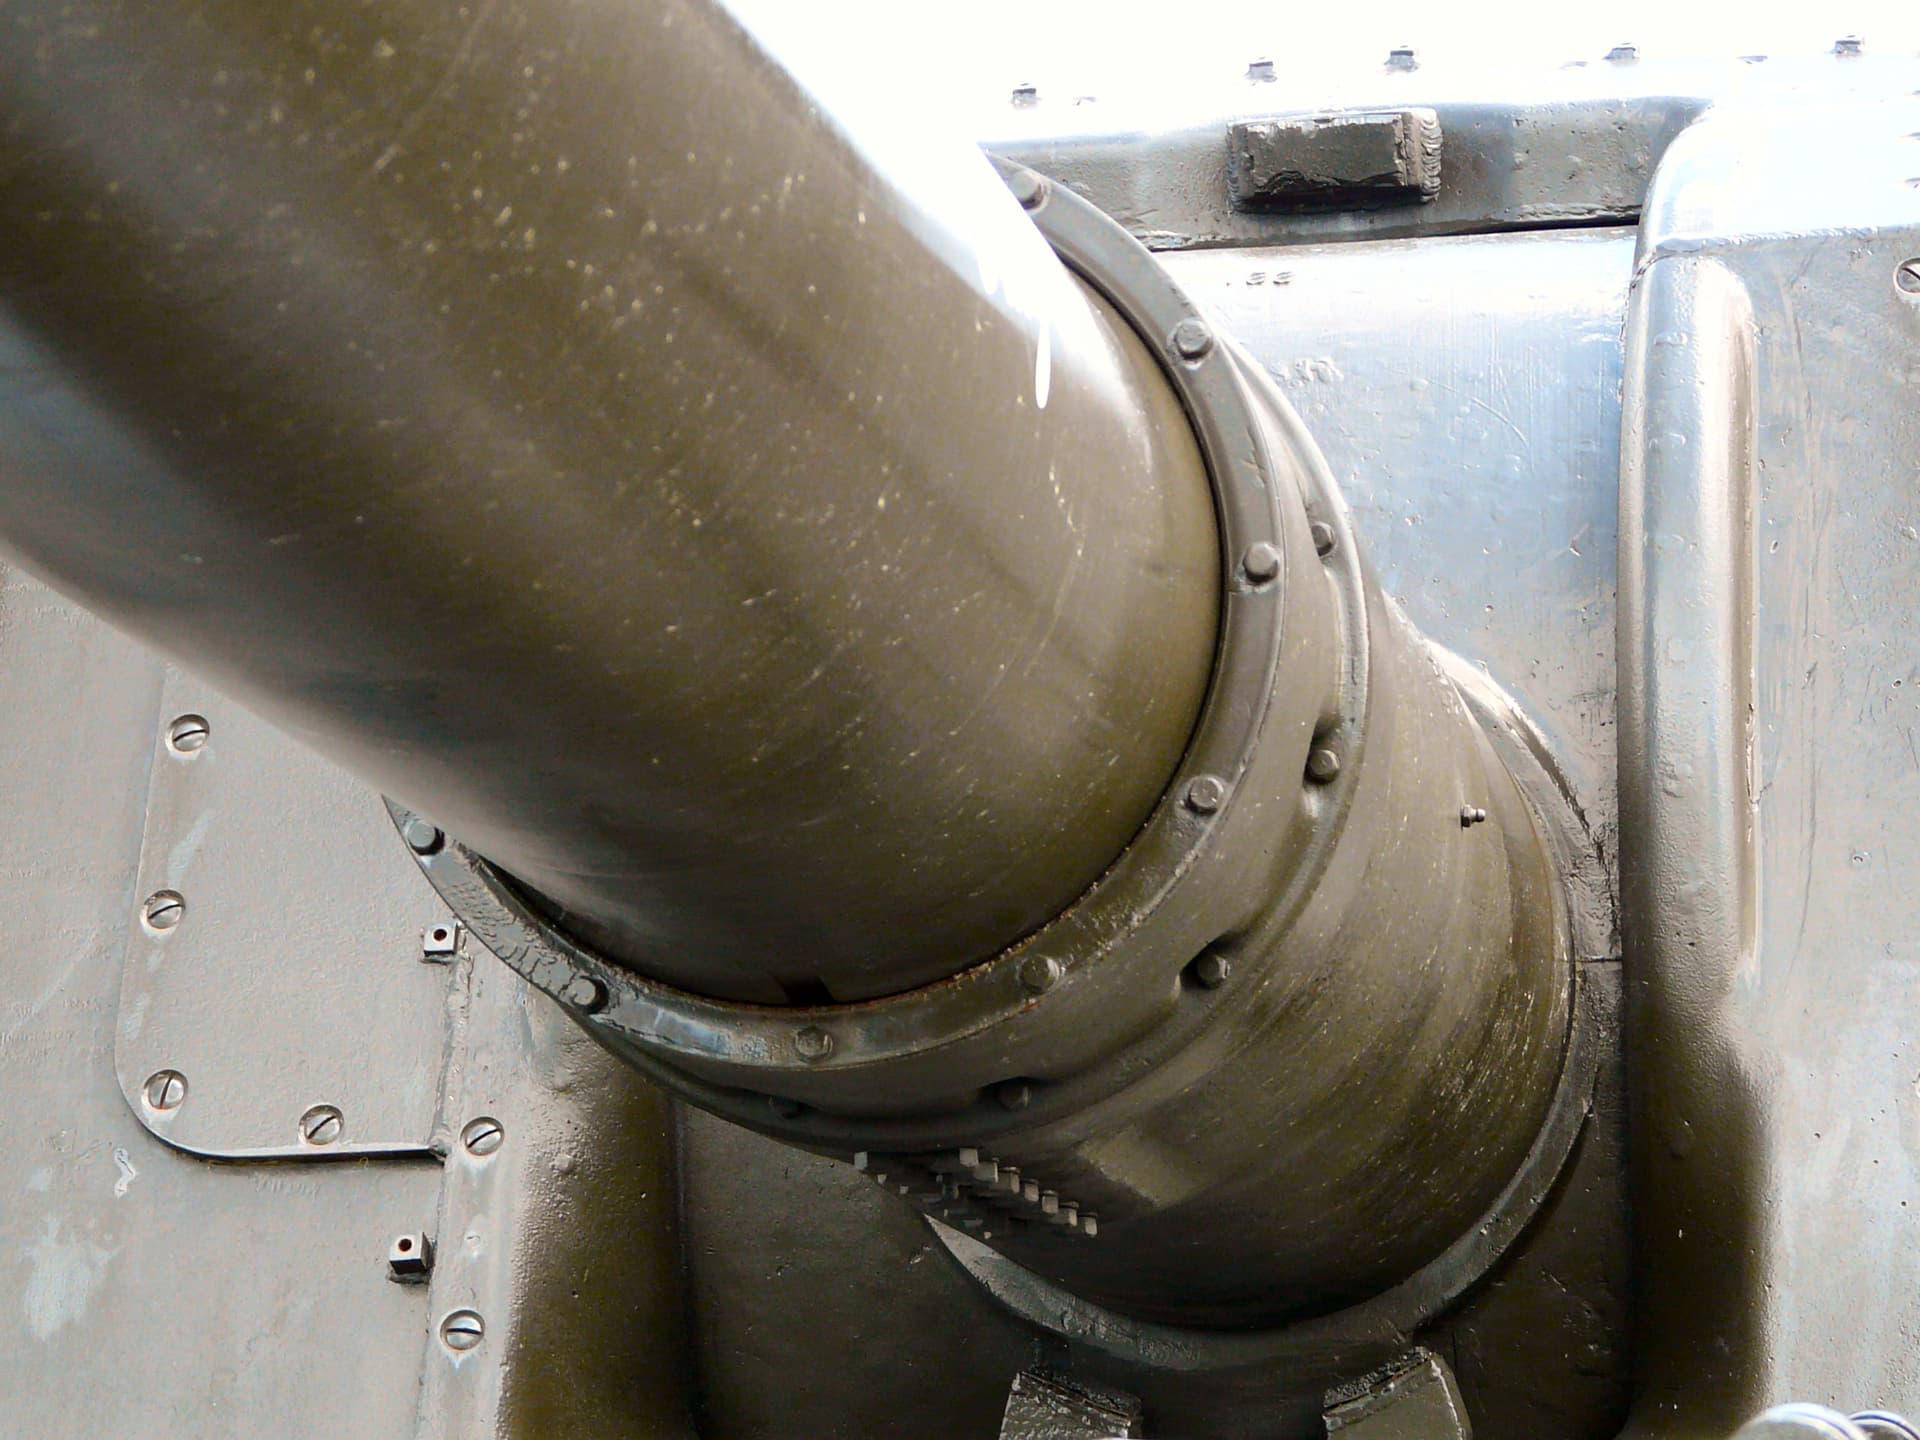
Taking wheel spacing and location as fine, the issue is the spade mount does not extend far enough from the hull. Note its position to the turret rear and the spacing when compared to Idler position:
image
image

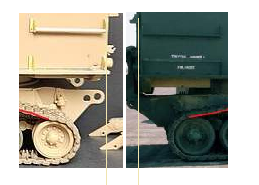
Re the Turret seeming off, it is not so much the length, it is the proportions. The door on the side is way off where it should be making the side seem compressed. Therefore, keeping the turret ‘floor’ in line with the door edge, this means the floor is too short. The door placing also means the object to the rear of the door is also pushed backwards. The bevel on the turret front appears to be way too high too and possibly too steep in the vertical, therefore the turret sides are shorter at the leading edge and that is why the door is displaced.

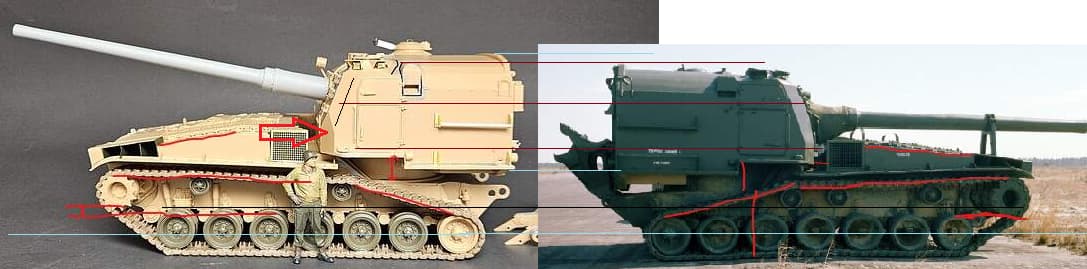
Now this where we really get all rubbery… horizontal plane and angle of photos … but with the grains of salt all lined up, here we go:

So taking the turret ‘floor’ as the base point of interest, which seems to line up sufficiently, and the noting turret in the real pic is angled forward… Regardless of probable distortion, the turret seems to be too high, and again the side door is off to compensate but it may only be a tad too tall.

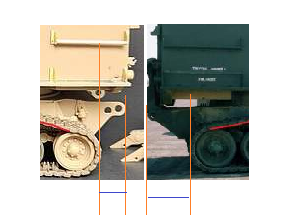
The lip on the rear of the turret roof seems to taper to nothing on the kit pic, where there is a distinct difference in roof to the rear palt lip in the real pic.

So it appears it is the height of the turret that is making the turret in the kit seem compressed. I believe the reason the turret is too tall, is to compensate for the hull roof, which everyone agrees should be way more to the horizontal… and that is also why the turret base to hull is too tall.

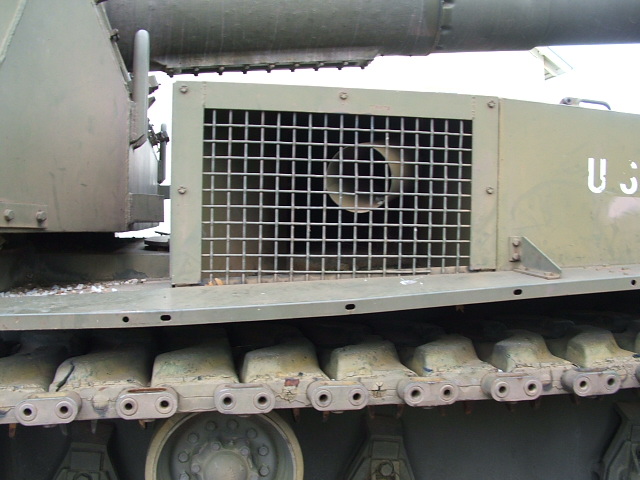
Also note in the kit pic how the hull floor seems to be very close to the top of the road wheels, where the actual vehicle pic shows the floor well below the road wheel top. Yes, the vehicle is not a a flat surface, but even so… as everyone has said above, the hull bottom sits way too high.

2 Likes

You might as well add the grease nipple:

You also need more bolts, and they need to be spaced out more. Also there are none on that front band that stick out further than the others. They should all be on the same plane. That front collar is longer in relation to the rest of the rear collar, etc…

I’ve said it many times before - one of the pitfalls of using a kit as a reference. Especially one with known dimensional problems.

Sean 176

Might it be sitting too high on the suspension? Possibly. I’d compare the angle on the kit’s suspension arms to this photo and adjust if necessary. It won’t fix all of the issues, but it may fix one.

1 Like

Rob,
I added the grease nipples. At 1/35, they’re about 0.4mm - will barely show up.
I disagree with you on more bolts, front band sticking out, and the same plane, etc. based on the reference photos I’ve found:


I counted 14 bolts, and that’s what I am going with. I’ll have to ask you not to make an assumption. I am not using a kit as a reference - I don’t have that kit on my hand. I am basing the CAD on reference photos.

As to the size of the bolts and spacing, the CAD is still work in progress so I will be adjusting them and need to balance the printability vs. accuracy.

I need to make some cuts and add more bolts, etc. Starting to look fairly close to me:


At the same time, these details would barely show up in 1/35. We are talking 0.2mm at most:

3 Likes

Finished. Here’s a close-up screenshot to satisfy some rivet or bolt counting fun:

4 Likes

More interesting variations.

Grill over the exhaust. Pic 1 and 4 seem to have a rectangular shape, but 1 is at deck height, 4 is higher than the deck. Pic 2 seems to have a more square grill, as per the ILK kit, but clearly the housing for the grill is higher than the engine deck in pic 2, where the kit has the deck as high as the grill.

1 Like

The gun will be 3D printed and sold in 2 parts to reduce printing time and to enhance realism:

Part 1 Barrel only

Part 2 Rear gun cover only


6 Likes

That is looking sweet James. The way things are going, you may have to do a turret to hold it!

1 Like

If that photo is of a display vehicle, though, it’s likely sitting too high itself.

Possible. But I’d check anyway. Someone posited that the vehicle they used has no engine. Tamiya did that with their M48. Bit of the lower hull sits too high it’s a possible fix in any case.

James, I stand corrected. Drive on!

2 Likes

Here are two slightly better ones:

KL

3 Likes

Hull bottom seems to be level with roadwheel centers.

1 Like

I would not make any sort of interpretation from those illustrations beyond the relationship of the dimensioned points to each other.

KL

2 Likes