Just a thought. photograph the ship before painting. The trouble with this much work is that it all starts to look like kit provided parts after painting. It is the pre paint photos that really tell the story of the build.
2 Likes
WOW!..just…WOW! 
Chris, in Victoria, BC
1 Like
Thank you guys! I’ll see if I can get the roof rails under control this weekend…
Just a thought. photograph the ship before painting. The trouble with this much work is that it all starts to look like kit provided parts after painting. It is the pre paint photos that really tell the story of the build.
You have a point, Greg. All this extra stuff will just blend in under the IJN grey once I get things painted up. Most won’t know what went into this model once it is completed, but that’s ok 'cause I’m having a good time…then again, maybe I should just build from better kits! ![]()
Enjoying everything you do on this project Tim -
We all know it wouldn’t be the same if the kit provided everything. You have made it your own .
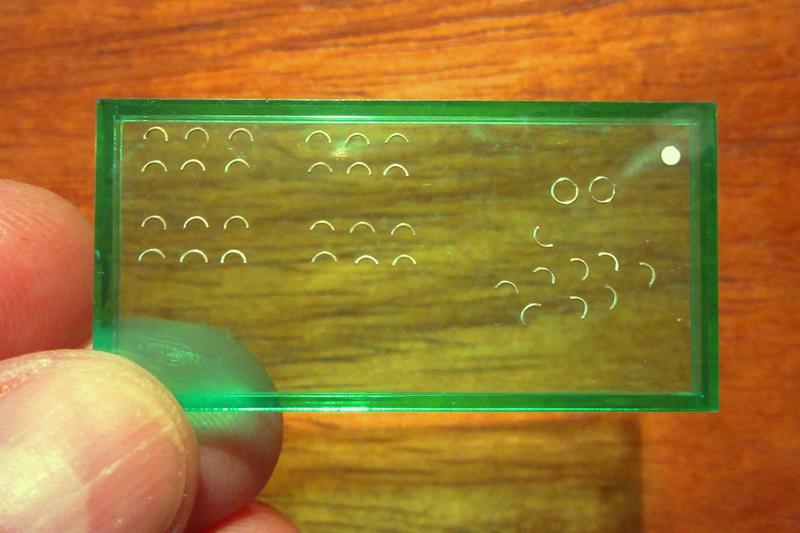
Have you given any more thought to the rivets on the gun houses ? Still not to late for Archer rivets …
(hint hint )
1 Like
Thanks Richard, and thanks for the Archer suggestion!
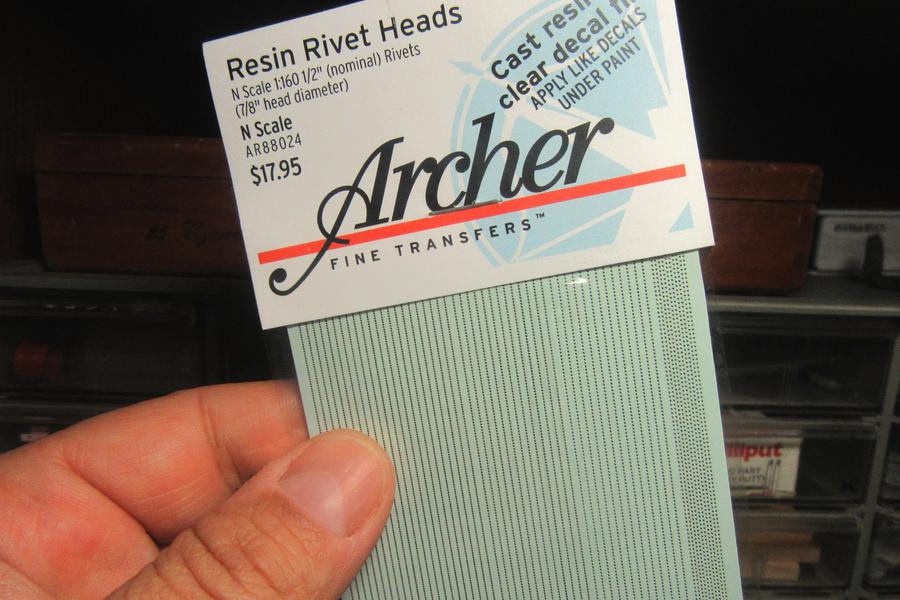
I actually bought a set of their smallest rivet heads after you first mentioned them.
They are a great idea, but I am not altogether sure about them. Although they look good at a distance, up close what should be spherical rivets are actually tiny asymmetrical blobs. I’ll have to experiment on some scrap; they are so tiny they might still work!
2 Likes
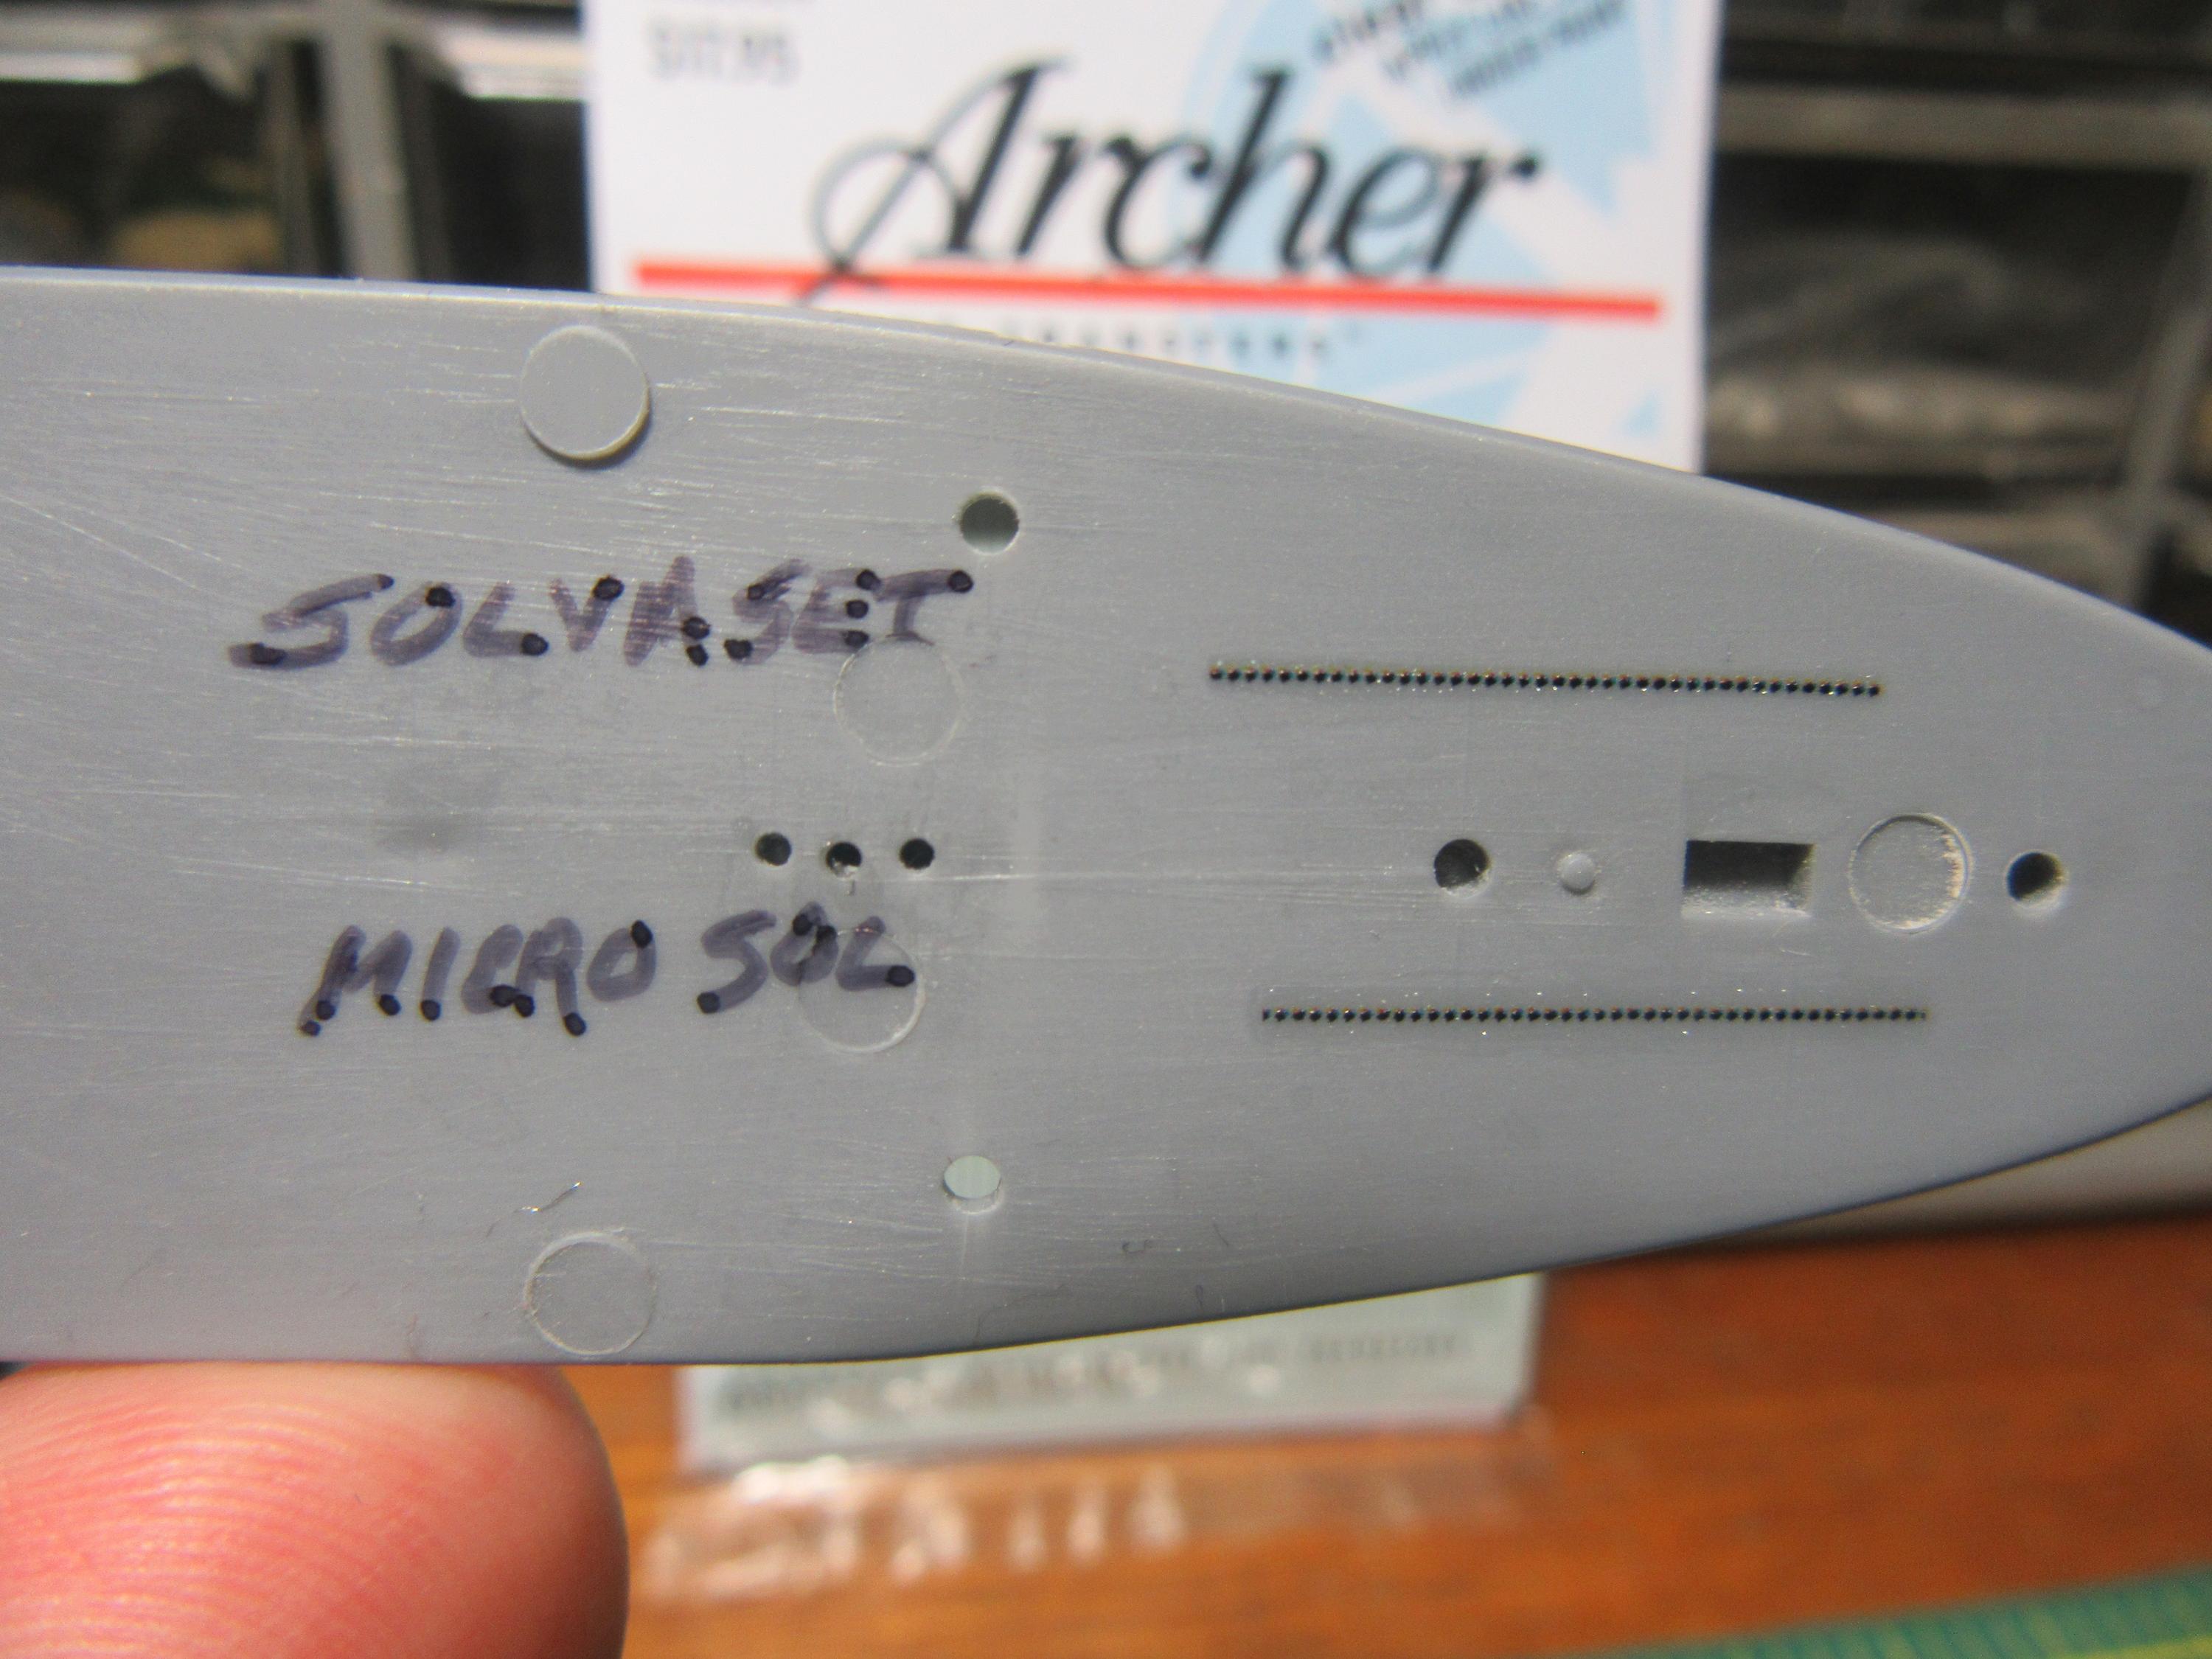
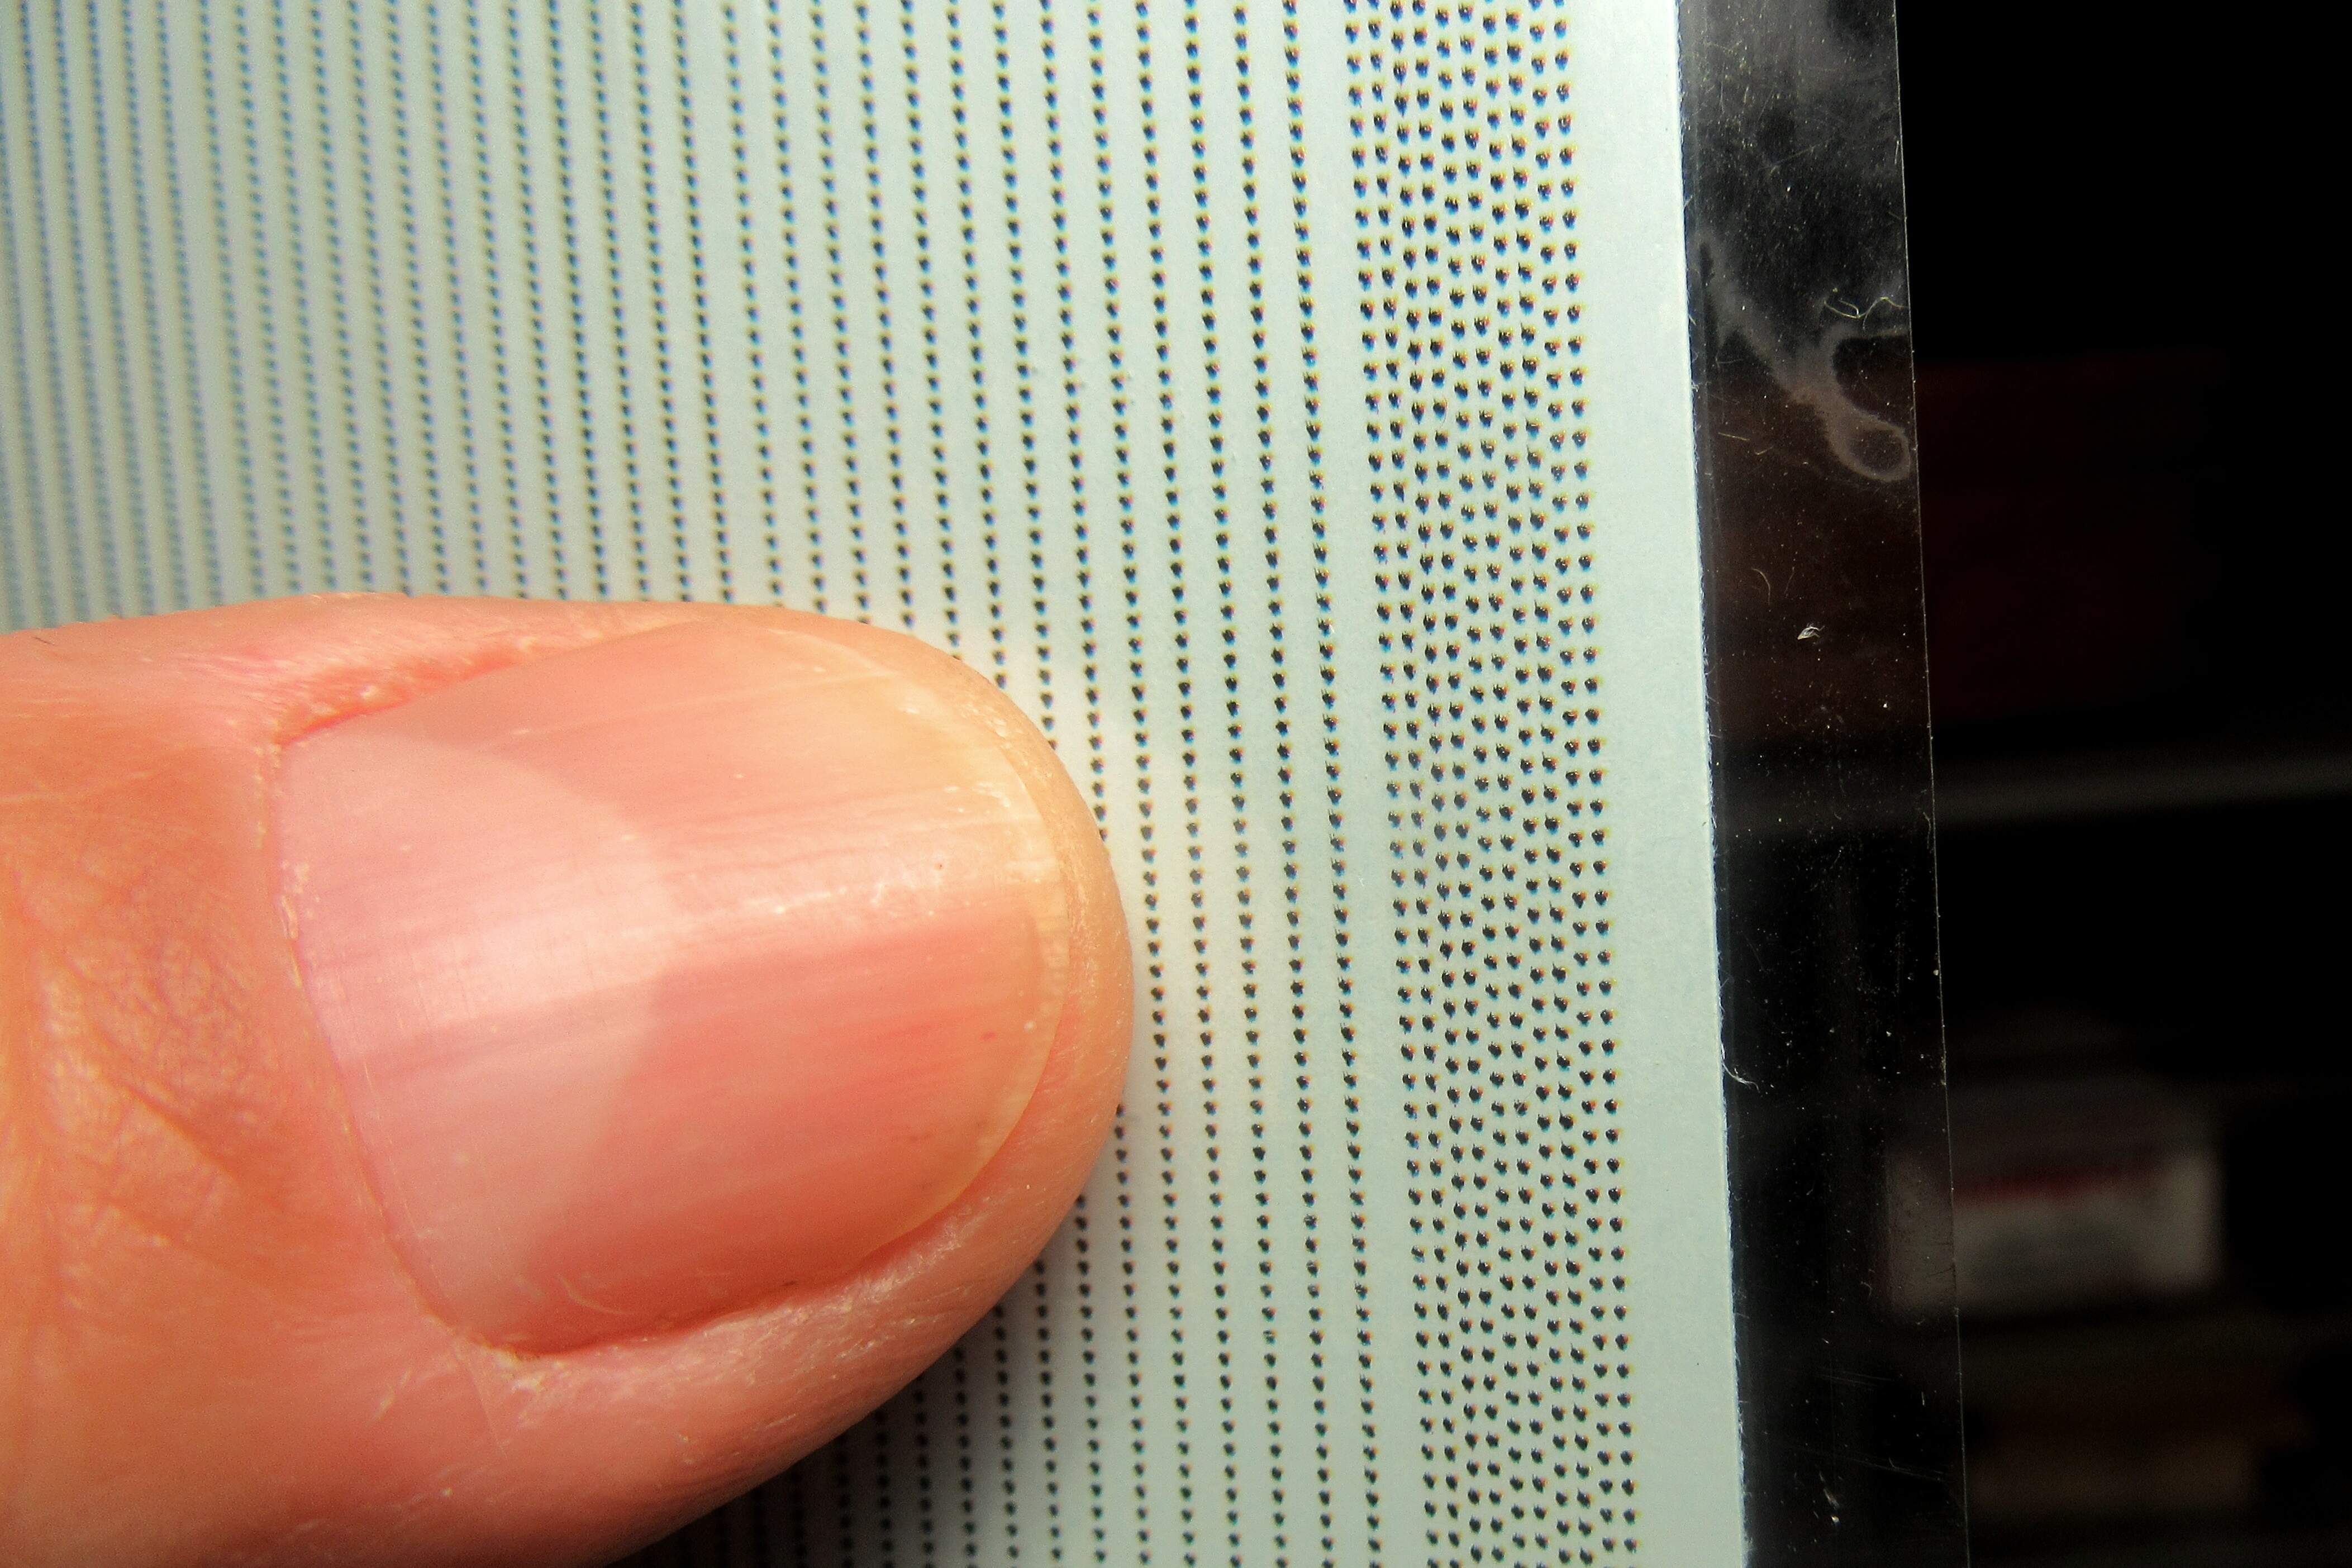
I tested a couple of lines of the Archer rivets on a piece of scrap using two decal setting solutions: the fairly aggressive Walther’s Solvaset and the milder Microscale Micro Sol. Both seemed to work well.
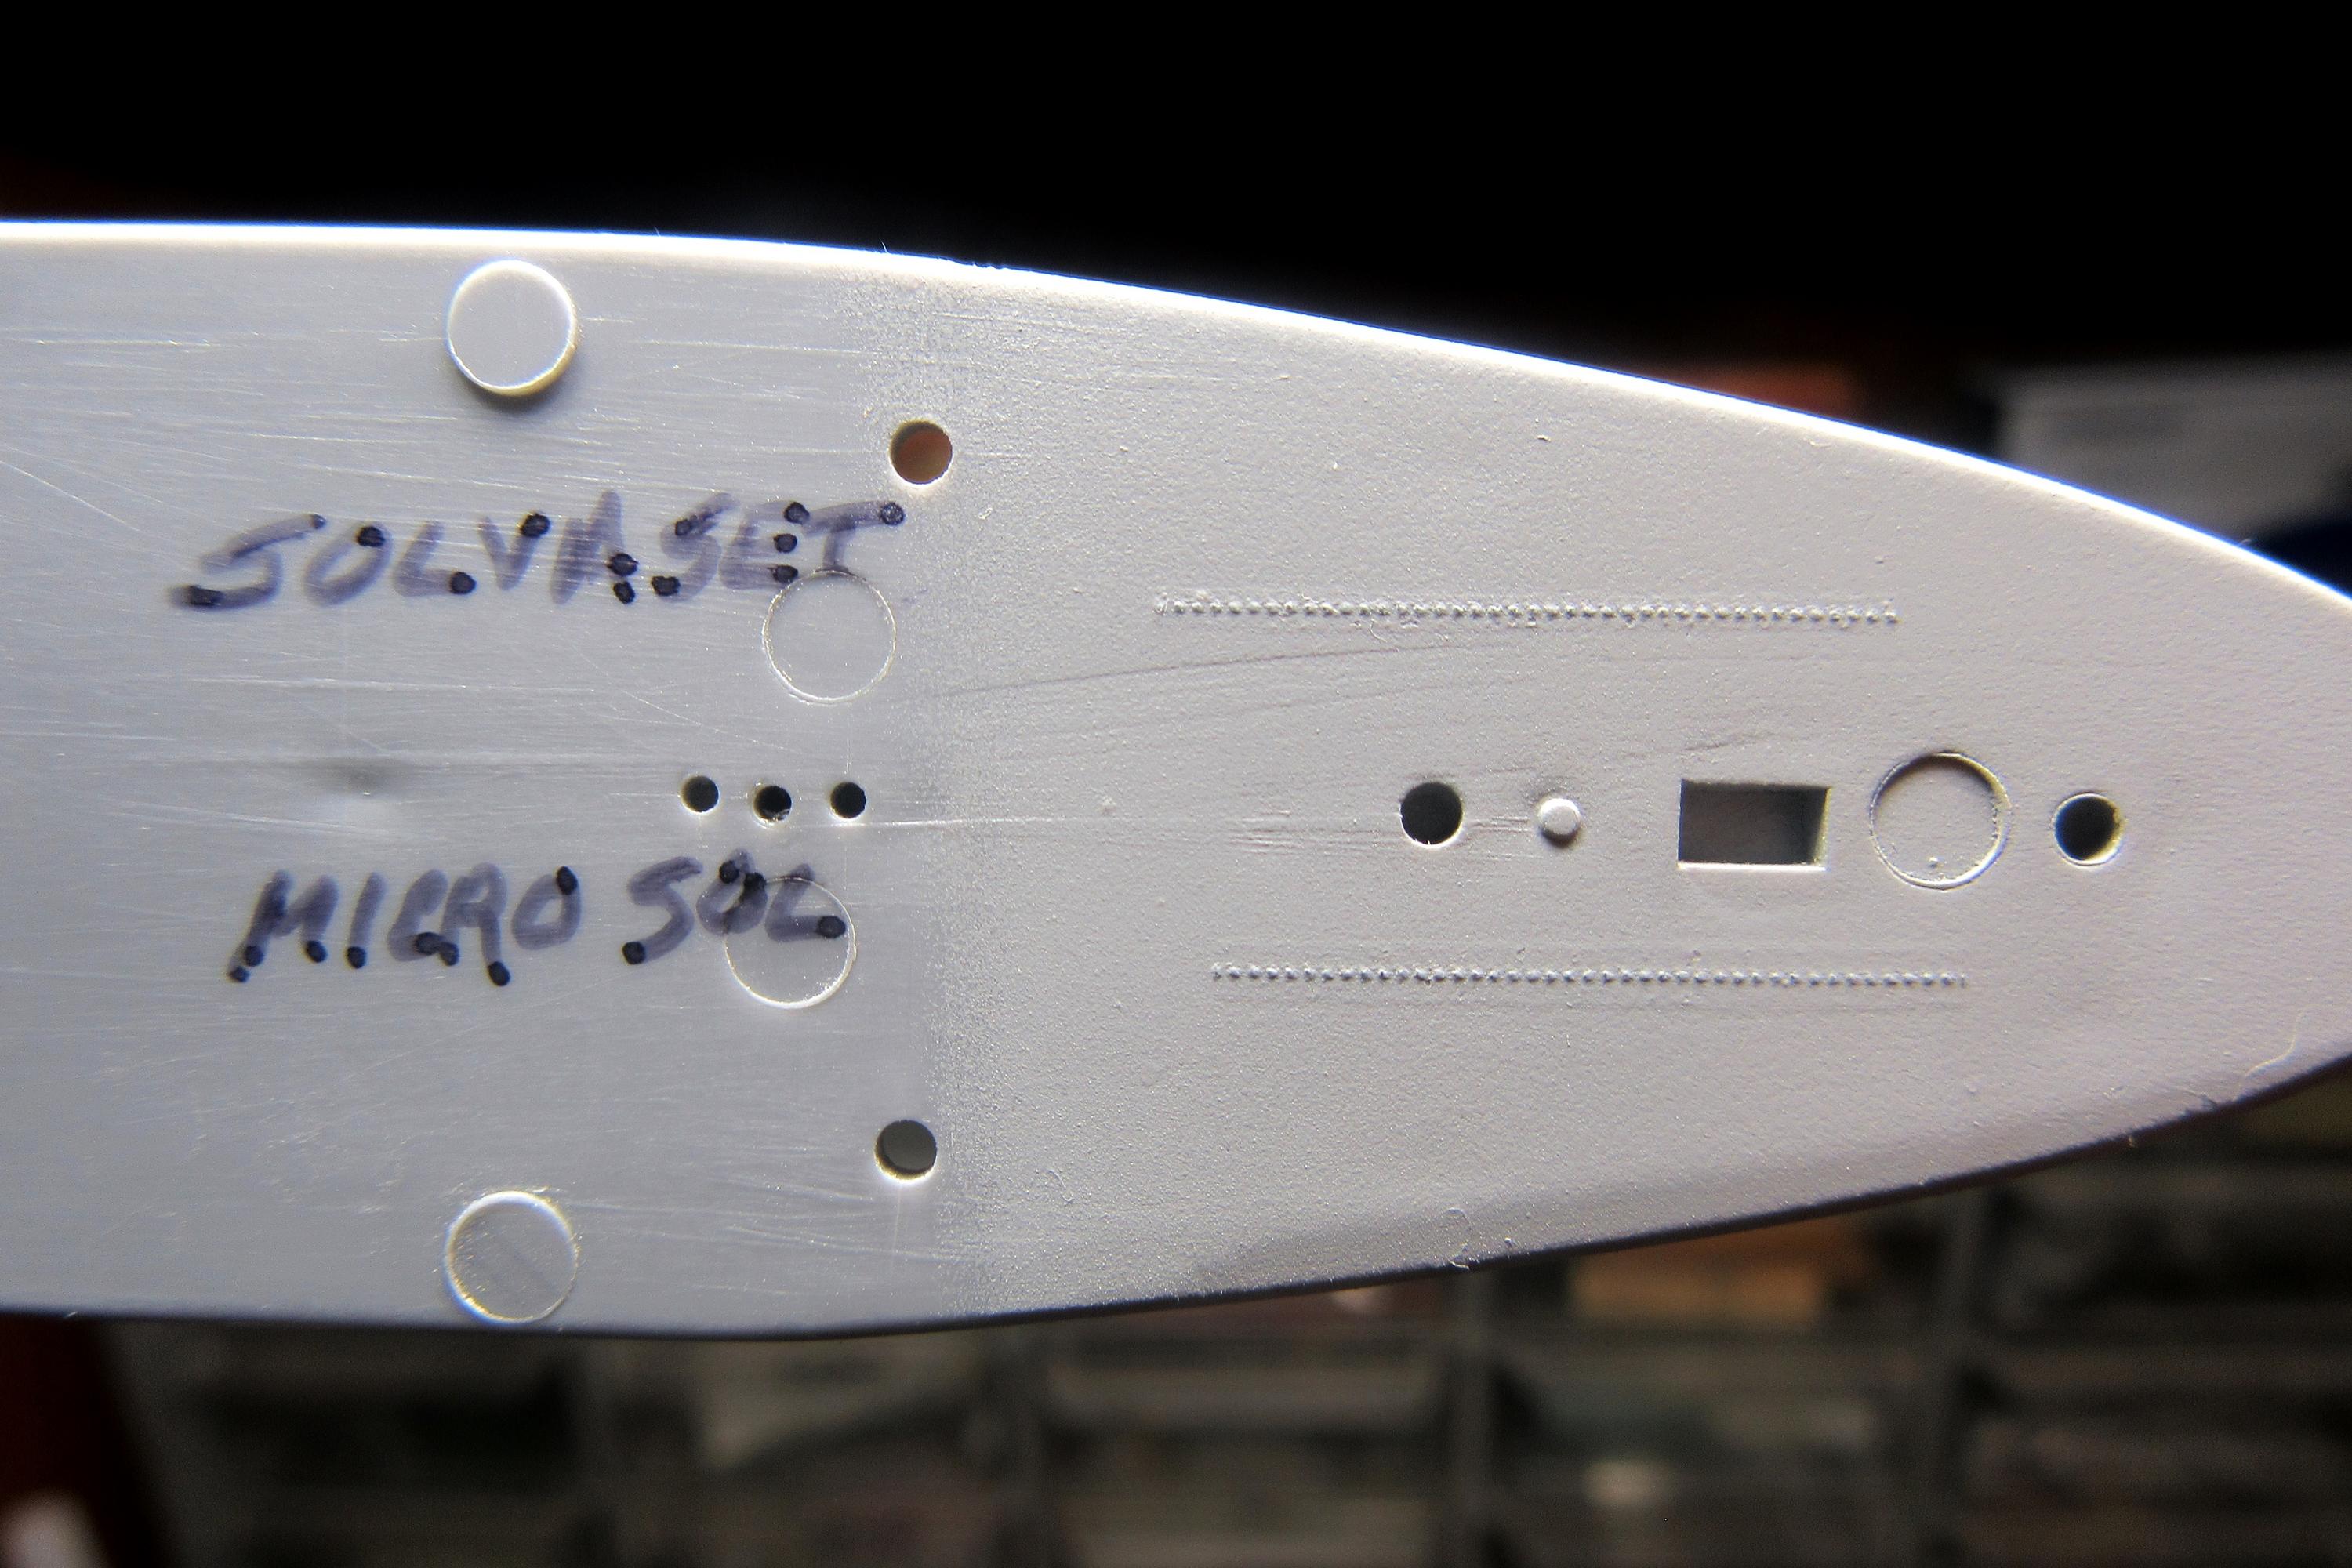
Under a coat of Tamiya primer they both look pretty good. The carrier film is still faintly visible under the paint, but I’m now satisfied that concerns about the less than perfectly formed rivets were unfounded; they are so small that even under heavy magnification they look right. This is really cool!

There are a couple of other details to attend to first, but I look forward to applying these little beauties to the gunhouses!
4 Likes
Awesome Tim!
Yes ! Glad they worked out - I have used them on several projects and have been happy with the results. Over the years I have been accumulating aftermarket stuff for the Revell 1/72 VII C U boat
and I see Archer makes a dedicated rivet and weld set for it - May have to add them to the pile.
Thank you for sharing the “scientific experiment!”
Every rivet is sacred, every rivet is great.
If a rivet is wasted, God get’s quite irate…
—mike ![]()
2 Likes
LOL! 
Looks to me that the Solvaset has done a much better job of hiding the carrier film, but I am being bias as I use it all of the time.
Mark 
Hi Mark,
The Solvaset sample does look a little better. I always test new decals before using it since it is “hotter” than MicroSol and has been known to melt decals - but no worries with Archer! It is the setting solution I’ll be using. 
1 Like
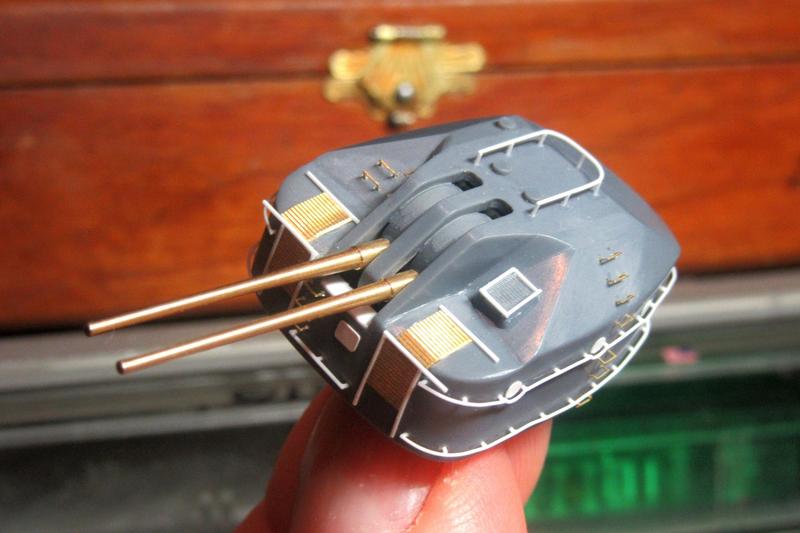
One of the tasks I needed to complete before taking on the rivet decals was to add the short safety rails for the gunhouse roofs.
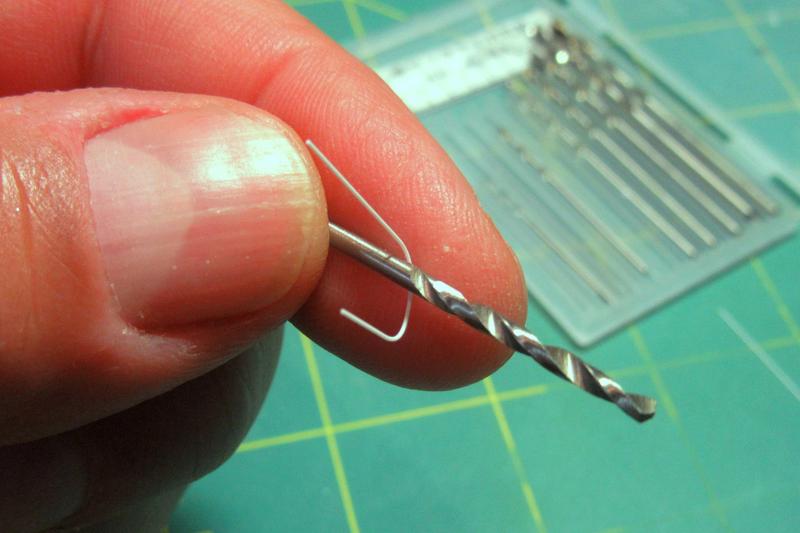
Following plans, I marked the locations of the stanchions and drilled them out.
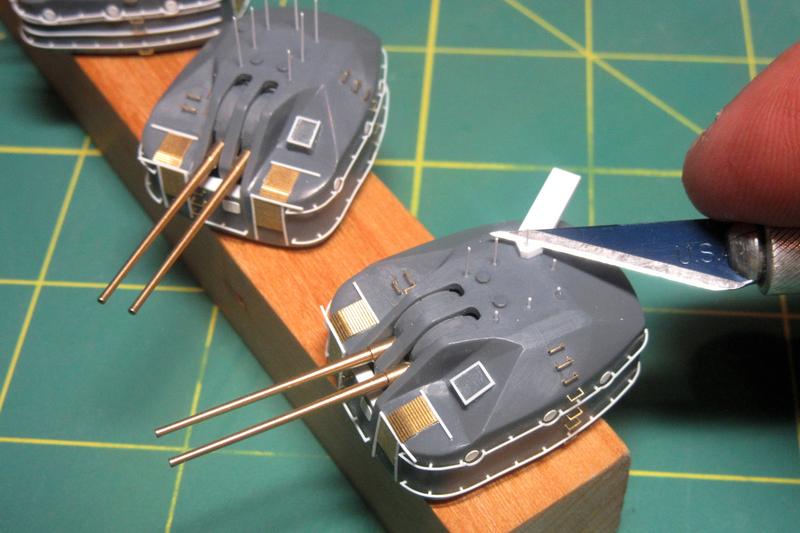
As with the footrails, the .010 inch rods were installed long and then cut down to size. This time I used a .040 inch spacer to create the 200mm high rails in 1/200 scale.

There is some discrepancy among sources as to the exact shape of these rails. The Miyuki-Kai plans for the late war Fuyuzuki show the roof rails to be straight with square corners, but the plans in the Gakken Reikishi-Gunzo IJN Akizuki-class Destroyers indicate that these roof rails were straight at the sides but curved at the corners. I went with the latter as the Hatsuzuki was among the early units of the class built in 1942. Later units, such as the Fuyuzuki, featured simplified lines overall with fewer curves to ease production.
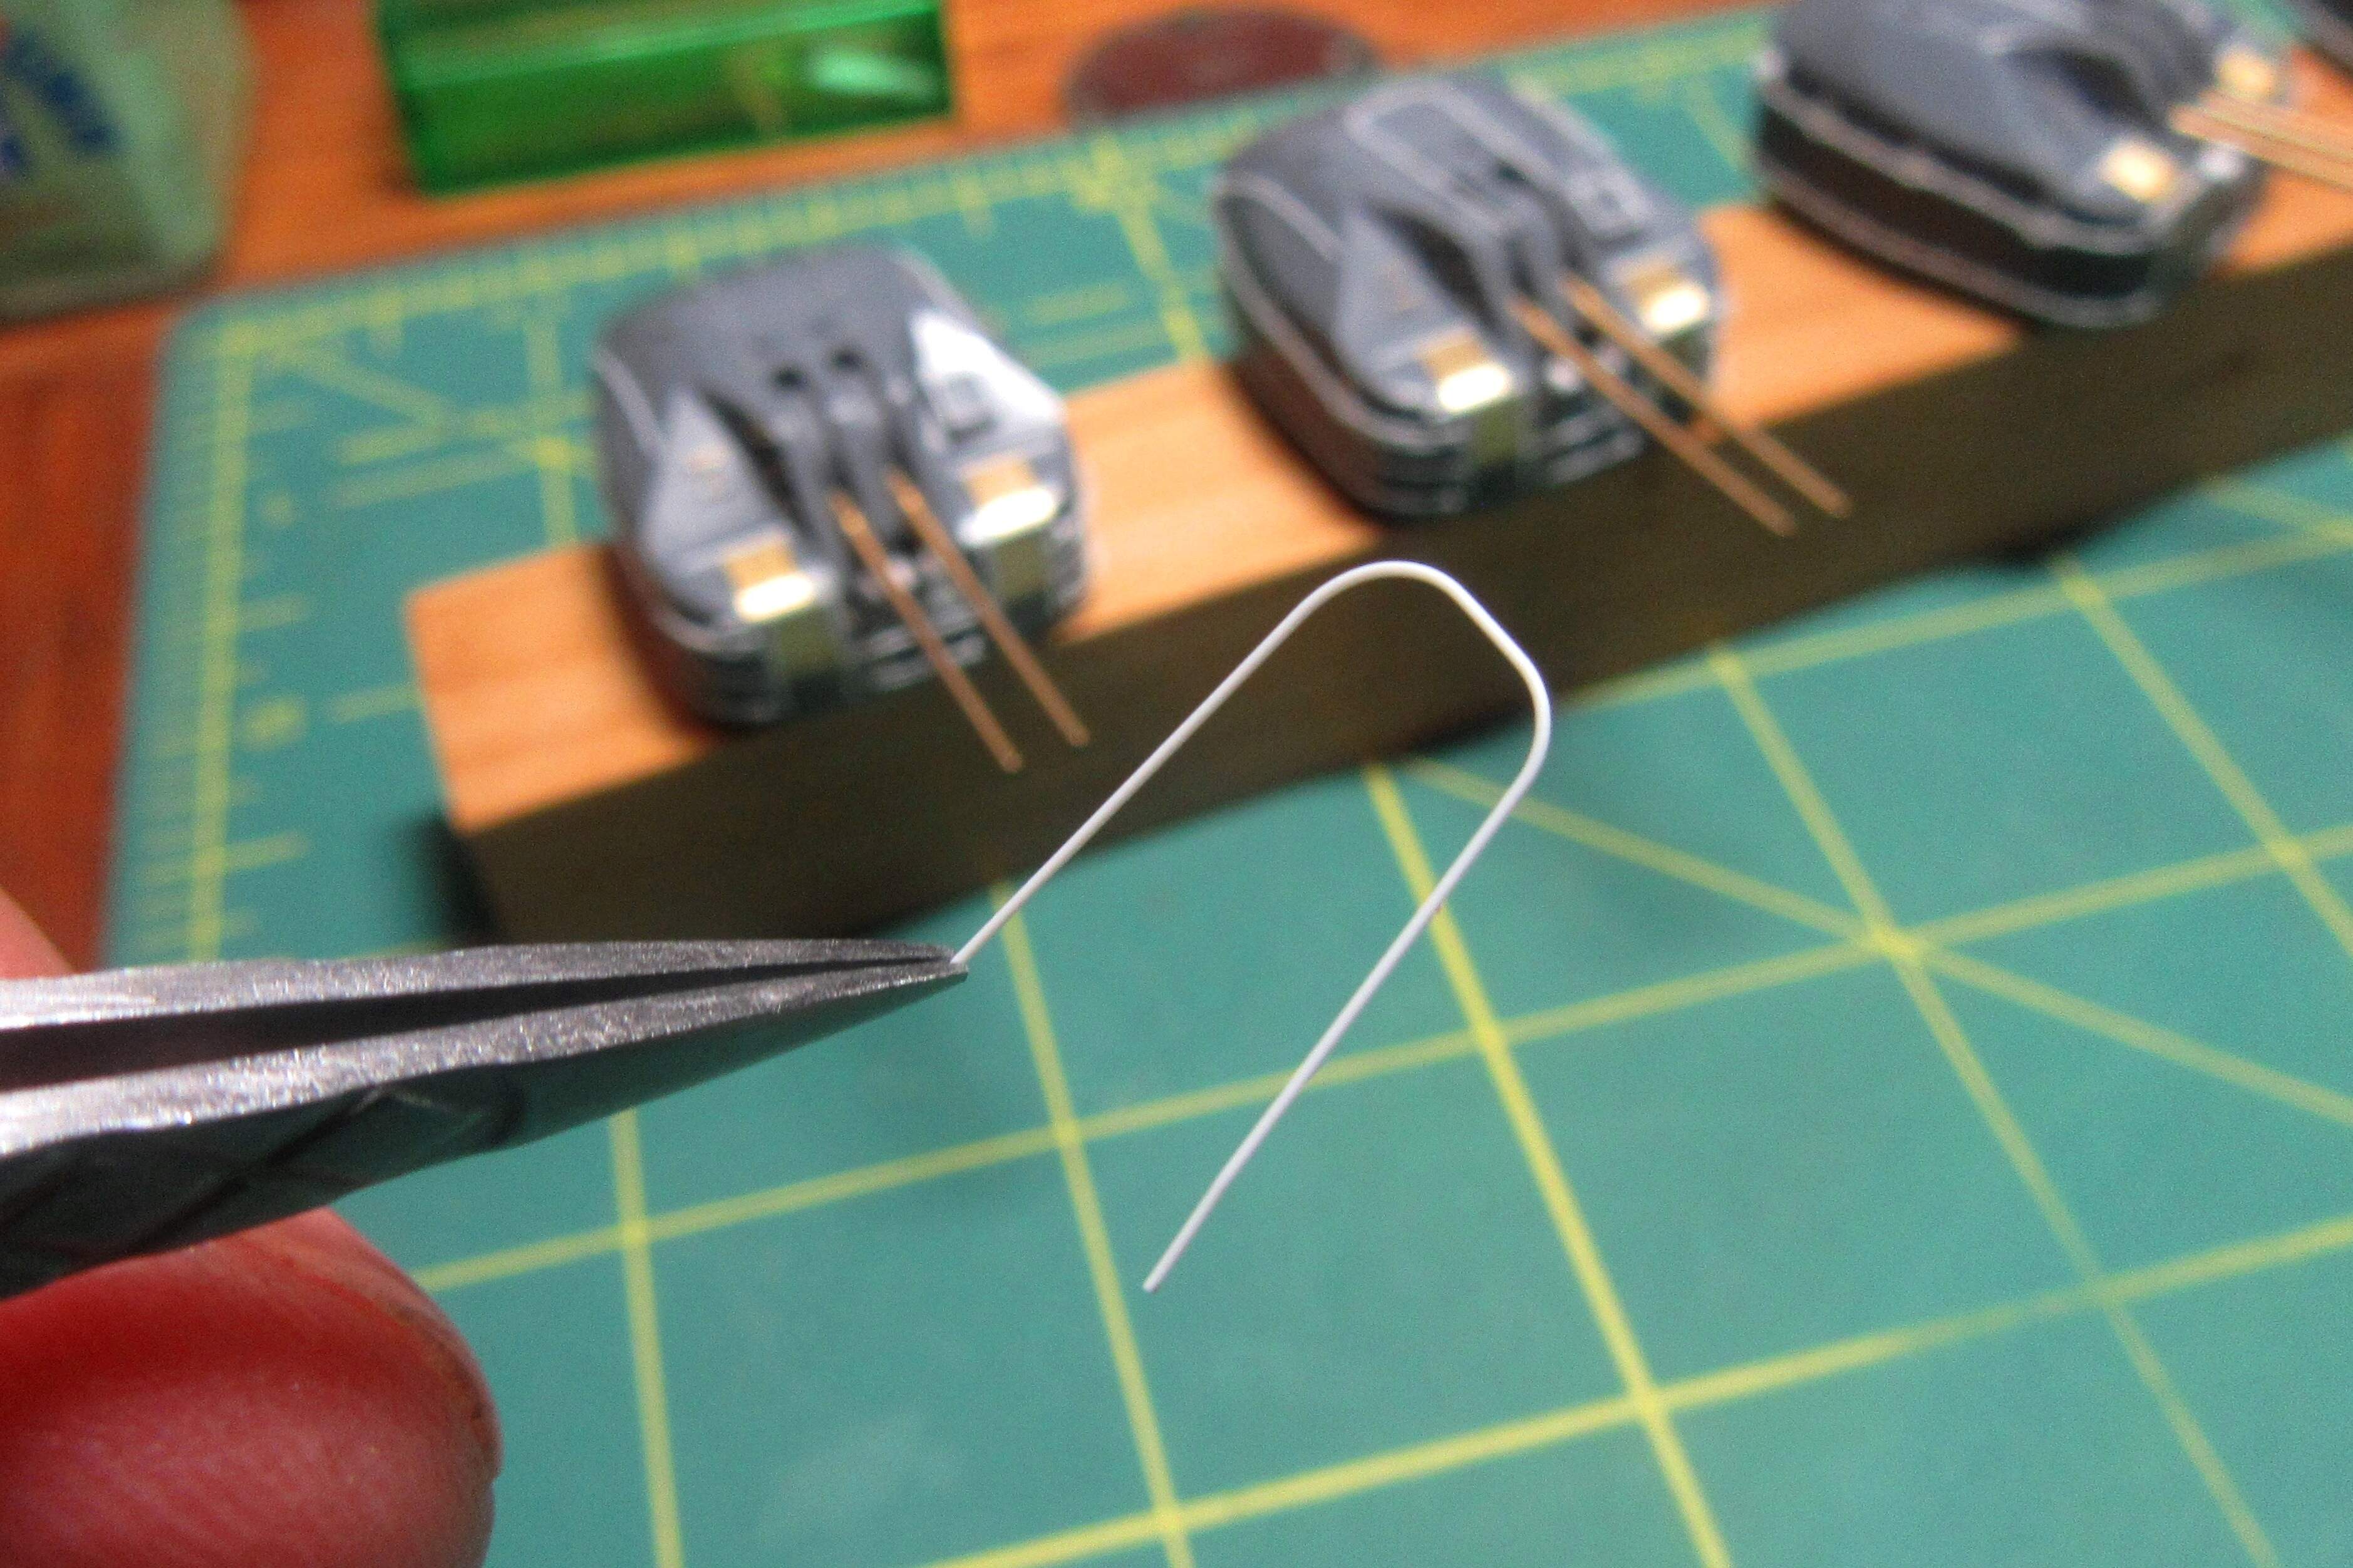
I replicated the curved corners by shaping the Plastruct .010 inch plastic rods around a drill bit before installation.
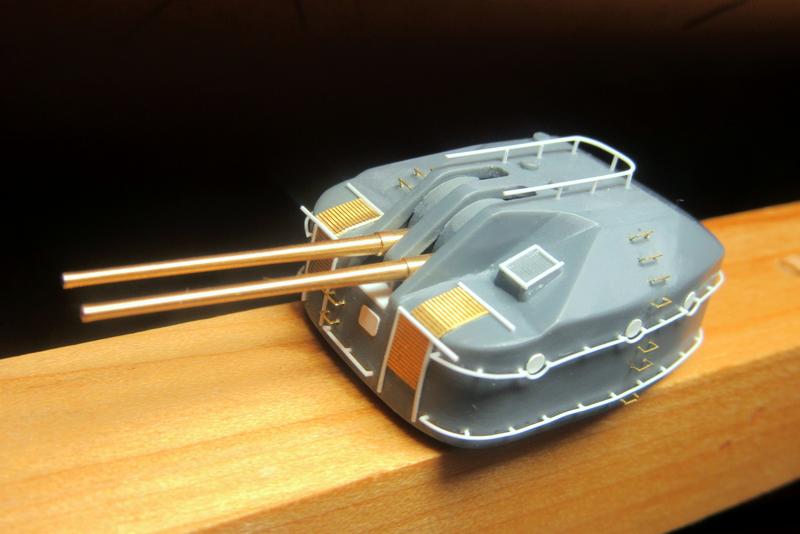
Left slightly long to simplify adjusting their position, the rails were set in place with Tamiya Extra Thin cement and trimmed to length after the cement was dry.
10 Likes
Hi Tim,
Excellent detailing, as usual!
Interesting technique for cutting down the stanchions!
Cheers,
2 Likes
Thanks Joe. I had puzzled over how to make footrail heights uniform until I hit upon this simple solution - SO much easier and more consistent than cutting the stanchions individually before installing them! 
2 Likes
Tim, I rarely post, but this is one of the most beautiful and ambitious builds I think I have ever seen. Its absolutely gorgeous! I enjoyed your Chinese Junk build from several years ago, and now I am enjoying your journey again. I especially like the way you present the build. It draws the reader into it, and you have a real nice way to maintain our interest. A job well done, sir, on both the build and on the presentation.
David
6 Likes
Tim, I rarely post, but this is one of the most beautiful and ambitious builds I think I have ever seen. Its absolutely gorgeous! I enjoyed your Chinese Junk build from several years ago, and now I am enjoying your journey again. I especially like the way you present the build. It draws the reader into it, and you have a real nice way to maintain our interest. A job well done, sir, on both the build and on the presentation.
David
Thank you, David, for your most generous comments! I appreciate your input, and I’m glad that this build has remained interesting despite my admittedly glacial construction pace!
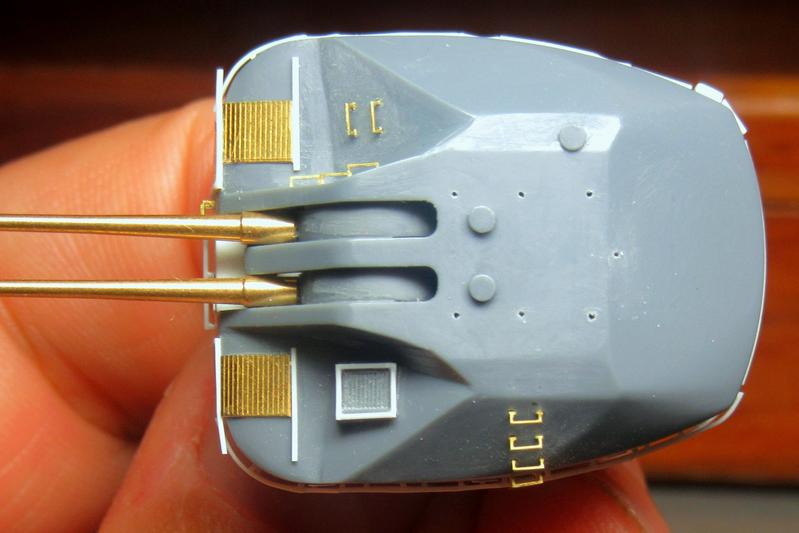
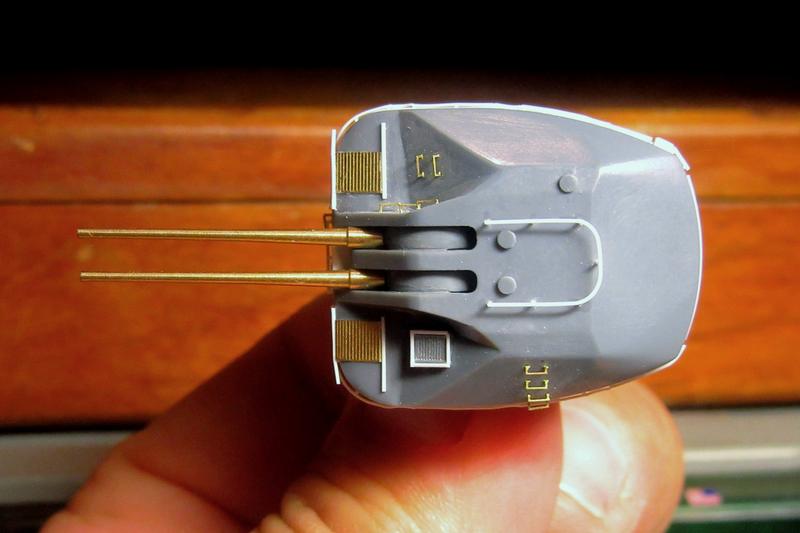
One last task before applying the rivets was to fit small “eyebrow” rainguards to the gunhouse scuttles. I made these from .010 inch brass wire.

The eyebrows were formed by looping the wire around a 1.5mm drill bit and then cutting the resulting rings into semicircles. Each of these was then flattened slightly by rubbing both sides against fine sandpaper.
Since the scuttles themselves were .058” (1.47mm) discs, the 1.5mm drill bit made the eyebrows just a tad larger in diameter. I made six for each gunhouse with some spares.

The finished rain guards help the scuttles match the others throughout the ship.
Next up: the rivets!
8 Likes
Not too late to open the doors/ scuttles and build complete interior with operating breach blocks , ammo hoists etc . - JUST KIDDING 
4 Likes
It’s just staggering the amount of detail you cram into a gun turret - never mind the entire ship! Really enjoying watching this (and learning a lot too). Thanks!
2 Likes