Done. 678910
1 Like
Thanks for the extension, I should be able to make it. ![]()
2 Likes
Can’t remember if I had already posted some final pics of my finished campaign build. ![]() Has already done some model shows …
Has already done some model shows …
It’s a Nakajima C6N1-S “Saiun” Night Fighter, kit is Hasegawa 1/48
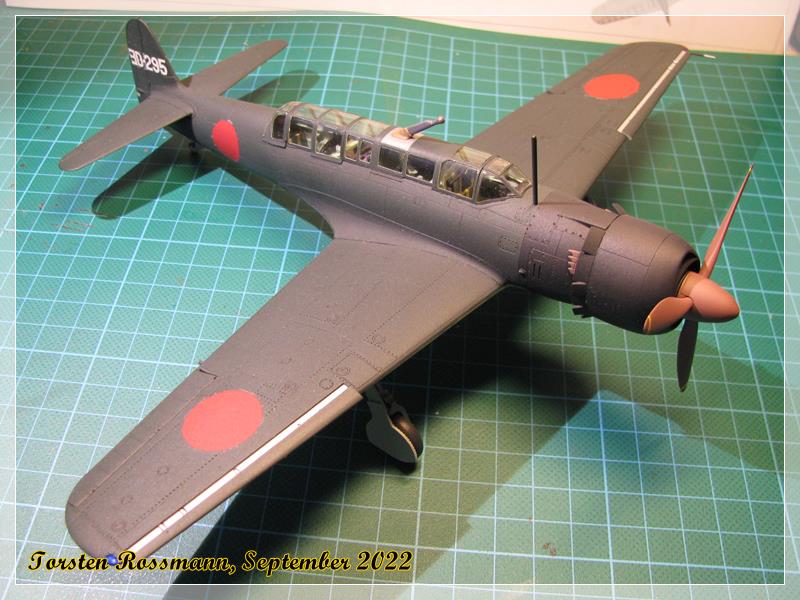
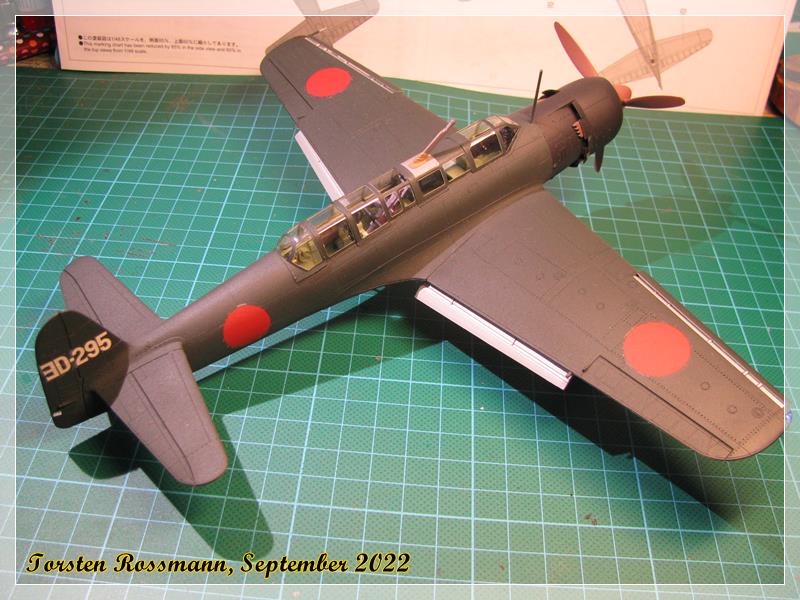
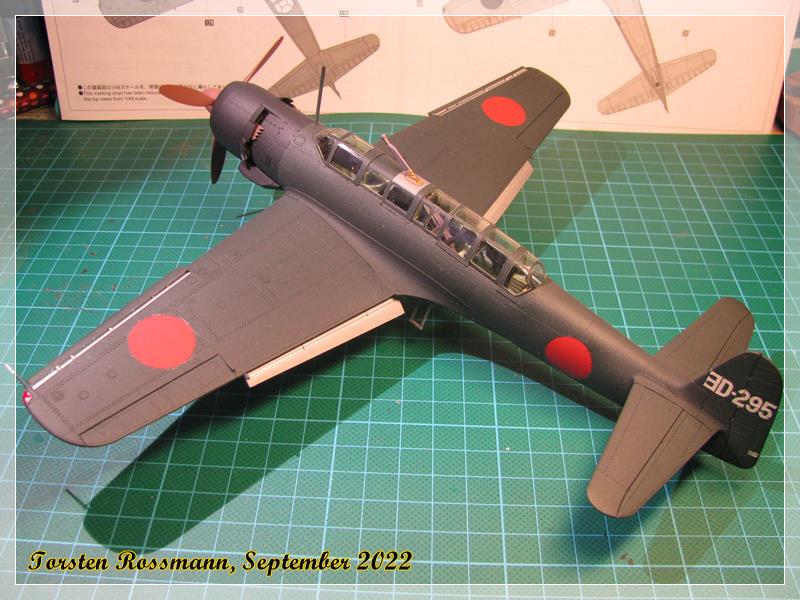
The whole build progress can as usual be seen in my blog “Torsten’s bench works”.
10 Likes
Wow! Fantastic!!
Wow, I thought this campaign ran until the end of June ![]() I better get started. Thanks for the 18th June extension
I better get started. Thanks for the 18th June extension ![]()

5 Likes
Colin, that’s great news. Where did you get the replacement sprue with the landing gear?
That’s great that you extended the deadline for the campaign.
The other day I posted that I won’t be able to do anything on the site here more than an occasional post until we get the house on the market and sold. Today our house went on the market. Shortly thereafter, we sold it! Closing date June 23rd.
Between now and then we will continue packing and getting all of our stuff out. Ugh, that includes my modeling area. Hopefully sometime in July I will be gluing and painting again.
Any chance for Risng Sun Campaign part 2?
Regardless, it’s great to see this fantastic work you’re all doing. @panzerman1, that’s a wild diorama with the okha. @BlackWidow , love the Myrt. @Mead93, Frank and Jill will climb over the hill to sit on the modeling shelf of glory.
I keep falling asleep as I’m trying to post this so just let me say I’m really enjoying the Chi-ha, I’m looking forward to the Otaki Tojo, and @Gary_Kato, thanks for showing me what to expect with the triple 25 mm. And the rest of you, banzai!
Fred
1 Like
Fred, congrats on the house! Very cool with an effective sale. ![]()
Looking forward to see what you will build when you get the working space up and running again. Hope the move works out smoothly.
Fred, I went to my LHS and they ordered it for me, only took 6 months lol.
1 Like
Naive question here. As I near the end of the Jill painting sequence I am focusing on the Ki-84. I plan to do it as a late war B-29 interceptor. As such it will have an IJN gray bottom and Olive greenish top side (I plan to use ak real colors olive drab 1941 for this with possible a touch of lighter green). I know later war planes tended to have rough paint jobs due to what I understand was a lack of primer. I want to emulate this effect and intend to do an undercoat of alclad aluminum. The question I had is, did the gray underside weather and chip as much as the top sides, photos of late war Ki-84 show significant top side paint chipping, but I haven’t found many good pictures of the underside
1 Like
Presumably the underside would chip and flake paint like the top side. I’d say especially the rear fuselage area, or the prop blast would blow any debris up from the grass strips they were often operating from. I don’t have any picture of Japanese aircraft that show the following, but you can find photos of Corsairs at Munda and Bougainville where the rear of the fuselage looks like a Jeep that’s been four wheeling through a mud pit.
I’m not familiar with that brand’s Japanese colors, a lot of research indicates that on the frank, the gray underside was the top side color heavily diluted with white.
Great info! Cheers!
Okay good to know. The olive drab 1941 is actually for early war US aircraft like the P-40’s at Pearl Harbor but it is the closest color I have to the No.7 olive brown, so I’m gonna use it as a start point. For the underside I will see if I can make up a mix then!
Outstanding work. It really looks the part. Well done!
Cheers!
chuck
Got the base green on used Mr color 15, IJN Nakajima green. Very happy with the color and the way it sprays! Did a semi black basing, focusing on panel line centers and going light over the panel lines. Tomorrow after it cures, I’ll touch up areas that are darker than I wanted, and then I’ll hit it with a blend coat. After that I’ll probably post shade the panel centers

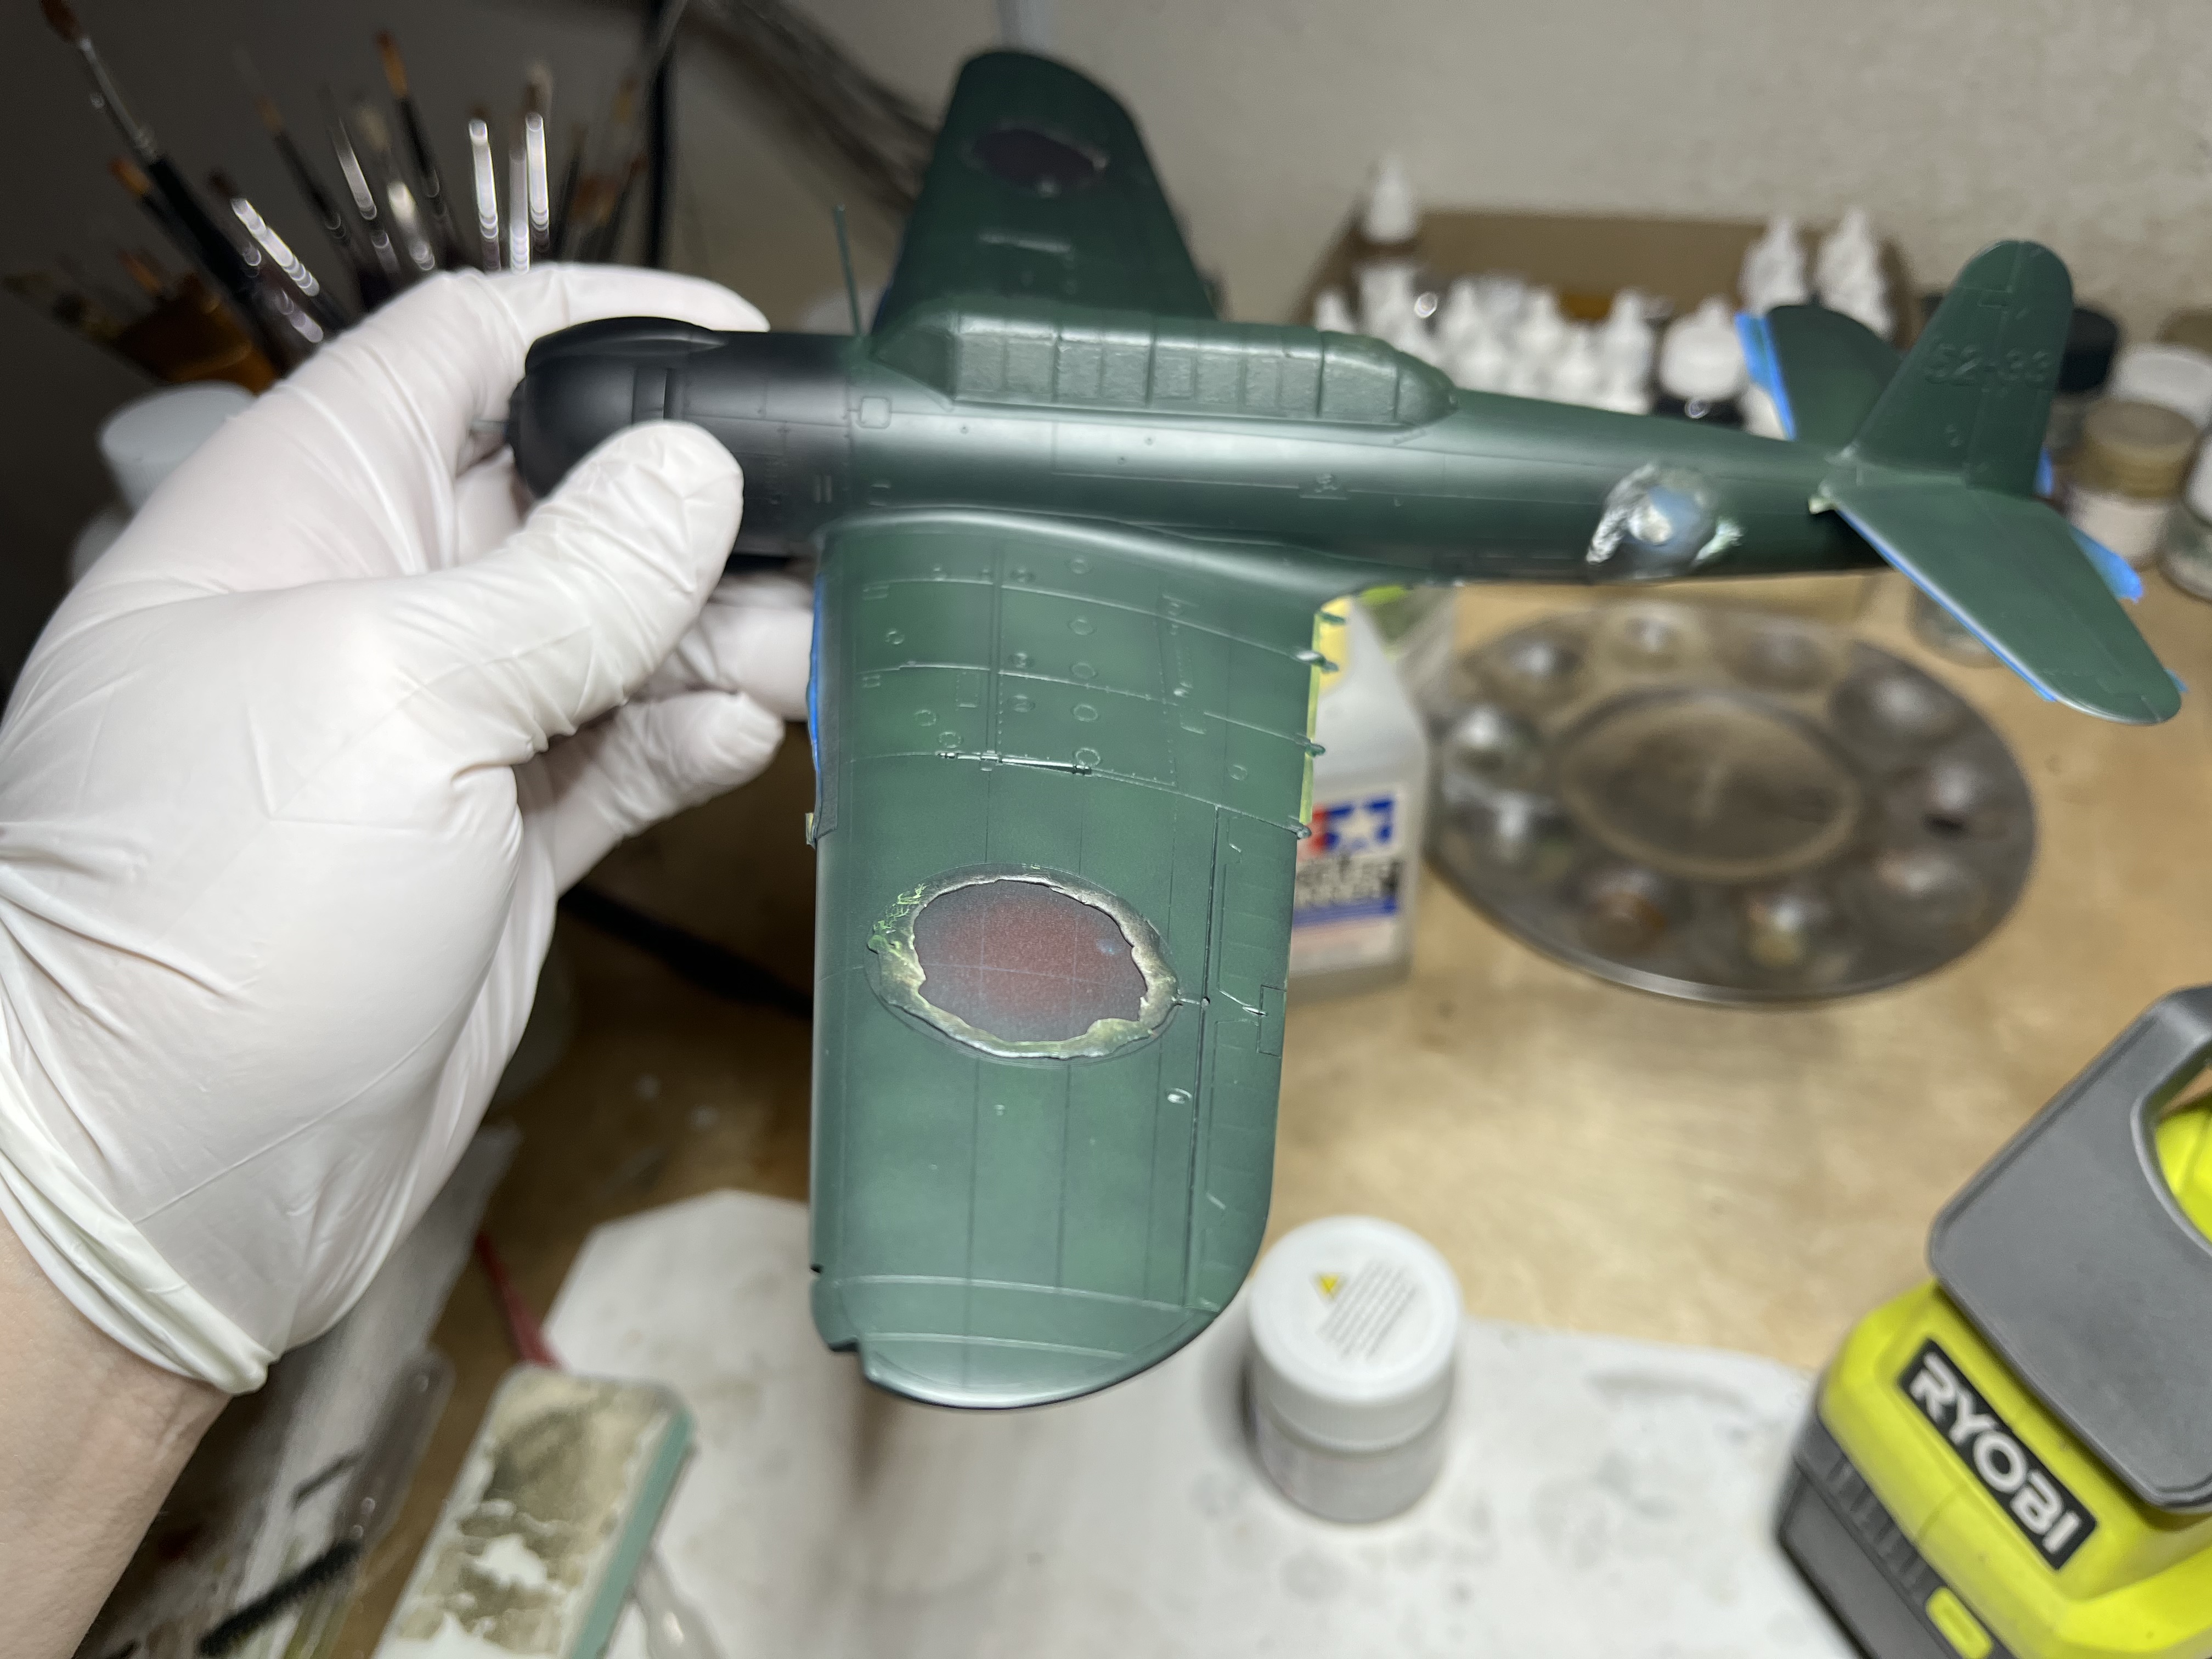


Getting close to the weathering stage on this one!!
7 Likes
Love that shade of green. Although I almost exclusively build armor, seeing this one makes me want to go out and buy a kit like yours and give it a try. I’ve just started using Mr. Color on some armor projects and I really like the way it sprays and the final finish after it completely dries.
Thanks for posting your progress.
Cheers!
chuck
1 Like
I am by no means an expert on Japanese aircraft color, but to my eye it’s a near perfect match to IJN Nakajima green, it is an excellent color! It’s a bit dull right now by design, as I intended to do some blend coats and post shading, but it is a really nice green!
It was my first time using my color, but as you say it sprayed beautifully and dried to a smooth finish! I will definitely buy more. It sprayed similar to AK real colors which I love!
Well i certainly appreciate you sharing your steps along the way.
chuck
2 Likes
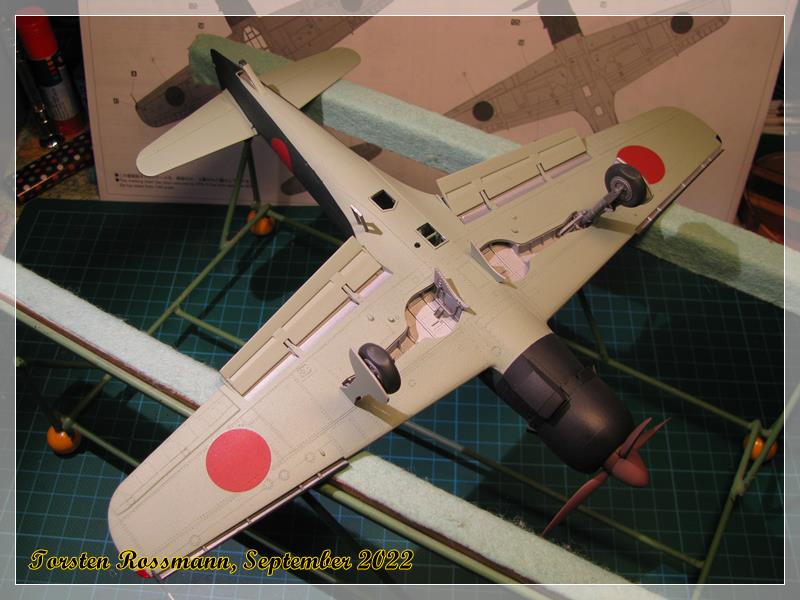
Base coat done. The stencil vinyl left a bit of residue on the markings. I think I can get it off with some Mona Lisa odorless spirits. I hope it doesn’t attack the paint though.
Otherwise, I am very happy with how this has turned out. Just need to paint the cowl then a satin clear coat for decals (some stencils on landing gear doors) and on to weathering


Edit: just as I had hoped, the mineral spirit took off the glue with no adverse affects!
9 Likes
Fantastic work.
1 Like
Hi Everyone,
As we get closer to the finish line, I’m impressed with the very nice, completed builds. This campaign has really brought out quite a variety of subjects!
For what it’s worth, I use Mr. Surfacer (500, 1000, 1500) all the time. On most seams I let it dry and wipe the excess away using plain label lacquer thinner with not issues at all. If more complete filling is needed, I’ll coat it with some superglue and sand and polish it with no issues either.
So, in my last update regarding the Ki-27, I alluded that it was part of the “spatted” builds, and here’s a bit of an update on that. With the extension, I was a bit hopeful that the Val would make into this campaign, however, my palate is full and will most likely be a stand alone build. I was in the mindset of early 1942 Malaysia when I decided to the do the Ki-27, and would also like to have something a bit different that would have been around at this time. Enter Nichimo’s Ki-51 type assault/recon plane, allied code name “Sonia”.
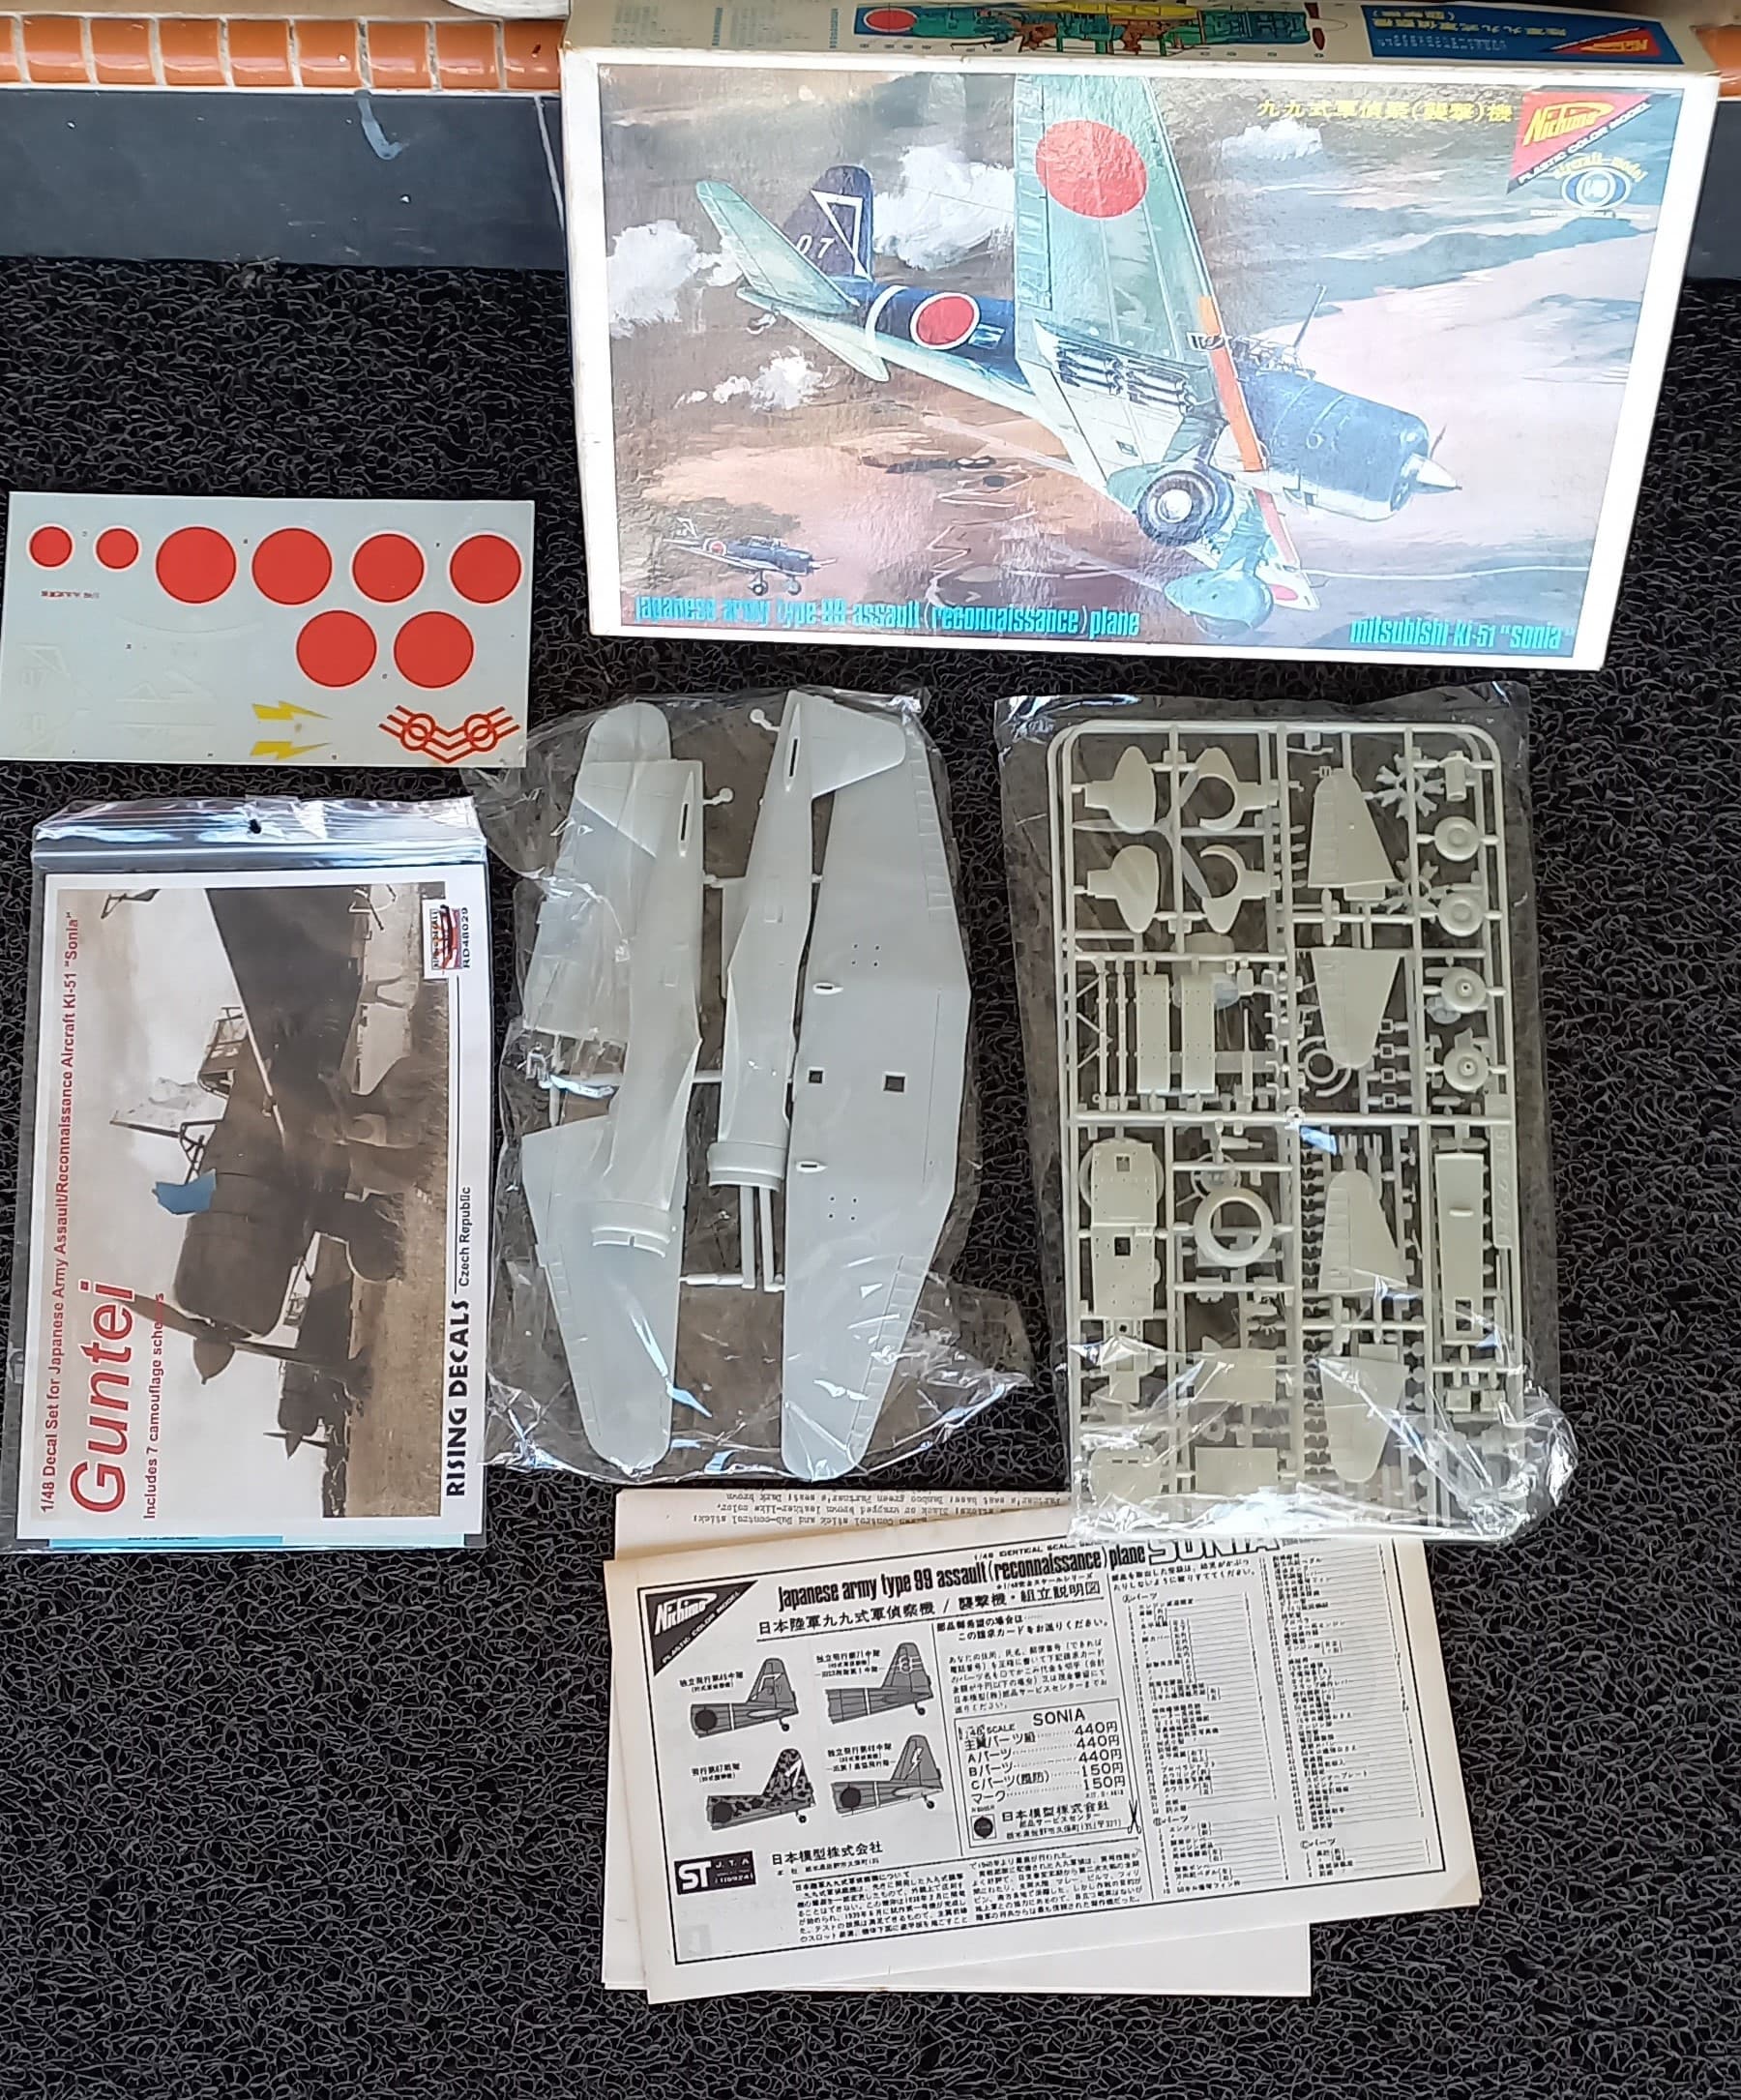
First molded in 1975, this kit has held up well over the years. Granted I haven’t had the opportunity to see what is in the Wingsy kit that was introduced in 2019. While I do enjoy painting the insignia on my Japanese builds, I picked up a set of Rising Decals and wanted to give them a go.
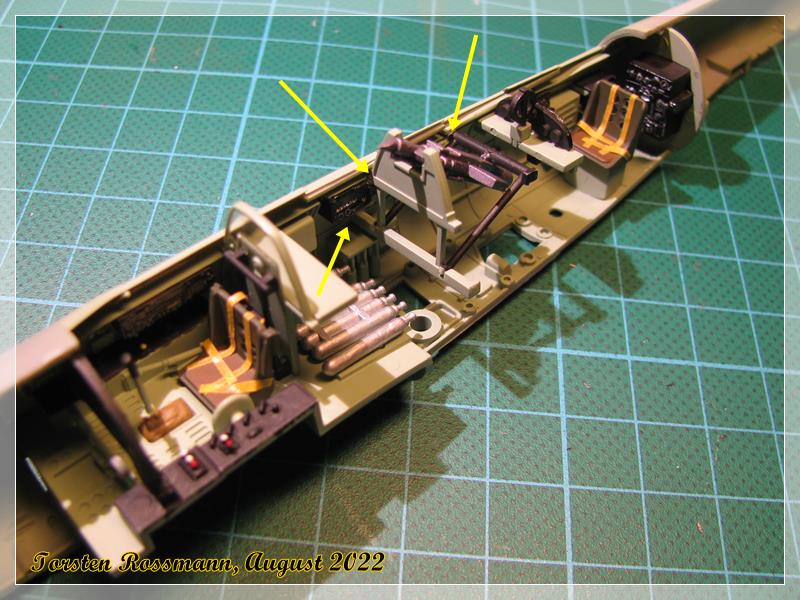
Following a washing of the parts I went about deciding how this build would go. There are no real framing supports on the interior, so I set about making those, additionally, I have noted that a good number of modelers build up most of the interior prior to painting, so I decided to try this out as well.
The pilot seat that comes with the kit looks a bit more like a chase lounge than a pilot seat, therefore it was replaced using a Tamiya A6M2 (old kit) seat with some grooved stock sheet styrene added to mimic the seat back cushion.
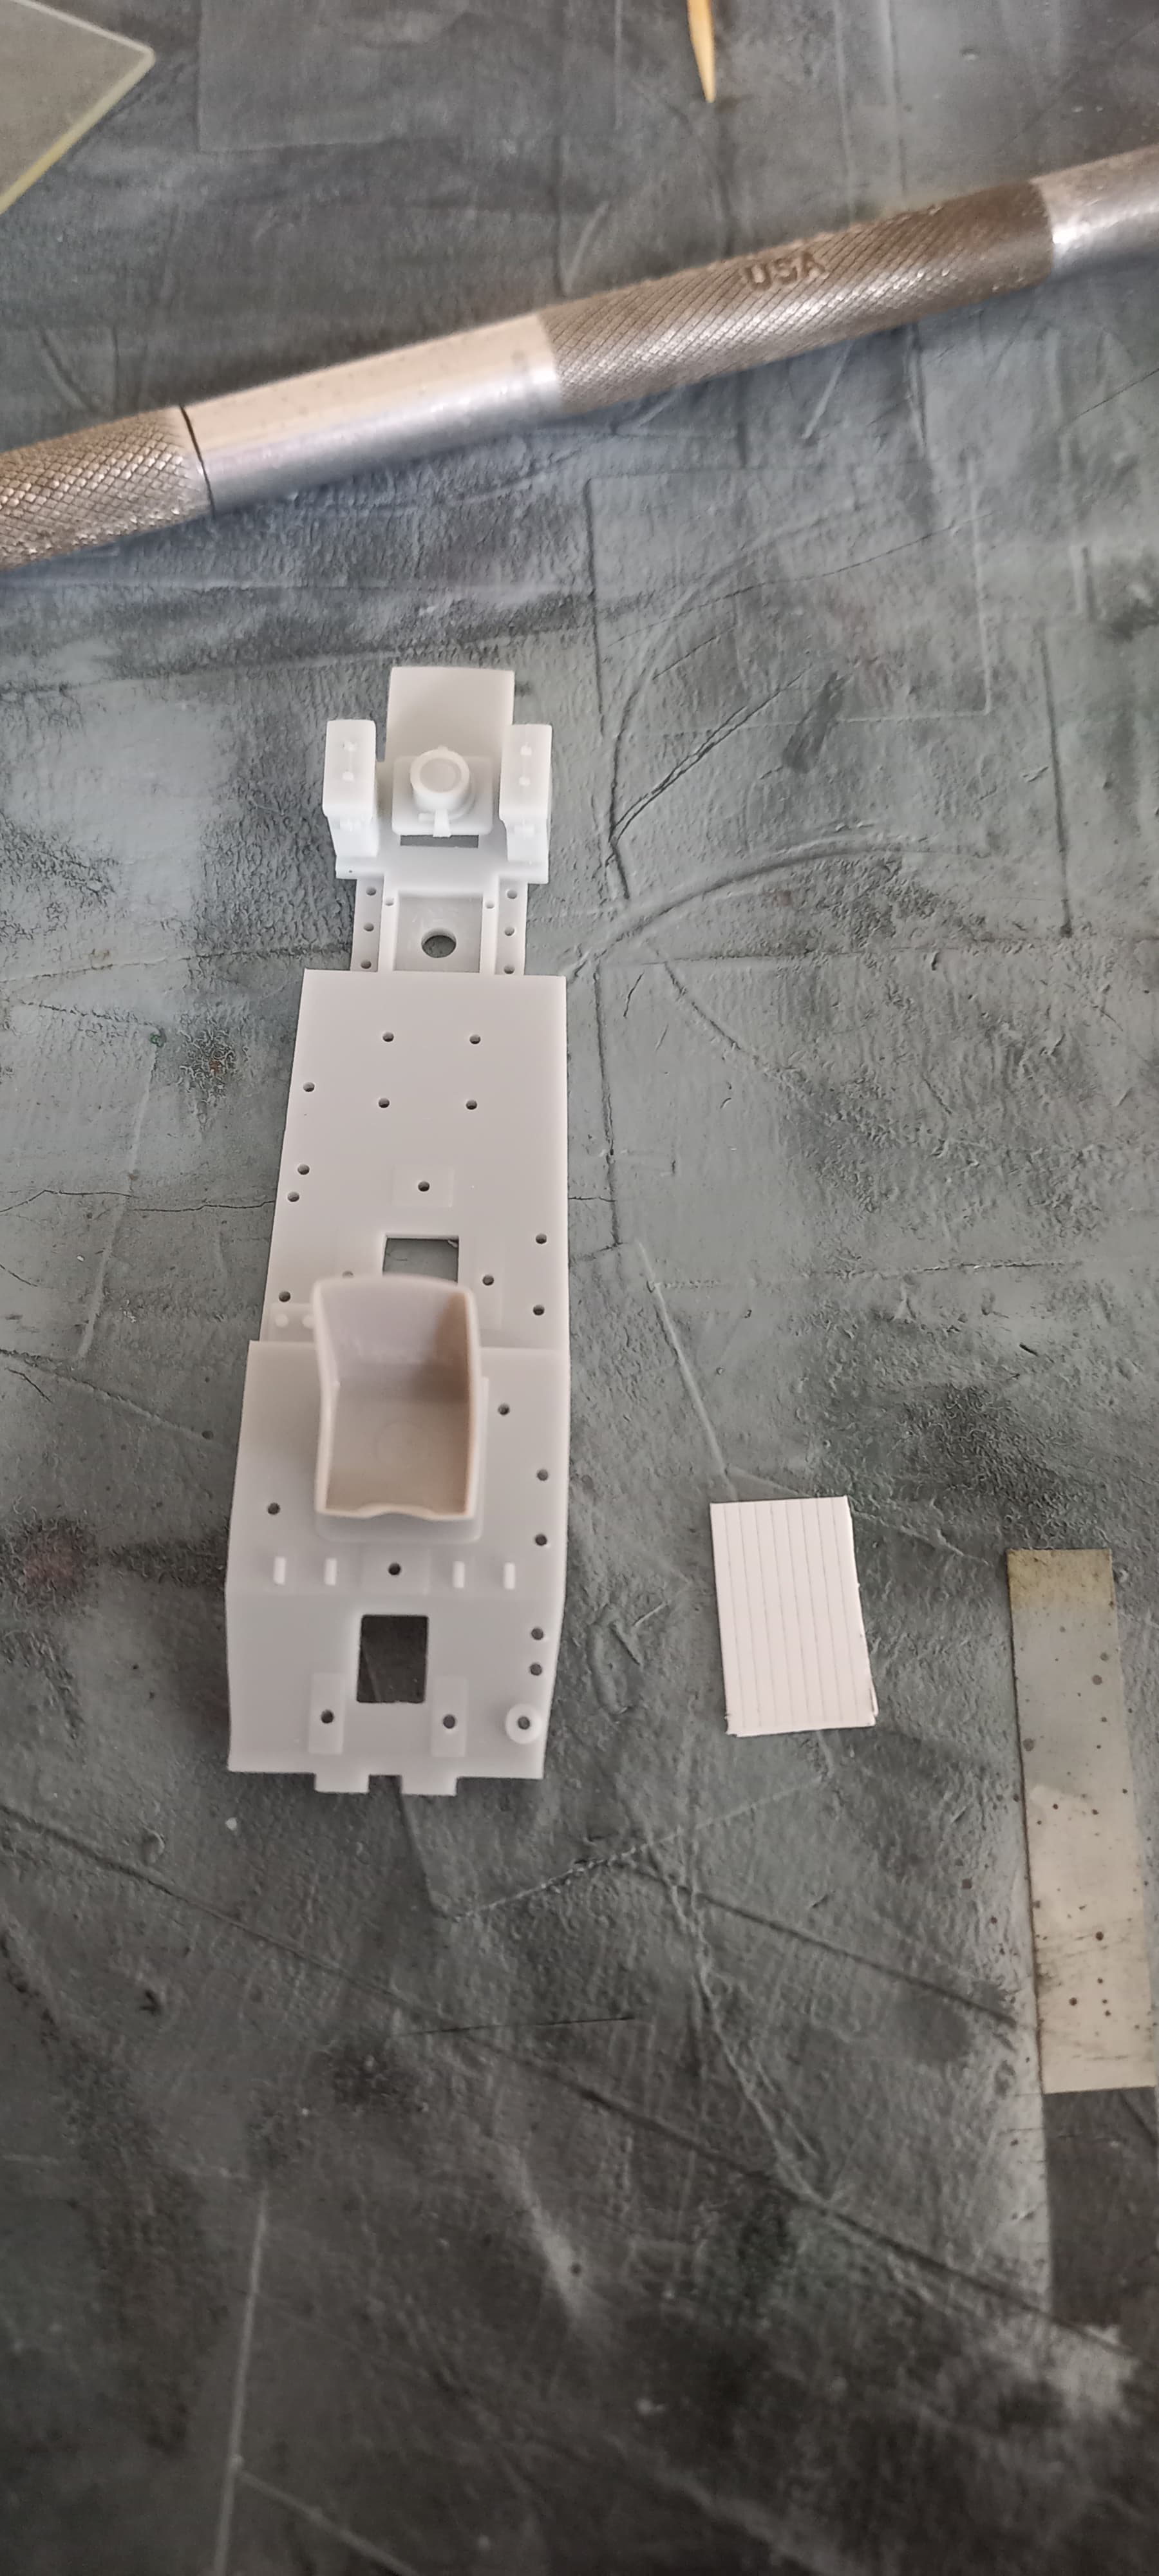
Next I opted to start adding parts to the cockpit flooring and marking the exterior along the rivet lines to act as a guide for the ribs that would be added.

After using some 0.01 thousand sheet styrene cut into strips, and some stretched sprue I added some ribbing that would be visible through the open cockpit. I also added the bits that went on the fuselage sidewalls.
It was then time to paint the interior! I started with a black base using Mr. Surfacer 1500 black (I really like this as a primer, gets rid of minor scratches, looks good and with a little rubbing shines up!). This was followed with the interior base coat of Tamiya XF-71 cockpit interior (Mitsubishi).

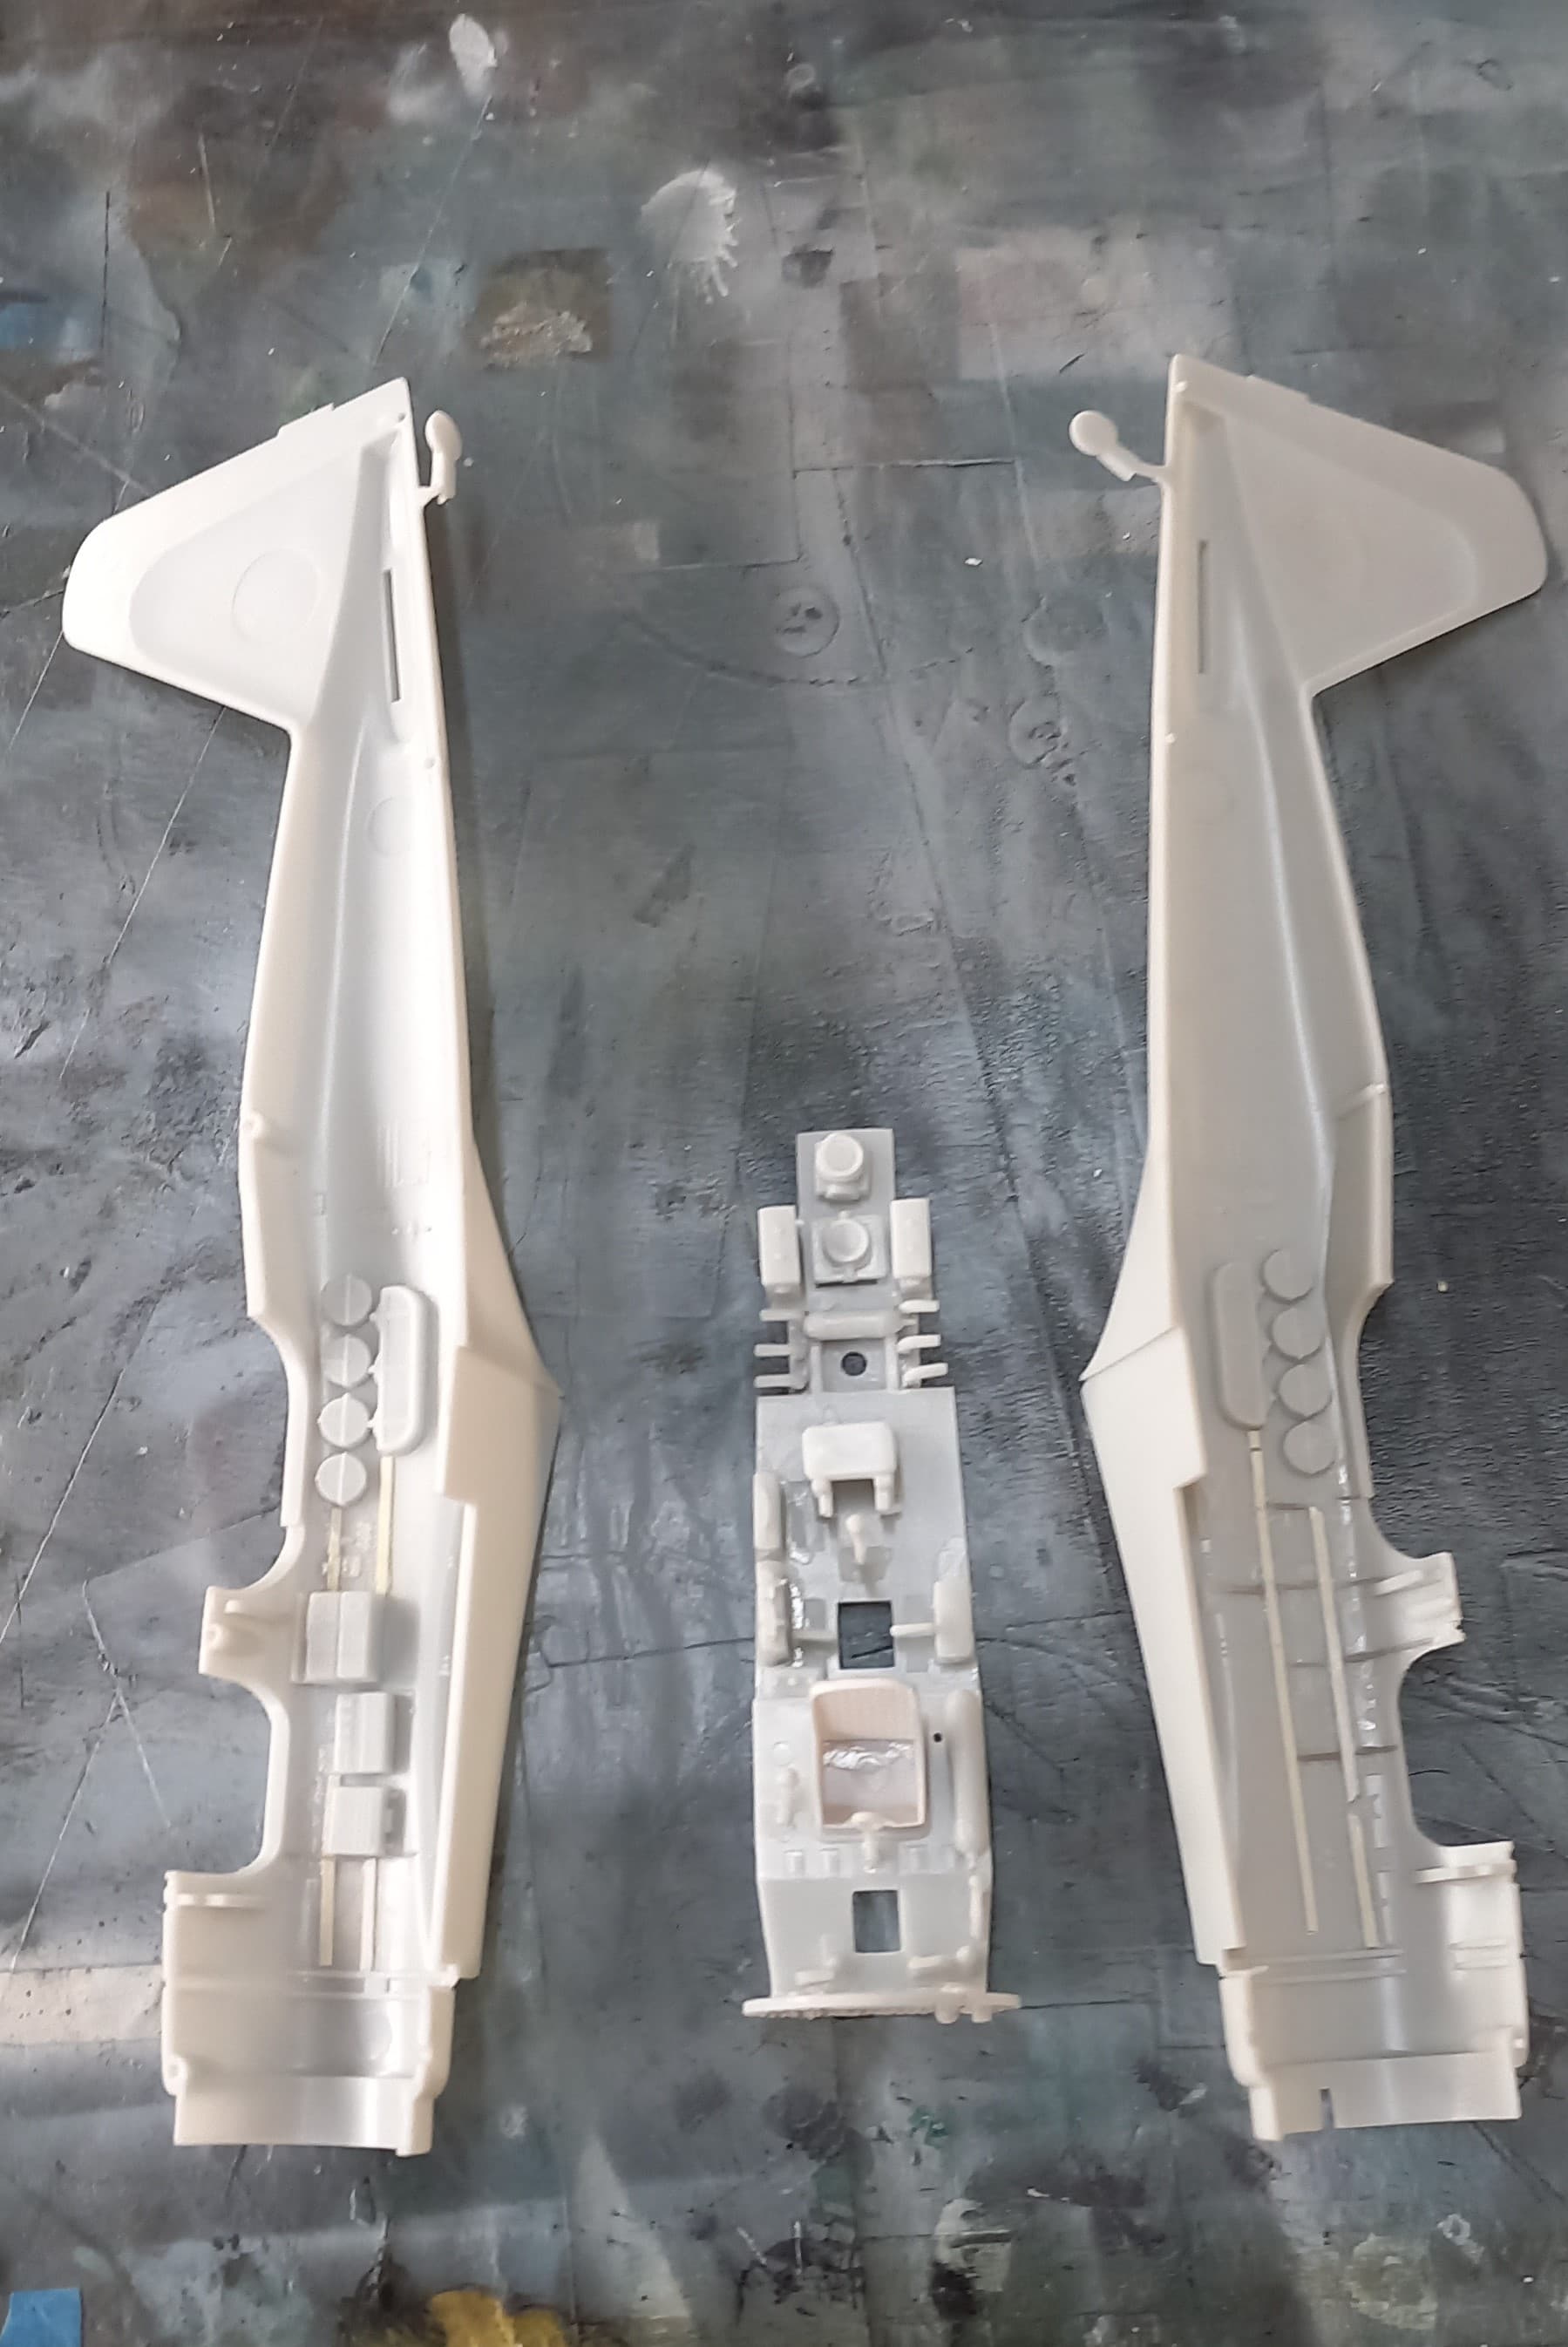
I then proceeded to do some detail painting of the interior parts of radios (also using a decal to replicate the tubes of the radio from an old instrument decal sheet) and the spare ammunition drums. I also gave some dry brushing of greys and silvers. One thing lacking was a decent throttle. The Ki-51 I was doing would have the controls set up in tandem so that the guy in back could fly the plane if needed. This meant that I’d need two throttles, to solve this I used an old PE set from the Monogram P-47, using two PE per throttle as opposed to four.

At this point I was content with how the interior looked and through double checking how much would be visible from the outside. I also assembled and painted the engine and test fitted it. Since the cowling would be closed I left off the parts that would not be used to support the engine. A rather fiddly assembly, but with some patience it goes together and fits as it should.

With all the test fitting done the fuselage halves went together with no issues. This did lead to a quandary about the roll-over bar. The kit part comes as a solid piece, where as the real one was open to allow the guy in back to see forward. Using a drill bit in a pin vice I opened up the kit supplied roll-over bar

Once completed the wings went together with no issues and were attatched to wings with some fanfare, but not too much.


The gaps were filled with Mr. Surfacer 500 and smoothed out once dry with a cotton bud wetted with lacquer thinner. These areas turned out very nice, and lead me to getting the spats constructed and attached along with the stabilizers. These line up nicely and alignment was quite easy to attain.
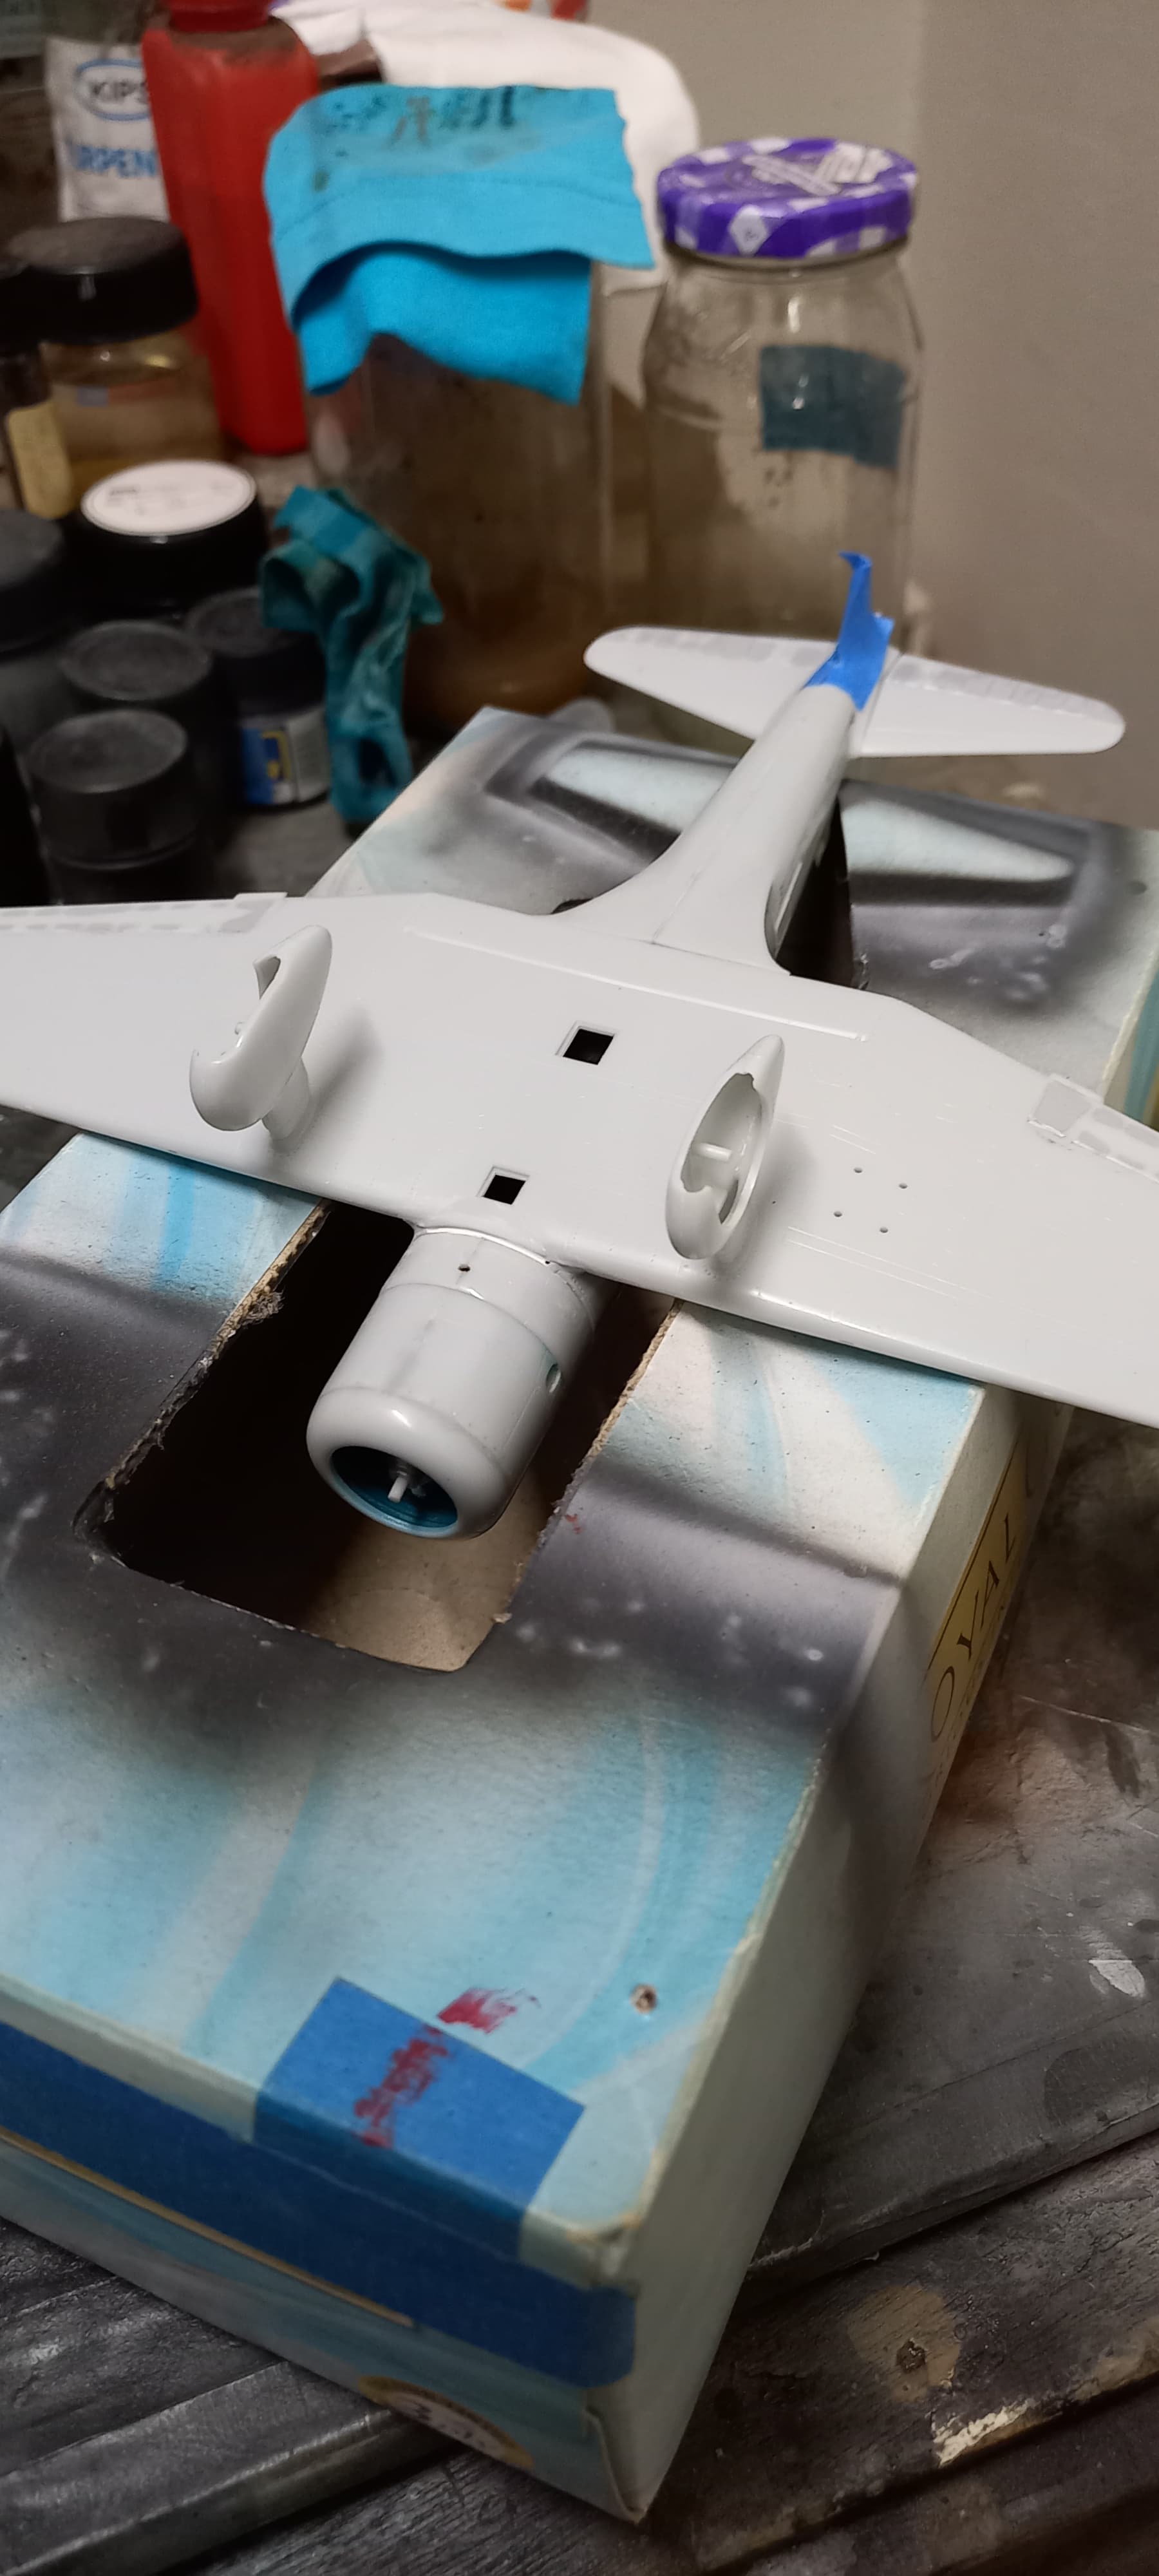
The roll-over bar was attached, and proceeded to give the control surfaces several application of Mr. Surfacer 500, as the kits depiction of this is really the poor part of the kit. After about three application things smoothed out and looked pretty good. I also used a shapie pen to see if all the seams were done, there were a couple that were taken care of with superglue.
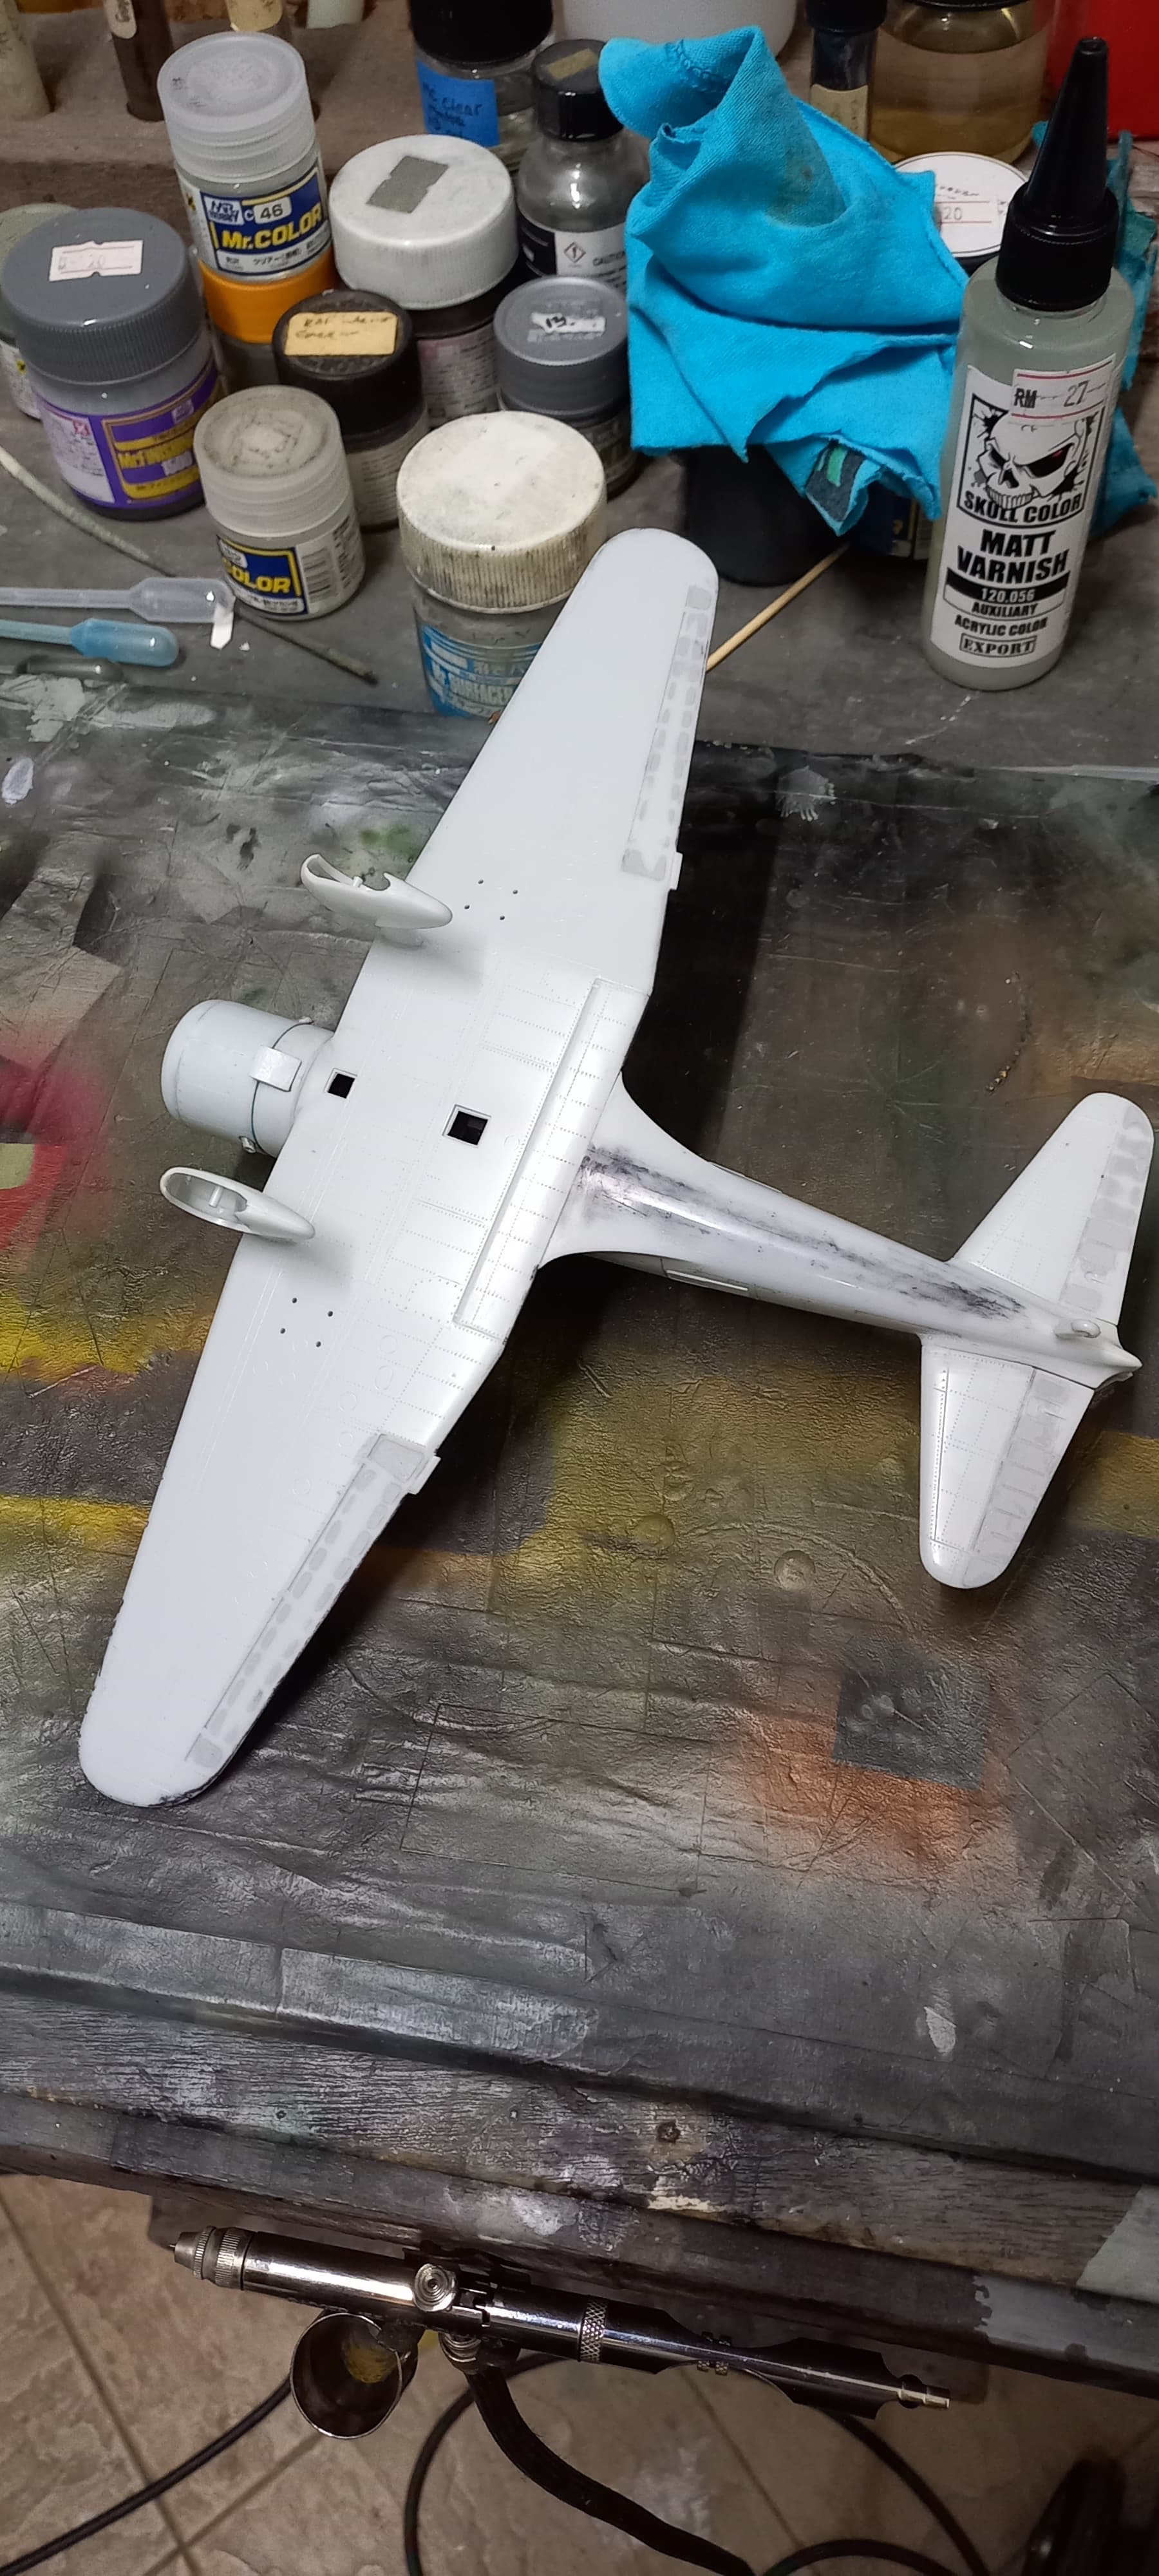

I wanted to paint the area under the canopy using a custom mix of Mitsubishi blue/black, so I first gave the airframe a coat of Mr. Surfacer 1000 mahogany as the base coat, since the primer used on this plane was done in red brown, which for my purposes was close enough.


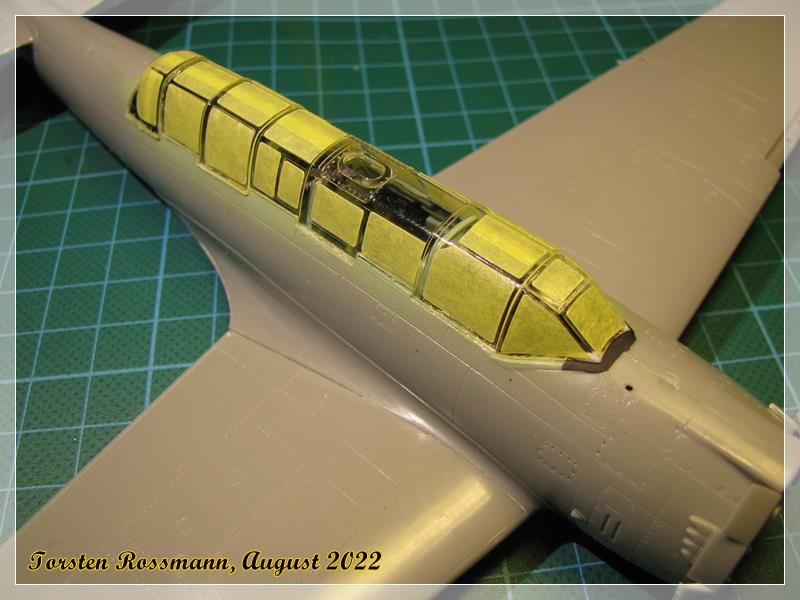
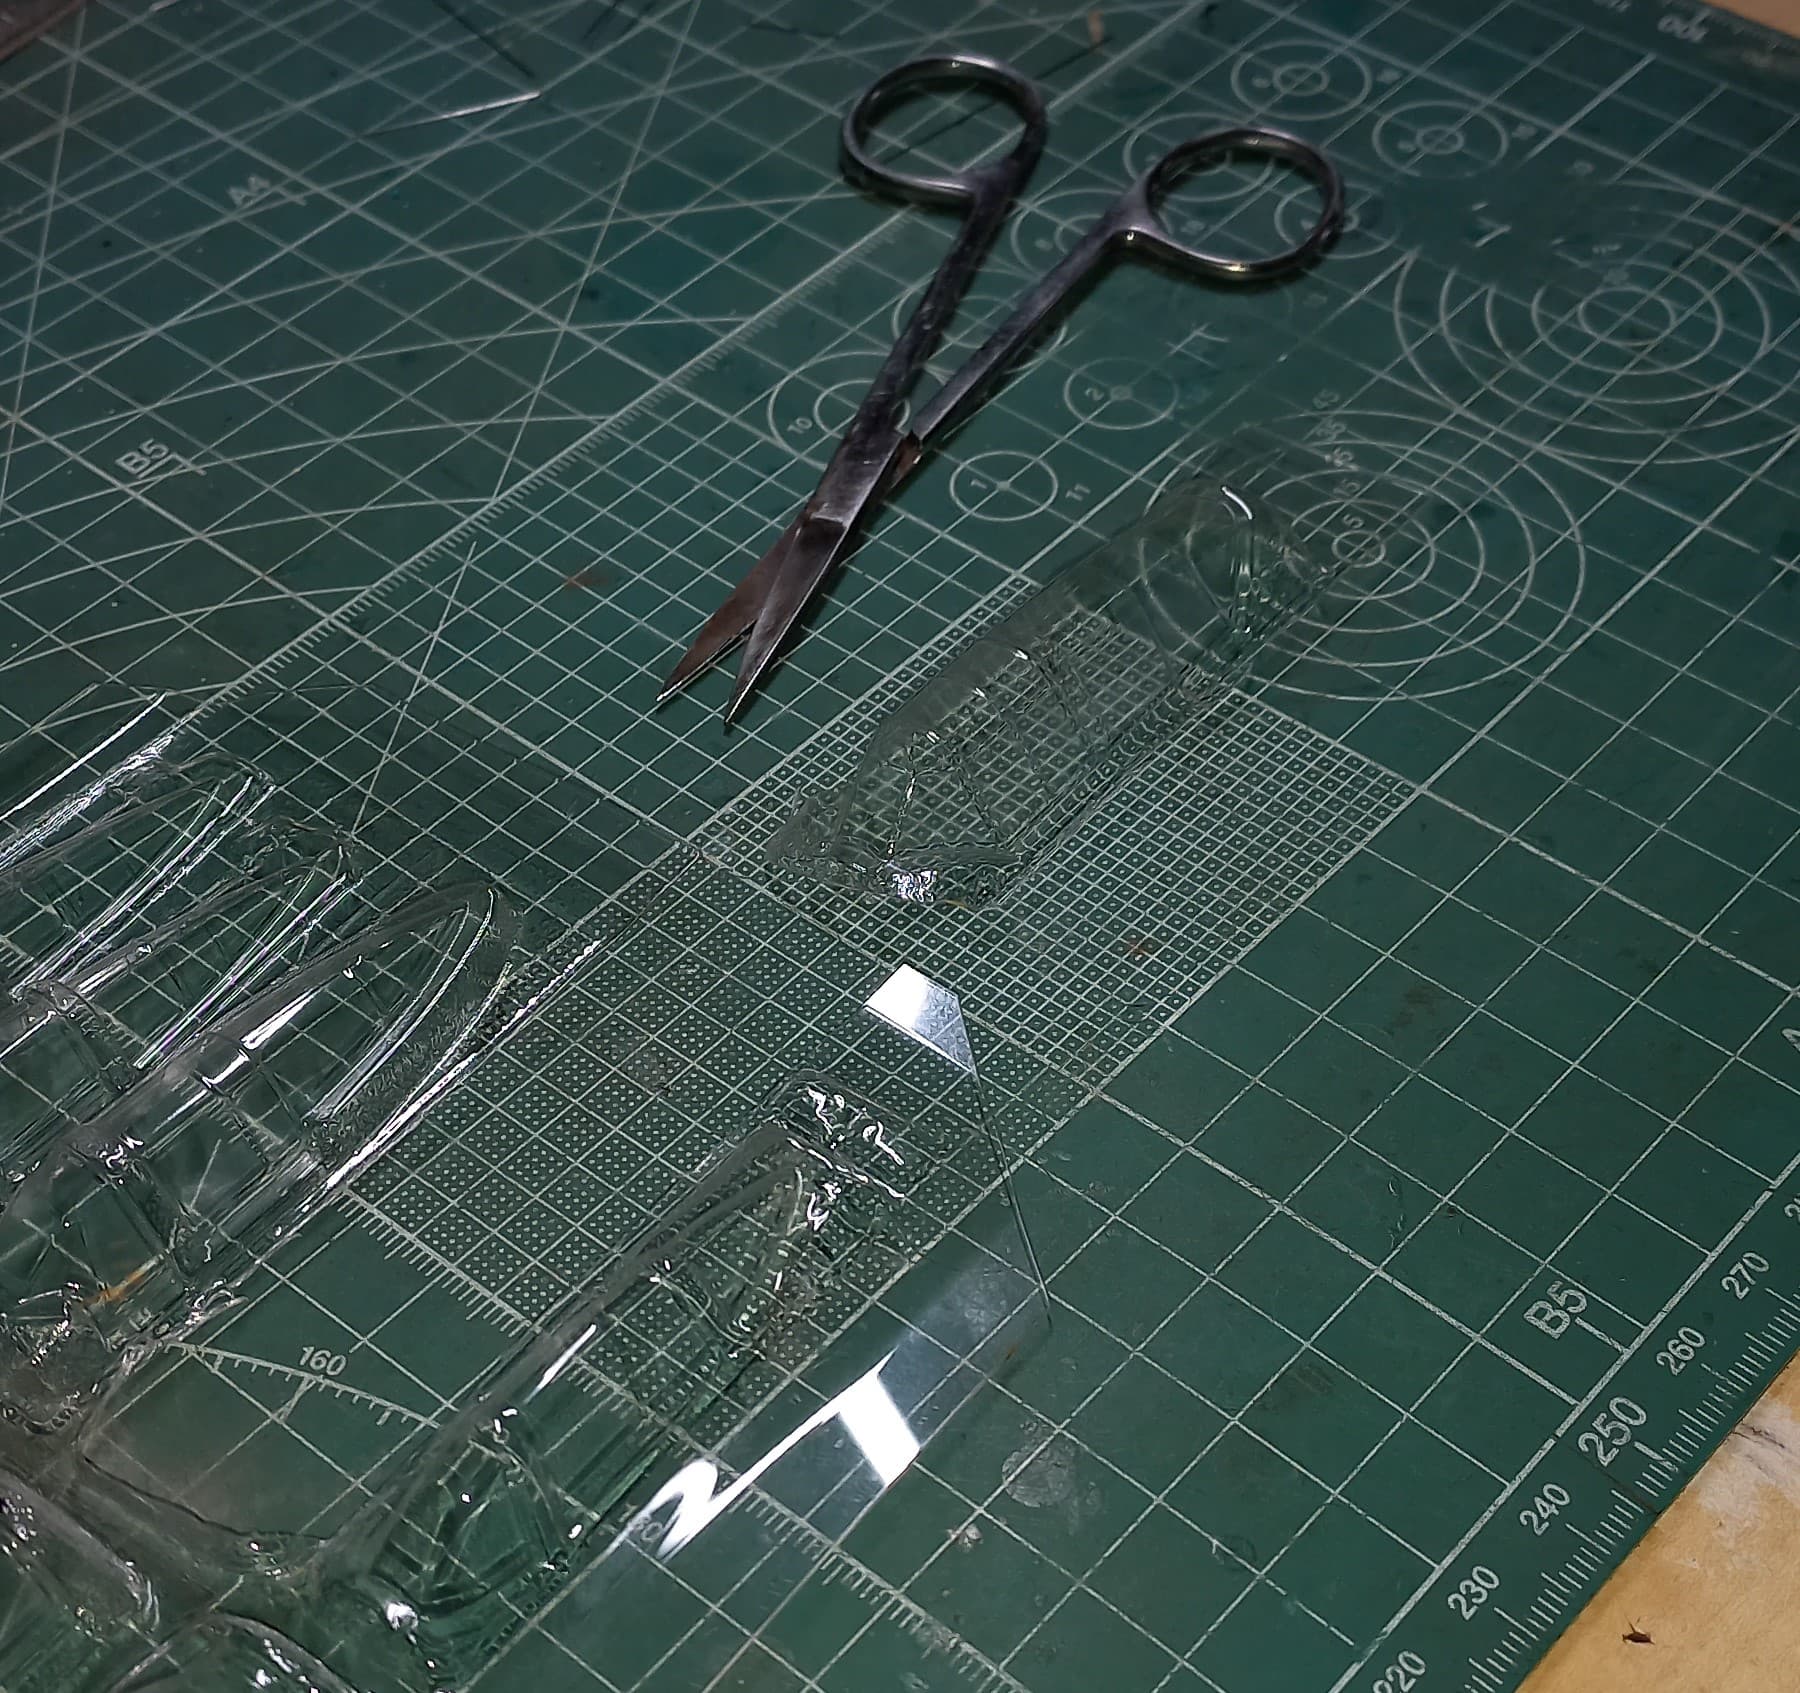
The area under the canopy was then painted black/blue, which lead to the final step of assembly the canopy. The kit’s canopy is a bit on the thick side and can only be posed in the closed position unless one wishes to spend hours trying to make it look more realistic. To remedy this I opted to use a Falcon canopy from their IJA canopy set.
The canopy was carefully cut away from the main sheet, and then carefully trimmed using a number 10 razor blade. I’d wished to get better photos of this procedure to demonstrate it, however, without an assistant to help and phone camera the photos I did take won’t adequately show the description. With a little time I might be able to demonstrate it (sorry).

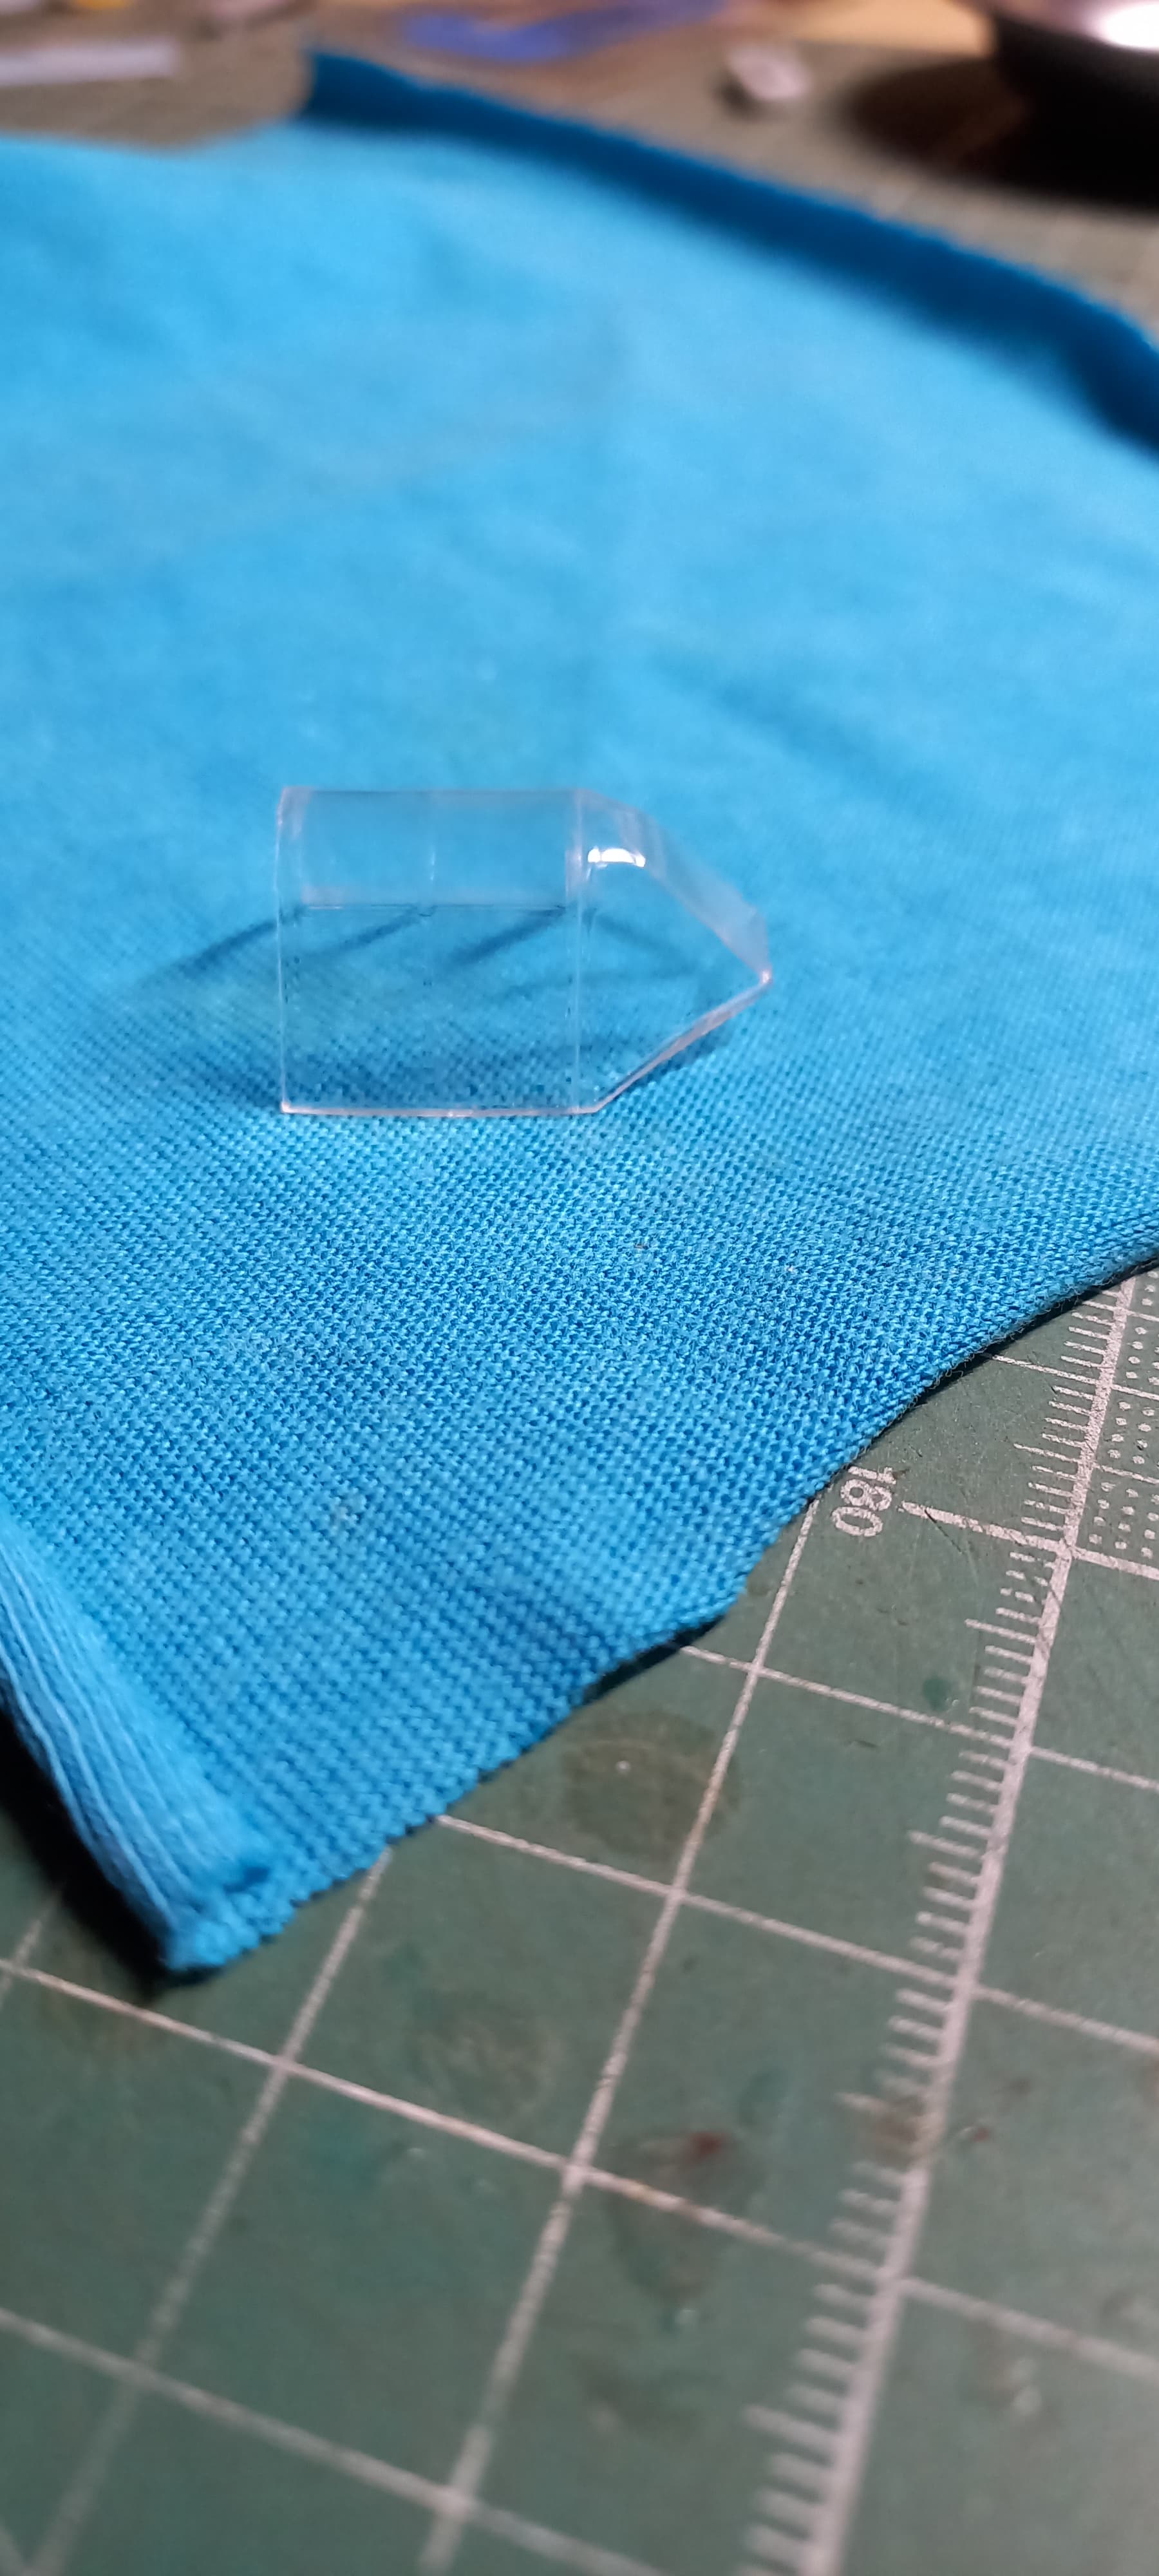
I wanted the pilot section of the canopy to be posed open, so I filled the interior of vac-u-form canopy with blue tac, and was able to score the plastic to allow for easy seperation.

Once all the canopy pieces were seperated, the arduous task of masking the canopy began.

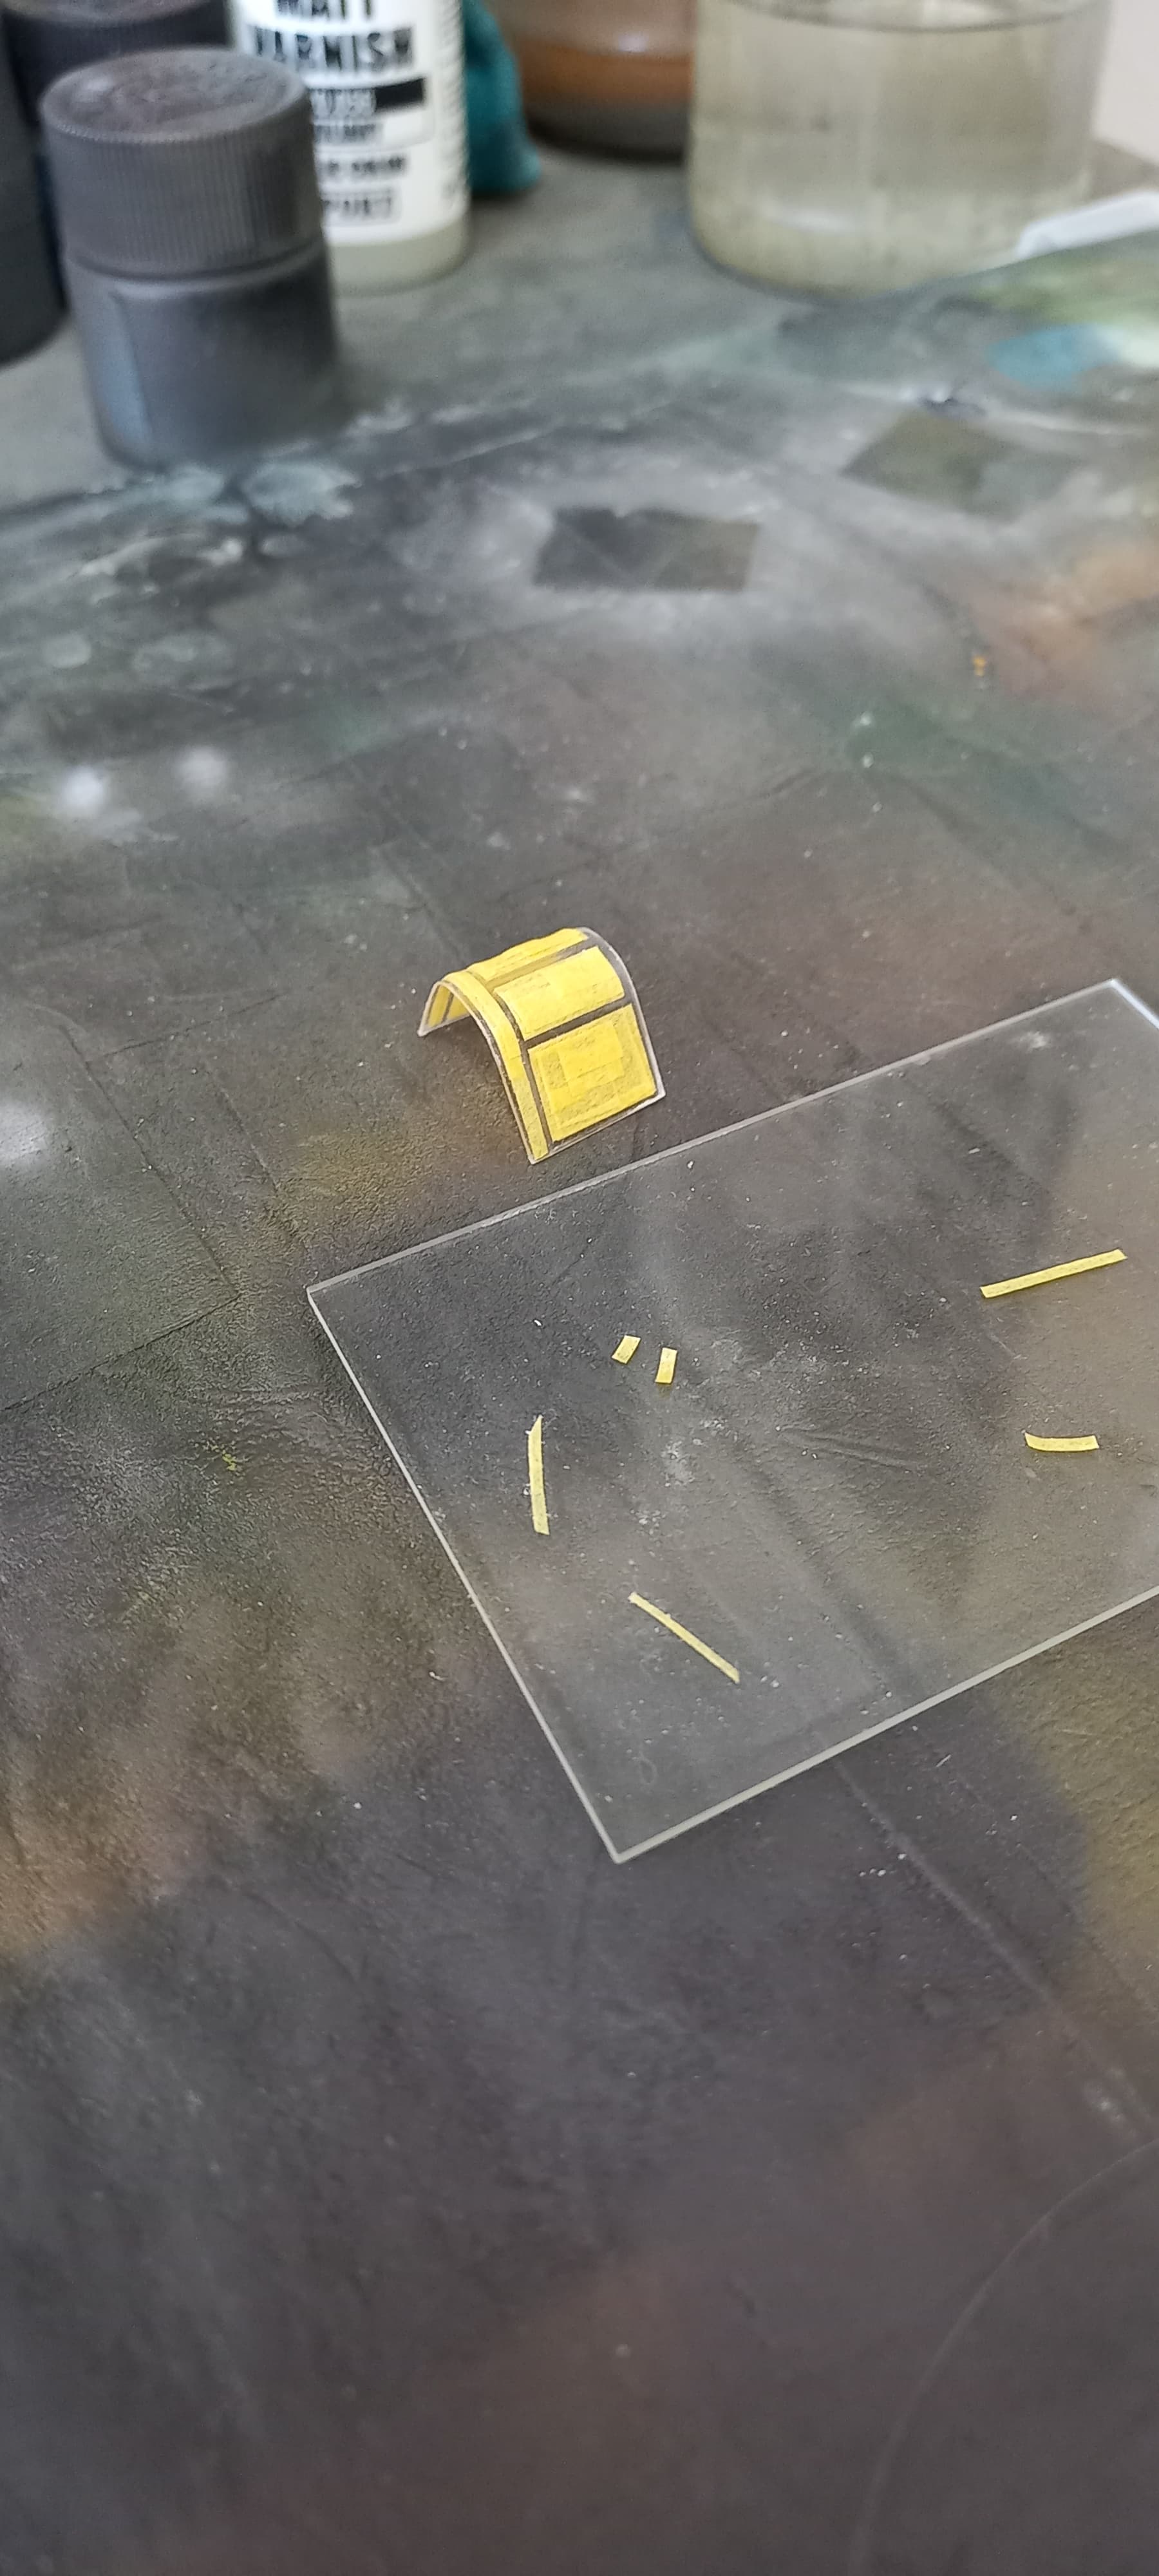
The masked canopy’s were attached to the airframe using white glue, and any subsequent gaps were also filled using white glue. At this point I could finally paint the bird! I’ll update the painting process and results soon, till then be safe and have fun!
8 Likes