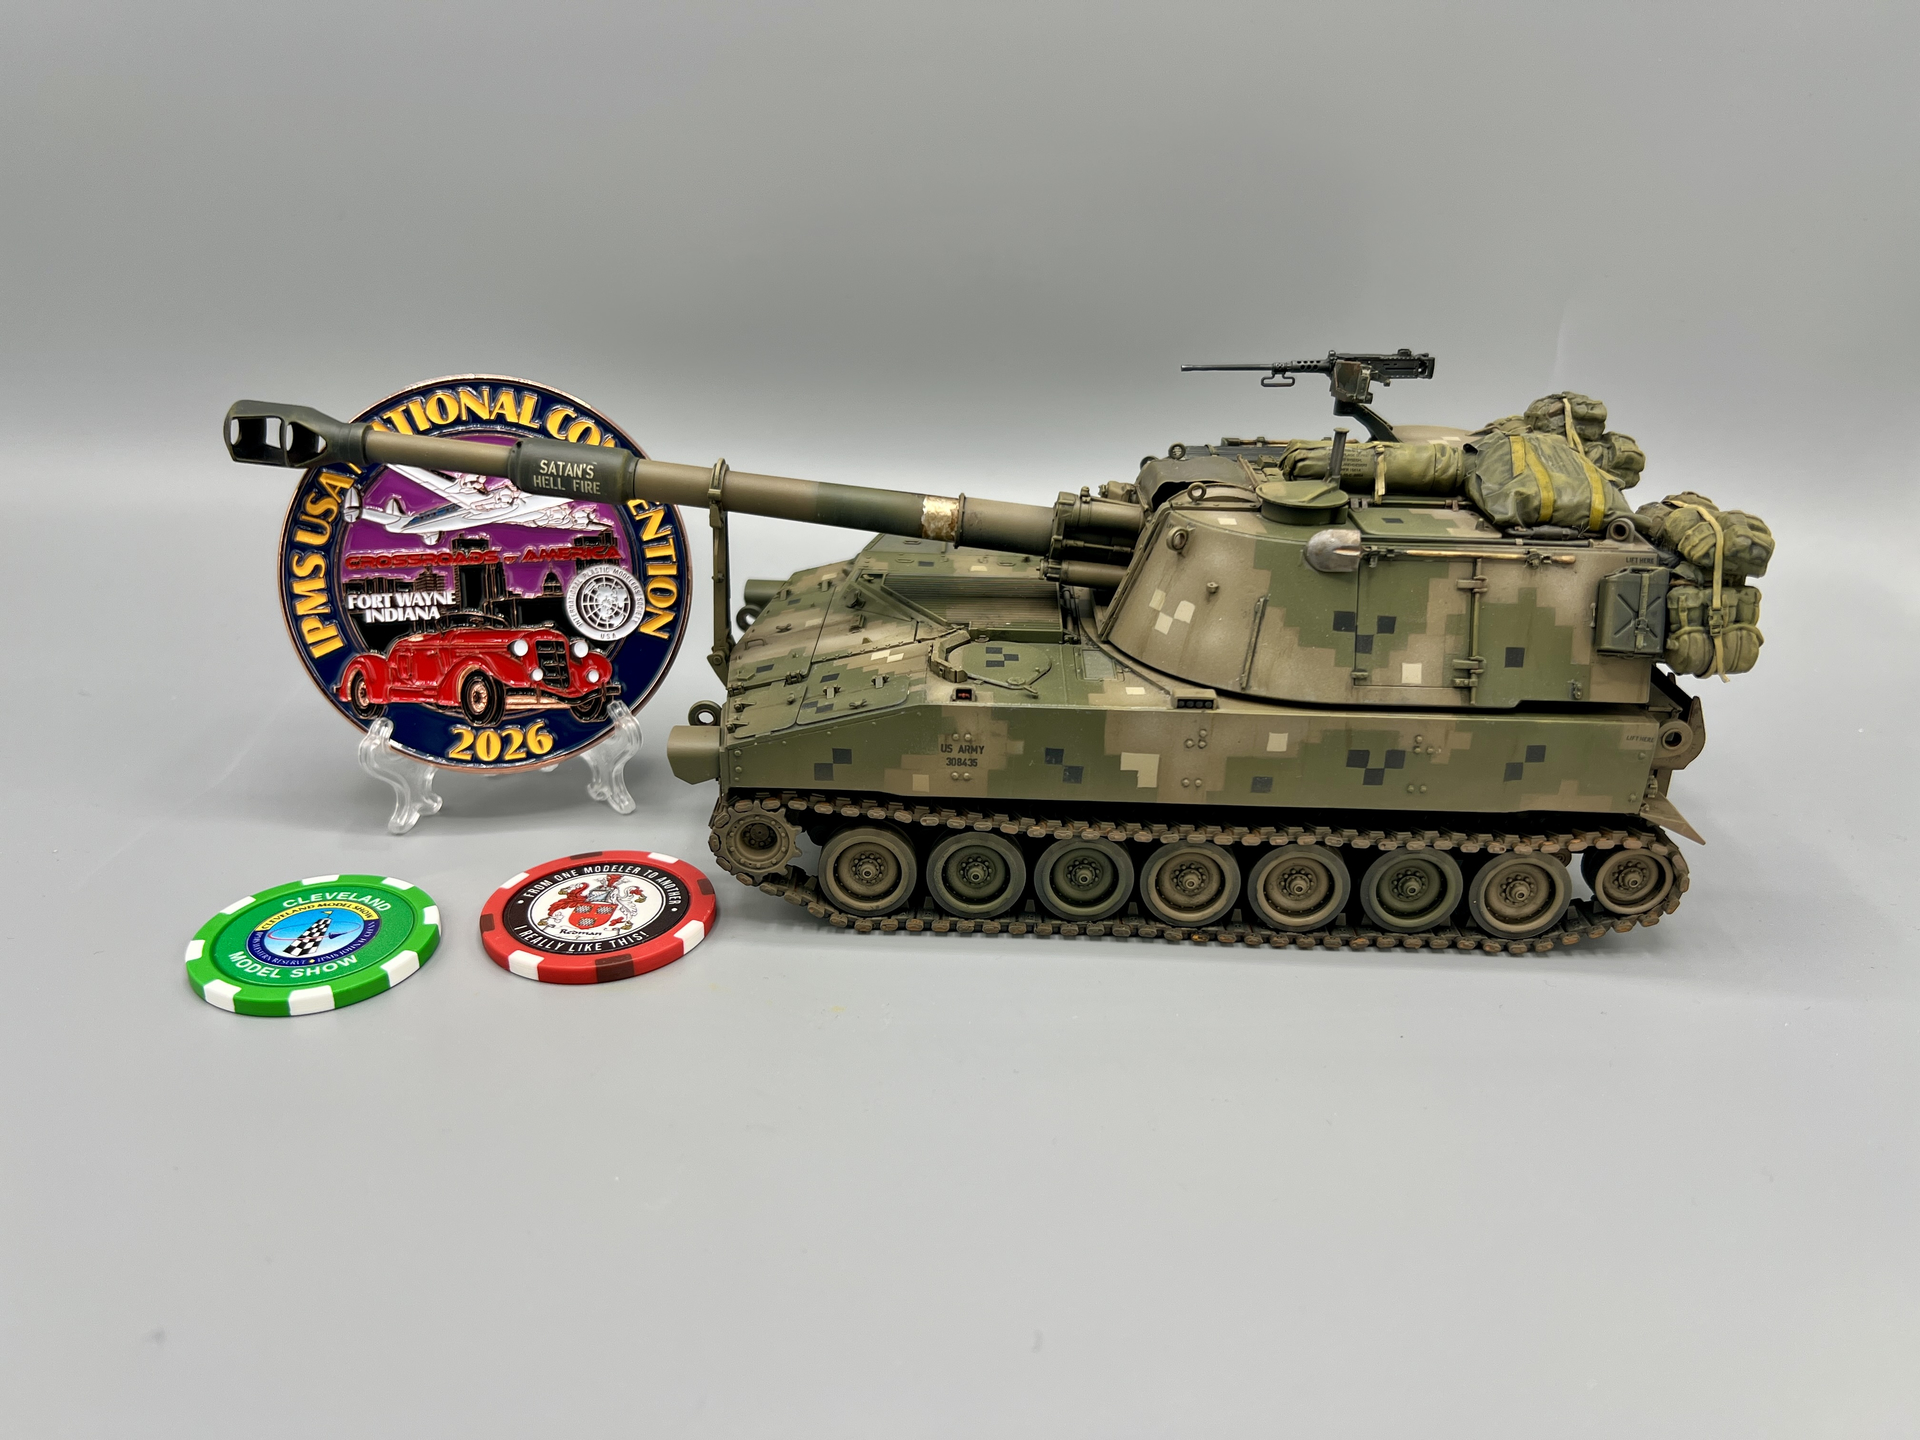
M109A1 in DualTex

All,

I am back from our long vacation. But had rotator cuff surgery 2 days after returning. So I am in a sling for the next 6 weeks. No modeling for me… So, I’m planning and plotting for now. One of the items on my list is a 2nd Armored Cavalry Regiment M109A1 in Dual-Tex camo scheme in Germany in the 1978-1984 timeframe. I’ve only found one photo of one of these.

A couple questions:

  1. any more photos of the M109A1 in Dual-Tex?
  2. Any one know which battalion this is?
  3. I am looking for bumper numbers for these (i hate doing my best guesses)

thanks.

Rick

3 Likes

Hi, Dual-Tex was only tested by 2nd Armored Cavalry. I think M109A1 should be rare, in this time most M109 were modified to A2/A3.

Do you know the Tankograd book about Dual-Tex?:
MASSTER - MERDC - DUALTEX
Mehrfarb-Fahrzeugtarnung der USAREUR im Kalten Krieg - TANKOGRAD Publishing - Verlag Jochen Vollert - Militärfahrzeug

2 Likes

Rick, Mirko, I’ve just checked my copy of the Tankograd book; it has the same (and only photo of the M109s). It gives no indication of the unit other than the individual vehicle names visible on the gun barrels, viz:

Master Blaster

Satan’s Hell Fire

Night Hawk

being the only ones discernible. As the camouflage scheme was only applied to those vehicles within 2nd (US) Cavalry, I imagine that someone on here with knowledge of their order of battle will be able to identify the unit shortly. Thereafter, any numbers should be fairly easy enough to devise I would have thought. I have to admit that such numbers generally confuse the hell out of me so I’m no help here(!)

4 Likes

I can’t help you there. What I can help with: Last year my surgeon wanted me out of the sling as soon as possible, two weeks, which was fine with me - the thing was driving me crazy. In fact, he had me doing light PT as soon as it was off - just bending over and letting it swing around slightly like an elephant trunk. Every patient and doctor are different - I get that. But mine was pretty severe. I also had to have the bicep reattached with screws.

The good news is I’m lifting as heavy as ever, and sleeping pain free. But my surgeon doesn’t want to hear that.

When all is said and done, you’ll be happy you did it.

4 Likes

Have to agree with this one. When we converted to the M109A1 from the short tube M109, it was in the summer of 1974. The most obvious difference in the A1 from the A2 is that the former still had the same cover over the panoramic telescope, which was simply a flat round plate on a pole which was extended up above the turret so you could then mount the pantel to the gun and stick it above the turret so you could see. The A2 had a permanently mounted cover with a clear glass/plastic window which allowed the pantel to be used and still maintain protection to both the pantel as well as the interior of the turret. By 1978 I would have figured that any of the old A1’s would have received the new modification.

The link below isn’t exactly what you’re looking for, but it does provide a bit of a clue. The bumper number on the left side of the vehicle as you look at it (either from the front or the back) will PROBABLY be 7A2^CAV where the “^” is a solid triangle. This indicates that the higher HQ of the 2nd ACR was 7th Army. On the RIGHT hand side the number should PROBABLY be either 1,2, or 3, depending on which Squadron the vehicle was in, followed by “HOW” indicating that it was in the Howitzer Batter of that Squadron.

After THAT??? Any guess as to what specific VEHICLE number it was assigned, I’d have no idea, OTHER THAN it definitely would NOT be “HOW-1” which would have been reserved for the BC’s jeep.

https://usarmygermany.com/Units/ArmoredCav/2nd%20Sq%202nd%20Cav%201974%20a.jpg

4 Likes

@taylorrl and @18bravo I hear you! My arm was rebuilt on 13 August, with one plate and about 10 screws. Still in a non-weight-bearing status, but I am getting PT for range of movement. I go back in November to get checked out. Till then the heaviest thing I can lift is a soda can.

@thathaway3 nice link, should be very helpful!

Ken

3 Likes

Can you lift a X Acto knife?

3 Likes

I can! The injury was to my left arm, so the hand that I use to hold the model or item I am working on. Unfortunately, I have been staying with family while I recover, so I have not been able to work on anything for three months now.

So I spend a lot of time watching the builds here!

Ken

4 Likes

Thanks guys! With only 18 M109A1’s to ever sport this camo pattern, I’ll be pleasantly surprised to find more photos. My date range was the period when 2ACR tested Dual-Tex. When I factor in the life span of the M109A1, it reduces the date range from 1978 to maybe 1980.

Barring more photos showing up, I’m going to arbitrarily pick bumper numbers - left bumper VII 2CAV - right 3HOW-12, in black on a sand background. I’ll go with MASTER BLASTER on the bore evacuator as the gun name.

thanks for the encouragement on shoulder. 5 more weeks in a sling is going to be a drag…

4 Likes

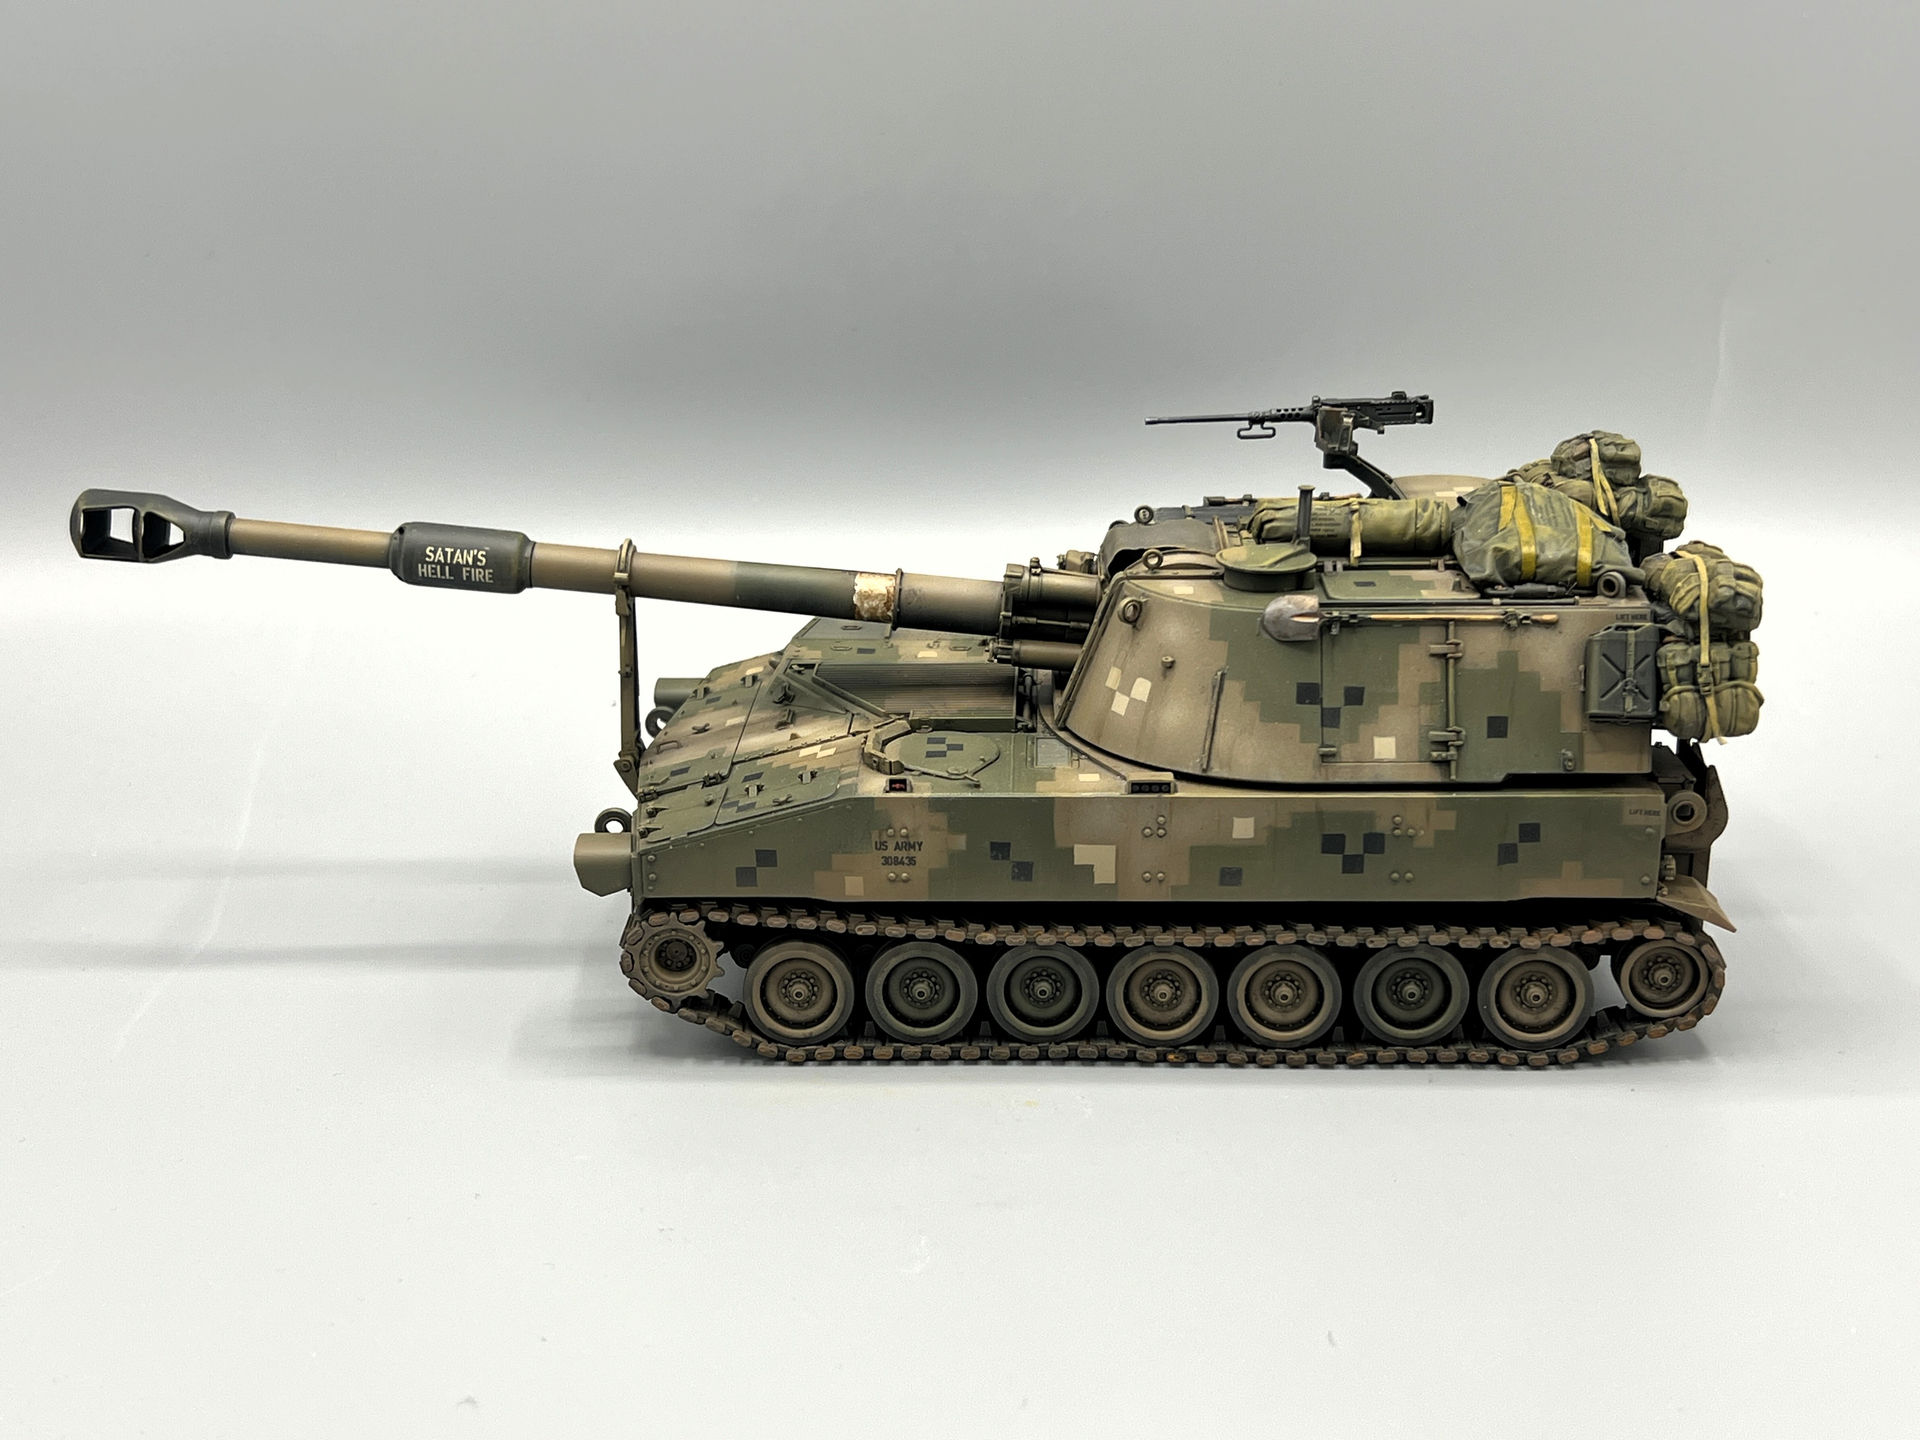
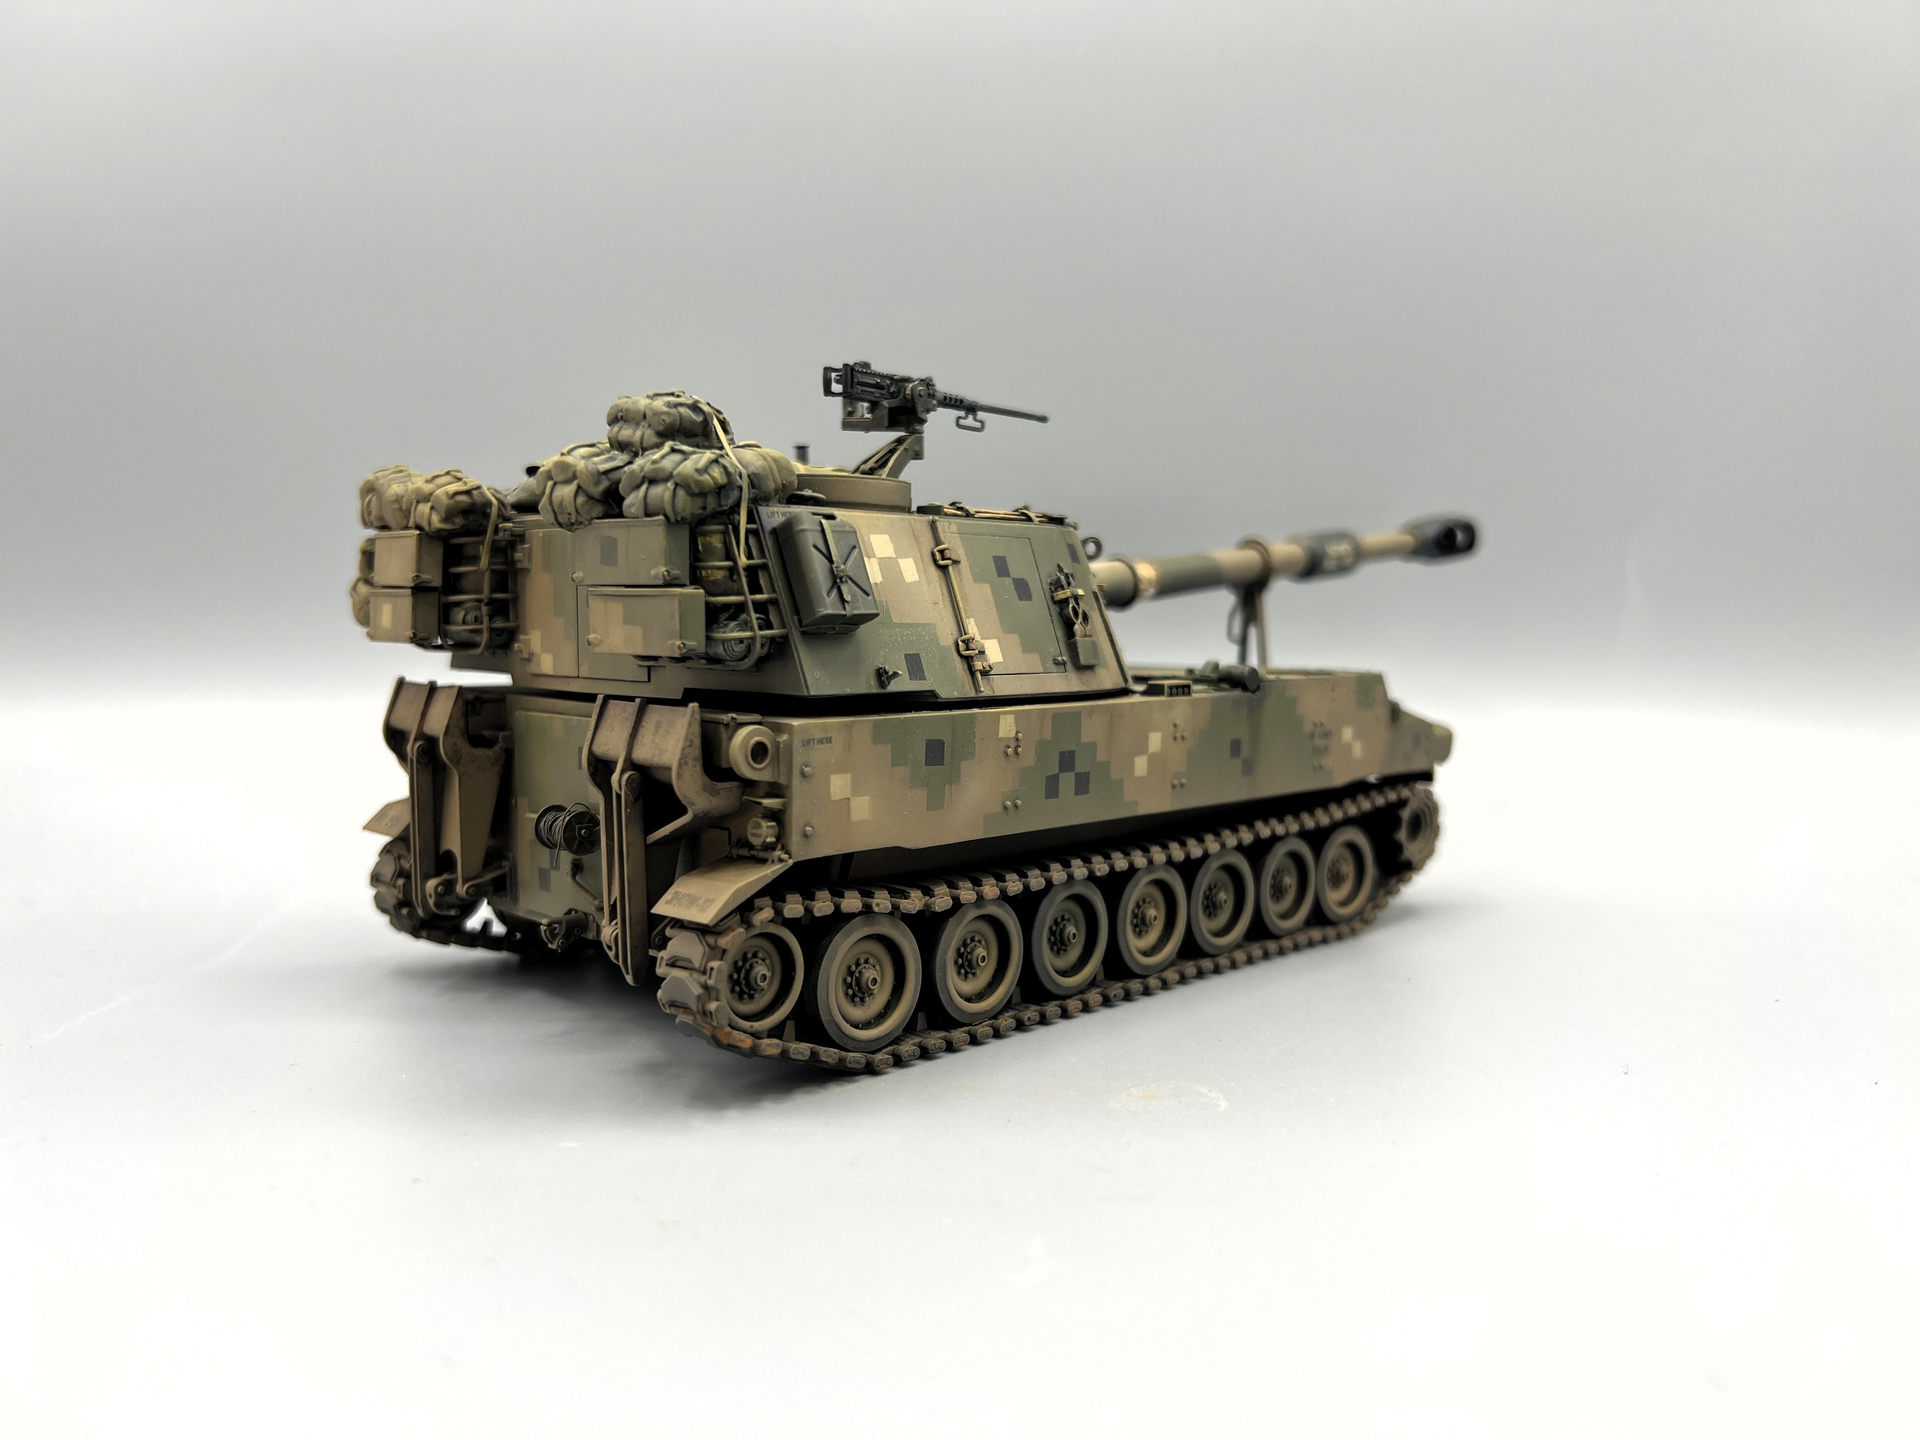
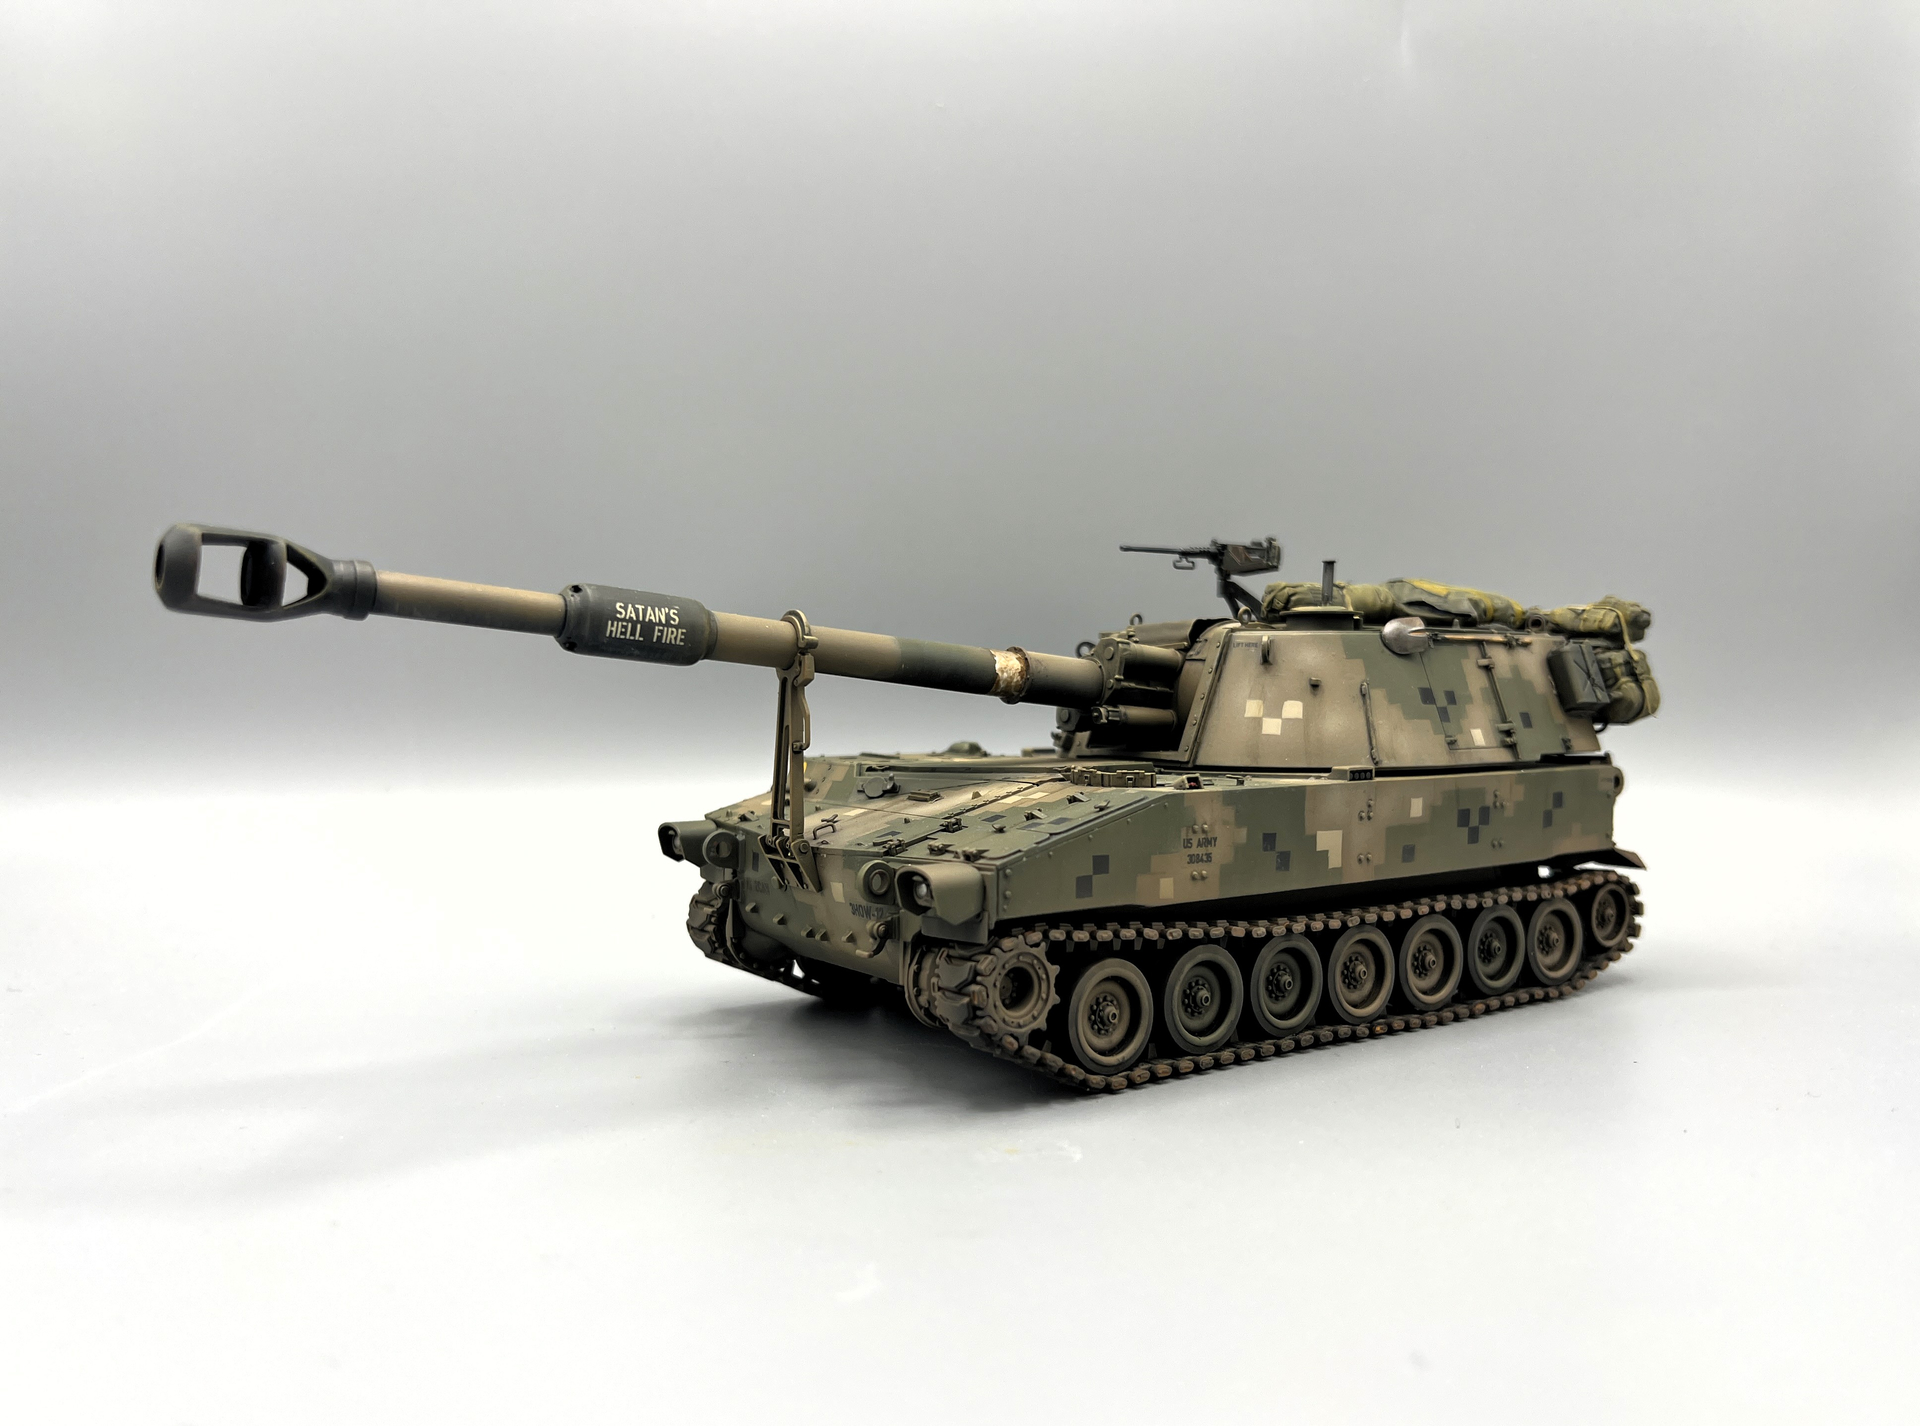
Well, I’ve been an ungrateful cad for not sharing the results of everyone’s help. I apologize about being so tardy about posting. Between my shoulder surgery and an embarrassing amount of travel I finished this project just in time to take it to the 2026 IPMS/USA Nats in Ft Wayne.

The project was a simple kit-bash conversion of the excellent AFV Club M109 155mm SP Howitzer and their M109A1 kit.

  • Used AFV club T-136 individual link track

  • Used Voyager PE kit for the M109A2 kit.

  • Commissioned custom decals per the only known photo of this gun in DUALTEX

  • Modified the M109A2 travel lock to match the TM drawings and photos of the M109A1

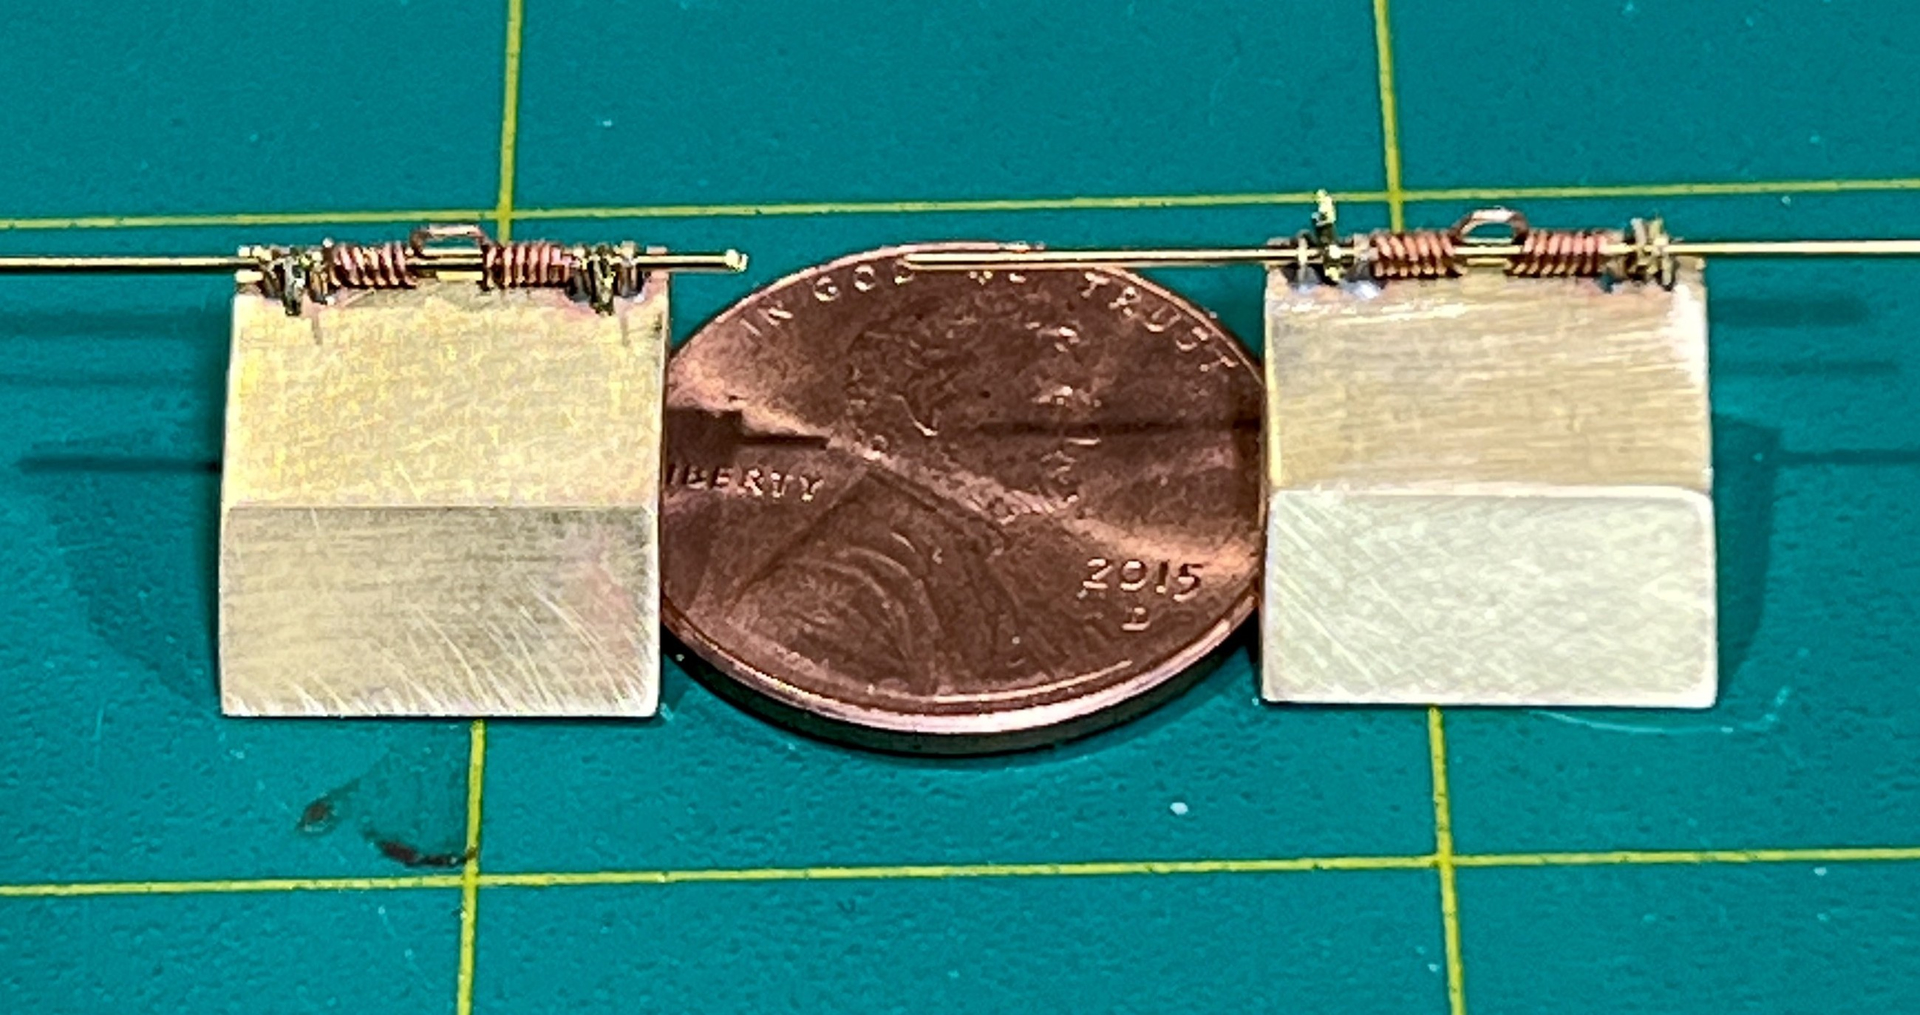
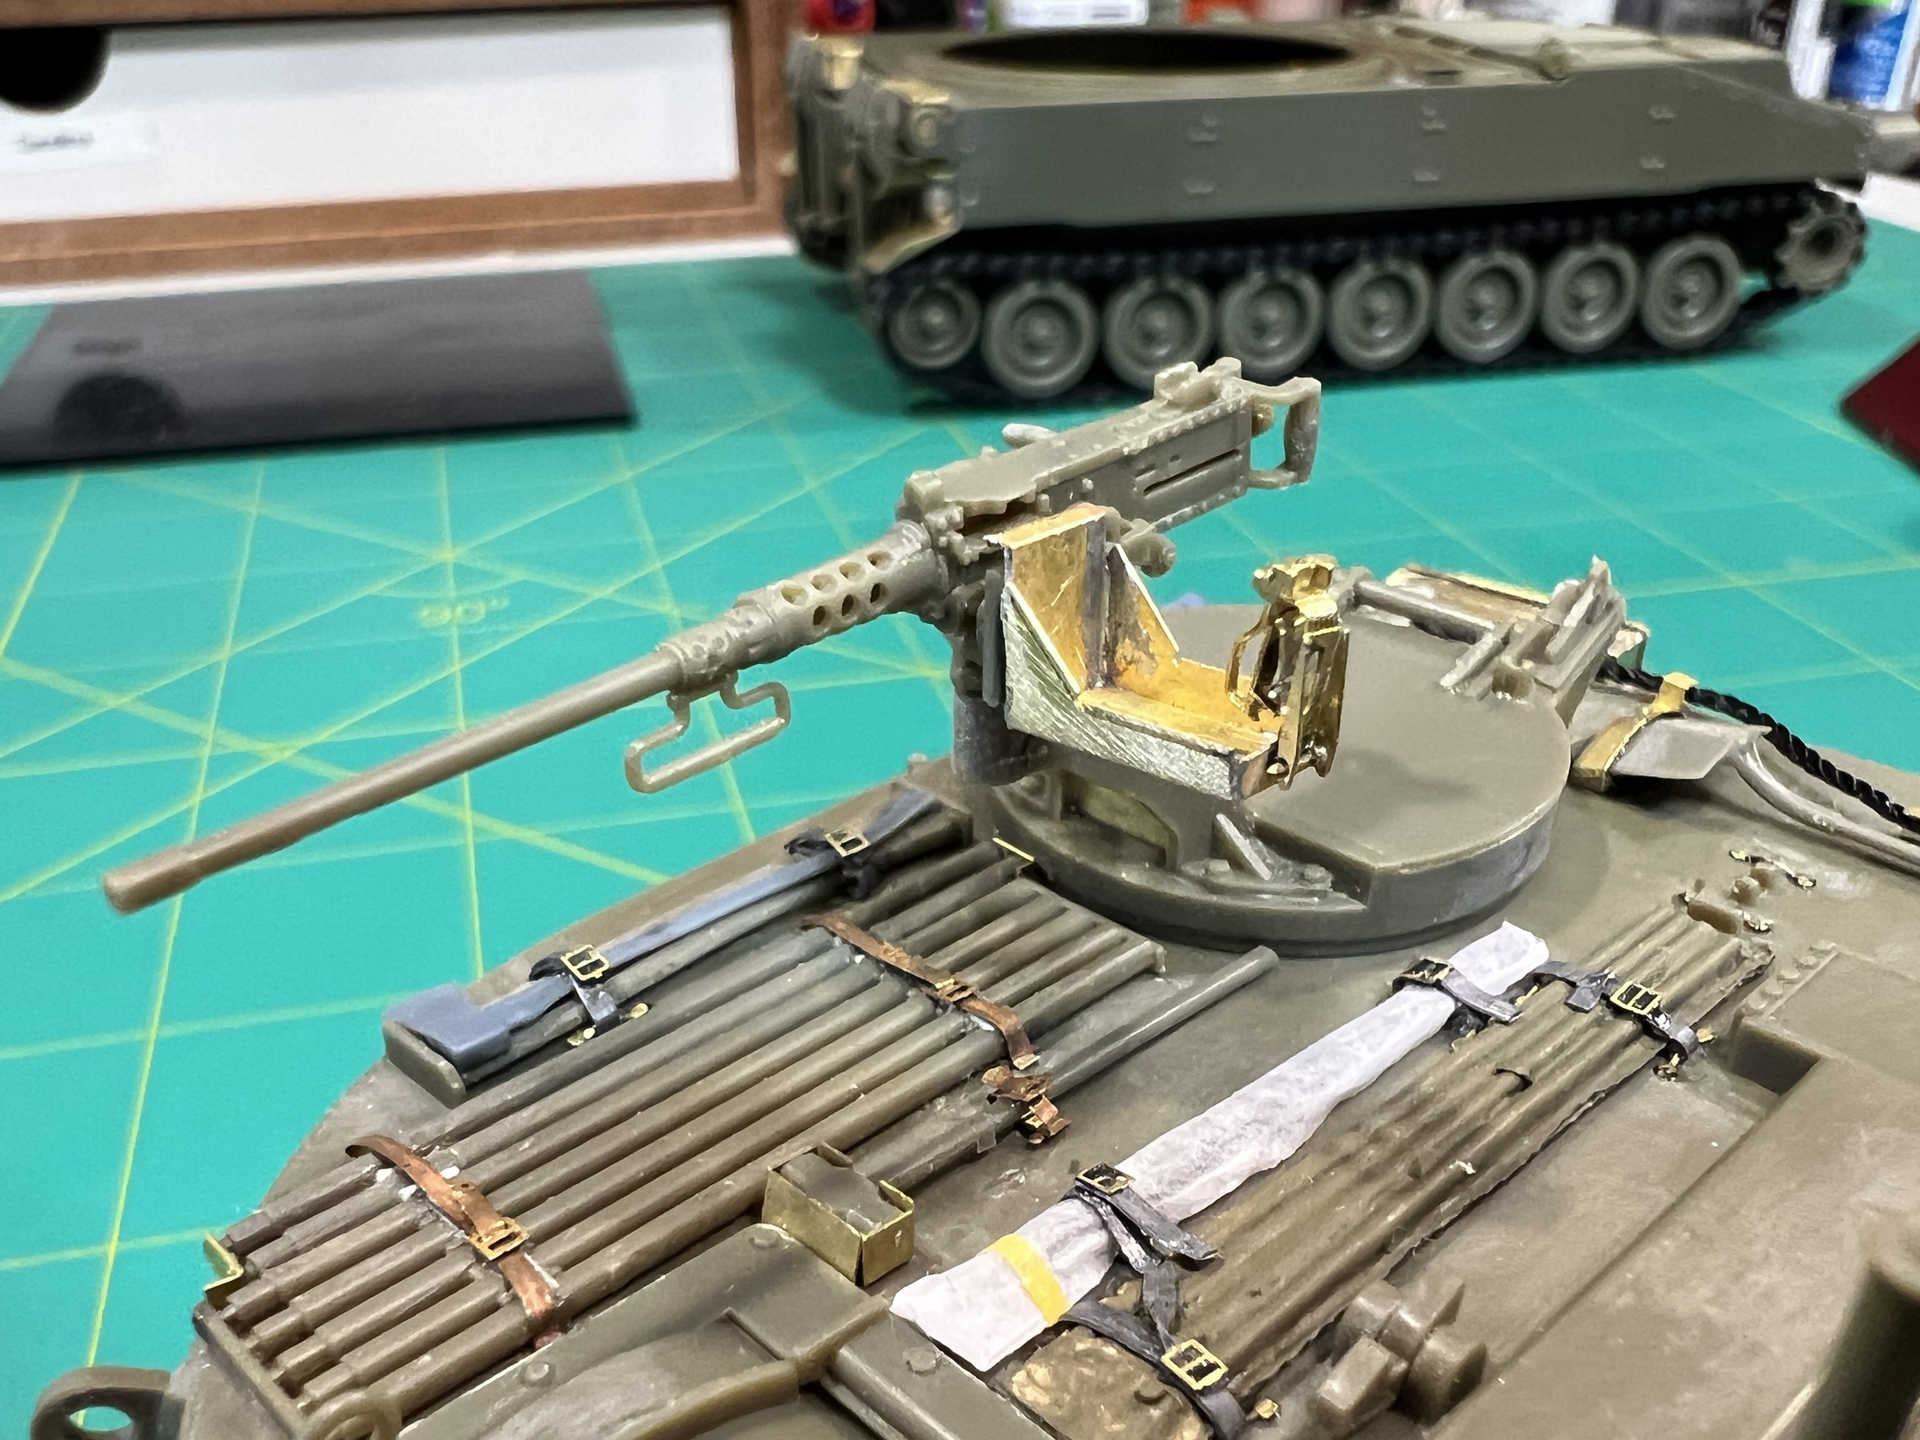
  • Scratched the 7 section cleaning staff and mounting brackets from brass tubing and brass strip

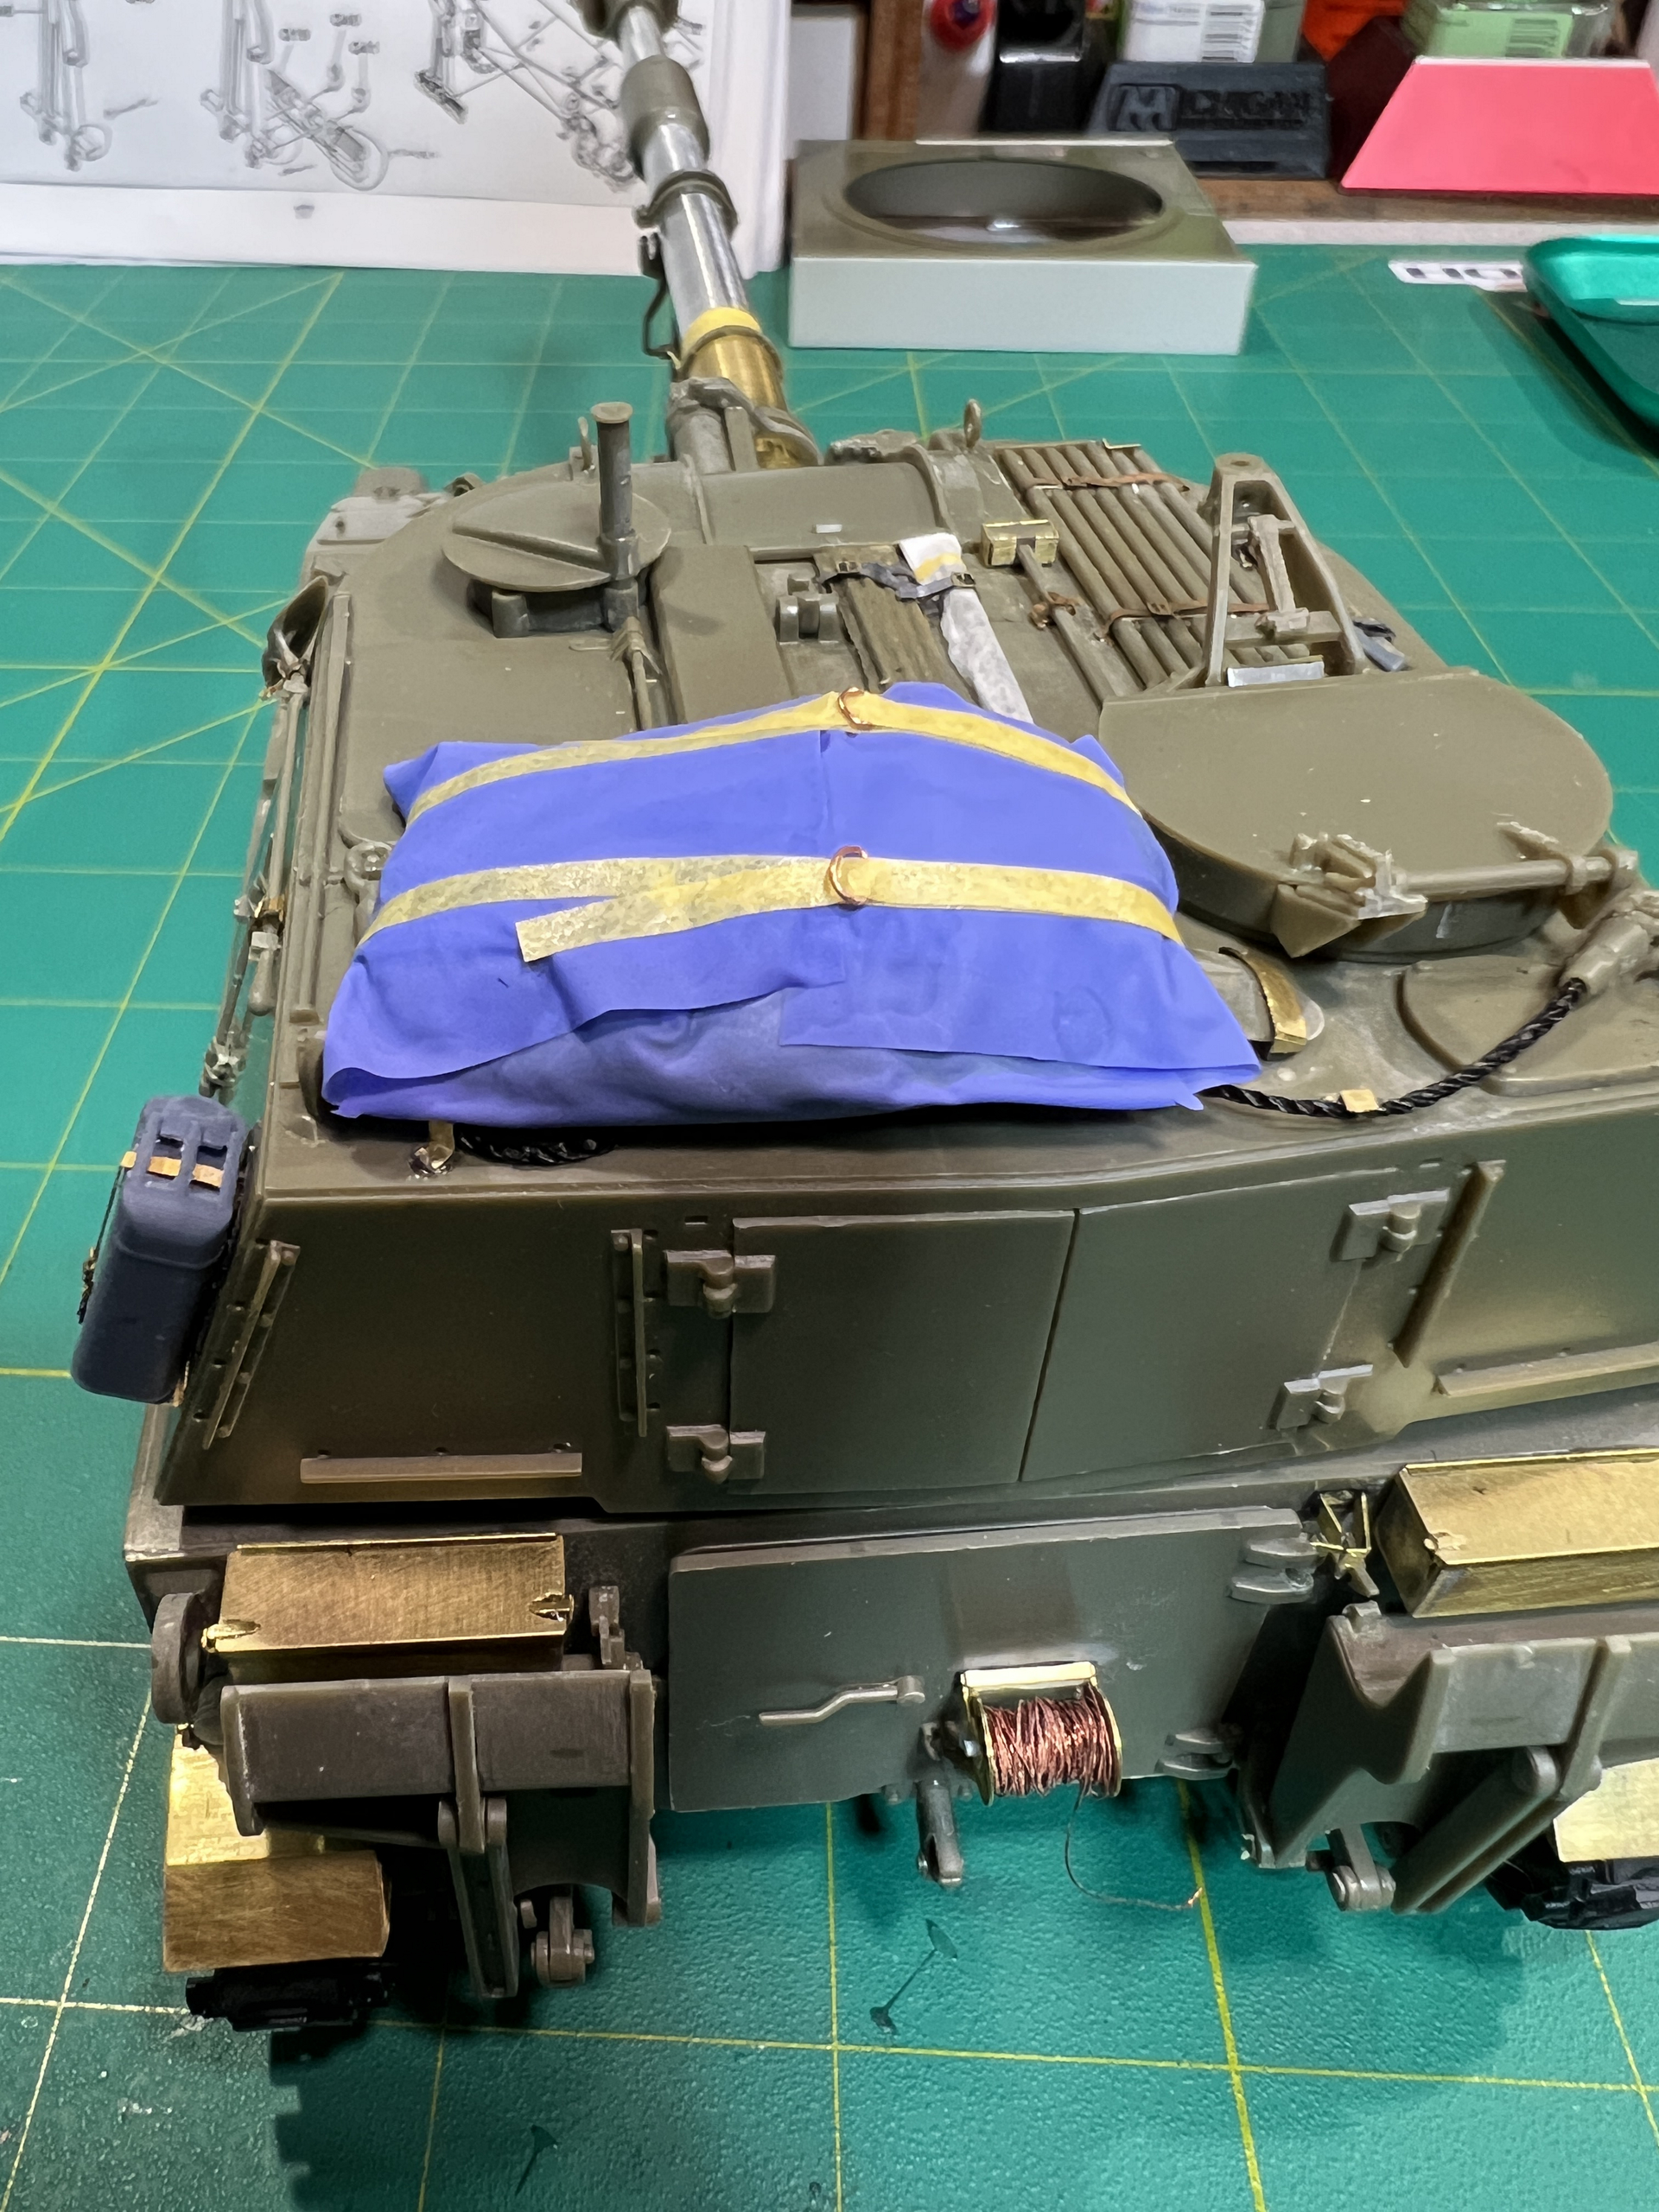
  • Scratched the camo net bag from Apoxy Sculpt, a nitrile glove, and Tamiya tape straps with custom decals

  • Scratched mantlet dust cover from wrapping tissue and thinned silicon latex caulking compound (Thanks @KurtLaughlin)

  • Added ALICE packs, sleeping bags, and sleeping pads, from Value Gear.

  • Used 3D printed track jacks vs. kit parts

  • Added straps from lead strip and PE buckles to the OVM gear and pioneer tools

  • Scratched the aiming posts and cover from styrene rod and tissue with custom decals

  • Scratched the 50-caliber spare barrel bag from packing tissue and Tamiya tape with custom decals

  • Replaced some of the pioneer tools with 3D printed resin replacements

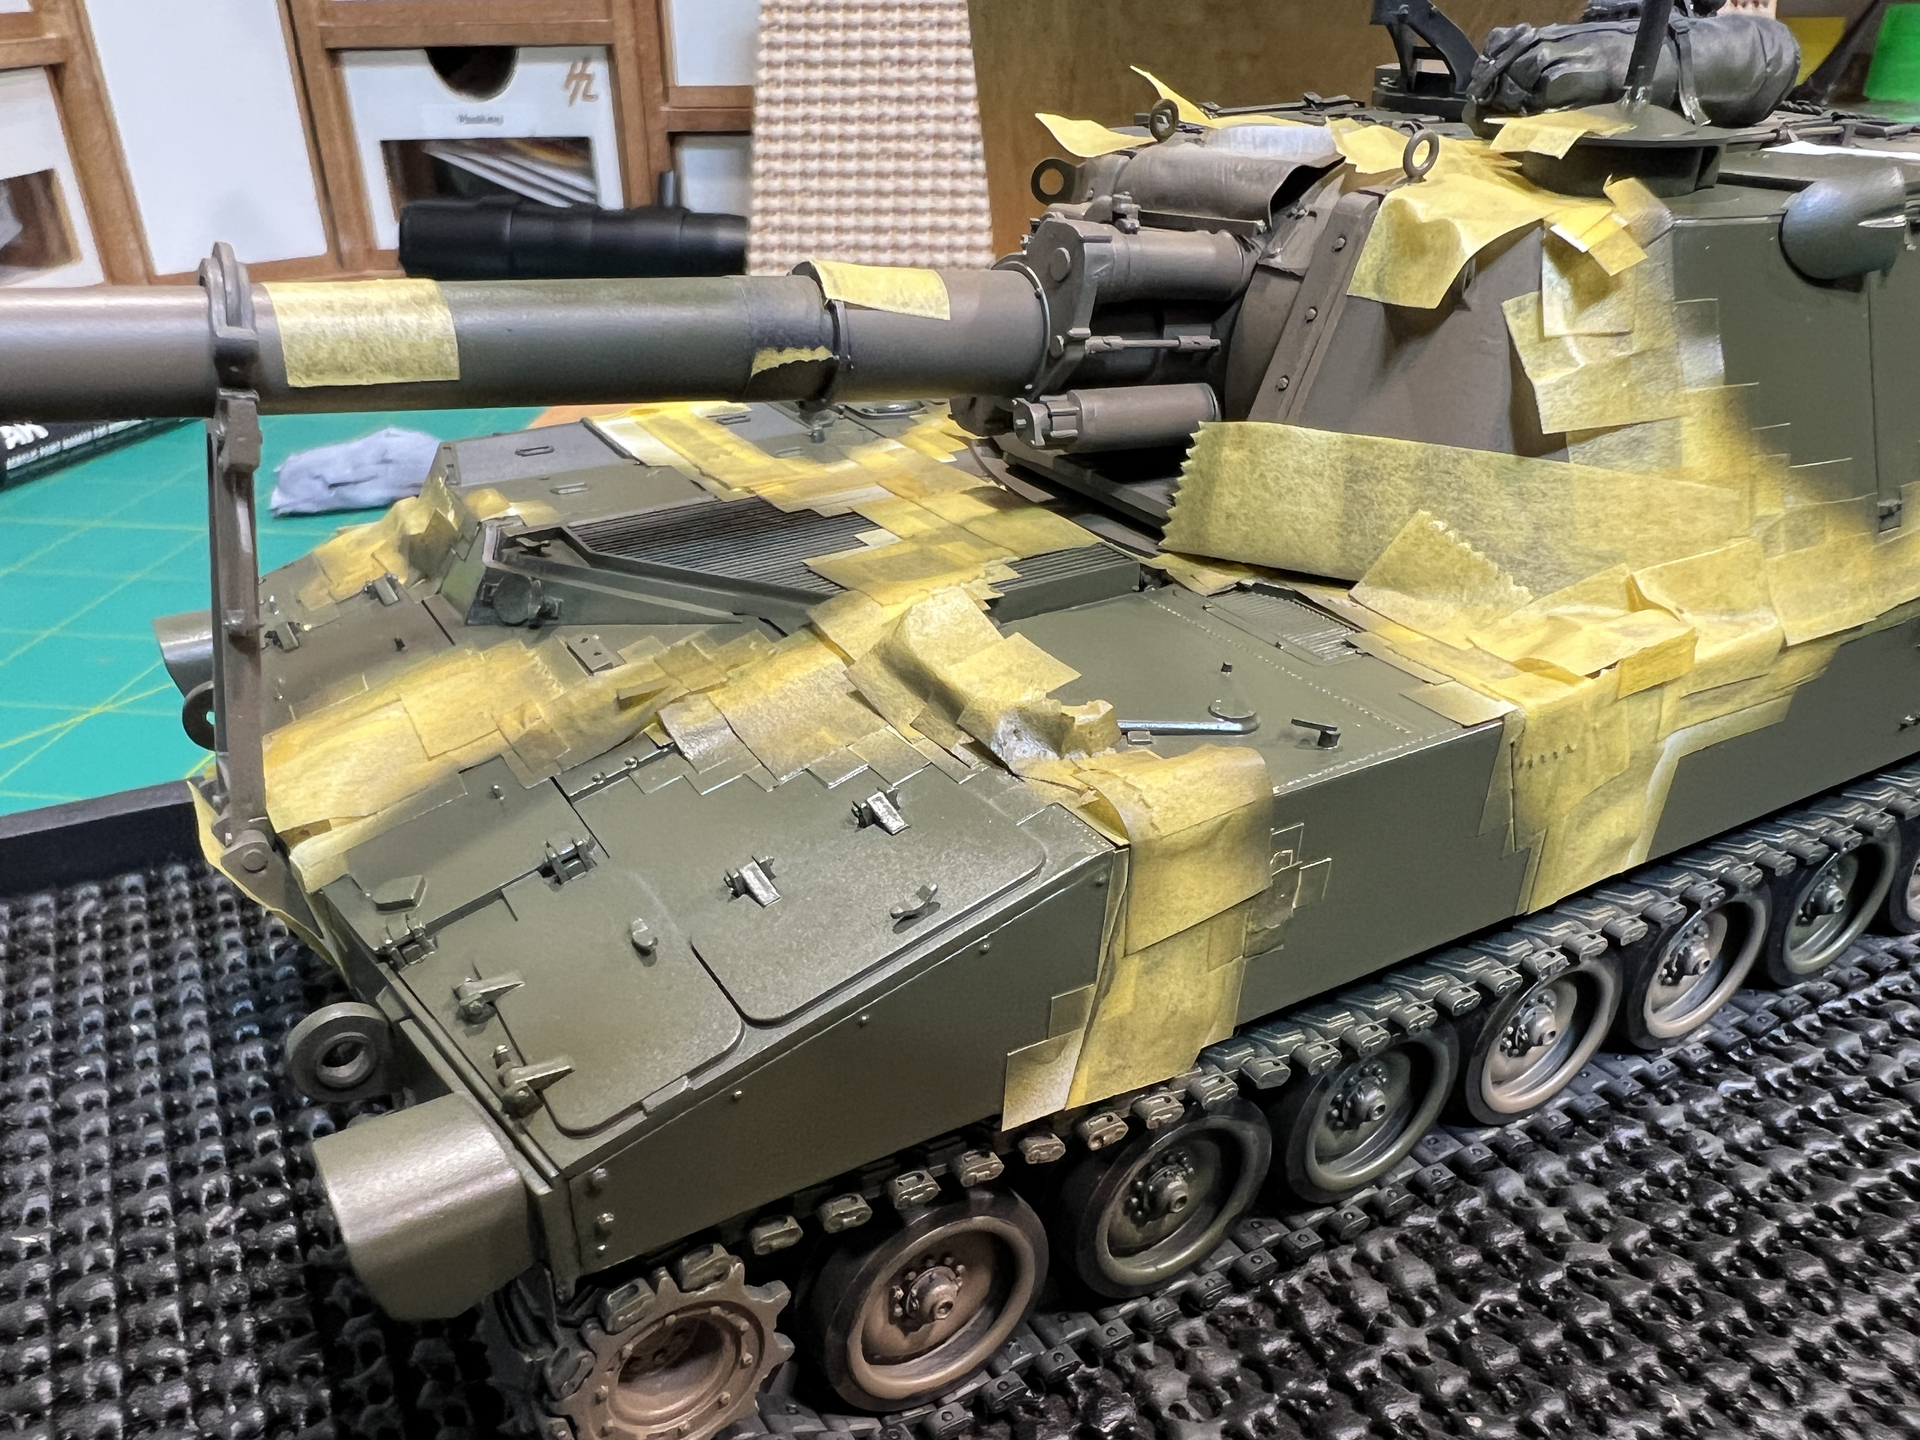
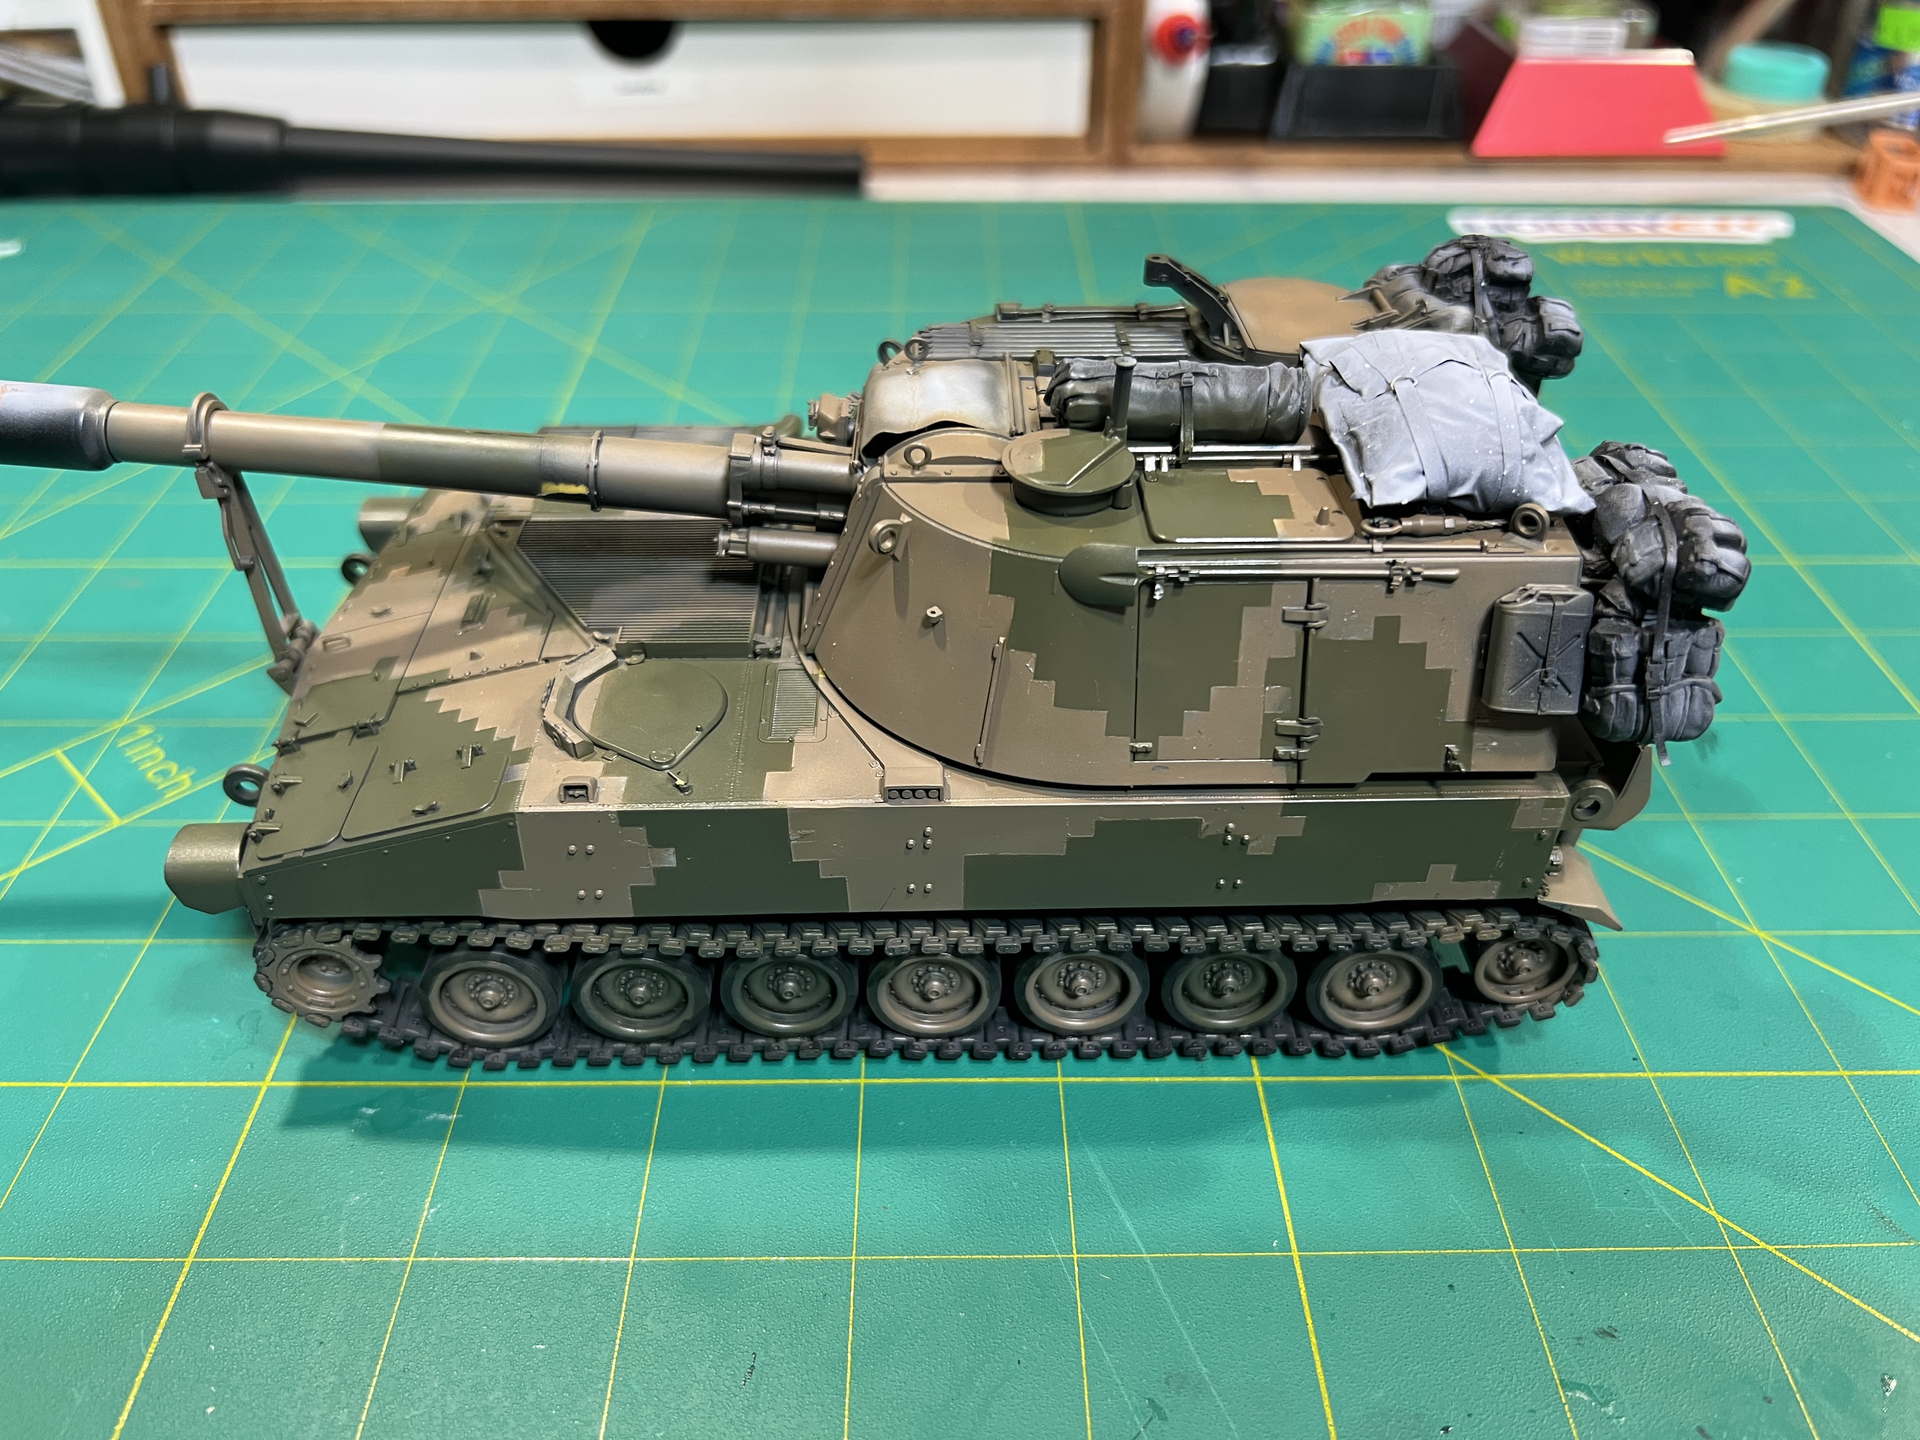
The build was easy. The camo pattern not so much. As the DUALTEX pattern was based upon the MERDC Winter Verdant colors and pattern, I started there. I sketched the MERDC pattern onto the model for the Field Drab and Forest Green. I sprayed the FS30118 Field Drab using Hataka Orange C209. This was my first experience with Hataka paints. I bought their MASSTER/DUALTex set to get these colors. The Hataka paints are very similar to AK RealColors. They thin well with Mr Color Leveling Thinner 50-50. They turn to goo with X20A, Water or IPA. I sprayed with the H&S Infinity with the .2 needle at 18psi.

The DULATEX pattern is based upon 10cm squares of color which I replicated as 3mm squares. I found a set of 3mm masks from KAV and used them and Tamiya tape to “digitize” the edge of the pattern and sprayed the Hataka C016 Dark Green.

When removing the masks, I discovered that the KAV masks were nothing, but a big steel roll die cut shipping label, and the adhesive really did not want to come off. It took way too much time to get the masks off and the adhesive cleaned up.

At this point I highlighted the Dark Green and Field Drab with lightened tones. I lightened the Hataka Dark Green with a bit of Tamiya XF-60 Dark Yellow and the Field Drab with Tamiya XF-2 White. The Hataka and Tamiya paints are compatible.

For the sand and black squares, I cut masks from Tamiya tape using the 3mm steel grid template. I spotted the masks on the Dark Green and sprayed with Tamiya XF-1 Black. I moved the masks to the Field Drab and sprayed the spots with Hataka C210 Sand Brown.

At his point, I was adding stowage from my bins - a mixture of Value Gear, Legends, Black Dog, and some home rolled stuff from Apoxy Sculpt. My buddy Mike B from Oregon printed up all of the decals for me including those on the stowage items (camo pole bag, camo net bag, spare barrle cover, aiming post cover, ALICE packs, etc.).

Weathering was very light as I was looking for a just leaving the motor-pool look.

Overall, it came together well and with the DUALTEX is a pretty unique addition to my collection.

17 Likes

Nice job Rick! One can not be embarrassed by enjoying the world’s sites!

3 Likes

An outstanding example of something truly different from the Cold War; fantastic build, attention to detail and a superb finish, well done Rick; as I say, simply outstanding.

I struggle with MASSTER, Dual Tex would have me sectioned(!)

2 Likes

Thanks Brian and Dan. The DUALTEX was kind of a struggle. I’d only try it again on a slab-sided vehicle like the M113 family. Trying to do it on a vehicle with curves, like an M60A1, or a lot of surfaces like a wheeled vehicle would be much more challenging.

1 Like

Looks awesome. Great job on a hard paint scheme.

2 Likes

Awesome job. Man am I ever glad I never served in a unit with this scheme, because I’d NEVER be able to do any models!!

3 Likes

Fantastic work. Love it!

2 Likes

Gino, Tom, Javier, thank you!

I’ve spent much of today stuck in Chicago O’Hare trying to get to Boston. I’ve been thinking about how to be more efficient with the masking for DUALTEX. Using frisket vs Tamiya tape for the small shapes would work better. The Tamiya tape stretches. Another alternative might be to print decals for the sand and black. For the field drab/forest green I might be able to cut and reuse some masks from frisket of stair-step and other reoccurring patterns. This only works for slab sided vehicles. I think I may have just talked myself into doing another one.

Ric

1 Like