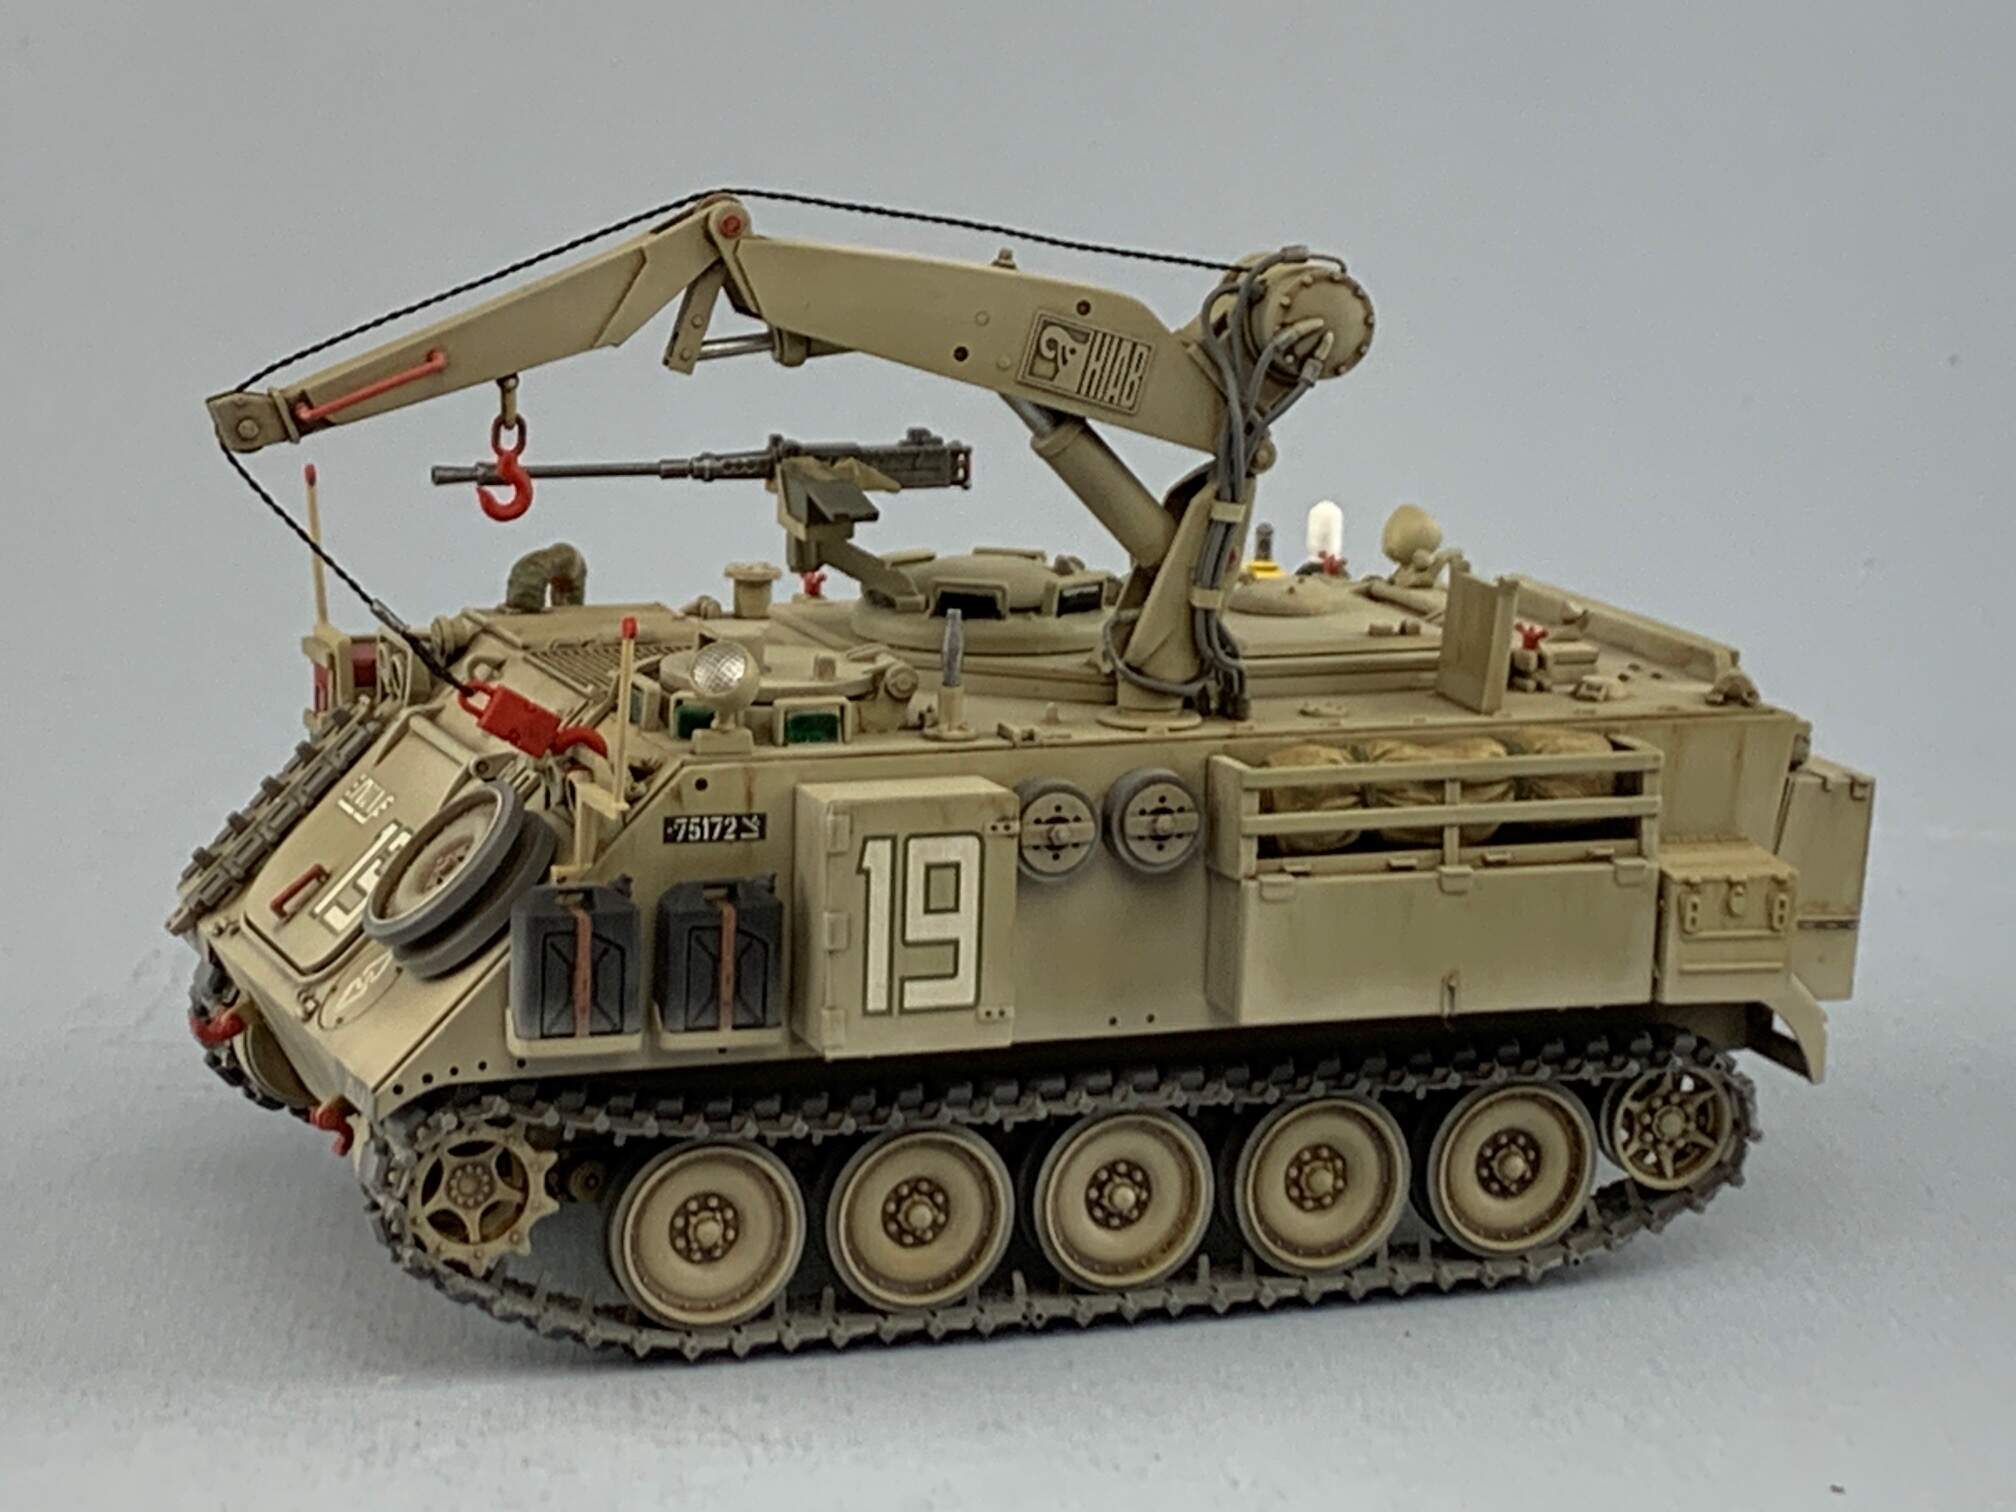
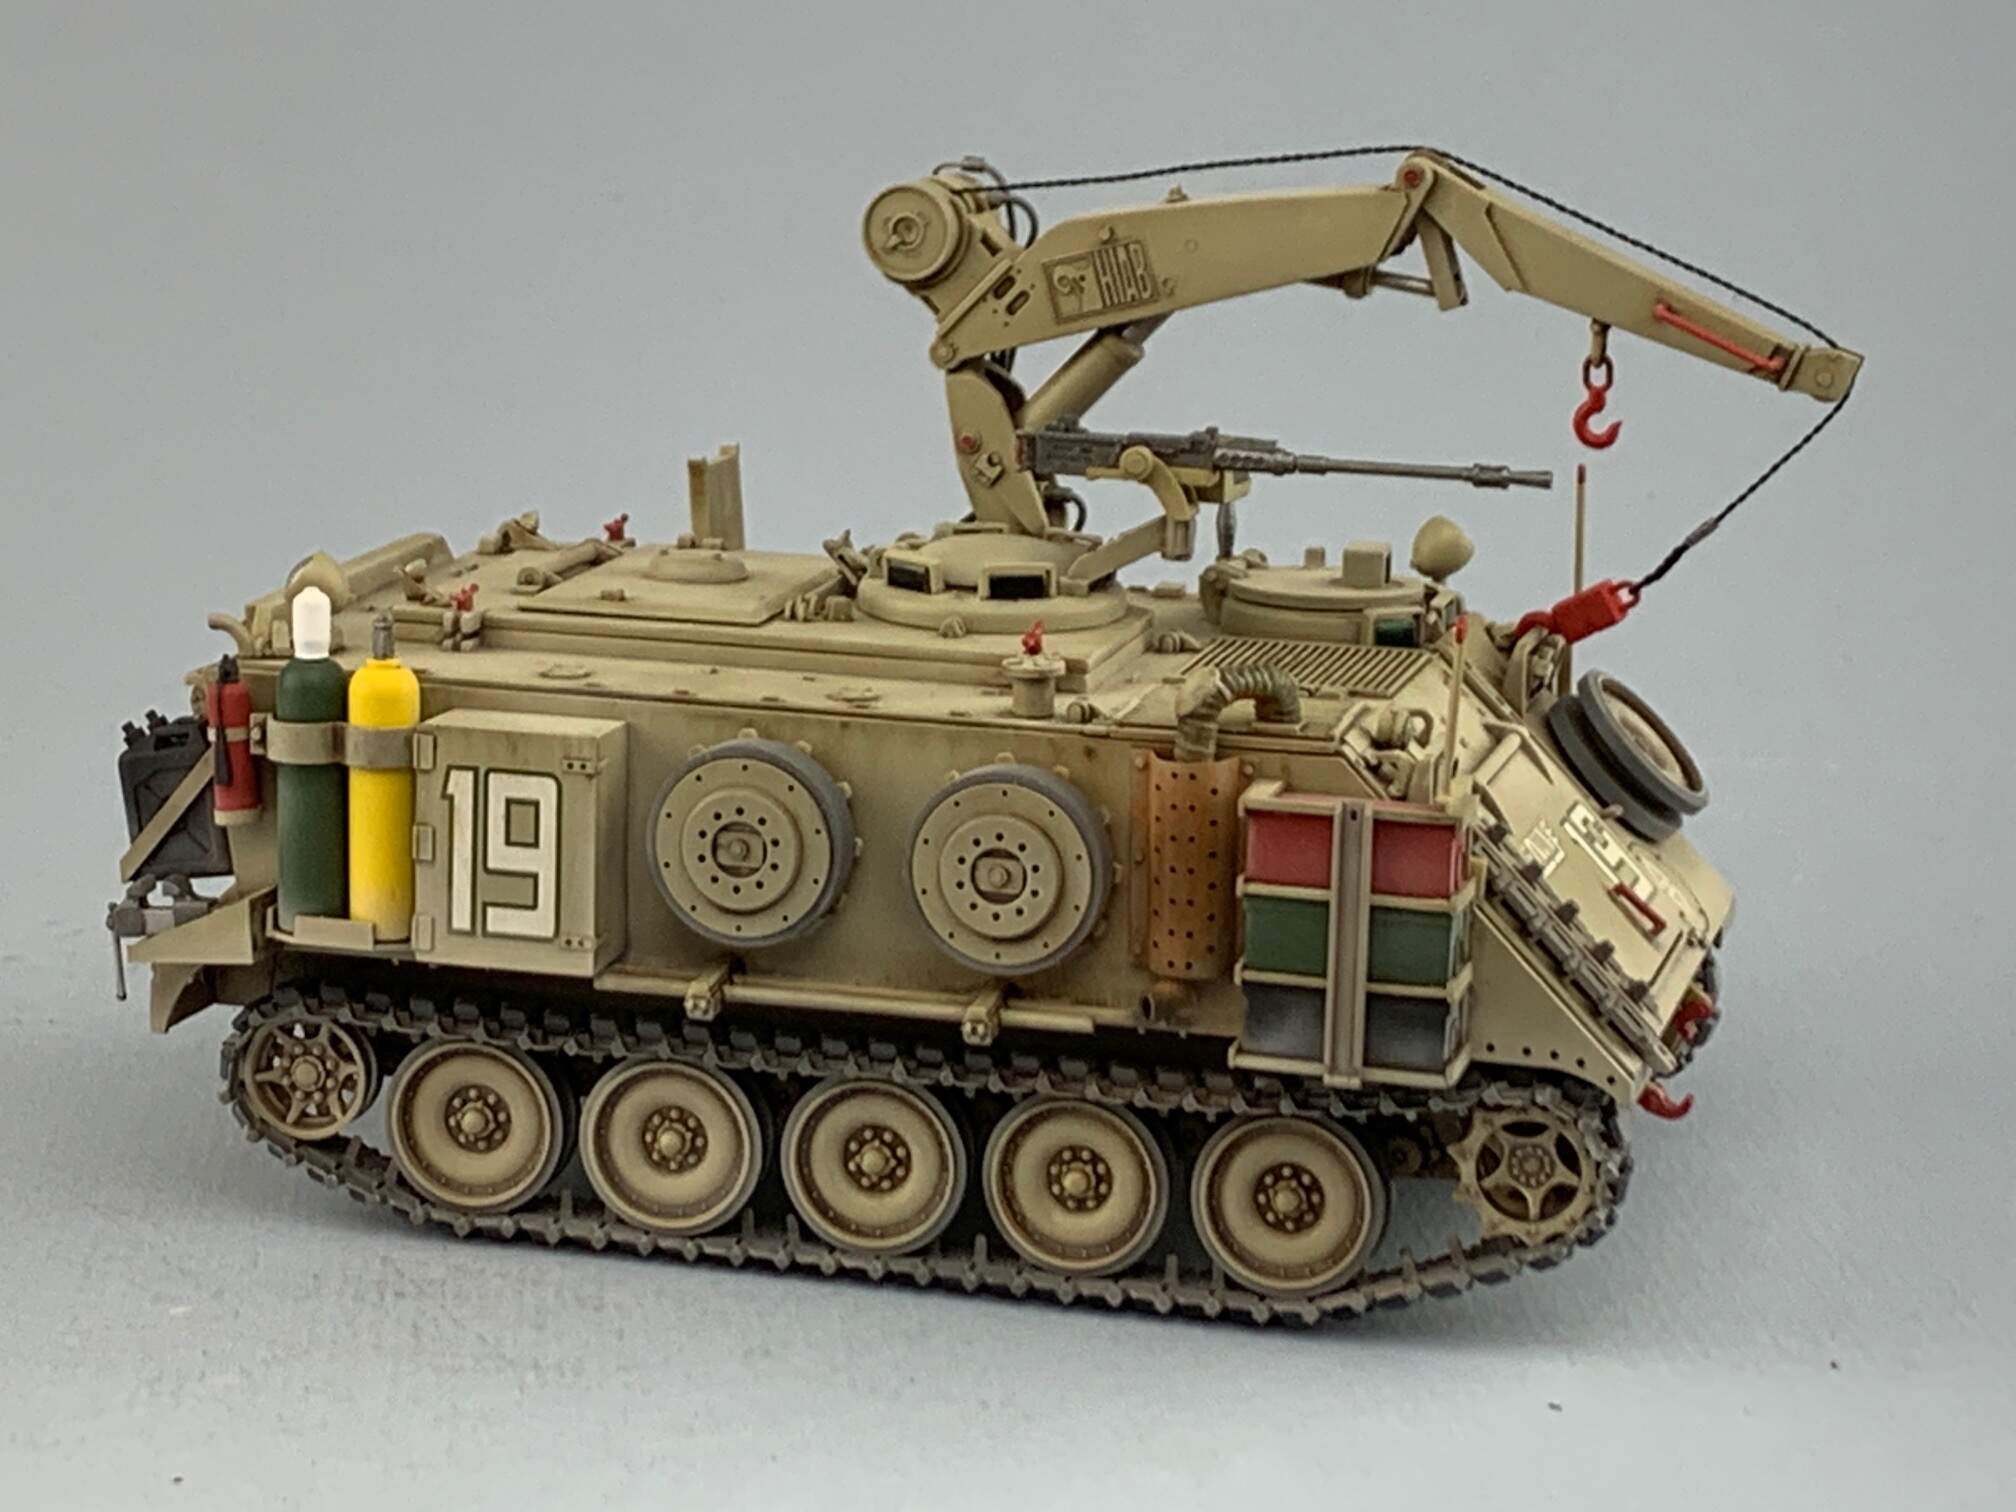
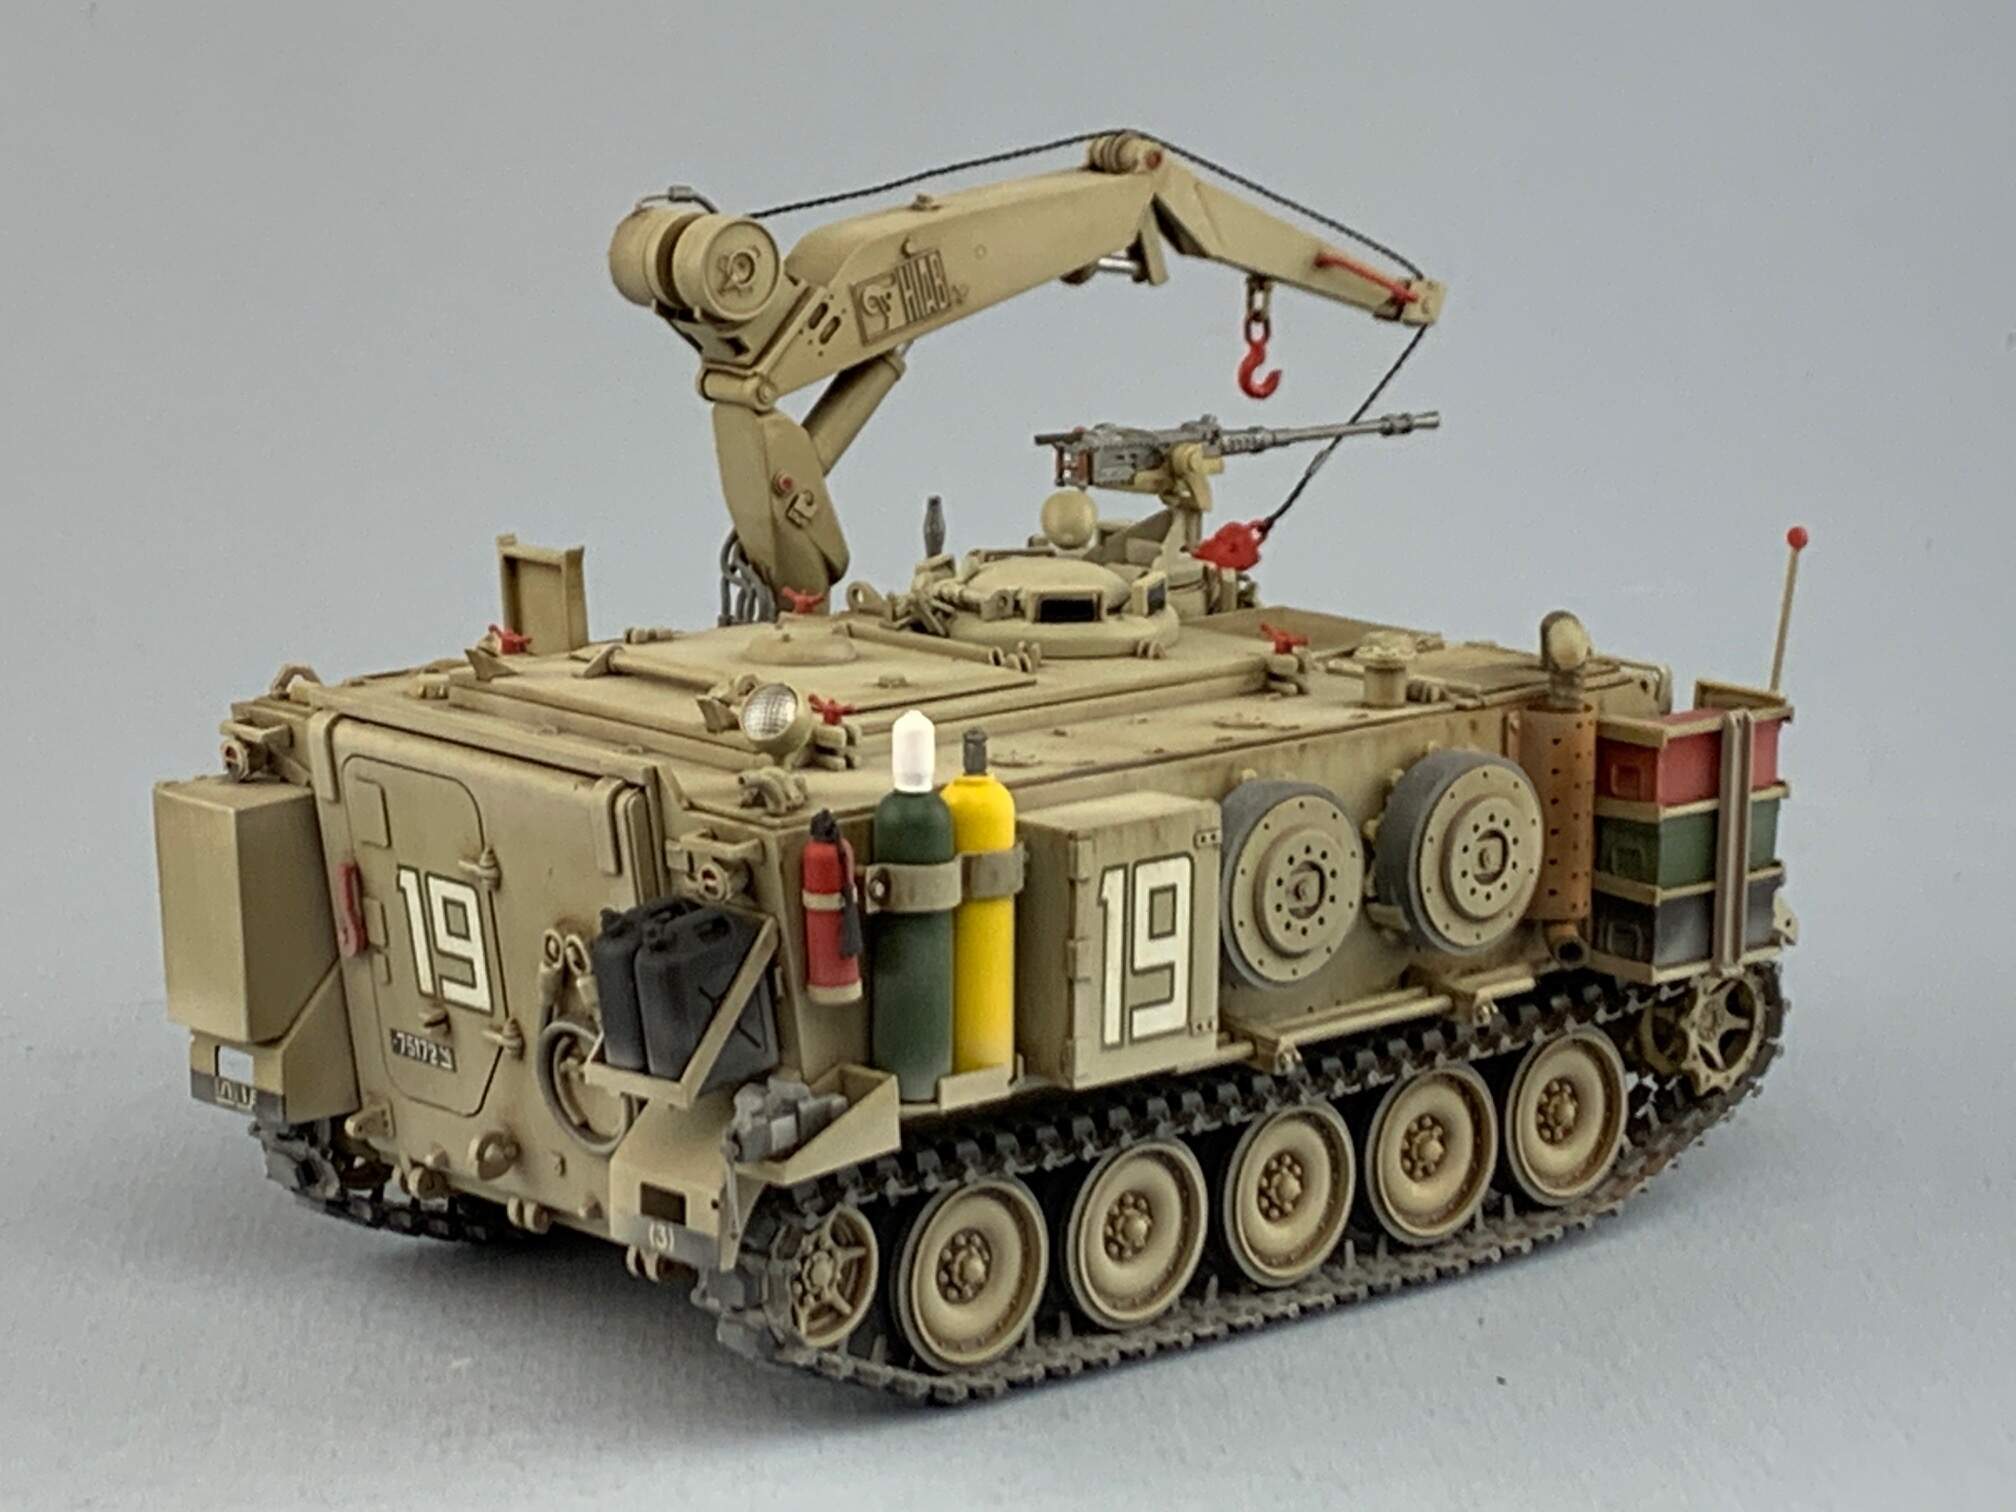
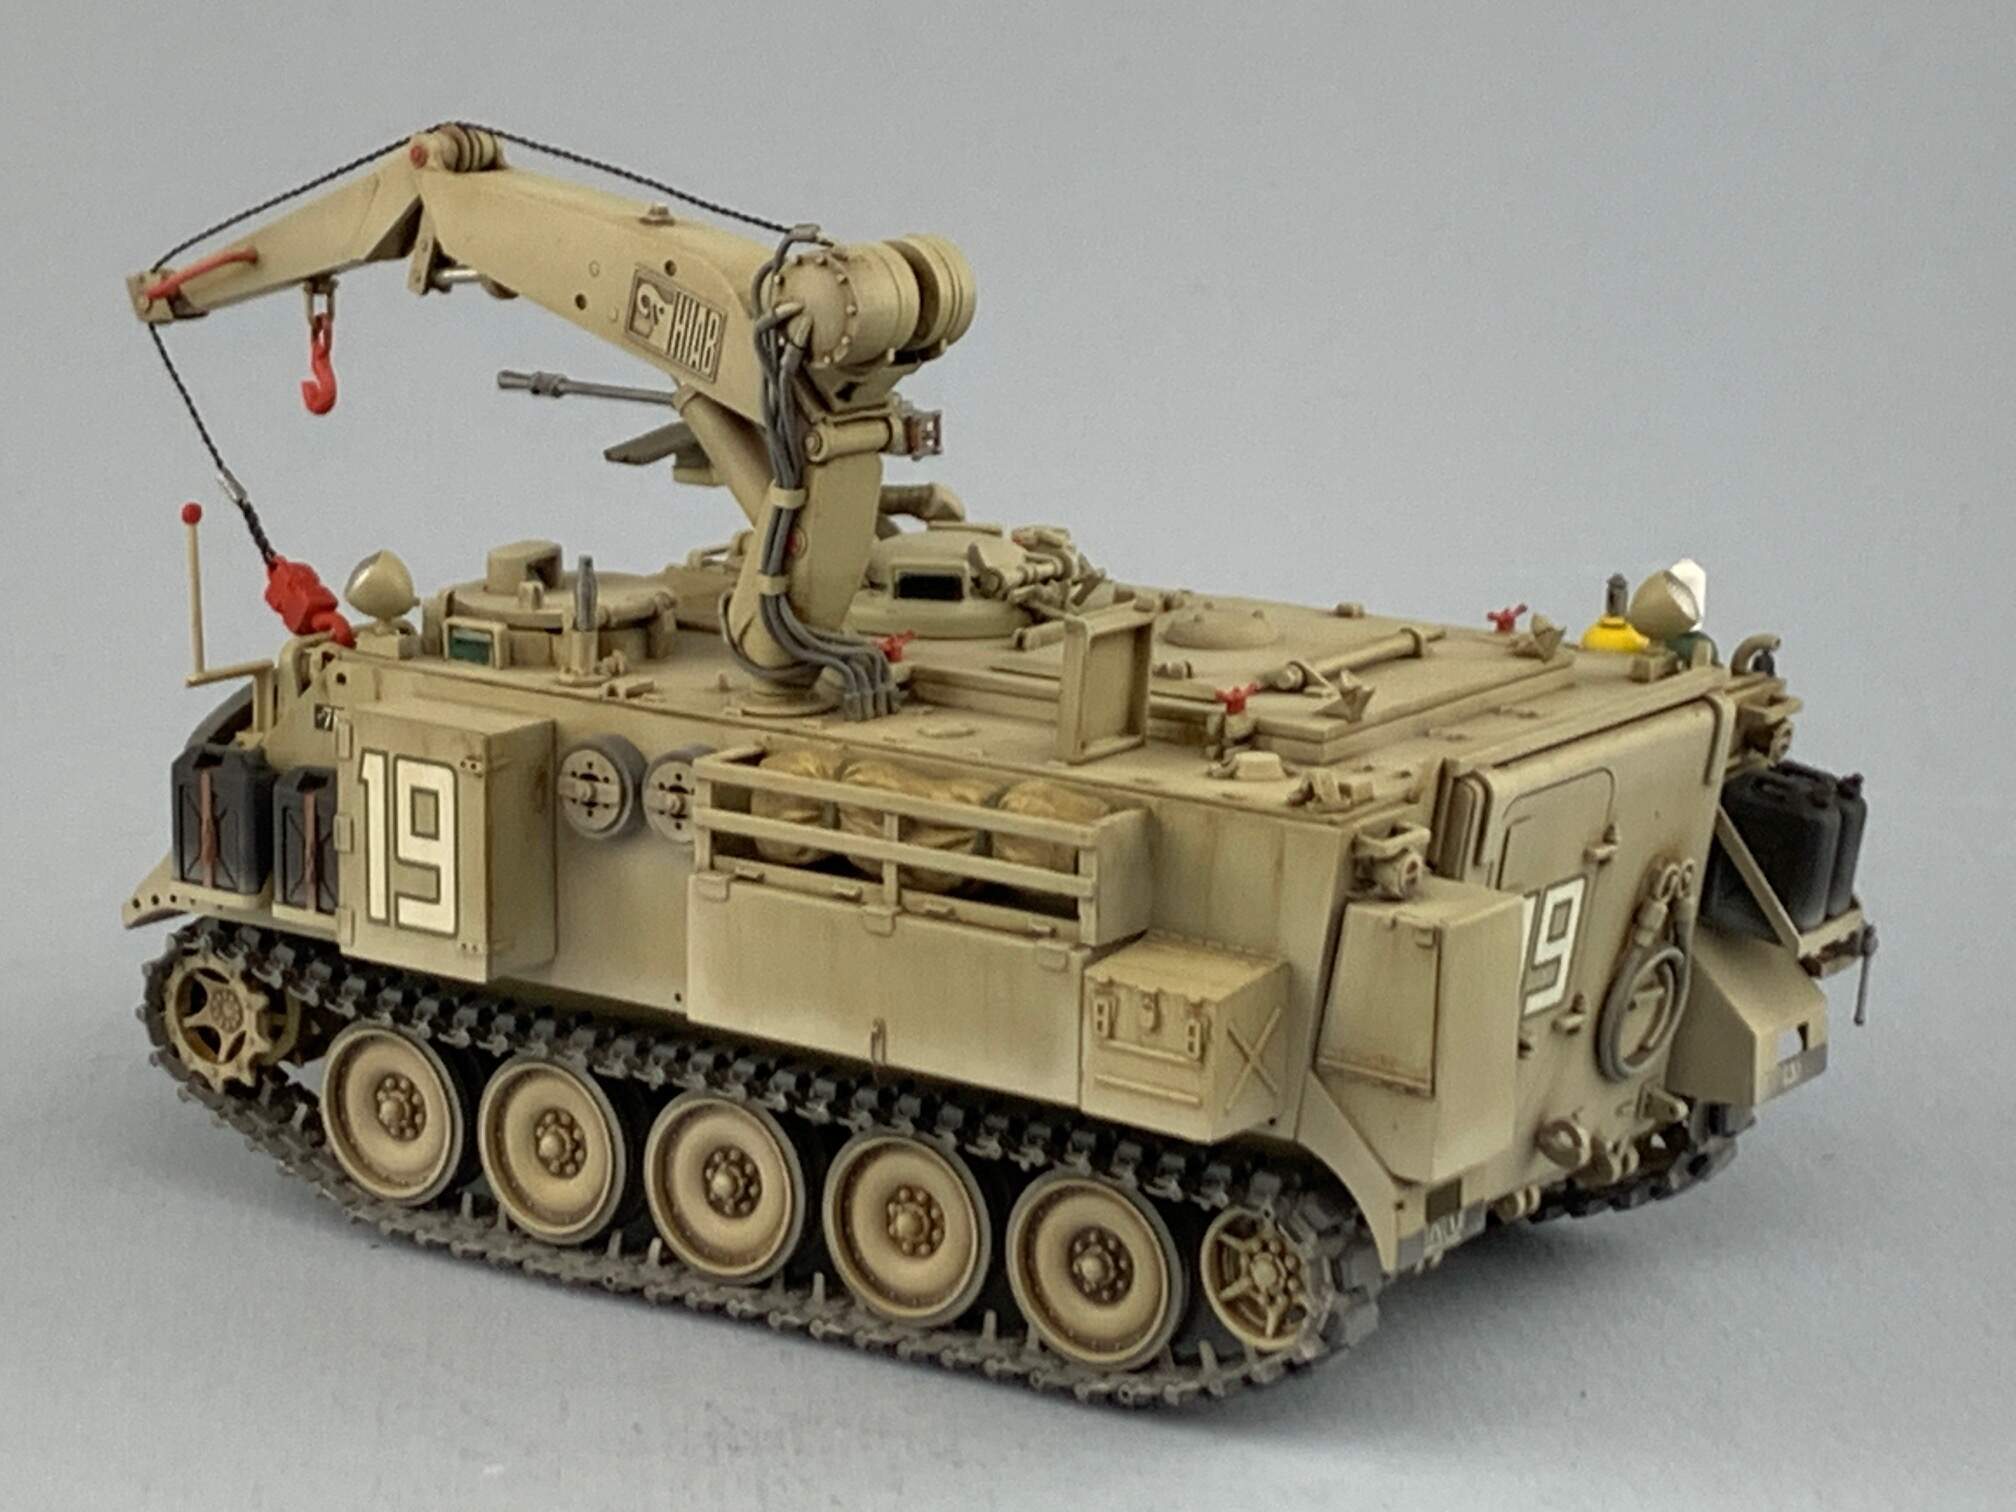
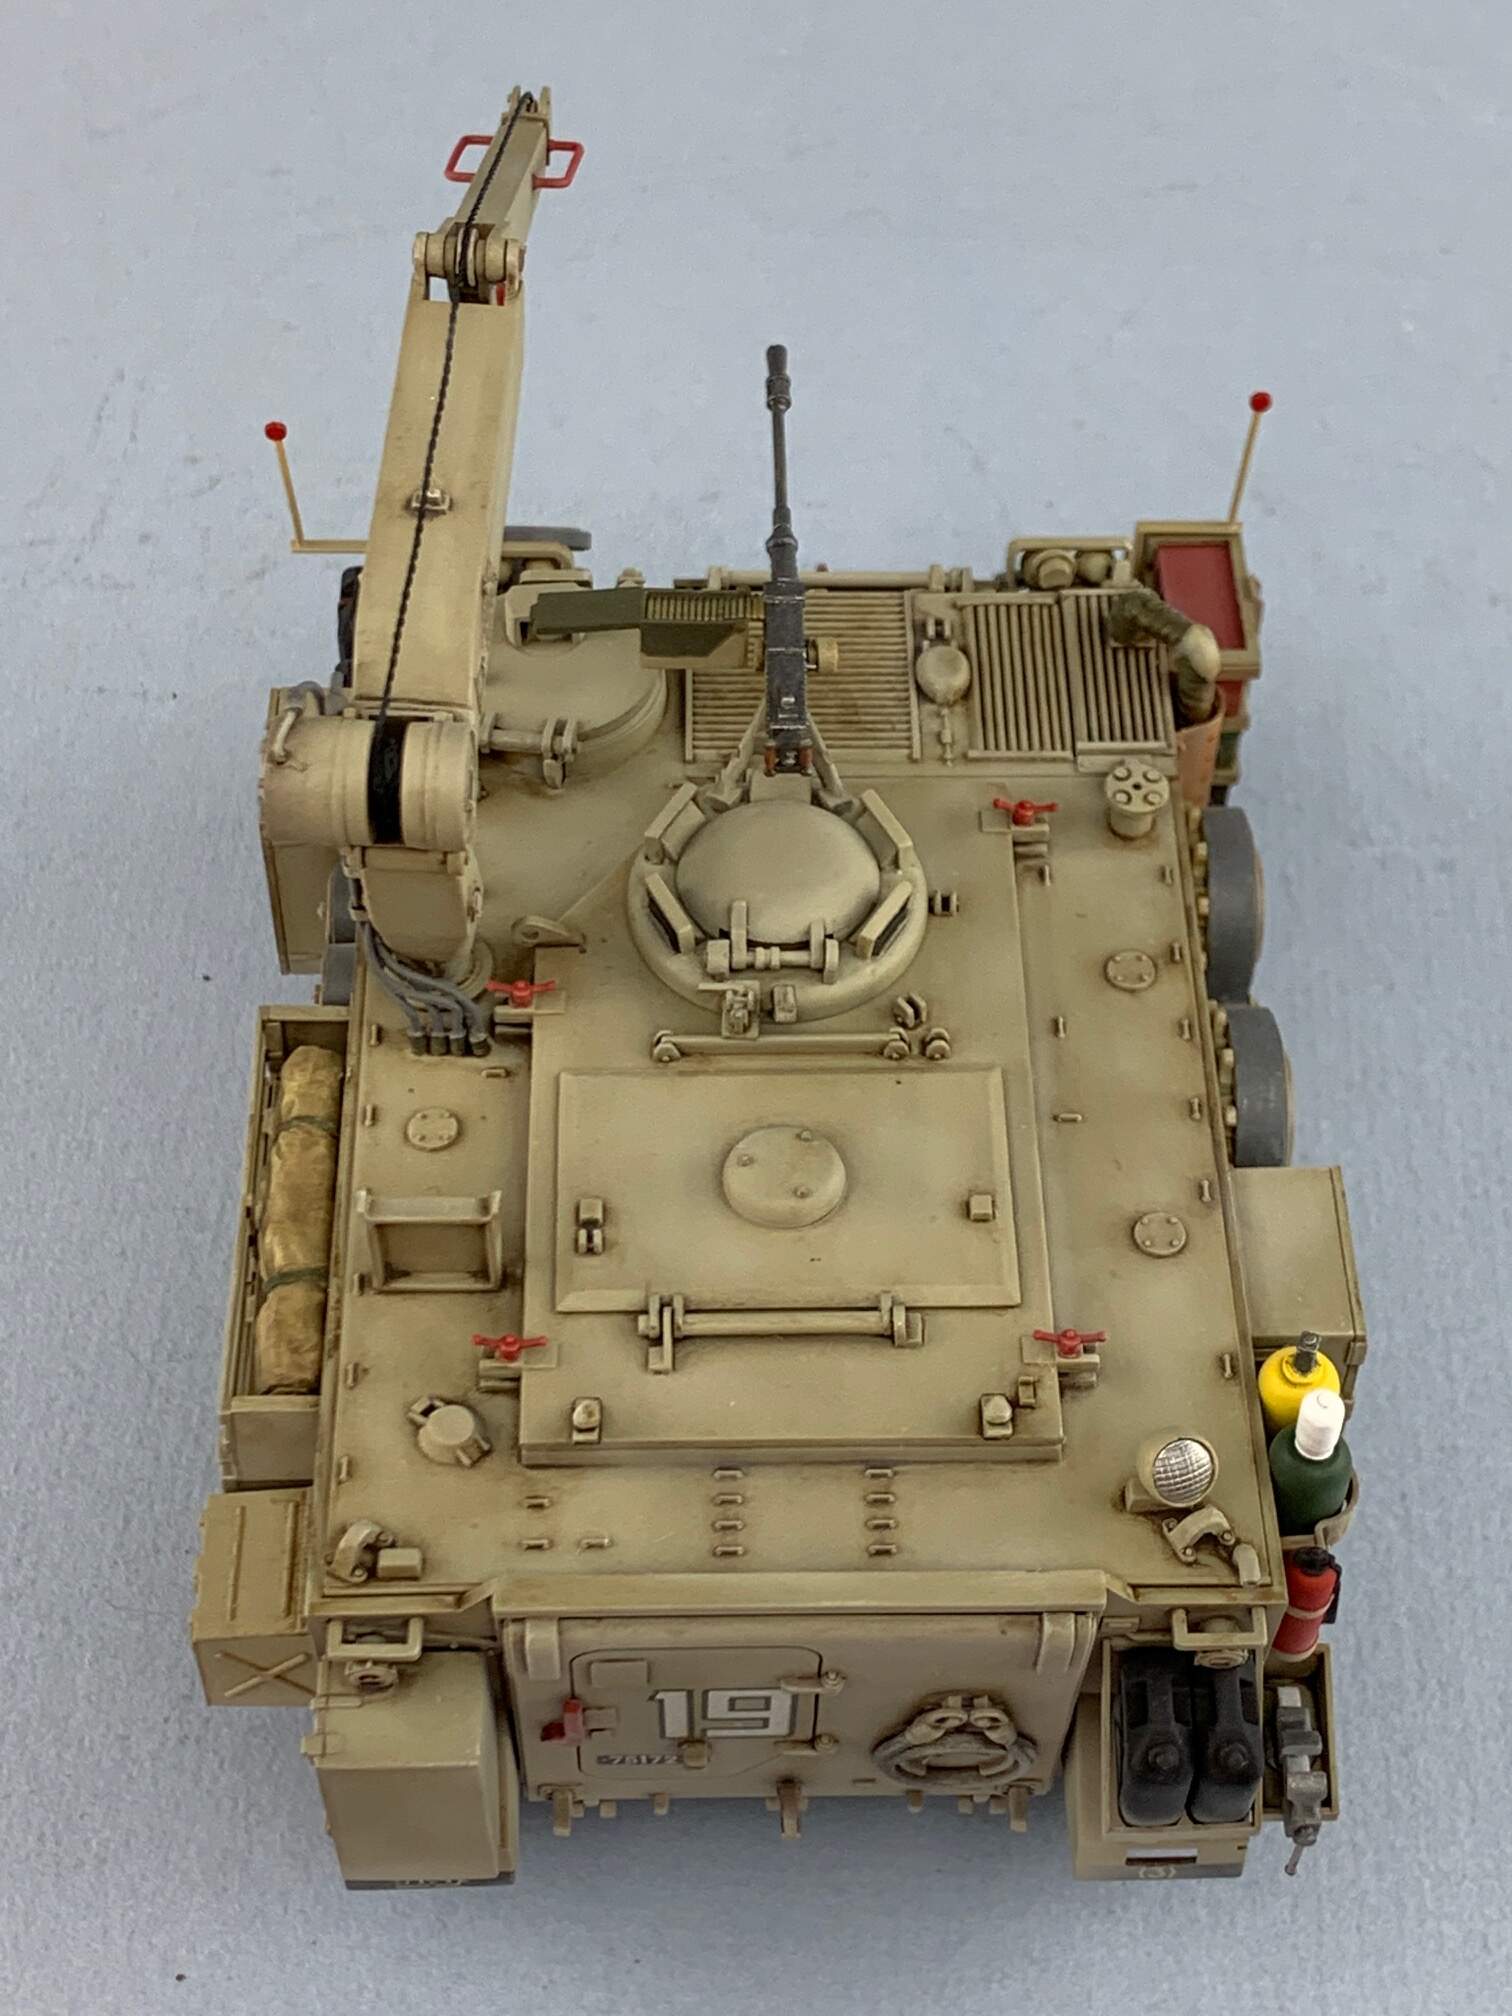
This is the Academy kit. I added Fruil tracks and the hydraulic lines on the crane. I also replaced the kit toolbox rack with one bade from Evergreen stock. Deviated from my usual Tamiya paint and used Model Air Sinai grey 1973. Its a dated kit with no clear optics and rubberband tracks but it builds up nice enough.

36 Likes
It is clear you put allot of love into this build . Would have never known it was dated . Another masterpiece anyone would be proud to have on their shelf.
2 Likes
Did you drill the lug holes on the spare road wheels , if so I tip my hat to you . The precision measurements are a real piece of eye candy.
1 Like
Once again, EXCELLENT build, paint job and weathering!
Cheers,
I honestly do not remember. Built this about 2 years ago.
1 Like
Nicely done DV, the added hydraulic lines alone take it up a level. Lovely finish as well.
Always wanted to build one of these little field engineer pieces, you did a great job on the fit and finish, I agree the hydraulic lines and connectors really take it to the next level.
Cajun 
Spectacular would be a great way to describe this model!
Looking good I like what you have done to it
I have one in my stash.
Cheers,
Ralph
boy you did some seriously nice work! Can I beg you to let me know what kind of paint colors you used?
gary
re-read your post and see you called out the paint. Sorry.
gary
That is a very good build indeed
I just love it, nice color!! I like IDF vehicles because they are so full of little colorful details, well done!!
Thanks. And I agree I like a splash of color to make a monotone scheme more interesting.
2 Likes
You like it !! The M113 is my favorite vehicle in all its forms 
1 Like
Stunning build! Those hydraulic lines do add a lot!
Fun fact: since in Hebrew Fitter and Peter is written the same way, in the IDF this M113 version is simply called Nagmash (APC) Peter.
3 Likes
Always love those fun facts!
1 Like
This is such a nice build DV.
What was your procedure for weathering it? I love the clean but used finish and wanna do it on my Dalet.
After painting and decals everything is sealed with either MM clear acrylic gloss or Tamiya clear gloss. I use a dark brown oil overall wash and let that dry for 3-4 hours depending on the consistency of the wash. You can usually tell it’s about right when there is no more shine to the wash. I use a Q-tip to remove the residue using downward strokes. I generally go over the whole build at least 2X. I can usually create streaks and such by varying the amount of wash I remove. The long drying time allows me to tweak the effects I’m trying to achieve. Once the basic overall wash is dry I will use a pin wash around rivets and other raised detail. I also revisit the streaks and add more or darken the ones created with the original wash. Once every thing is dry I very lightly drybrush the raised detail to add more depth and make things pop. Once that is dry the clear flat goes on followed by AB work to create dust. I use an earth color and buff heavily thinned to build the effect slowly. Earth color first followed by the buff. Sometimes I will use pigments to tweak the effect. Lastly everything gets a very light dusting of either the earth color or buff. When using pigments I do not use any type of sealer as that seems to negate the effect and also changes the color of the pigments. Good luck.
2 Likes
Can’t believe I missed this first time around as I have a thing for IDF vehicles. That’s a really nice build and I love the colours, some really good contrasts.