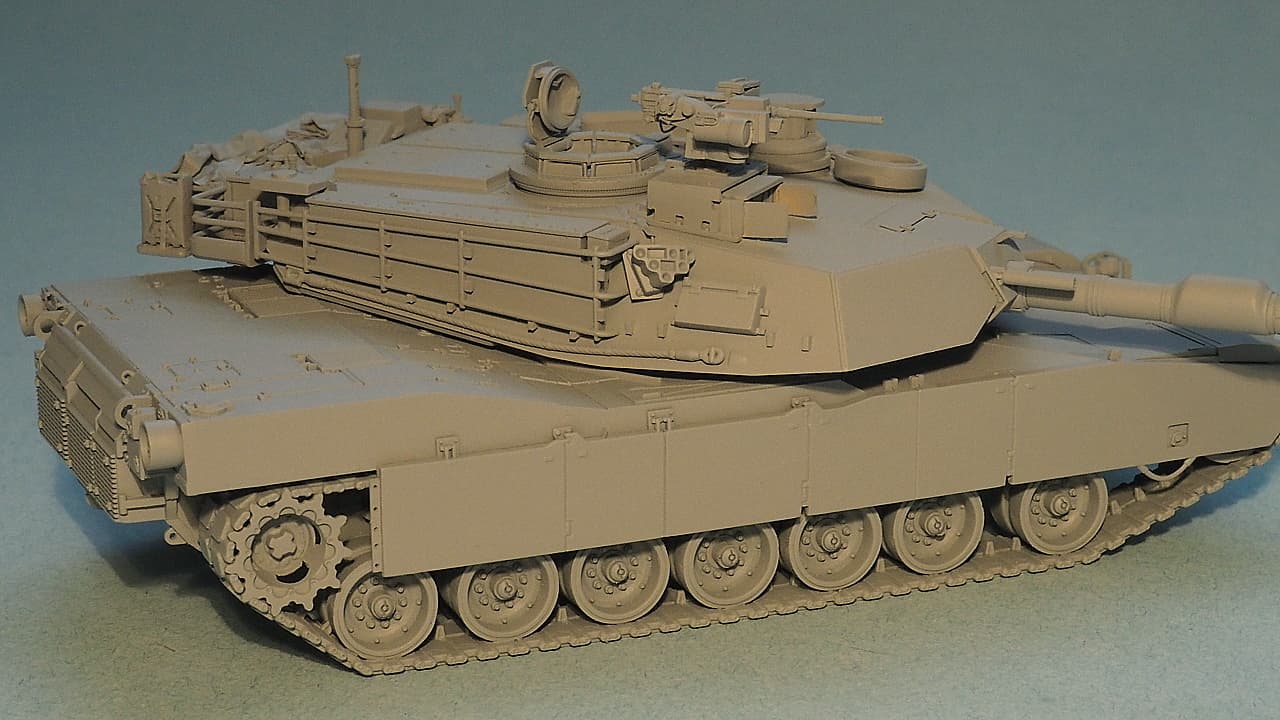
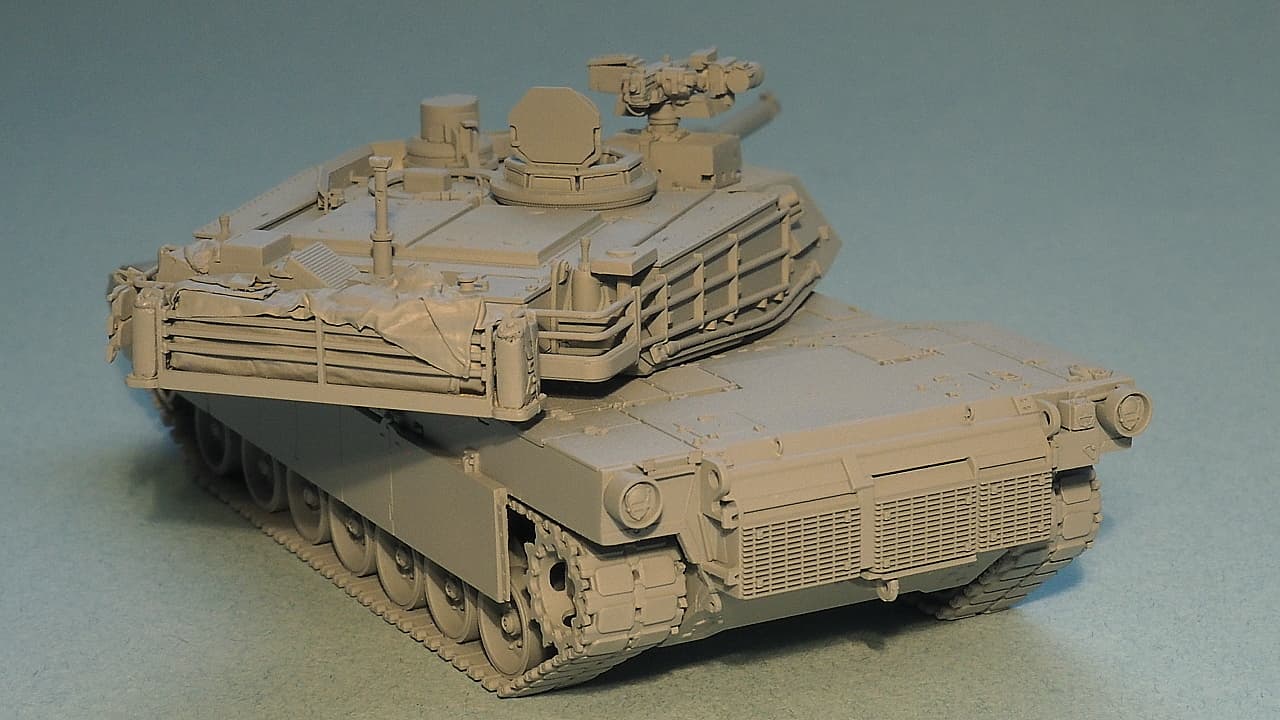
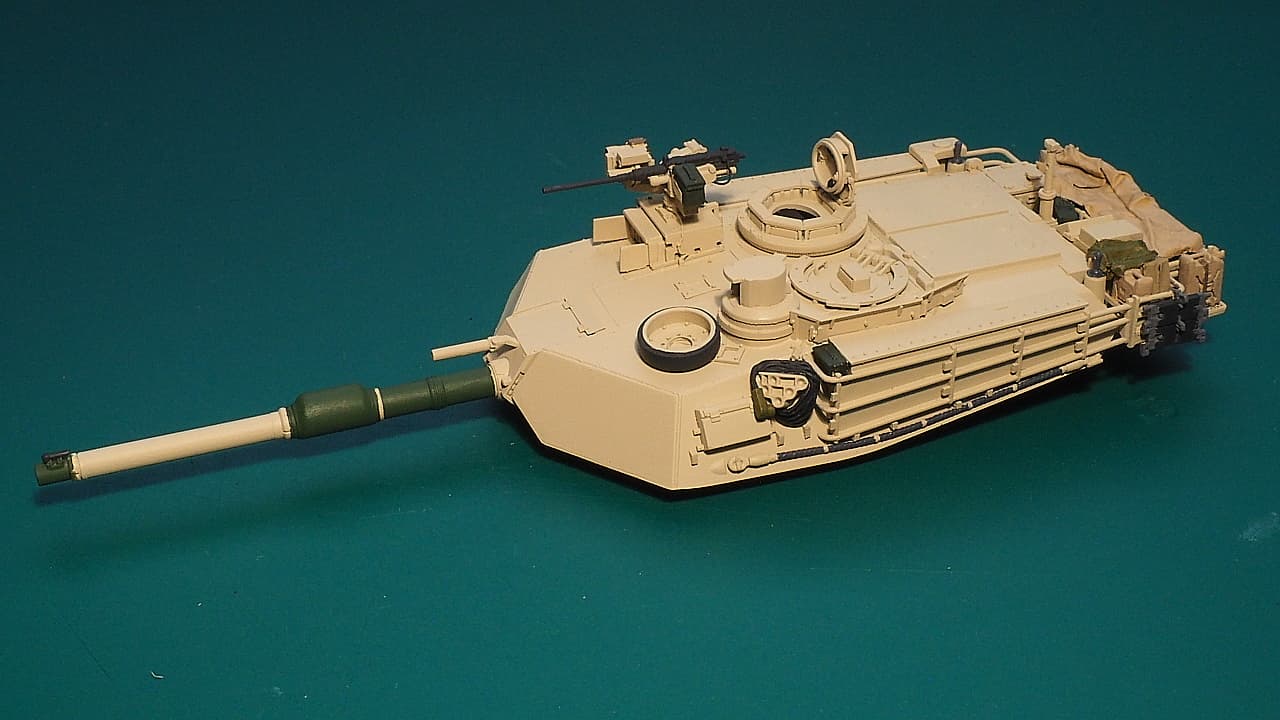
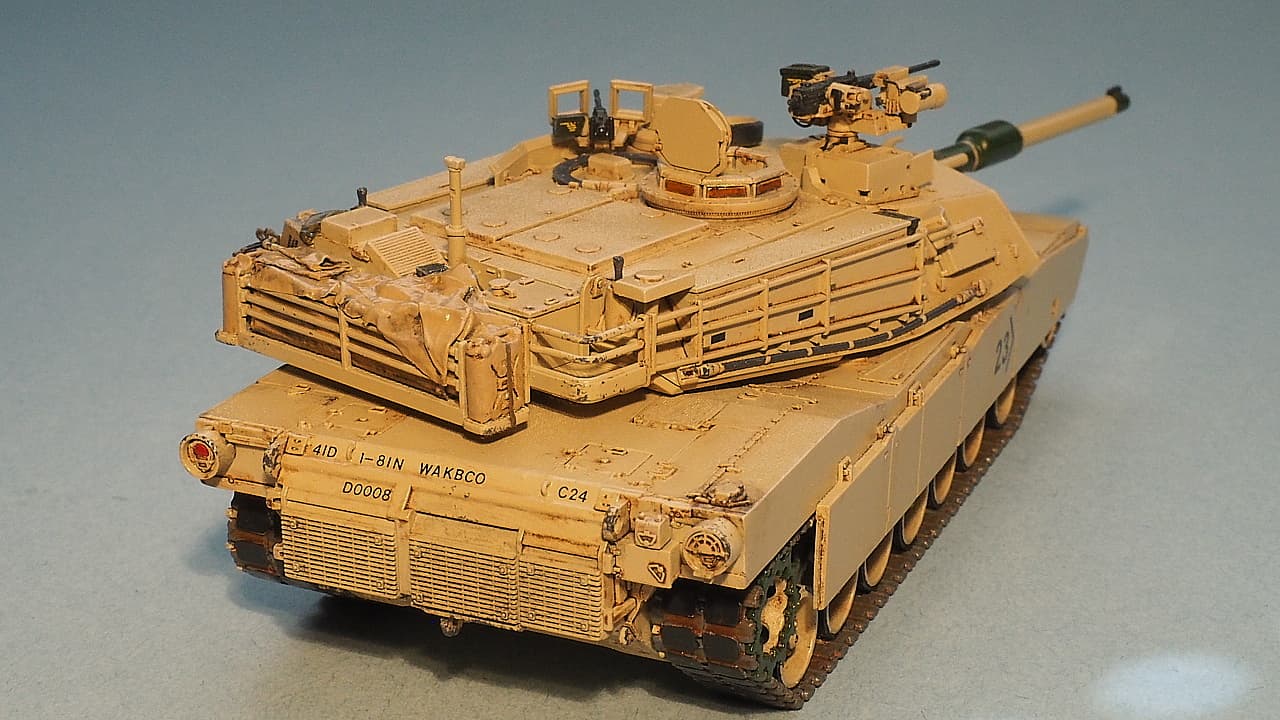
I airbrushed a coat of Mr Surfacer 1000 as a primer. The primer coat revealed some minor issues I have since fixed. Here’s how the tank looks now (minus the gunner’s MG/shield, and some details). I’m happy that my scratch built additions and modifications are of the same detail level as the kit itself. And the tarp turned out just fine as well.
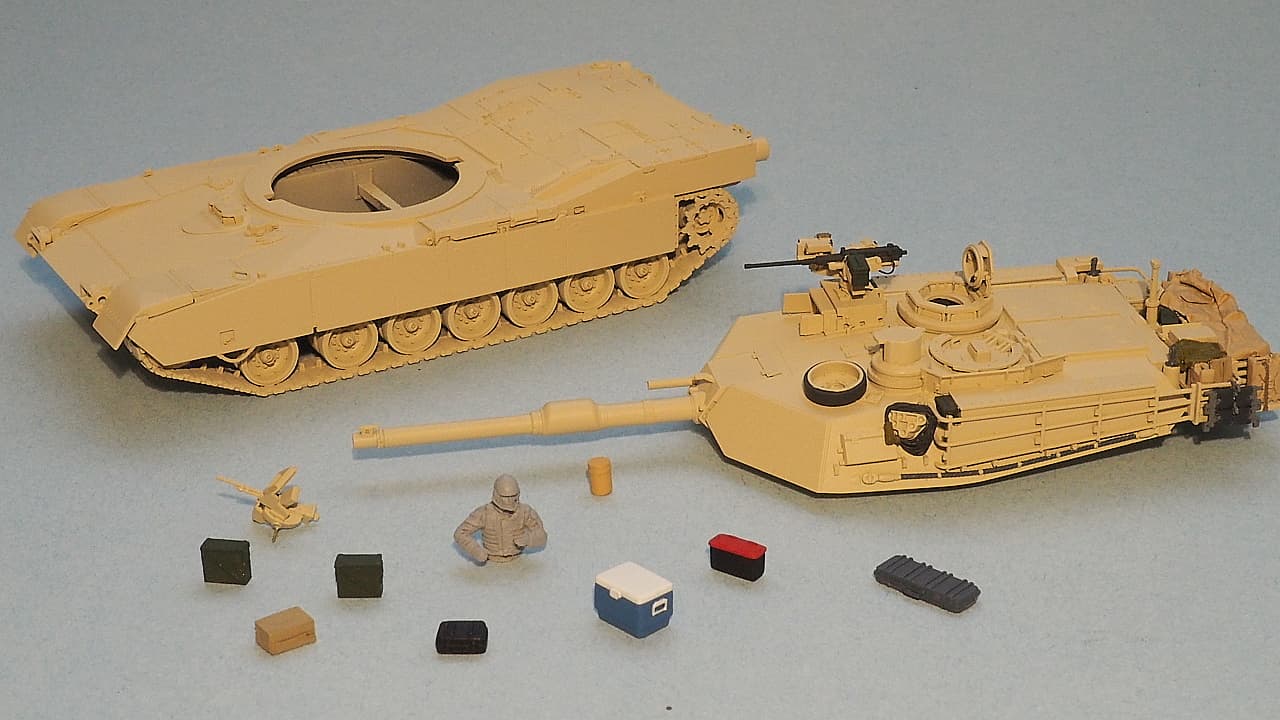
I’m making progress getting the base coat of paint on everything. I still have a bit to do on the turret, and then it’s on to the tedious track and road wheel painting on the hull. Of course I’ve made my life difficult by attaching the running gear, tracks, and side skirts before painting.
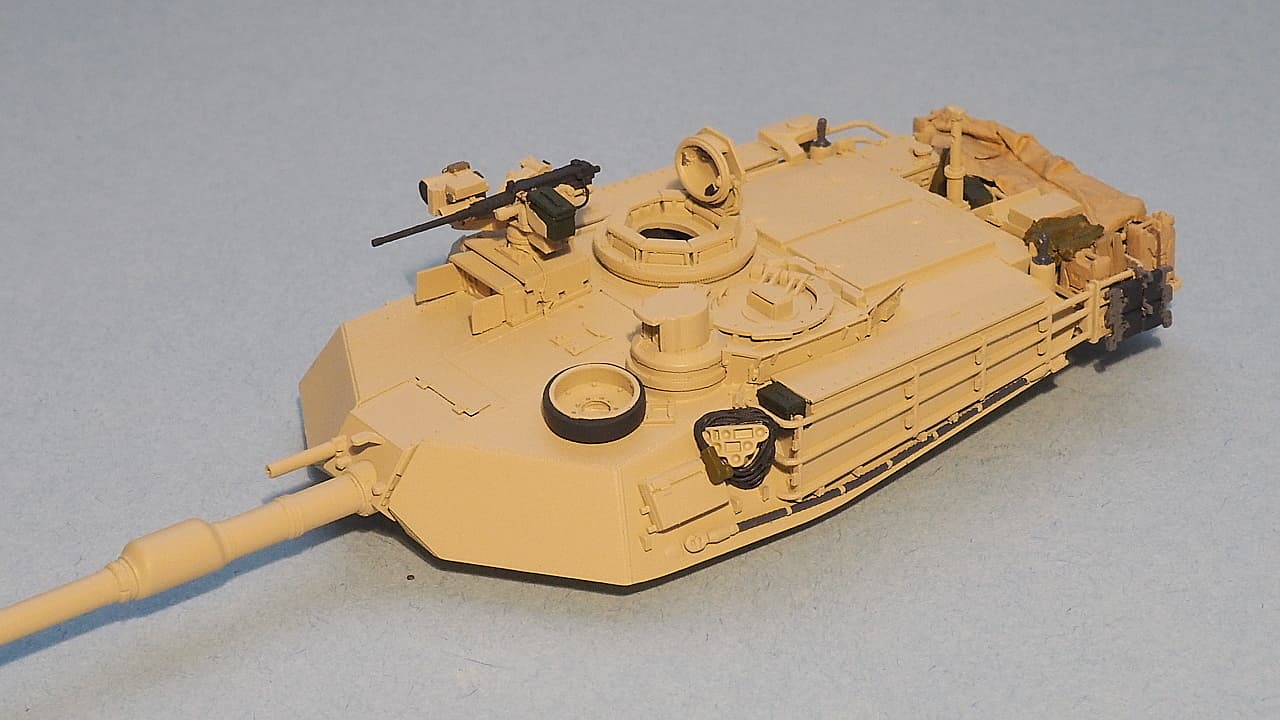
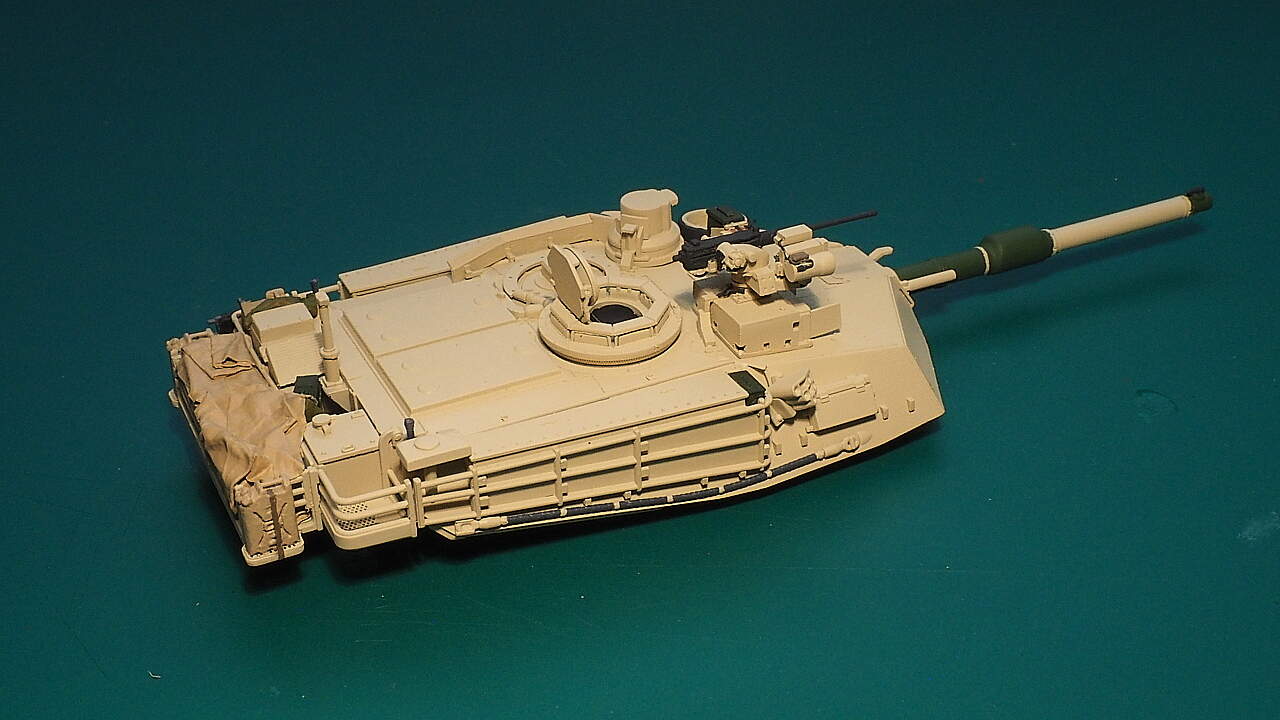
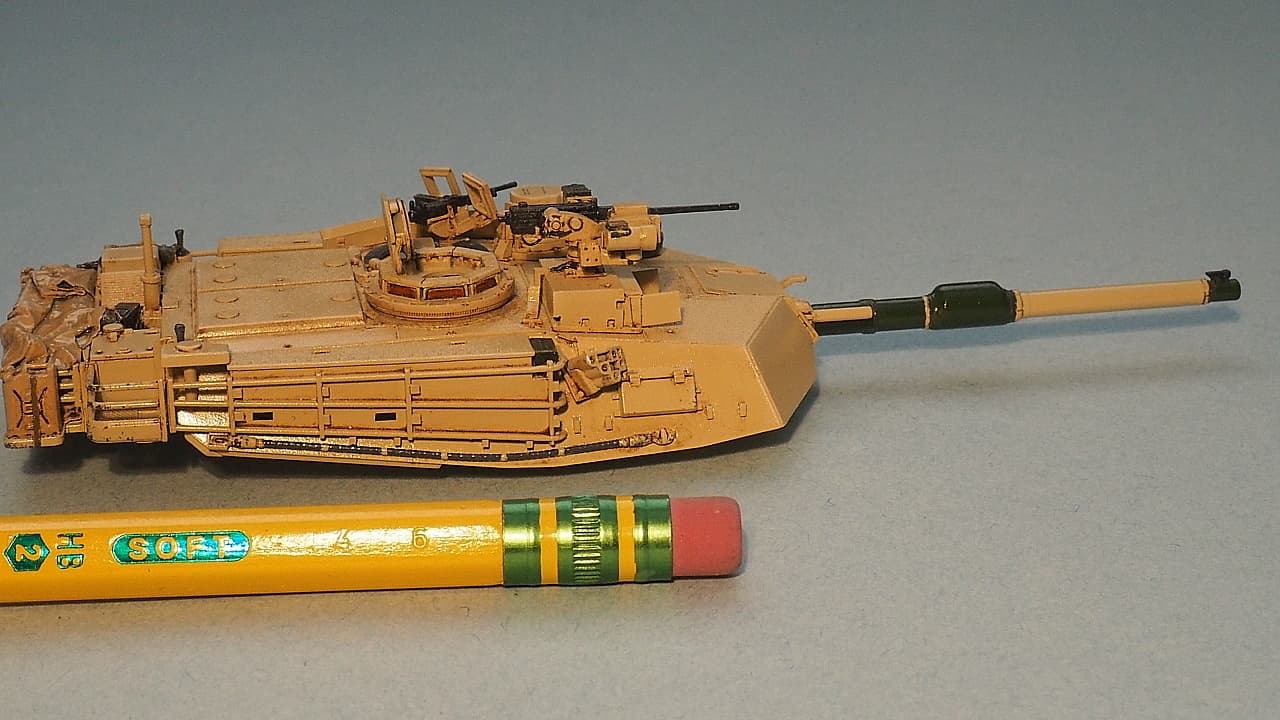
I’ve finished the base coat on the turret. The tank I’m modeling mine after has some green replacement parts on the barrel. So I brush painted those with Vallejo green.
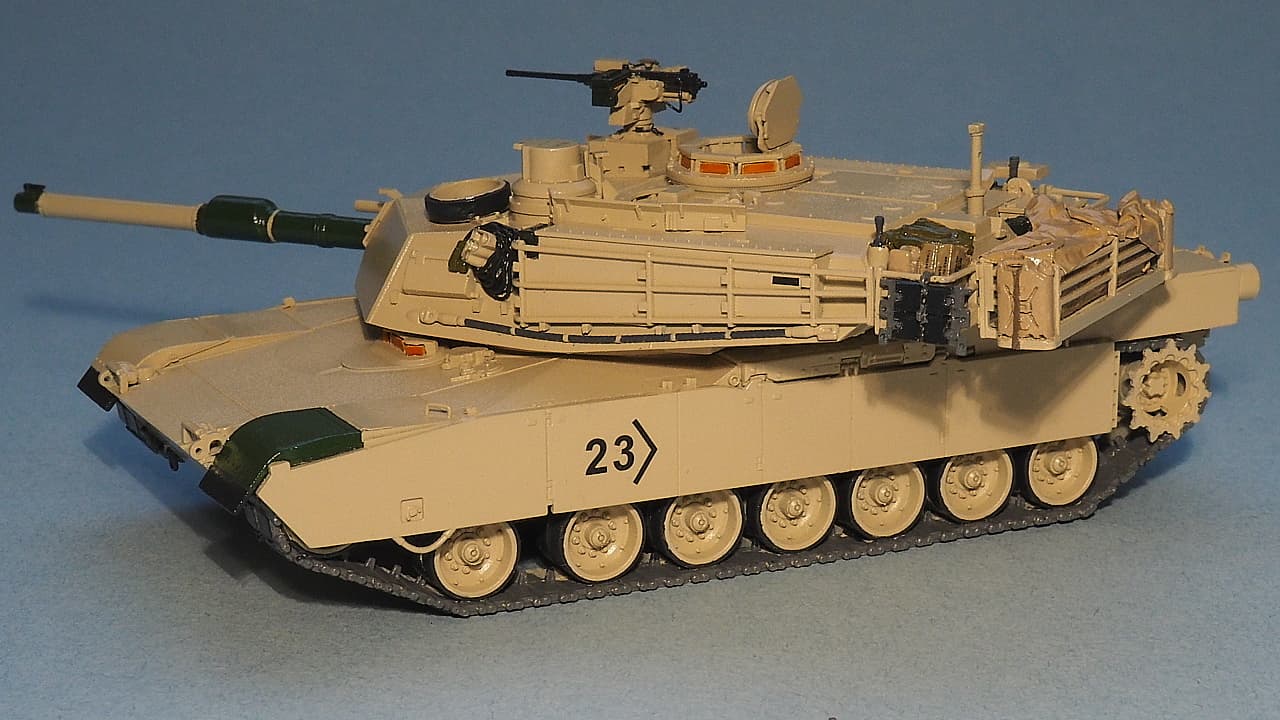
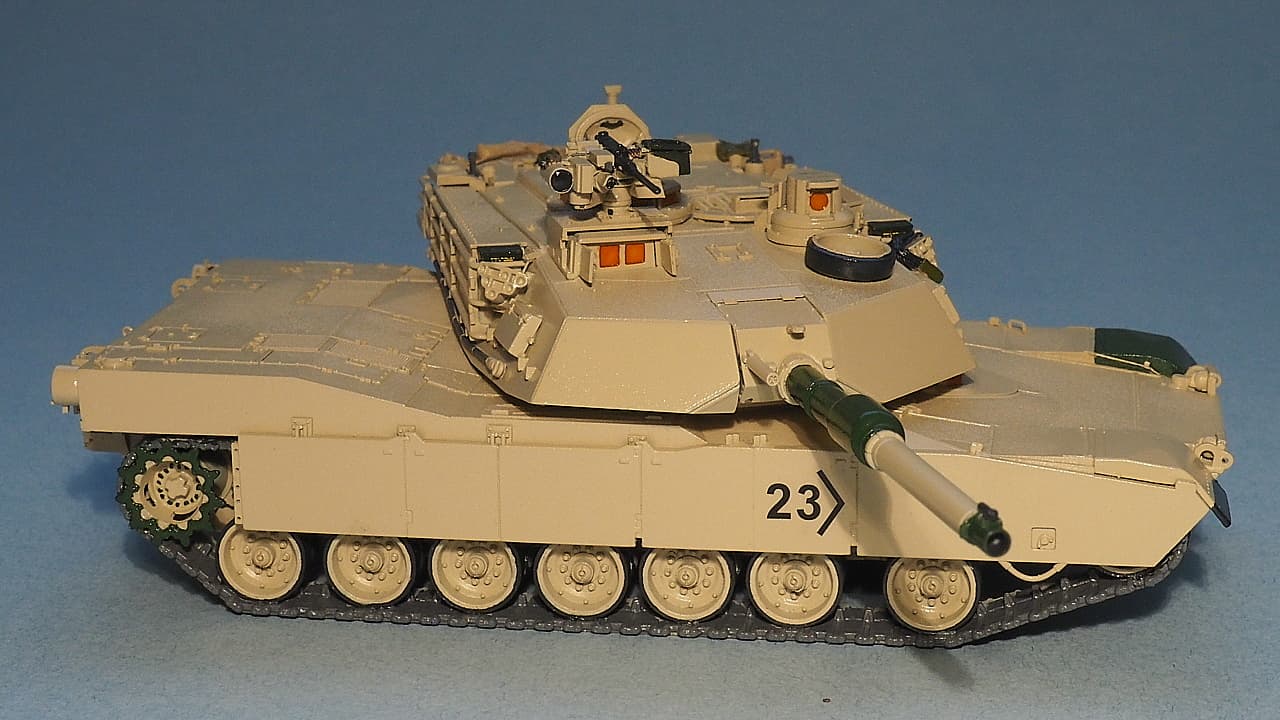
This is always the part of my builds I’m almost embarrassed to show photos of, the gloss-coat-before-weathering-starts looks like a child’s toy. Things like the tracks, and bright orange optics will be much changed with weathering. The decaling wound up being 64 individual decals, using an N scale model railroad lettering set for the vehicle specific decals. Next steps = washes, dry brushing, weathering powders, etc.
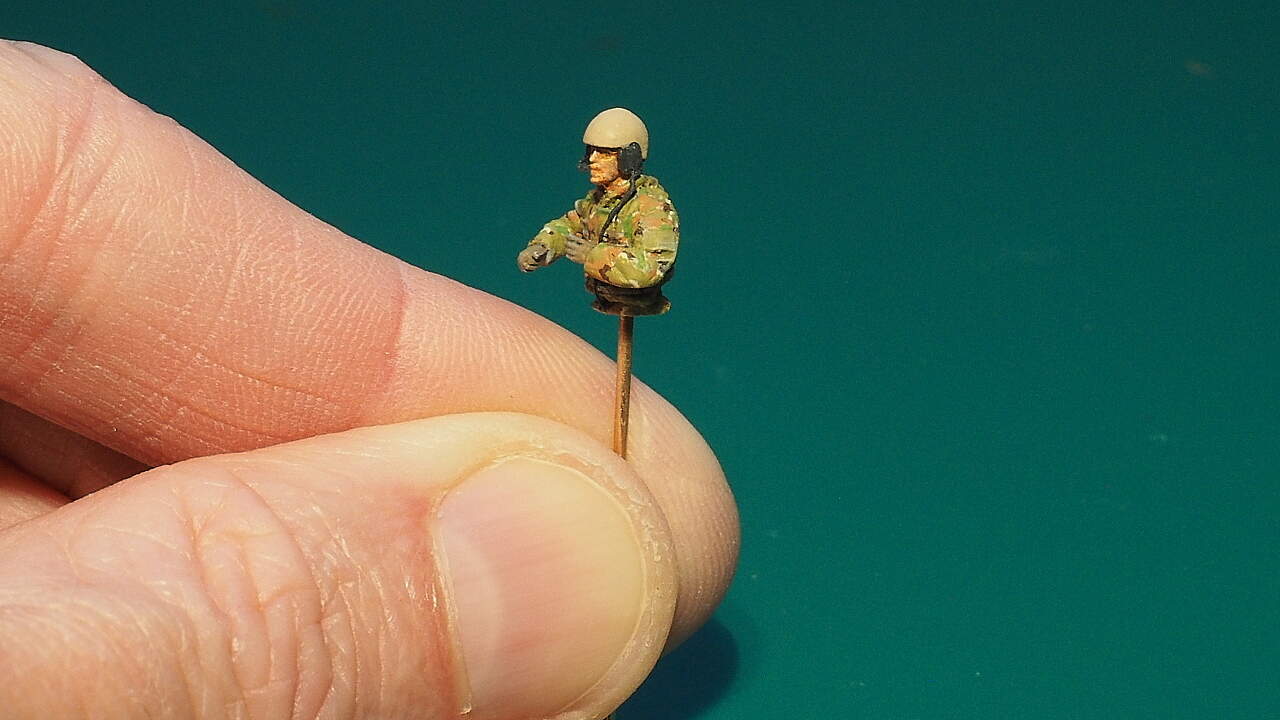
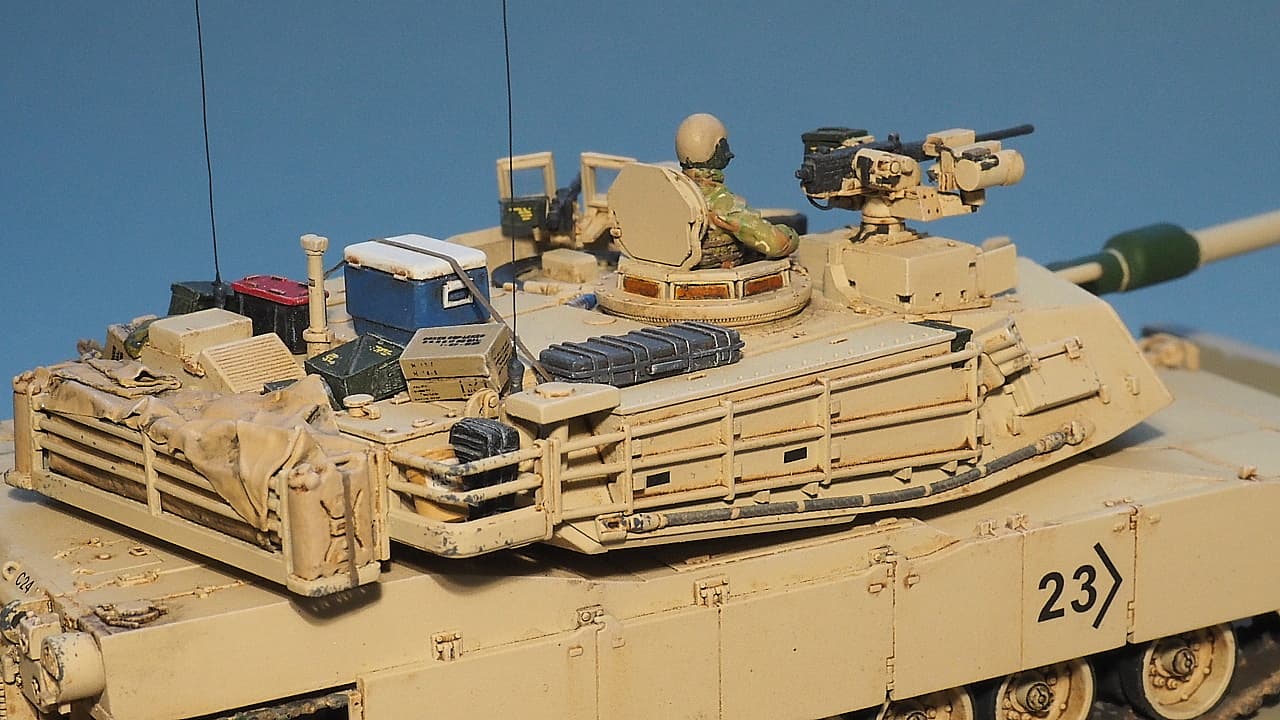
I’m part way through the weathering process on my M1A2. I’ve applied washes (made by me using oil paints thinned with Turpenoid synthetic turpentine), dry brushed, and added some minor chipping. The finish is still an obnoxious high gloss. The next steps will be painting the tank commander figure (which I’ve used .006" copper wire to add the intercom mouthpiece arm, and .004" wire to add the wire from the helmet’s headset down to his waist). Then I’ll finally give everything a matt coat, and apply weathering powders, chalks, and pigments.
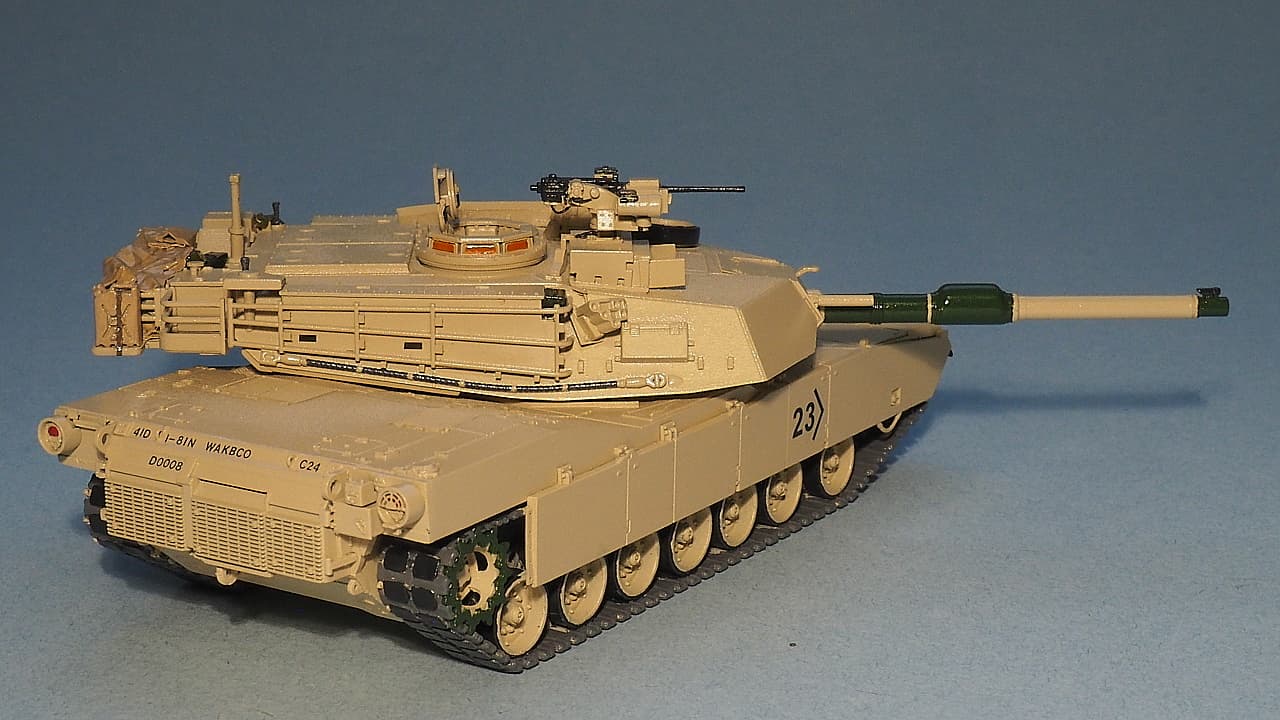
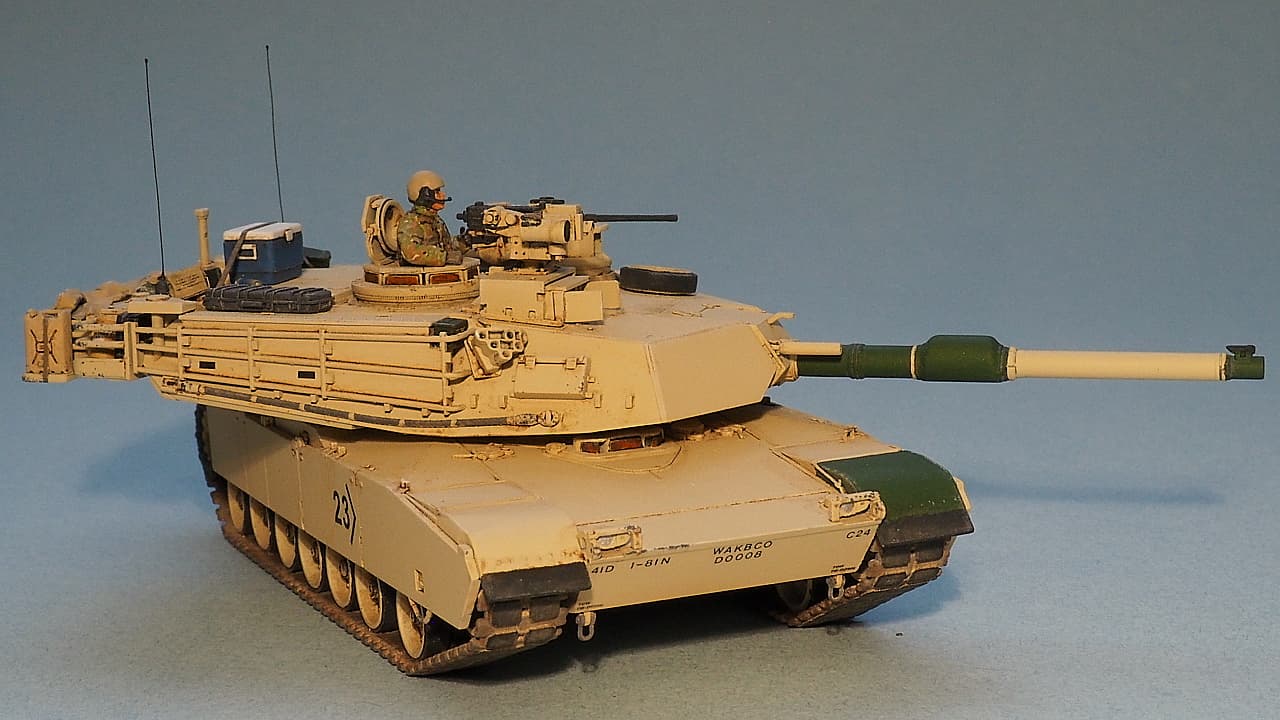
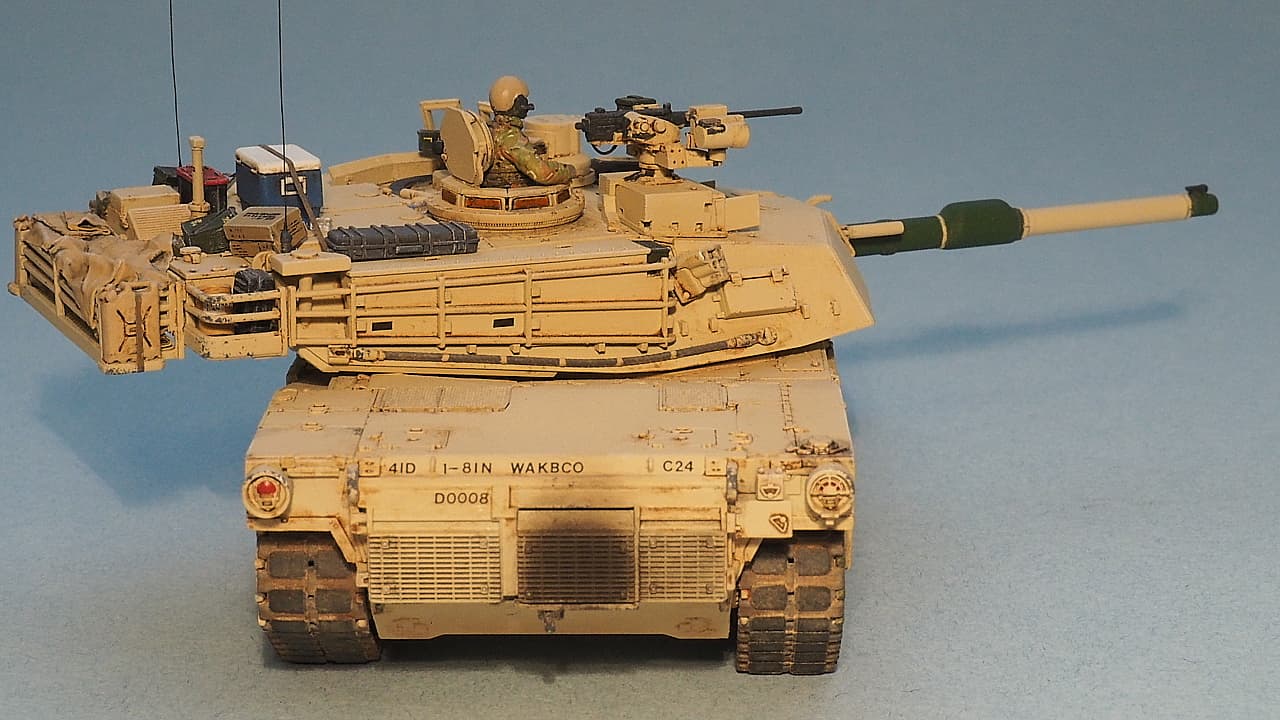
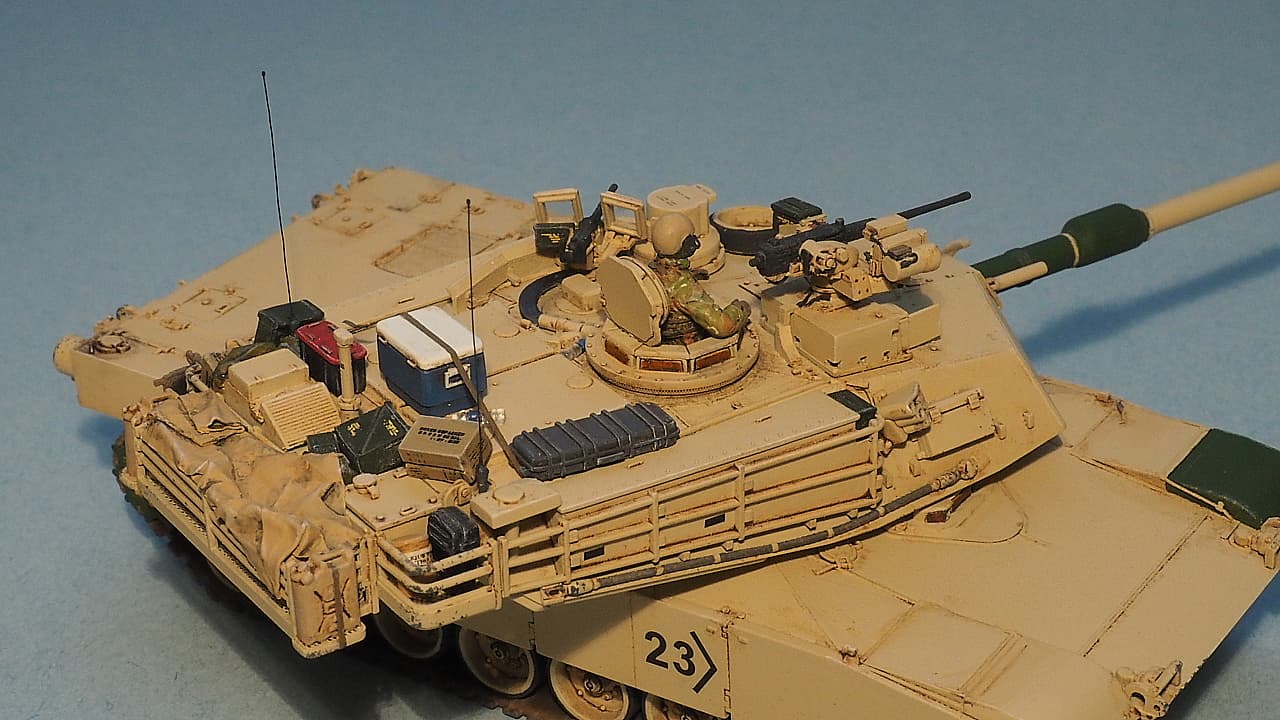
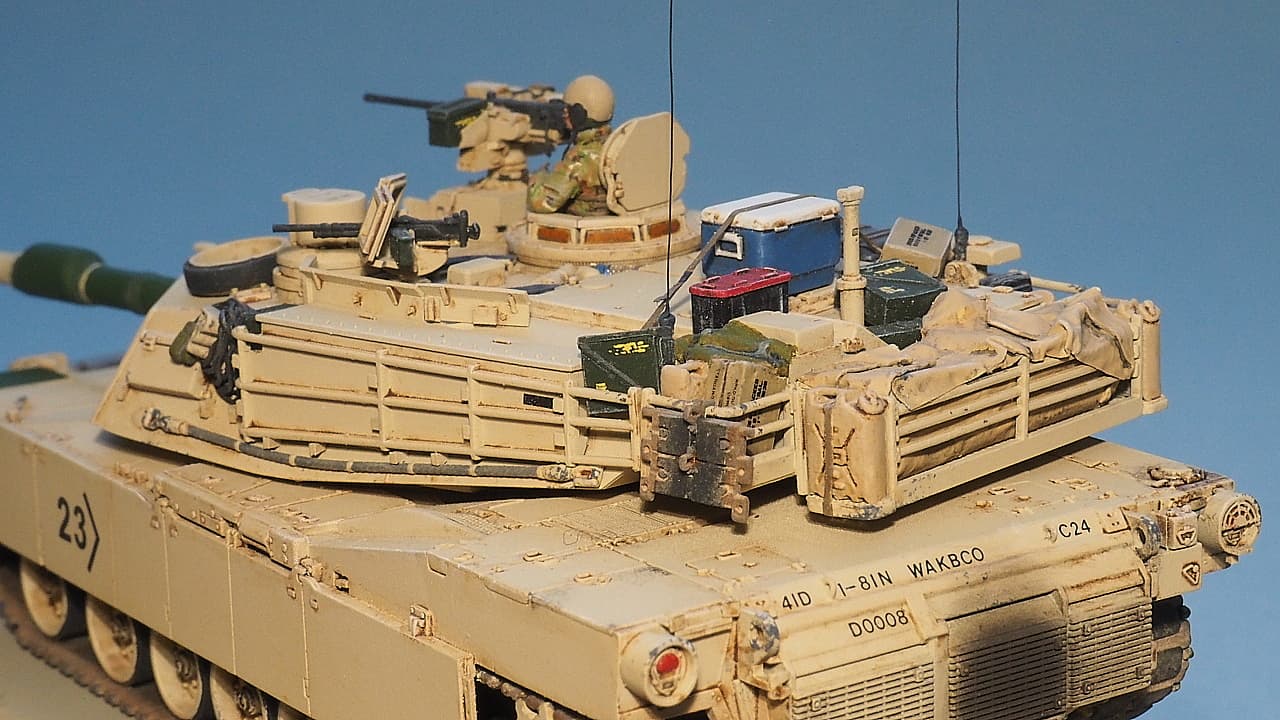
I’m happy with the results of the washes and dry brushing. The commander’s CROWS II Low Profile weapons station was 100% scratch built out of 94 pieces of styrene and wire, so the weathering has helped make the details more visible in this small scale. Also, with the weathering, I’m going with the less-is-more philosophy, since it’s easy to overdue it in 1/72 scale.
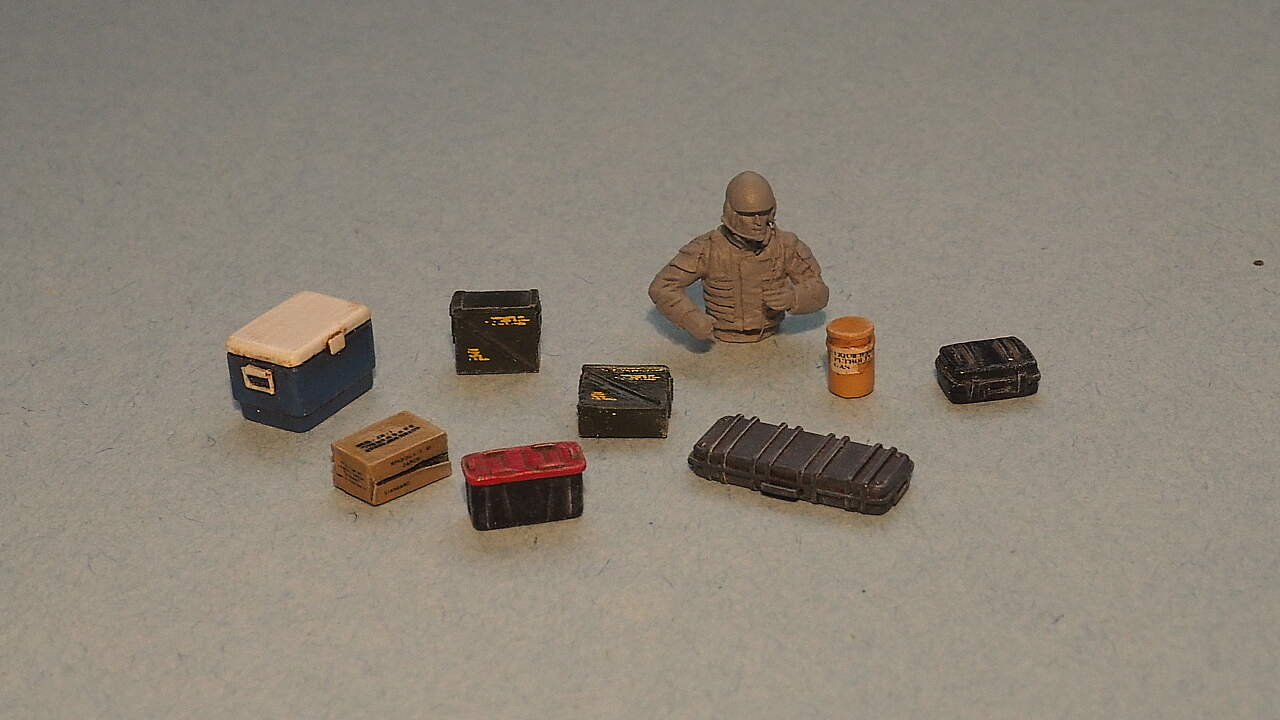
Lastly, there aren’t really any 1/72 scale decals out there for MRE boxes, ammo cans, etc. So, I used various small lettering from N scale (1/160 scale) RR lettering sets for those items as well as the lettering on top of the commander’s independent sight. These are so small as to be unreadable, but help make the model look complete.
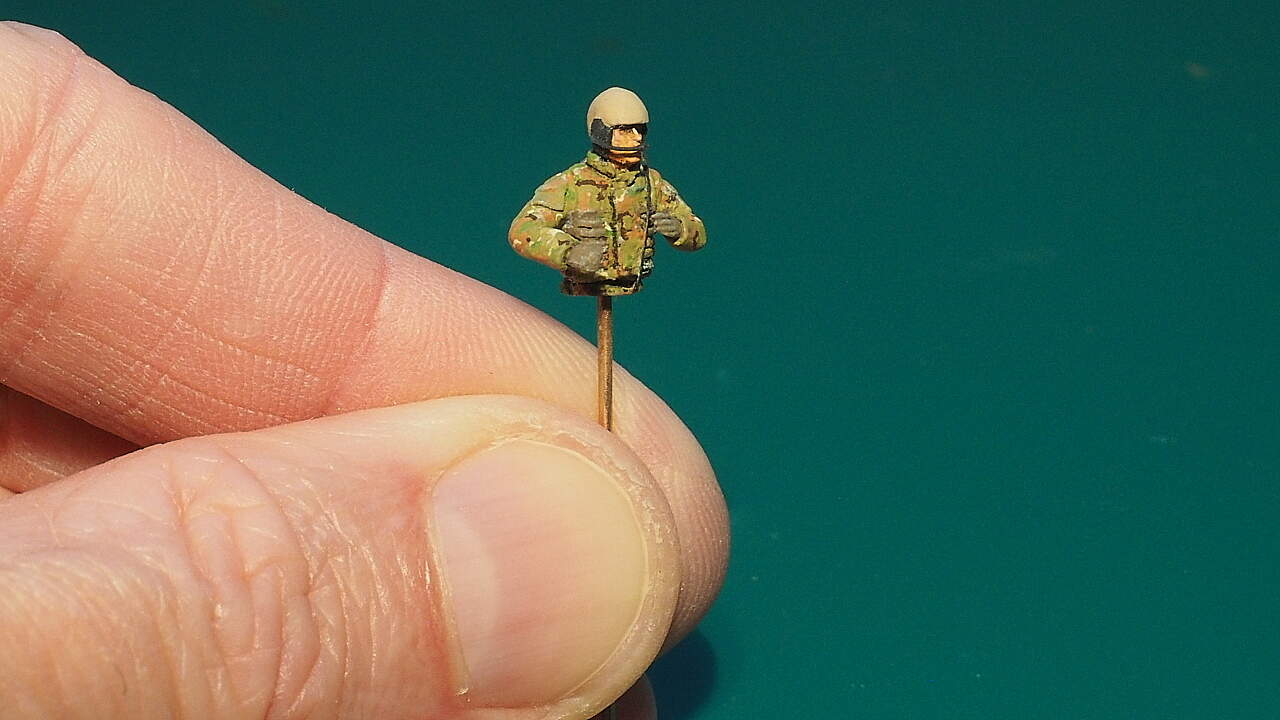
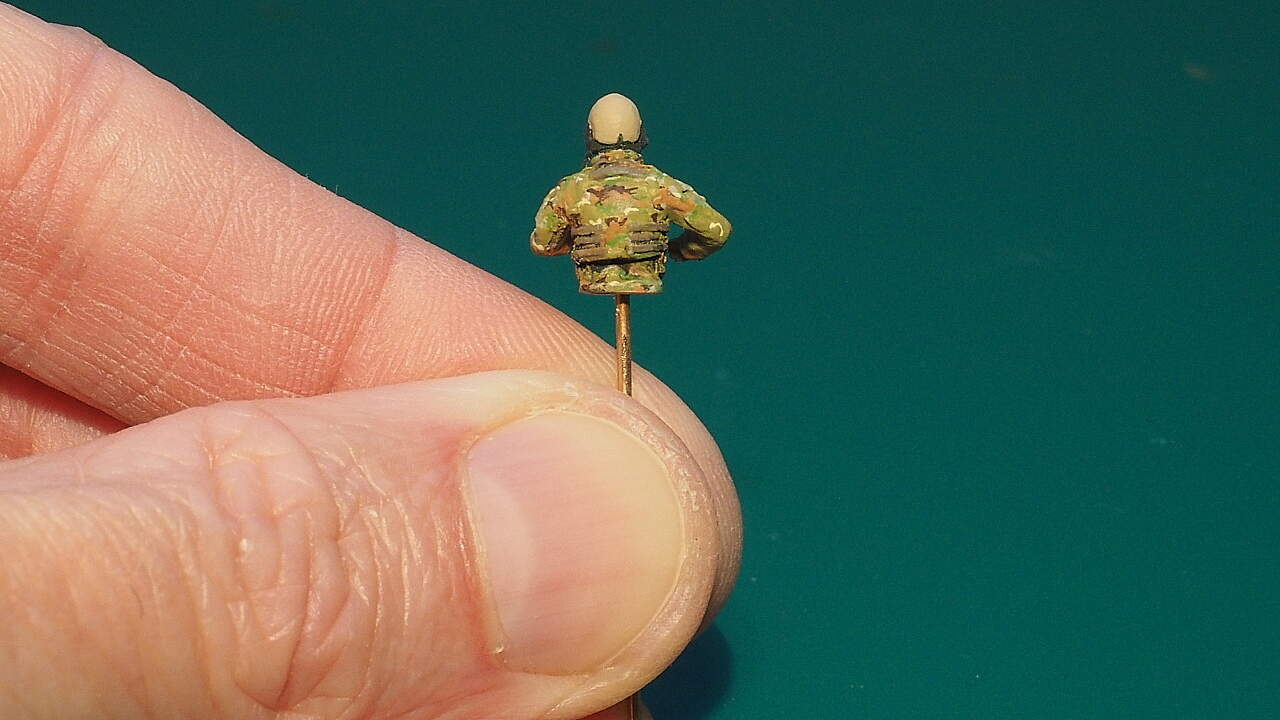
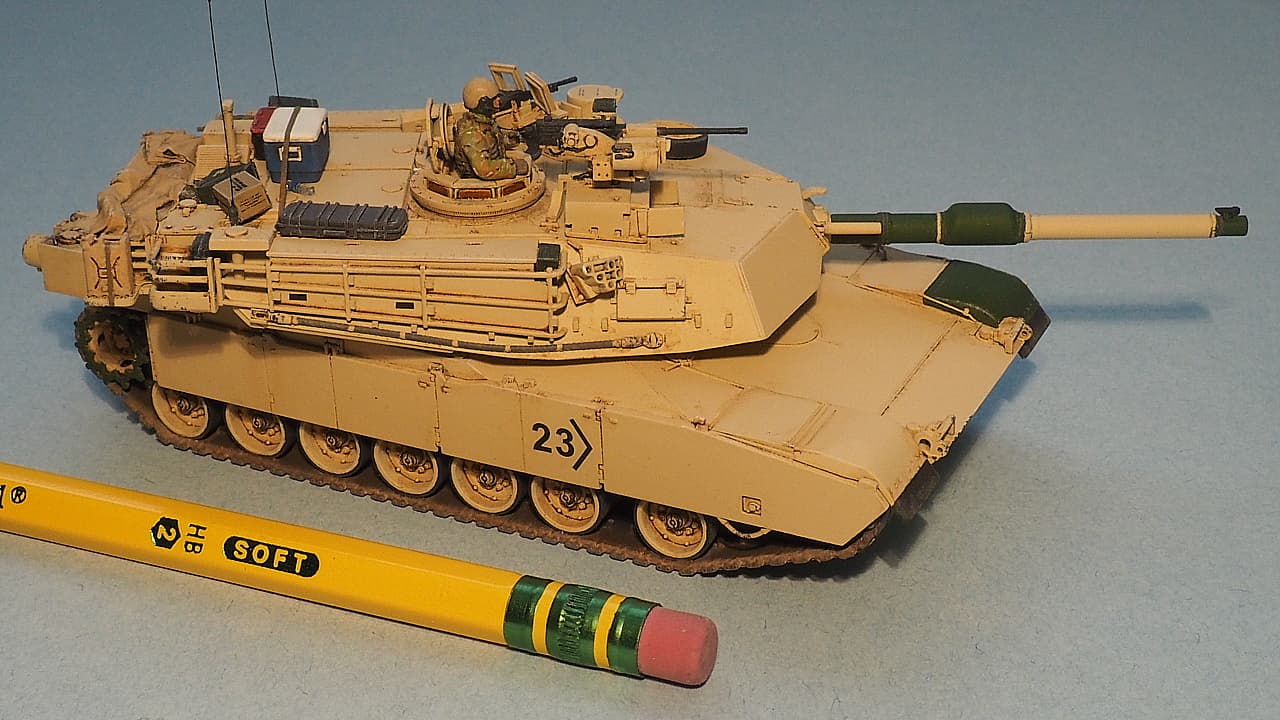
I was away on vacation for a couple weeks, so hadn’t made much progress on the tank. I’m not much of a figure painter, but I gave the tank commander my best effort. The multi-cam camouflage pattern the US Army currently uses is a real pain to paint in 1/72 scale!
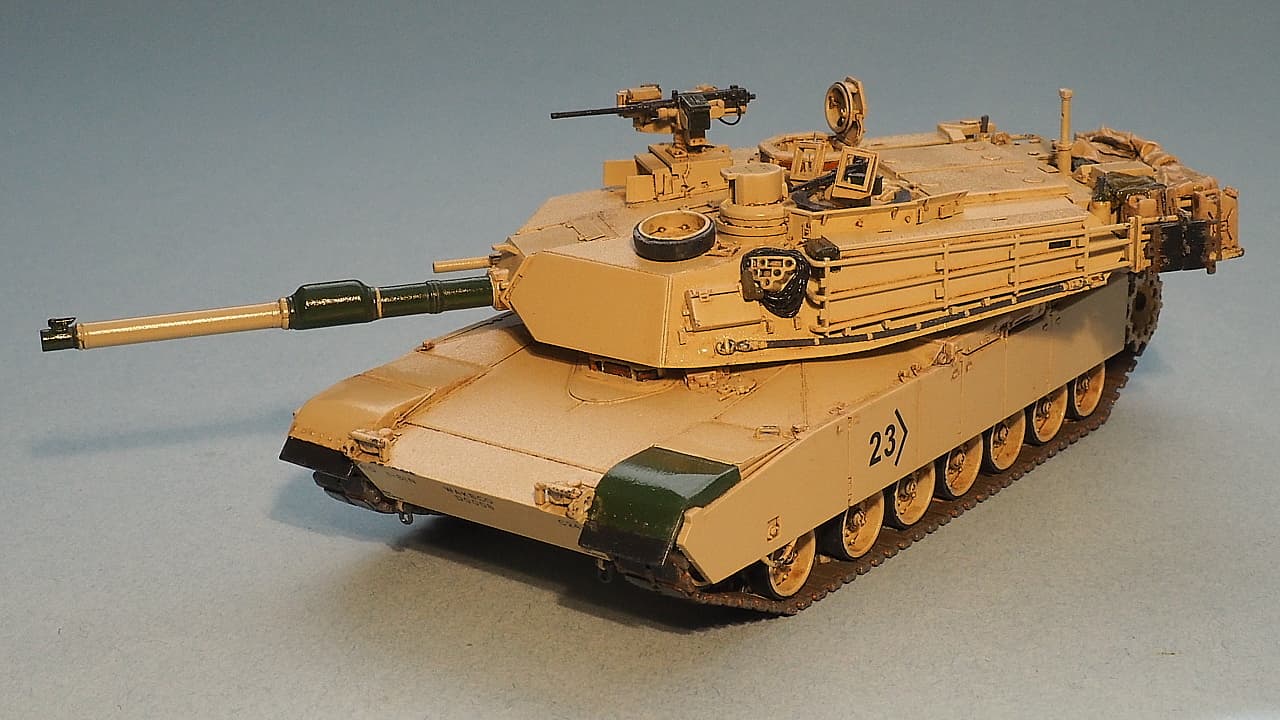
As far as the tank itself goes, I sprayed a flat coat on the tank after weathering. I just have to attach the final details, and weathering, and then it should be complete.
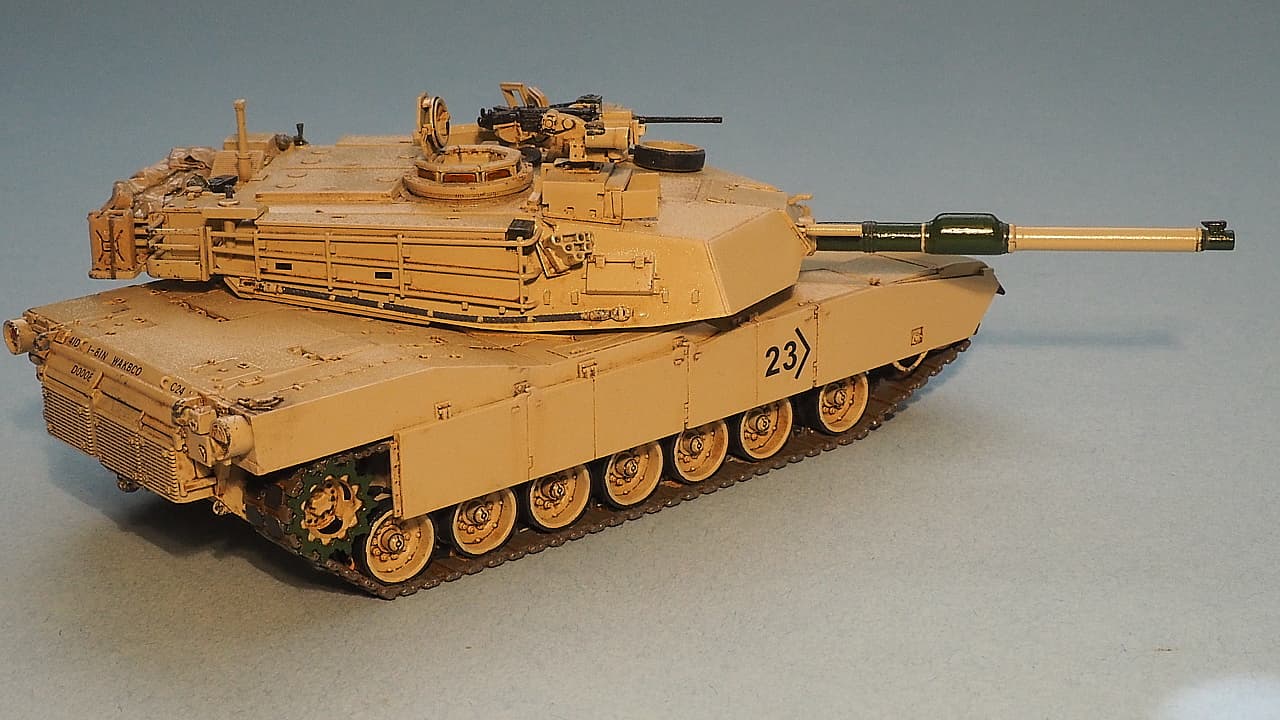
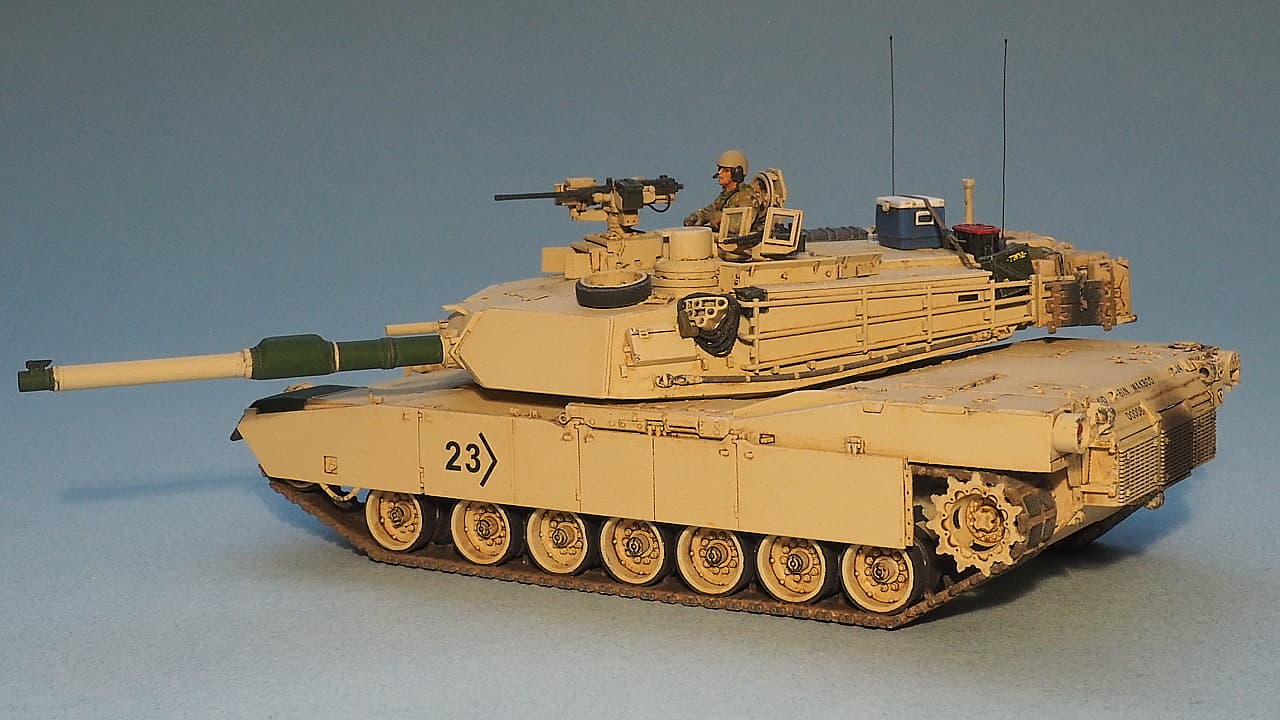
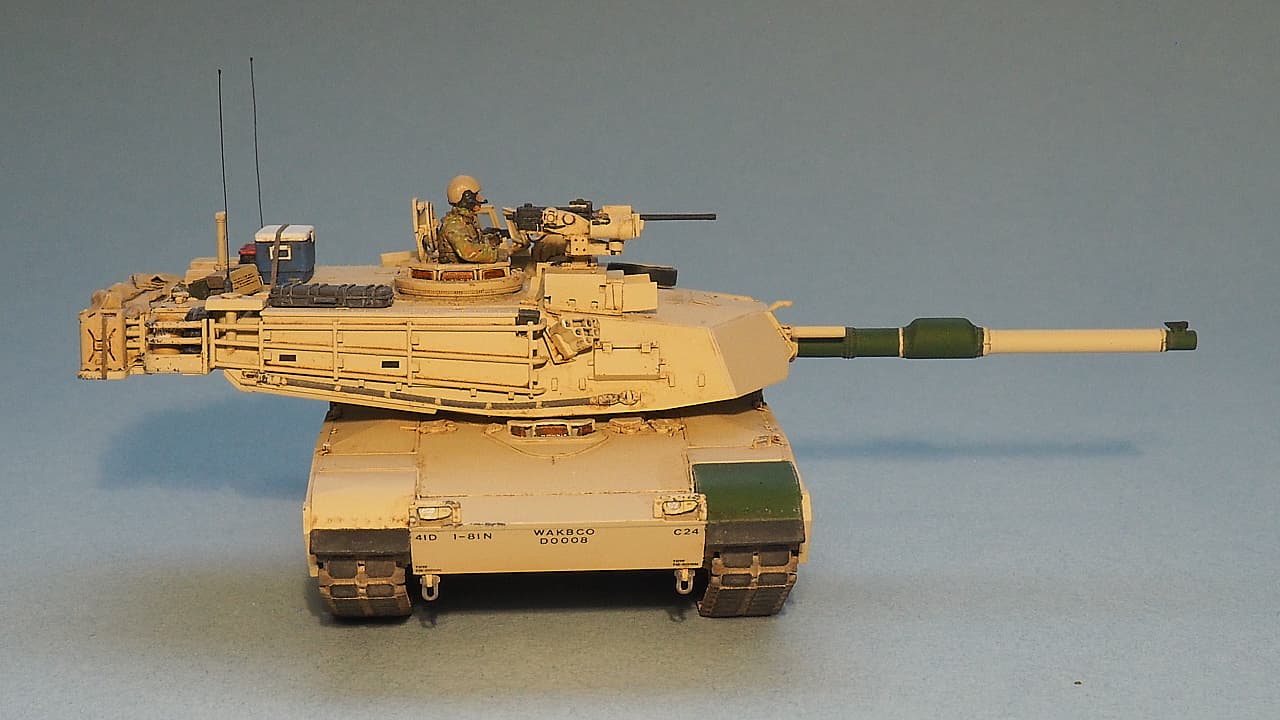
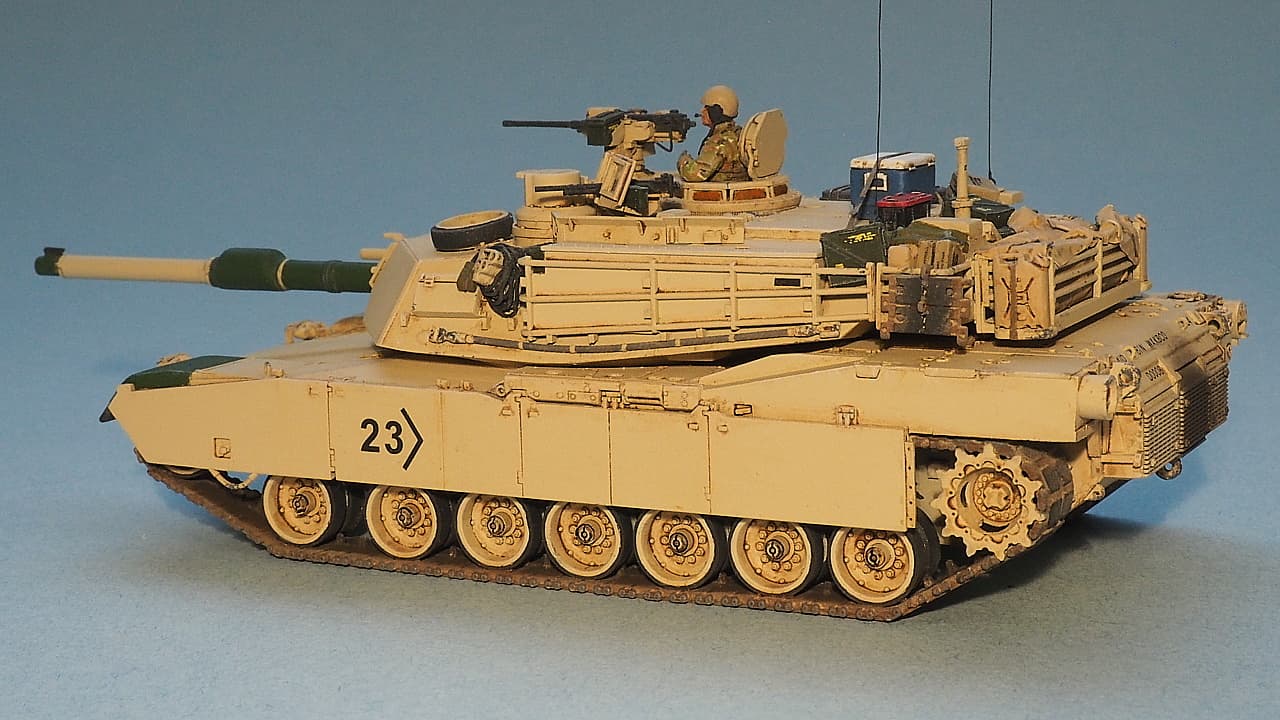
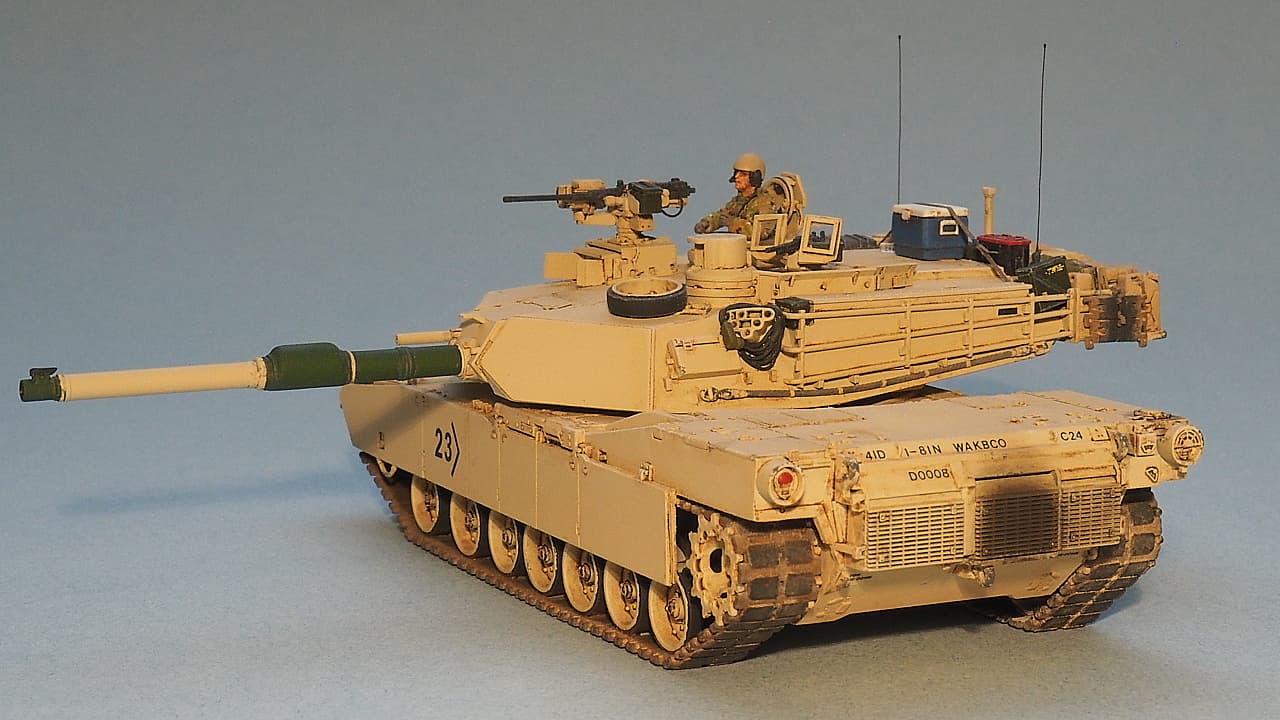
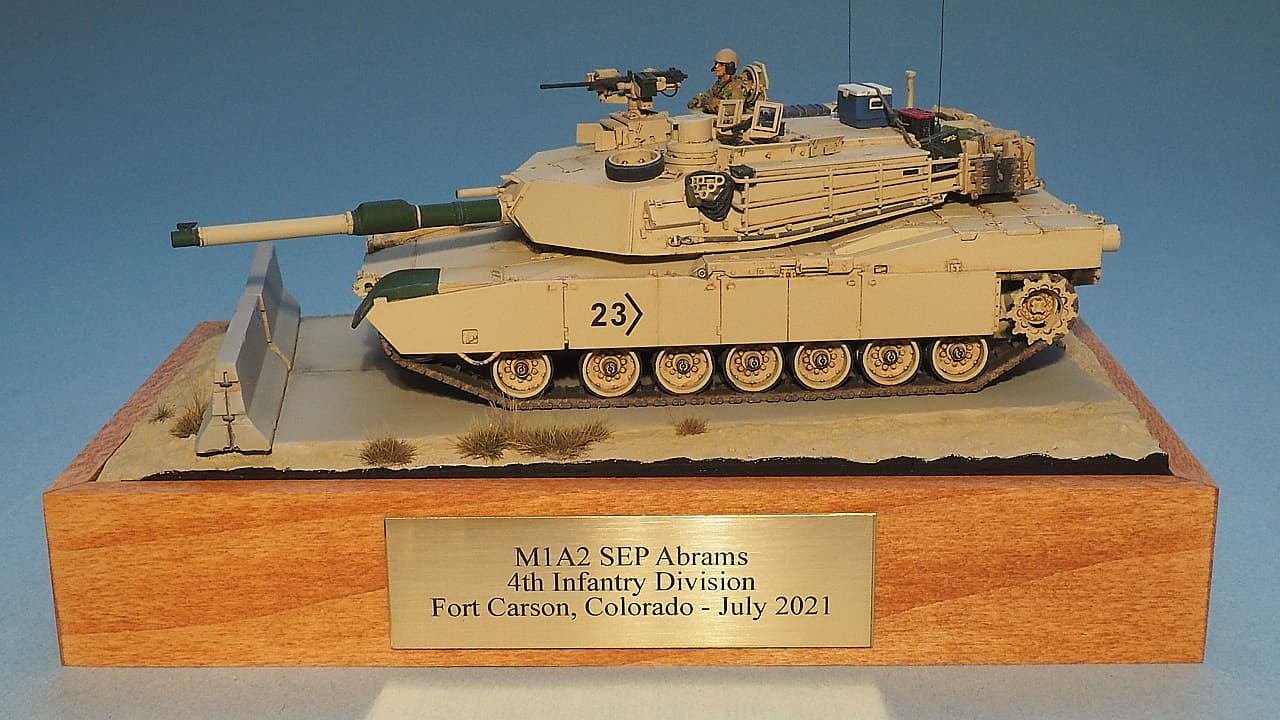
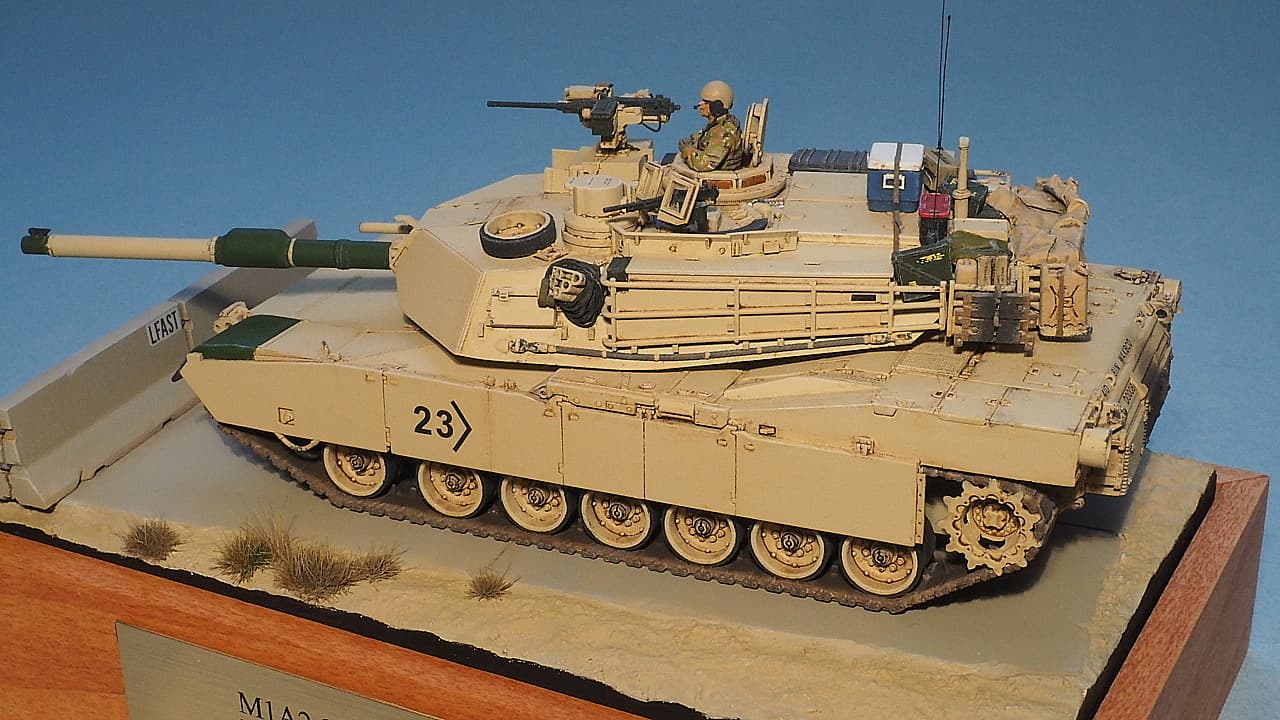
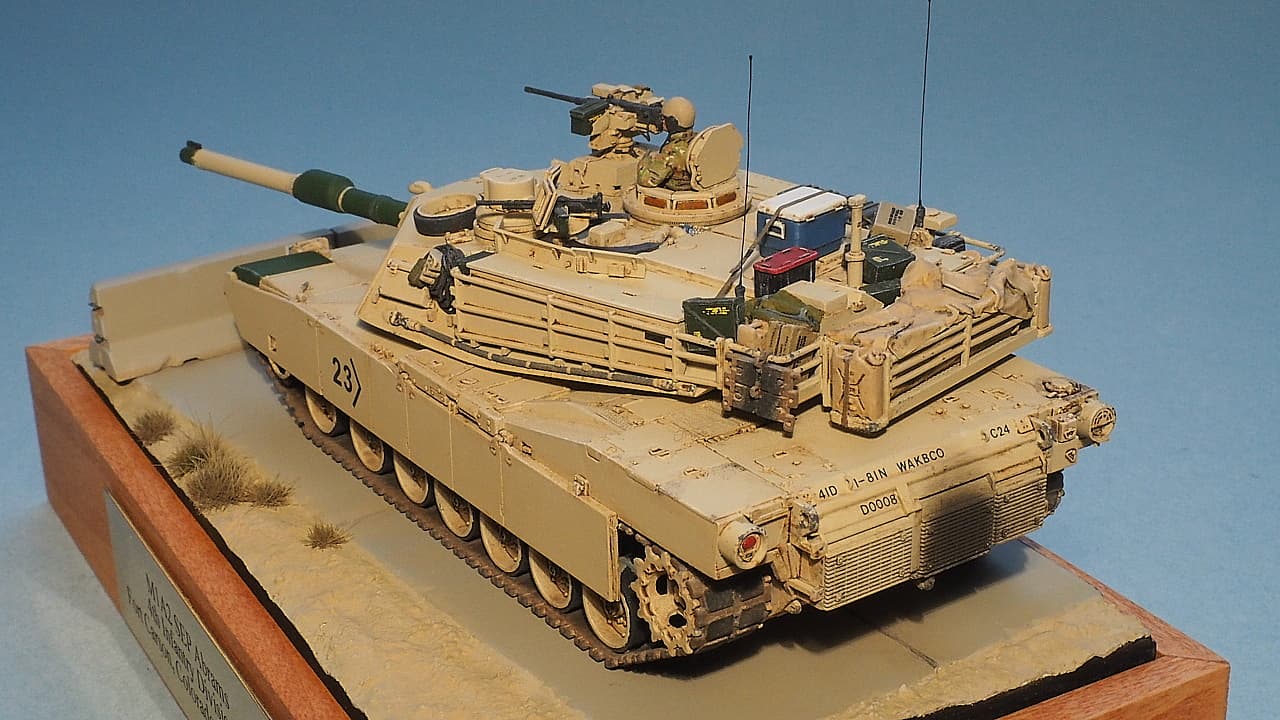
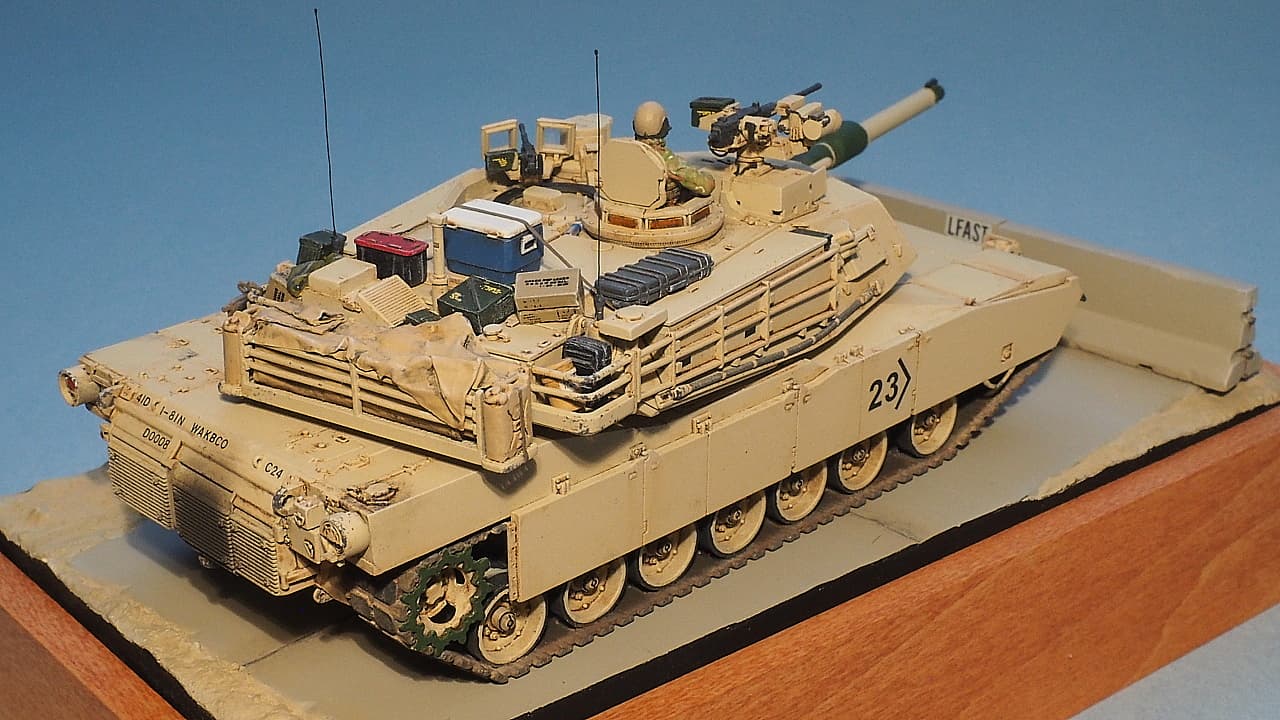
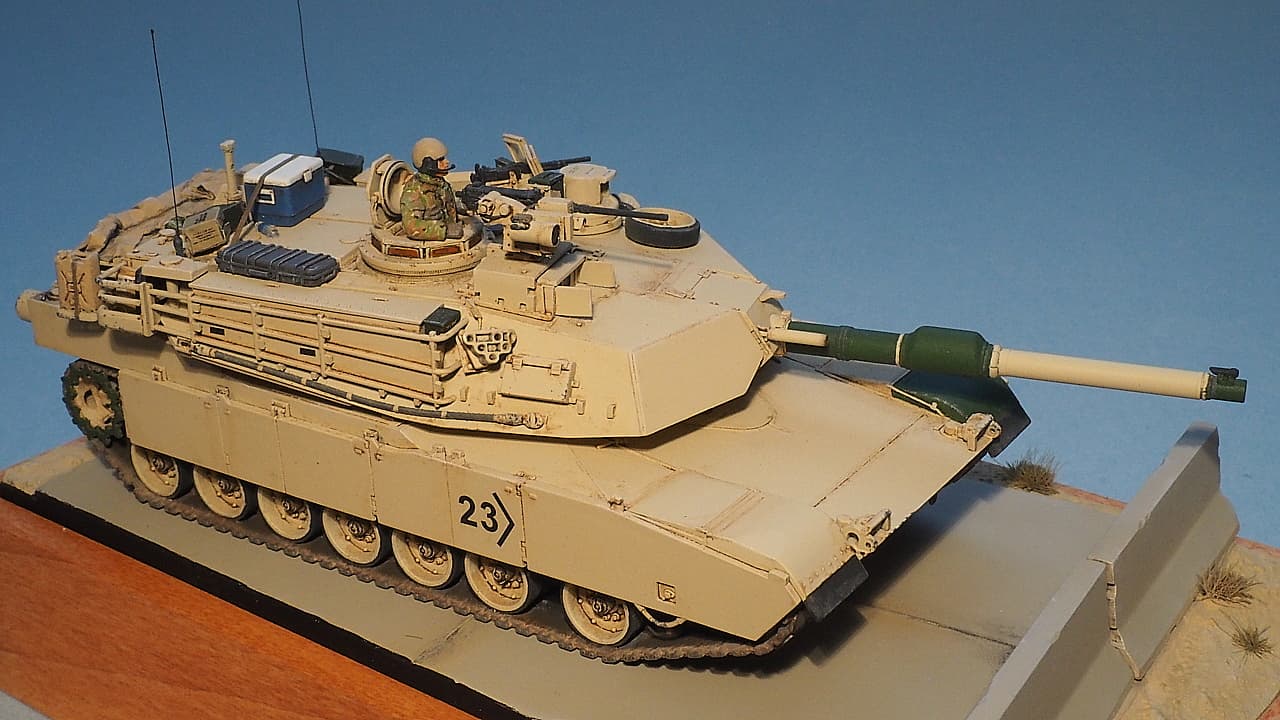
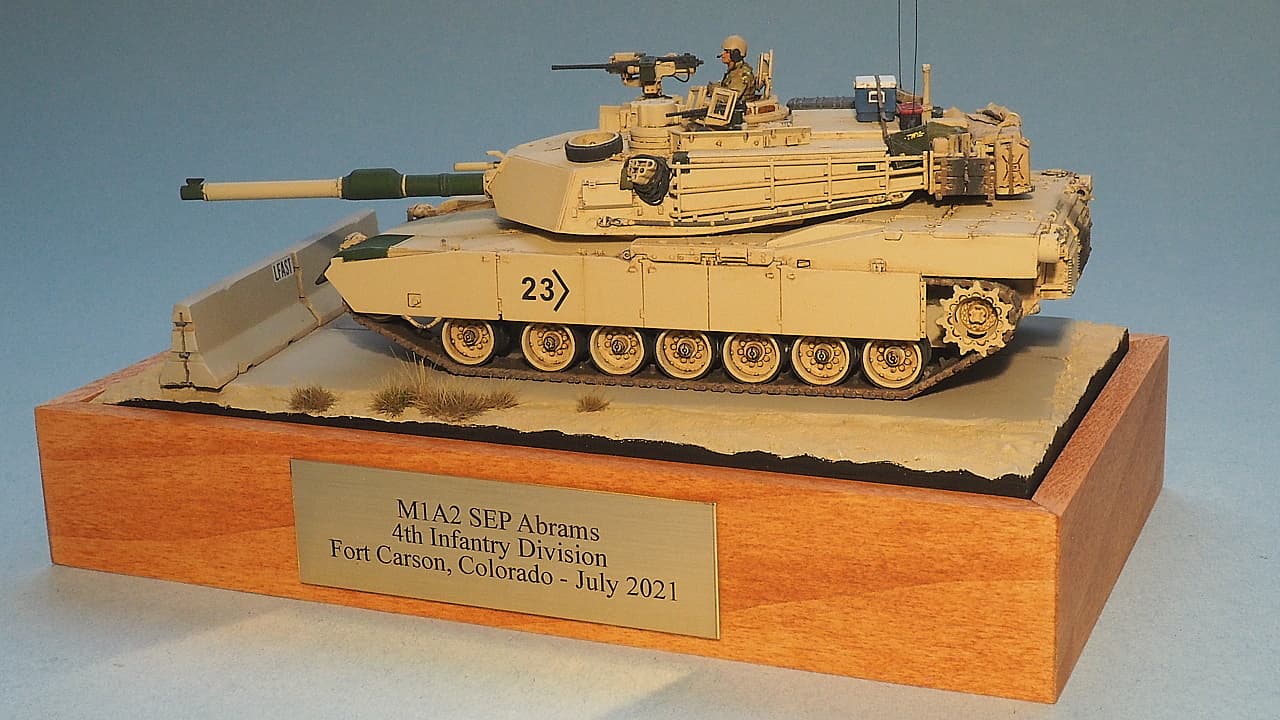
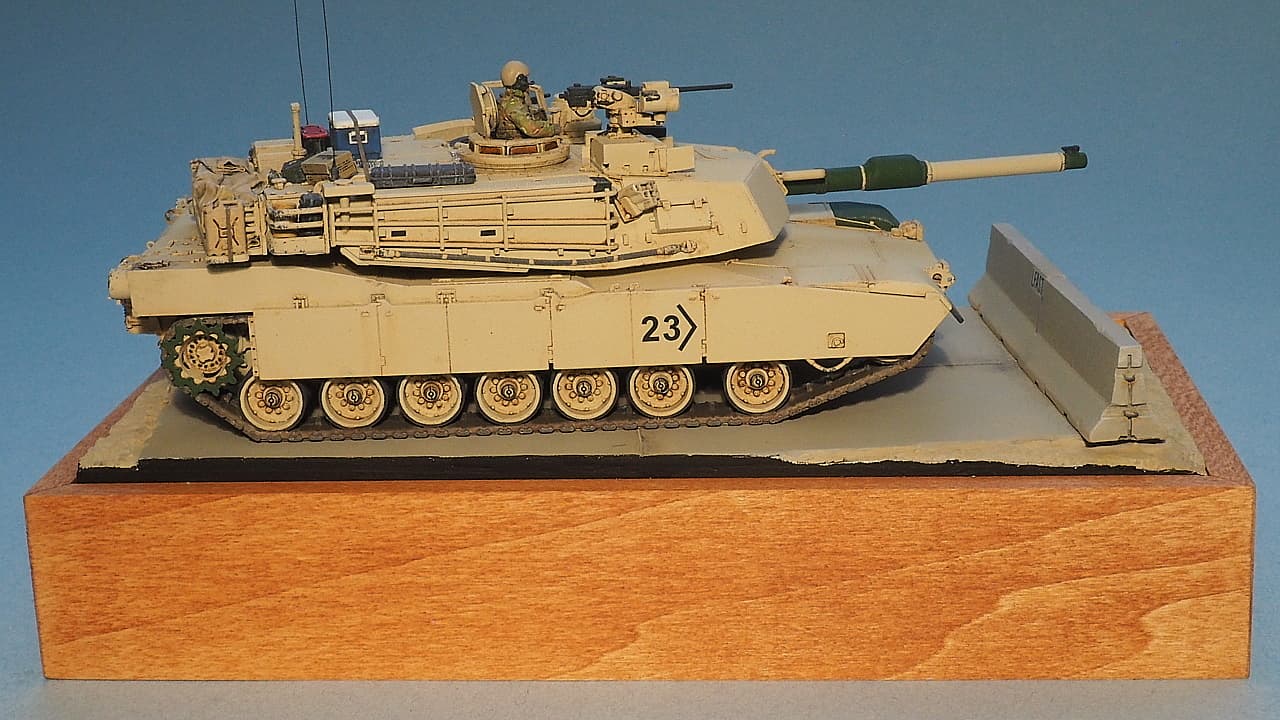
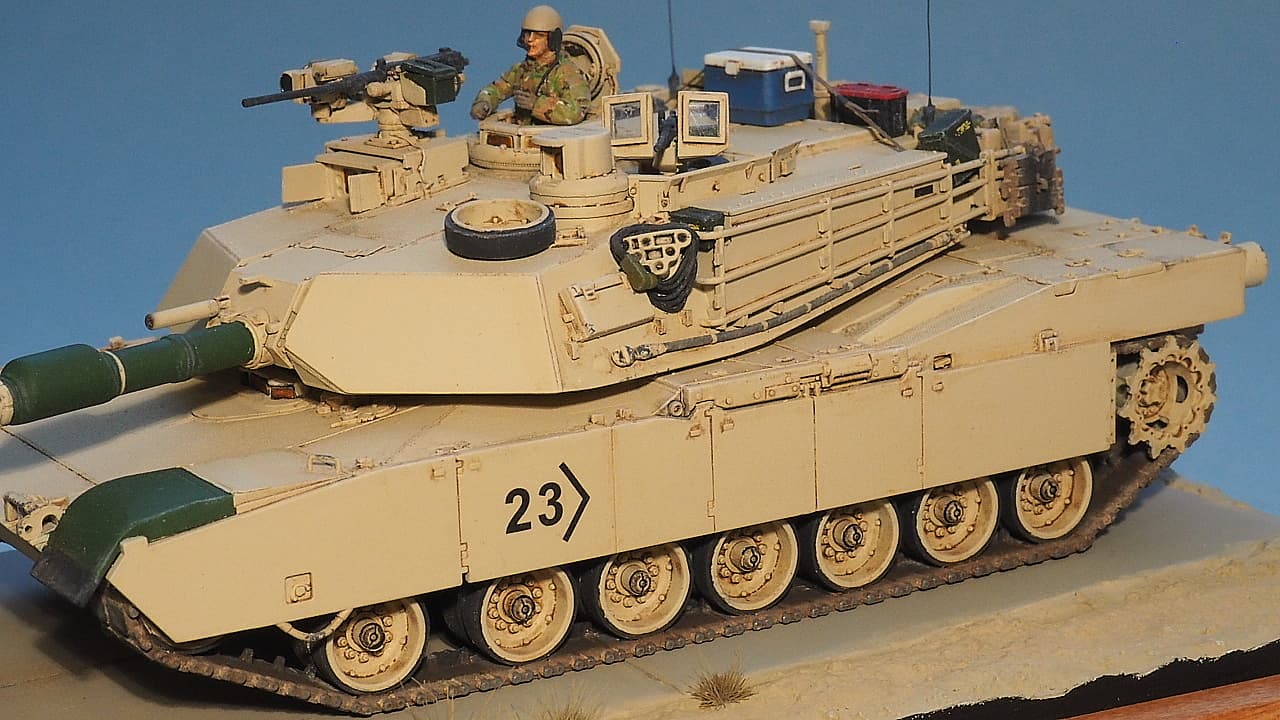
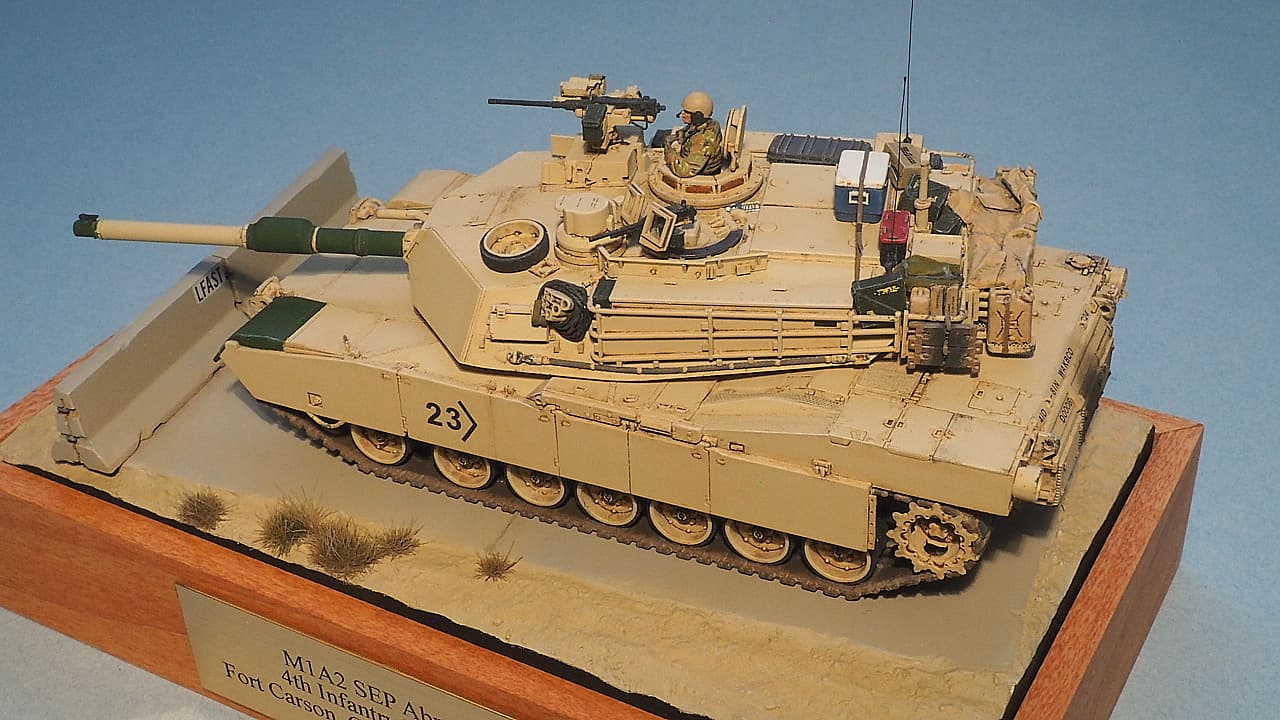
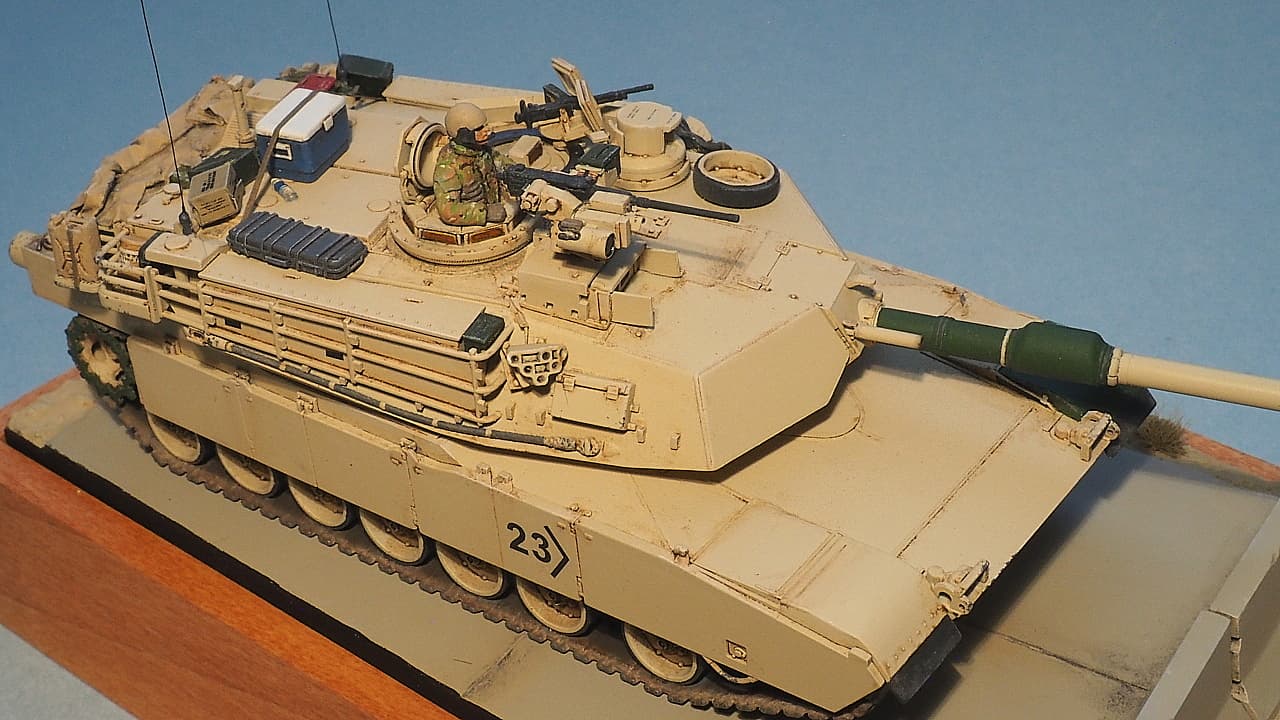
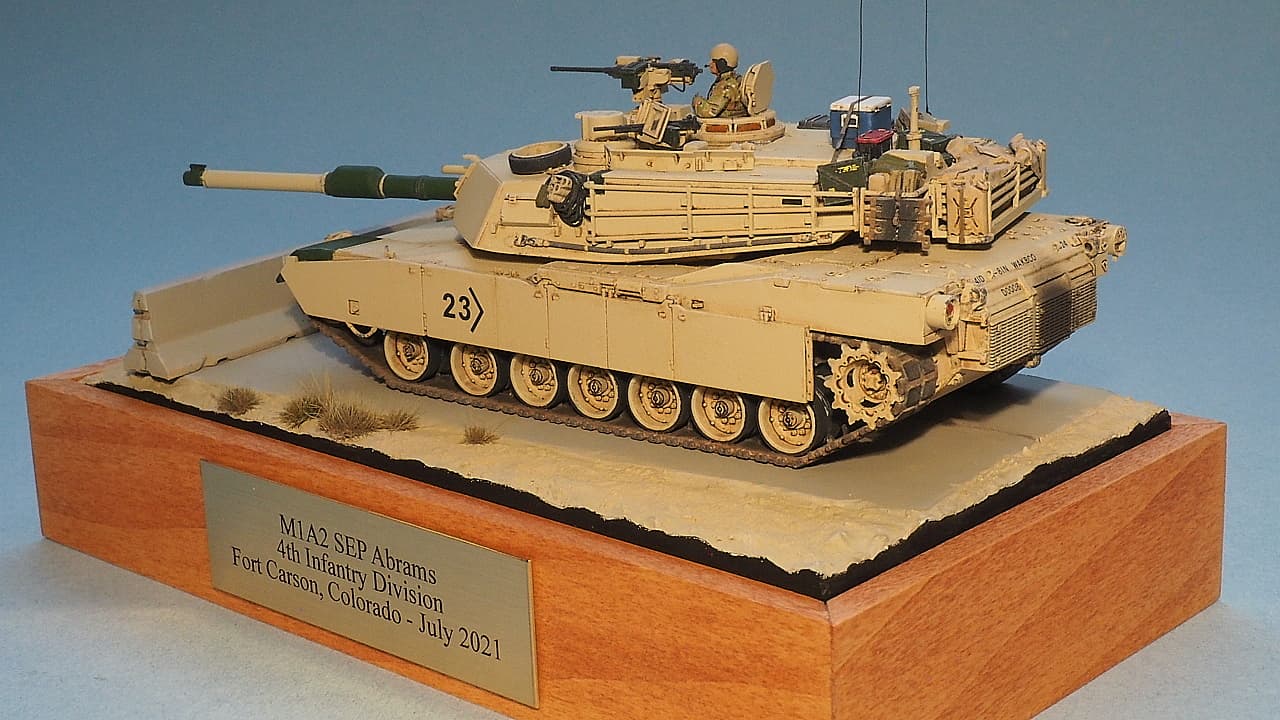
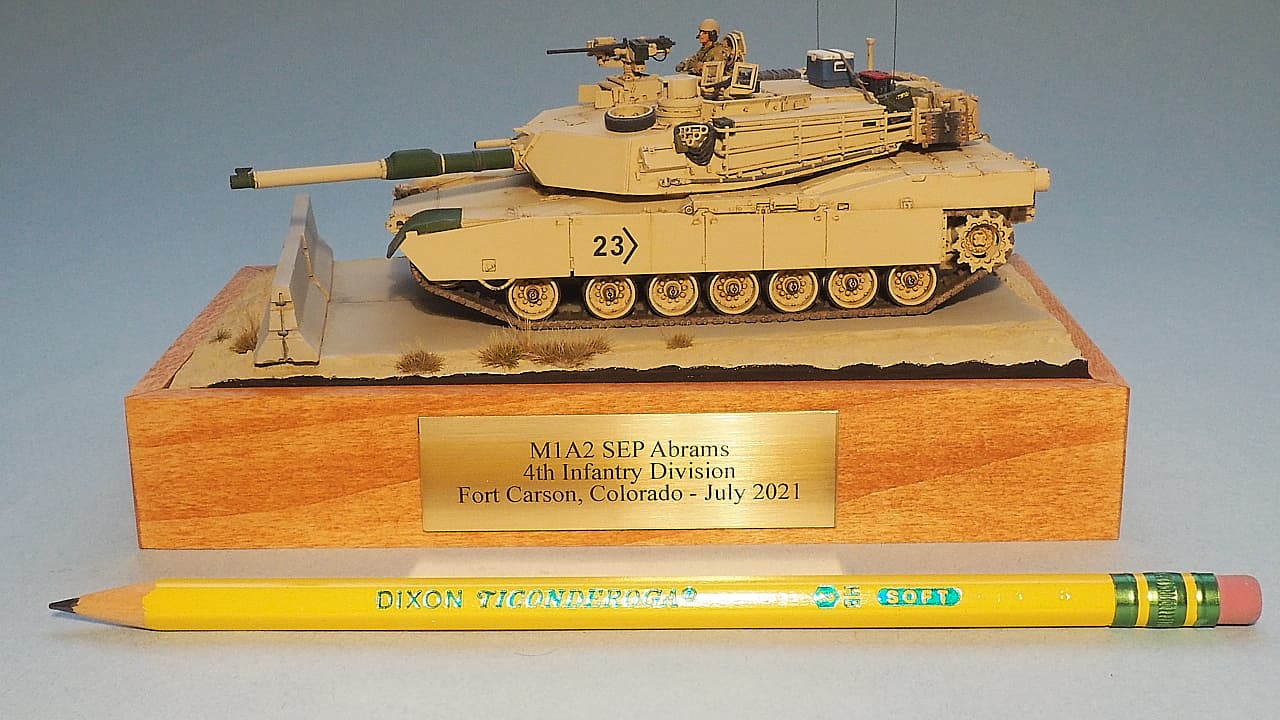
I finished my M1A2 SEP w/Low Profile CROWS II commander’s weapons station. I’m working on the display base now. What was intended to be a quick 1/72 scale build wound up taking 7 months. When I looked through my build photos and added up all the individual styrene pieces I added to the model, I came up with over 400! The scratch built Crows II Low Profile weapons station alone was 94. No wonder it took so long. lol.
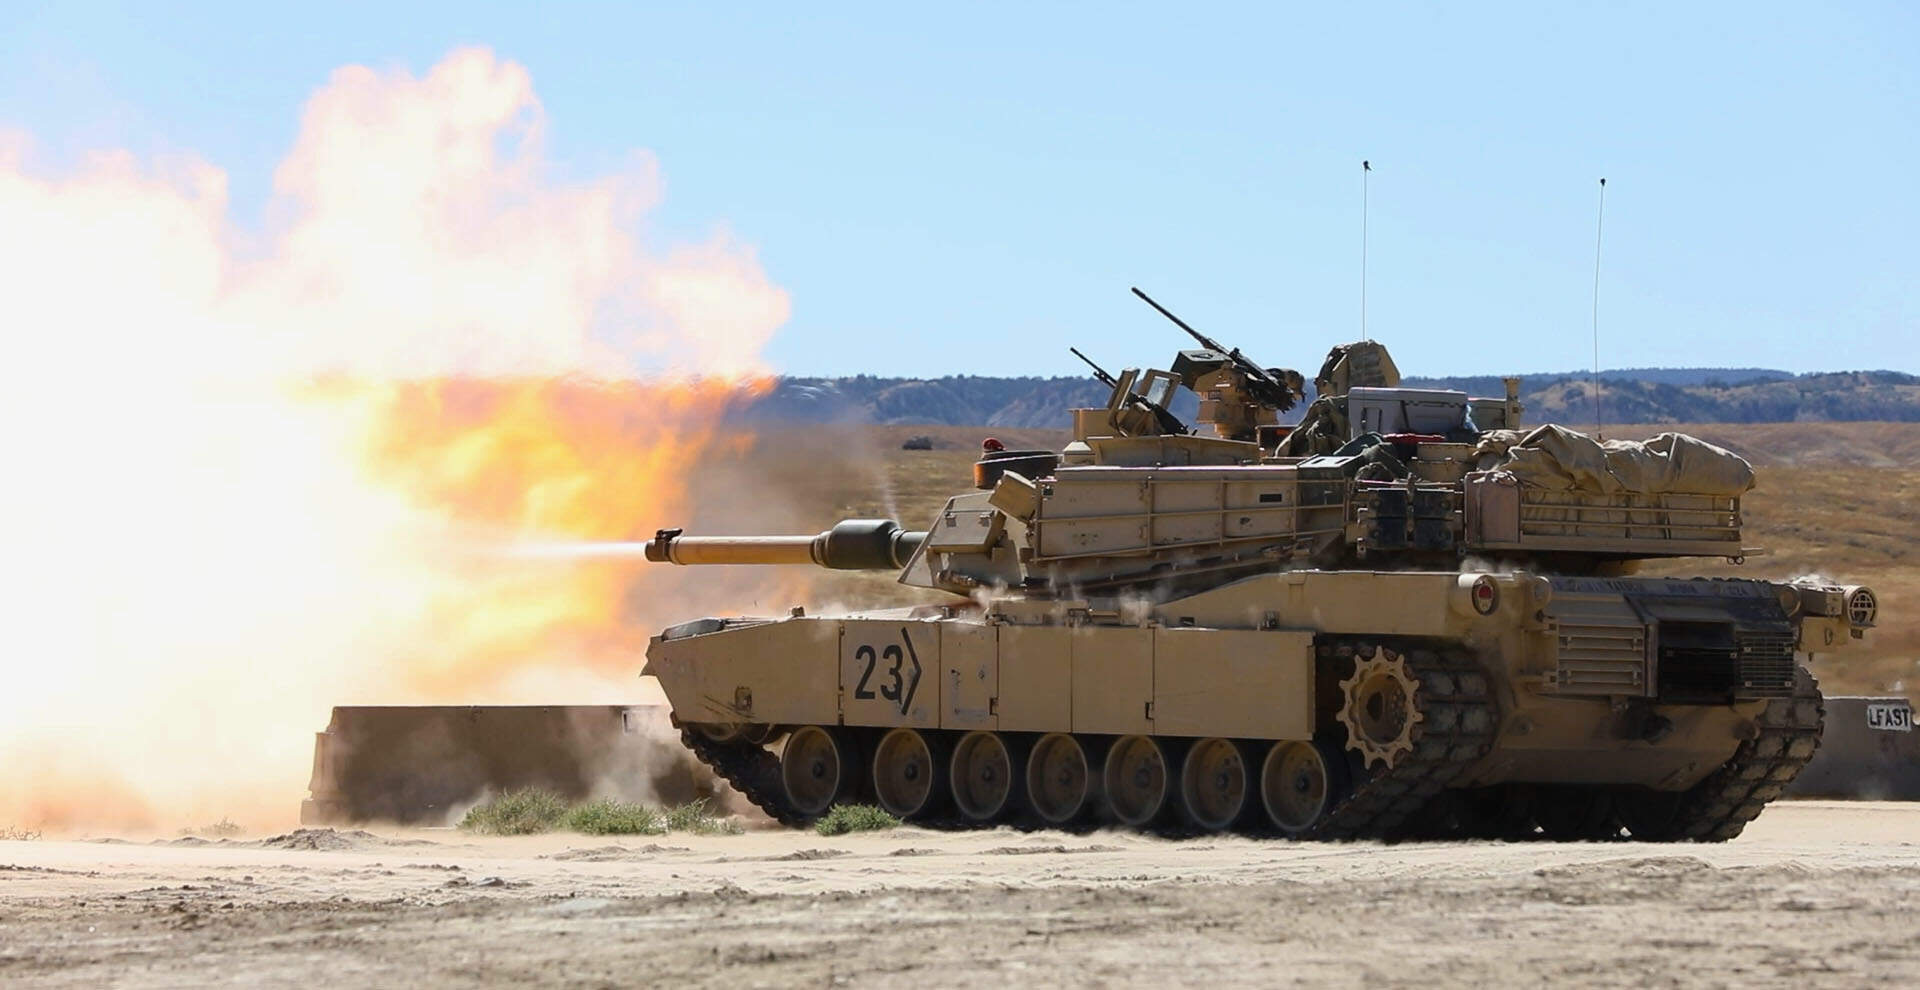
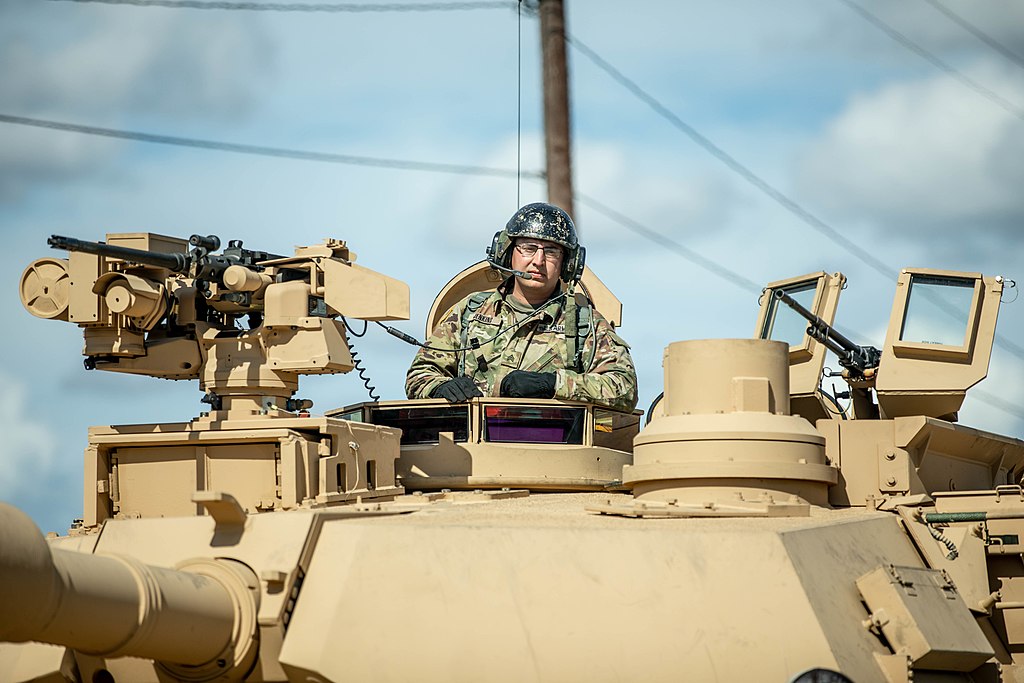
This project is officially done. The display base is finished. Here are some final photos, along with a photo of the prototype that inspired this project. All in all this was a fun build and a great little kit.