Pressing in small steel balls into the clay, and leaving them in place, will make
nice half sphere indentations in the first mold half.
1 Like
Thanks gents - the past few molds I’ve made I skipped the clay bit - made a plastic box open at the top with one end removable to which the master and pour stub are attached. Pour in rubber to halfway up the master and cure . Hence the need to cut the keys .
1 Like
Suspend 4 pegs into the box and pour silicone until the ends of the pegs are immersed.
2 Likes
Considering your previous lathe work and general technical knowhow
I expect to see a contraption with four height adjustable pegs mounted on a plate.
End of pegs turned to nice rounded shapes
2 Likes
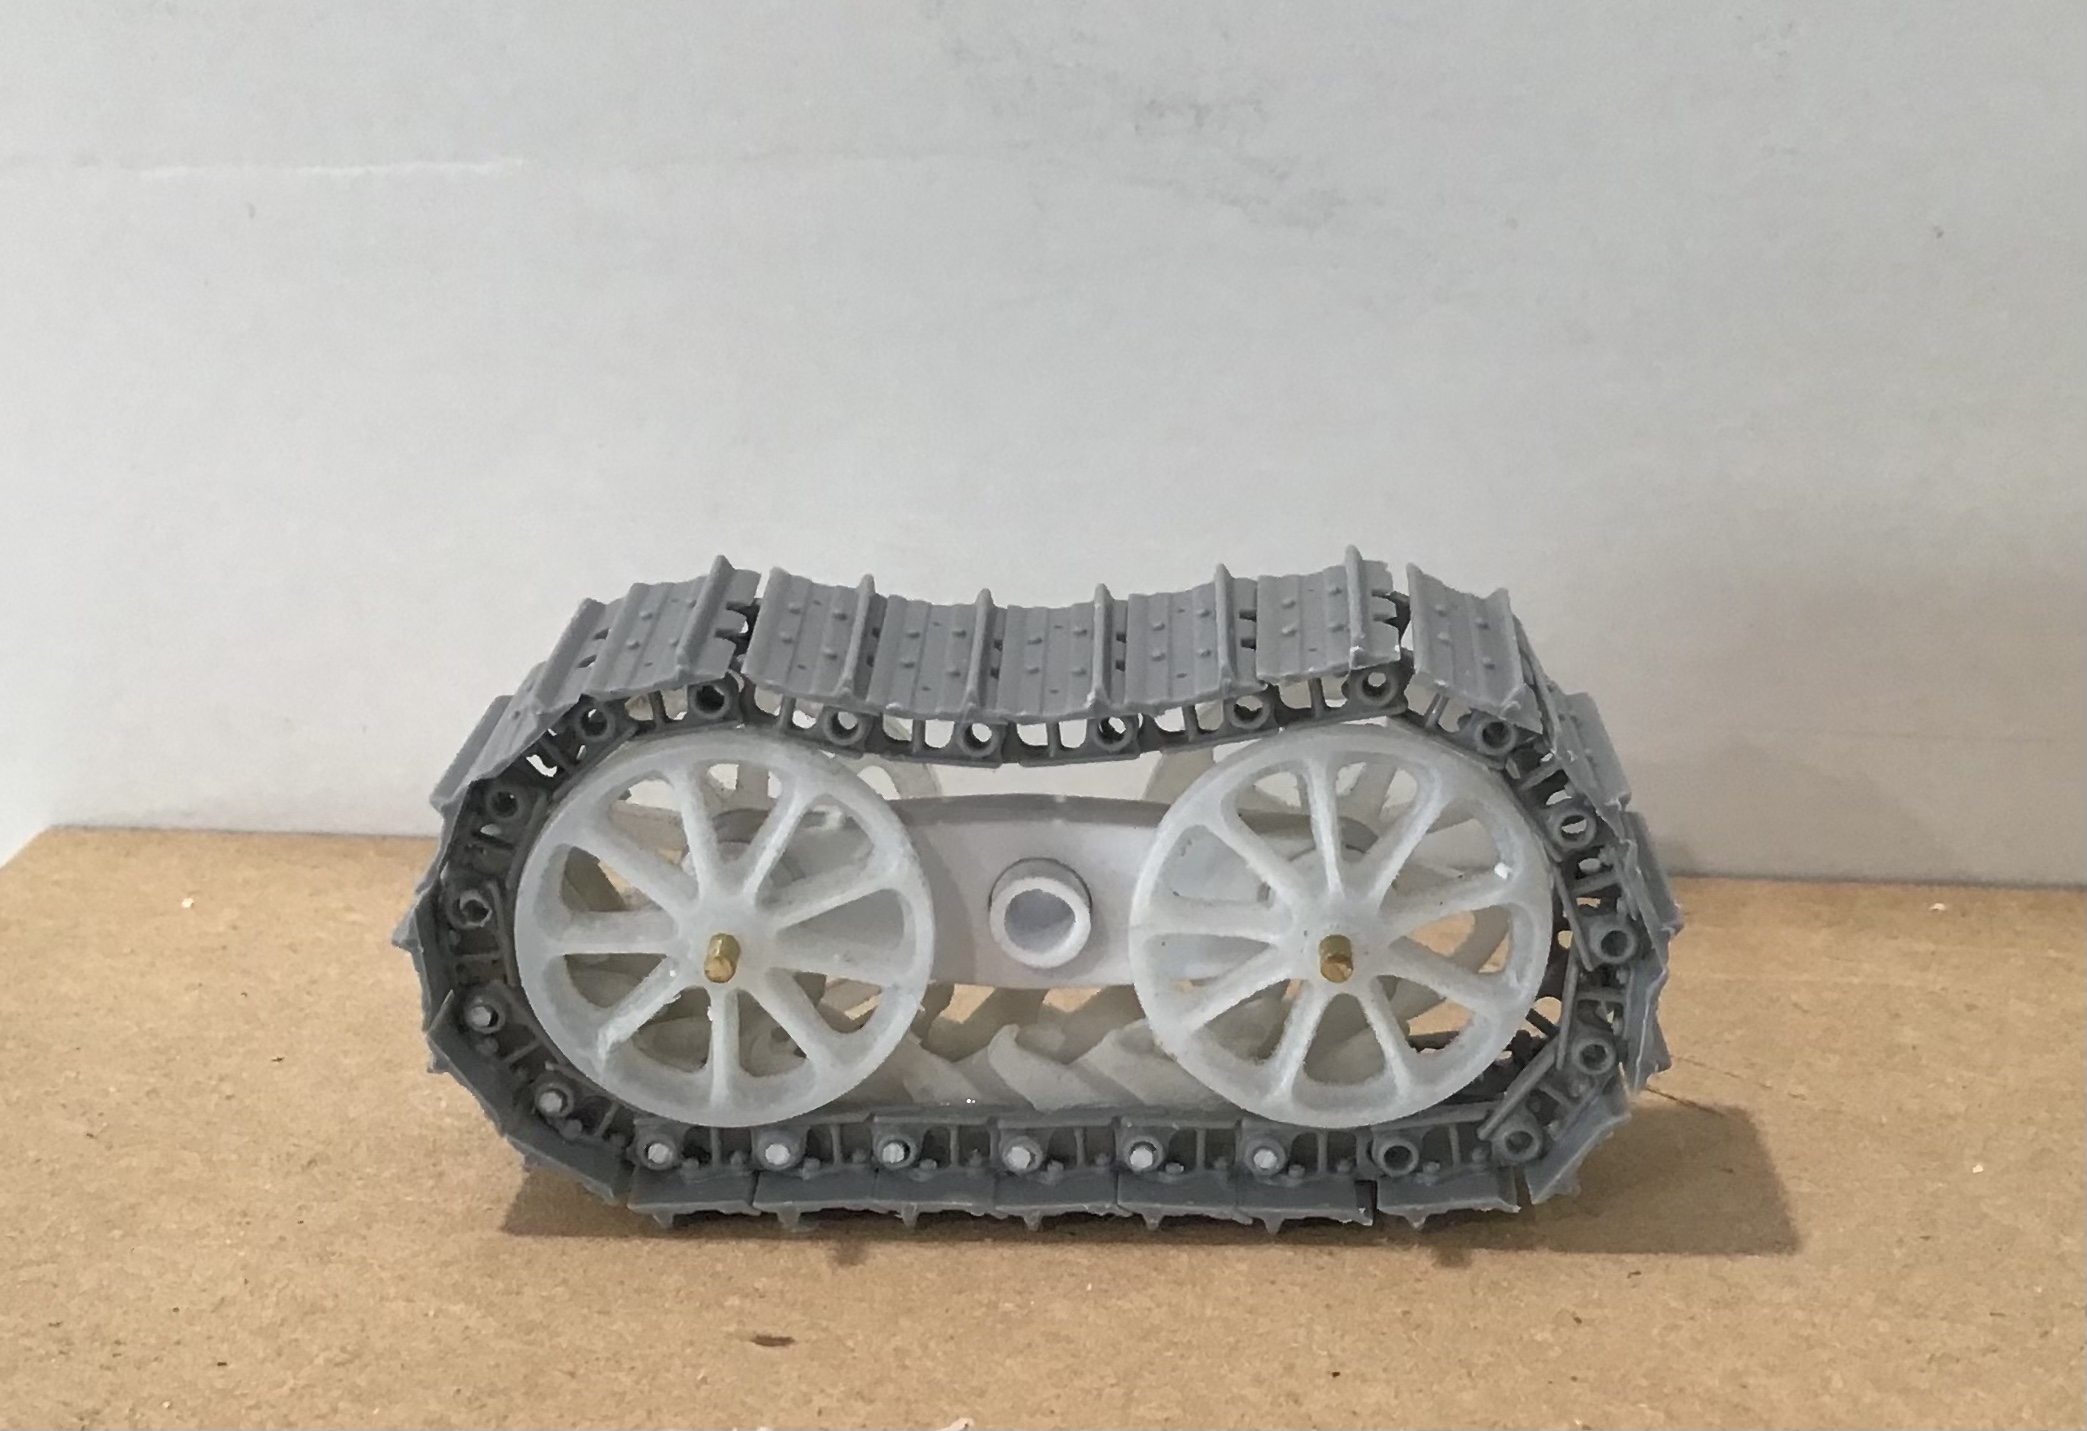
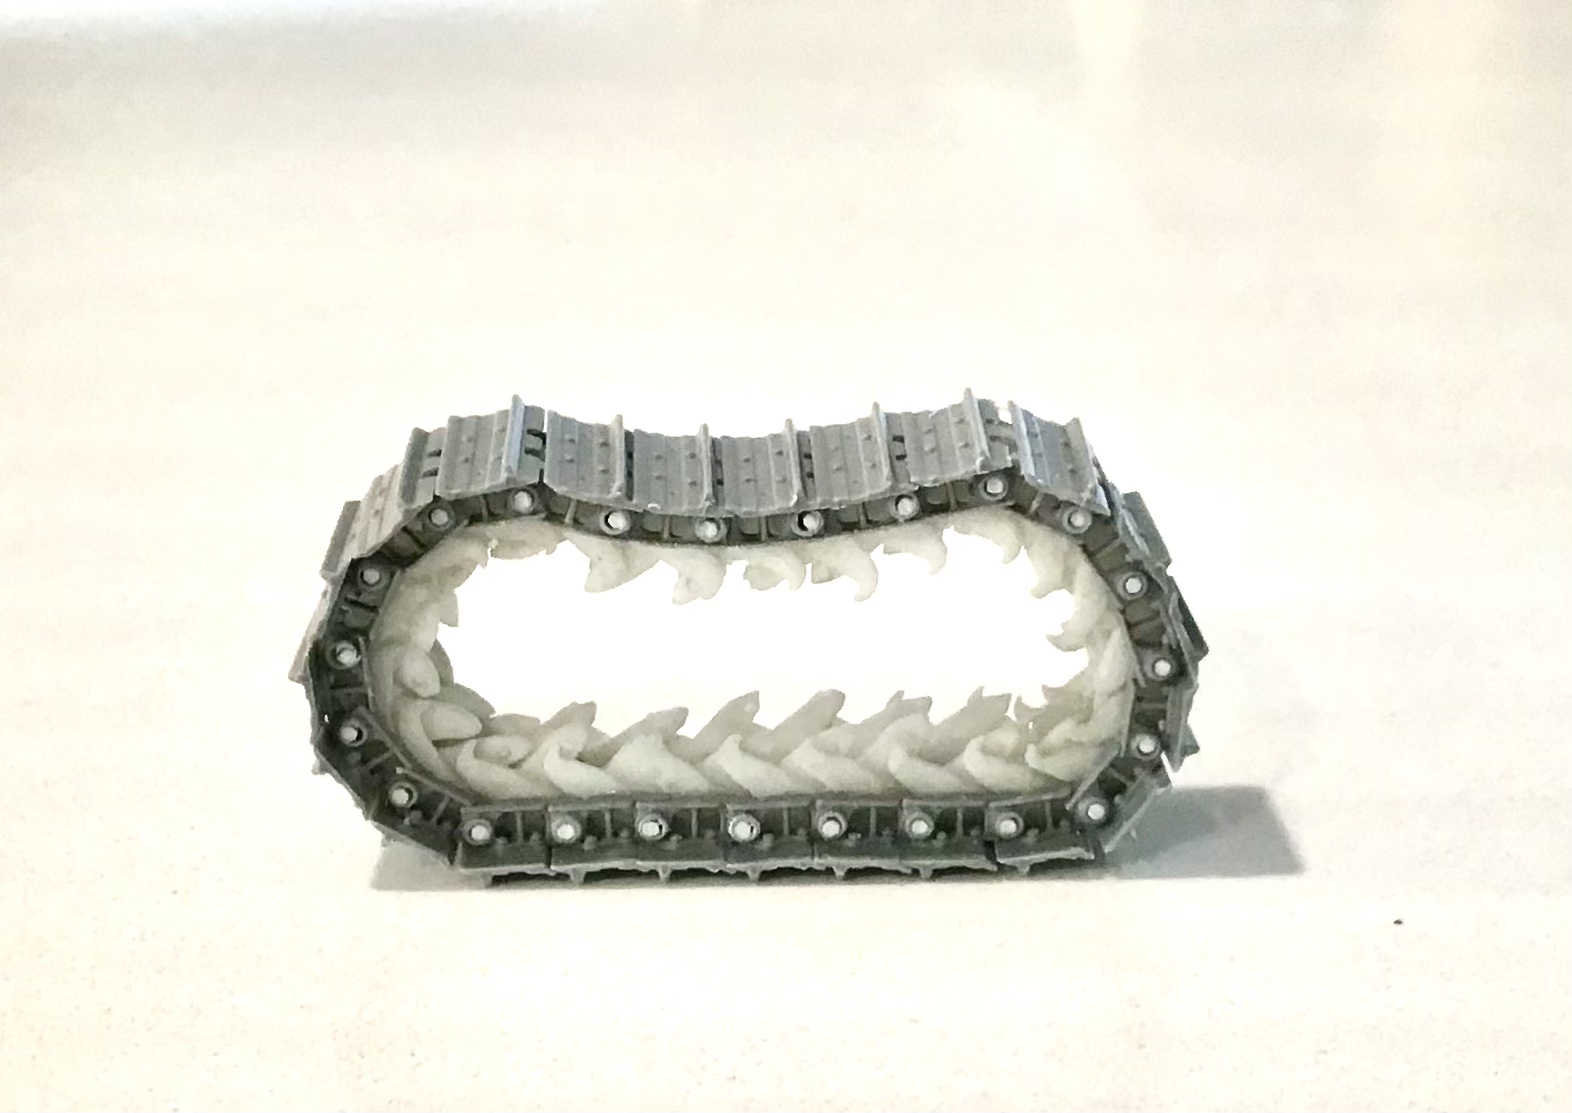
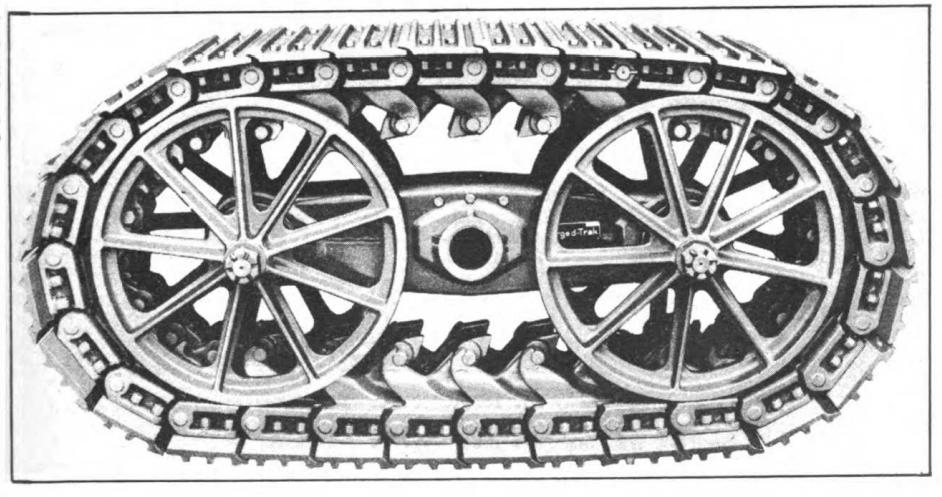
Moving forward with plan B for the tracks .
I have made four molds for casting the guide horns separately from the pads . Each mold does one pair of horns, left and right.
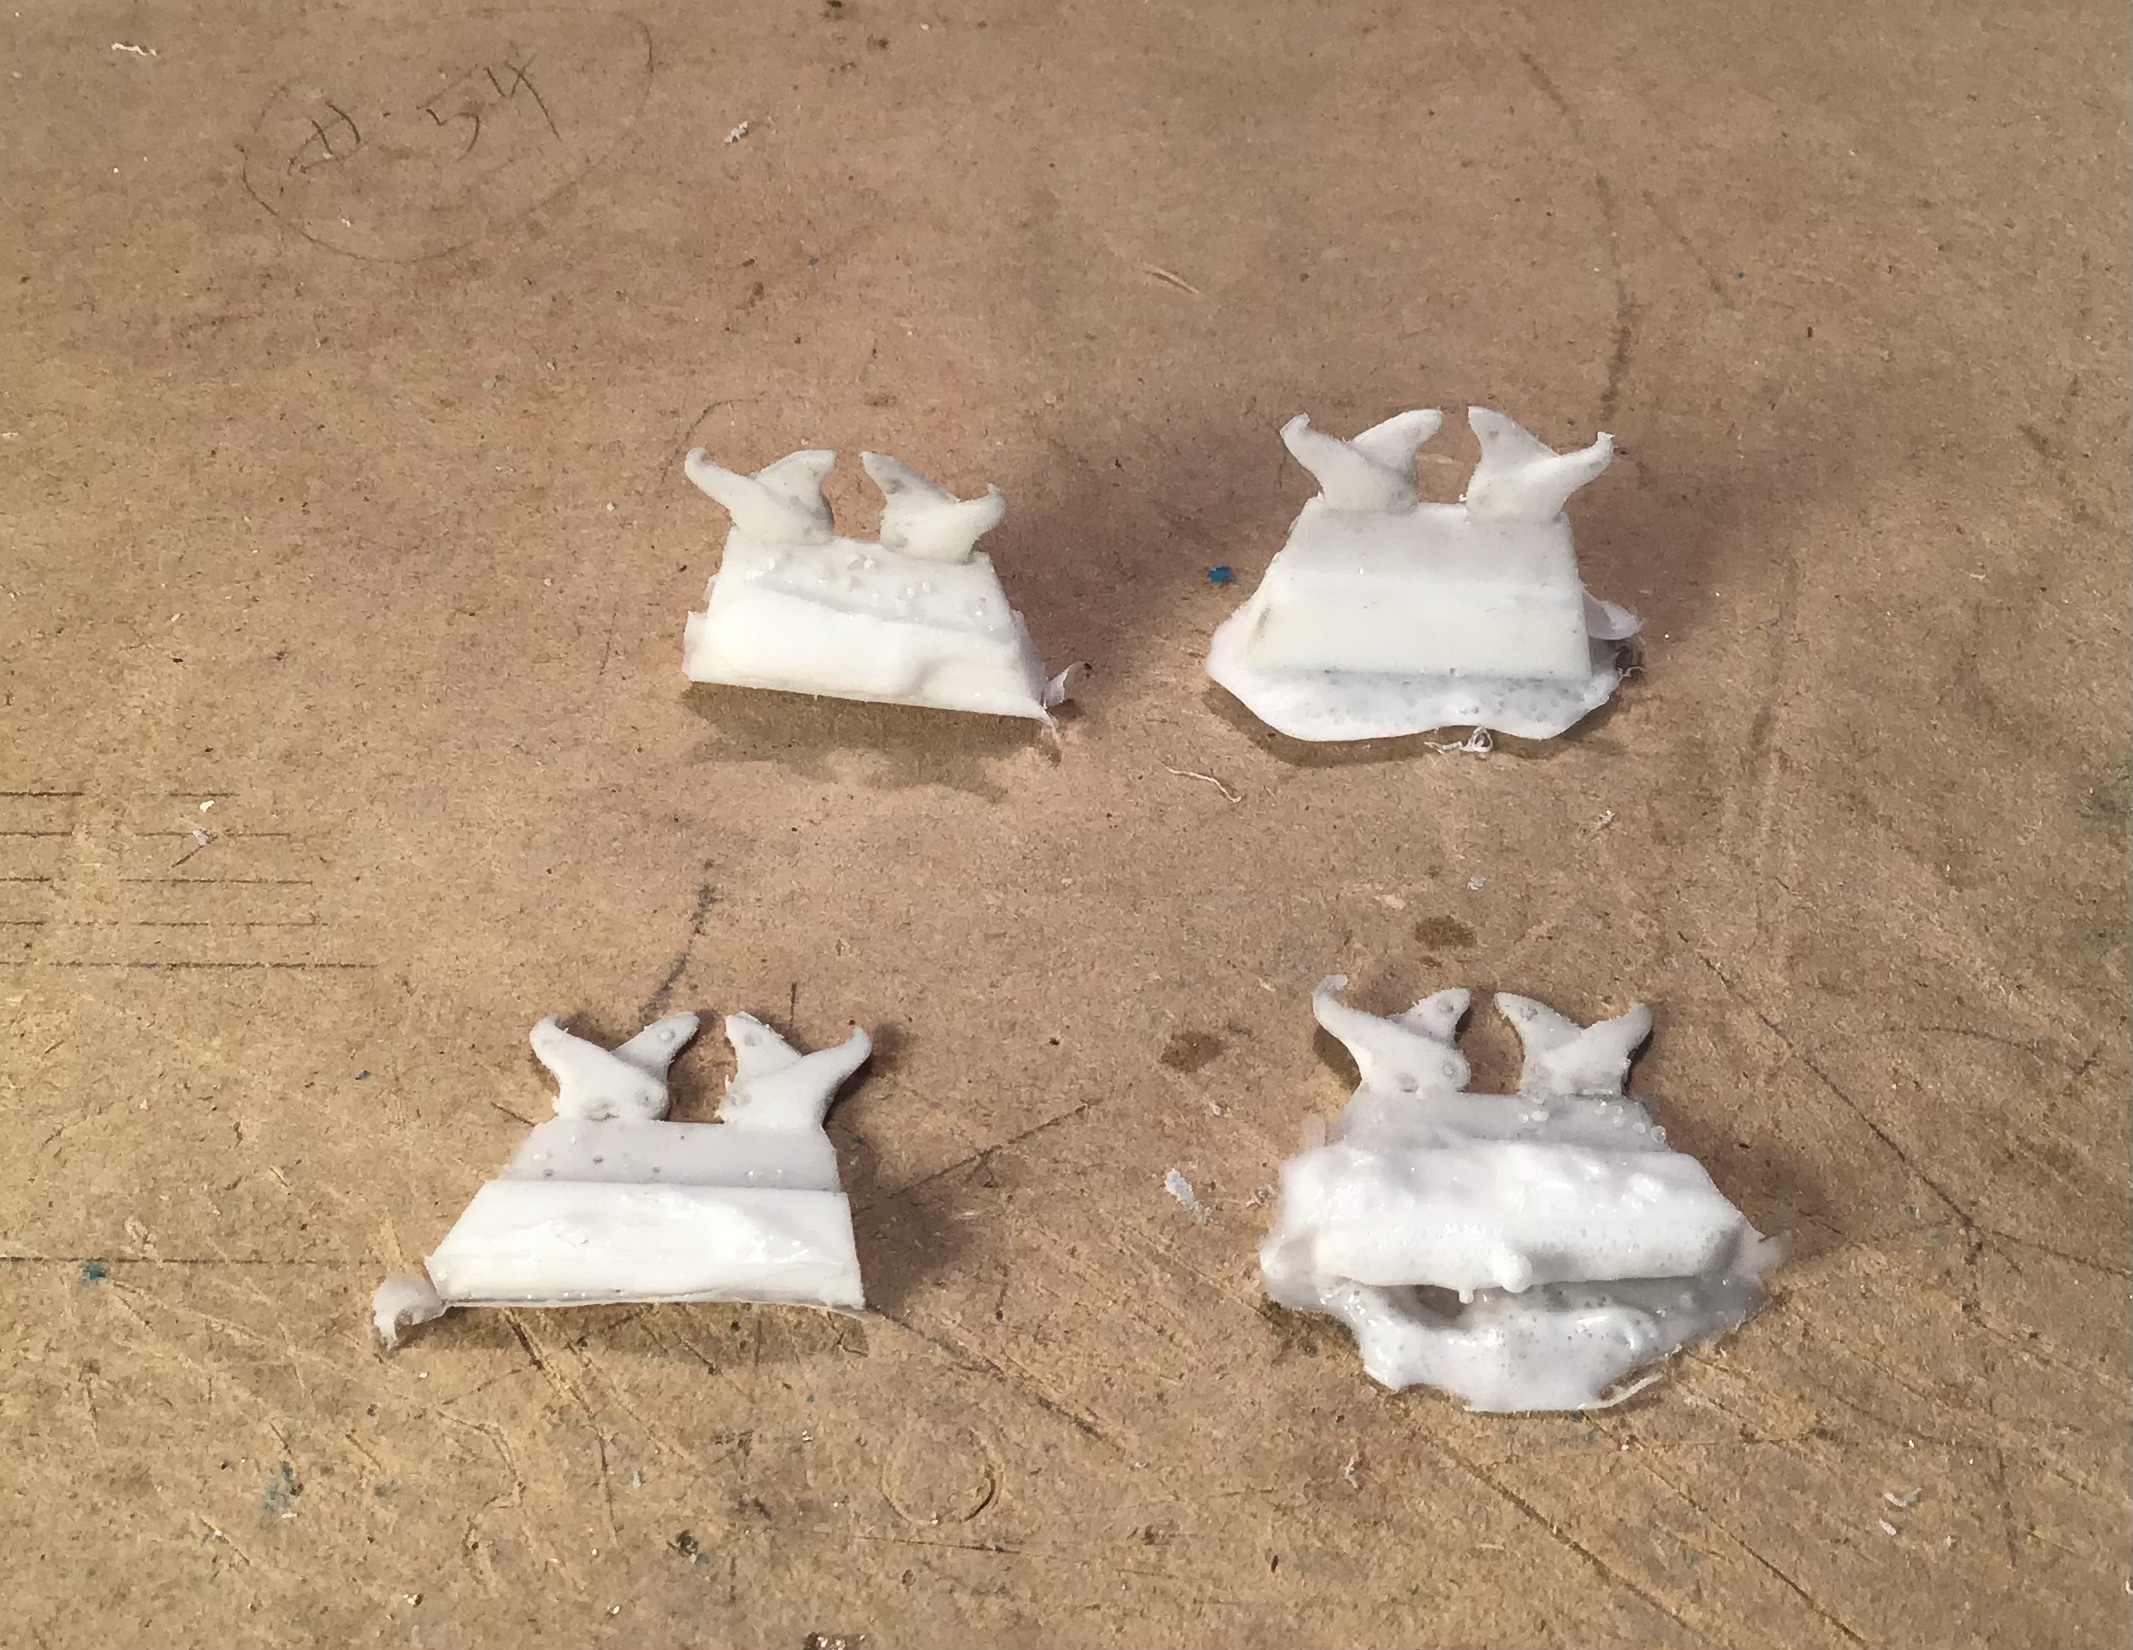
A bit of clean up is needed on each as well as a little fitting here and there but all in all an improvement over the one piece castings .
I made a fixture to assemble the links to the pads as the arch undercarriage requires a larger space between links .
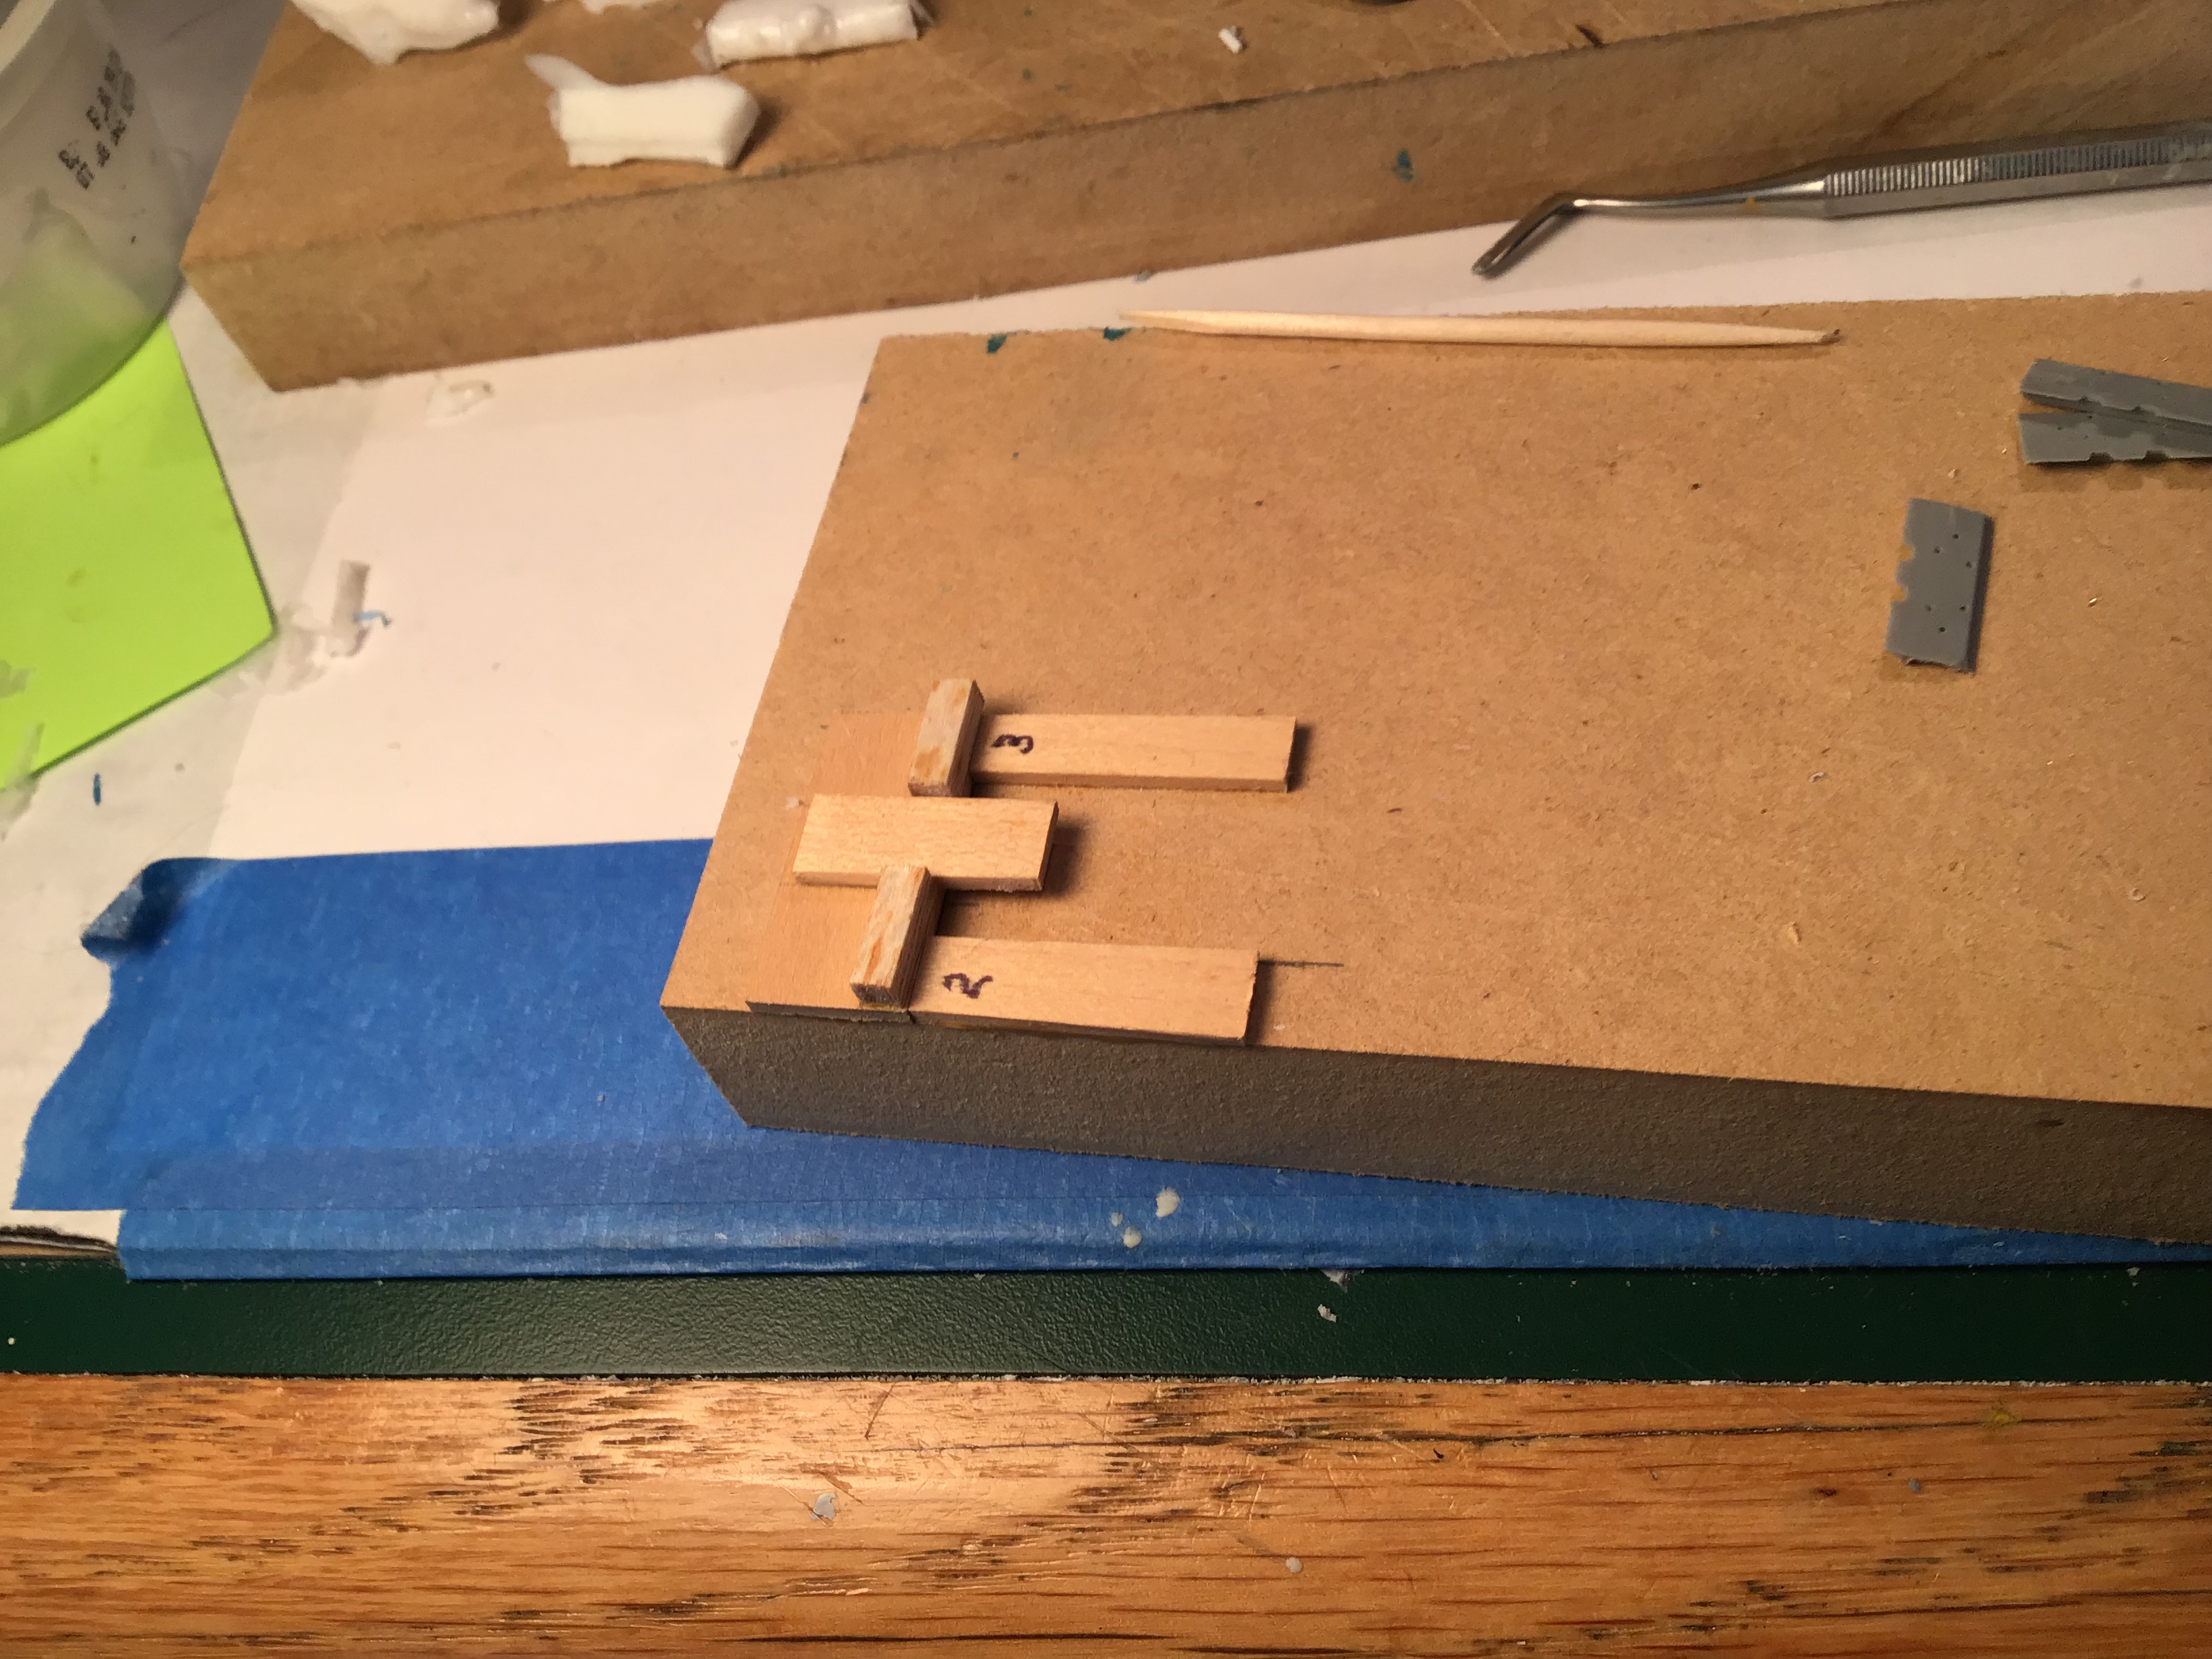
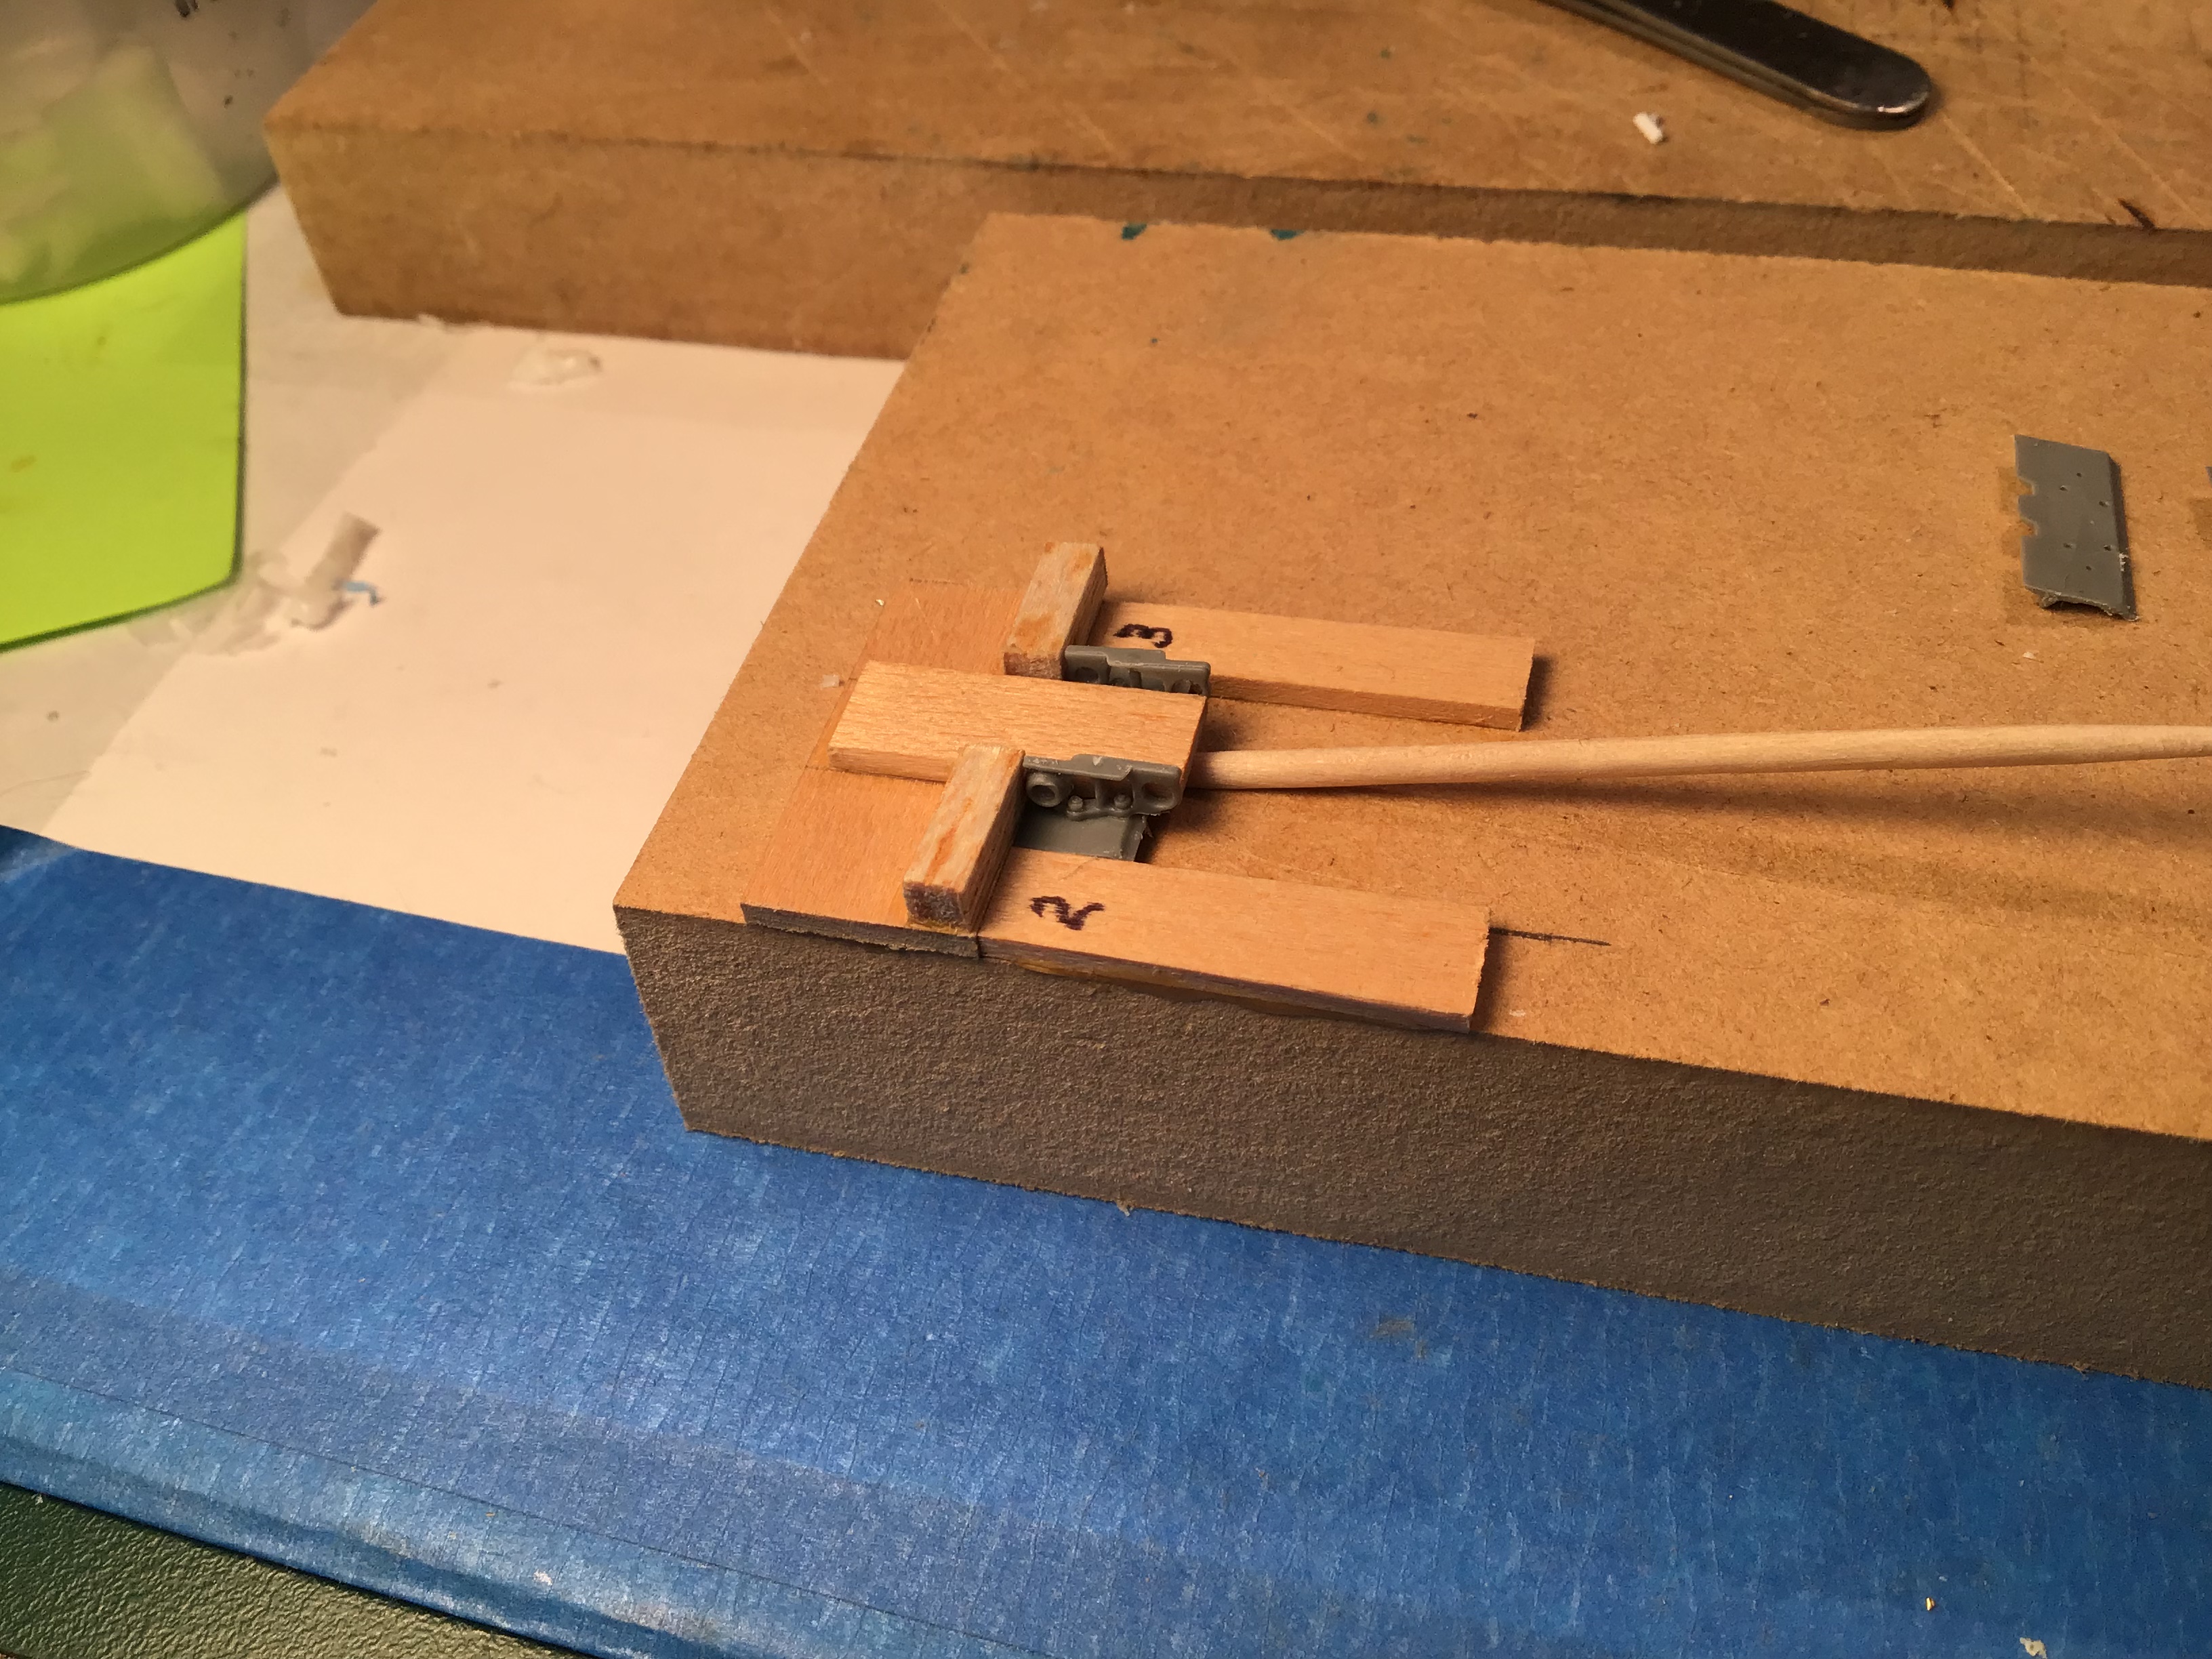

Another fixture for joining links and fitting horns -

All in all I am much happier with these results but casting and assembling these bits is tedium ad infinitum …
10 Likes
Well at least those track runs are short. You don’t have to do 98 links per side like some tanks.
Ken
3 Likes
Agreed - the estimate is 24 per side .
1 Like
You seem to be getting a lot of air bubbles in your resin. I am not sure why, but some things to consider:
- Stir the resin slowly to avoid creating a wake behind the stirrer. This will trap air as the resin falls in behind.
- Pour the separate resin parts in different clear containers (Medicine cups are ideal) and use a toothpick to draw any air bubbles to the surface and to the edge to pop them before combining.
- When pouring from the separate container or into the mould, pour onto the edge of the mould in a slow thin stream and let it flow in from there into the rest of the mould. If you pour from about 6-8 inches from the mould, the thin stream will remove the air as it travels.
- Stop and tap the mould on a table top a few times regularly during the pour. It is better to release any trapped air in stages when the depth of resin is small, than try and release the air the full height of the liquid.
PS. With most resins, you need to turn the bottle upside down and back again to agitate it, so the resin is properly mixed. Otherwise, the polyurethane is in layers which are not obvious just looking at it. This is why a lot of people end up with a tacky non-curing resin when they get to the bottom section of their bottles - too much poly oil which leaks from the casting later.
Cheers
3 Likes
Thanks again Peter - I am doing all of the things you mention. While I am a beginner at this I can’t help but think that part of the problem is the viscosity of the resin . Seems to me that all would be better if it were thinner . Have you any experience with thinning resin ?
Richard
1 Like
I would not attempt to thin it Richard. You will run the risk of improper cure or overly brittle castings.
What is the temperature there? You might consider heating the separate components in a bowl of hot water. ONLY the parts you are going to use. Heating the whole bottle will shorten its shelf life.
When I do casting I use A product distributed here by Barnes. A very low viscosity type:

Note how thin the resin is being poured on the box art. As you can see, it is not a clear resin, it is translucent yellow/orange and turns white when cured. It has a short reaction time though. For a longer working time, there is Procast:
2 Likes
Just a little bump here to keep the blog alive.
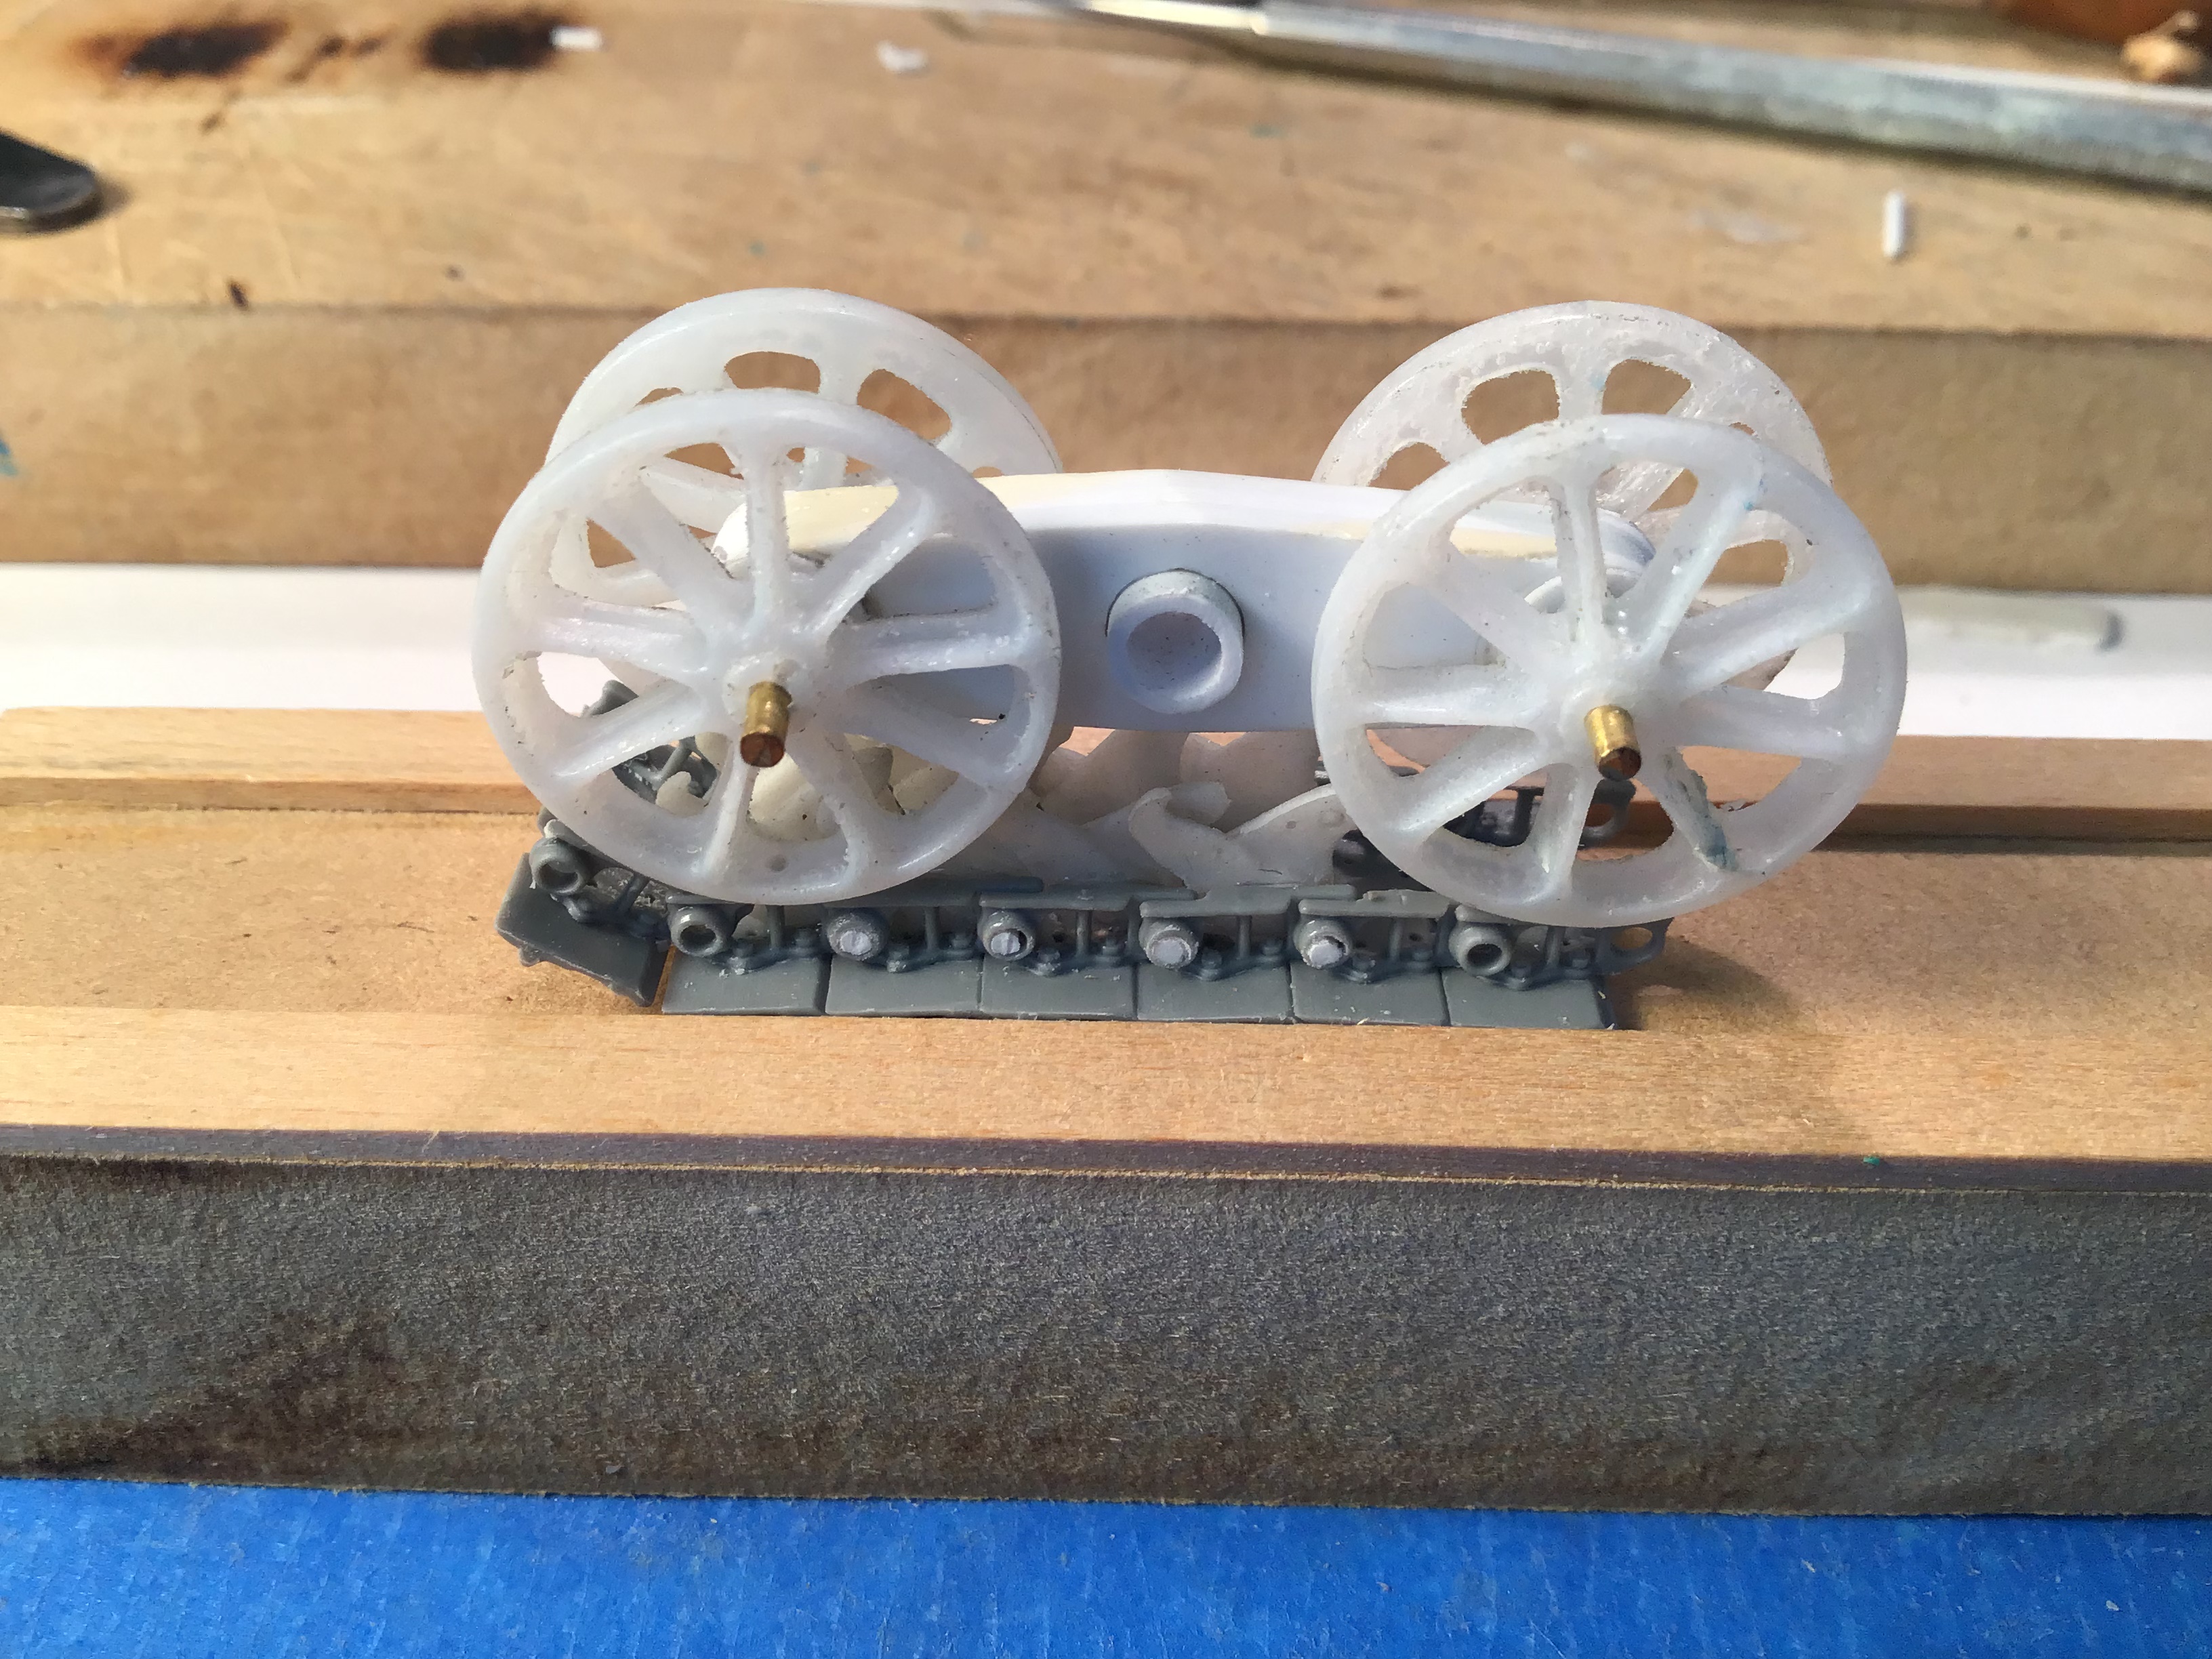
I have been busy casting guide horns . I have four molds so with a cure time of 16 hours I can make four pair a day . Some days the mojo is low so I miss a day here and there. Turns out each side needs 23 links . I have more than half the needed guide horns cast and one side tracks made up with a little more than half the guide horns installed .
Chipping away at it . Some of my time is diverted to a commission aircraft build but a little progress on the tracks every other day…
11 Likes
This has clearly been a lot of work to pull together, and the reward is, it looks great! I admire your patience while experimenting with castings, and the time required between each!
Cheers
Nick
6 Likes
Richard,
Great to hear from you too.
Yep I’m back as my HO scale 1975-1980 era Toledo Industrial Railroad that comprised 6 (going to 7) 2x4 modules as I need to expand the yard into a space I reserved for it from the beginning. The layout is an L with 4 modules for 16 ft then the two remaining modules to form the L portion but starts behind the end of the last module not next to it as I would end up in front of the part of the Laundry room entrance. So it’s 2 x 18 x 8. It’s basically a industrial switching layout but consists come and others leave the modeled portion so there’s two connections to the outside world. It’s wired with NCE DCC and makes life so much easier then in the old DC days where you needed blocks. The whole TIR is just one small part of the huge Industrial area of Toledo, and most of it is serviced by 3 major RRs. I’m Running CSX power and follow the CSX and Union rules. the TIR is fully operational at this point. Started basic ground scenery, and just completed my 1st major structure which is a Kit bash for the 1st building of the Old Milwaukee Brewery complex. years of work ahead for sure, but I operate it twice per month which takes about 3 hours.
Your Cat D7 with the Hyster isn’t something I’d expect you to be interested in, but with your modeling skills I’m sure that it will be IPMS National standards for sure. I’m already looking forward to seeing the Diorama. As for where to put it, I’d go for Auto/trucks as it fits that bill for sure.
D and Michael have been asking for me to post pics of the TIR, but i have so few pics to date. Will take some current ones tomorrow as air brushing is out with the storm coming our way.
I’ve reached the point where I can build cars again and alternate weekly between cars and the TIR. I’ve already completed the Monogram 1/24 scale IMSA Ford Mustang GTP car I started before taking all these months off. The amount of views for the post has been amazing.
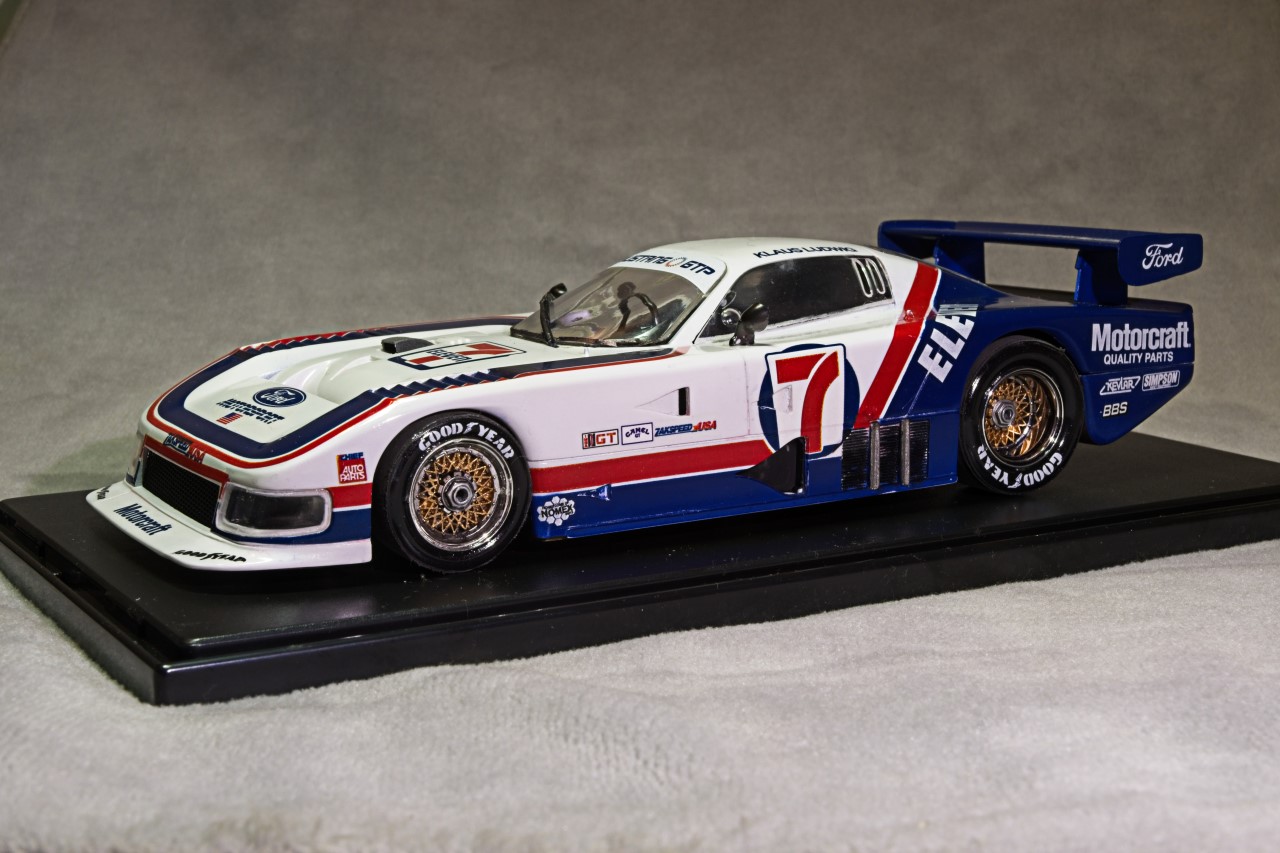
![5 17 23 1 24 scal3 Mustang GTP 1|690x459]
Looking forward to seeing you online again.
joel
3 Likes
RDT - You certainly have set about a serious modeling challenge for yourself! Great progress and well done!
1 Like
@Joel_W
@165thspc
Thanks all for the encouragement.
One side tracks complete and the other underway …
I won’t be sad when this phase is over !
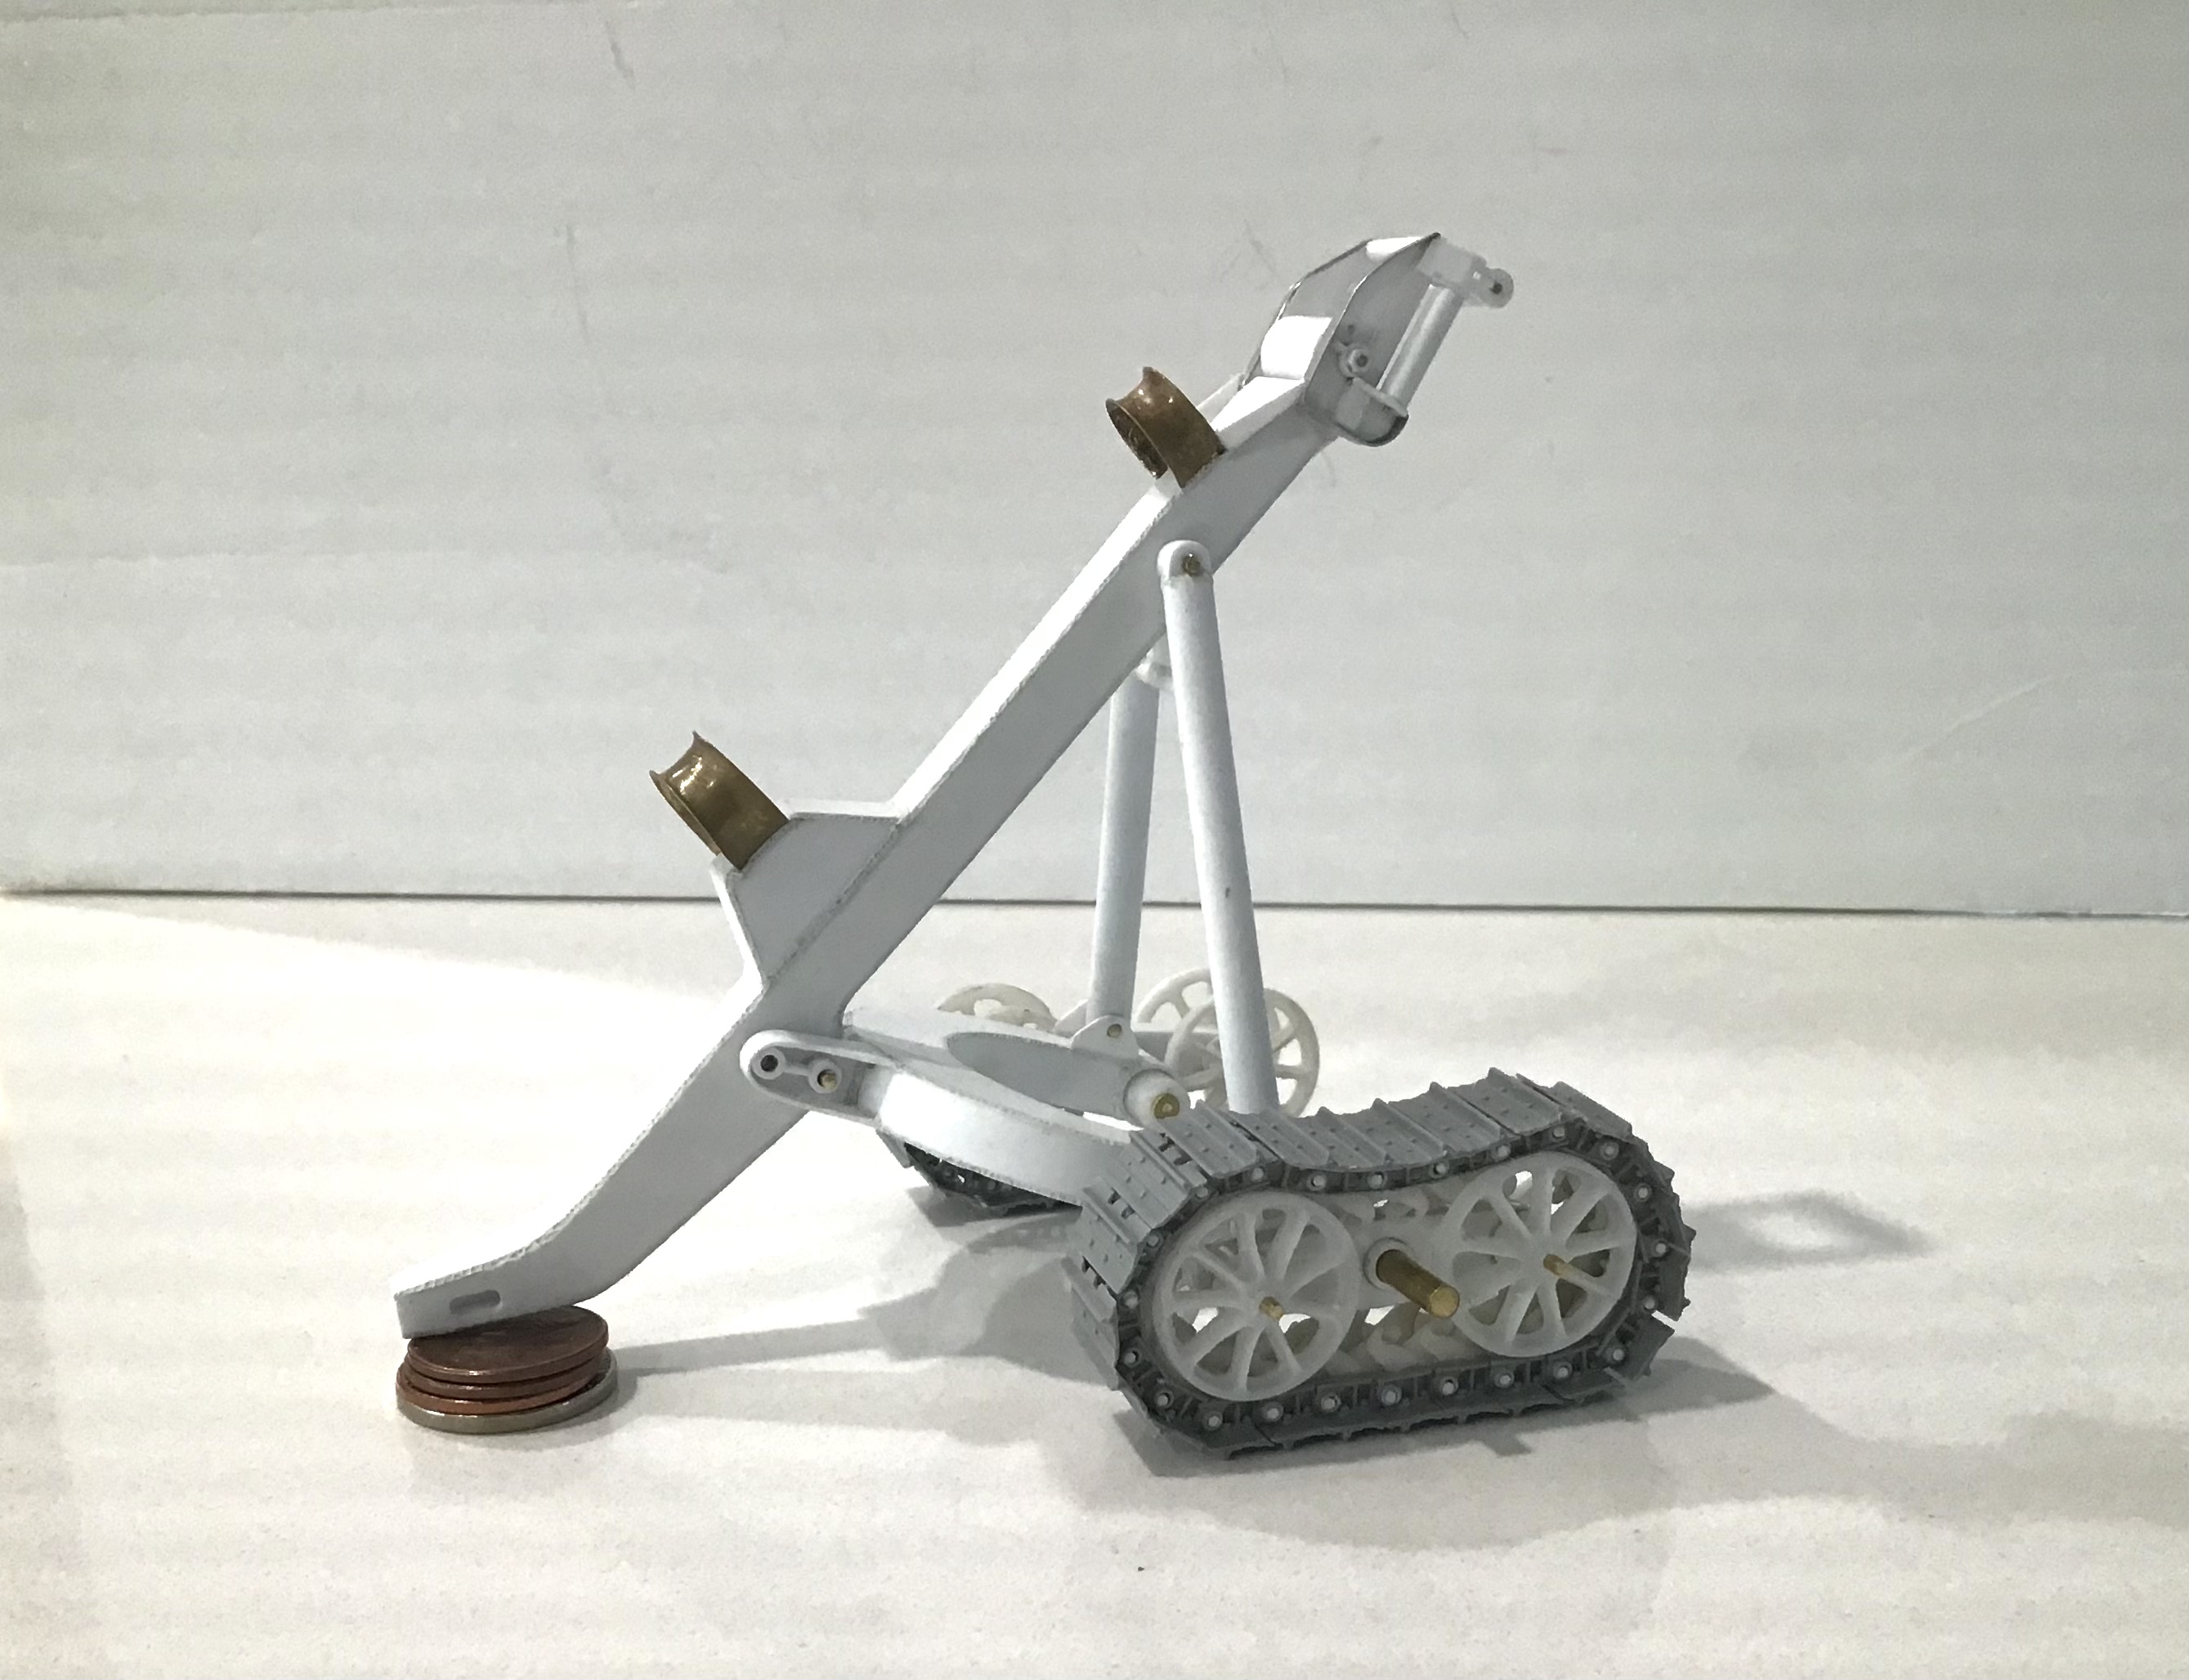
Will likely be another week or more to finish second side - more to come.
Cheers- RT
9 Likes
Don’t mean to set you on yet another possible project . . . . but:
In some of the post D-Day (ETO) photos we see a four wheel tracked trailer on the beach looking much like the tracked set on your logging arch.
I have never known the designation for this trailer and have so far not come across it in any reference.
(Frenchy - Help!)
p.s. Your work looks amazing - really blown away by those tracks!
1 Like
Yes Michael - Athey made tracked general purpose trailers and bottom dump trailers .
I found this on line which was very helpful for track details.
I would build the dump trailer in a heartbeat if it weren’t for the tracks …
Thanks- Richard
Well at least you have already done all the mastering work for the tracks. They certainly look identical to your work here.
Until now I had only seen a cargo version of the tracked trailer (looked like it had the loadbox from a Deuce and a half mounted.) Had never seen the dump trailer.
1 Like
Richard,
Just checked out that bottom dump trailer, and your tracks and it’s tracks are identical. You certainly are a master modeler no matter what you model.
joel
3 Likes
PM sent