Also interesting is the spring in it’s neutral position is unloaded and as the suspension compresses it loads the spring - opposite of the convention of arched pre - loaded springs that we are used to seeing .
1 Like
More great work Richard. If you’re like me and really enjoy the assembly stages of the build this one must be a real delight for you!
Cheers, D
1 Like
Thanks D . It is indeed enjoyable - as noted previously, to the point of it calling me away from other responsibilities. I’ve been working all my life and always put family first but my girls are grown and married to wonderful men , first grandchildren on the way , all my debts are paid and I am self employed so blowing off work for selfish reasons seams justified at this point of my life. ( I have been practicing this speech in the event that someone in the household with more authority than I calls me out … LOL ) .
What has become apparent to me with this new genre is the need to constantly think several steps ahead . I have jumped around the instructions because while they are logical from an assembly standpoint the suggested order doesn’t consider painting concerns. Learn as you go with this one .
I would LOVE to see you and Joel get involved with these kits - you both have the skills and the car model fever while my main interest for years has always been aircraft .
But this is so much fun that I can’t remember what an airplane looks like …
Cheers - Richard
1 Like
Ok, if you need me to have works with anybody there regarding this new priority list, let me know. Luckily I’m thousand of miles away and out of reach of that flying saucepan, but you might want to duck ![]()
I’m much like you mate, many years of focus on aircraft (still quite a few kits to build there), but really enjoying the auto world right now. My pile of about 10 large scale (1/12 and 1/16) Chevy kits will keep me busy as that is where my subject matter love lies and I’m planning to put a lot of work into modifying and detailing them. Maybe one day, but for the moment I am enjoying following you guys here!
Cheers, D
1 Like
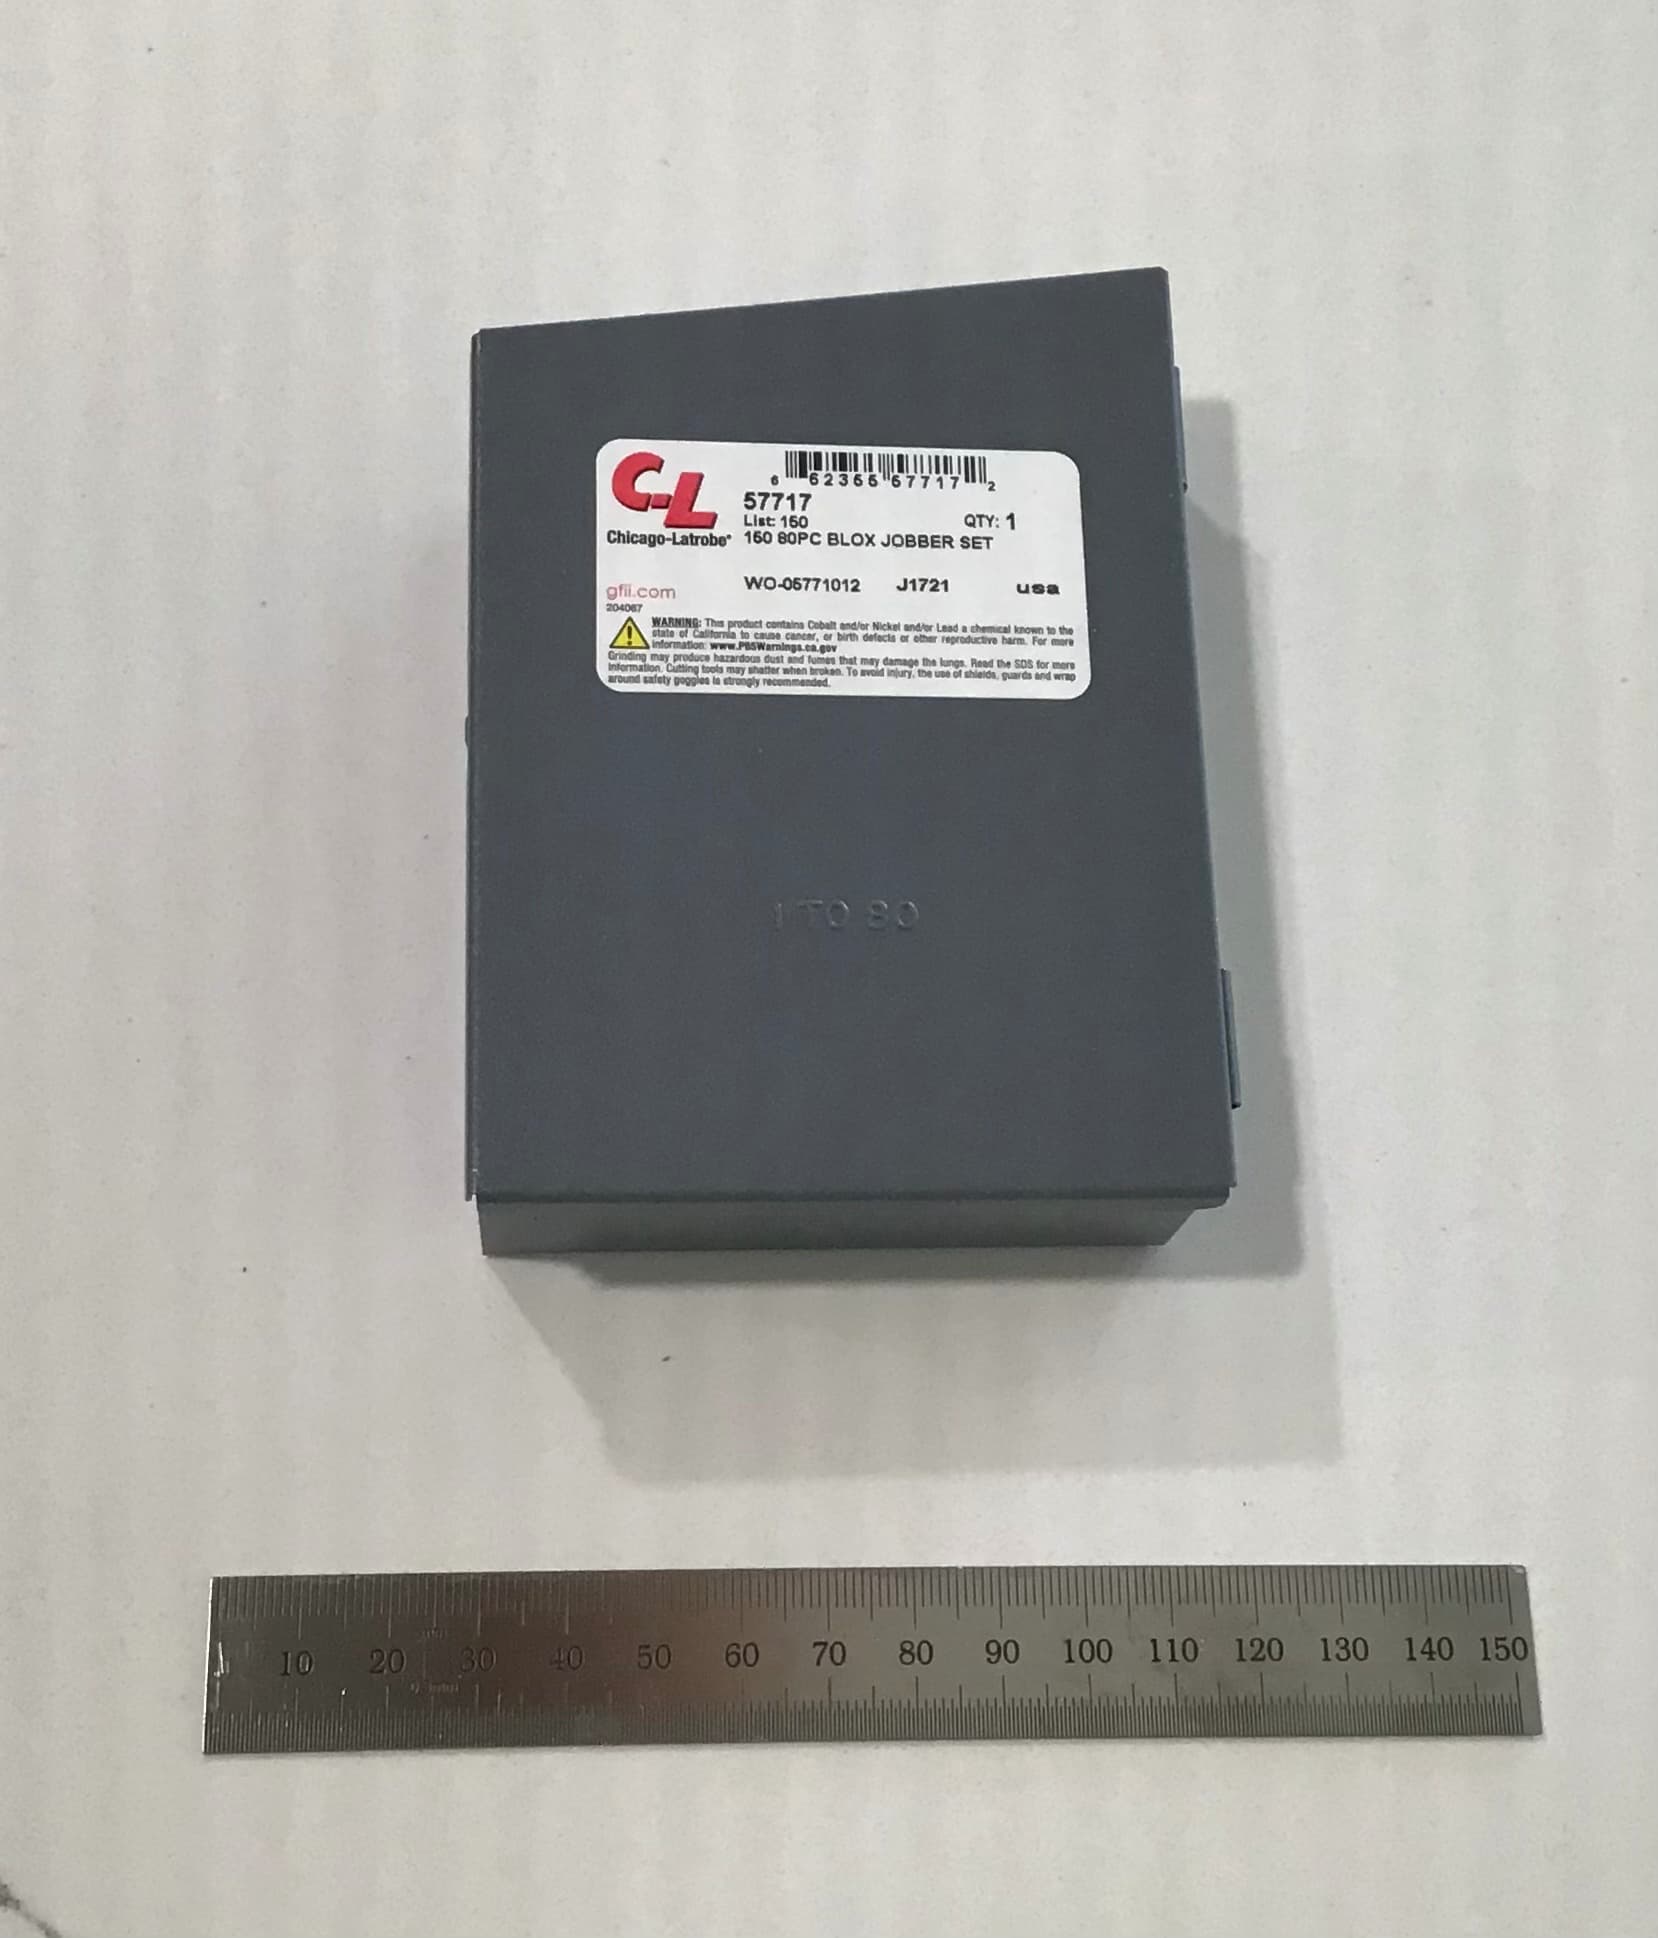
I bit the bullet and invested in a couple things that will really help - a metric scale and a complete set of number drill bits #1 through #80.
I buy lots of raw materials and machining necessities from McMaster - Carr industrial supply. They are truly amazing - wonderful website and likely hundreds of thousands of items in inventory. Orders are usually received the next day and on more than one occasion I have actually gotten my order on the same day . Over the years they have only once been out of what I needed.
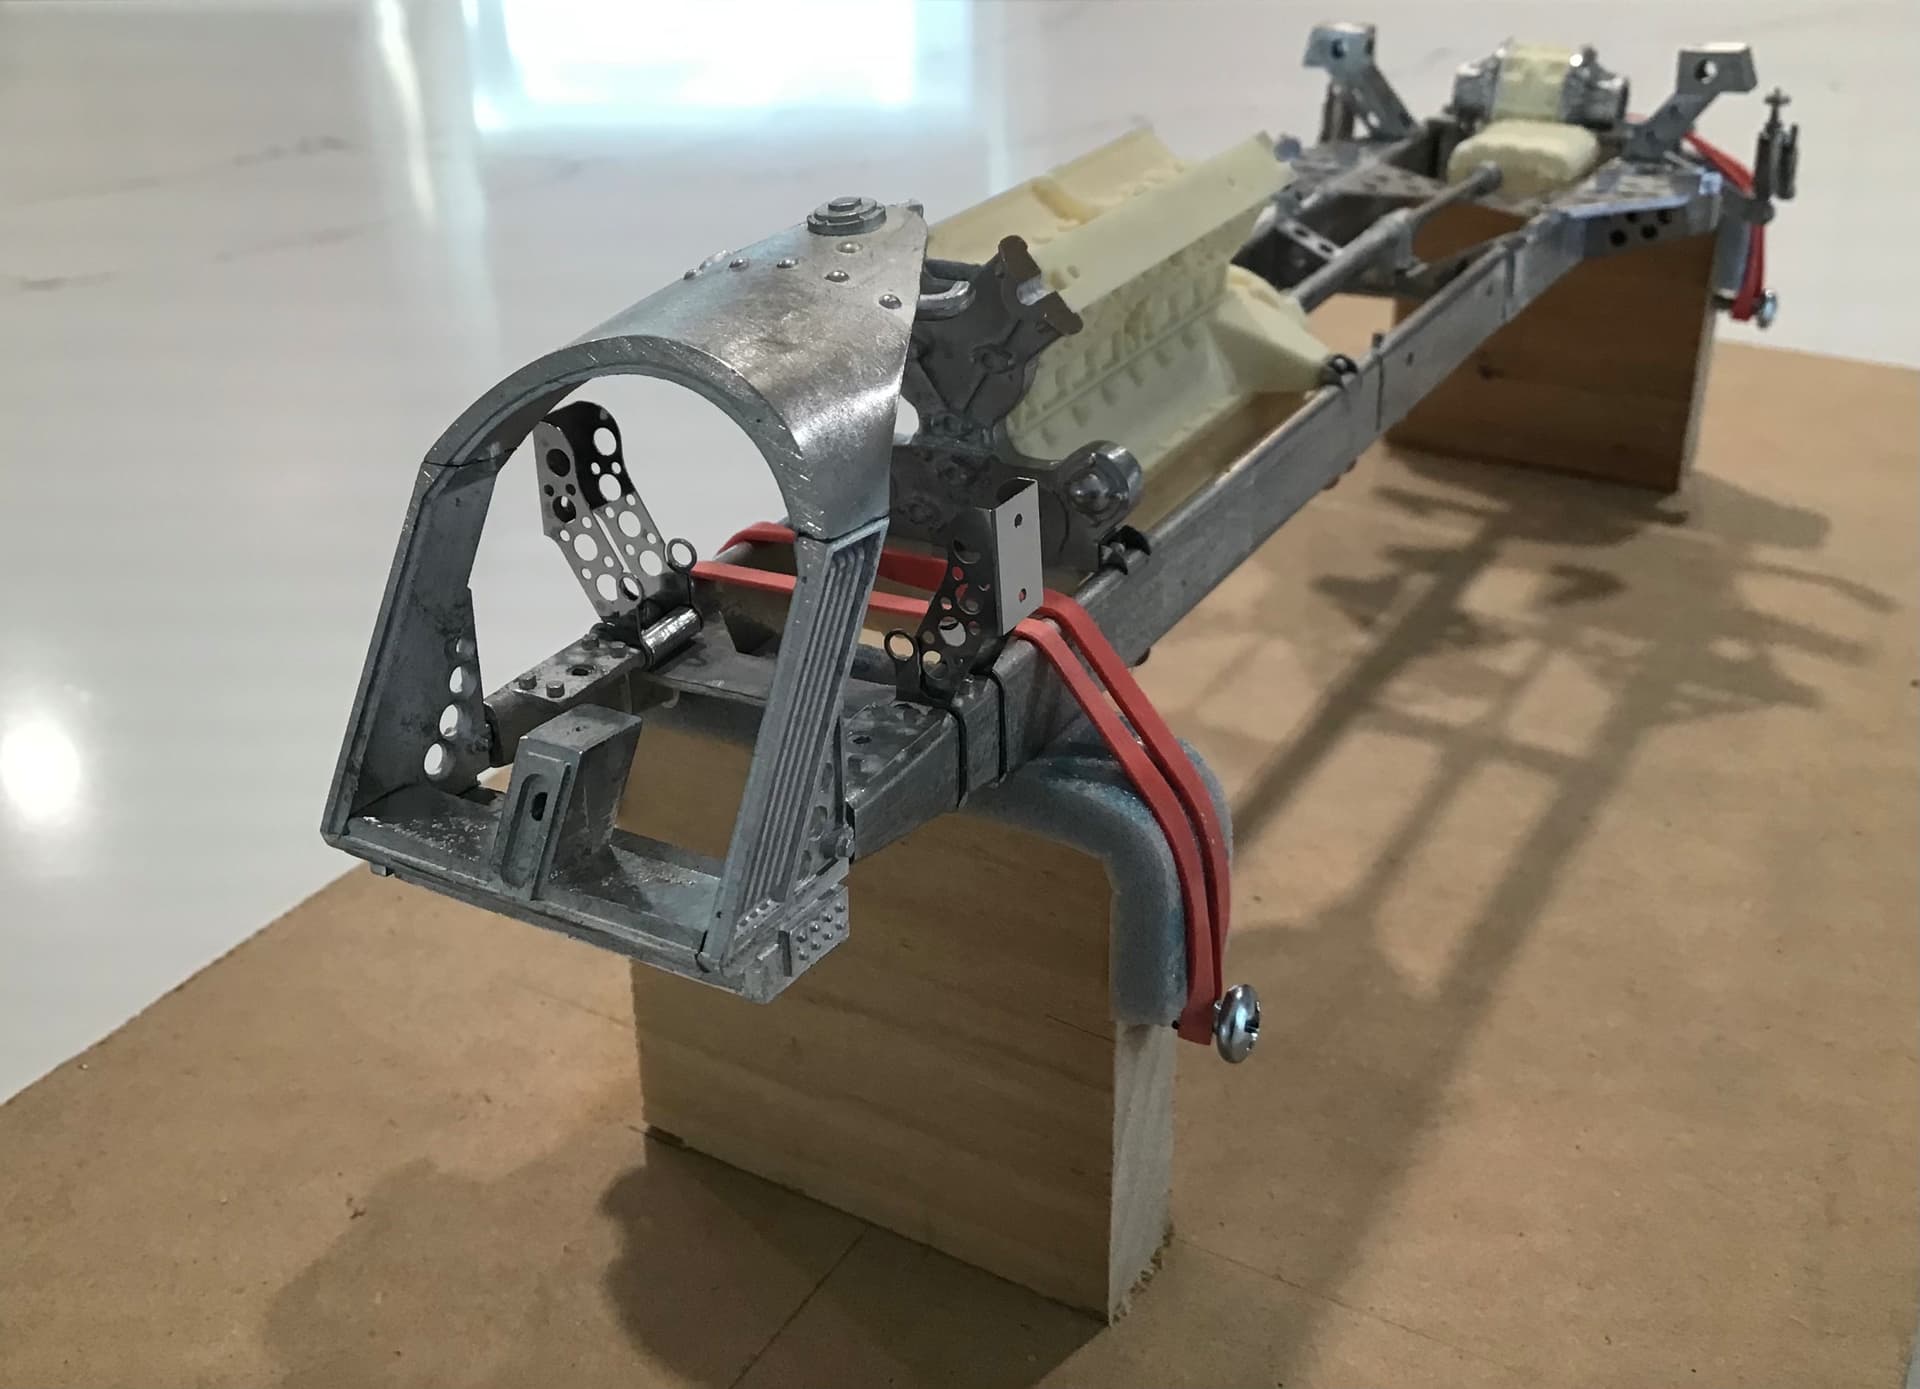
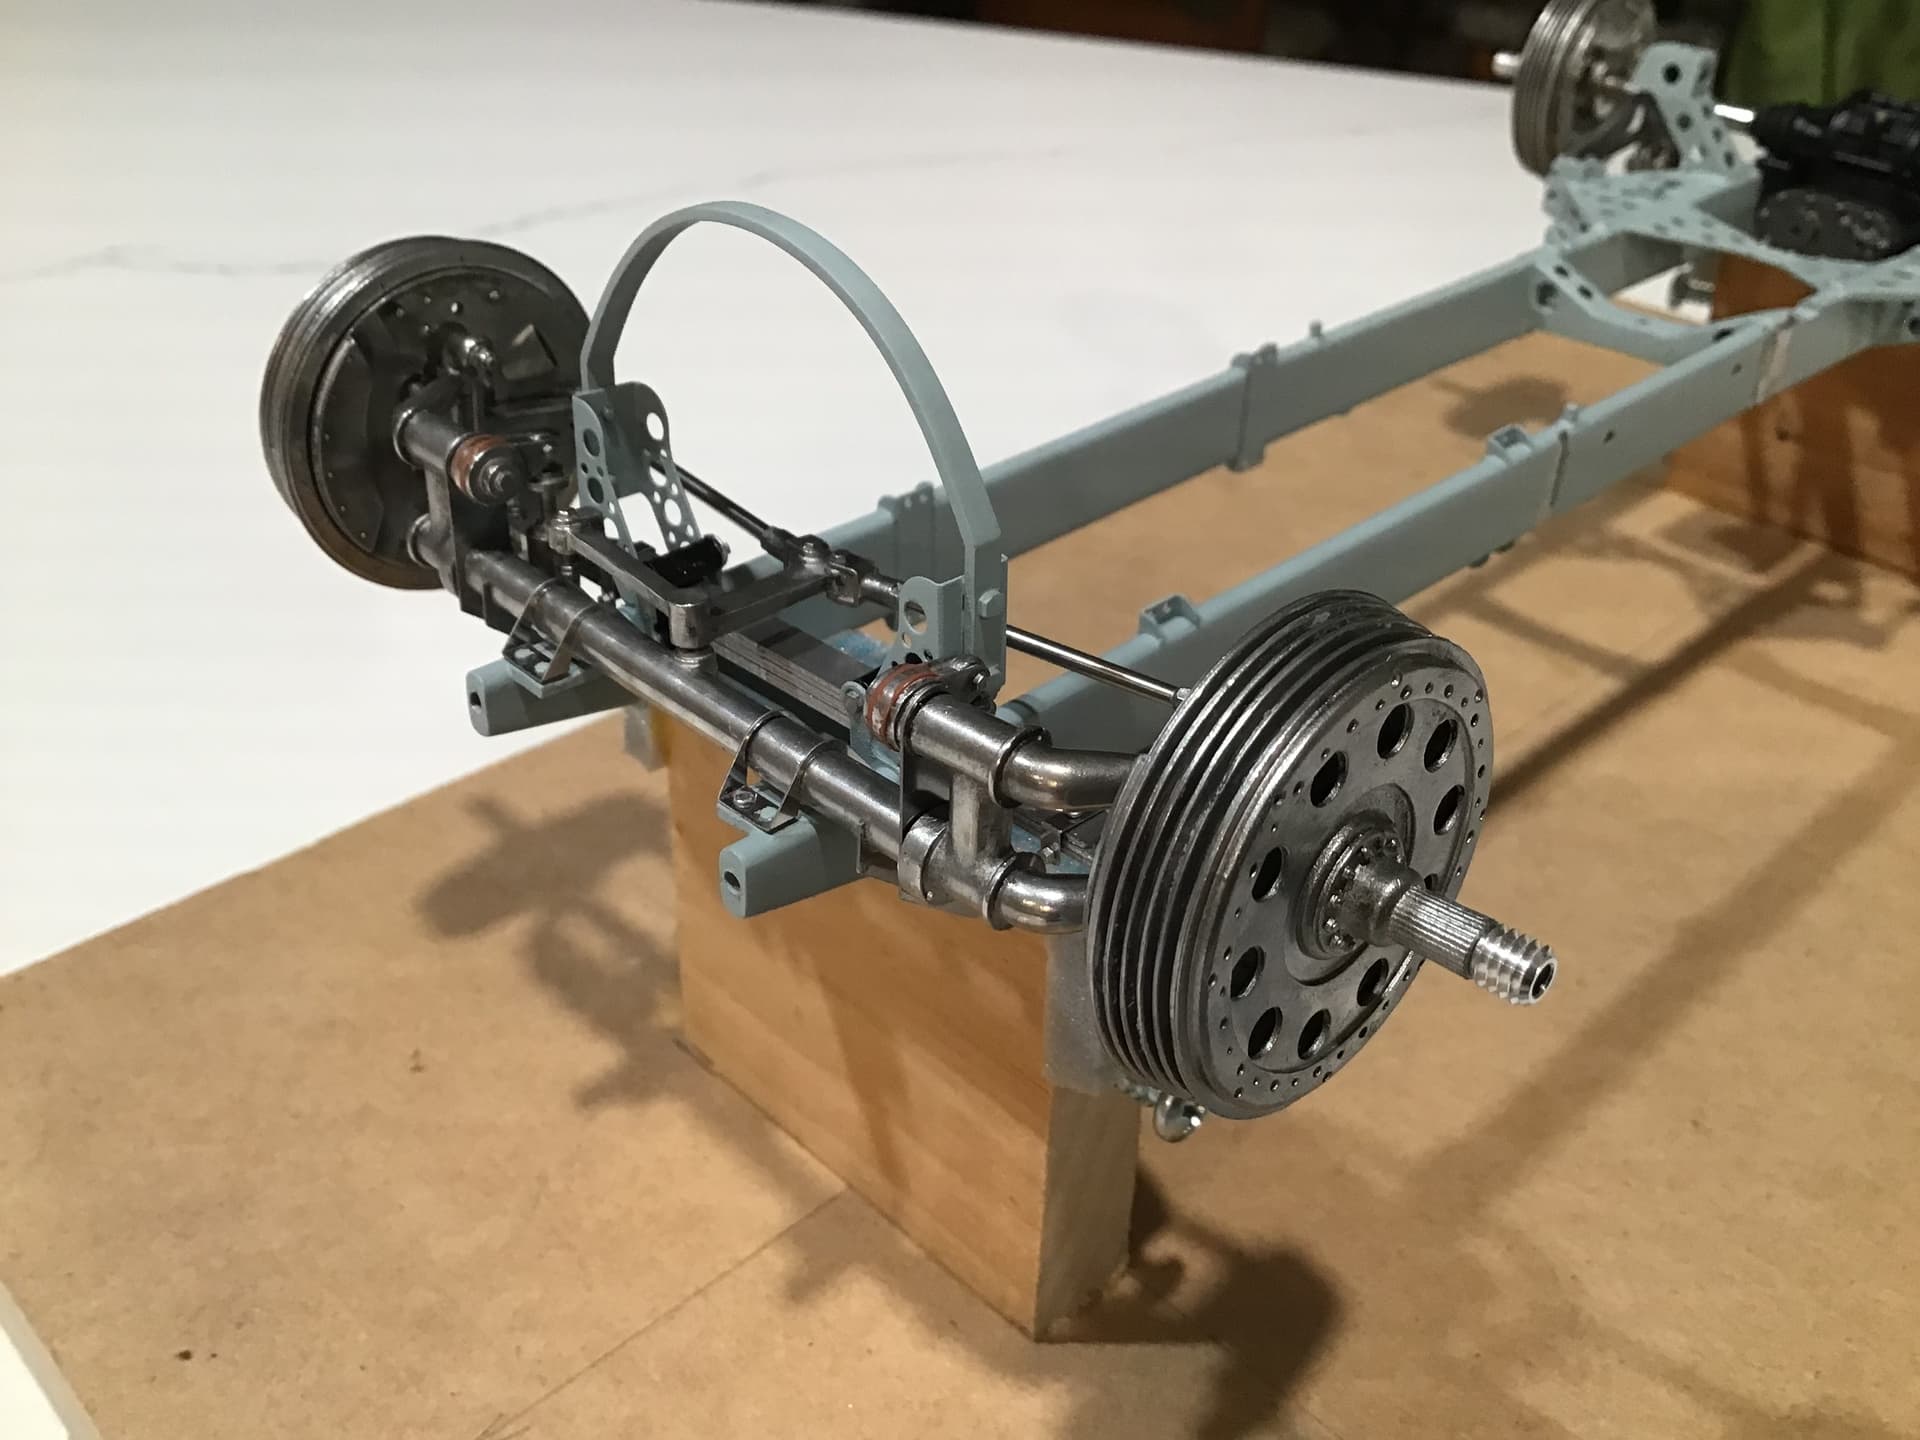
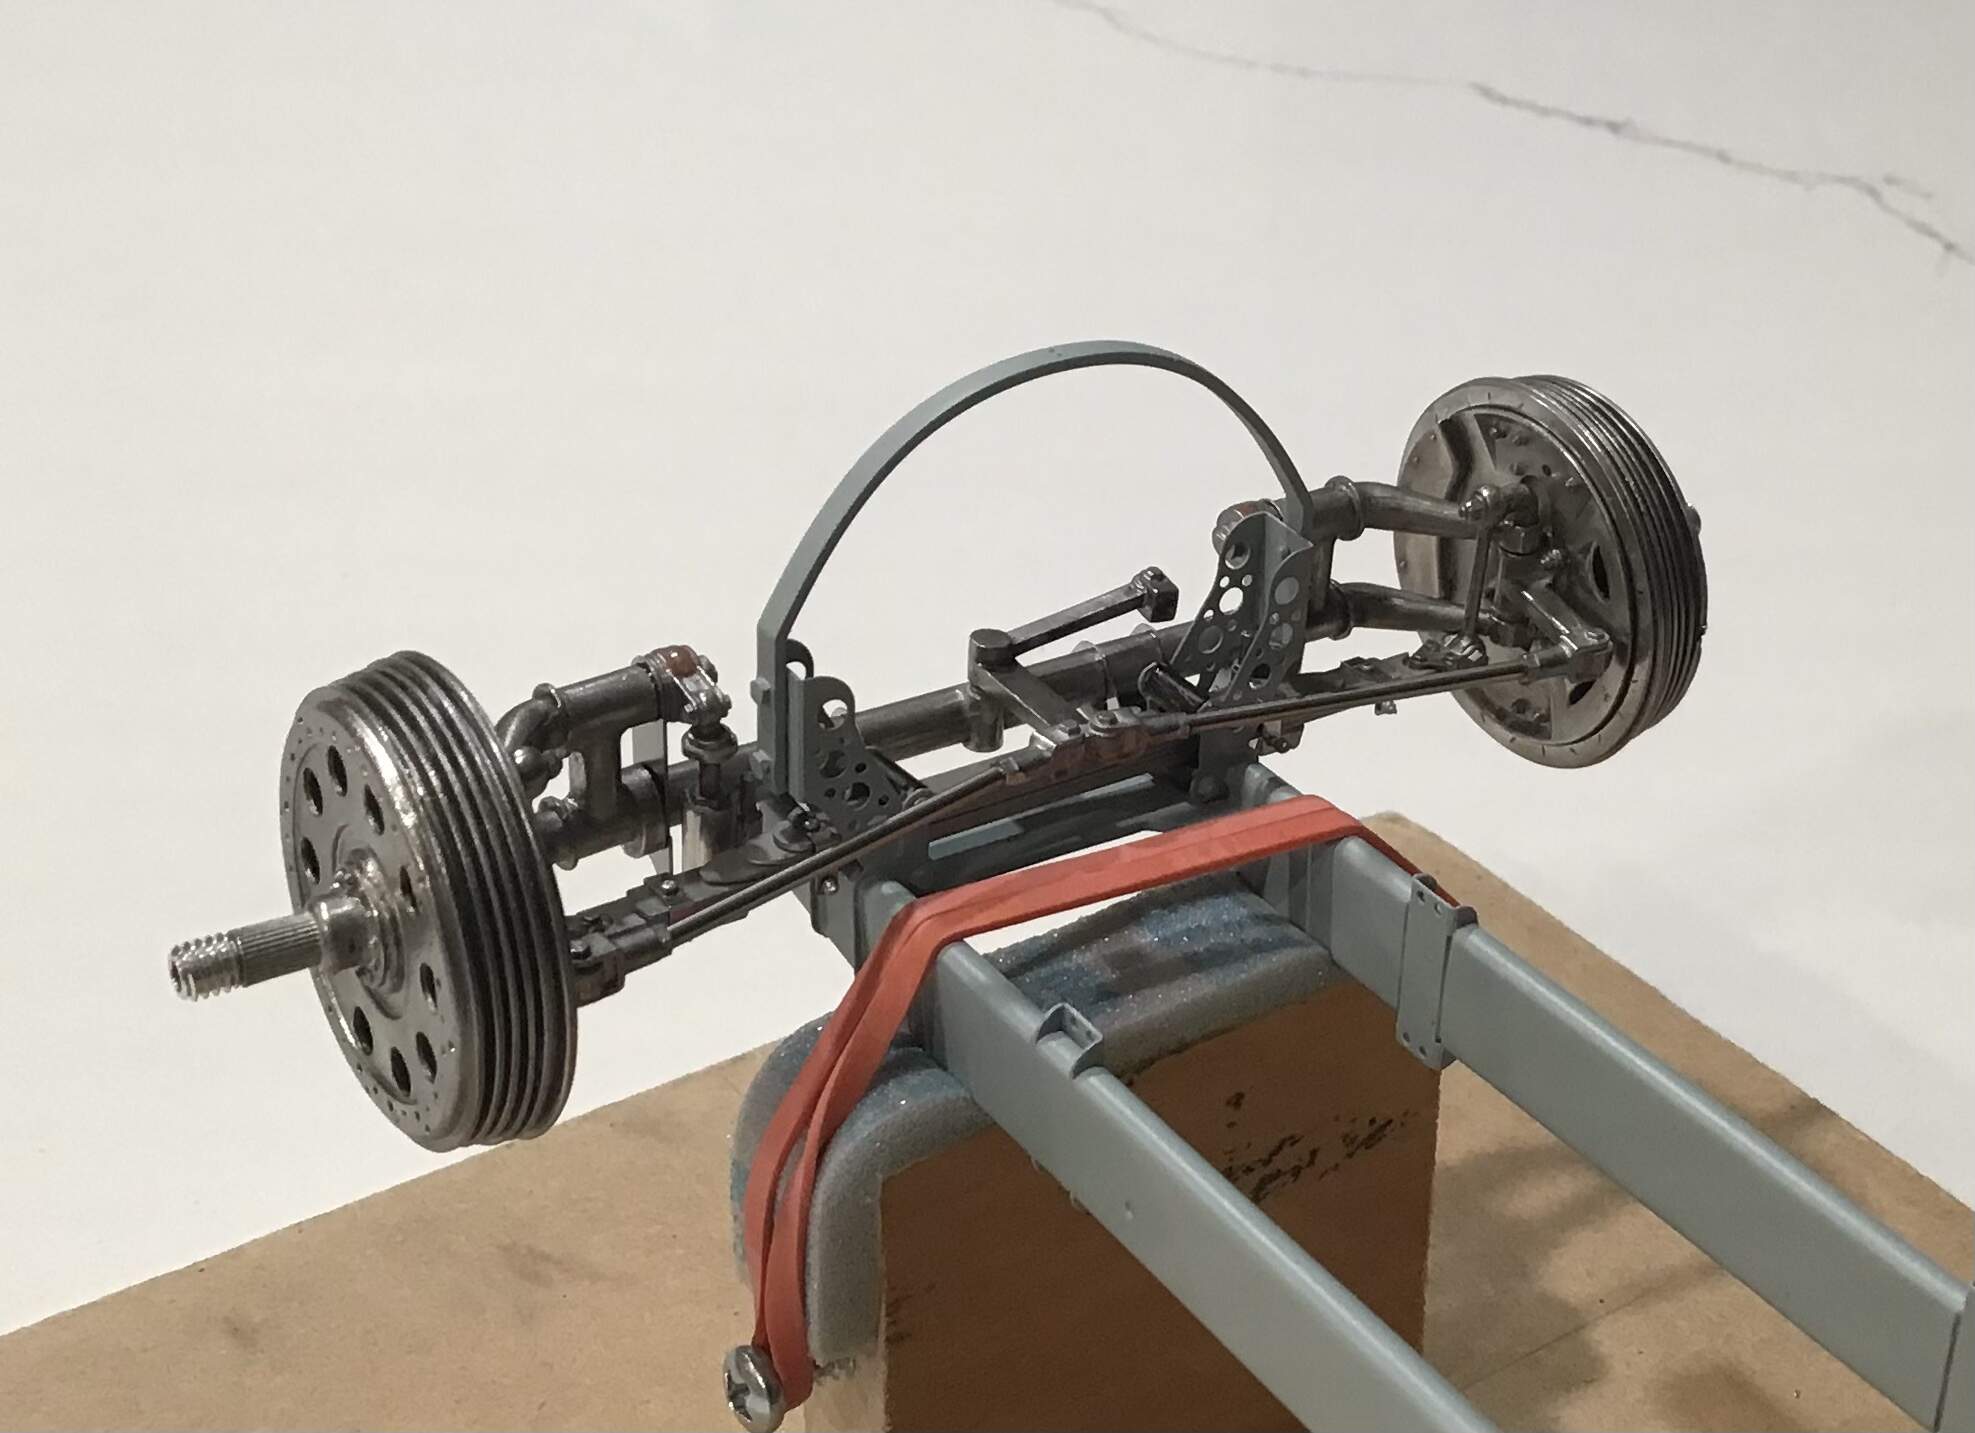
I made up a fixture to hold the chassis after primer and paint as the aluminum jig will scratch everything.
Here is the chassis with radiator tank
(core is photo etch)and driveline dry fitted-
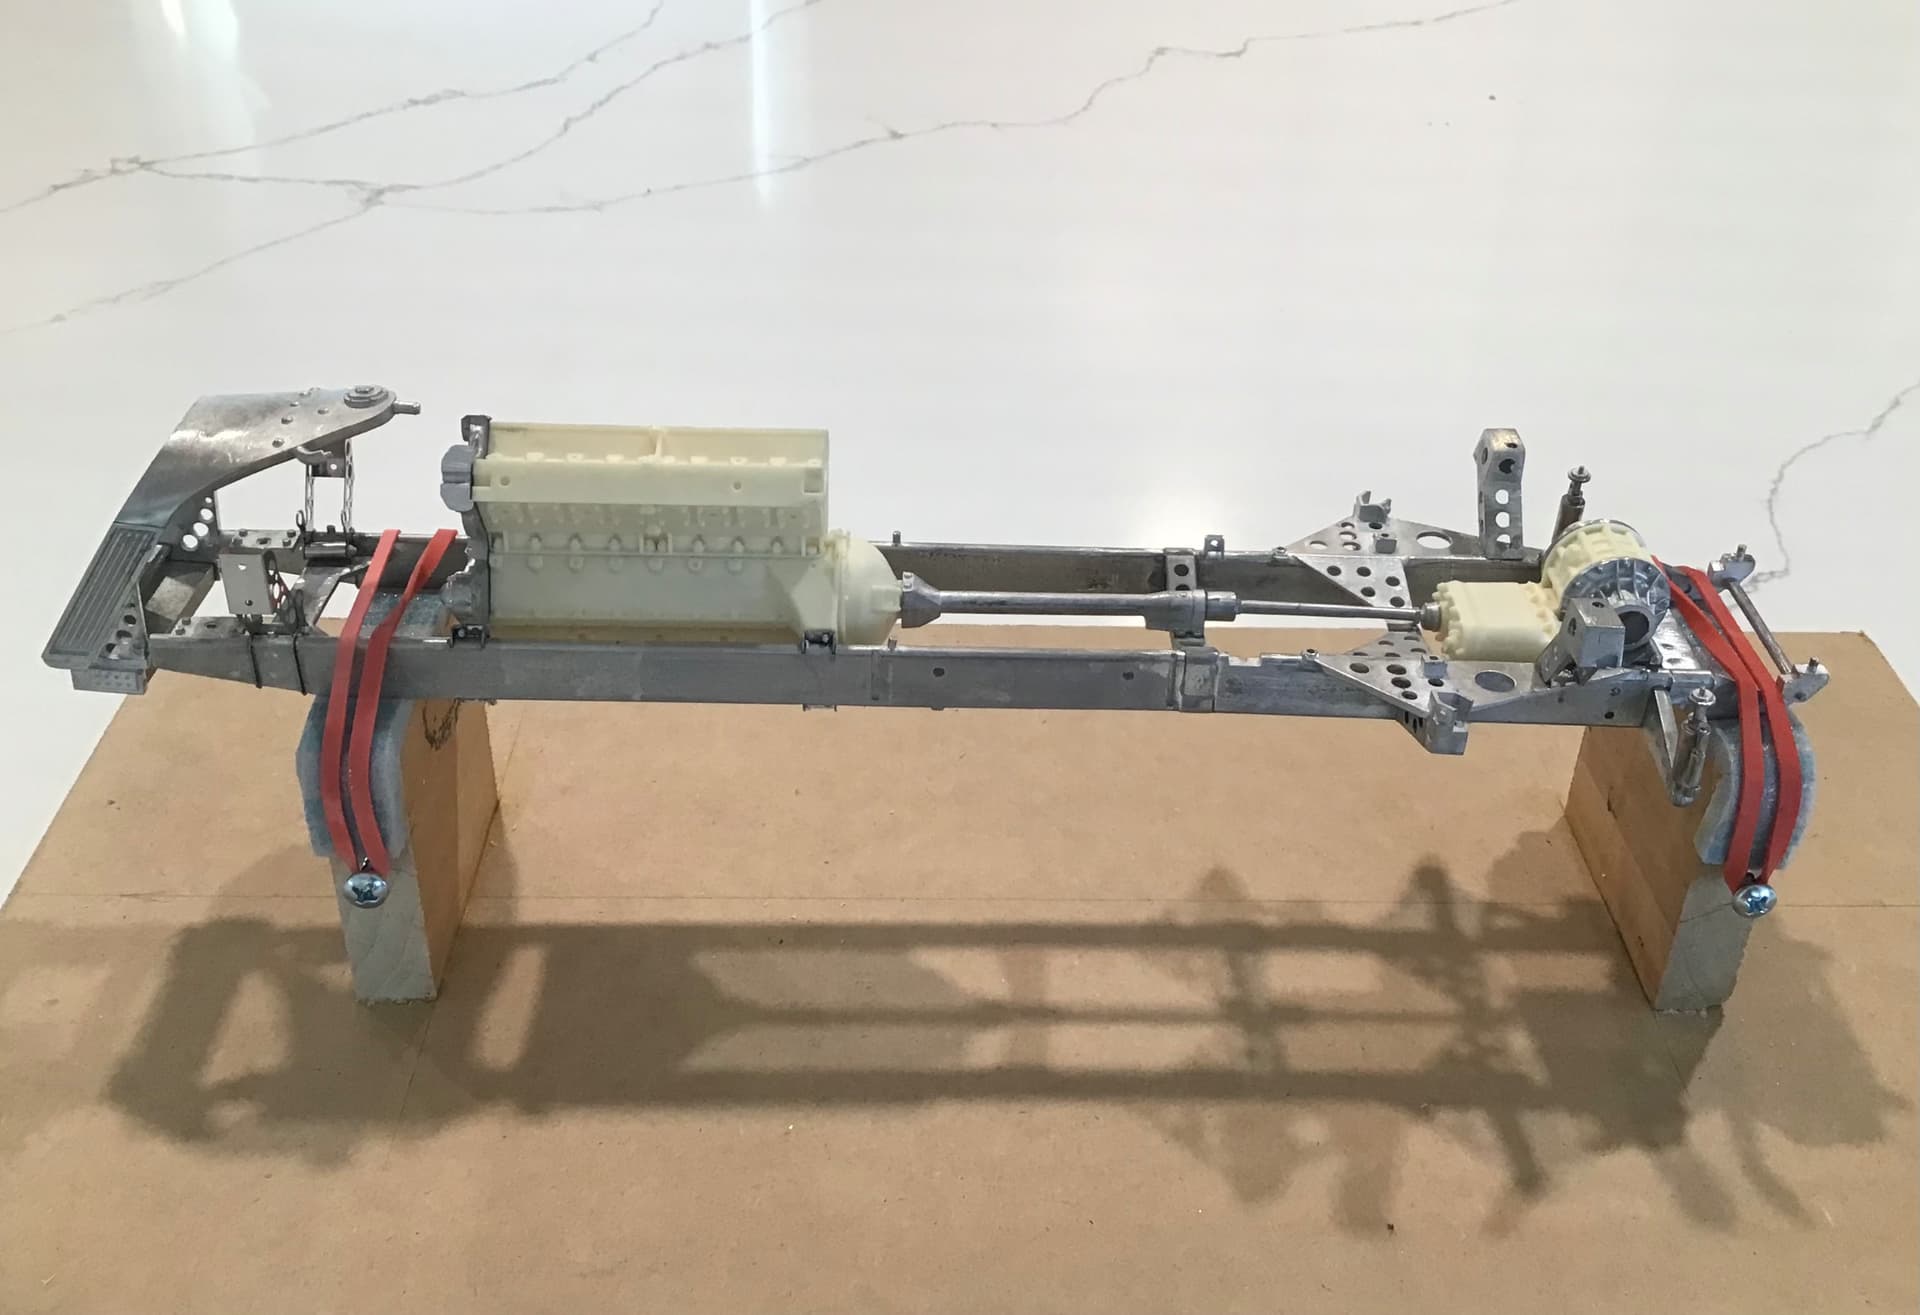
Engine as seen is comprised of 3 pieces.
The real car has horizontally split crankcases . These along with the bell housing are one resin casting .
The cylinder blocks on the actual car are two groups of four joined end to end- on the model all eight are a second resin casting and for some reason the timing case on the front of the engine is white metal .
Getting close to priming & painting the chassis.
Thanks for looking ! RT
4 Likes
Love it! Every time you post an update here one of my 1/12 Chevy kits creeps a bit closer to the bench, inspiring work my friend.
Cheers, D
2 Likes
Richard,
Nothing like a full set of model drill bits to make like easier. The new jig looks like it does it job perfectly with min surface to surface contact, and the areas of contact are foam coated for protection.
The radiator casing really came out stellar.
joel
2 Likes
Looks incredible Richard.
2 Likes
Thank all for the interest and compliments.
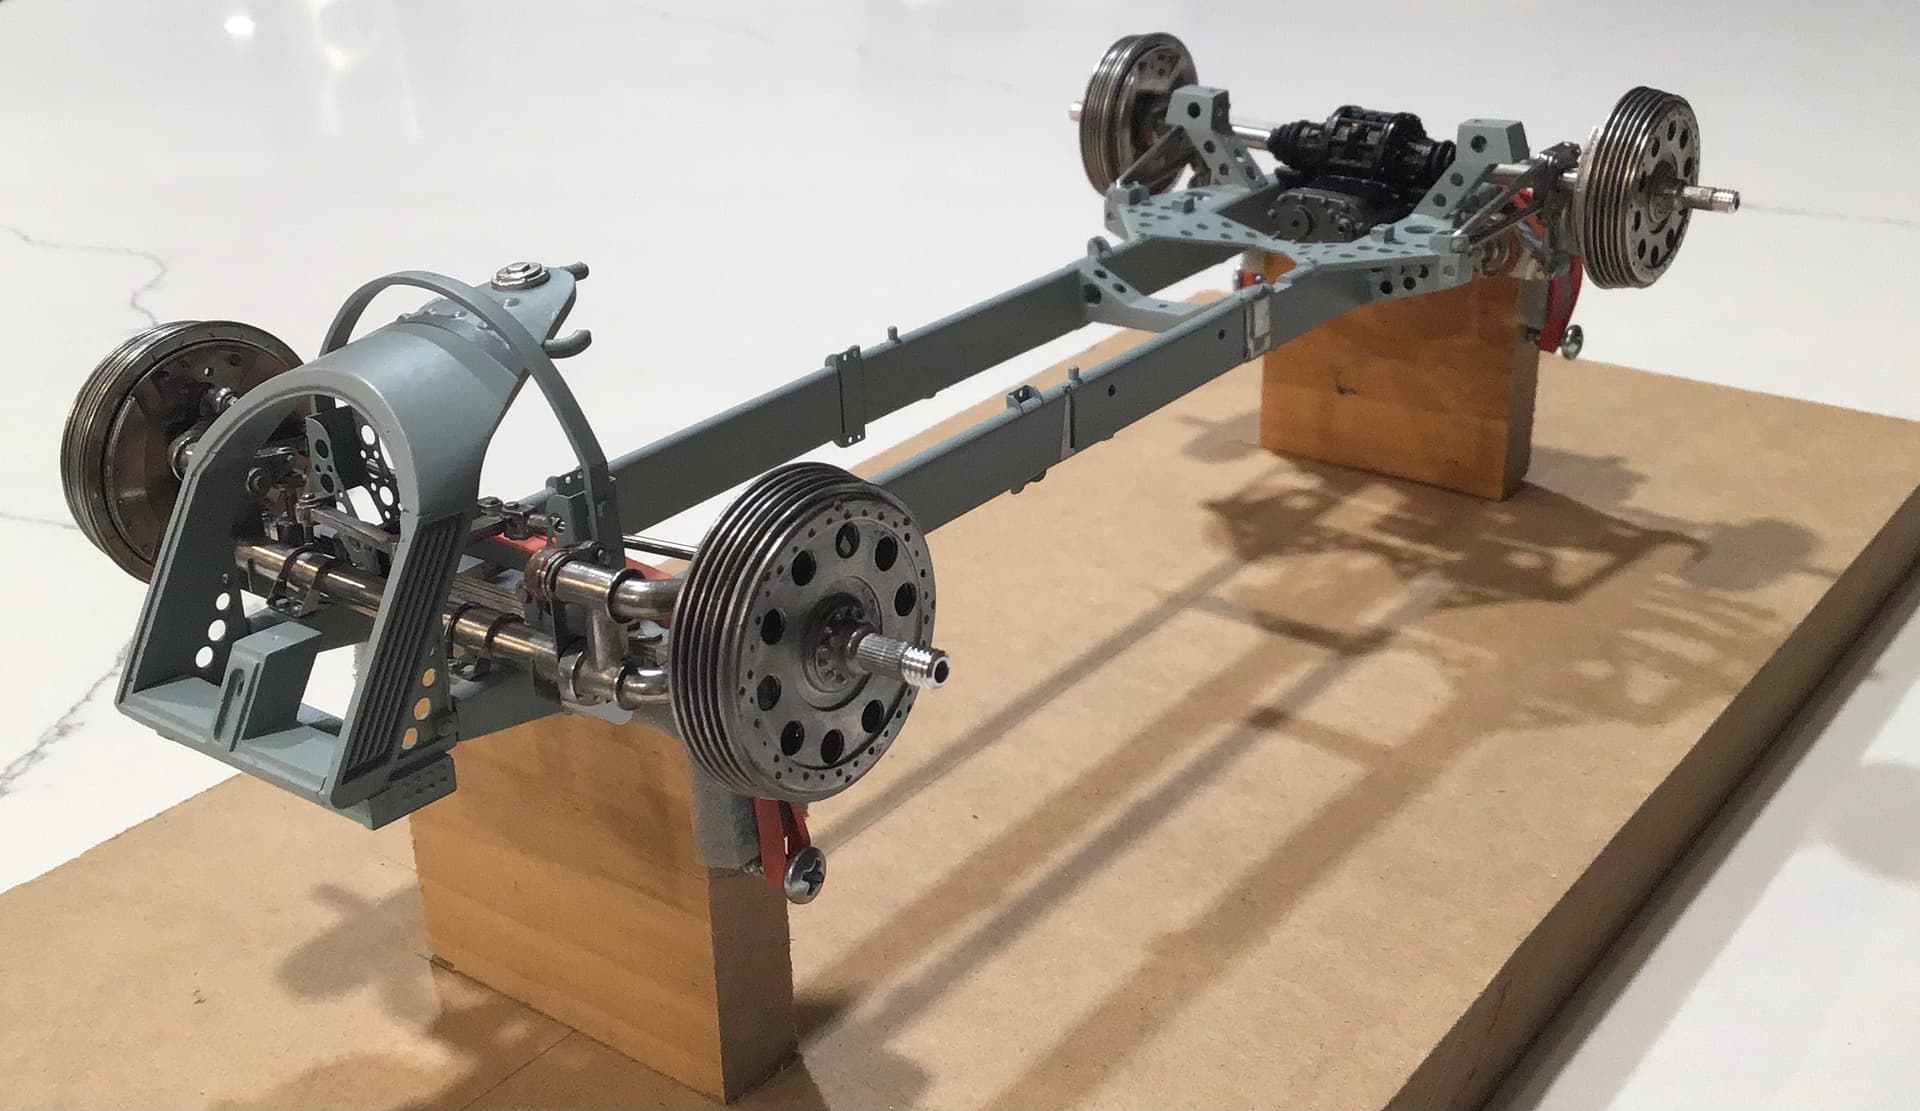
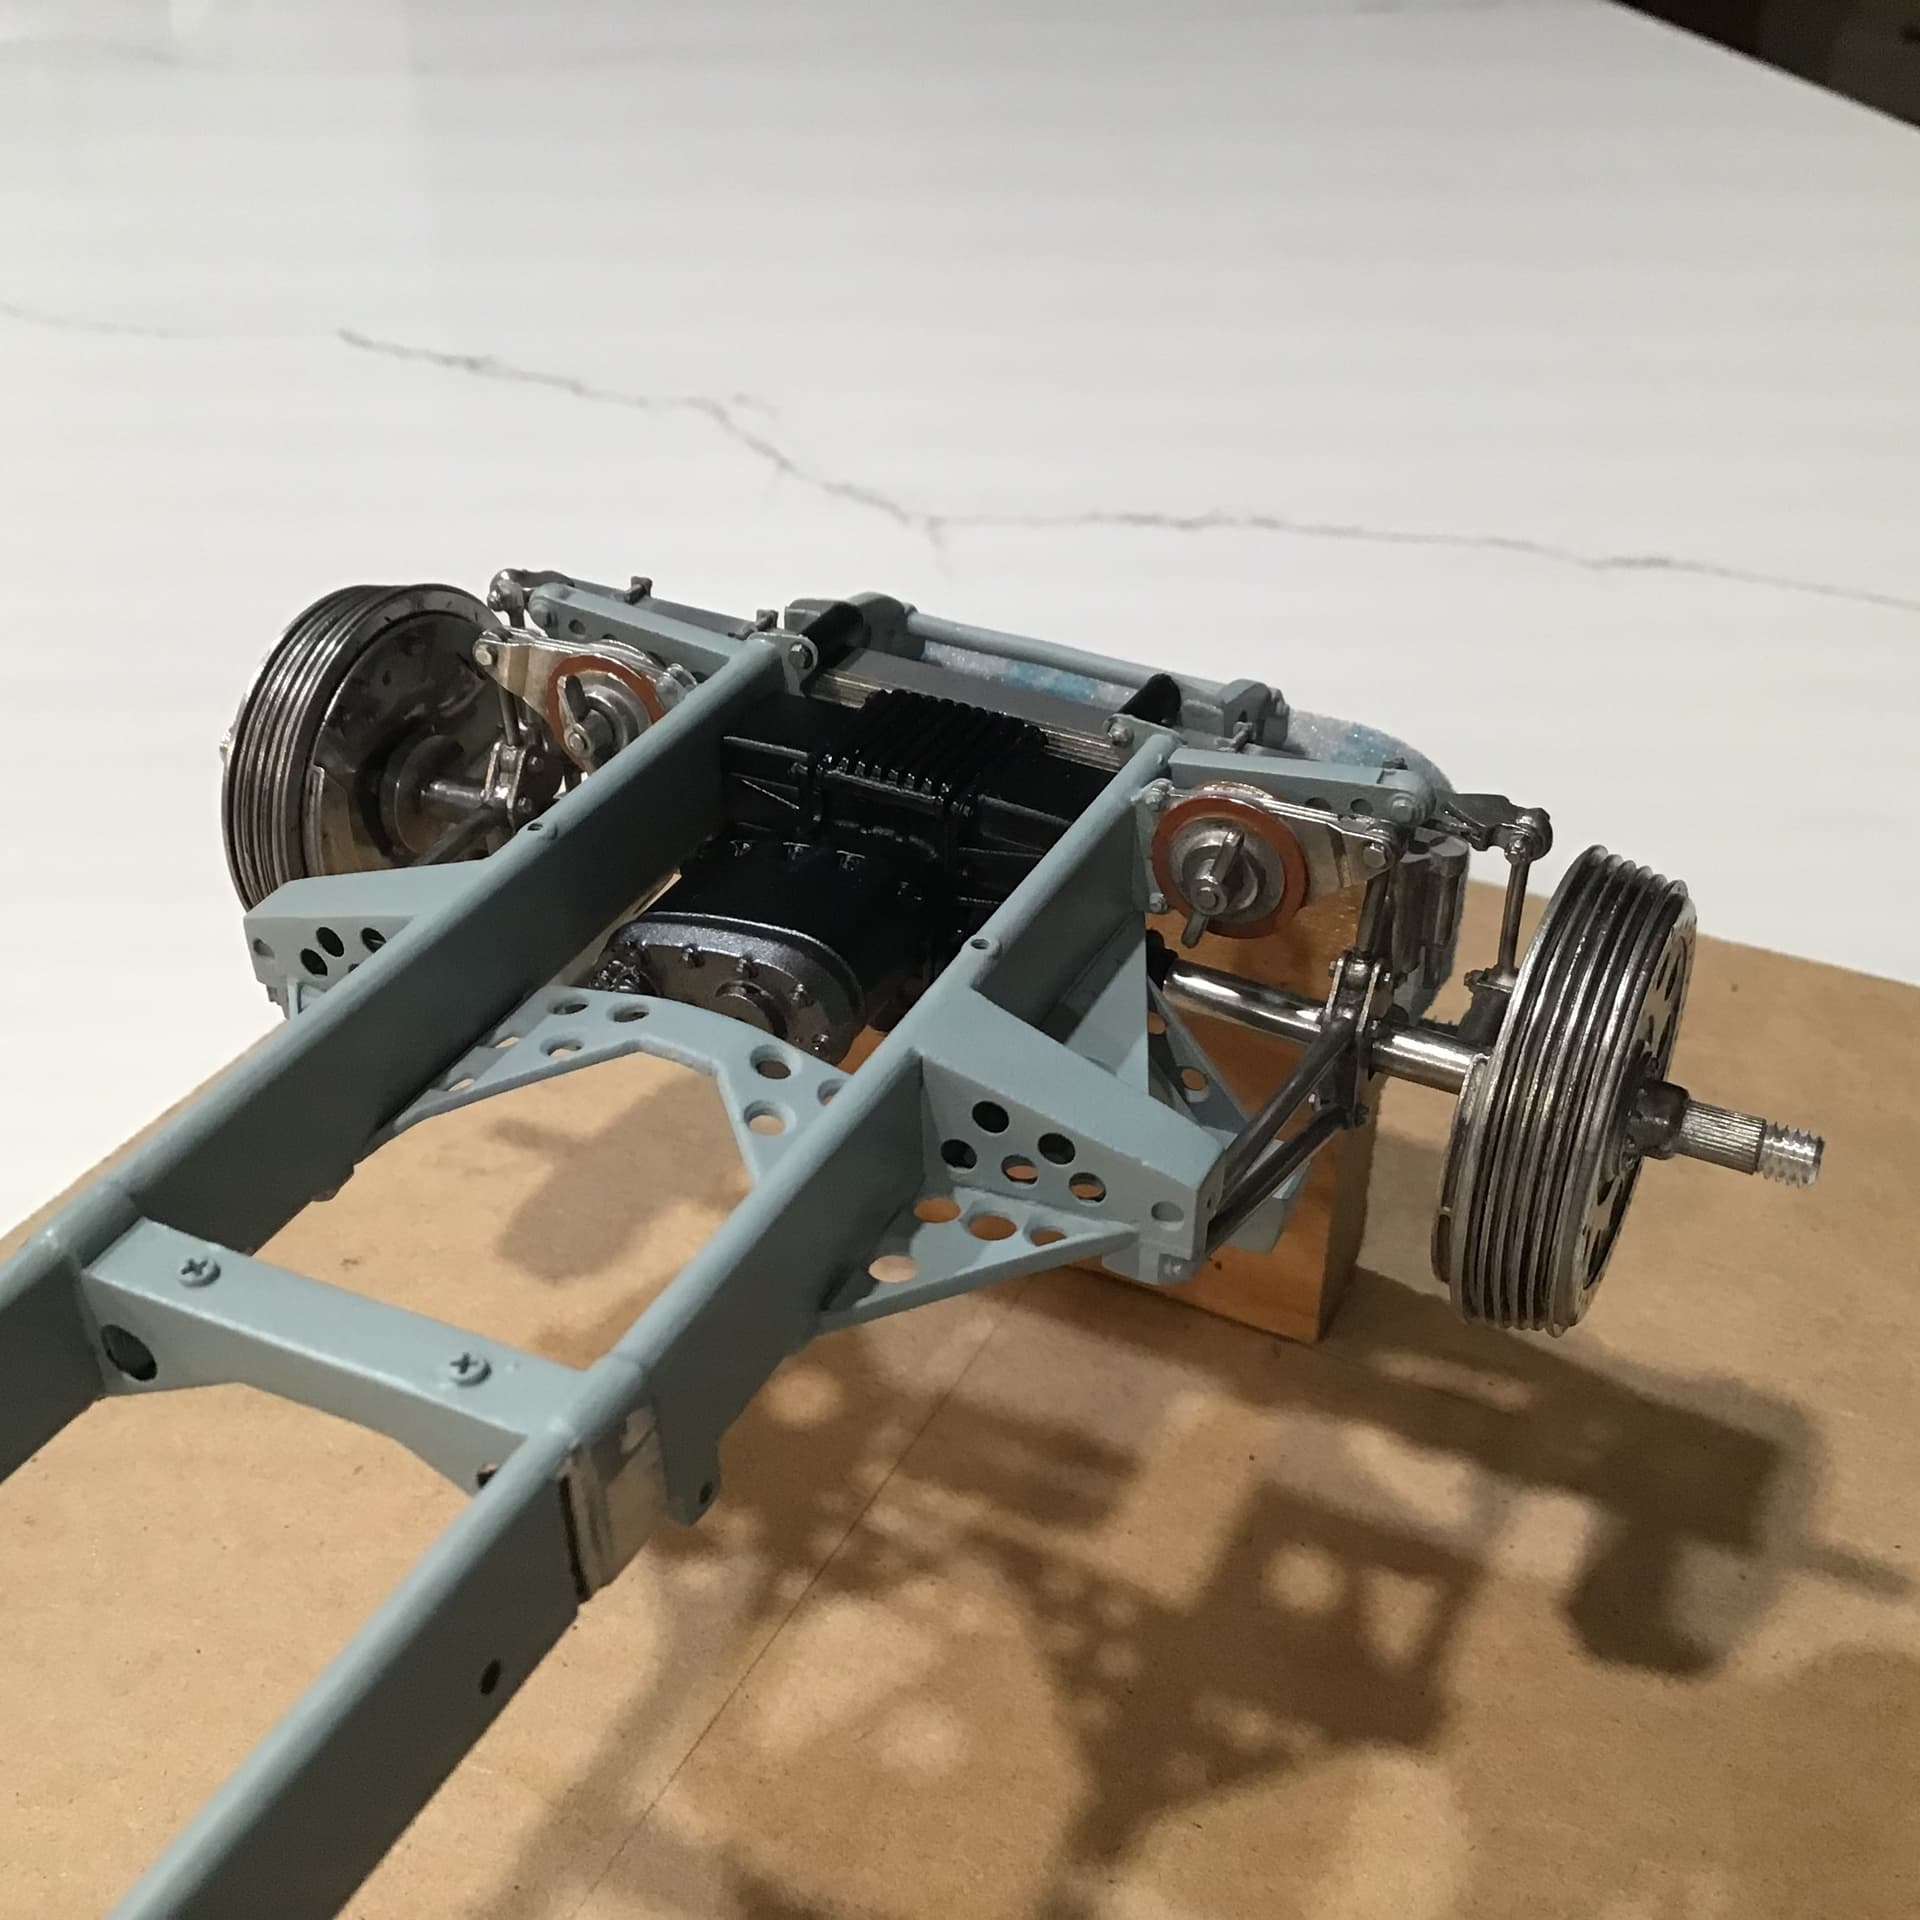
Some big progress lately - chassis and radiator tank in finish paint. I used Gunze Mr Color RLM 75 Helleblau .
A very light blue-grey that looks pretty close to what I could glean from photos.
Transaxle done in Tamiya Semigloss Black - front of gearbox done in a mix of gunmetal/ metallic grey.
I masked off the front friction dampers and painted these and the rear units with a color I had in my head from the friction material in the friction steering damper in my 1950 Norton - flat red with yellow added to kick it towards orange a little then flat earth to brown it a bit . Looks pretty close .
Suspension all done.

Really enjoying this kit - challenging and rewarding.
Now time to put the chassis aside and concentrate on the engine which is a model unto itself - I believe MFH offer it as a stand alone kit .
Thanks for looking in and all comments always welcome.
Happy modeling ! RT
6 Likes
Looks great mate, super smooth paint work and a great choice of colour!
Cheers, D
1 Like
Richard the blue looks a great match. Fantastic work on the chassis and looking forward to the engine now.
cheers
Michael
2 Likes
Richard,
The finished chassis looks fantastic. The color really did come out looking exactly as you wanted it to. Both the front and rear suspensions are basically kits all by themselves. But with your modeling skills they both look absolutely perfect.
Can’t wait to see you work your magic on the engine.
joel
2 Likes
Engine work begun in earnest. I had previously assembled the block which consisted of 3 parts - timing cover in white metal and crankcases and cylinder blocks in resin . Added now are the two white metal stirrup like brackets midway along the bottom of the crankcases. I’m not sure of their purpose. They aren’t motor mounts as they don’t reach the frame rails.
So including the five pieces that make up the block as now assembled the engine is composed of some 75 pieces- mostly white metal - plus 10 in photo etch and 10 ignition leads in wire .

The block assembly alone that you see here required the drilling of 60 holes of various sizes. The cam covers each will require another 10 and the various white metal components another 50 , at my best guess.
So 130 or thereabouts. Mostly all done now - only the cam covers and ignition wire holes yet to do . I’ve begun painting the block .
More pics to follow as I begin to polish up the white metal bits and add them to the block.
Cheers- RT
2 Likes
Richard,
That new drill bit set is sure seeing OT for sure. Betcha you’re glad that you bought it when you did.
joel
2 Likes
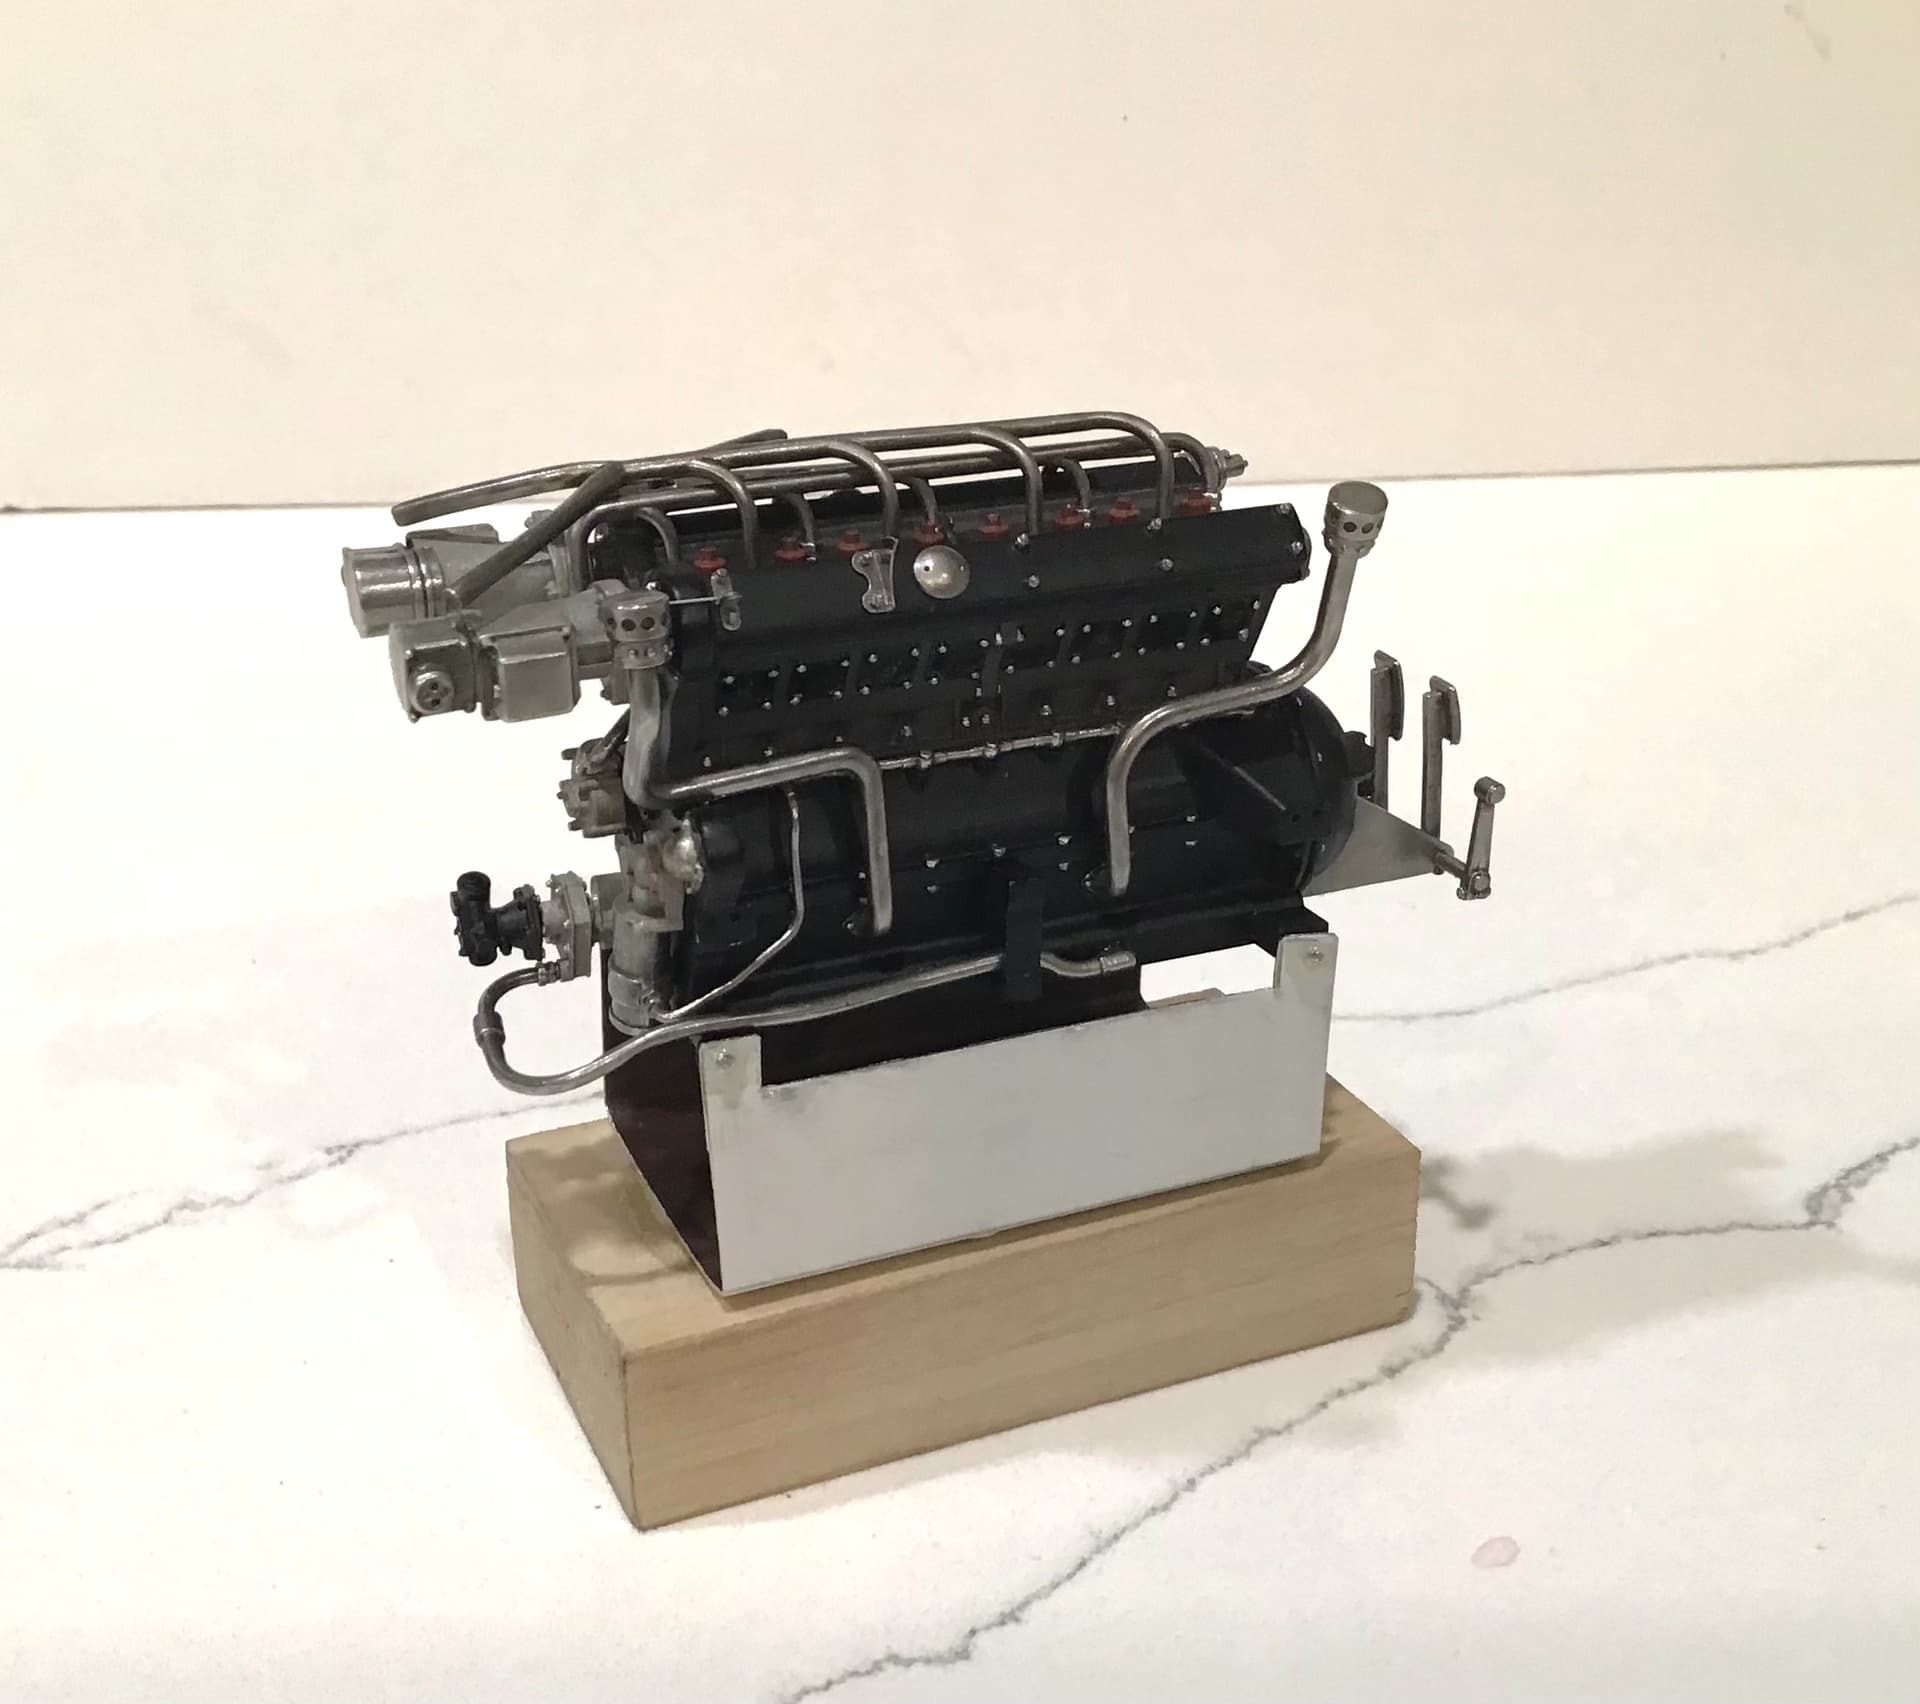
Engine is largely done - a beautiful kit unto itself.
I had to knock out a stand from a piece of coil stock to handle it while building .
Crankcases and cam covers done in Tamiya Semigloss Black - cylinder block done in Tamiya Dark Iron . Various white metal components polished or glass bead blasted .
The two magneto castings were pretty rough on one
side - these were cleaned up, polished over all and then parts masked off and bead blasted . Polished areas coated with SMS clear gloss and bead blasted areas done with Dullcoat.
The coolant manifolds on top are dry fitted at this point - they will be permanently installed after the engine is installed in the chassis, along with the ignition wiring.
The intake side …
The exhaust side…

Rear with bell housing / pedal mounts .
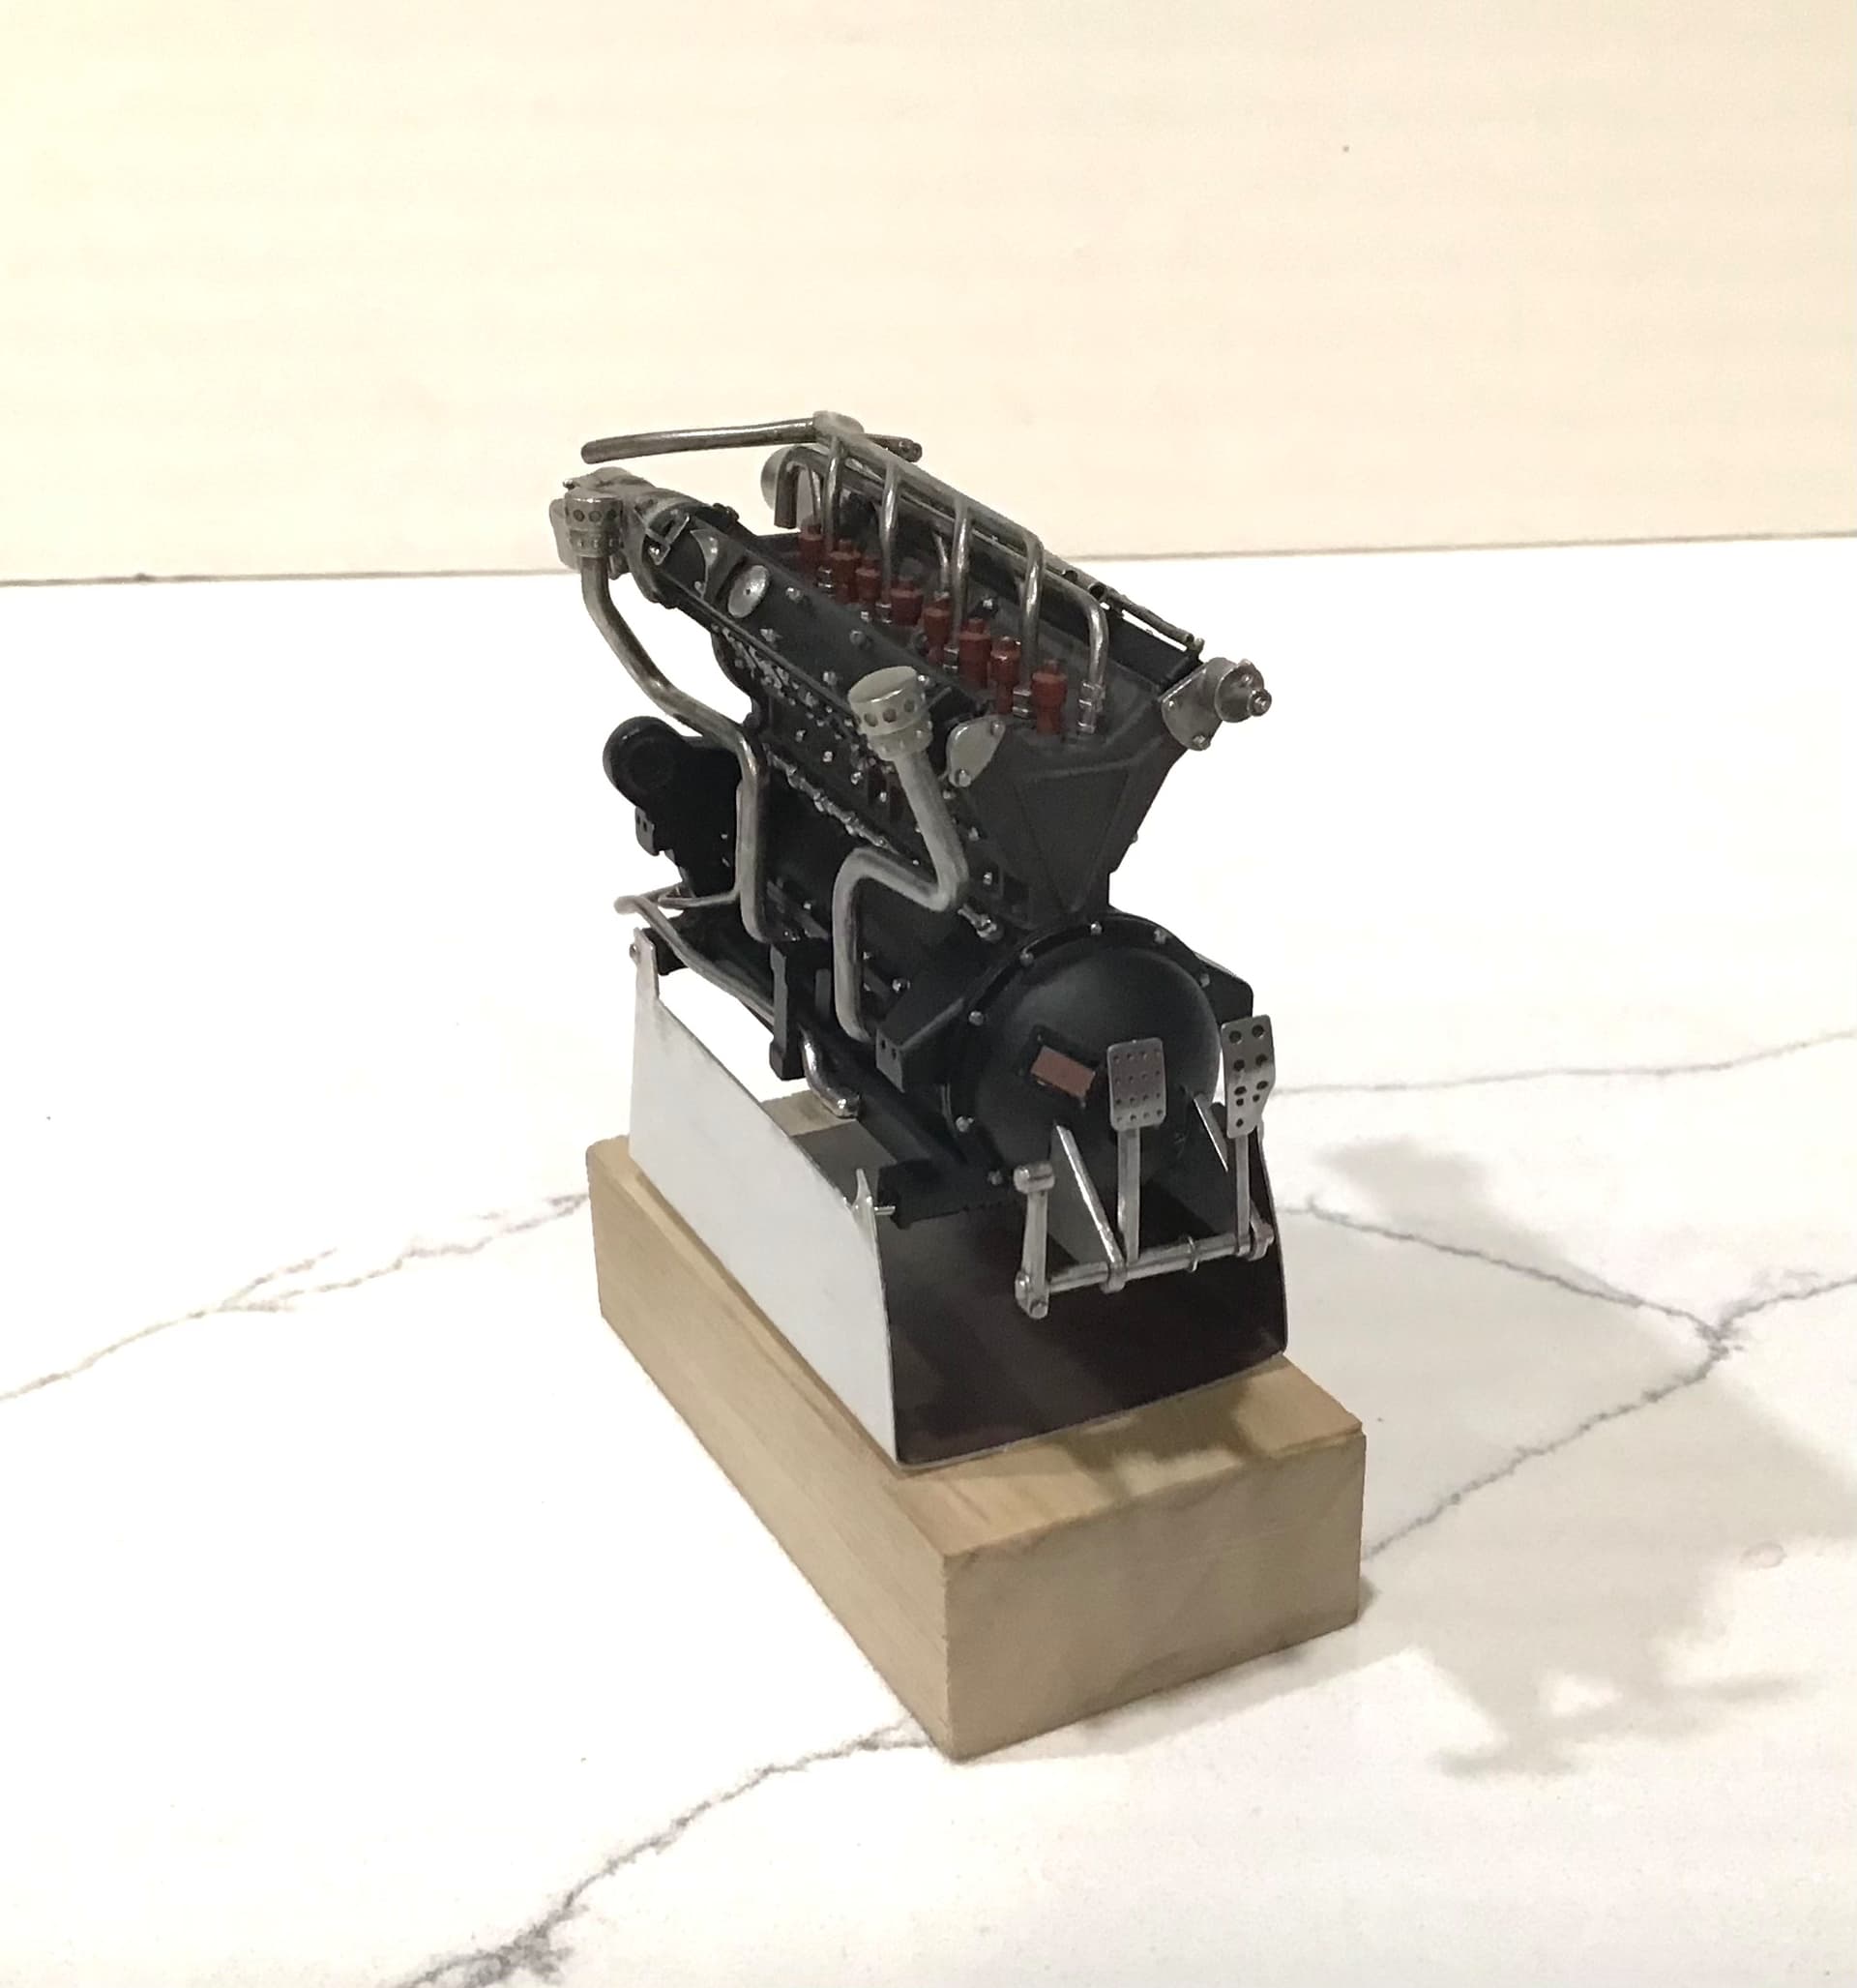
…and top galley …

Interesting that Italian cars of this era had the accelerator pedal in the center - brake pedal which is not installed yet to the right .
Yet to complete is the intake manifold/supercharger assembly.
As the chassis will have to be inverted to install the brake lines at the four corners I will do that next before installing engine . It looks like I will have to make yet a third base to carry the chassis by the wheel hubs when working on the underside once the engine is in .
More to come … thanks for looking.
Cheers - RT
2 Likes
Richard,
OMG!! The engine/trans assembly looks fantastic. Not a single building error I could find anywhere. Paint looks perfect with all those nuts and bolts just popping right out at you.
Your engine stand sure looks like it’s doing its job as intended. Looking forward to seeing your 3rd incarnation of a chassis stand. Will it be completely new, or a reworked version of this one?
Only the Italians would put the gas pedal between the brake and clutch. Just sounds so weird. BTW, what is that not quite pedal to the left of the brake pedal?
BTW, what is a bead blaster and the polisher you use? I’ve heard and seen a polisher that uses metal pins but never a bead blaster before.
joel
1 Like
Thanks Joel - The polishing is just as before - Dremel and felt wheels with Blue Magic . The bead blaster is a cabinet - similar to what many call sandblasting but it uses glass oxide - tiny glass beads like very fine sand .
It simply blows the beads at the workpiece using compressed air. Gives a nice matte texture.
The arm all the way to the left is an actuator arm for either the accelerator or the clutch - not certain which yet .
Great engine Richard. As you say their engines are models in themselves and you’ve made this look like the real Alfetta engine. When I built the Porsche engine all the bolts were a different colour from the engine and I read that was so the mechanics could quickly see if one was missing. Not sure if its true but it adds a nice touch.
cheers
Michael
1 Like
Engine looks incredible Richard.
I Googled the odd position, of the pedals. Apparently it’s supposed to make it easier to do the heel and toeing, when shifting gears 
Jesper,
I’m trying to figure out how moving the gas pedal to the middle makes heal & toeing easier. If anything it makes it harder.
Back in the very late 60s when I took my rookie driving school at Bridgehampton, heal & toeing was the hardest and most unnatural thing to learn. It requires you to steer with the left hand, work the shift with the right hand, then when it’s that magic moment to actually downshift, you use your right foot pad to depress the brake and when you just starting to actually downshift gears, blip the throttle with your right foot heal. Done right you matched the rpms of the engine to the rear wheels. Done wrong (which I was an expert at that day) caused some serious poor shifts). This method is needed for gearboxes without syncro’d gears, or grinding becomes an all to familiar occurrence.
joel
1 Like