-
If you had been able to build a perfect replica of the catenaries with their poles and supporting wires you would still have the “problem” that the diorama has four sides. Any photo taken along any of the tram tracks will have problems with the “horizon”. Agreed?
-
If you are able to solve the “horizon” issue somehow (carefully chosen camera angles, photoshop, creating flat backdrops either as photos, manipulated photos or paintings) you should also be able to let that solution include hiding the supports for the perspex panels. The backdrops probably need to have a section of sky visible above the rooftops of the distant buildings.
-
Extreme example to illustrate what I am getting at: Imagine suspending the catenary system by very thin fishing line hanging from hooks in the ceiling of the room. The walls support the ceiling and you take photos inside the room and have a solution to handle point nr 2 above.
-
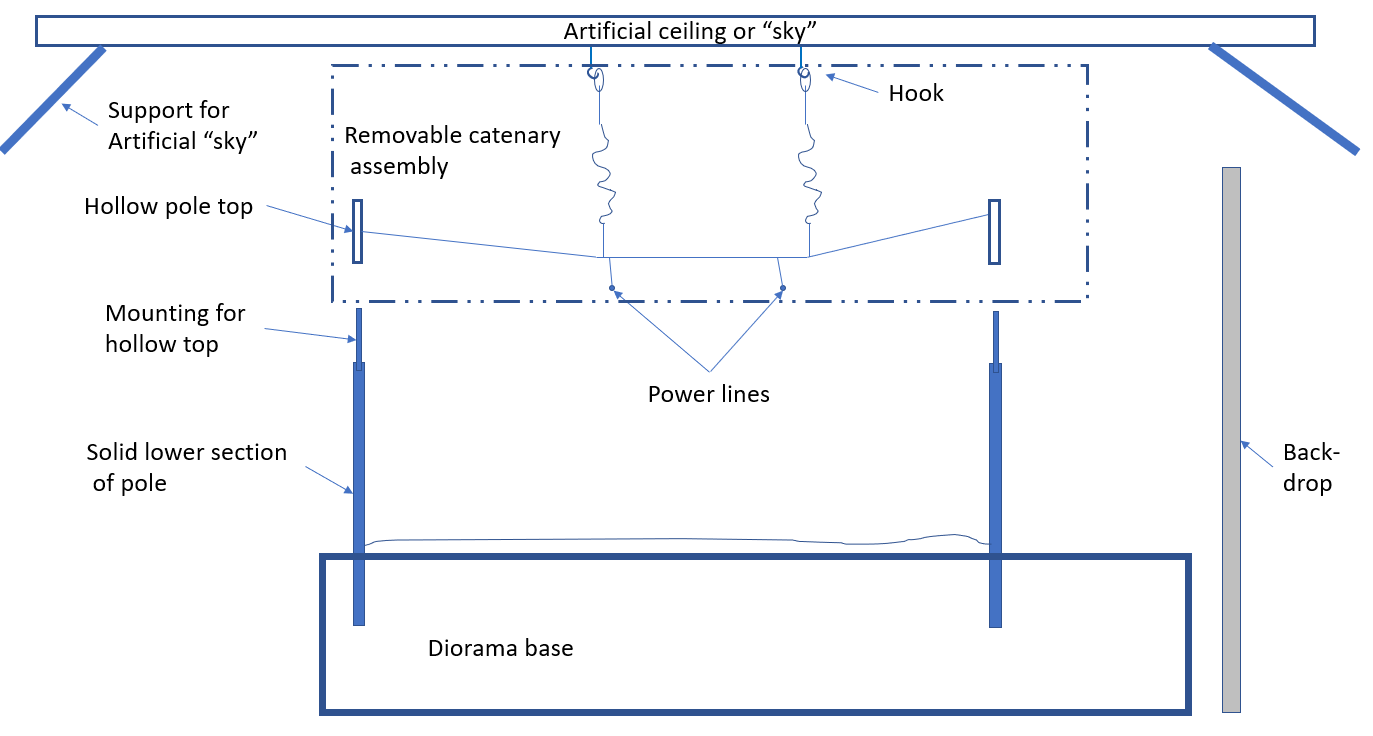
Hanging the catenaries from the ceiling is silly (up to you really?) so let’s consider creating an artificial ceiling, either a big perspex sheet or rods in strategic positions, that can be lowered closer to the diorama but still at a sufficient height to be outside the camera view. The hooks attached to this “ceiling”, or imaginary sky, and the thin fishing lines would still be there. Replace the walls of the room with supports, wooden sticks or whatever, closer to the diorama while still keeping outside of the solution to point nr 2.
-
Make the catenaries as one complete assembly. Splitting it along the divide between the blue and red sections will most likely result in ugly discontinuities visible in the photos. Photoshop could solve that issue so it is not an absolute problem. The catenary assembly needs to attach to the top of the poles in the diorama and in some cases “disappear” over the edge of the diorama. Where they all attached to poles or were they also suspended from the walls of buildings?
-
Make the top of the poles removable. The base of the pole is attached to the base of the diorama and the tops are slid down over the top of the pole bases. The whole catenary assembly then becomes a frame of rigid power lines and a bunch of loose lines attached to it. The whole thing should then be possible to collapse between two flat sheets for storage/transport. If the artificial “sky” is a perspex sheet it becomes part of the storage/transport solution.
Ouch , … Tim , I’ve seen you outmodel some tricky scratches and conversions , each for a victory , and your visuals on past projects represented in photos and celluloid are unsurpassed .
Just don’t go past the point of no return on what you’ve already built .
I know it’s not my place to tell you what to do or not do but whatever you decide I’m rooting for ya .
I was typing my reply while Robin posted his , nice solution Robin .
Still seems like way to much work though .
I’m not knowledgeable enough on the computer photoshop thing but isn’t that the least risky solution and easiest vs. marring the actual build ?
You make an oops on the photoshop thing ya just call a do-over .
Creating the whole catenary system in photoshop could be easier 
Yeah Robin , that was my thought .
I know Tim’s not shy when it comes to a challenge , as a matter of fact I think he’s in his element on a challenge , it seems to fuel him to brilliance .
I just think the physical build of the wiring is a bridge too far . Not that he can’t do it , it just seems too time consuming wrought with alcoholism and maybe going back to smoking …
I still think you can make anchor lines using clear fishing line. Even on the poles set at the edges of the base. You may have to go with 2 anchor lines per pole to create a triangle but the monofilament clear line may disappear in pics. A trial could be done?
As always, I suggest trying a “horse” solution before a “zebra” solution.
J
Robin- I’m so grateful you expended so many grey cells over this puzzle, in response to your points:
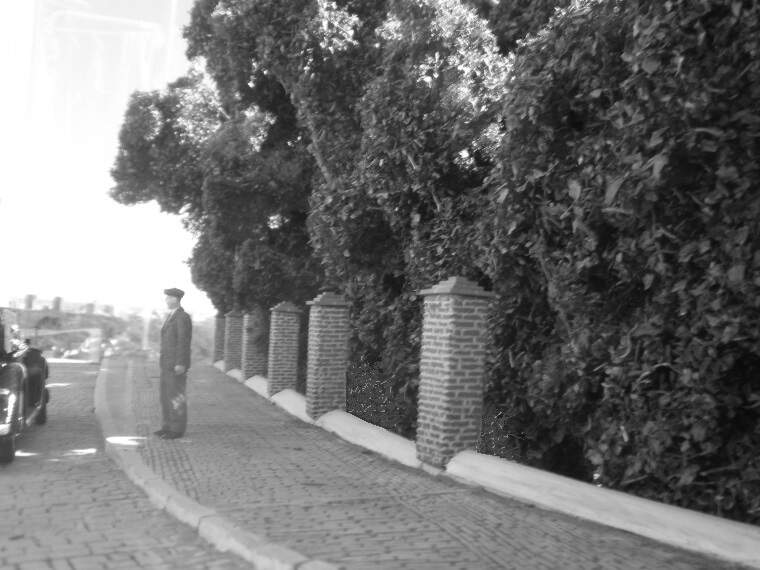
1 – Yes and no, I only foresee a photography problem looking up this street so I tried photo-shopping it a few months ago…


…I think I can do a better job than that first attempt and the wires can be easily photo-shopped in too. Photographs shot in all other directions will be either substantially blocked by closer-in elements like trams, the Big House, the Sub-station, figures etc, and/or the edge of the diorama base will be far enough away to be well out of focus. It’ll all be shot on the outdoor terrace in full sunshine, the base halves clamped together on a table which I can both rotate and elevate in order to get the right height of blurry background, like I did in these monochromes…

There are bound to be a few gaps that’ll need photo-shopping, and catenary lines fading into the distance, but the sky will be starring as itself 95% of the time.
2 – Agreed, and so as per the above explanation I won’t want or need solid backdrops and therefore no supporting walls either - the sides will be open on all four sides.
3 & 4– Agreed (except it’ll be out-of-doors), it really comes down to whether it’s suspended or supported, or a combination of both.
5 – The guy lines all seem to originate from either lamp posts, a couple of dedicated wooden poles (dedicated as they didn’t seem to also carry telephone lines), and at least two very tall multi-purpose box-section latticed steel towers which were unfortunately located way off the ends of my base. Apart from the debated enigmatic Sub-station “flagpole” connection, none of the area’s catenary was attached to any building.
6 – Understood except a 1.34 x 1.34 metre matrix packed between 2 boards is too big, it needs to be in two halves each no bigger than its respective half-base for where I need to store it.
So I think we’re agreeing the matrix in whatever form needs overhead suspension particularly in the middle zone, and also supported. The lampposts are way too fragile & bendy, strategically placed perspex columns would do the job better anyway. I’m really reluctant to make the matrix out of wire & EZ line/shirring thread, especially as it has to be in two halves and Glenn hit the nail on the head as to why!
And so in order to prove the perspex-panels alternative either a dud or viable, I moseyed over to my friendly local picture-framer just now and returned with three trial UV resistant acrylic off-cuts for the price of a handshake - two panels of the right dimensions would cost as much as two MiniArt trams. I peeled the protective paper off one sample piece to see how it might look…
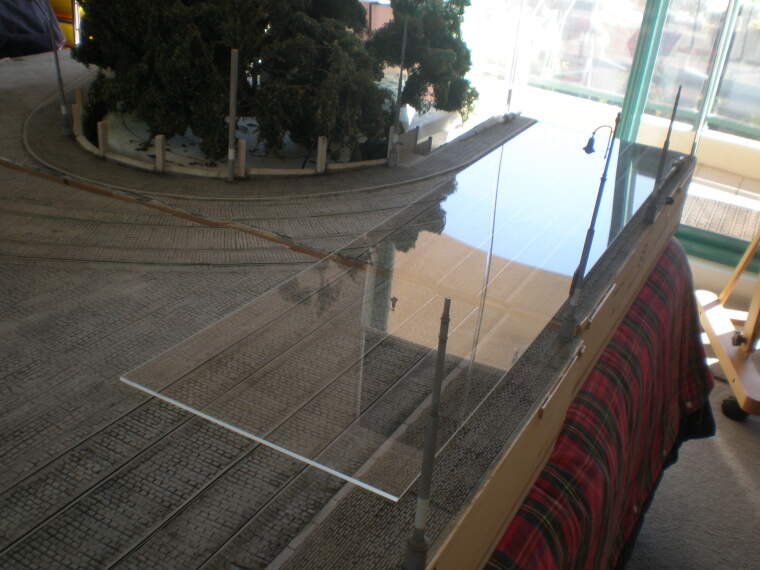

…imagine that’s positioned at top of lamp-post height (with the catenary drawn on it), shooting photos underneath it in the sunshine…would there be reflections all along the underside of it…? Watch this space…
Well Jerry just as long as we don’t end up with a camel solution! And you bet guys, if I knew how to create the entire matrix in virtual 3D it would be a cinch - spin it, flip it, tilt it, shrink it, expand it, fade it & just drop it in perspective into each photo. Way too easy 
Update - scrub any kind of acrylic/Perspex, not only are the reflections diabolical but the static electricity & general dust kill the idea stone dead. And a brief trawl of the interweb seems to confirm that nobody else has been dumb enough to attempt a tram diorama over such a large open space. So it looks like Robin’s prototype’s the best & only option so the soldering iron’s gonna run hot for some time.
Anyhow I was able to get my problem back in perspective by watching this, it’s only just over 10 minutes so if you’re also stuck in your project I hope it helps you too…

![]()
Maybe there are some points in the catenary system where it could have joints that can be separated or maybe built in smaller sections to cover individual photo angles?
Yep I’ve been looking at that but it’s fairly horrible…beginning to think about retracting another statement, the one about not making the entire thing in one piece. Also regretting I sold my Meccano set nearly 50 years ago… 
… sold the Meccano…
Heretic 
I have been thinking about the removable tops of the poles for the catenaries.
Maybe it would be easier to making the whole pole removable and have a larger tube solidly fixed to the “ground”. The pipe would not extend above “ground”.
Yeah but hey it was 1973, it was so I could pay for the pair of Led Zep concert tickets to take a hot girl – priorities! A box of redundant metal strips vs Miss OMG & live ultra-rock…hmm, tough choice. Mind you Bonham’s 30 (?) minute drum solo could have been a tad shorter…now that’s heresy! Strangely I still don’t need hearing aids… ![]()
Anyhow about the poles…magnetism…? Probably too tricksy but one of my steel rulers stuck to the roll of wire this morning, gave me half an idea… ![]()
![]()
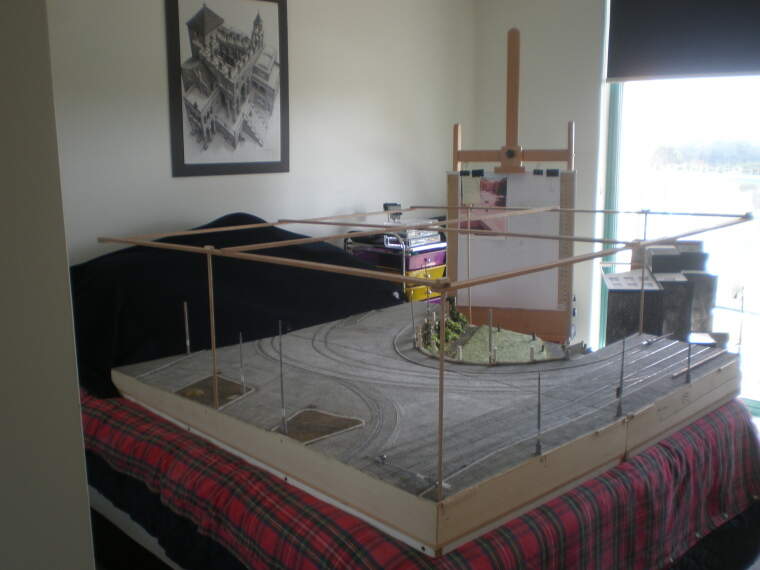
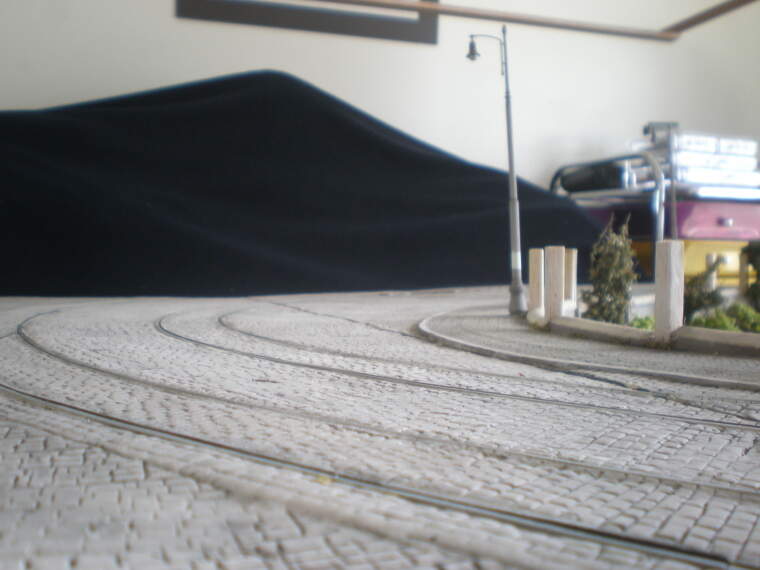
Walking-the-walk for what looks like the most difficult phase of this diorama so far, suspending the tram catenary. Take six 135 x 2.5 x 0.7 cms strips of wood & five short lengths of 8mm dowel…
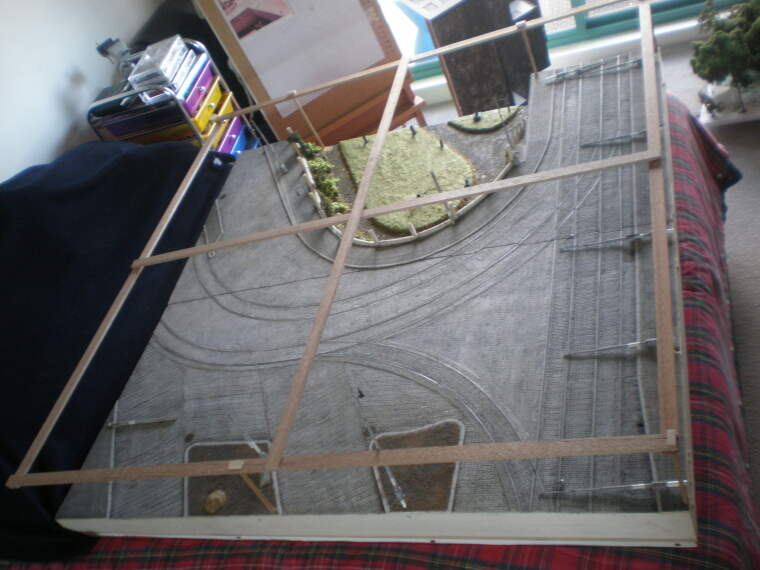
Three supports (bottom right corner, top right corner & opposite side of that street) are using existing lamp-post holes, I drilled a fourth in the garden path where the support will be hidden behind trees, and a fifth to the right of the sand-pit which will look like another lamp-post. The purpose of the latter two is to allow photos looking towards those lower corners to be free of supports. All five can pretend to be telegraph poles anyway, up to a certain height…
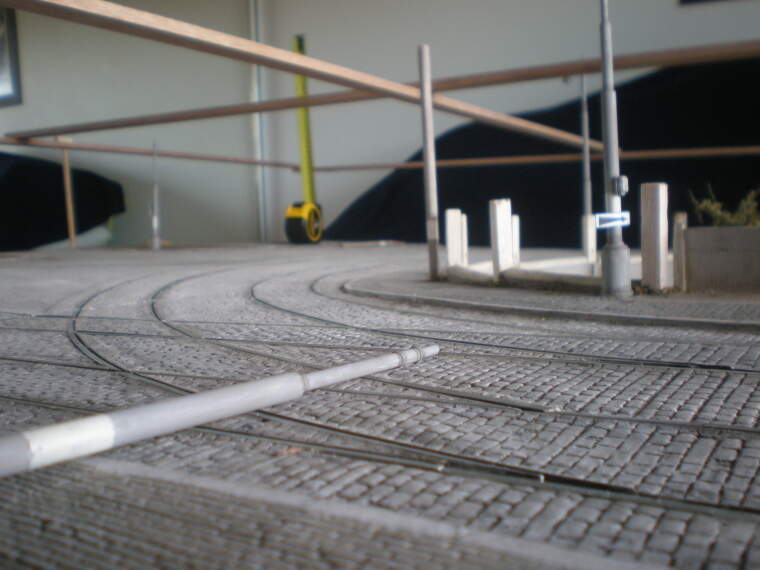
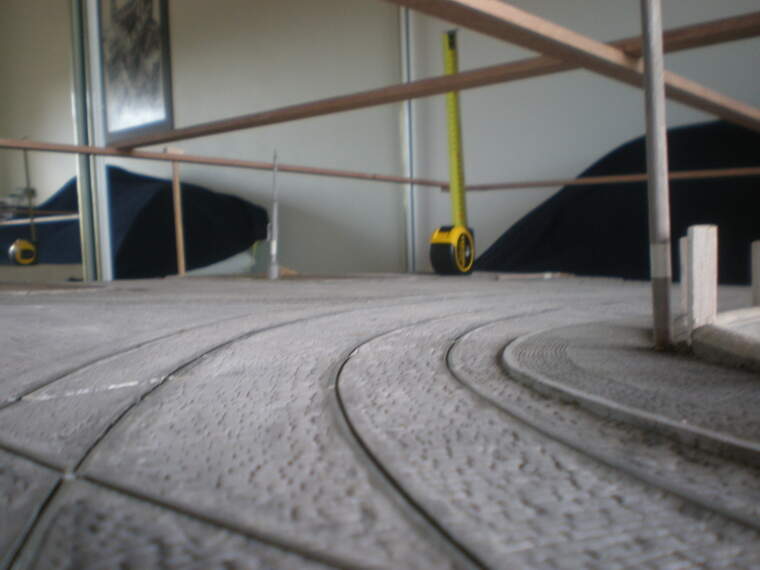
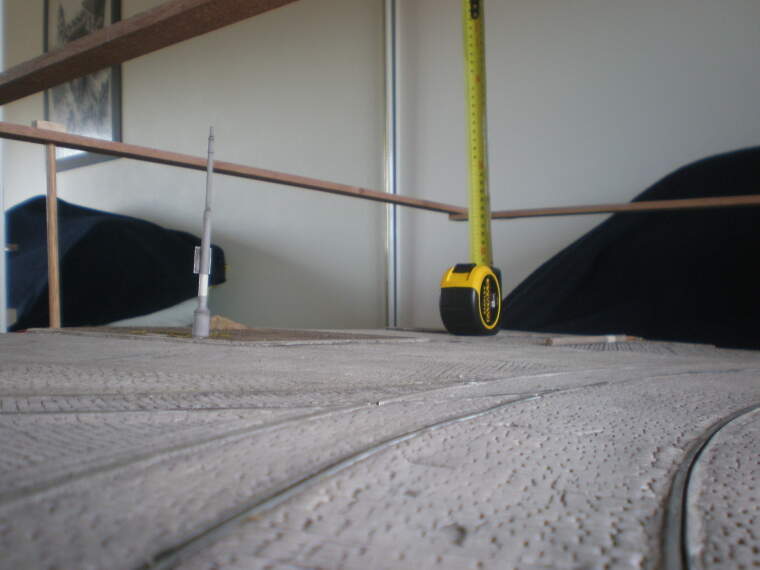
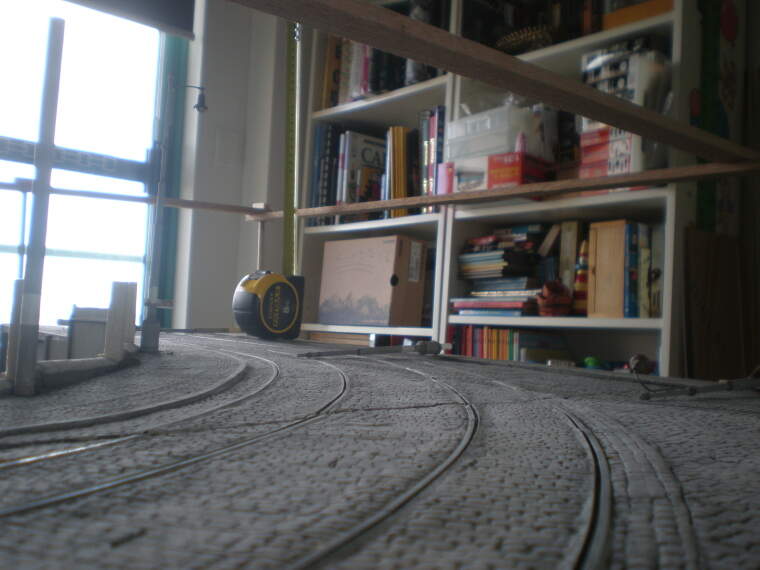
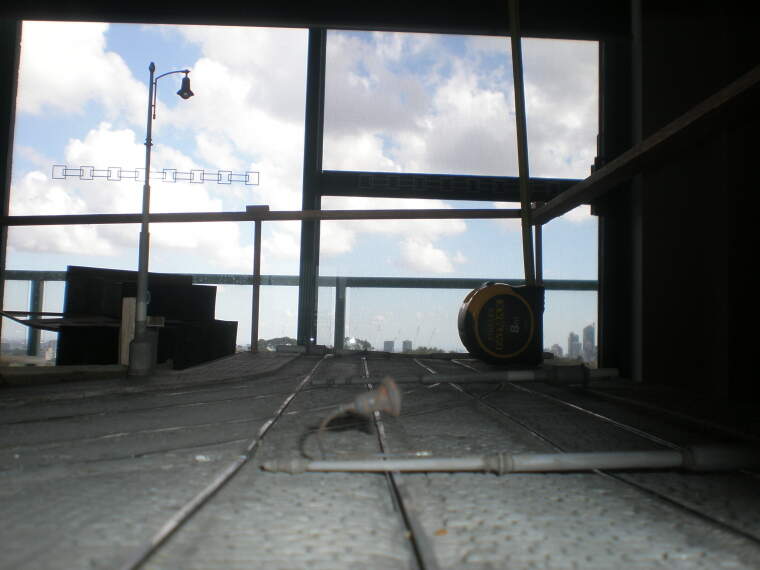
These trial supports were only 15cms high meaning the overhead frame was resting at the level the catenary will be at. I had several reasons for that trial, one was just to prove the frame would be way too visible to photoshop out of every photo at varying distances. So proved, and so the top of the yellow tape measure indicates a revised suspension-frame height of 40cms above street level to eliminate most (if not all) of the frame from most photos. Up she goes…
In these views I’ve deliberately included the first bit of frame that intrudes into shot, to see what’s possible…
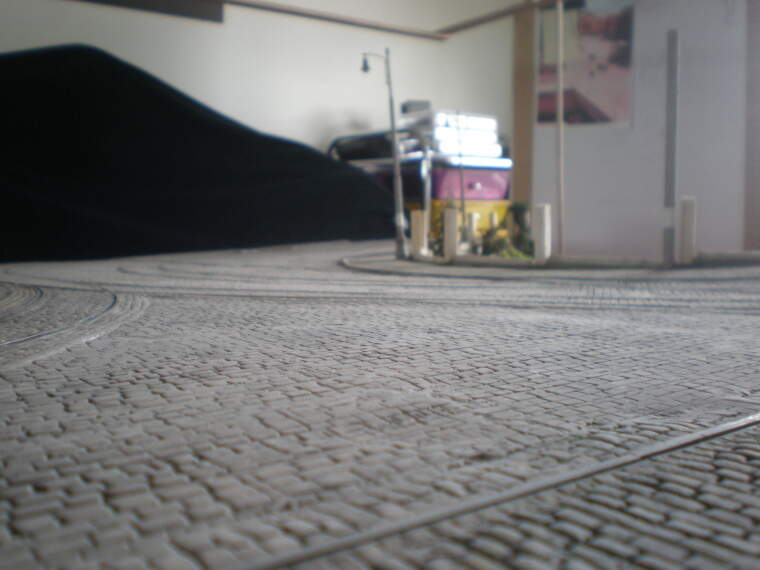


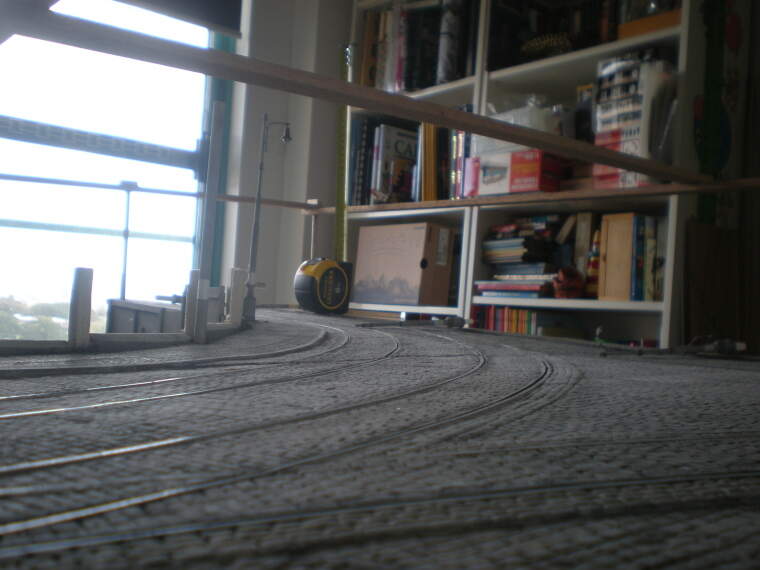
Very handy in that top/north-west corner I only need one of those two dowel supports at the edge of the base & the original lamp-post can remain on the opposite side of the street, depending which angle the photo’s from…
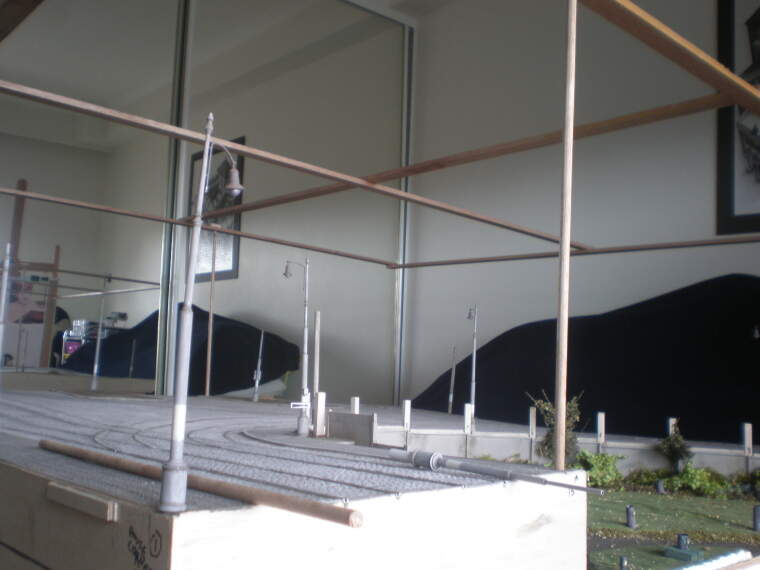
(ouch that lamp-post needs urgent maintenance, duh I remember knocking it now) If it wasn’t already obvious I am making this up as I go, although I guess if it doesn’t work out I can always blame Robin  Still not yet resolved exactly how the cables & guys will be attached, and to what. Trial & error, it’s the fragility that bothers me now that it must be one big suspension frame…and it still all has to be removable when not in use, that’s a guest bed underneath
Hi Tim, have you seen or heard of Nano Silk? Fly tying thread that is made up of many nano strands. Very strong even as individual fibers.

Hey Phil great to hear from you – if memory serves you were the very first to post a comment when I first joined Armorama 5 years ago, seems like yesterday. Thank you then & thank you now! That Nano Silk looks like a very strong candidate for what I’ll call the vertical-hopefully-invisible suspending cables i.e. connecting the overhead frame to the cable matrix. I may as well spill my current ho ho thinking, it’s fluid…positively runny…here’s what I want to try for the interlacing guy lines connecting the power lines to nearby poles & posts…

It’s got just the right amount of stretchiness, and in early trials doesn’t seem to sag…well, after a week so far. I ought to also try covering them in white glue or other to see if they stay rigid. I assume it’s a (very) cheap alternative to EZ line. I think the power lines themselves have to be strong wire, but my main concern is the wire grade can’t be too thick, so it’s not going to be very stiff. I’m thinking about wire coat-hanger grade, dropping down at intervals from the overhead frame & soldered to the powerlines. Those verticals will certainly show up in photos so will have to be photoshopped out.
All hopes of using stiff vertical Perspex/acrylic panels to provide rigidity have been binned, reflections everywhere 
I am beginning to think you are a genius,
J
- Go higher, 2 feet minimum. Going higher lets you use thicker/stronger material
- Supporting sticks/poles shall not be attached permanently to the support frame. Make them removable and the support frame will essentially be flat
- That fly fishing line is plenty strong, breaks at 1.14 kg (or 2.5 pounds for the metrically impaired). You can fit a lot of cheese wire in 2.5 pounds, just make the frame strong enough …
- Make the power lines from cheese wire / piano wire / music wire. Same type but thinner for the horizontal support wires. If you try to stretch soft wire straight you will have to pull harder than your frame can handle → straight wires need to be made from straight metal wire. The only use for soft wires is vertical lines which get pulled straight by gravity (the fishing line down from the frame in the sky and possibly the feed lines which supply power to the catenary)
“Metrically impaired”. 'Love it - that’s me.
Gotta admit metrics does have it’s advantages , I’d rather tell my girlfriend I’m 15.24 centimeters than six inches …
Ha! Add Superior Memory Management Specialist to the Jack of Trades list! I can’t even remember what year it was five years ago. The “Plastic in action” aspects of your photos take the static diorama to an “explosive” new place with carefully timed shutter release + detonation control. “Brave and Crazy” is almost always fun to watch from an armchair. Between your show and JRutman’s most righteous current gig, I cancelled cable TV. Thanks for making the effort to let us watch.
The NanoSilk strands can be separated and used for lots of things (I’m thinking about how Jerry does windy hairdos on his mini peeps, for example) and it comes in many colors
Cheers, Phil