Well, I think you are taking the right approach and cutting the losses and finishing the build. It’s been an incredibly detailed run, Tim, so no harm, no foul, changing the final results, imho. 50 figs is an incredible feat to have on one set stage, and we all can see the intense work involved all along the way.
Hi Tim, glad to see you up and running - or, up and denting up a nice model! I’ll echo the others, regarding your 3d process - too bad, but still, just that you came up with the idea and followed through!
As for your soon to be sagging rear end - do you dare add some heat to the rear leaf springs (assuming this is sitting on leaf springs and not another type of suspension ) to allow you to compress the car to the desired height? If you add the heat to both sides you might be able to get the ride height to equalize across all four tires ie getting the “modified” rear end to match the stock front end?
I wonder, if I were trying this, I don’t usually/ever apply heat to plastic, maybe you could use some needle nosed pliers to bend the leaf springs? Or, cut off the front leaf spring hanger on each side and replace them with thin wire, which might allow you to bend the wire to set the ride height where you want it?
Thank you all for your kind words, yep I’ve sure got enough material for a treatise on project psychology – “Perfectionism, Masochism & Sanity – the Eternal Triangle”
Nick – phew for a moment I thought you were serious, holding the car over two lit candles… actually I did consider a hot hair-drier but as I mentioned the car’s so fragile I didn’t have the cojones to even try that. I was thinking of posting on the Deteriorating thread, seems to me both Tamiya Extra Thin and cyano lose their grip after a few years. I already tried the needle-pliers ploy, while the front left might bend to my Will the rest of the car felt like it would fall apart…as the front fender already has. So I backed out, which is why I think I’ll stick to the not-ideal solution I posted before.
It’s strange that given the obvious downward sag on the right rear – compare my previous photo of my car sitting level with the Investigation photo – the following Investigation view of the other side doesn’t seem to show any upward body derangement on the front left…
Agreed Matt, hopefully my imperfect fix won’t show.
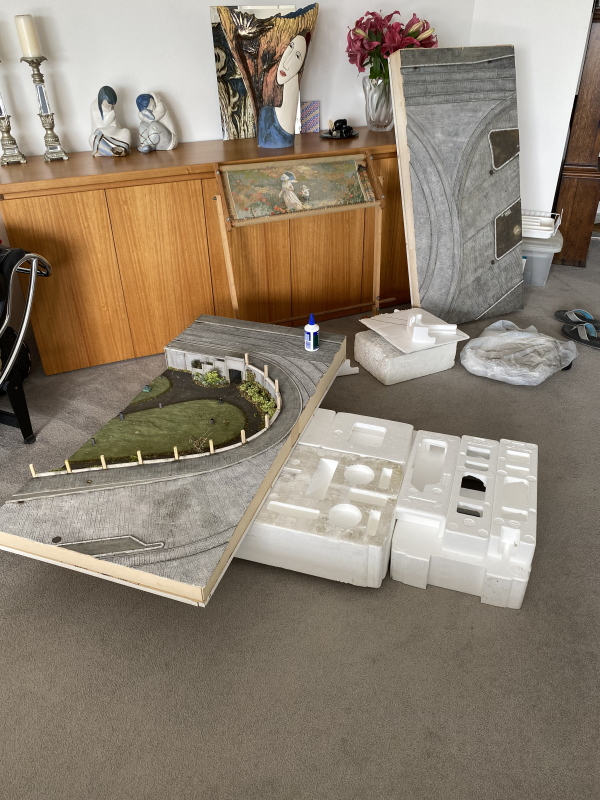
Meanwhile, (cue rusty turning-wheels sound effect) – the dio bases being levelled/reassembled 3+ years later…
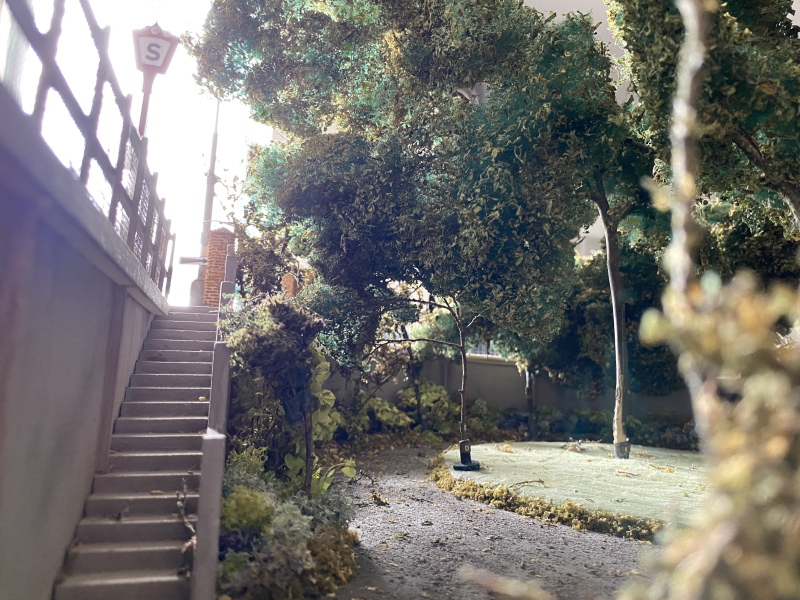
The sunken garden with all railings/fencing installed, just a spontaneous indoor snap during reassembly today but oops a large bush seems to have grown up at the foot of the steps…
Thanks Glenn & Erwin - Weather Report no good for fresh-air photos today so instead I did some gardening & swept those steps - turned my back and look what happened. Anyone would think this was a diorama.
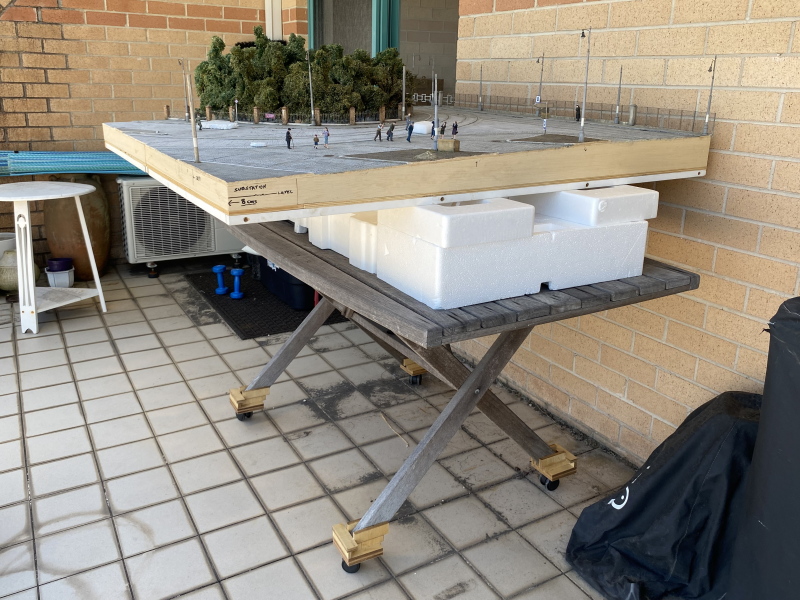
Big Day – final photography, complicated logisitcs. So the previous day’s forecast for this day was sunny 25°C & calm…but by mid-morning wtf it was already 30°C in the sun with increasingly gusty on-shore breezes when I was nearly set up…
Thanks guys, the final photos score: 123 taken, 70 deleted & another 30+ probably won’t make the cut. A fairly intense 3 hour session, the trailer’s roof blew off at one point but survived intact, not many dead.
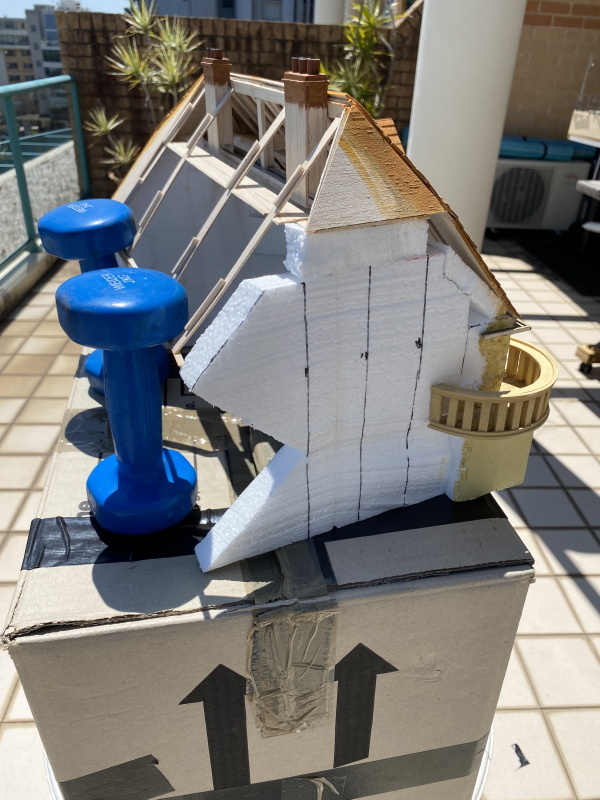
I destroyed the big sub-station (once I’d copied the photos to hard-drive) because it served no further purpose & pointless to store it. I was going to do the same with the yellow house but to my surprise SWMBO intervened – who knows, maybe she can make it into a hat to go to the races…
All but 3 of the trees are now cactus, so to speak. That leaves the bases (incl. railings, fences, lamp posts & signs) which I can store…they might be cut up into smaller dio bases in the future. The trams & cars will likely end up in a very long narrow display box, and the figures…no idea, but they don’t take up much space.
1,562 photos published so far in this project over 5 years & Erwin you want more? Oh yeah that was the whole point, I remember now. I’m not going to look at them for a week to get some critical distance. Regulars may remember way back a long agonisation about the catenary – it proved impossible/impractical to actually install it, so I’ll break a rule & try photoshopping it all in. Still time-consuming but the only viable solution, I don’t think the final photos will look so good without it
Hi Tim, anxiously awaiting the debut! Seems a good idea to sit on the images for a while to let them stew a bit, then assemble those that you think best tell the story.
I seem to share your sentiment, or lack (of sentiment) thereof about projects when they’re done - they’re done - time to store, dismantle whatever and move on -
The photoshop catenary idea seems good if not tedious. I don’t know how to use photoshop, but know many who do and the results can be great - looking forward to seeing whatever you do!
Thanks Nick, yeah I’m actually a sentimental-tragic but when it comes to my own work I can be utterly ruthless. But if someone else had made it I wouldn’t dare touch it.
Well I say “Photoshop” but I’m actually clueless about that too, I’m still living in the early 1990’s MS Paint program – which, provided the photo images are giant-sized pixel-wise, can still produce acceptable/semi-invisible enhancements.