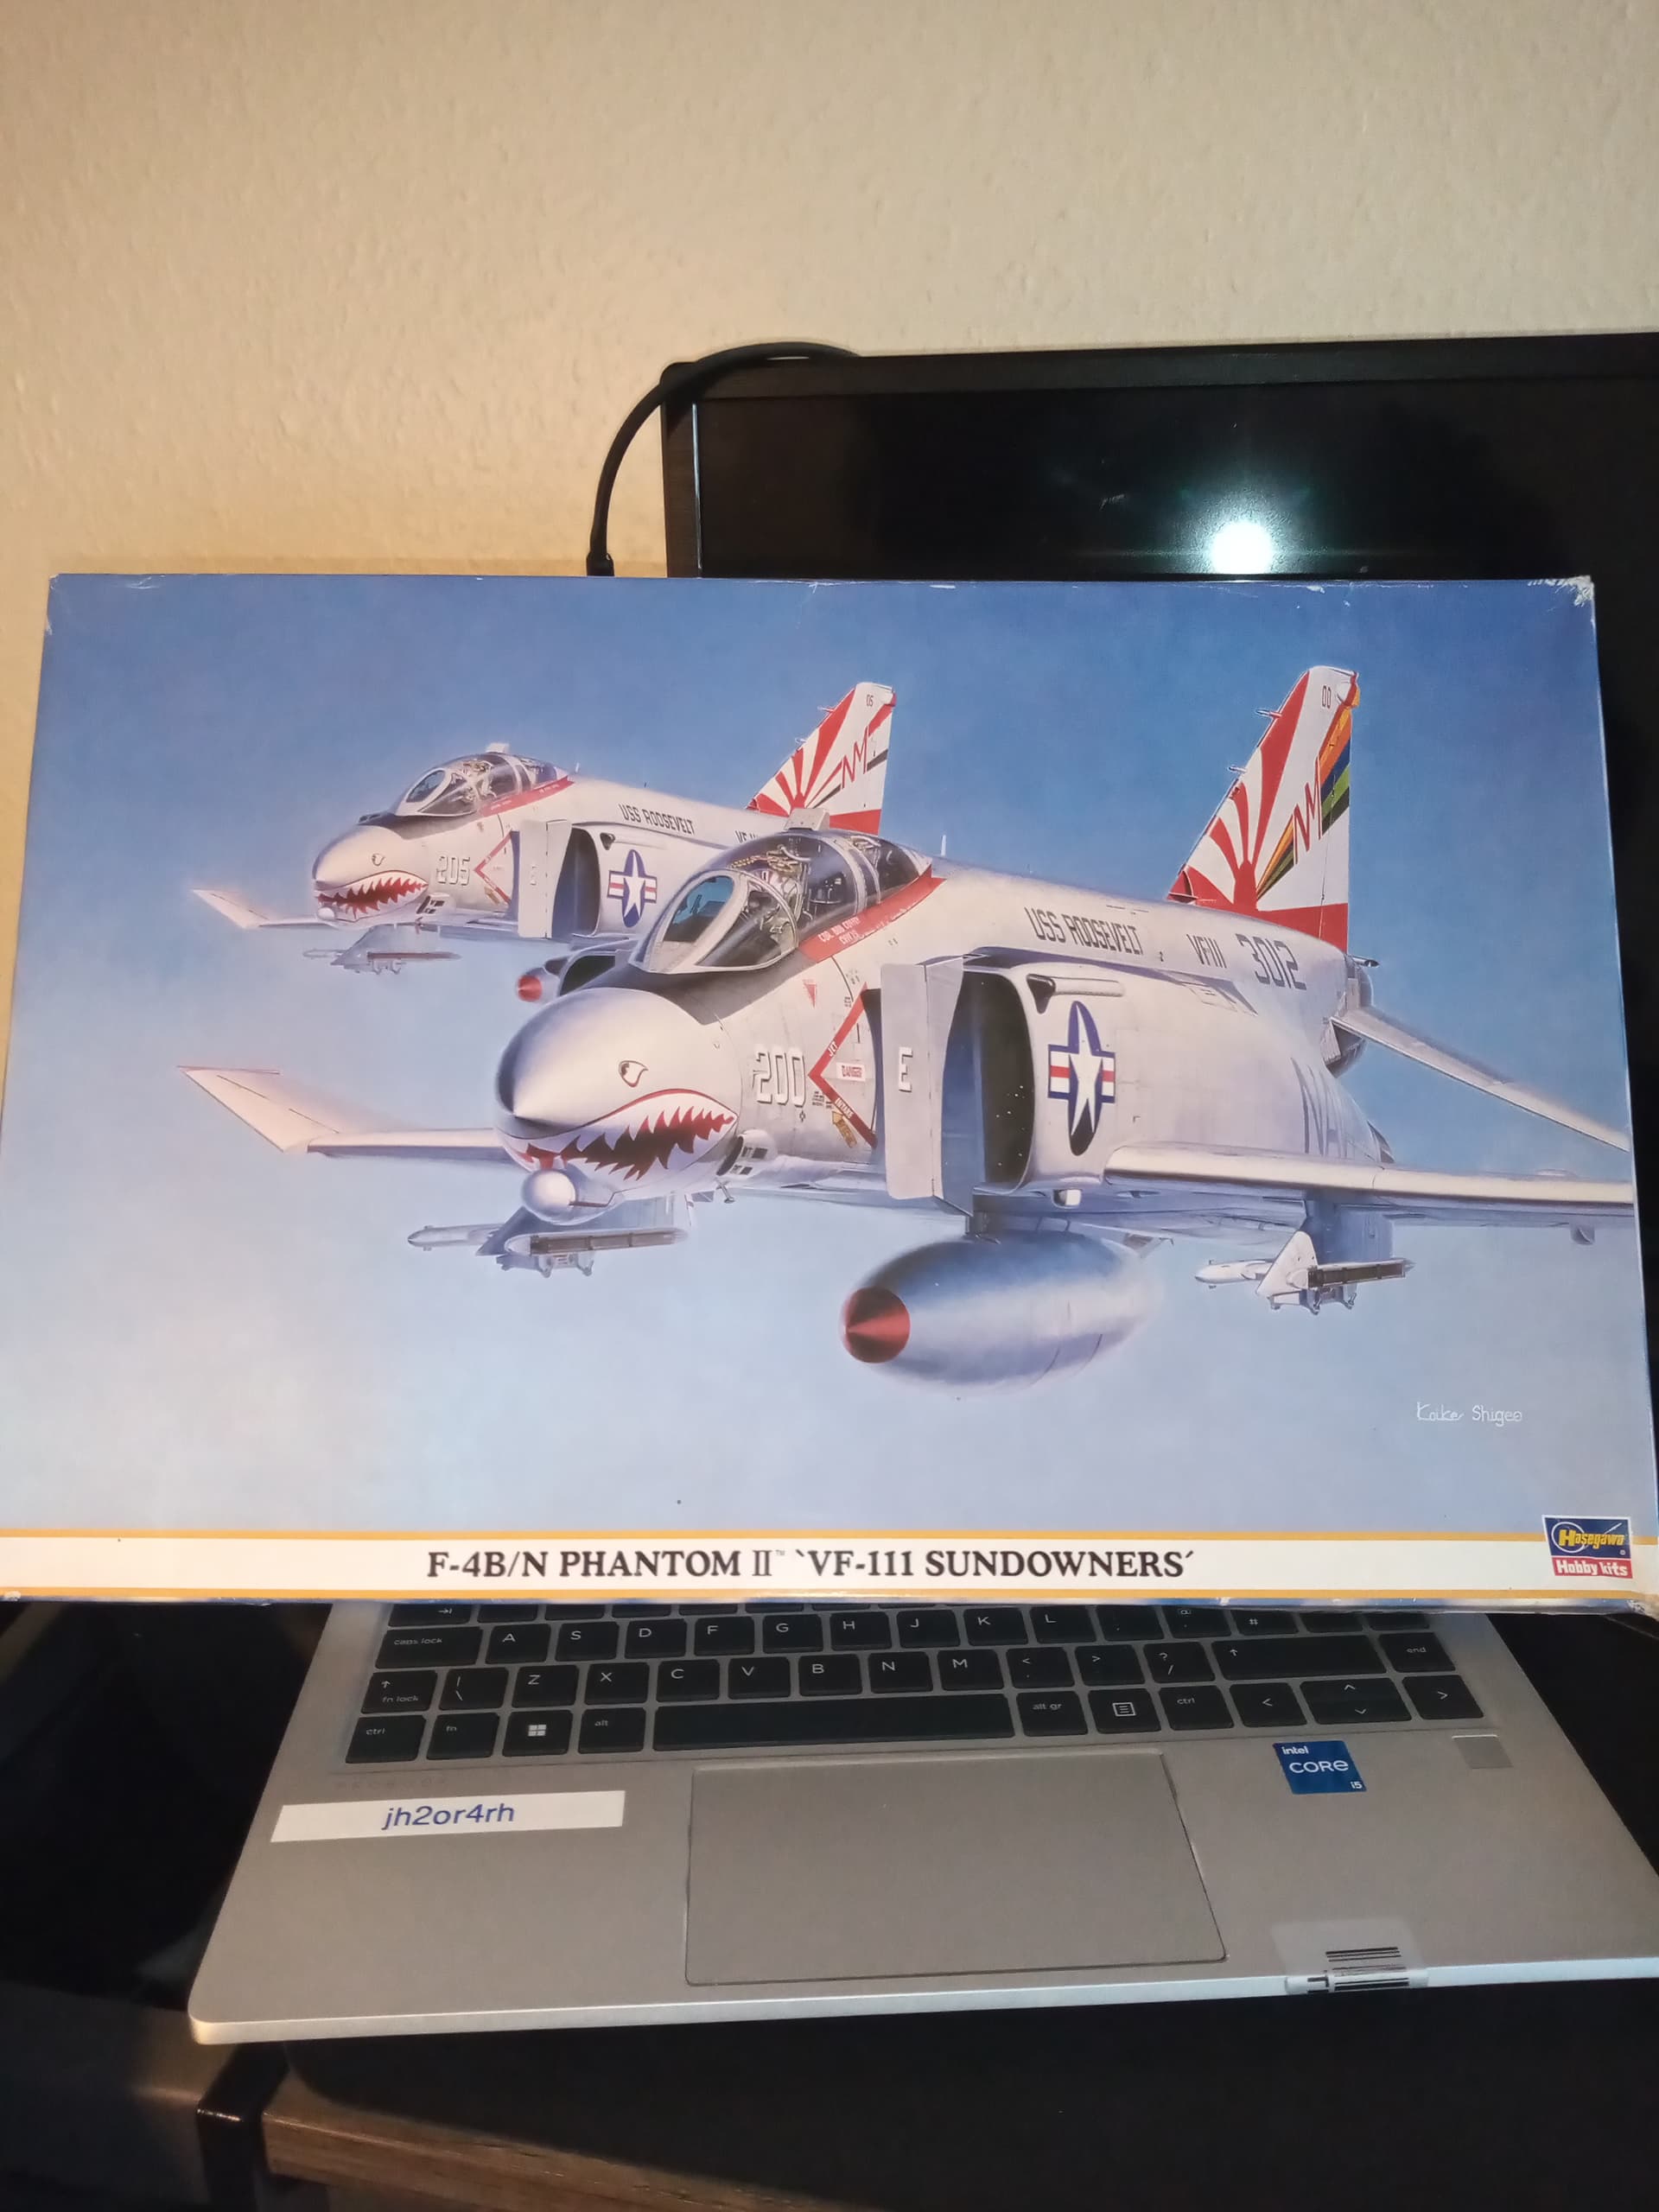
My build, the Hobby 2000 rebox of the Hasegawa F-4C.

I’ll be using an aftermarket set of decals to build it as Olds Operation Bolo aircraft. Have an Italeri kit ready for paint for quite a while I already intend to do as Scat XXVII.
My build, the Hobby 2000 rebox of the Hasegawa F-4C.
I’ll be using an aftermarket set of decals to build it as Olds Operation Bolo aircraft. Have an Italeri kit ready for paint for quite a while I already intend to do as Scat XXVII.
Phantom arrived …
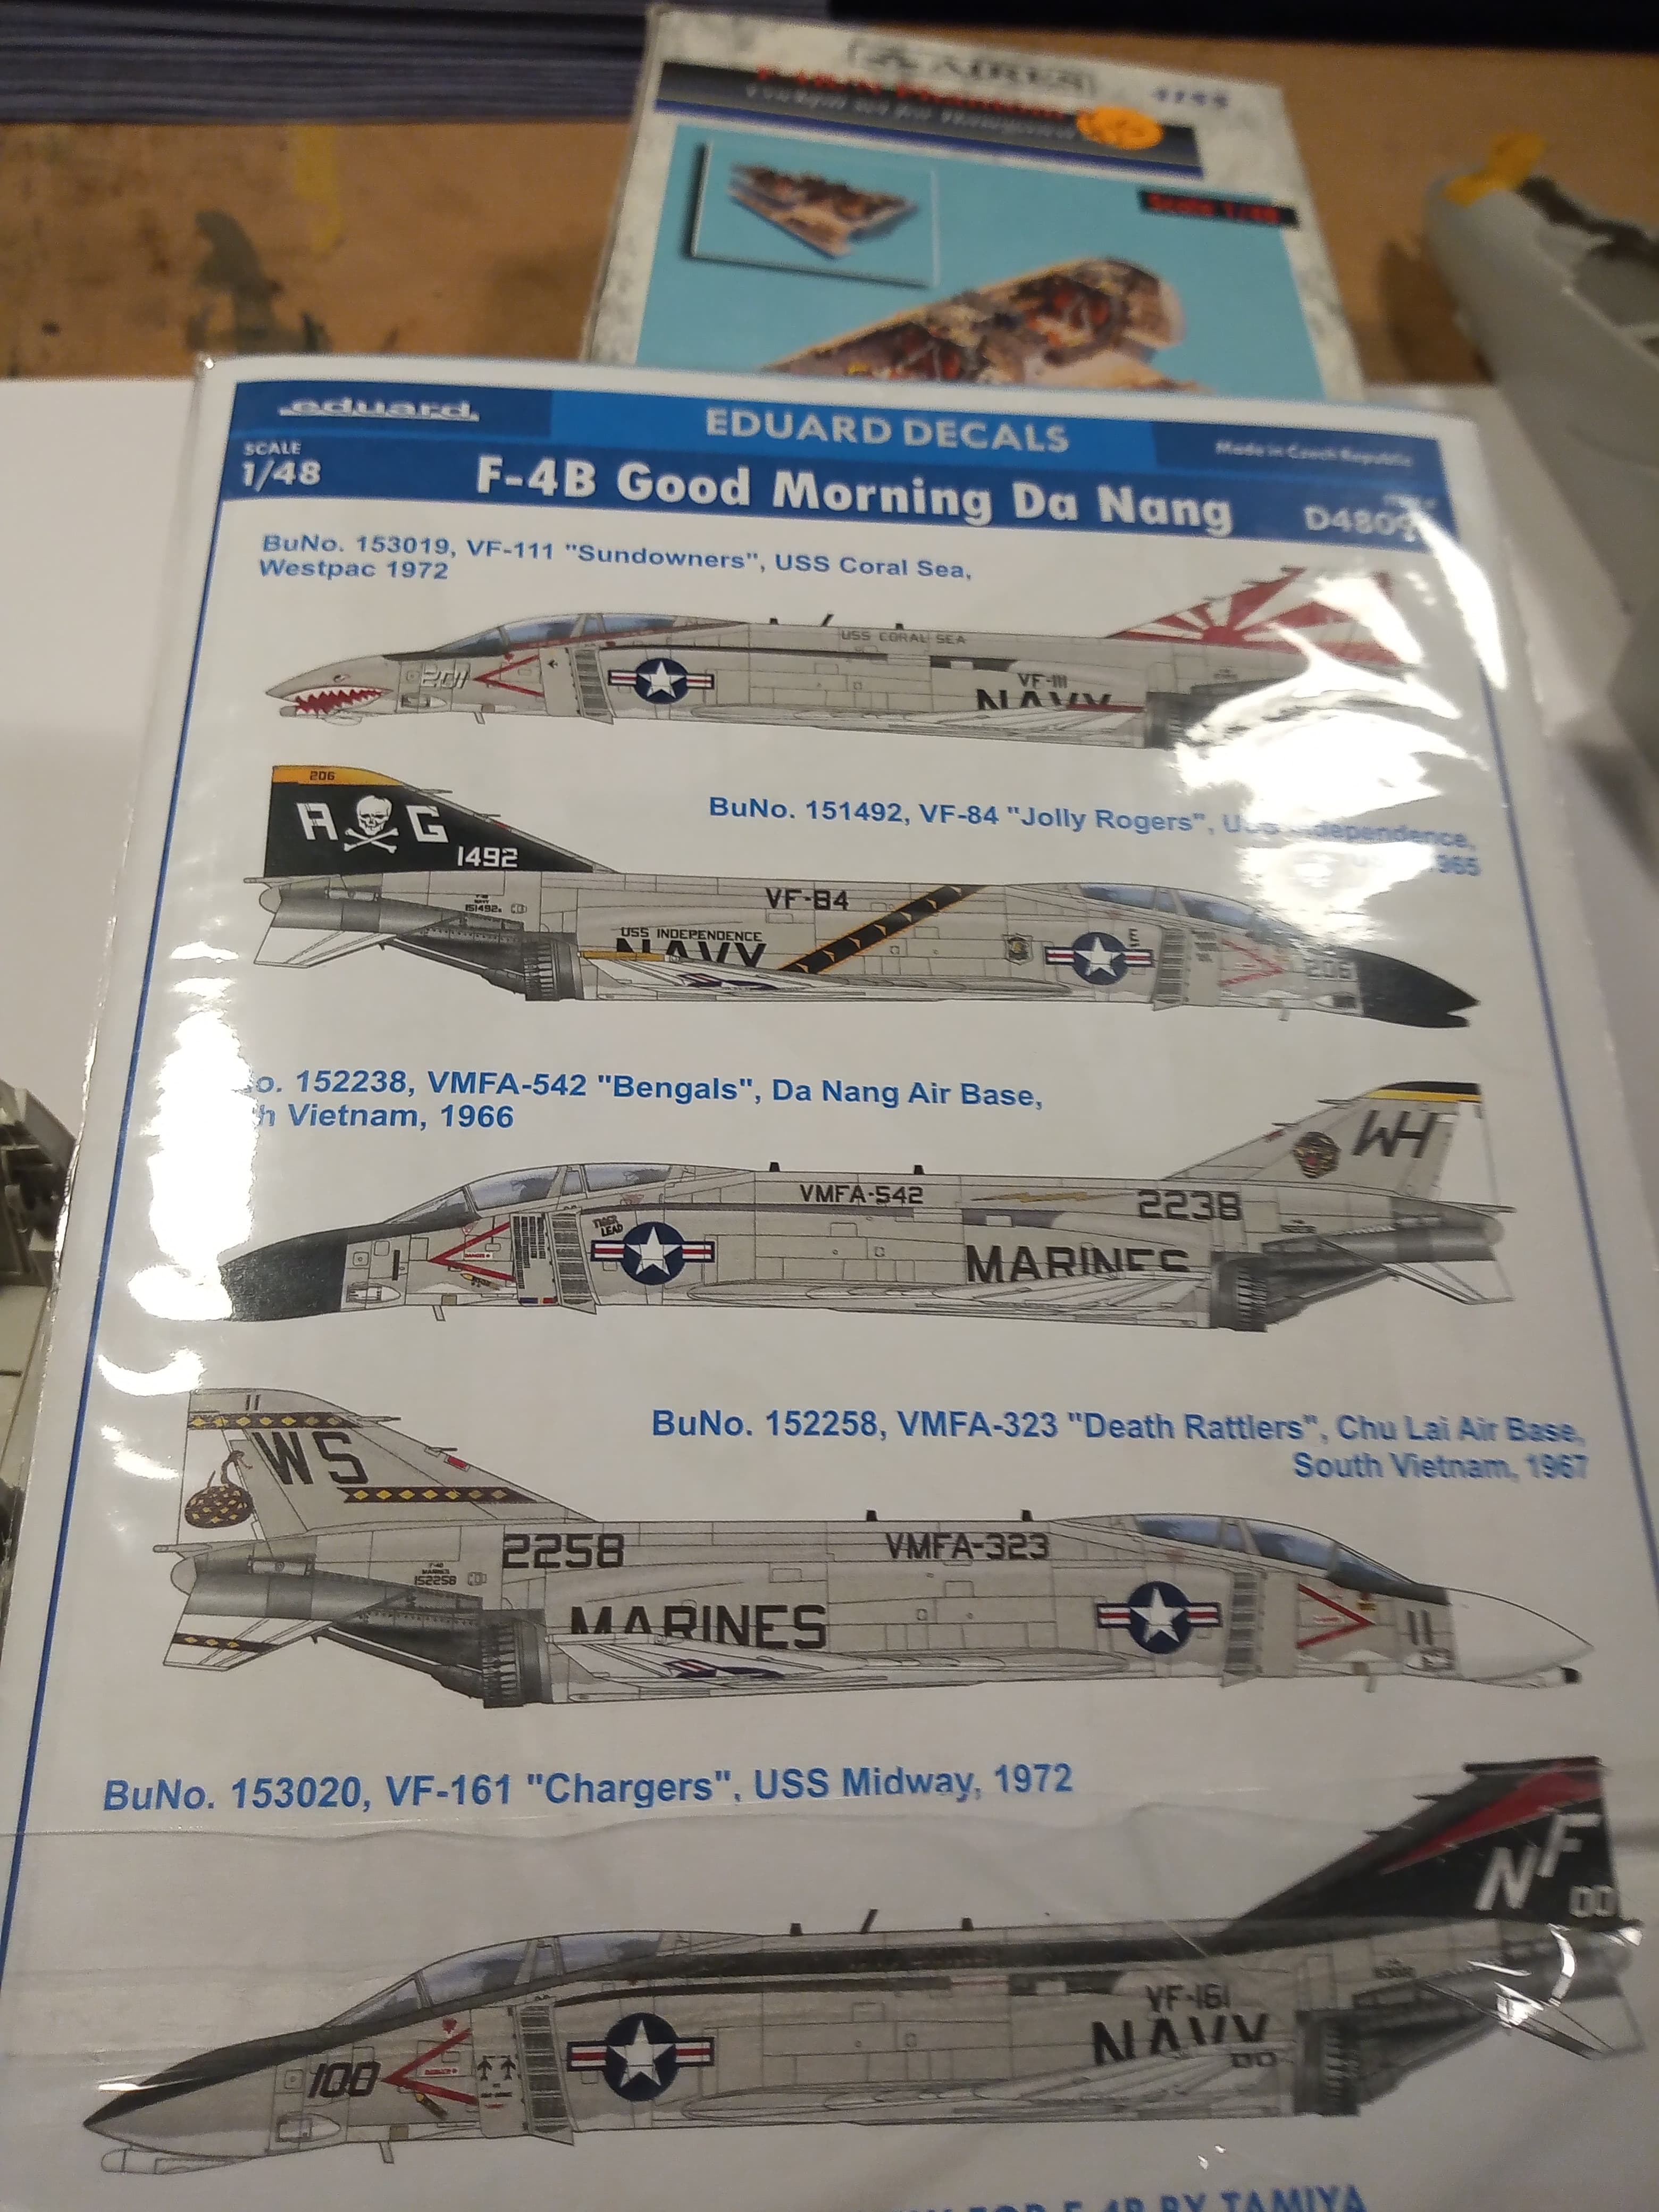
Sadly no other decals, so will need a Jolly Rogers VF 84 decal set
OMG.
Discovered 5 Phantom Kits in my stash ![]()
Gerrit, are we going to see an out of the box build from you??!!
That would truly be something new ![]()
![]()
VF84 decals ordered … Jolly Rogers are en route …
Johnny, Those are some of the coolest looking markings for Phantoms and Tomcats!
Looking forward to follow your build!
Game on …
Going to get some reference images for the cockpit and get started on that …
Also still need to order some replacement AK RC paints for this one…
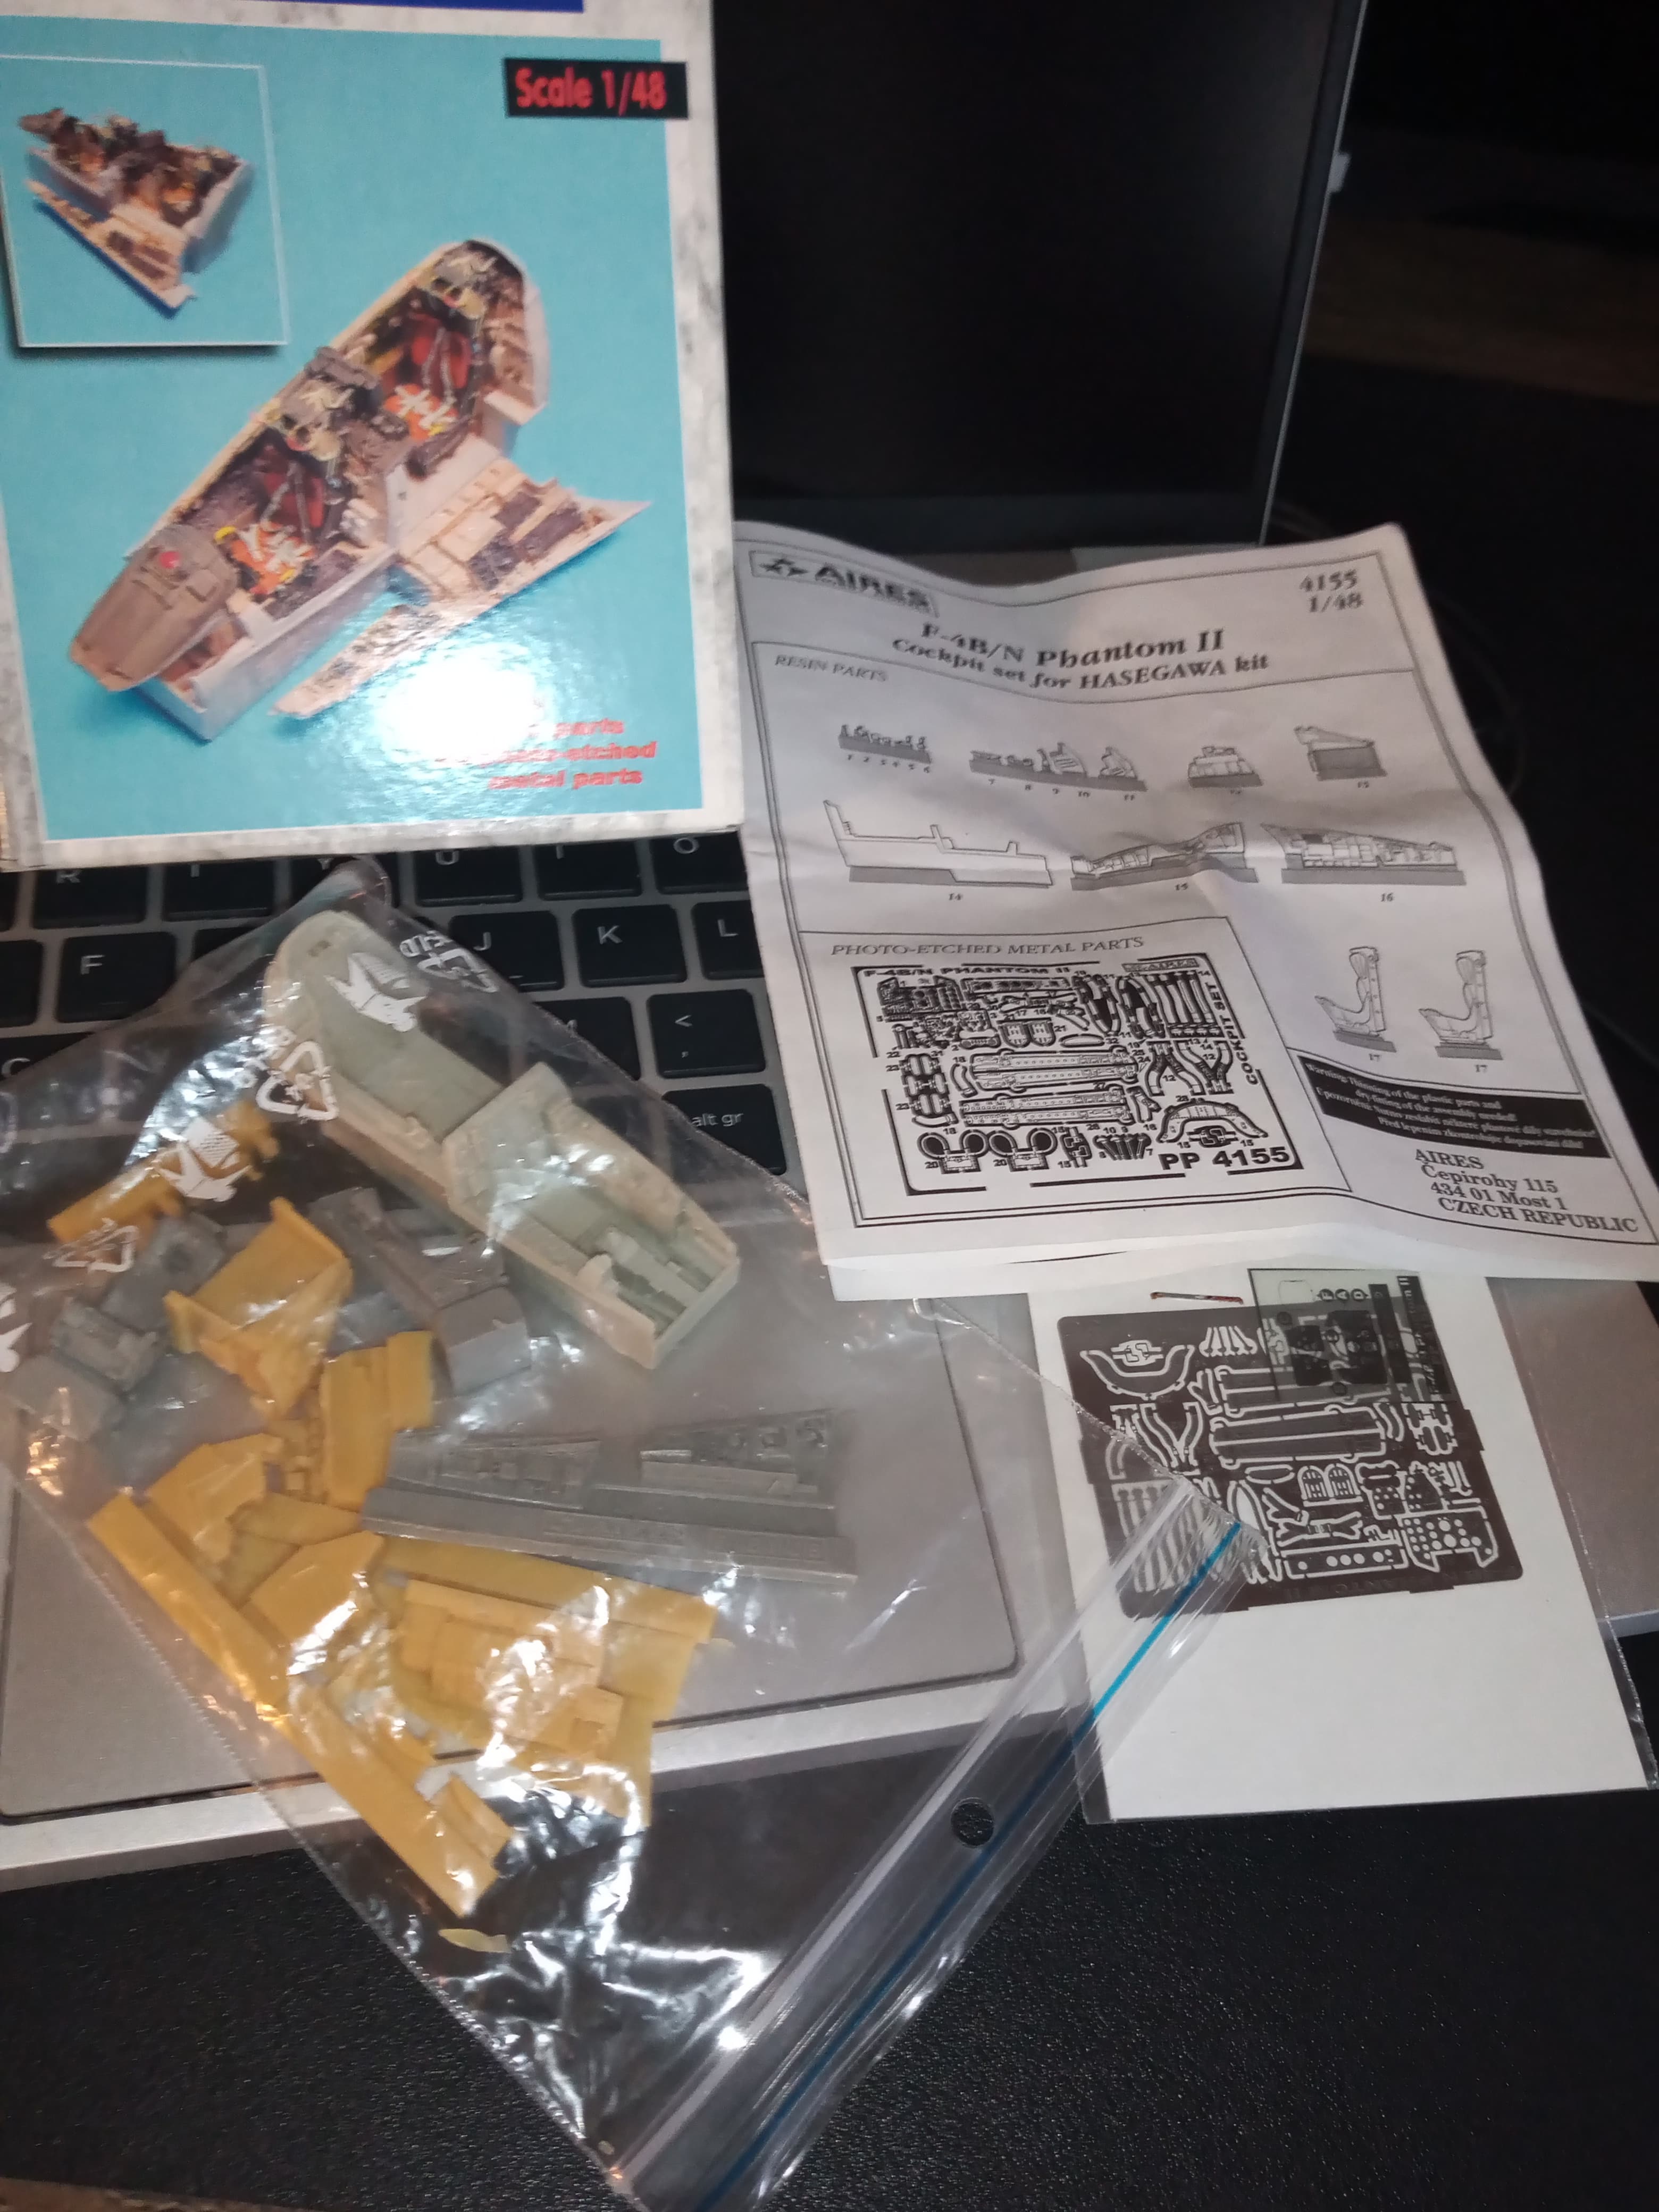
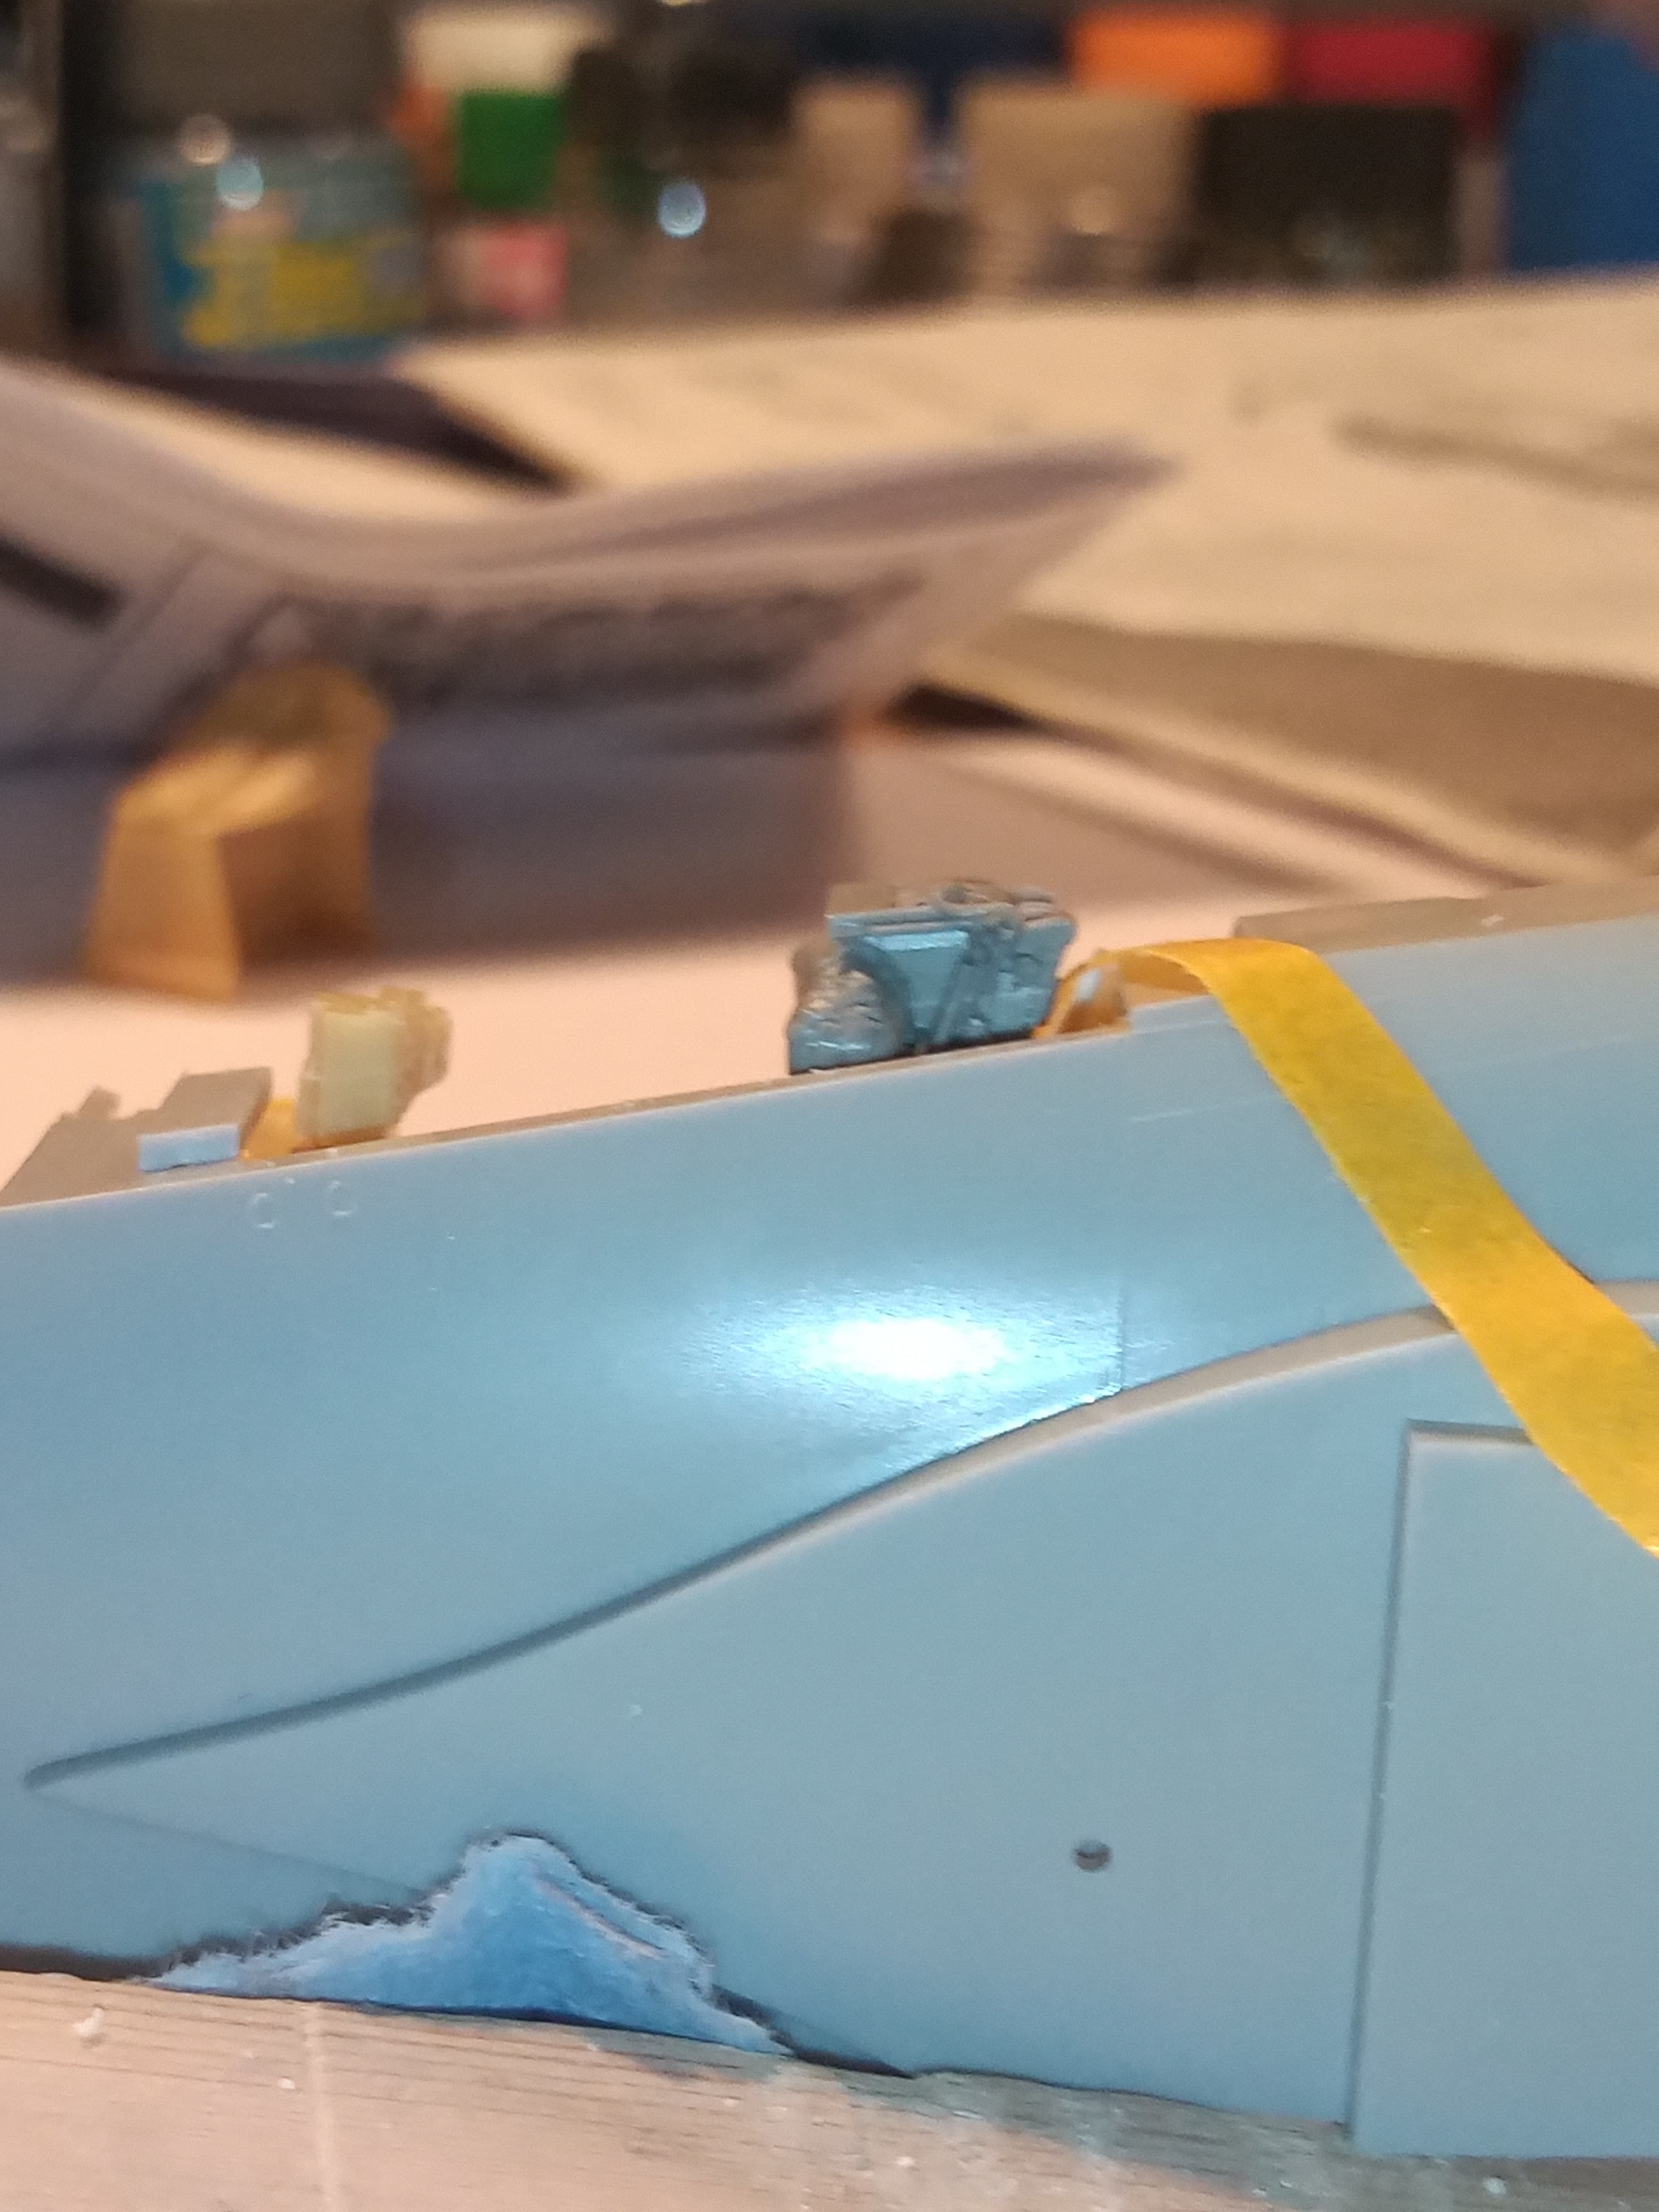
Initial look in the box was ok. The kit itself looks pretty simplistic… Not a big parts count which I’m not worried about really … Just means I can get to the painting a bit quicker … And the AIRES cockpit set will lift it up a bit and it was nice to find there is no seam on the canopy parts so that’s a plus …
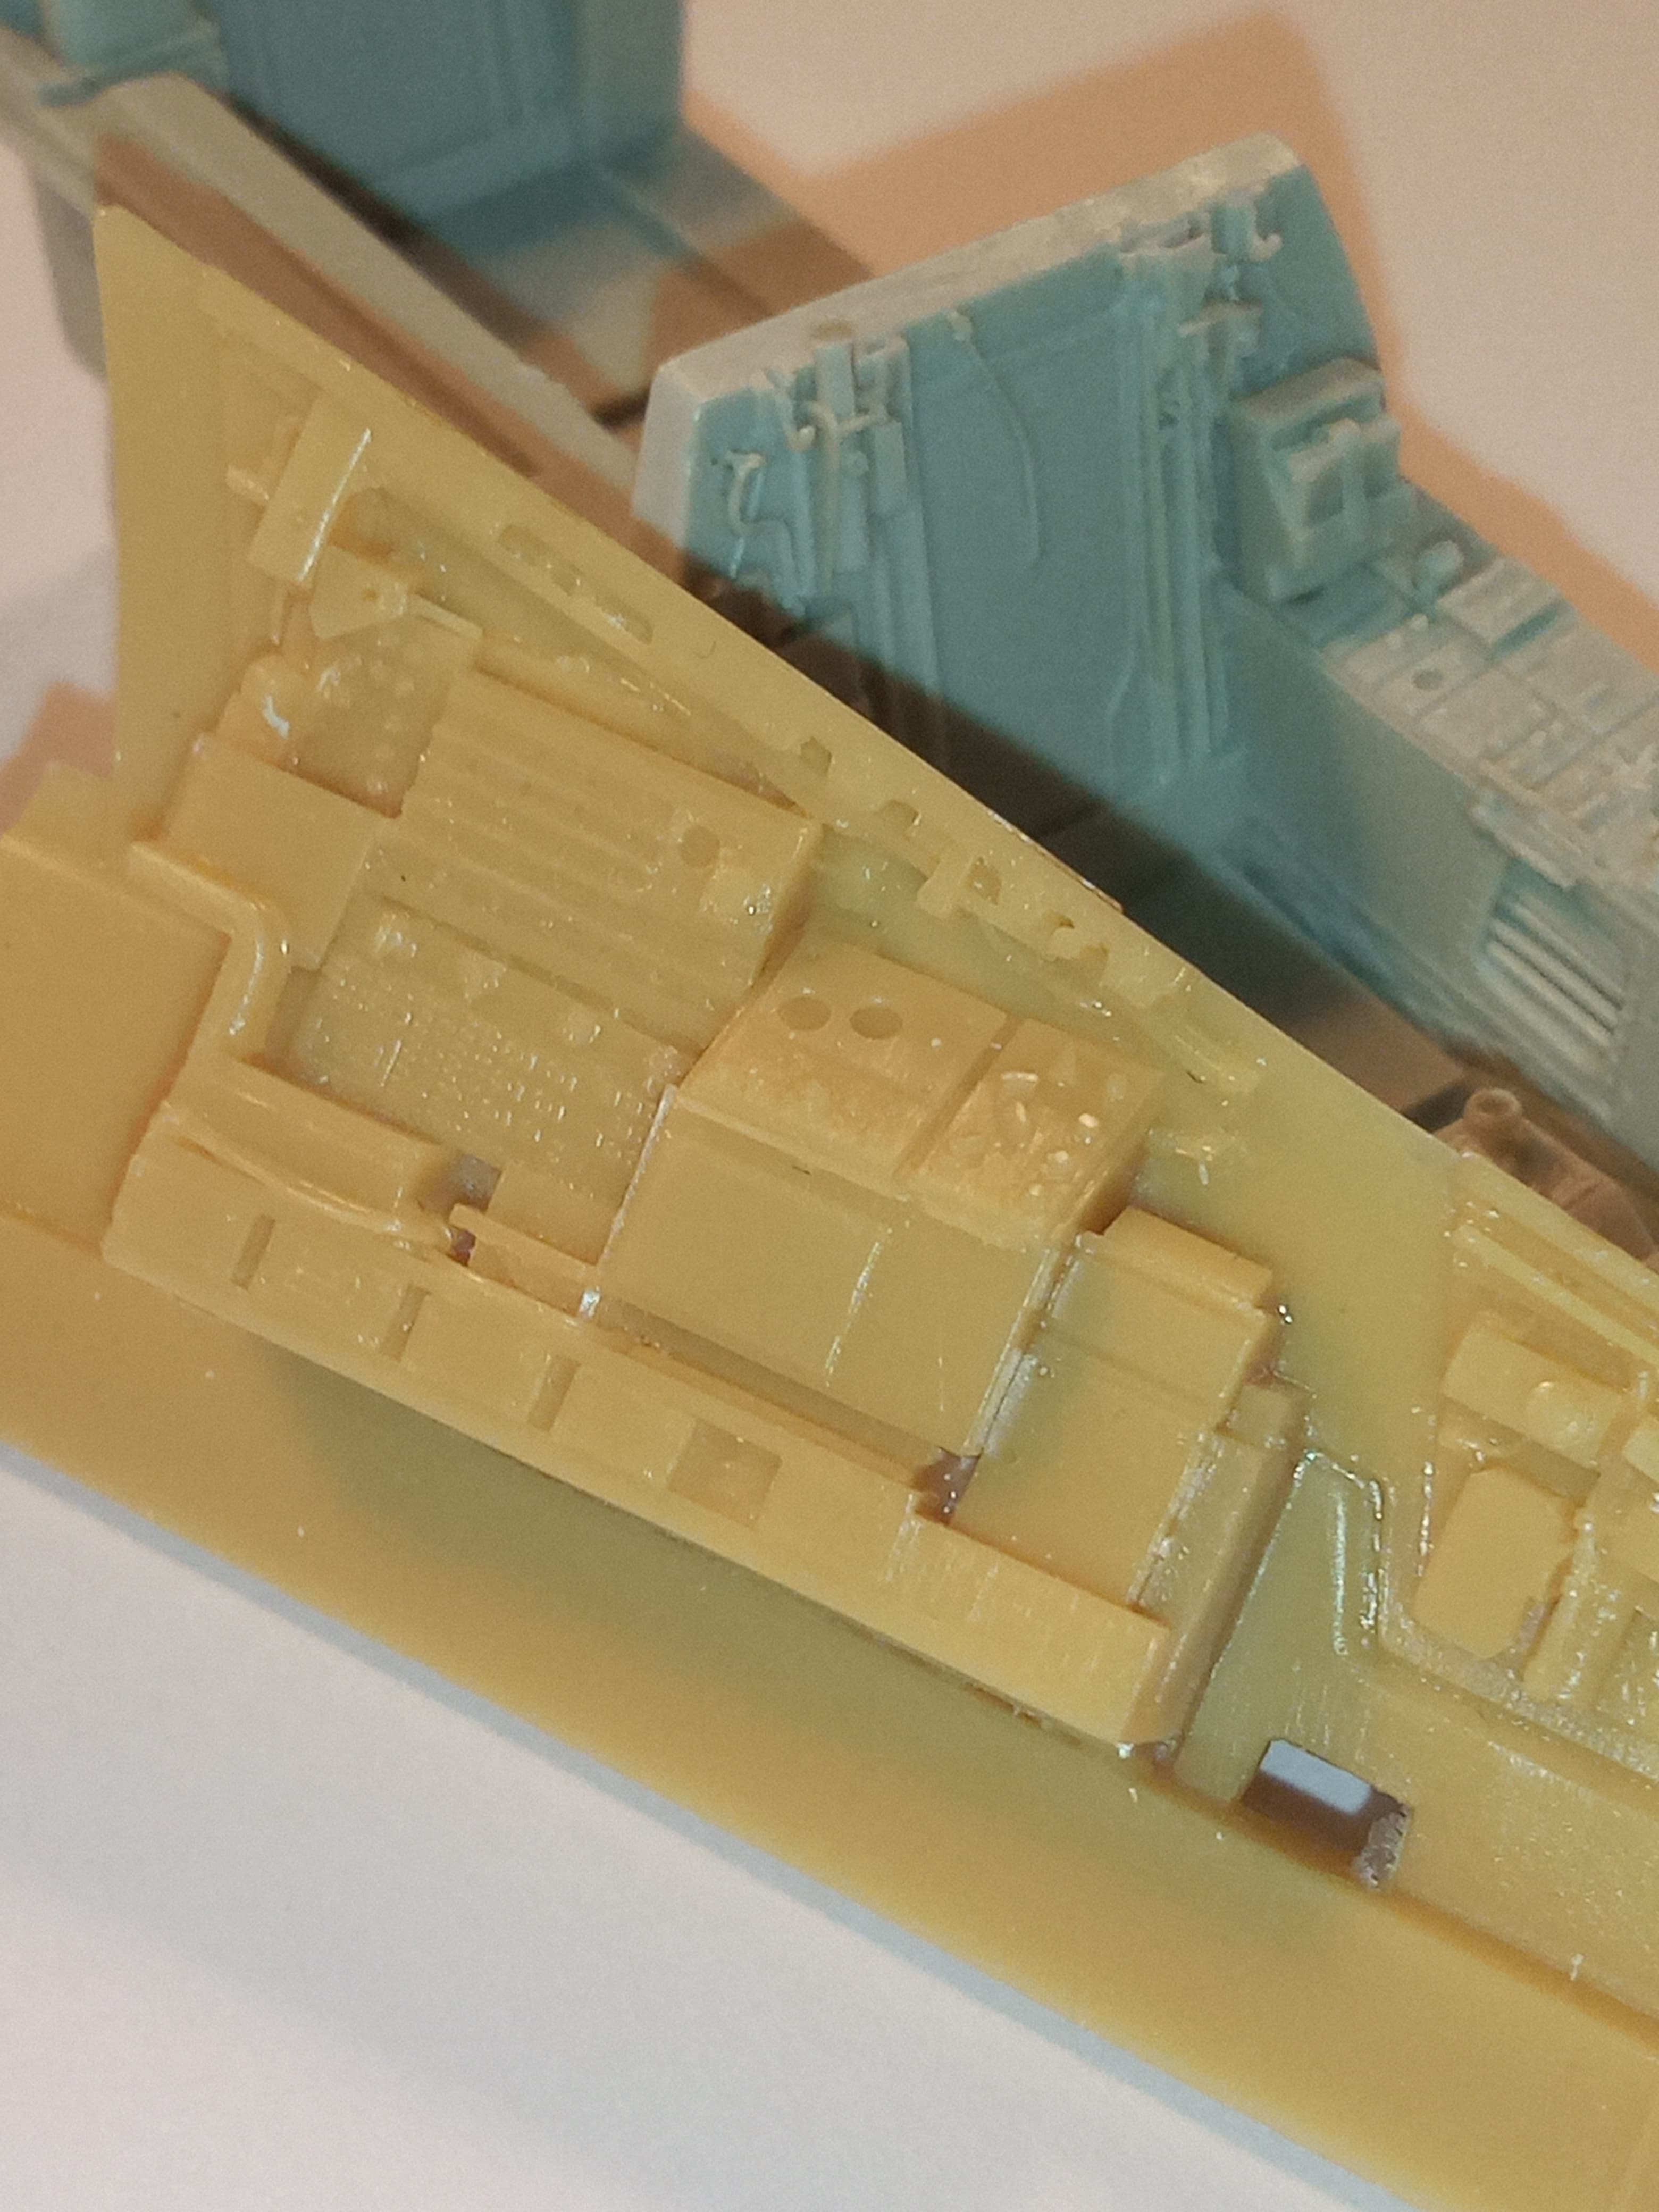
Had a quick look into the Aires cockpit v the kit offering…
The Aires set is nice, but wow … It’s going to take a lot of carving up the fuselage on the kit to get it to fit, more than I thought …
This maybe a case of mix and match…using certain Aires parts with the kit parts and getting the best out of both worlds …
More research required…
First dilemma… Aires v Kit cockpit …
Aires will require a lot of cutting and once the fuselage is cut … There’s no going back.
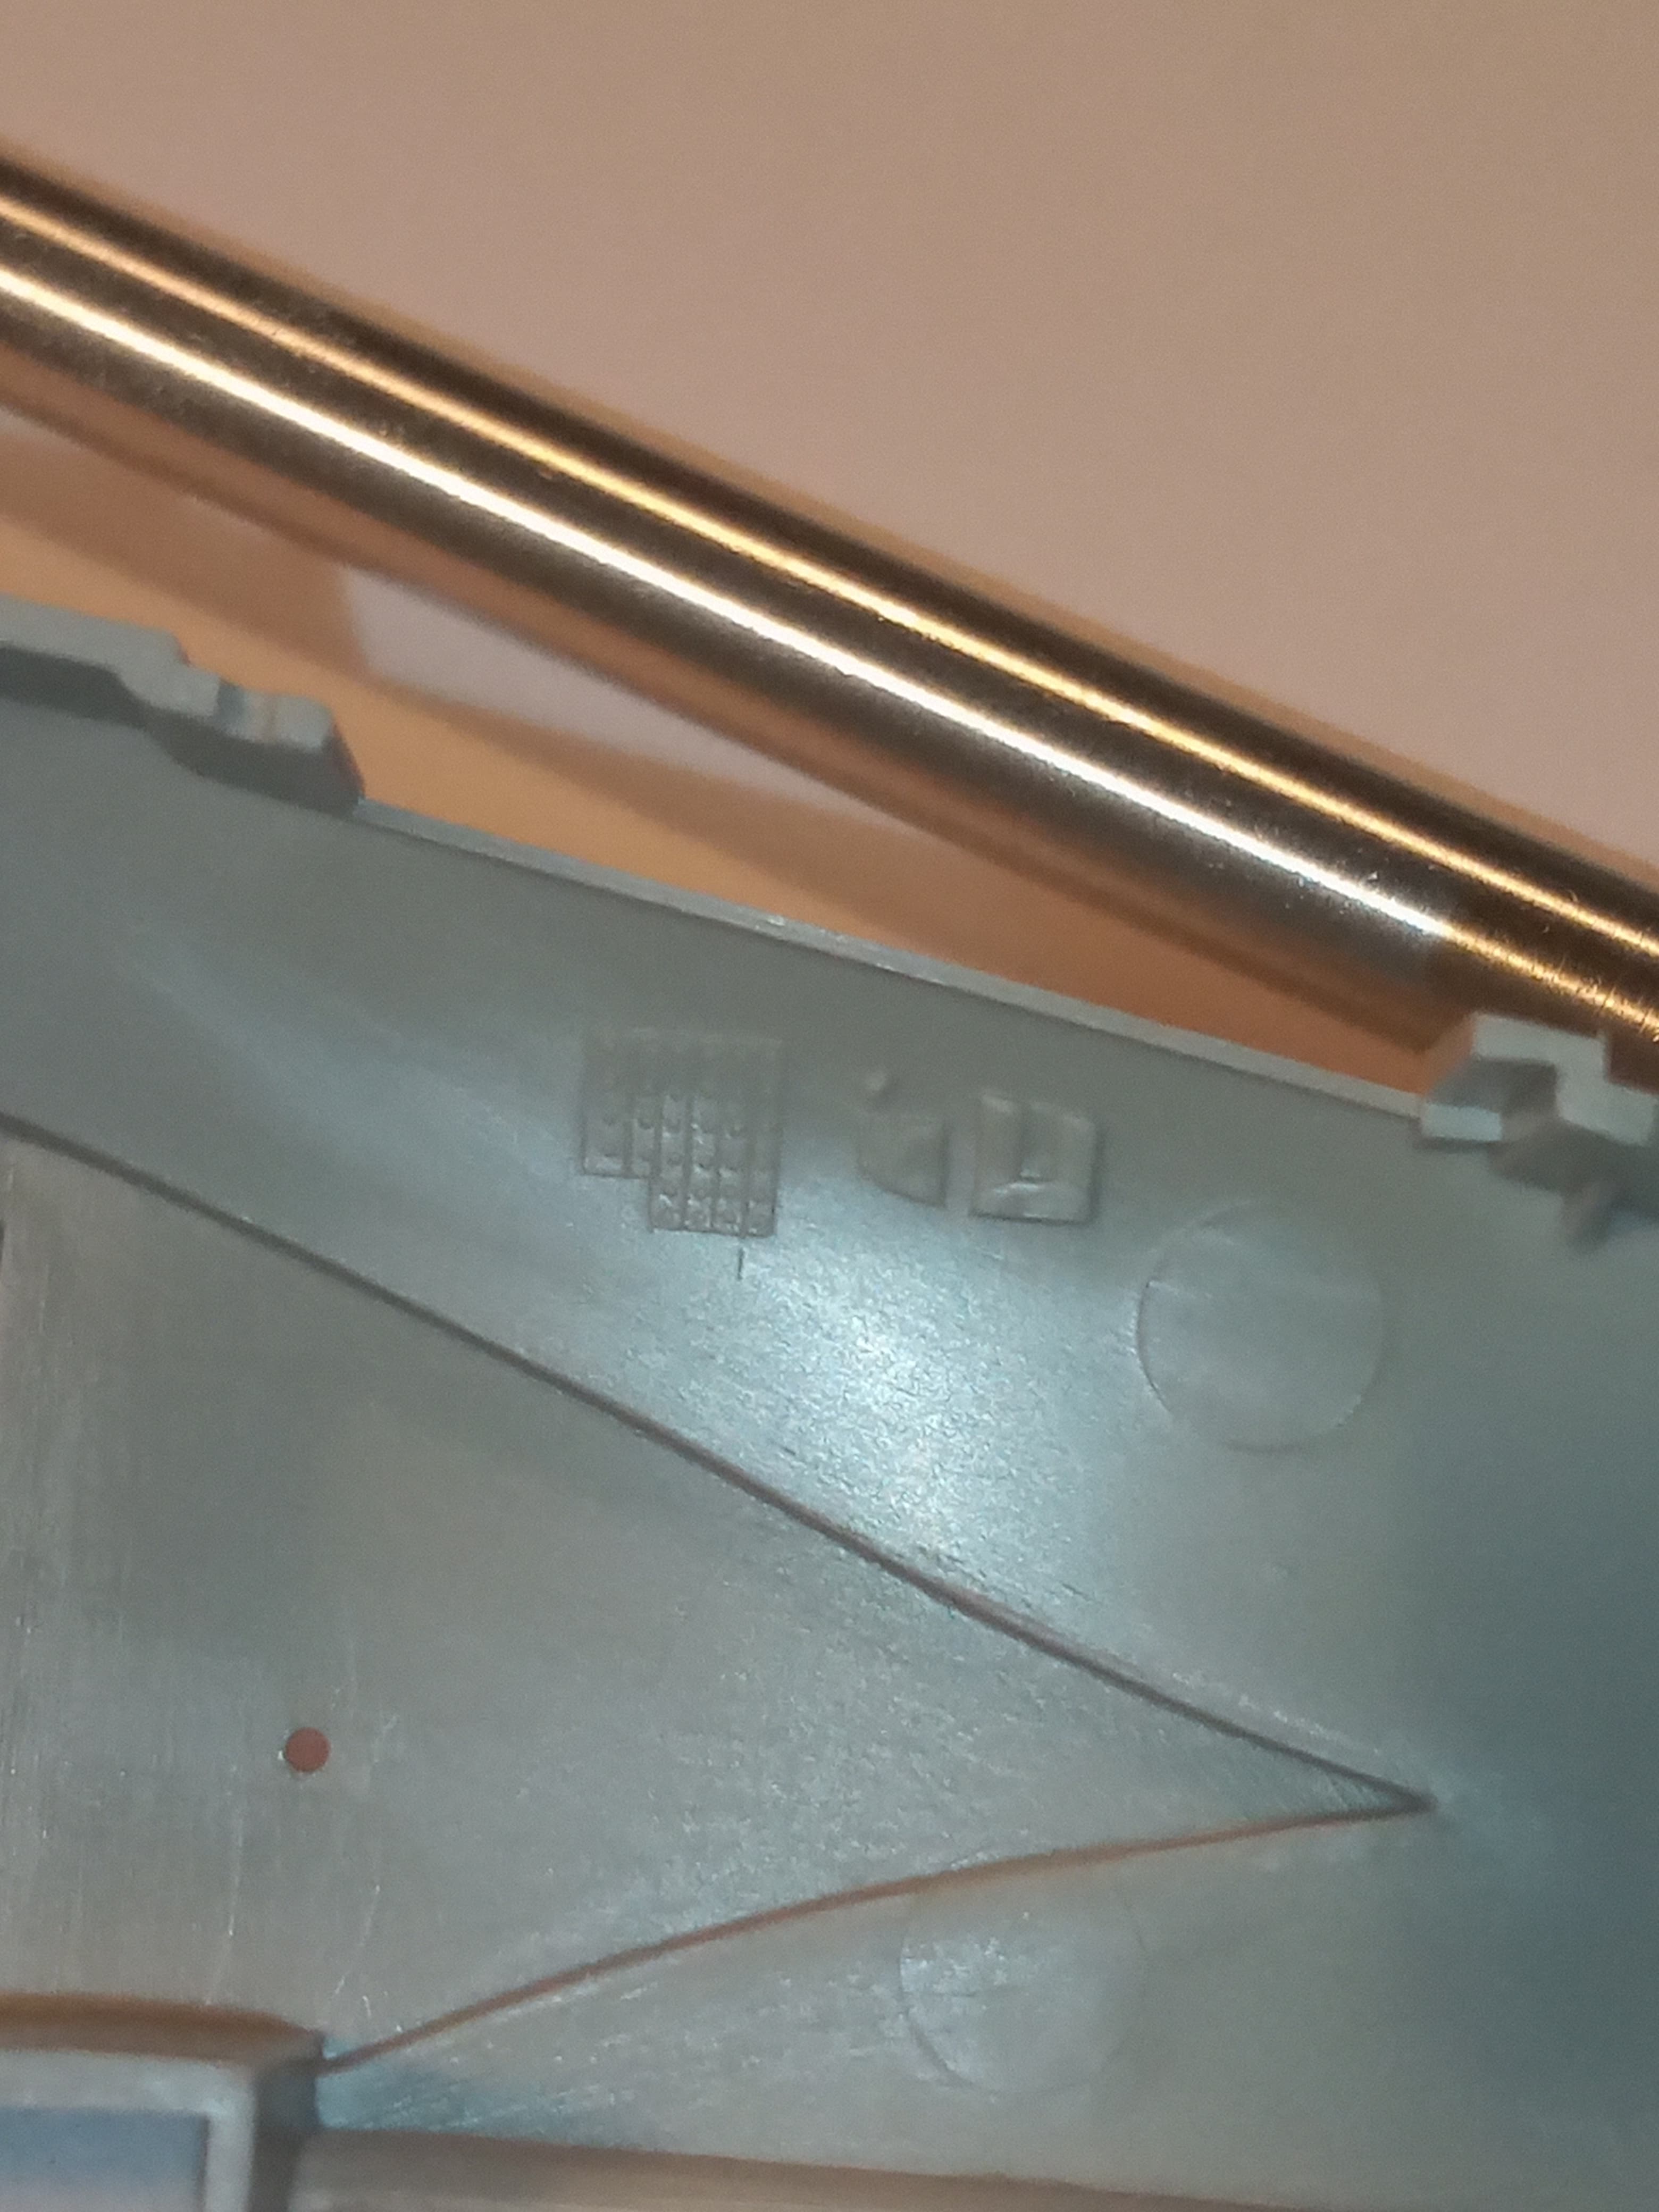
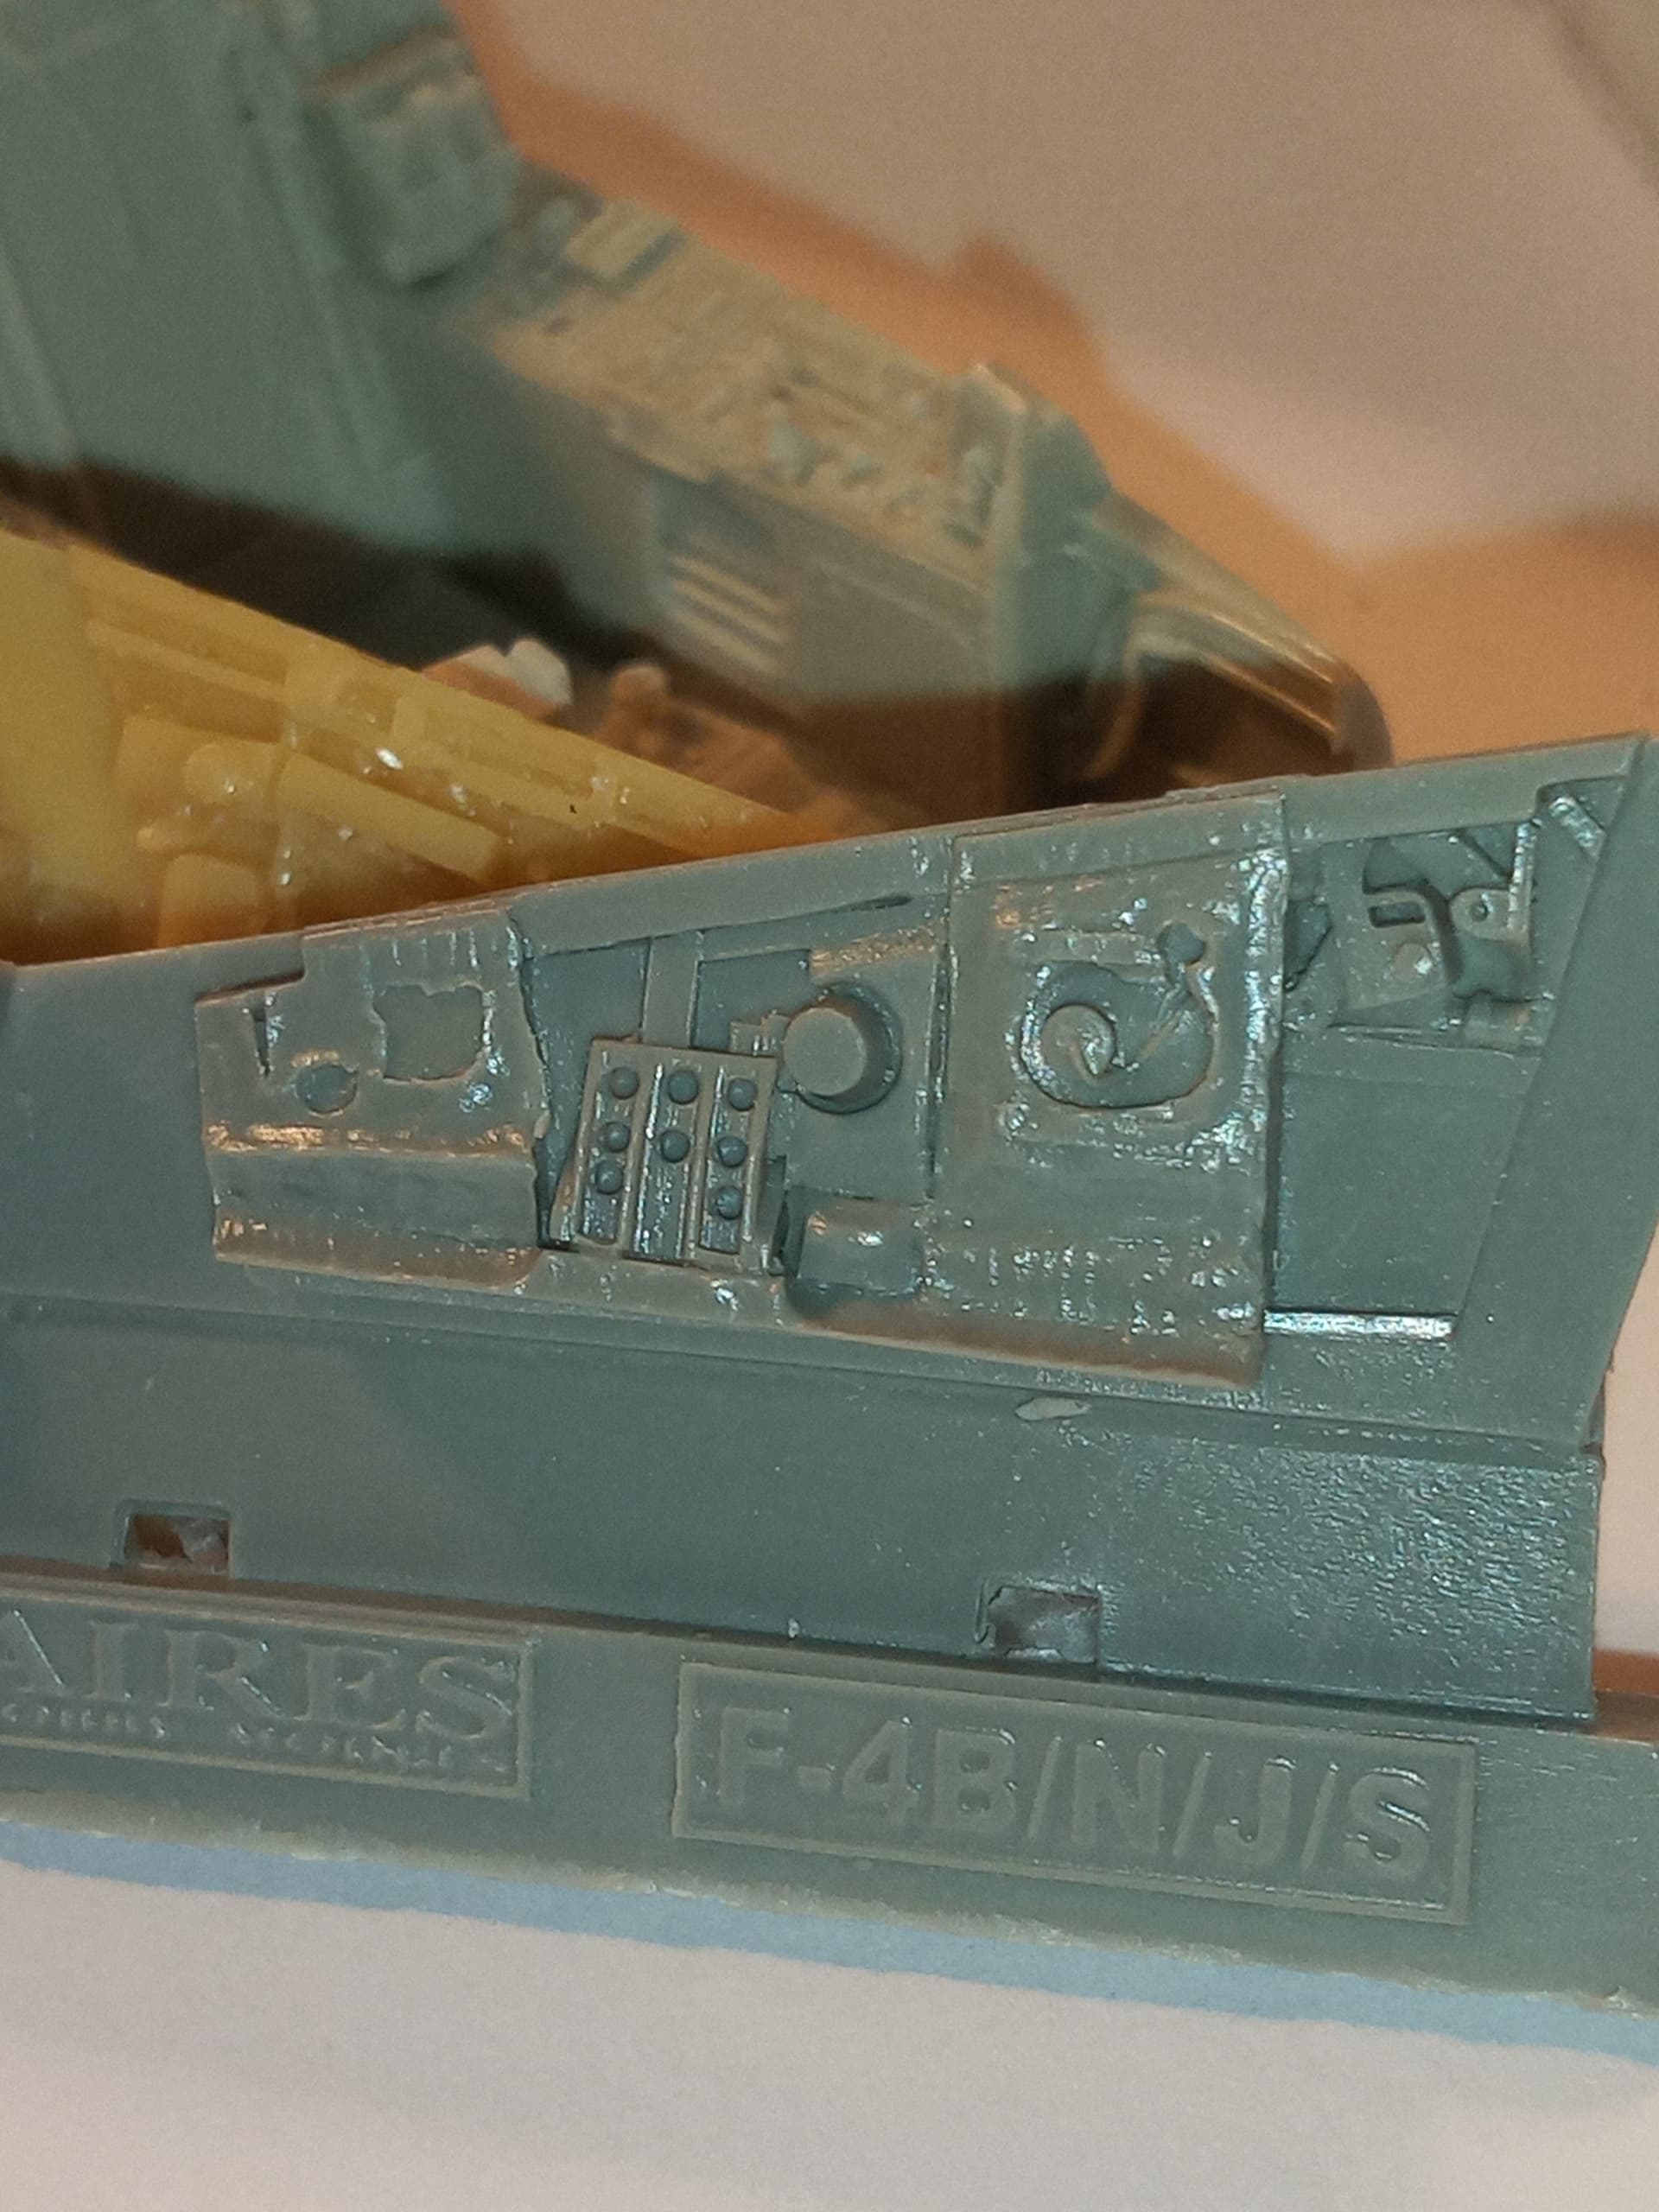
Aires offers a hugely more detailed option whereas the kit is ok (ish) but the side walls are practically non existent with detail.
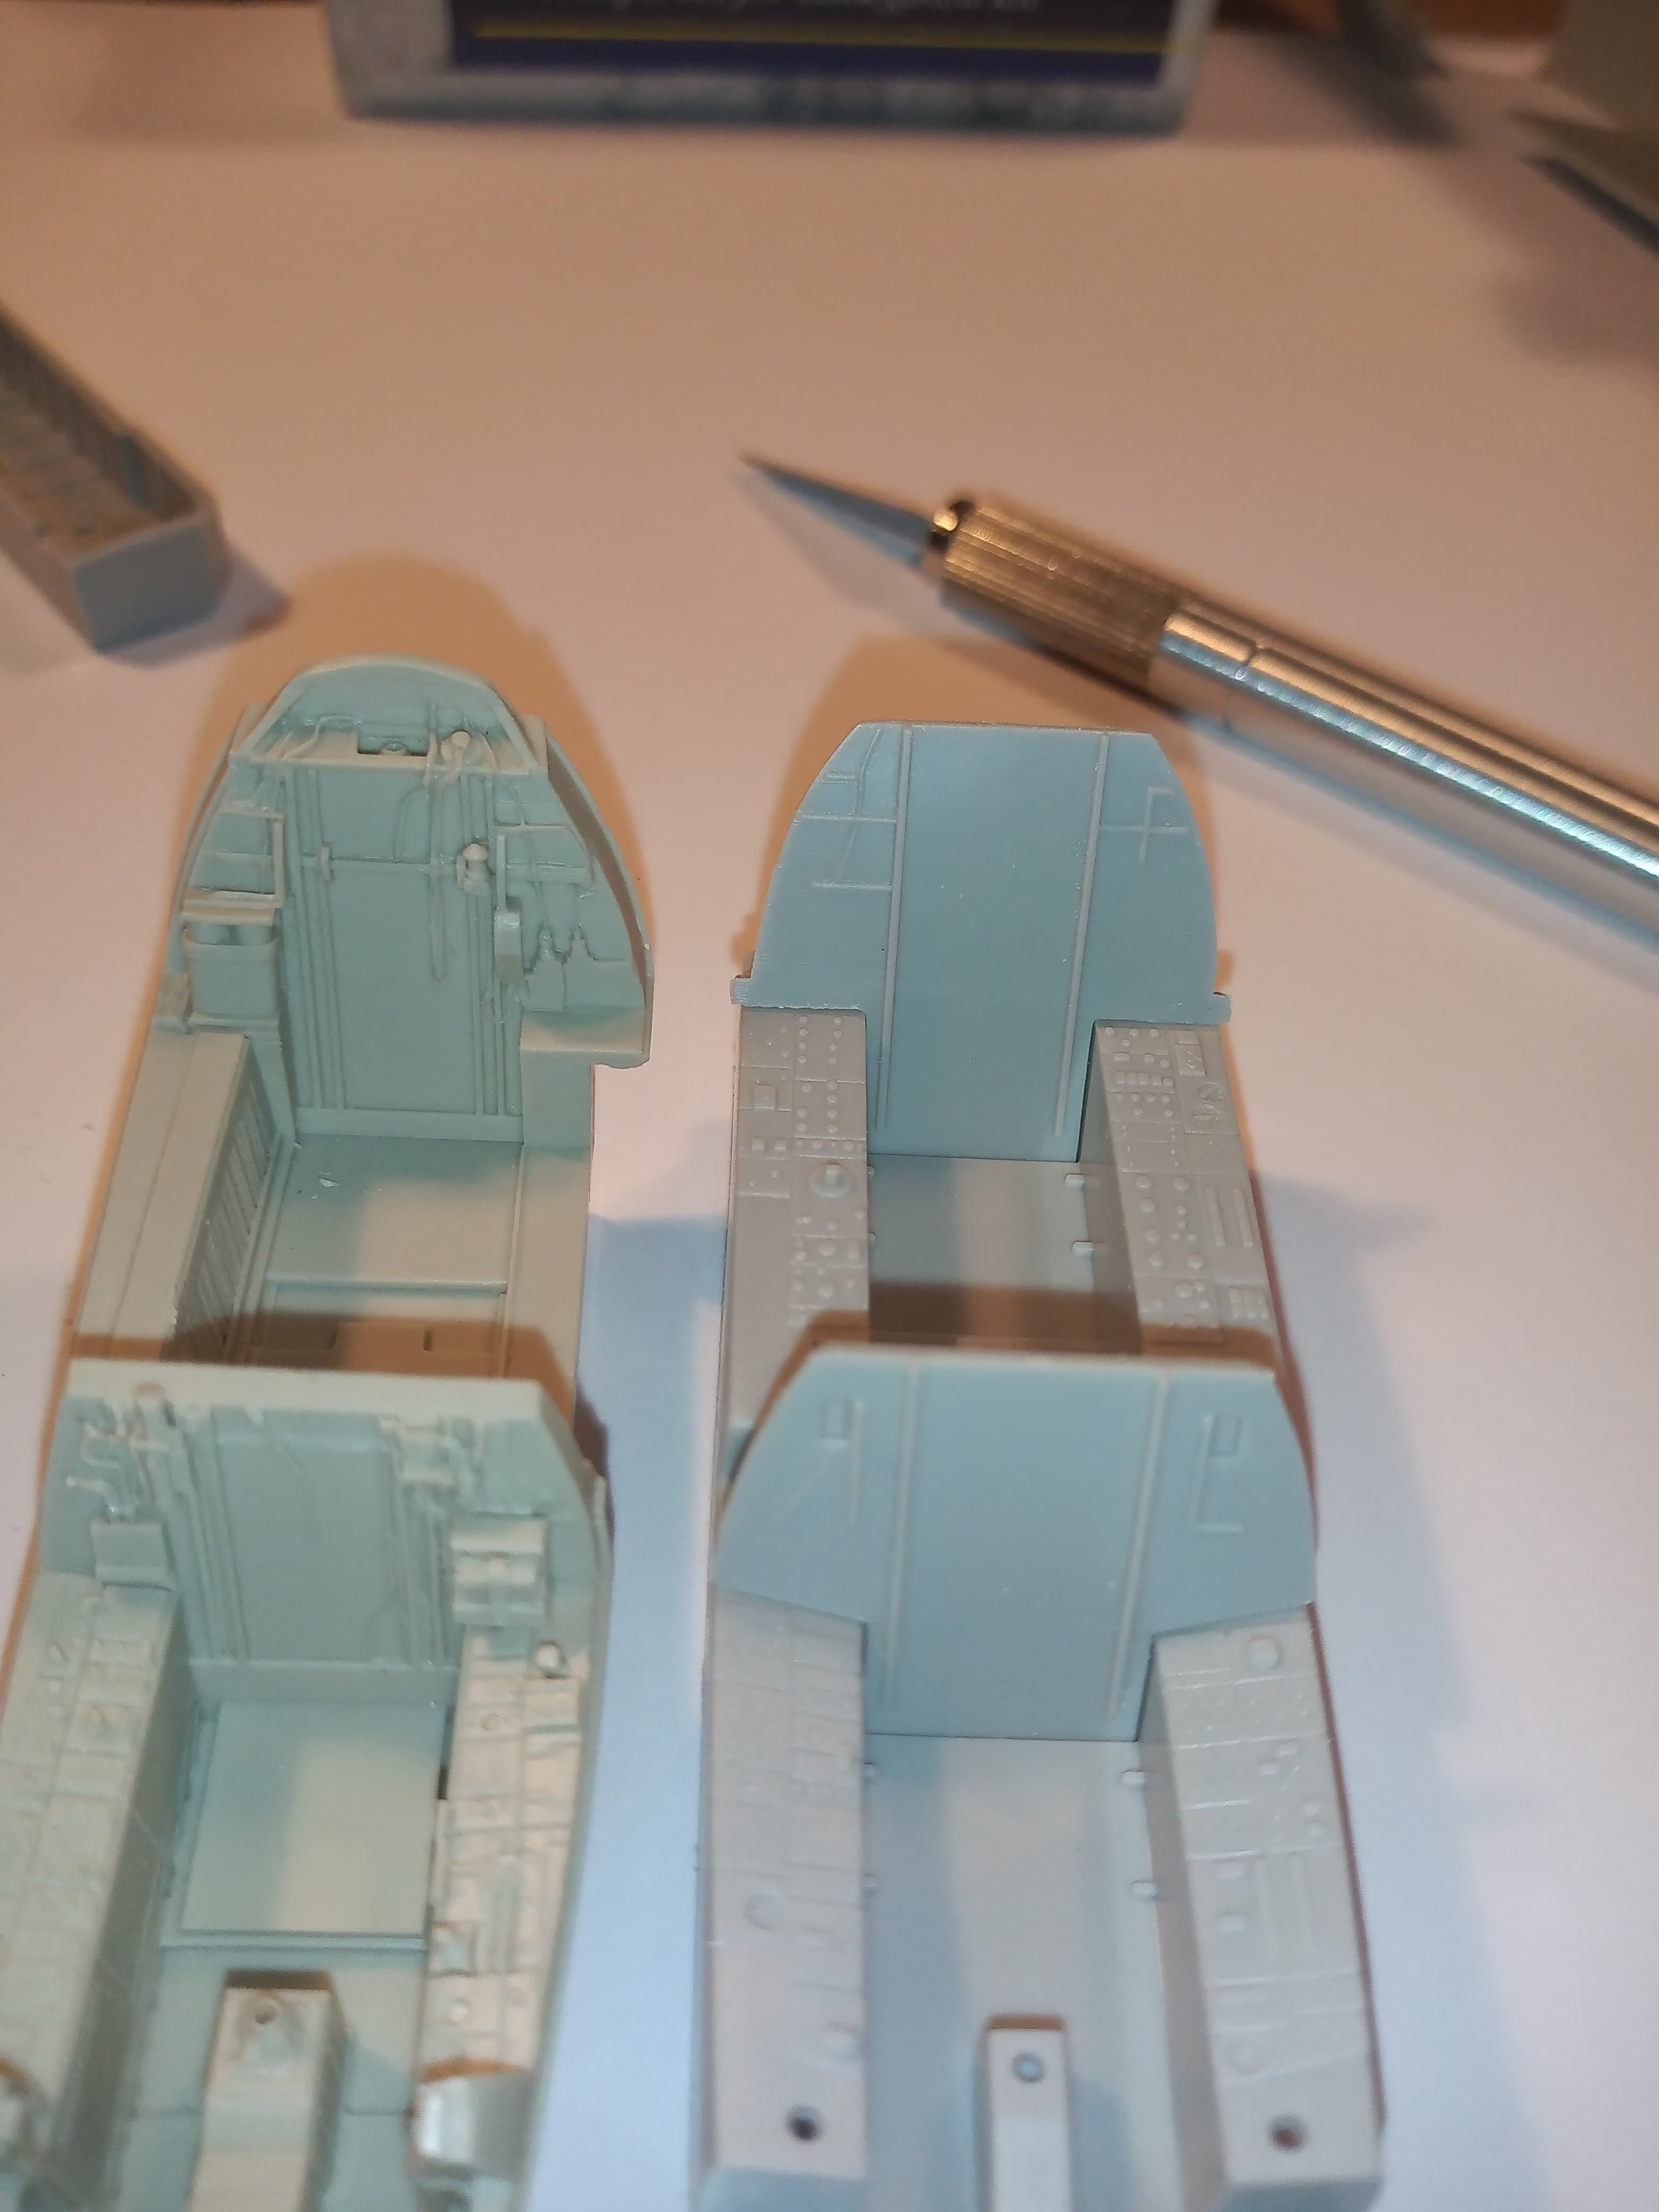
Cockpit tubs
And the side wall detail …
Kit offering
Aires side wall…
You see my dilemma…
And these are some more parts I was thinking of removing and adding to the kit rear walls to add detail…
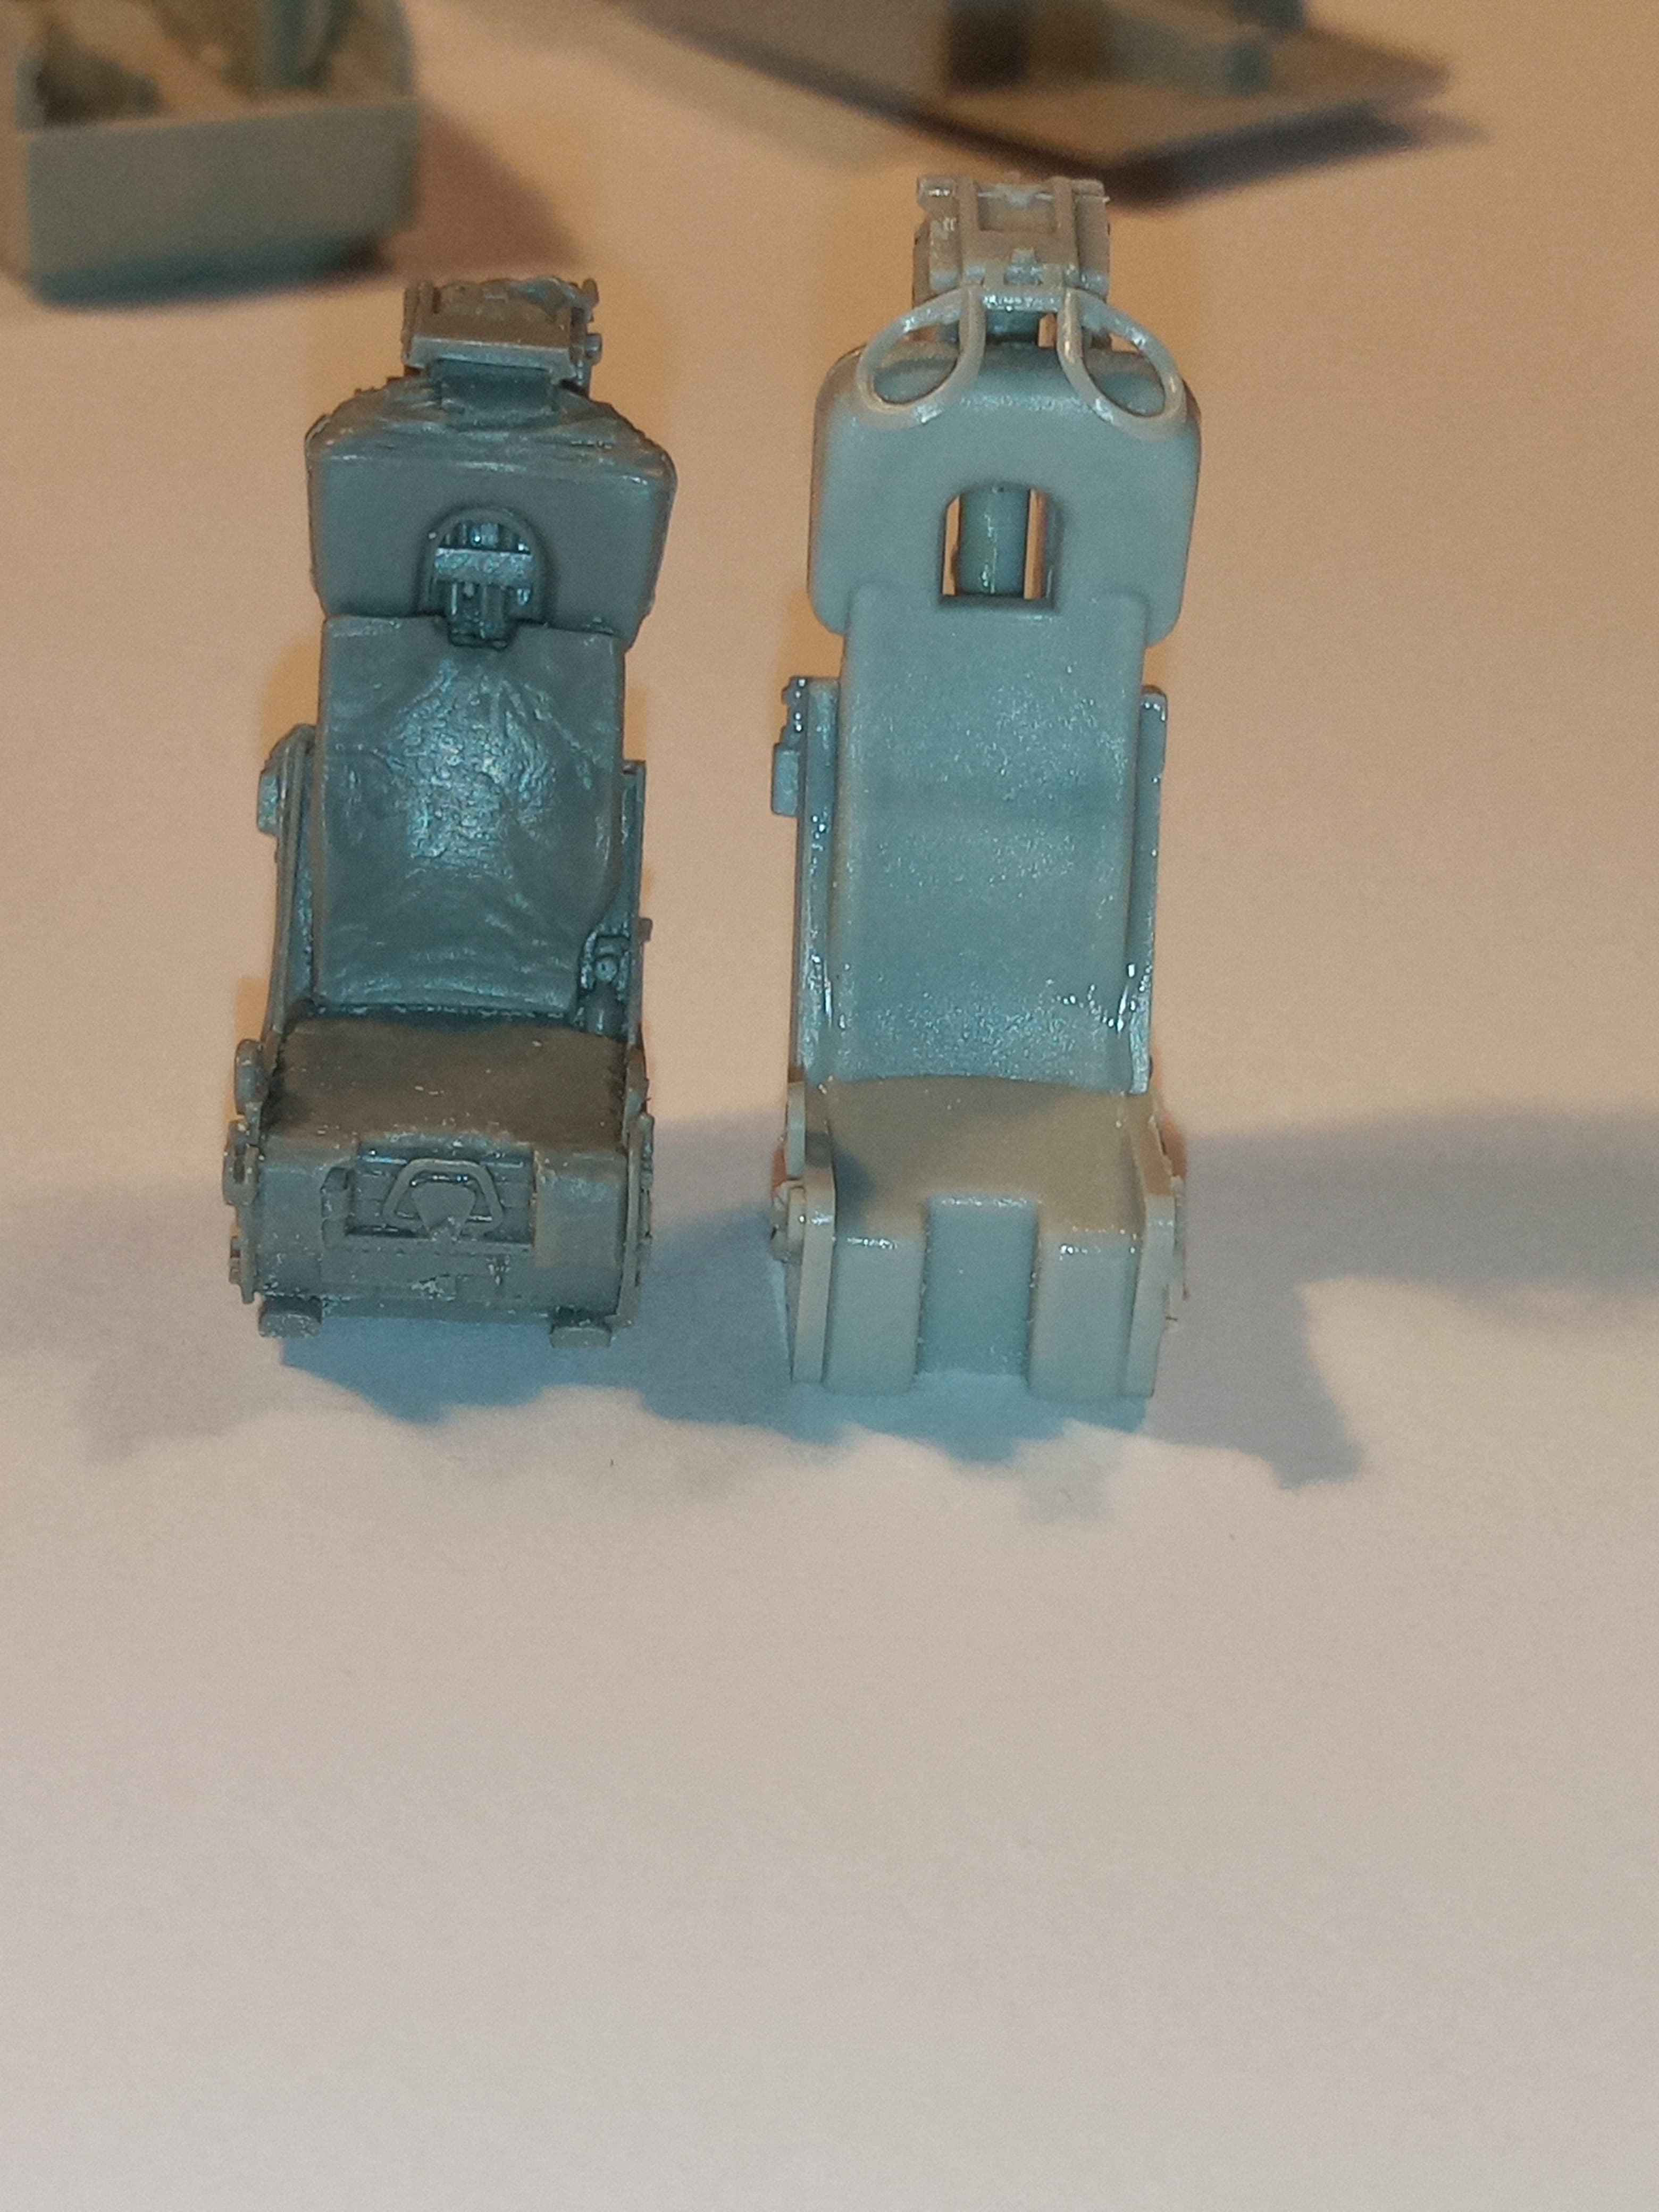
Also, although massively better detailed, the Aires seat is also smaller than the kit one. Kit is light grey, Aires a bit darker.
And both fitted into the kit cockpit tub.
Thoughts ?
Oh, and the decals arrived … ![]()
Are doing an open or closed canopy?
I would very tempted to stay plastic as much as possible and get a Kelic or Quinto set. Use the Aires seats but use the rest as a guide to scratch pit detail.
At the moment closed canopy and I wont be buying any more bits for it … As long as it looks like a phantom I will be happy and its never getting shown anywhere apart you here and you guys seeing it… I am thinking of Aires seats like you said but just slicing and dicing a few of the obvious stand out resin bits along with the instrument panel PE and seat belts from aires.
is there anyway to place some of the parts into the fuselage to see what is visible once it’s together? I haven’t done this kit, but I’ve done a few kits where I had some nice detail on side walls that were invisible unless I held it at precisely the right angle and shined a flash light on it. Not sure that applies here, but, just sayin’…
Worth a test fit tomorrow to see whats visible … good plan ![]()
With it closed, I would only worry about the seats. The rest would be difficult to see through the canopy and not worth the squeeze, imho.
Thank you for your kind words.
I just can loose if i try to hold line with all the builds here, so i have to modify the Phantom in a HEAVY way ![]() .
.
I am in the brainstorm construction phase, can’t decide between the idea of a science fiction X-wing Phantom and a vertical take off Jet .
Not that I want to stifle your creativity (an X-F4 sounds cool!), we’re going more for the real production versions.
I’m happy to accept proposed variants that were never built if you want to try a kitbash. Like this variable geometry version McDD put forward as a competitor to the Navy F-111B. But it would have to be a genuine version that McDD, IAI etc put forward but never left the drawing board or prototype stage.
A few more can be found here.
Test fit the Aires cockpit with the front wheel bay. You might have to really sand the bottom of the resin tub, way more than you think. If that is the case, I would go with the kit cockpit.
I had tried that already mate, and you are right, it would of needed a lot of extra sanding. Also, the Aires tub was just slightly off in a few places.
It would of needed a lot of work to get it to fit correctly even with it fitted there would of been other issues like the visible seat heights etc.
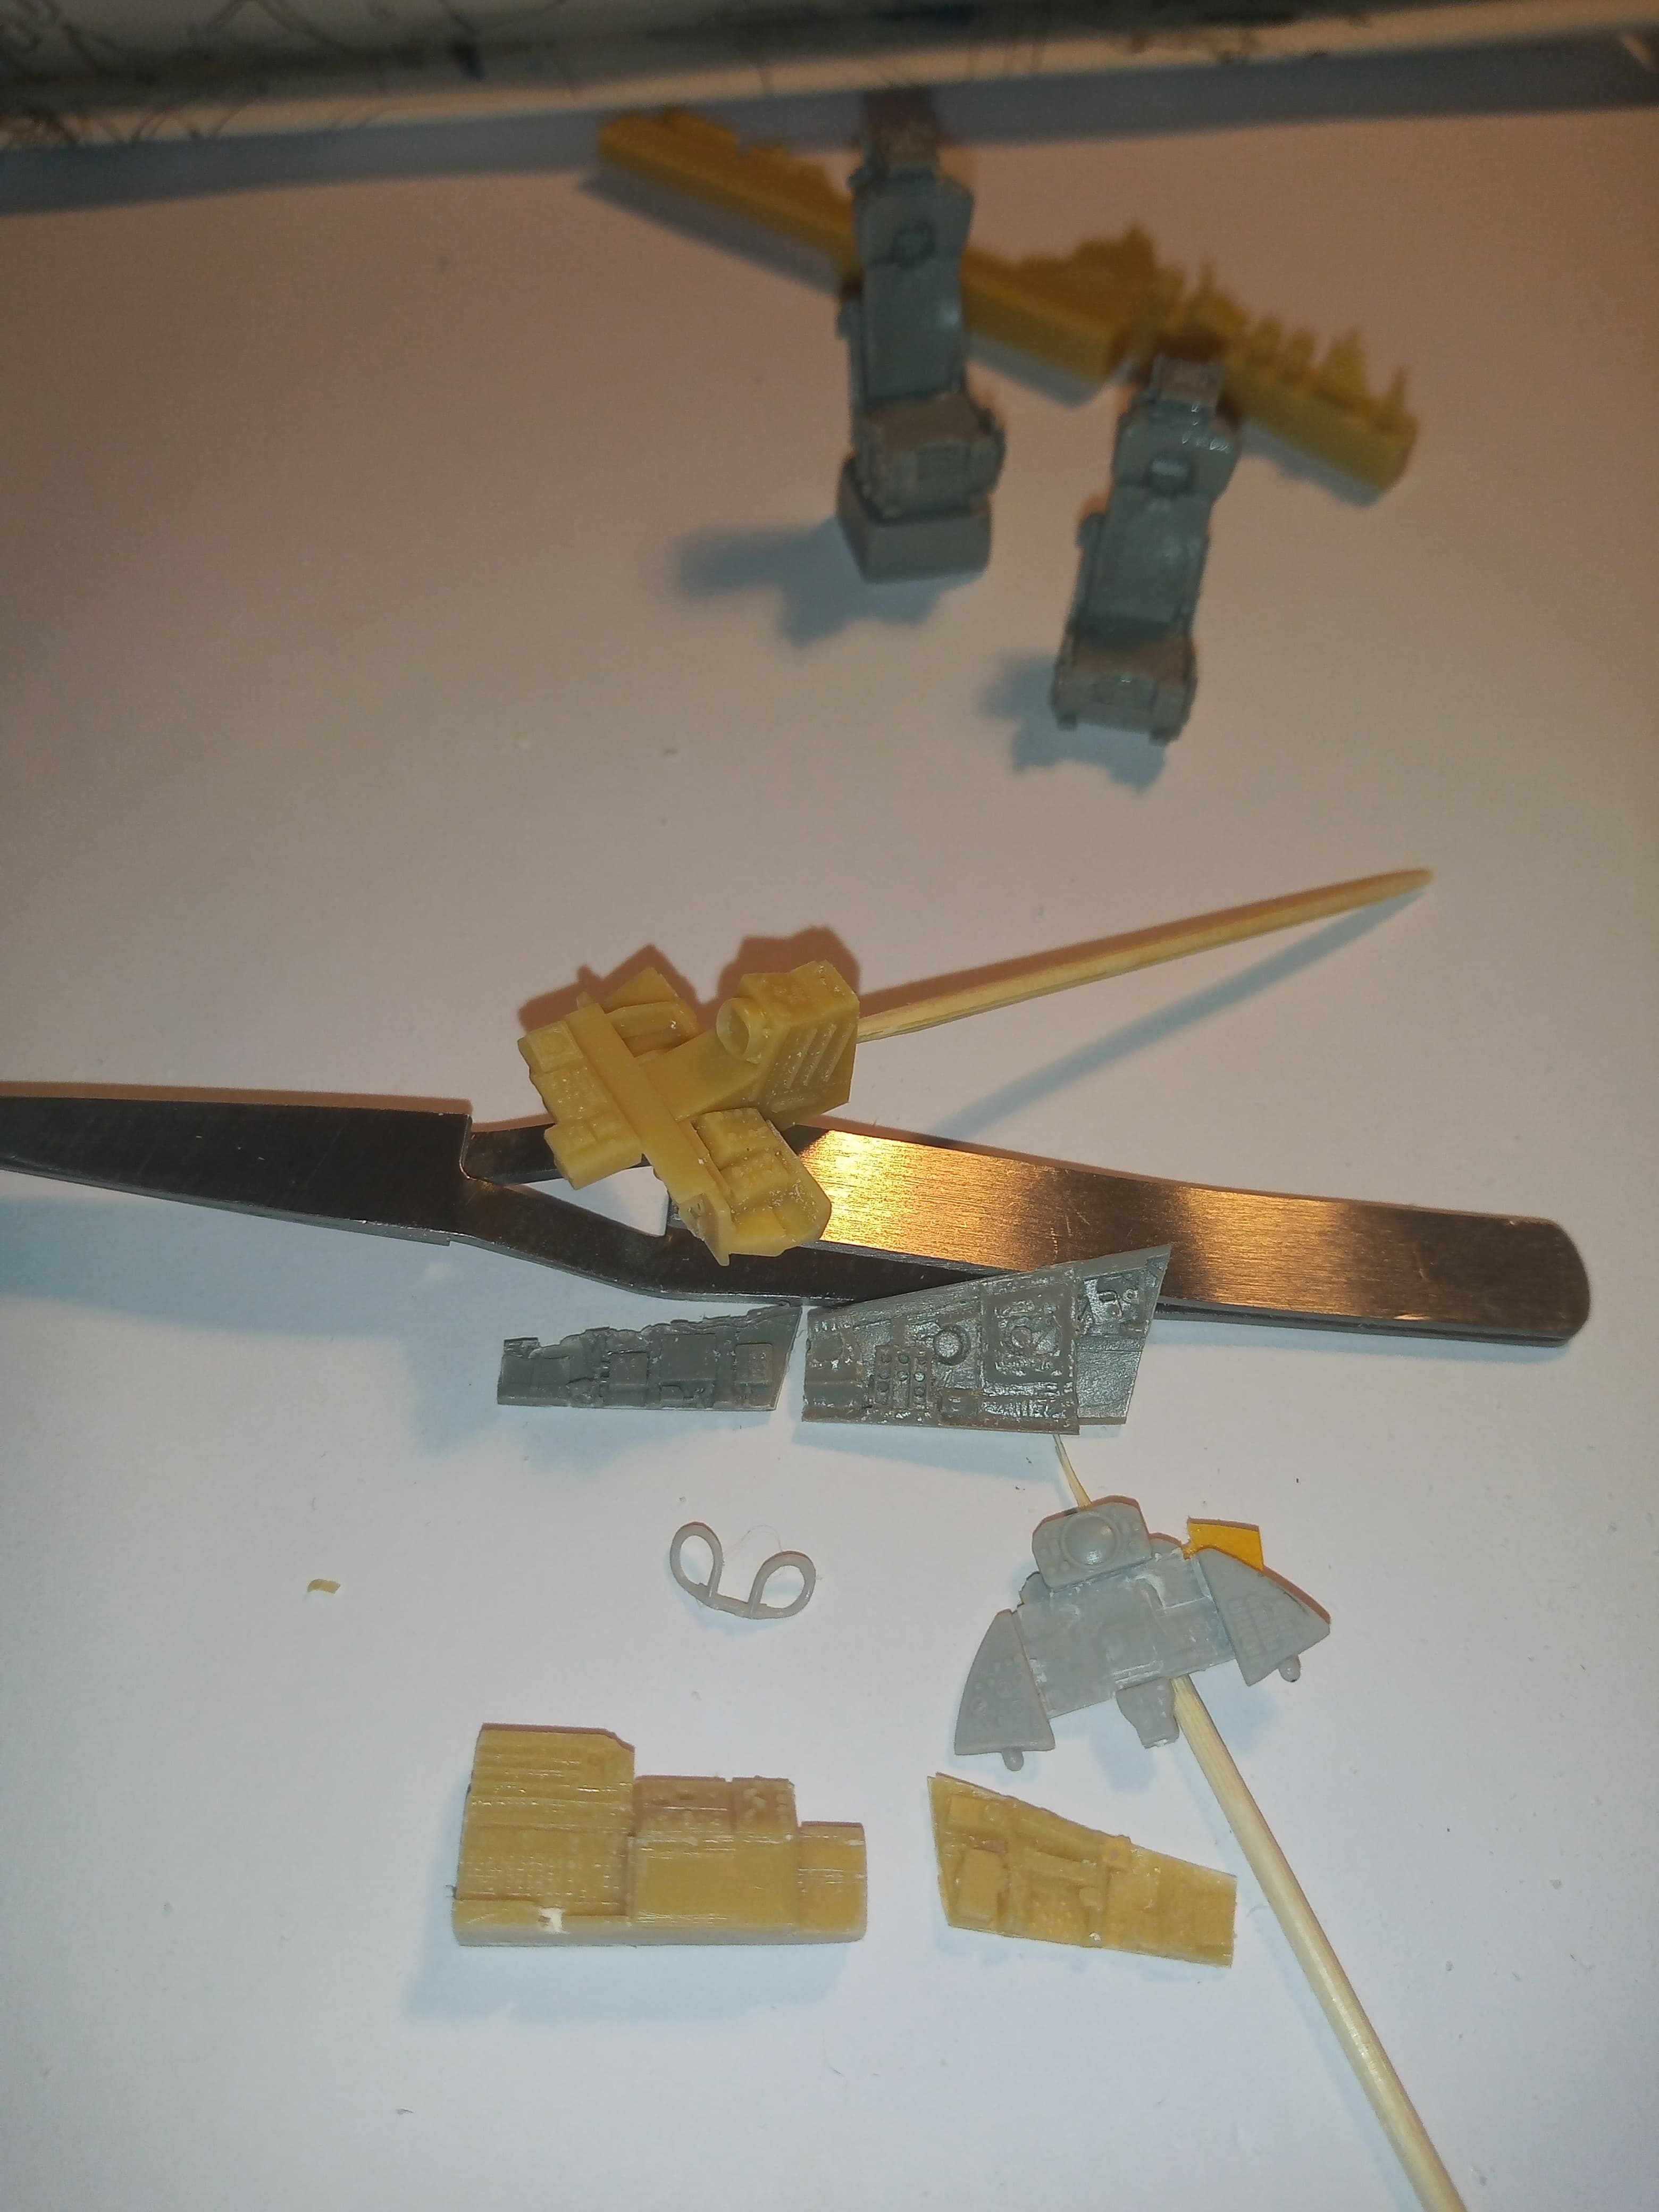
So, as I type, the Aires set is being carved up.
Now on this one, canopy at the moment is going to be closed, with no crew inside.
As Phil @phil2015 said, I test fitted the kit tub and the sidewalls on the fuselage although not obvious, can be seen to certain extent…
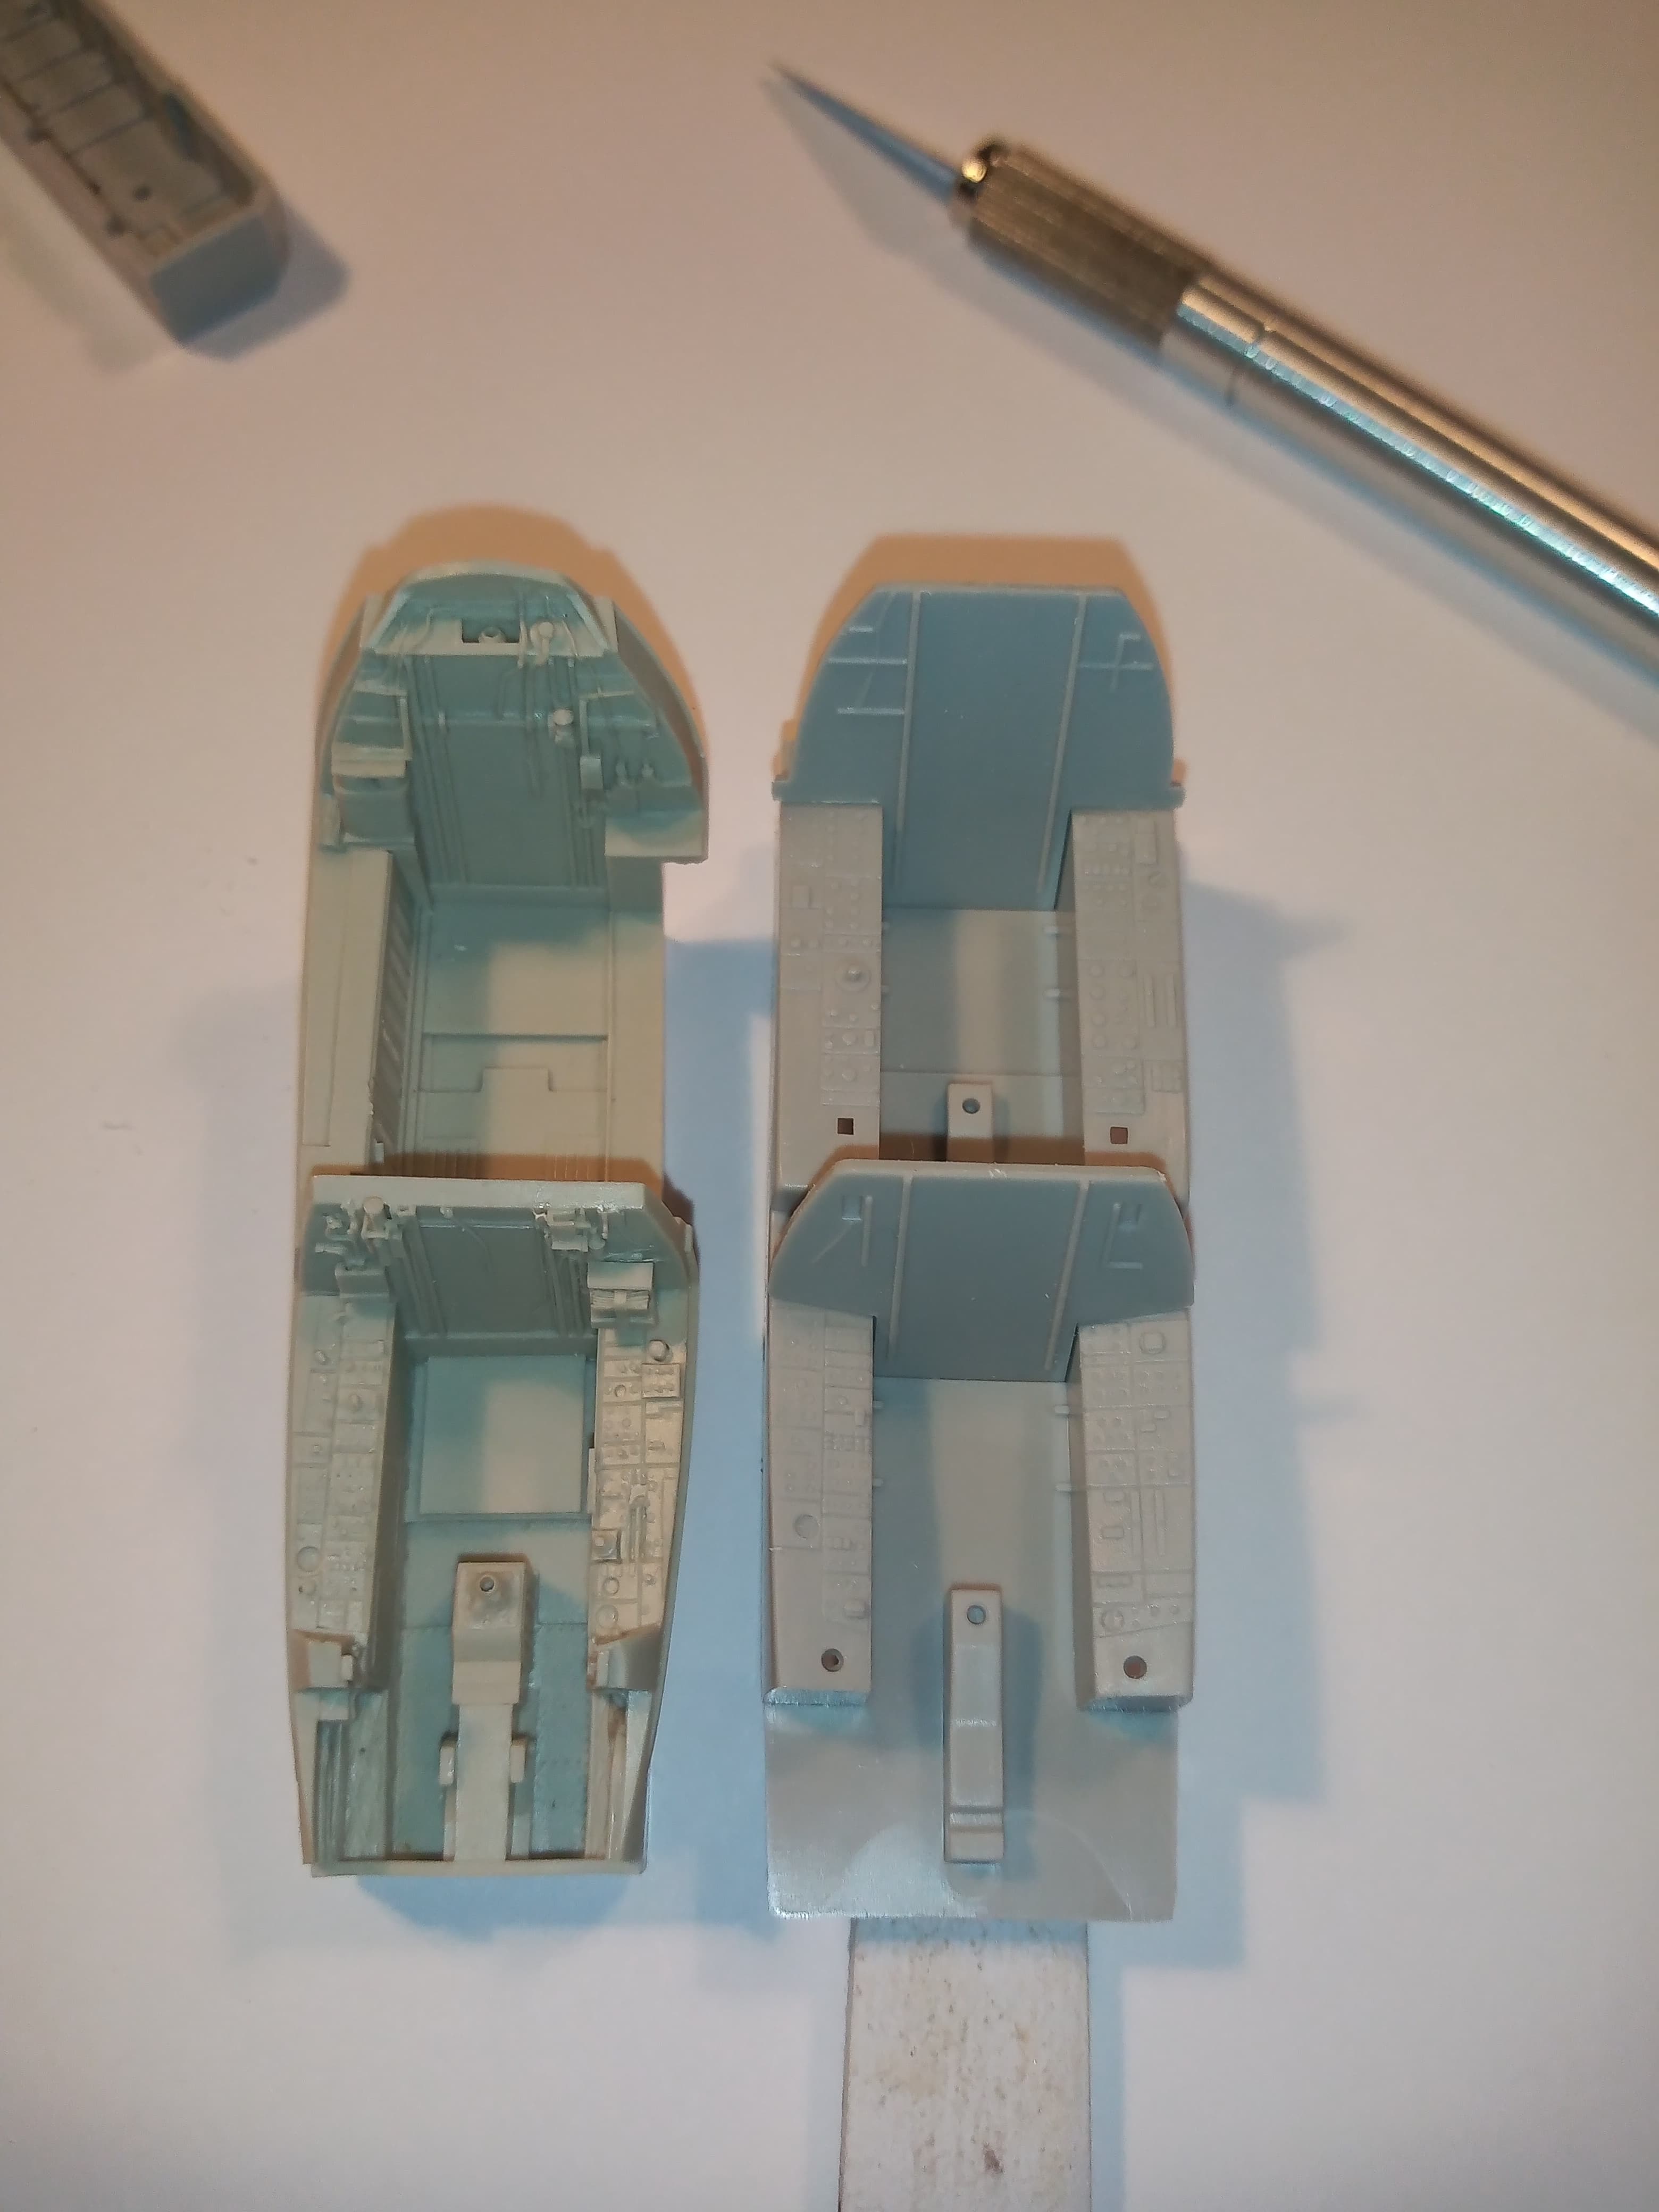
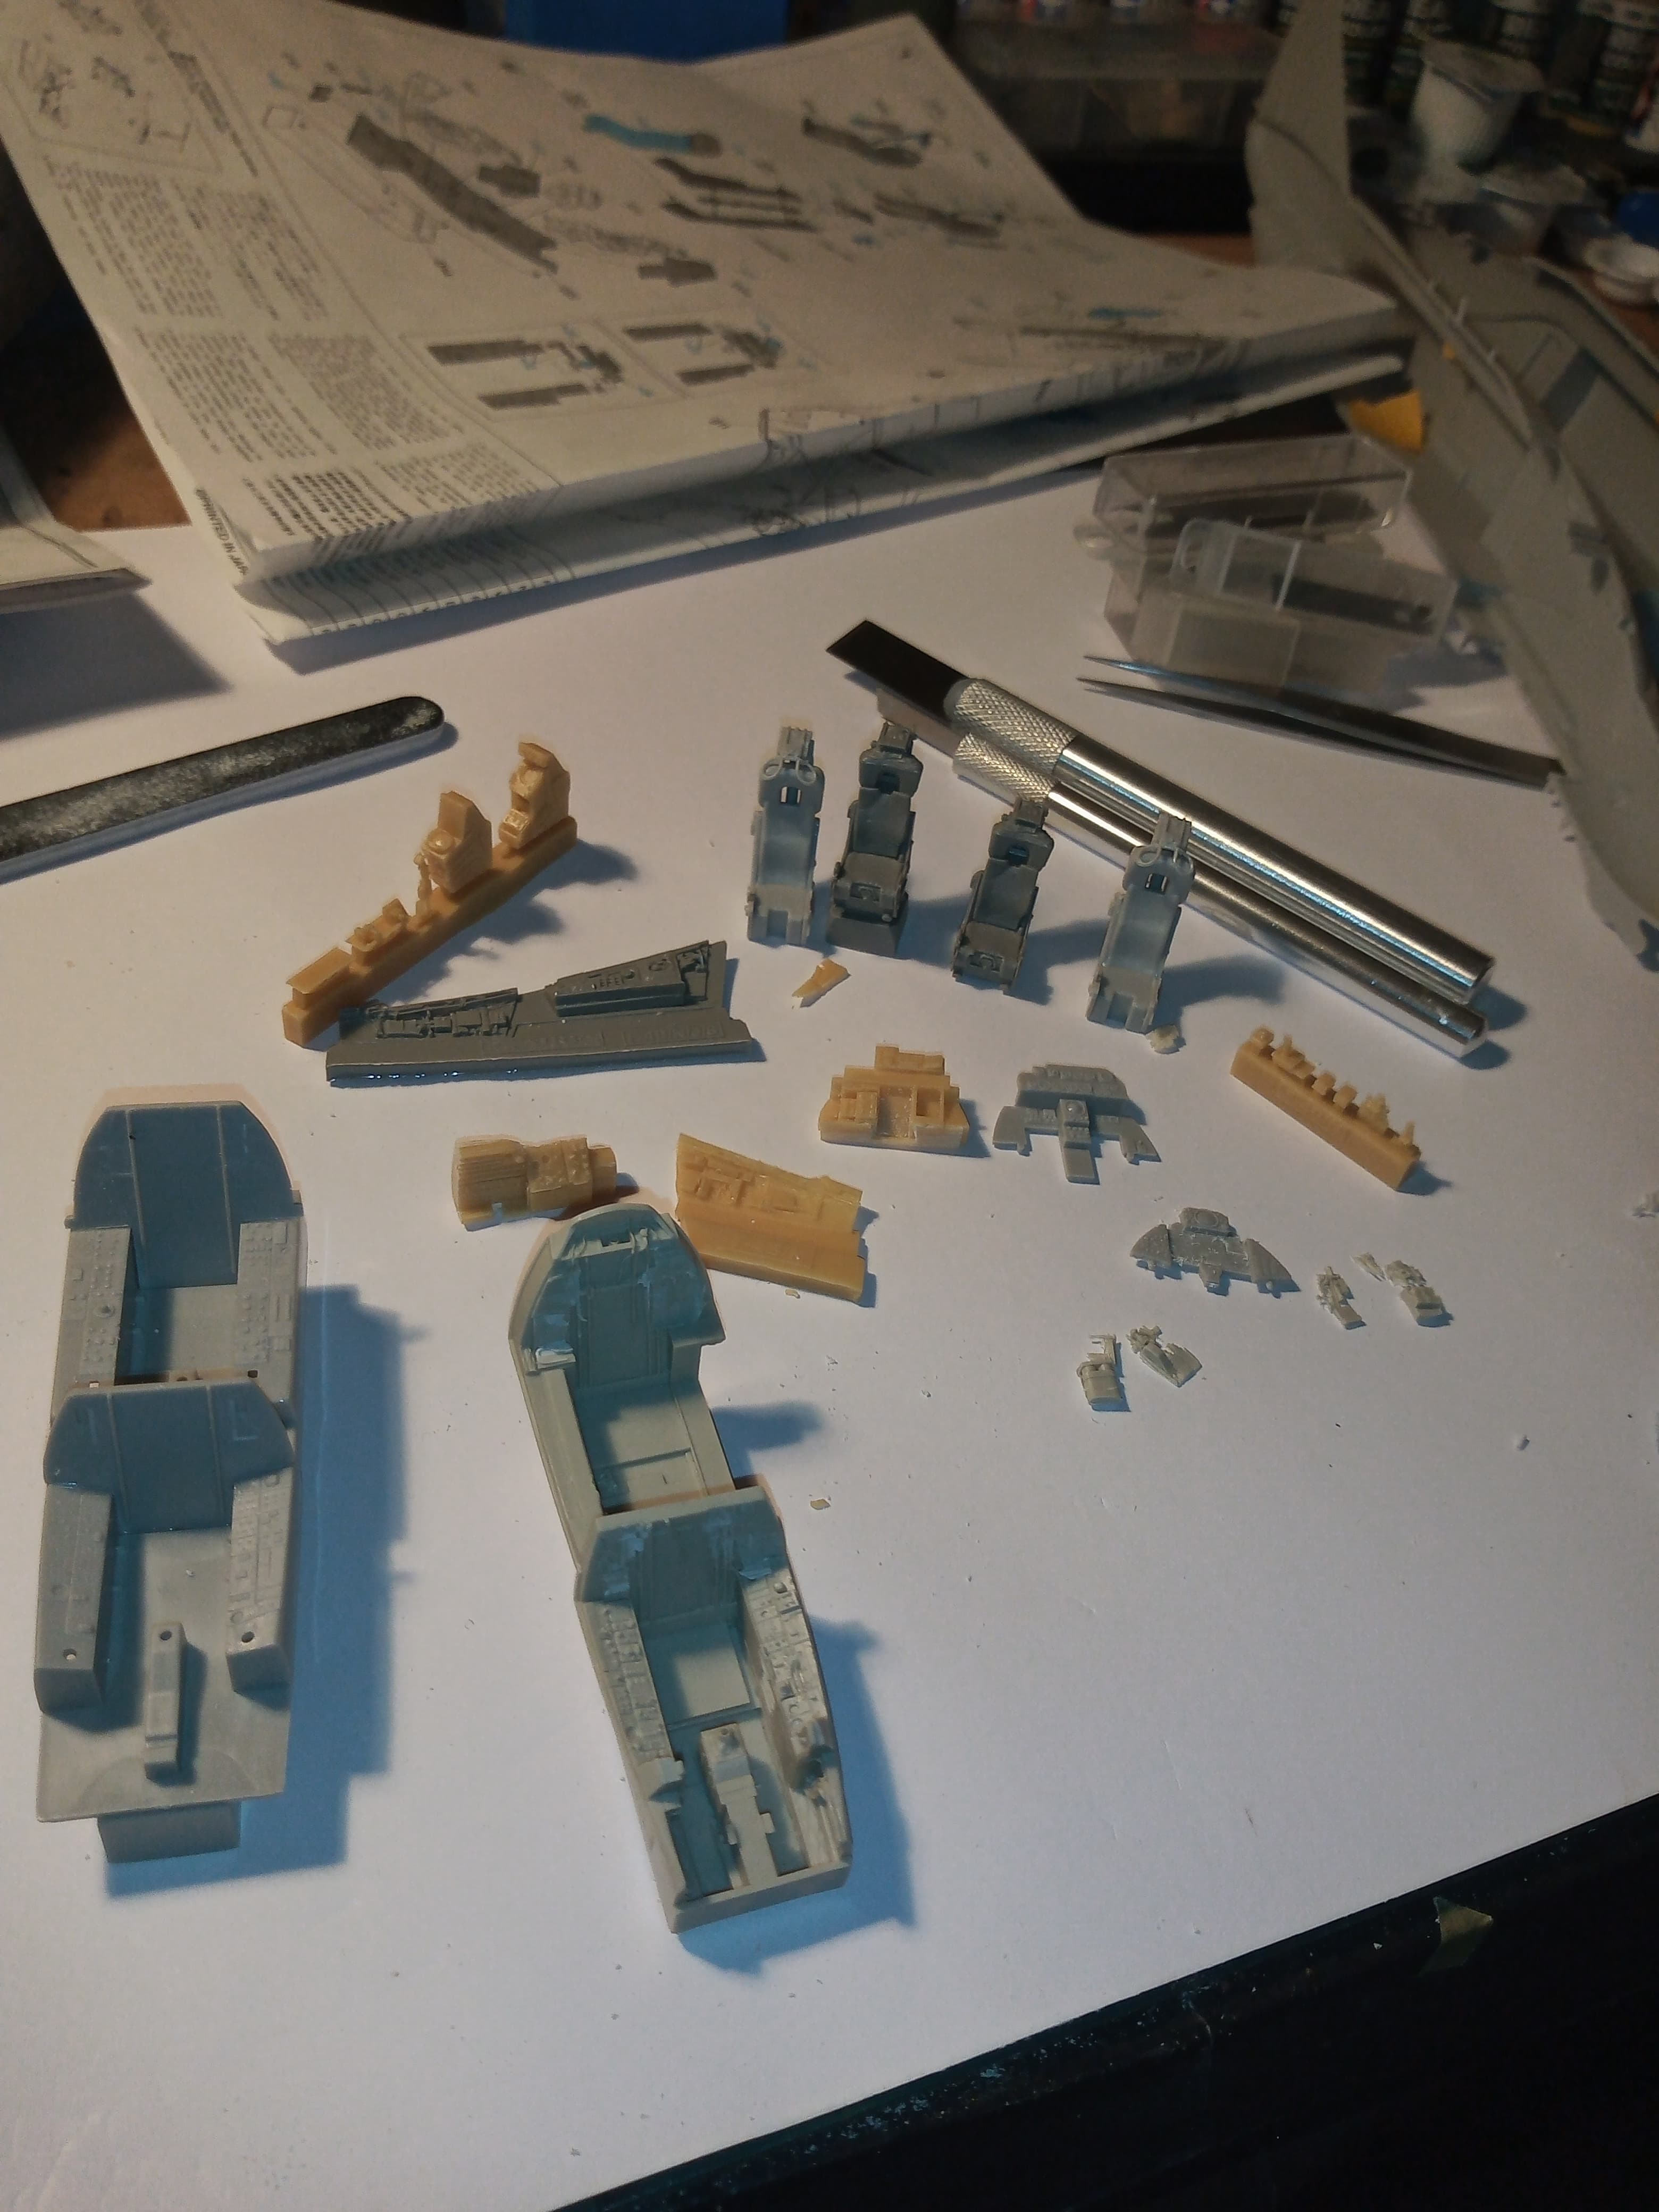
Parts to be used …
Kit tub
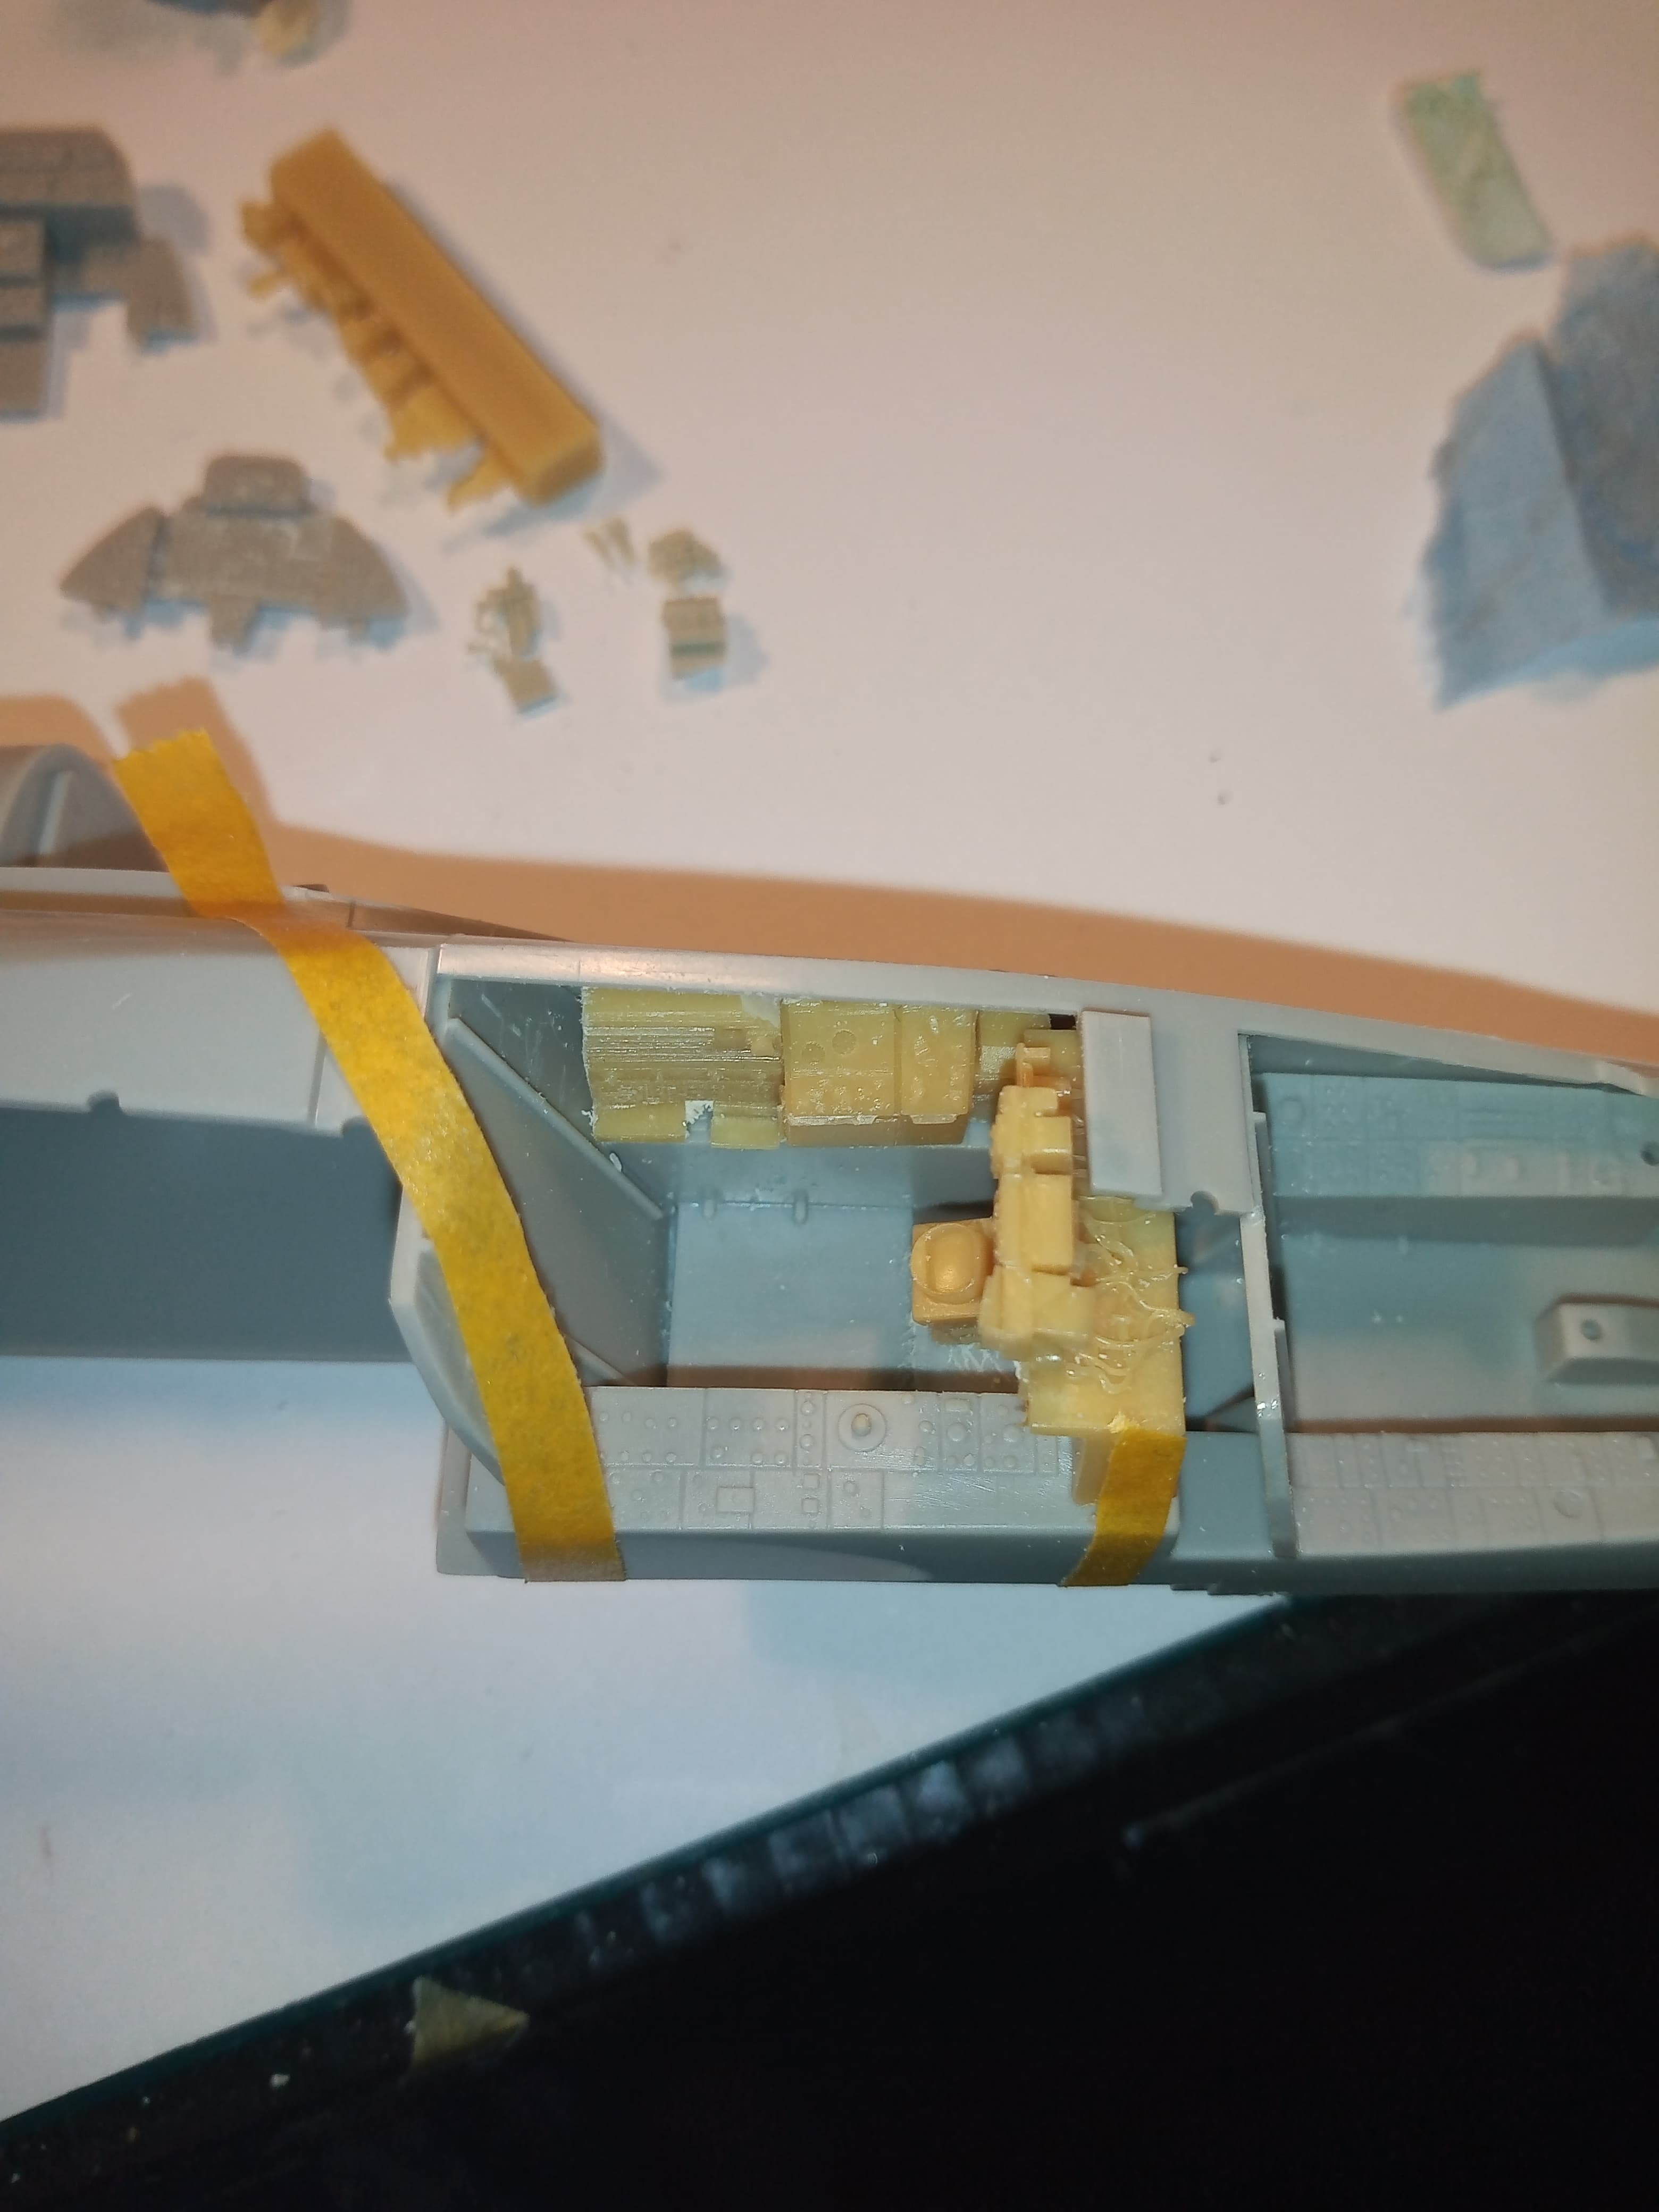
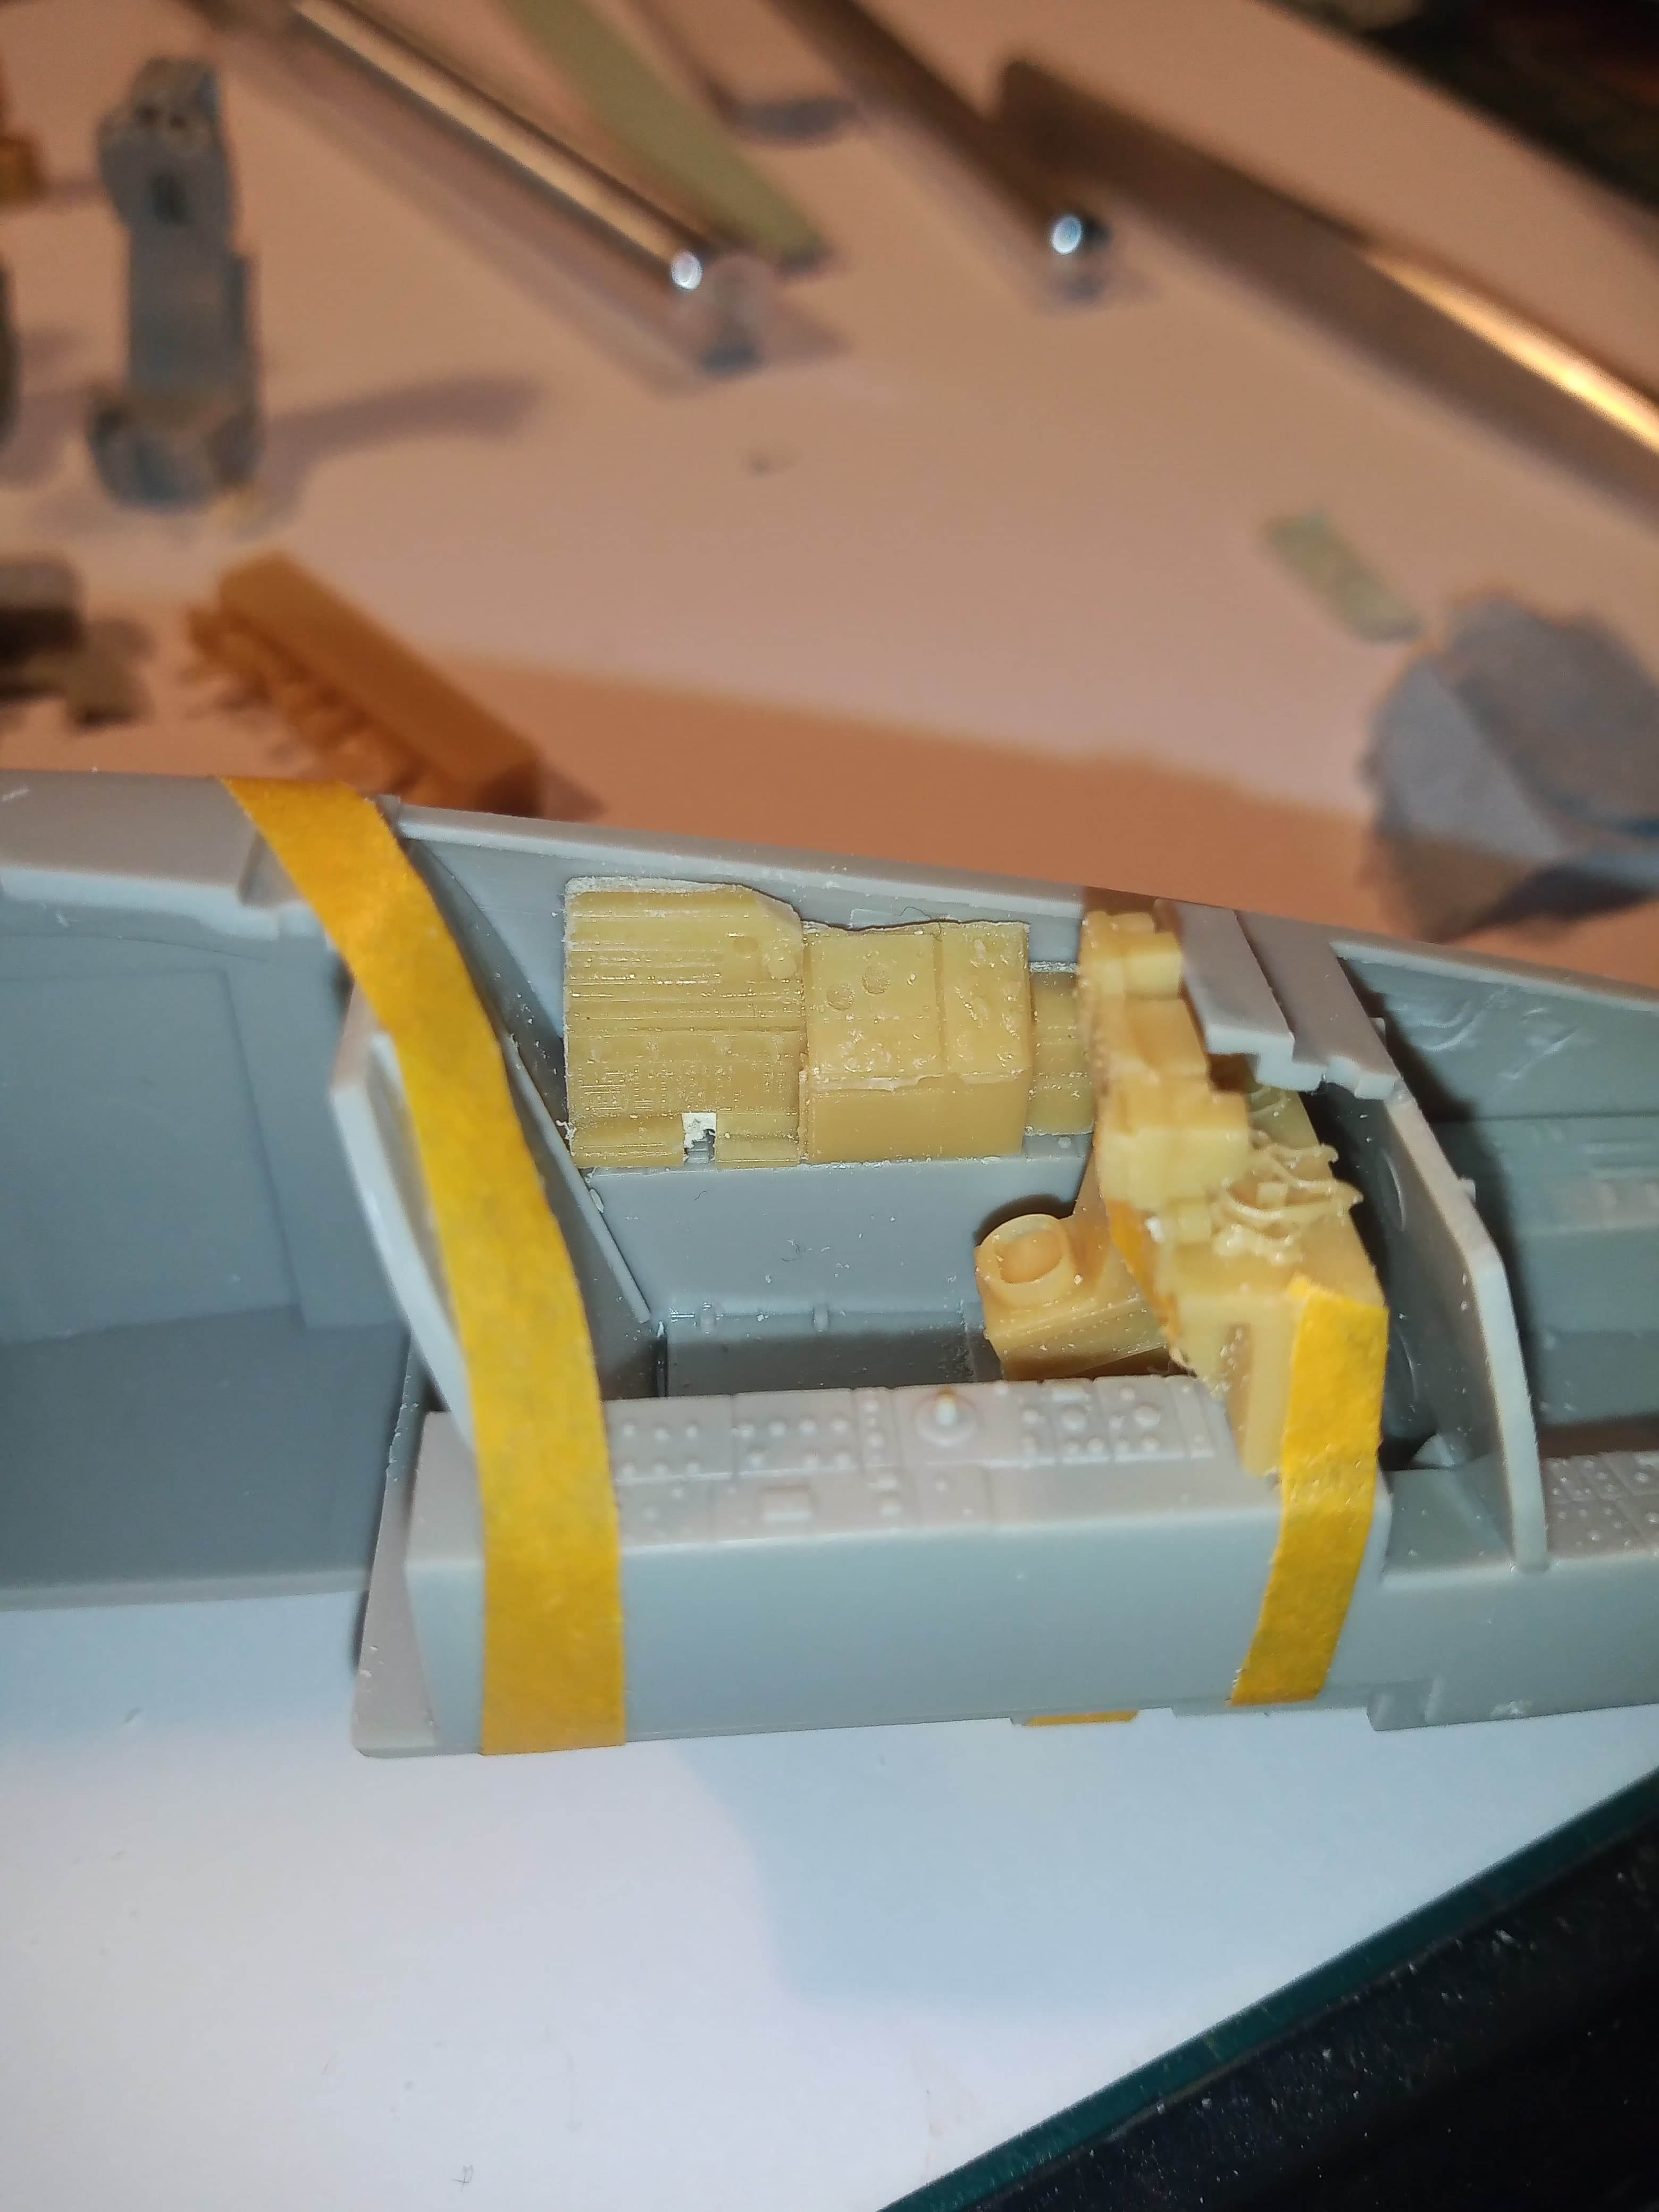
Aires seats with kit ejection pull handles added (not the PE ones). Also, the Aires seats are smaller by a bit and sit lower, so I need to raise them up about 3 to 4 mm as per all the images I have seen.
Kit pilot instrument panel with Aires PE detailing.
Aires RIO panel complete with PE but slightly modified to fit kit tub.
Aires small resin parts for side consoles front and back.
Aires canopy detailing.
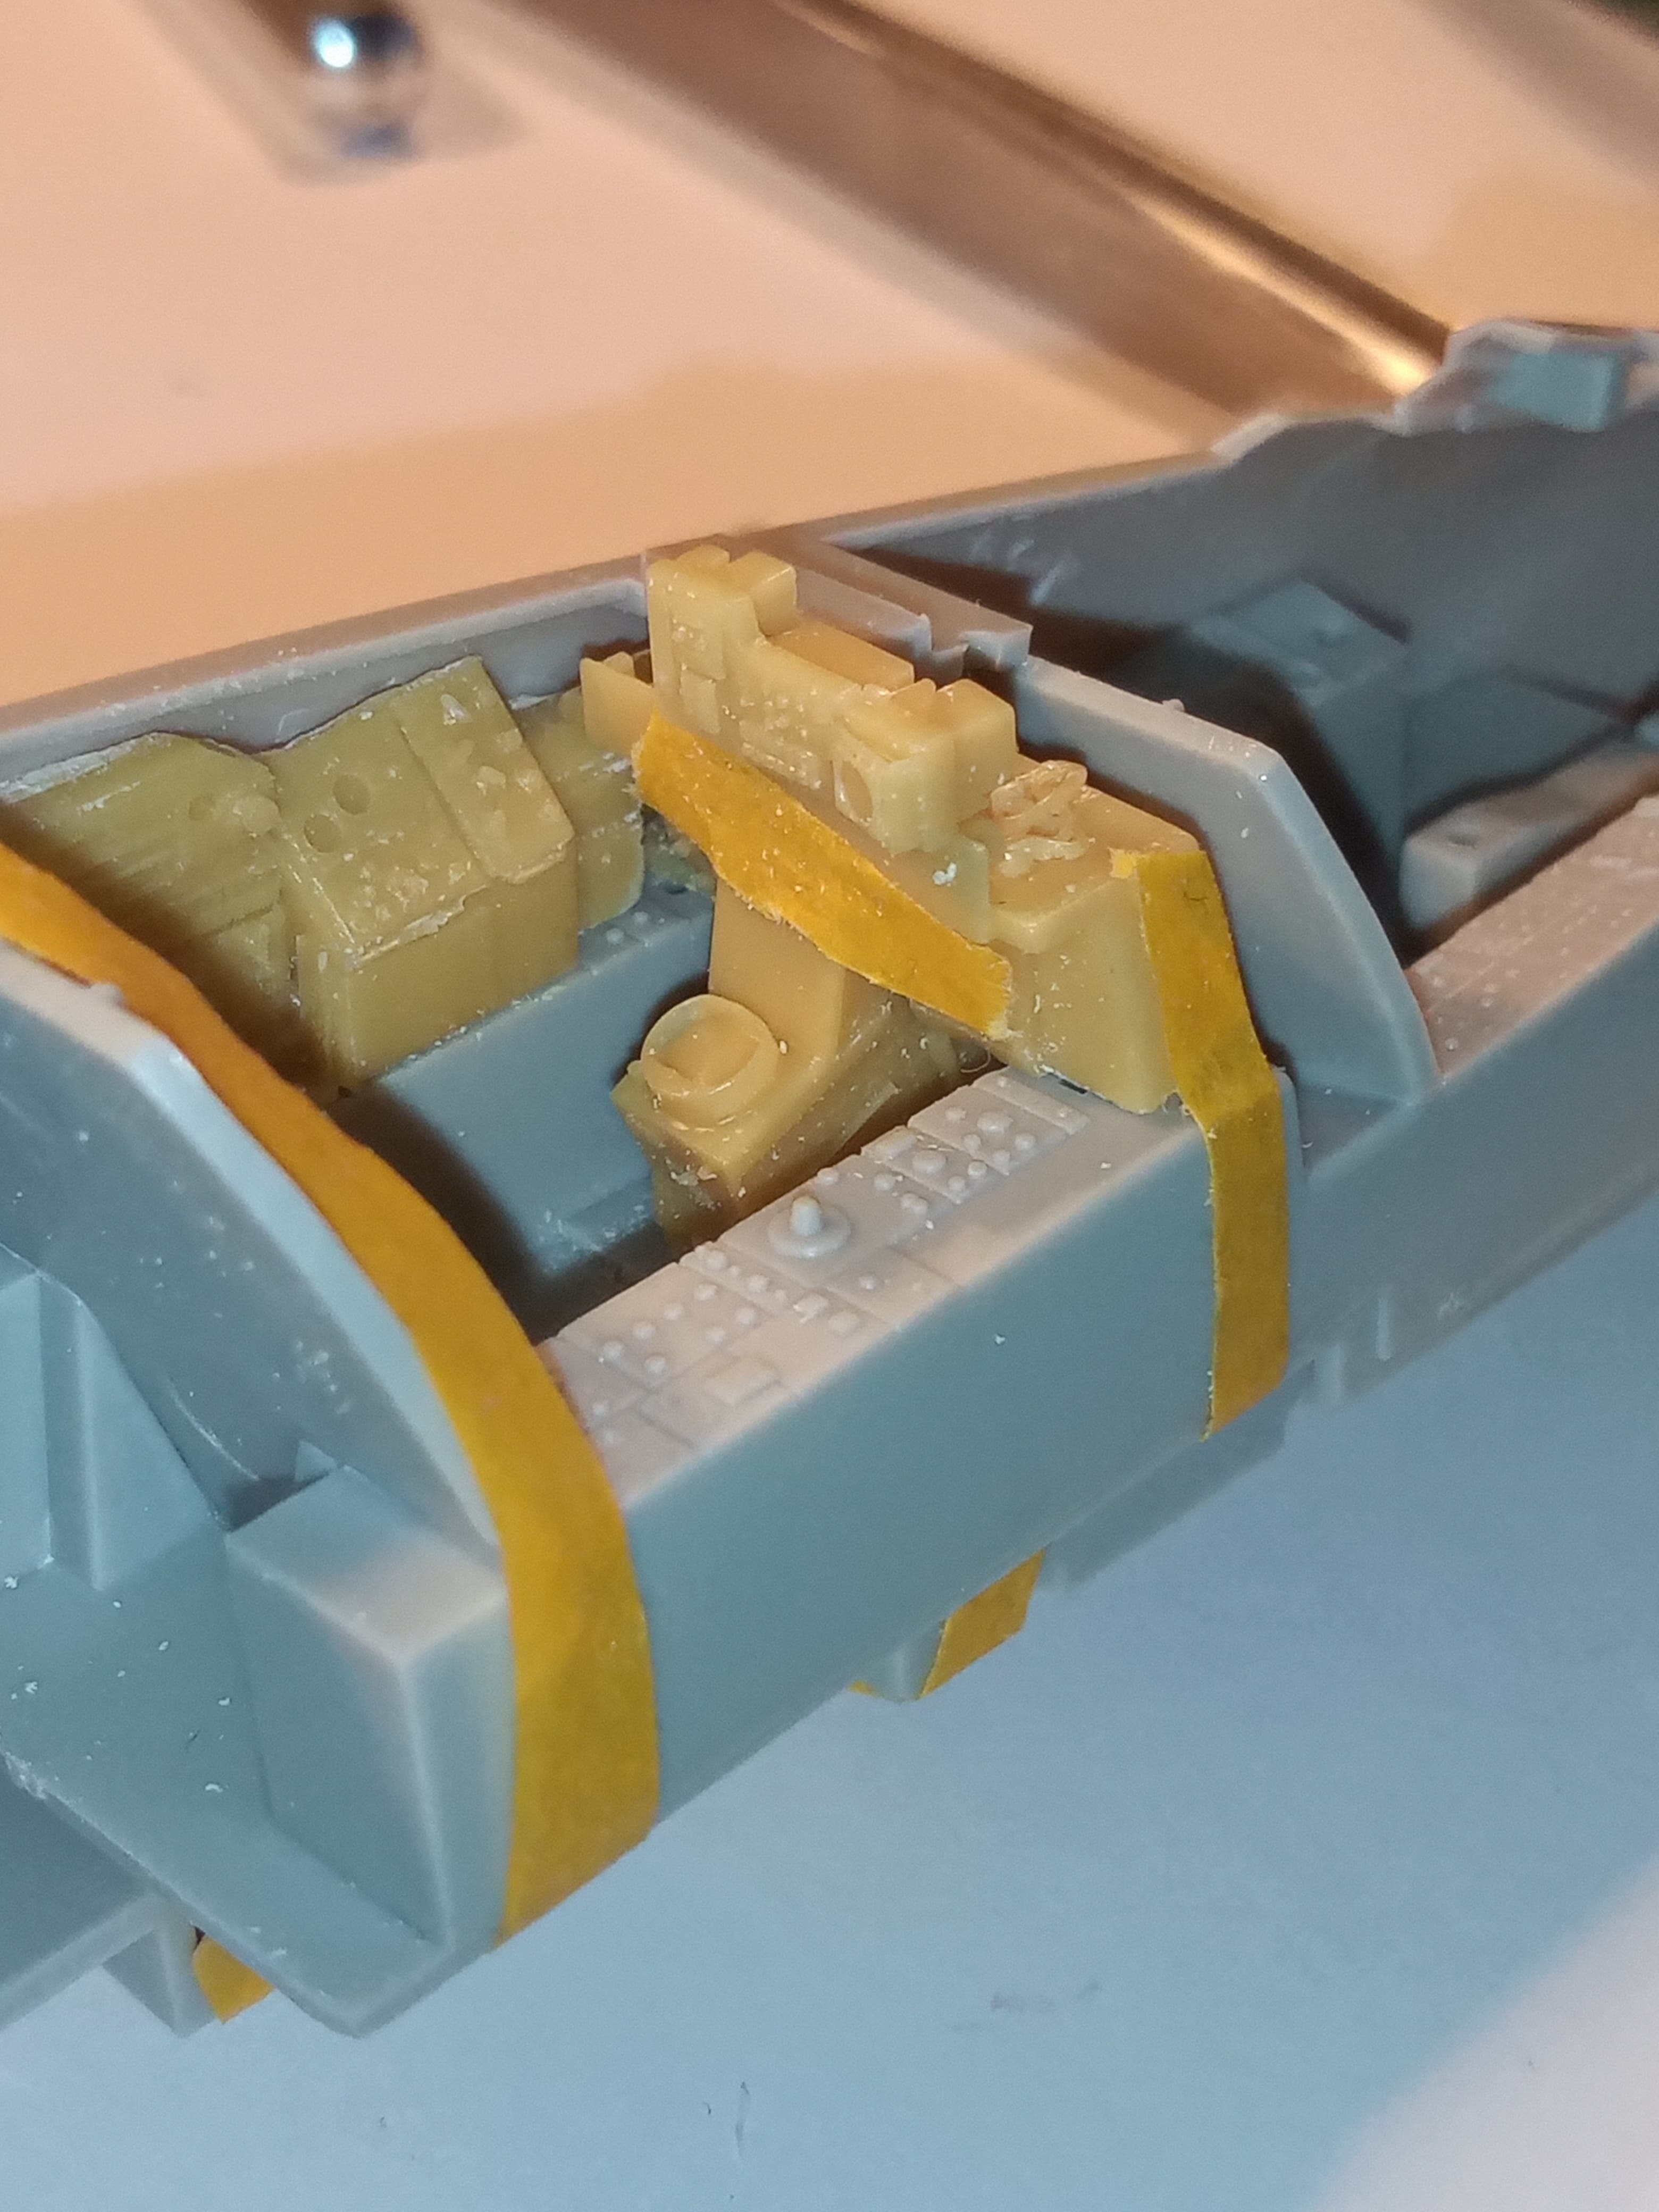
Cut down versions of the Aires side wall resin panels so they fit and blend in with the kit tub.
Would I recommend the Aires kit … Definitely not on this kit …
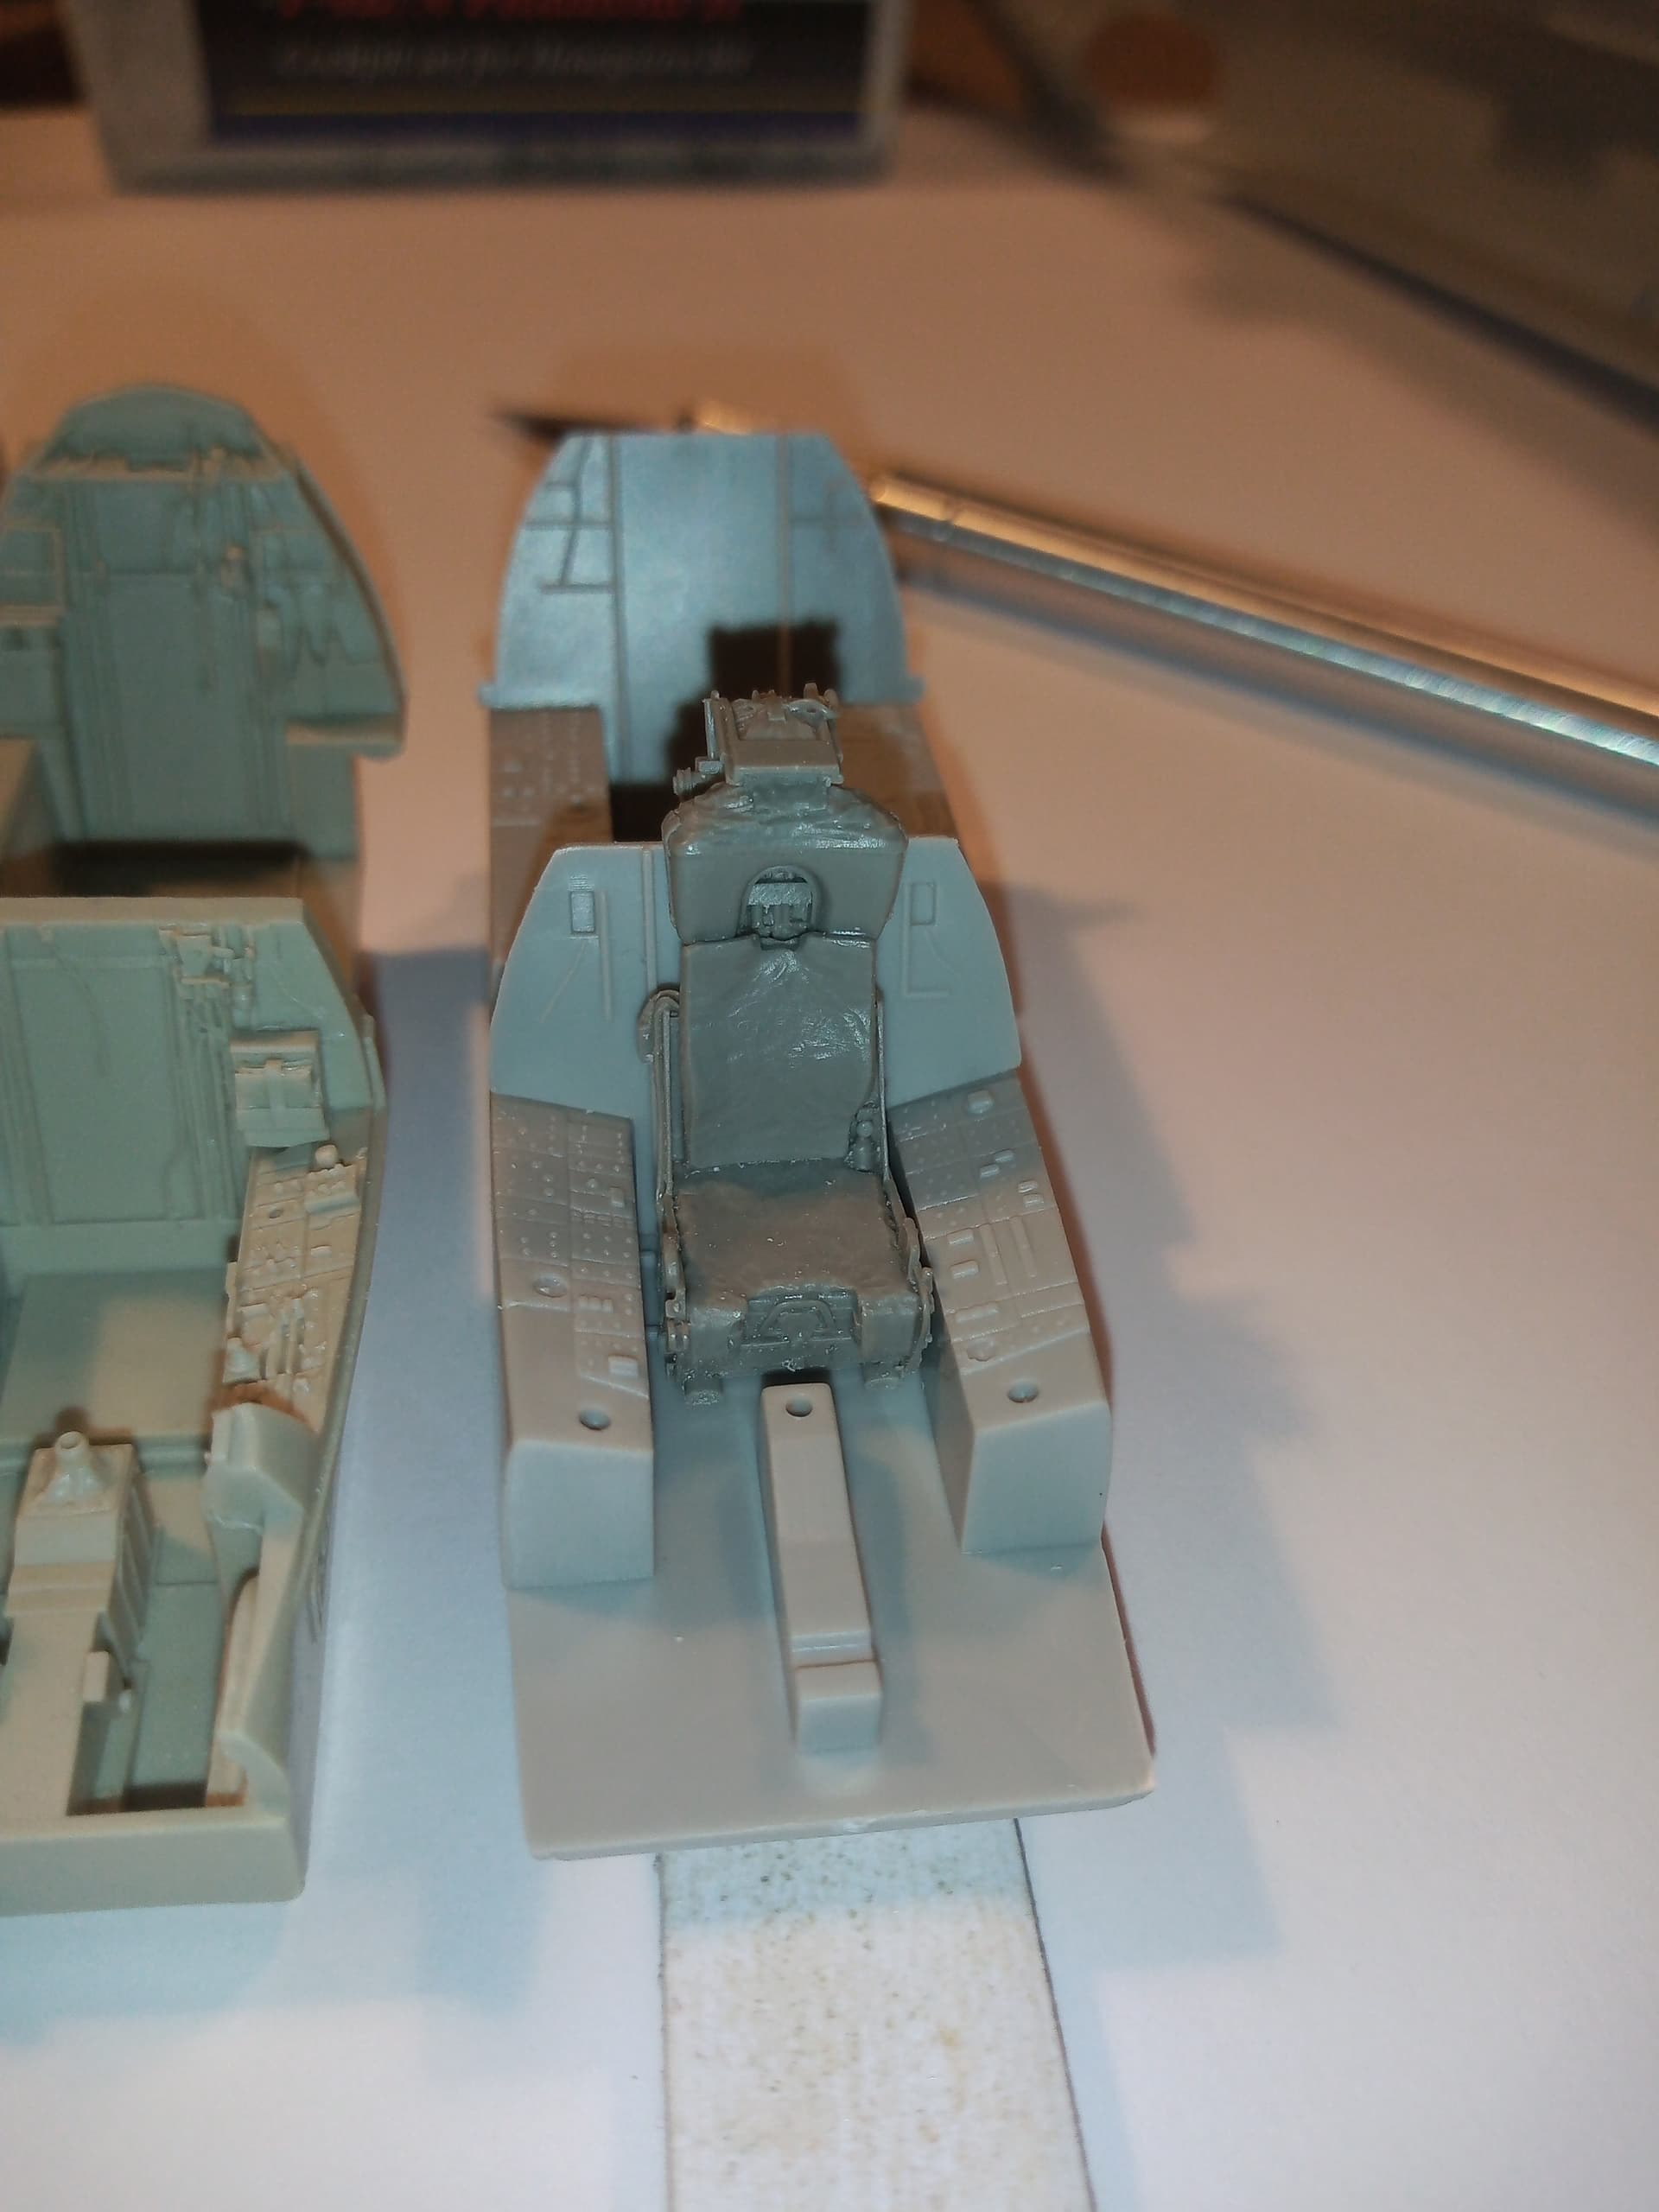
Did a mock up for LH side of the RIO area.
Tub dry fitted and masked in place, RIO instrument panel masked in place and the cut down section of the sidewall panel dry fitted.
Definitely gives the area a bit more detail and interest…
And with the Aires seat dry fitted … you can see how low it is on the side view … Will need to be raised up a bit …
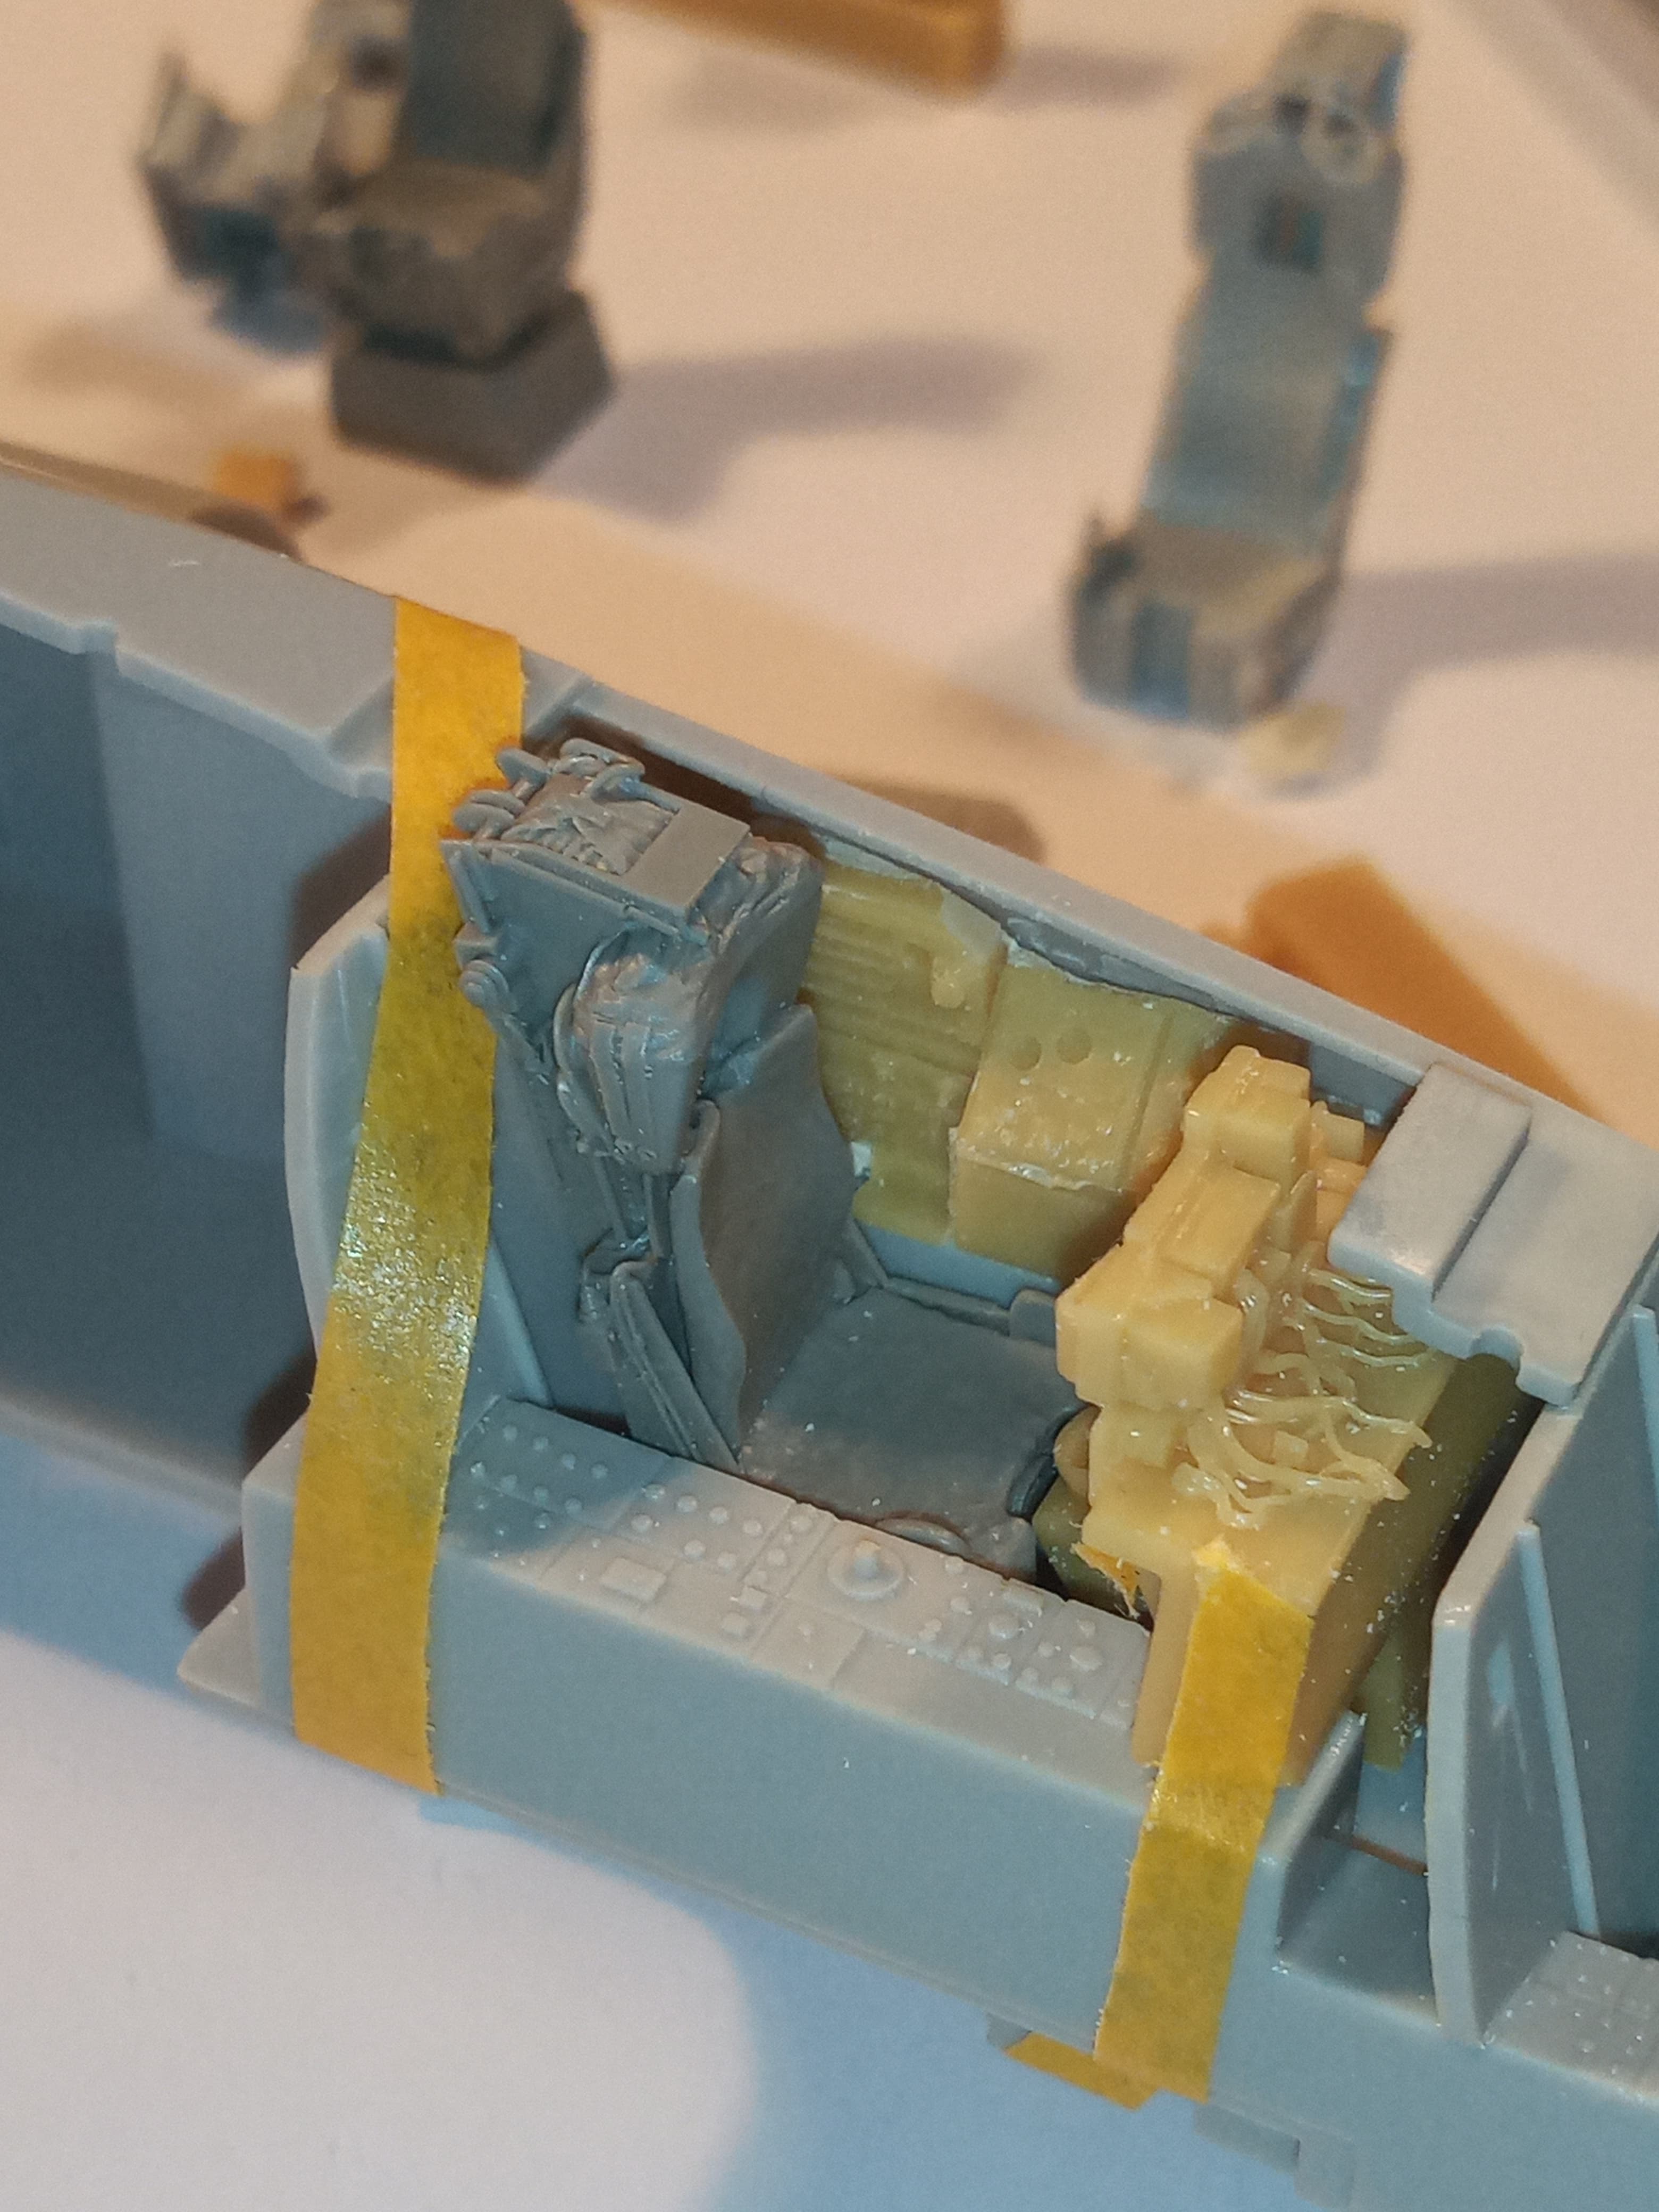
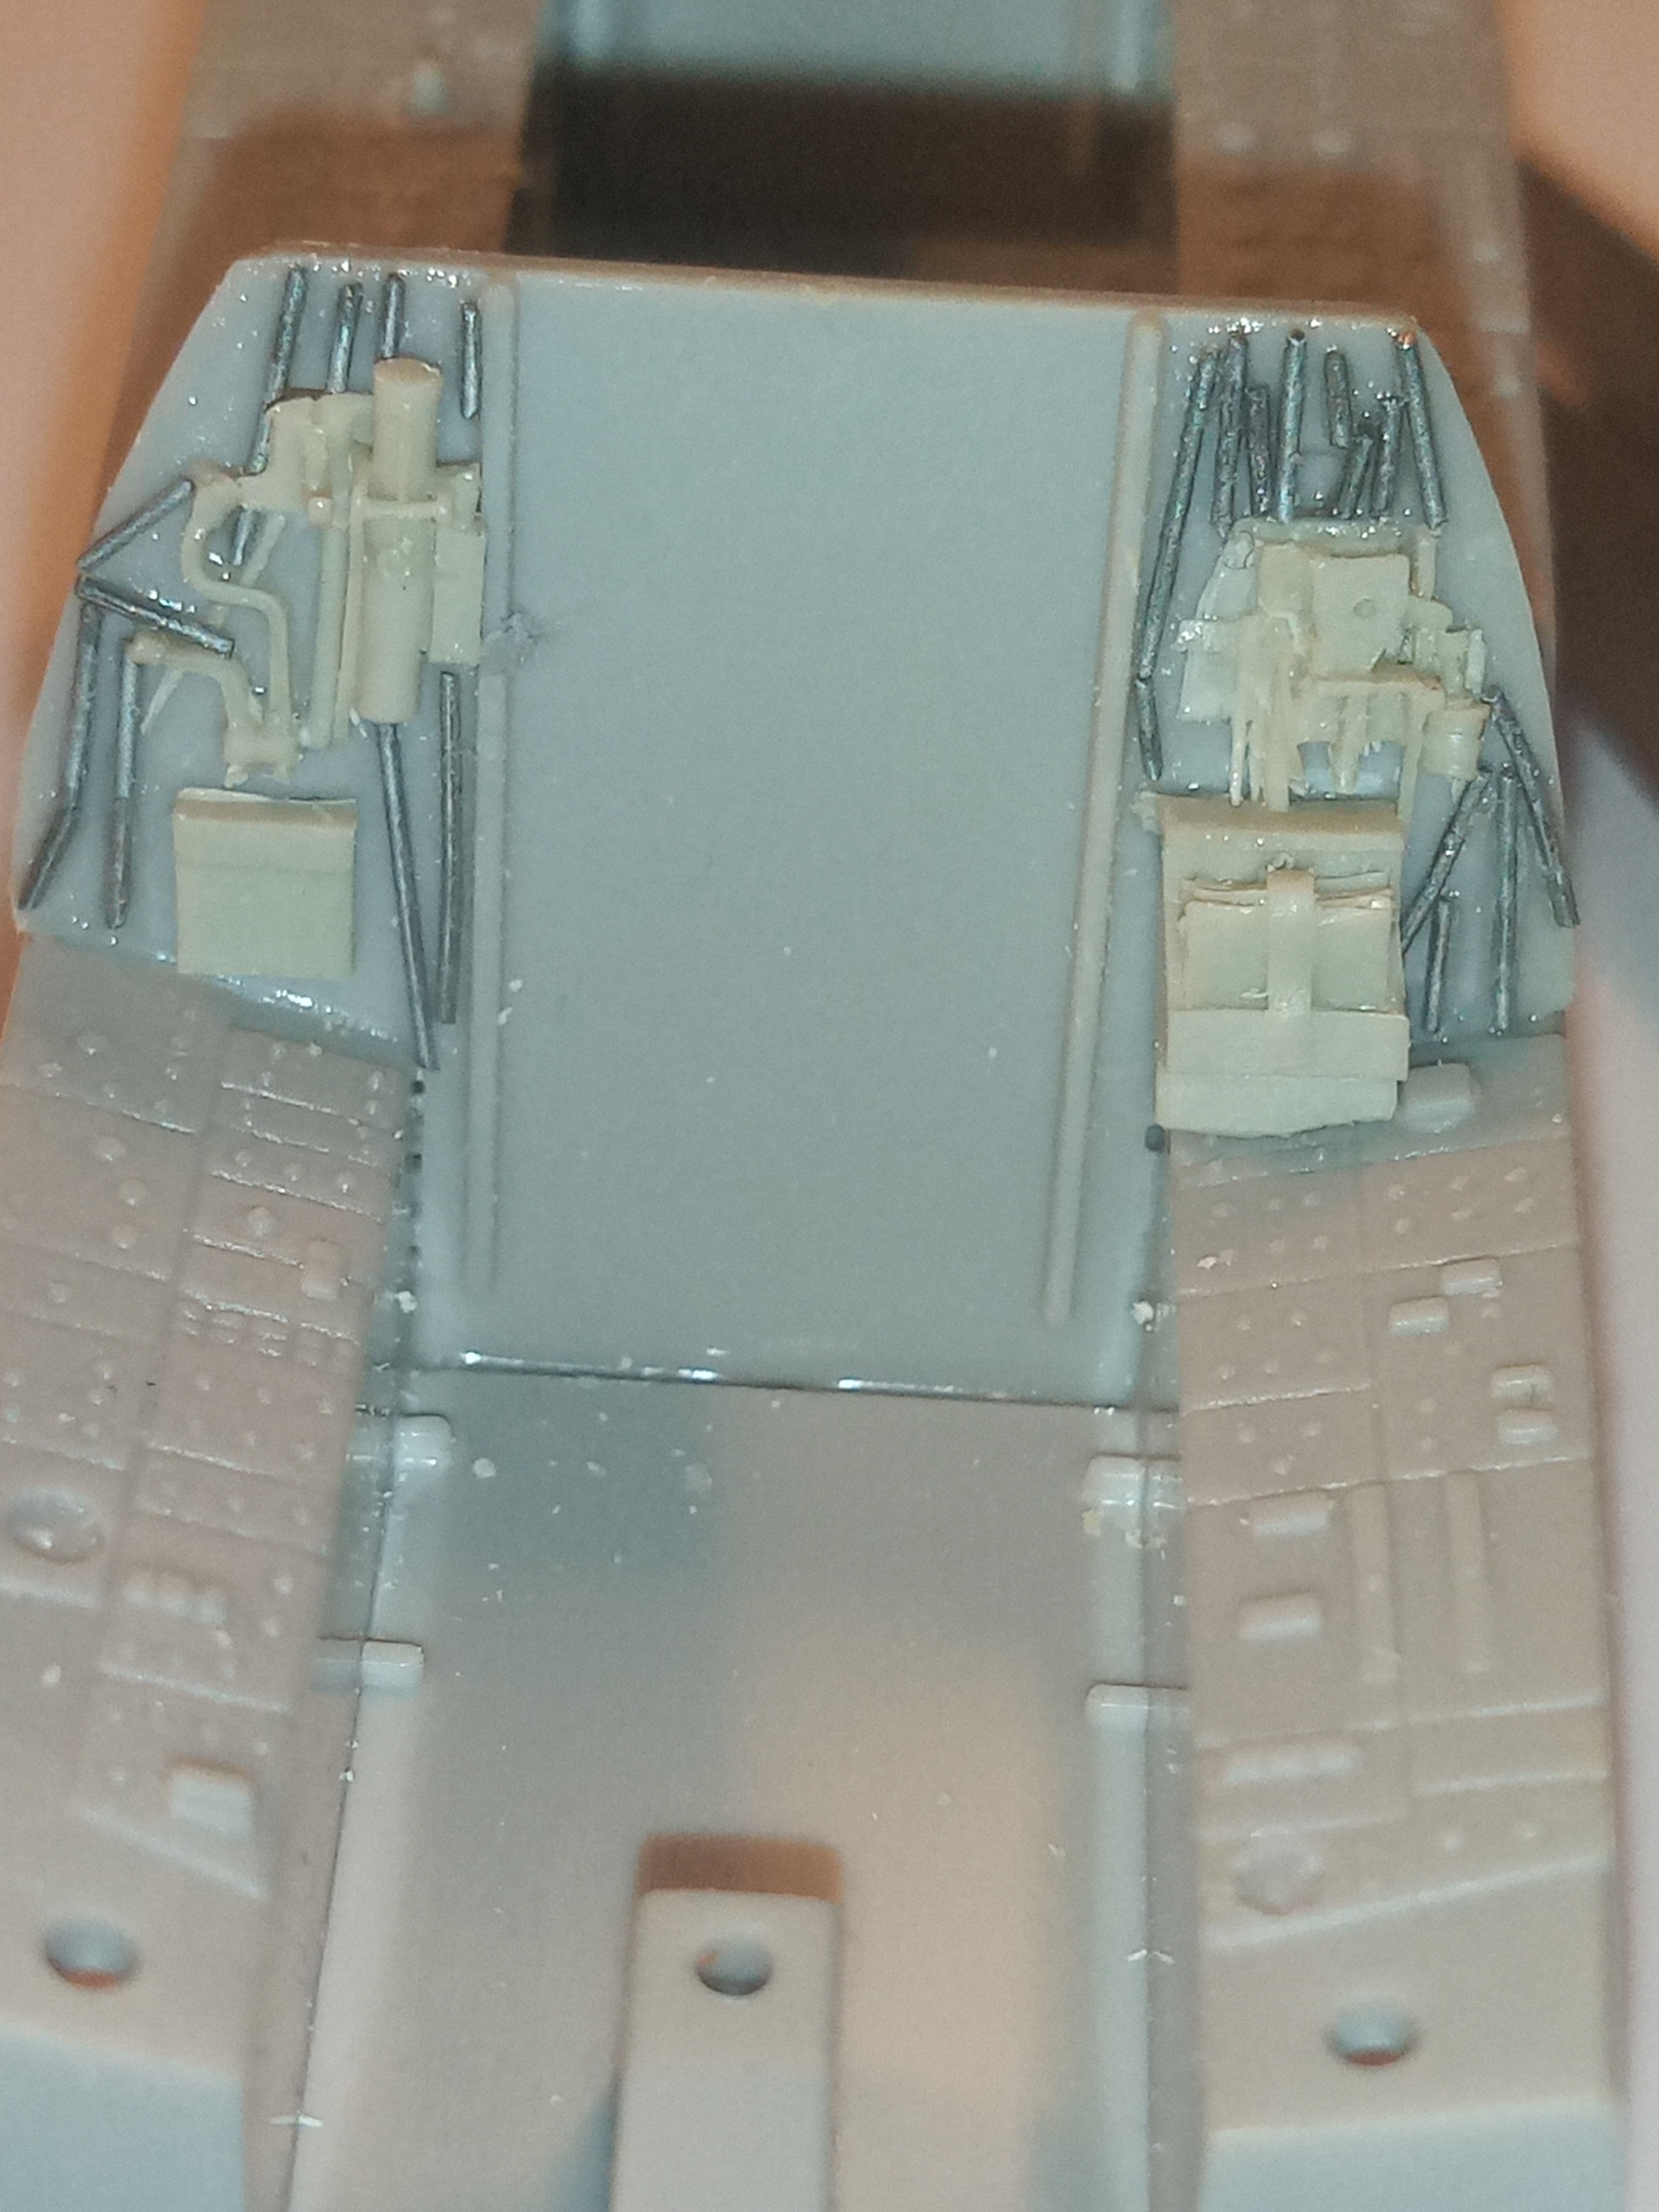
Started to add some details to the rear bulkheads. Used some of the resin sliced from the Aires cockpit tub and glued back into the same place and some .5mm wire to show cables, not 100% accurate but enough to add some interest to those areas…
Pilot section
And the RIO back wall.
And the sidewall sections and instrument panels which need priming then painting and then adding the PE detail.