Pinwash, weathering, sealing and stuff

I think part of the problem is that some tank crews (and others)

painted the muzzle break black.


Also, despite the name, smokeless powders do create some smoke. But as has been stated before, the effect is pretty light, and mostly in the baffles of the muzzle break, like this white washed Panzer IV:
Panzer_IV_Ausf_H_ost

Or this Super Sherman:

Most of the time it is just not there:


a339dcd22fdcd5795235627dca9aef39

3 Likes

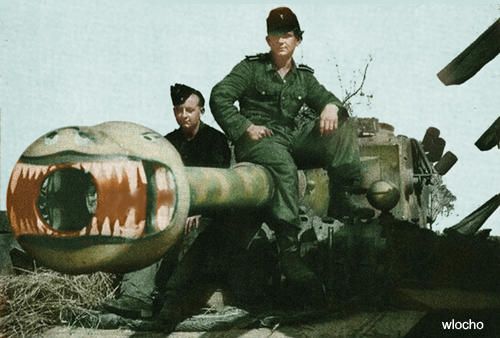
Ha, the last one is one hell of a muzzle brake, I am going to do that someday! :grinning_face_with_smiling_eyes:

This hobby really came in a dark moment in my life, I always liked WW2 military vehicles as a child and in adulthood I spent a lot of time looking at other peopleā€™s models thinking it was too difficult for me.
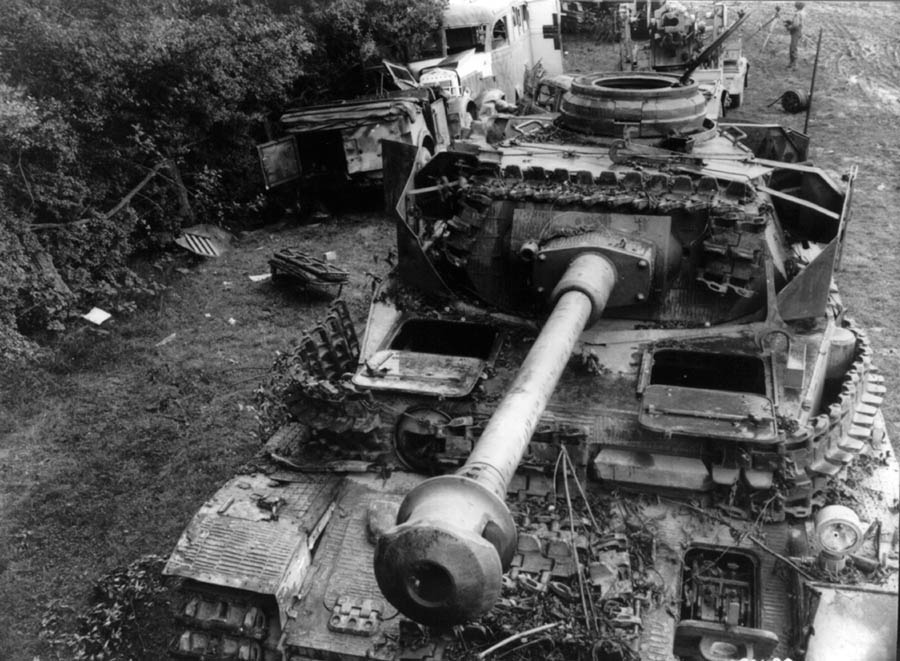
Then a couple of months ago got this ISU on the Amazon suggestions and told me ā€œwhat the hell, why not?ā€.

The plan originally was to buy the model, assemble it, applying some cheap artist paint and be done with it.

Assembly was surprisingly easy, barring some unclear instructions from the Zvezda leaflet.
Had zero tools, just a nail file and a box cutter.
I also was forced to put away the revell cement, as itā€™s fumes proved deadly to me with a very strong eye/nose irritation even with the few tiny drops applied. Solved it buying the Tamyia Lemonene glue, it lacks the precision nozzle but it glues and smells tasty.

Artist paint without primer was a disaster with horrendous brush marks and paint globs, so I took it away and spent 2 days scrubbing with toothbrush and alcohol, with my heart reaching the bottom of my feet because I had grown affectionate to that lump of plastic.
Since then, it snowballed out of control with me impulse buying a cheap 60 ā‚¬ airbrush not even knowing how to operate and clean it, Italeri paints, thinner and a Tamyia Fine Surface Primer can.

Then spent a couple of hobby days essentially unclogging, cleaning and swearing until I found the right thinner balance for the airbrush (LOTS and LOTS).

Meanwhile bought some revell files and tweezers and an Army painter sprue cutter to use for my next model which I also ended up inpulse-buying, a newer Zvedza kit, a KV-2, currently sitting on my shelf.
(I just inspected it, it looks like a much newer kit with an actual instruction booklet, more decals and a nice set of plastic tracks.

This hobby will definitely help me to take my mind off my life, so I hope to be a regular presence around here. Iā€™ll post updates in the weekend, thatā€™s when I usually work.

By the way, since the shop is very far from my home I have a chance to hoard some materiel at decent prices. They got Humbrol and Vallejo stuff. Anything you think I should buy besides the already mentioned items?
I was thinking of making a German vehicle after the ISU, for now I want to avoid camos so itā€™s going to be the standard german grey. What would the Vallejo equivalent be?

1 Like

@Nightgaunt - your post made me smile and laugh. I remember starting out this way too. Was the Revell glue in blue packaging and called ā€˜Contactaā€™? I used sooooo much of this stuff on early models they were basically 50% glue. Also remember painting with whatever looked interesting- gloss yellow and black for one scheme I remember.

That Tamiya stuff does smell tasty compared to some glues!

Donā€™t worry about tools or supplies too much- you seem to be on the right track and have got the basic stuff you need.

Yes, it was the blue Contacta glue, even a applying a tiny glob made me physically feel the fumes hitting my eyes, and had significant eye/nose burning feel for a couple of days, the same sensation I get by smelling burning industrial waste (yes, I actually smelled that once).

After this, the huge ā€œCANCERā€ label (which was cleverly hidden when shopping on Amazon) really made me wonder if my life was worth the 5 ā‚¬ price difference, and despite my crippling daily thoughts, I decided it was not. So bought the Lemonene stuff. Itā€™s fun because it actually smells like orange, not lemon.
I think that one of these days I am going to lick that tiny brush.

Yes, about tools I think I am fine for now. I lack a professional blade-cutter, but the ArmyPainter choppers should be fine for that.
I just want to hoard some stuff, mainly the washes, varnishes and some paints I lack, like the german gray. The shop is the only one in the 50 km range and I will happen to be near it this week so I want to make the most of it.
Amazon had good prices for tools and the Italeri ā€œWW2 Allied Vehiclesā€ and ā€œModern Military Vehiclesā€ paint sets covered all my needs for now: I got many shades of green and single pots of brown, rust, wood, couple of desert colors, black, tire rubber and gunmetal. They were decently priced but I cannot buy single paint pots because of the shipping charges which end up triplicating the paint price.

I definitely need german gray, could you guys show me the correct Vallejo gray for that?
I was also thinking of a white for snow camos.

1 Like

Great story, glad to see you ventured in this wonderful world of modelling. Being your first kit, the base looks very good indeed.

Amazon is not the best place to shop for modelling stuff, depending on where you are some online shops should be much better, wider range and prices.

Personally I would stay away from Italeri and Humbrol paints and stick with vallejo. Note that they have two (well, in fact more but these are the ones we use) ranges, Model Color and Model Air. The latter is for airbrush and the first, for brush.
Model Air German Gray is reference 71.062

As you seem to be sensitive to revell glue, better use acrilyc products like paints and weathering. Oils should be fine, I think, get a good thinner for them.

Have fun, and do not be discouraged if results are less than perfect because it needs practice.

1 Like

Thanks for the suggestions and the encouragement guys, really appreciated.

Right now I am evaluating purchasing options for the above stuff.

1 Like

varanusk, I found german gray Vallejo air 70.995, is that good for main coats of german armor? The bottle color looks really darkā€¦
Also, these ā€œAirā€ colors come in 17 ml, how many models can you squeeze out of it adding some thinning?

I was wondering, what other important colors or stuff do I need?
I found a shop on amazon that has decent prices and I want to make the most out of the delivery fee.
I also found a set of 3 Tamyia masking tapes ā€œreloadsā€ at 3 euros, wonder why the single version with the plastic thingy costs almost triple.

I think I need something for future winter camos, whatā€™s the best model air to choose, white or ā€œwhite greyā€?

Any other important color/stuff?

Sorry not trying to hijack the thread but the issue of barrel blackening came up and Iā€™ve always had a question on this so it feels like a good time to ask?

I know most people say no barrel blacking occurs, but I am curious as to why? Is it due to meticulous cleaning? While I do agree that the black barrel is often overdone, from personal experience shooting smaller caliber guns, the barrel end does blacken. Okay, you canā€™t see it blacken on small guns because the barrel is usually black/deep blue, but touch the end of a barrel that hasnā€™t been cleaned and you get a black carbon residue on your hands. Curious why the same thing wouldnā€™t happen with AFV

1 Like

70.995 is the right shade but on Model Color range:

Vallejo Model Color German Grey 70995 for painting miniatures (acrylicosvallejo.com)

Although you still could airbrush it with thinner, it is not the specific Model Air product::

Model Air Vallejo RAL6006 German Grey 71268 acrylic airbrush color (acrylicosvallejo.com)

Note that I made a mistake, and correct reference is 71.268

A 17ml bottle can last for at least 3-5 medium sized models.

Vallejo Flow Improver is a great aid for airbrushing, get a bottle as well and add 10% to the paint when you mix it with thinner.

For winter camo, I guess it is a matter of preferences. I use white.

Placed the order, found that 71.268 grey.

Unfortunately the dark grey wash was out of stock sop I picked up the vallejo grey wash 76.516. I hope it is dark enough for my vehicle. It should be as the label says ā€œfor dark vehiclesā€.
What gets me also worried, is that the Dark brown wash I bought is labeled ā€œfor light colorsā€ā€¦
now I really donā€™t know if I just wasted money or is these two could apply to a decent effect on my green ISU.
I also got the flow improver, a bottle of thinner, 2 bottles of matt varnish and 2 of gloss varnish. also threw in that masking tape.

Well those sound like good purchases. Thereā€™s no real need to pay huge attention to wash labels that say things like ā€˜for dark vehiclesā€™. Its a suggestion- washes of any color can be used on any finish- I experiment with them all the time. Dark brown on green should not be a problem- however, those washes are acrylic and for this you need to be aware that they dry very quickly and once dry, cannot be worked anymore. They can sometimes create tide-marks as well. The best way to apply them is to go slowly and with ā€˜less is moreā€™ in mind. If you feel you didnā€™t get enough on a particular area, you can always go back and do it again. Test it out on a difficult to see area first, like the underside of the tank.

Good information above from Karl.

Also some interesting advice here:

1 Like

Some questions to prepared when the package arrives:

  1. Vallejo varnishes: whatā€™s the ideal varnish:thinner ratio?
    I am getting quite scared reading about people having whitish frosty finish
    And how many drops of flow improver? Ideal spray pressure and distance?

  2. Wash: suppose I go over the top with application, whats the best way to clean it up right away? And later when it settles?

  3. I got this standard gray and dark brown washes: how should those be applied? Brown for bolts, and bottom hull details, and gray for panel sides and hatches? What about all those grilles on the back of the hull? Any advice or preference is really appreciated as I have no idea about the final results with either of those.

Donā€™t worry too much about paint/thinner ratios- doing a test first will give you an idea of what is needed before you try it on your current project. Personally, I thin Vallejo varnish with distilled water- the correct consistency of the mix should resemble skimmed milk. Thatā€™s if you are spraying it.

If you need to clean up a bit of a wash then keep a moist medium sized round brush handy. Just draw the excess up with the brush- a cotton bud works well too.

Generally speaking a wash should be one color for all of the vehicle. For a Russian green coloured vehicle a dark brown wash is a sound choice.

Thanks, good info.

Could you show me the effect of well made finished brown wash?
And maybe also a good video that shows the proper technique, there ae so many around!

About the ratio of the varnish, just to err on the safest side for a rookie who might make mistakes, is 1:1 good? About the pressure? Flow improver, is that bad for the varnish?

Also, is there any other easy weathering effect I might try along with this dark brown pin wash?

I think this video shows how to do acrylic washes quite well.

A ratio of 1:1 is kind of what you are looking for. I donā€™t personally think of it in terms of numbers. For me itā€™s about the consistency of the mix. Pressure wise you should probably use the same as for regular Vallejo Air but thereā€™s no harm in upping or lowering it to see what happens. Canā€™t speak about flow improver though as I donā€™t use it.

I just applied varnish, not Vallejo but a mix of future and Tamiya flat base.

I found to avoid frosting, the distance, pressure, and flow were crucial. Too far, too low pressure or too low flow and you get frosting, essentially the varnish dries just before hitting the model and you get what looks like a dusting of snow. Too close or too much flow and the varnish gets to wet drying more glossy. I would experiment on scrap if you can

Delivery is expected next week, Iā€™ll have to wait.

Anyway, thatā€™s so weird how this hobby changes your perspective of the world around you.
Now I look at my car and itā€™s not junky and dirty anymore, itā€™s just well weathered.

Back to the ISU, today I am gluing the two halves and a couple of track-links on the lower plates.
Luckily, judging from the kitā€™s picture, the tracks are not supposed to sag, they should be completely straight and simply pushing the hull on them seems to do the trick.

I was wondering, after the pin-wash that shovel and pick will look a bit too ā€œnewā€, what can I do on them?
And about the machinegun, besides starting over, will a gray wash bath make it look darker?

Washes or filters , are best done in thin light layers to build up to what you want.
Wood handles ā€¦ Use umber
Metal / machine gunā€¦ Paynes grey or blue.
Tri tone camo fade ā€¦ Pale yellow almost white.
Rain streaks ā€¦ Sand color.
Green vehicles / general use filter ā€¦ Burnt umber or burnt sienna.
These are not hard and fast rules, they are what I use . Experiment and see what works for you.

1 Like