@jfrank
Thank you very much, Frank. But my name is Joerg. 

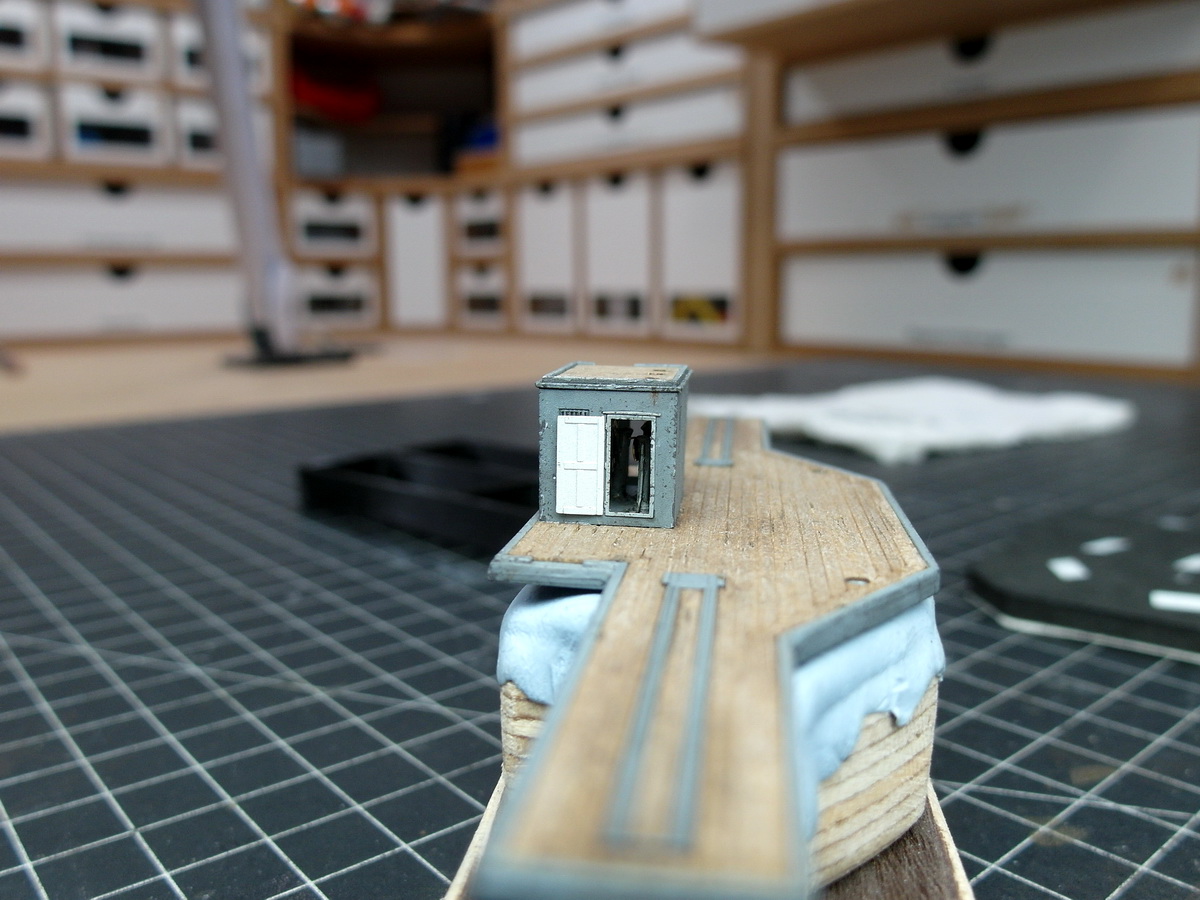
Today I dealt with the doors of the wheelhouses. I discussed the color of the inner door panels with users who possess considerable maritime knowledge.
Wheelhouses are usually painted white on the inside, so I logically painted the door panels white as well. But I didn’t like it at all.
A user who served in the navy told me that bulkheads were often painted grey on the inside. And I followed that example with the doors.
I think it just looks more harmonious.
9 Likes
Now that I’ve mastered the doors, I’m moving straight on to the next section, which I was dreading again.
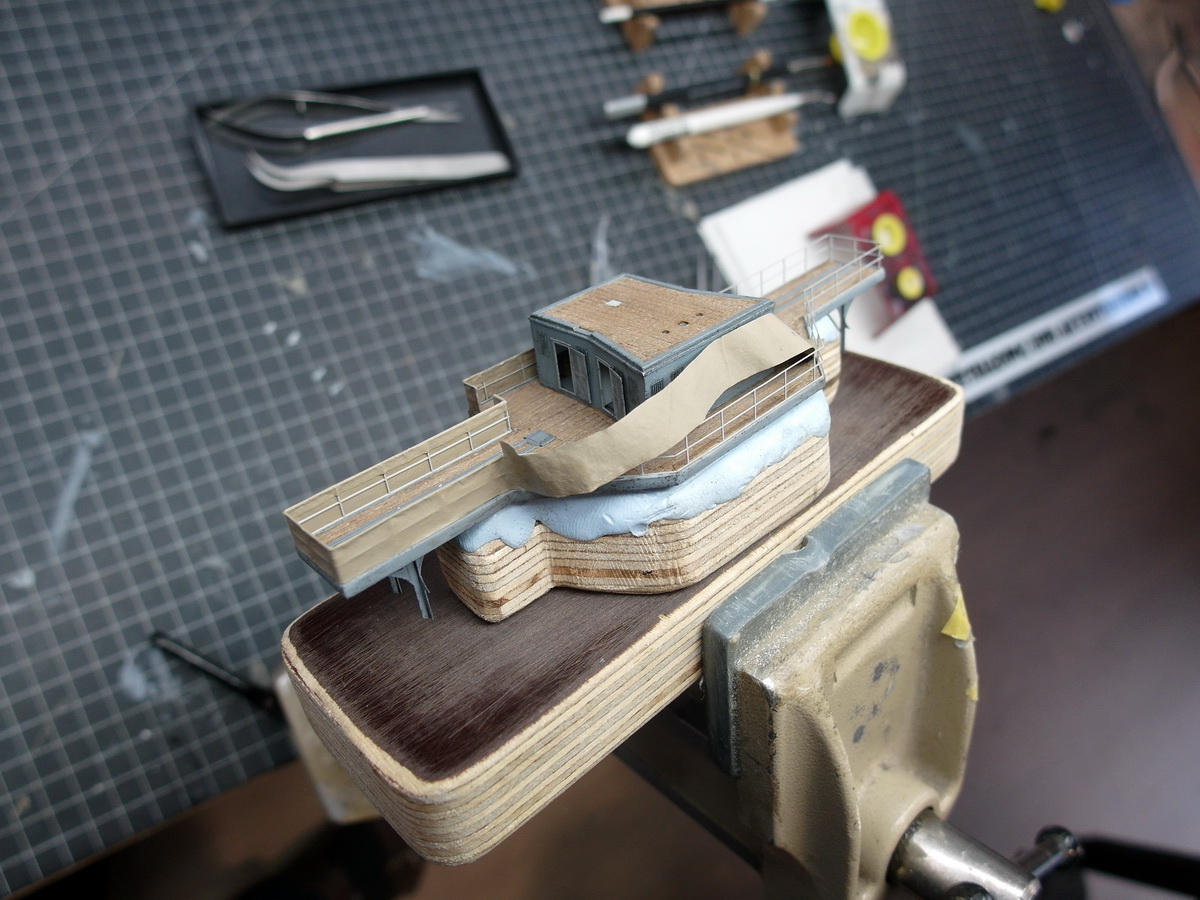
The mere thought of the tarpaulin that attaches to the railing made me break out in a sweat. This is where my homemade handle really comes in handy and calms me down a bit. It securely holds the part in my vise, making it much easier to work on.
I first cut tissue paper to the correct size using my paper cutter and dyed it brown. Then, using a very thin mixture of water and MIG acrylic glue, I applied the paper to the railing.
Shaped and aged, I’m already satisfied with my first attempt.
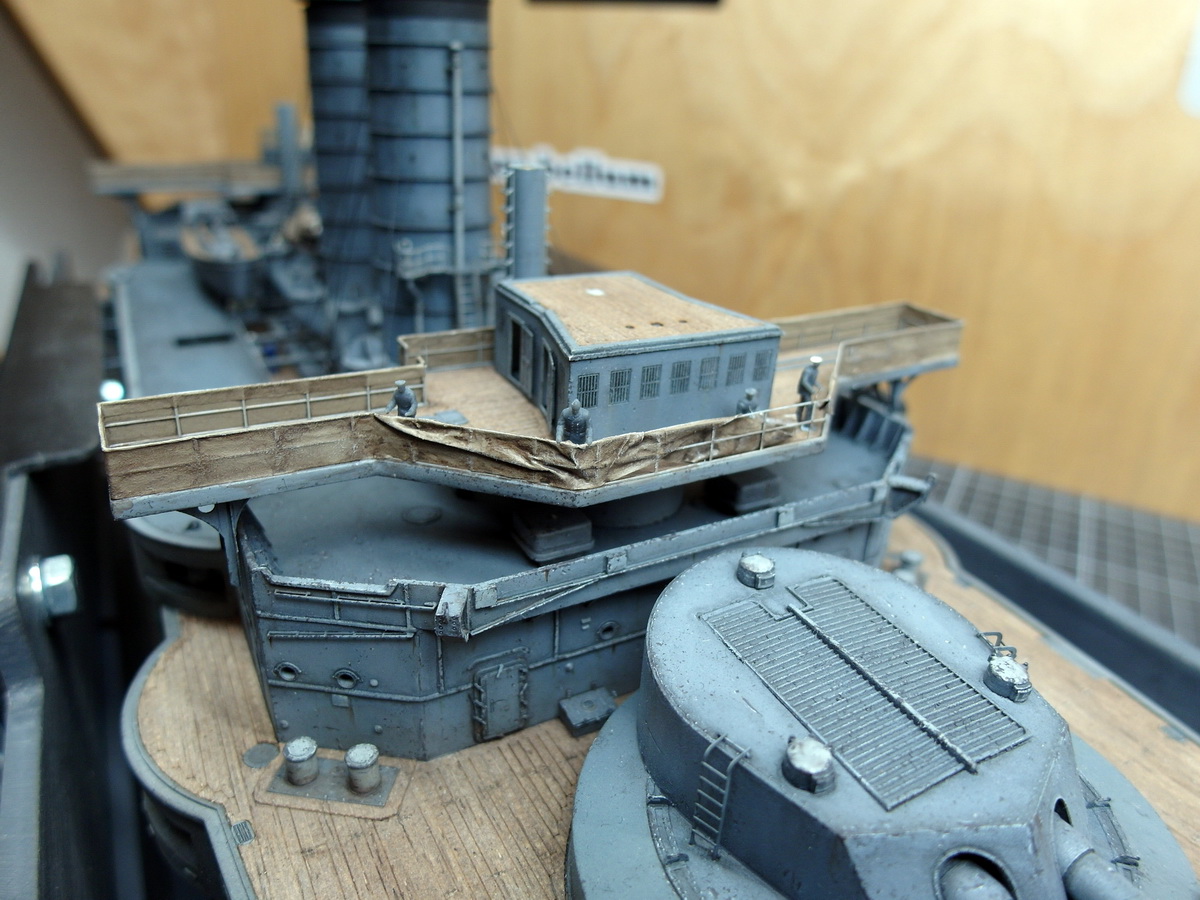
Placed on the ship again for testing and it fits.
Even at the stern, where the space between the bridge and the mast is extremely tight. Everything is satisfactory.
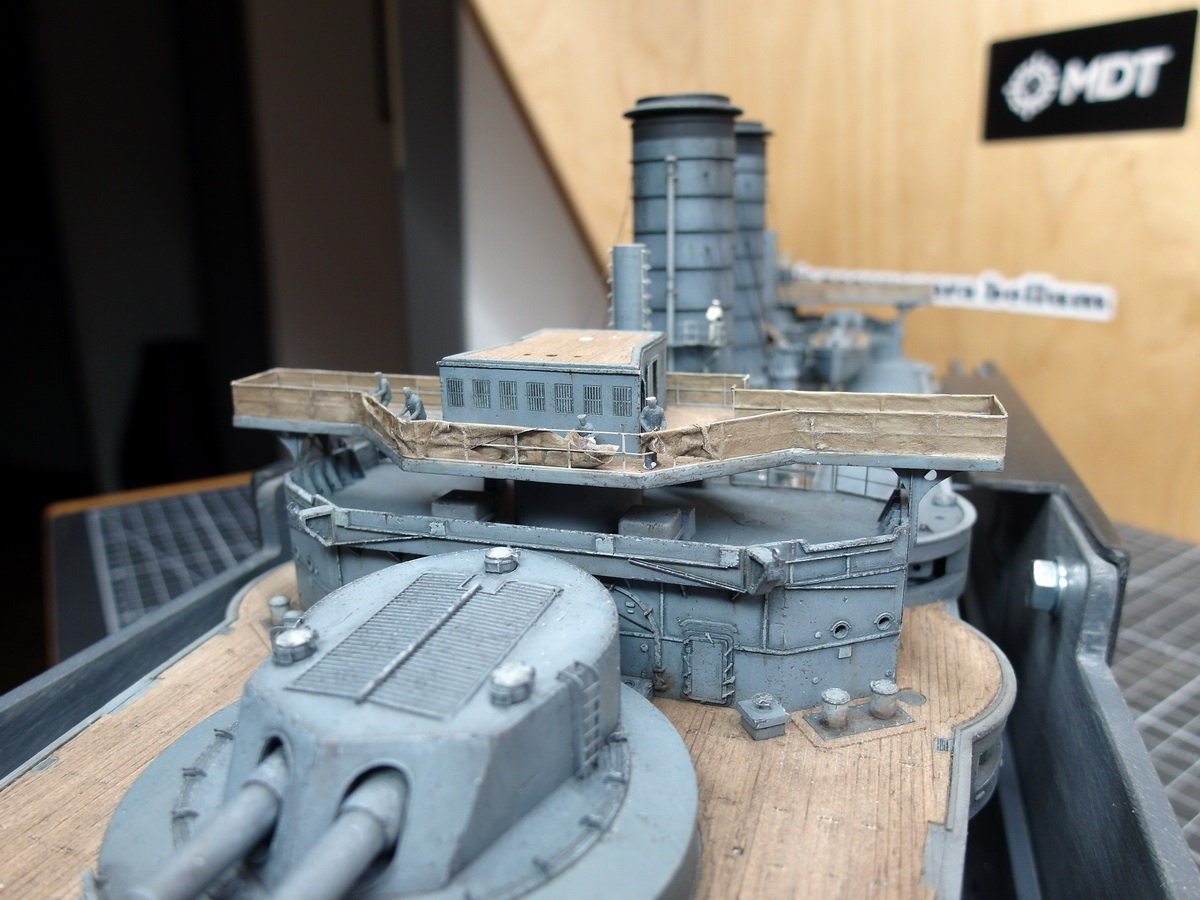
After I succeeded with that, I continued tinkering a bit with the stand for storing the signal lines. You can see a first prototype in the following picture.
The height is currently flush with the railing. I think I’ll make it a bit higher, though. I’ll also make the signal flags out of tissue paper and put them on the shelf.
Let’s see how that looks.
9 Likes
Moving on.
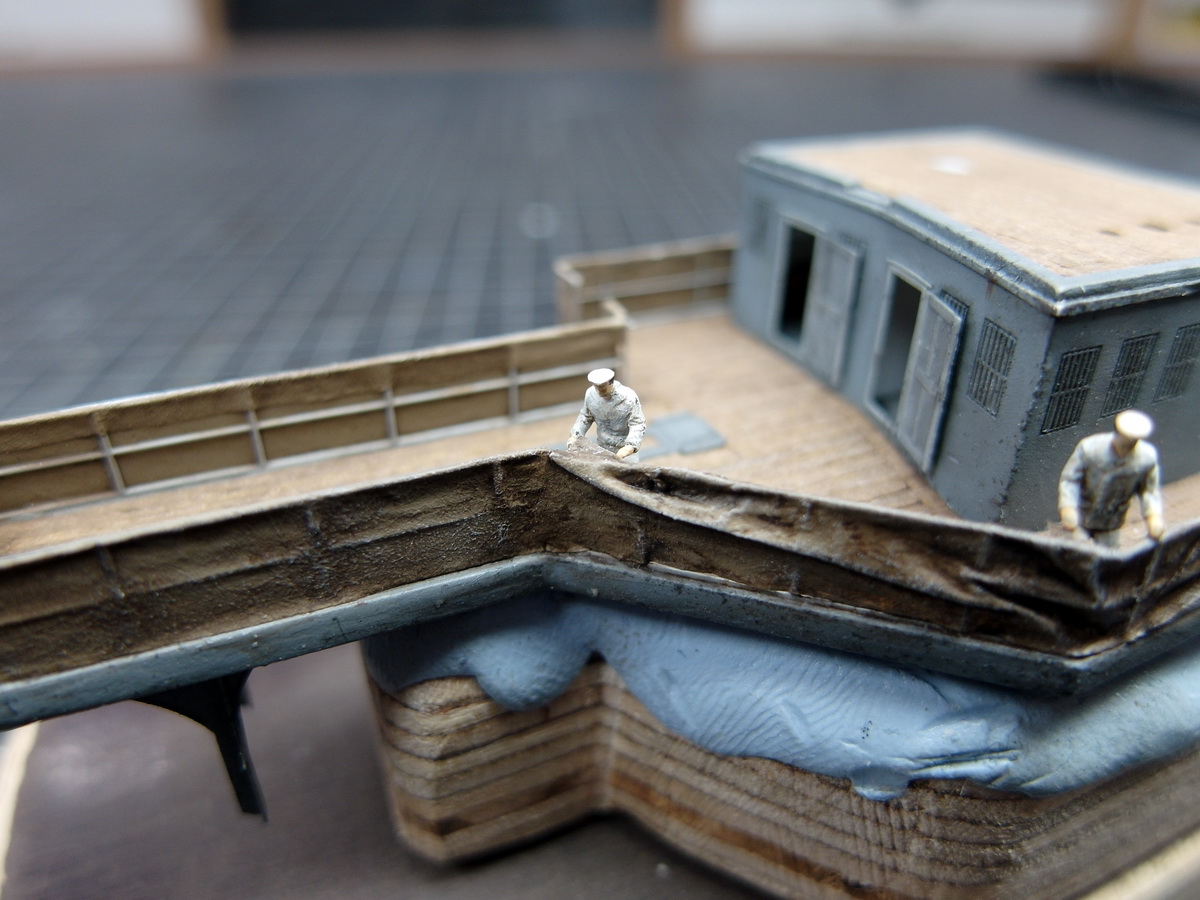
A long strip of colored tissue paper is placed around the remaining railing of the bridge and cut at the corners.
Once the strip has dried, I can fold over the top edge between the cuts and glue it down.
A small model-making spatula with a ball head helps to neatly shape the tarpaulin against the railing.
Then age again and you’re done.
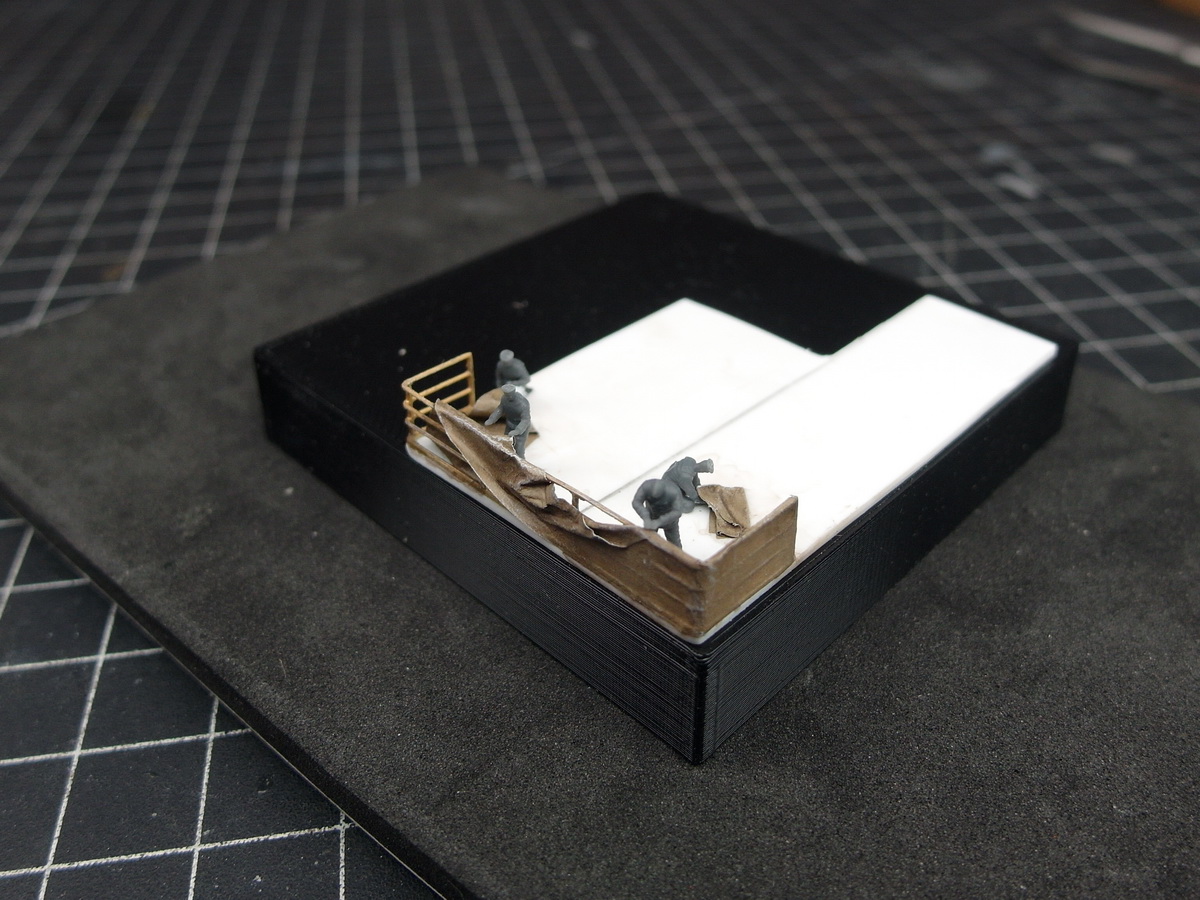
Once that was done, I looked at my work and thought, hmm, how could I make it a little more interesting? Maybe create a little scene where the crew is attaching the tarpaulin to the railing?
Let’s see.
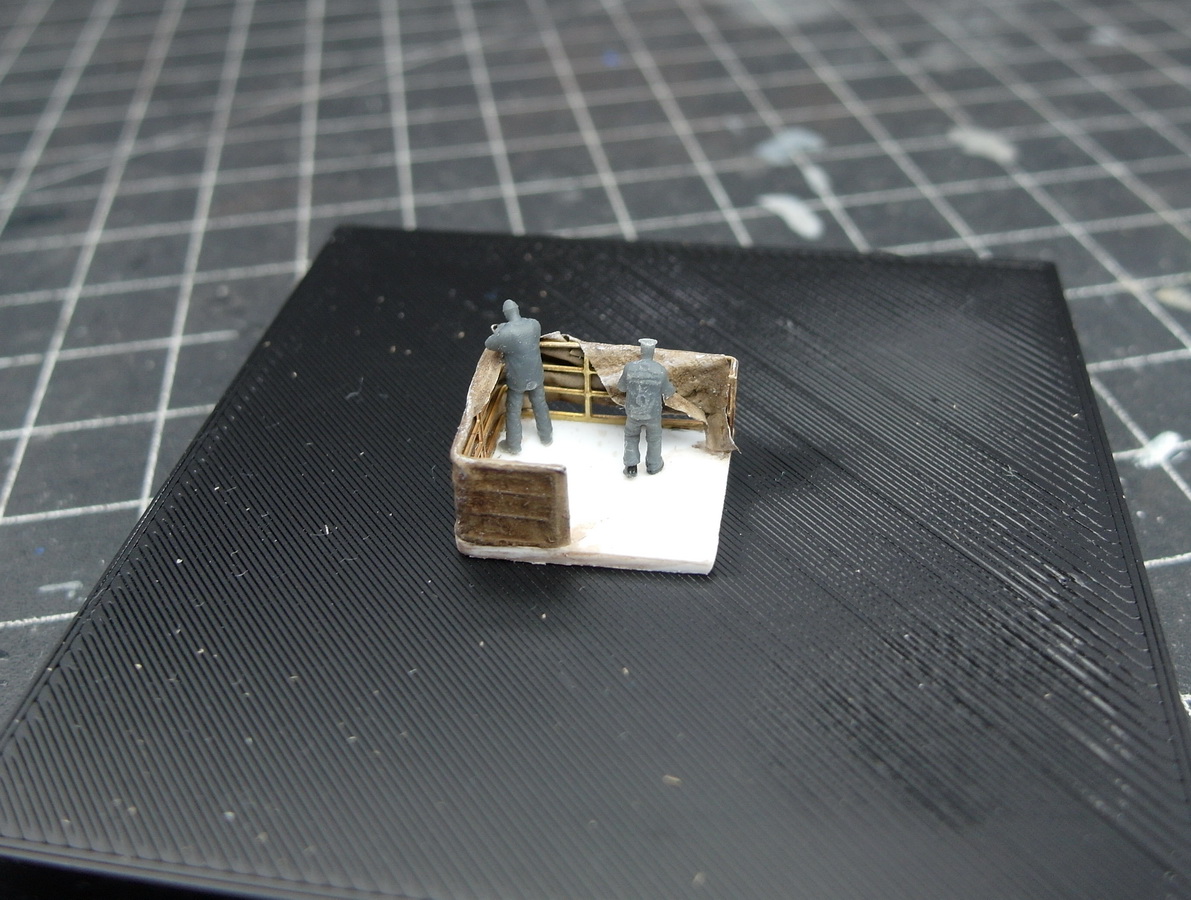
So I started this test run…
…with styrene, an old railing and a few sailors.
So far so good.
Only one thing bothers me.
Unfortunately, I only thought of it after I’d finished the railing on the rear bridge. And that would have been the perfect spot for this little section of groyne. It has the most space to properly detail it.
Now I have to figure out where else I could fit it.
10 Likes
Would the ship be moving or would it be still (at anchor or by a quay)?
I suspect that those tarpaulins, unless they are stretched tight, would
be influenced by wind.
Wind can be caused by speed or by weather or both.
If the tarpaulin is pushed into the railing at the front of the bridge then
I think it would be pushed away from the railing at the rear edge of
the bridge.
I don’t know if the Imperial Japanese Navy pulled the tarpaulins tight
or not 100 years ago …
In the old pictures I’ve seen of the ship, I think you could see the railing pushing through the canvas, even in port.
Whether the Japanese navy actually stretched it taut, I can’t say for sure.
But artistically speaking, it simply looks better this way, as it conveys more depth.
2 Likes
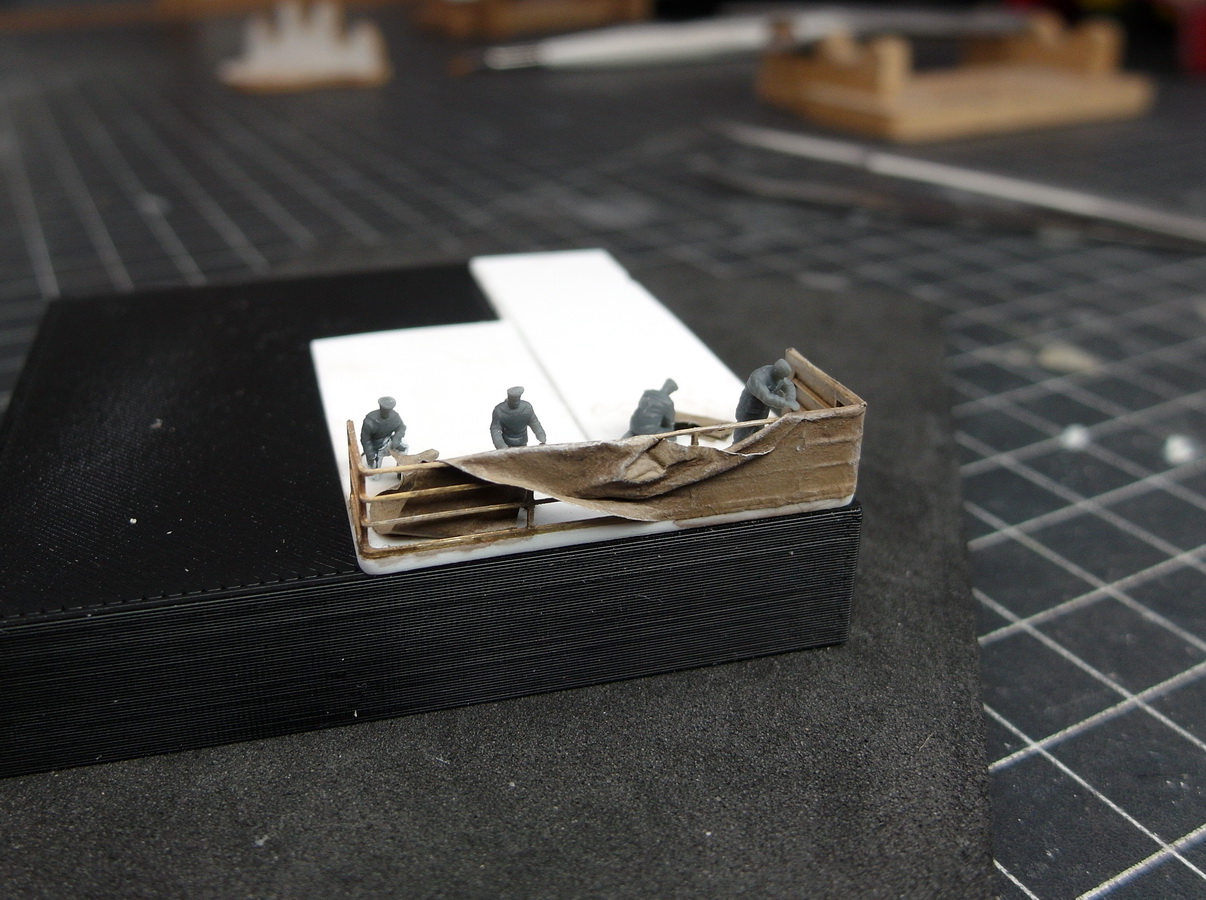
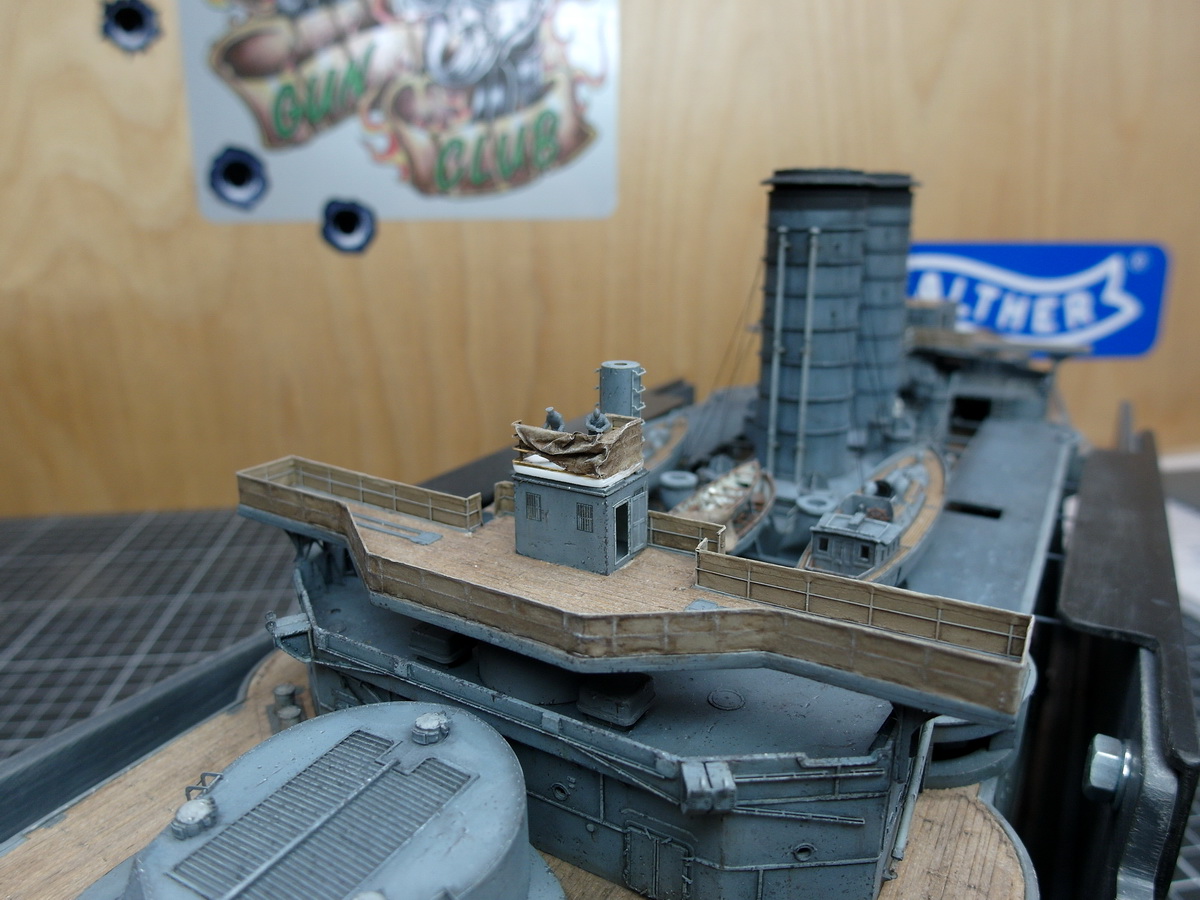
And I’ve finished the next test.
For this scene, I chose the roof of the wheelhouse. Space is very limited, but I think it worked nonetheless.
Only two sailors are now pulling up the tarpaulin due to the limited space. The compass and speaking tubes also need to go there. The sailor on the right should also move a little to the right.
I’ve placed it on the wheelhouse.
I don’t think it looks bad at all. I could expand the scene in front of the cabin. The sailor who folded the tarpaulin during the first test could go there, and an officer yelling at the guys would also look great.
13 Likes
What can I say?
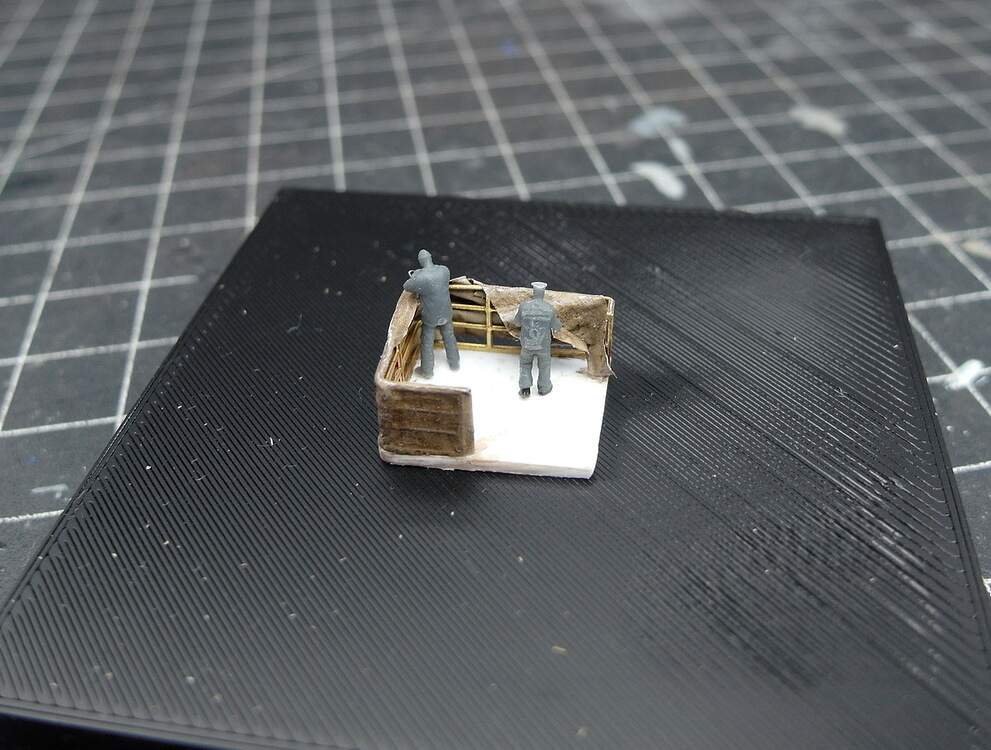
When you want to add these kinds of DIY extras that weren’t originally planned, you have to expect some setbacks.
I’m afraid putting the tarpaulin over the small wheelhouse was a bit too ambitious. There simply isn’t enough space to make it look good.
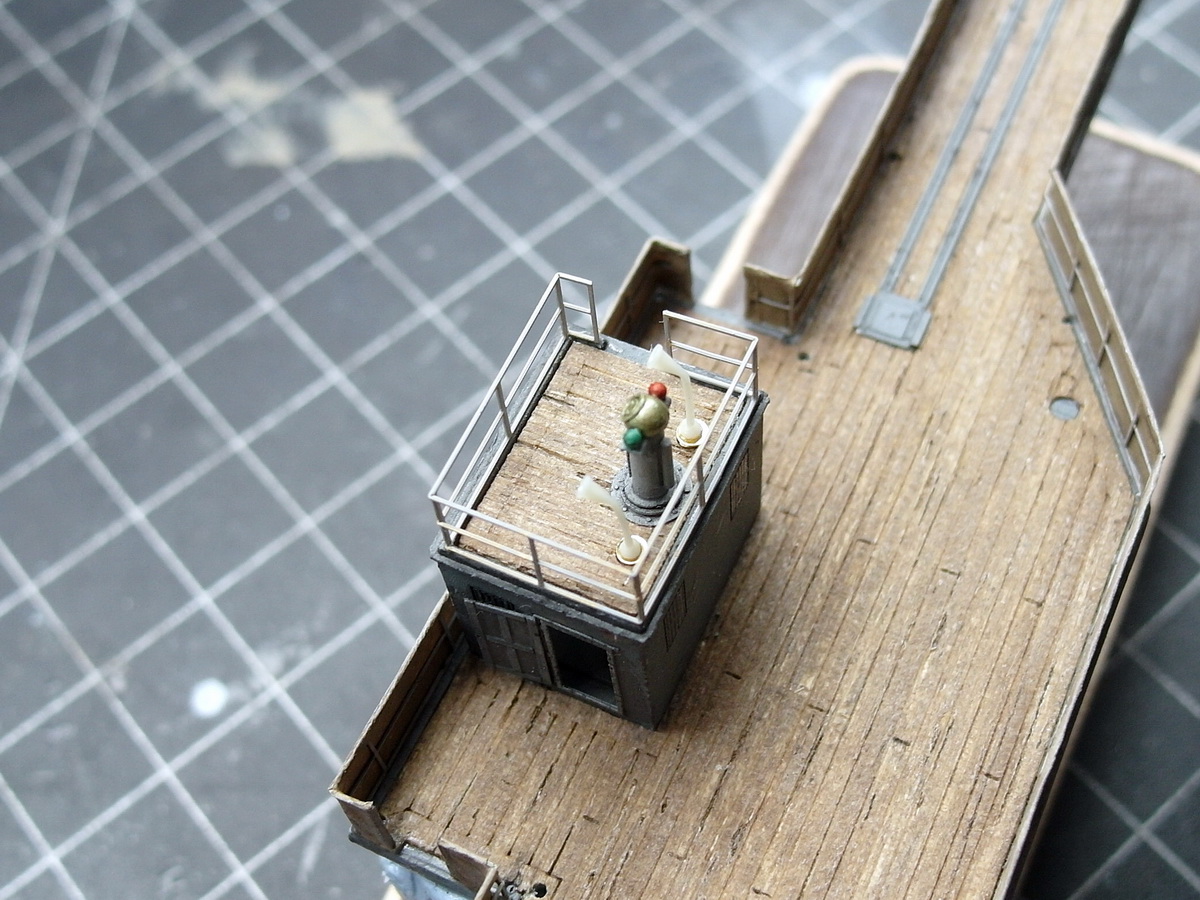
Today I glued the railing onto the cabin and did a test fitting with a compass and speaking tubes.
I’m afraid if I cram the two sailors and the folded-over tarpaulin up there, it’ll look like something you’d find at Woolworth’s bargain bin during their summer sale.
And of course, I only get one shot at the actual model, and if I don’t like it… What a waste of that nice big space in front of the wheelhouse. I’ll see what else I can do with it. Maybe a little exercise with the searchlights, semaphore lights, and/or signal flags.
No, I won’t discard this scene, but I will move it to the front bridge.
8 Likes
I love that you are adding these little treasures for the viewer; they make ship models so much more interesting, even to those poor souls who normally don’t appreciate model ships!!
4 Likes
Tim, your words are an honor. I also really enjoy sharing my passion with other users and perhaps inspiring them to do the same.
So, let’s create a scene facing the bow.First, cut the paper to size again and attach it to the railing with glue.
I then attach it up to just before the point where I want to drive it in.
Cut the corners and fold the top edge over lengthwise, then glue it down. This makes the whole thing quite stable and durable, even though I’m still struggling with the wrinkles.
After weathering, I set up a few figures and the rapid-fire guns to see how it looked.
I still think it would have worked better on the rear bridge. There was simply more space there.
Nevertheless, I am quite satisfied with this small performance.
And laid down again on the ship.
I think it can stay like this.
10 Likes
And now, for the sake of completeness, here’s the finished version.
I did a little more work on the shadows and highlights in the drapery folds.
This was especially necessary for the second figure from the right, as the tarpaulin shouldn’t be floating in the air. So, for the crouching sailor, I shaped it to fit over his knee.
I’m trying to get the sailors to interact with each other on stage. I think I hear the two on the right quietly saying, “Hey, how do you tie that tarp again?”
It was also important to me to create reasonable points of contact between the boys and the tarpaulin.
It should look as if they are pulling on the tarp to get it into the right position.
So that people will believe they are in the process of attaching the tarpaulin to the railing.
And last but not least, it was played on the Mikasa.
12 Likes
Great updates and some lovely detailing with the figures. You are totally right about not having any in the small wheelhouse at the rear, they would be lost in there once the roof is on….. the others look perfect. Beautiful work 
4 Likes
Thank you very much, Johnny.
I’ve finally finished installing the tarpaulins on the bridge, completing another delicate task.
And here’s how it looks now.

After consulting with users, the supports on the railing for the sunshade were removed and will be folded up and stored on the deck later. This was likely related to the work being done on the tarpaulin.

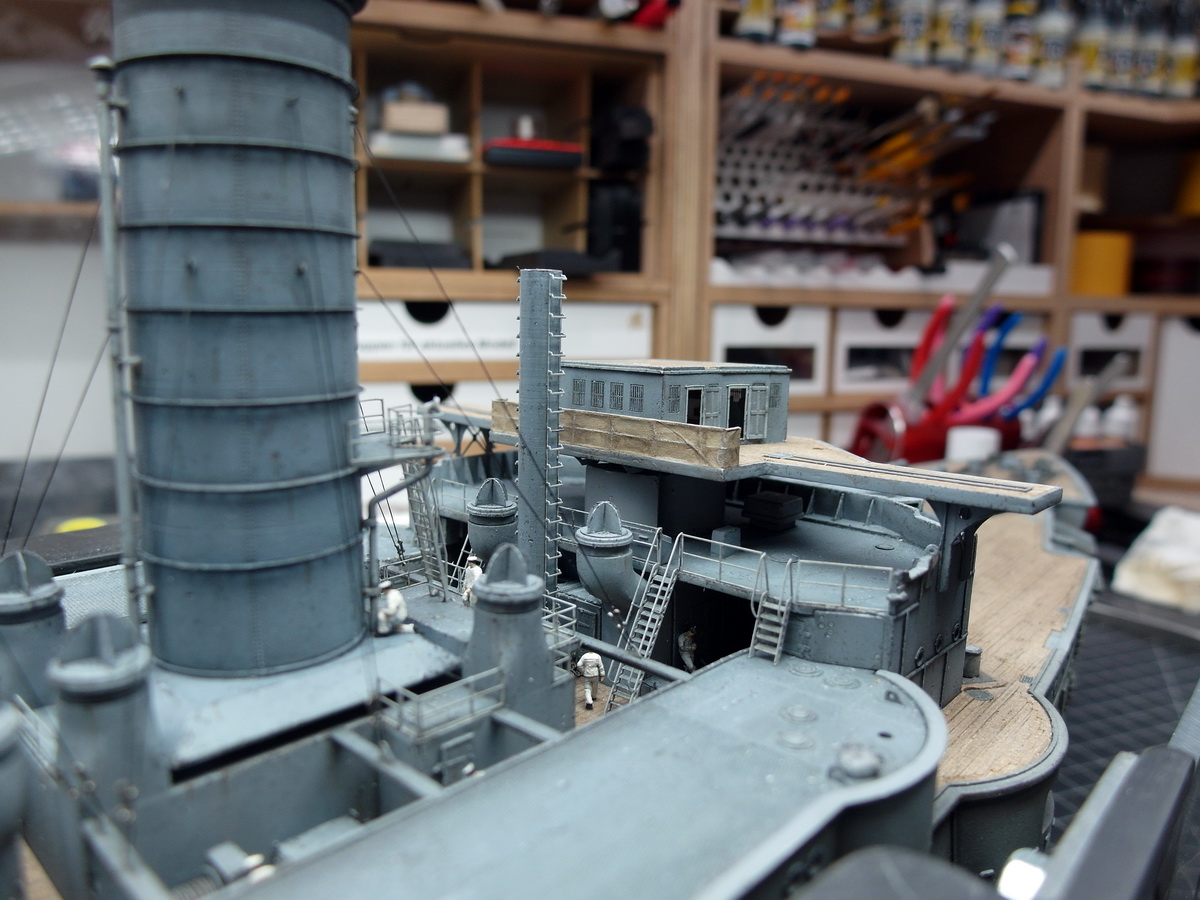
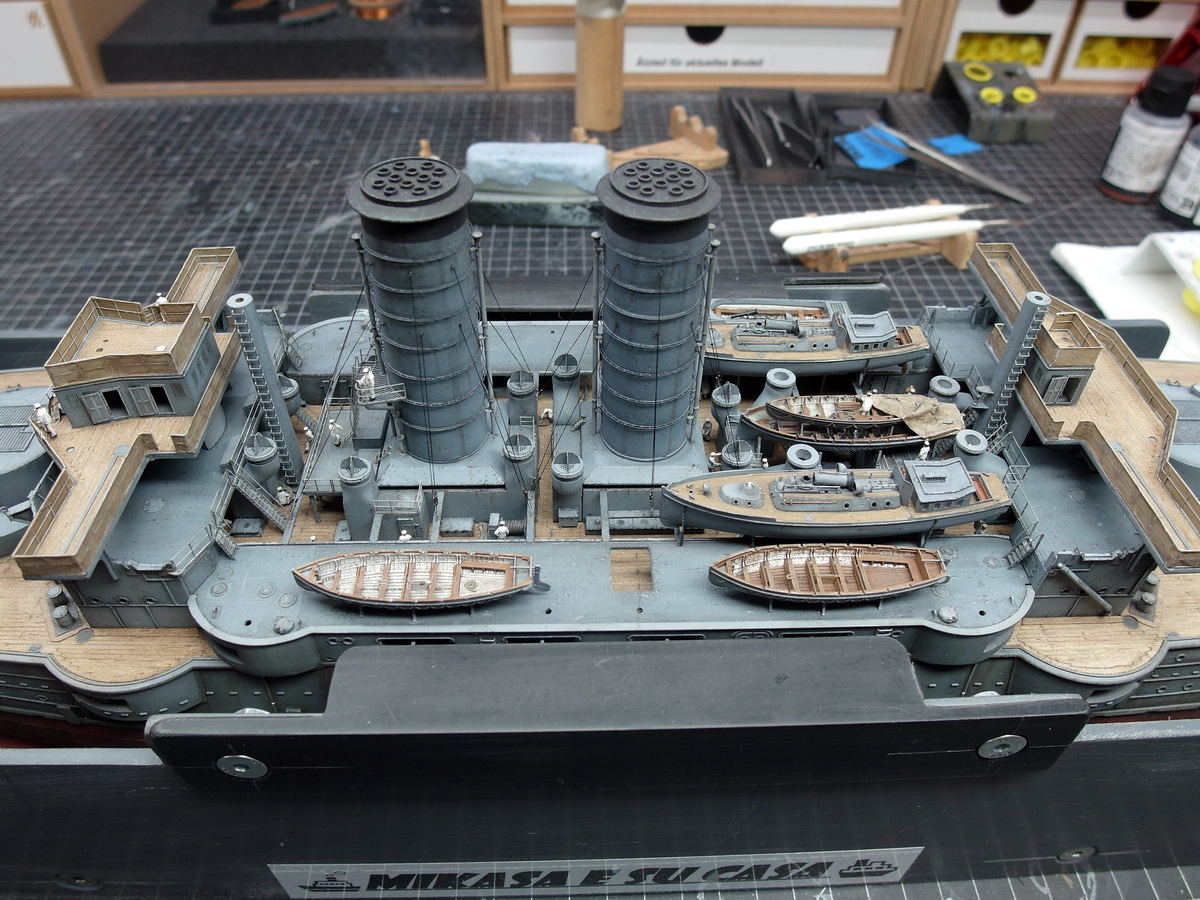
Since the bridge is roughly finished, I wanted to continue working amidships before attaching it to the Mikasa.
So I turned my attention to the three missing lifeboats.

And subject them to the usual procedure of painting details and weathering. The first cutter is finished.

Micro Master makes truly first-class 3D prints.

Painting the rope neatly on the side of the cutter was truly a test of patience.

But the middle deck is also slowly filling up. Starboard deck complete.

10 Likes
Those life boats look stunning
1 Like
I’m so glad you like the boats too. But have you heard of them?!
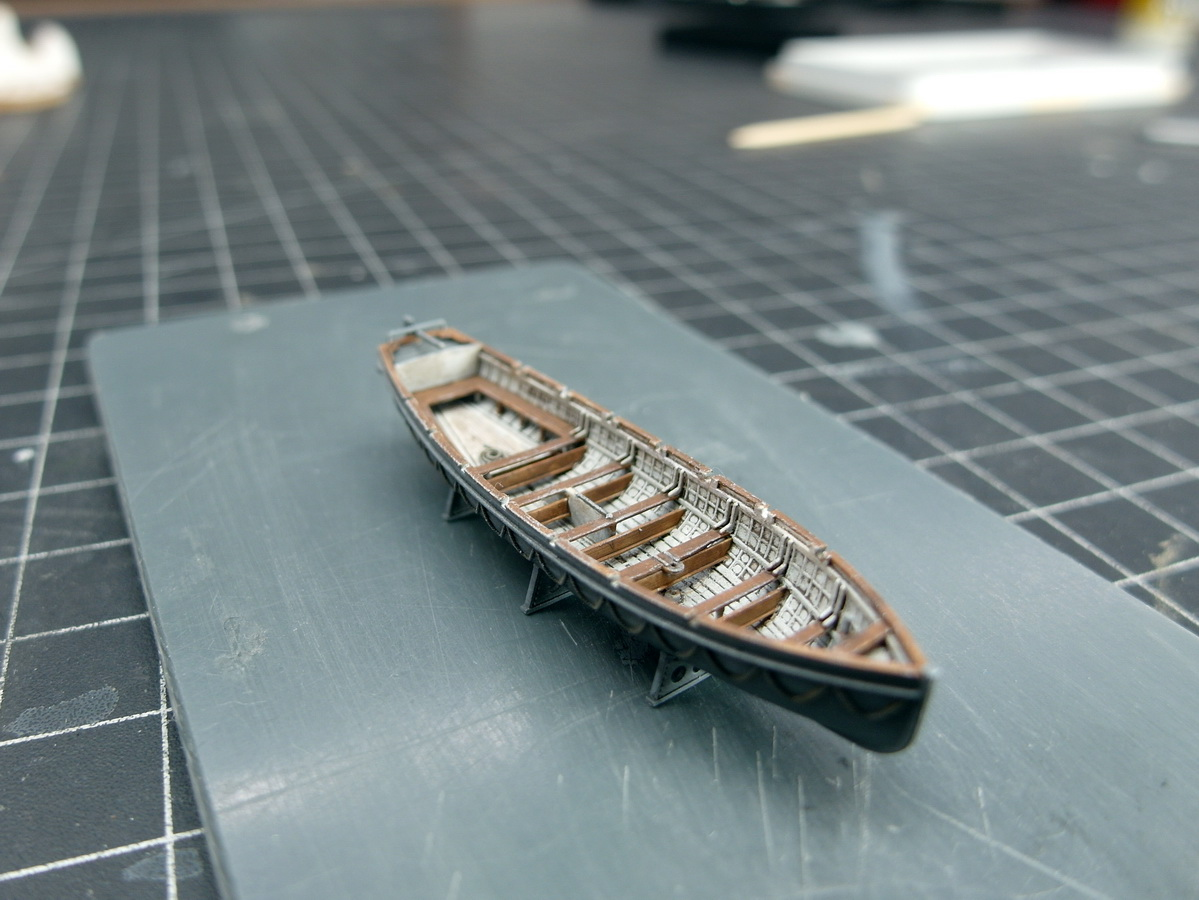
Nothing is as constant as change.I was thinking about the 32-foot cutter and its color scheme again this week and decided to change it.
It didn’t seem right to me that the tidy Japanese would soil the white floorboards with their feet. I believe it’s generally accepted that the inside of the hull was painted white.
But the floor would get dirty very quickly. So I redid it and painted the floor in wood tones. I think it looks much better now.
And placed on the deck. Yes, better.
13 Likes