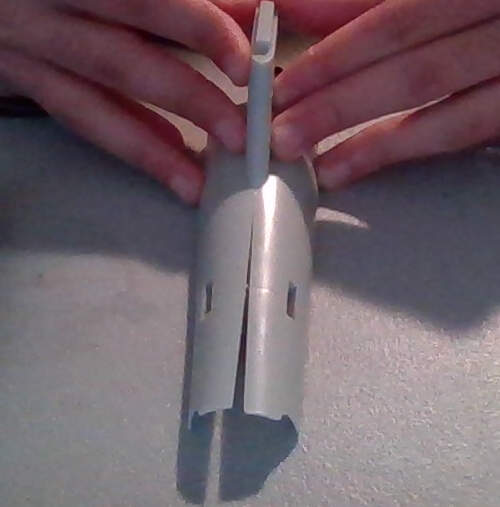
Thought I would do a solid dry fit today to see if all the part will go together smoothly and this is what I found:
Looking closer the pieces seem to be bent outward, kinda like this:

This would be fine if I could clamp it down well and force it to straighten out but its such an odd shape to try to clamp…

Any suggestions?
Glue it together and then wrap it in rubber bands and be careful not to glue the rubber bands to the fuselage.
Well, I just tried it. It does pull the top together but it also pulls the sides in so it doesn’t line up with the bottom half of the fuselage.
If the first try doesn’t work, glue it again and use more rubber bands on the area that is bowing out.
Depending on who makes it, you can always call Customer Service, email them the photo, and ask for two new fuselage halves. Or you will have to putty and sand the bottom.
1 Like
Looks like a starship Enterprise. Try using a tube, dowel, pipe, paint jar, etc. of the appropriate size underneath when gluing and rubber banding to keep the proper shape. Edit- also some strip styrene glued across the inner surface perpendicular to the seam might help strengthen the join.
2 Likes
Yep, it’s the 50th-anniversary rebox. And thanks for the tip, I found a glue cap that fits almost perfectly.
looks to me the alignment pin may be off center.Trim iit and use scotch tape starting at fin while glueig.
1 Like
Start gluing from one end. Do a small section at a time and allow it to dry. Then do the next section same as the first. A bit tedious and takes longer to finish but things will line up. Good luck.
1 Like
Glad to see the kit hasn’t improved in the five decades since I last tried to build one! Mine too was warped, and back then I did not know how to fix it. Gluing around a lid is good, but afterwards remember to add strips of plastic inside over the join, and I’d also cut some sprues to add across the span to brace it. Heck, a few disks cut from thick sheet plastic on the inside to act as frame-rings wouldn’t go amiss! Bear in mind the hull will be stressed when you add the engine pylons…
Oddly my Klingon battle cruiser of the same date had no issues whatsoever.
1 Like
I have glued warped large parts using this method of starting from one side and moving to the extreme when the glue dries. With Tamiya green cap or MEK it is quite easy and quick.
1 Like