Reposted - "Wait for My Command!" Diorama (Build Log)

Hello again guys. By now, I consider this is an exact time to redocument my log notes that might be useful for anyone of you that decide to start how to build a simple diorama like year 2009’s project of mine, as I posted before through the link Reposted - “Wait for My Command!” Diorama. This topic also originally is a reposted build log from a thread with identical title that I ever been posted before in old version of Armorama.

Quoting also some parts of my explanation from the first post of old thread:
“… Actually, this topic was a build story rather than a build log, because I already post the final result into this site. But, later I think such log will be useful for anyone of you that decide to start how to build a simple diorama especially by using scrap materials, even not at all, in order to be a ‘go-green’ modeler. I really proud of this! :smiley: …”


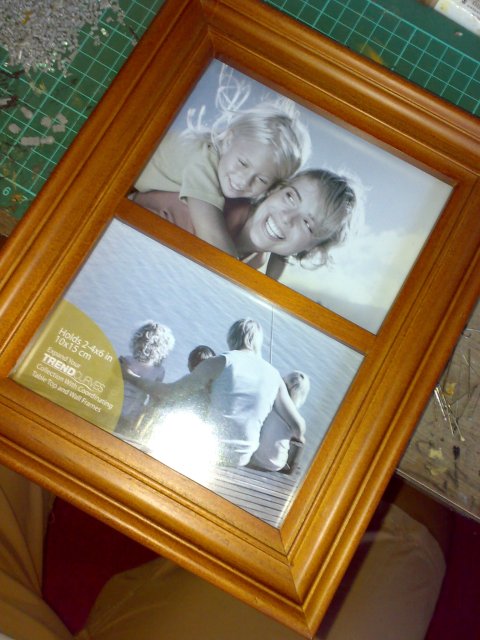
I bought a simple wooden photo frame which its’ size considerately fit into my diorama plan. In 2009, such frame cost at IDR 30.000 or equivalent with US$ 3,30 and FYI, such amount equals for about 2x complete meal in one day at our capital city, Jakarta.


A ‘surgery’ began on the frame by removing its’ back cover, standing platform, instruction sheet, and any unneeded materials. Rather than to put them out into trash, I had to keep it for unexpected use in the future.


Those pictures shown my action when fill the base with basic cover, replacing its’ original standing platform with ex-used carton sheets from mineral water packages. That’s what I mean with go-green!
After that, I seal such carton using an adhesive stuff, Bostik (following suggestion from our fellow Indonesian modeller, Mr. Wawan “Der Fuhrer”) from local hardware store, so it became more solid for next phase of construction.


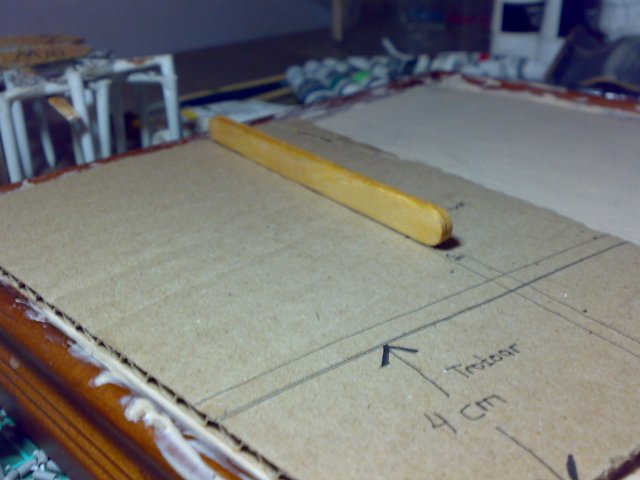
Meanwhile, I start to made a rough sketch on a thin carton, again, cut it out, glued it above the Bostik-sealed carton, add any other needed sketches, such as paveway design, and test it with the 1/35 figure simultaneously to made sure that I’m already in the right path in size and condition.


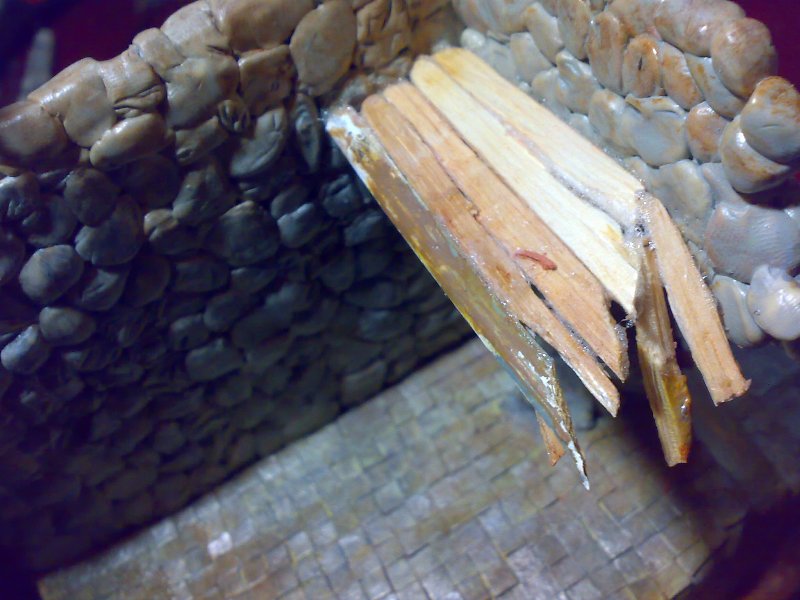
The picture shows how I start the construction of the building, which the wall material were designed from ex-used wooden ice cream sticks as its’ building blocks. Another step for being go-green!


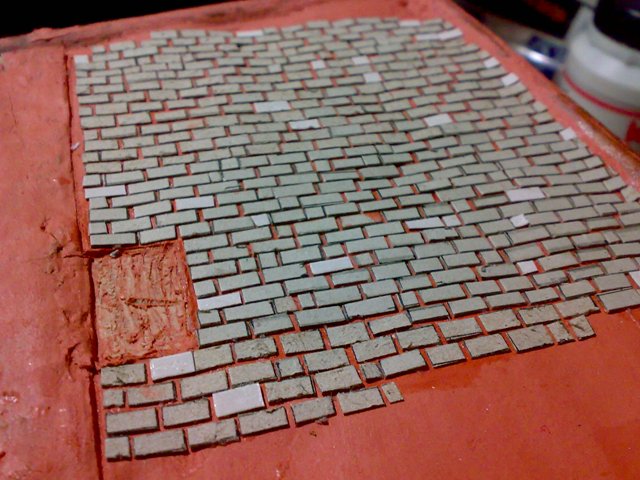
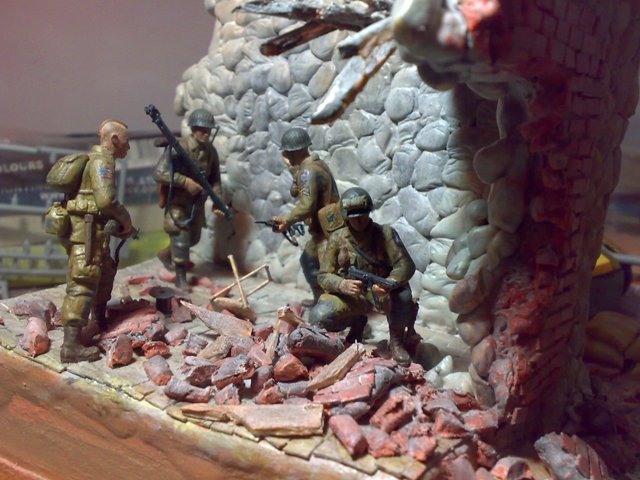
After that, I designed for the road construction and decided to made them as rectangled-cobblestones. Rather than to manually scribed, I prefer to made them one by one following the foot size of 1/35 scale figure. Once finished, I glued them on the brown-pink surface made from dried modelling clay from DAS (following Armorama’s build story of Mr. Pedro Machado’s diorama entitled “Retreat in Normandy”.
I do such steps, because I still have no adequate scribing tools and I think they may naturally appear in shape following technique adopted from another fellow Indonesian modeller, Mr. Windy Soemara.

2 Likes

This reply of mine is a continuing share about this diorama’s build story. Just check it out and have fun.


The pictures above reflect my action when constructing the floor of the building. I have to made the floor just about 3cm higher than the surface of the pavement along with a permanent stairs added in front of building’s entry. Such design would affect on an empty space below the building’s floor and I filled such space with ex-used sprues, glued them simultaneously, let them dried in several hours, and covered them with another ex-used carton sheet.


After that, I continue to raised the building blocks into a form of wall as depicted above.


In order to complete the construction of the wall, I continue it with constructing a doorless building entry in which the height of the entry was measured by 1/35 figure with standing position. After getting the desired size, I began the real construction by using ex-used wooden ice cream sticks into the shape of the entry.


Those picture above depict how I covered the raw wooden sticks with epoxy putty and in the other side, while I ran out of my epoxy putty stocks, I used also the modelling clay to cover it as an alternative beside of the putty with a similar result. For the wall, I decided to shape it as stones rather than bricks. Such decision was just out of my imagination only and some criticsm arrives from our fellow modellers, Sean Malloy and Frank Wetekam, due to the final result. Thank you guys, I will learn a lot.


Meanwhile, I set the floor tile as a square also but smaller than the pavement’s square, approximately 0,5cm x 0,5cm in size, as inspired from Keith Magee’s diorama entitled “Triage at Aachen”.


The picture above shows the beginning of basic painting. A mix of burnt umber, burnt sienna, and flat white were used for basic coloring of the stones, while a mix of vermillion and burnt sienna were used for basic coloring of the bricks of the building entry.


Finally, I performed some positioning tests of the GI figures, German troop figures, ruins, and the AT gun (not appear in those photographs). Several trial & errors happened, but finally I got the desired finished result along with its’ reimprovements day by day as you can see on Reposted - “Wait for My Command!” Diorama .

Please be kind for any additional comments and critics, guys… since I do NO research or something at all for accuracy of the events of this diorama project. Once again, just feel happy when it’s done and improved. By the way, here is the web address to the archived post:

Still in learning process, still lack of many things and details, but I hope this build story will be useful and have fun for all of us! :slight_smile:

Kind regards from Indonesia,

Garry

8 Likes

Hi Garry
Your diorama is great and the effects you worked out were brilliant , you should be proud of yourself .
As long as you enjoyed what you were doing , that is what modelling should be about .
So carry on as you are and the rest will follow , like the research , detailing etc … , I started modelling when I was 7years old , now 66 and still learning , as I say just enjoy what you do and if your happy with what you’ve done , then that is all that matters .

4 Likes

Wow, I’m very surprised about how long you’ve been in the scale modeling jungle. I hope I can do so and improve myself from time to time. Many thanks for your kind support and very strong motivation Sir @bootneck , and have a nice modeling time always, Sir!

2 Likes