Whassup Young Gun! Looks like you’re ‘sub’-mmersed in your build again, like your base board, wax on wax off rite. I found out what “oil canning” is, go figure, never knew there was a name for it. Well goes to show an old f . . um fella can learn something new.
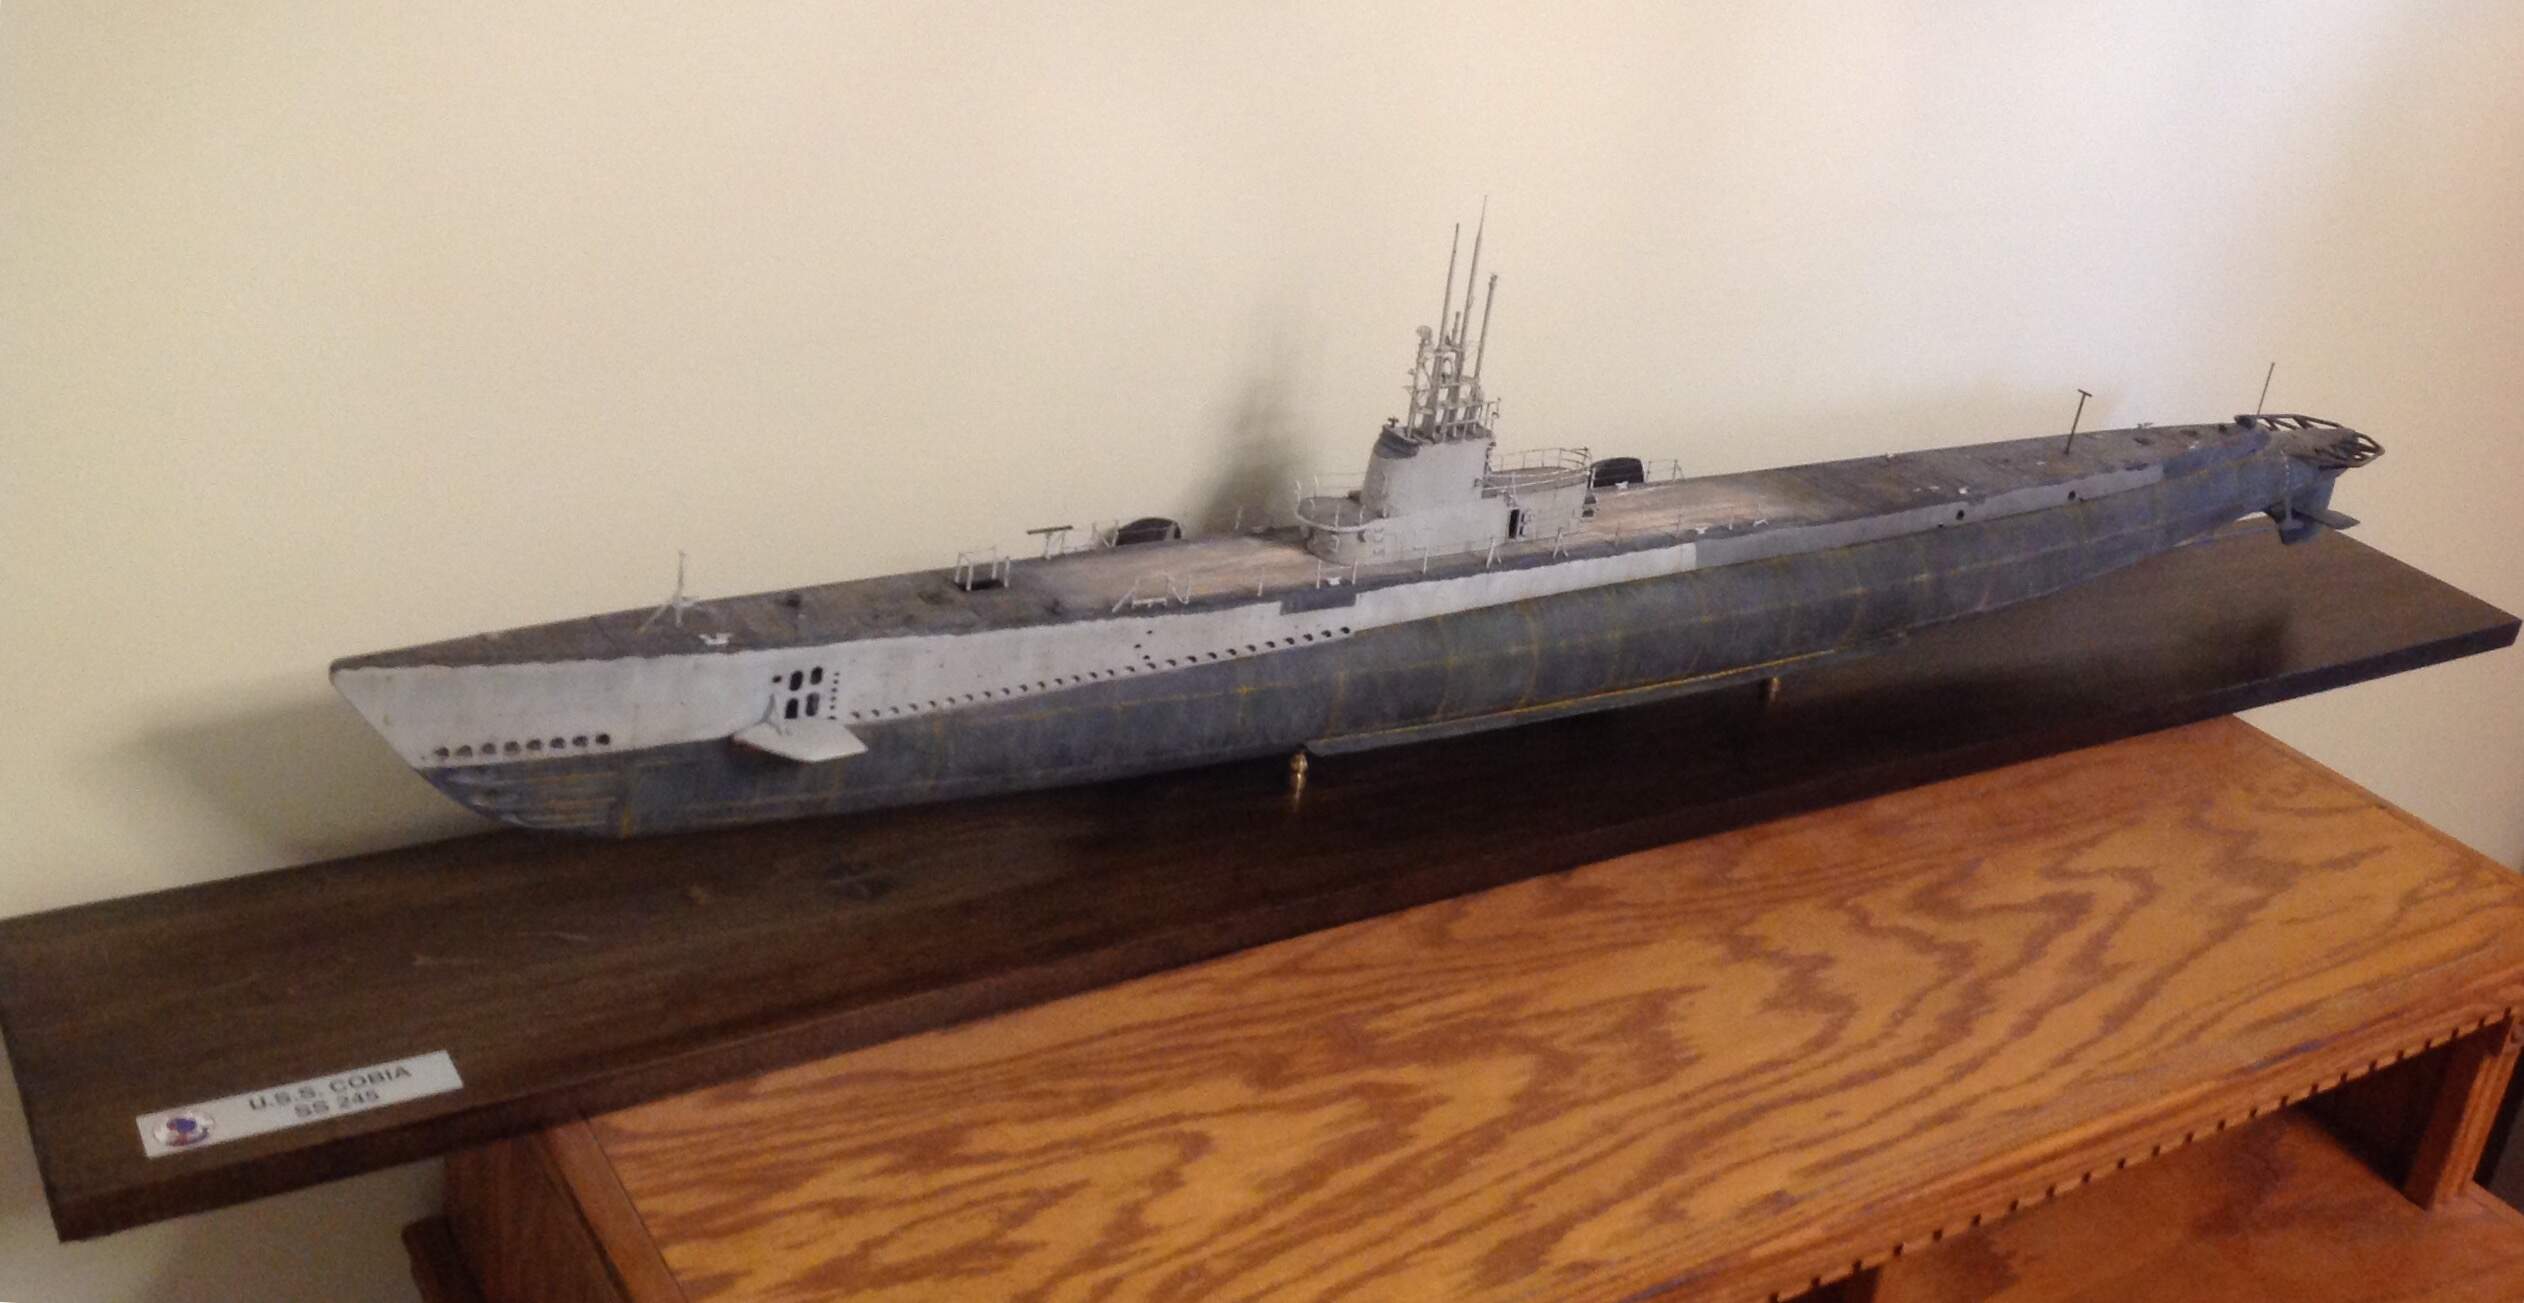
I definitely am 'sub’mmersed in this build Terry! I just finished the Base and Im very happy with it and I think the sub will look great on it!
And a close up of the decal.
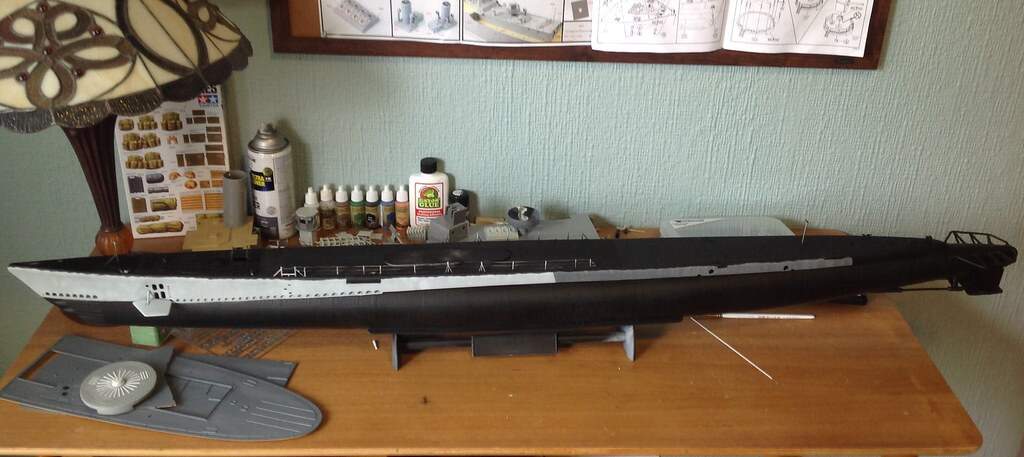
I’ve finished 20 rows of vertical rivets so far, and be warned I’ve only done about 1/6 of the ship and just 20 rows took 1 hour 15 min… so if anyone decides to not buy the Eduard set and rivet it this way you will be here for a while. Im fairly happy with how they look though. I just keep telling myself im one step closer to paint!
I just finished the rivets today, it took about 9 hours total for this one side… I’m planning on finishing all the details in the next few days and start paint in a couple days! I probably wont post much after Christmas for a week or two, as I will be working on my 1/72 HMCS Snowberry.
Some progress! I’ve painted about 75% of the Cobia. It still needs some touch ups but I think it generally looks good, except for the black which will be post shaded over with a very dark gray, but that will have to wait because my airbrush broke and I’m waiting for a replacement. Hopefully next update I will have some pics.
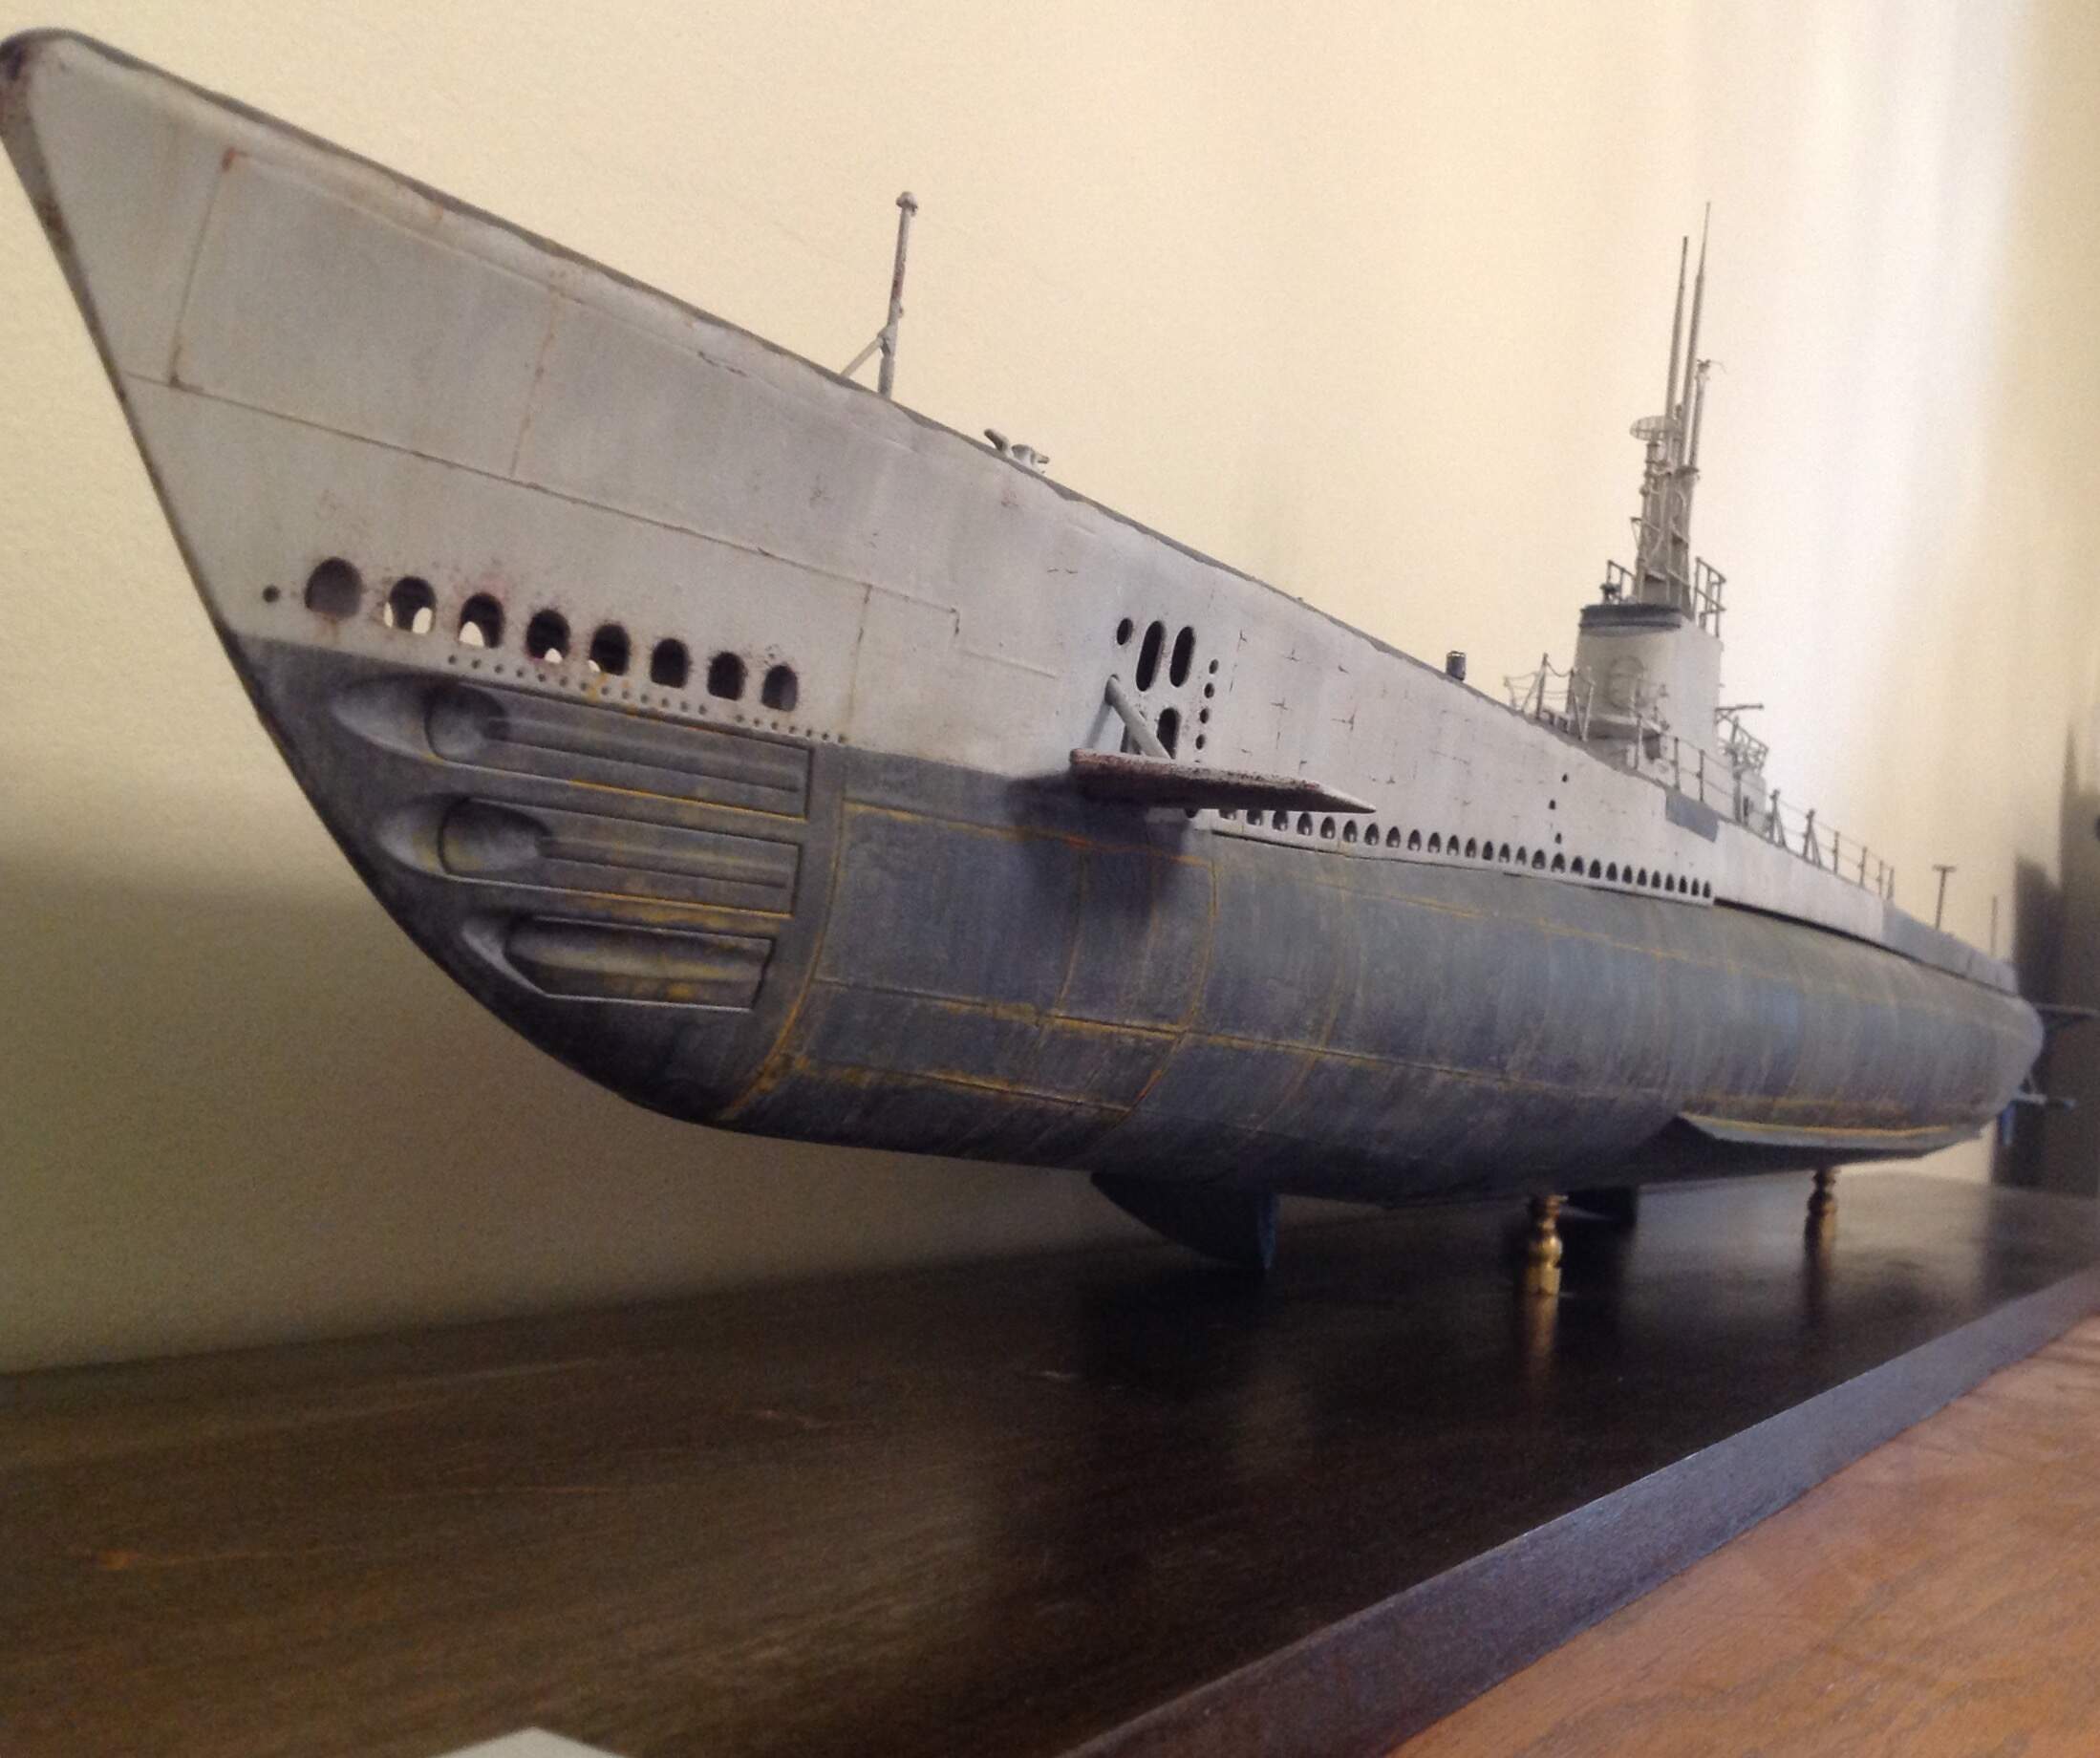
The hull is painted! Im fairly happy with the finish and cant wait to start weathering once I paint some small deck parts. on the dark gray on the back I made some streaks and splotches in the gray with a paintbrush to show that the boat has been fairly well maintained as the crew are repainting some areas. I’m currently on winter holiday from school so I have 2 more weeks of bench time!
Thanks Joe! No pics but Ive made progress spraying the black with dark grays to get a faded effect. Now I just need to paint some details and then on to my favorite part of any build… weathering!
A little progress. Ive done about 40% of the weathering on the left side, and Im very happy with the results!
The white dot filter need a little more blending then I will be done with the black color modulation. the rust you can see on the panels is rust colored water colors, I still need to do a bit more blending of it on the deck. The wood part of the deck was dry brushed with multiple wood colored paints to give it a worn, chipped look. I also started the chipping on the grey parts. Overall Im happy with the results but remember there’s still a lot more work to be done.
And here shows you what a couple oil paints and acrylics can do
Thanks Fred!
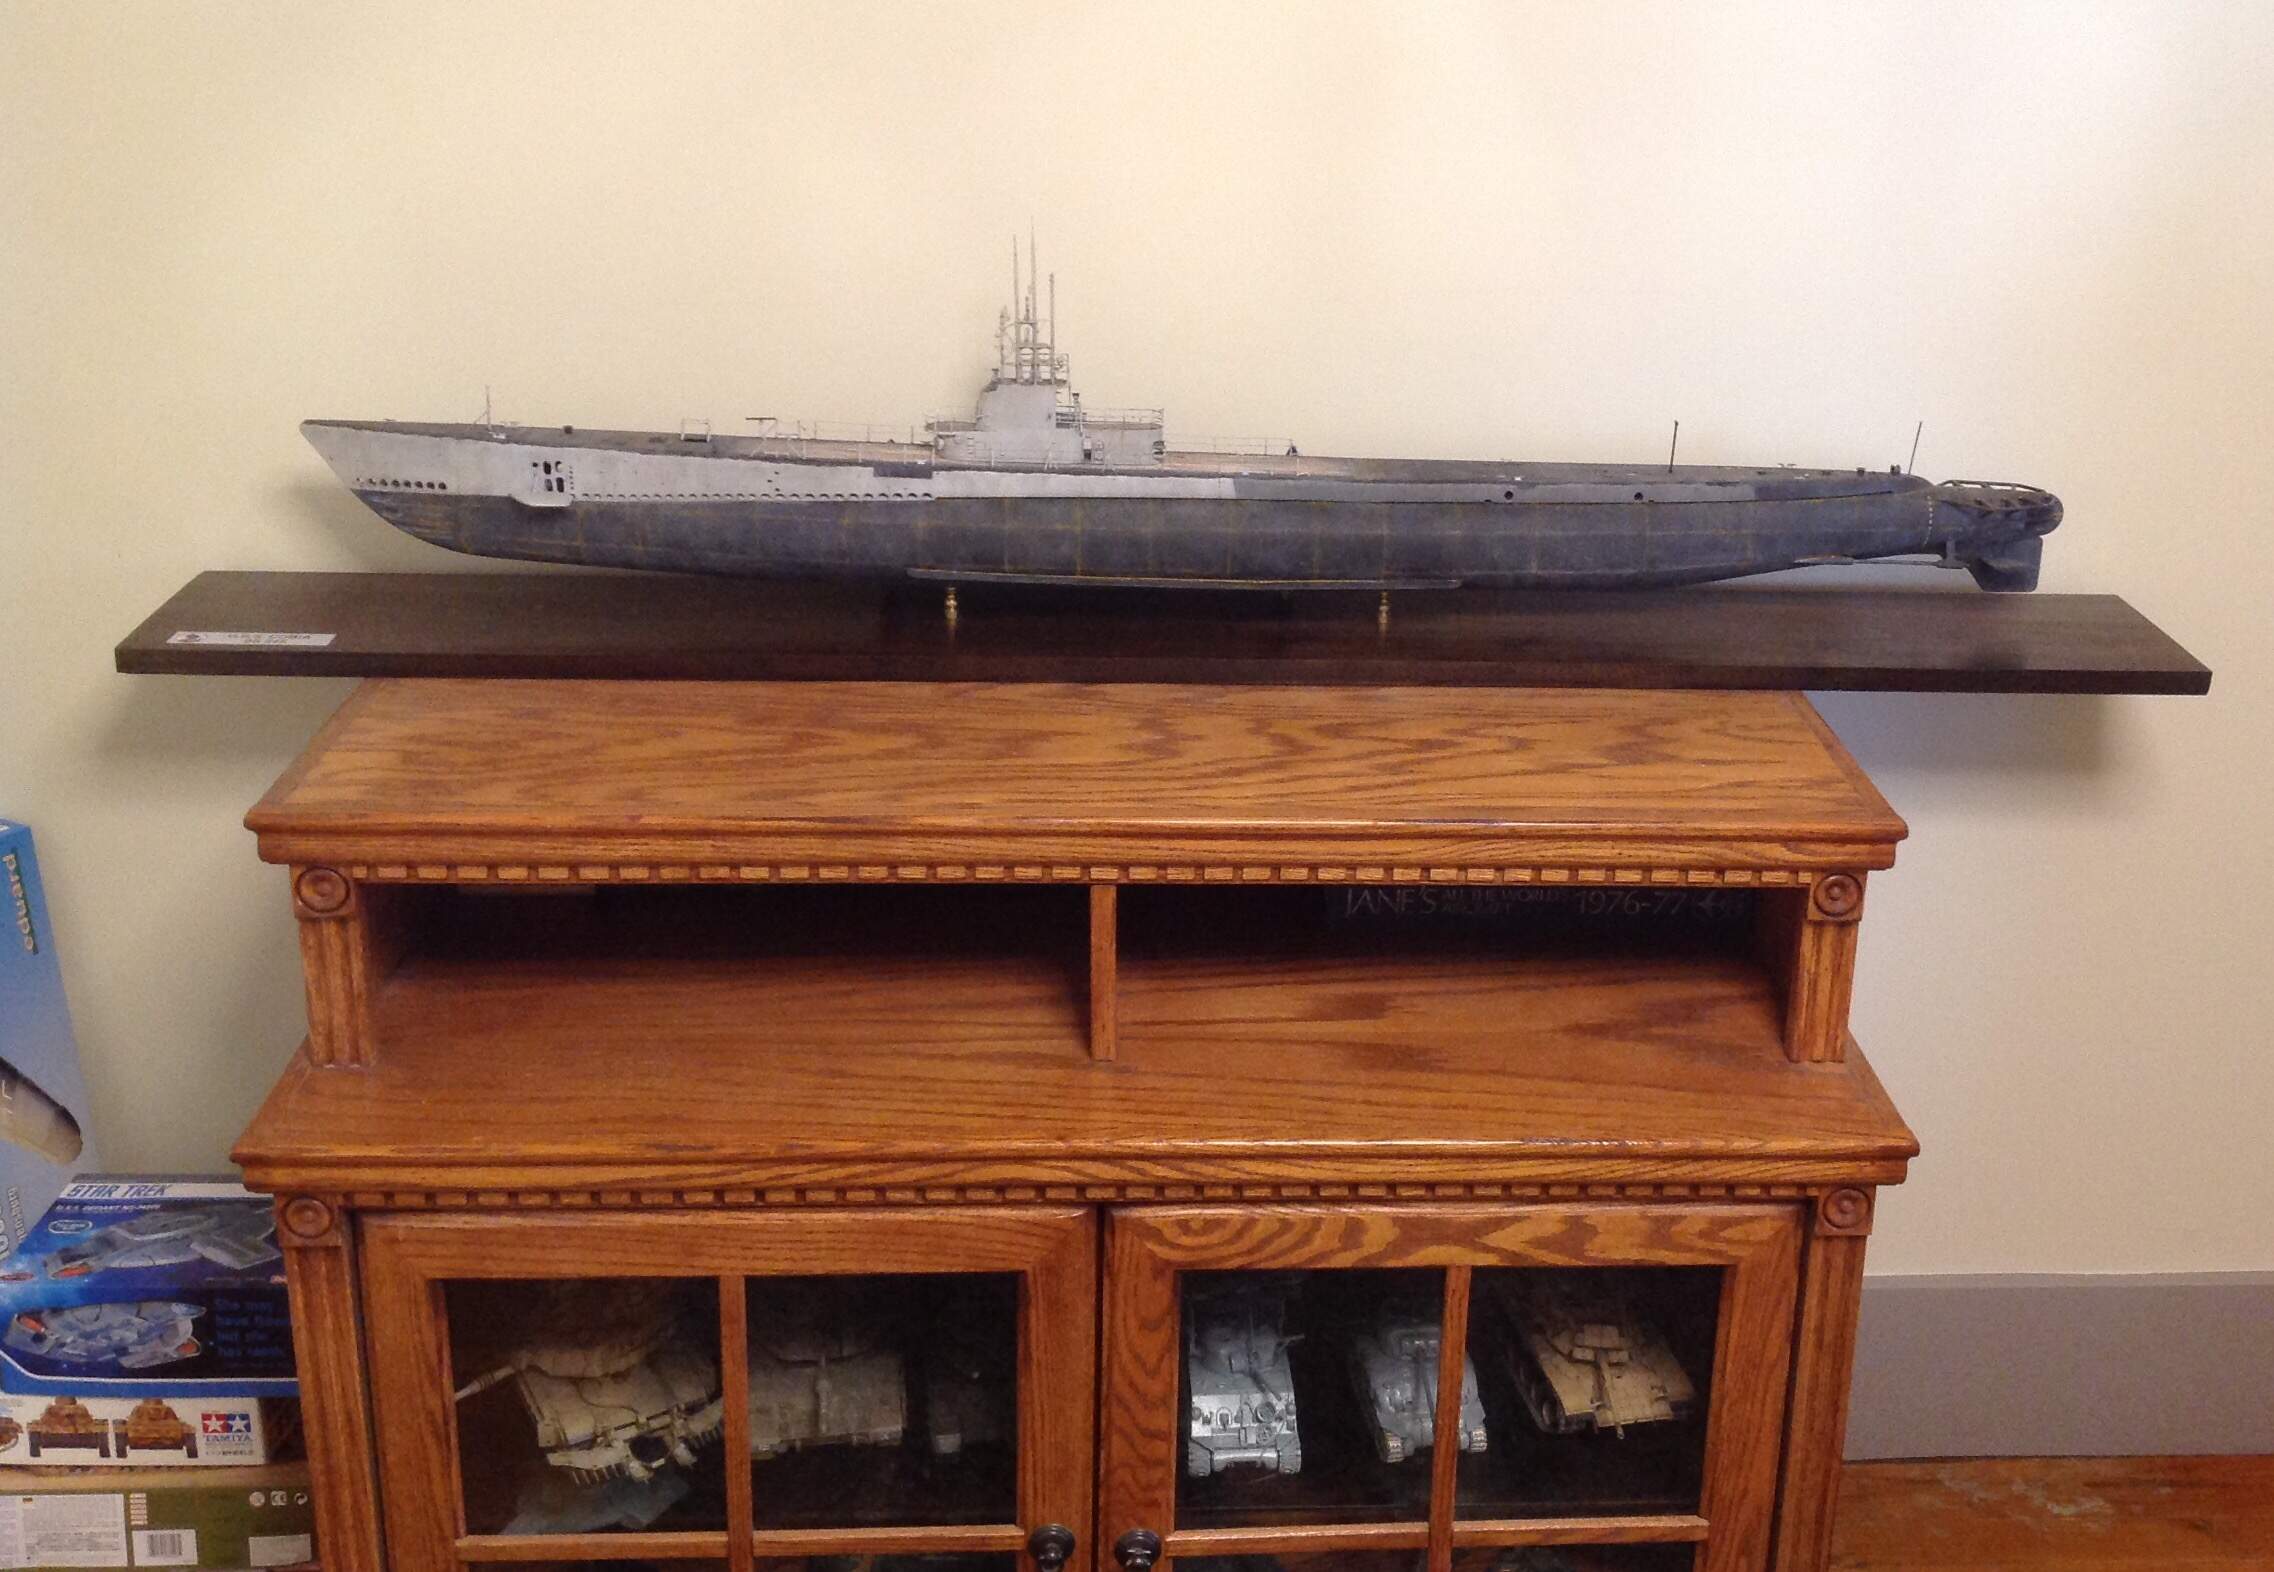
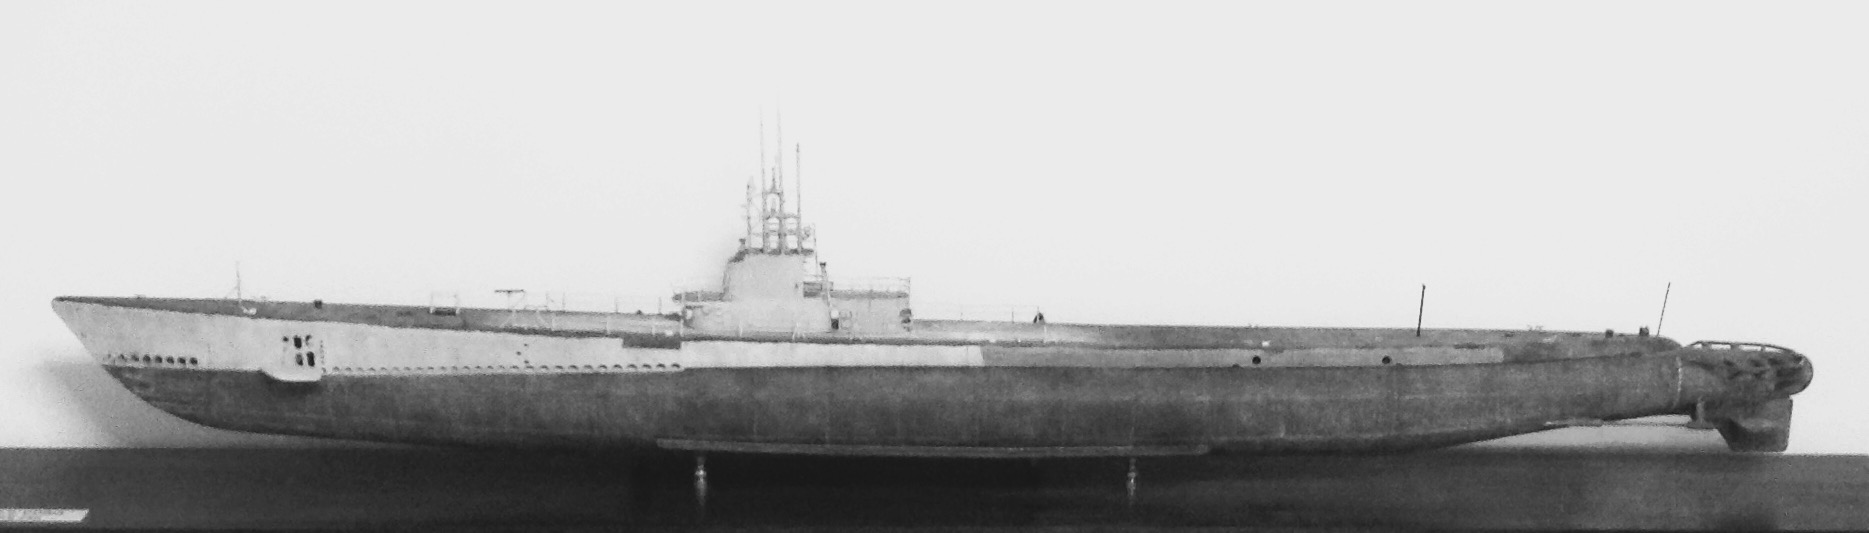
After a couple months of looking at the Cobia on display case I decided to (Temporarily) revoke my evil armor ways and work on something salty. Here are some photos of where the Cobia is at currently.
And here is a picture of it on my bench ready for more weathering.
Im about to use another white and brown dot filter.
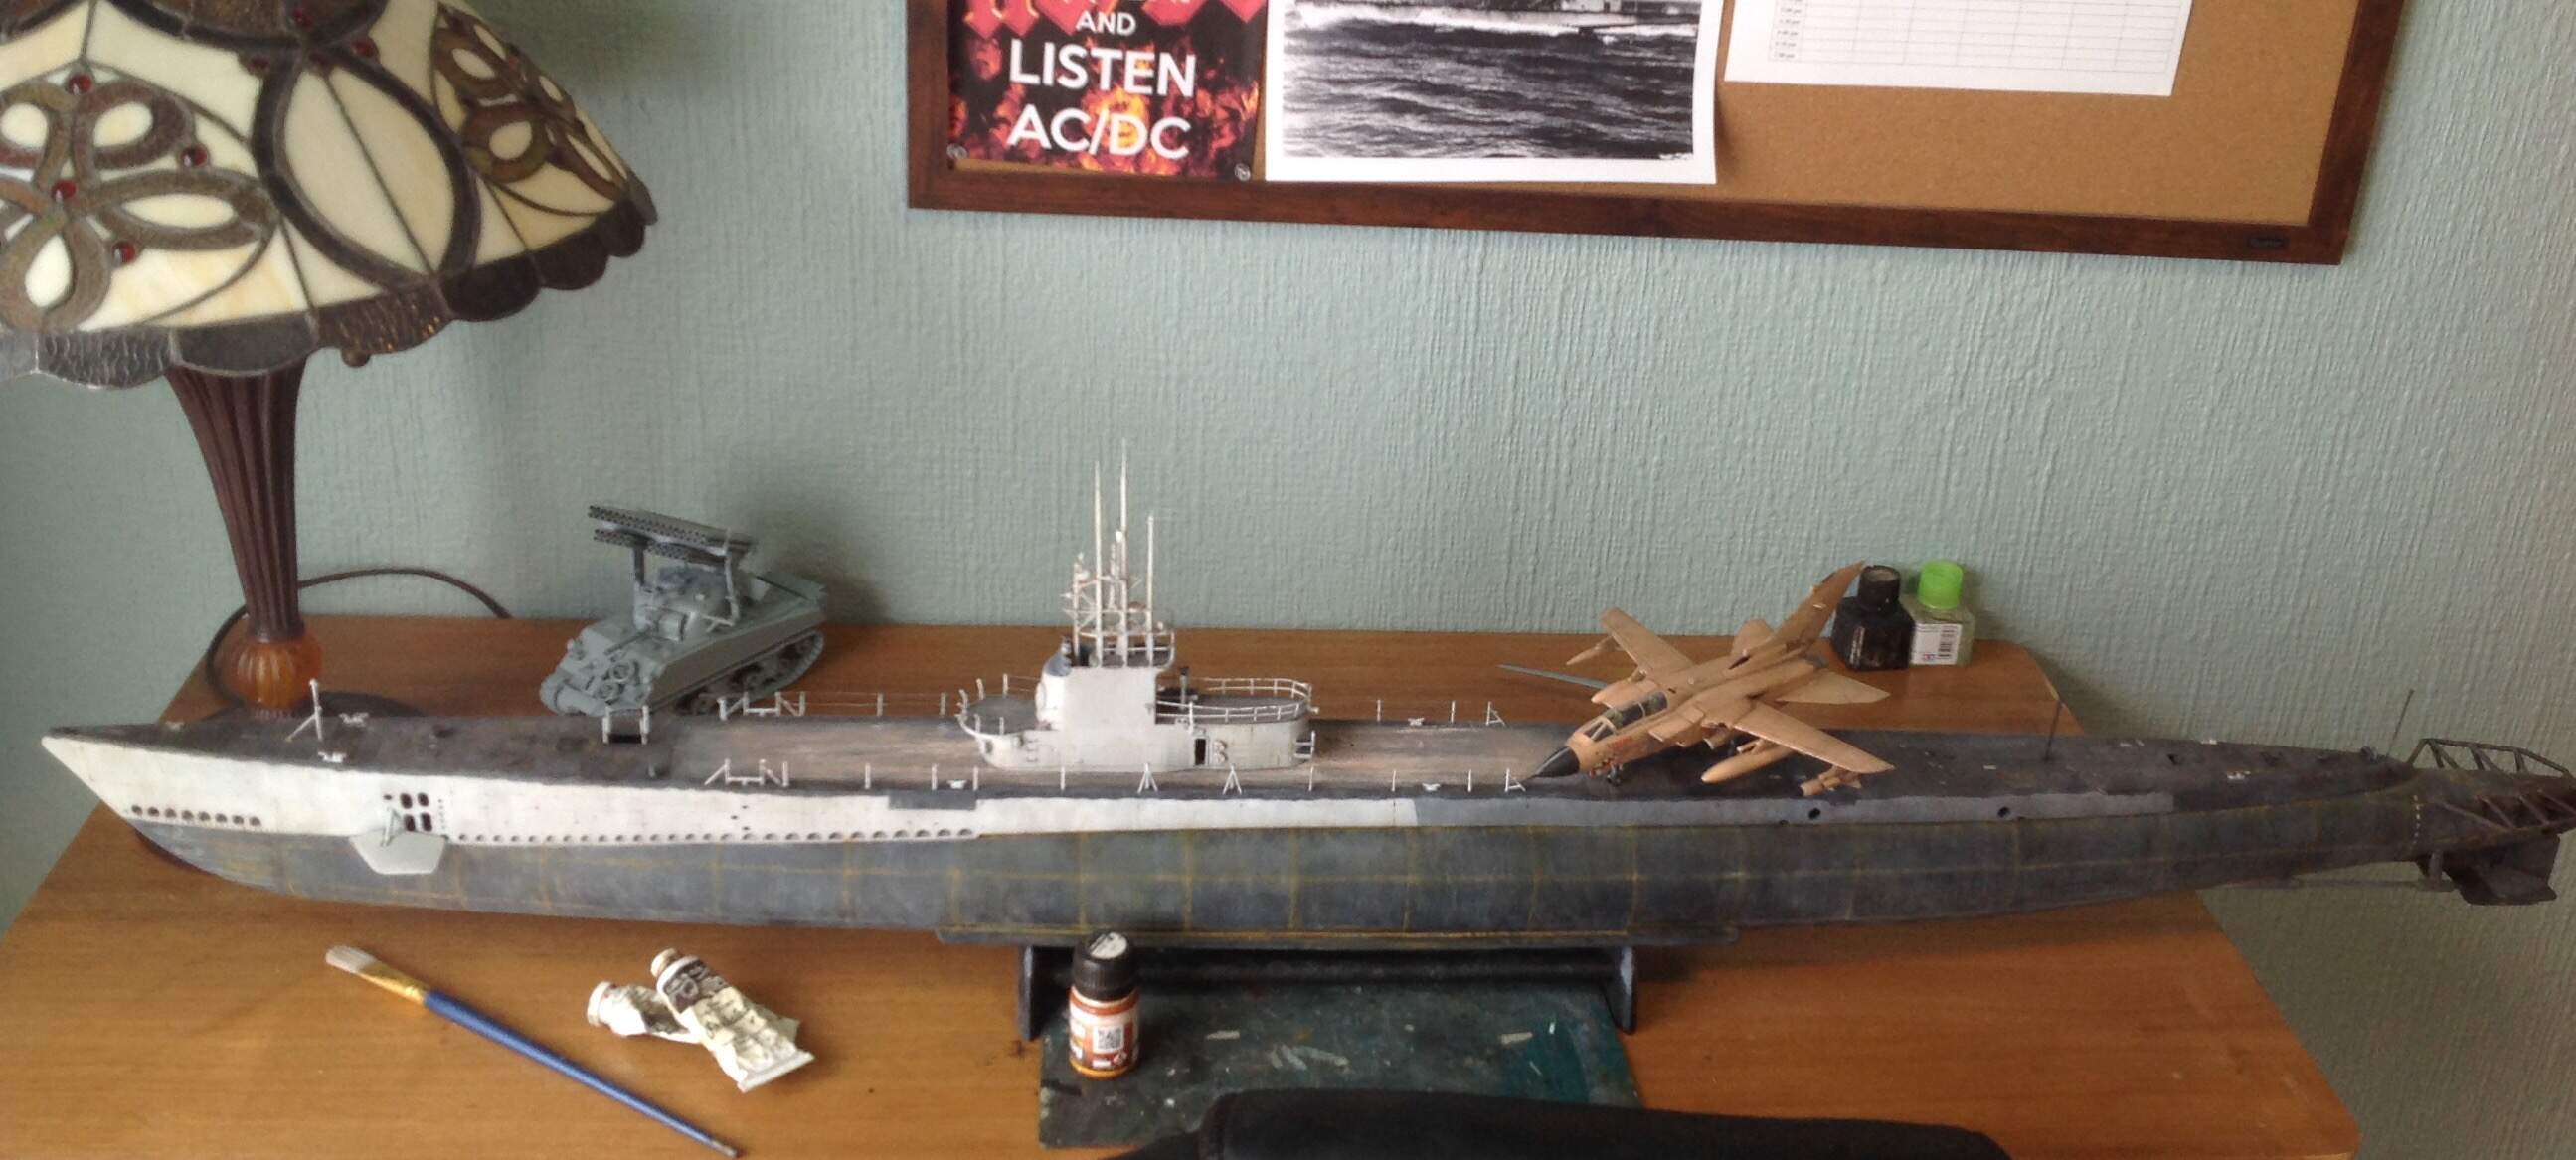
The 1/72 Tornado gives a sense of scale to how big Gatos were.
Very nice weathering - you ‘armor guys’ are typically better at this than most of us ‘ship guys’. I tried my hands a little bit at it, but most of my ships look like directly from the shipyard… I know you can achieve really nice effects, even in 1/350 or even smaller, but with my last models it was that I simply was afraid to apply some dirt and rust on my almost finished model for fear to mess it up…
but with my last models it was that I simply was afraid to apply some dirt and rust on my almost finished model for fear to mess it up…
Jan, that’s why I use almost exclusively oil paints. They are super forgiving so if your unhappy with the results you can simply just wipe them off.
Todays update is fairly small… on a large ship!
I worked a little on the weathering applying some oil paints to get a rusty chipped appearance.(This is only the first application.)
(sorry for the blurry photo.)
I then added some larger chips to the sail in preparation for some rust streaks coming down from them.
I also tried something new, using different grey oil paints for speckling to break up the monotonous black hull.(To give the look of fading and small chips.) Later I will add rust colored specks as well as some green ones.
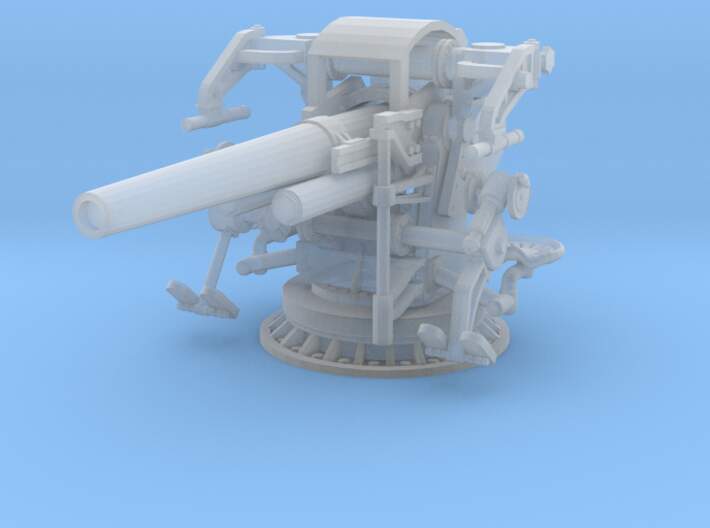
I also ordered a 5" Mk.40 deck gun from shapeways.