That is a big mask session… But the finish looks great
2 Likes
Mike, I usually do a very fine sanding on my tanks’ flat surfaces (if there is any) with an over-used 320 grit Tamiya sanding sponge. That step does makes the surface really smooth, which I think could appy to your model, too.
No hard pressure, just smooth circular movement with the sponge. Once touches before-after you would feel dramatic difference.
Tamas
2 Likes
@ Tamas. Thank’s for the advice! … Ah yes, the joys of fine-grit sanding/wiping. Kind of relaxing when I get into it… that is, when I don’t hurry.
However, I did notice one critical issue, i.e. spraying rattle-can paint outside. Seemed like with every paint pass, I was cursed with a light gust of wind. Then again, the Semi Gloss Black came out fine… except for a GIANT cat hair and an Epoxy print that I had forgotten about. Now I’m just waiting for a paint order to arrive so I can finish with these large parts. ![]()
—mike …![]()
3 Likes
The office block has some colour as do the occupants, though they do look a bit grey around the gills. The building will require a spot of city grime and weathering.


I’m going to keep the colour palette simple as they are not the main feature. The Valkyrie Battroid is the star of this show.
Till the next update. ![]()
8 Likes
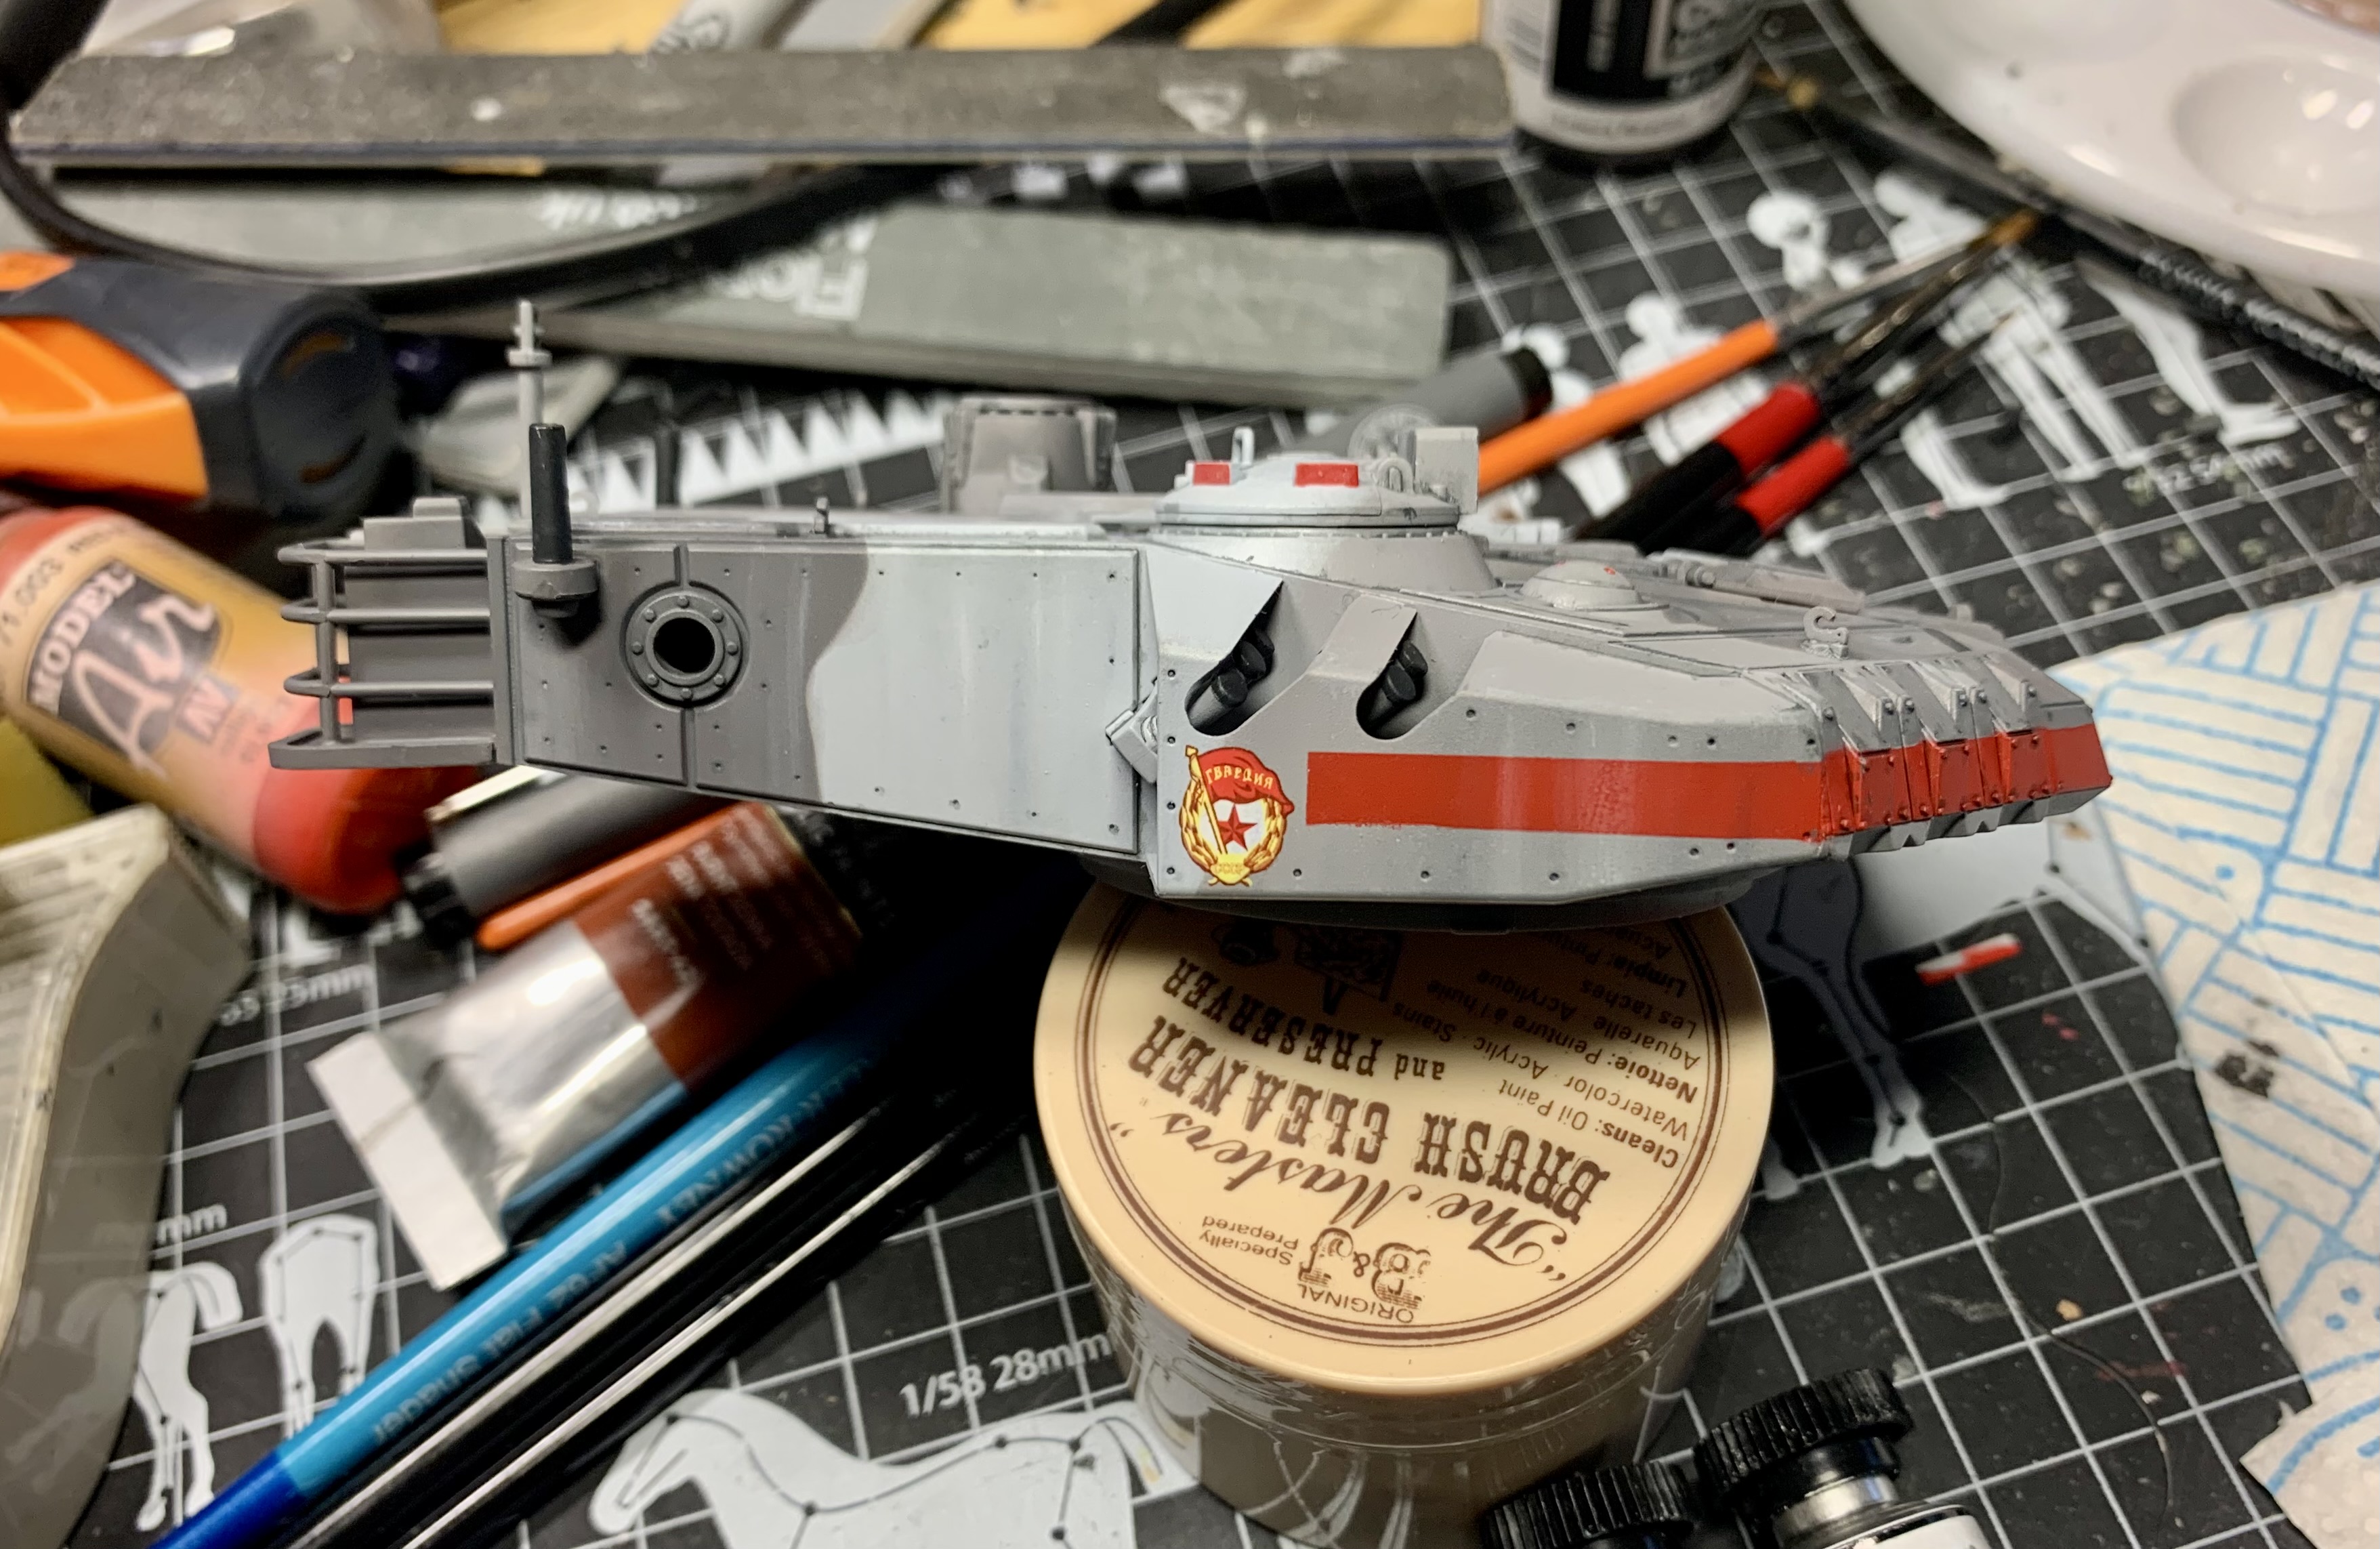
Belly up…
I managed a little bench-time over the past few days. ![]()
• Vallejo White Primer (73.600)
Half masking, then…
• Vallejo Scarlet (70.817)
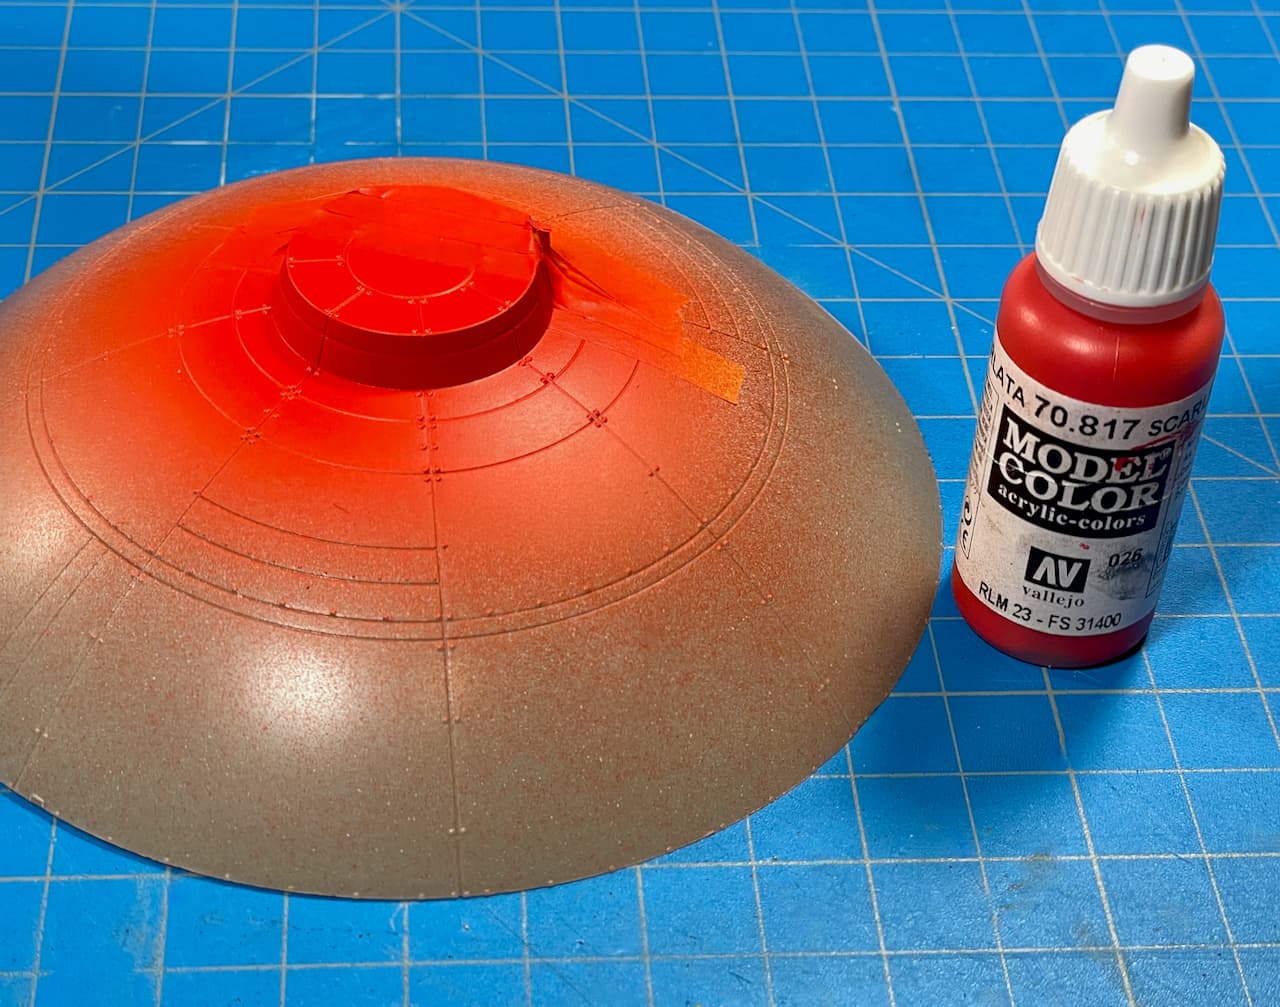
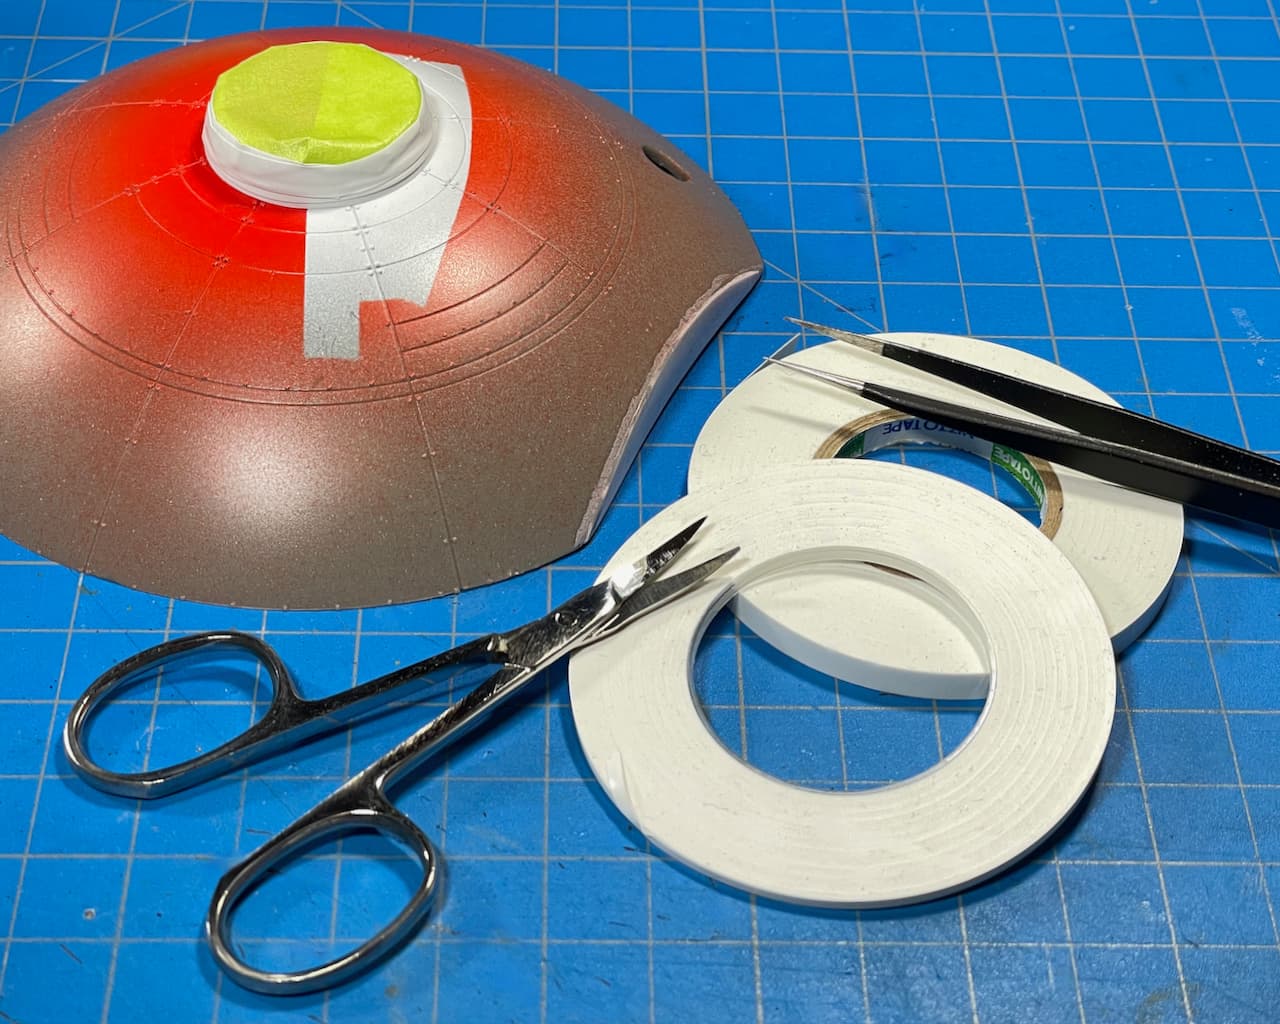
Then, full masking.
“Cut! That’s a wrap!” ![]()
“What is he up to now?” ![]()
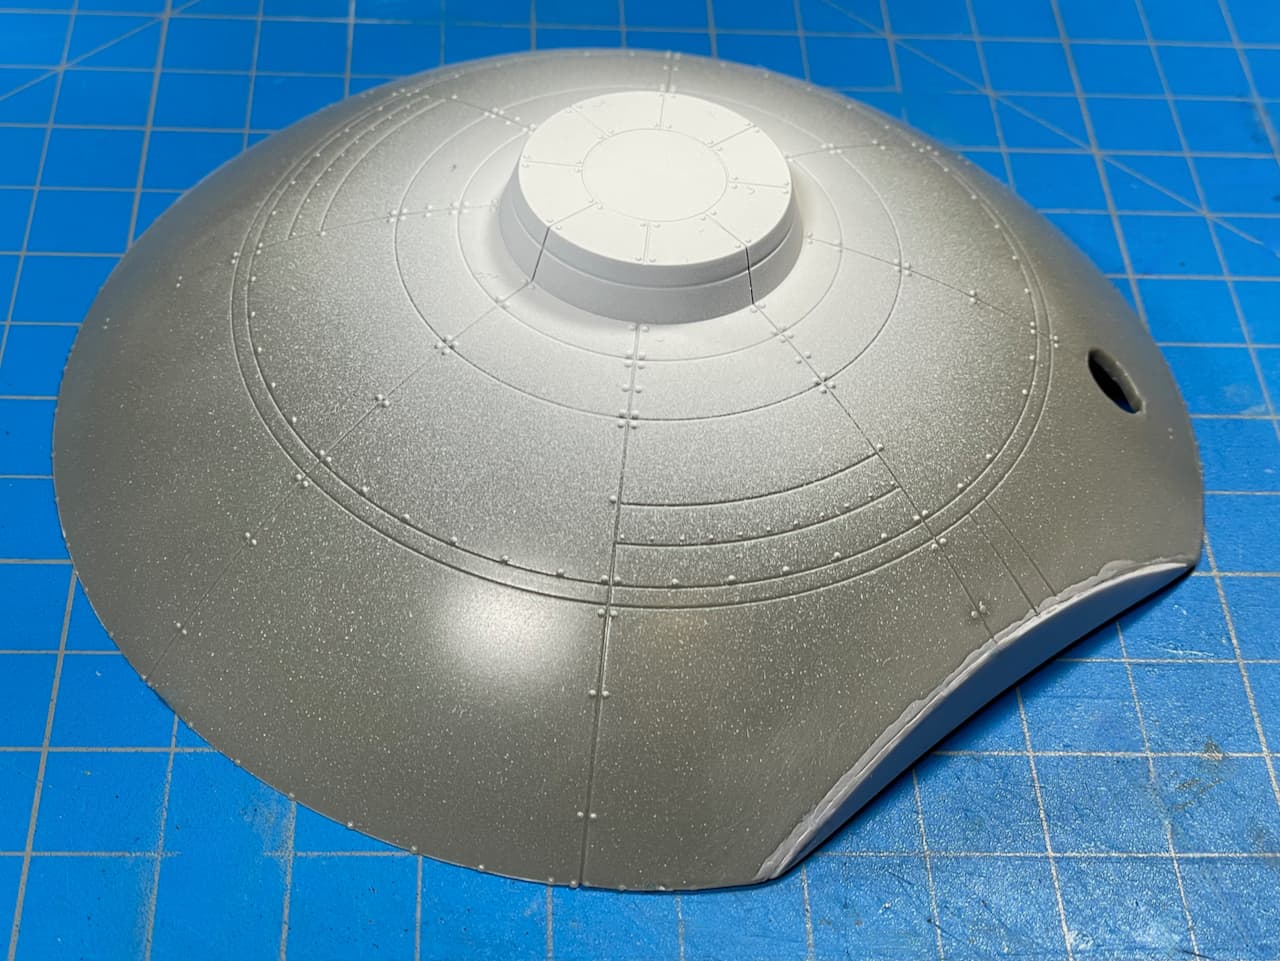
![]() Bore-dome, dome, dome, dome, big dome and doors.
Bore-dome, dome, dome, dome, big dome and doors.
• Tamiya (87064) Fine Grey Surface Primer (rattle-can)

My paint order arrived early! … Cover me! I’m goin’ in! ![]() …
…![]()
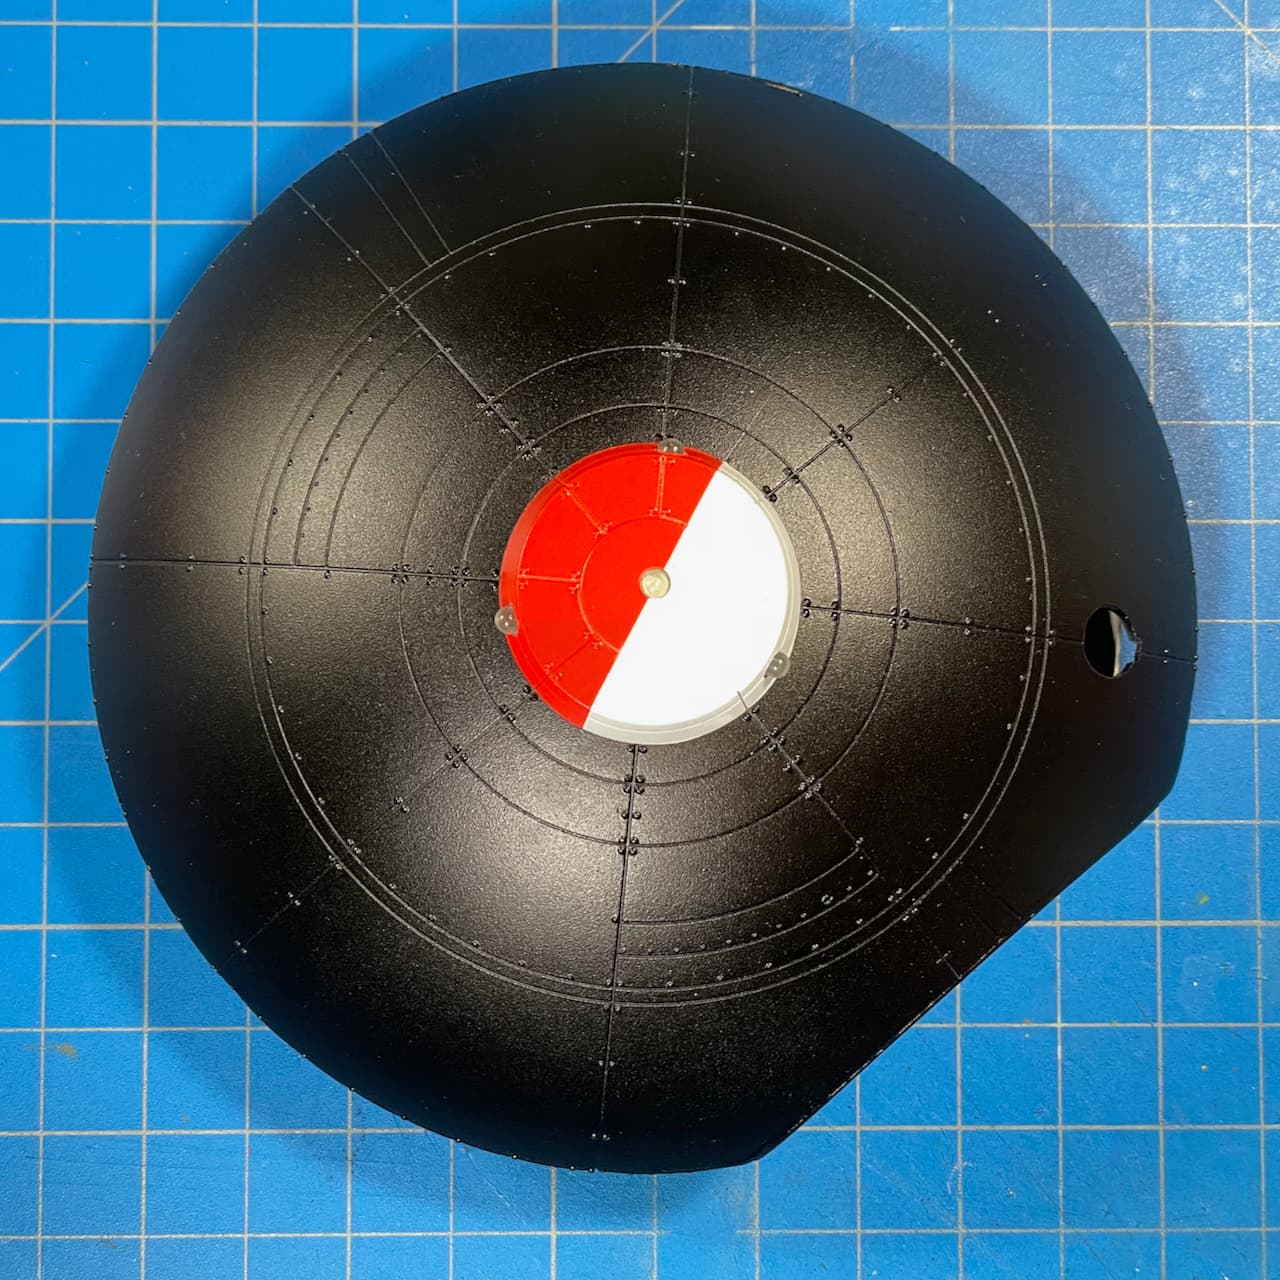
• Tamiya (85029) Ts-29 Semi Gloss Black (rattle-can)

![]() Wait for it… wait for it…
Wait for it… wait for it…
Okay… PULL TAPE!

“Huh?” ![]()
Time to drill a few holes. Easy does it. Gradually step-up to the proper size. ![]()

Then, insert some clear sprue scraps. They fit snugly from the inside. ![]()
Le voilà! Navigation lights! ![]()

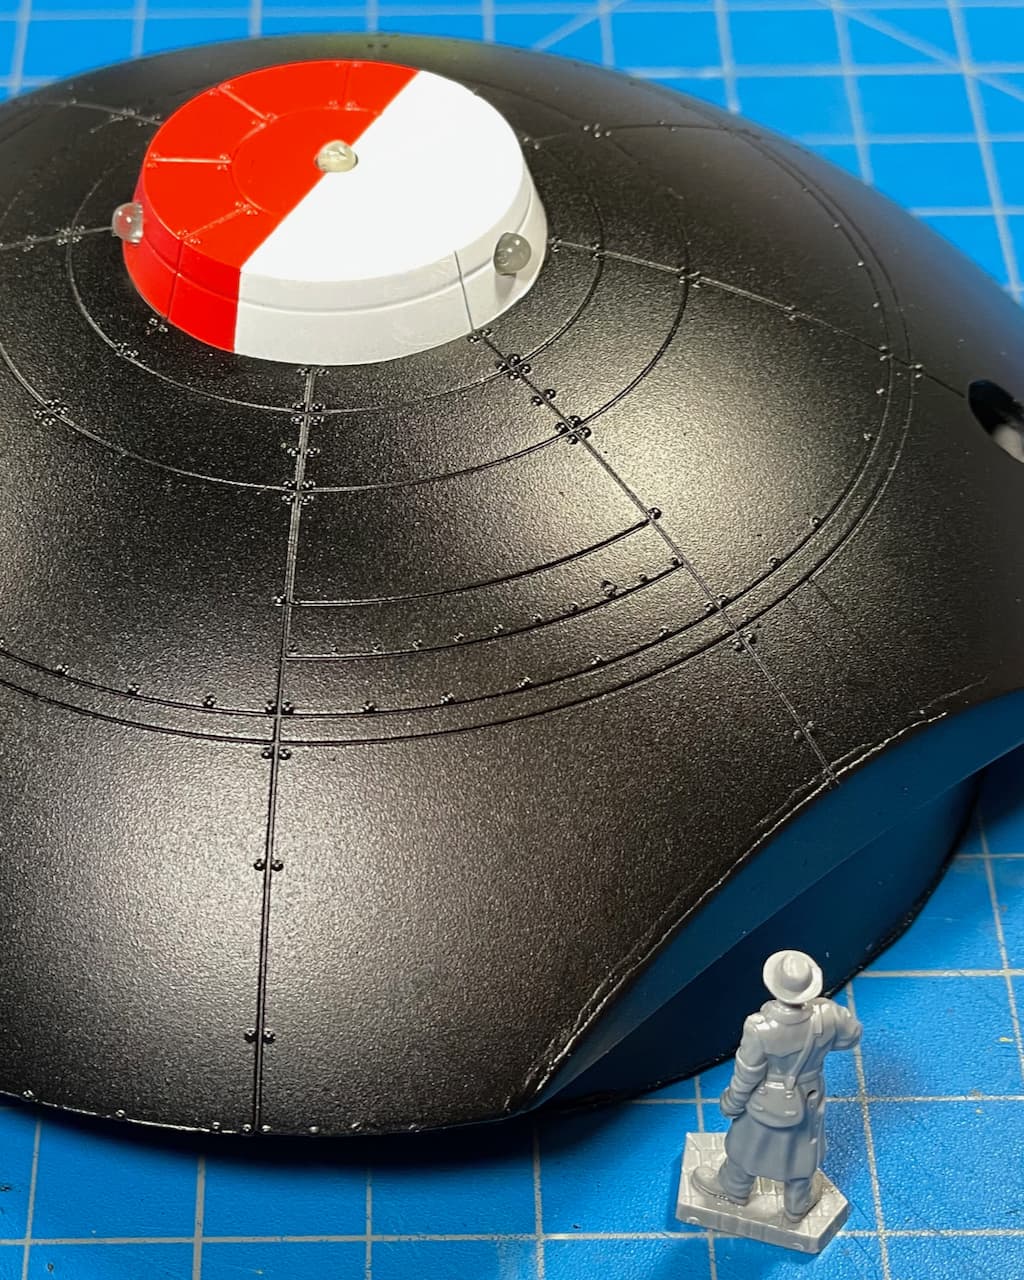
“Was ist das, Disc-go?” ![]()
—mike …![]()
![]()
15 Likes
Very very nice ![]()
![]()
![]()
2 Likes
So here we are at the oil stage and the big ol’ slowdown begins! Not that I want to slow down a build but I find the nature of oils can require it.
My first stage is dealing with the camouflage colors- creating some areas of wear and tear and paint fading etc.
This is stage one of the weathering process and I’ve been fairly restrained, hoping to add a bit of life and interest to the paintwork.
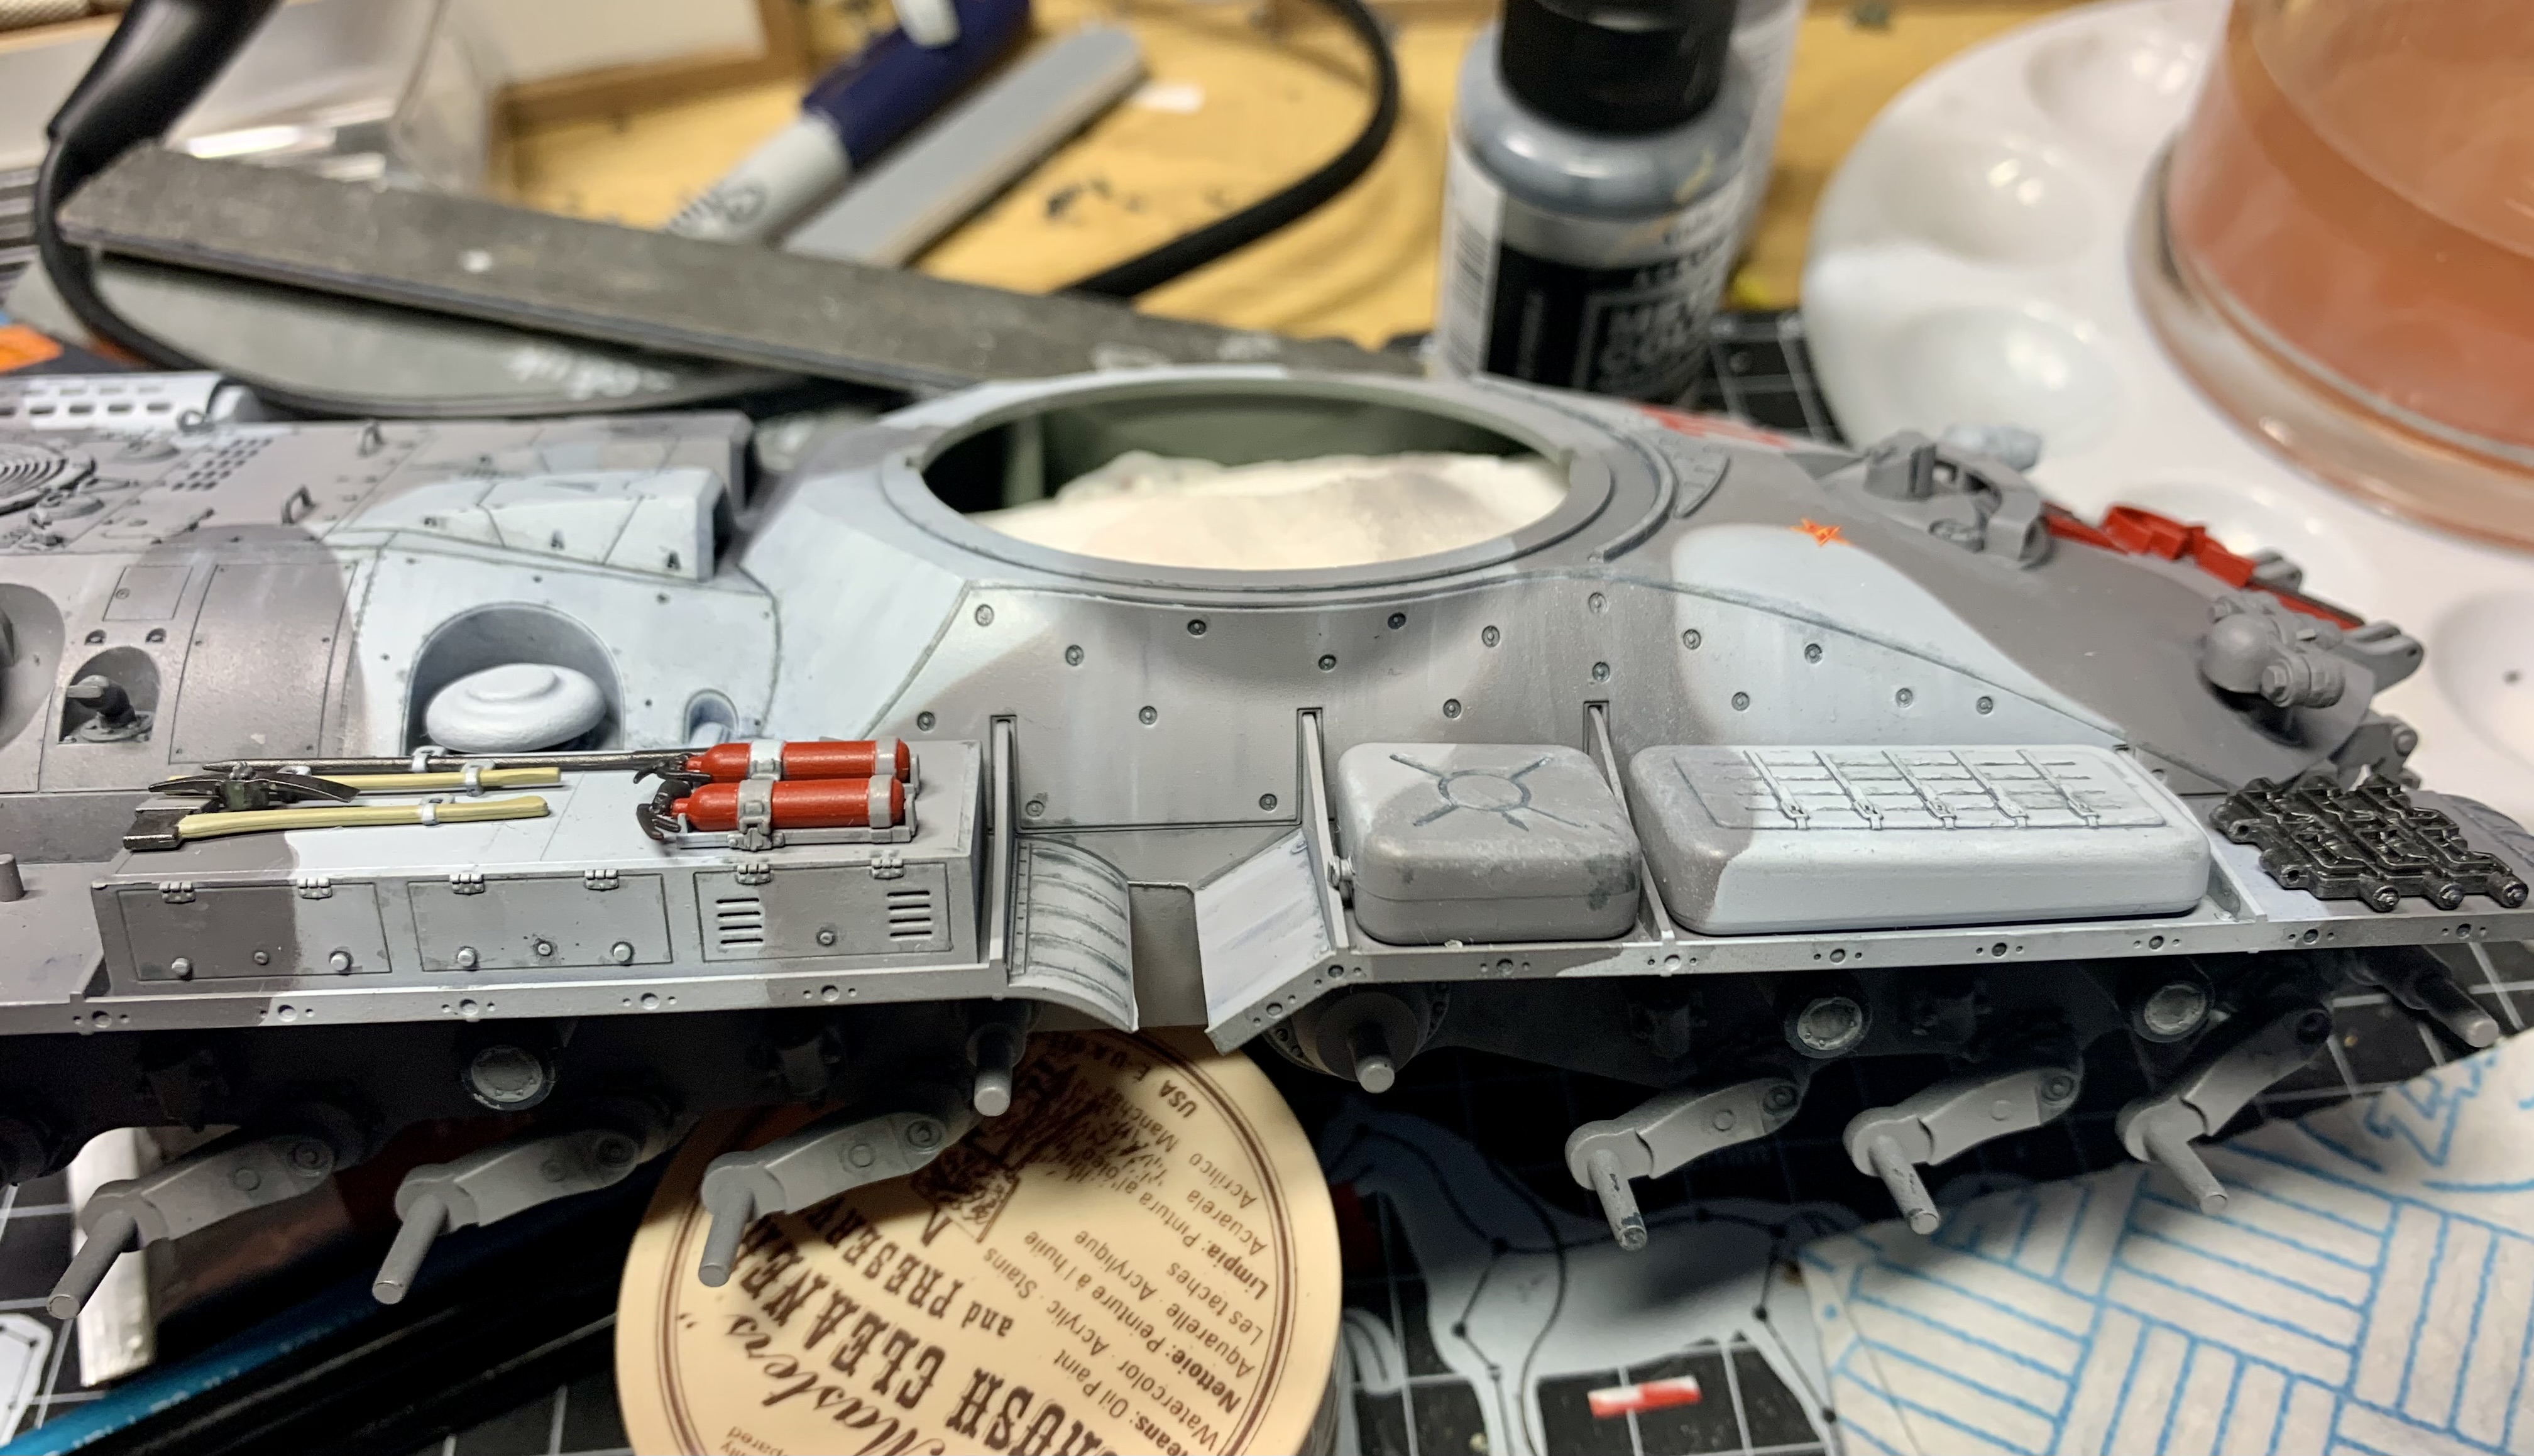
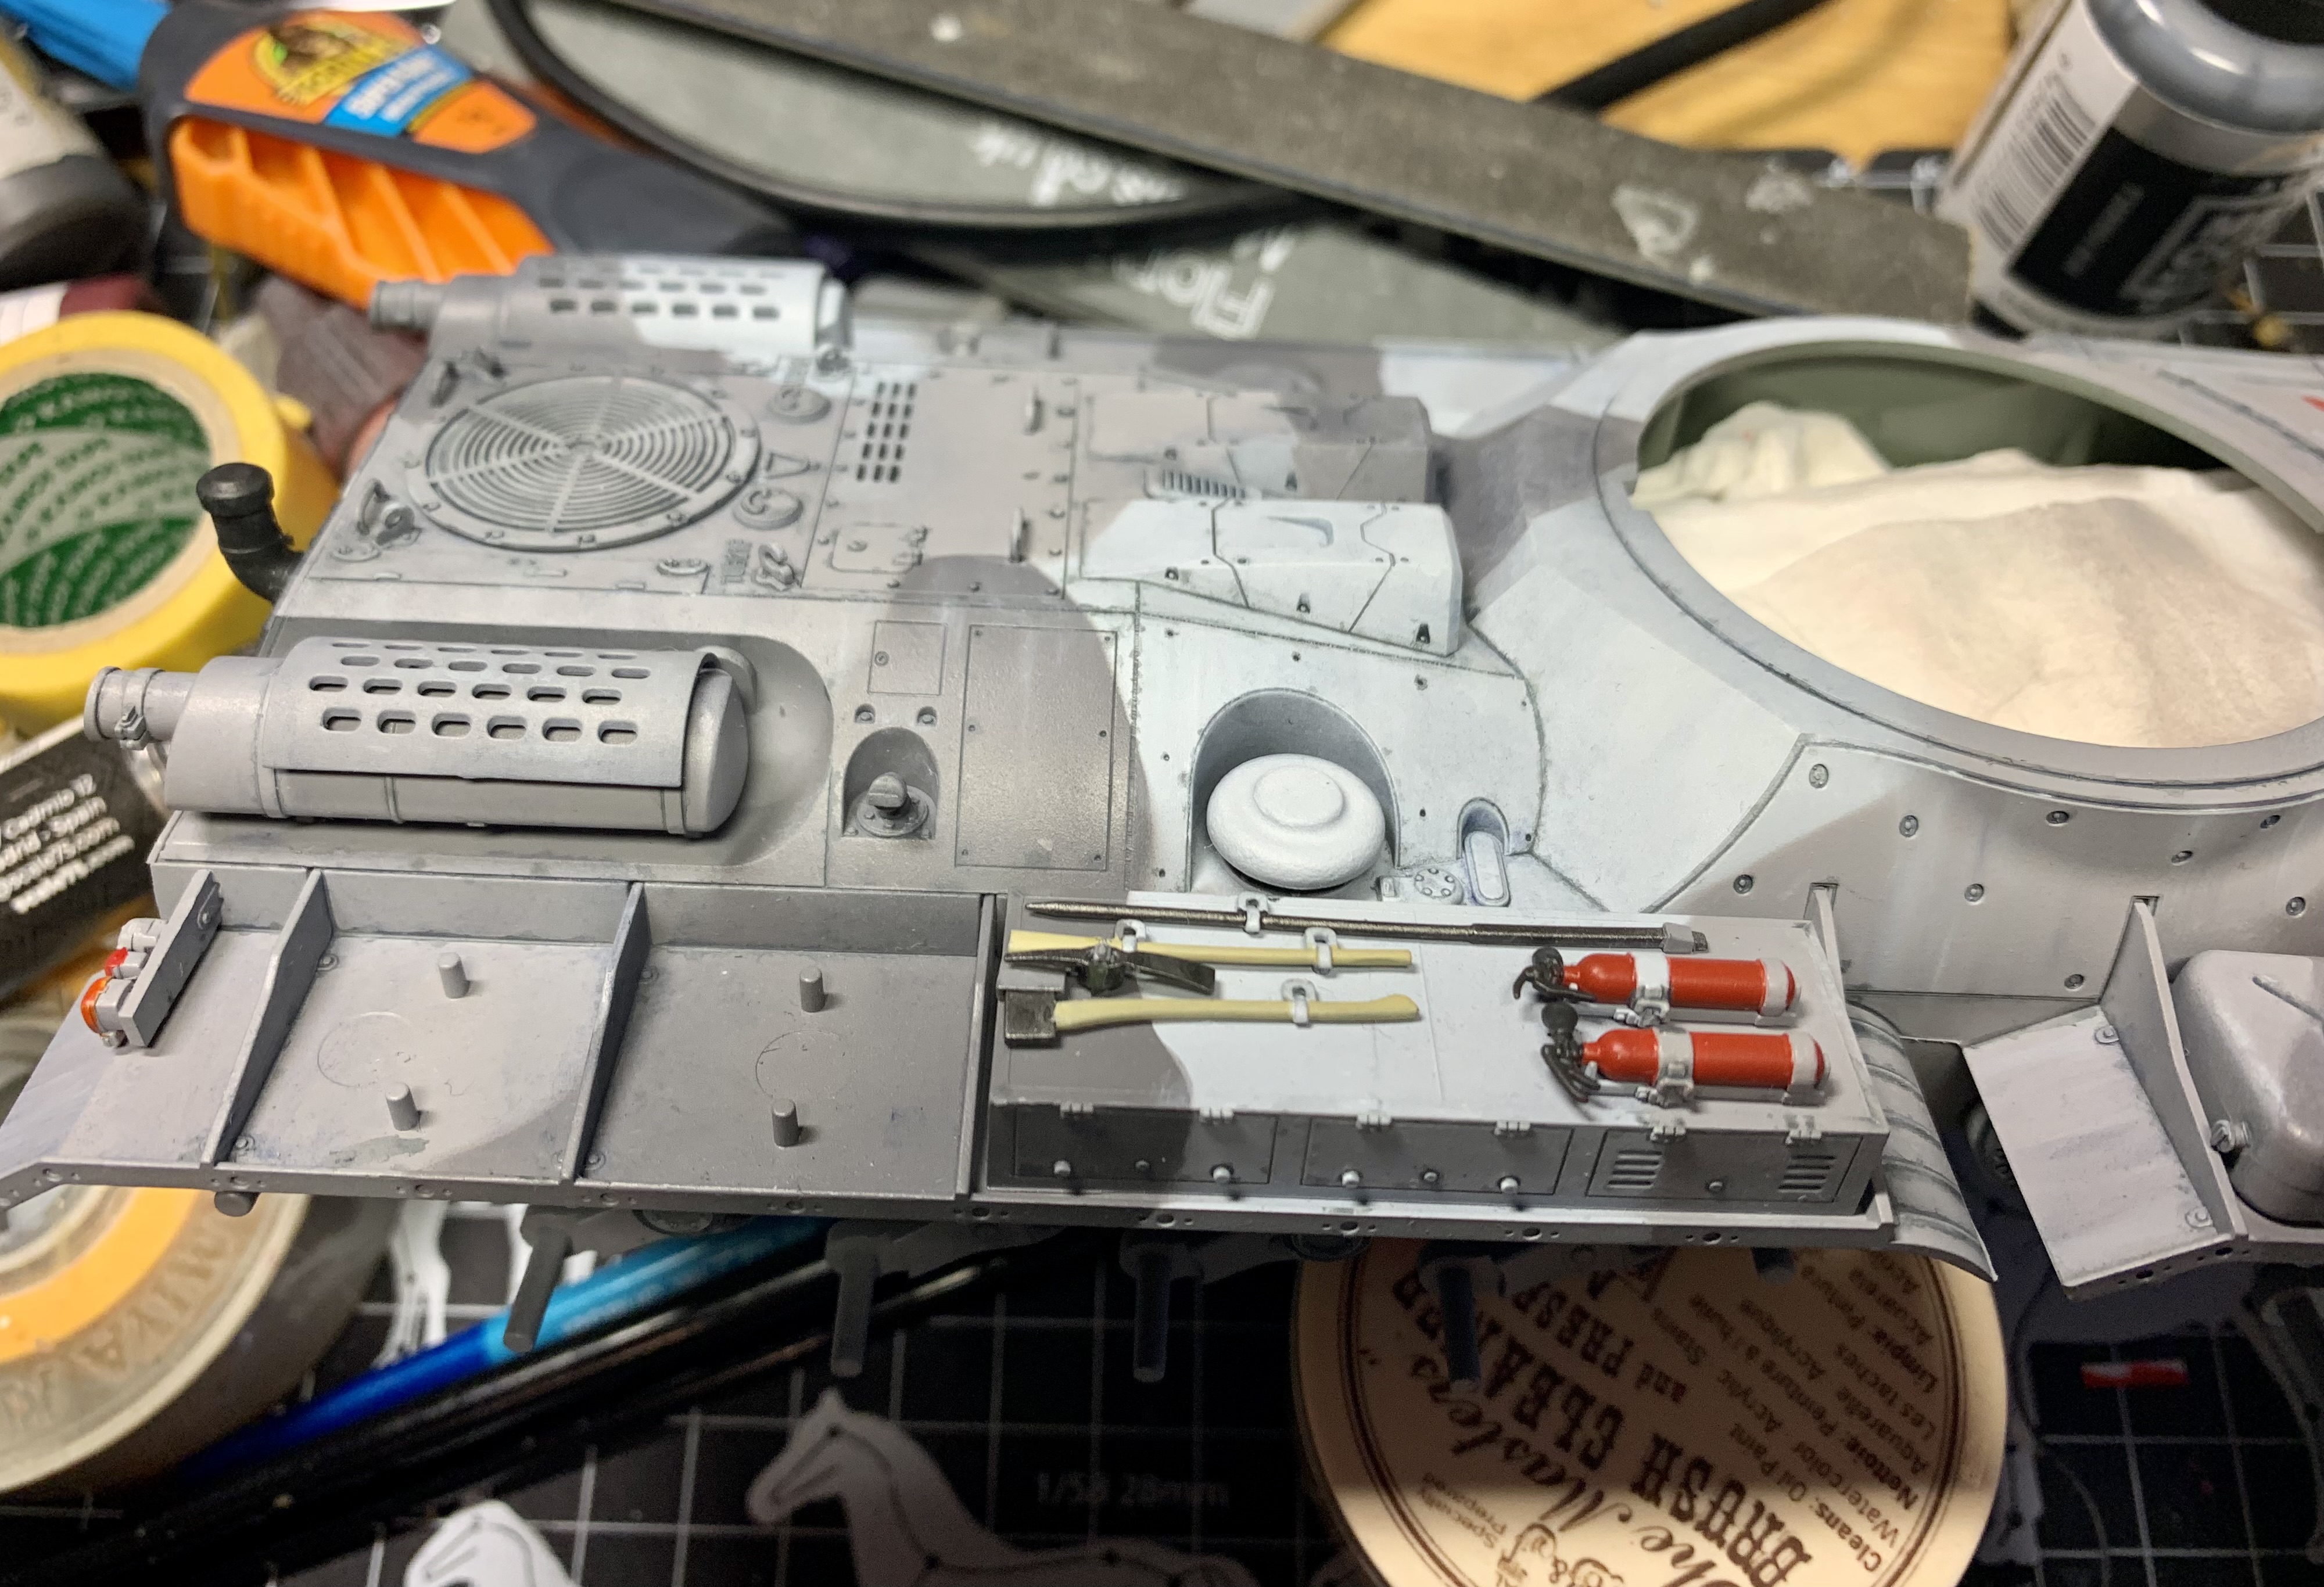
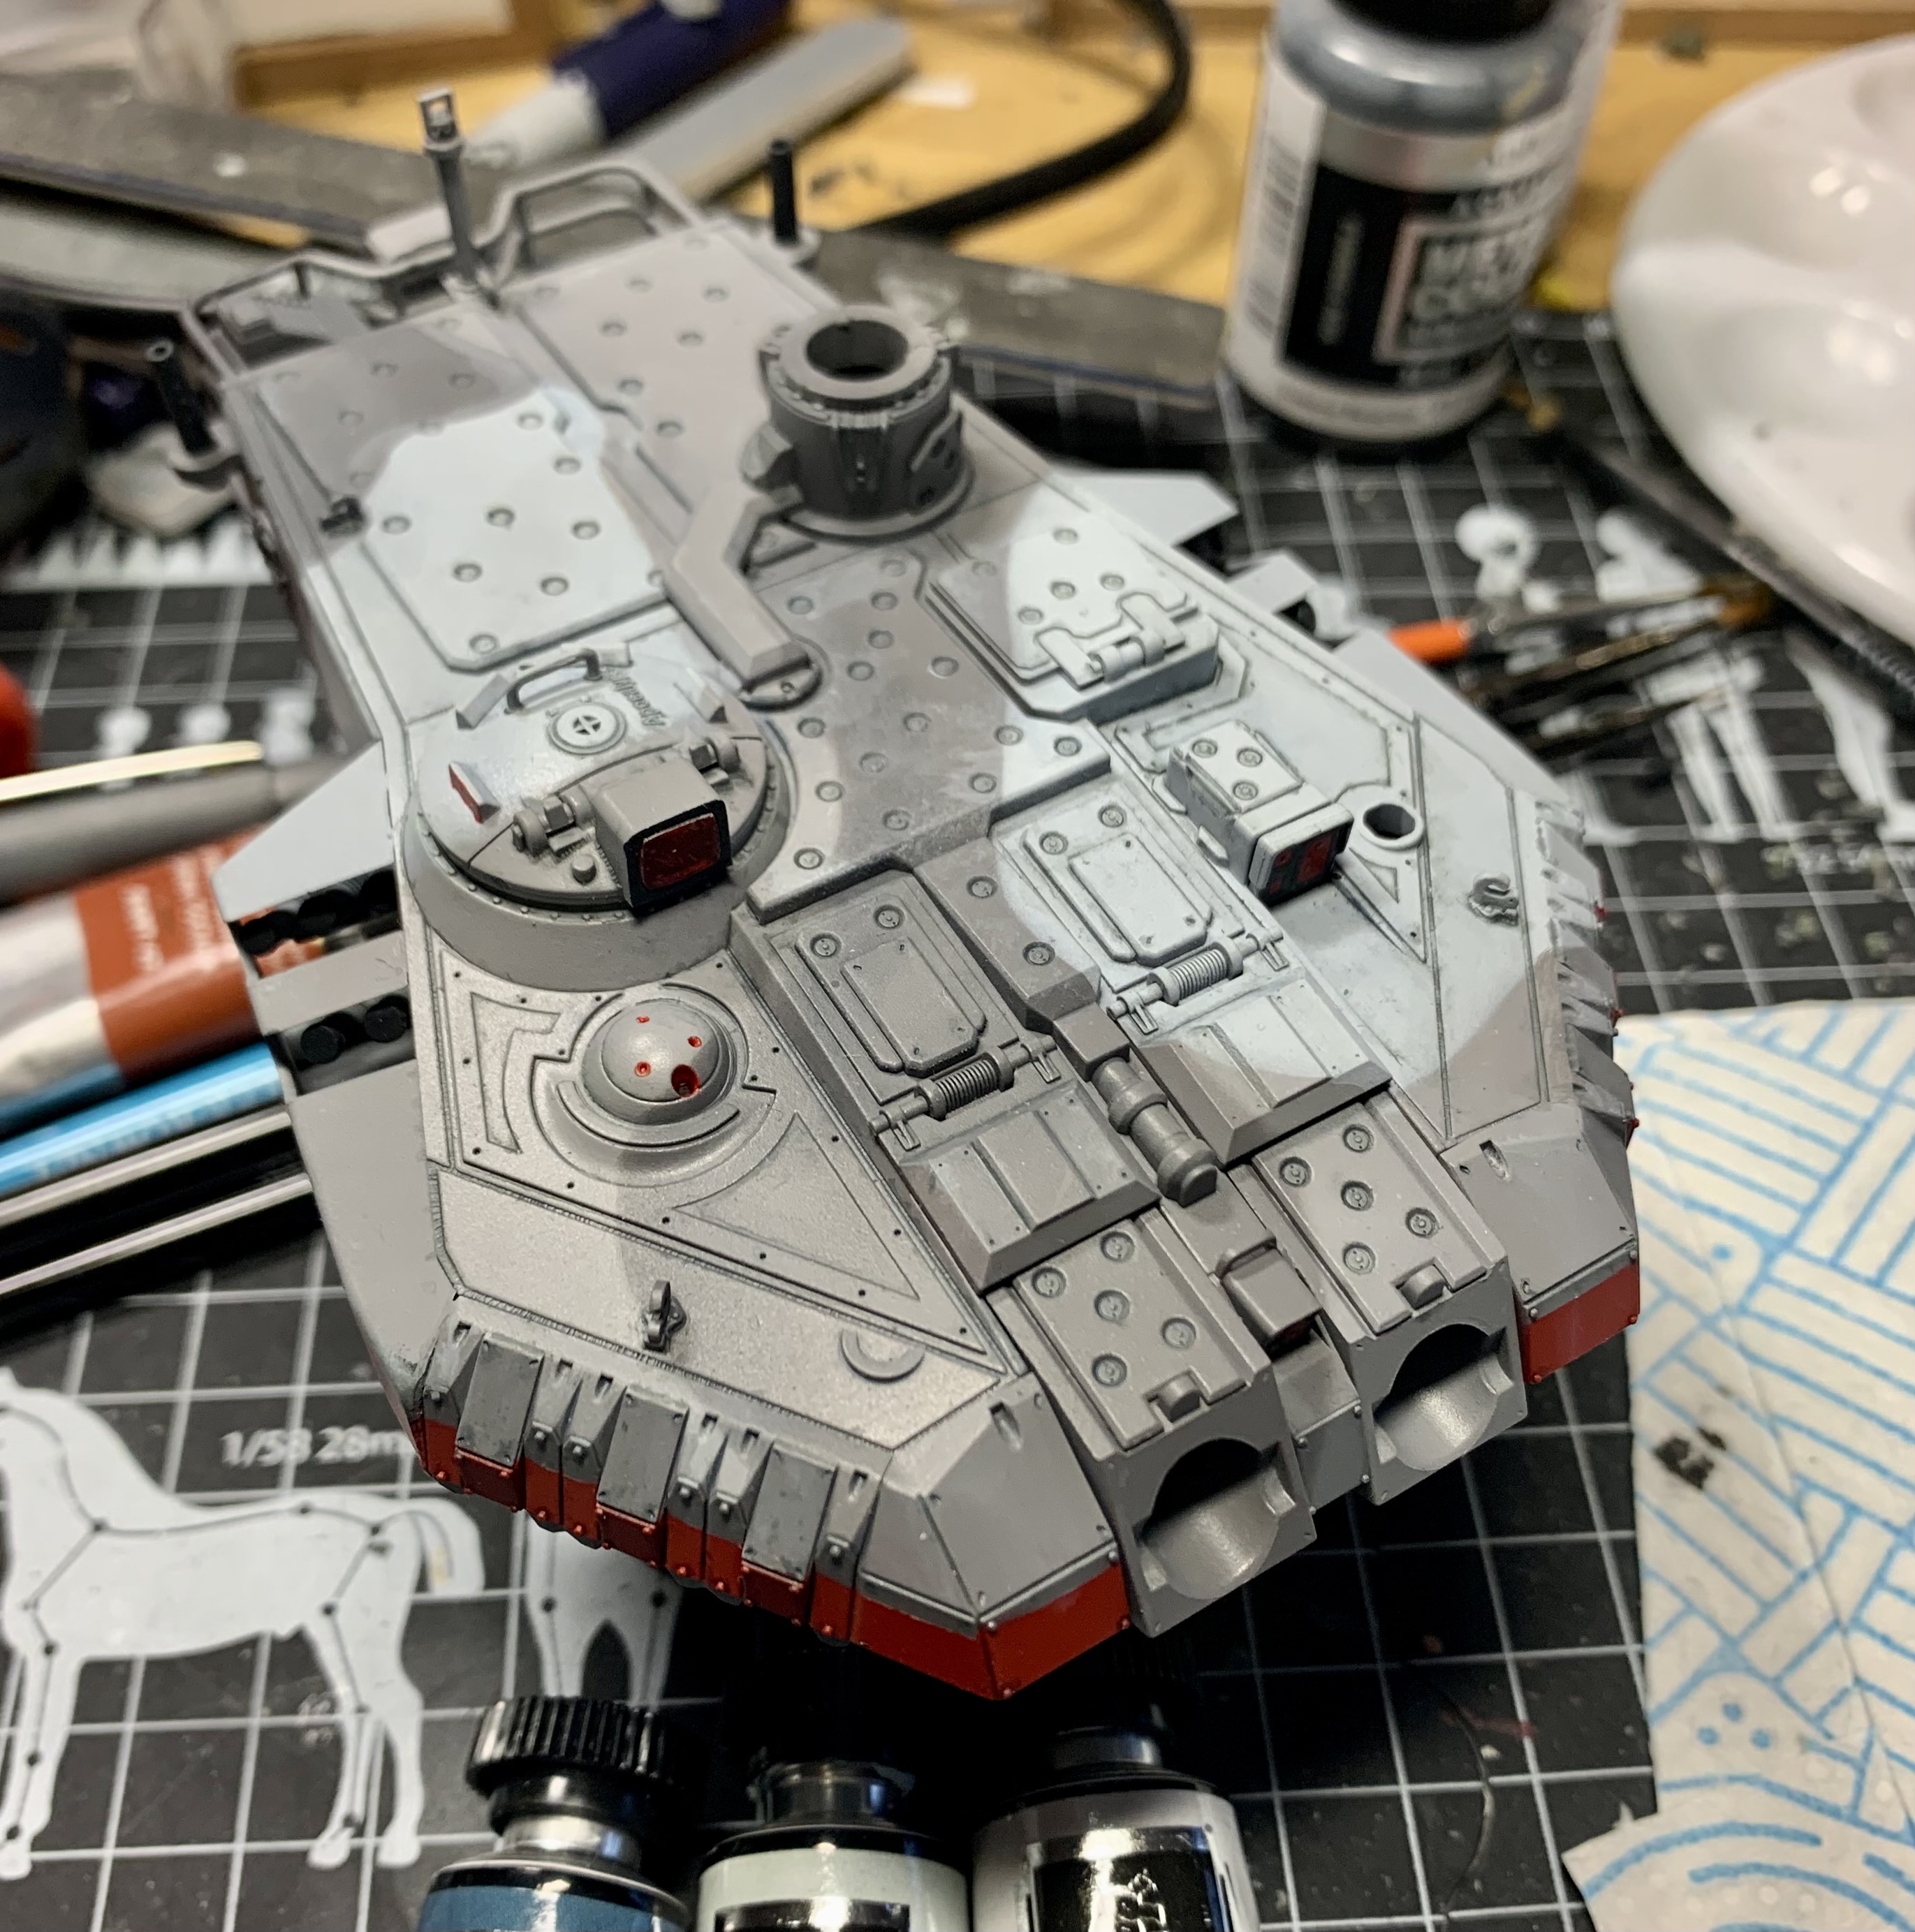
So that’s the first stage of the oils. The second stage deals with things like mud, dust and dirt etc.
Thanks for reading.
15 Likes
Well, most of the colour is down for the office space and exterior of the office block.
Grey concrete with anodised aluminium frame glazing and doors.

Thanks for watching, till next time.![]()
9 Likes
That cam scheme is really giving it a whole new and very good look… Great work Karl ![]()
2 Likes
Really like the concept and attention to the lesser background details… It’s a superbly thought out office space which you have recreated very neatly ![]()
2 Likes
Your work is really very-very clean and nice. Lots of details and great painting - I do like it. But to present the works, if I was you, I would make these photos on a much “cleaner” and tidy area. That would definitely provide more attention and focus to the model. It deserves it!
2 Likes
Looks superb!
2 Likes
The top looks well done, but the black looks gritty? Appearances?
2 Likes
@ Ron van Wiggen,
It may be the lighting in my setup. I checked and the Tamiya Semi Gloss Black looks very smooth in 1:1. Also note: In most cases, I’m using a hand-held iPhone for quick snaps at the workbench in-between build/paint sessions. I have better equipment, but find it too cumbersome to use for these web updates.
I will add… Due to the large nature of this model, I’ve turned from airbrushing to experimenting with different spray paints (rattle-cans) that I happened to have around:
• Ace Hardware Flat Black: Nice mat finish, but a terrible long-lingering odor and long drying time.
• Rust-Oleum Semi Gloss Black has a nice smooth satin finish, but again a long-lingering odor and long drying time.
• Ultimately, I settled on Tamiya spray paints (expensive rattle-cans) where I’m clearly noticing different textures with each one I try… not unusable, just a different experience from the Vallejo acrylics I’ve become so used to airbrushing.
Anyway, I hope the end result will entertain you with more oddities coming your way. Stay tuned. ![]()
Thank’s again for having a look!
—mike …![]()
2 Likes
@Johnnych01, @Agriamodeling, @RonW - Thanks for the kind words fellas, very much appreciated.
@Agriamodeling- I hear what you are saying about a decent background for photos- truth is I would love to have somewhere to do that but I don’t have the space on or near the bench to make a nice, well lit area like that. I do have a small ‘light booth’ made from a cardboard box and some white card but I’ve never been happy with the photos from it. I’ve been wanting to re-do it with a nice, medium grey color interior instead of white but can’t seem to tear myself away from the bench at the minute!
3 Likes
Karl, awesome work on the subtle fading and washing. Looks great!
Gavin, very nice details on the office spaces.
Looking forward to see more ![]()
3 Likes
Thank you Jesper, very nice of you to say!
2 Likes
Thanks Jesper, I appreciate the support.![]()
2 Likes
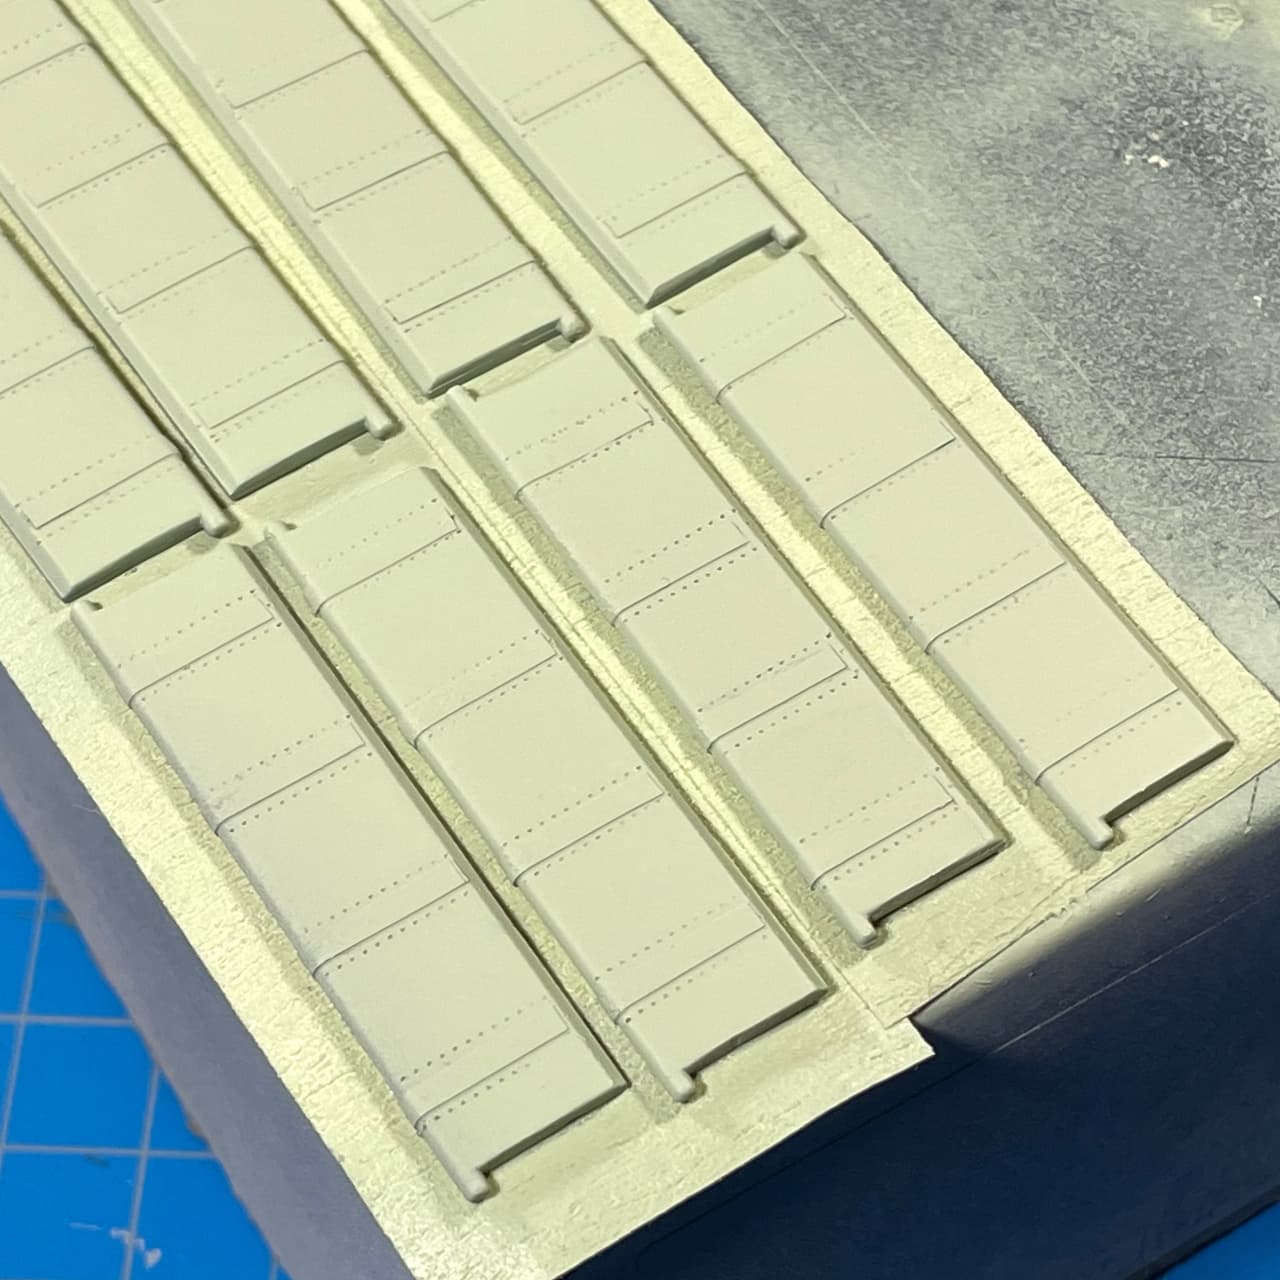
Knock knock… Who’s at the eight doors? 
Here’s my work on the wheel well doors…
It took me a few tries to get the hang of the Rivet Maker tool. Some came out okay… some, so-so. Still, I think the extra detail looks better than just plain. ![]()
Sprayed with Vallejo Interior Grey Green (71.305).
PULL TAPE!
The slight overspray along the edges has already been dealt with. …![]()
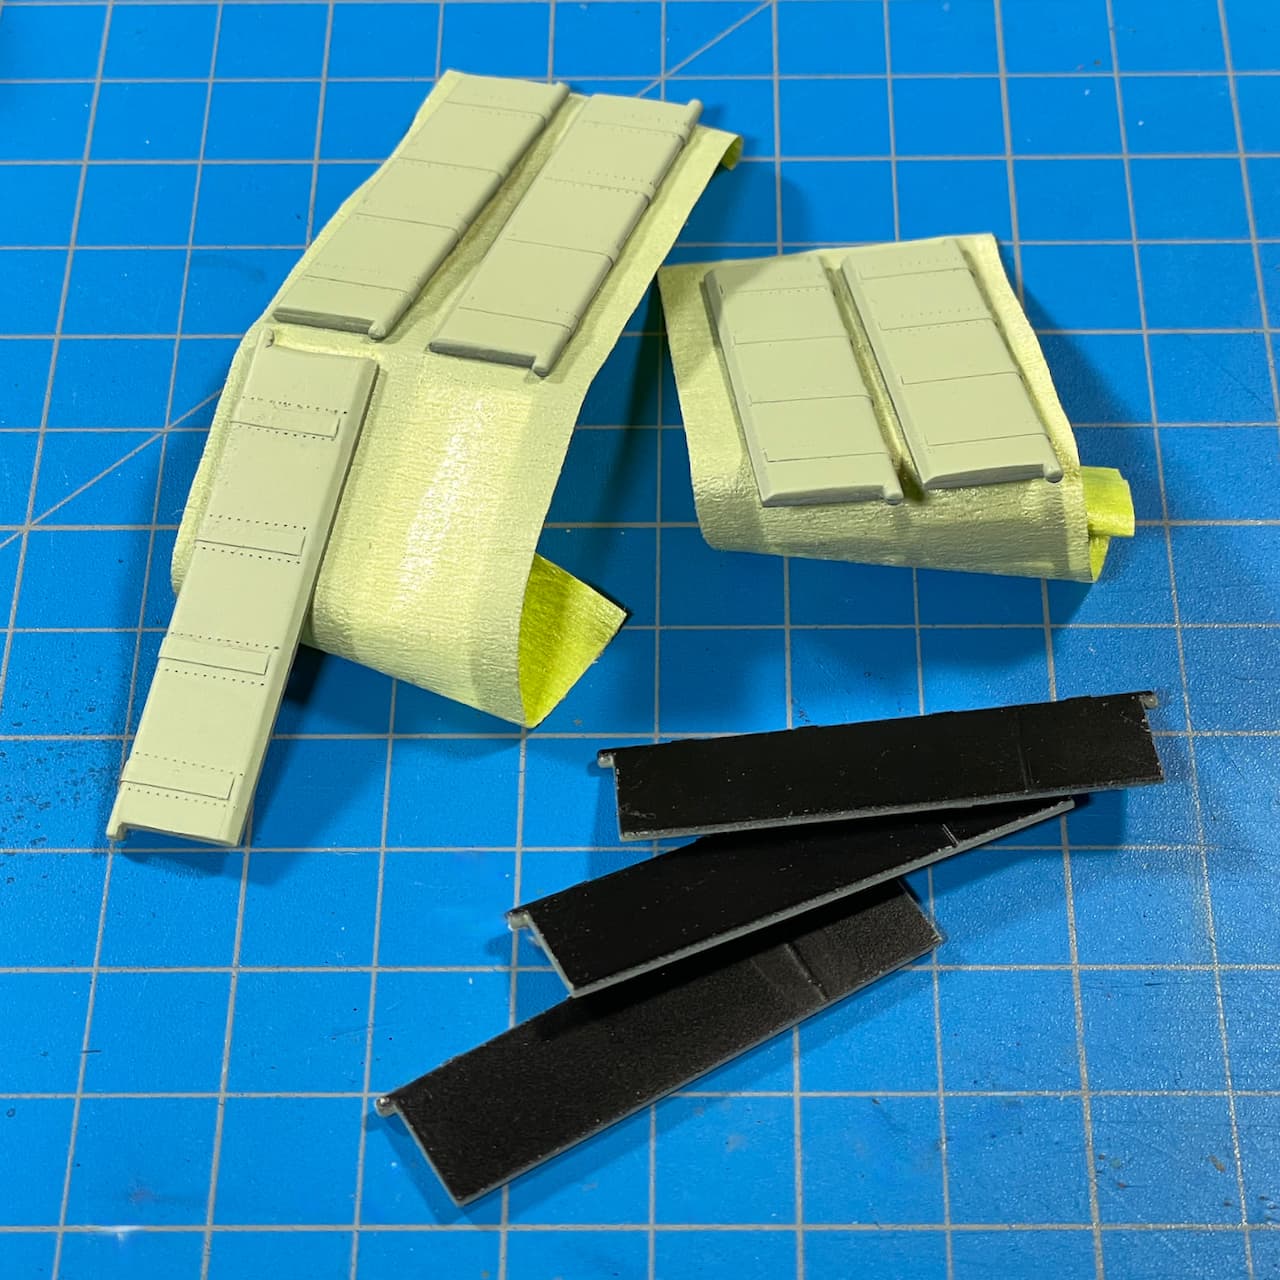
Painted the Landing Gear Struts with a hairy-stick. …![]()
Struts: Vallejo Light Grey (71.050)
Hydraulic Cylinders: Vallejo Silver (71.063)

Wheel Well Doors have been attached. They’re just waiting for me to knock them off now. ![]()
The Main Belly Dome and four Belly Turrets are dry-fit for now.
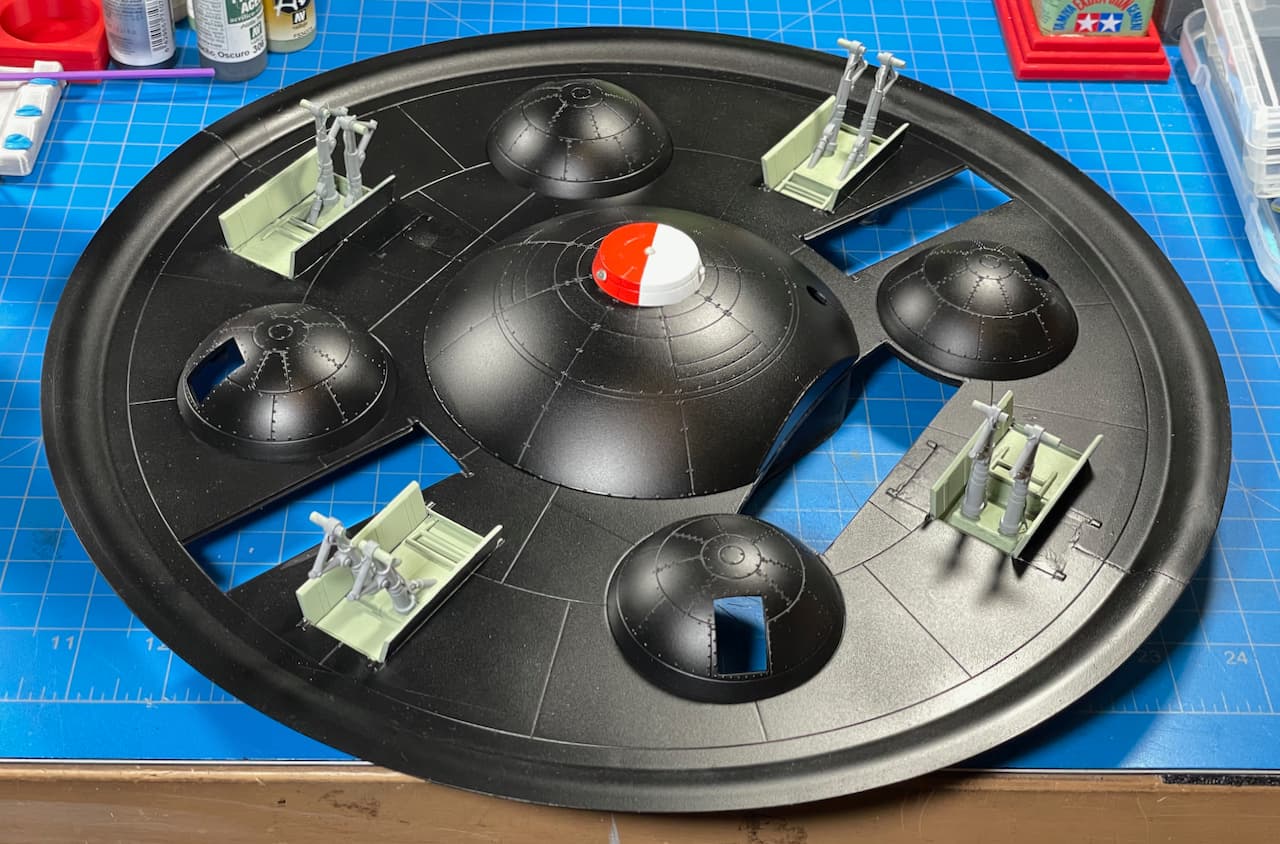

![]()
![]()
Here’s how the Haunebu IIb might look if you peered into the night sky. ![]()
“Do you really expect me to believe this nonsense? There are no wheels, there are no guns, there is no top… and most of all, there is NO bomb!” ![]()
![]()
—mike …![]()
10 Likes
You are doing such a cracking job with this Mike … I really wasn’t sure how it would look at the beginning, but you are smashing this one out the park mate ![]()
3 Likes