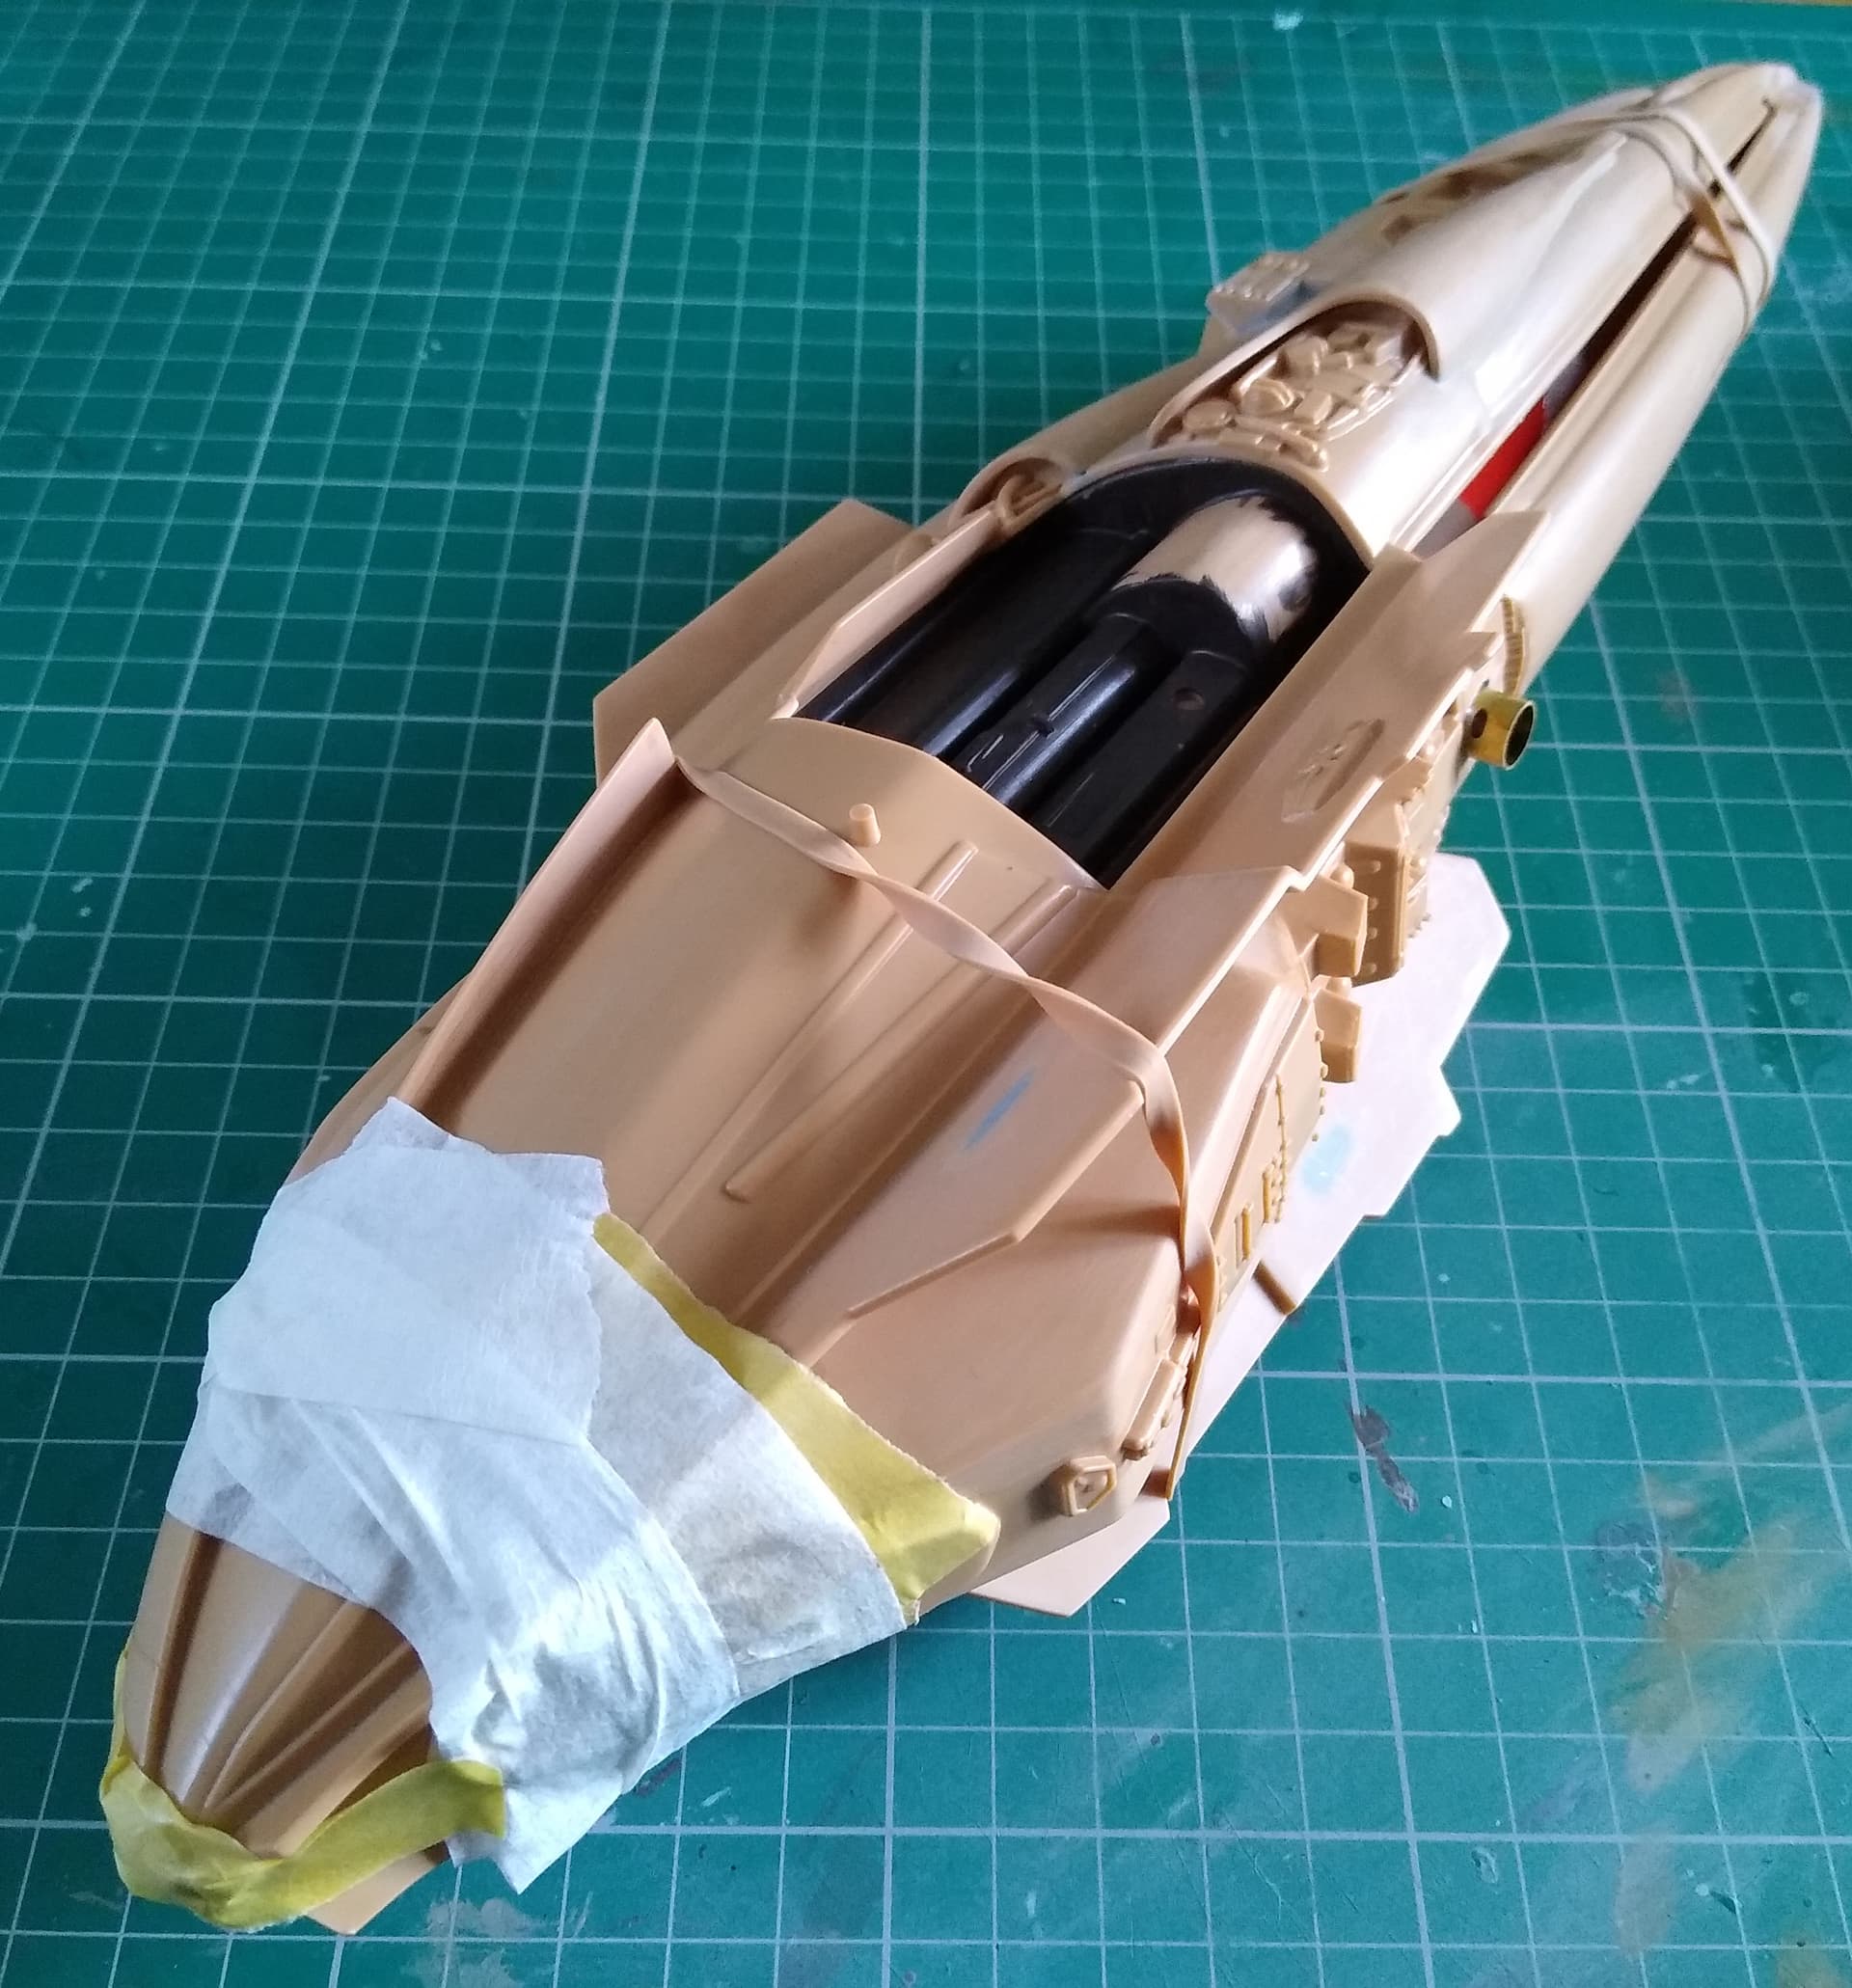
Fitted the upper and lower hull together today. The nose section needed taping to hold it all together while it sets.
6 Likes
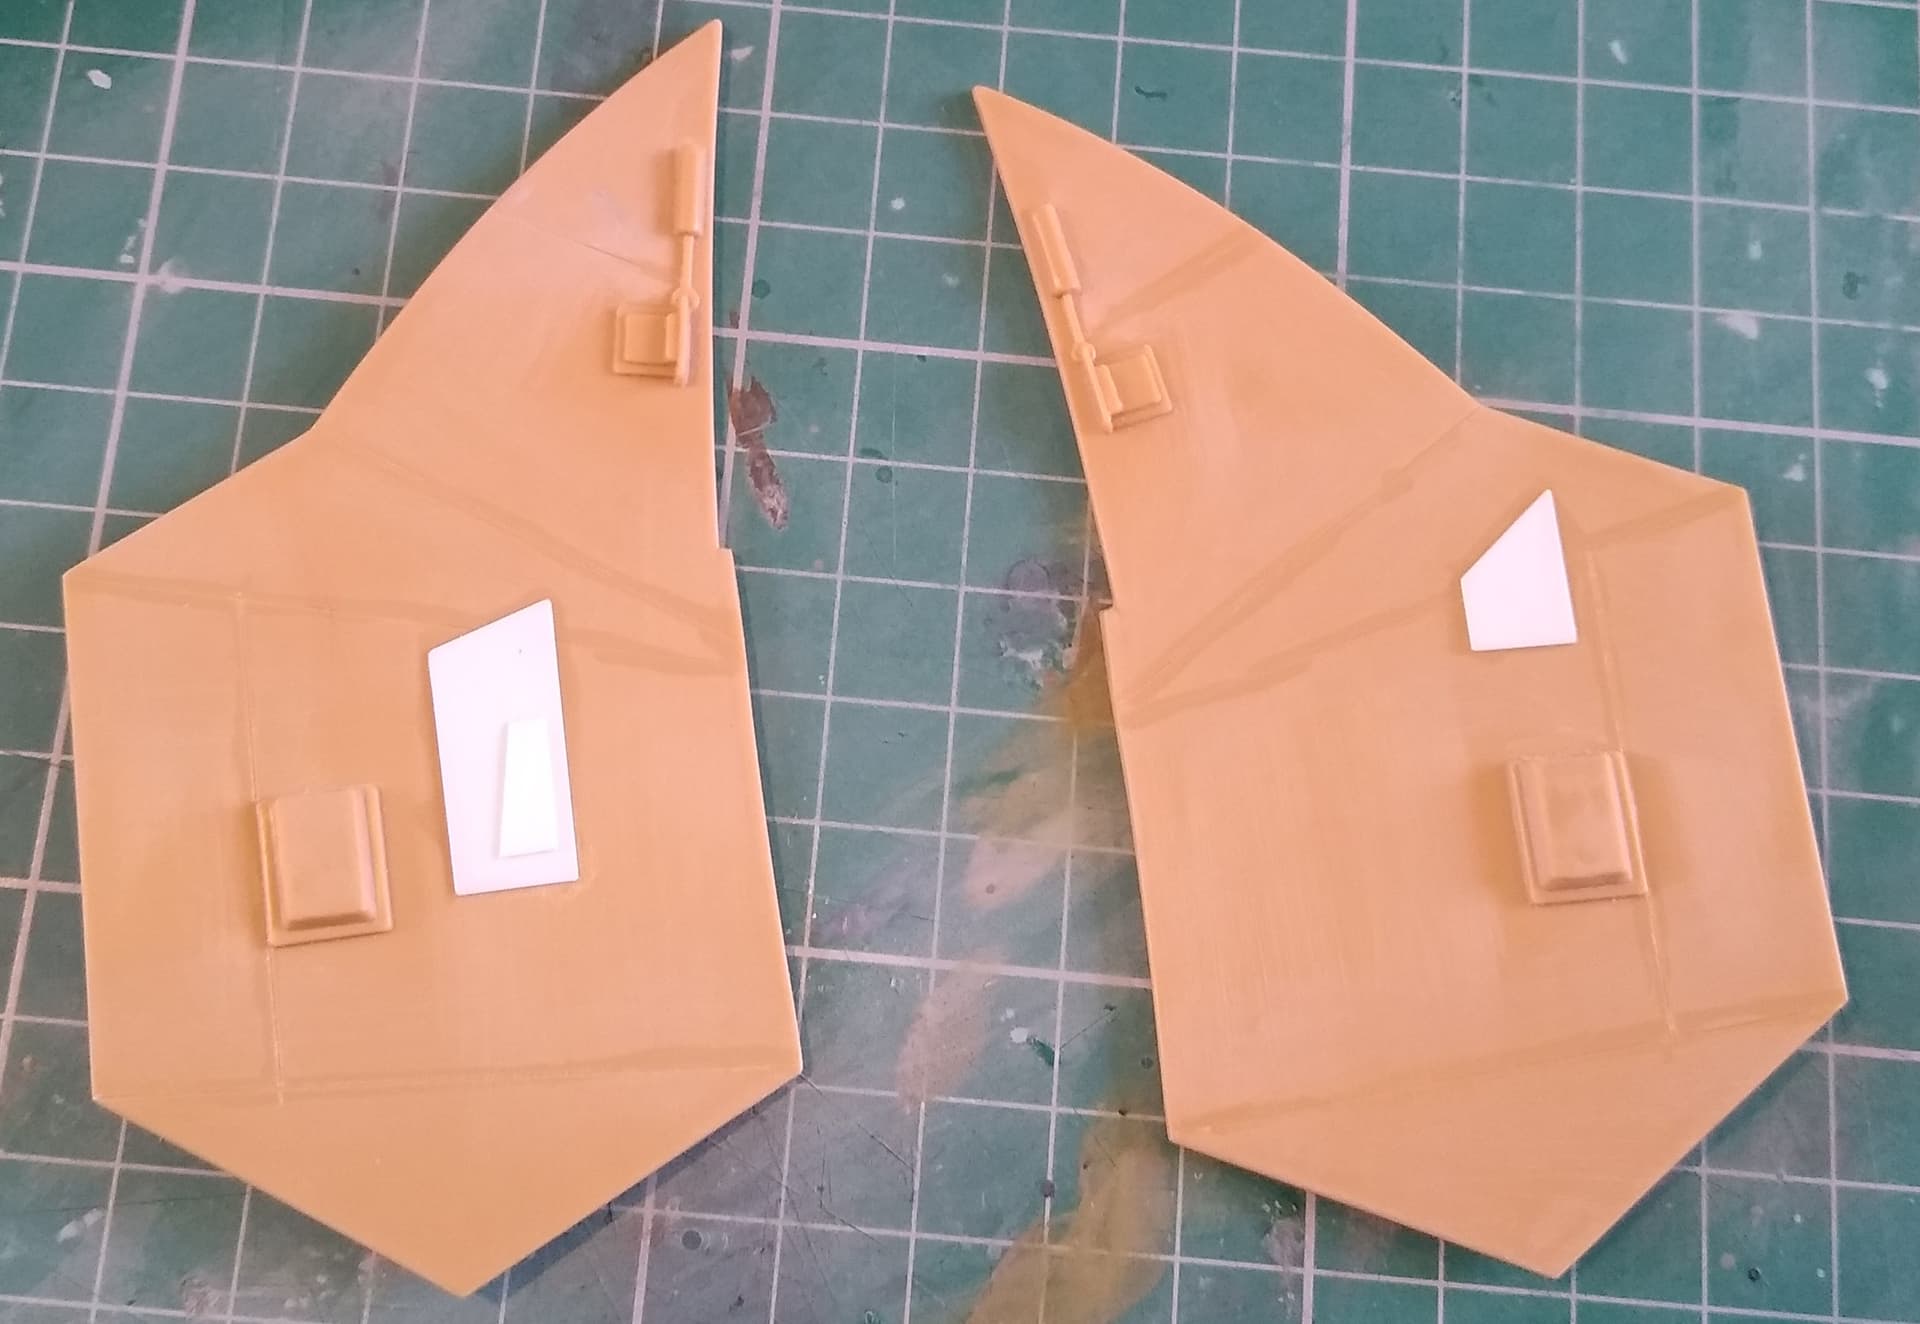
Fitted the warp-wings today. Not sure what they’re called, but that’s what I’m referring to them as!
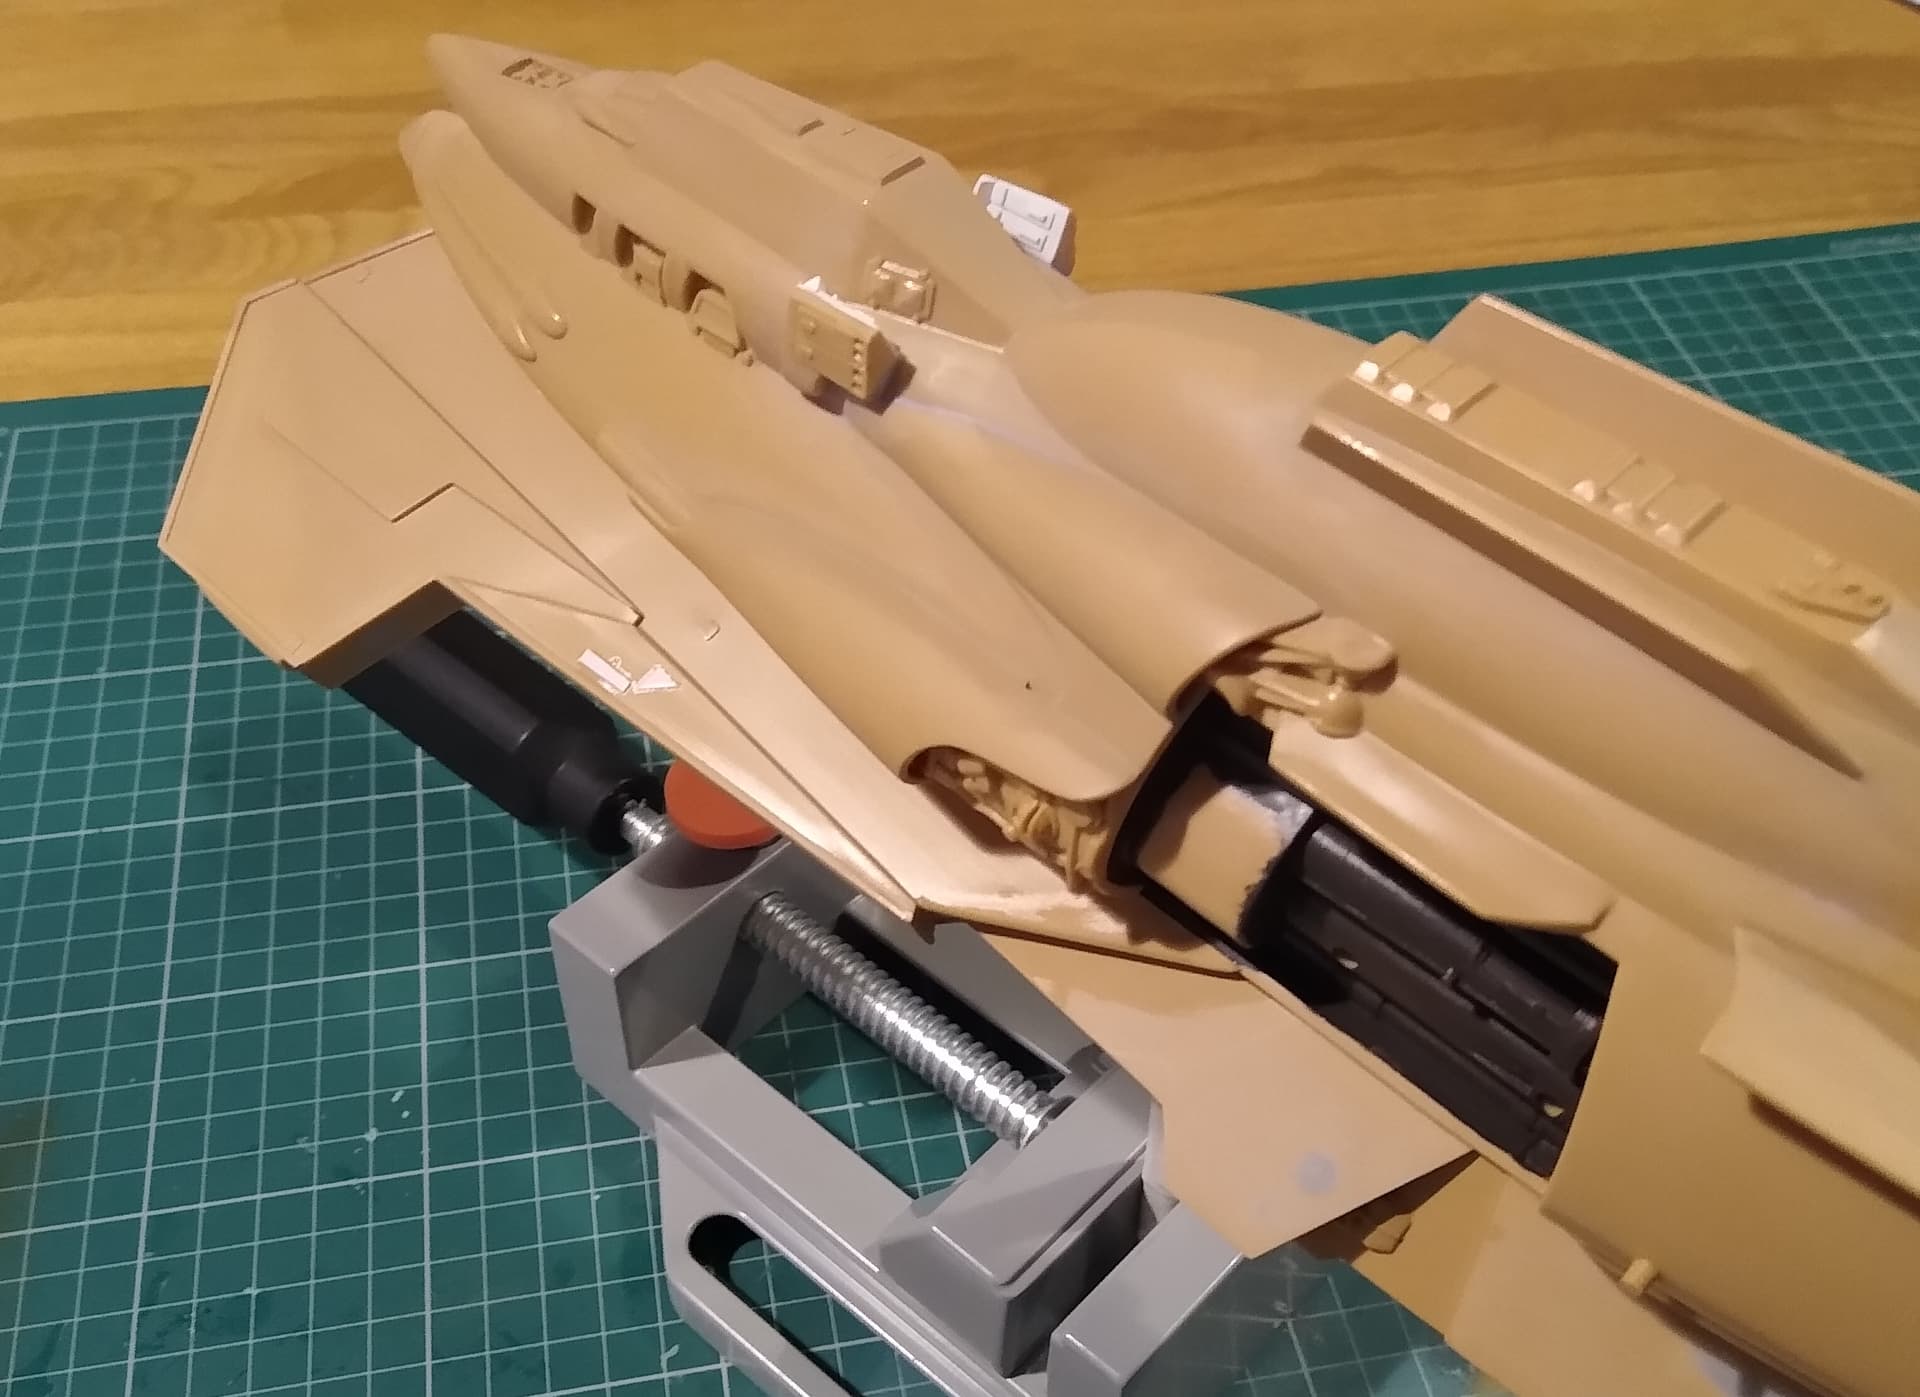

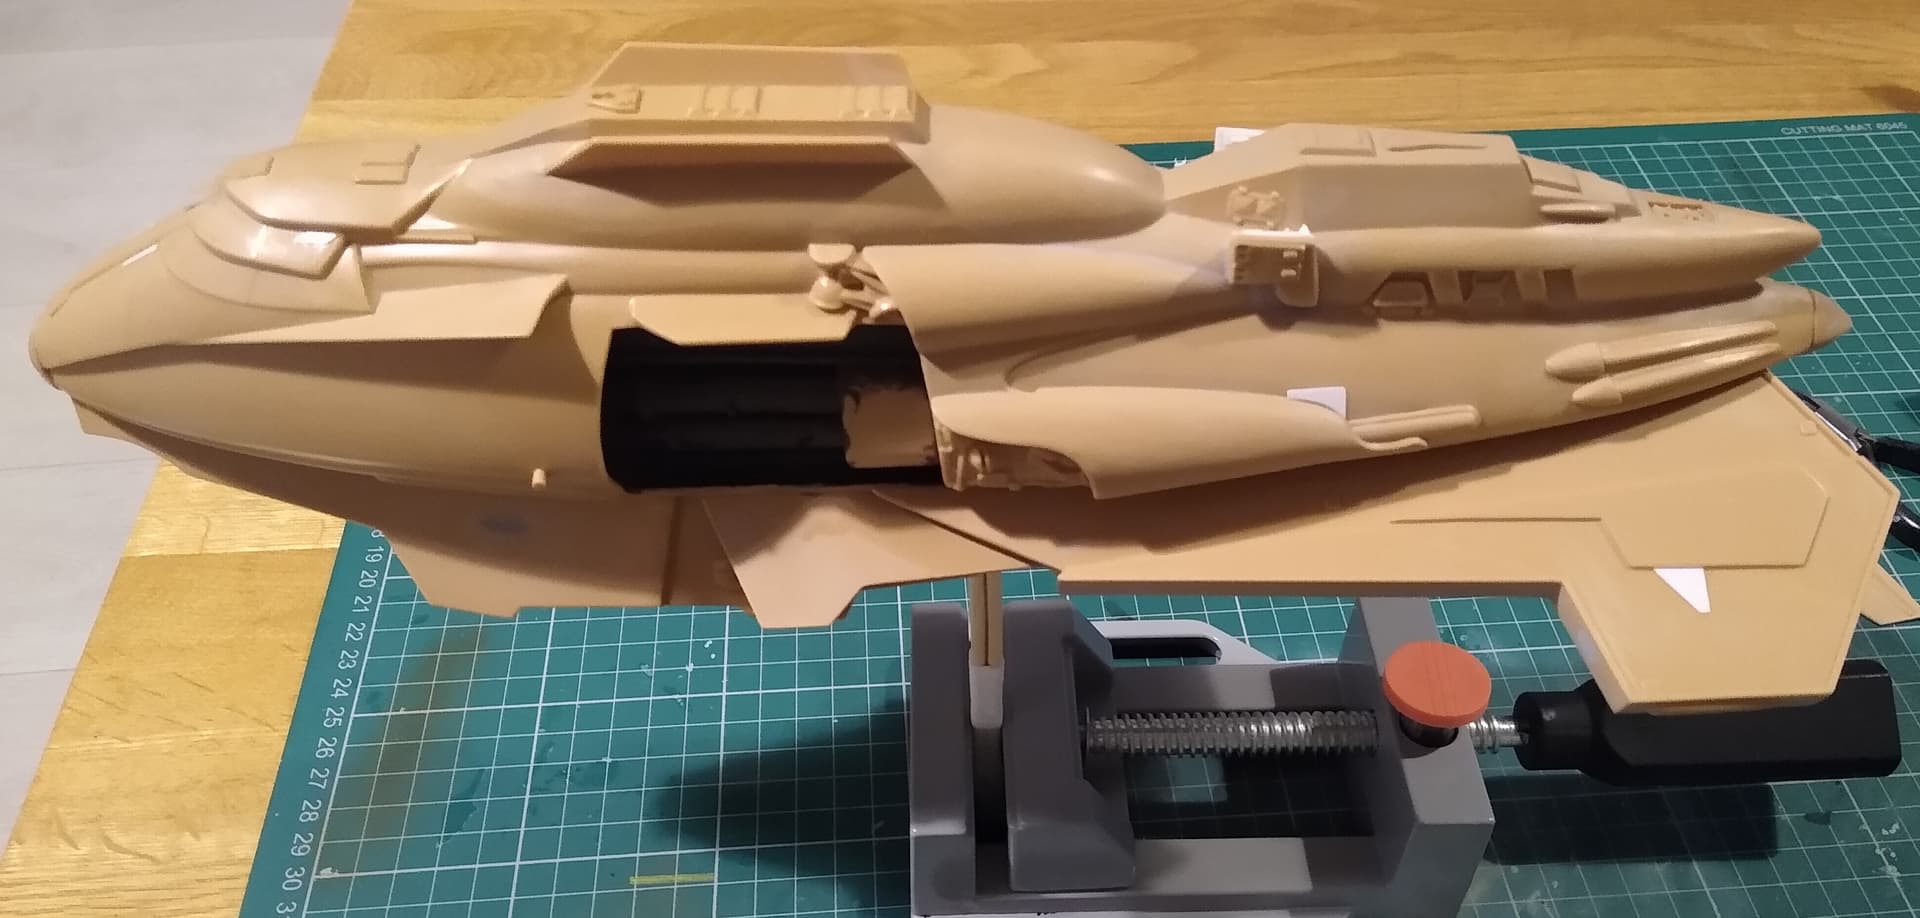
Bit tricky to fit as they kept wanting to fall off. Had to do each side at a time, taking care to get them at the same angles. Nearly time for some paint.
It’s also starting to become unwieldy to work with because of the size.
6 Likes
Looking very good Stephen.
I was looking at these and a few other types on evil bay for the Big 3 group build… It is actually a lot bigger than I thought… Will look nice with some colour on it ![]()
2 Likes
Thanks John. I think it is going to be an impressive display piece when done. Will need some care with painting to avoid it looking dull and monotone. I have a couple of ideas for that.
Hope you can find a kit for a reasonable price. Something I’ve noticed is that a lot of sci-fi kits are going for stupid amounts in the UK. Especially on Evilbay. I’m just glad I got a lot of them before the prices shot up. I think my all time best ever bargain was when I got a second hand 1/350 TMP Enterprise from £25 at the local market. Still sealed too which was good. No way was I walking away from that!
3 Likes
Looking good, Stephen! Will look impressive when done!
2 Likes
John, if you do get yourself one of these, don’t make the same mistake with the engines as I did.
I speak of these inset grilles I’ve highlighted here.
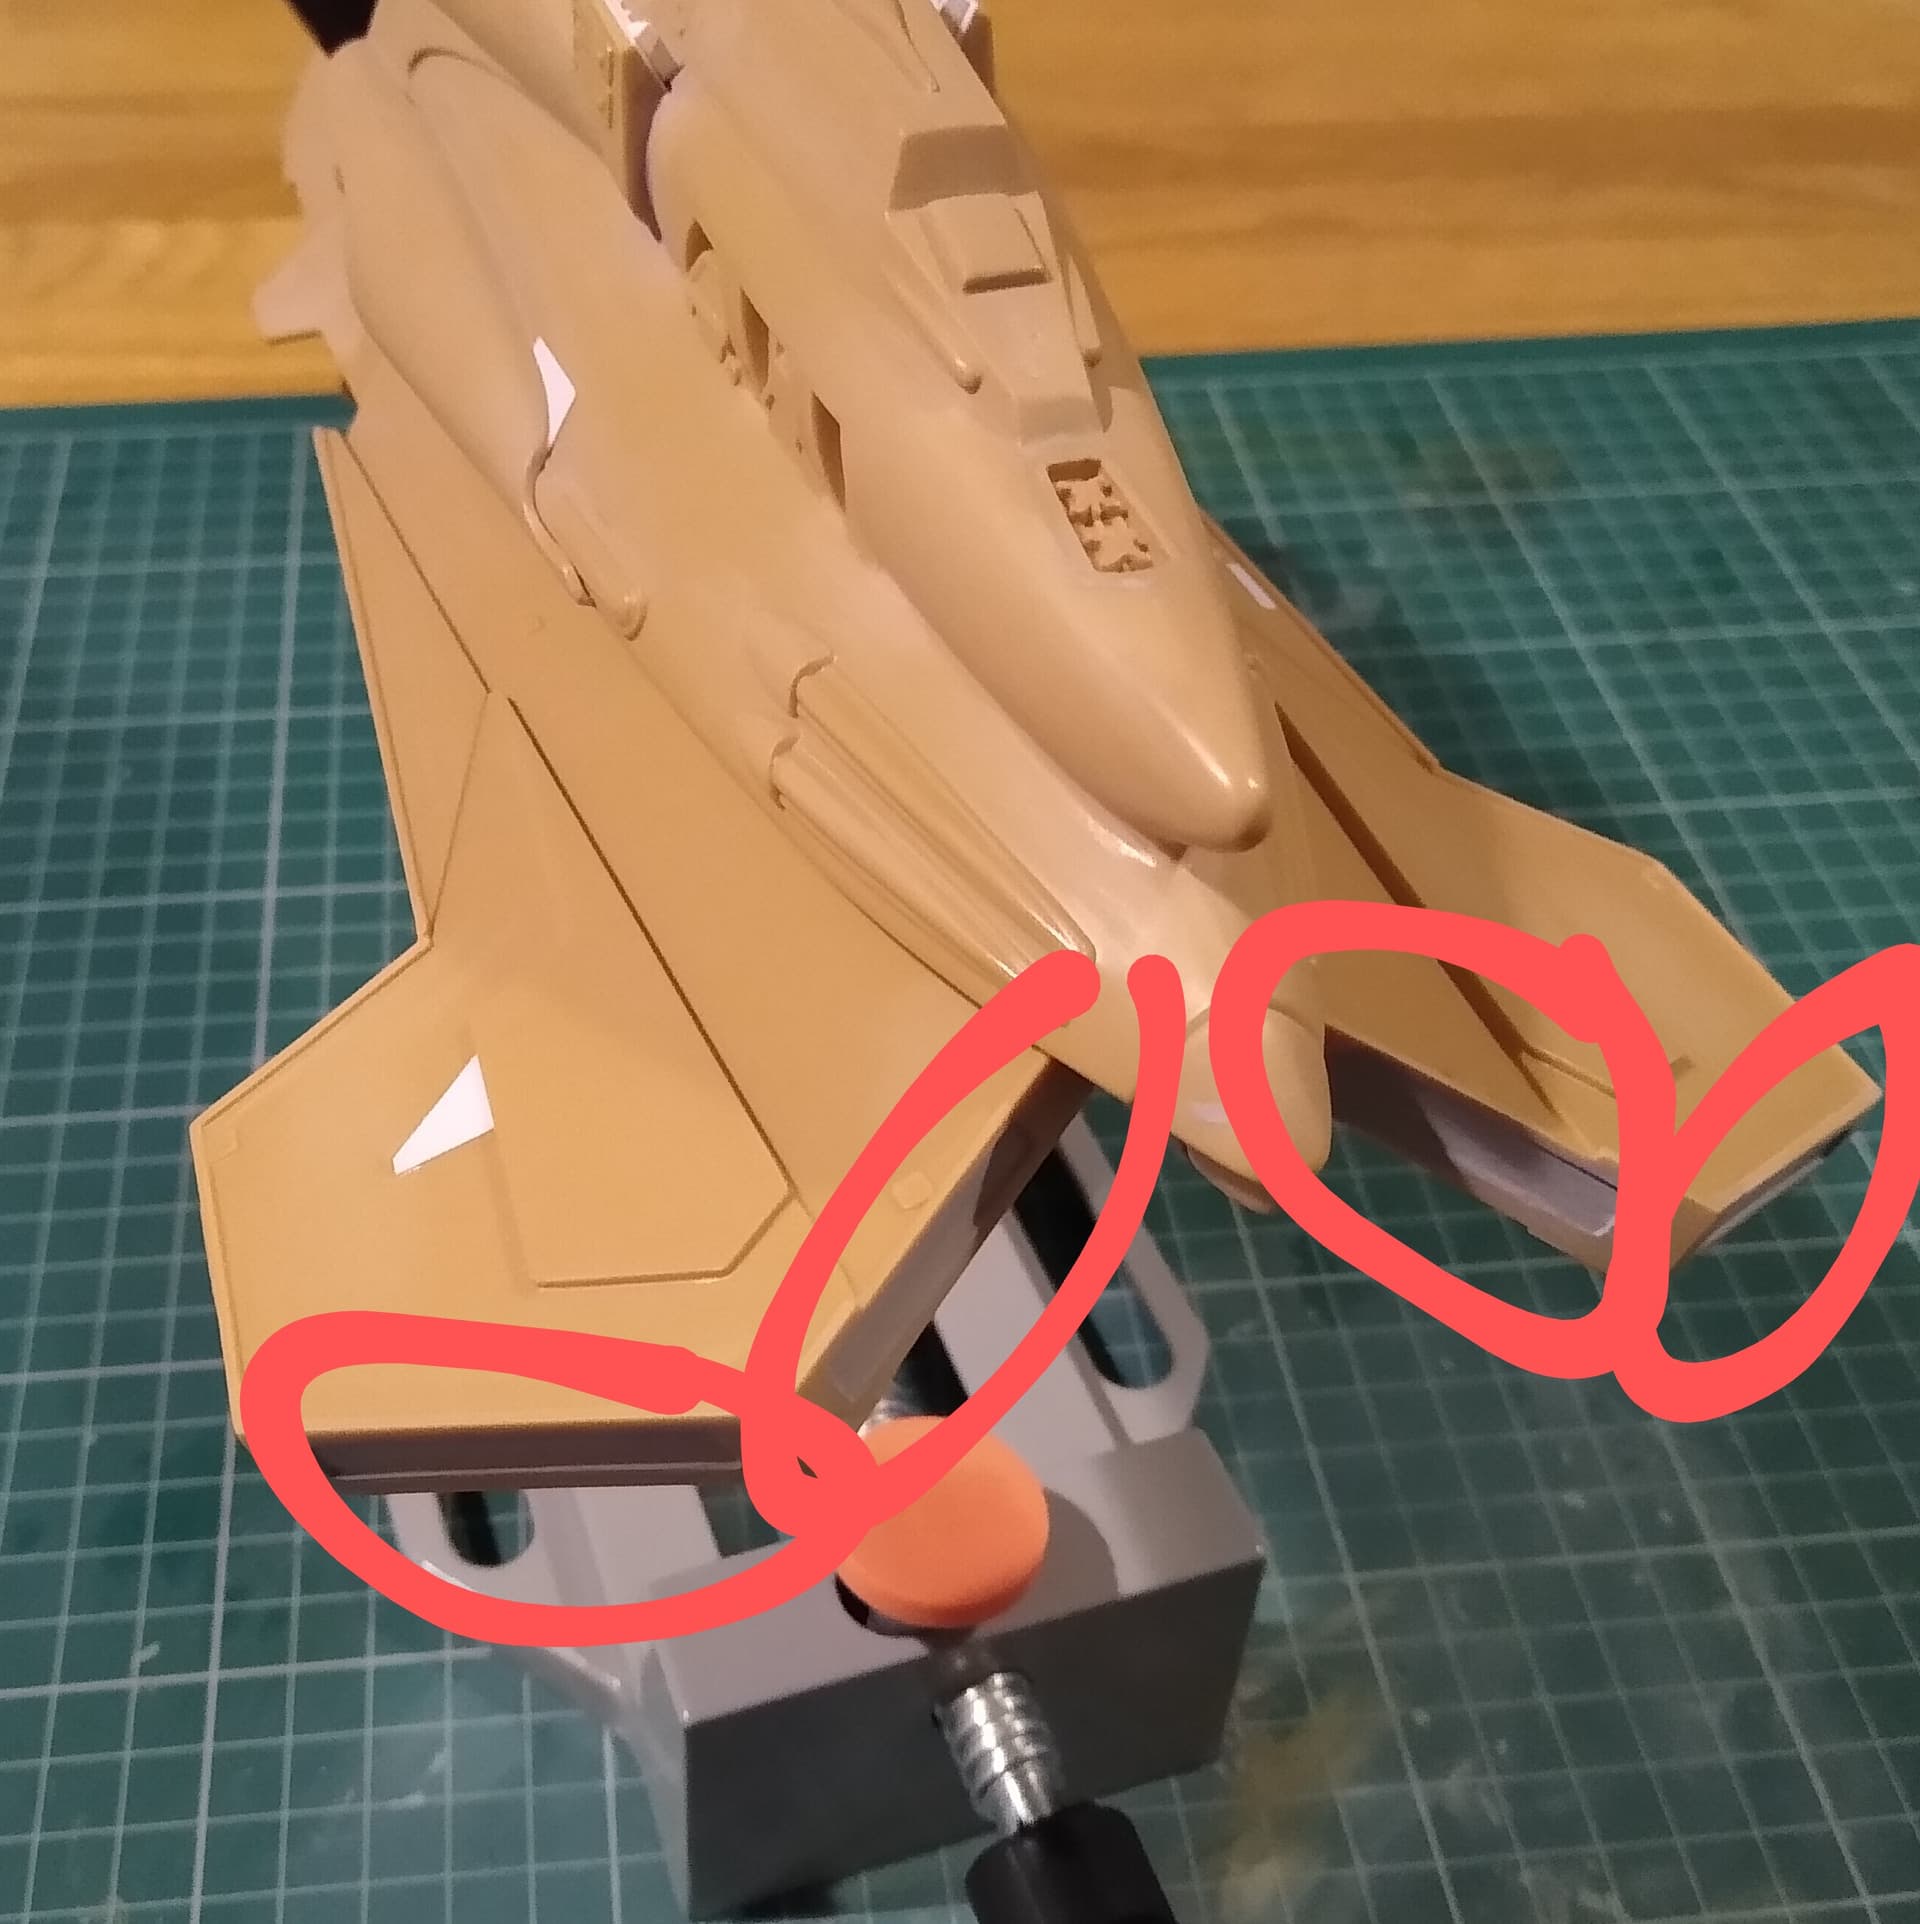
The join sticks out like a sore thumb and needed a lot of filling and sanding. Quite an awkward job. I’m still not 100% happy with them. In hindsight I should’ve cut them out and backed them with sheet. If you’re lighting you could back them with clear or transparent orange plastic. There’s probably room for some micro-LED’s inside the wings.
Just thought I would give you a heads up. It’s about the only big problem part of the kit.
I’d have to dig it out, but I think the Maquis Fighter also has the same horrible join in it’s engines.
Happy hunting.
2 Likes
The central fin has been fitted and I added a few more randomly shaped repair patches.


Think she’s just about ready for some paint now. That will probably have to wait until next weekend. I have to do all my spraying and airbrushing outside. With the evenings getting darker and thoroughly horrible weather we’ve been getting, it does put a bit of a block on getting projects finished. I might be cutting it close with this one.
8 Likes
Looking good Stephen!
1 Like
Thanks Zon.
The finishing line is in sight, I just need a break in the weather to actually get it done!
In the meantime, I’m doing a fair amount of test of the plates that go across the nose and those two other wings. The location points are a little vague.
1 Like
Afraid I’m going to have to bow out of this one, there’s just no way I’m going to get it finished by the end of the month.
I’ve only managed a partial primer coat at the weekend. I made a start Sunday but found out my can of Tamiya primer was empty and with the shop being shut, I had to resort to plan-B. Vallejo’s airbrushable primer. This doesn’t give as a good a coverage and is very thin. In the summer months it’s usually ok for a basic undercoat, but with the cold weather here it just wasn’t drying and started to run in a couple of places. Ended up getting the hair dryer on it and sanding back the runs.
I think I’m going to wait until I have some time over the Christmas holidays to fully commit time to getting it painted.
3 Likes
Shame that happened but fully get your frustration Stephen. Regardless, I will look forward to see it finished when you get the chance ![]()
On the primer front, and you may well of tried it and didn’t like it, but have you ever considered Halfords primer range in the rattle cans ? I swear by them, they do a primer red, white, and grey, I have also used their Matt black and they are great, I have a can of each and they are all I consider using now. They dry in minutes and take every paint I’ve tried.
1 Like
Unfortunately all the Halfords stores near us have long since closed. None within a reasonable travel distance.
A real shame because they do a bronze paint that’s the exact match for Deckard’s car from Blade Runner. I think it’s Ford Bronze? Another project I started and need to finish.
2 Likes
Stephen, sorry to hear it. But better to wait than to rush it.
If you want I can make an extension until the end of the year, but if you rather wait until next sci-fi campaign that is also fine.
Remember any kit started in a previous sci-Di campaign, but left unfinished is ok for next campaign regardless of how far you got.
2 Likes
Thanks, I might carry on with it in the next campaign.
The idea I have for painting might take a little while to do and probably not something I want to rush.
The plan is to airbrush some areas in a lightened shade of beige, mask those then repeat with a couple of progressively darker shades before a final coat of neat beige. The colour I’ve decided on is Revells acrylic 17 Africa Brown. Looks about the same colour as the filming model was painted. I’m hoping that the final finish won’t be too garish when I remove all the masking!
Still not sure what to do with the engines. I might try the same dayglo I used on the engines of the Romulan BoP I did a while back.
2 Likes
Jesper, I know this might be a bit cheeky of me to ask but you still be willing to grant an extension if I change my model?
It’s cool if you can’t.
I feel that I just won’t finish the Raider in time, so I want to switch to this single piece 3D printed Type-15 Shuttlepod from Cozmic Scale Models.

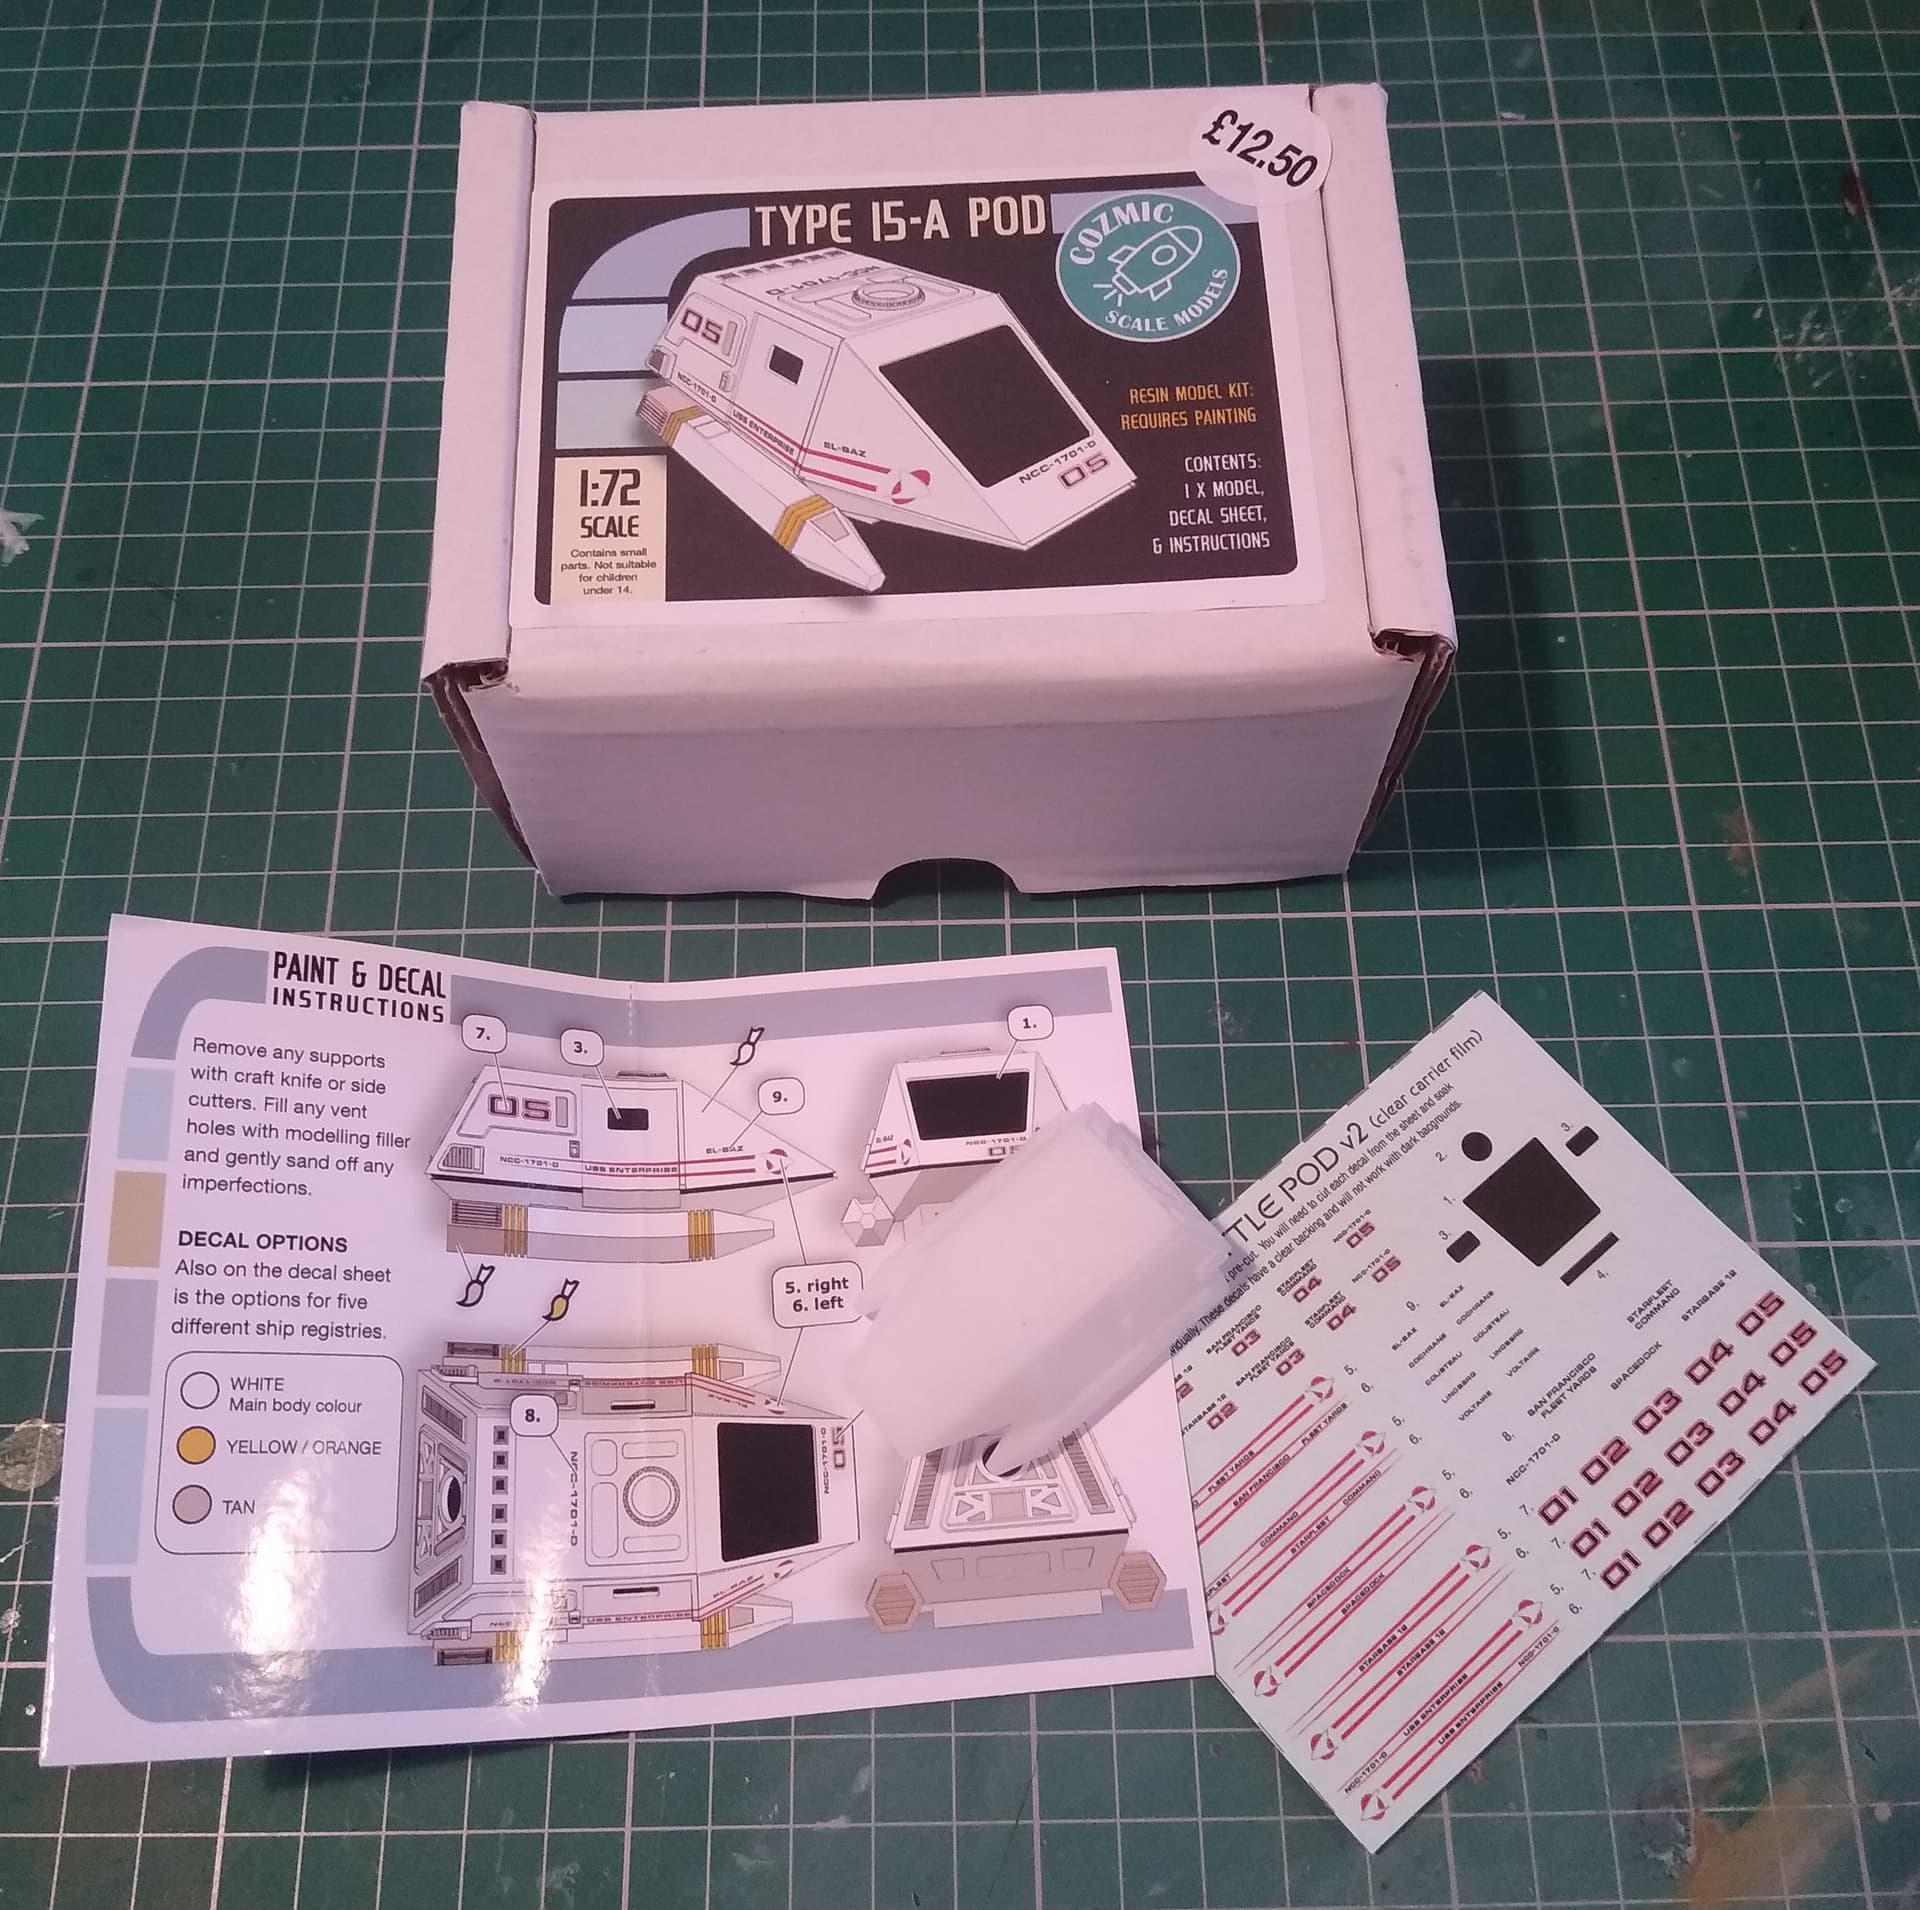
It’s going to need a minimum of cleaning up and has a very simple colour scheme. This I can do by the end of the year.
Thanks
Stephen
5 Likes
Indeed a bit cheeky, but go for it ![]() as long as it is started before the extension it will be fine.
as long as it is started before the extension it will be fine.
How is the casting? I find some 3D to be almost perfect. Others lots of laser lines so hard they are almost impossible to sand.
Looking forward to seeing it done ![]()
![]()
3 Likes
Thanks mate.
The printing is very nicely done. There are some noticeable lines on some of the angled surfaces, but they’re very fine. It does seem to sand well from a little test I did on the bottom. It might all disappear under a coat of primer, but I’ll run down all the surfaces I can to be certain.
I think the plastic filament printers use has improved a great deal, but I think cheaper ones still use crap plastic. I got a 1:1 Blade Runner 2049 Blaster a couple of years ago that is a very poor quality print, completely covered in big print lines. No amount of sanding worked! I resorted to filling it and sanding, but gave up after a about a week. Felt like fighting a losing battle.
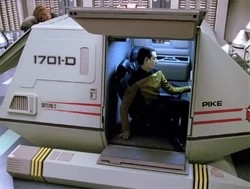
I’ve been doing a bit of googling for some images of the shuttle to get the colour scheme right. The instructions suggest gloss white, but that didn’t sound right. From what I can see, especially on some photos I found of the full size prop, a matt pale grey seems most likely. This would match the the grey and tan colour pallette of TNG. It’s also in a heck of a lot easier to paint than gloss white!
5 Likes
Chaps, I’m going to have to cry off on completion for this one; clearly a case of biting off more than I can chew so apologies all round. My project for a Deutsches Reich '46 scenario has stalled I’m afraid, primarily due to real-life getting in the way a tad (demise of dog, demise of Dad, recovery in Malta - well, the latter was a bit of a luxury I admit) and has all impacted. Whilst mainly staff work and admin it has slowed me down.
I hope to revisit the project some time but will be unable to do so within the timeframe - a pity as once I got into it I found the modelling potential for What-ifs quite stimulating.
Hope to see it completed whenever you get the chance … I do like a nice “what if” scenario…![]()
Thanks John - I’ll see what I can do; half the fun was devising a suitable “back story”.
2 Likes