Hi again
No photos yet, but I’ve got most of the cockpit parts cleaned up and built as sub-assemblies ready for painting. Dry-fitted, they got together really nicely and should create a nicely detailed and busy “office”. I’ll probably thing down the edges of the seat a bit for a truer-to-scale look, and maybe a add a few wires and cables, but I’m impressed with how neat the standard styrene parts look. Special Hobby already provide an etched seat harness which is really all that’s needed to bring the cockpit to life.
All the best
Rowan 
1 Like
Hi again
A quick update ahead of starting to paint things. I’ve got the cockpit parts cleaned up and dry-fitted:
The cockpit assembly slots into the fuselage very neatly:
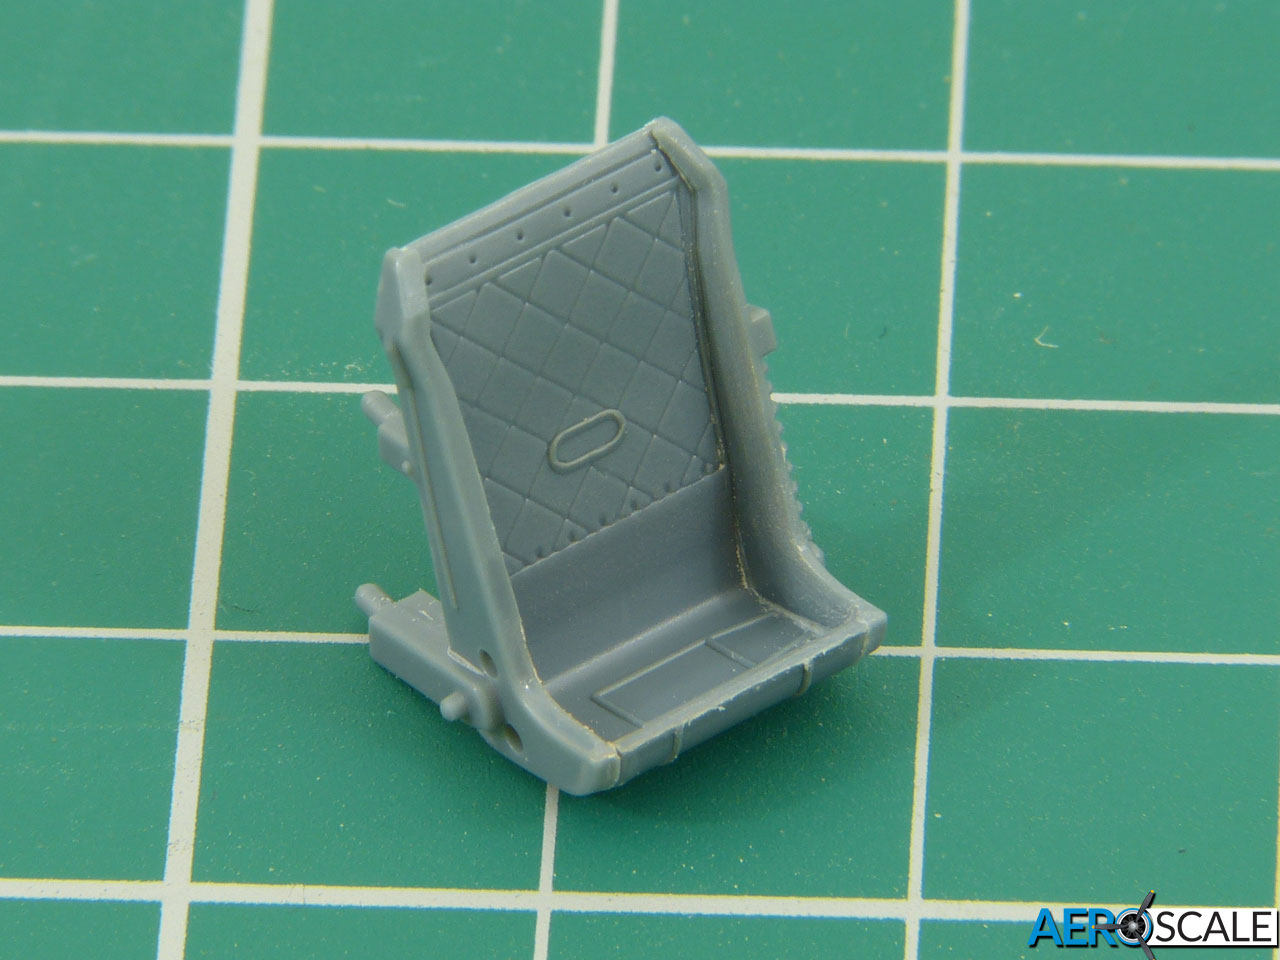
The seat has very thick sides and front, so I’ve started thinning them down for a better scale effect. The nearside in the photo is as moulded, while I’ve made a first pass on the other - basically, just scraping gently with a small scalpel blade to make the edge look more convincing.
It might seem counter-intuitive, but I think this is easier after the seat’s assembled, otherwise you risk messing up the fit between the sides and the back/pan.
All the best
Rowan
4 Likes
Nice details on the cockpit, Rowan! I’ll order the Eduard Tempest at my LHS when times comes … 
1 Like
Hi Torsten
The Eduard release will add some extra fun to the cockpit (I’ll actually cheat a little bit and use the PDF instructions from their site to add a few of the levers etc. from scratch that they’ll include as etched parts  ) - but I’m equally looking forward to opening up the engine with Special Hobby’s resin parts. I really like the colour schemes Special Hobby have included too - my build will be either Indian or Pakistani, but I can’t make my mind up yet because both options look great!
All the best
Rowan
Hi again
This is probably a good point to post a plug for Barracuda Studios’ replacement resin seat as a very worthwhile upgrade:
http://barracudacals.com/proddetail.php?prod=BR48397
It’ll save a lot of faffing around and give a much better result than my basic seat-thinning job - and you can be certain that anything which Roy Sutherland puts his name to is going to be top class. 
All the best
Rowan
2 Likes
This looks to have quite an intricate assembly. Outta look really good with some paint on it all.
1 Like
Agreed on that Rowan - I could scratch build things the rest of my life and not come close to what Roy and some others produce ( SBS Models for one …)
1 Like
Rowan, I second your points about the Barracuda seat. I have it. I was going to use it on my first Mark V Tempest, but decided I wanted to use separate shoulder belts, instead of the molded on belts on the Barracuda seat. The Barracuda seat is, however, as has been noted in other spots, a veritable work of art! Now, I’m not sure if I should use the one seat I have on one of the many Mark V Tempests I have, or put it in the Mark II. Or…just buy a whole bunch of Barracuda seats so I can out them in all of my Tempests!
1 Like
Hi there
It’s great to see the positive replies about Barracuda’s upgrades - all of Roy’s range is second-to-none in quality. I think I have his resin Tempest seat tucked away safely for a stalled build of the Mk.V but, this being a review build for Special Hobby, I reckon I should go with the kit parts - albeit with a bit of thinning. The result certainly won’t cause Roy any sleepless nights - but it should look pretty decent. One of the things I like about this kit is that Special Hobby have included everything needed for a really satisfying build straight from the box - and the options are readily available to take things further as your wallet and experience level allow.
I’ve got a short day at work tomorrow, and I think I’ve got everything I can logically build in sub-assemblies done… so I reckon it’s finally time to start throwing some paint at the wee beastie! 
All the best
Rowan
Hi again
OK - I fibbed! I found another excuse to put off starting painting this afternoon, and fiddled with the resin engine insert instead!
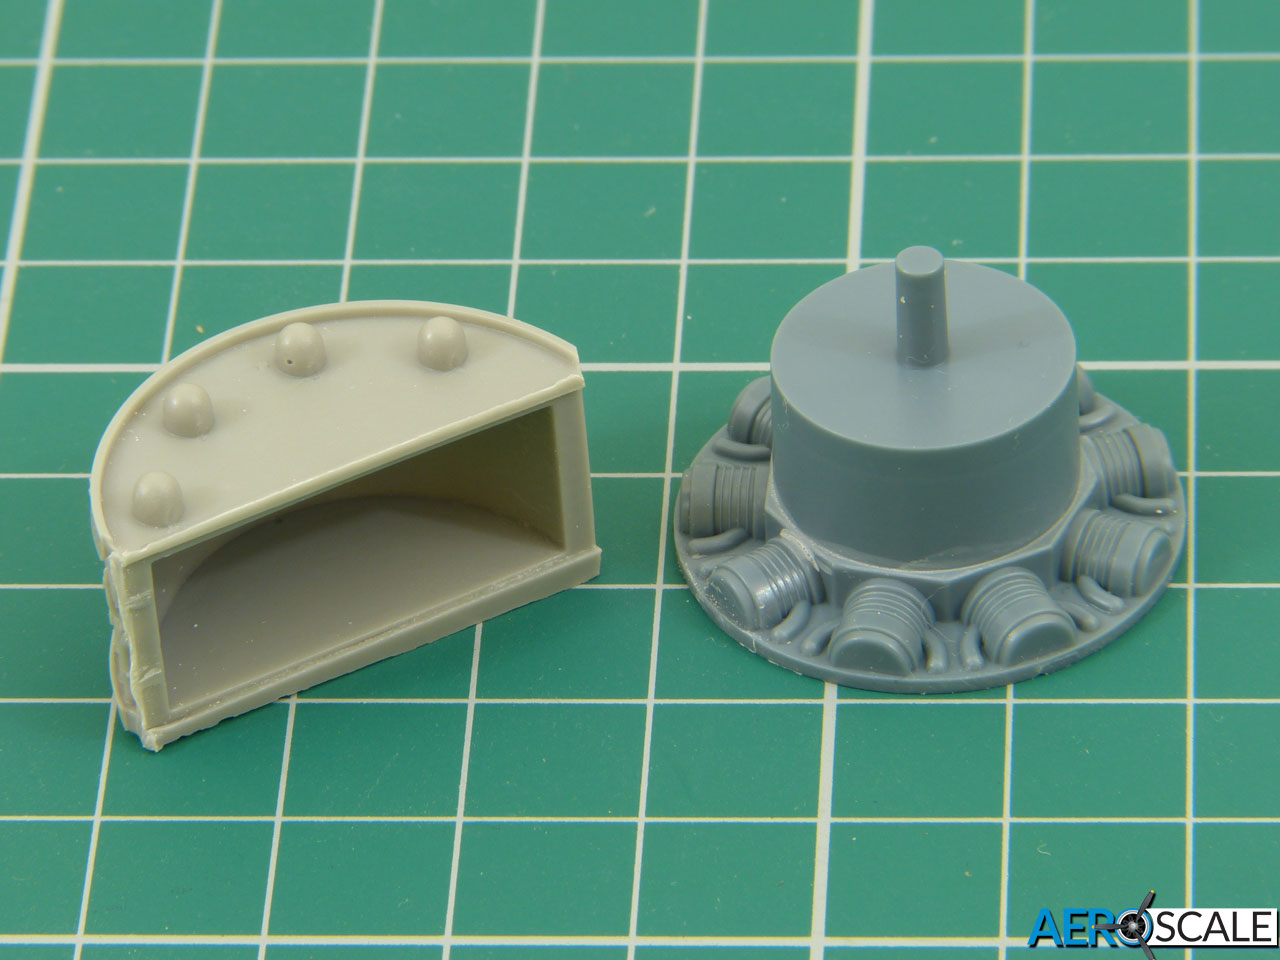
The actual insert for the exposed side of the engine is excellent, with some really nice detail that will pop out with highlighting and shading, but the piece for front of the cylinders is disappointing; it’s just a resin copy of the original styrene part - so it’s nowhere near as detailed. To make matters worse, it sits on the front of the insert and so pushes the cylinders too far forward, with the gearbox housing being shortened by a corresponding amount. As the cylinder faces are pretty bland, you really don’t want them sitting in view where this will be all too apparent:
I’d originally hoped to carve out the inside of the insert so the cylinder faces could sit back at the correct place in the cowling, but the depth of the detail for the exposed side of the engine pretty much precludes this:
The alternative is to reduce the diameter of the engine front piece to allow it to sit inside the insert, and that’s the route I’ve chosen. You could opt for a “middle route”, thinning the wall of the insert a bit so that you need to remove less from the front piece - but I didn’t think it would give sufficient benefit to be worth the extra work.
So, I cut out the front face of the resin insert and used a scriber to mark the section of the front piece that needed modifying and took all the material off that:
The result is that the piece for the front face of the cylinders has its original diameter except where it fits in the side insert, and it can now sit back at the correct distance behind the cowling and have a full-depth gearbox housing. I’ll remove the lip on the resin insert to blend things together and call it job done. I wish Special Hobby had provided a resin front piece for the cylinders that matches the detail of the side insert, but this compromise “fix” should look fine, so long as you don’t peer inside the cowling too closely.
What to do about the engine has been bugging me slightly so, with that safely modified, I’ll get started painting the cockpit tomorrow.
All the best
Rowan
3 Likes
Neat fix Rowan, but like you said, a little extra effort from SH on the front end would have taken this to the next level!
Looking forward to more progress reports.
Cheers, D
1 Like
Cheers Damian
Yes - I must admit I was surprised that there wasn’t a new front piece to match the level of detail of the exposed side of the Centaurus. Admittedly, the rather basic cylinder detail will hardly be visible now it’s pushed back to its correct position in the cowling, but it would be badly exposed if fitted as designed.
I sprayed a coat of Interior Green this afternoon and will aim to get the rest of the basic interior colours done on Sunday. I want to get Special Hobby’s Tempest II and Whirlwind “in sync”, so to speak, so make some progress on both where they share colours.
All the best
Rowan
Ya had too… you just had too. Get out of my head Merlin! 
Rowan,
Did you ever finish your Special Hobby Tempest Mk. II? If you did, I would love to see how it turned out!