Super cool. Love a good dio. The staining, of the wood, looks great, as does the concrete and brick work.
1 Like
Hi guys, thanks very much and glad you’re liking this build.
The dio is turning into quite an adventure. My self imposed rule is that the detail in the dio needs to reflect the detail in the race car - so, have been spending time making the things you’d find in a shop!
I don’t have much of a shop myself, just the regular knives, pin vices, files, and pliers I’m guessing you all use too - so, to make this stuff, well, a guy does what he can.
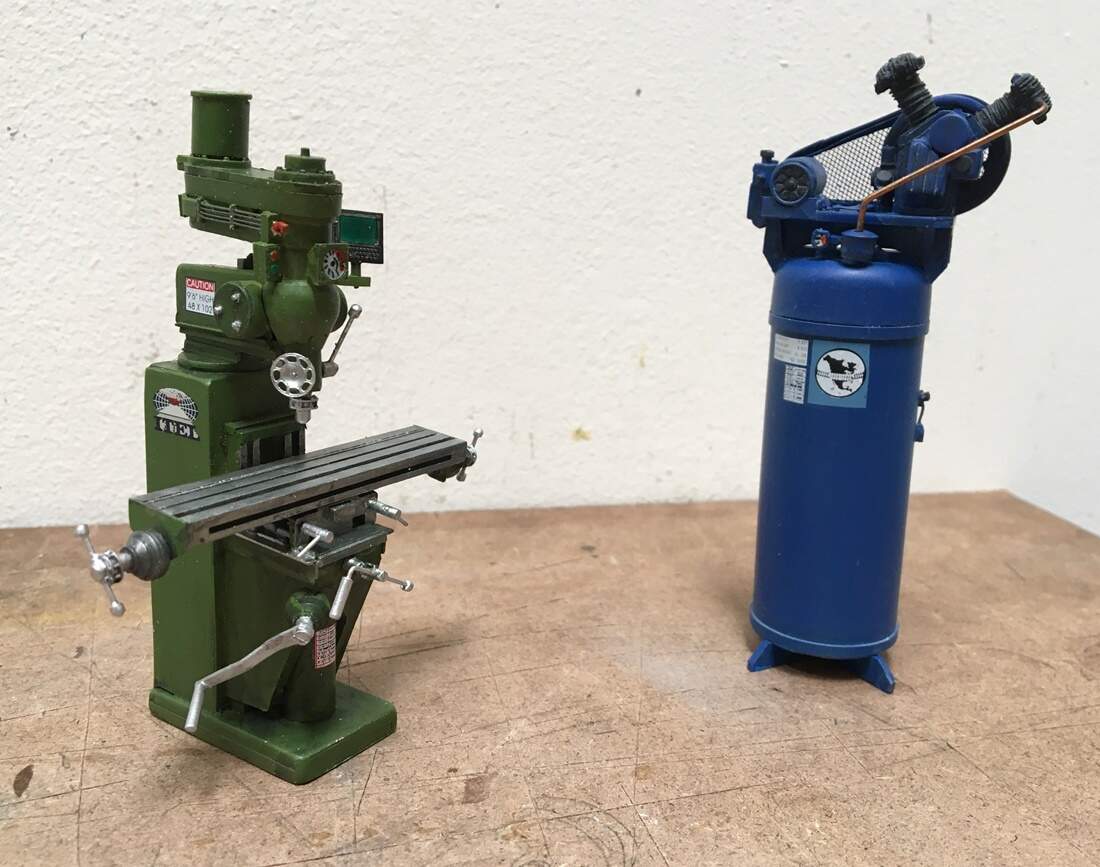
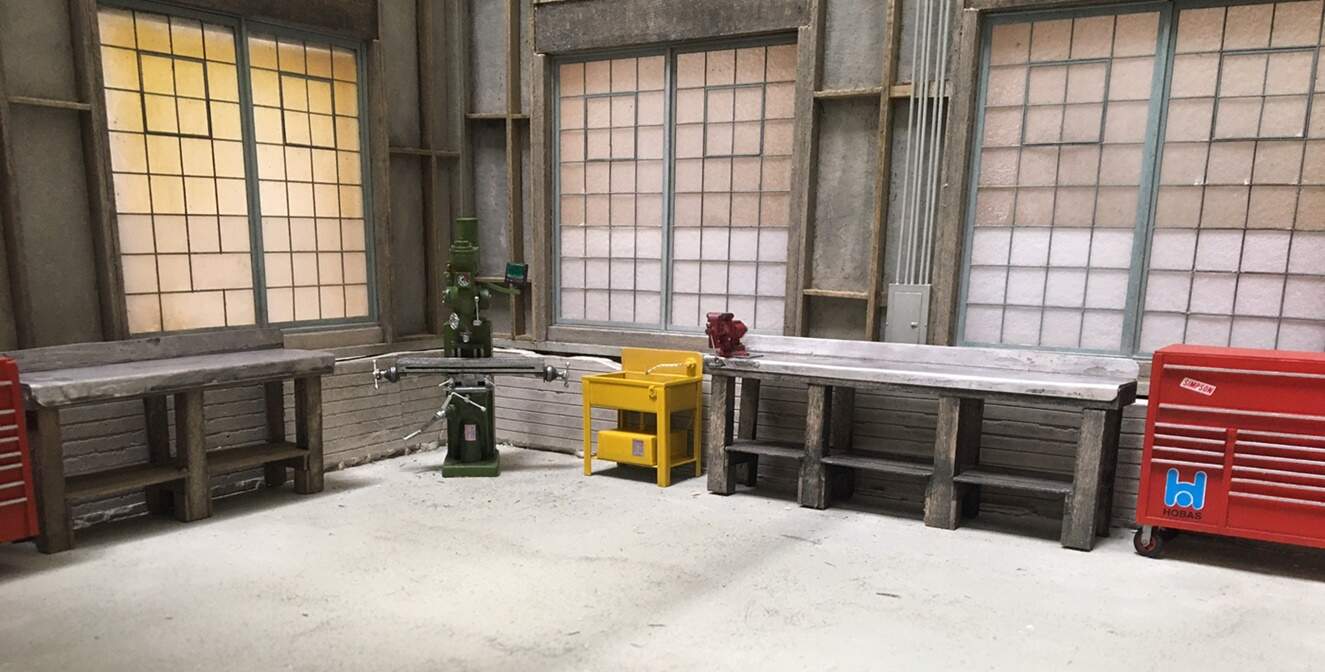
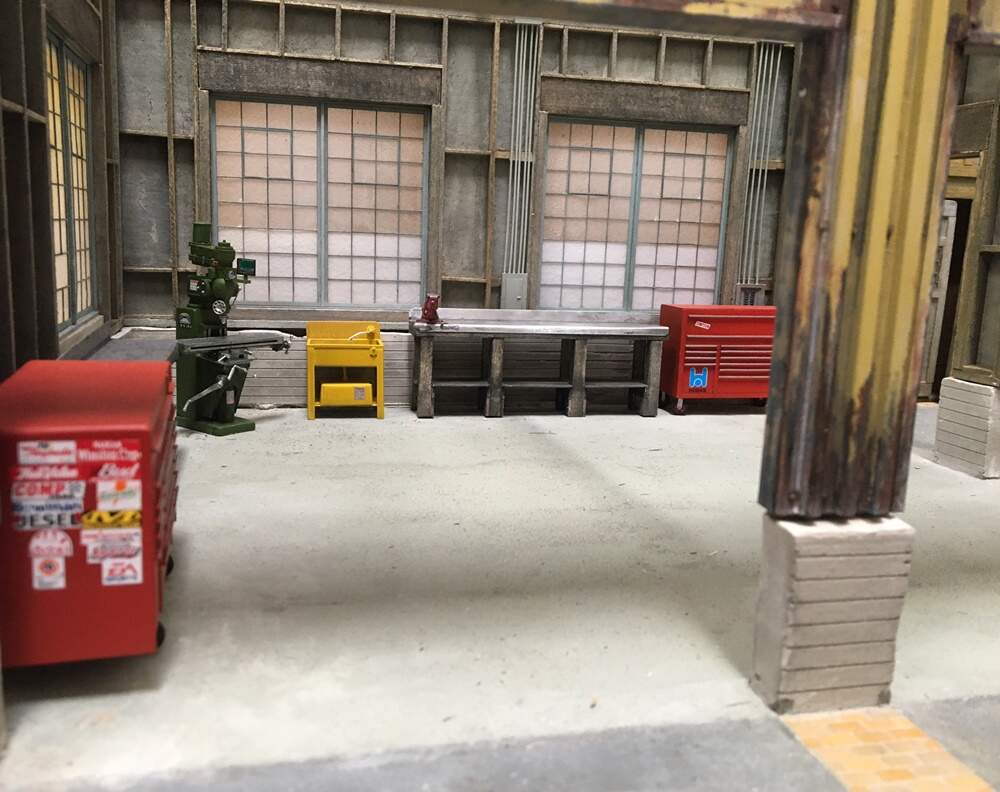
Every (good) car shop has a milling machine - how else do you work on heads?? so, I made a milling machine:
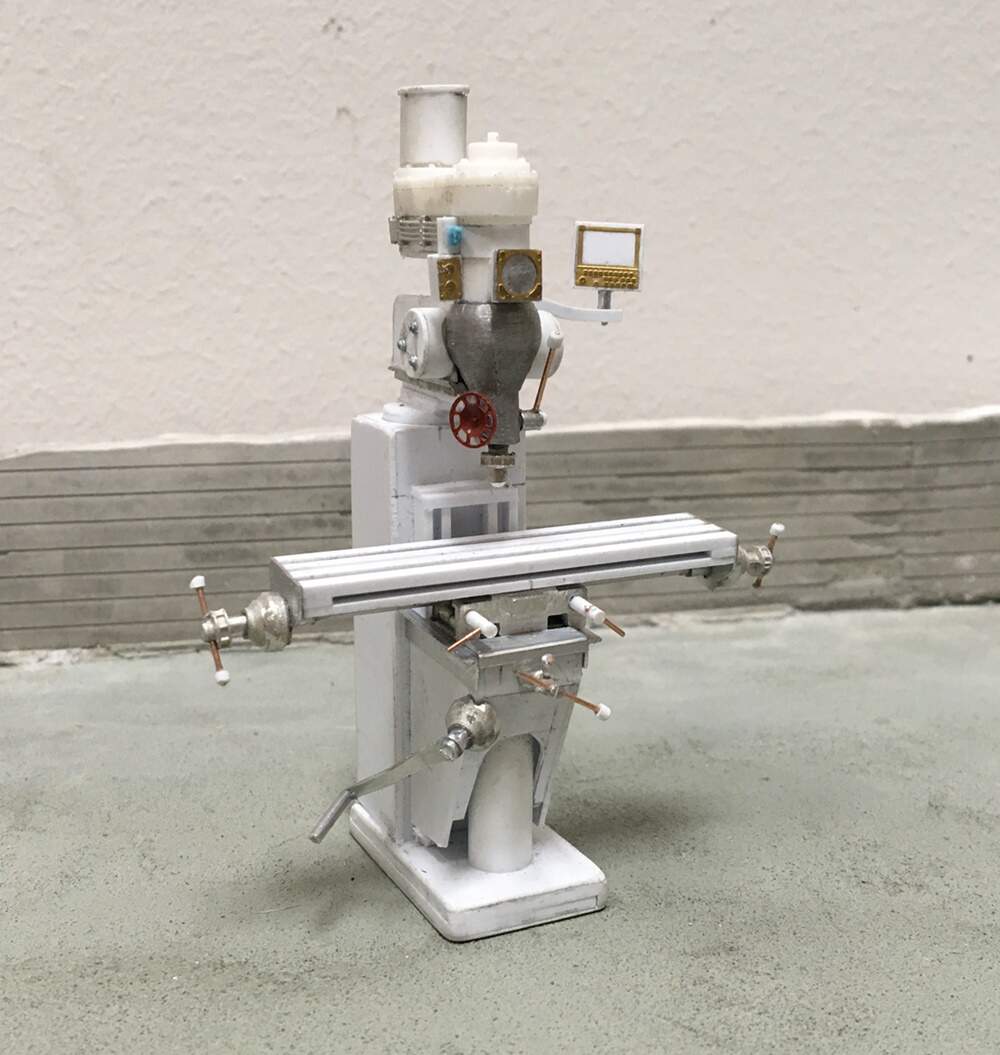
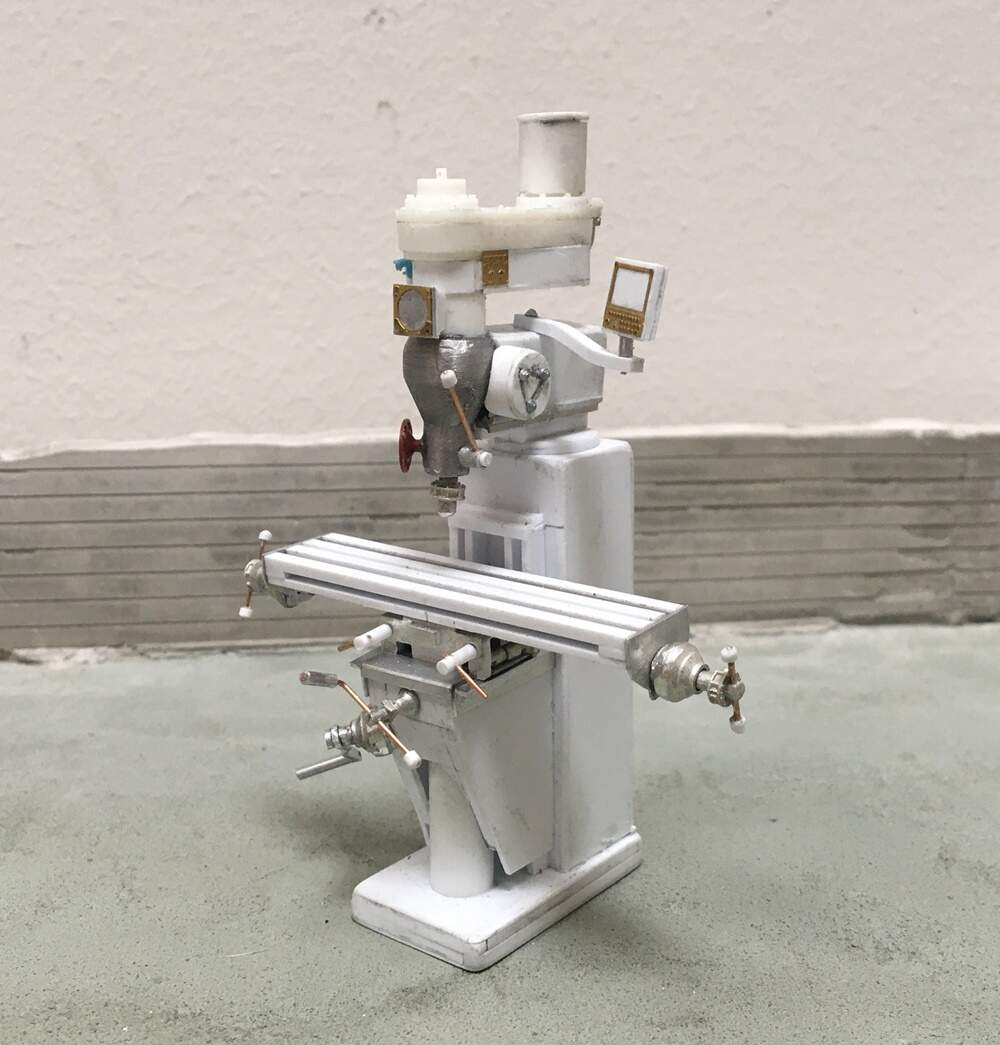
Yeah…not easy! This beauty is based on internet photos - and lots of adapting and scratch work. I used a lot of aluminum sheet in the deck and pedestal, while the head - a 1/24 scale transfer case, left over 1/87 model rr parts, styrene, more metal and so on. A fun challenge. On to other shop things:
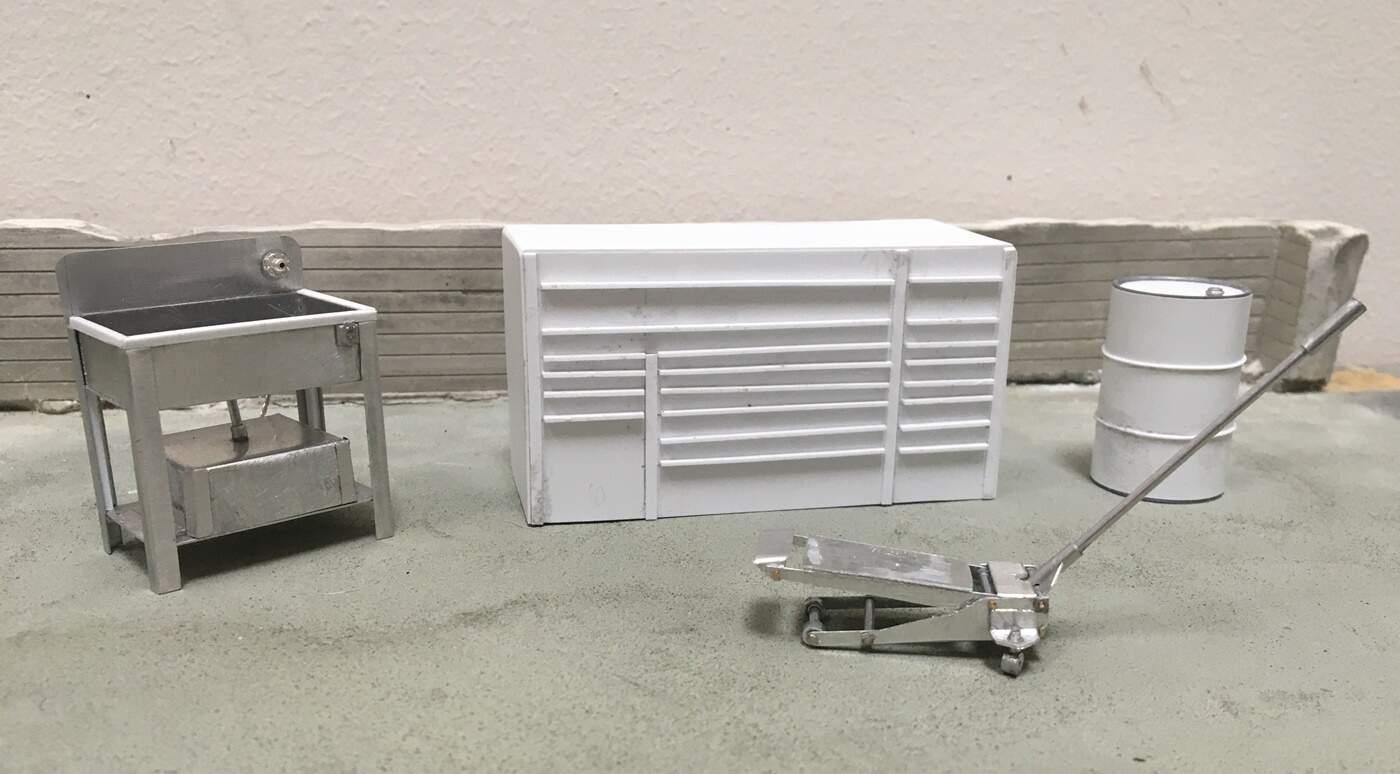
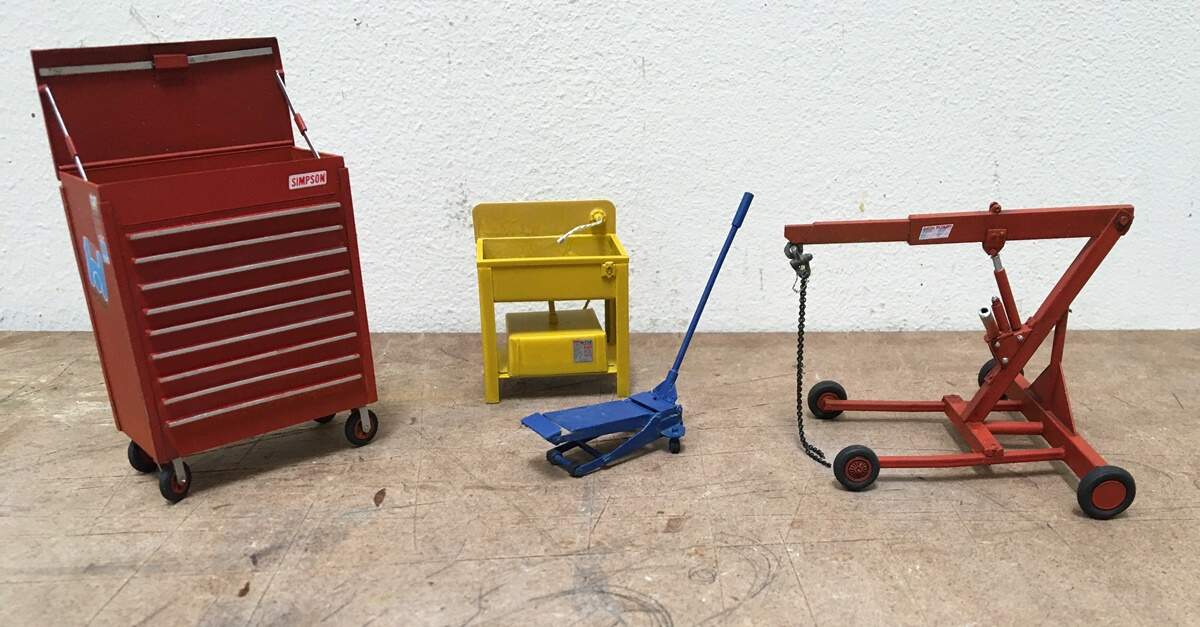
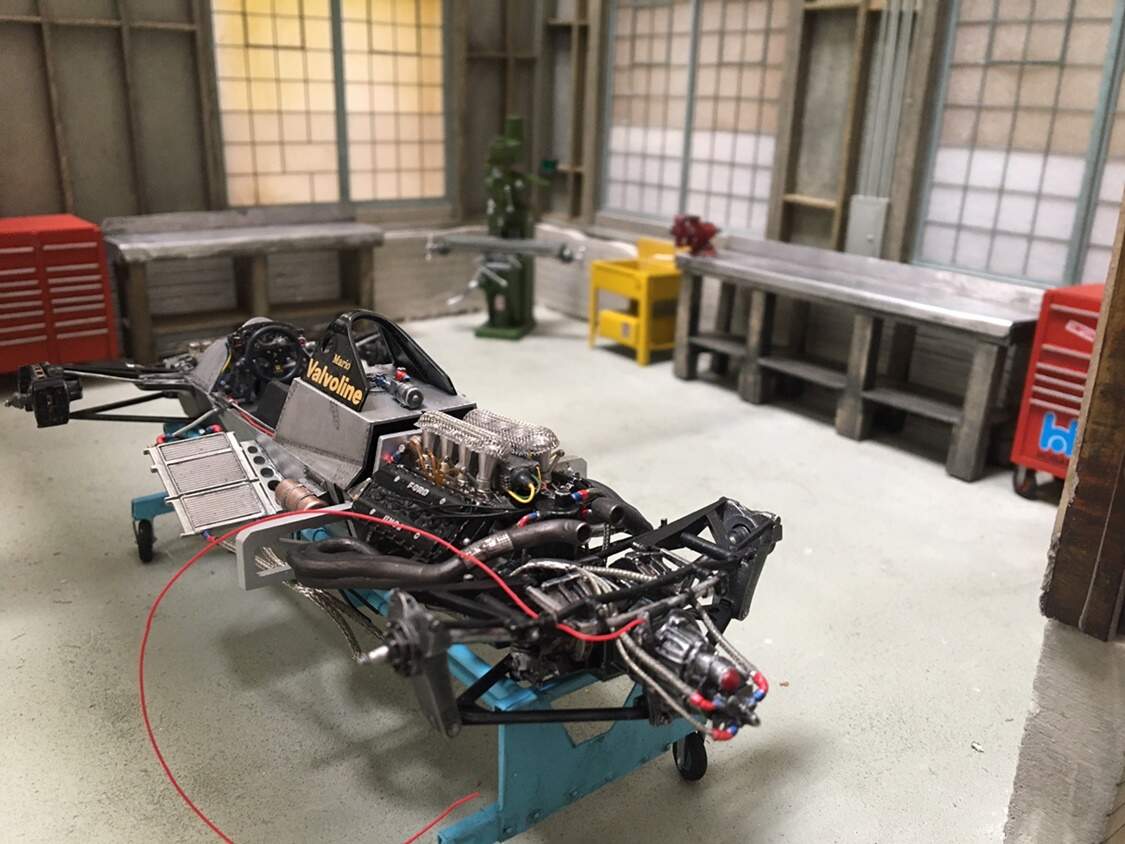
Same as above - internet search, convert inches in real size to 1/20 - and go from there - fyi - that floor jack…that’s all I’ll say about it!! And for some testing in context:

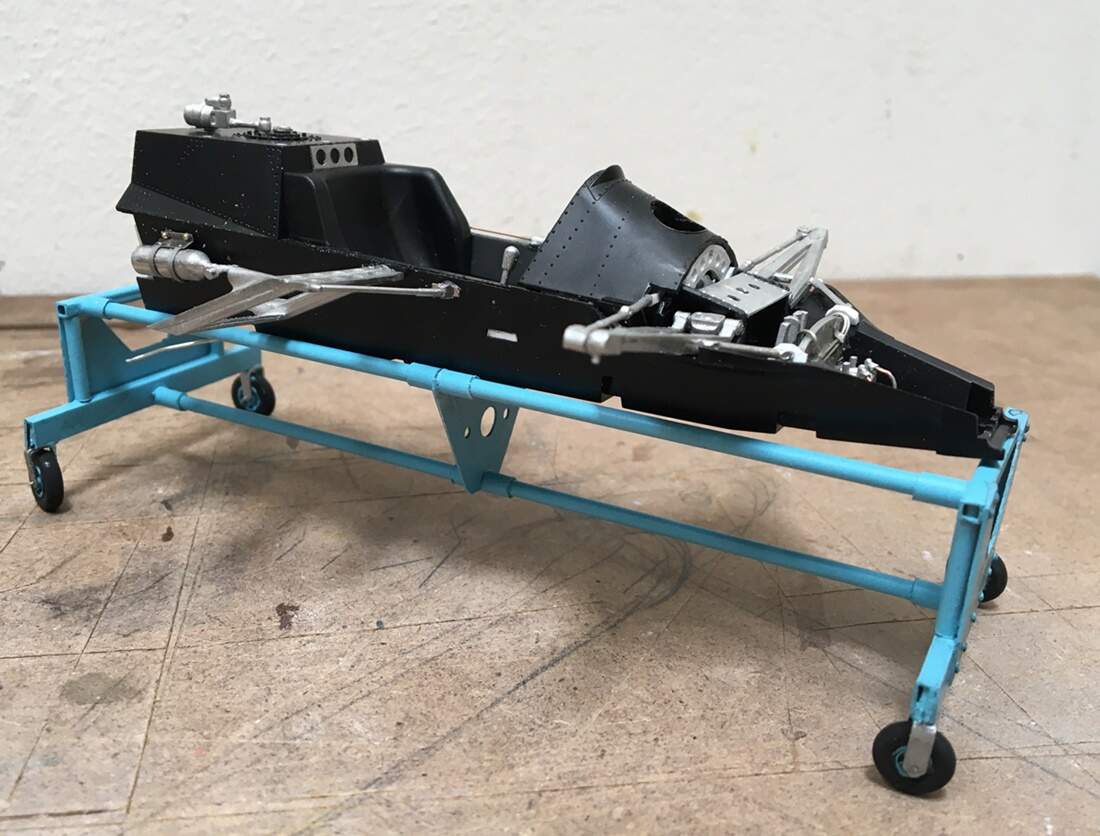
No nose…

With nose - this car is strangely long - much longer than similar vintage P34 -

And more and more tools:

Started some paint - the trans / axle rack, and on the little trolley a tubing bender - I realized the deck was too narrow, and push too short, so fixed them, and now they need paint.
For reference, I live in an area that was once industrial, with lots of big and small shops. Some torn down and others repurposed, including two (!!) Ferrari shops - who’d’ve guessed? Anyway, some time ago for another project, I went by one of them and the guy let me take some pics:
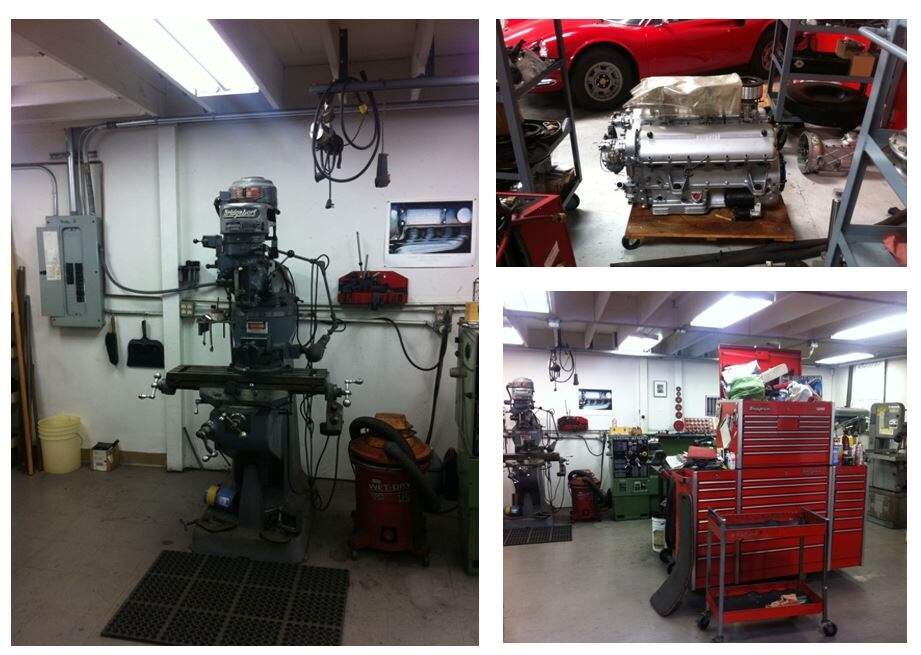
Yes - that’s a Ferrari engine on the pallet! wow. From the street, you’d never notice this place. And, for exterior reference, the trail I walk along passes several interesting old buildings - many of which are wood frame with metal siding:
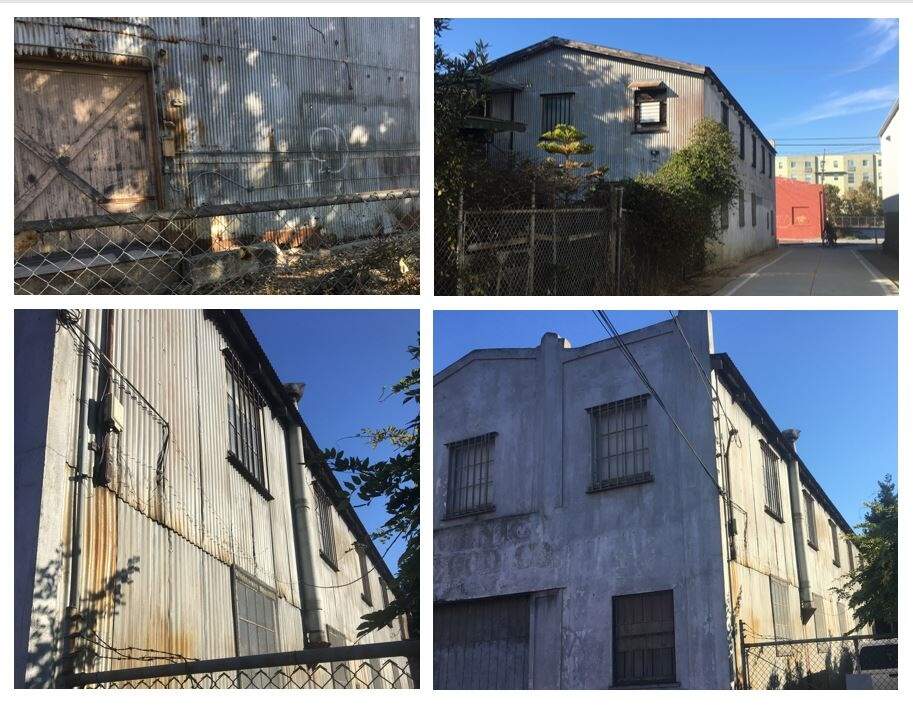
These reflect the look I’m going for. Run down on the outside - as in: “who’d guess they work on F1 cars?”
Ok gents, stay well -
cheers
Nick
3 Likes
I’m almost lost for words Nick, and that takes some effort mate! Absolutely amazing work on the shop equipment, outstanding!
Cheers, D
1 Like
 WOW! that is amazing.
1 Like
Holy Frak! Wow, just wow.
1 Like
Nick, DAMN man… you shopuld know I do have a set of detail parts on Shapeways that woulda helped… https://www.shapeways.com/product/XG8CAB7LB/1-24-handle-knob-assortment
Outstanding as usual!!!
1 Like
Nick, wow! Just amazing! Really! Wow! 

1 Like
Nick,
Just found your diorama blog. And as usual I’m must blown away at the scratch built “everything” at such high levels of details maintained for literally every single piece of equipment.
As for the Ferrari shops in your neck of the woods, all I’ve got is a Chevy, Ford, and Hyundai dealers, with the usual assortment of private and affordable service shops.
Looking forward to your next update as I have literally no idea of what magic is next on your workbench.
Joel
1 Like
Hello guys, glad you like it so far, thanks! These early steps, lots of slow going -lol. It’s fun to do tho!
Joel, yes, can you believe that? It’s funny tho, those seem to be the only independent auto shops here! Plenty of quick lube, tire, body, and smog check shops, but the dealers seem to dominate repairs! There are even a few precision machine shops nearby - traditional millwork on up to over the top CNC shops. I have no idea what they actually make! lol - even woodworking shops - just no regular old auto shops. There are by the way an abundance of old cars running around tho -
OK, on with the build - one more for the shop. Every shop needs a vertical air compressor:
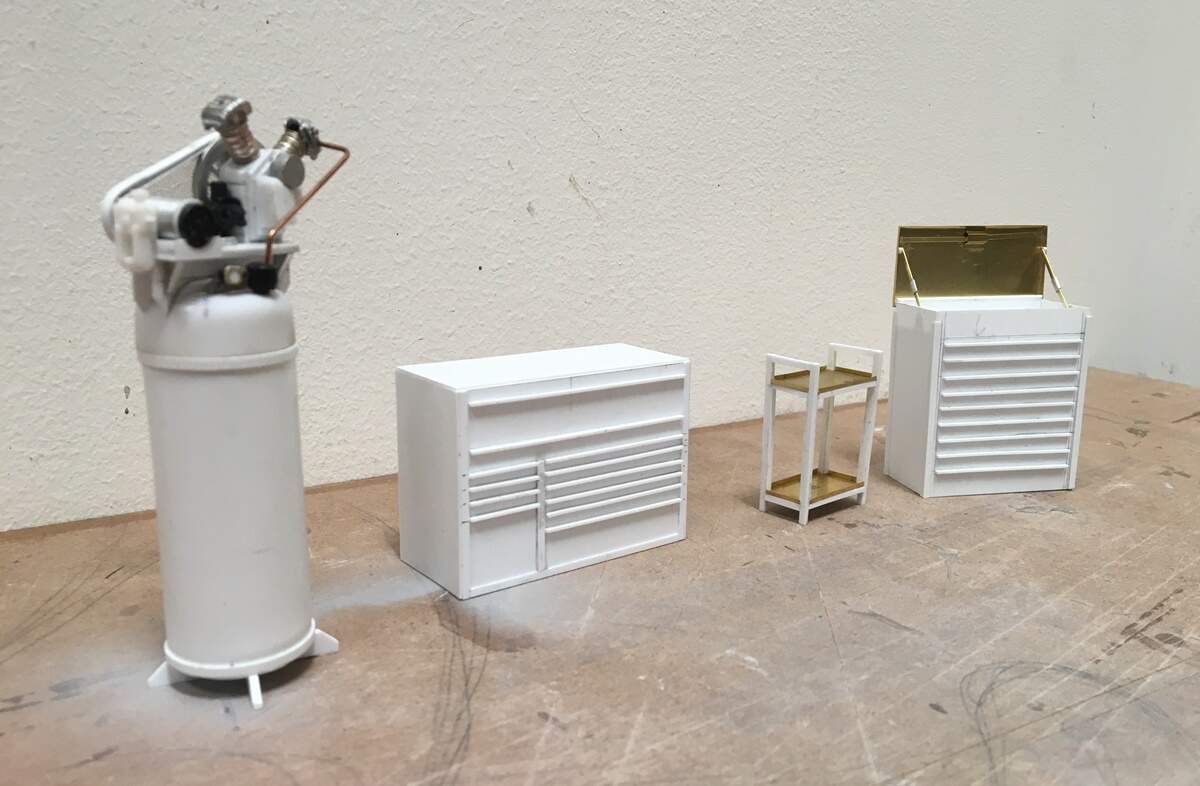
And, of course, more tool lockers! Casters will be added…
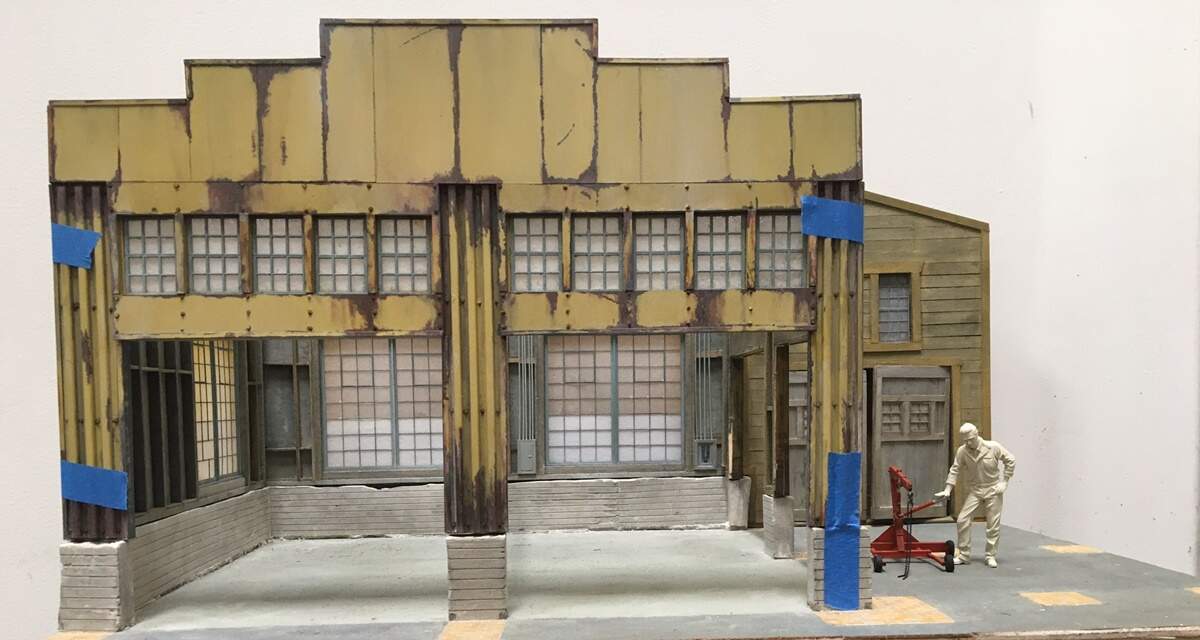
And, on to the shop. This shop will have one main building, and small shed next to it. For framing, the walls start with thin cardboard panel, with studs added on the inside, and more framing and siding outside - first up, the little shed:
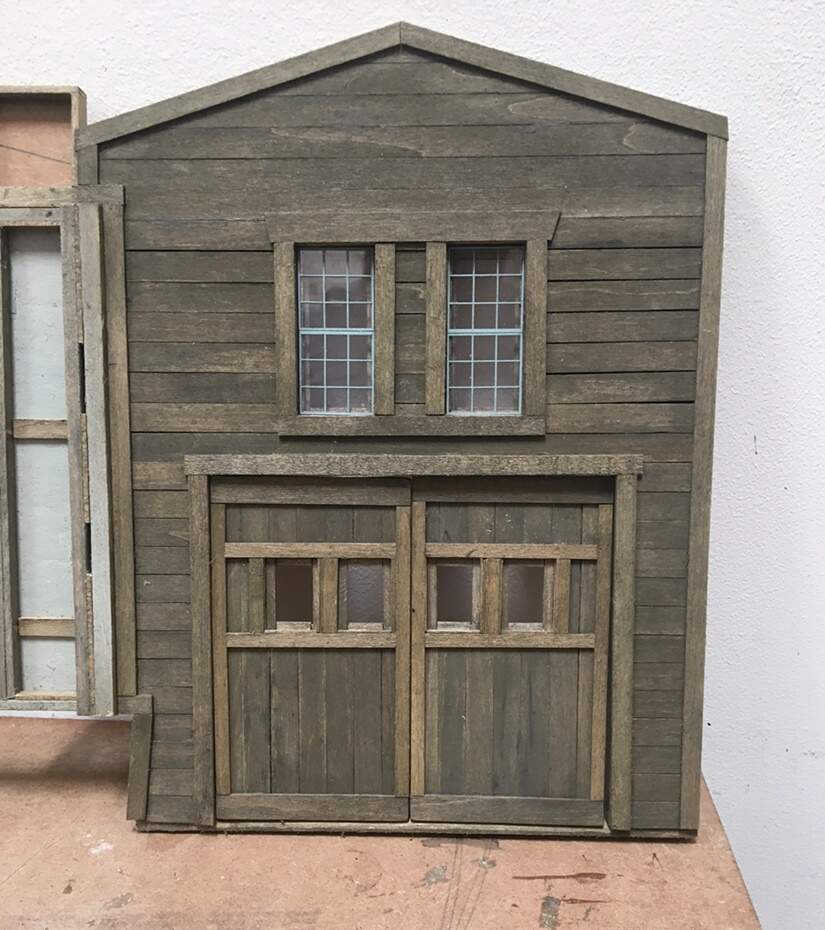
Weathered, but pre “paint” - and a few of the adjacent metal building:
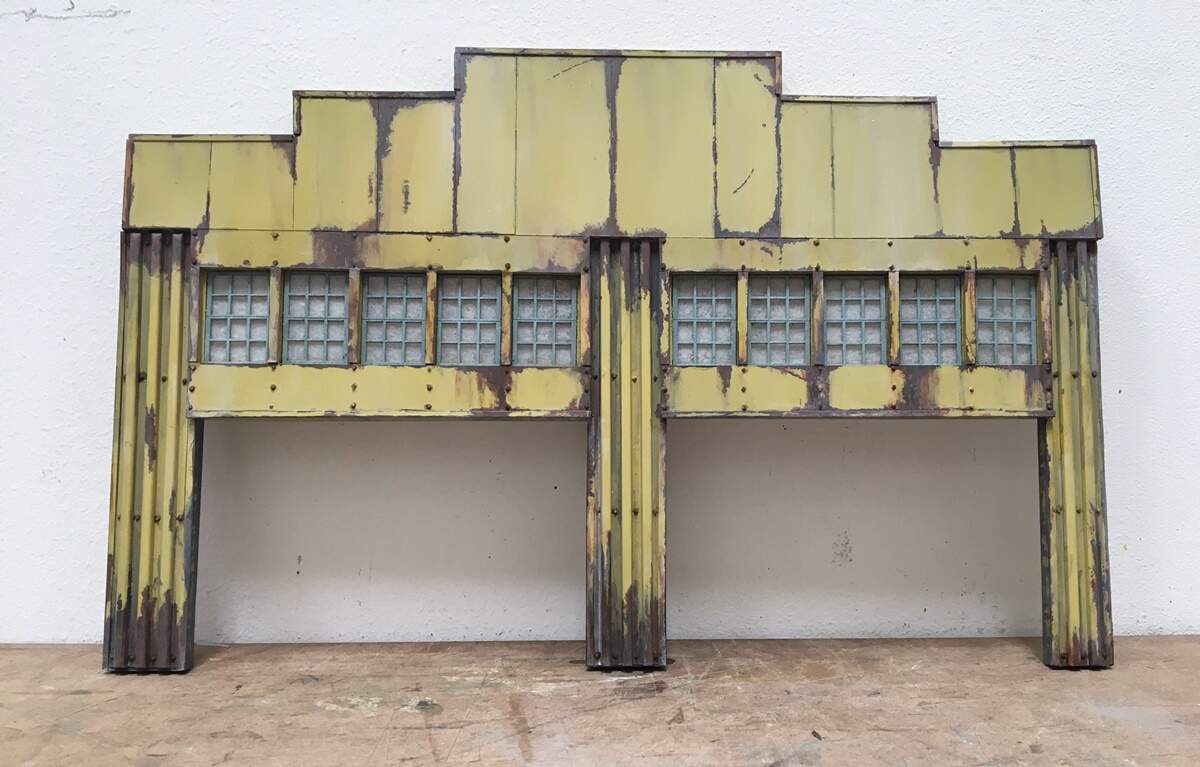
Several layers of “weather” here! and the two seen together:

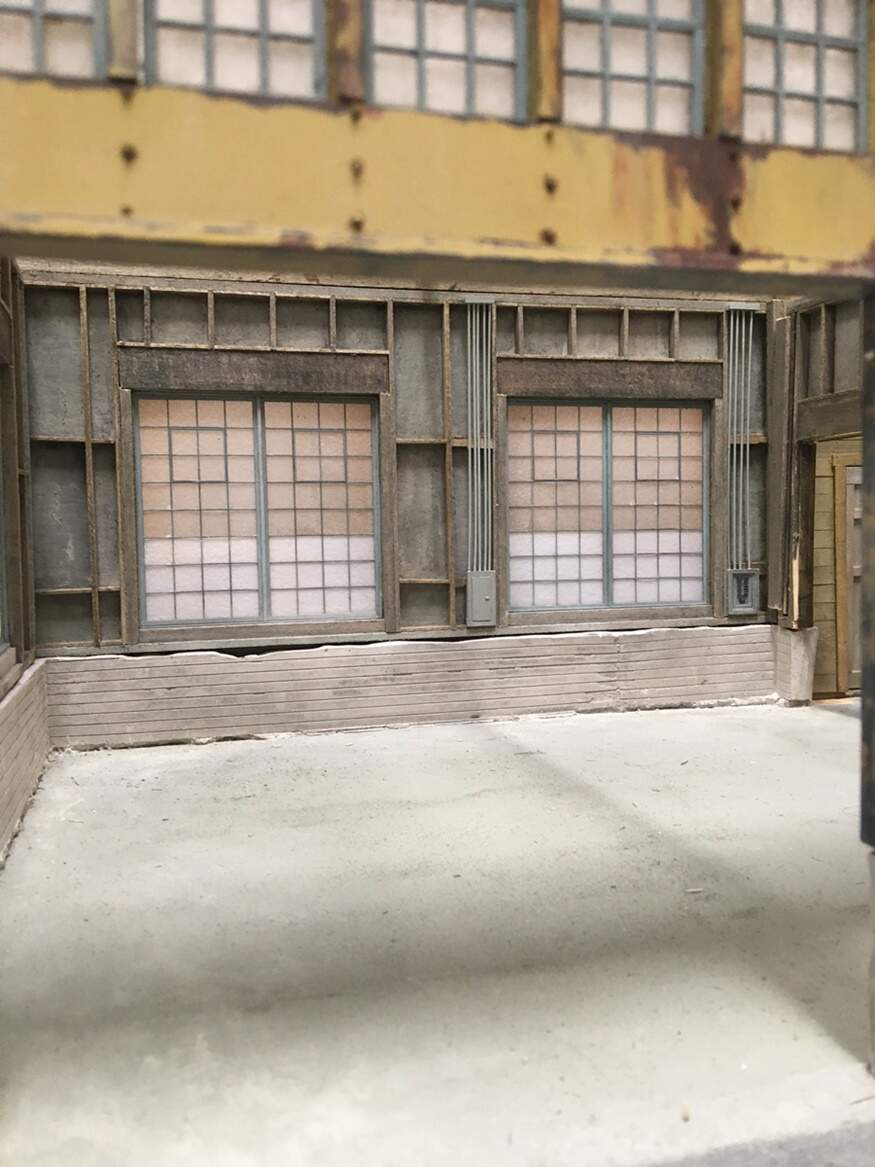
This pic is a bit confusing - the walls on the left of the shed will sit on the concrete foundation - and the wall on the left, will be about 18" forward of the shed. Finally, a brief shot of the interior of the back wall. It has a way to go, but you can see what’s going on:
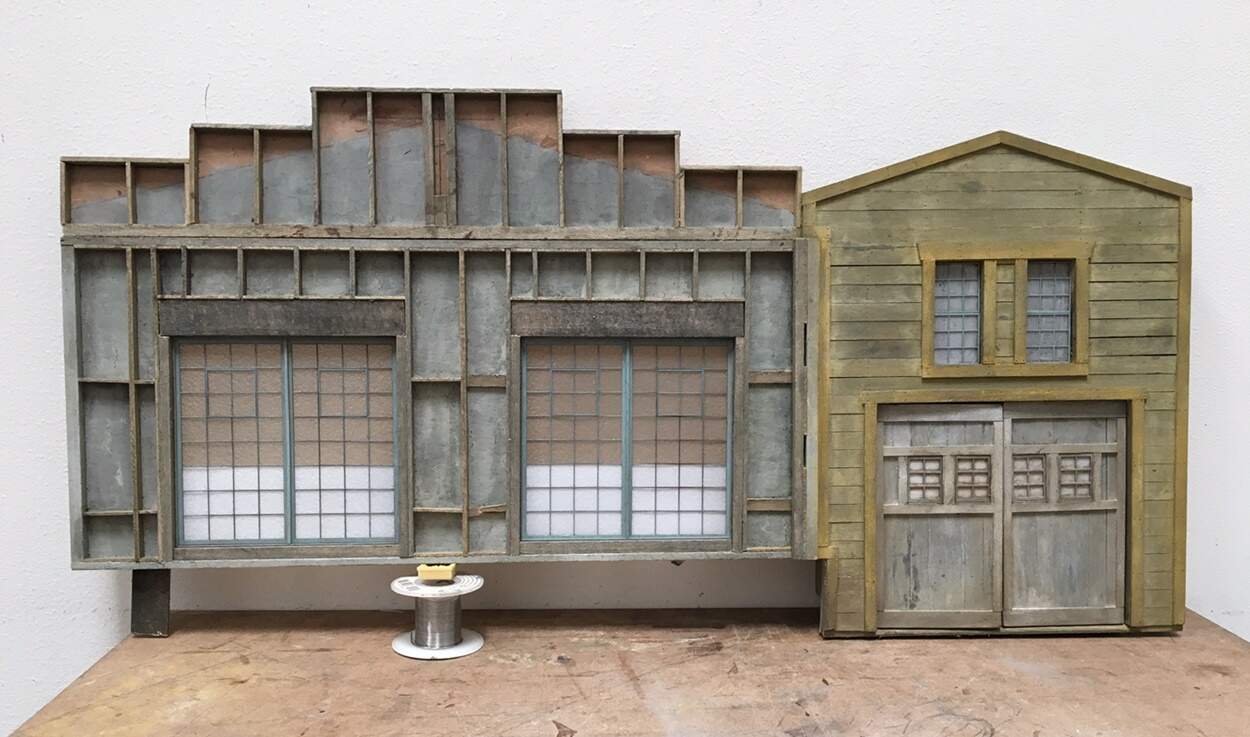
And that’s where is sits as of right now!
Thanks for having a look -
Cheers
Nick
3 Likes
Nick,
Sure seems like you live in Carland for sure.
The air compressor really looks super and passes my one eye test. Your shed and two door shop just blew me away. The weathering is just amazing. But then again, it’s by Nick, so that’s what I’ve come to expect.
Can’t wait for your next update.
Joel
1 Like
Hi Joel, glad you like that compressor! my guess is you’ve seen and used your share of these at tracks and shops!
I’ve kept working on this, and have added a Lotus Type 79. It will also be in the shop, just in less nice of condition than the PC4, but meeting the (my) criteria that this place serves cars from the late 70’s with the DFV engine. I’m also making a free standing DFV that I’ll mount on a stand - and, contemplating a third car!
So gents, please have a look - first up, the mill and compressor with paint and light weather:
and some friends:
On to a series of images on the Lotus. It’s the Tamiya kit with some really nice Studio27 details. Here we go:
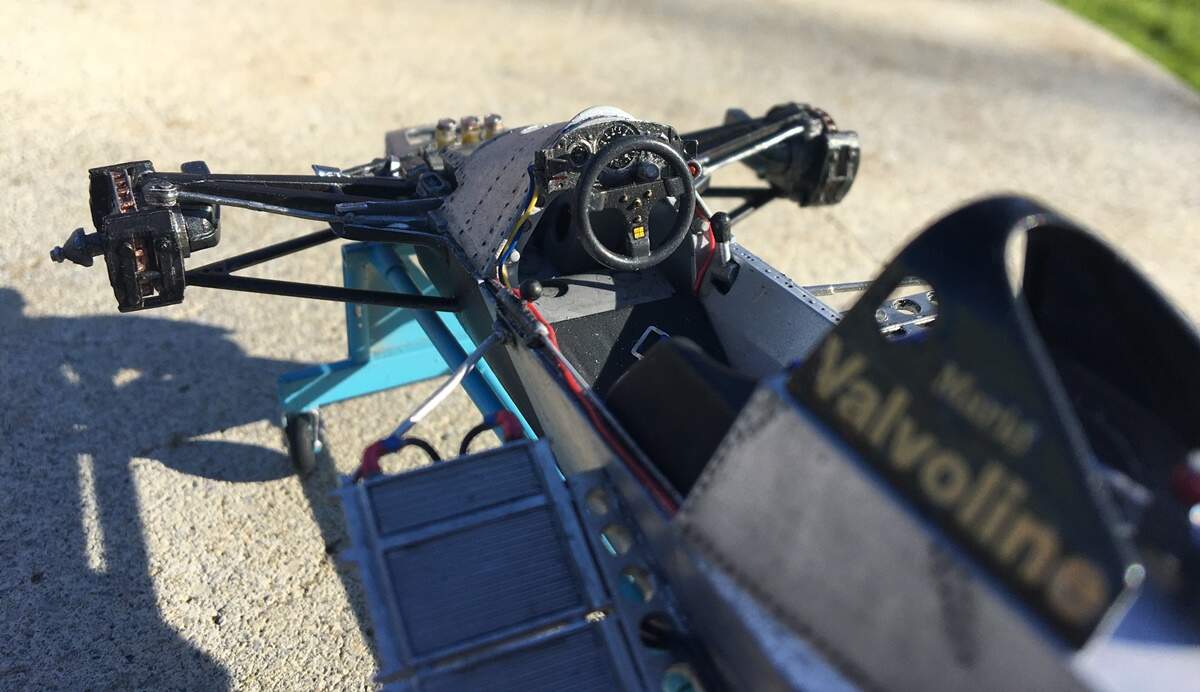
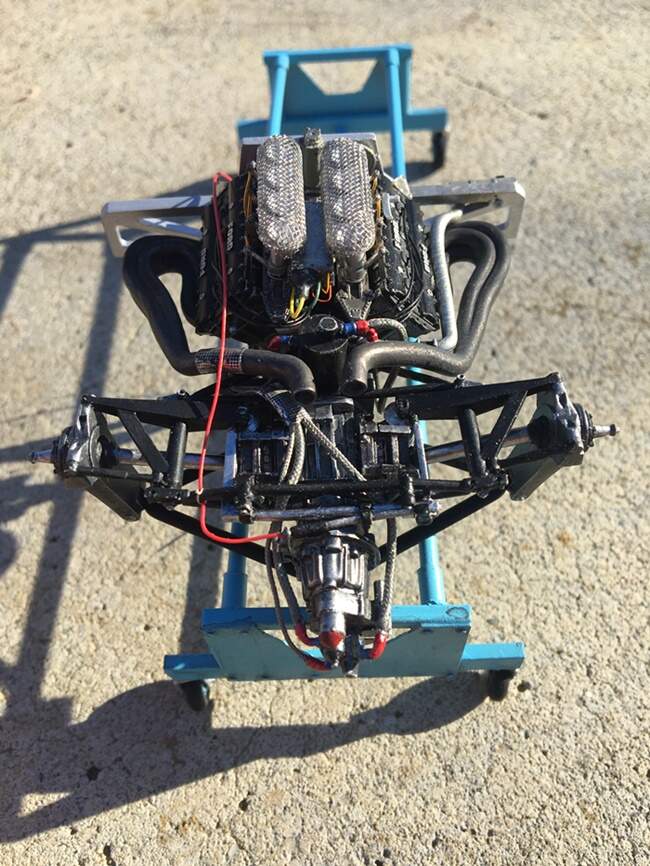
From above, you can see what I’m up to with this car -


This has been a lot of fun to pull together -

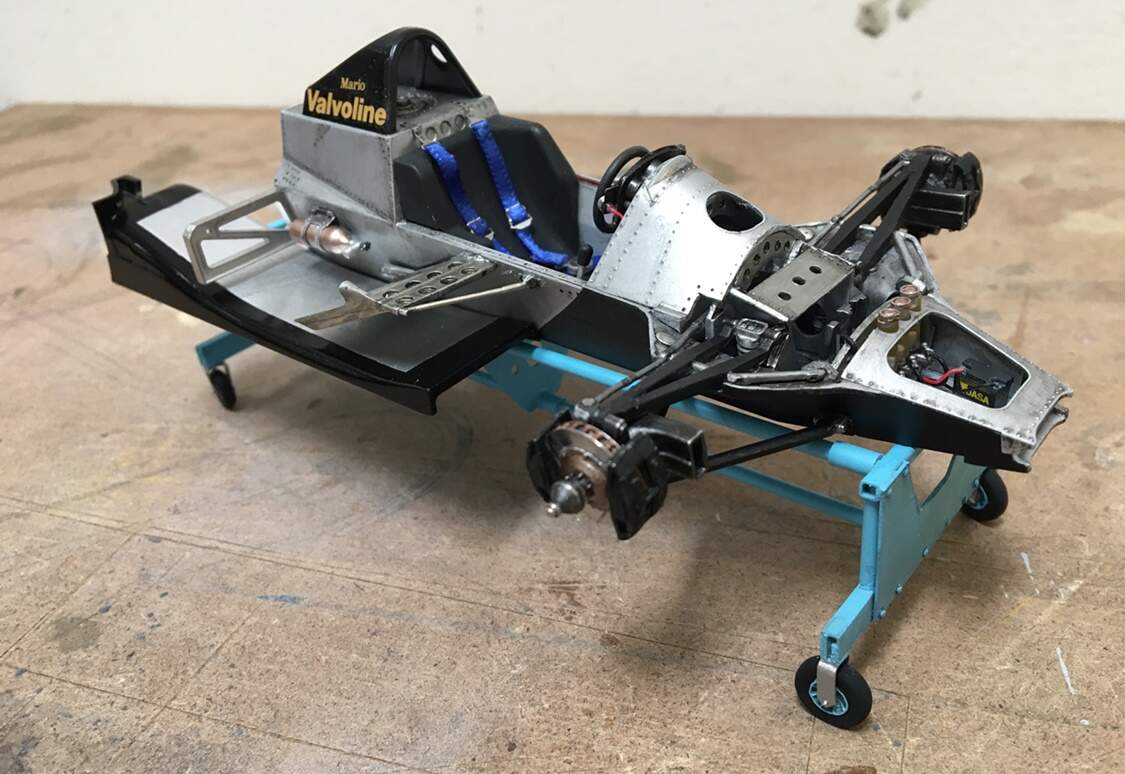
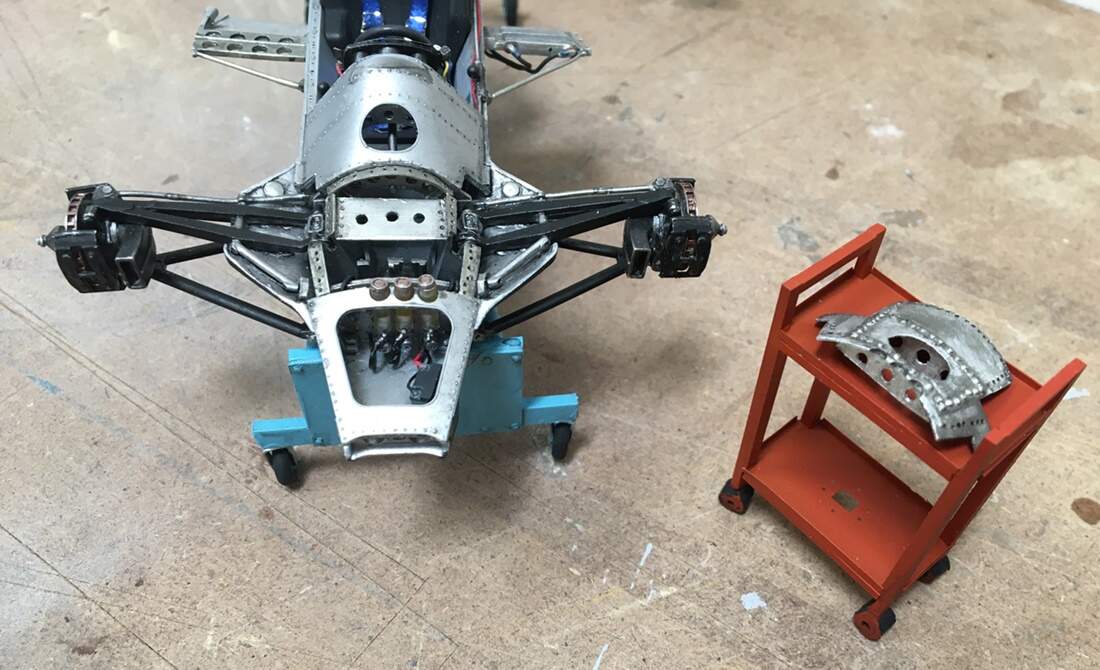
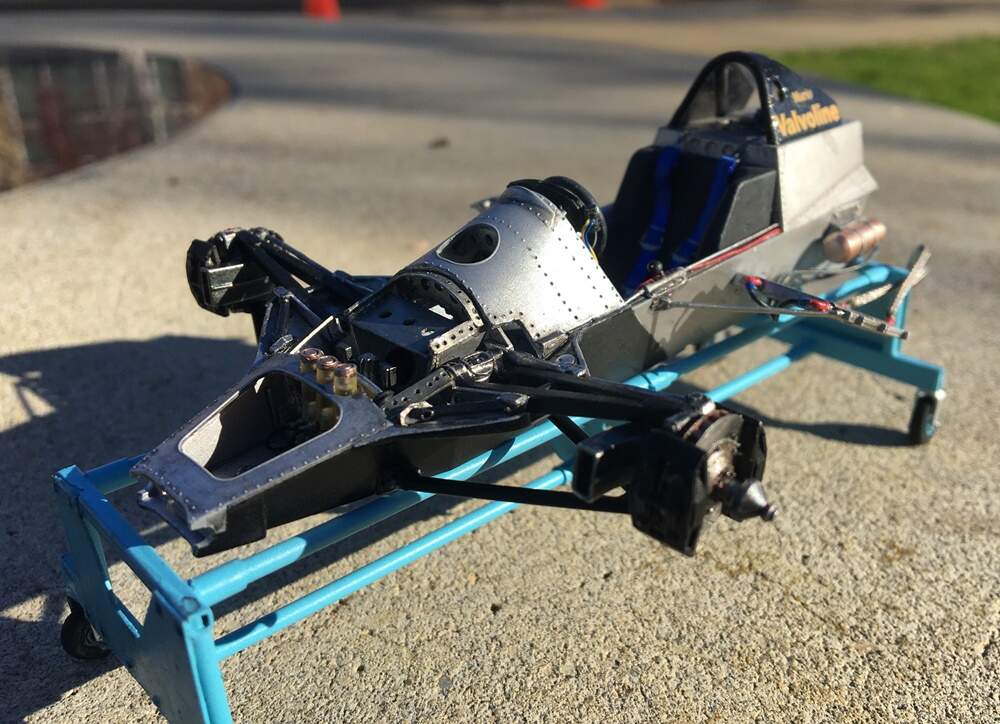
Lots of nerve wracking work here - lol - and, if you have the kit, you can see I cut out the middle third of the front cowl…hmm - did it to see the front suspension goodies - but, this clever move begs the questions - why is it gone? and what was it attached to? glad you asked:
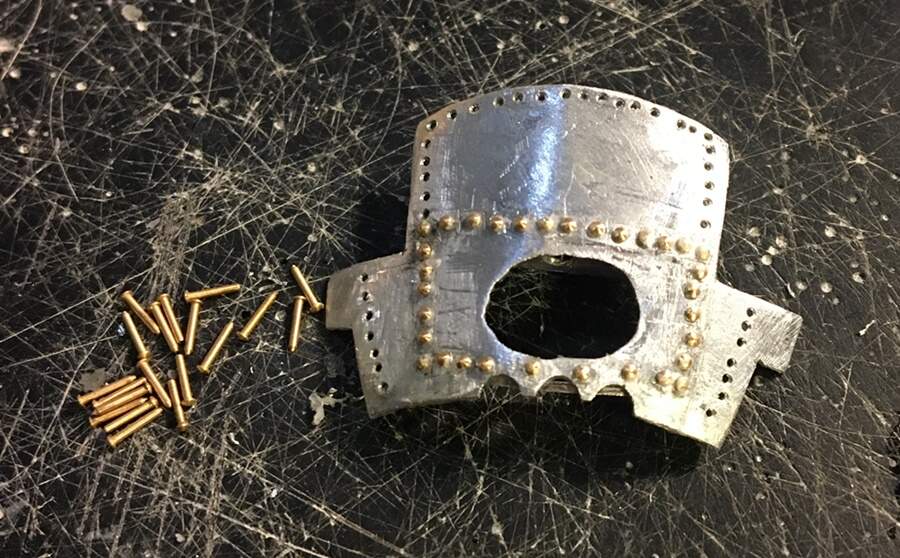
Task 1, build a cowl insert (the remnant kit part was pretty chunky) - maybe the front end was damaged and the crew needed to get in there. So, they drilled out all those rivets and removed, or cut out a section. For kicks I decided to try and make a replacement - this was pretty interesting. Too bad tho - the rivets…while tiny they sure look big. In this case it’s fine. This will be sitting on a cart next to the car:
Task 2, if you look closely also added rails for the rivets to be replaced on the race car.
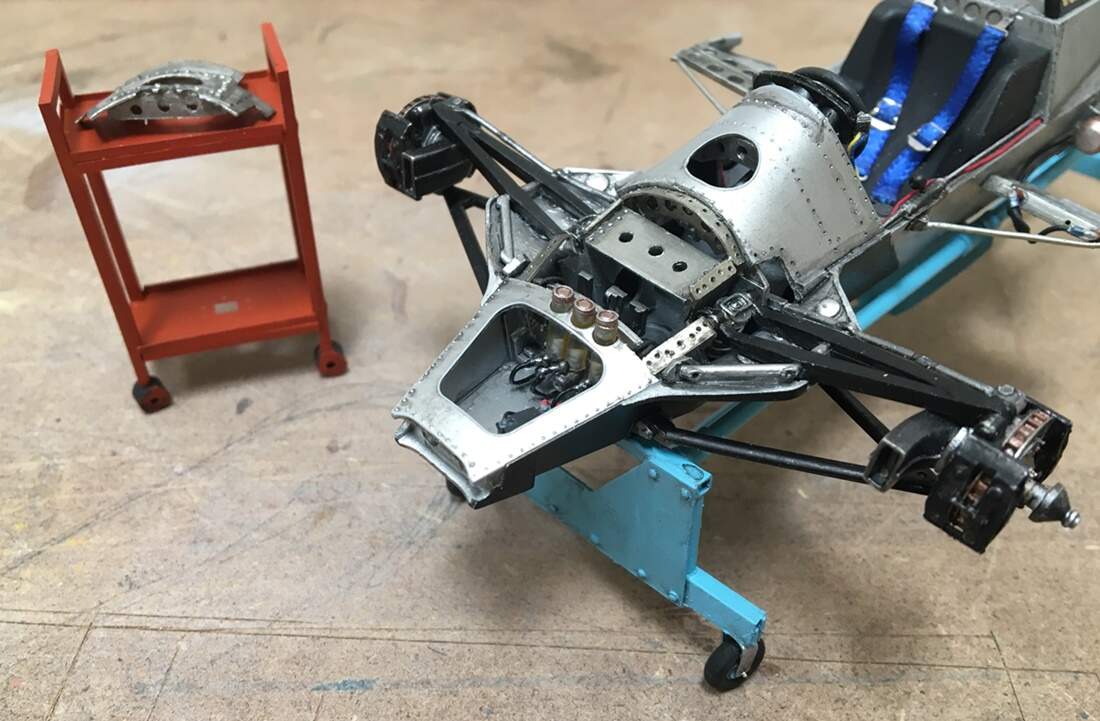
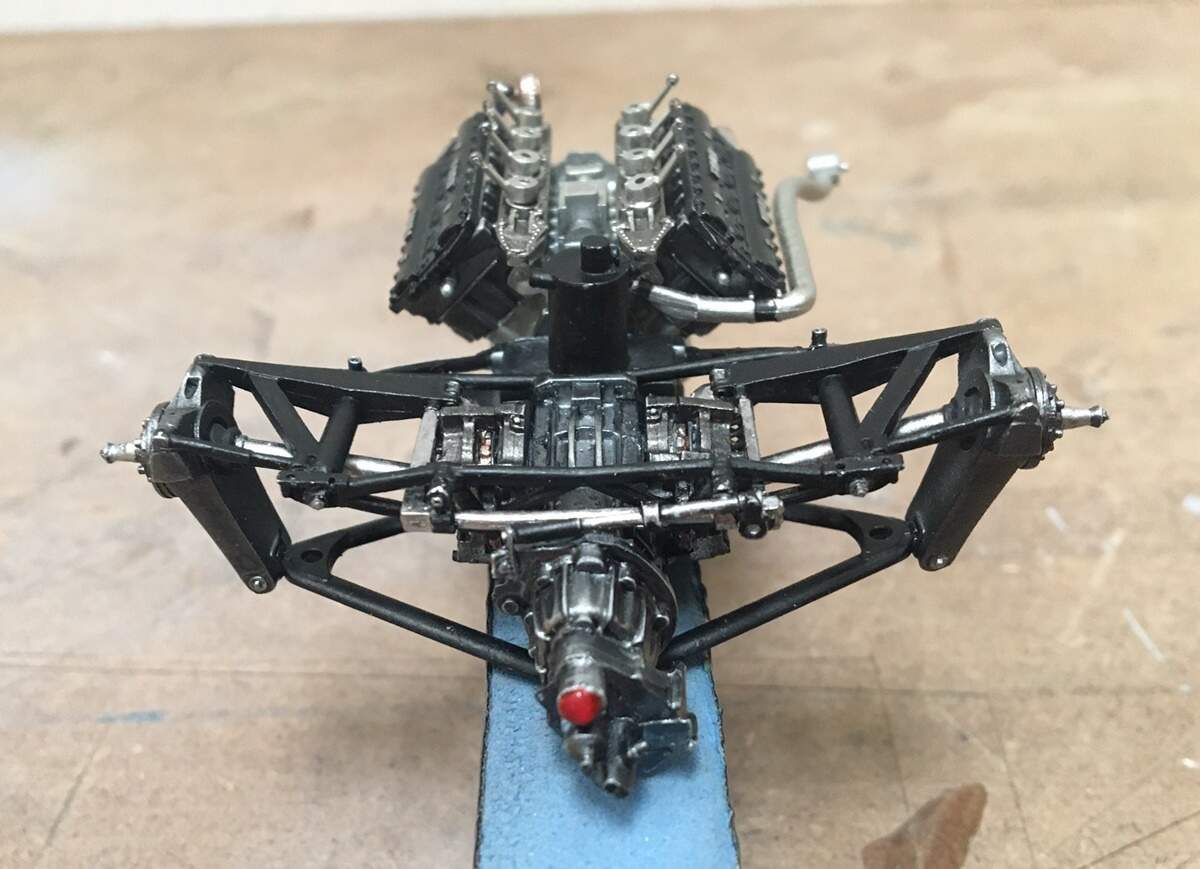
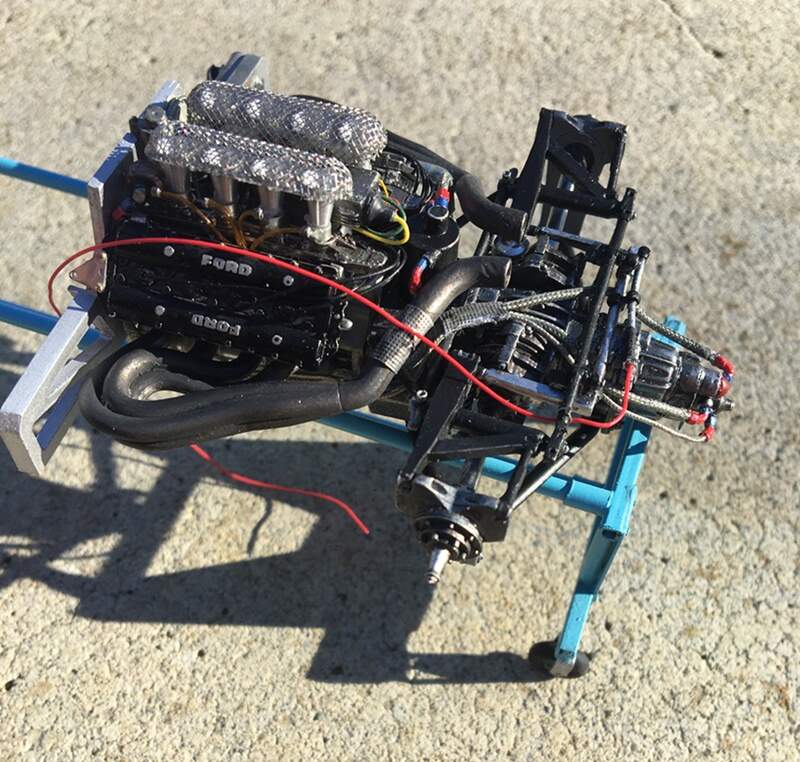
And then - sorry, I forgot pre-primer pics, but on to the engine and rear end:
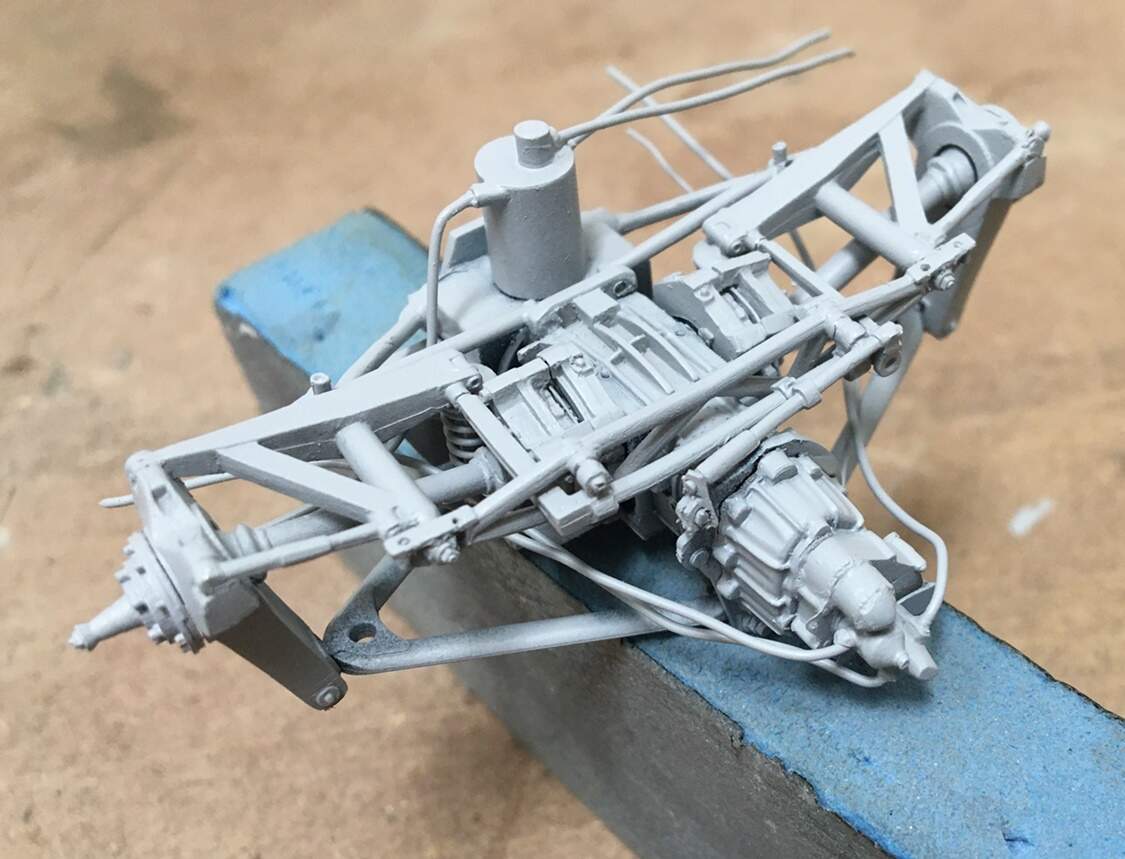

I blew it here - should have taken pics pre primer as the rear end has a lot going on! White metal, Tamiya, and scratch parts. Oh well - as for the engine - I left the DFV covers off at this point - I like to paint them separately.
Ok - on to some paint - dryfit engine/rear end and fuel injection rails:
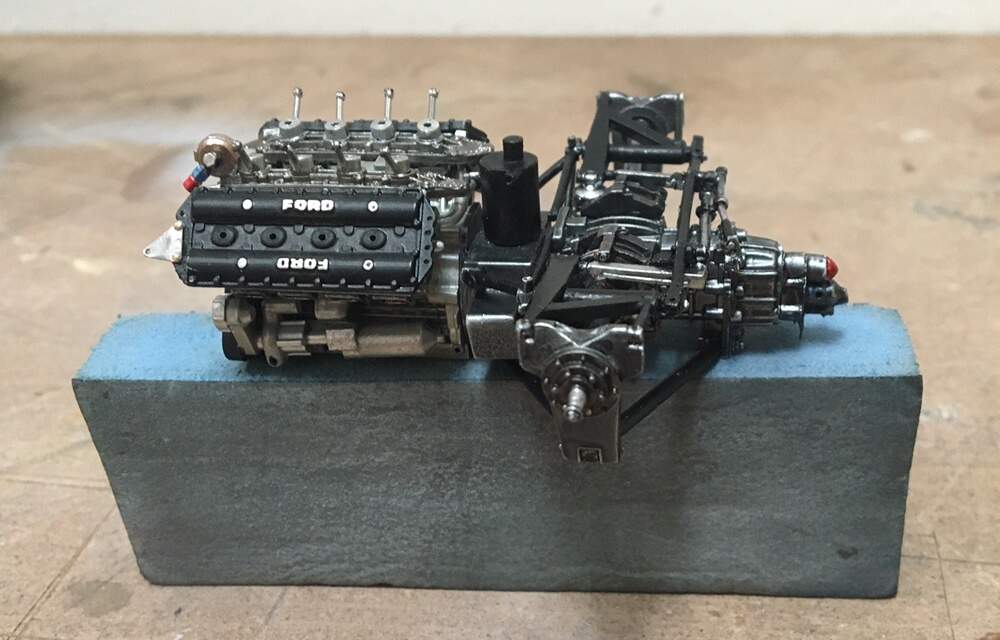
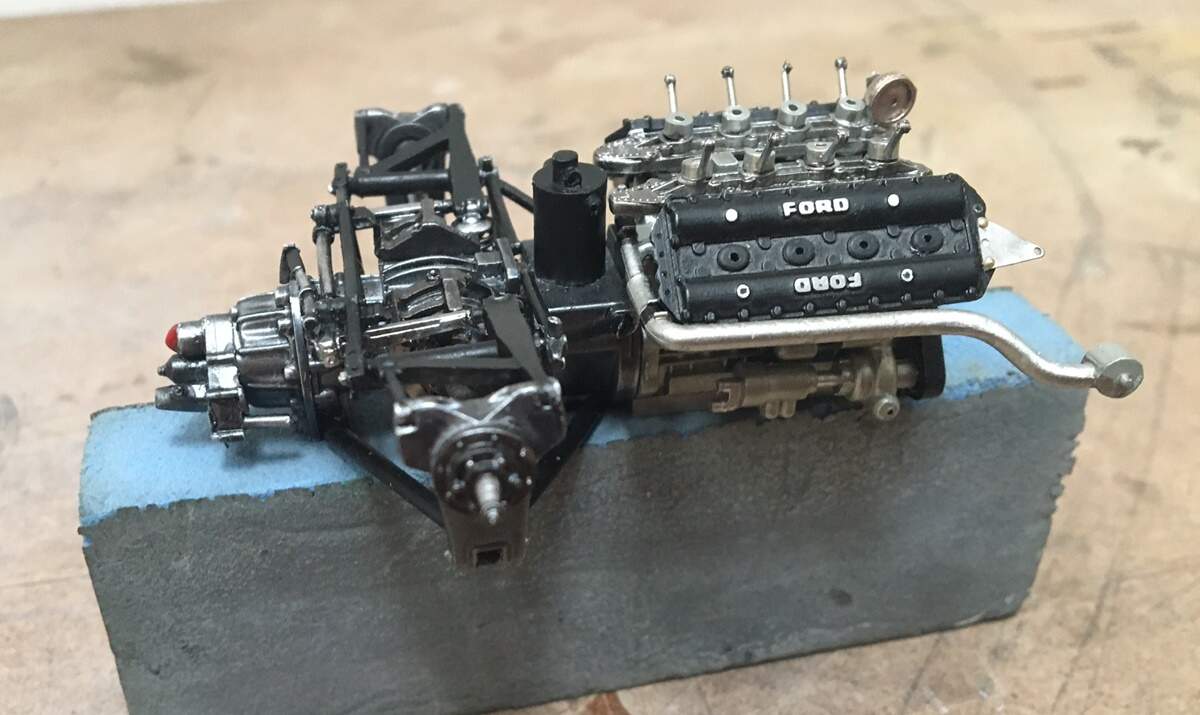

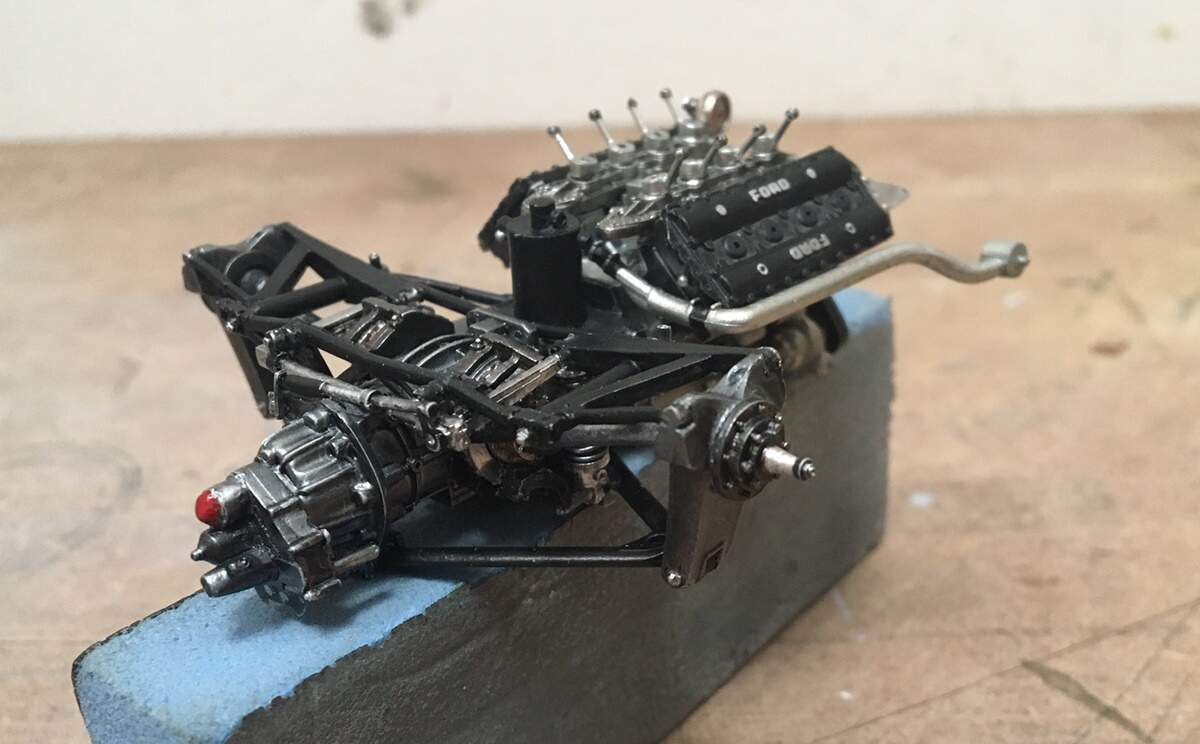
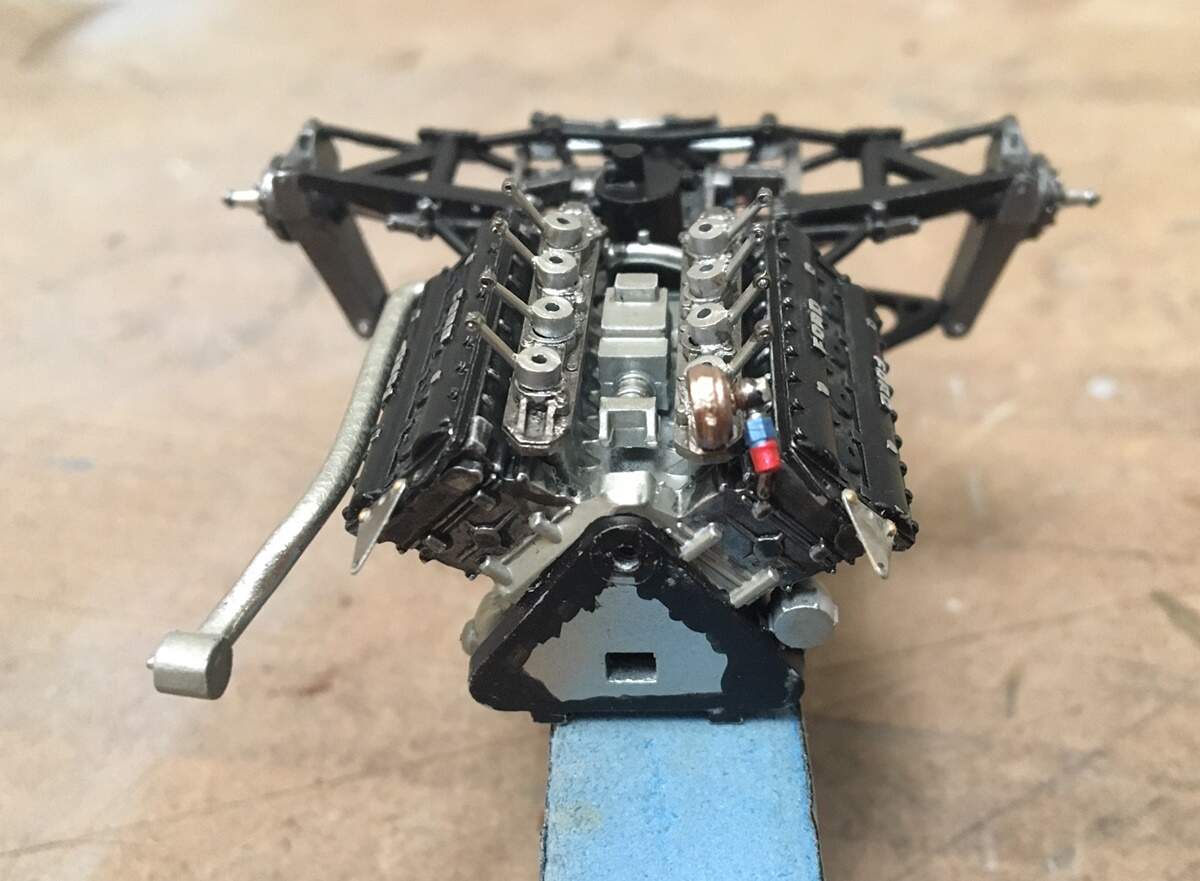
So - a guy has spent some time in the black and silver paint shop! All of the paints are from Vallejo. I’ve got to say, I’m really pleased with this paint work - it’s a shock in that it seems free of my typically rich collection of painfully obvious blunders, and, yes, it, like the rest of the car, will receive several light washes of NATO black - to give it the required grime and patina. I almost hate to do it!
The lower cowl and cowl over roll bar are painted with Vallejo too - with three coats of Aqua Gloss II, I usually don’t built in such a modular manner, but this project requires it - as there are so many parts that are separate but interrelated - quite a bit of head scratching and test fitting along the way.
The engine/rear still has a while to go - hoses, wires etc - and of course, headers. They’re done, now though isn’t the time to attach them.
Finally - the stand alone engine. For this I bought a Tamiya engine sprue, and looked at lots of pics of this noteworthy engine. My goal is to show it on an engine stand, which means the otherwise unseen ends of the block need some attention. It will not get a spec of grime! 
So - what to do for this eninge? First make up a clutch pack and flywheel - simple? right? - well, not really. But, very simple tools and materials used to come up with this:
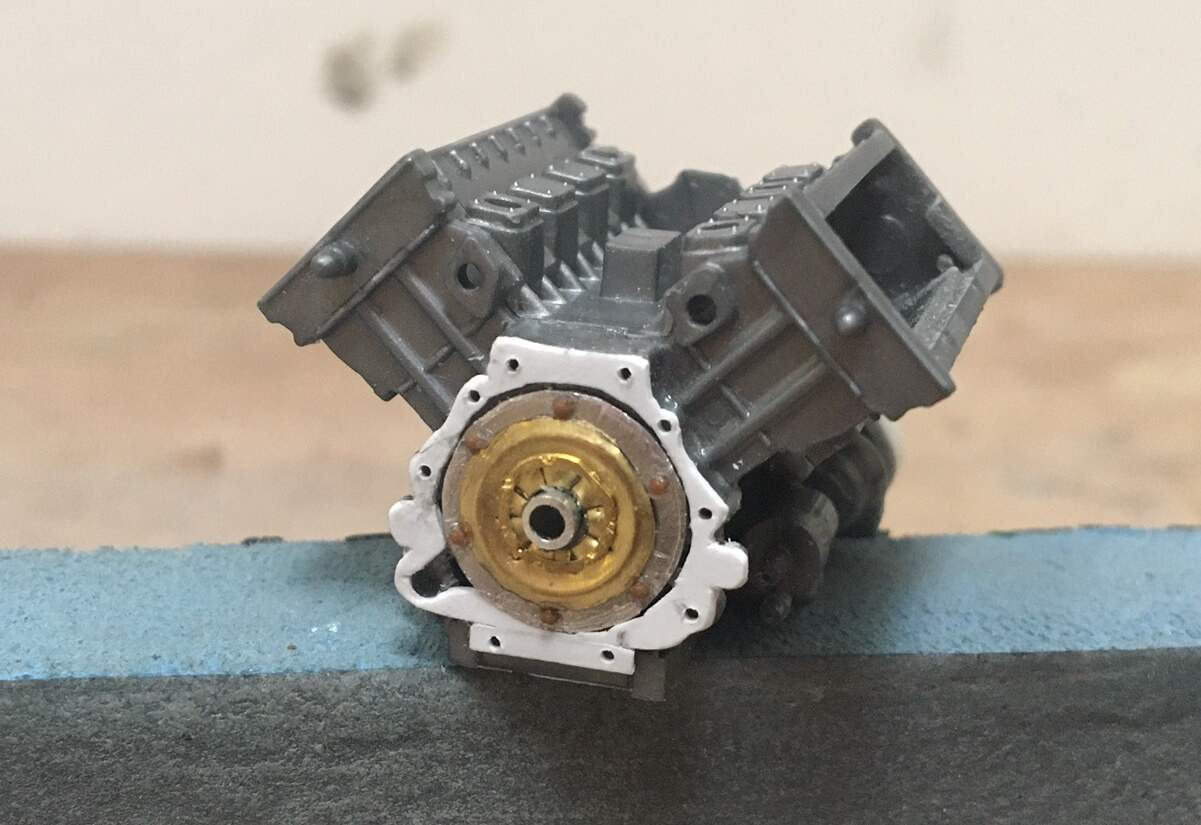
The center/clutch is a thin piece of brass sheet metal, cut in a circle, then a hole drilled in the center, then pressed with a piece of small pipe, into a piece of basswood to get the three dimensional shape. Yep, this guy got it perfect the first time! 
 Well, no, he didn’t! lets say it took few to get it this far.
The flywheel is a piece of lead foil from the neck of a wine bottle, cut in a circle, slightly larger in diameter than the clutch, then bolts added. I suspect not exactly “precise” but close enough for this guy! And, a short piece of tubing added in the center.
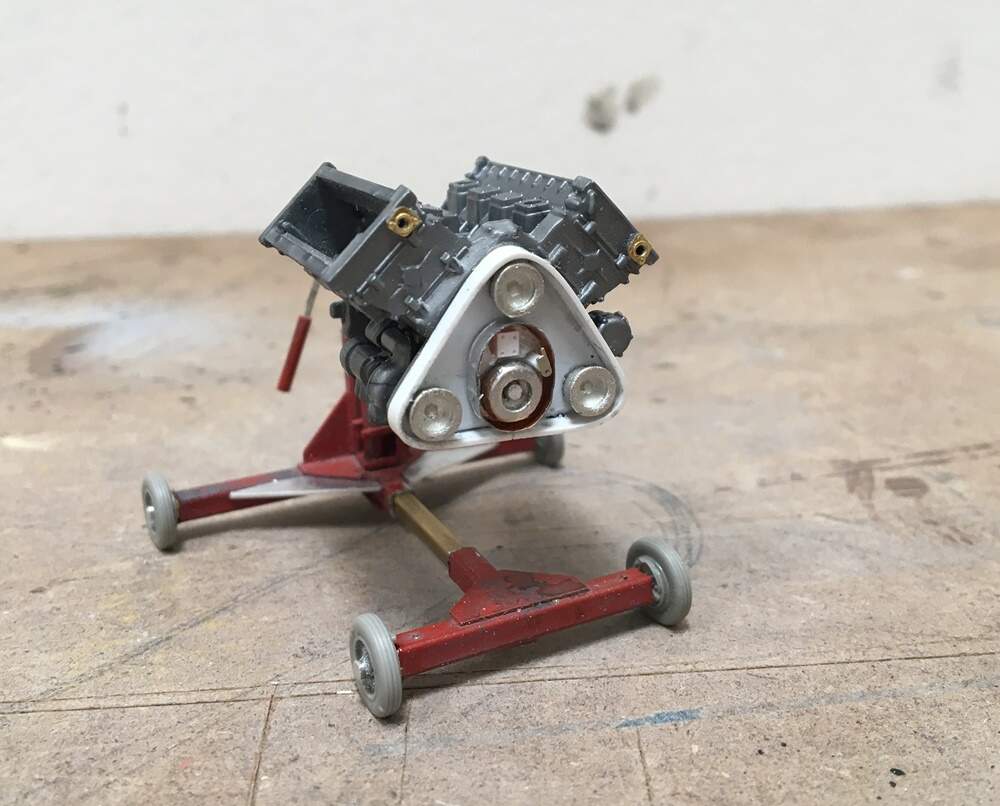
Finally, the other end of the block. This area is where the timing belt and its three pulleys go somehow synchronizing the double four valves. It is a very distinctive look, and I’m really only through the early steps of this:
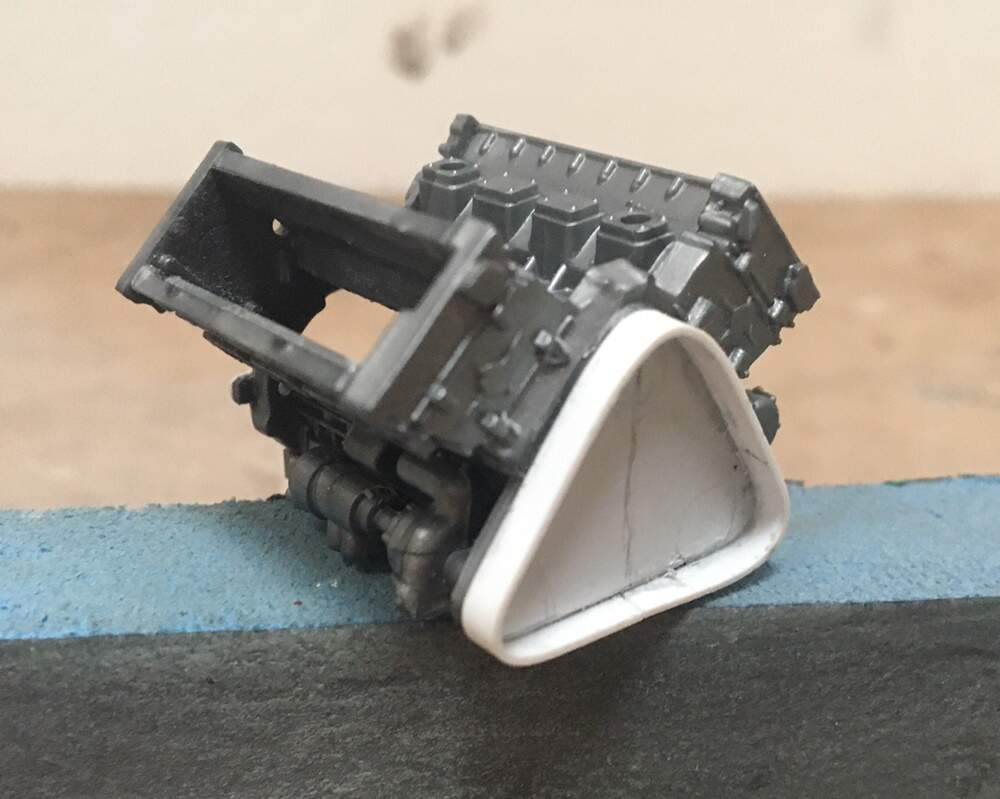
Once again, looks easy enough - how hard could it be to make that one piece shroud around the triangle perimeter? Well, it took this guy some time to pull this together! Let’s leave it at that!
Next up figure out how to get either small belt pulleys, or something that looks like them into each of the three corners, then add an elongated circle shroud (not an oval) to the center…right.
And, keep going on the Lotus, and, the dio!
So - between work (which is weird - all zoom calls etc) trying to see family and friends, while respecting social distancing, and the general oddness of these times, there is the peace of mind that comes from listening to music, drinking coffee (and beer and wine!), and building unnecessarily complicated models!
Stay well gents, and thanks for having a look -
Cheers
Nick
2 Likes
Nick, I’m speechless. Damn!
Beautiful work as always Nick. Your use of household “junk” to bring these kits to life is super impressive.
Cheers, D
Nick, I’m just amazed! It’s taken me several reads just to be able to comprehend and comment on what is simply brilliant model making 
Lost for words here, simply amazing.
Nick,
For some reason I never got any notification of your last post, so I’m one day late to the party. Needless to say, I’m still struggling with some of the ins and outs of the new site.
As for your shop compressor, how right you are. I’ve used quite a few in my younger years, and have two at home. One is my Iwata/Sparmax duel super silent compressor for modeling, and a larger home/small shop portable one out in the garage. I had one with the same basic belt drive as your modeled one, but it was almost as old as me, and has been given away when I replaced it. Your modeled version is simply amazing. I just have to close my eyes, and I can hear it running. That’s how good of a modeling job you’ve done on it.
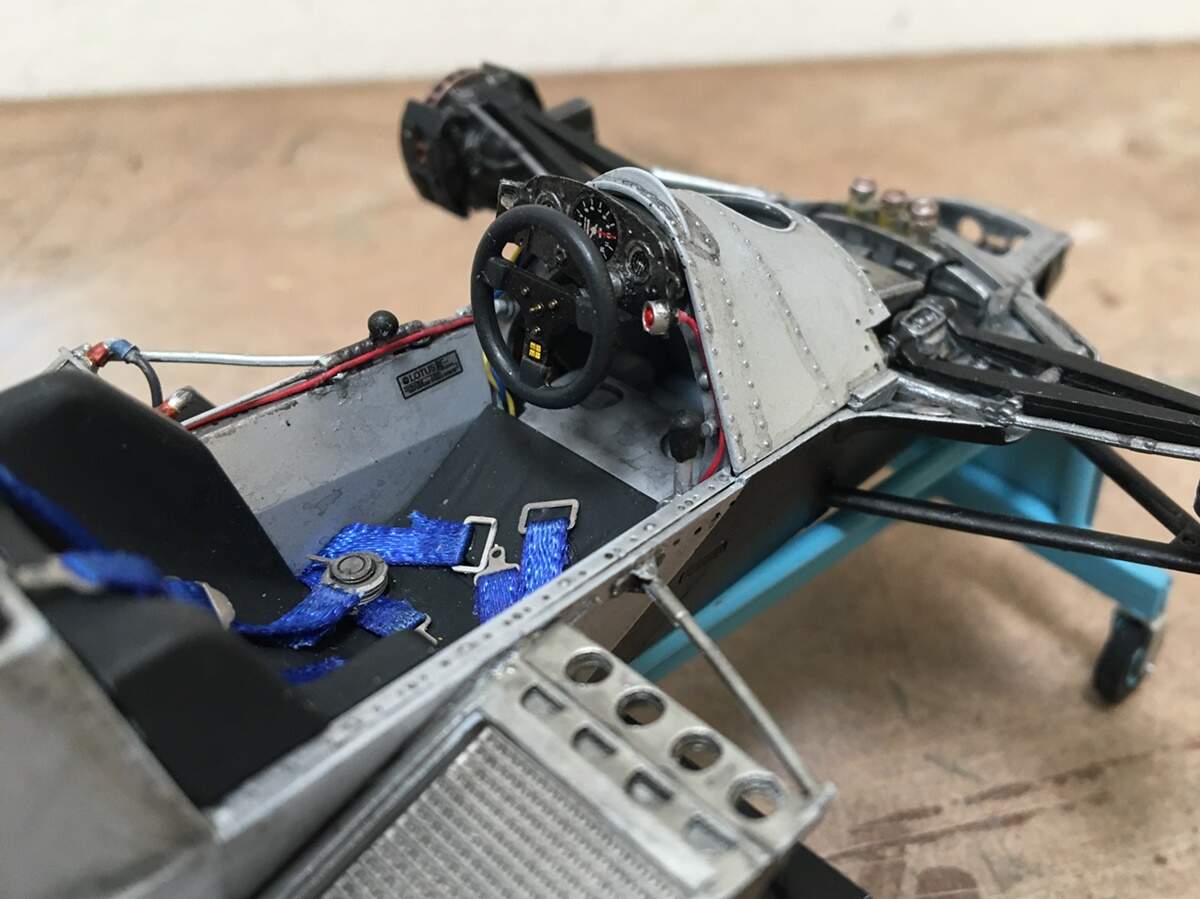
As for the Lotus 79, mine is still in the box, but I’ve built the Tamiya Type 72E OOB, so it’s not even close to what you’ve already accomplished. Just the added details for the radiators, tank, and lines is super impressive. Excellent job on the cockpit as that dash really just jumps out at me, as does that seatbelt harness.
But the front end from the suspension forward just blew me away. Excellent fabrication effort on the 3 fluid cylinders, fittings, and lines. What’s even more impressive is the hundreds and hundreds of holes you drilled for those rivets. BTW, whose rivets are they, and what size are they?
The engine/transaxle/suspension just blew me away. The valve covers just pop with perfect white painting of the letters, as does those head bolts. The rear suspension really looks like the various shades of weathered metal used, not painted plastic. Even the wheel spindle is detailed.
I’m not use to seeing any type of clutch assembly in 1/20 scale, let alone one that’s scratched built. I changed my fair share of them over the years, especially at the race shop, so I’d say that you really did a great job on fabricating yours.
As usual, your updates never cease to amaze me as to scope, attention to detail, and execution of replicating those details.
I’m already looking forward to your next update.
Joel
Hello gents, thanks for having a look, and forgiving me for such a chaotic build! It wasn’t supposed to be quite to random, just the car! But, as you all know, things change - so this keeps changing!
On to an update. I do plan on finishing the Lotus, but, it’s turning into a very modular build - finish one section, work on another, and so on. I recently had what started as a bright sunny day, but had to work for much of it, and afterward, ran out for some late afternoon shots:
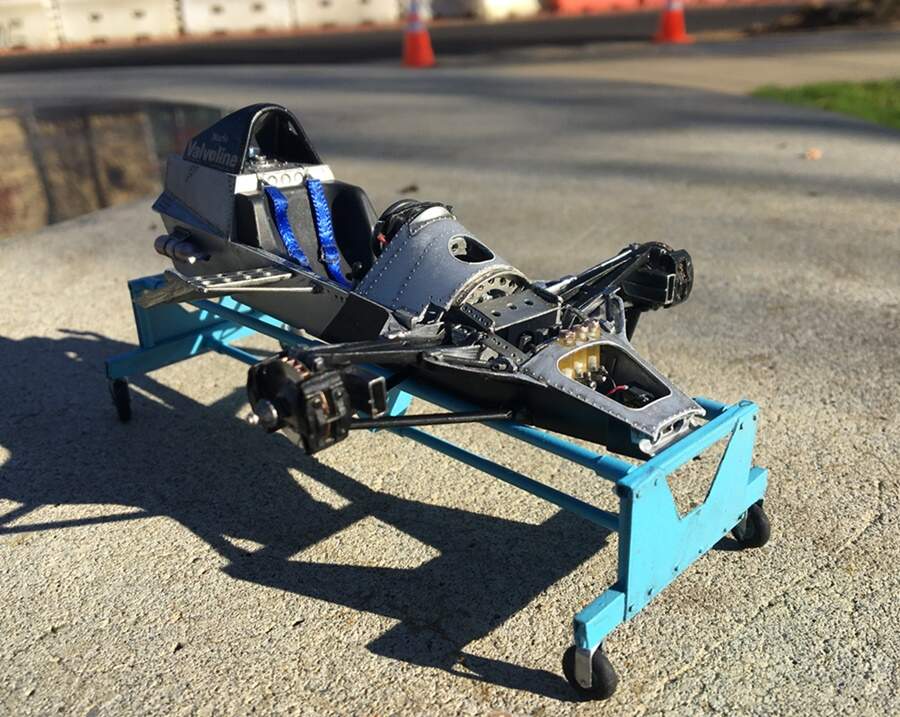
So far so good. This has been slow to all go together because of things I didn’t expect (why else would it go slowly?? quite a bold observation by me! ) like the braided hose I’m using is metal, so as I strung it up, over, and around parts, I discovered I was also sanding paint off! perfect…I’ve also been looking carefully at reference pics, so have tried to add things - which also gums up the work.
And, when not being frustrated by this, I’ve been working on the free standing DFV motor, and its stand:


Yeah…simple, right? well, no. The stand started as something else, but I changed it to meet this need. As these tools are all metal, well, out came the saw and files - extending its length, making an adapter to hold the engine. These are usually variable - but, I figured that as this shop specializes in DFV engines, a standard plate and studs would work for me! Also added different tires/wheels, which was A LOT of work - my last set of wheels didn’t want to come off, and there was some hard as rock, dried CA in tight places that didn’t want to let go! Anyway, it all did eventually.
Back to the engine. While the other side has a clutch, this side has a timing belt with three pulleys, and a circular housing (not a pulley, maybe a main bearing?) in the middle, and another shroud! So - the pulleys are from 1/25 scale blowers, and the center, a remnant white metal part adapted. The shroud is thin lead foil, that follows the shape of an underlying piece of cut aluminum sheet. Again, by strict definition not hard to do - but in application, slow and tedious!! It was supposed to be easier than using thin styrene…
Oh, and Mr Grumpy and some of his friends arrived! The quality on him is excellent - but he does look tense - get him a beer or a diet Coke! hew needs to lighten up, man -
Onward to the shop:

This is just dry fit - but, you can see what’s going on -
The big shop doors are there on purpose - so that you’ll be able to see the cars inside, but in a convincing way:
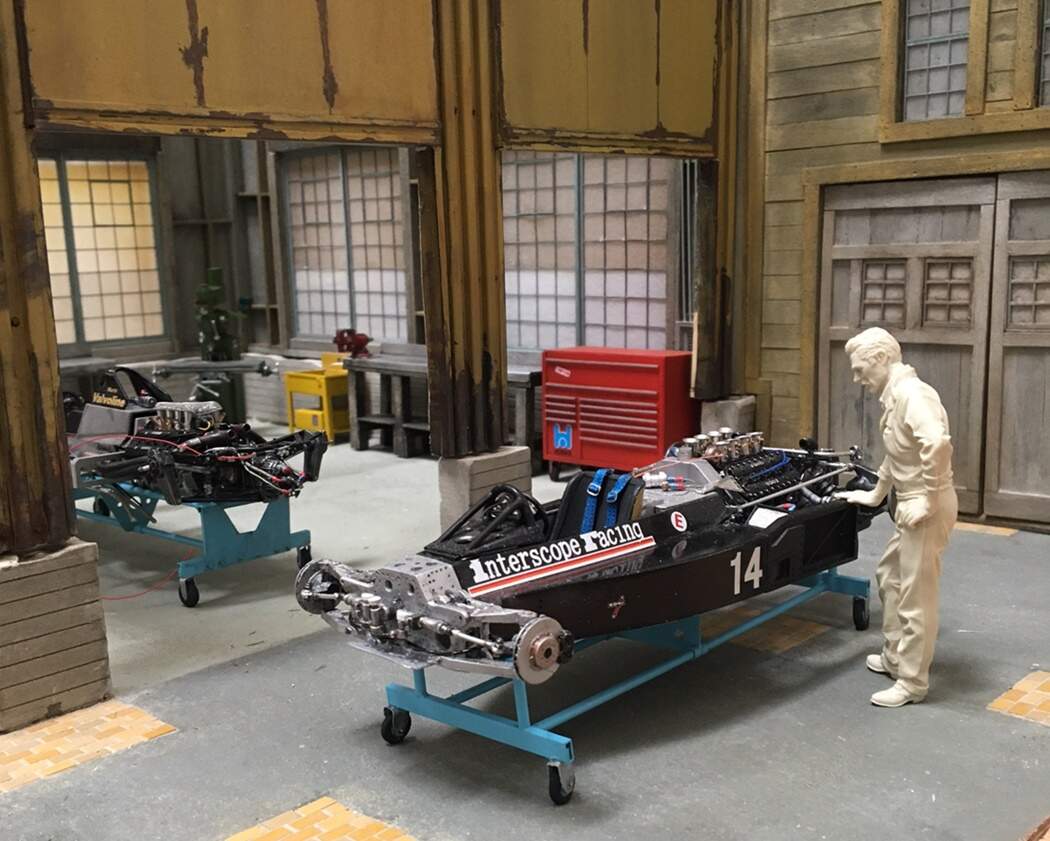
The idea of course is to be able to see what’s goin on in there. As I kept working, realized - that yes, the base needs to be (ha - none of this “needs” anything! Its just a model! bigger) - perfect:
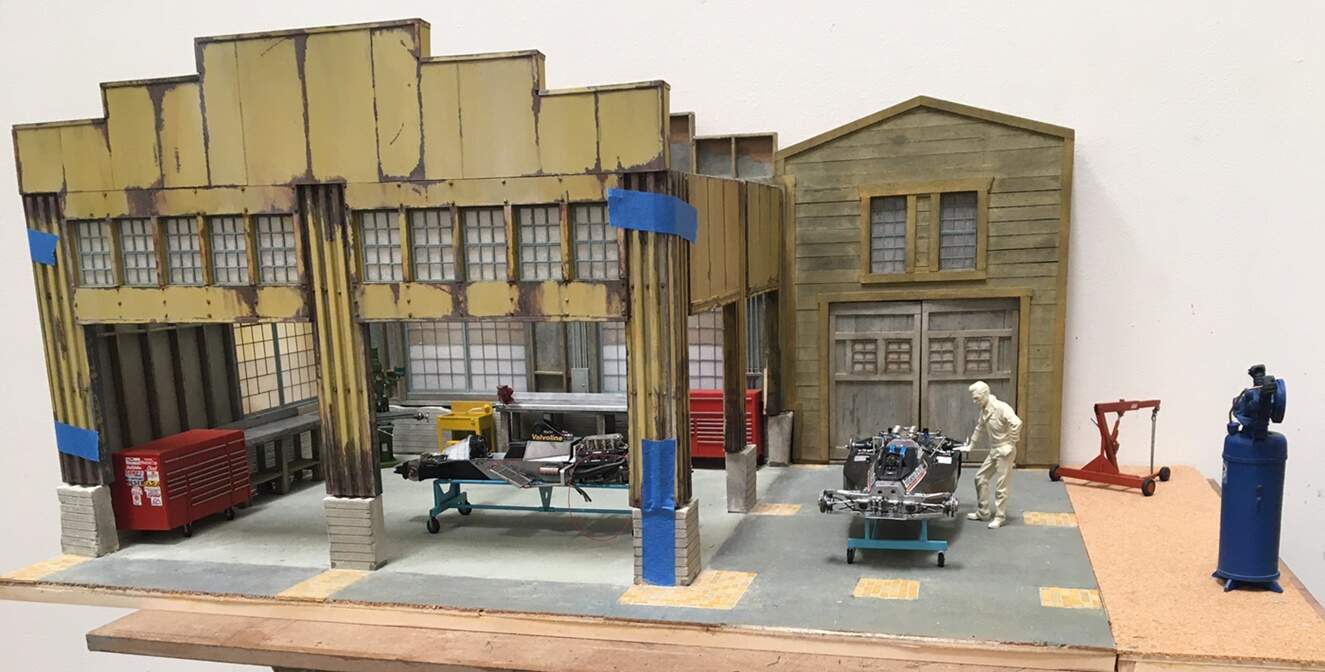
You can see, its now wider than before. I want more room for photos without distractions! I’ve already added a fence down the side, and started a little shed in the back for that air compressor. As you Joel, and I’m guessing others, know having used commercial compressors - they are NOISY!! and if it were my shop, I wouldn’t want to hear it. And, to prevent “theoretical” theft: 1) they are monstrously heavy!; and, the driveway will get gates - and that’s my story and I’m sticking with it!
Cheers and thanks for having a look -
Nick
2 Likes
Awesome progress Nick, just amazing work!
Cheers, D
Nick, your build is going to be amazing when completed!
Nick,
Wow!!
This is turning into an diorama/build of epic proportions. I’m just blown away at the endless details.
The PC4 is shaping up to be a build that even my Hero: Mr. Penske would be proud of.
I owned a small portable compressor that was a million years old that had the same piston and build drive for the pump, and boy did it make a racket. Needless to say that I replaced it a few years ago.
Looking forward to your next update to start my New Year off in grand style.
Joel