I too was going to follow this avidly, but fear that MI6 may be monitoring(!)
3 Likes
Brian, the words in this thread could draw the attention of the US ATF.
4 Likes
Thanks guys again. Hah yes Brian and Matt, I’m even disinclined to Google “11mm ammo” because the Oz Feds & Intelligence HQs are only a couple of miles away from here. I’d rather not be the first Kitmaker member arrested in possession of a Sturmy. We need to use some innocuous word like “Robin” instead of words that go kaboom ![]()
So er Robin, your second post is kinda what I was thinking too (the Y tube), but unless I can find a criminal mind equal to my own I’m likely to electrocute myself. I’m only really comfortable using Robin….hmm this could get awkward couldn’t it? Anyhow give me some time to ponder further, believe it or not I’m almost enjoying building this thing right now.
Talking of which, the ignition mechanism is one thing but equally important is Robin’s necessity to generate instant dense smoke. I remember struggling with that when I was pyro-happy several years ago. Shredded rubber powder didn’t perform as expected & my chemistry knowledge is as poor as electrical.
5 Likes
Send me a postcard if you manage to electrocute yourself with a 12 volt battery.
Once upon a time I placed a metal spring (twice as thick as the springs in ballpoint pens) across the terminals on a 4.5 volt battery, the spring wire, at least 0.5 mm diameter, glowed cherry red after much less than a minute.
When it had gone back to dark metal I picked it up and found out that metal can still be very hot even when it isn’t glowing … the 10 parallell brown-black marks on my thumb and index fingers hurt like f–k but looked sort of neat. Lesson learned.
Y-shaped small diameter tubes, hose connectors, can be bought from China.
Aliexpress has a sh!tload of options, this is just one single example:
https://www.aliexpress.com/item/1005003228418445.html?spm=a2g0o.tesla.0.0.16f1Fg75Fg75tr&afTraceInfo=1005003228418445__pc__c_ppc_item_bridge_pc_same_wf__lMWHmIQ__1760869183771
Heading off into deep waters:
Let there be SMOKE
4 Likes
![]() OK no problem it shouldn’t take long.
OK no problem it shouldn’t take long.
Certainly the video clip in post #26 shows most of the smoke is pale/white and not black, the trick would be how to concentrate the source of that Pyroking smoke for an instantaneous detonation, I’m not sure it would be sufficiently controllable (at the same time as launching the shell) for photographic purposes.
Anyway I woke up in the middle of the night with a cunning plan to get around all these issues…but I need to experiment in a secure clandestine environment ![]() , meanwhile I’ll carry on with the build.
, meanwhile I’ll carry on with the build.
5 Likes

Which one is Tim ? ![]()
H.P.
5 Likes
Look for the one wearing the hat…oh, wait..
6 Likes
He’s the one sitting astride the bomb, waving his Stetson.
![]()
Oh well, it never was a secure perch…
Poster on the old RGMW usenet group: “When I become Supreme World Overlord I will build the most massive Thermonuclear Weapon ever and name it after my P-n-s.”
Me: “Who’s going to be scared of a bomb called Mr Wobbly?”
Cheers,
M
5 Likes

3 Likes
Its“JUMBO”
2 Likes
It is indeed.
2 Likes
Jumbo- Jumbo | The Trinity Test
2 Likes
Ah yes thanks Brian you found that old chestnut from my nuclear period. I thought I did the figures particularly well huh? ![]() Here’s a rare frame from a more relevant experiment some years ago, it reminded me how difficult pyro can be…
Here’s a rare frame from a more relevant experiment some years ago, it reminded me how difficult pyro can be…

The wrong propellant, too much, not enough? Who knows, I didn’t have the patience back then to trial all the likely variations, I’m not sure I do now. (Btw thanks Robin, that actually was my go-to recipe, sometimes with additives)
Back to the build. The vendor had done a good job on the suspension, except it could have been movable but he glued it all dead level. And his strange methodology omitted parts even on seemingly completed sub-assemblies. For example, here the plastic part K71 (incorporating the steering levers) was supposed to go under the PE longitudinal braces…
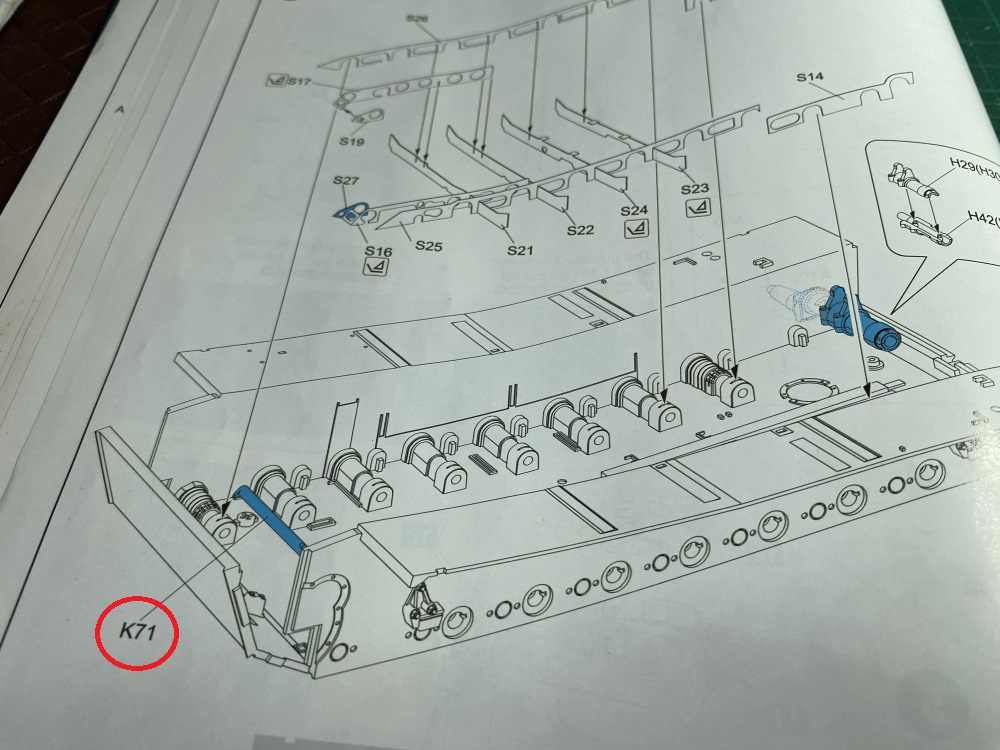
Maybe this was the last straw for him when he realised the error & threw in the towel? I couldn’t prise or bend the four braces off without the pain of restoring them afterwards, so I ended up cutting the plastic part into 3 pieces in order to insert it in place…

From the refs I’ve seen the primer colour didn’t extend any higher than the torsion bars, and even they were probably steel. Maybe he just intended it as a base coat. Everything else including the side/front/rear walls should be…most likely…off-white/ivory. And if you disagree you can take it up with my new best buddy for this build, Martin Kovac aka NightShift.
His excellent series on building the Sturmy (which morphs into a how-to-paint tutorial for any AFV) has helped a lot. If you want your mind blown and get depressed with feelings of inadequacy all at the same time I can recommend it - here’s Ep 1:
https://www.youtube.com/watch?v=pO-mqYvI1bw
The other 4 episodes show up on the right-hand menu in YouTube. I should say while NS’s tutorials are superb, I think he went waaaaaay over the top on his Sturmy’s weathering/corrosion given the beast was only a couple of months old, even when derelict.
Construction-wise I’m about half way with multiple interior sub-assemblies awaiting a massive painting session both pre- and post-installation. Much more to come…
9 Likes
Confirming SWMBO’s occasional jibe I can only focus on one thing at a time (turns out she’s the same) the build continues. Here’s the most recent test fit…

One reason for going glueless (is that a word?) is that with random sub- and main assemblies already done by another modelmaker, I can’t afford to trust his fit-accuracy. If all the internals don’t align perfectly the external panels won’t either.
The other reason is that many sub-assemblies need painting before installation, and I’m trying to get all the off-white elements ready for a single mega-spray.
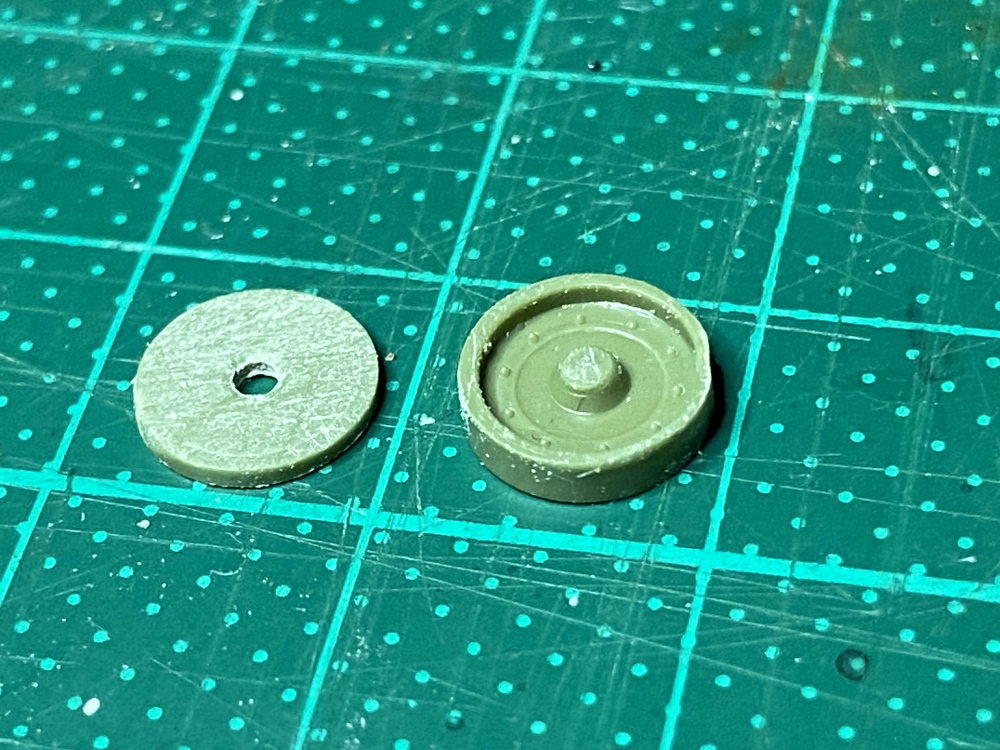
Meanwhile, finally, I’ve collided with a missing part – a pair, the exhaust covers D27…
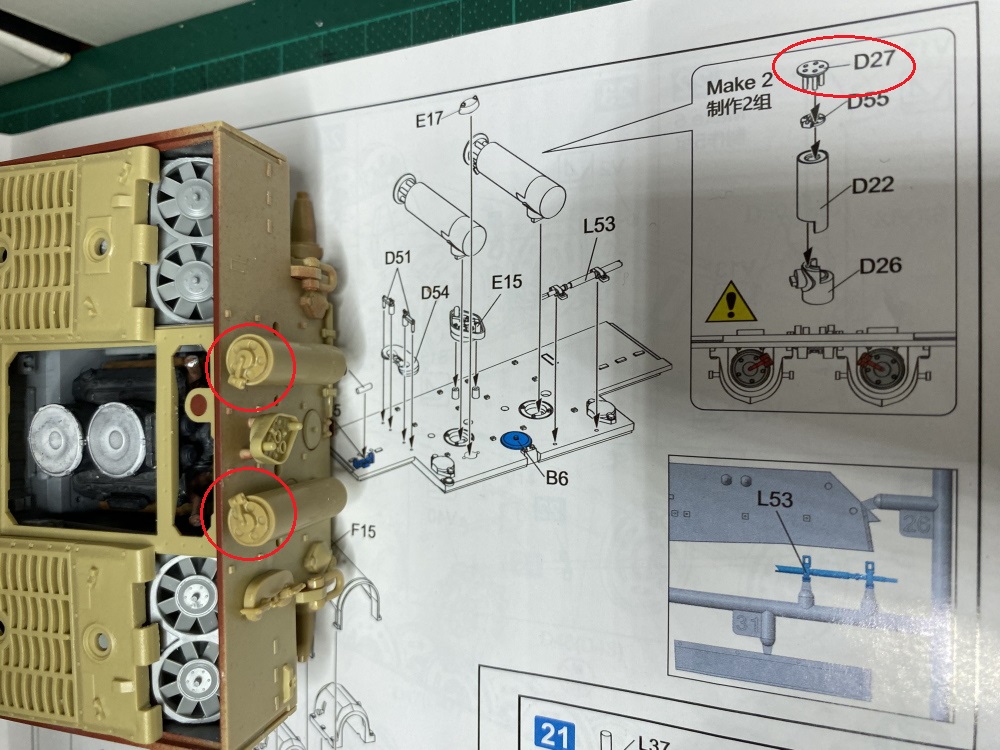
I wasn’t expecting that. Given smaller components had been de-sprued (is that a word?) but preserved in the box, I’m at a loss to explain their disappearance. But it is what it is, no choice but to scratch them and unfortunately they’re not the easiest to get symmetry but I’ll do my best.
6 Likes
Tough!
1 Like
Indeed. So let’s make ‘em from…
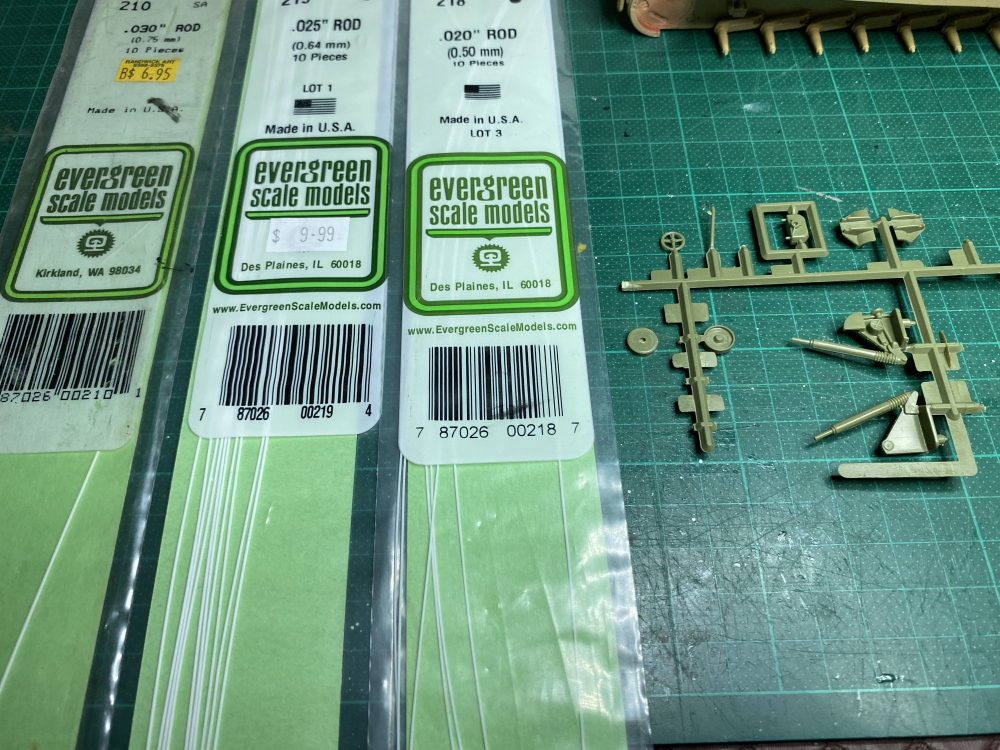
Pesky Germans, had to be five supports instead of four…
I went with the .030” rod…
Hey it’s not my finest hour but with some minor fettling of the support seating, and by the time the main covers are enclosing them, only you will know the awful truth…

Anytime now the original parts will fall out of some larger component in the bottom of a bag.
10 Likes
Nice recovery.
5 Likes
That’s the rear done - observant lurkers will notice something’s missing…
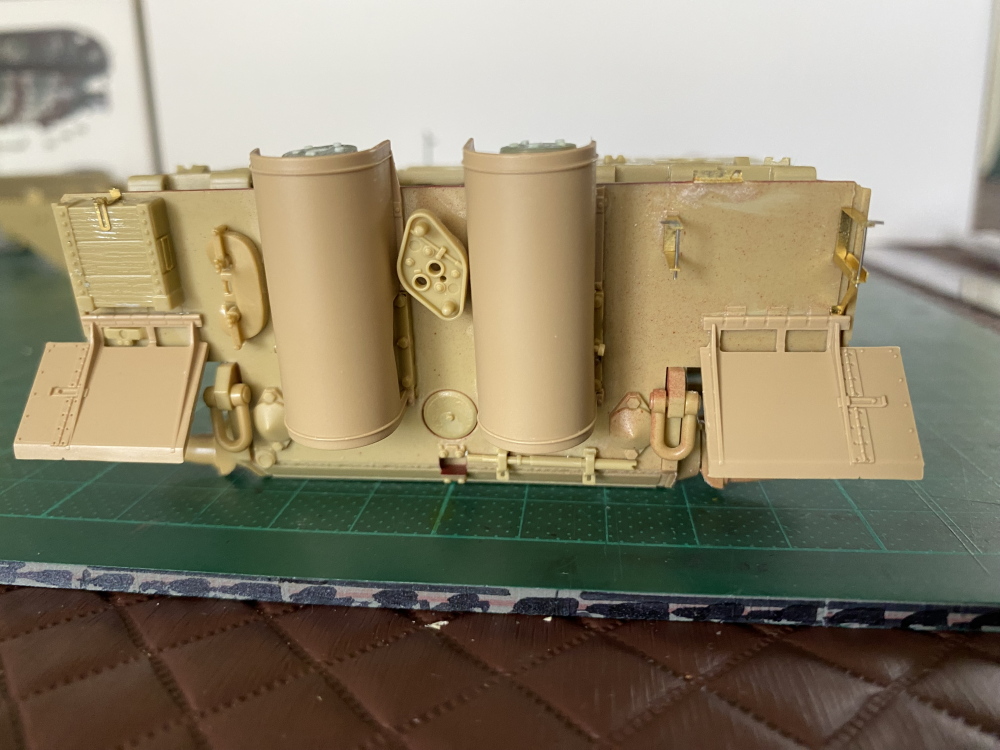
Yep, jack-less. What a shame, the original owner had clearly built it including the PE parts, but apparently it ran off with the exhaust covers, and who knows what other MIAs await to annoy me? I’m not that bothered, the PE support brackets tell a story of loss or theft…

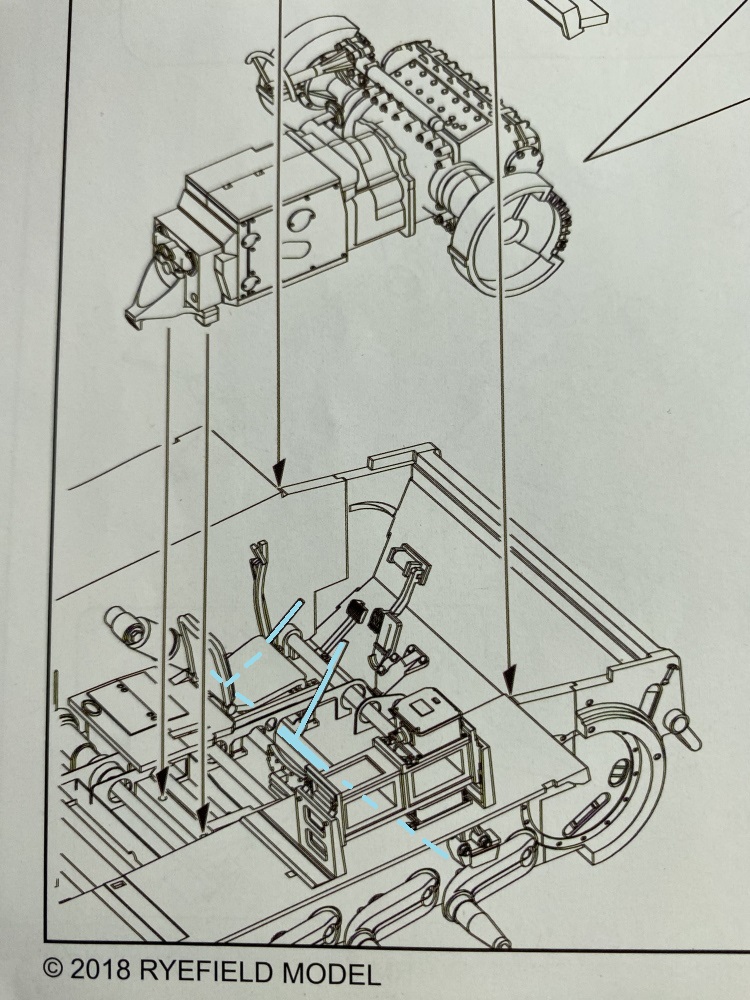
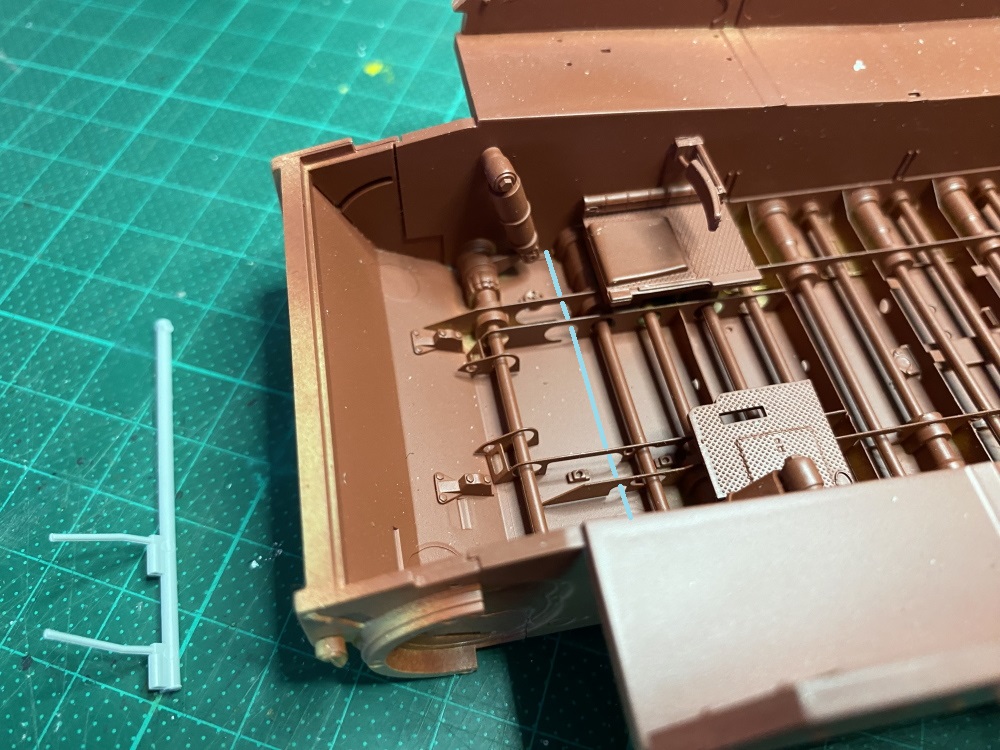
The next steps were the wheels & tracks, but I’ve jumped ahead to the last interior area so I can paint everything inside…that’ll hardly be seen. And immediately the 2-page instructions for the interior roof fittings bamboozled me…
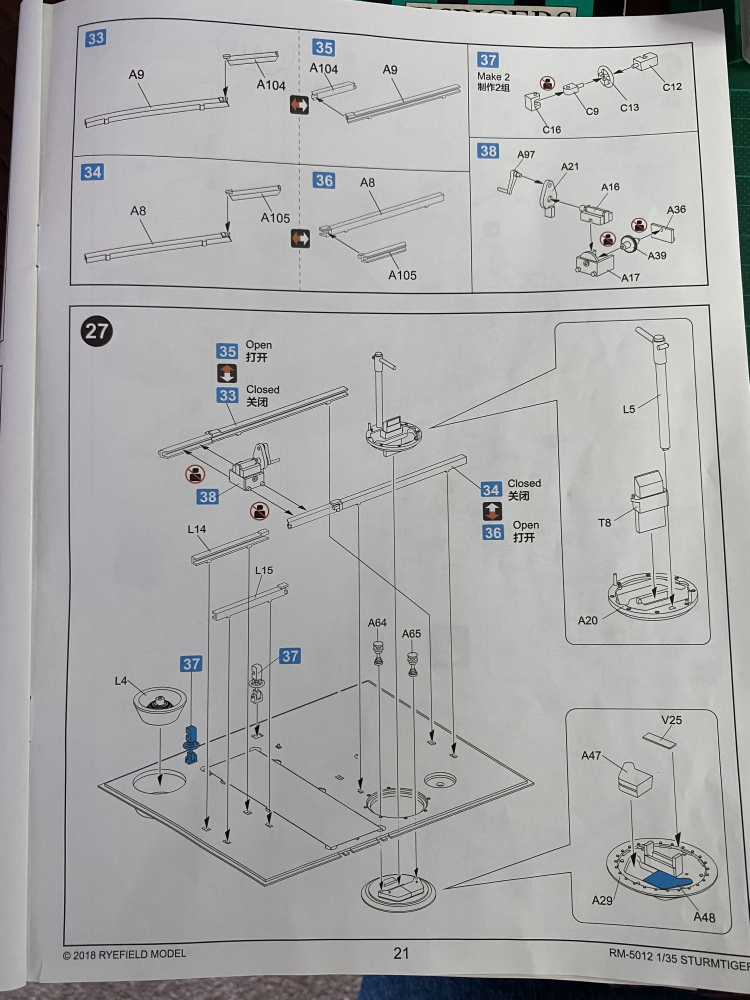
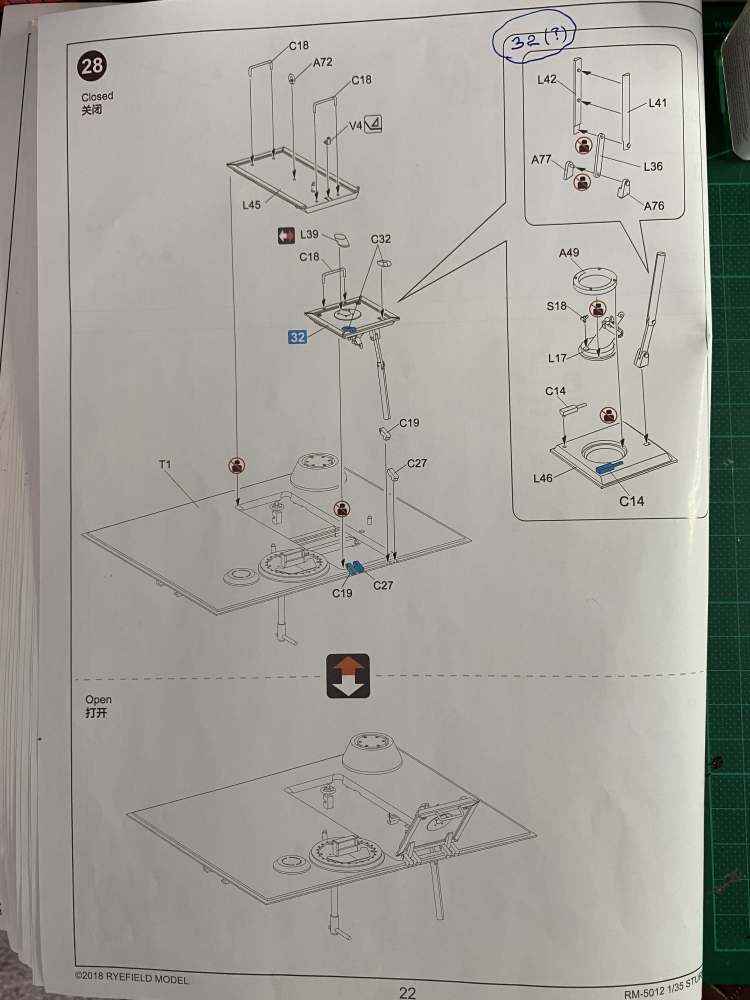
They offer the choice of “Open” or “Closed”. Sure, meaning the hatch right? Well, the smaller hatch. So…where does sub-assembly 38 go if the hatch is open? It’s shown in the closed position fixed to the extension rails…but they’re folded back if the hatch is open. And how did that mechanism open the hatch anyway? And the articulated arm hanging down loose from the open hatch, WTF is that…? Maybe a cheeky Merlot will help me divine the mystical inner meaning, it sometimes does.
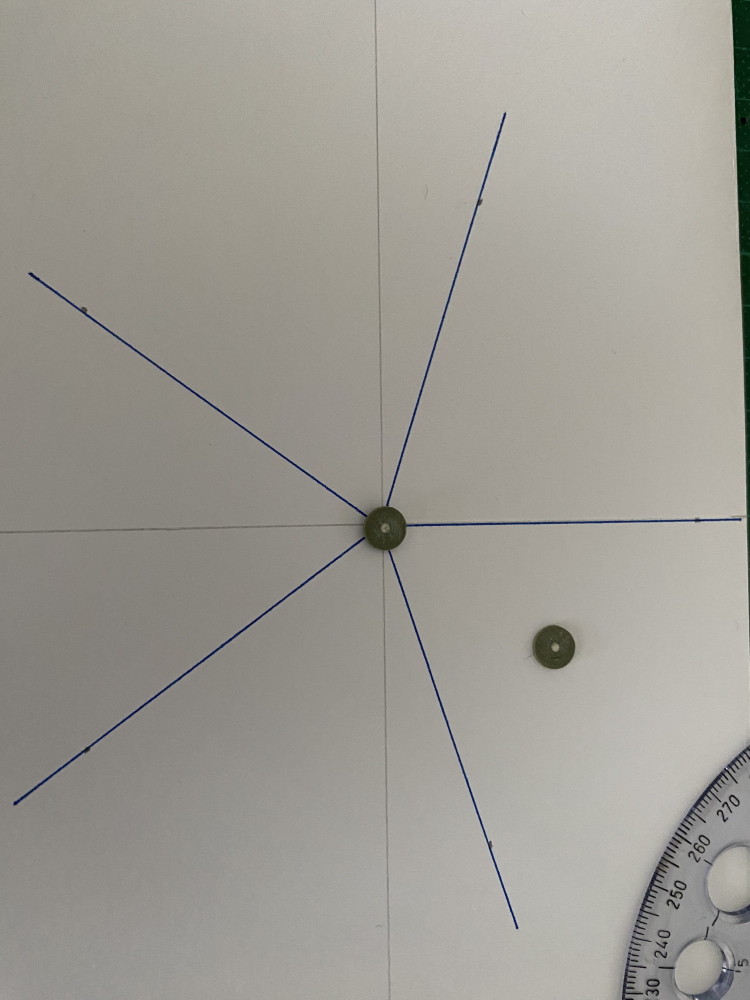
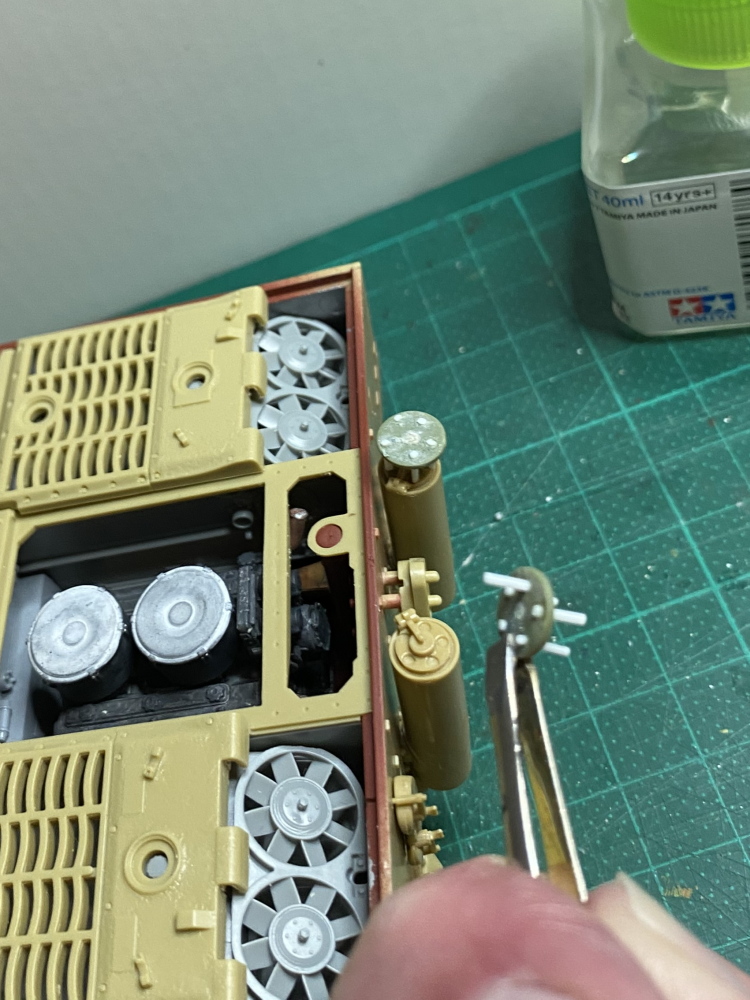
And then the genius of the kit designers really kicked in – sub-assembly pair 37…
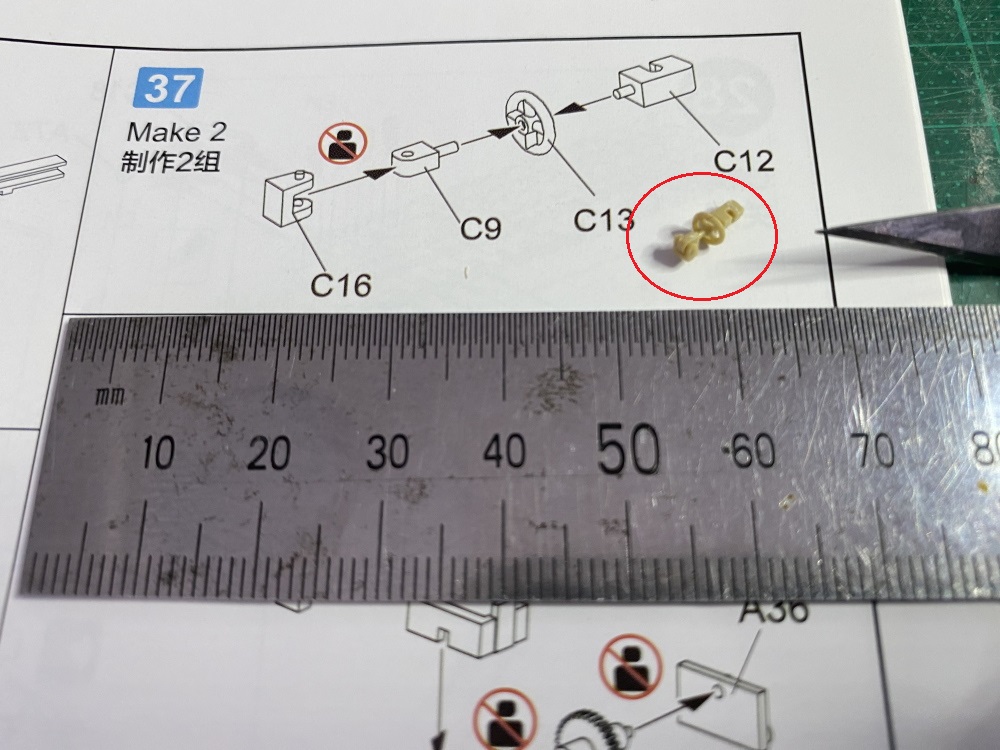
Why make a single part when you can chuck 4 nano-parts at the builder? And just for fun let’s not bother to provide positive location points for them either, a 0.001mm depression in the wheel hub on either side will surely suffice. The whole assembly is 7mm long. Well, shockingly I actually did make one as shown, after chasing the parts round the workbench for an hour or so. But the first two parts of its brother flew off into the carpet monster’s gaping jaws never to be seen again, and Life’s too short to get the vacuum cleaner out. Just ridiculous. Will it be visible with an open hatch but an opaque roof? Not much, maybe I’ll scratch a rough substitute.
I may seem bitter & twisted but that’s only because I’m in a good mood.
10 Likes
A real jack off …
3 Likes