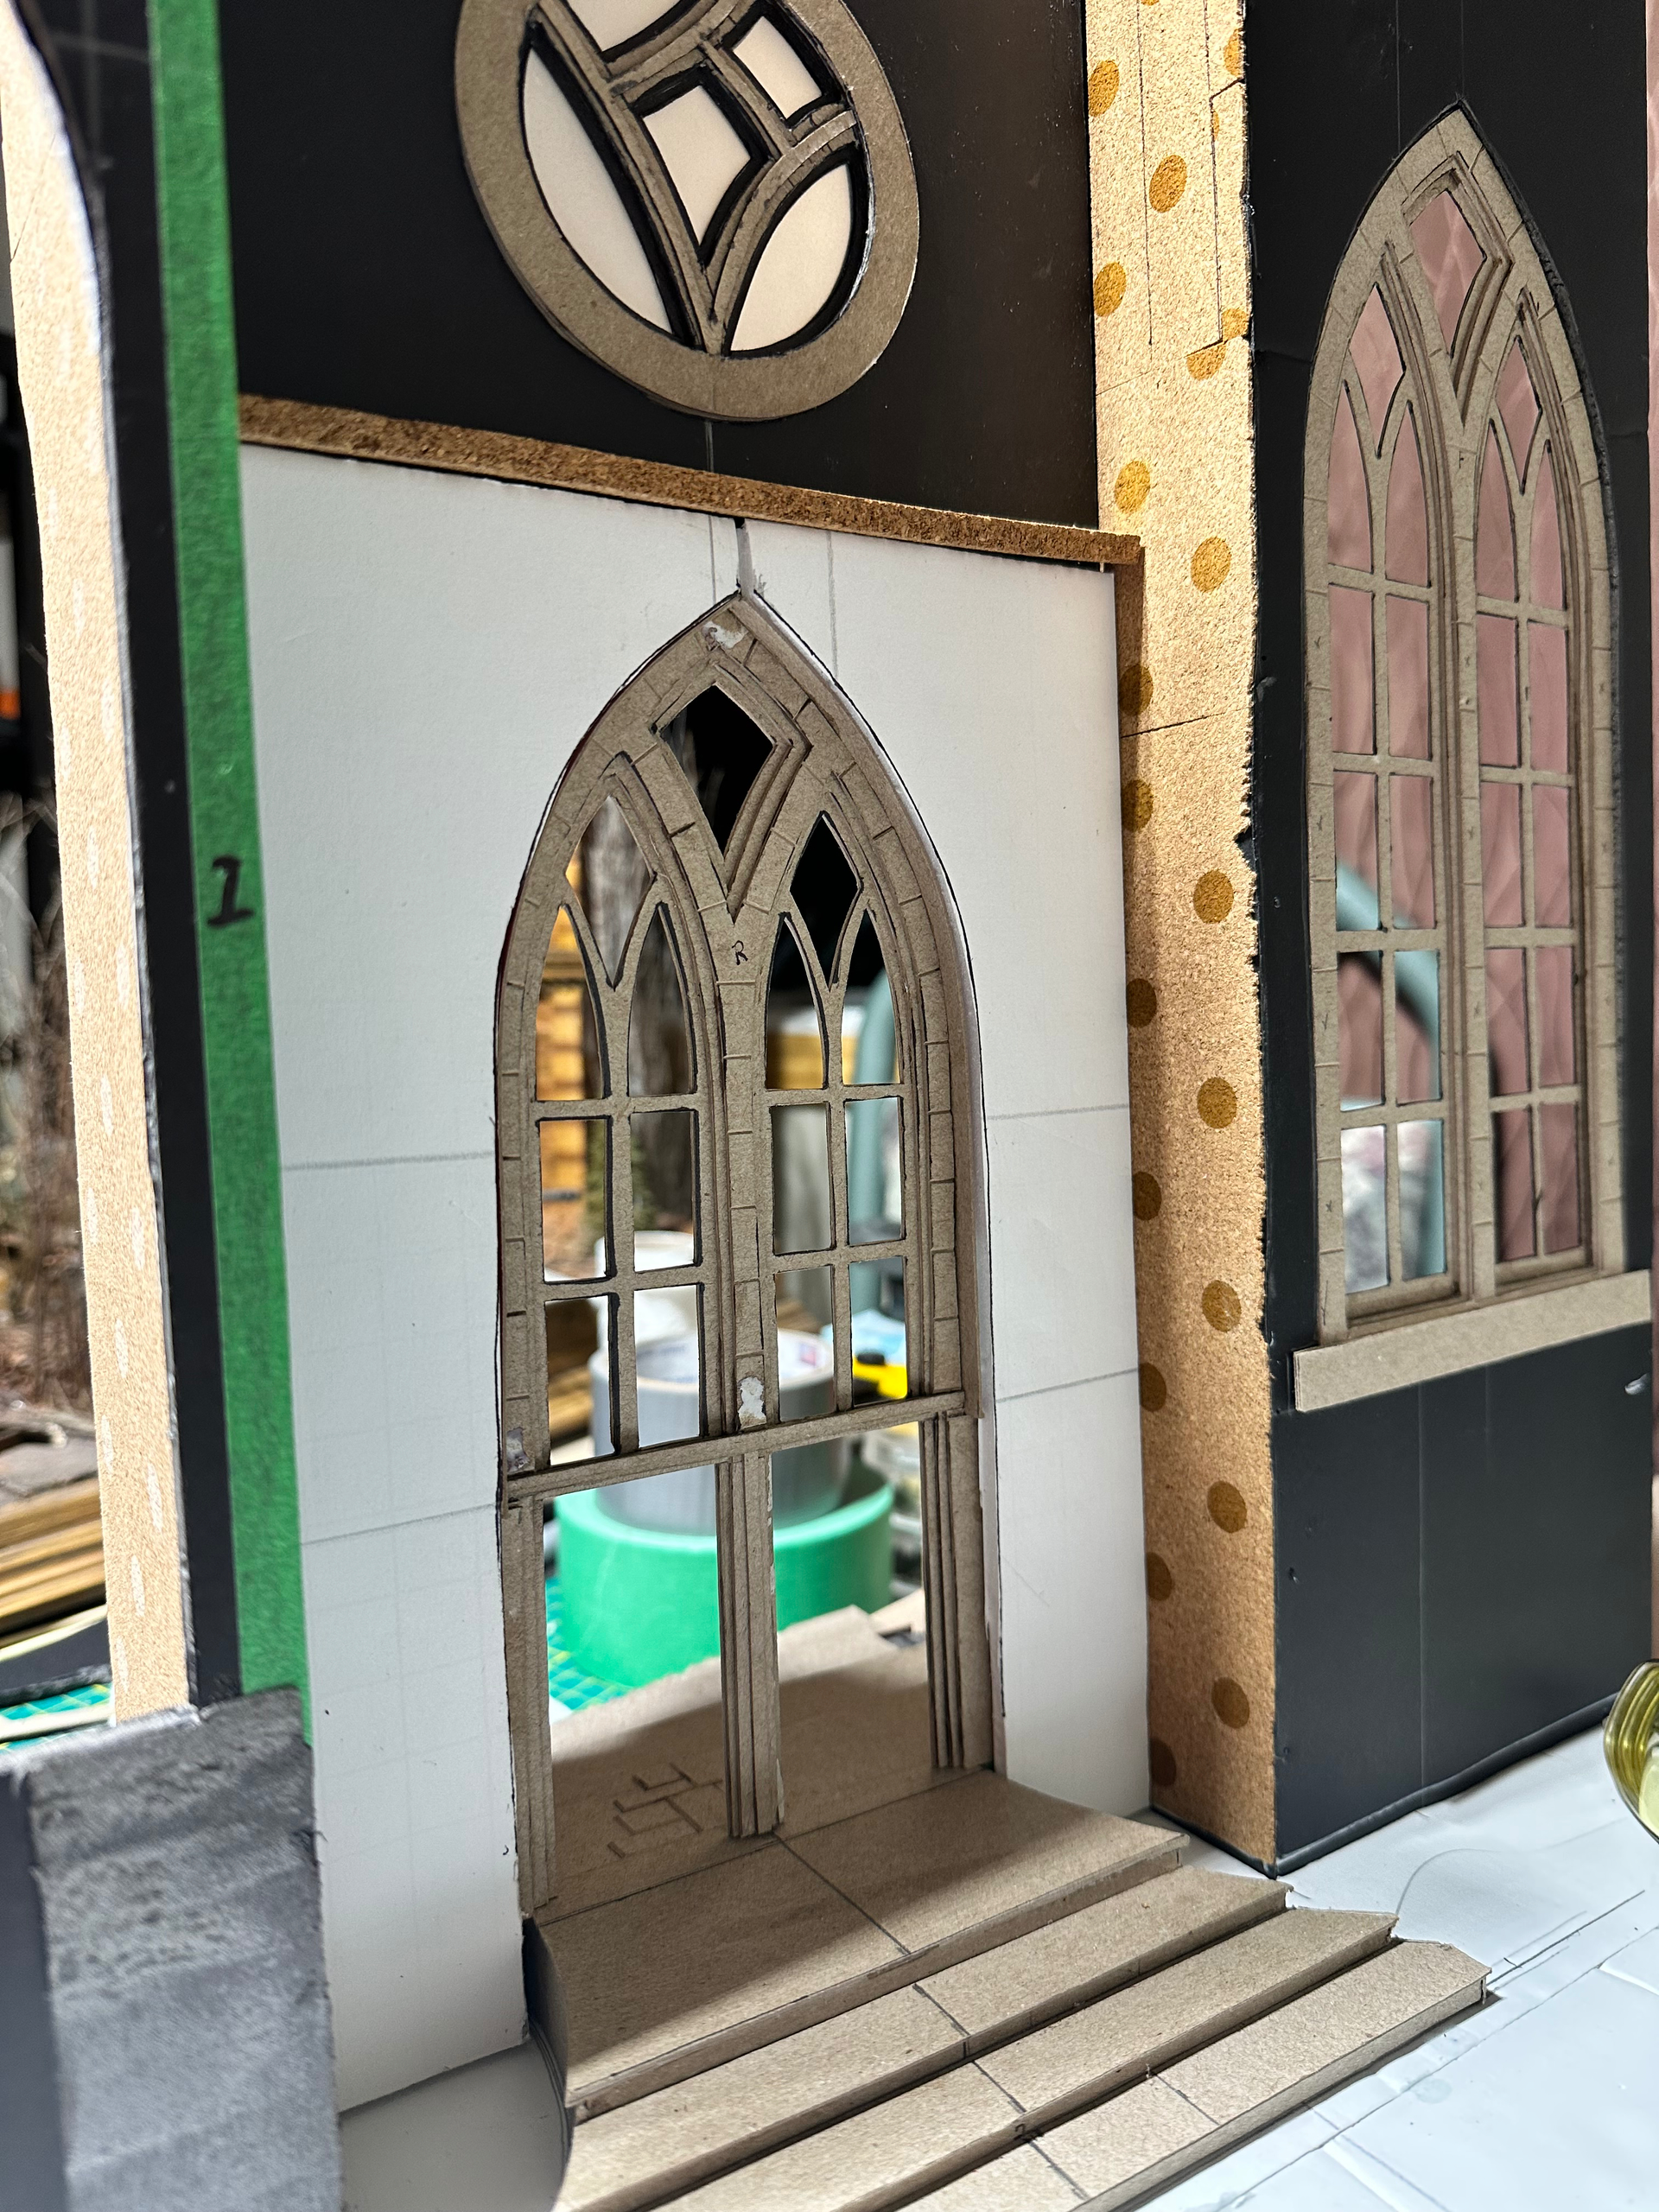
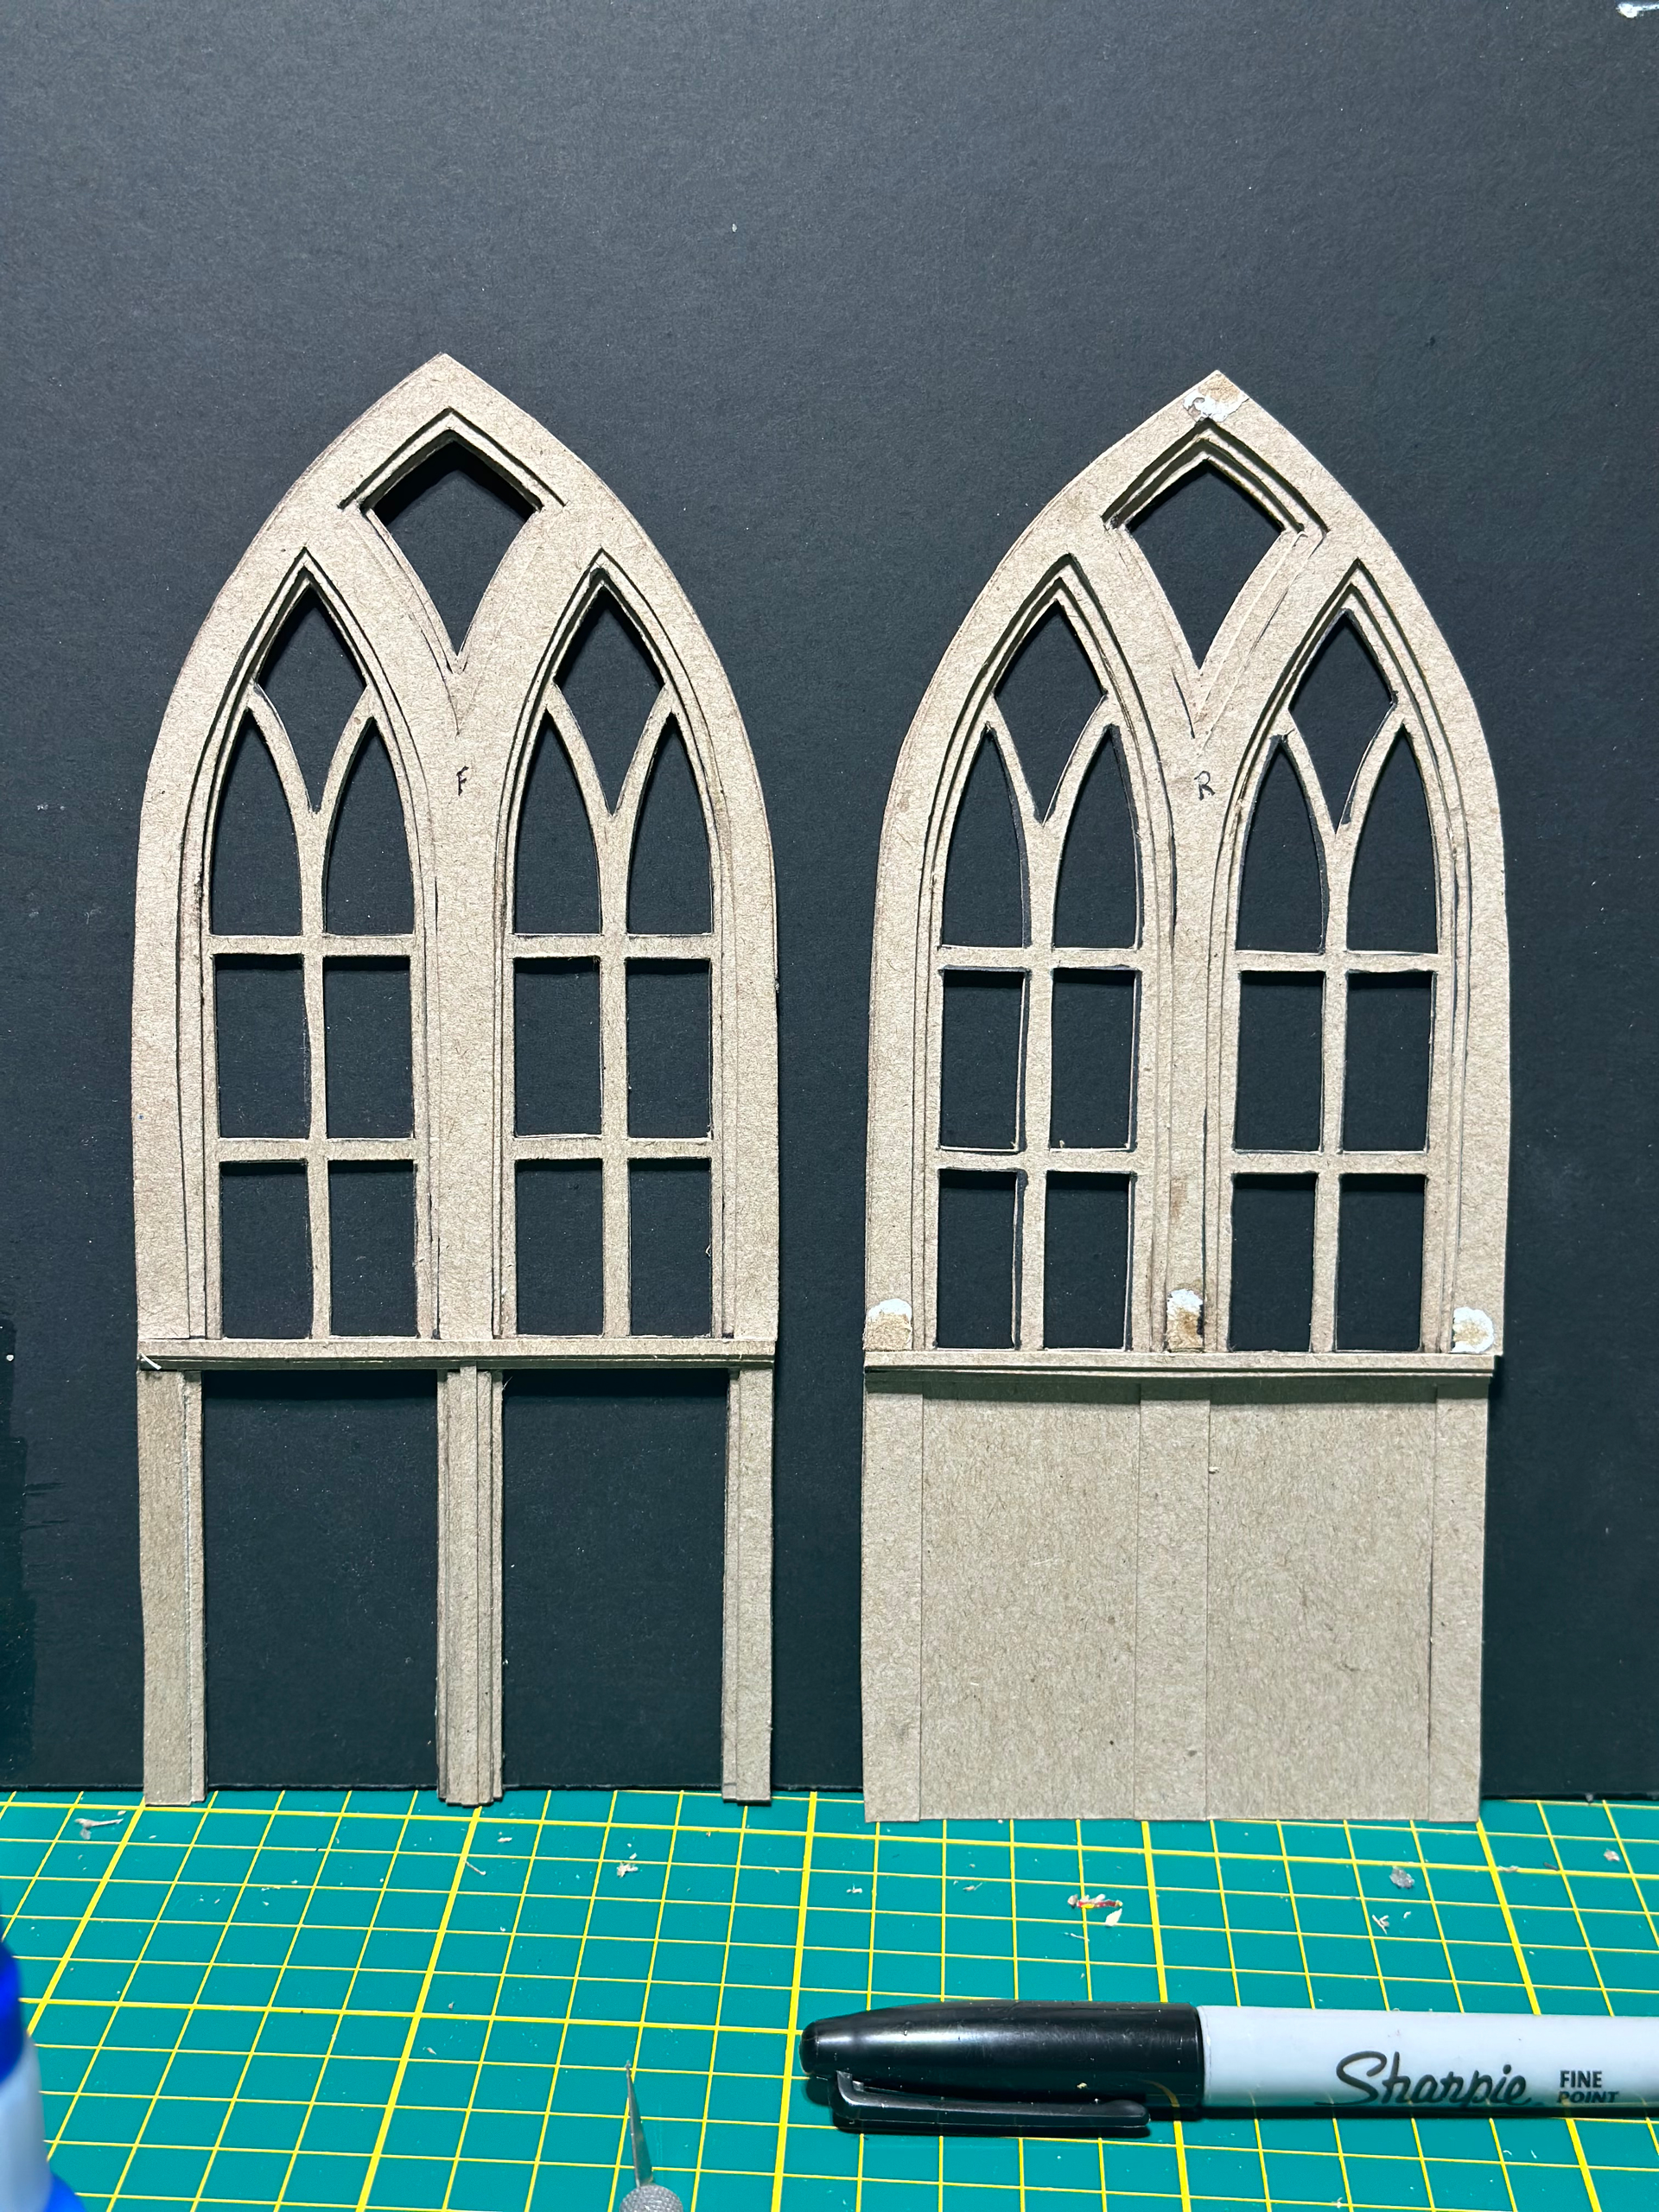
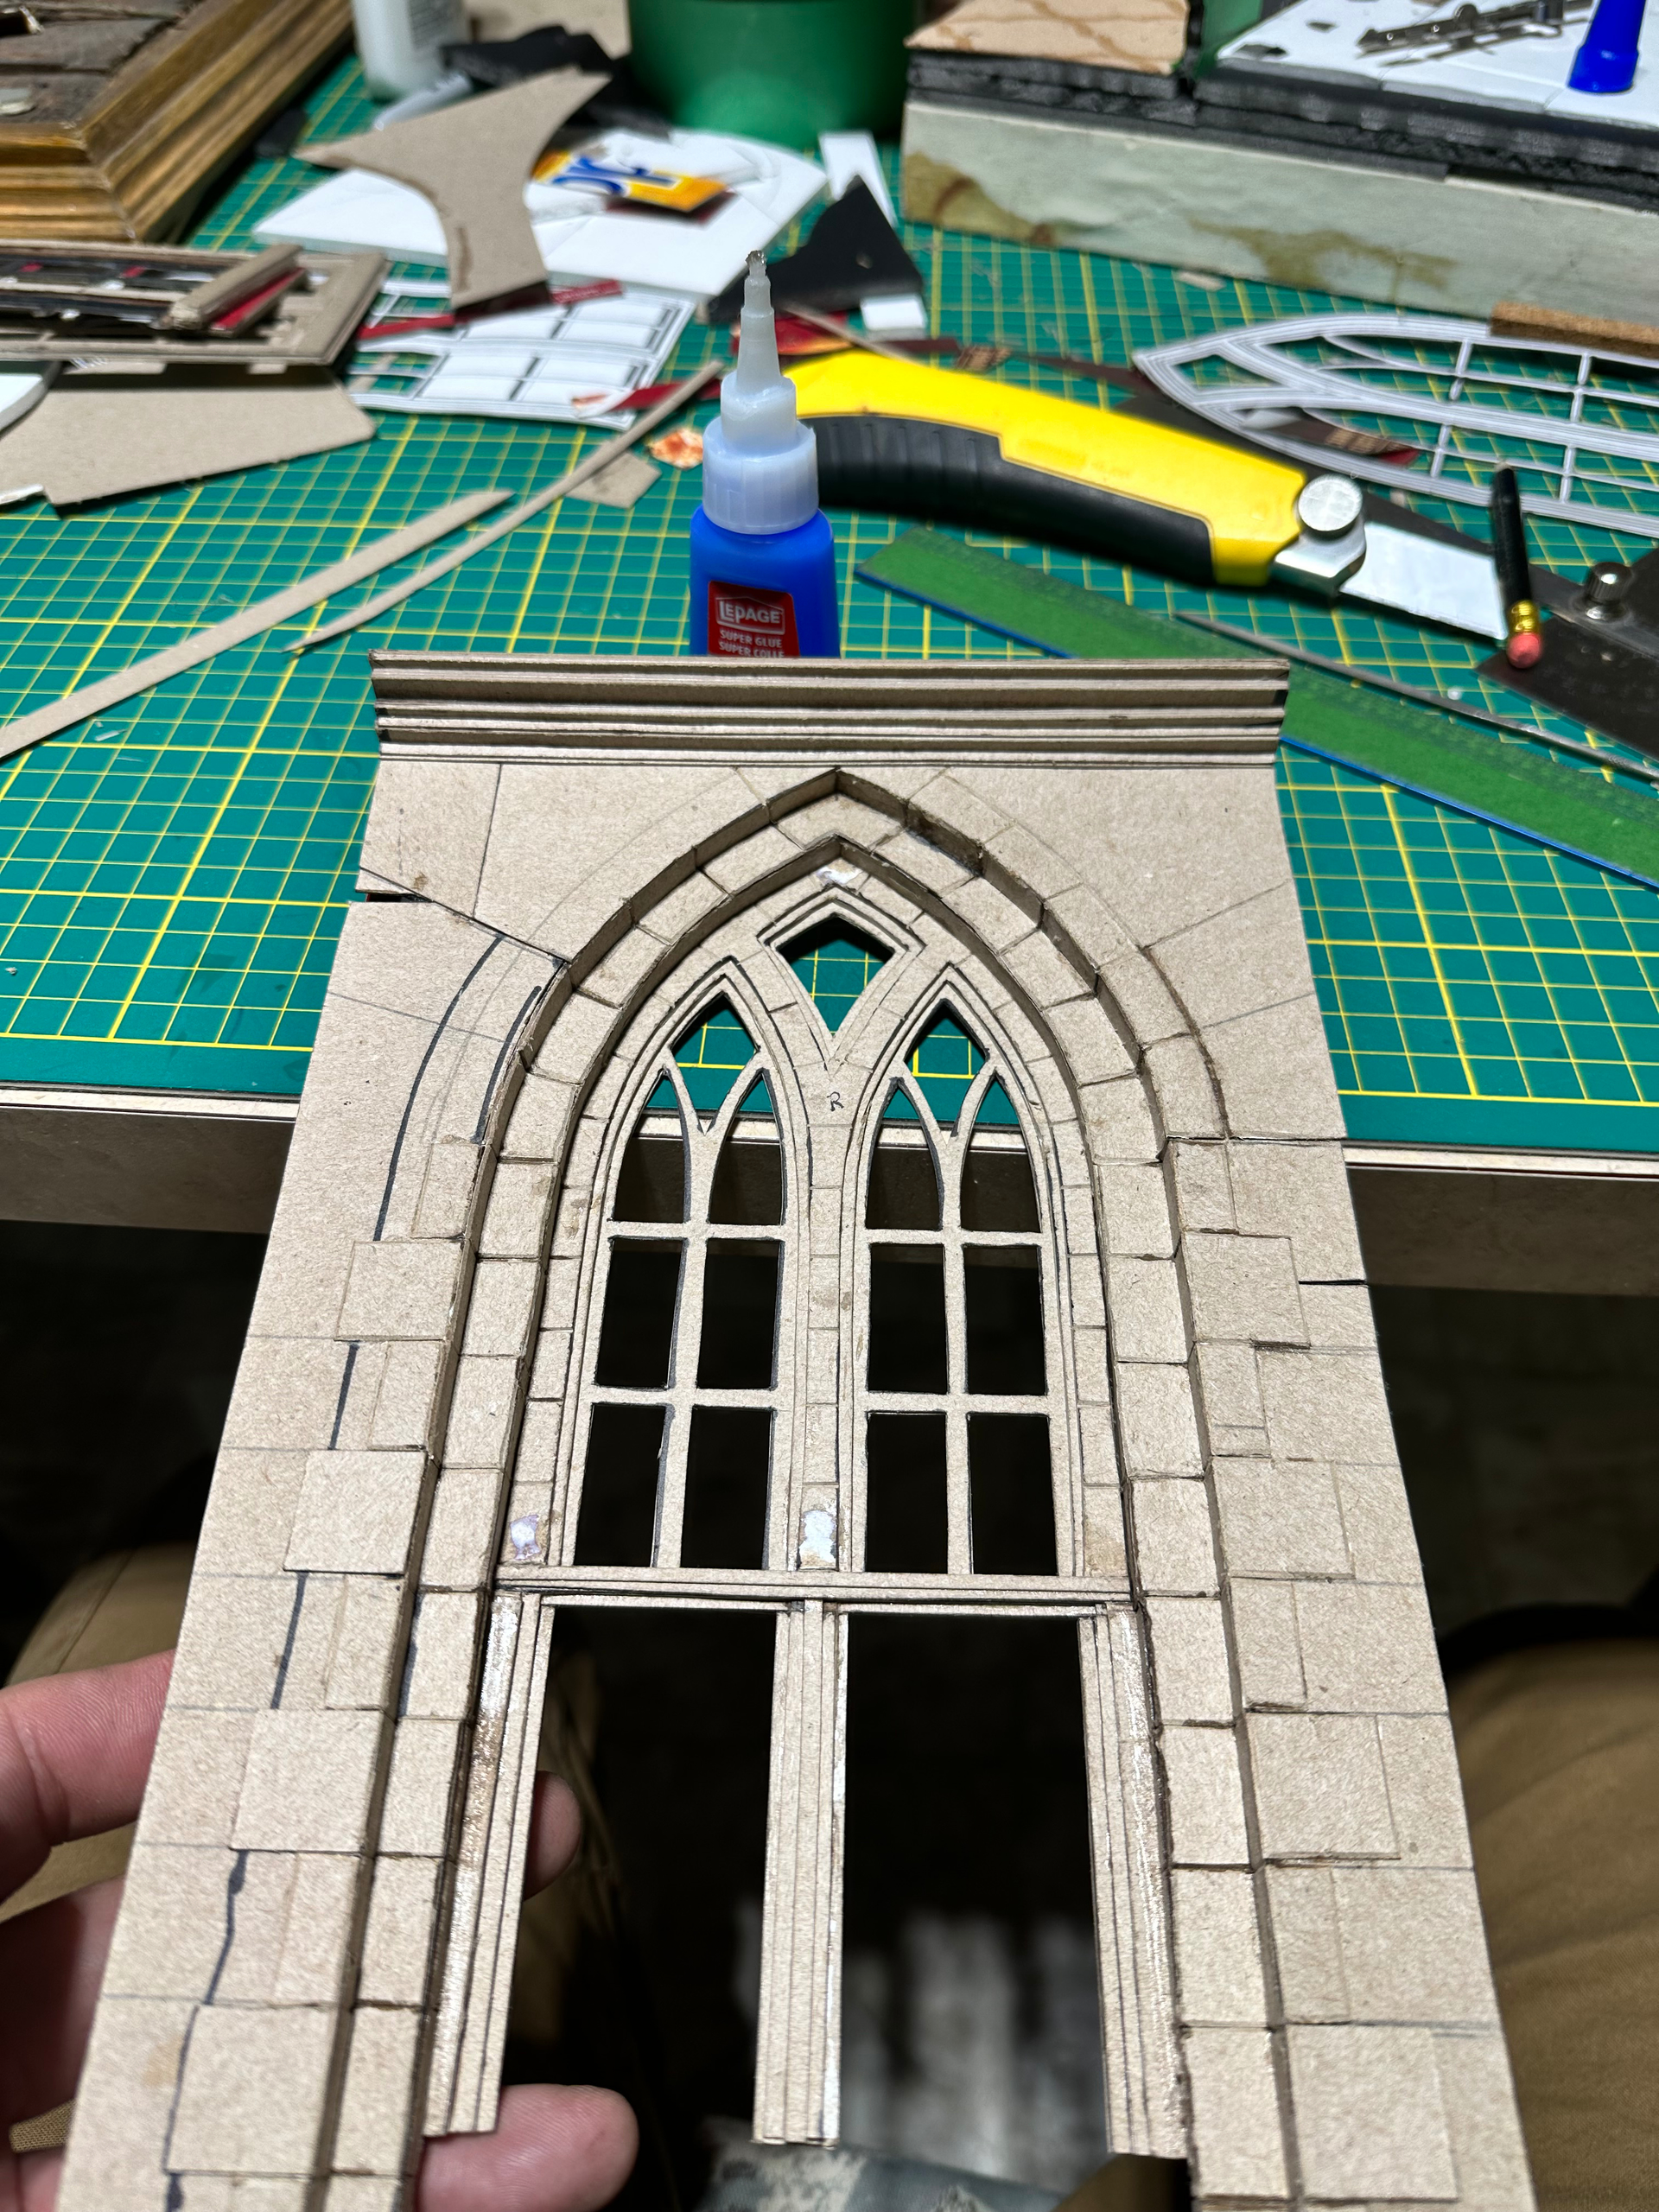
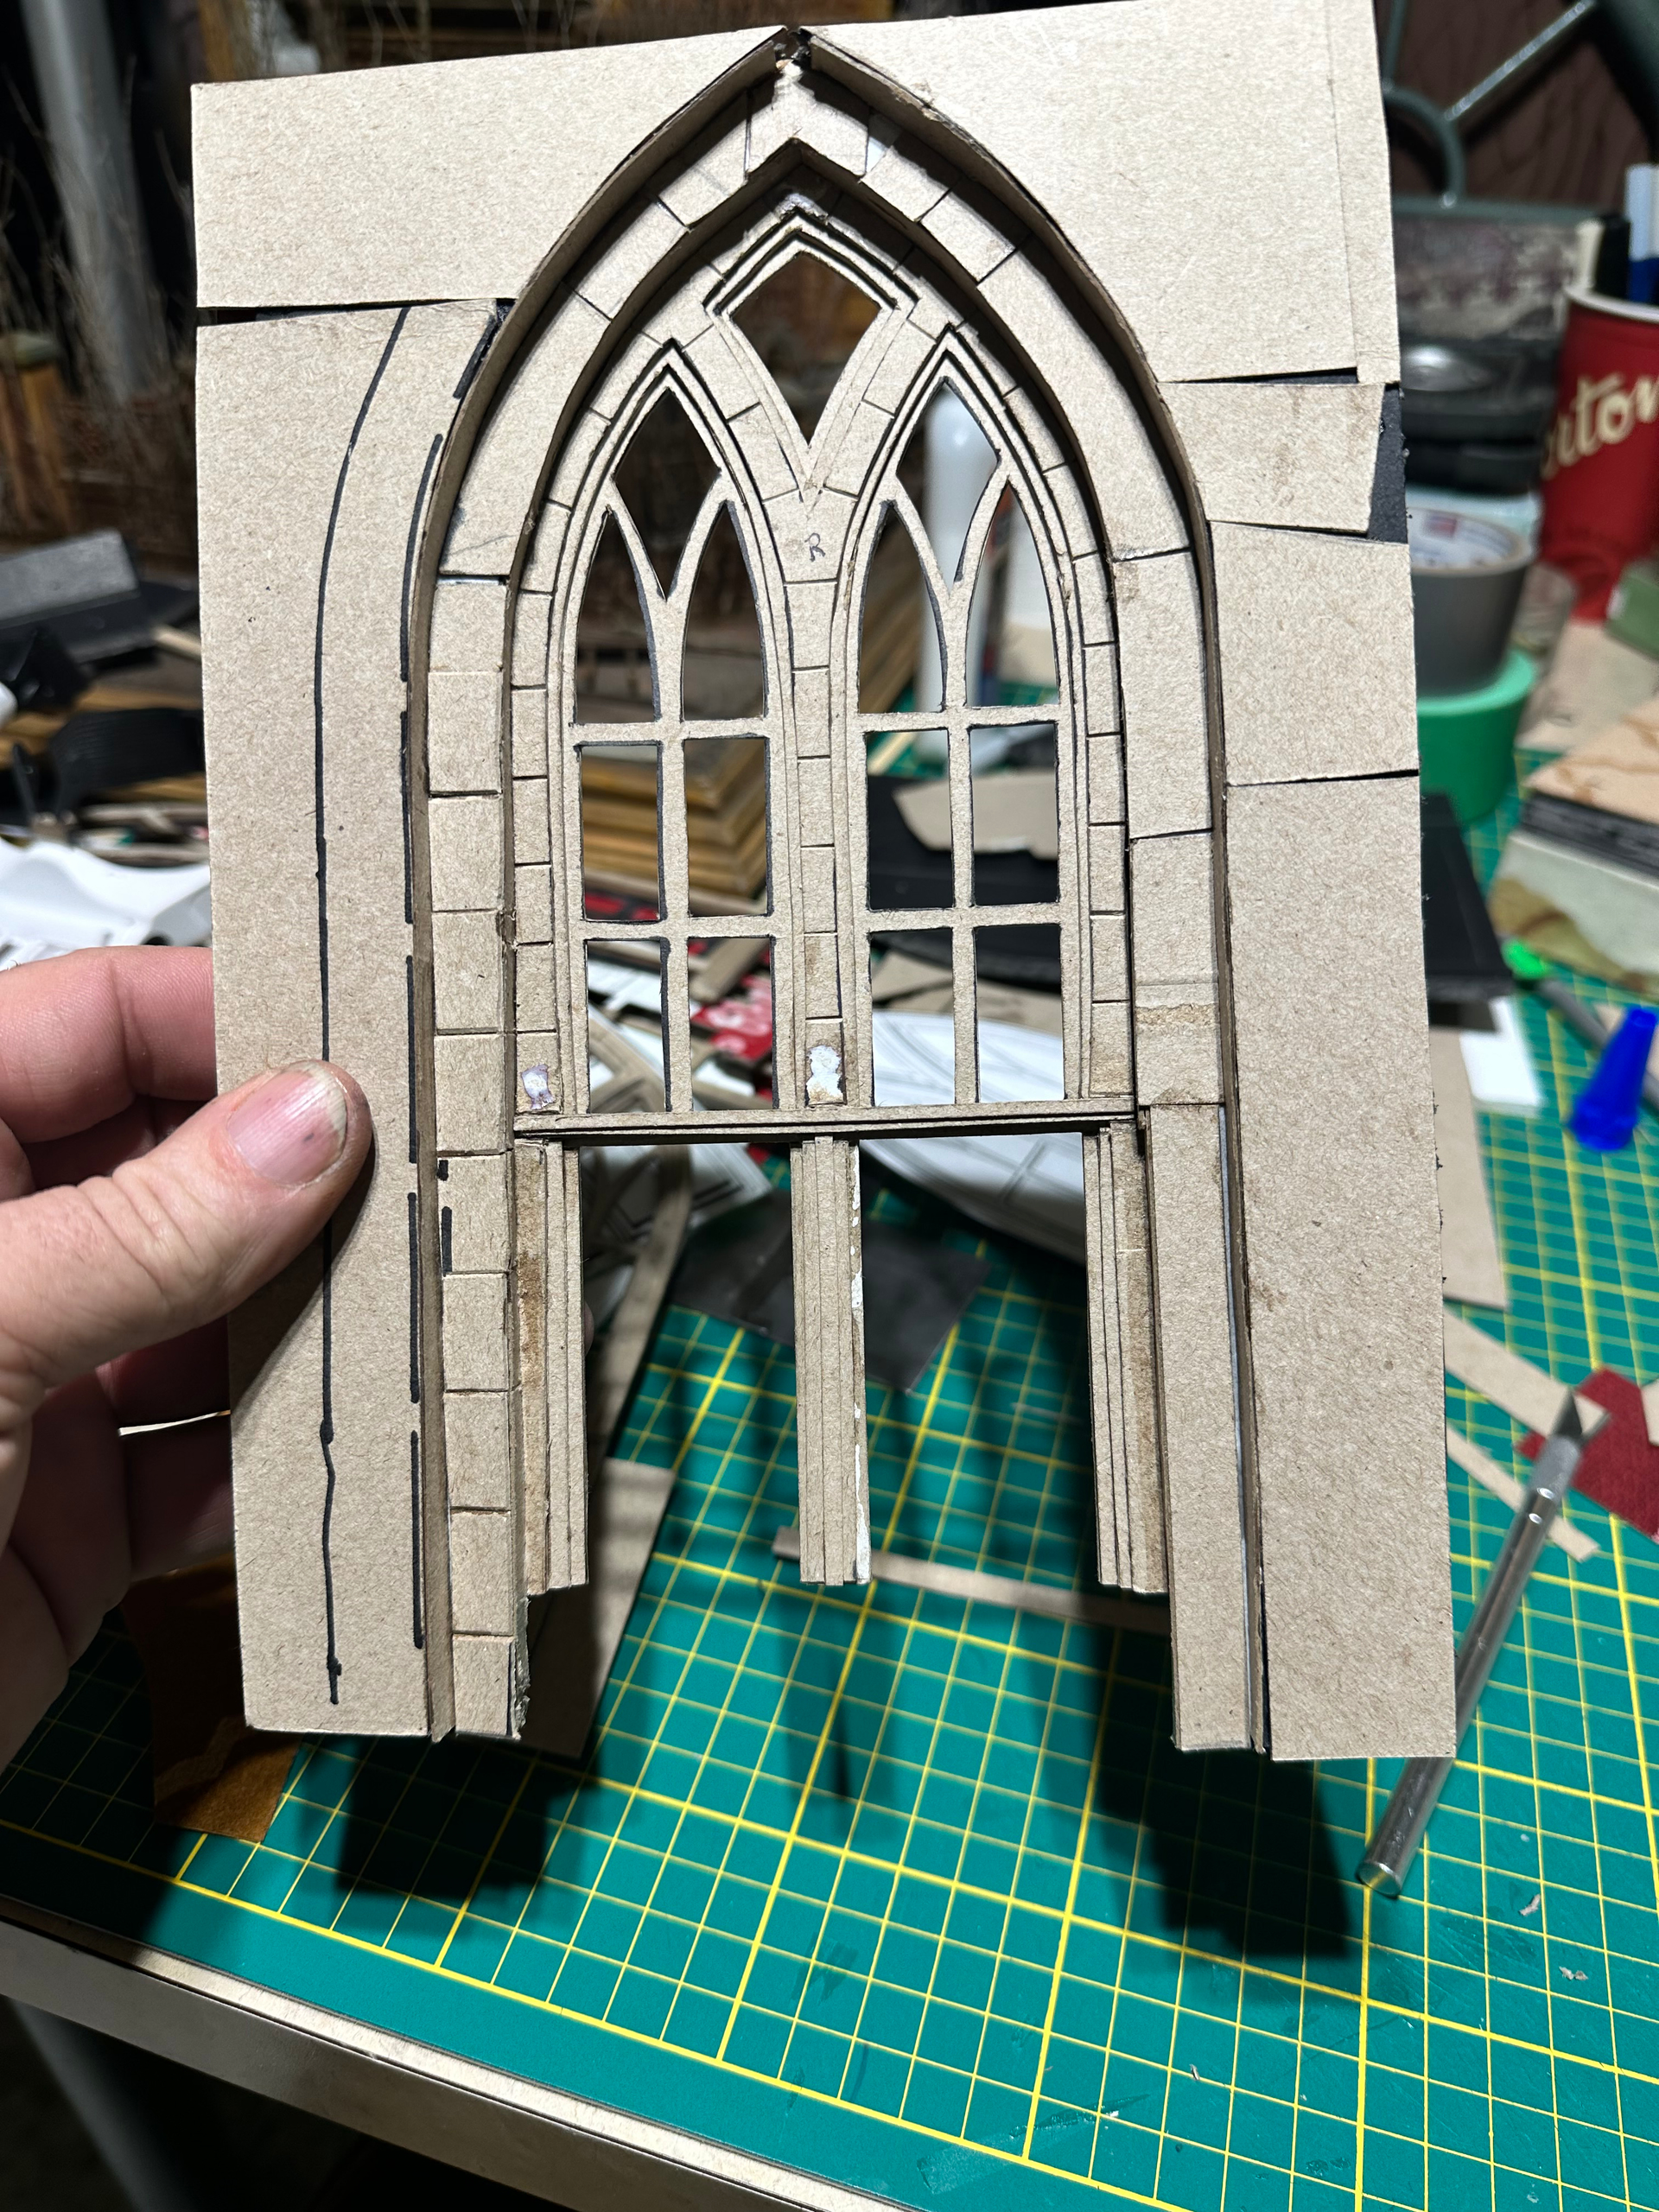
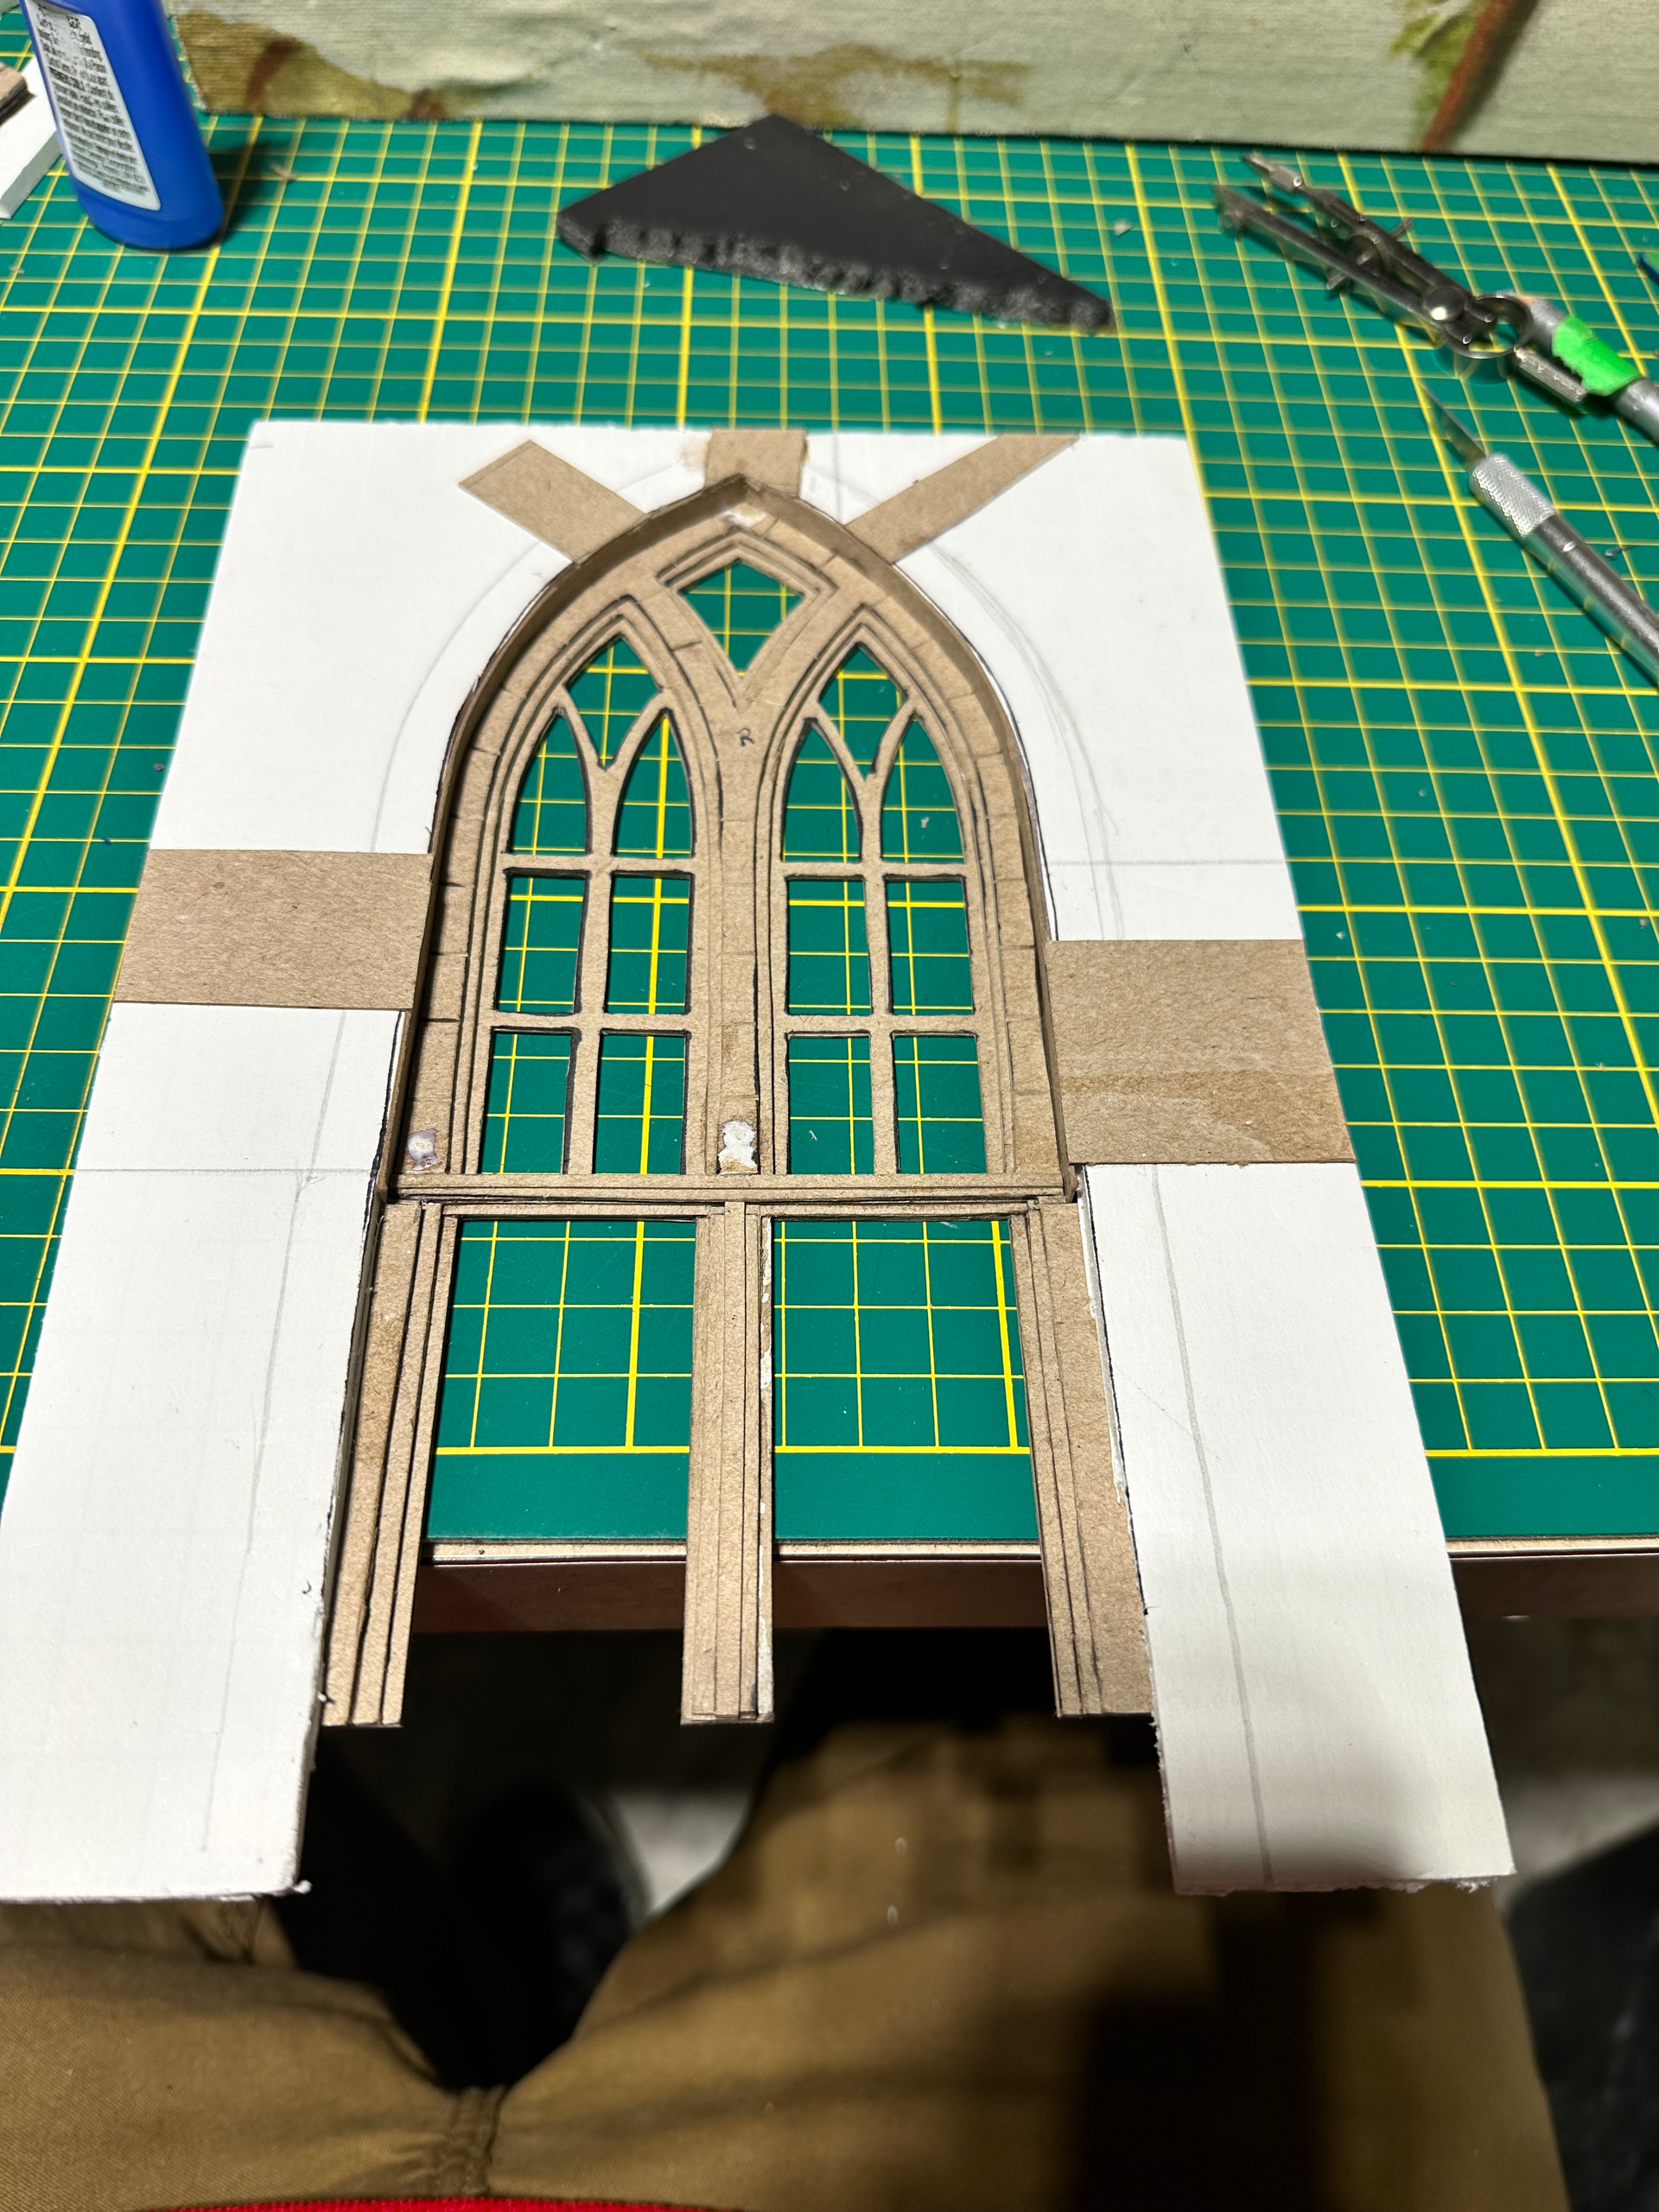
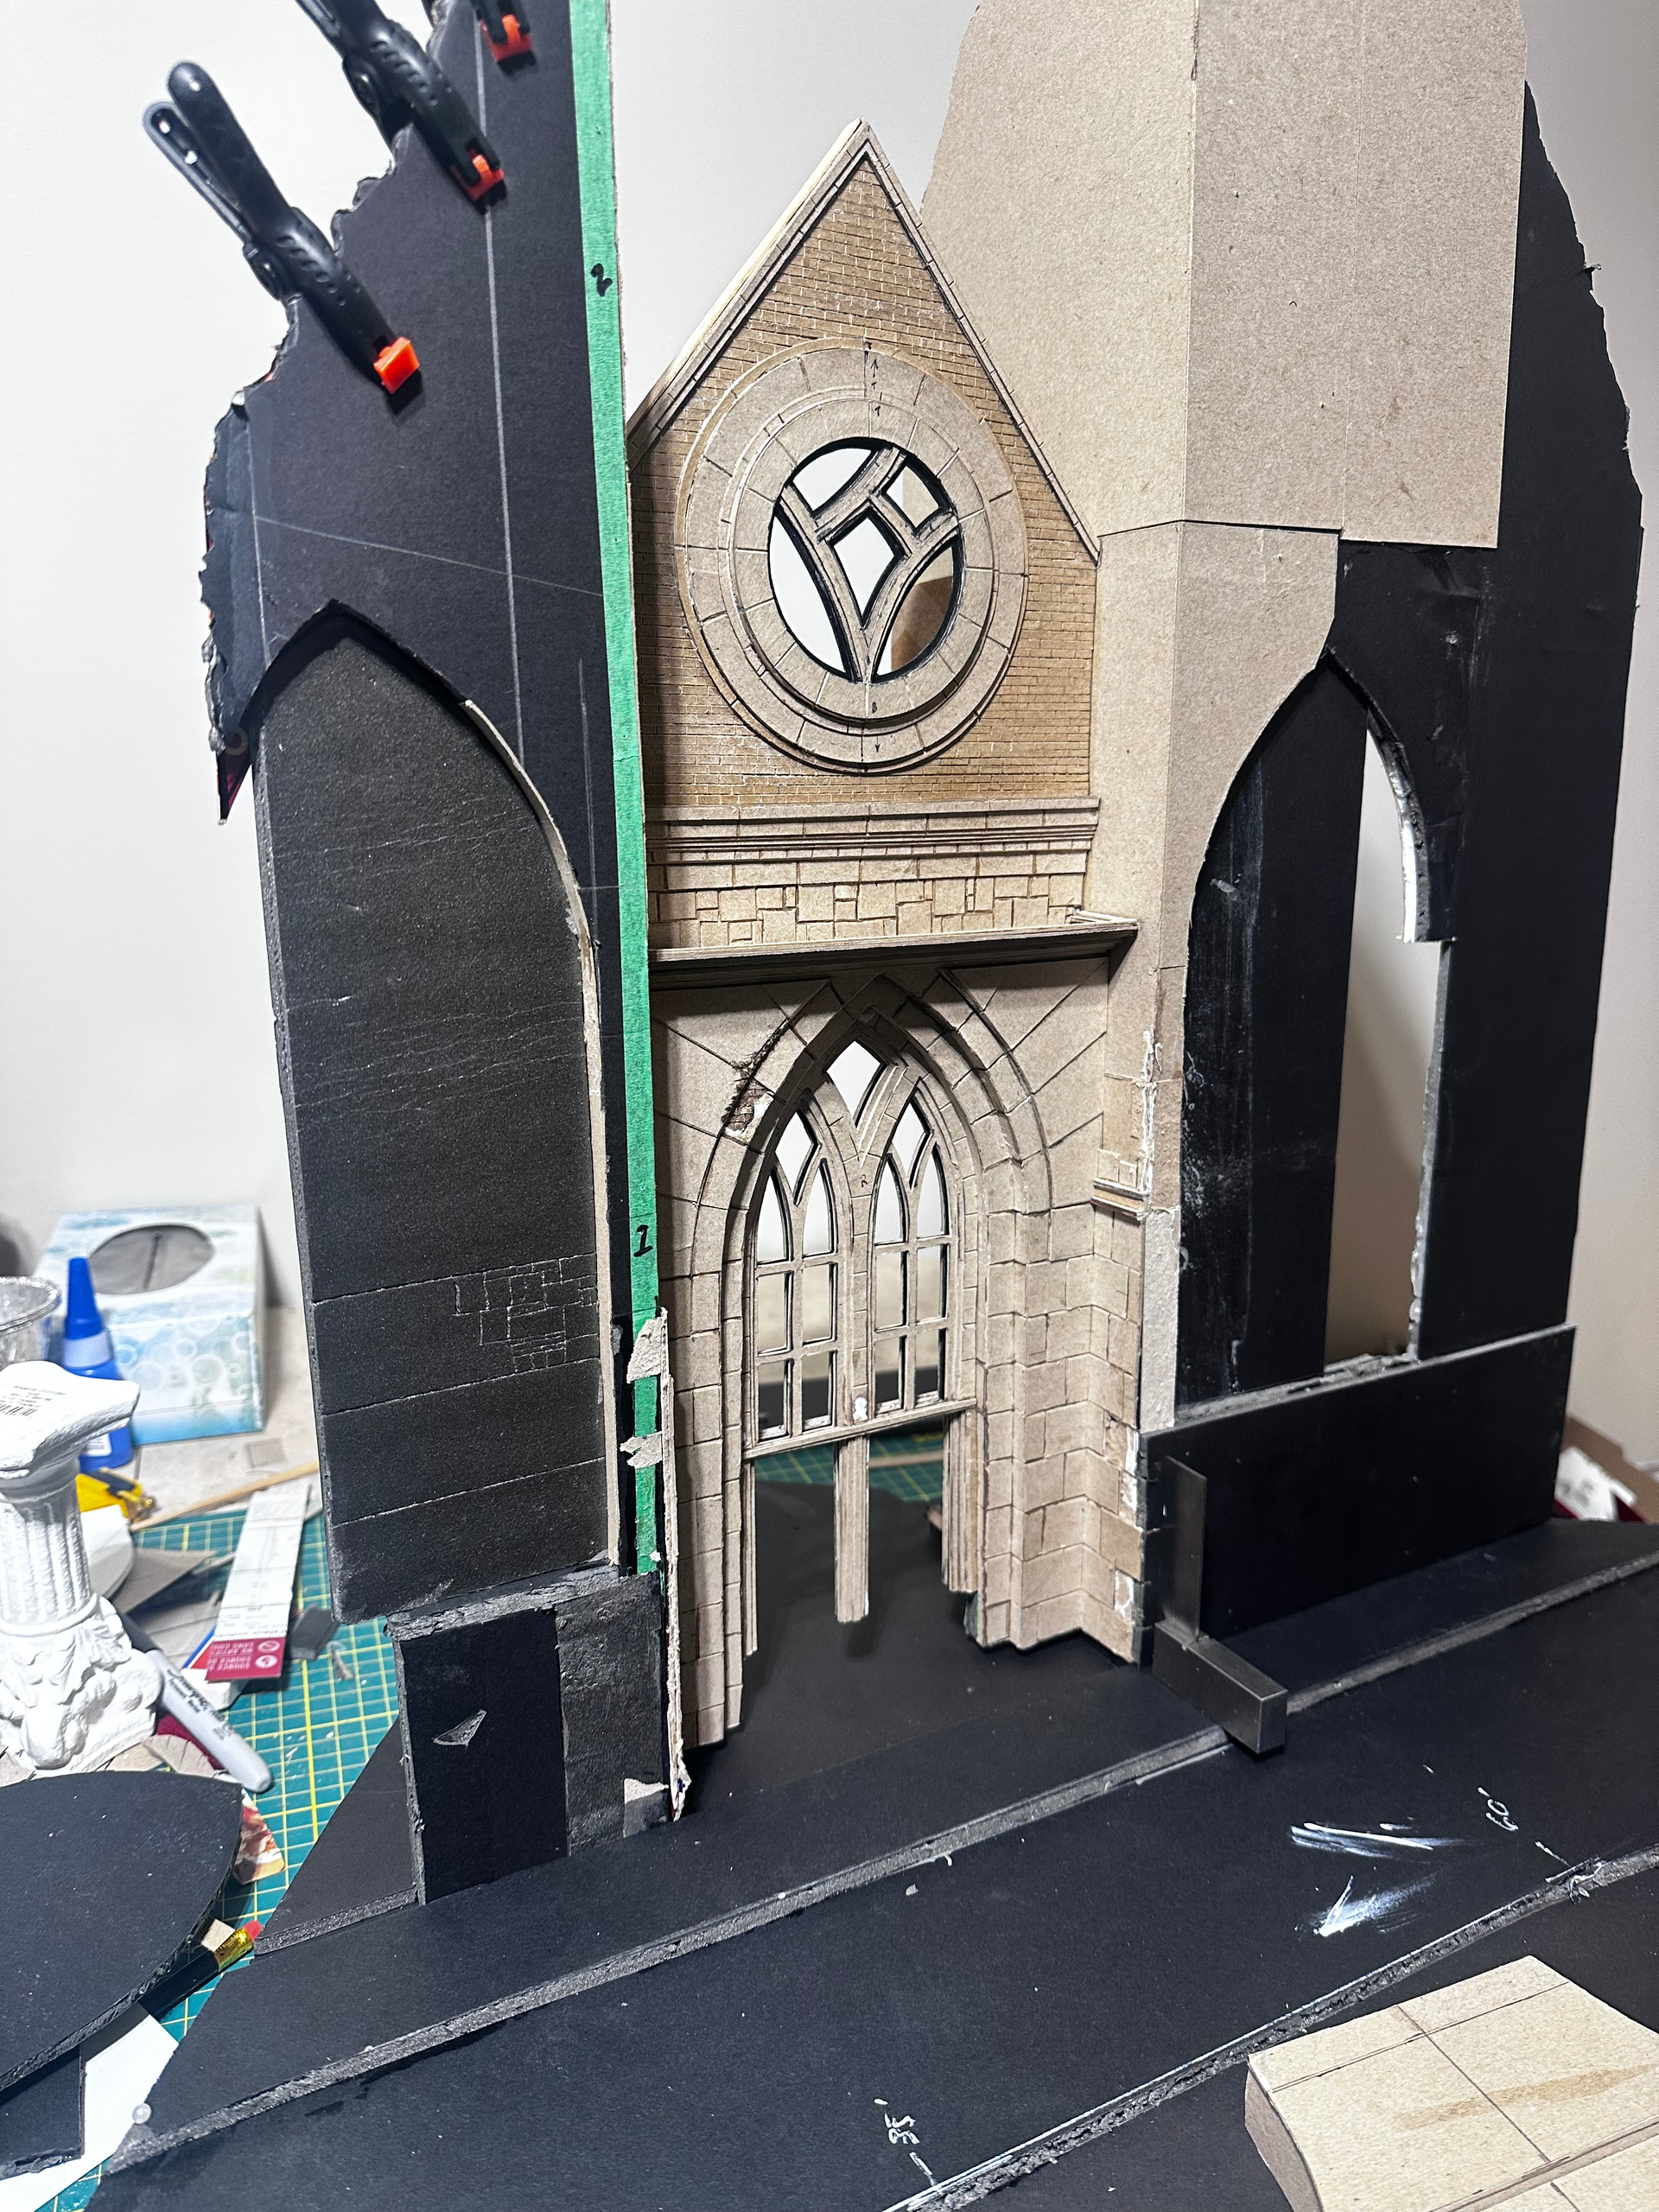
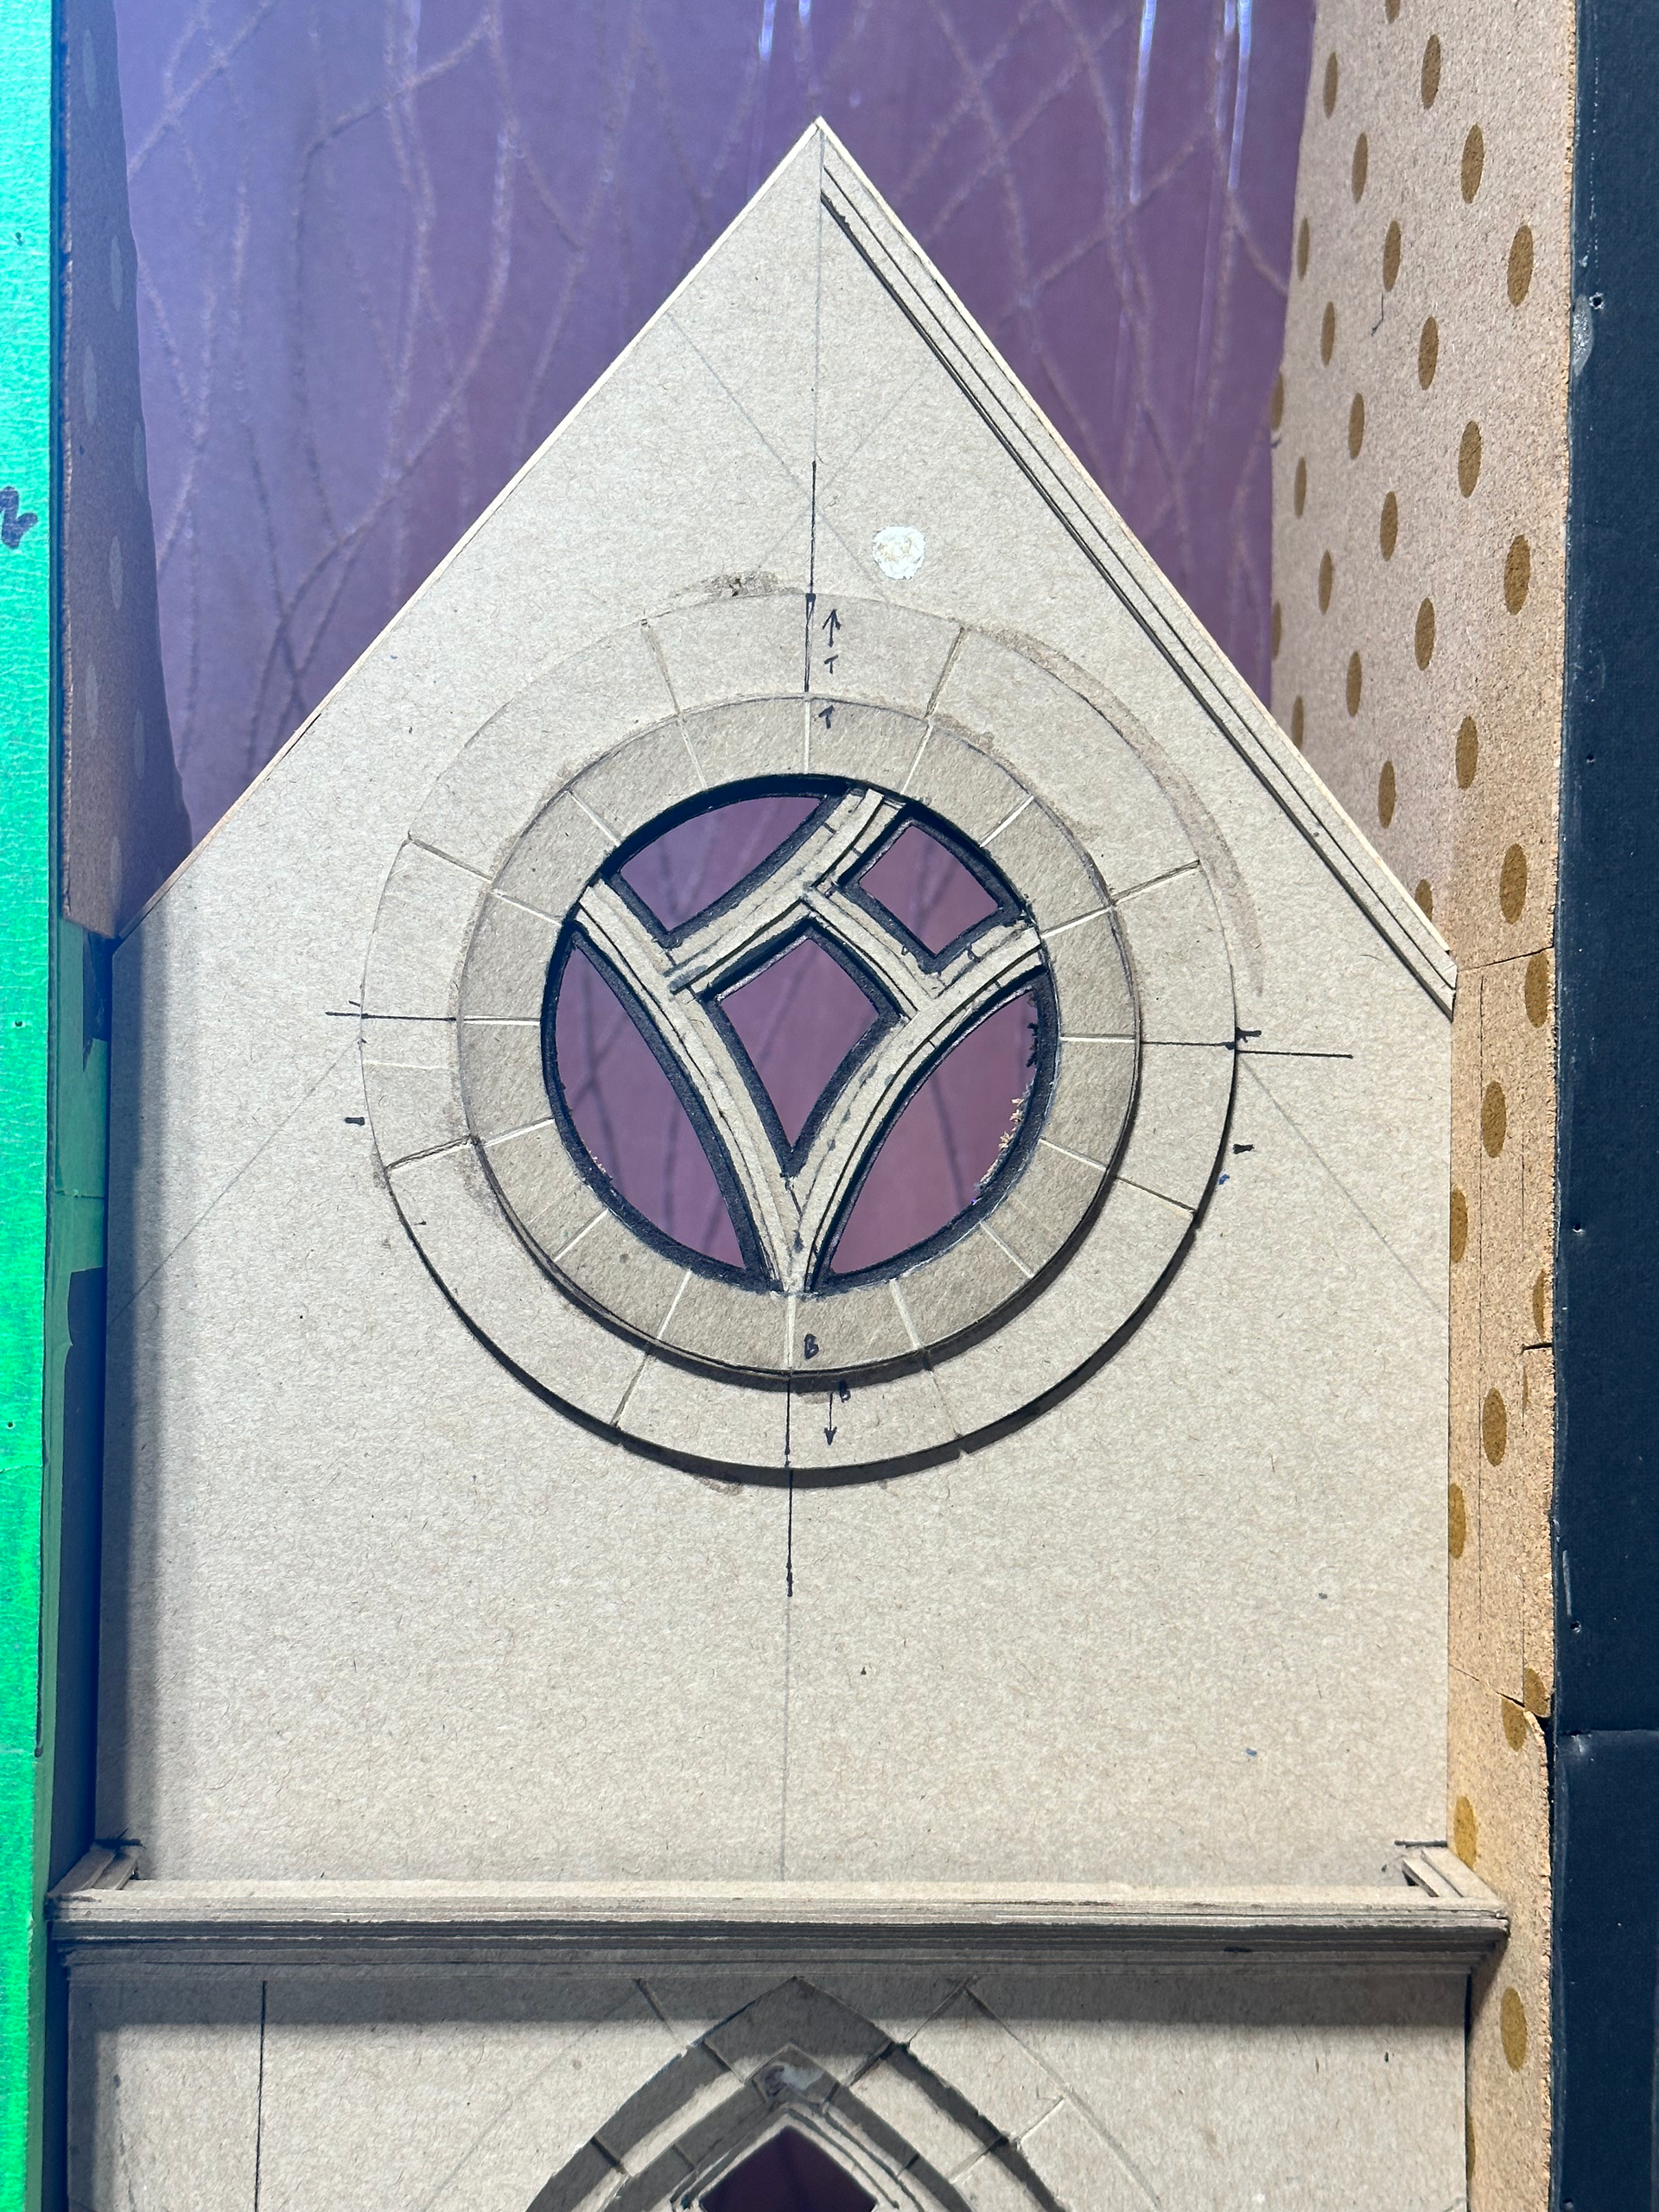
Windows and doors galore! The windows and door’s were done in pairs, a front and a back for each set. The plan is to install stained glass panels in each set. Making them in halves as it were will allow for the panels to be installed after the painting process has been completed.

12 Likes


Clever!
3 Likes
(3 hours later) OK I give up…..huh? My searches were fruitless ![]()
2 Likes
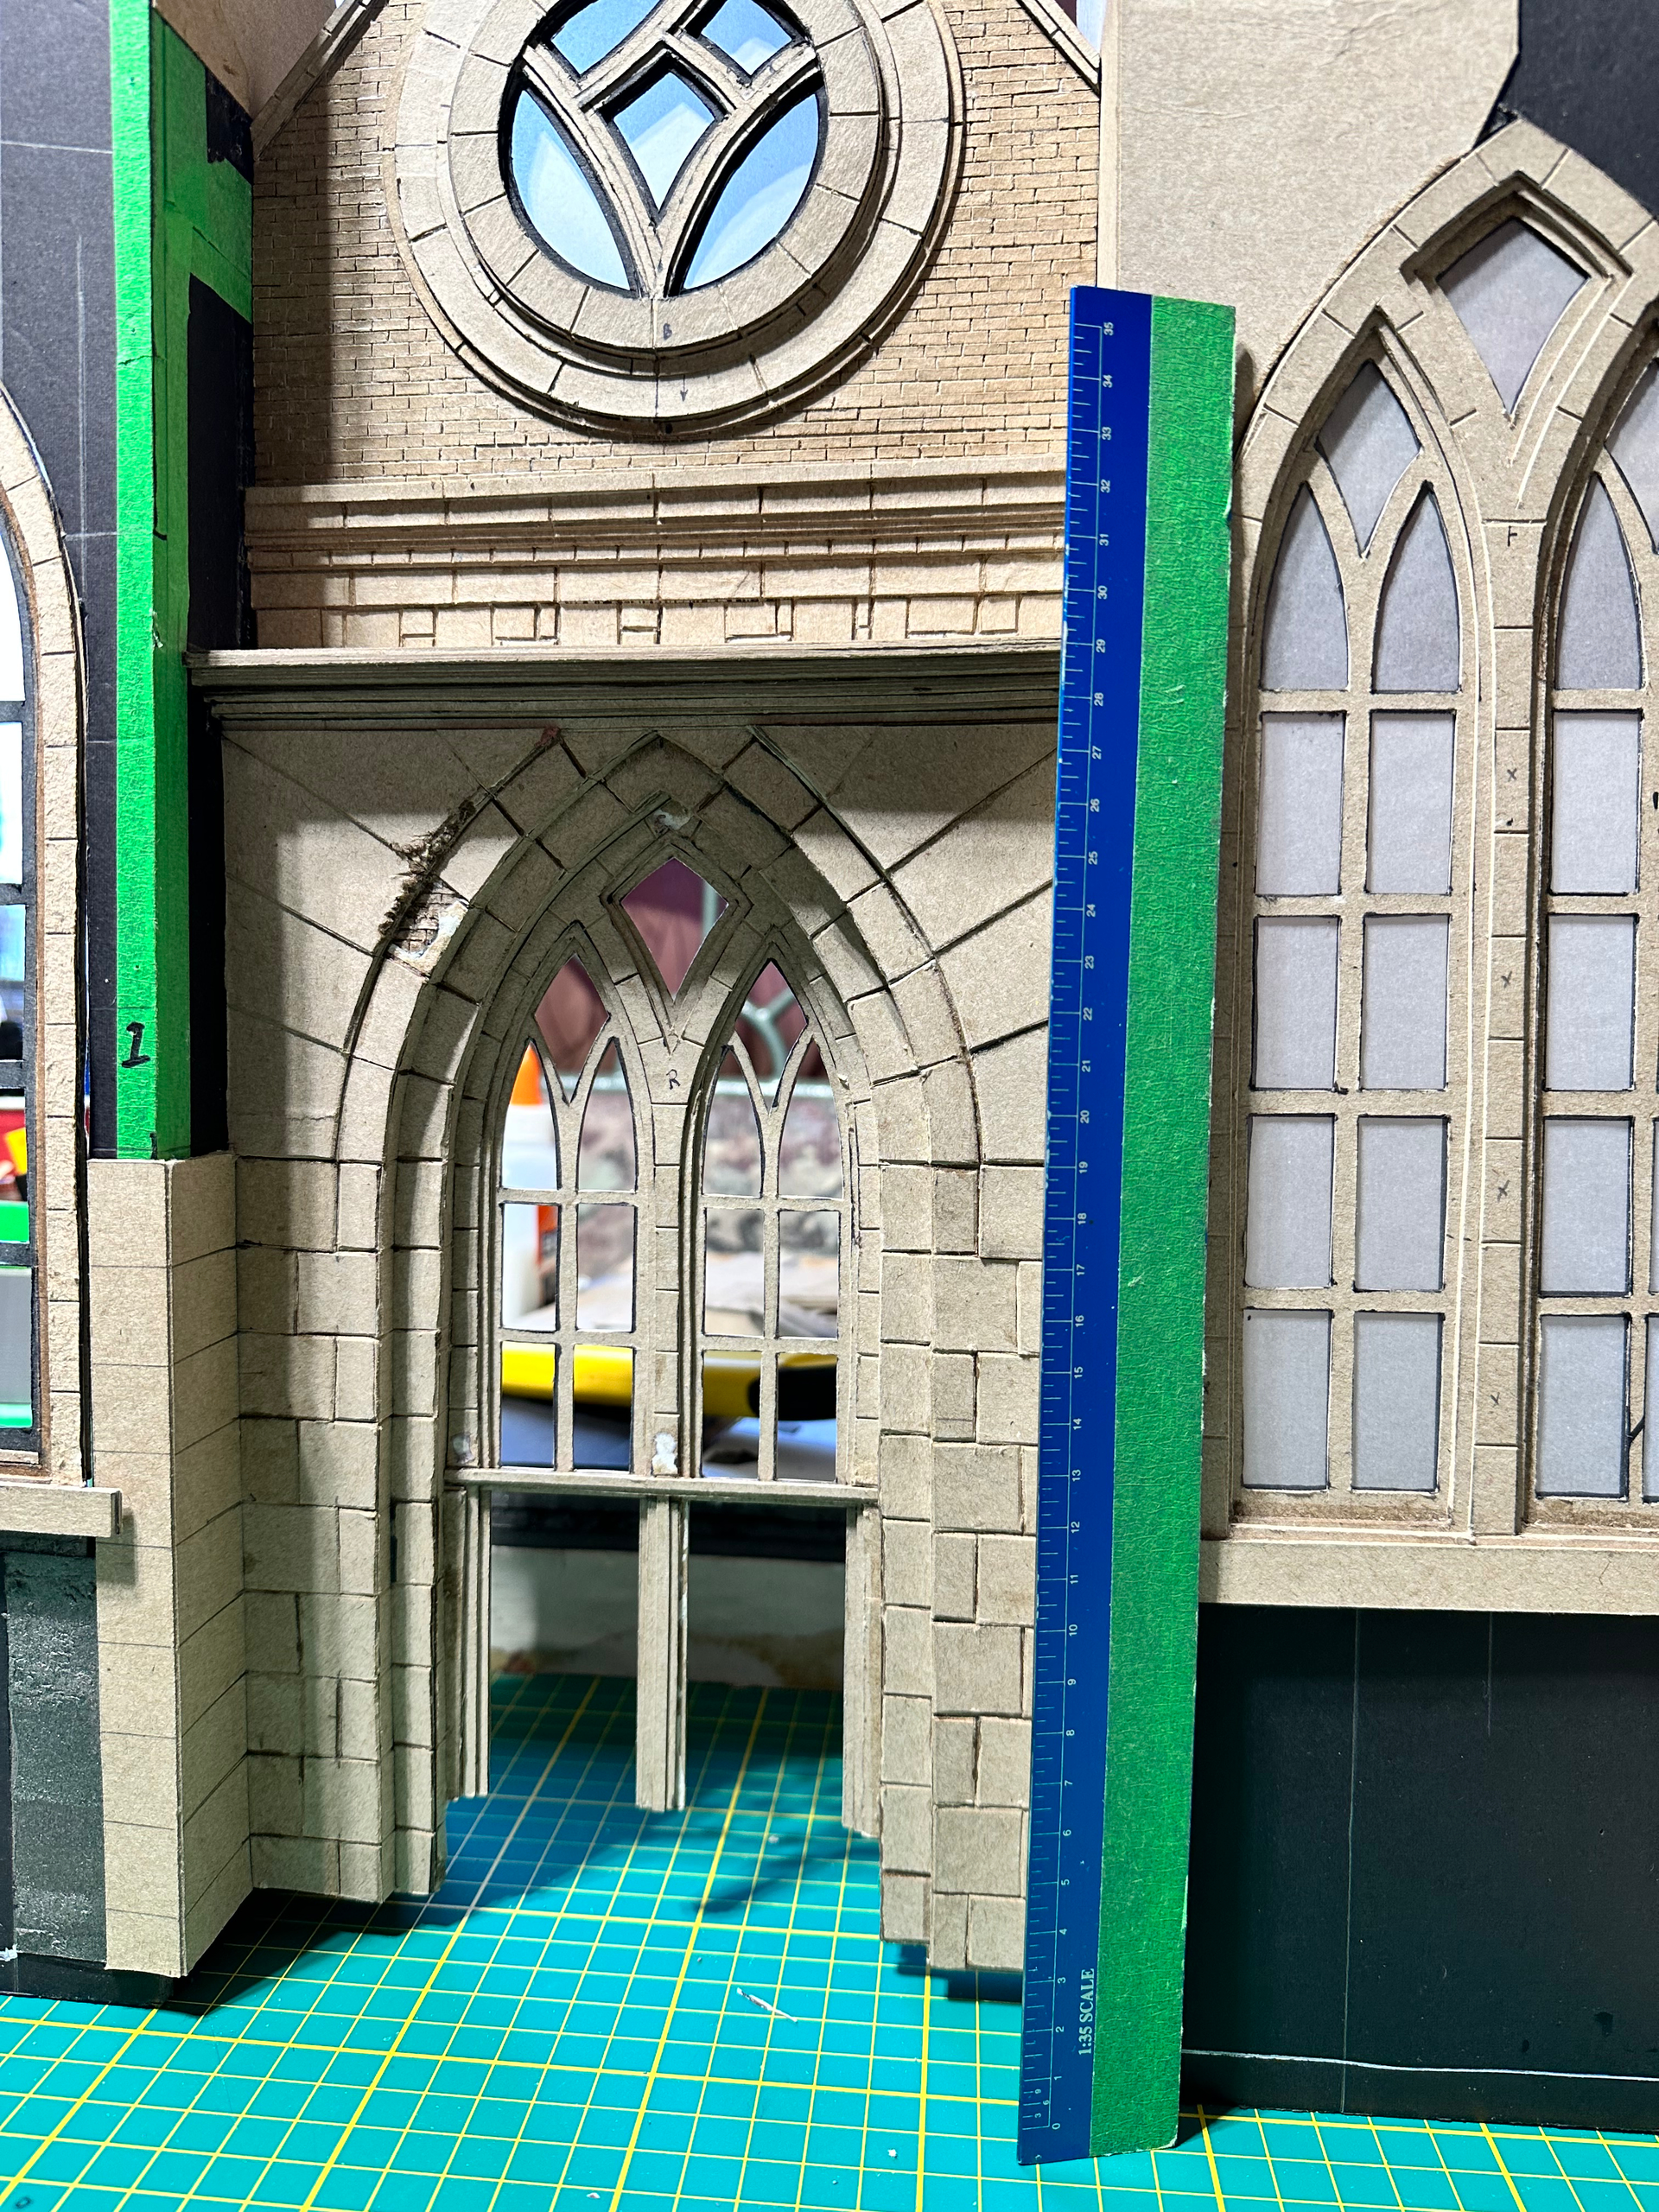
Wow - quite a show of endurance and patience! Three layers of cardboard cut for each (complicated and tedious!)) window - again, wow!
Cheers
Nick ![]()
3 Likes
I really can’t stomach bananas, unless it’s something like banana bread; something about them and some other fruits too. They come back up within a half hour of eating them. ![]()
2 Likes
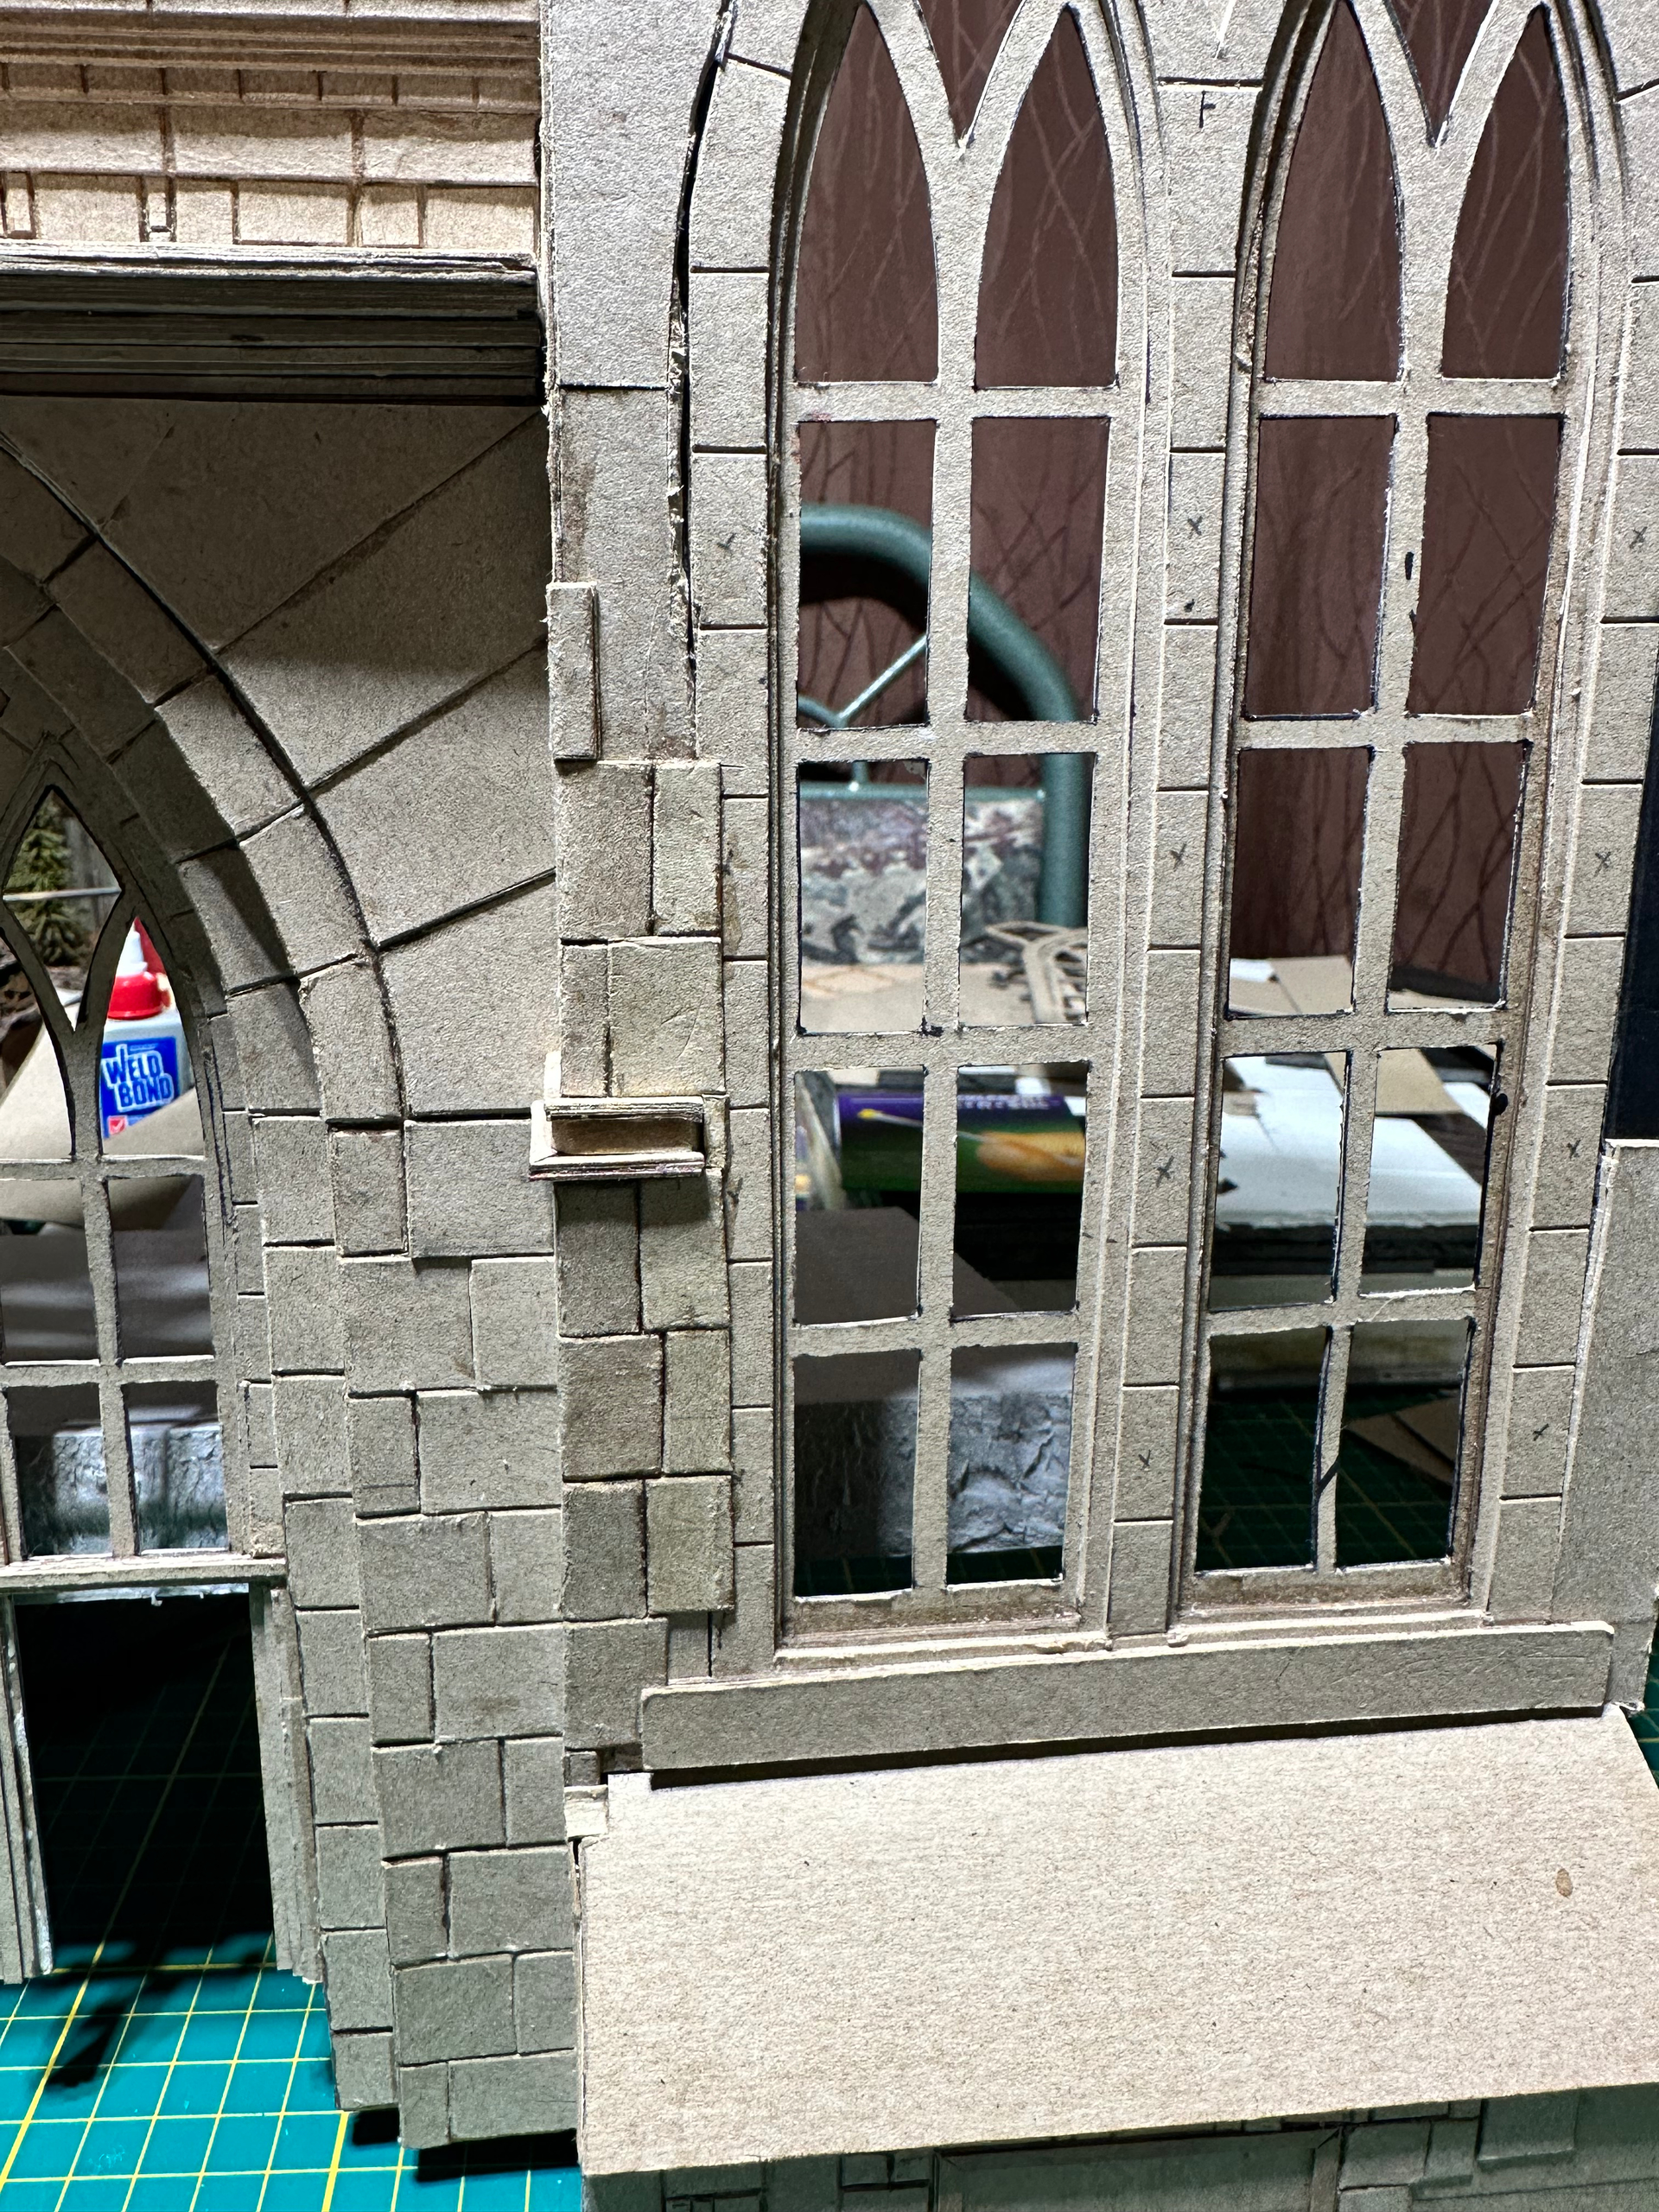
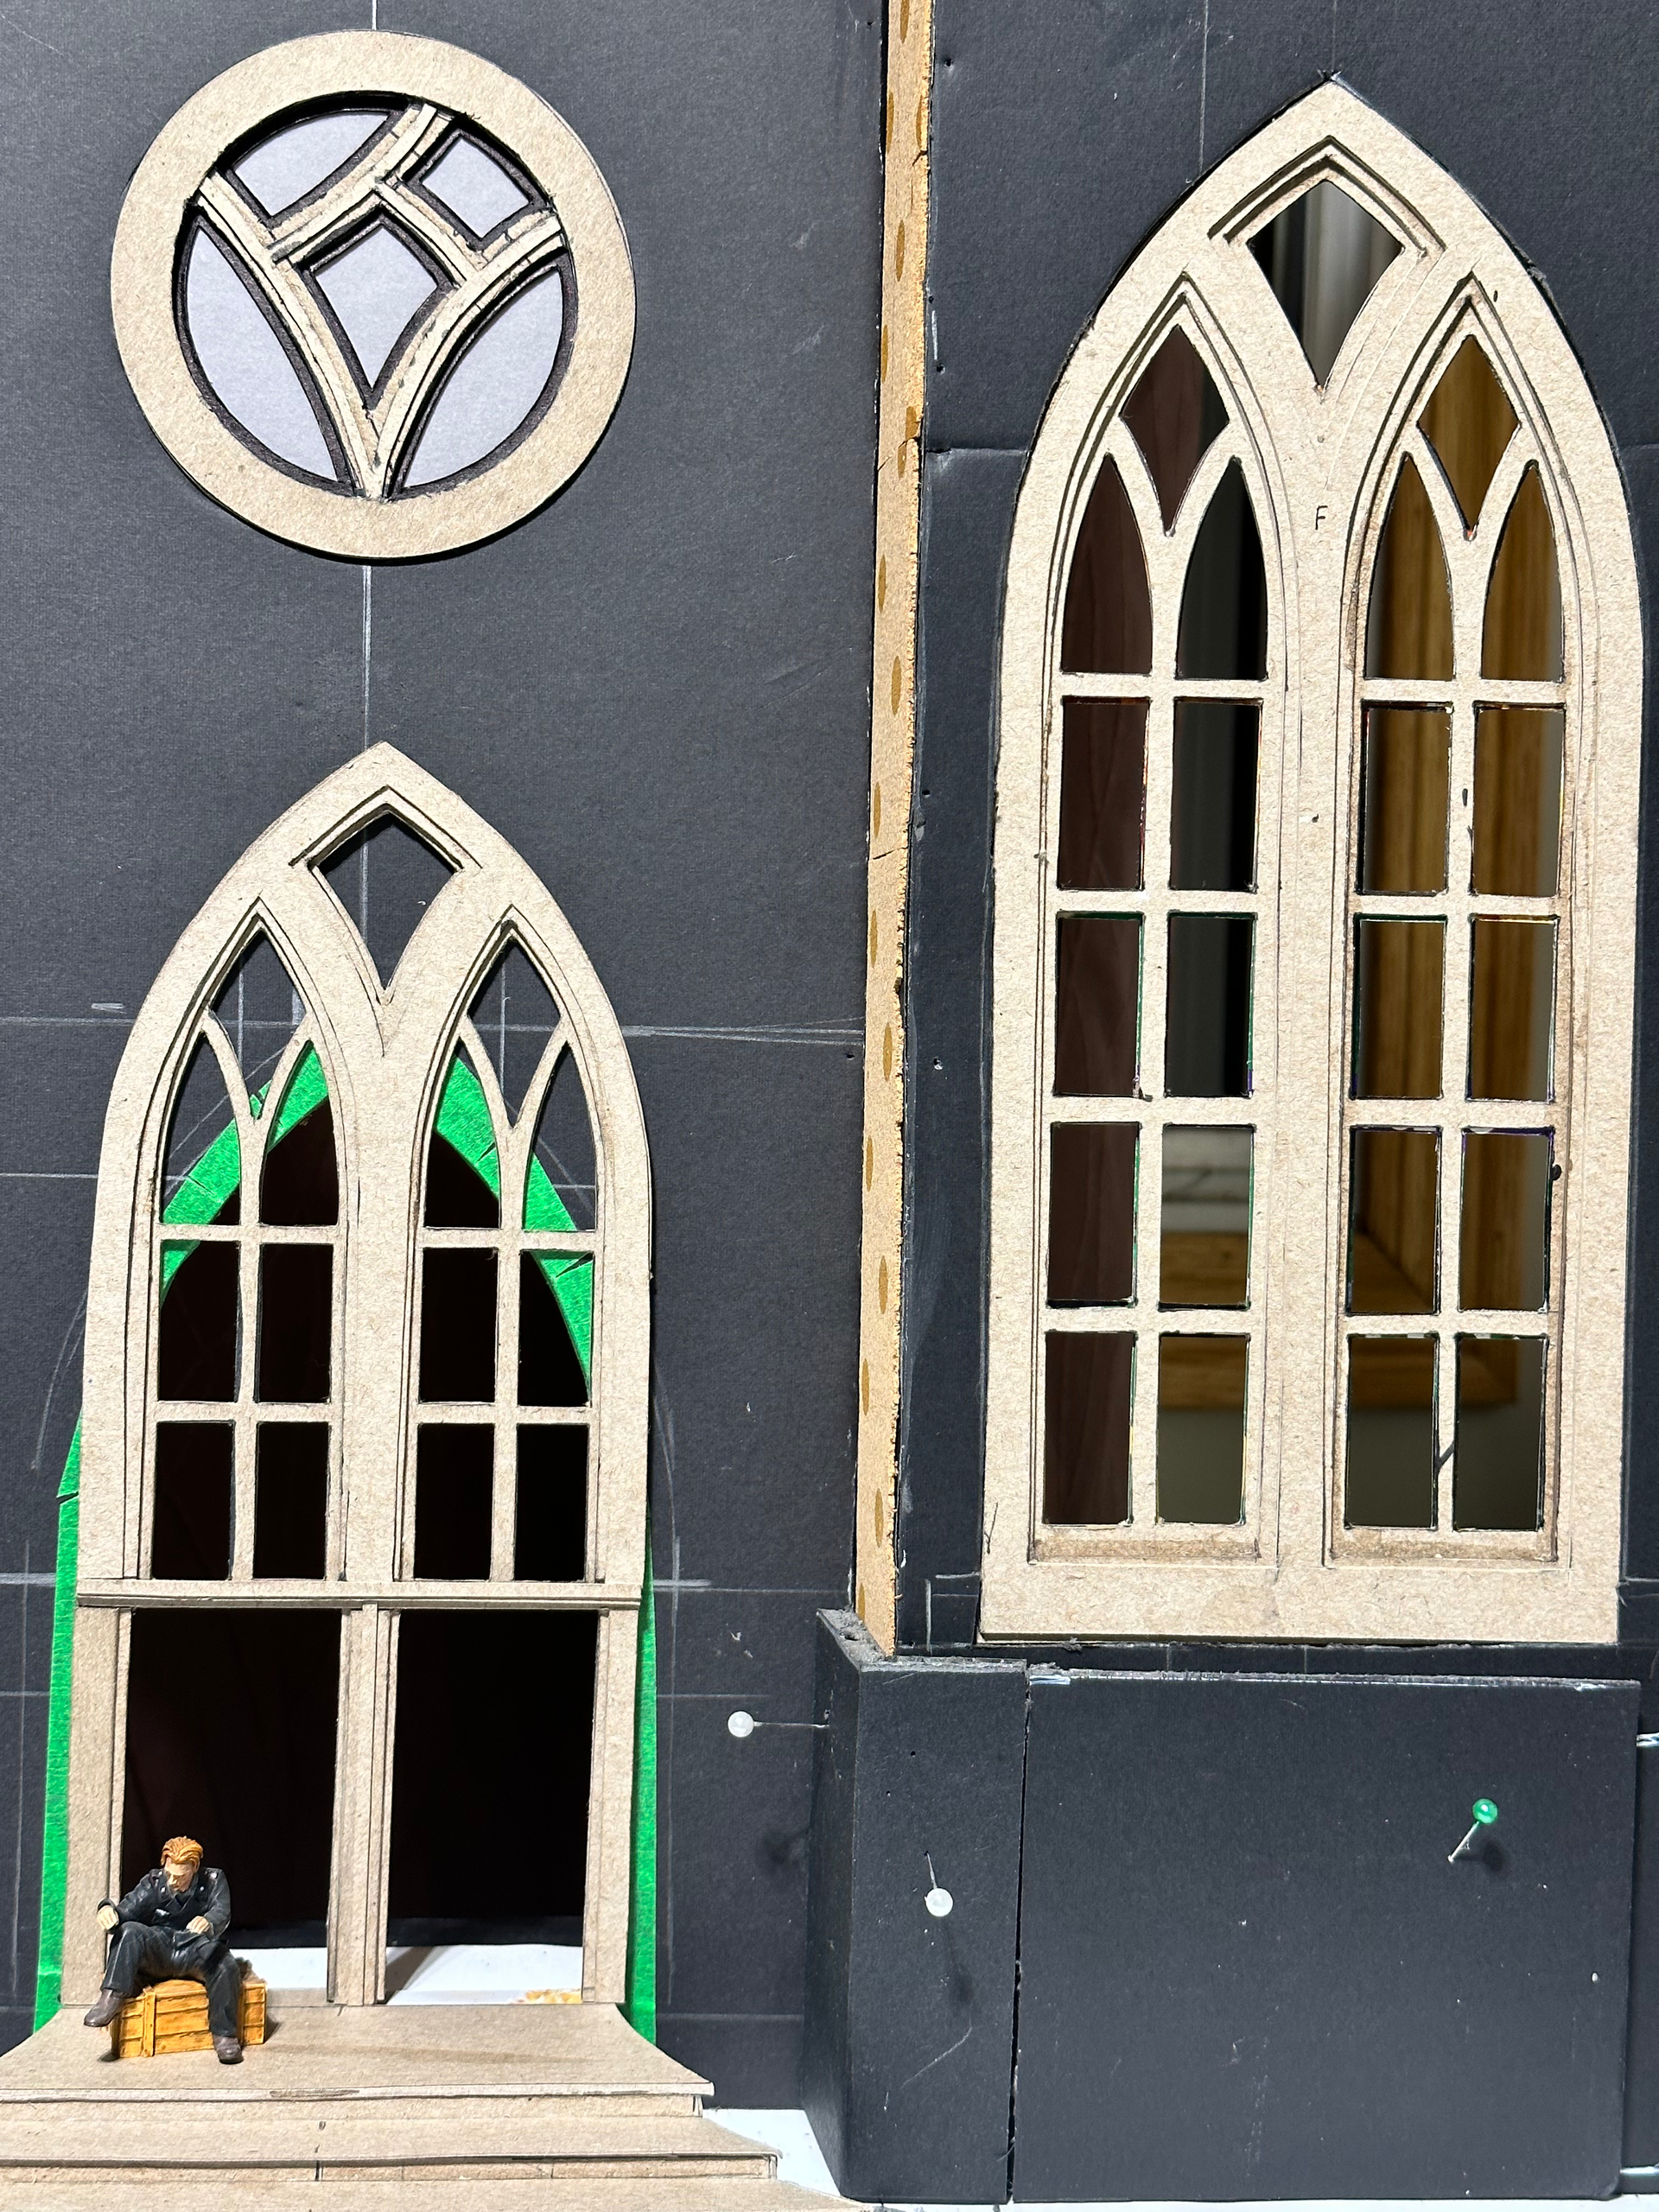
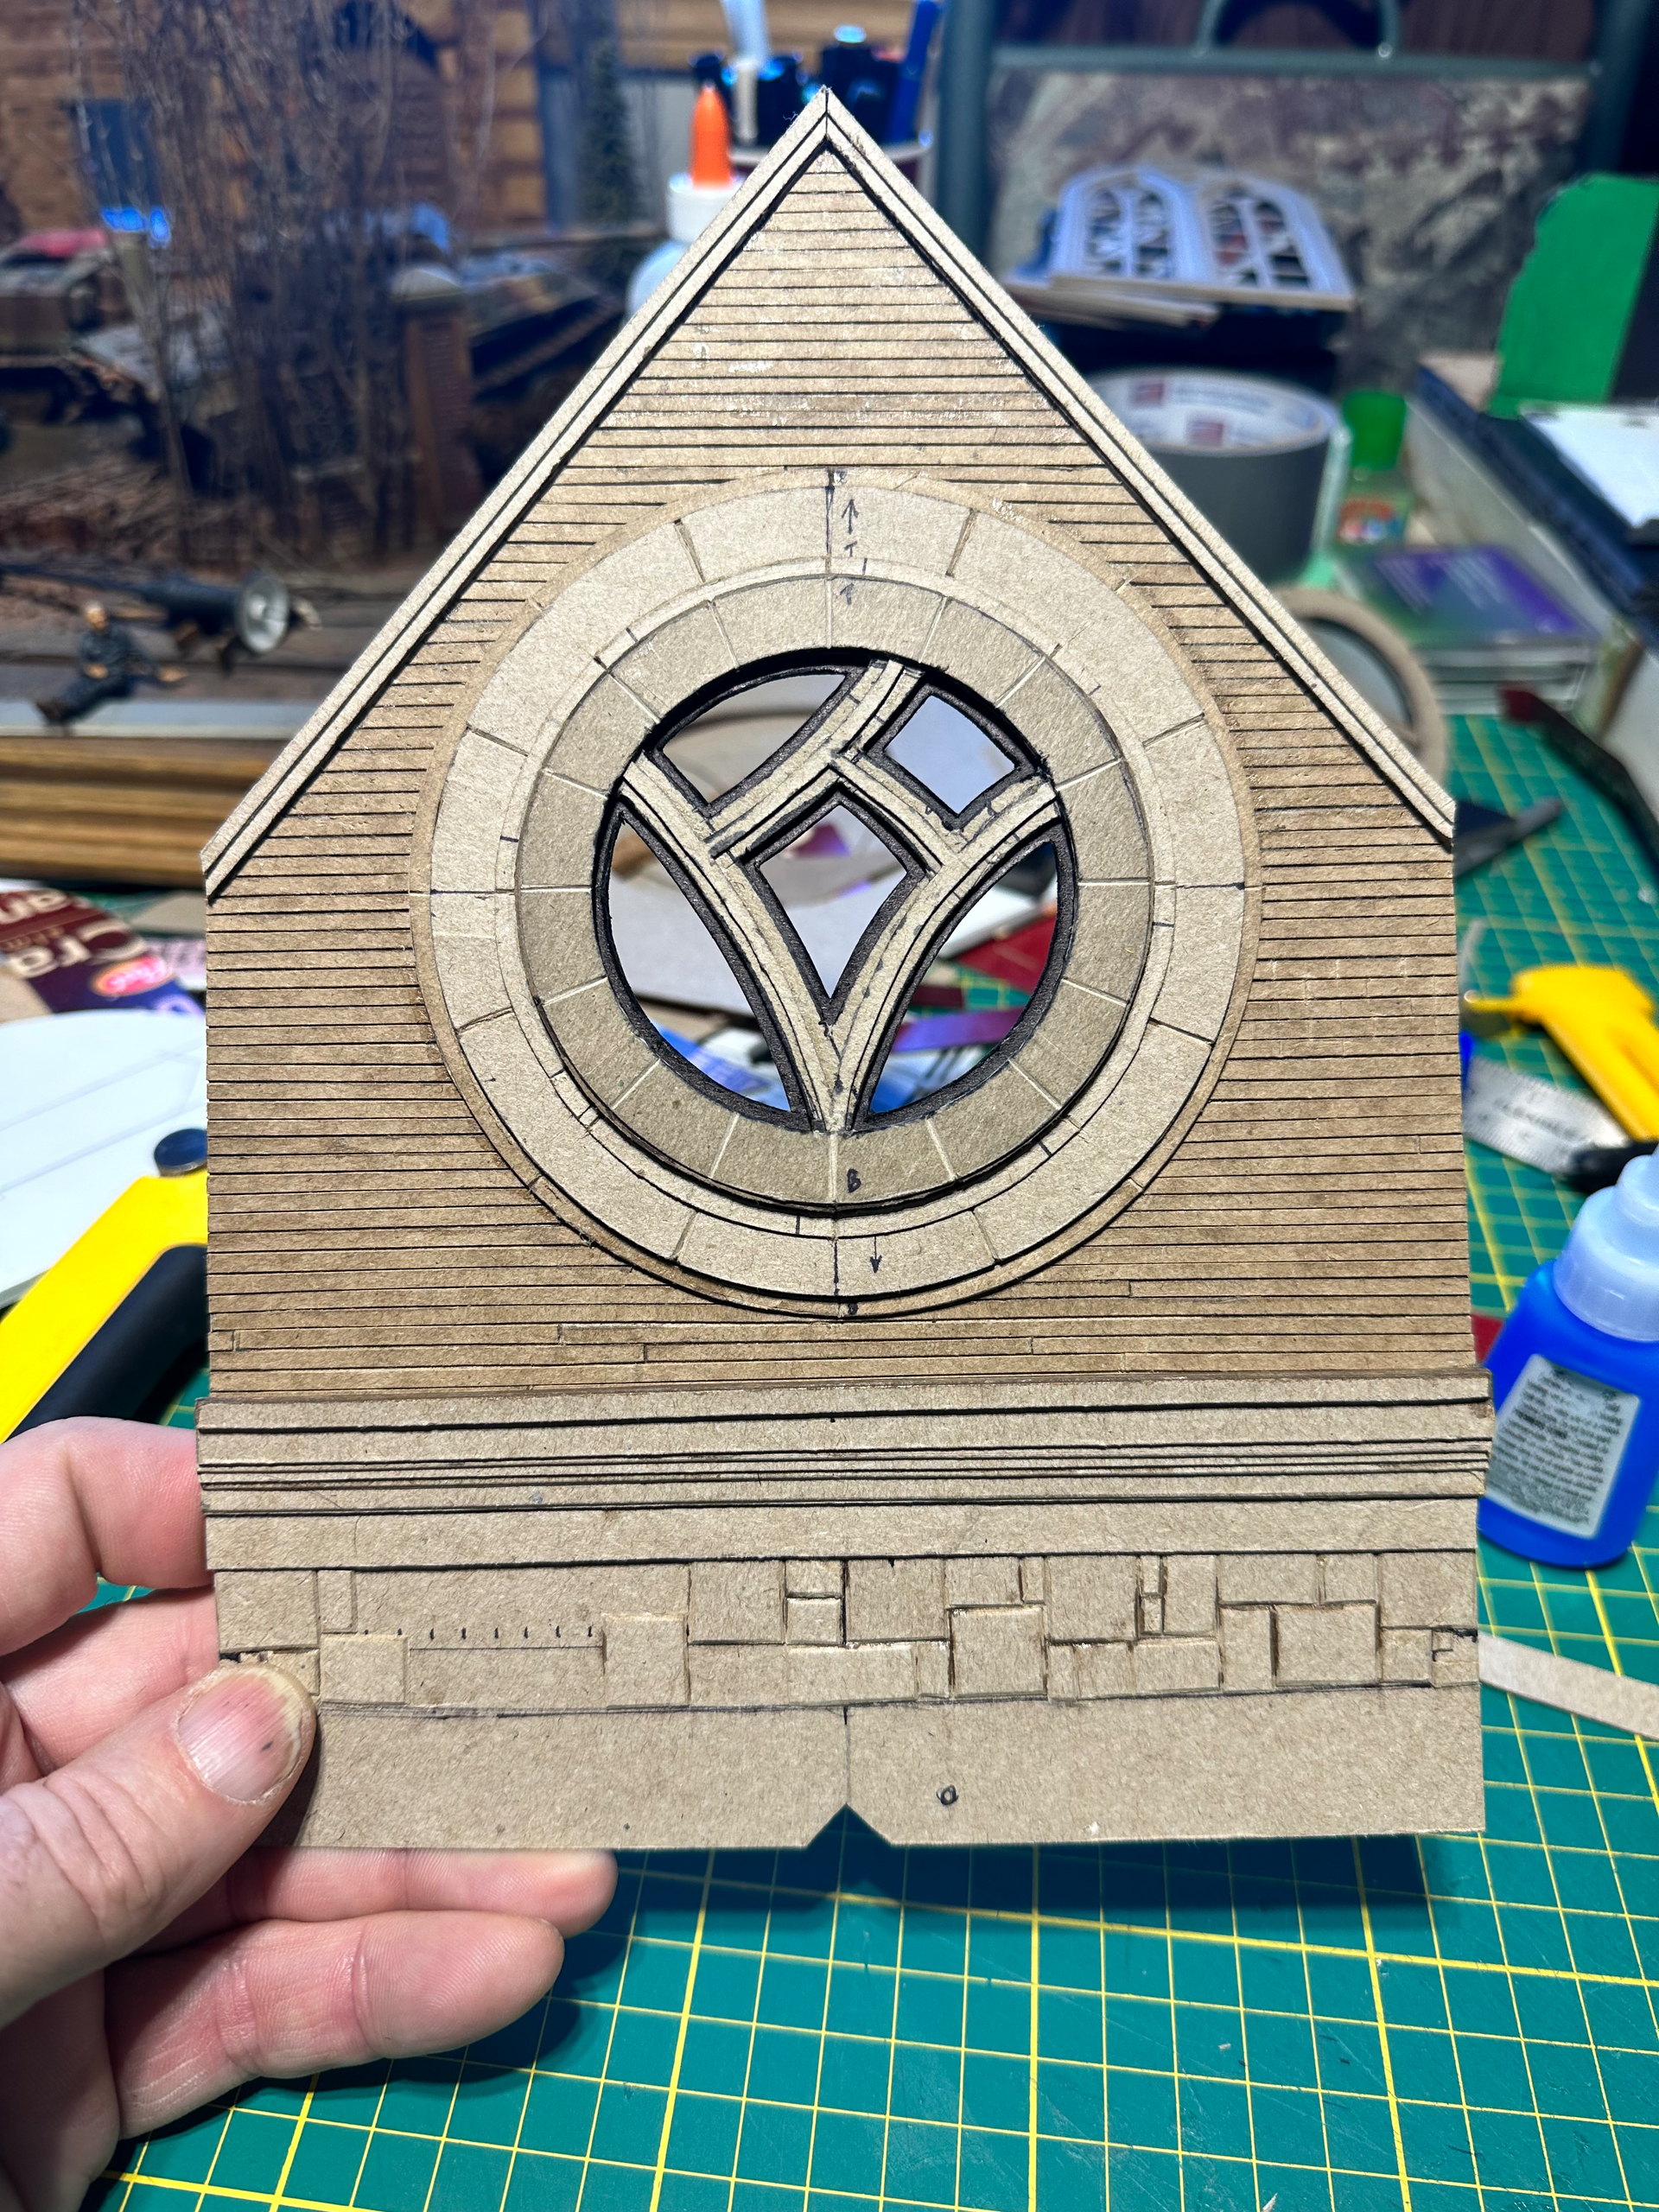
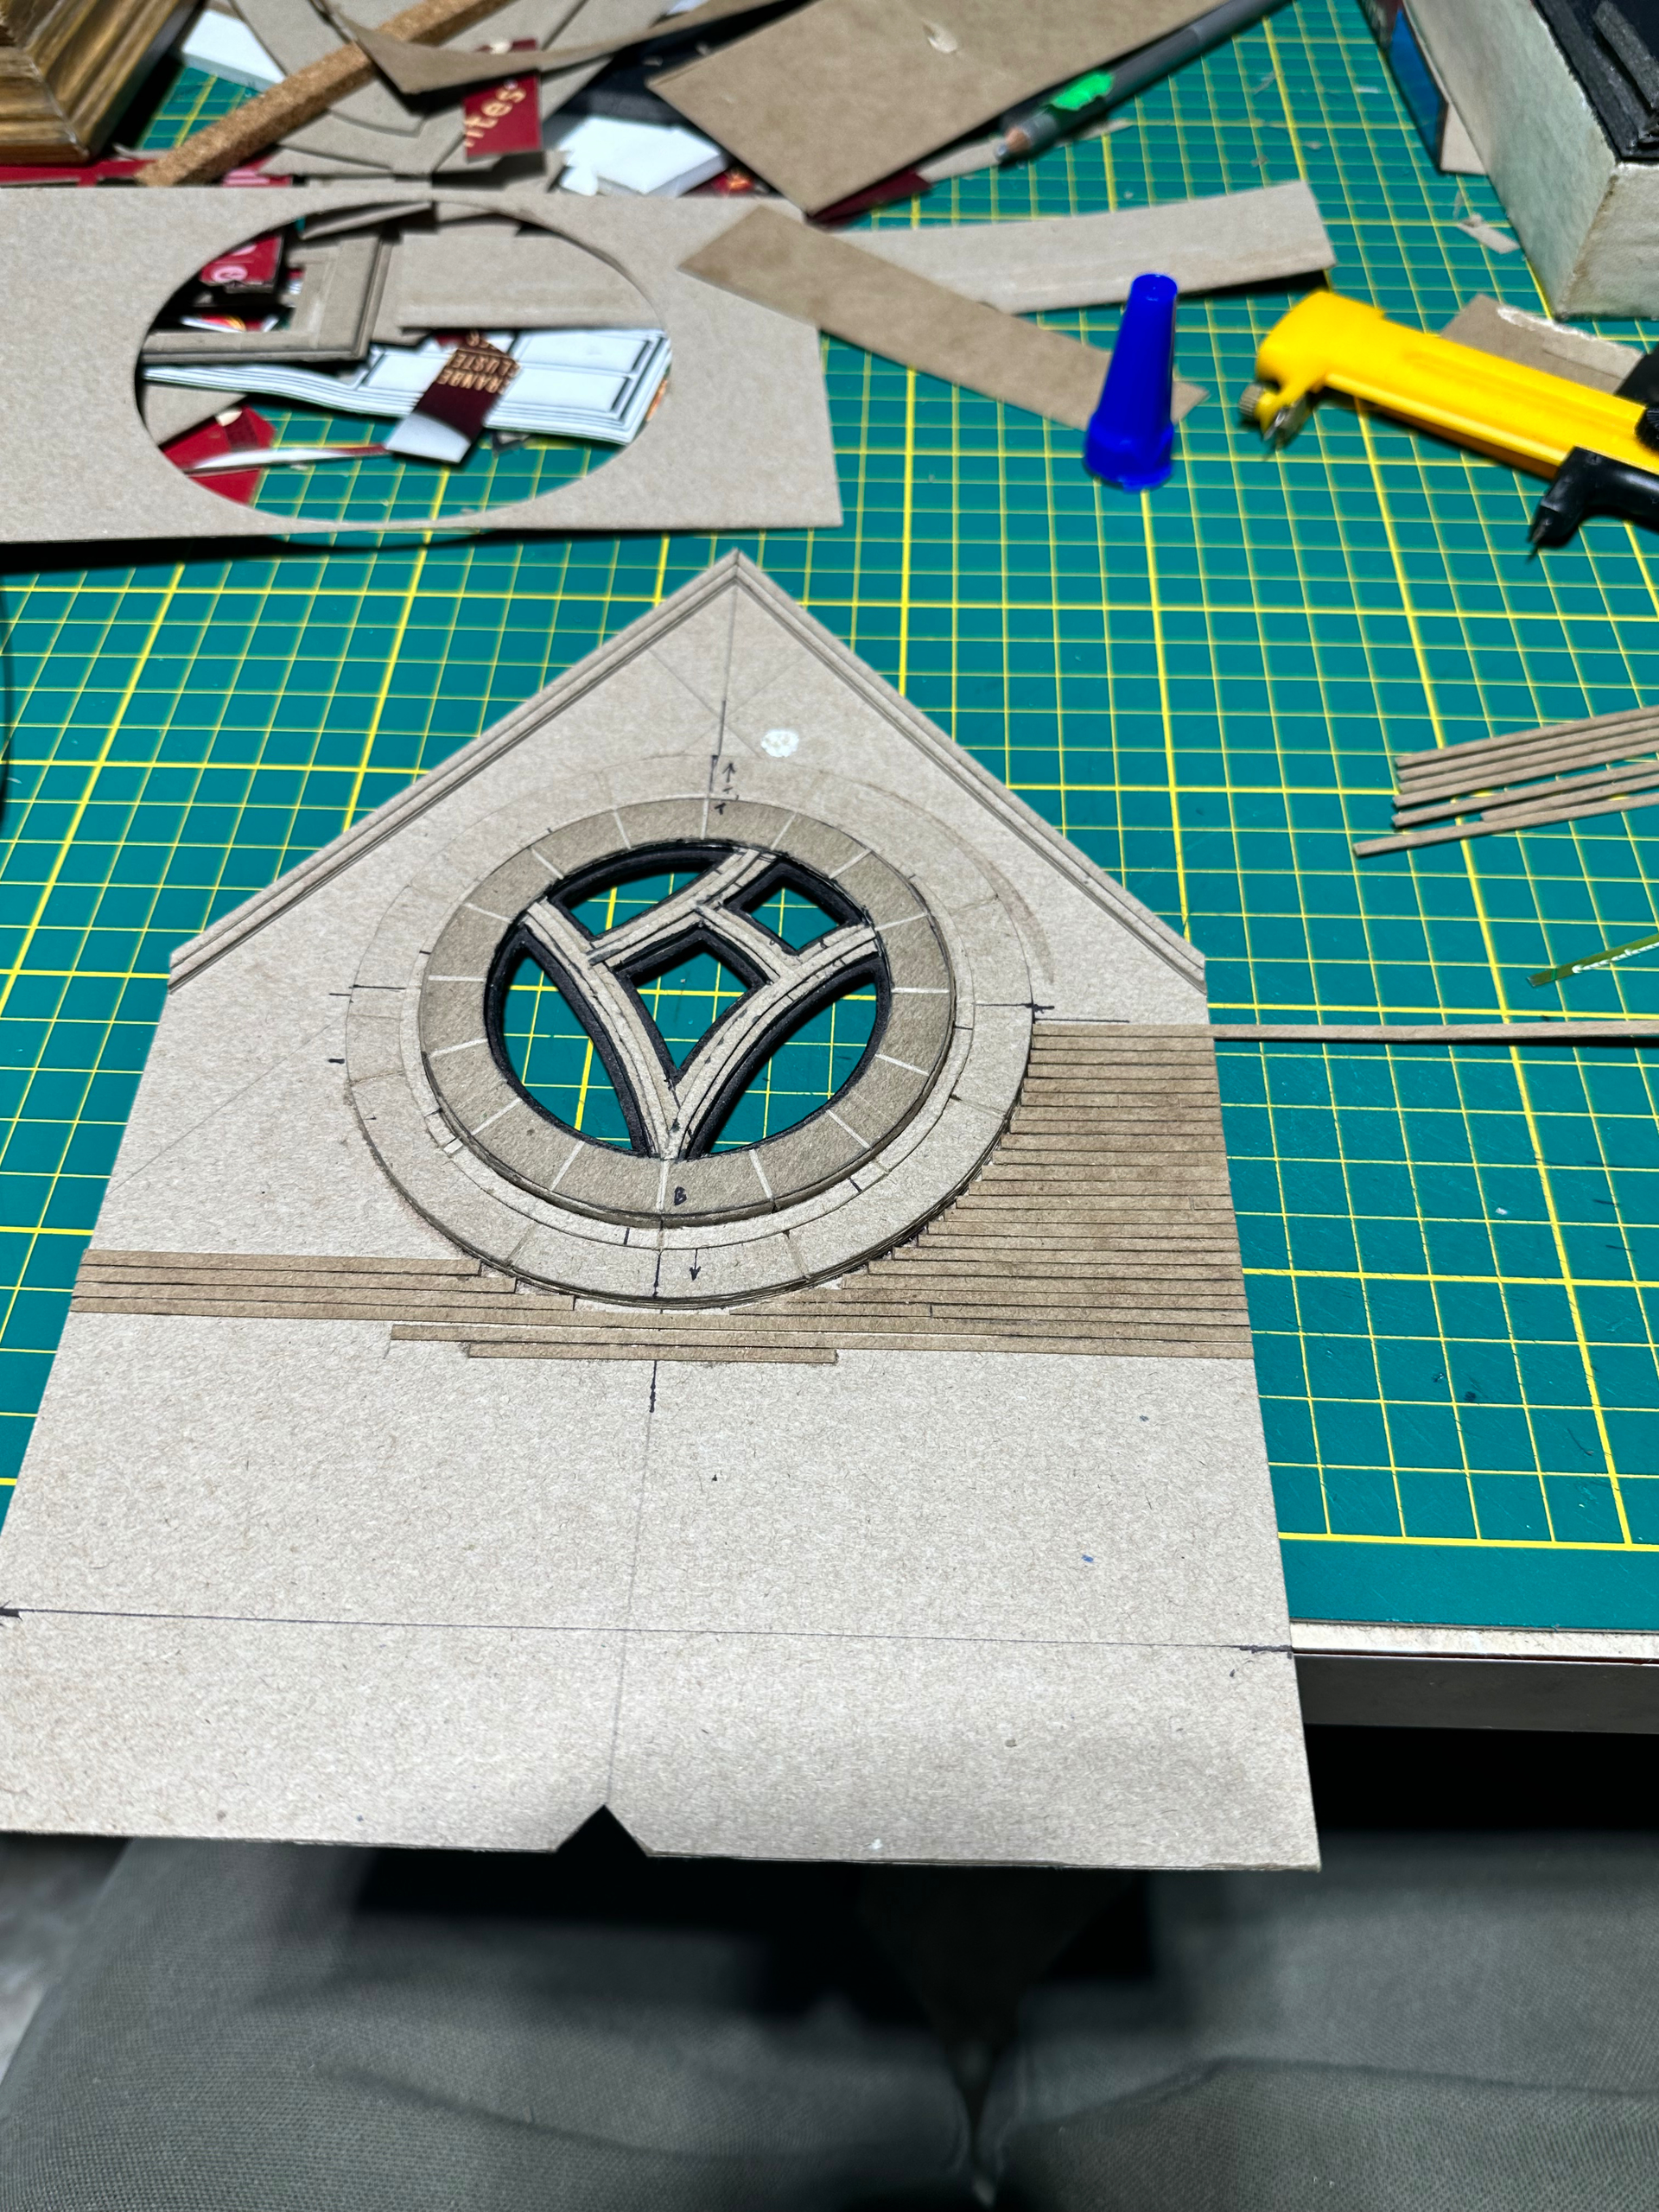
Yeah Nick, it is certainly an exercise in precision and patience. The window frames are actually many layers thick as well. Each individual step down in width is made up of a minimum of 2 or three layers of cardboard. Most of the details of the construction are several layers thick, and in retrospect I should have continued this pattern all the way throughout the build. It would have added a lot of time and effort and glue lol, but in the end it would have given a scale perspective closer to reality… something that you are very aware of and exceptionally good at achieving.

7 Likes
Thanks sir. That was my thought as well
2 Likes
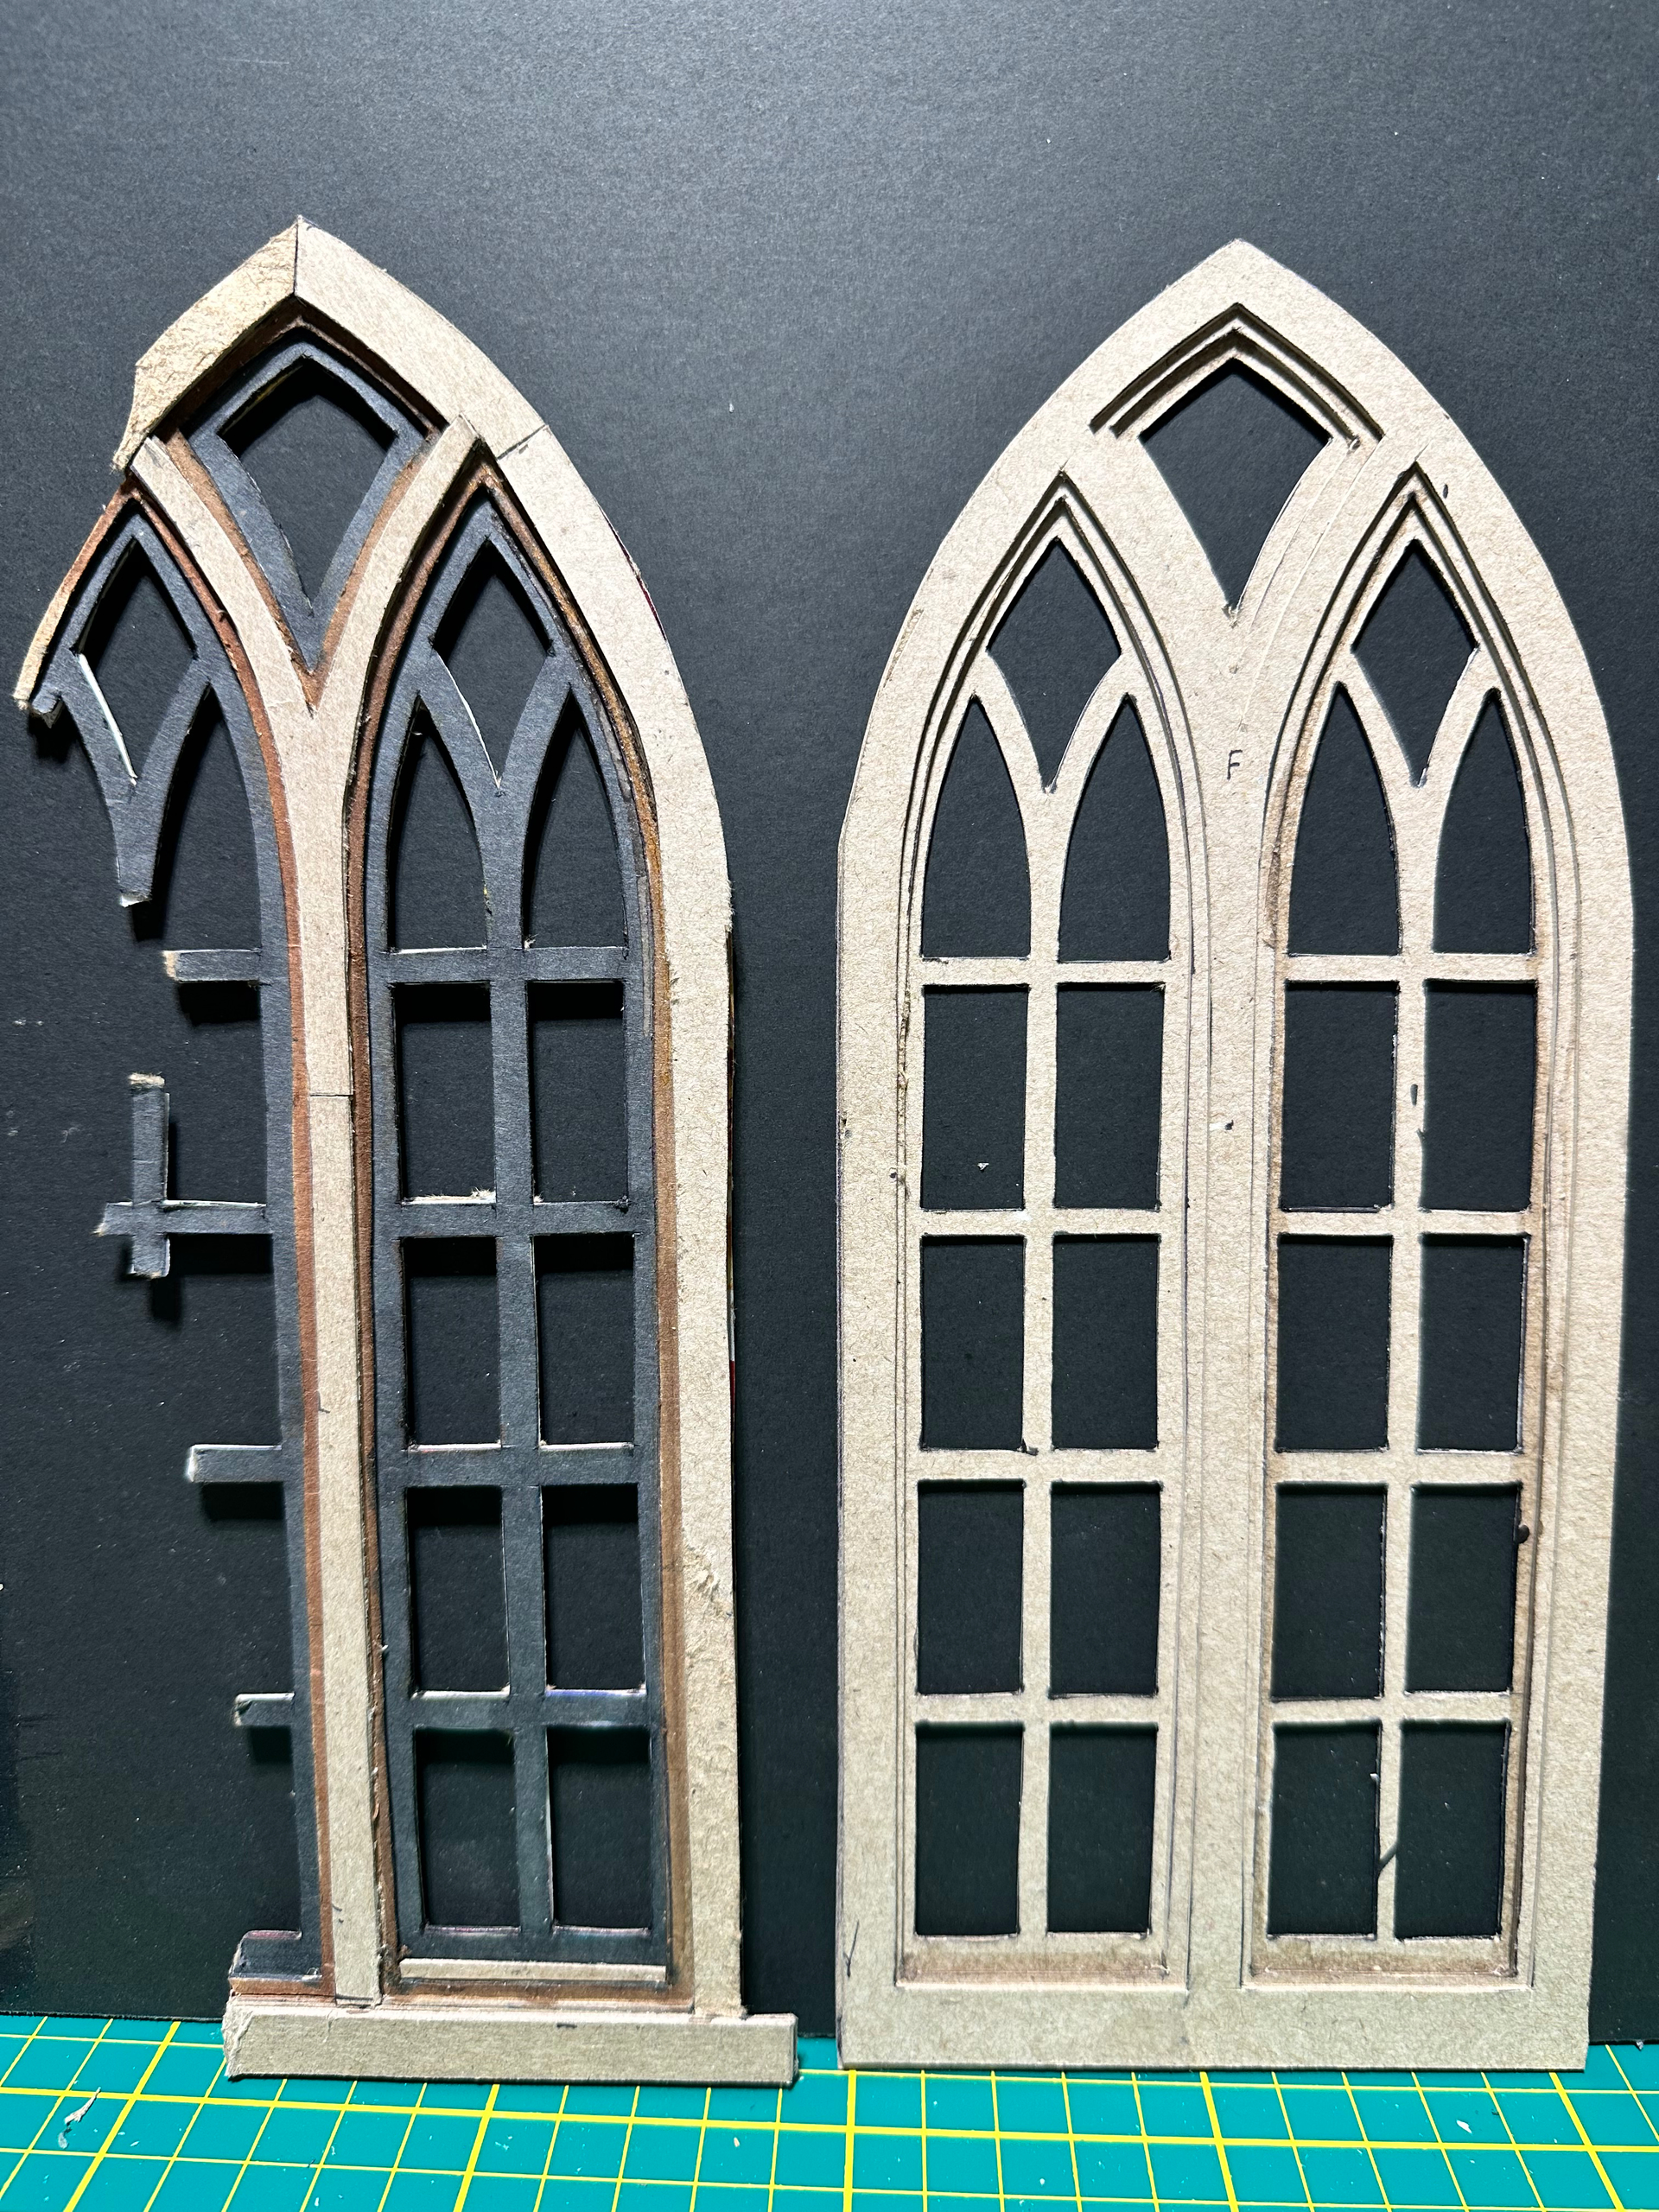
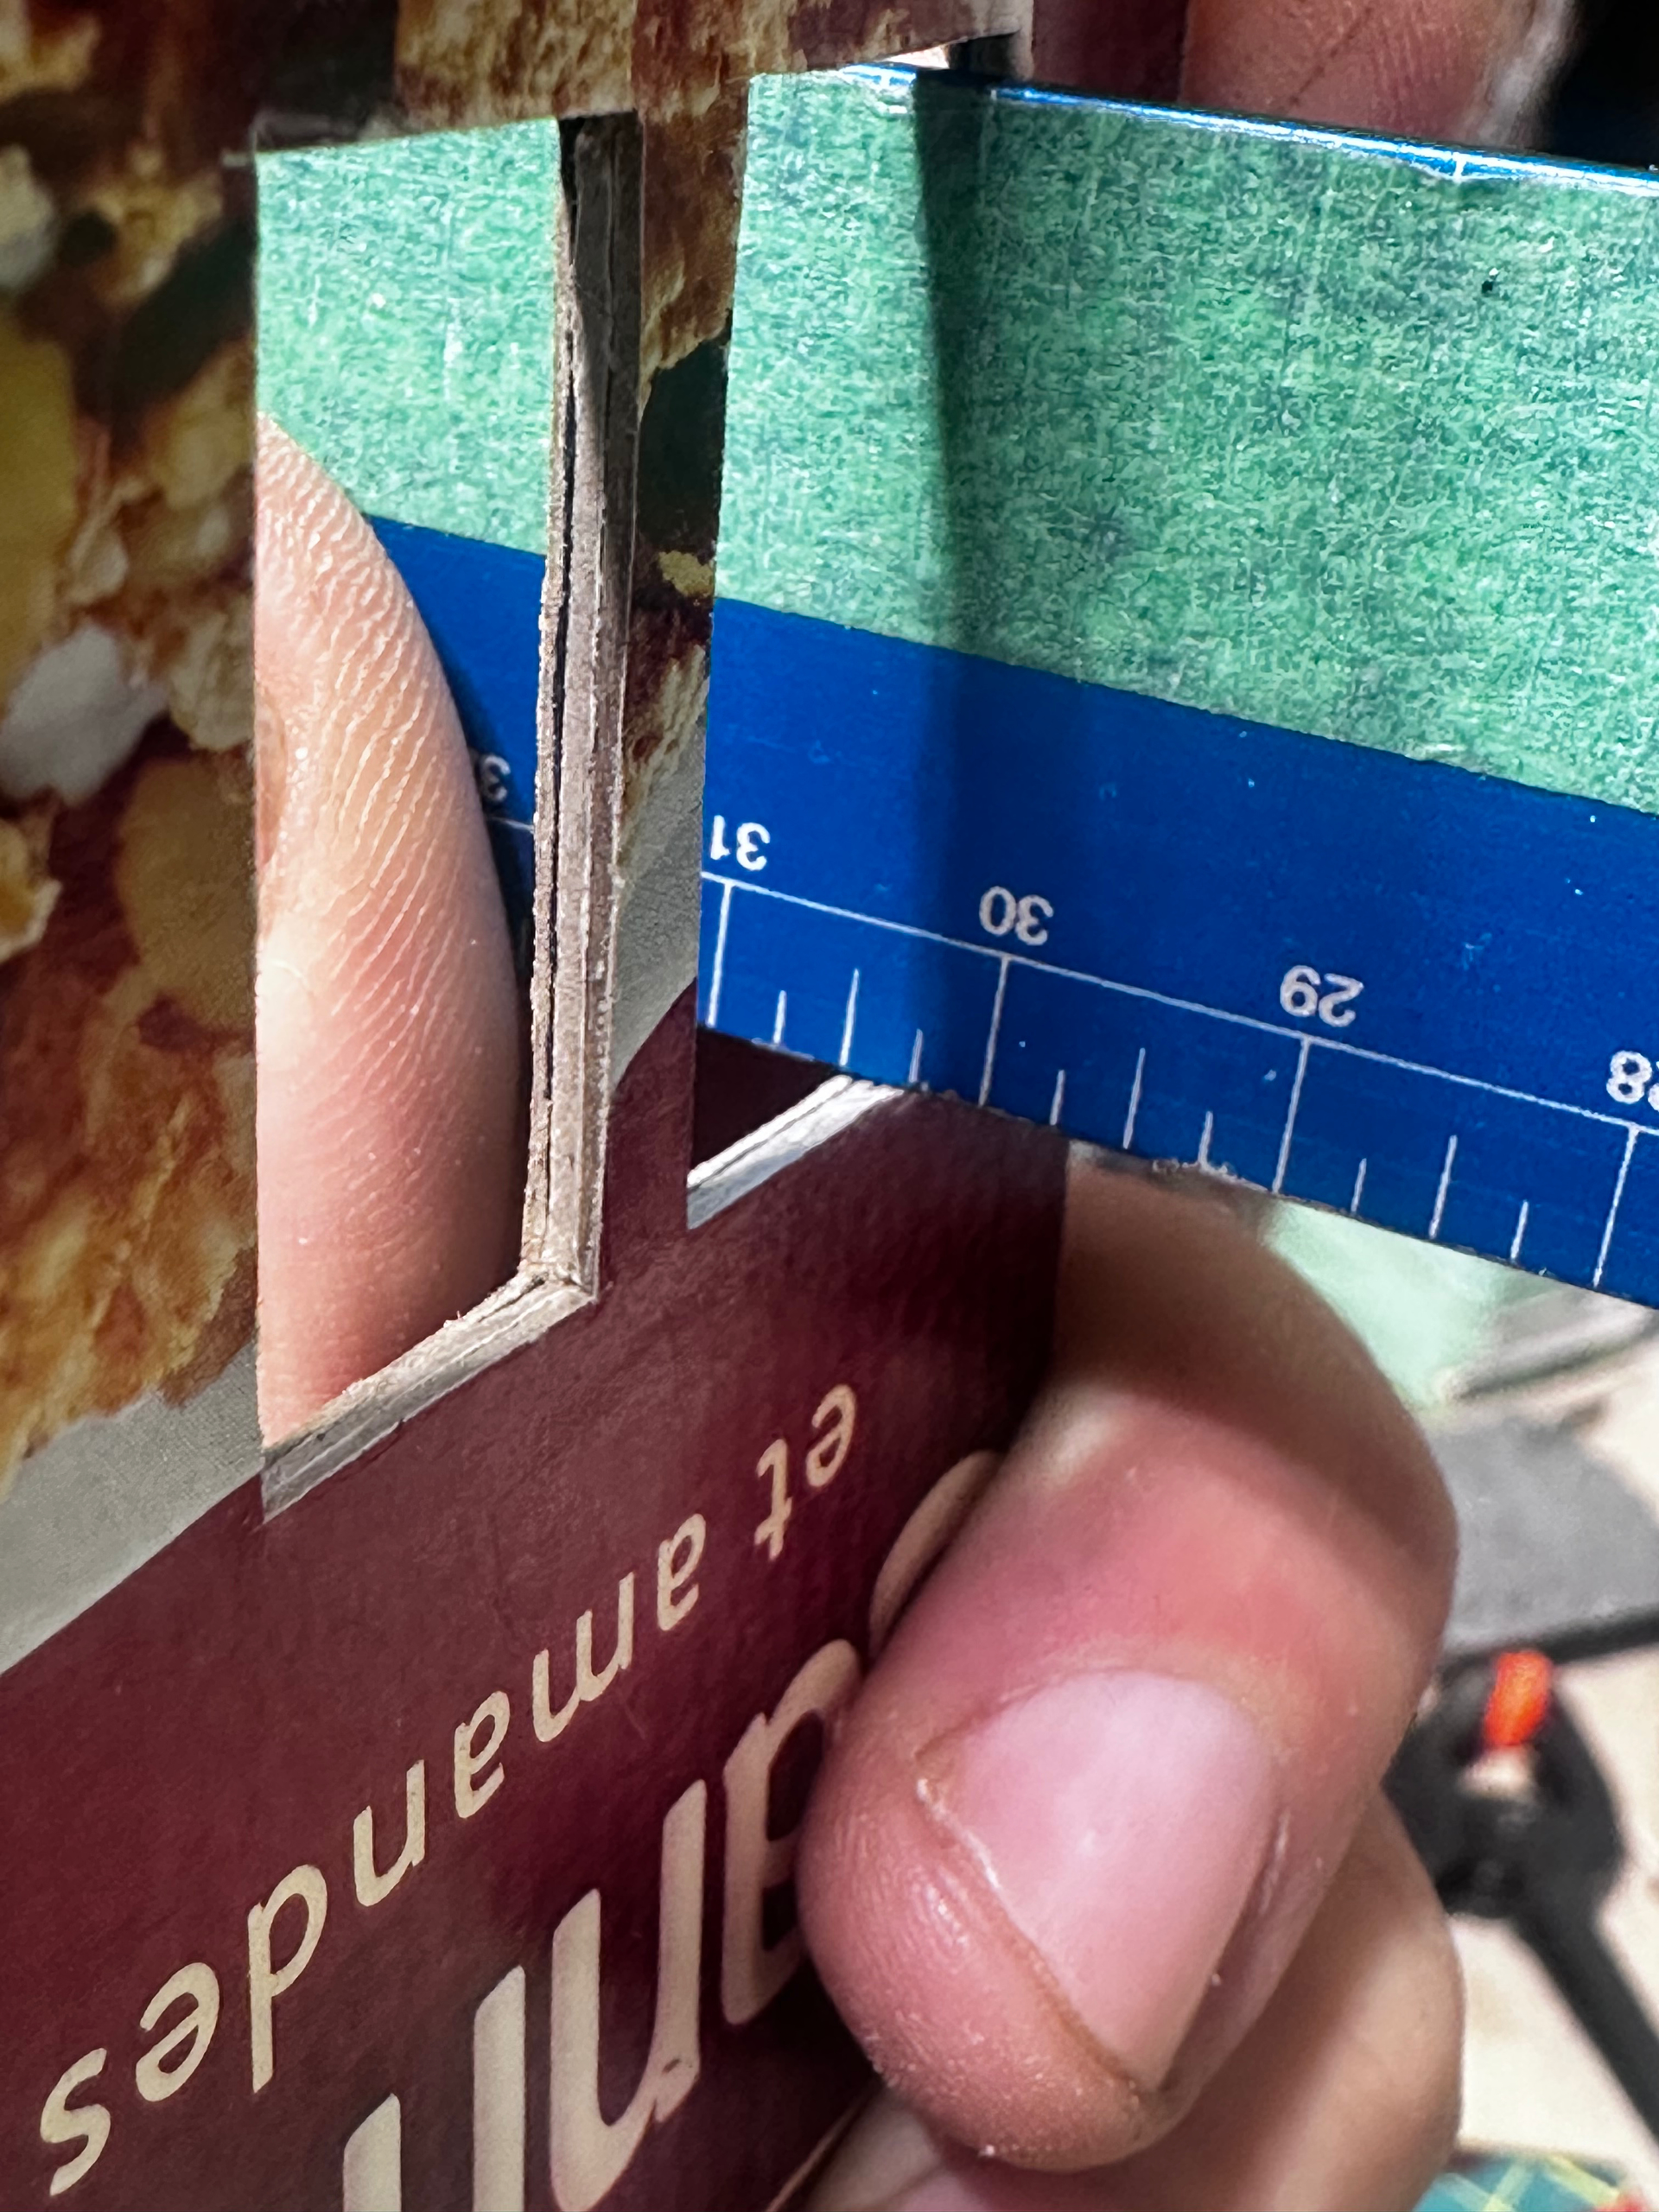
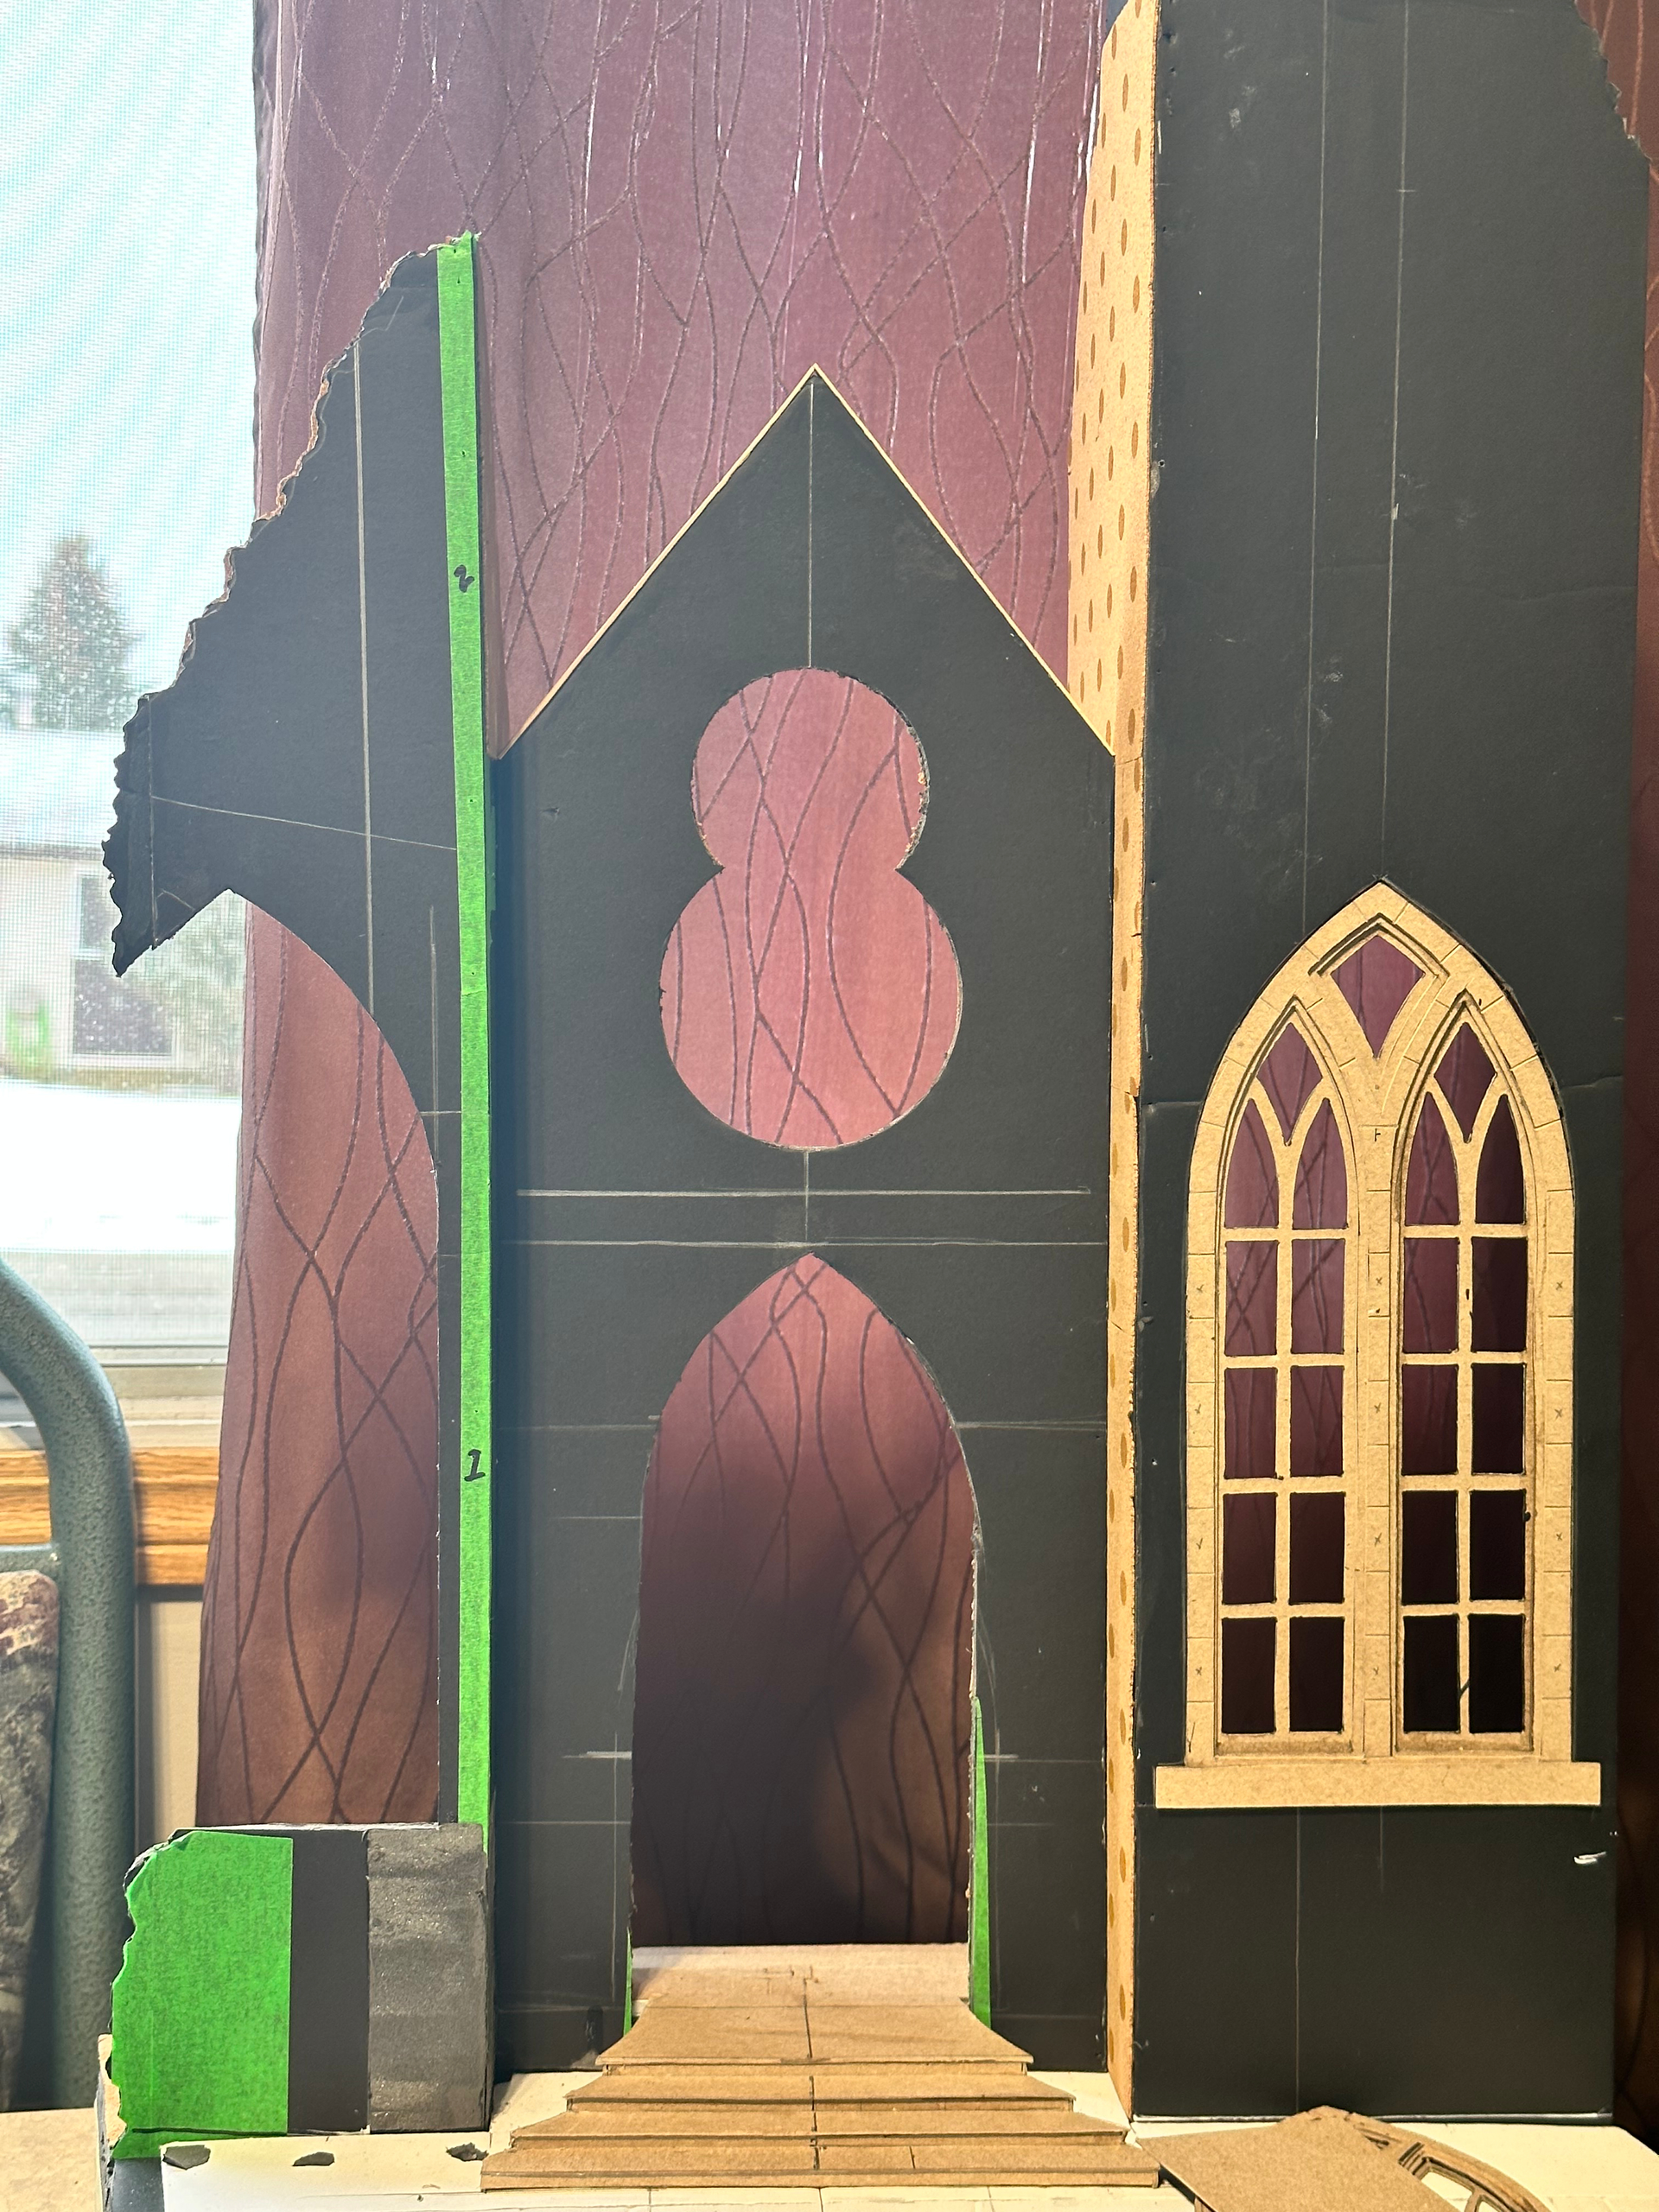
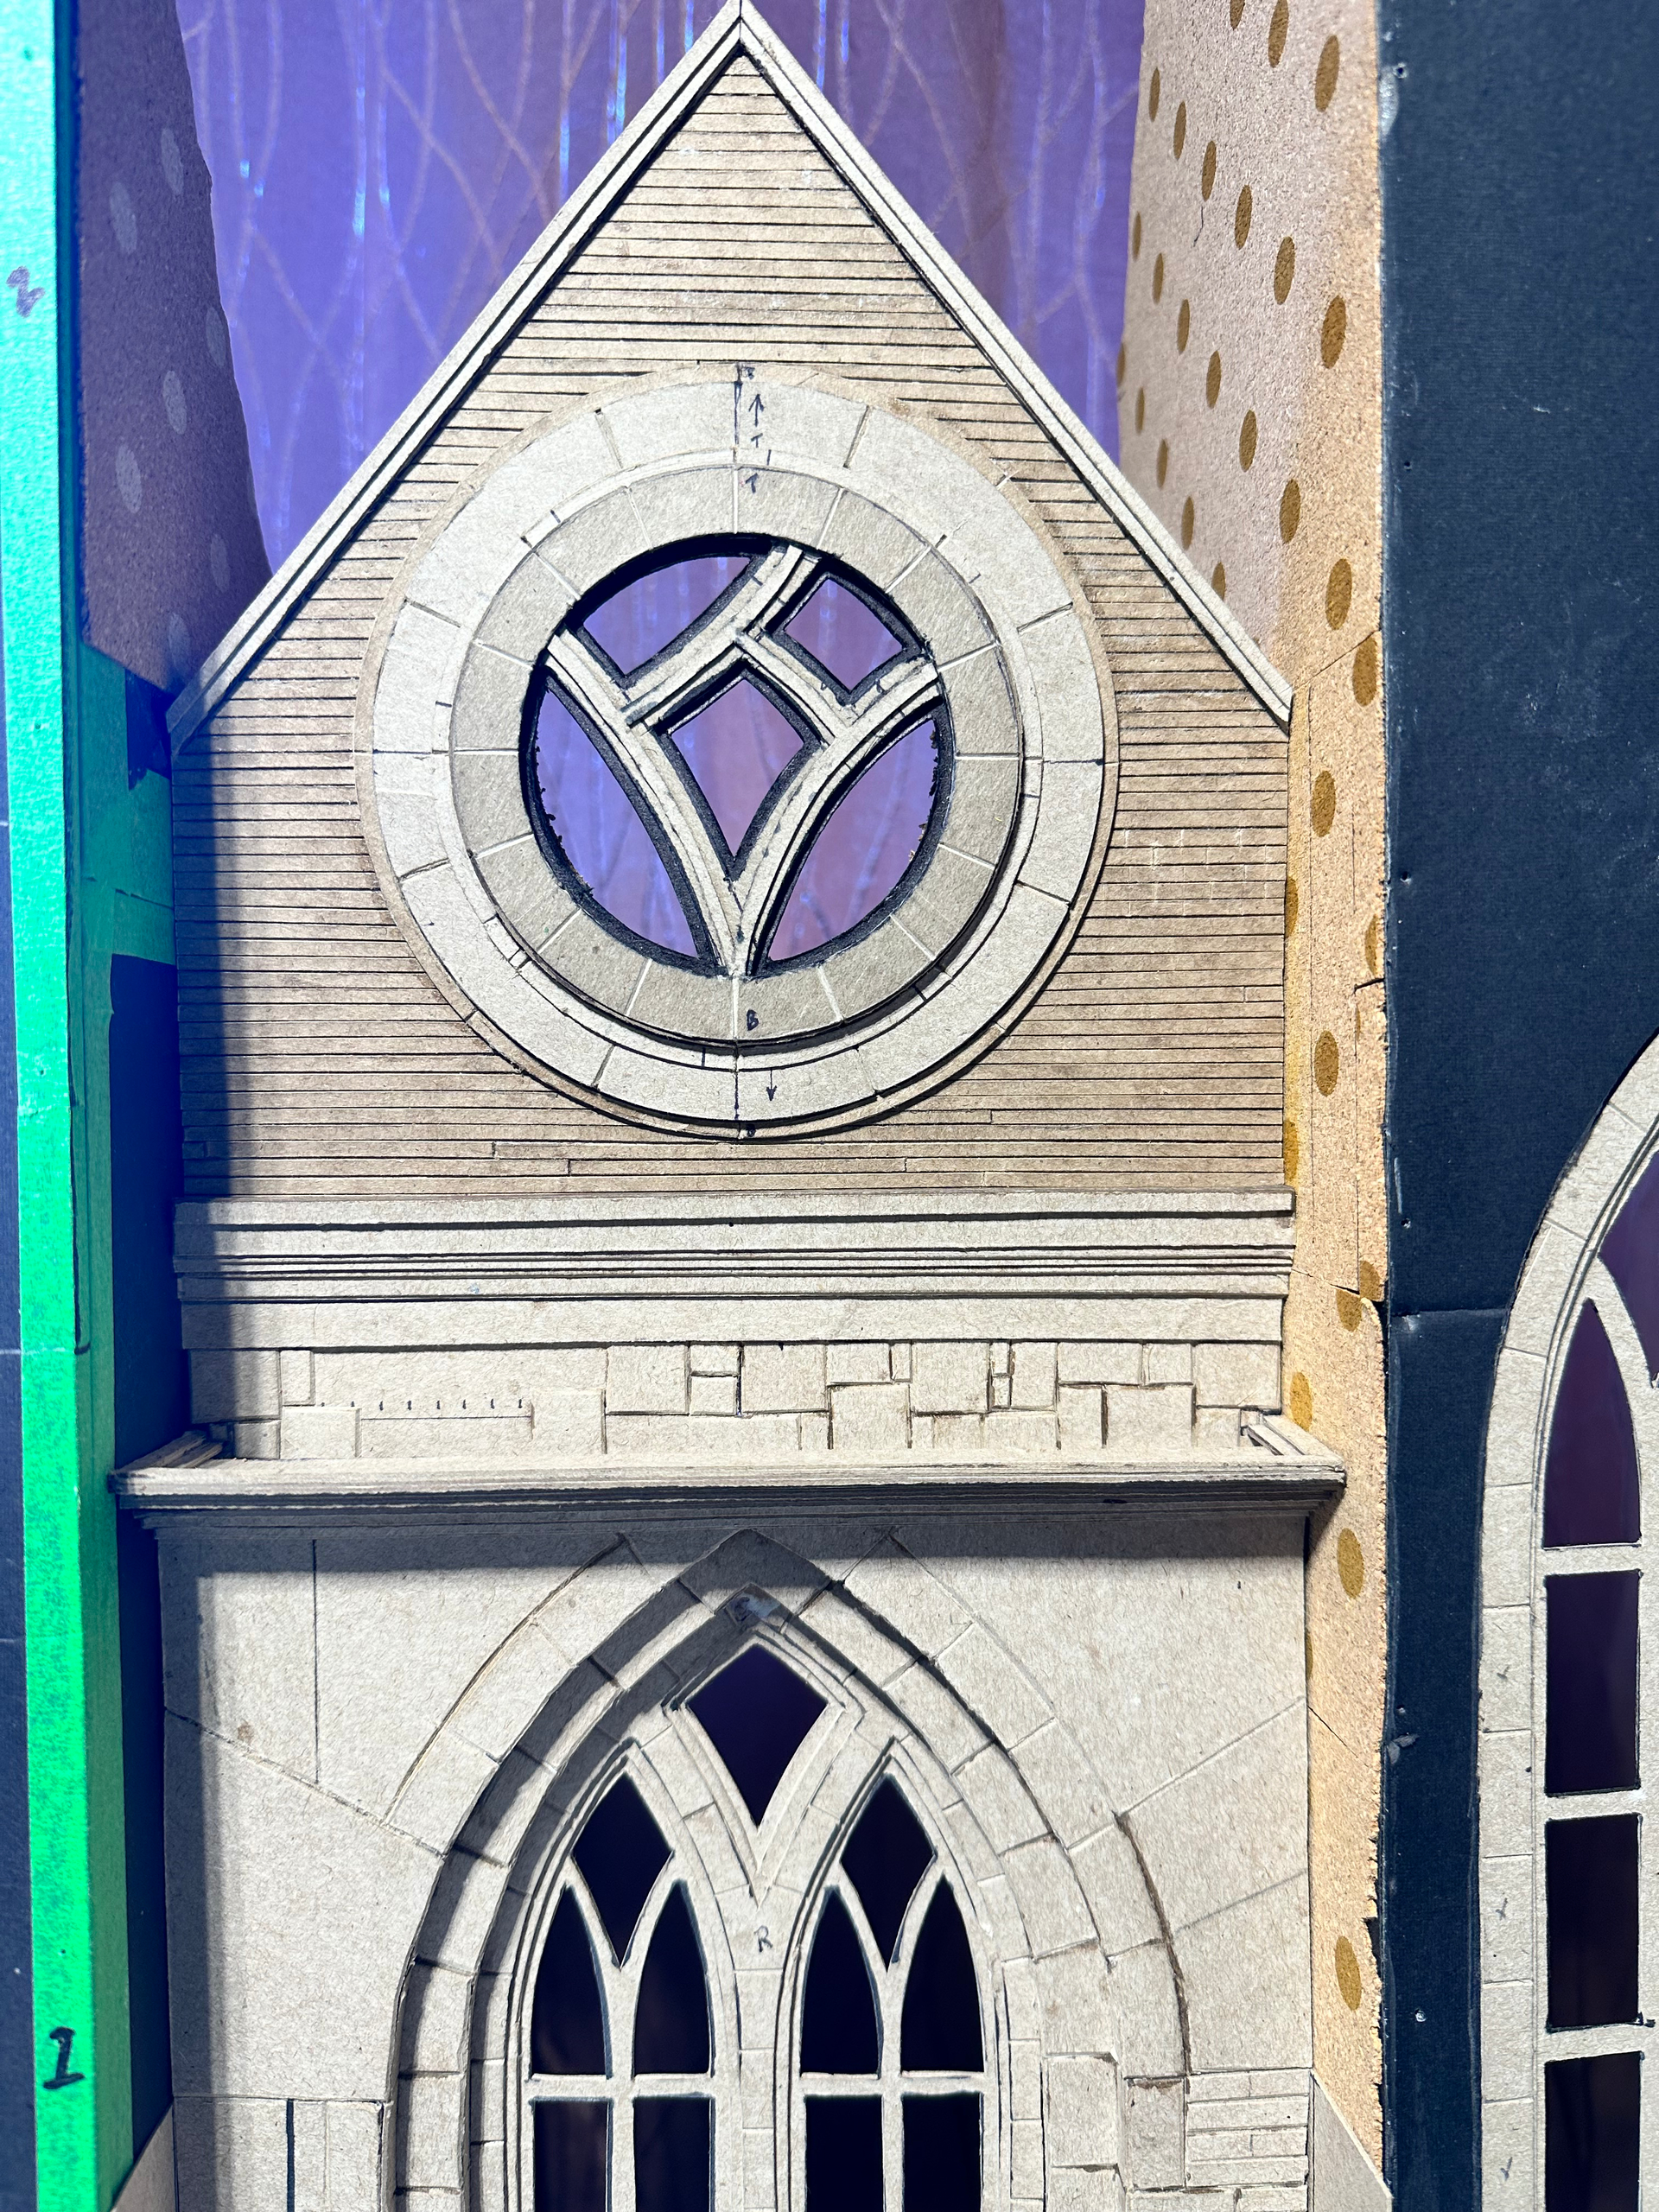
Here’s a pretty decent closeup of one of the window sections, a half as it were; showing how many individual pieces of cardboard were used in the creation of the end piece. It really was nuts lol, and I probably wouldn’t do it this way again; but I’m not going to junk the work and start again… it is as it is. My next project will most likely consist of the latest trend in modelling, XPS foam sheets. You can see some of it in this project as I’ve used it to build up the debris piles which front the church on the street side of the diorama. More on that later.

6 Likes
You and I are in the same boat. I’ve been recycling parts from a big old project for a while now. It was sitting collecting dust and getting broken apart anyway. Bigger projects tend to eat up a lot of expensive materials and I don’t want to keep spending on the same materials over and over! So, I’m essentially treating some old projects as resources to be parted out! ![]() I’ve also been checking out other less expensive materials, maybe not at all intended for hobby purposes - like you say, cardboard, foil from wine bottles, and other odds and ends that do the trick.
I’ve also been checking out other less expensive materials, maybe not at all intended for hobby purposes - like you say, cardboard, foil from wine bottles, and other odds and ends that do the trick.
I really admire your work on those windows - as cardboard/composite board is not that easy to cut with precision, and the layers you’ve built up look really good. A long time ago I built topographic maps using chipboard ![]() I remember making one for a huge site, maybe 3 or 400 acres - it took forever to make, and like what your doing with those windows, required lots of tedious, radial/parallel cuts - an awful task! but, like your windows, it sure looked good when it was done.
I remember making one for a huge site, maybe 3 or 400 acres - it took forever to make, and like what your doing with those windows, required lots of tedious, radial/parallel cuts - an awful task! but, like your windows, it sure looked good when it was done.
It seems I build a lot of scale windows - sometimes cheat and use at least some laser cut elements, or merge hand made with them, and in no way is it easy! ![]() I’ve tried starting with thin plywood, cardstock, and evergreen, but it’s never easy - especially if you’re after a window with divided lights, and yet, I keep doing it!
I’ve tried starting with thin plywood, cardstock, and evergreen, but it’s never easy - especially if you’re after a window with divided lights, and yet, I keep doing it! ![]() so yes, about once a year I buy a box of 100 hobby blades and they get used up -
so yes, about once a year I buy a box of 100 hobby blades and they get used up -
Cheers and looking forward to seeing this move forward!
Nick ![]()
2 Likes
Thanks Nick. Yeah getting perfect or near so results are difficult with cardboard for sure. The knife blade has to be very sharp to get a tight edge that doesn’t tear apart; and they dull quickly too. But like you said the results can be good if you’re careful and patient. I only slipped once and sliced deep into my thumb when the blade got away from me.
I have used lead foil from wine bottles on a few occasions, they are quite popular with figure guys for rifle slings and such. As to other media, I think that’s how this XPS foam has really taken off… people started looking for inexpensive, light, and easily accessible materials to use in building their scenery out of and landed on the 2nd or 3rd generation of styrofoam our dads used to work with. Now all the big modelling accessories makers are selling it. I hope to someday maybe have a Proxxon cutter machine to get the accuracy down to a high degree of precision. For now I’ll stick with my ruler and some good sharp blades. Take it easy man. I’ll post some more stuff this weekend.
2 Likes
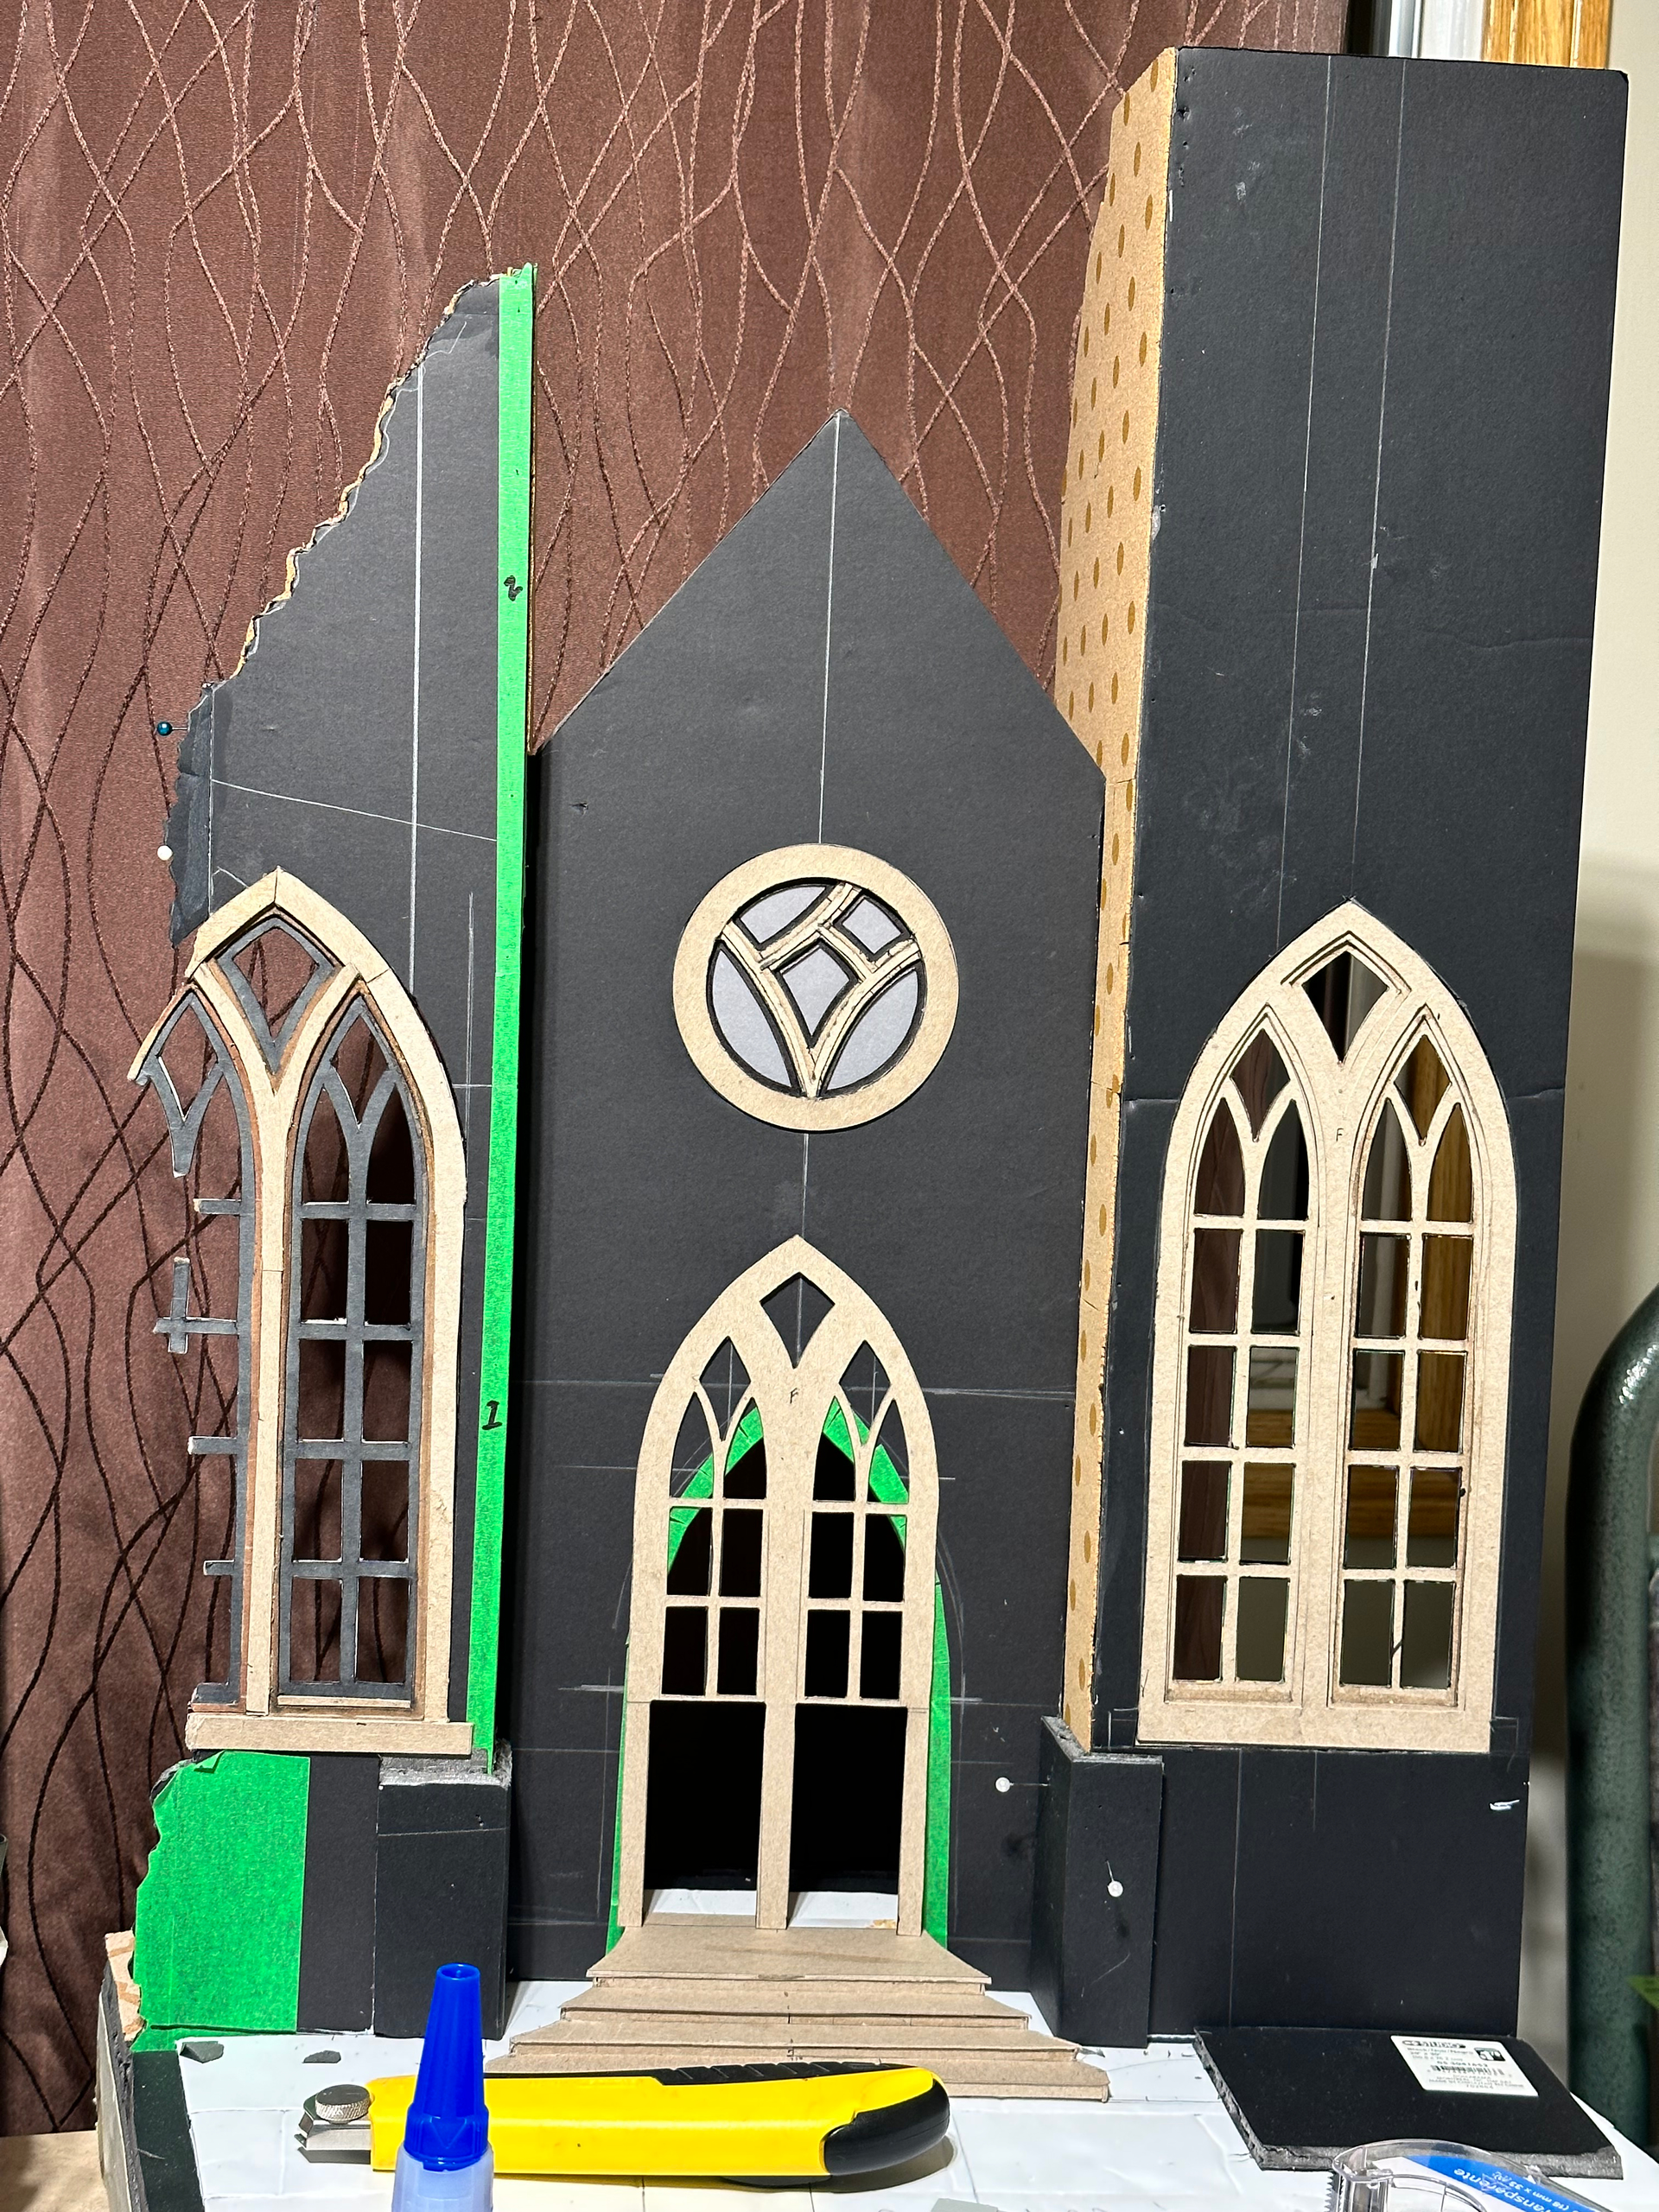
Some more pics for the enjoyment of the gang… if anyone can let me know how to make it so I can upload more than 5 pics at a time… that’d be great


6 Likes

And… ditto ditto… and if you’re able to tell me how to get the pics to be ordered the way I choose them, that’d be great too

4 Likes


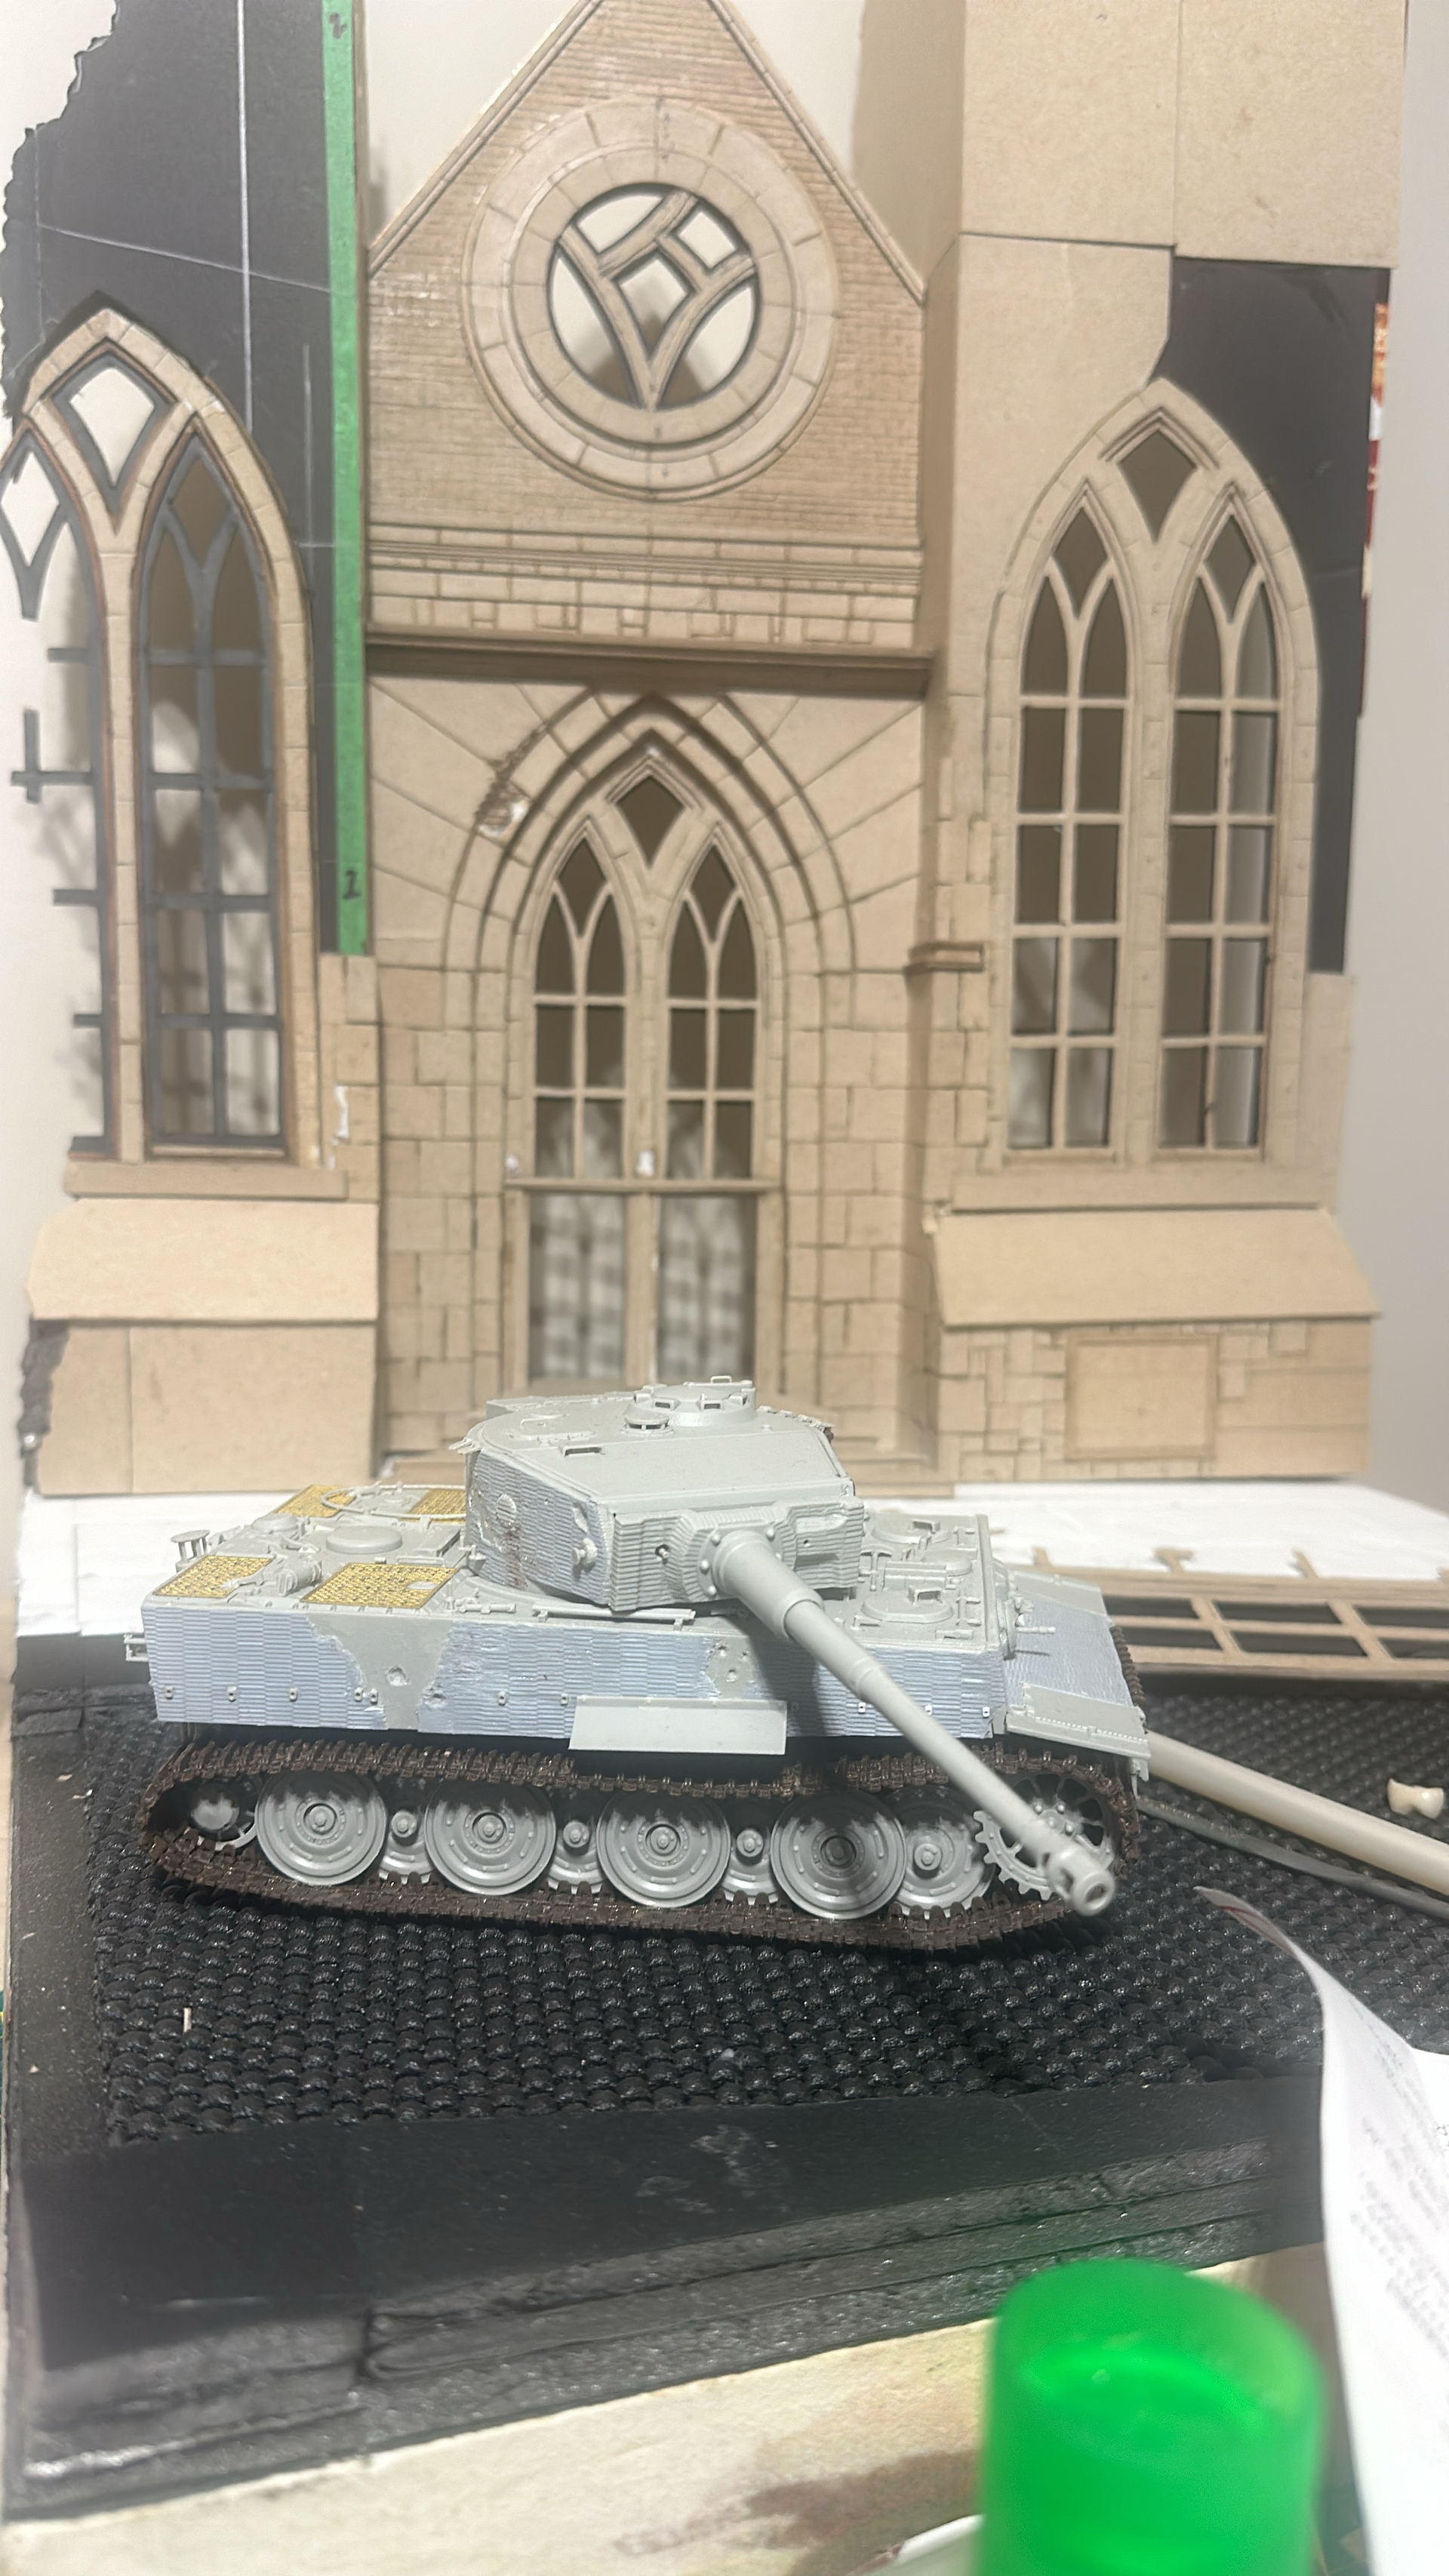
As I glanced at the first photo, I thought, “Nice use of an RT Diorama piece”. Then I scrolled down. Wow, was I wrong. Sir, my compliments! Now that’s modeling!
2 Likes

This will show the rest of the icons

Click the pencil icon to open the edit window
Your post looks like this in the edit window.

Cut and paste the image links, starts with an exclamation mark and ends
with jpeg) to get them in the order you want them.
Another option is to upload them one at the time, in the wanted order.
I use drag and drop for images stored on my computer and for anything else I copy and paste.
3 Likes
Thanks Robin! I’m using my phone mostly to post because it’s harder to upload photos from my computer… but I may end up sending the pics to my desktop as it’s easier to type and stuff. I’ll give these instructions a go.
2 Likes
Thanks Evan! I appreciate it.
1 Like
Dang. This level of work is absolutely stunning.
2 Likes