Credit to you for posting that. ![]()
![]()
4 Likes
I got it right this time,
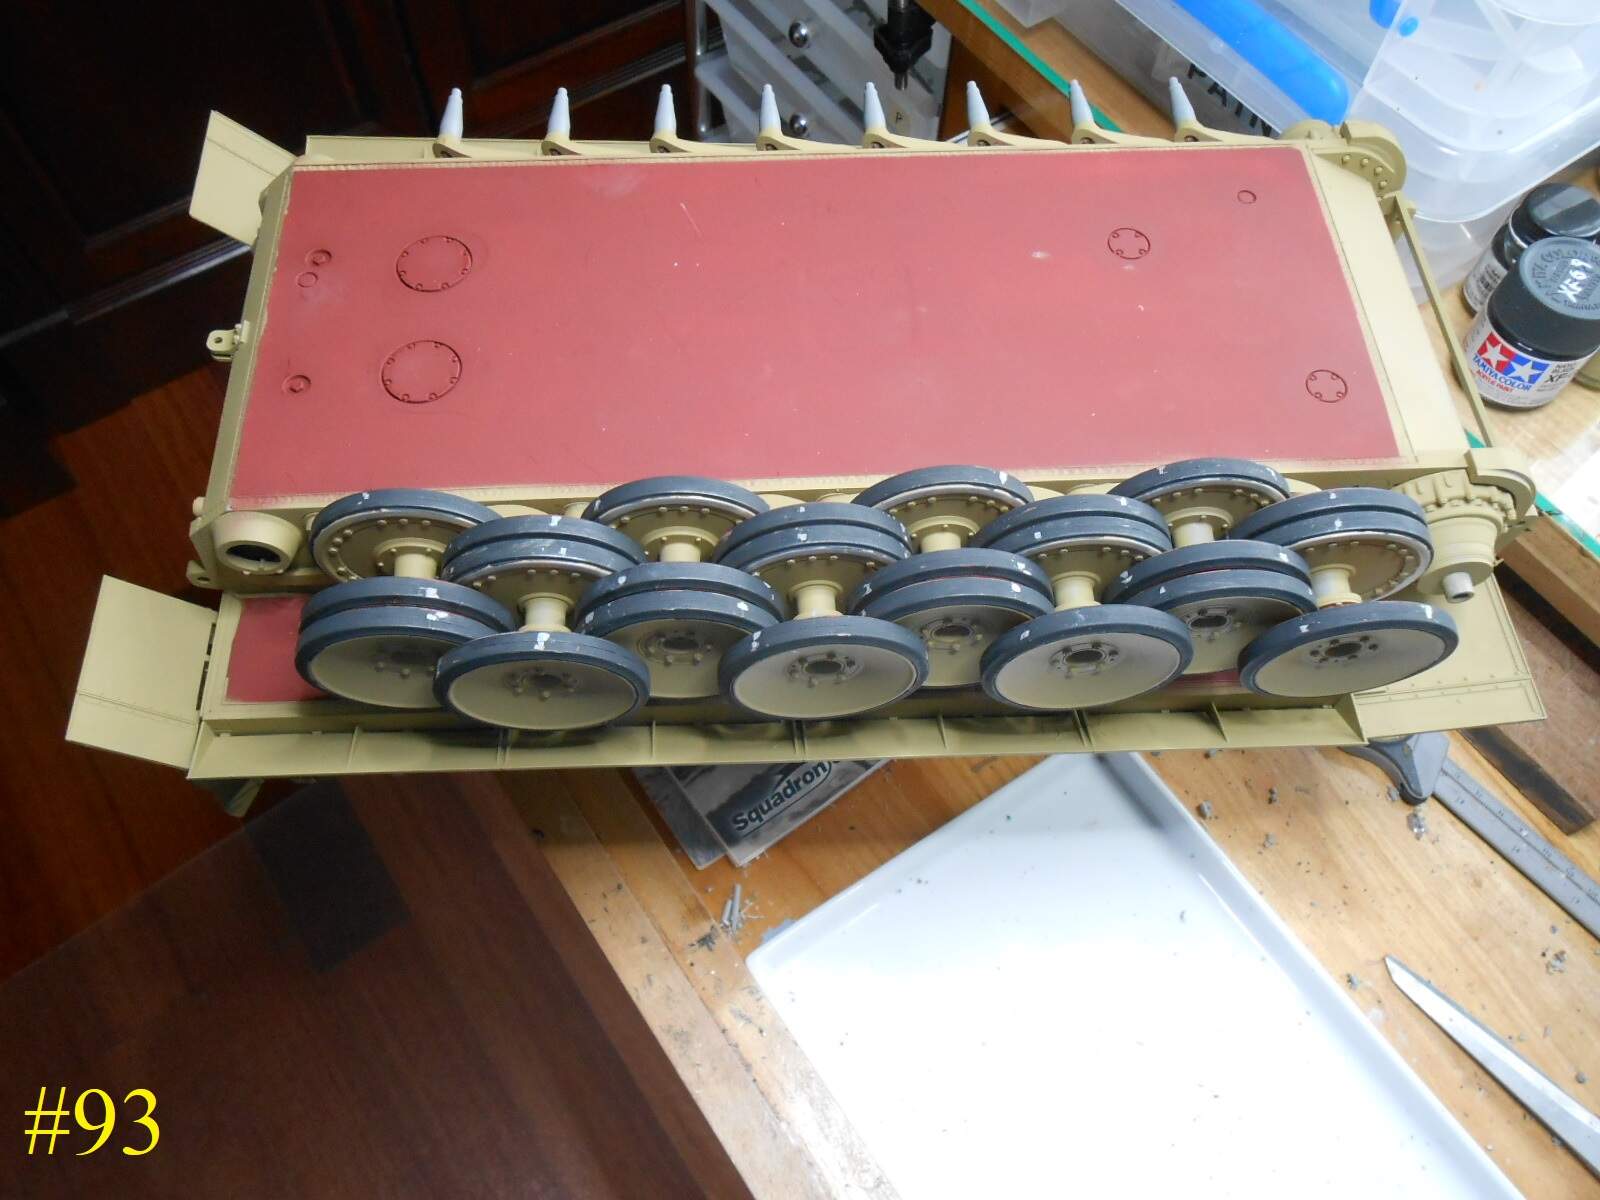
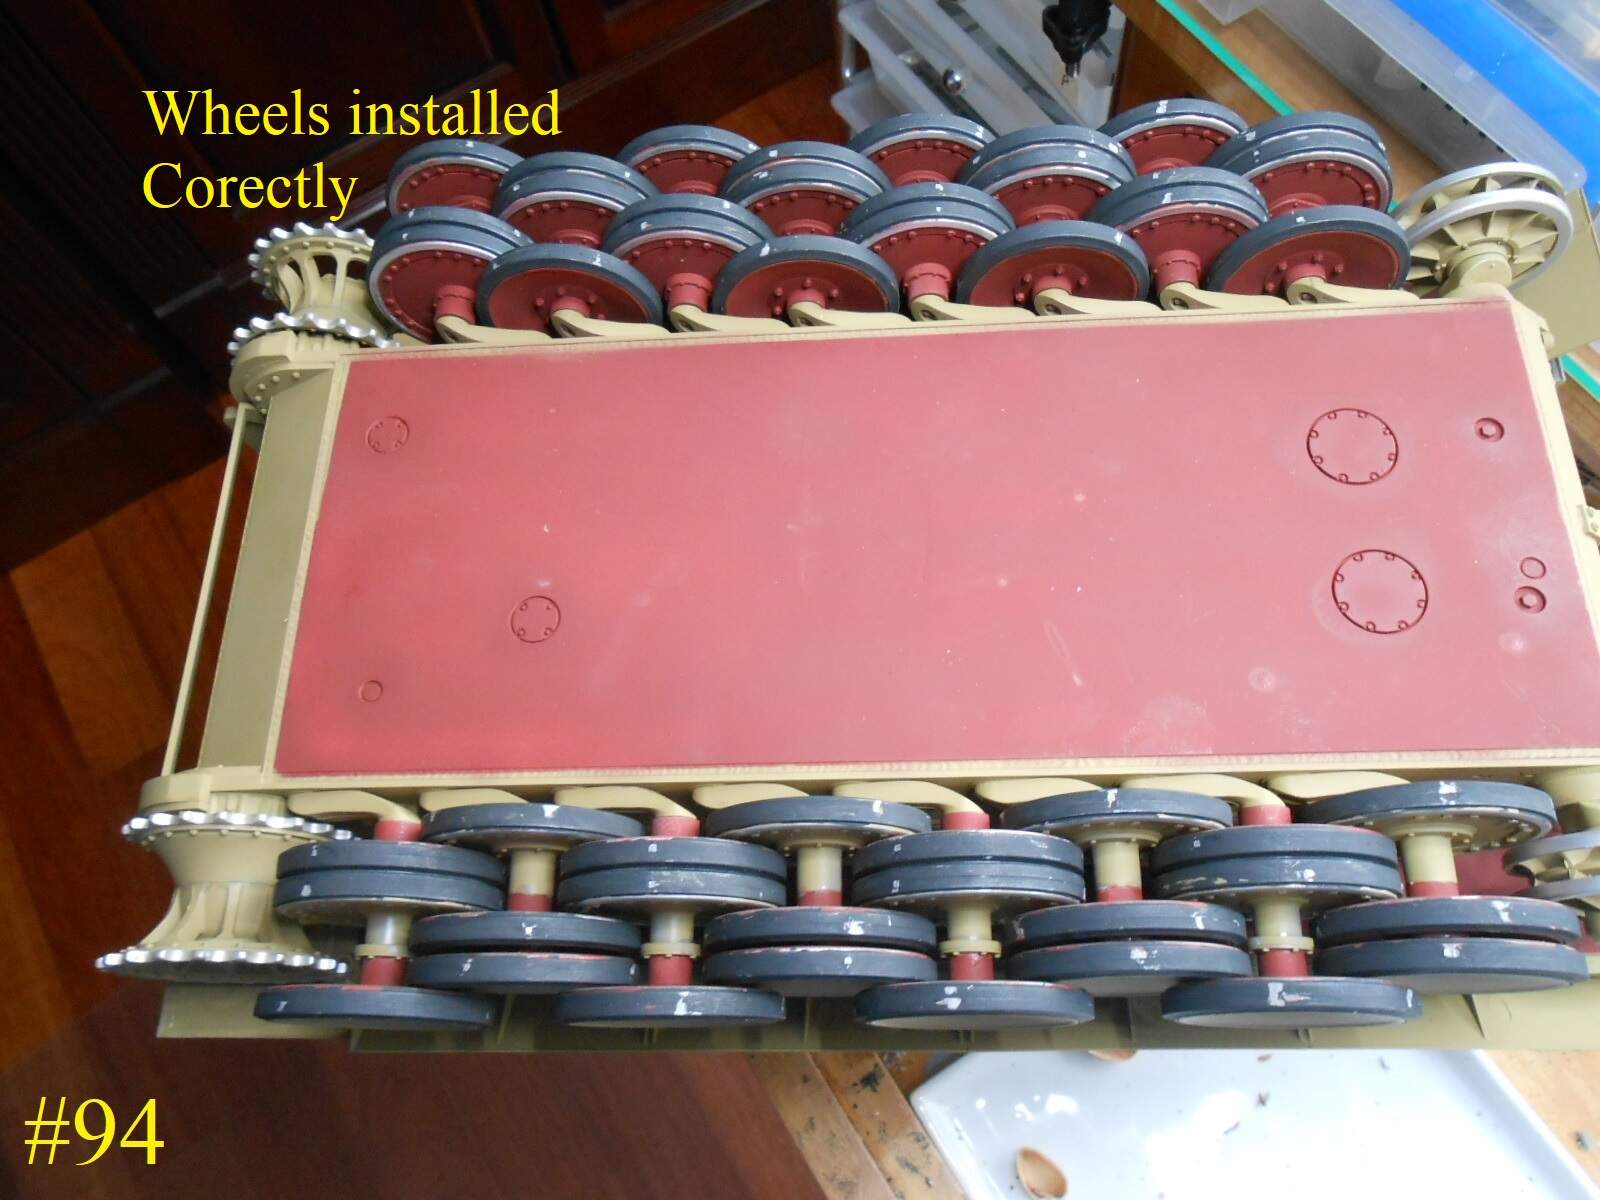

After that disaster I’m moving on to the Track.
Hope that goes right.
I have this mental thing that sometimes I reverse things.
Well anyway moving on
Donald
4 Likes
Such an easy mistake to make, but an excellent recovery.
Keith
1 Like
Boy that’s an awful lot of wheels to deal with!!! Really enjoy following your progress.
2 Likes
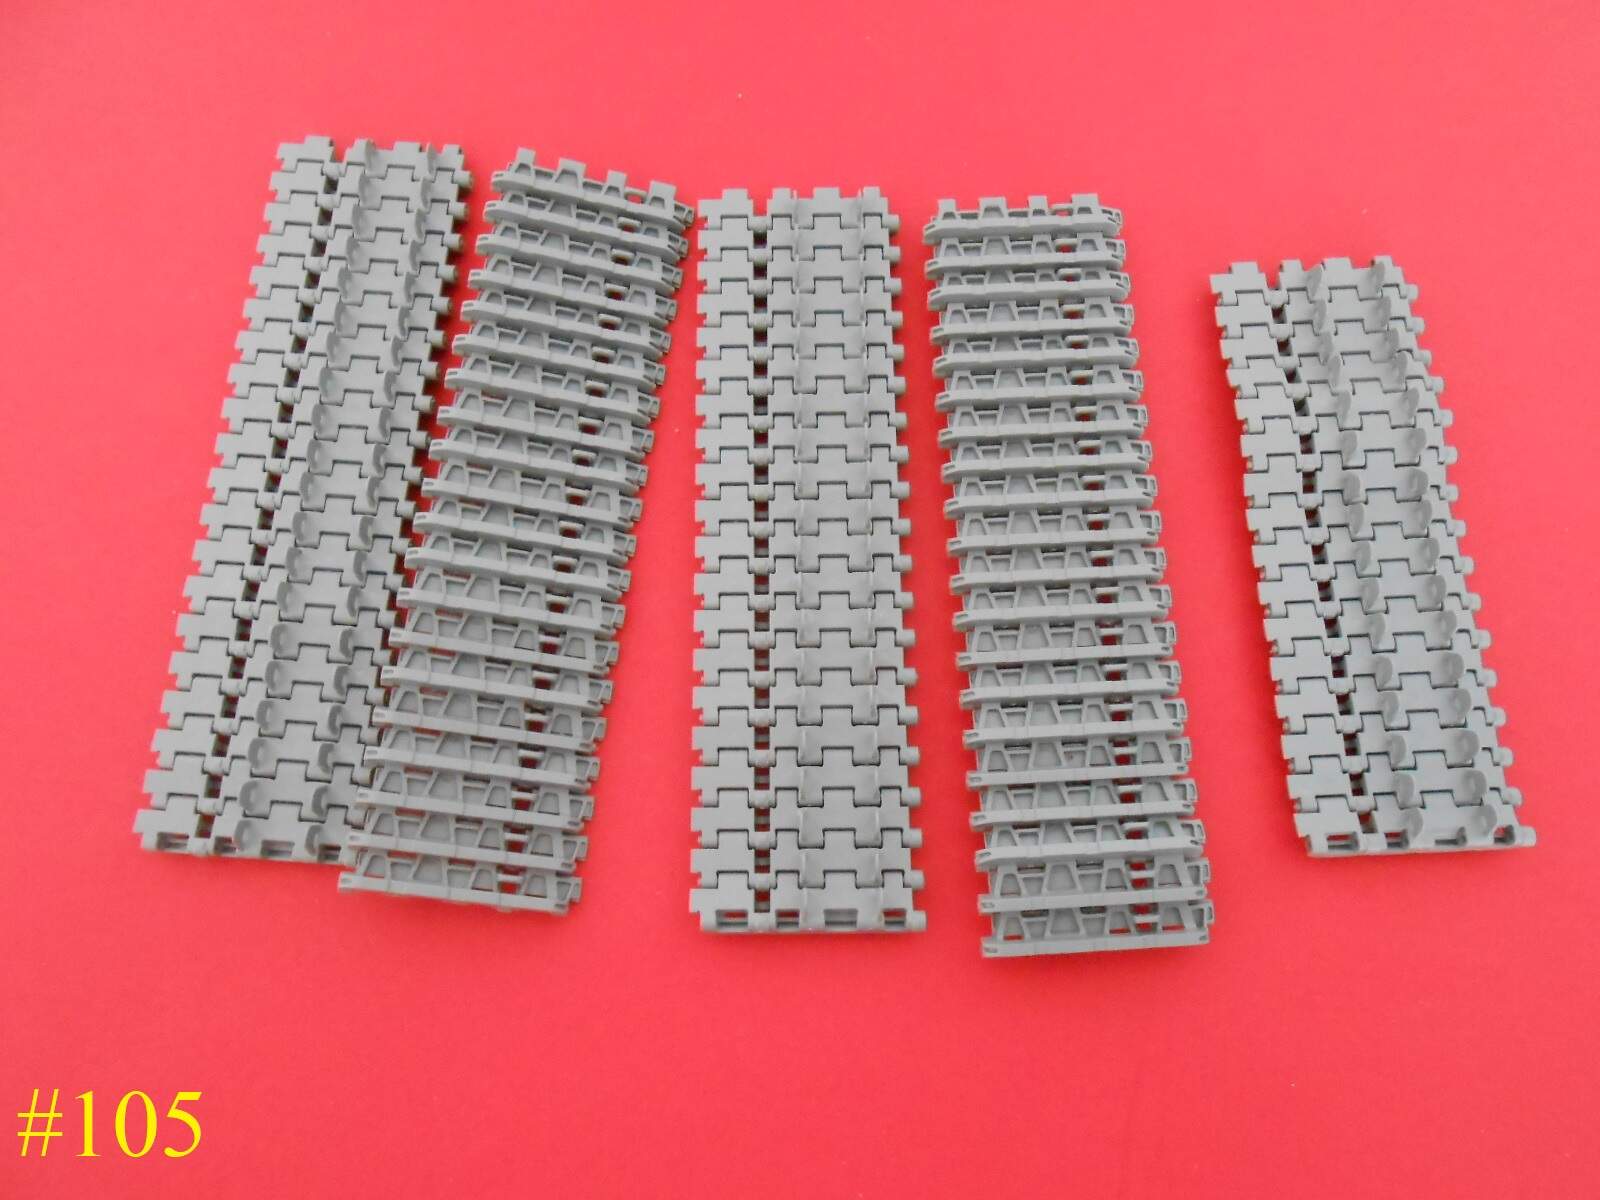
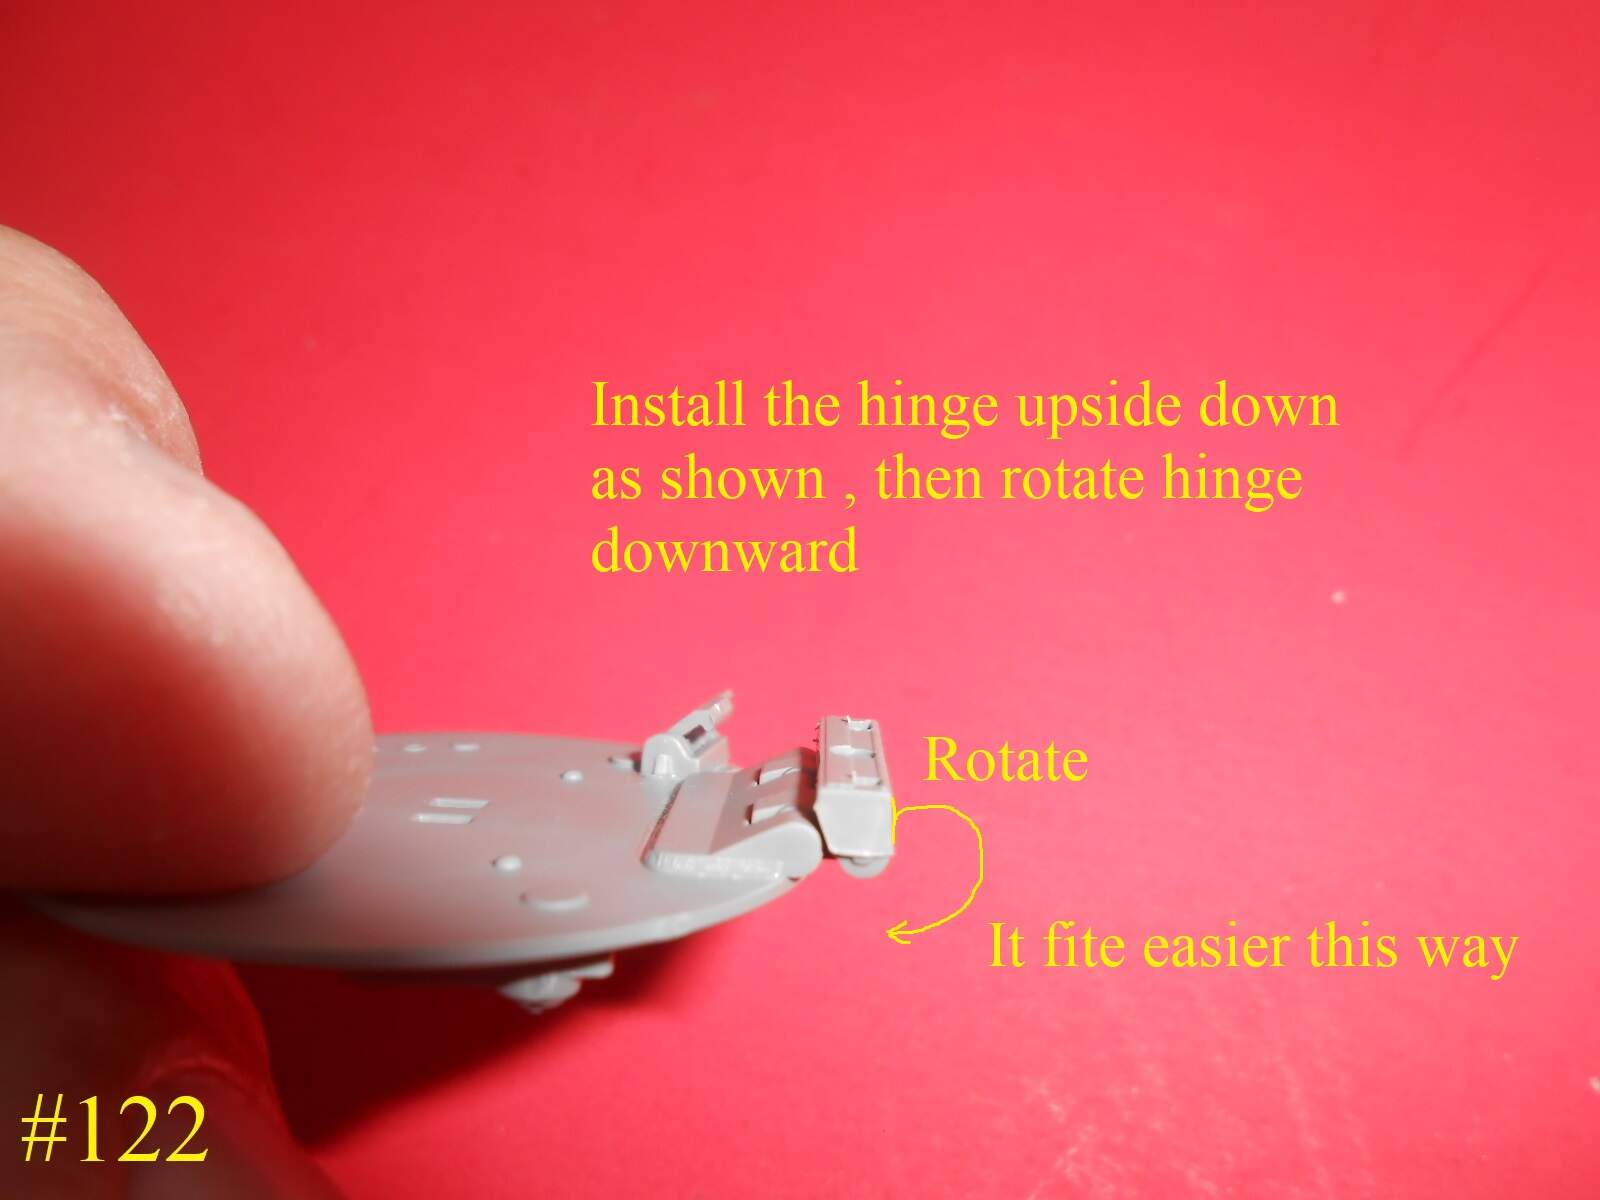
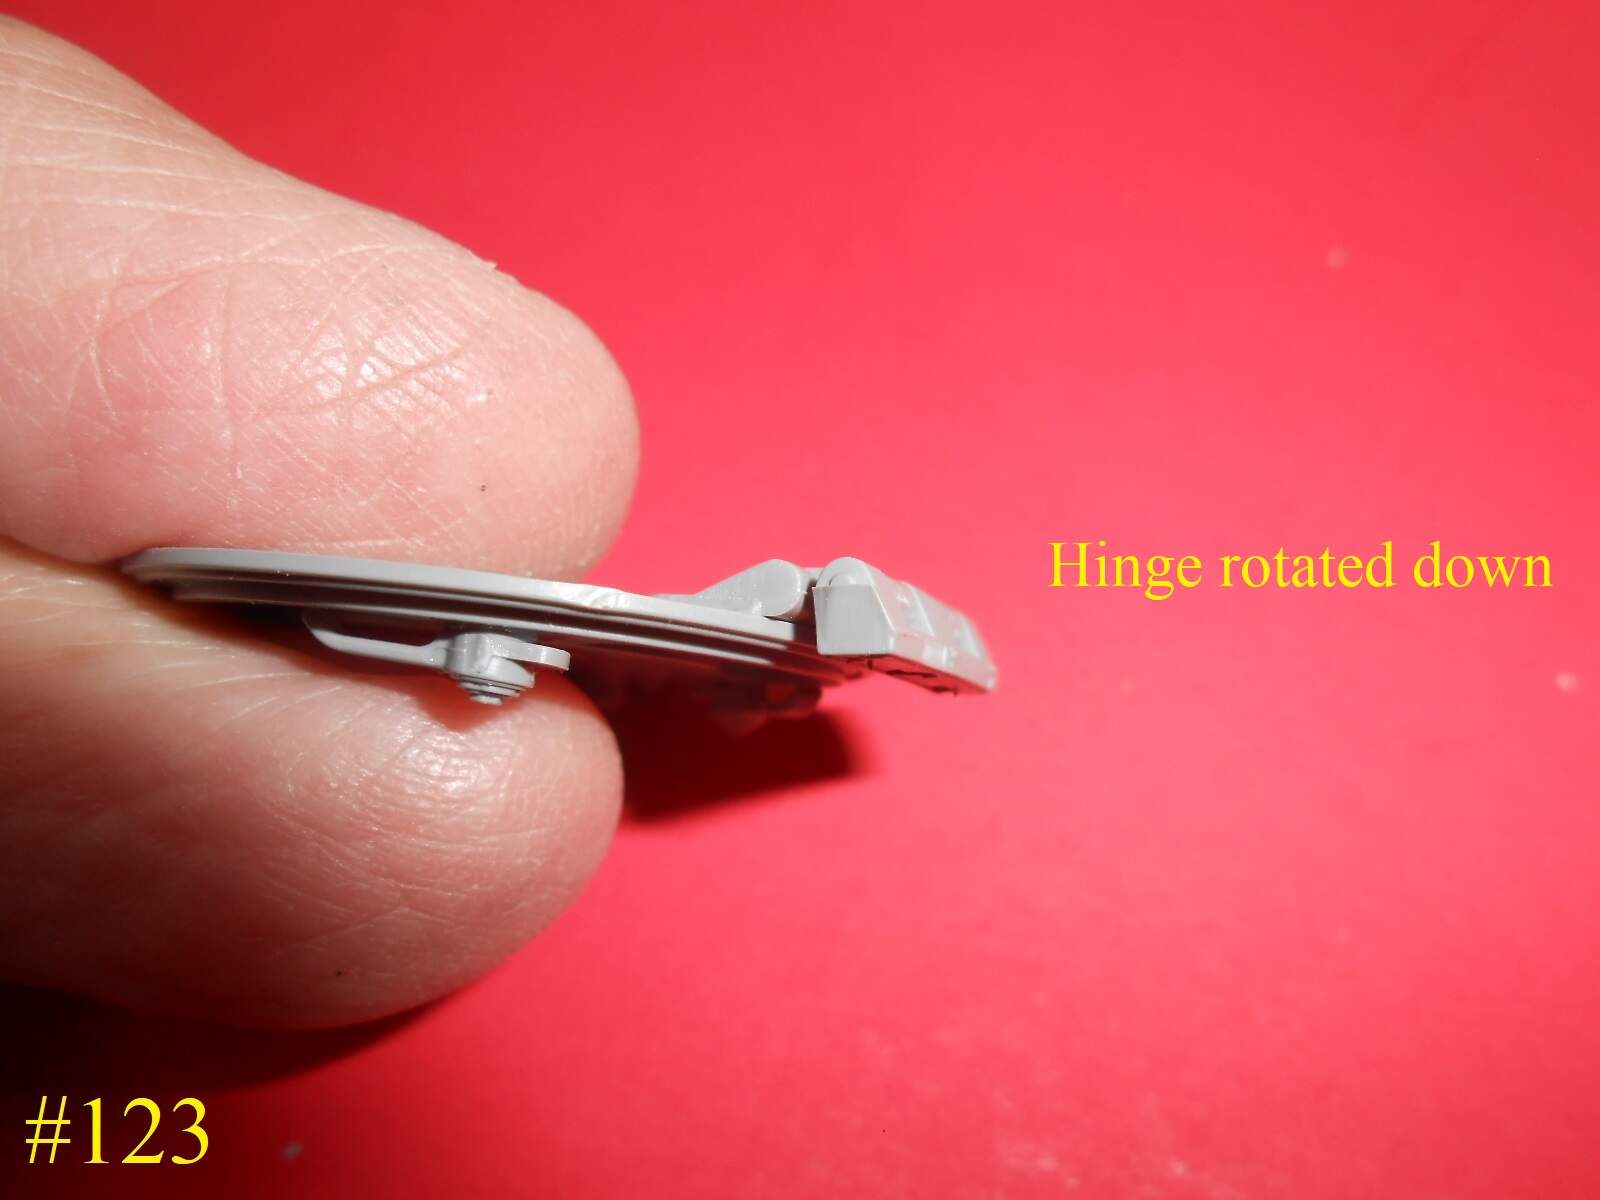
I started the Track , I tried the Instruction way and my Way here’s what I found.

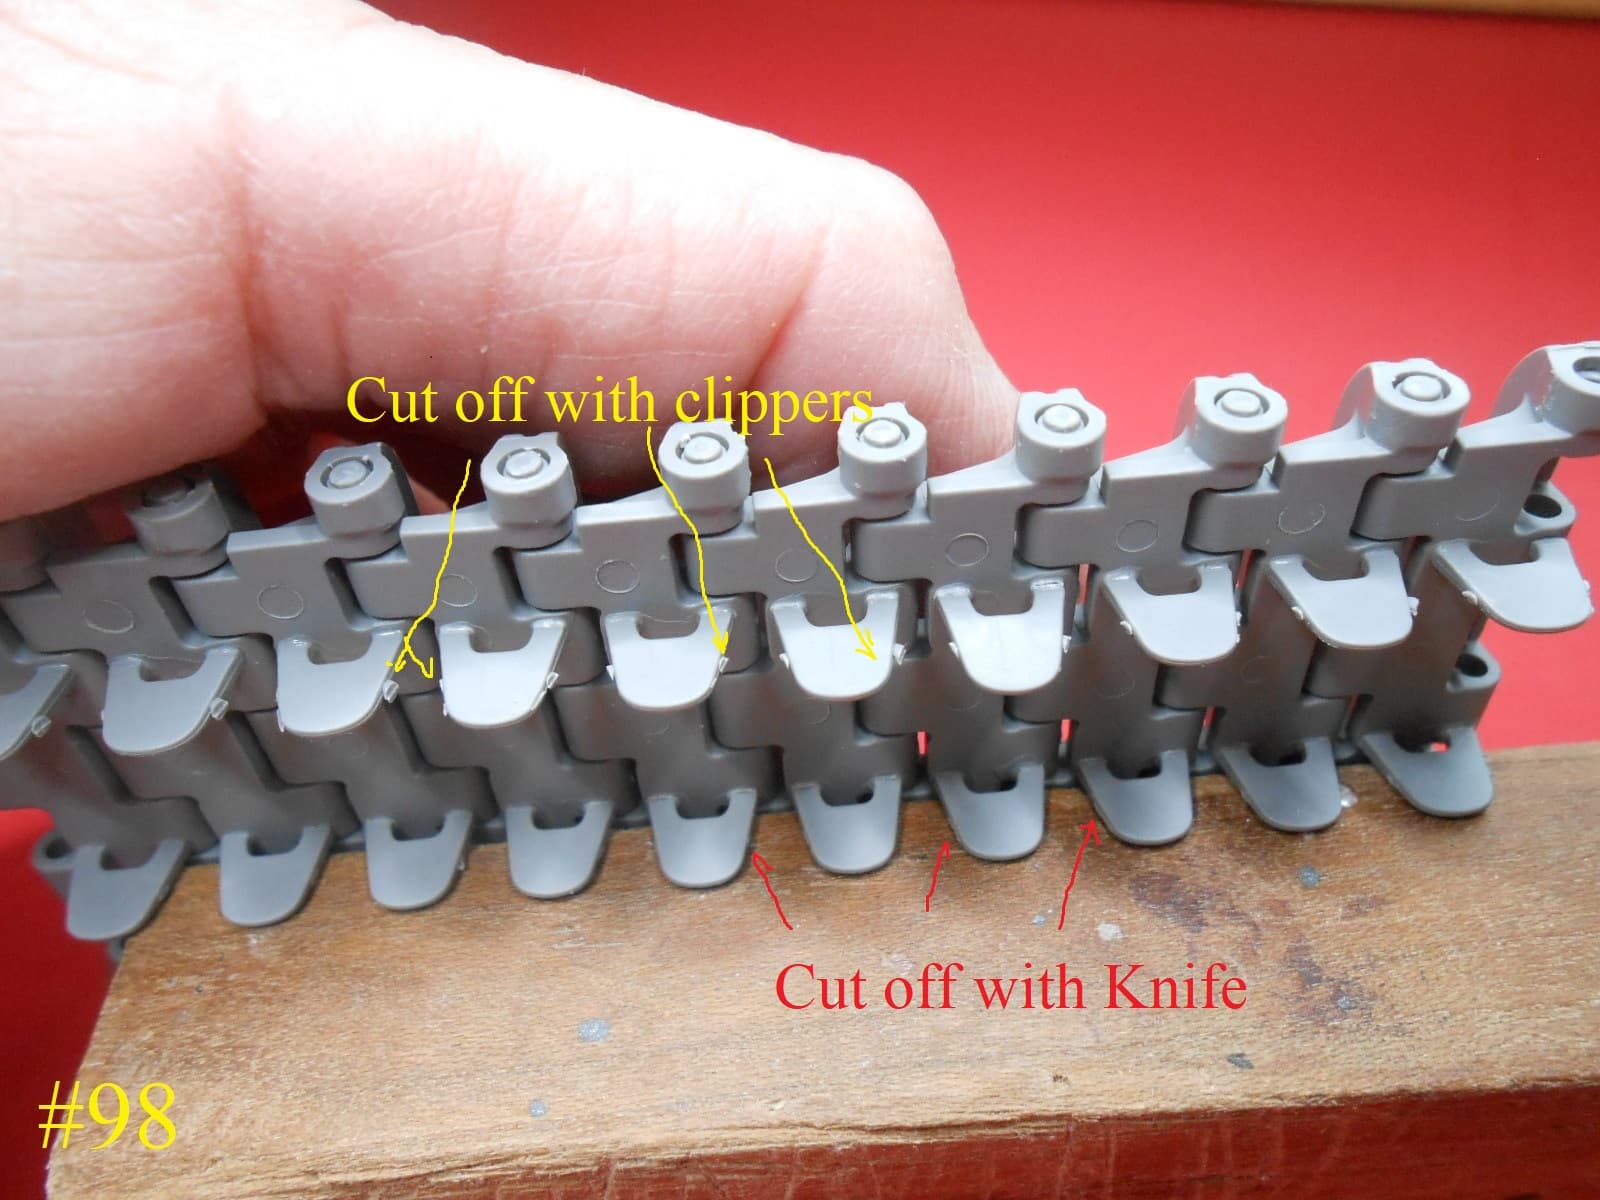


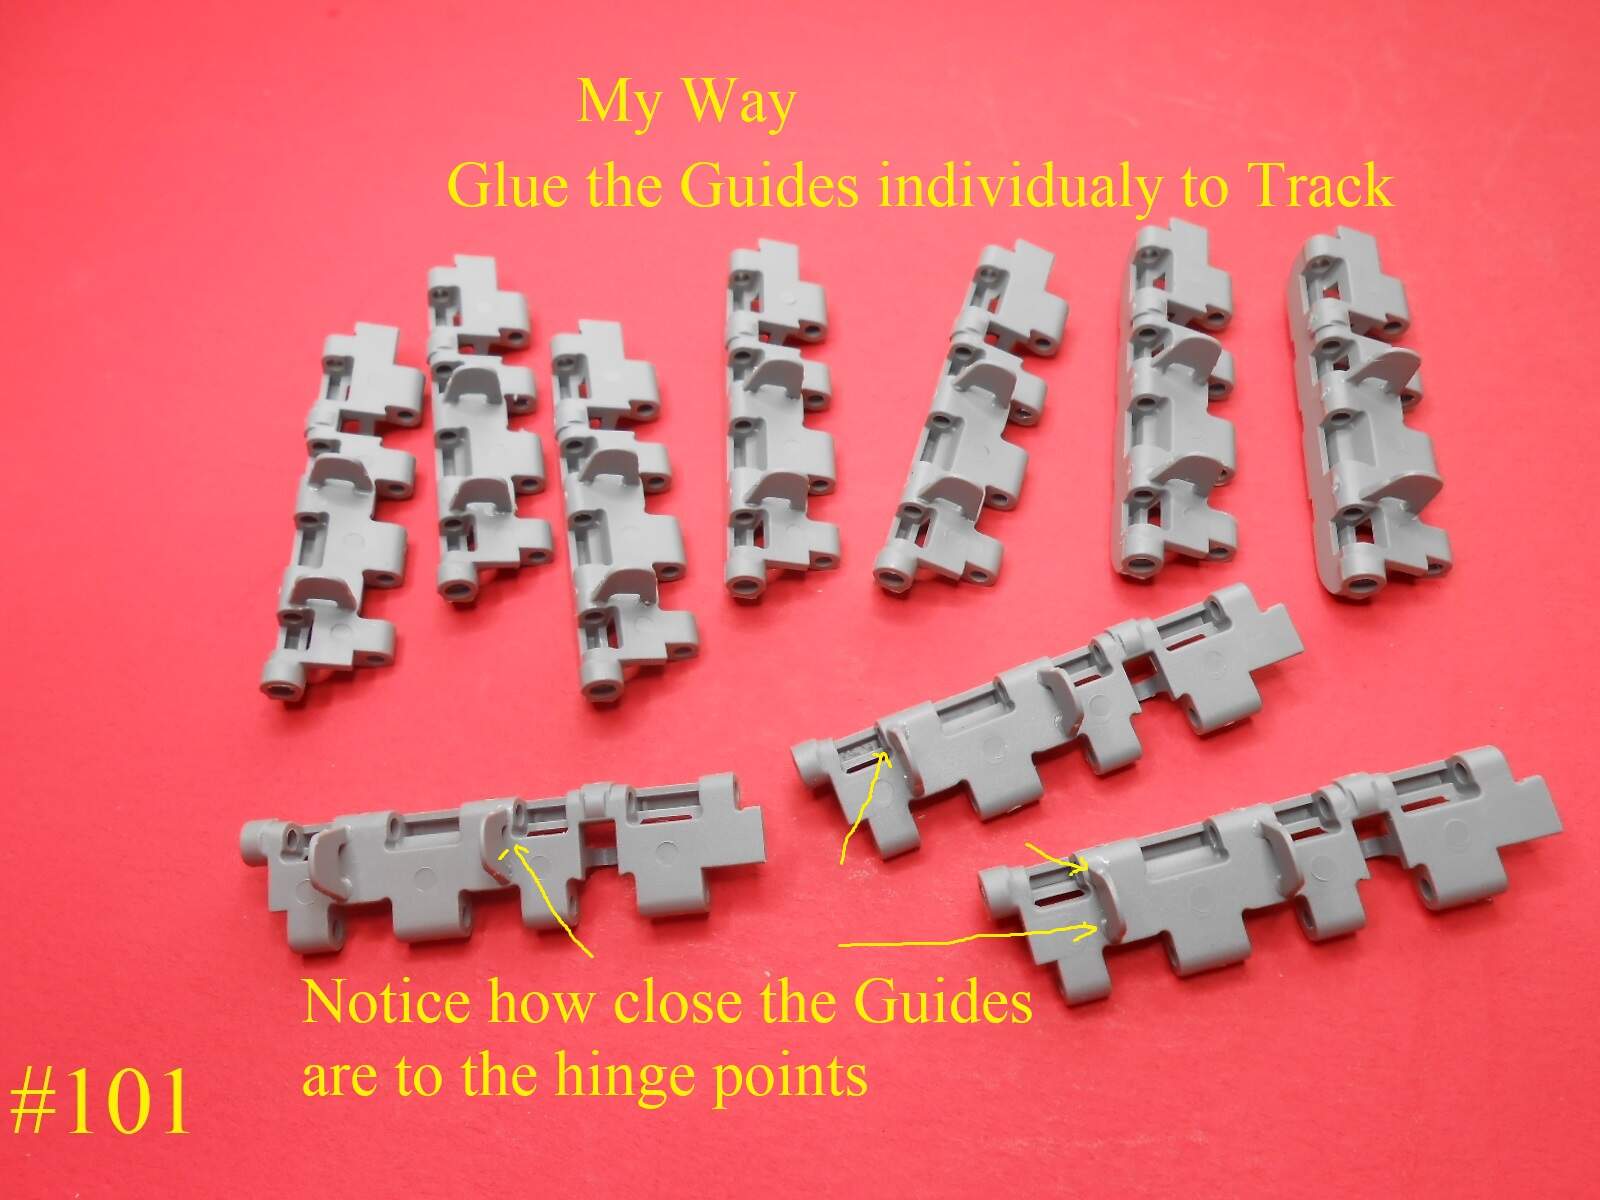
This is just the start , I think I like doing it My Way.
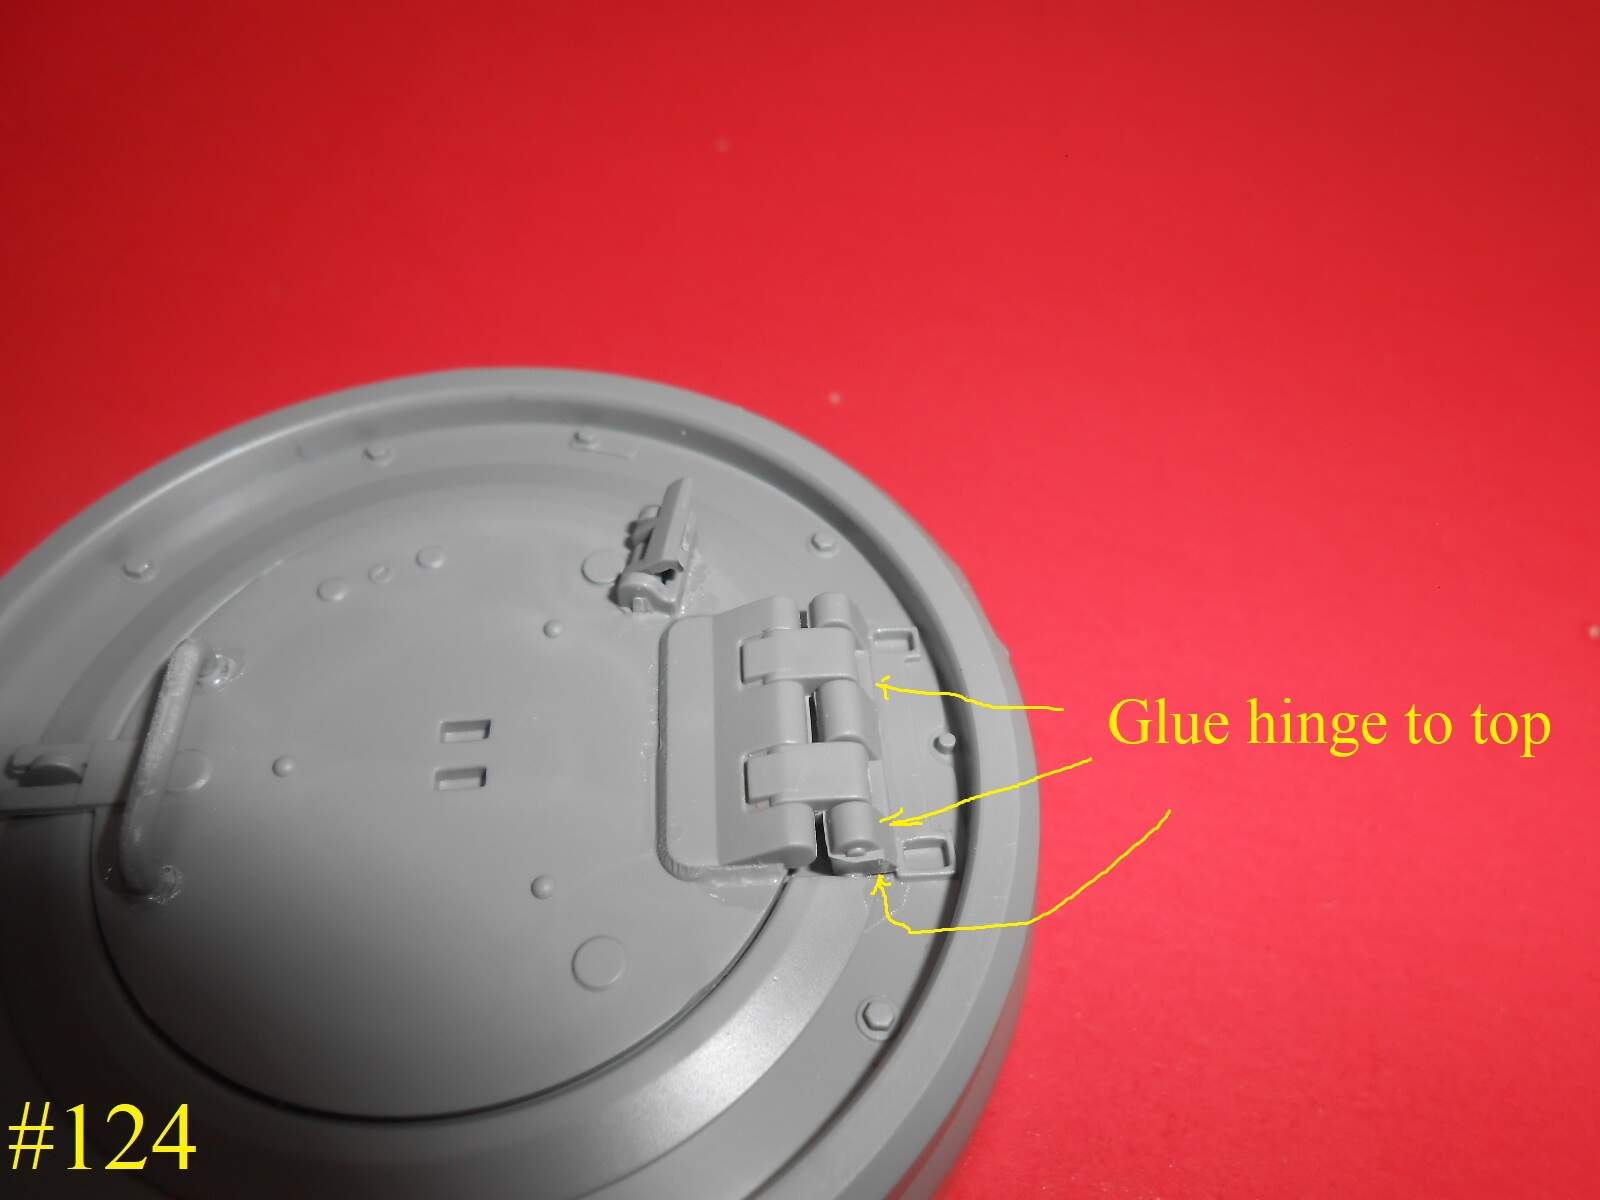
There’s less risk of getting the glue where it shouldn’t be , in the hinge joints.
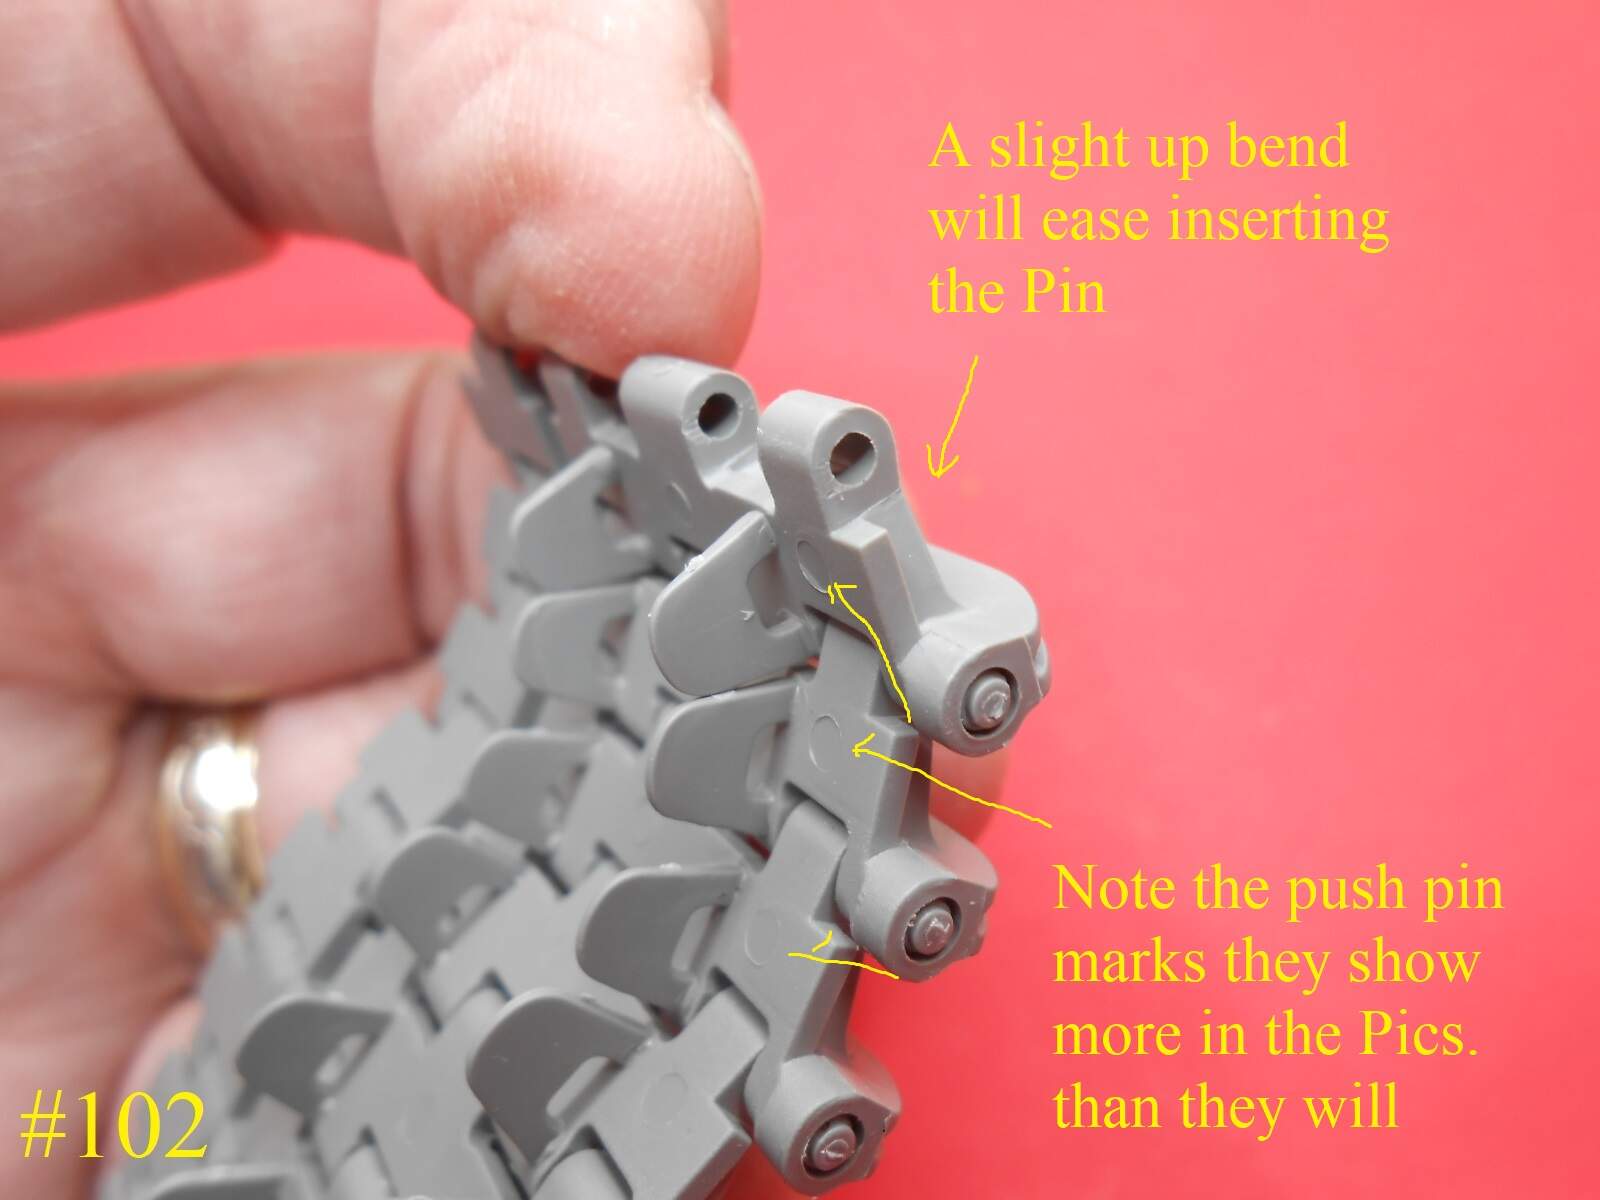
As for the Push pin marks , I don’t think it’s worth bothering with them.
They are verry light and will be mostly under the wheels.
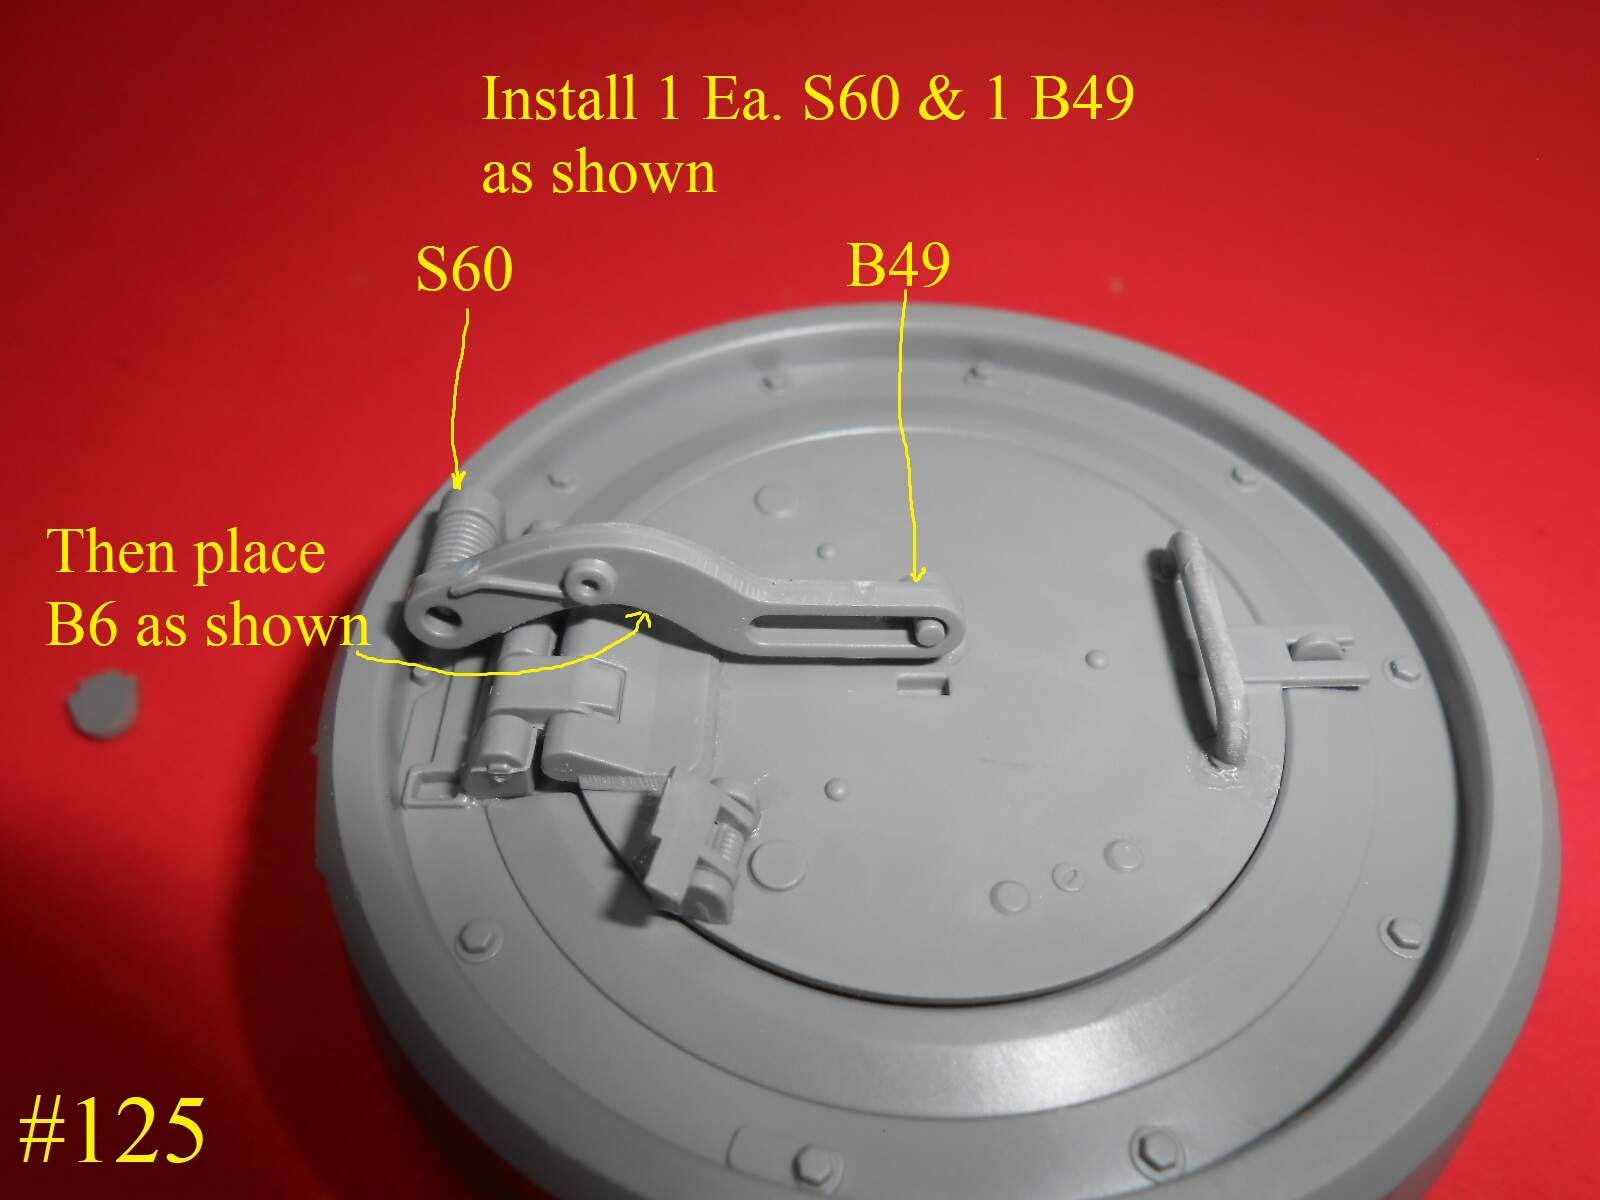
Finished for now.
Donald
6 Likes
Well I have the track assembled and ready for paint
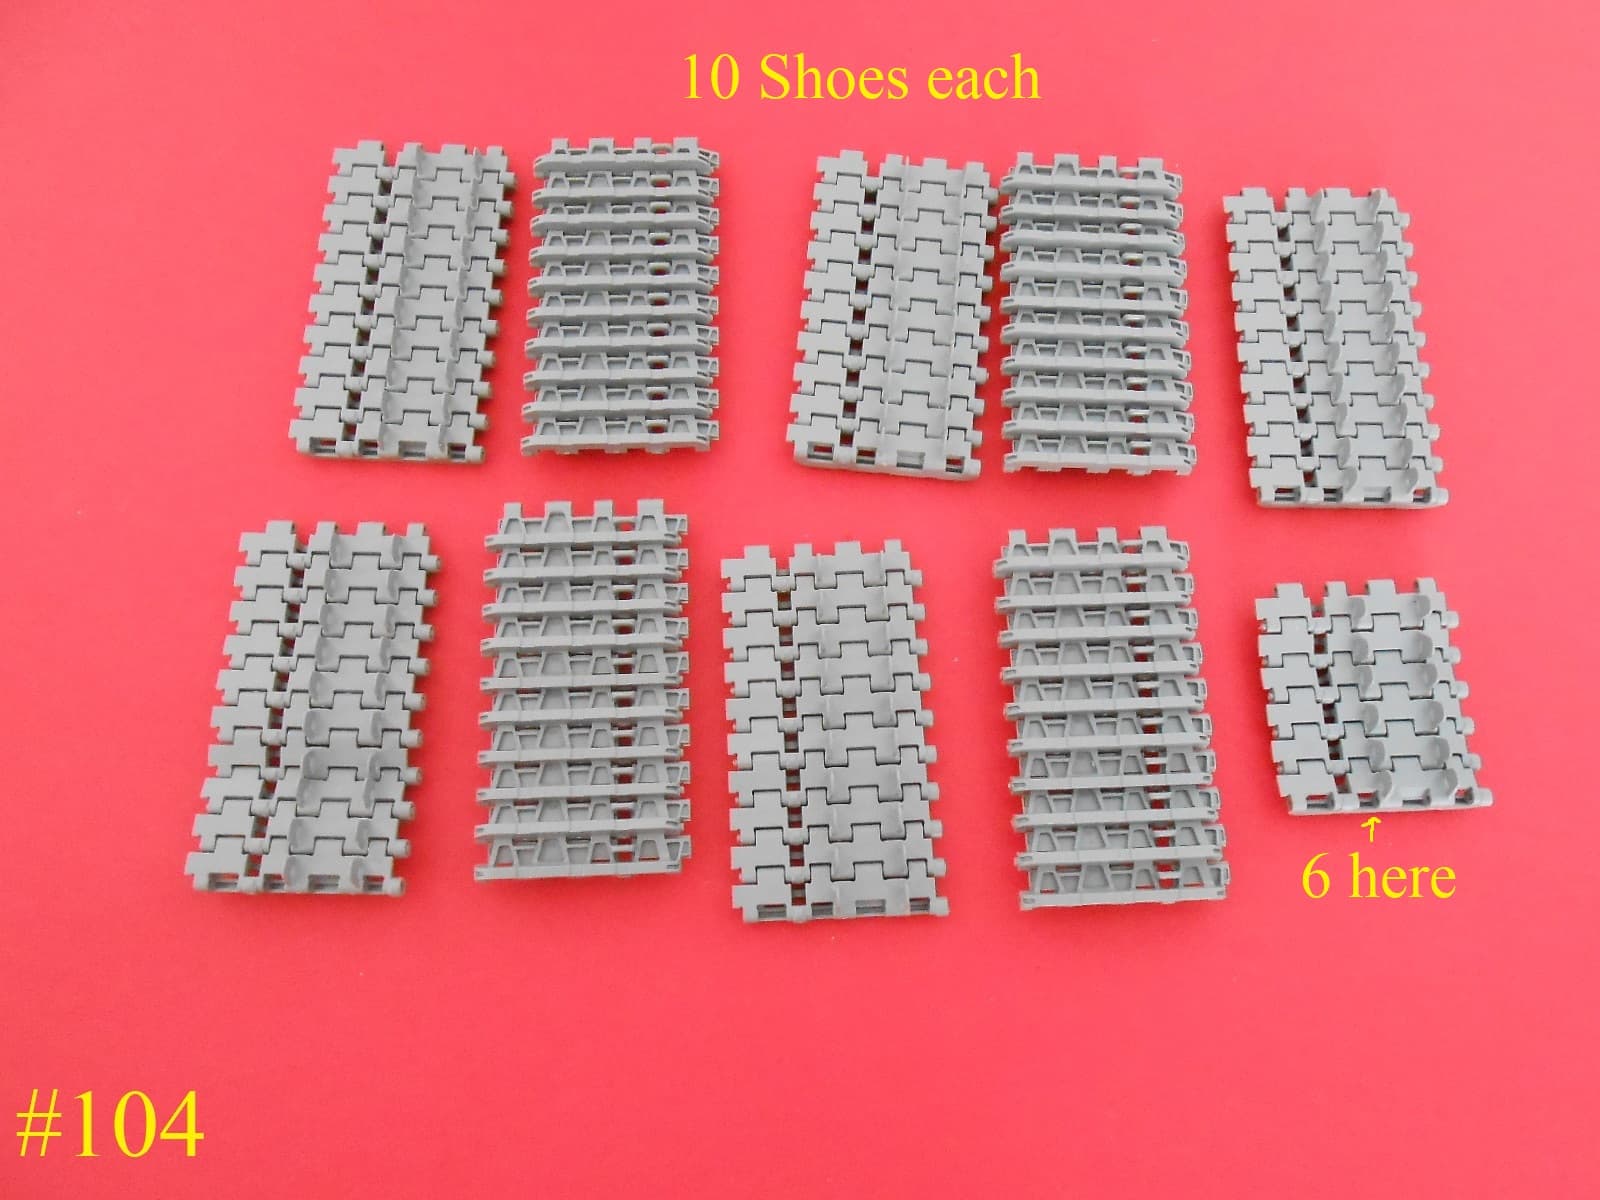


Just double and double , it’s easier to handle this way
Regards
Donald
8 Likes
Good idea of working with sections,no sense trying to deal with one long run
3 Likes
Totally absorbing build Donald, I admire your cojones. Interesting what you said about sometimes reversing things, me also & supposedly because I’m left-handed. If you’re not, you may be quietly ambidextrous!
2 Likes
That’s my usual suggestion for folks dealing with regular or complex link and link. Do a little bit at the start and end of each build session. By the time you need to add track you have it complete or almost there and it’s not one single step you have struggle through at the end and stalling your project.
4 Likes
Agreed. “How do you eat an elephant? One bite at a time.” Build tracks in sets of 10 at the start of each build session when you’re fresh. How many of us have trackless AFV’s sitting on the shelf of shame because we procrastinated on the tracks until we moved on to another kit? Uh huh. Bad mojo.
4 Likes
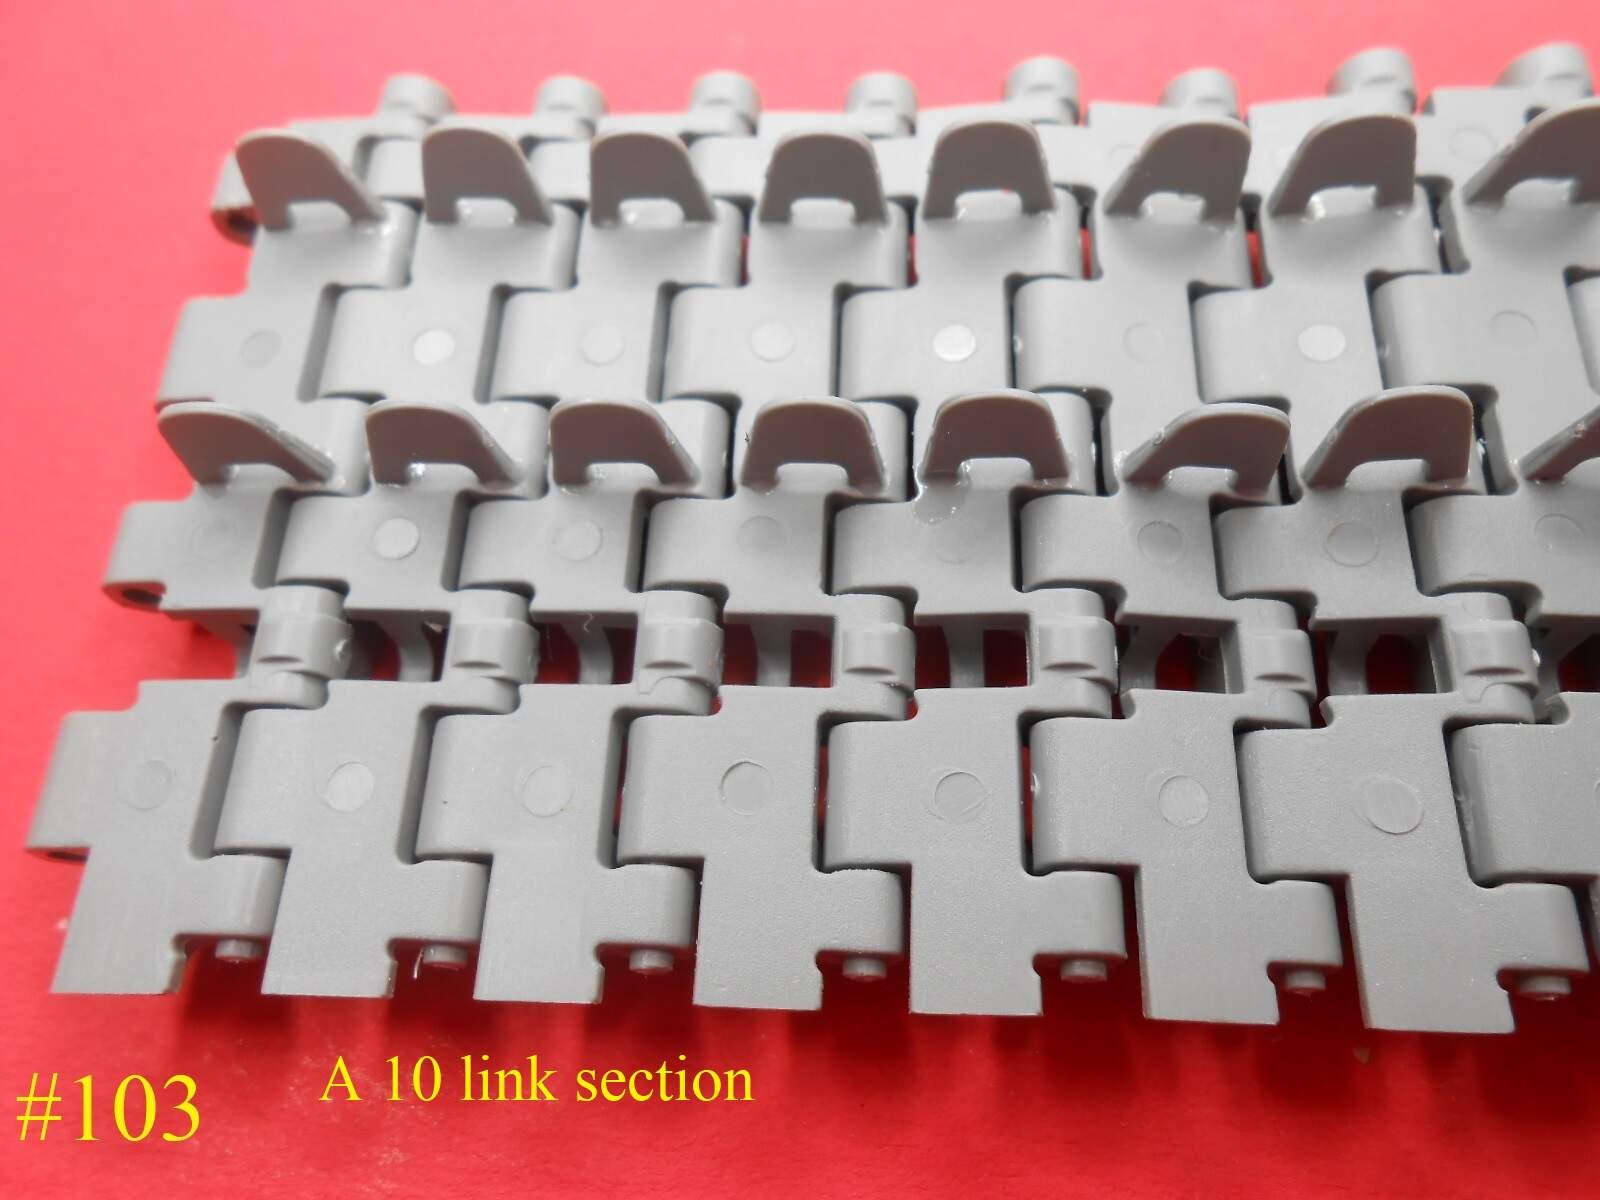
It’s easiest to handle 10 links at a time , then double to 20 to 40 and so on . I always complete the run before weathering.
Here’s the result.


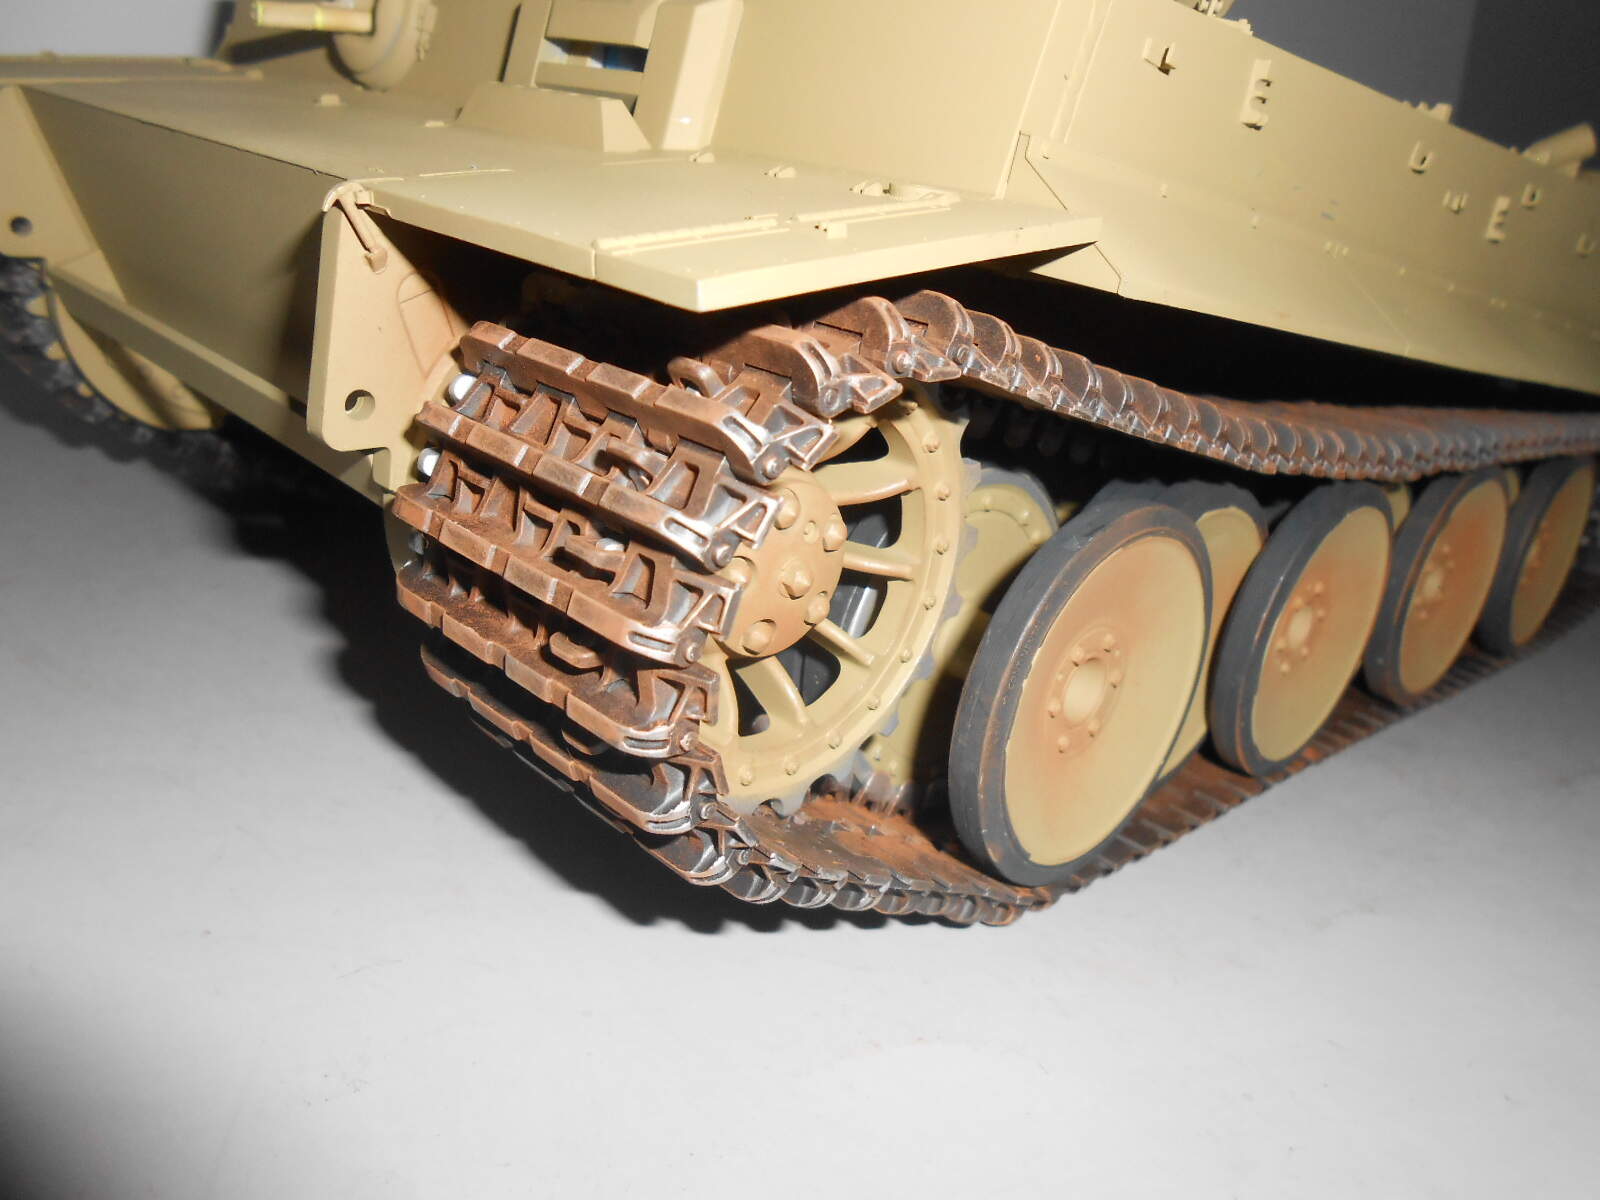
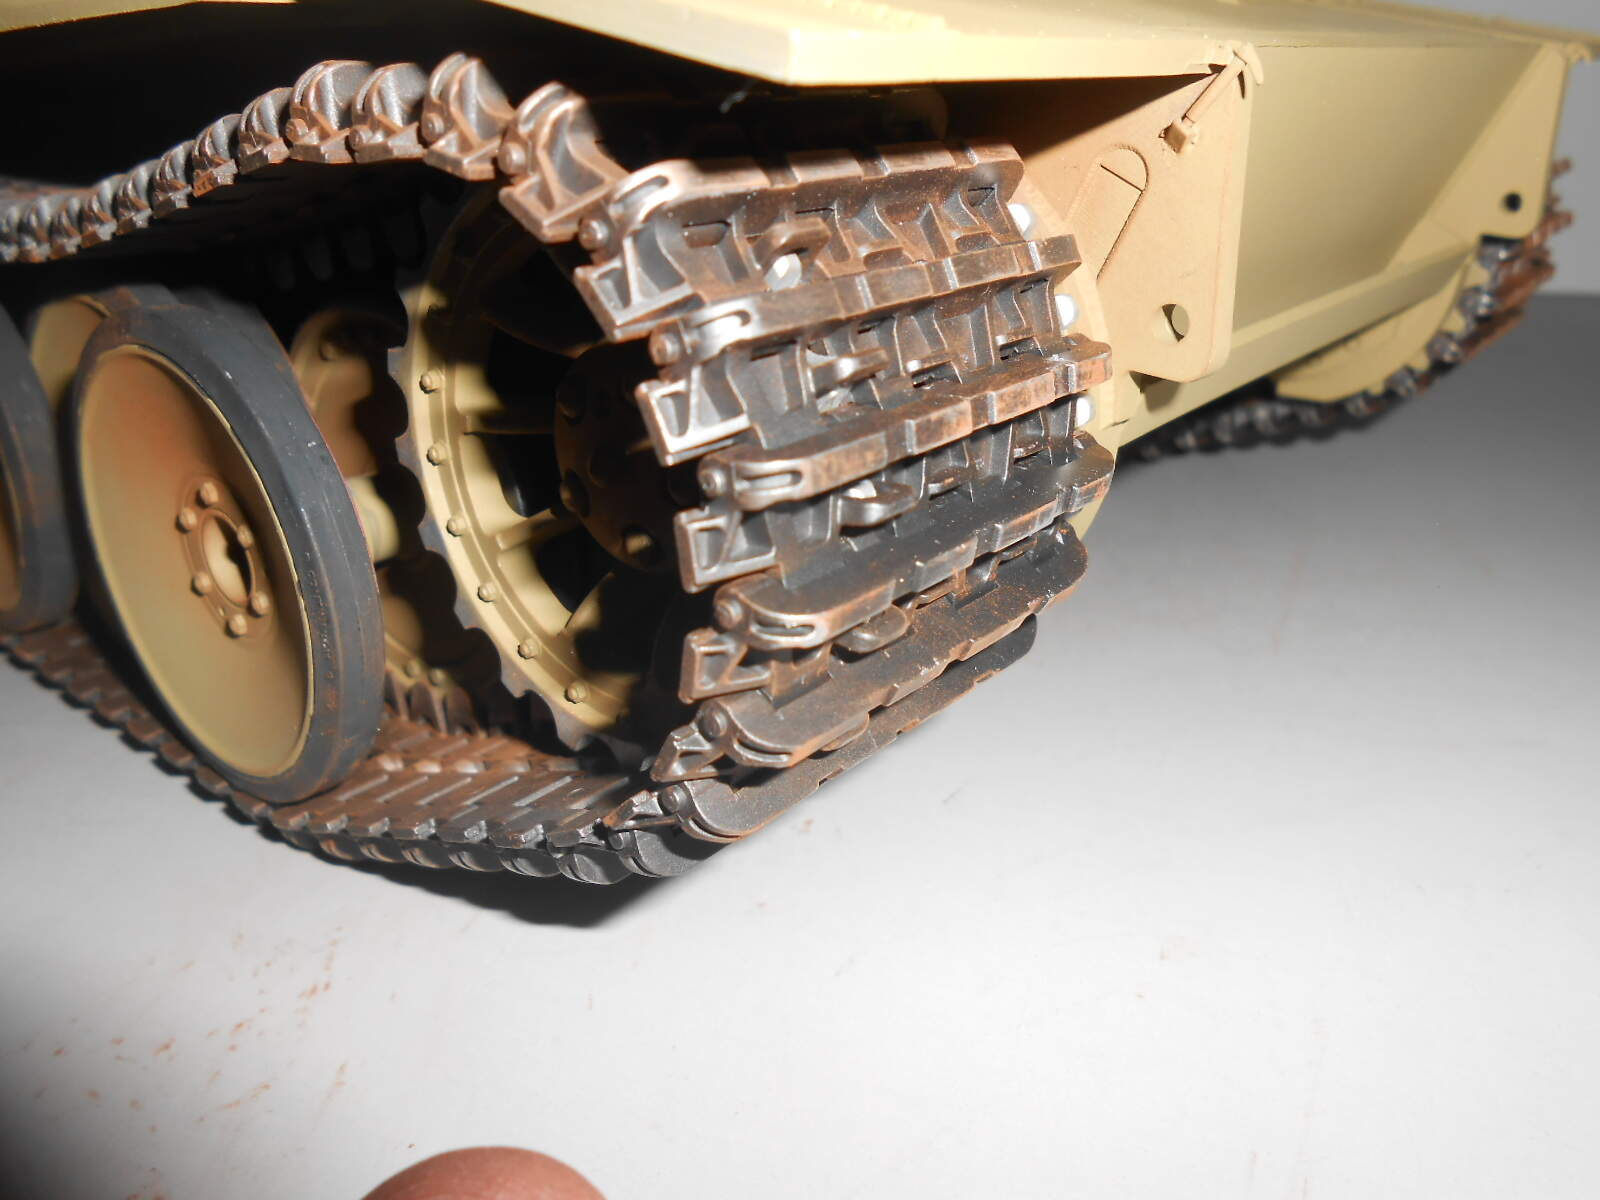
I’ll add more at the finish of the model
Regards
Donald
5 Likes
I’ve been working on the Gun and some turret parts.
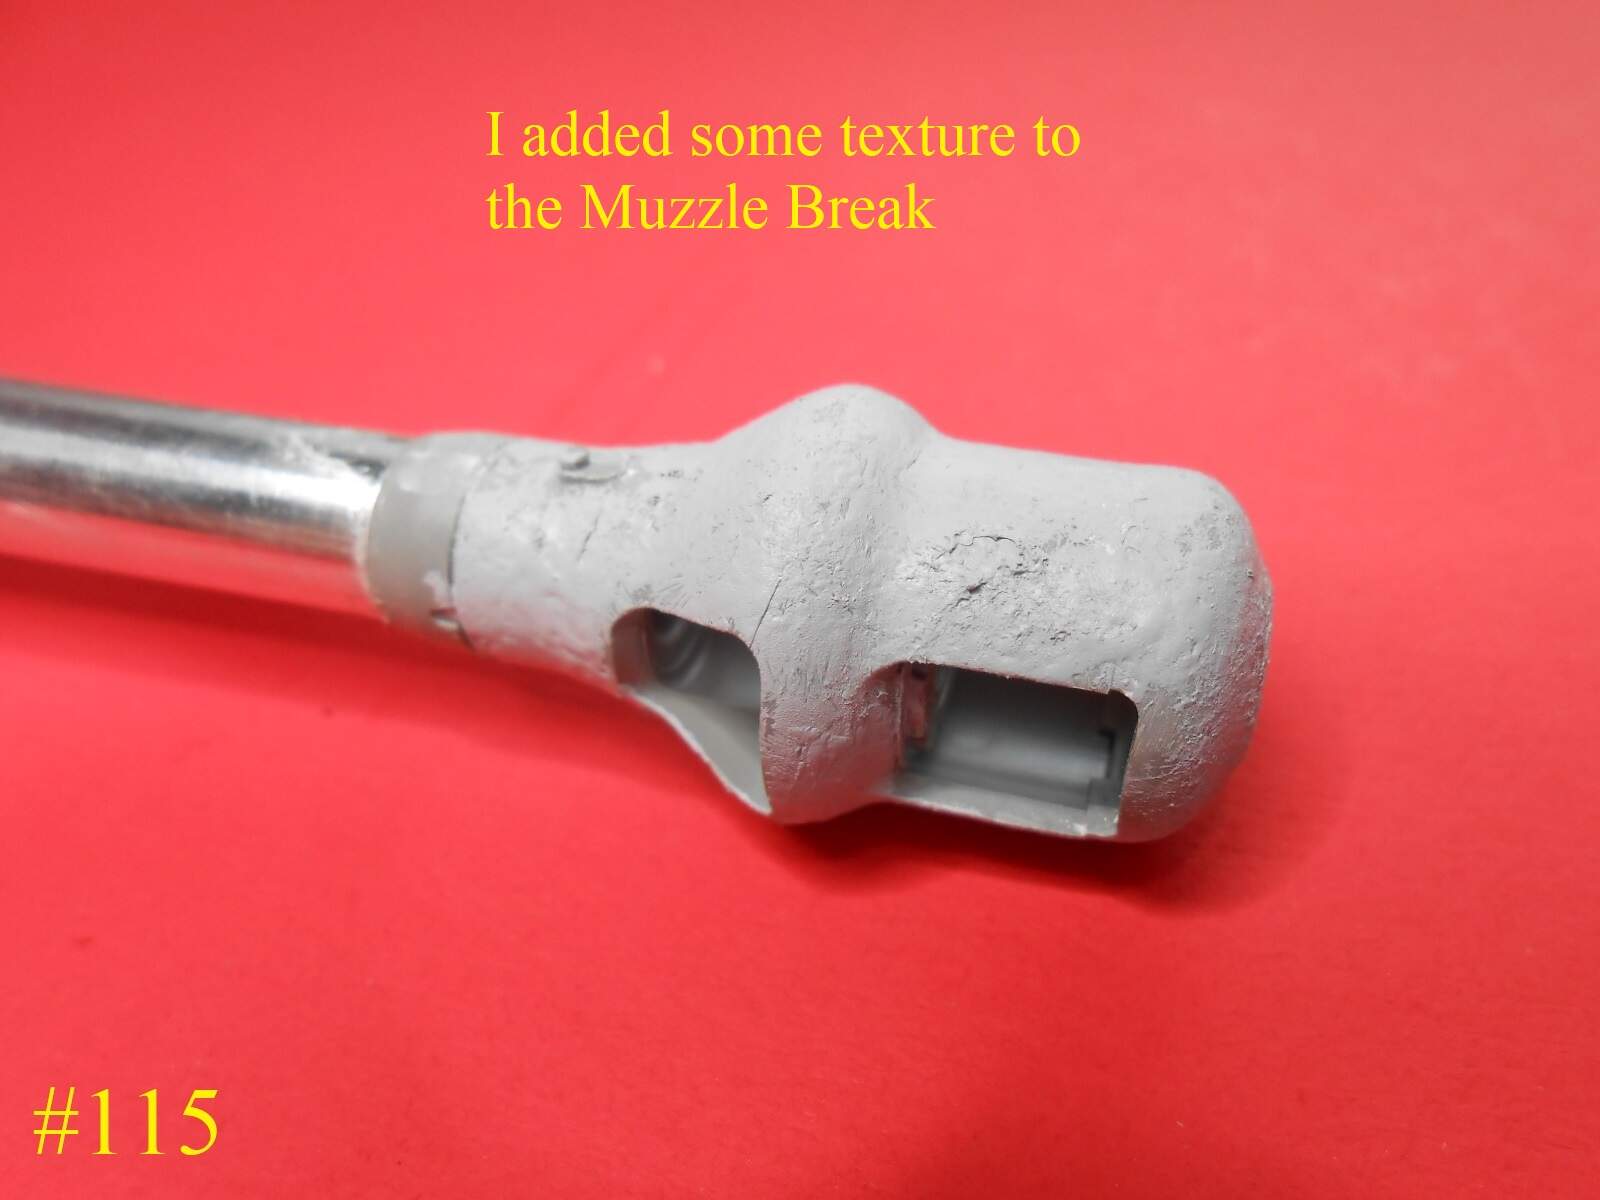
I used the method shown below to keep the Muzzle Break level with the Mantlet.
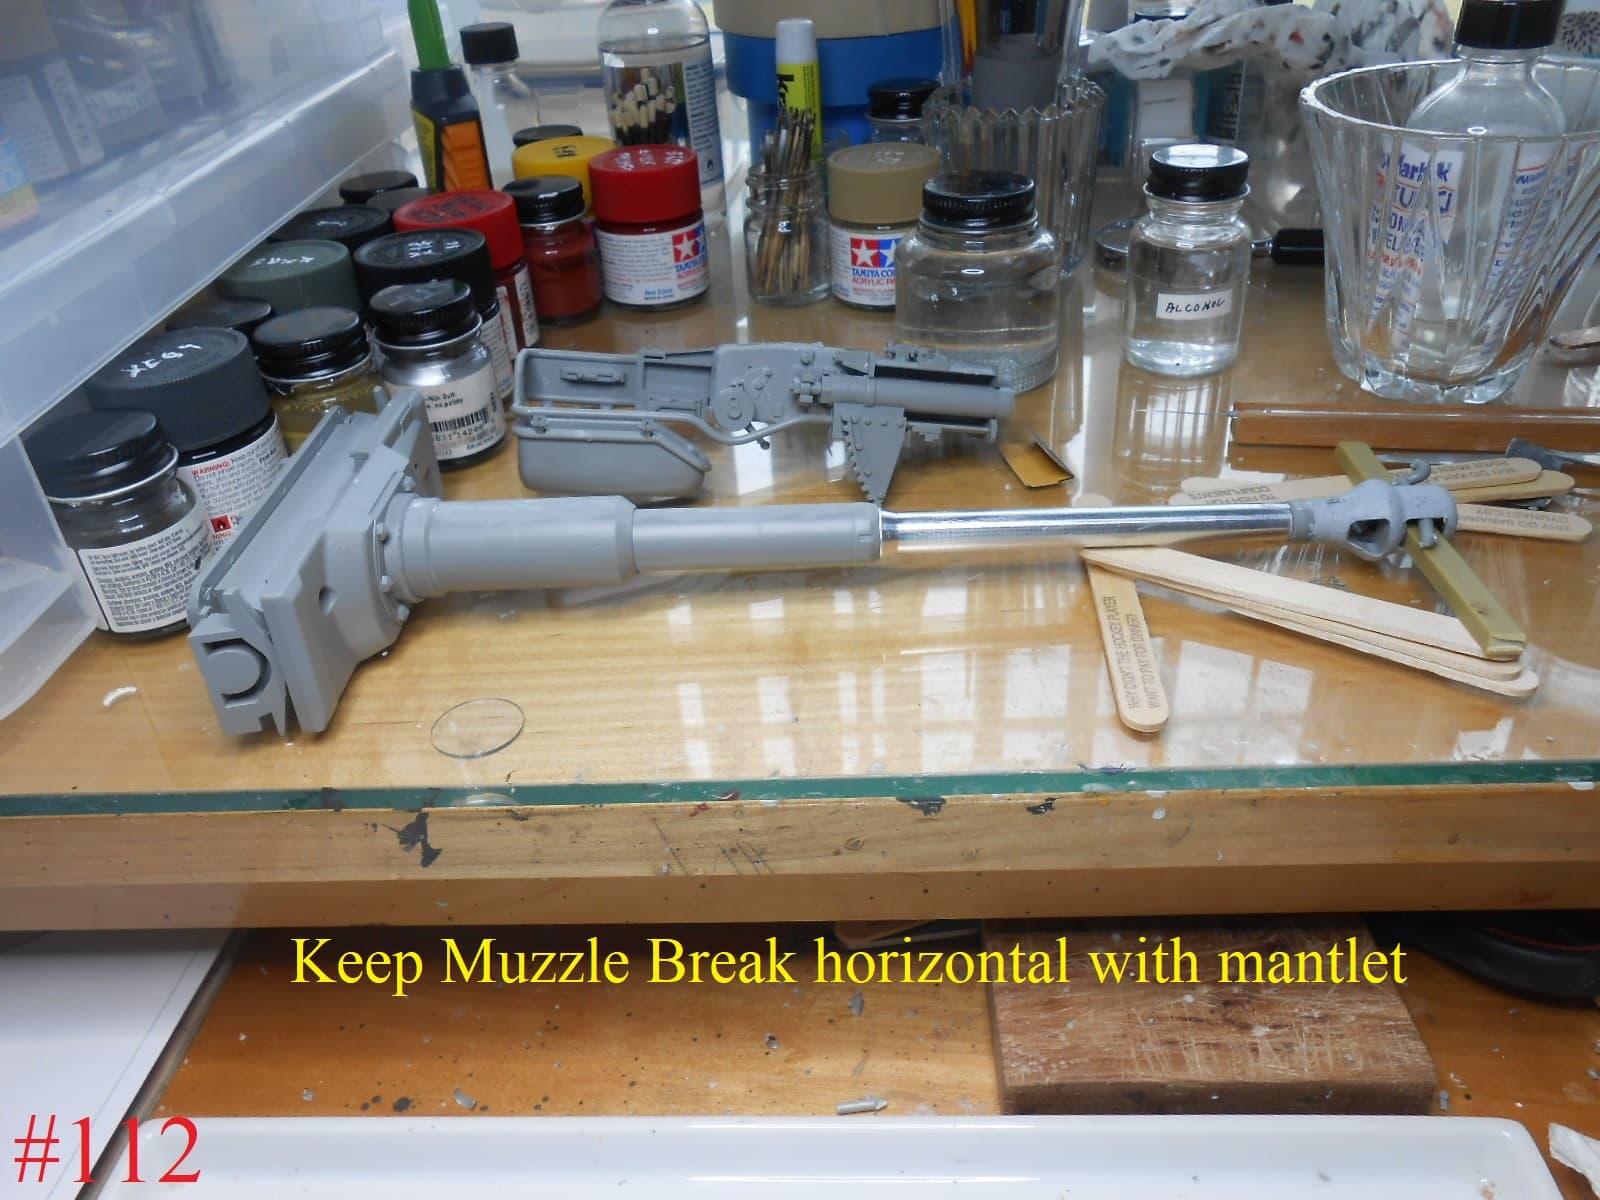
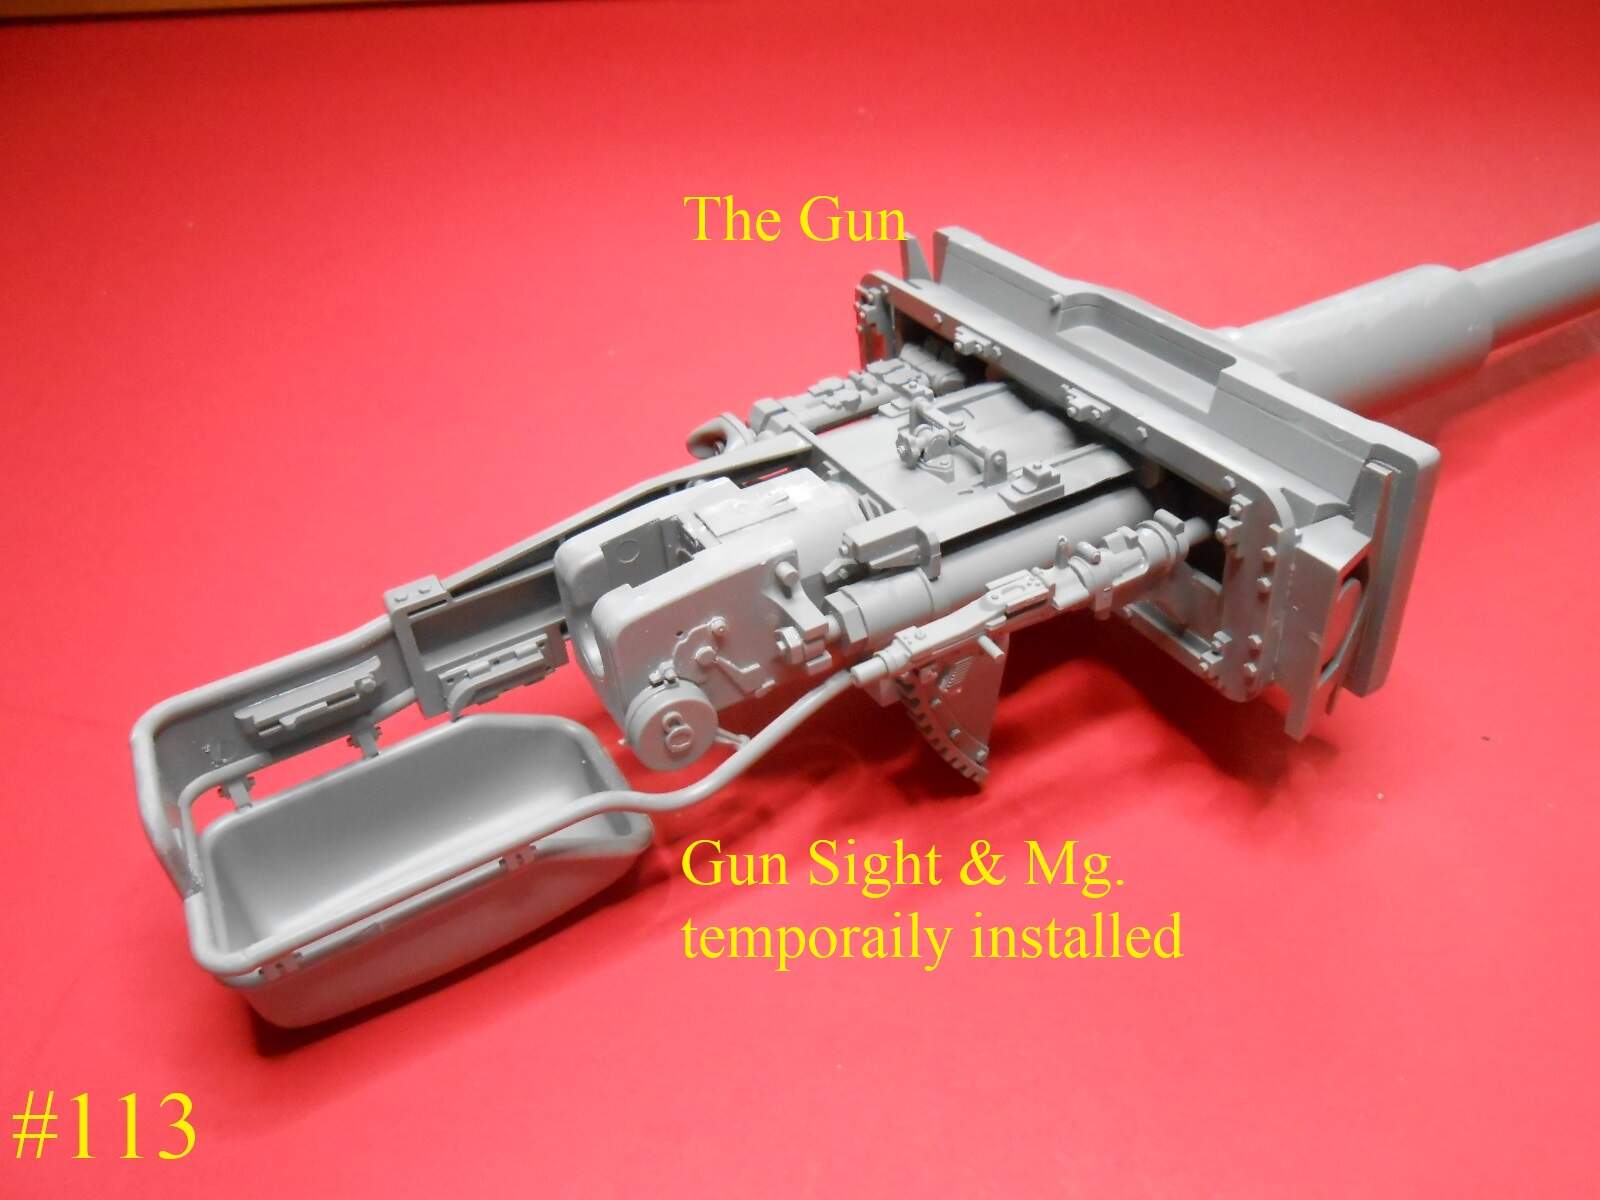
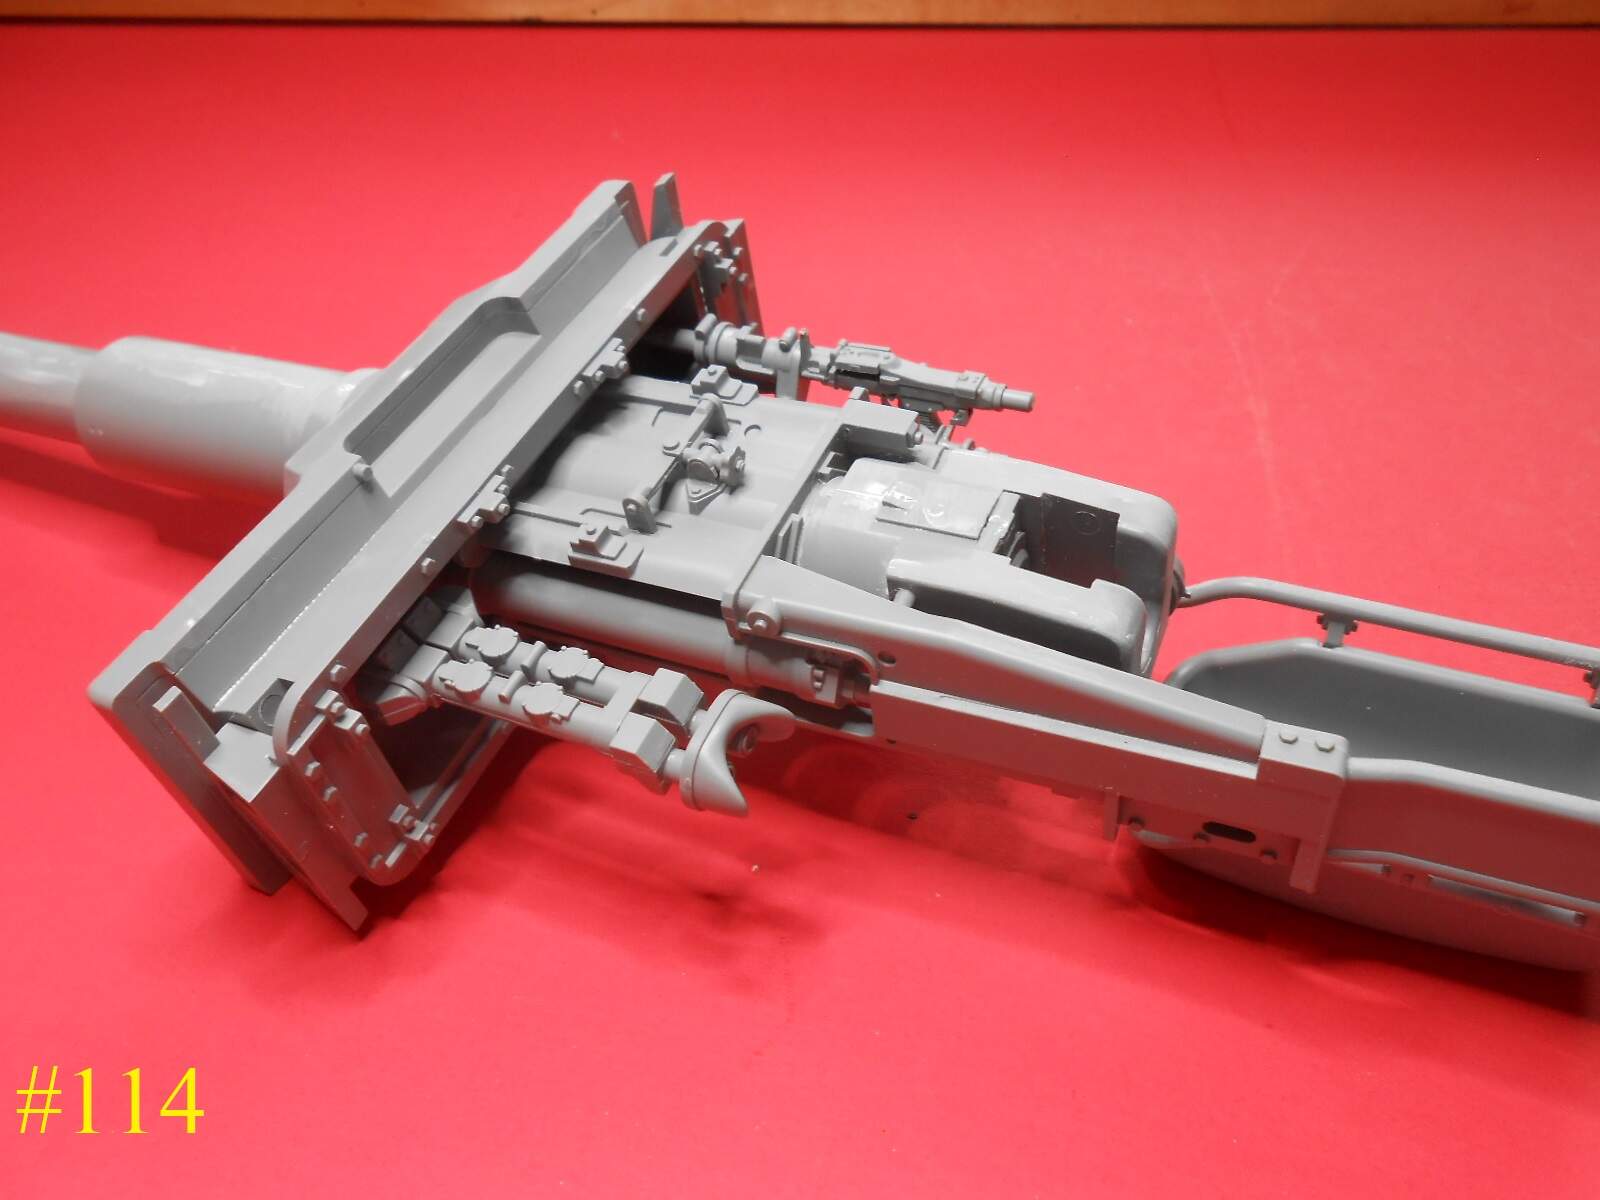
I added some texture to the muzzle Break.
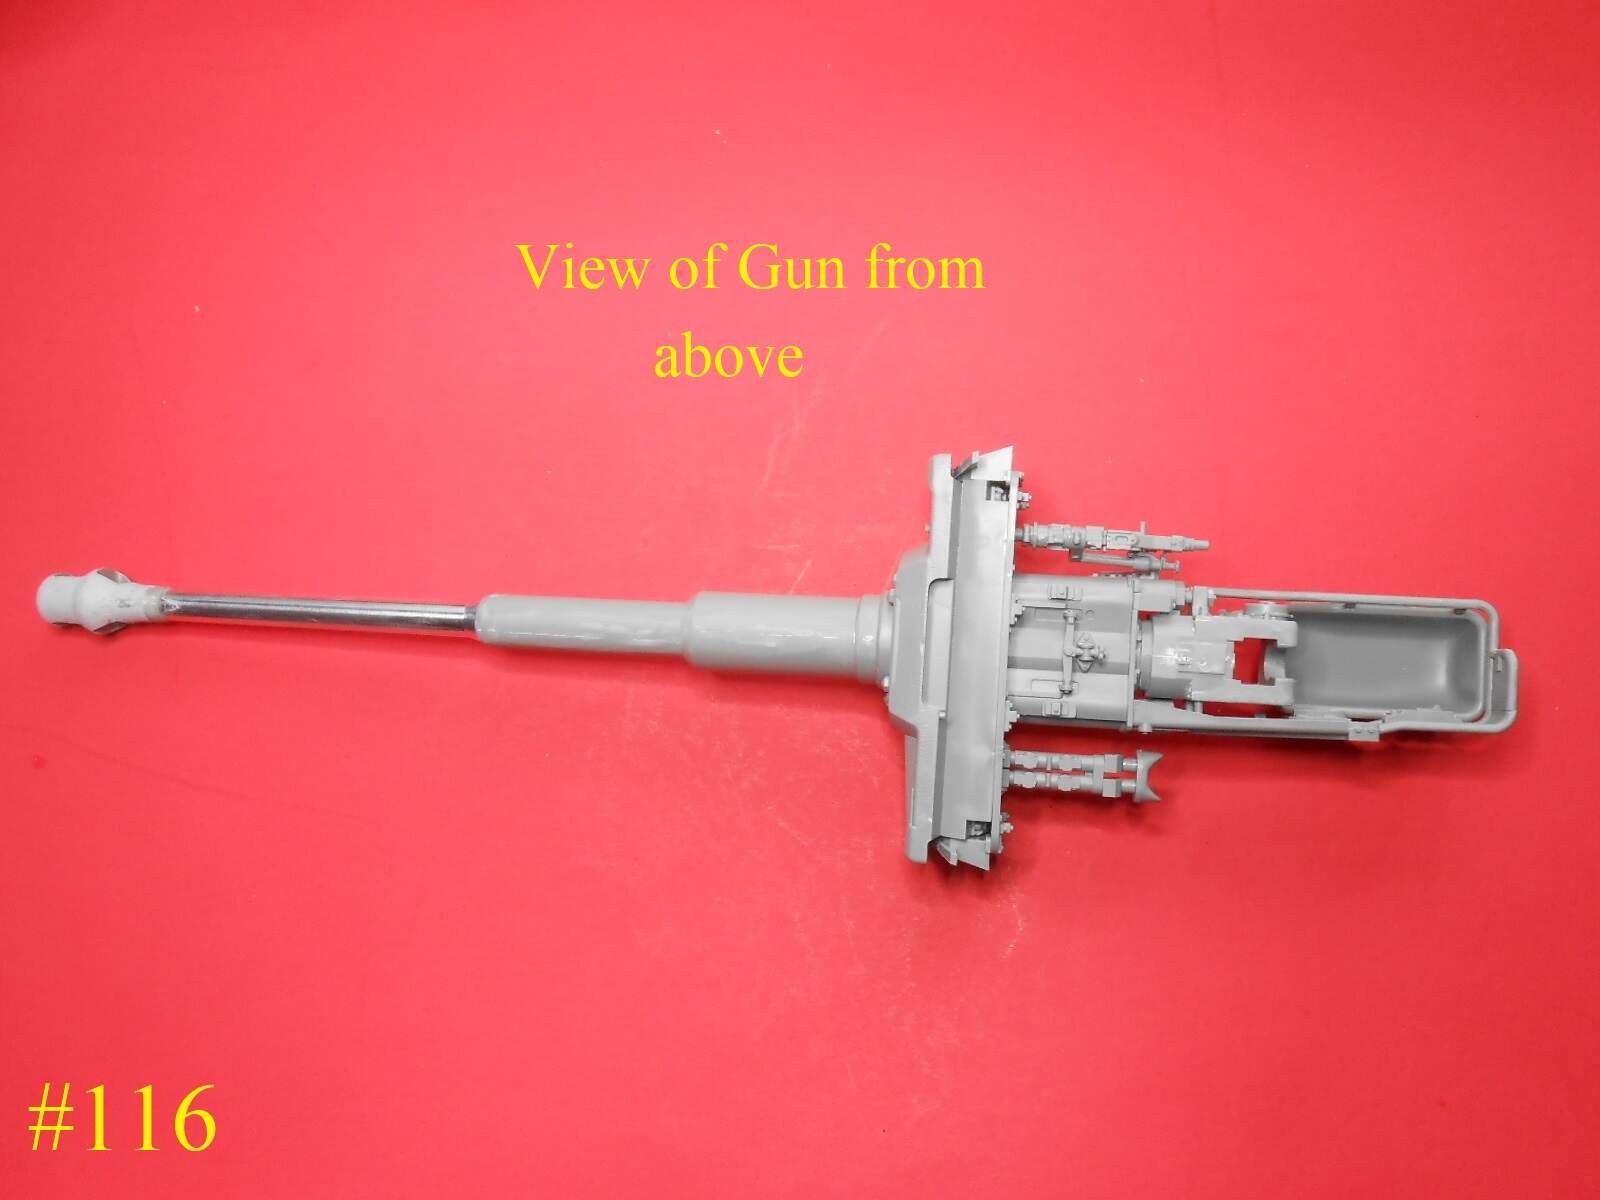

I’m finished for now.
Regards
Donald
8 Likes
Argh! Muzzle BRAKE !!
2 Likes
Thanks man, you educated me!
Hey of all your Human Languages Englis is the moast dificult.
Hey I’m old na ancient watdy want
Donald
3 Likes

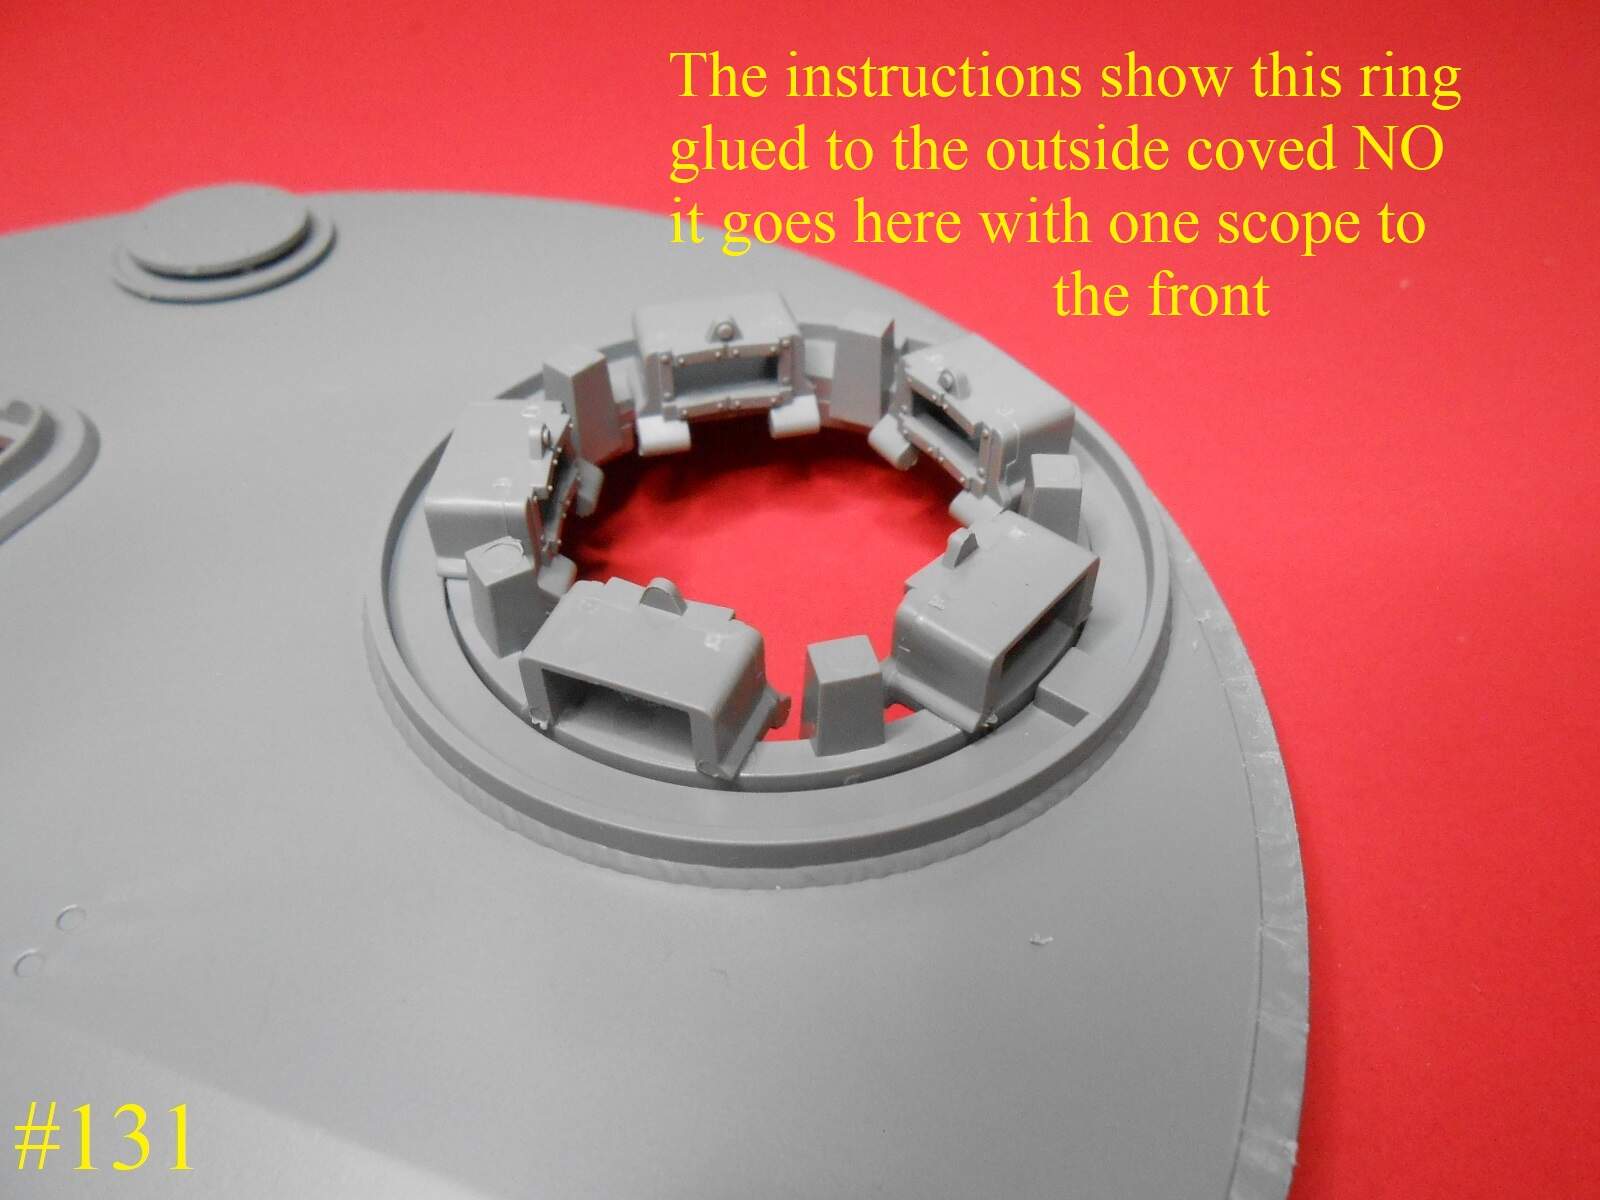
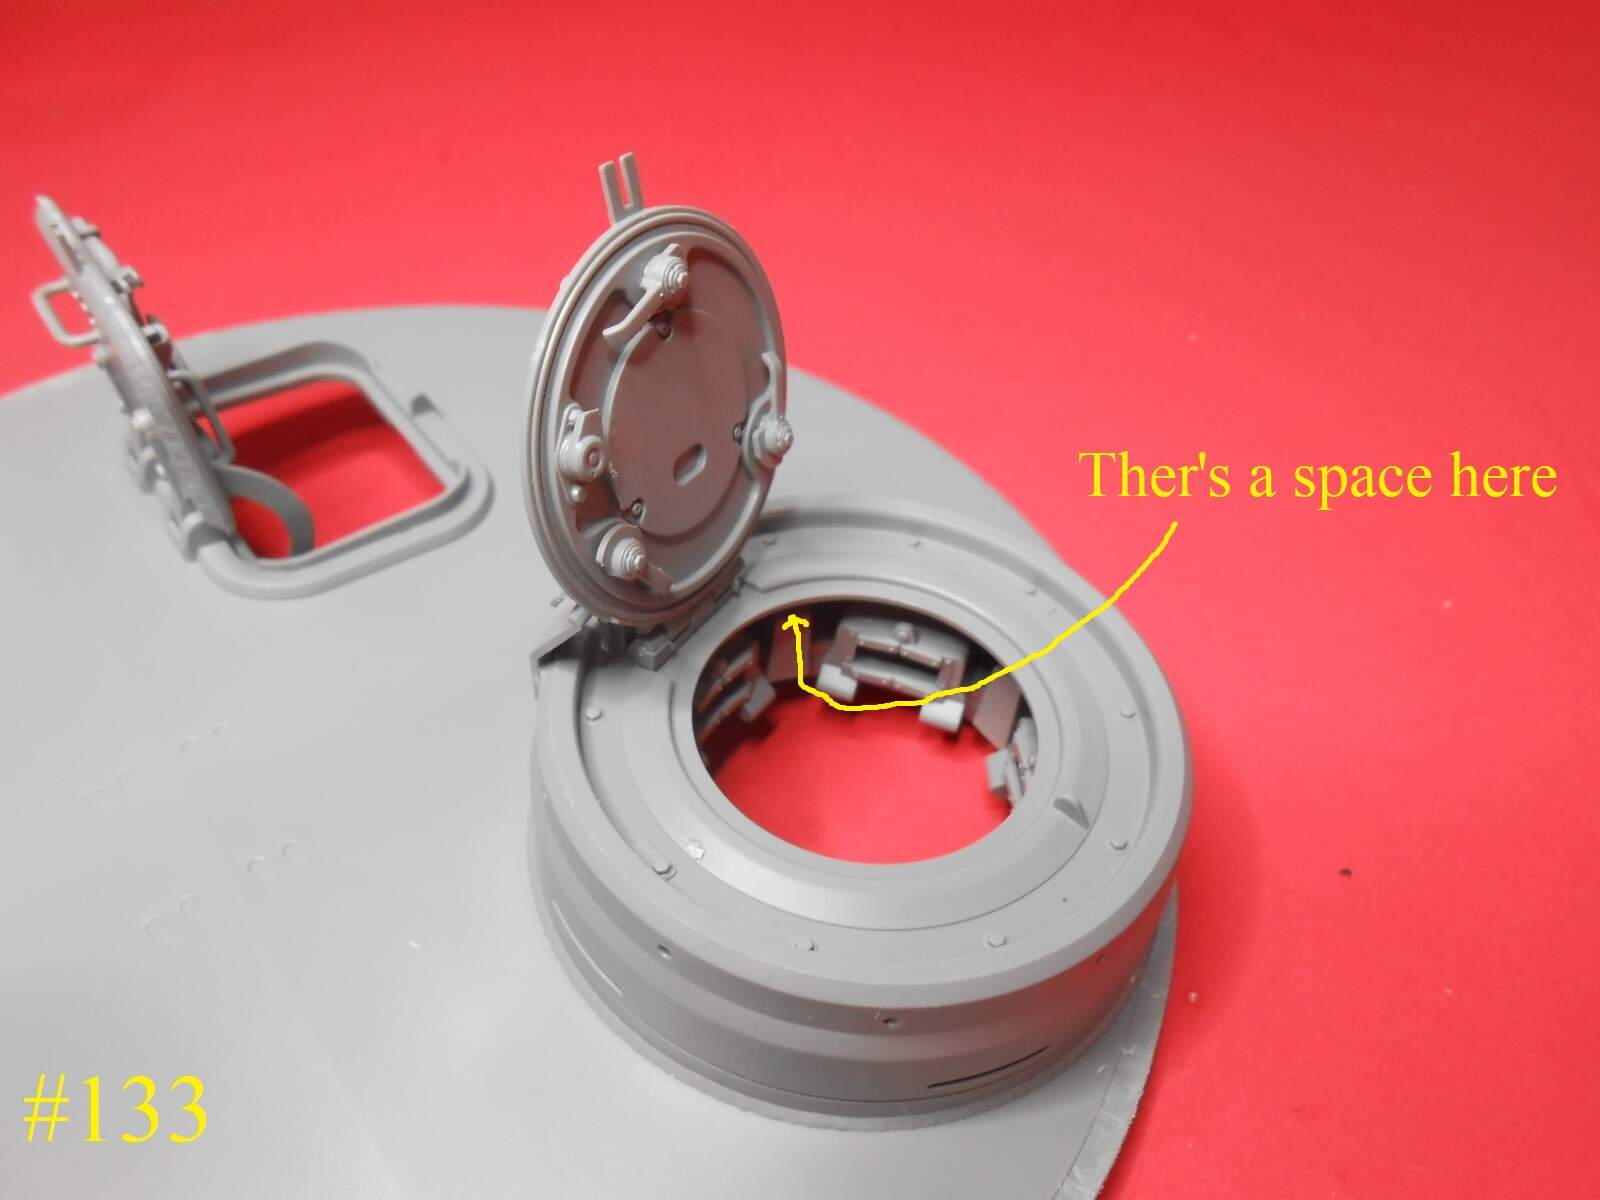
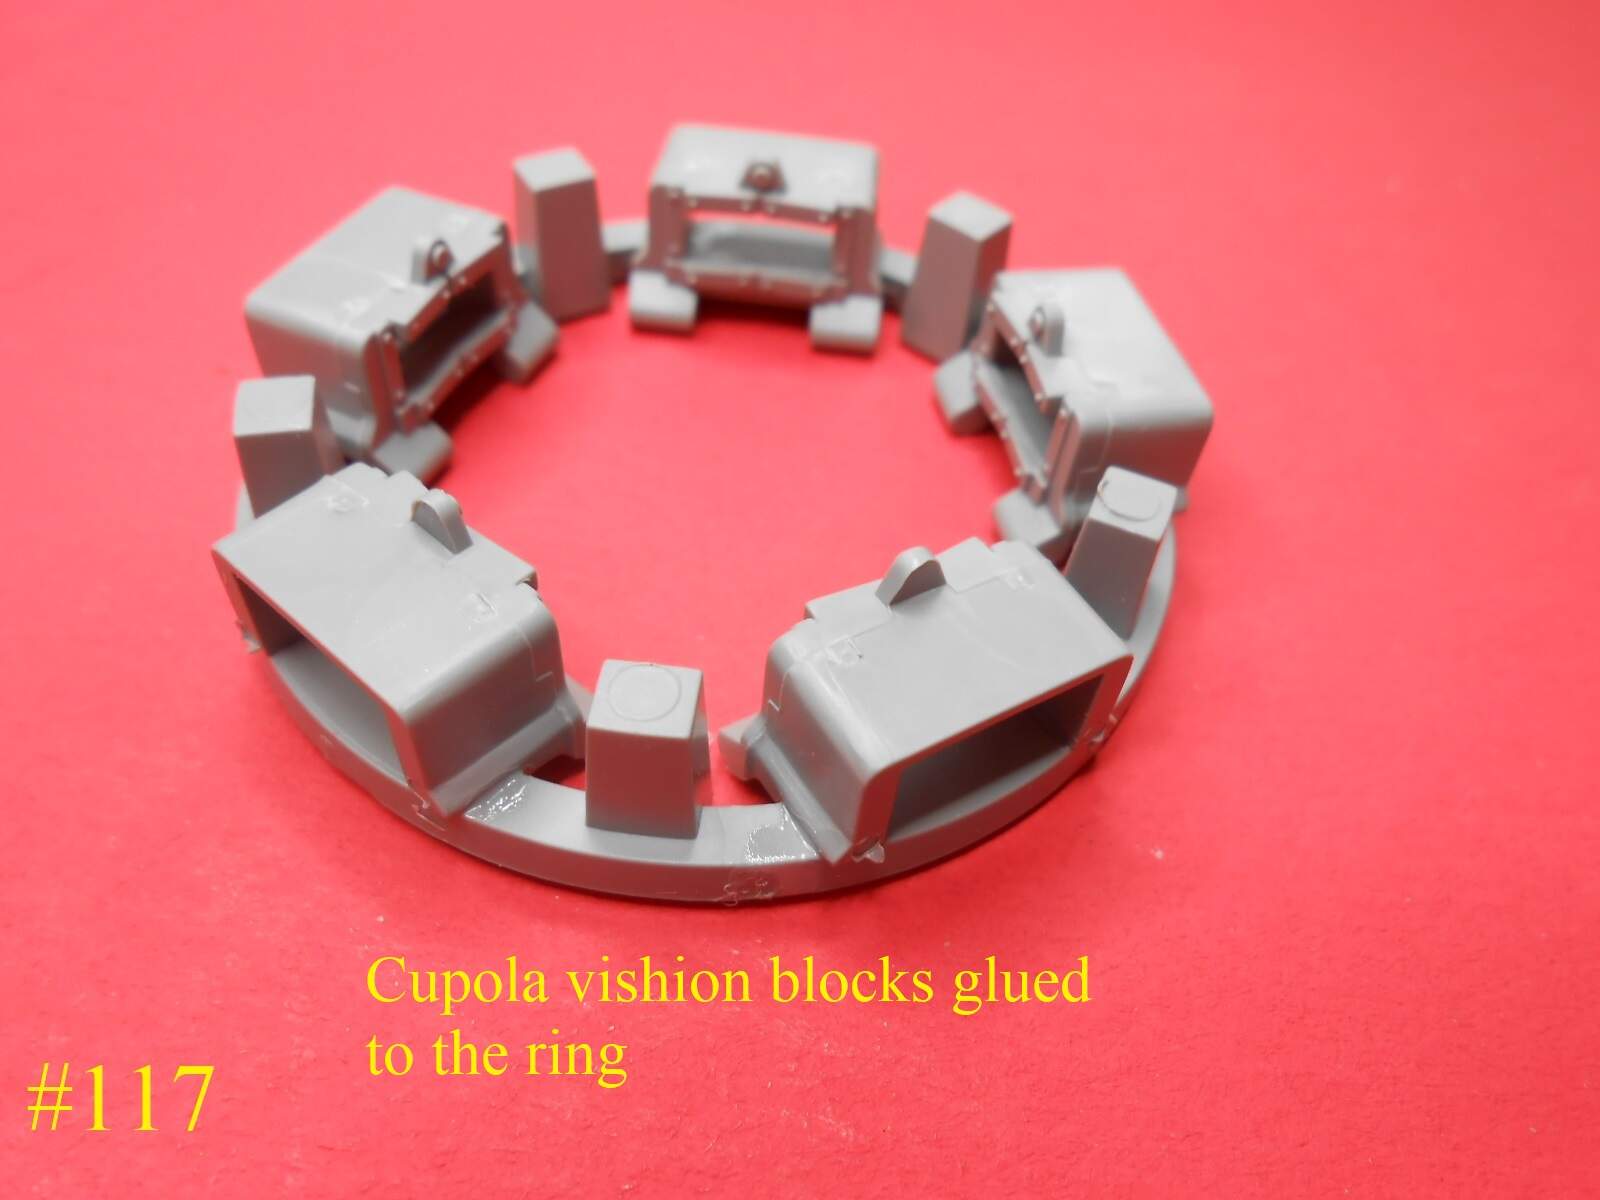
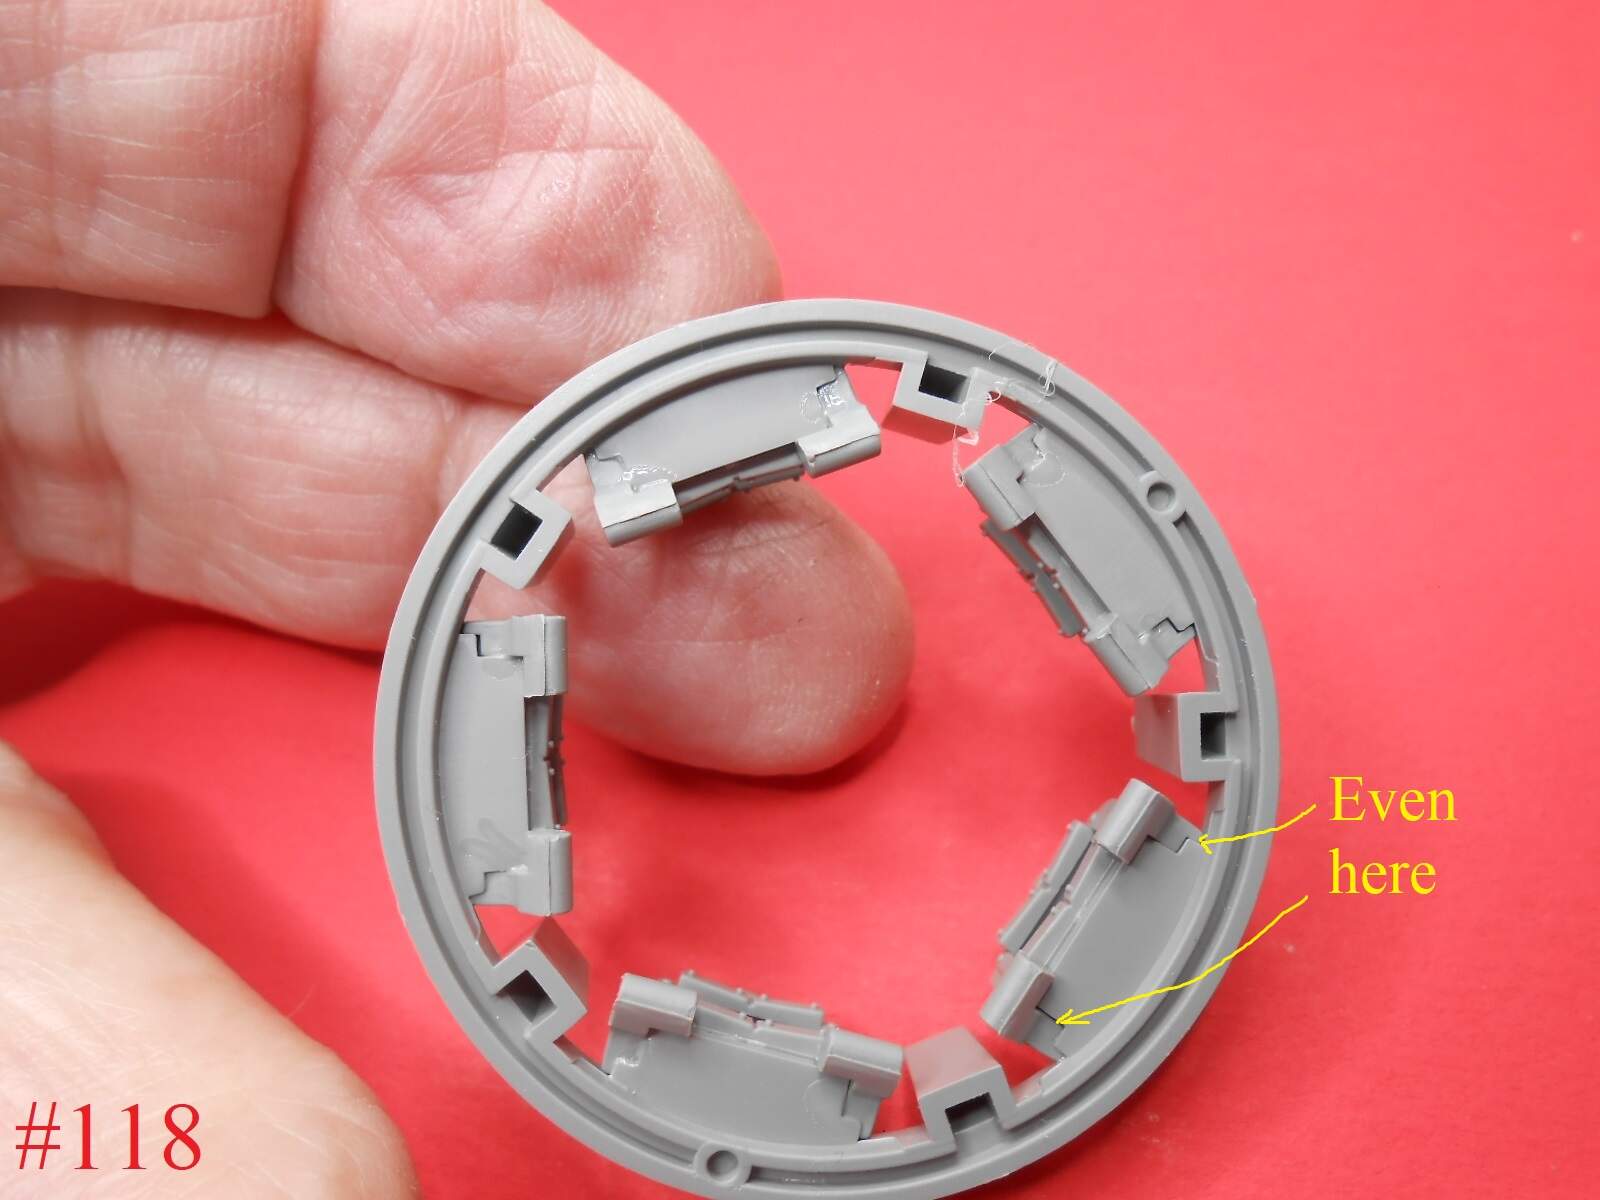
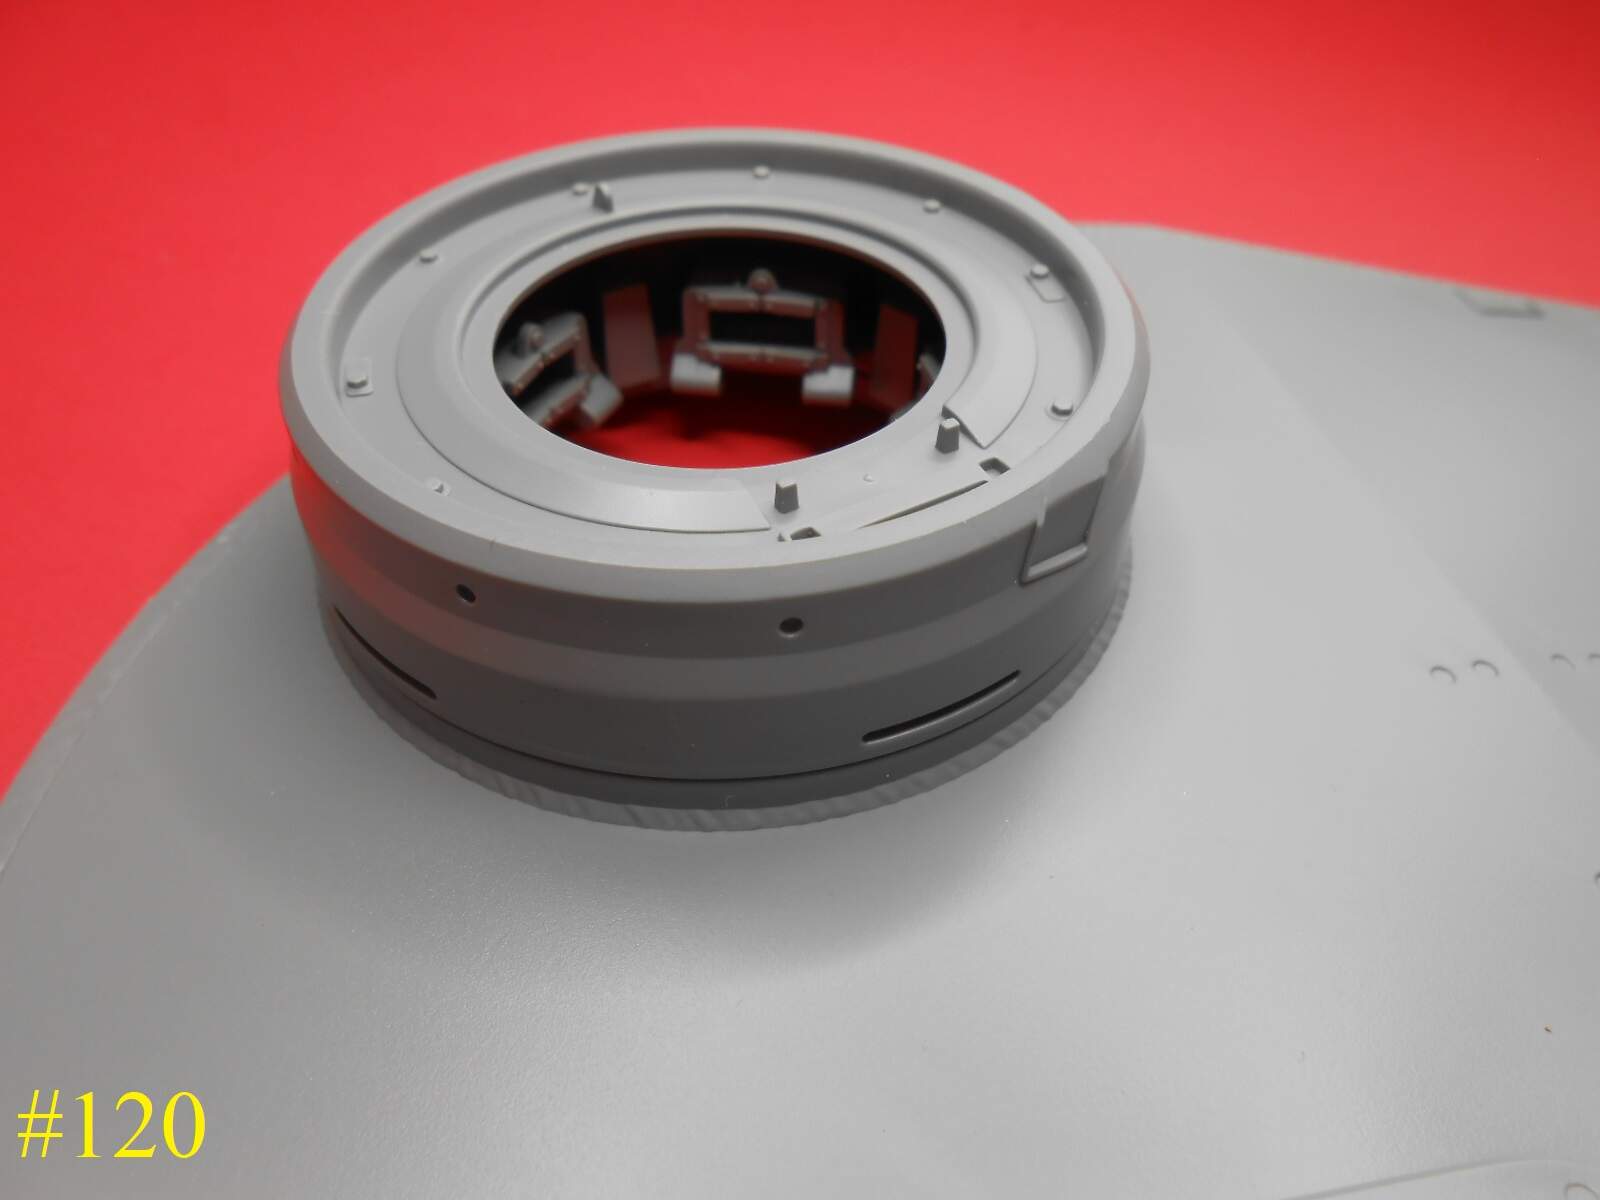
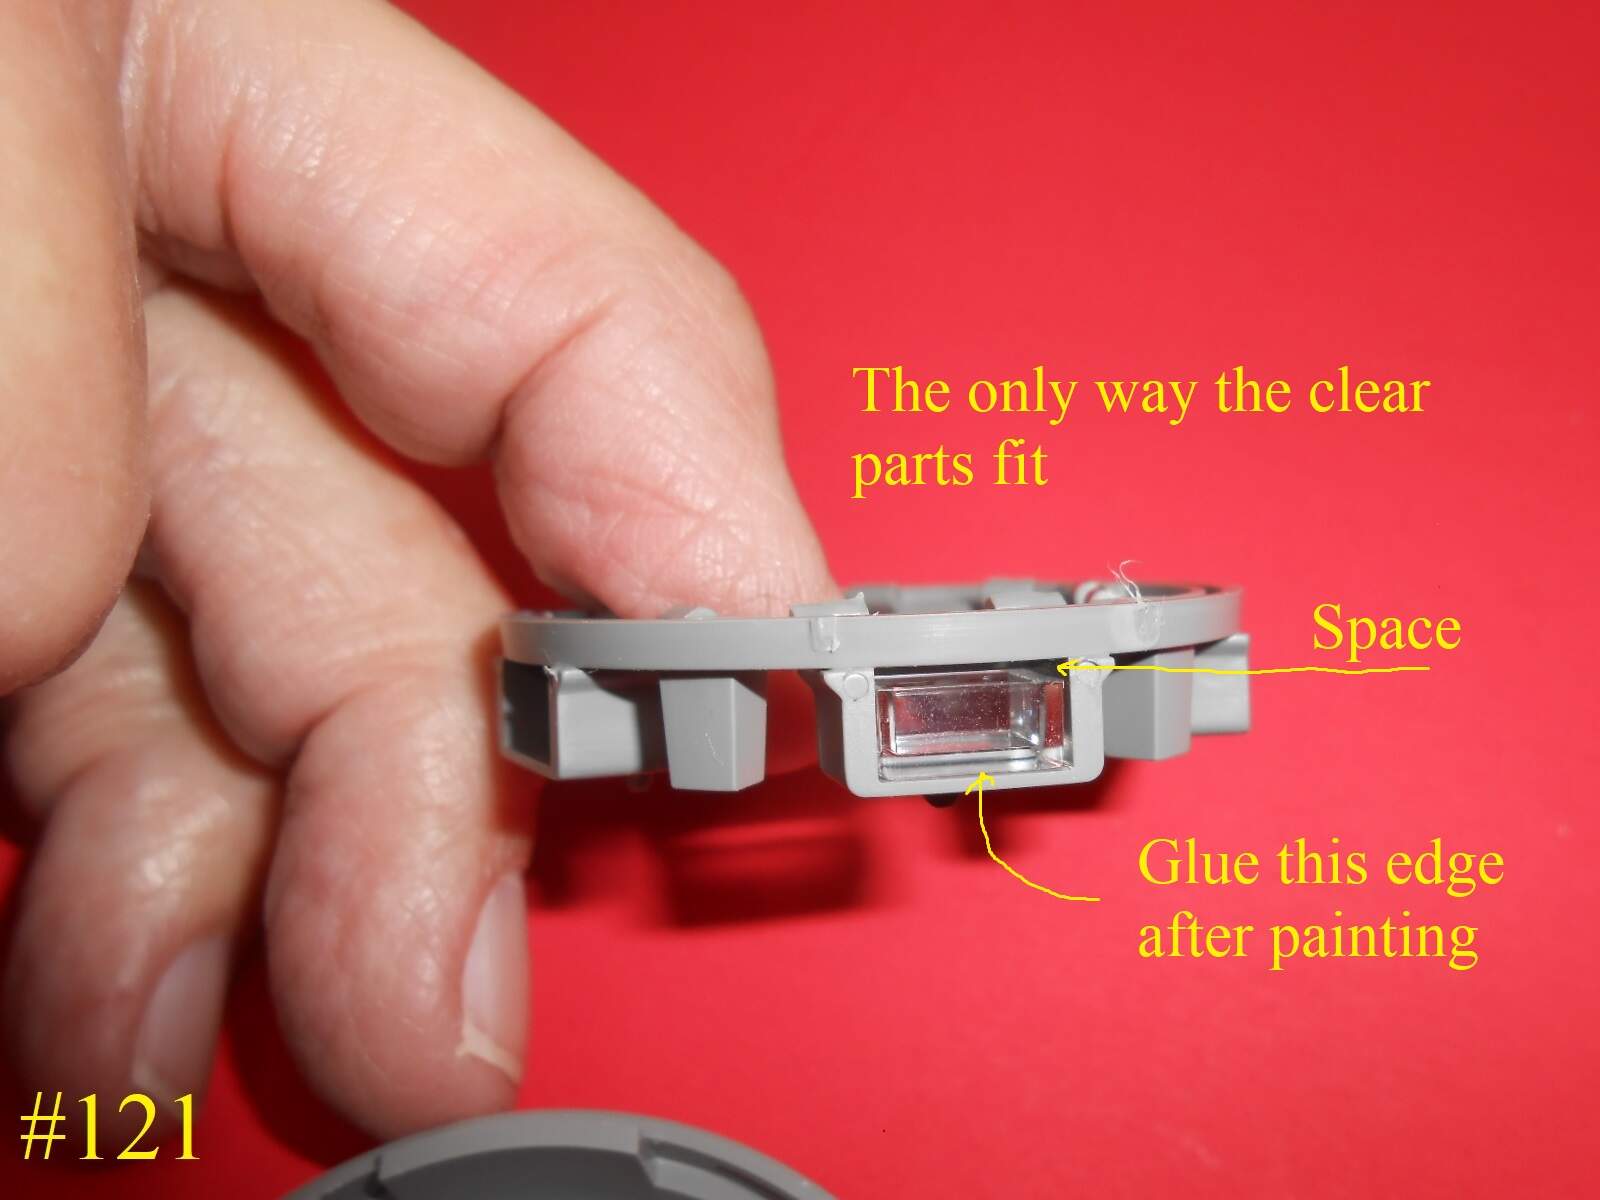
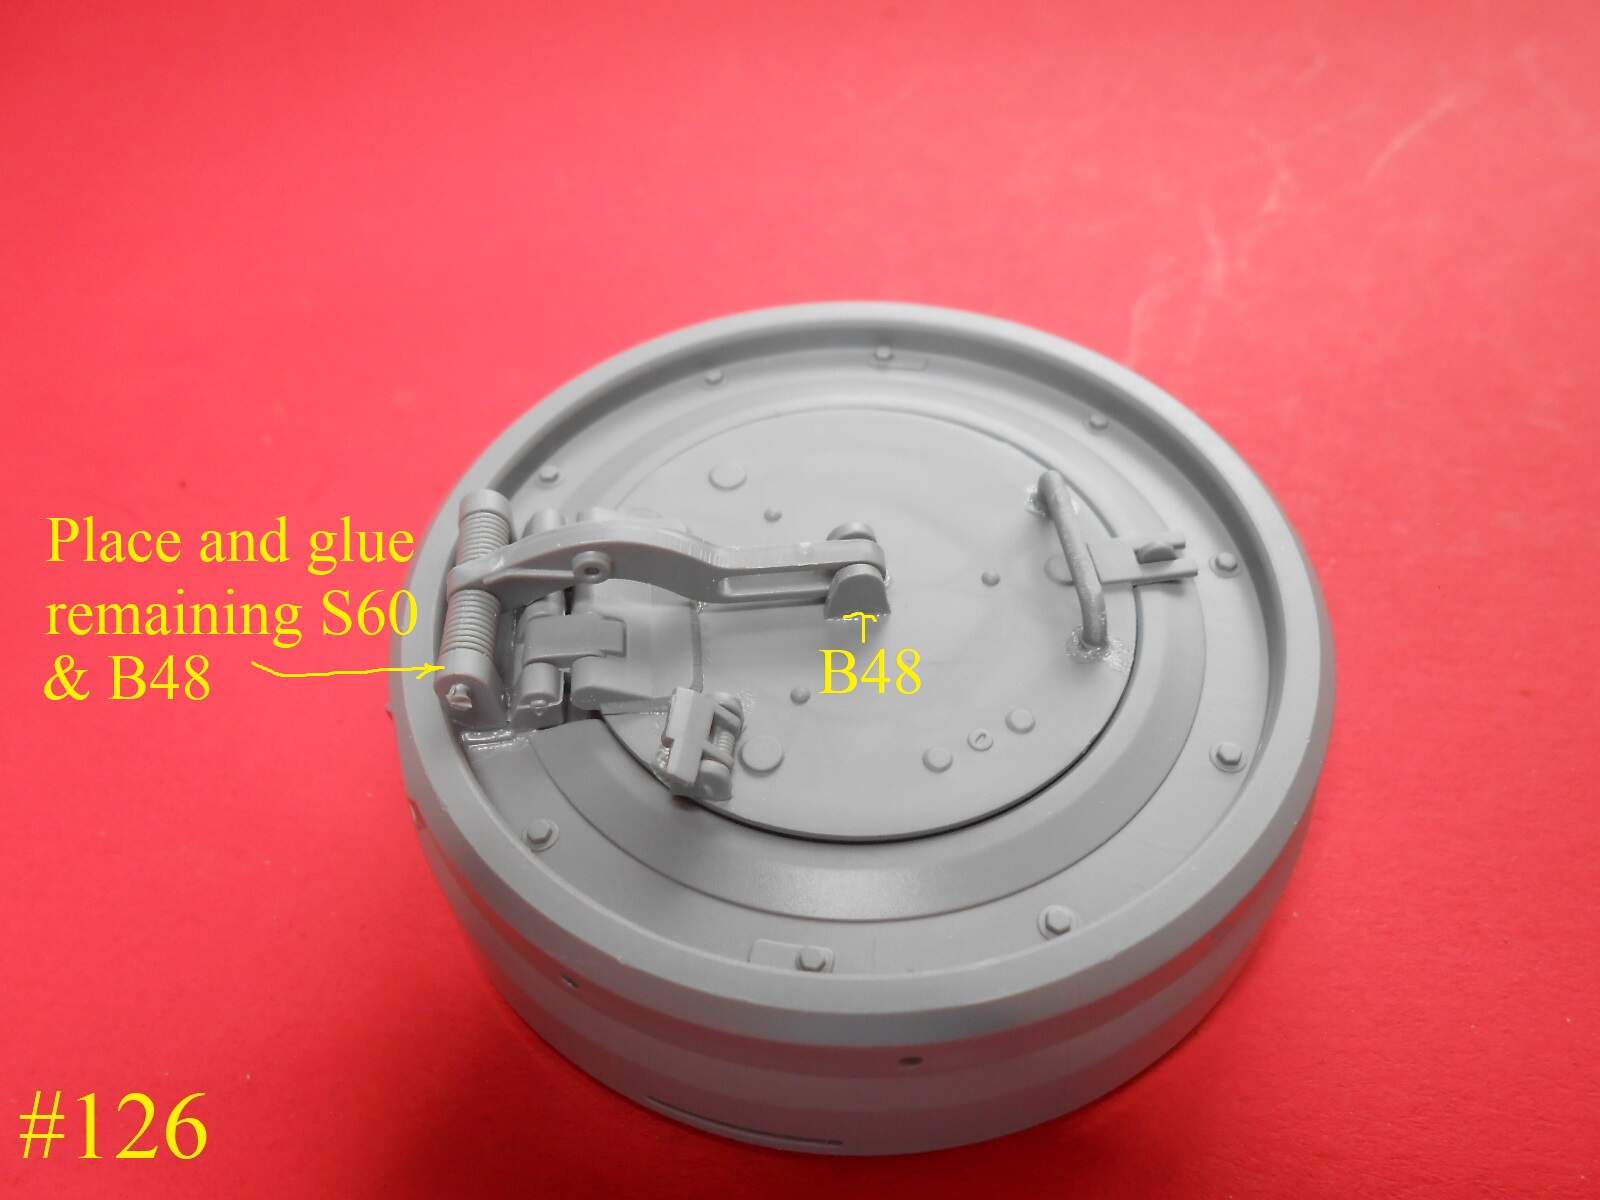
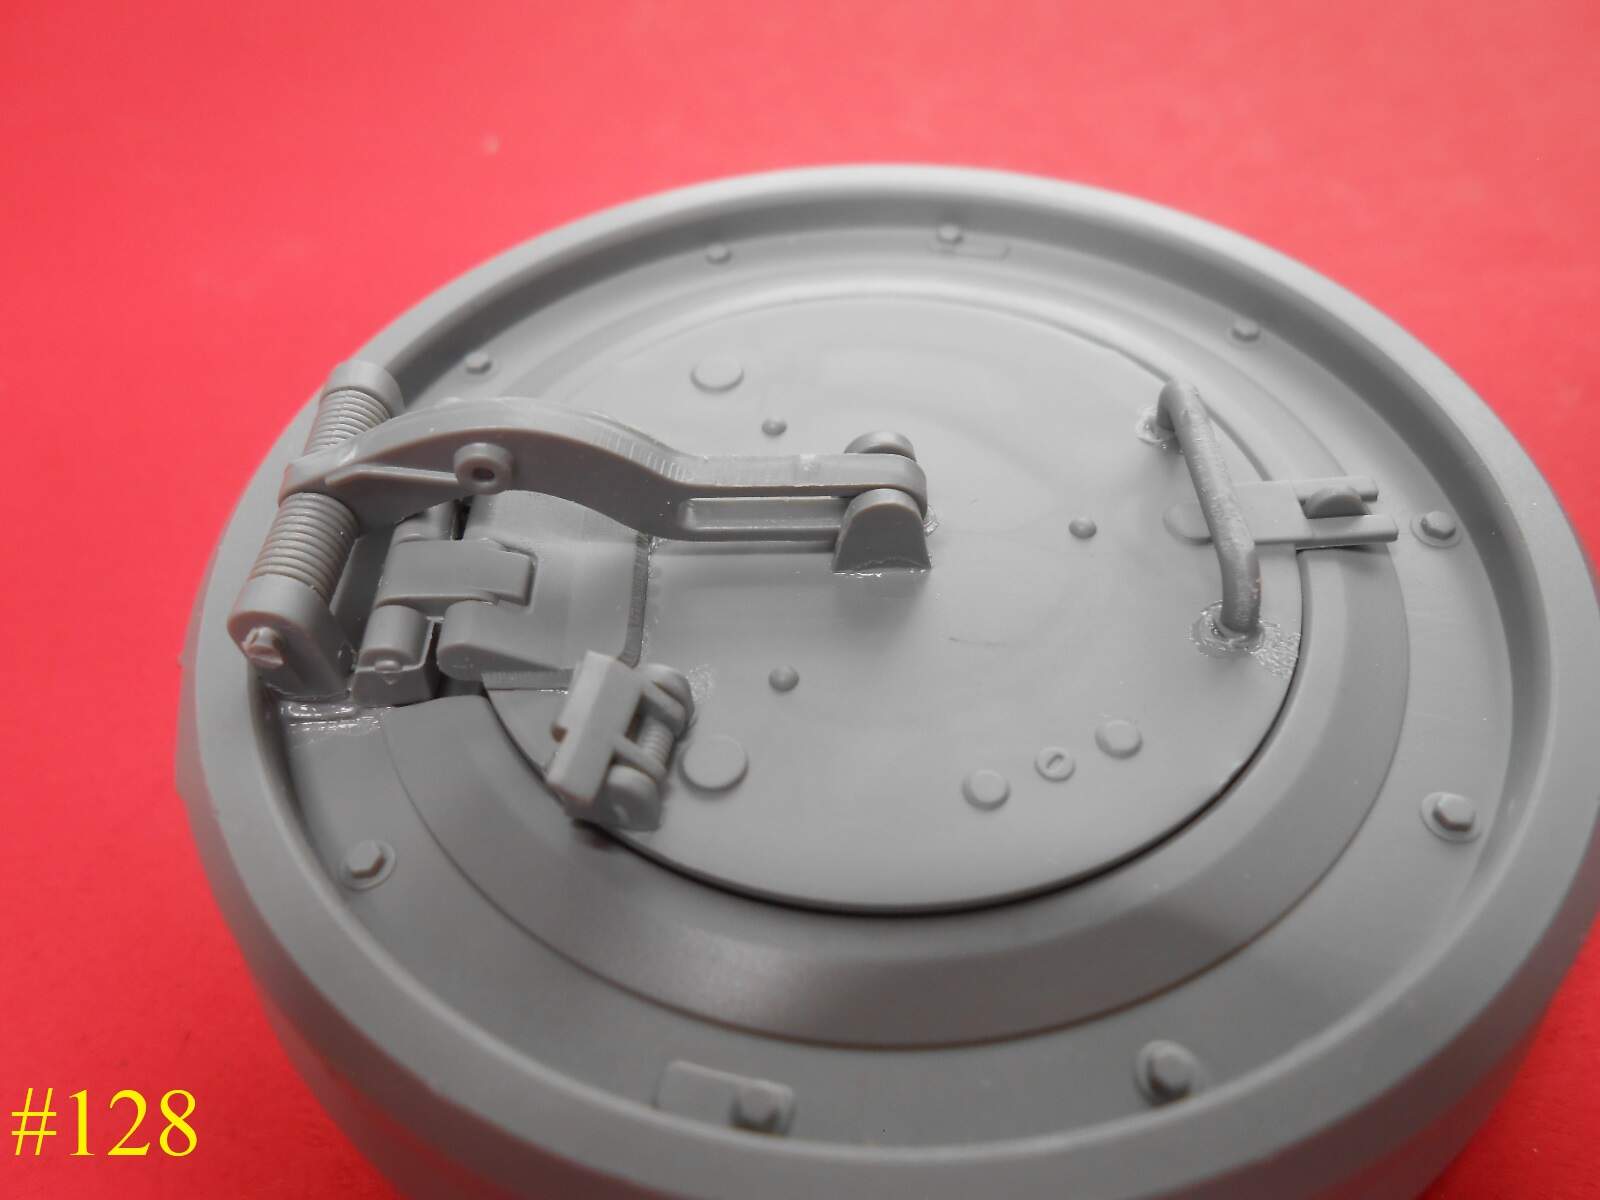
Re the cupola:
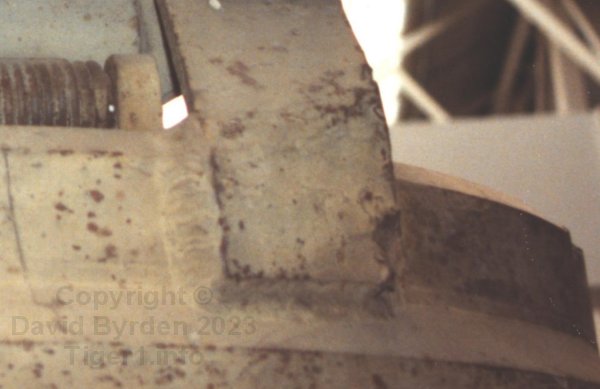
Yes, that fix looks good. But (on 131 at least) they didn’t bother to keep that rainwater hole open. They just piled the weld on top of it.
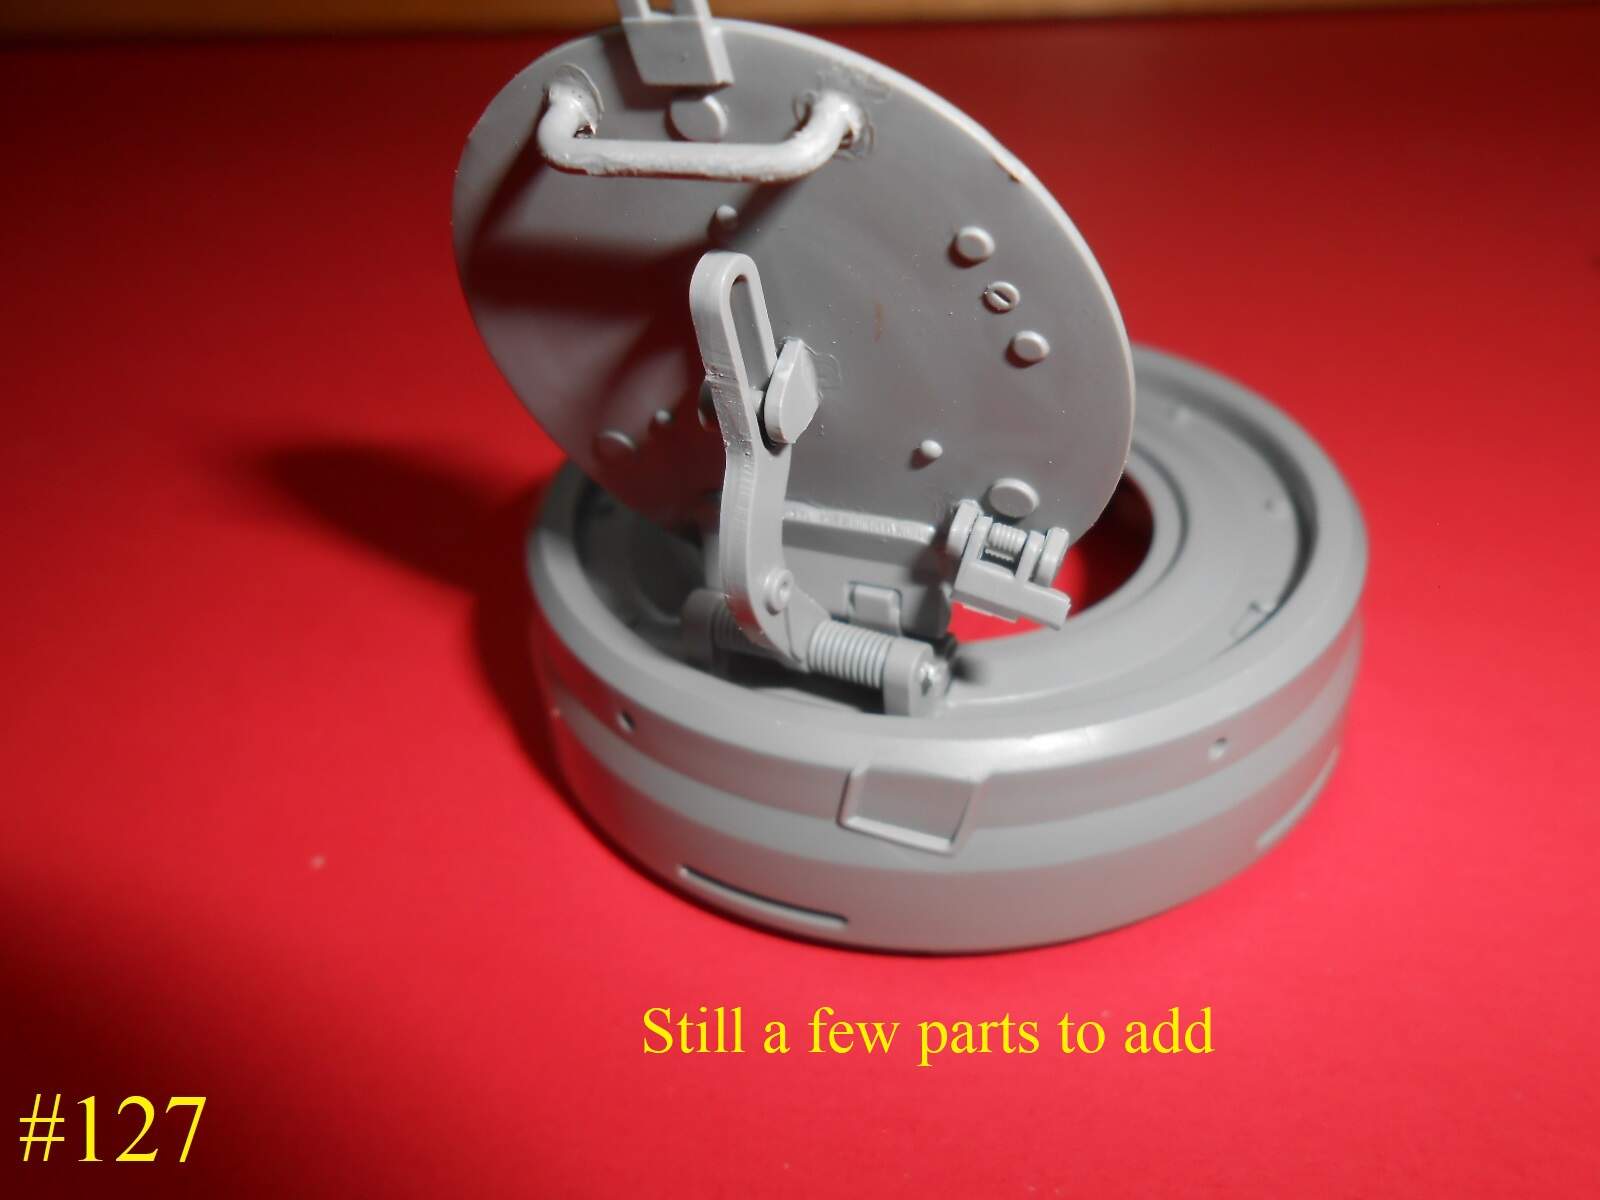
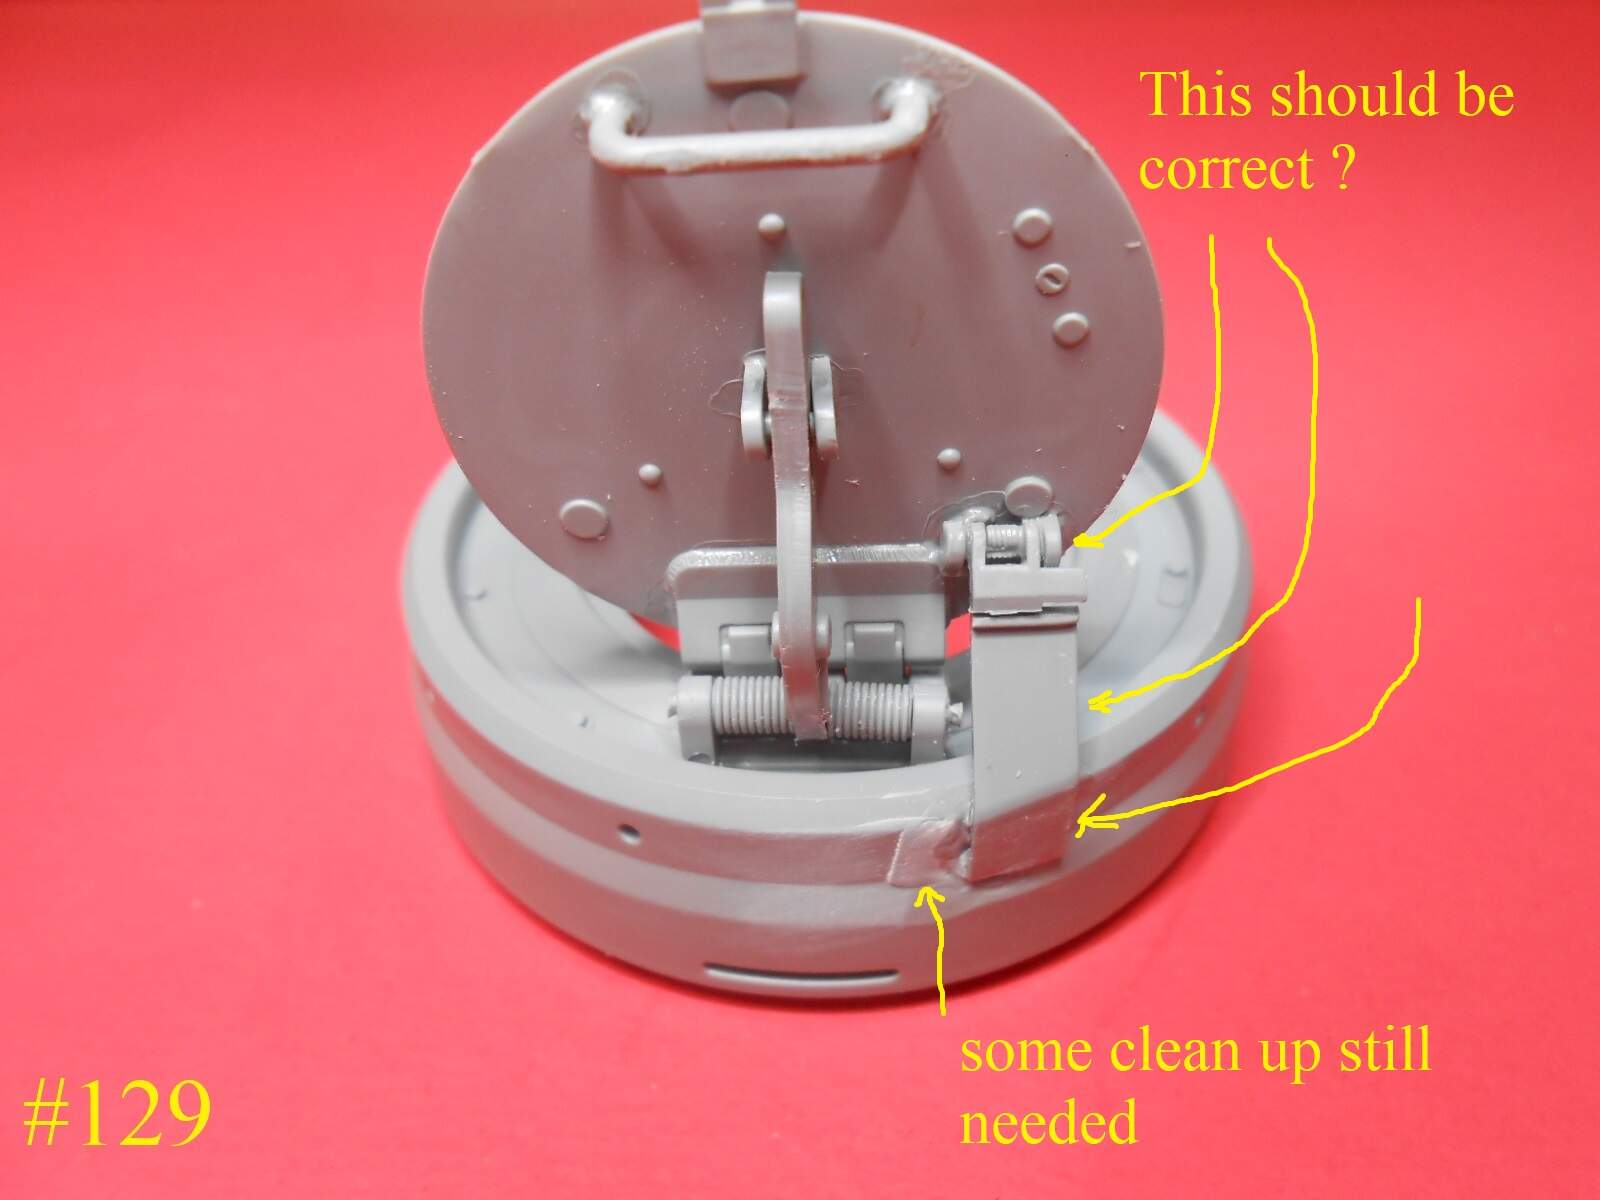
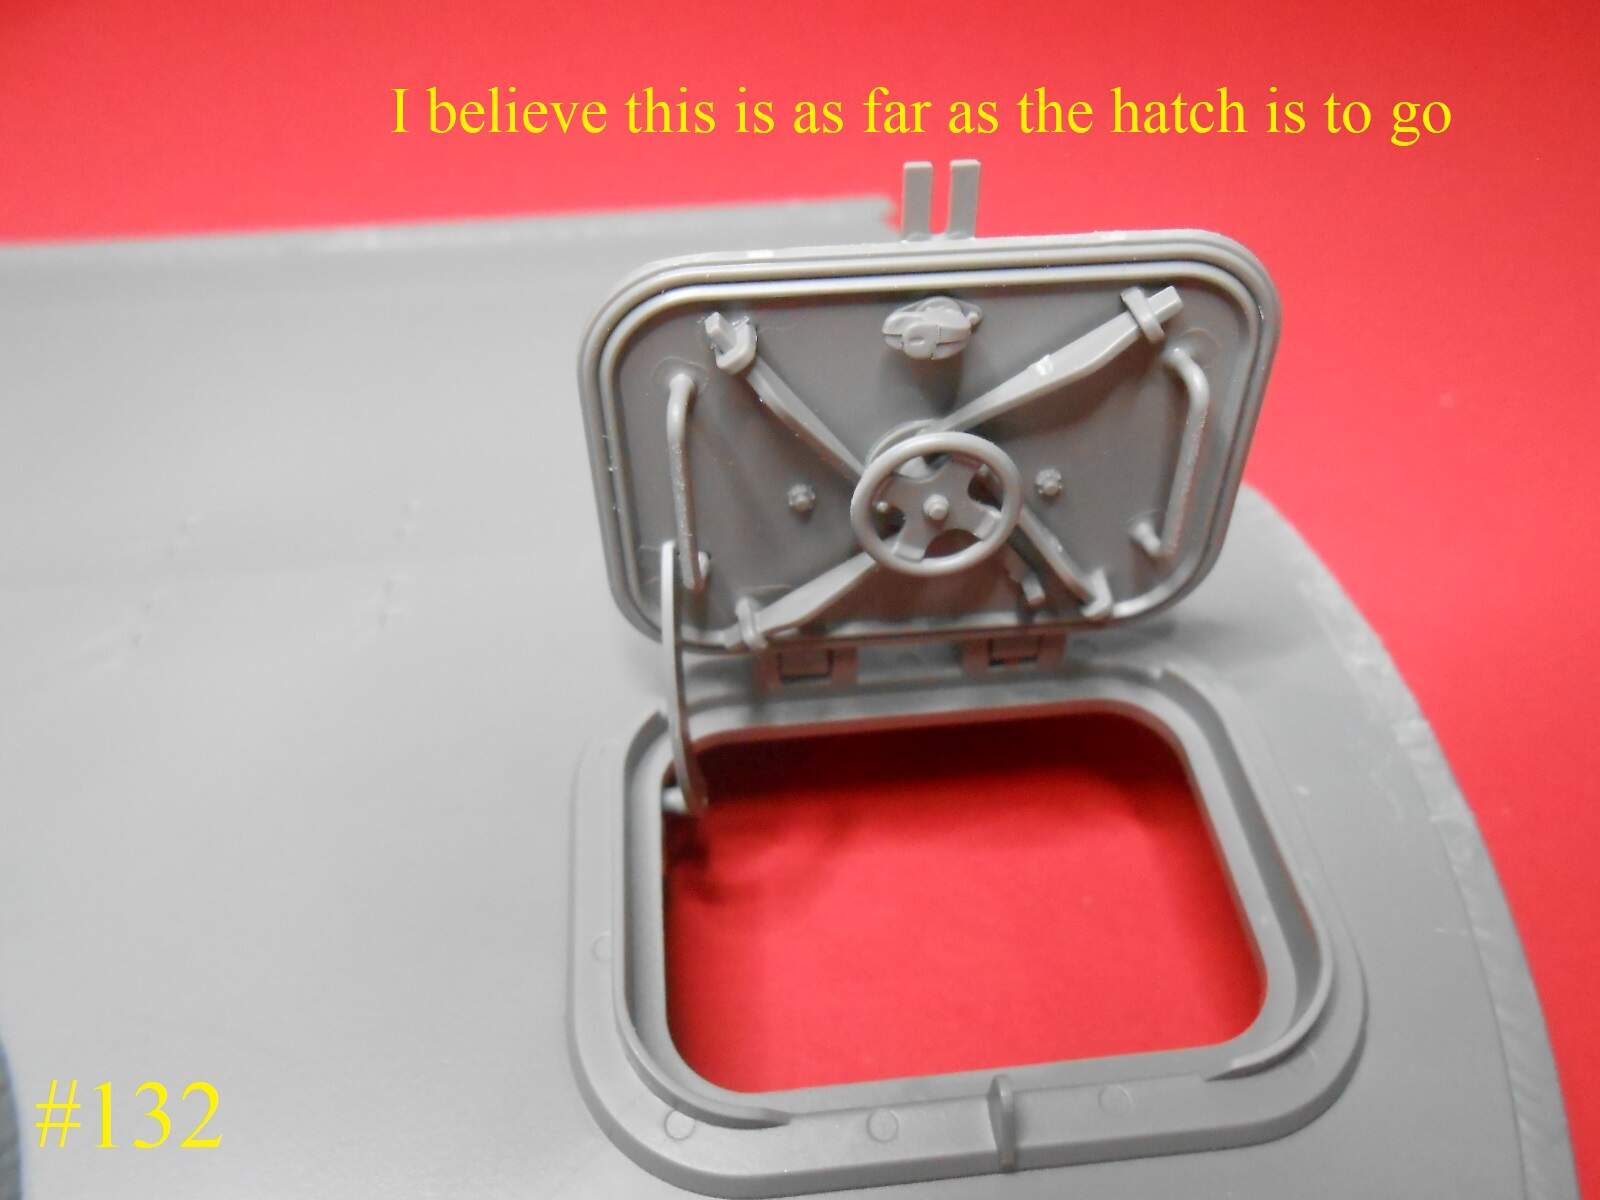
Re the loader’s hatch:
When locked by its arm, it stood exactly vertical. I have lots of photos of this.
In 1944 they added a thicker roof on the “Late” Tiger, and everything changed in this area, and that’s when you get a lock that leans the hatch forward.
David
1 Like
That’s what I thought , Thank You
Donald