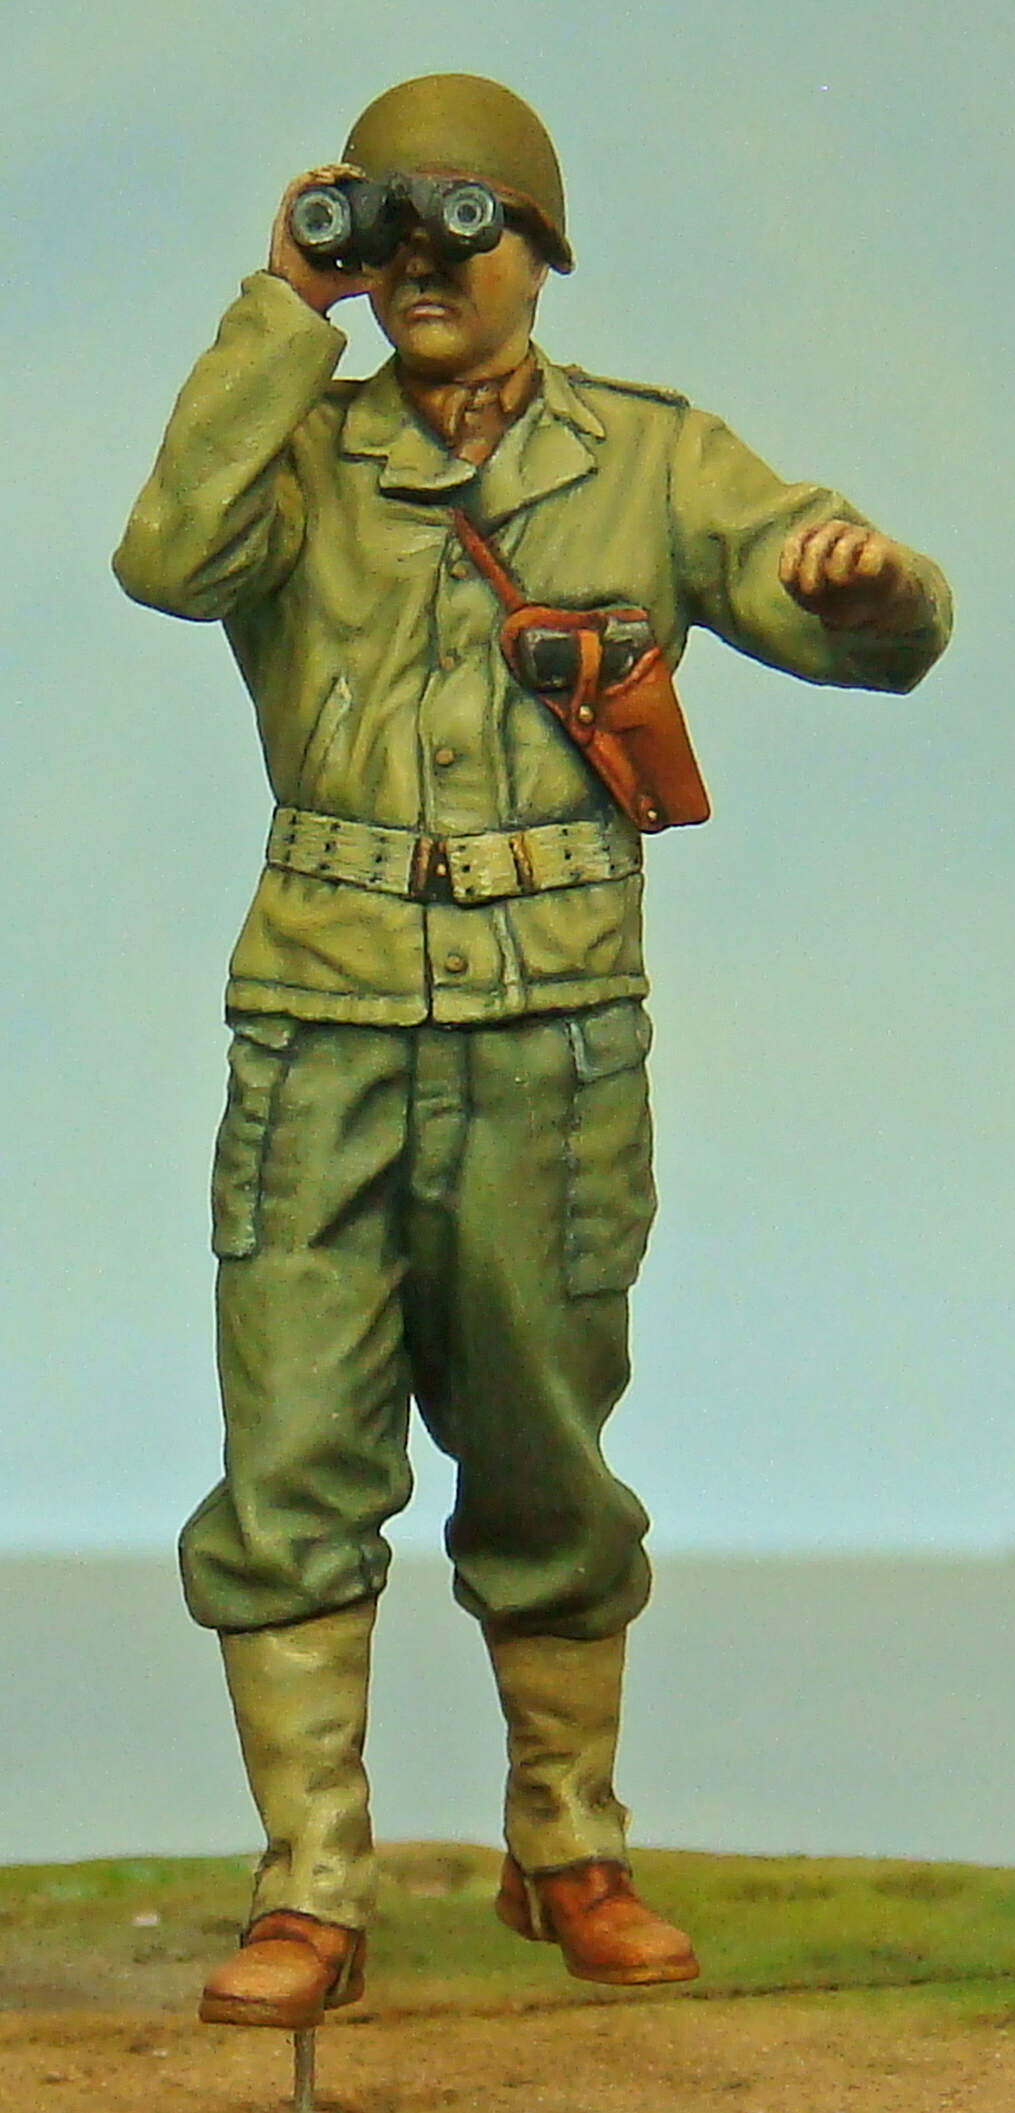
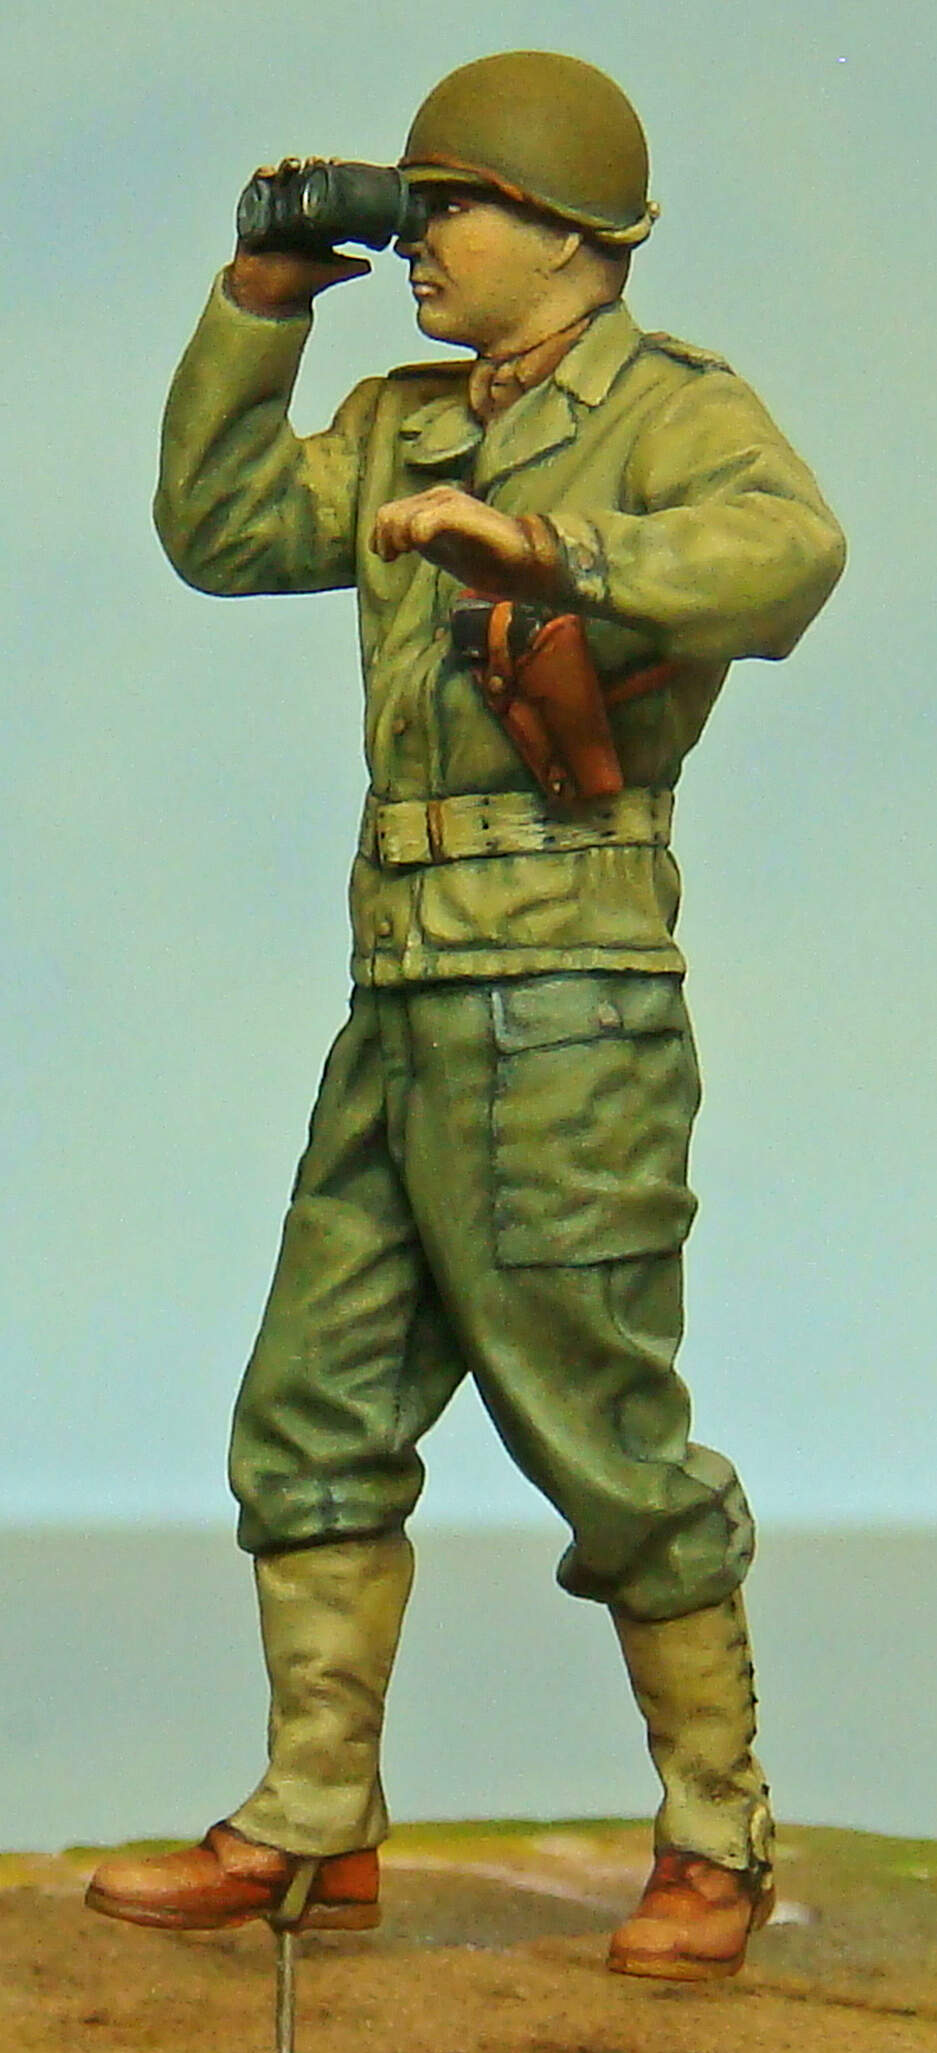
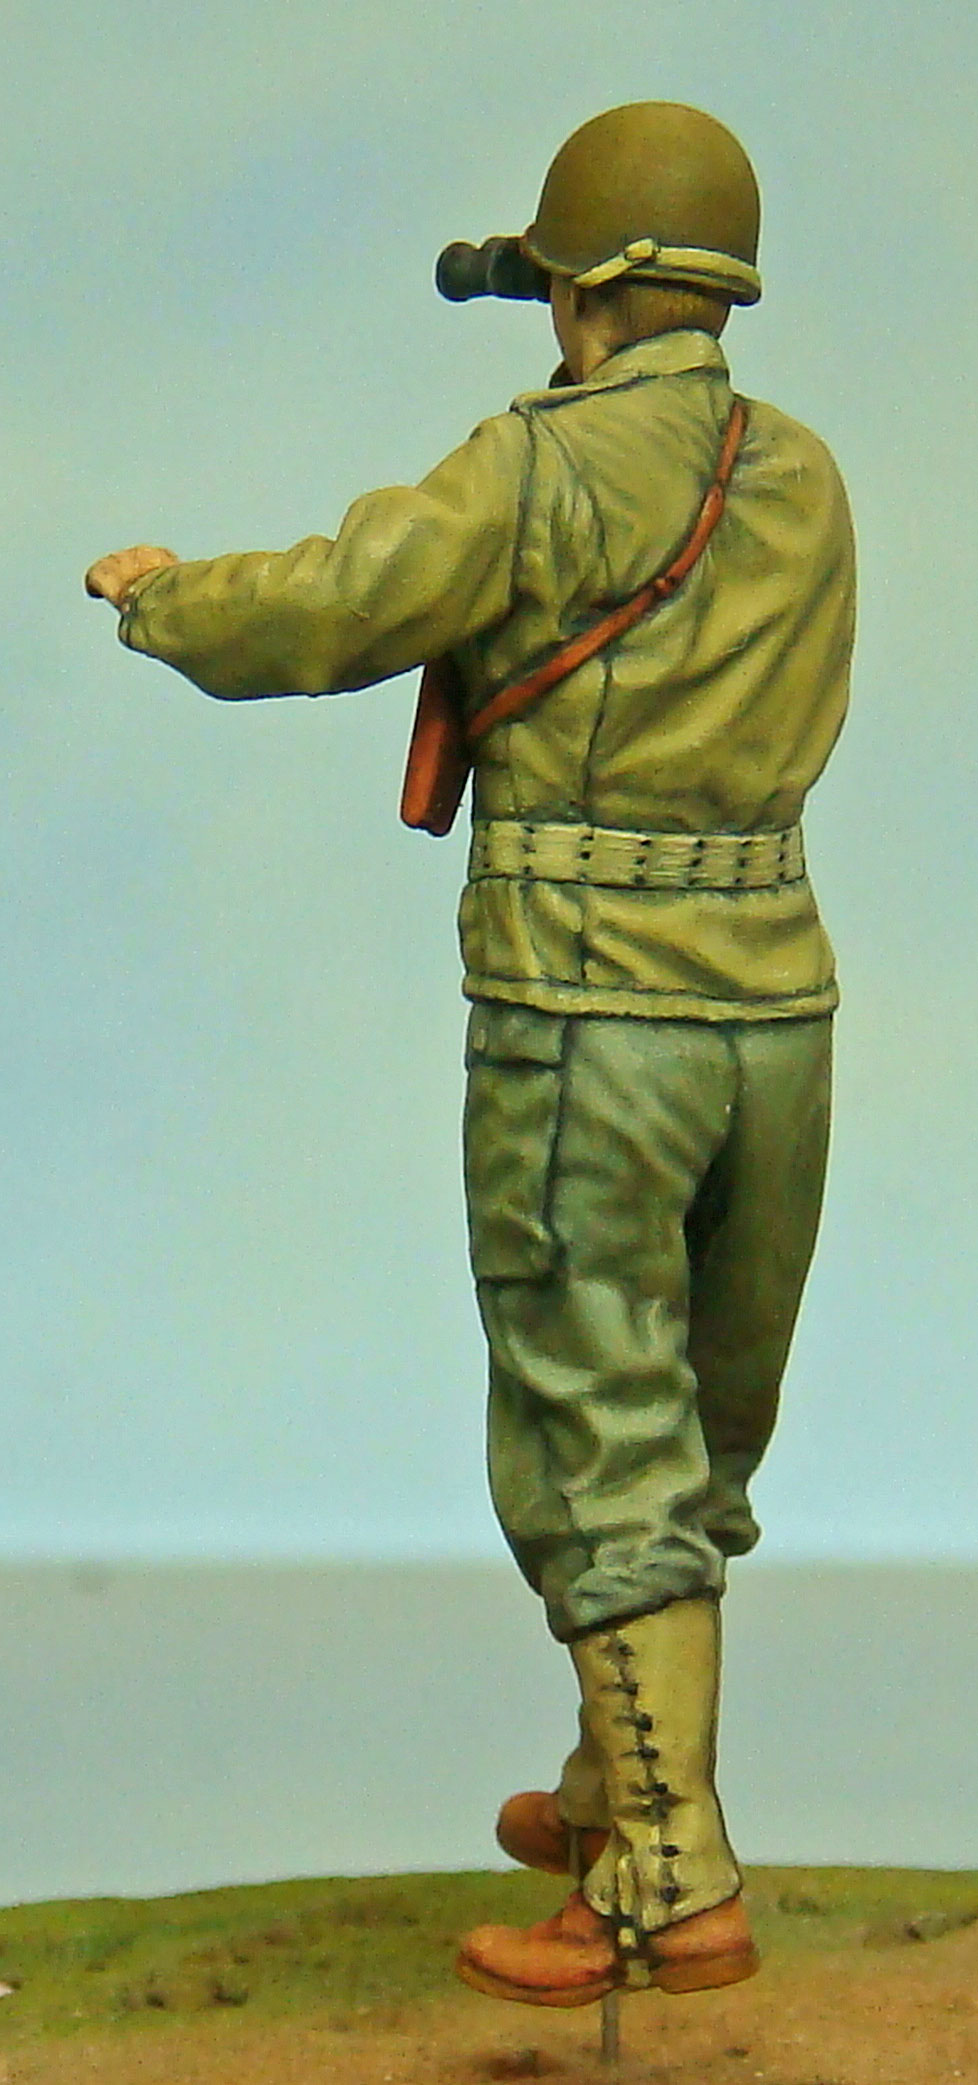
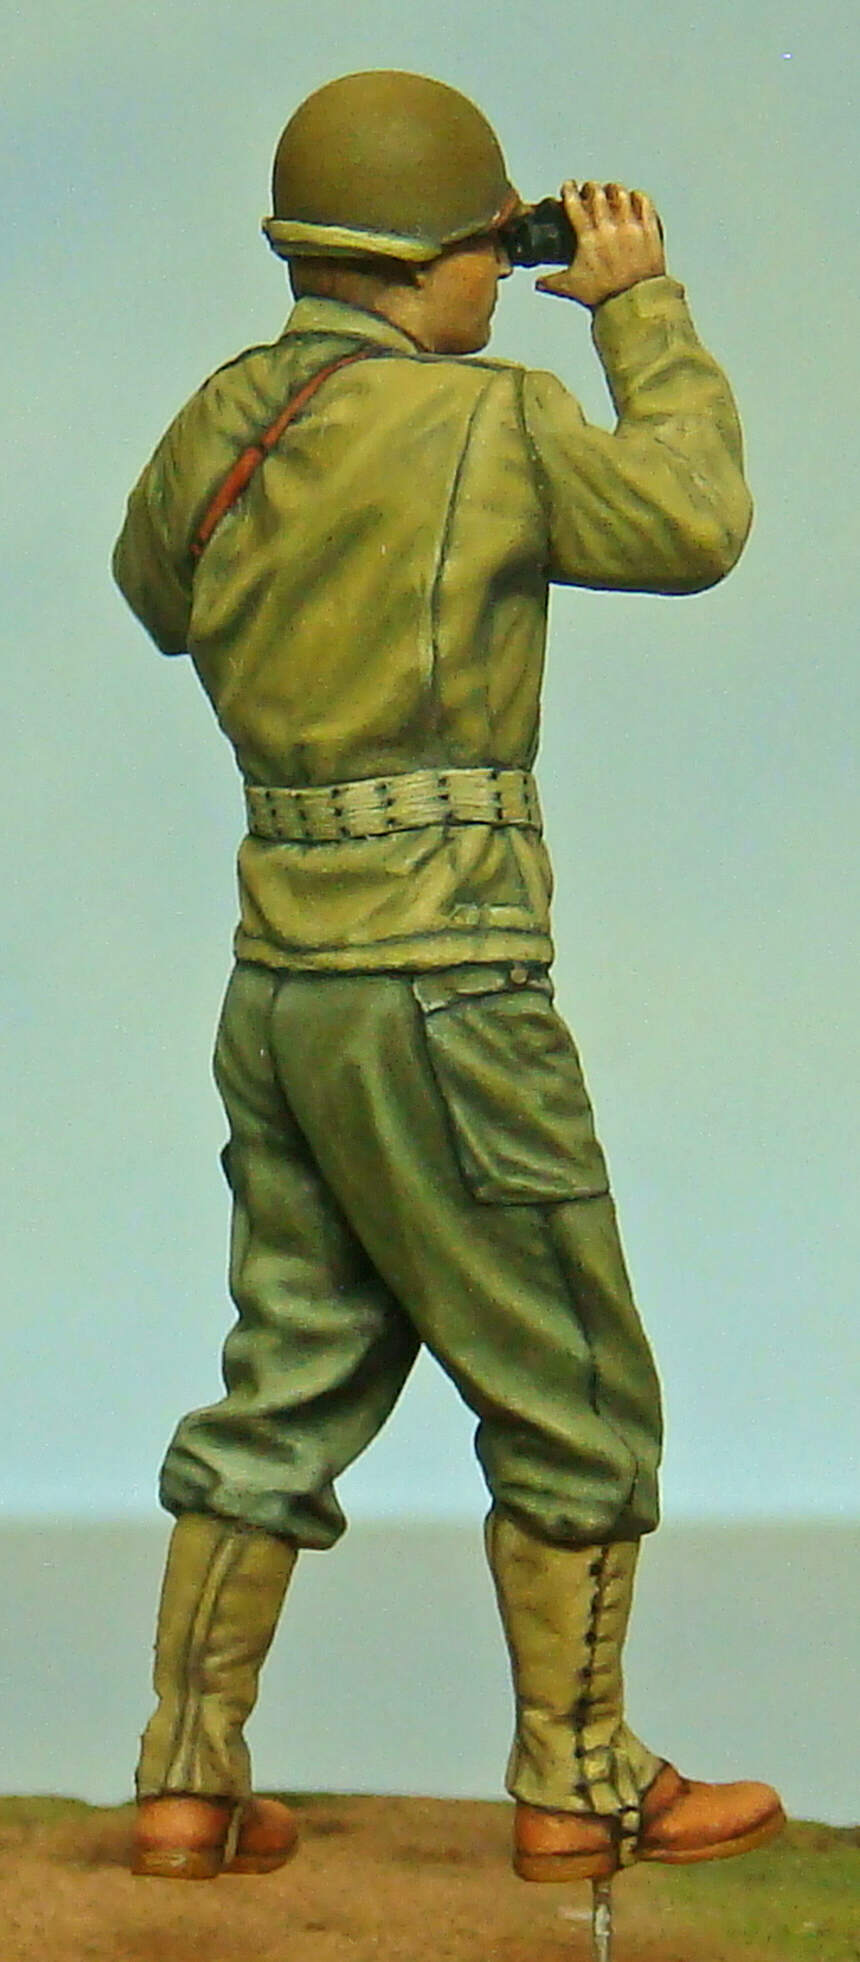
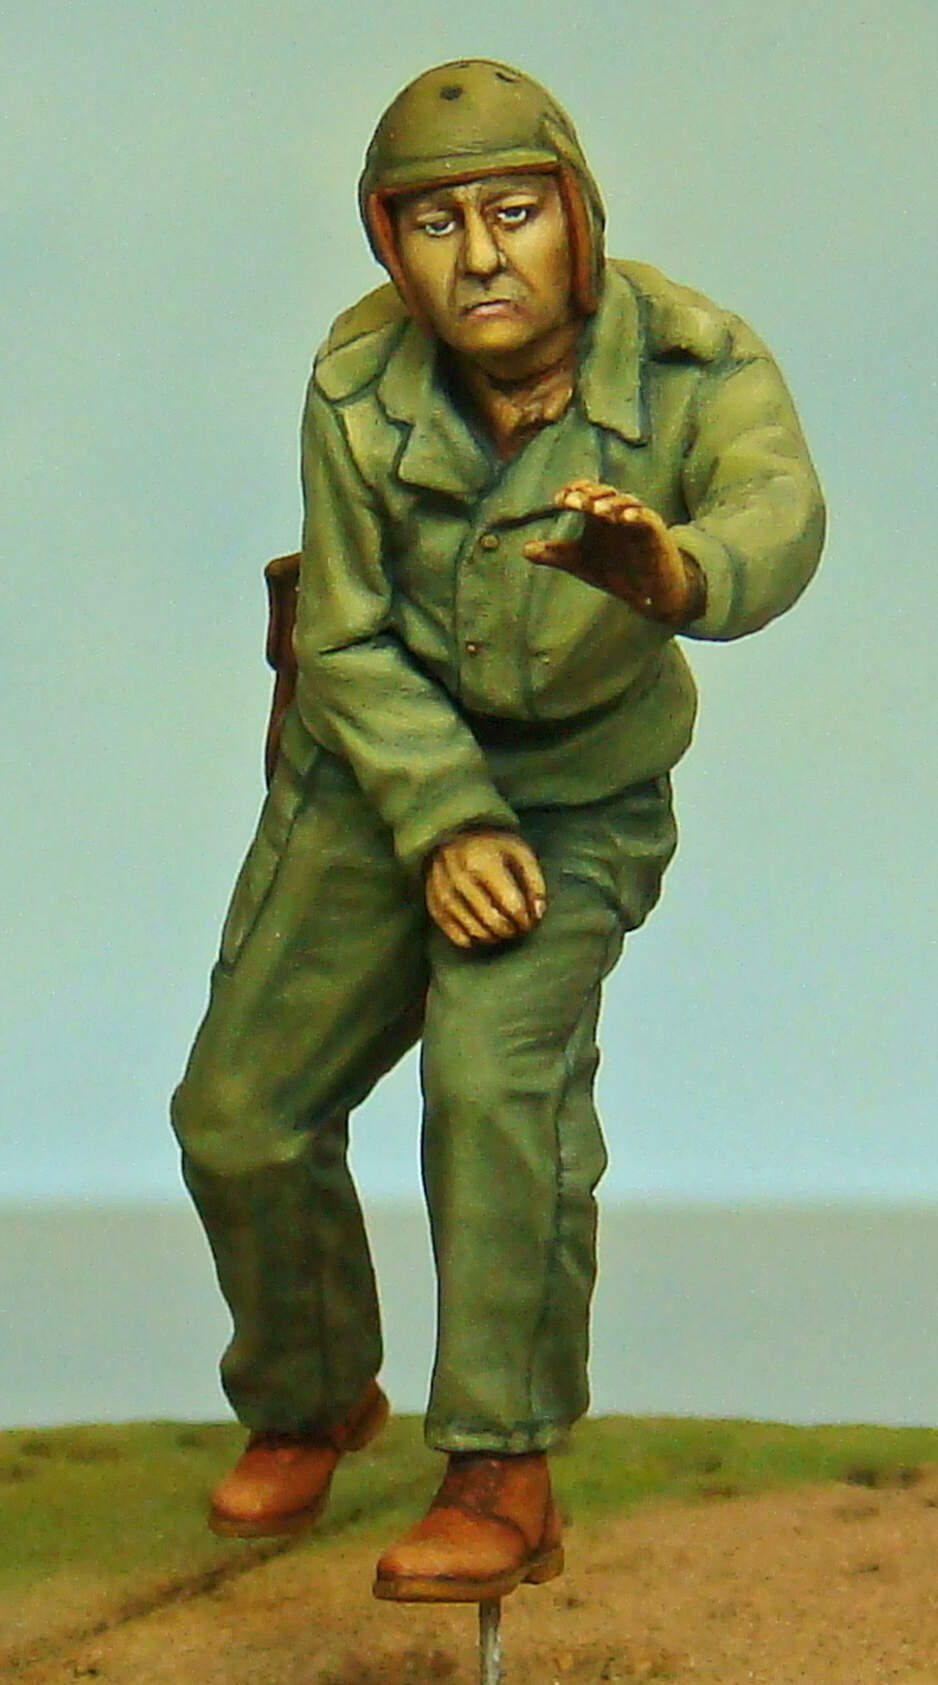
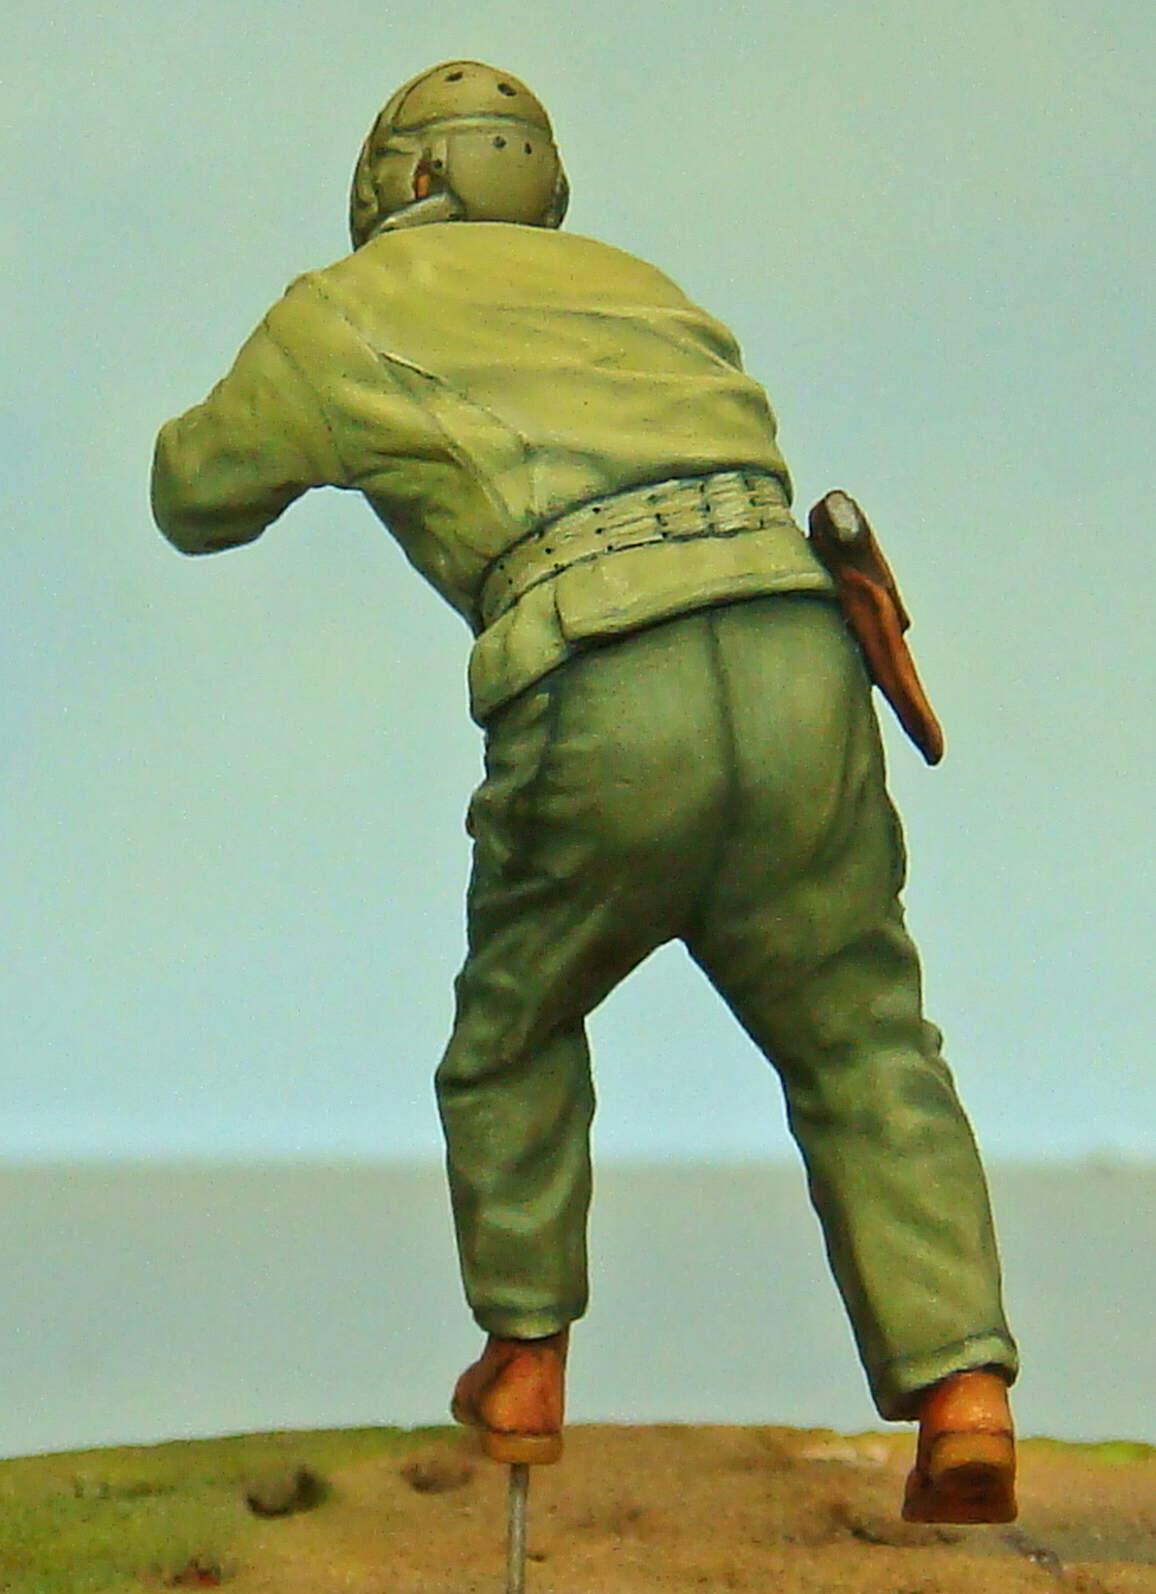
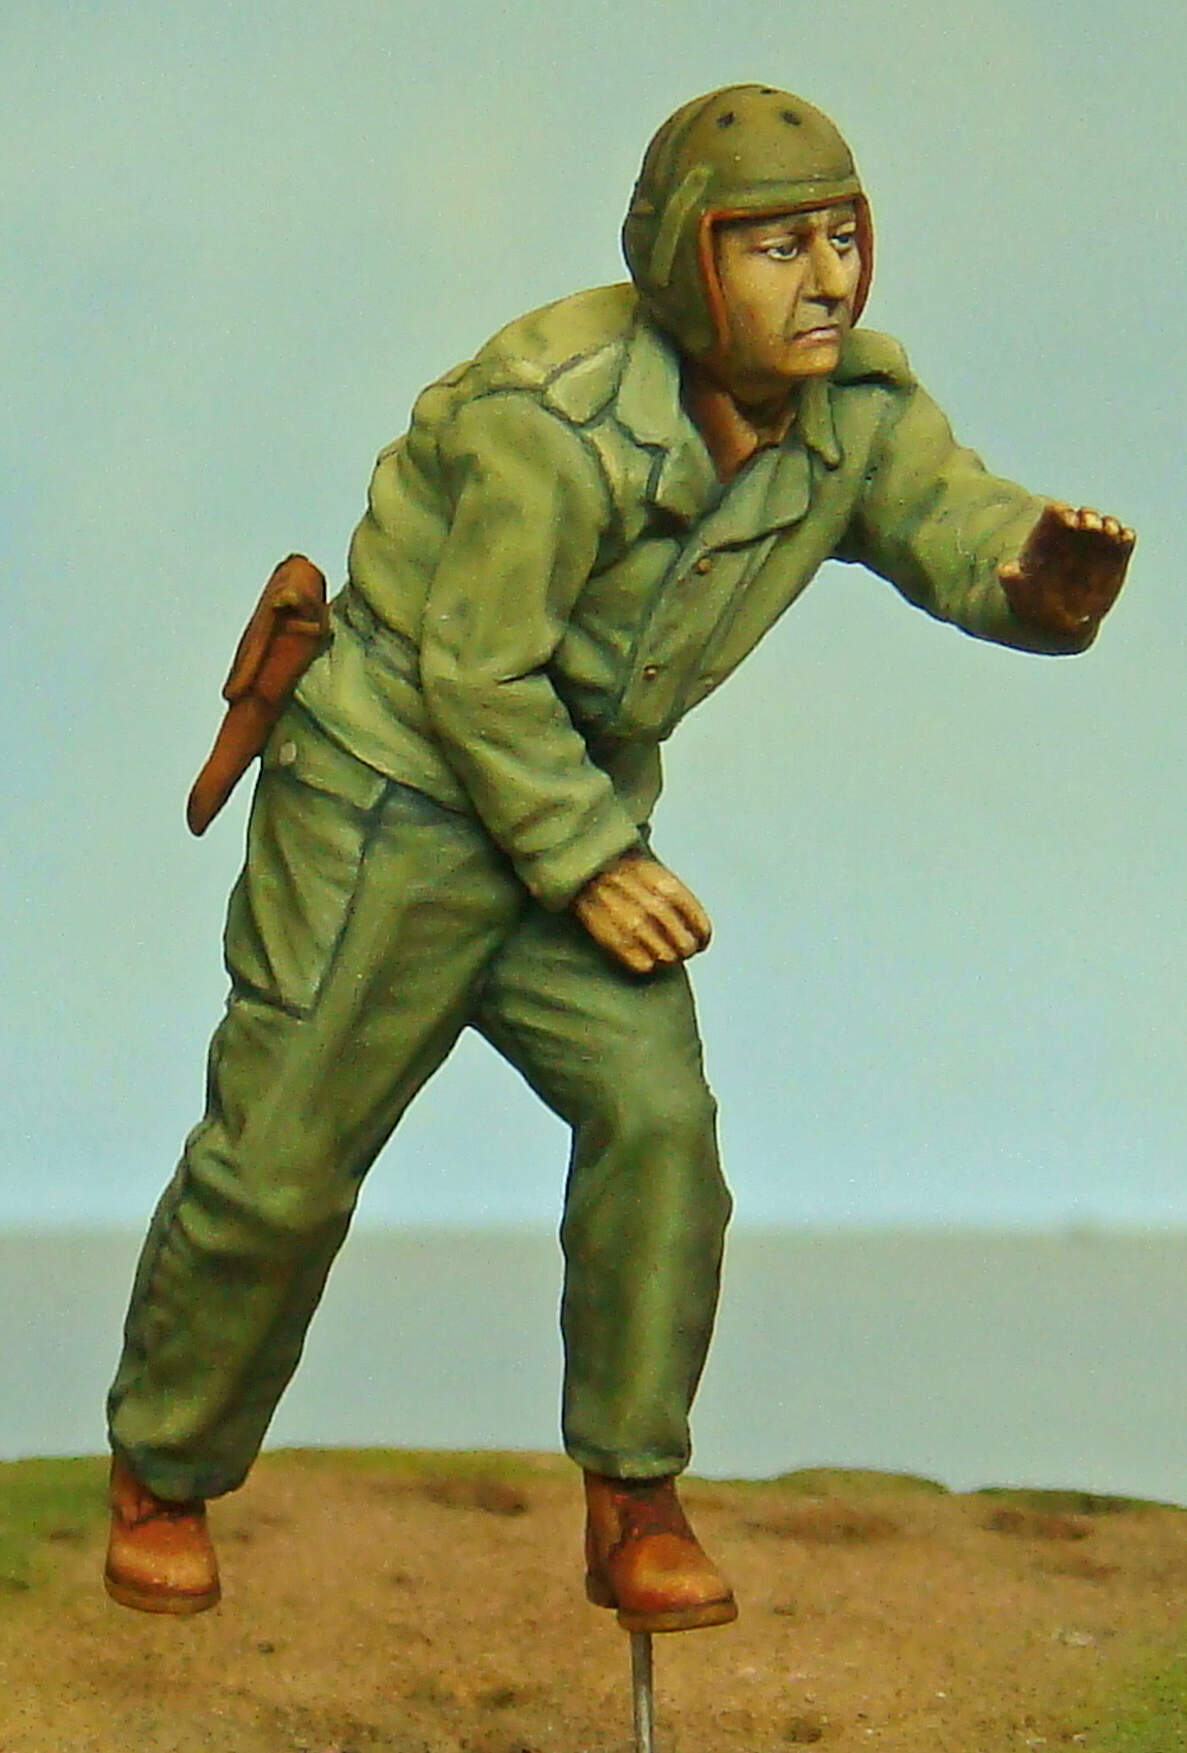
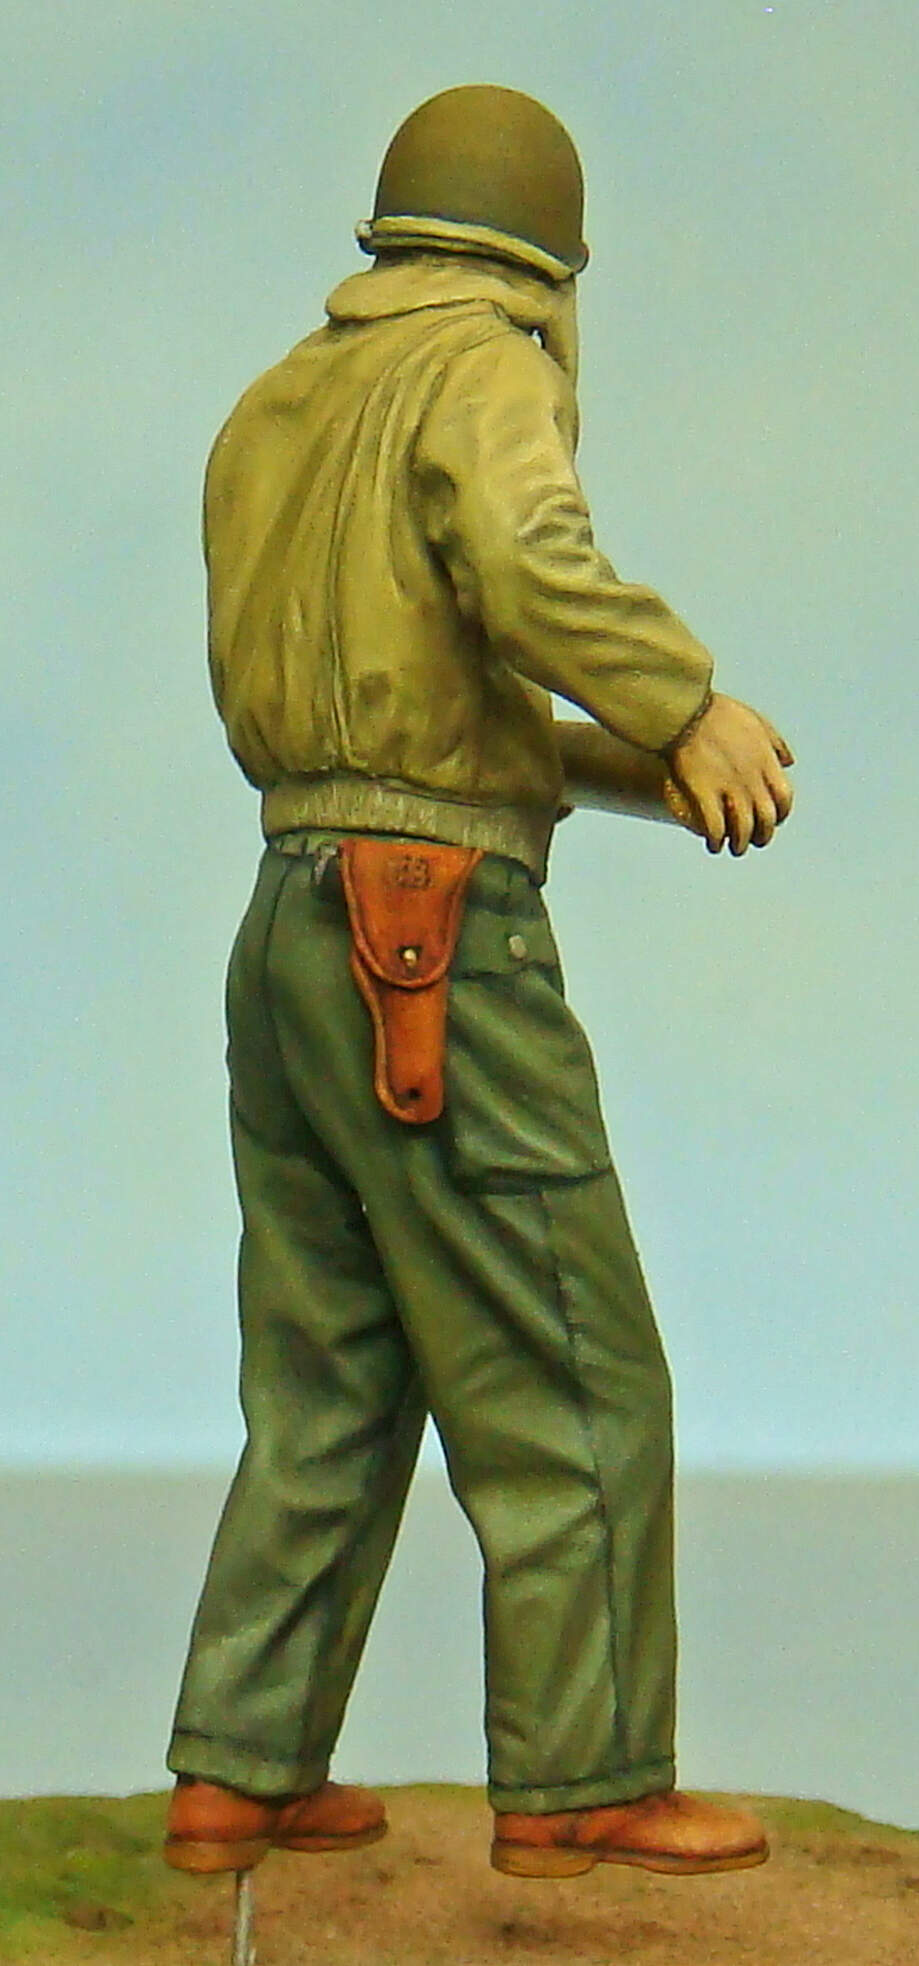
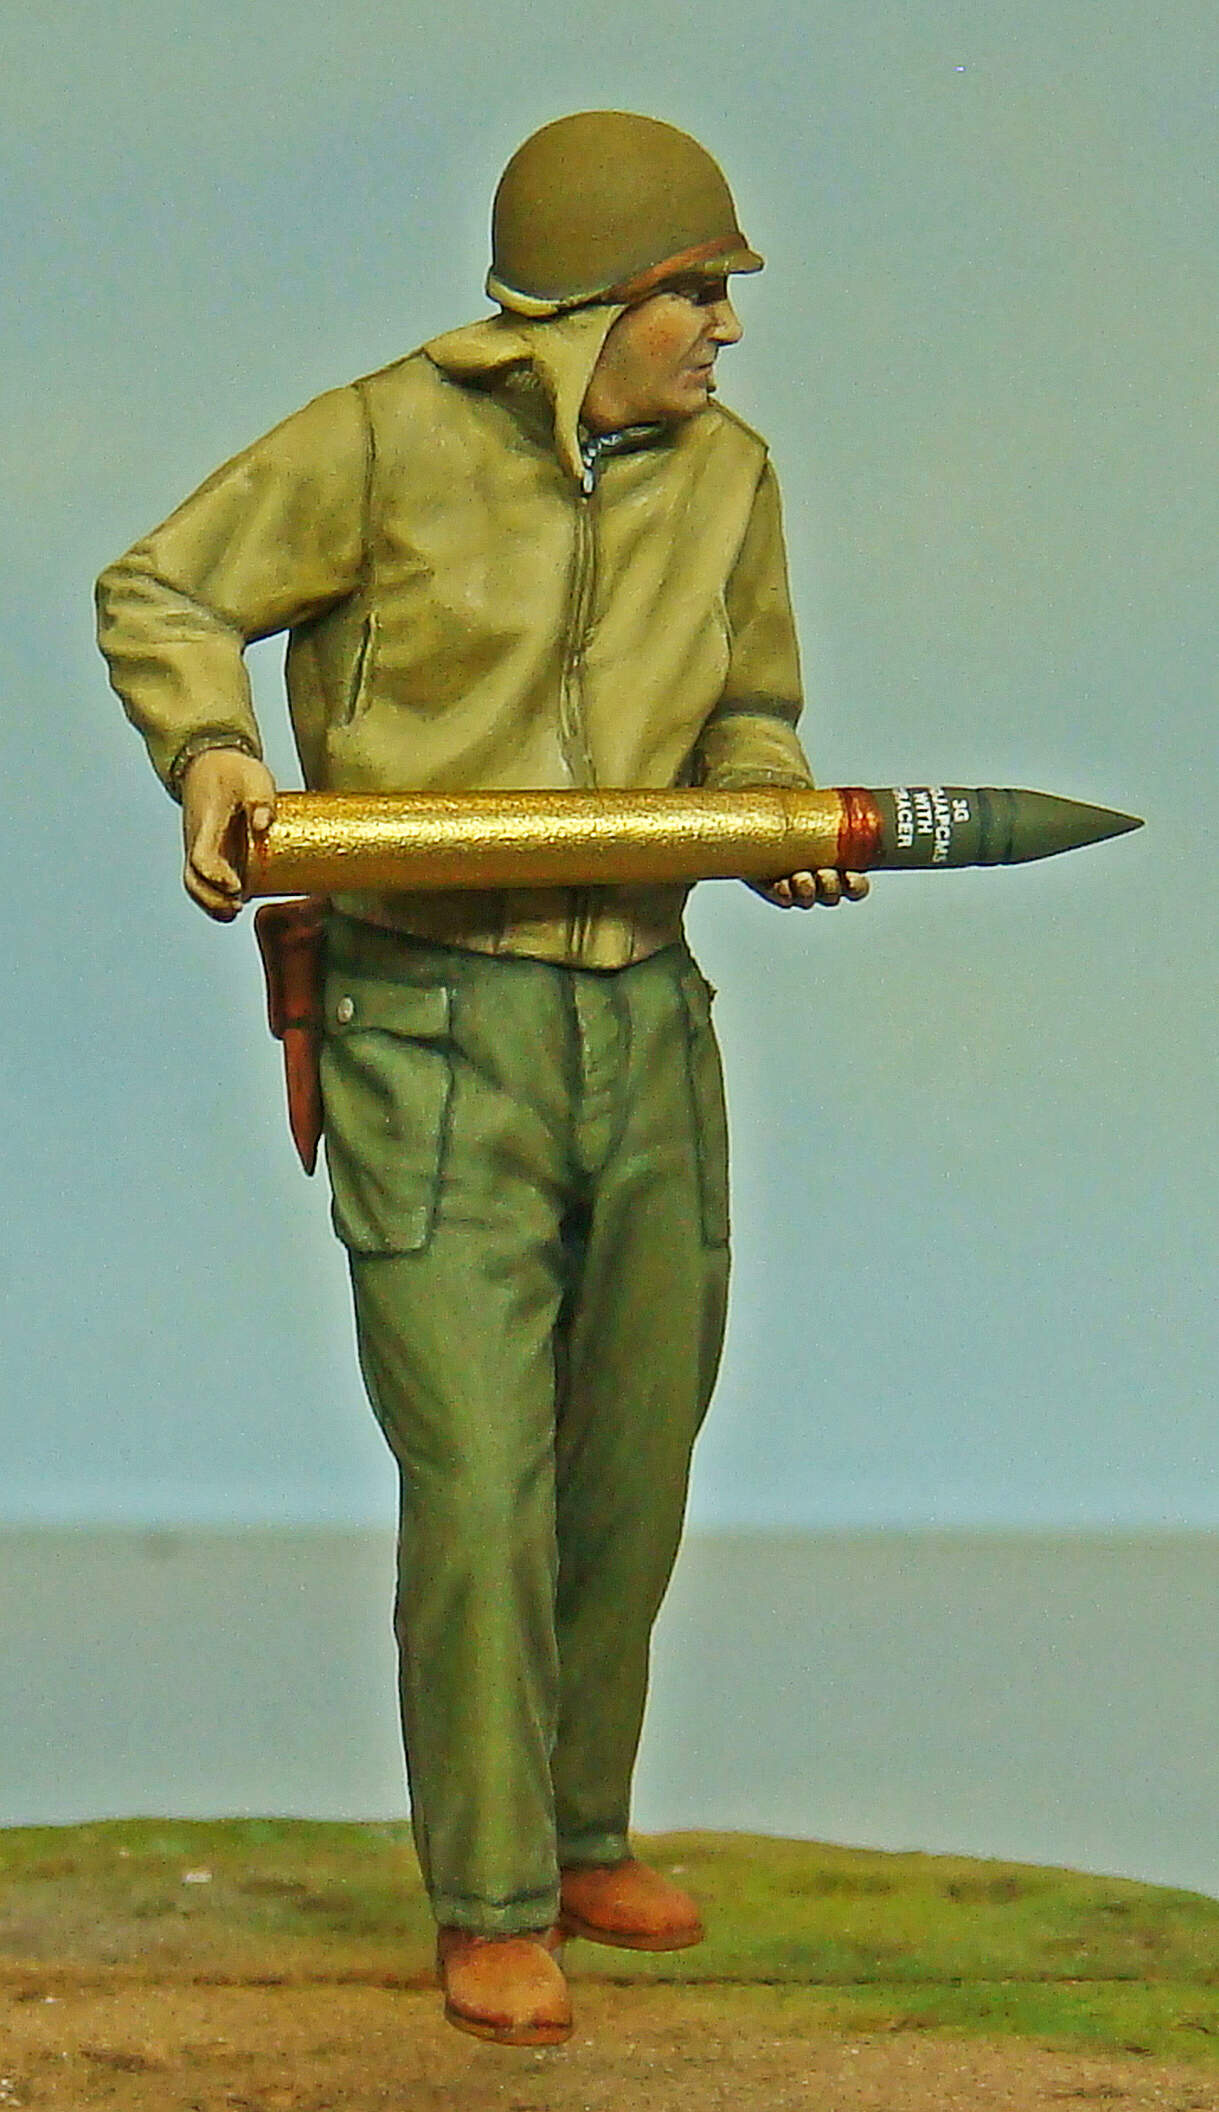
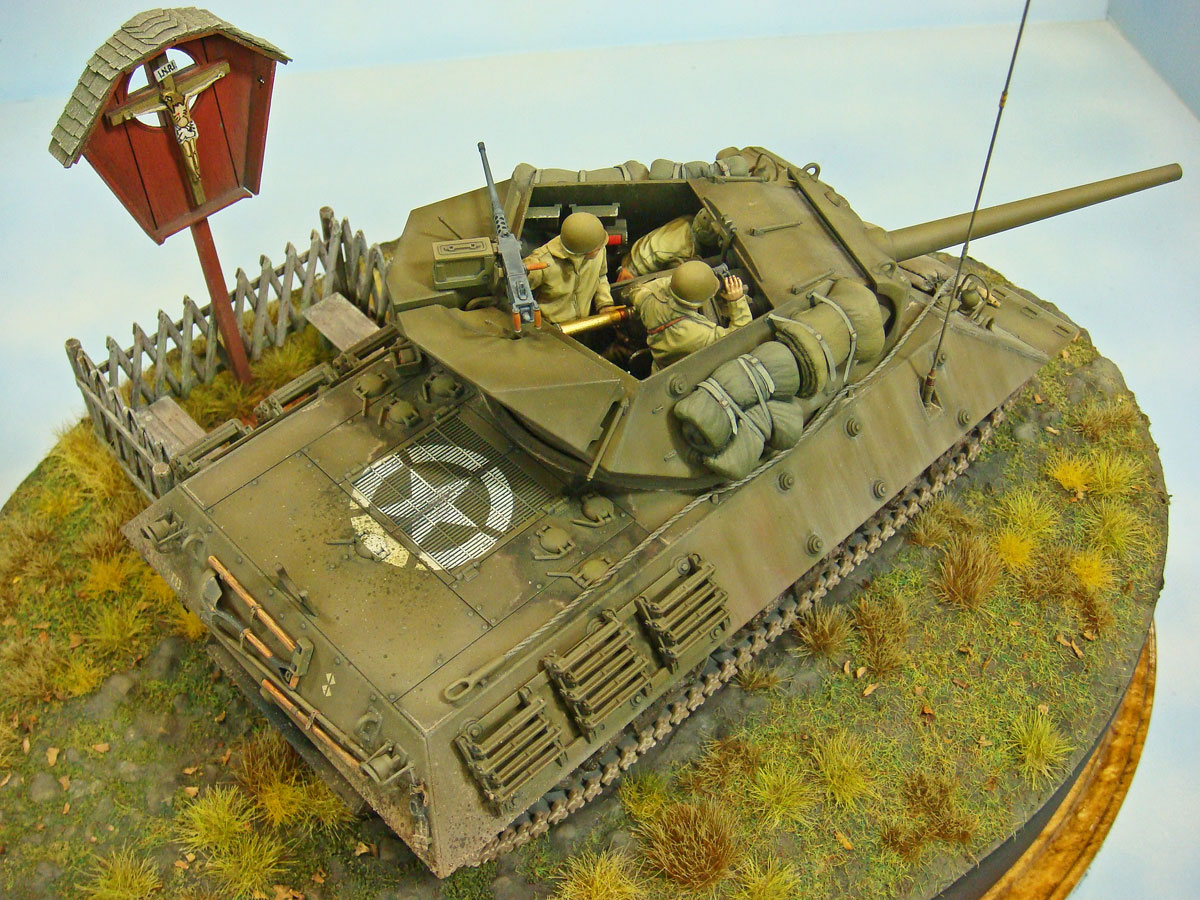
This is the stock, injection molded Tamiya crew figures included in their M10 Tank Destroyer kit. The only modification I did to any of them was to drill out the objective lenses on the commander’s binos and add a clear artist gel medium to give them some depth.
These were all painted in artist oils over acrylic undercoats.
The commander:
The gunner:
The loader:
Finally, the crew fitted to the model:
19 Likes
@justsendit Thanks, Mike!
Nicely done. Uniforms look great but to my eye the flesh tones look a bit greenish. Perhaps it is just the lighting or the way colors are rendered on my computer. At any rate far better than my figures which are passable. I have been very impressed with the figures that are included in Tamiya’s newer releases. Other manufacturers should follow suit.
2 Likes
That’s a cracking effect on the shading and highlighting! Wish I had the confidence to try oils. One day…Maybe?
G.
1 Like
@Armorsmith Hmmm… When I’m criticized it’s usually for my light pallet with not enough contrast as a close second (which are both just my personal style choices), but I think this is the first time for greenish skin tones. LOL!
First time for everything! So, in keeping with the finest traditions for a “first time"celebration,” I’ll buy the beer for this one! Cheers! 
I totally agree with your observation about Tamiya’s newer figuers. They have really stepped up their game, and I, for one, really appreciate it. I almost buy their newer releases now just for the figures. I always liked their “diorama in a box” approach, but they’re outdoing themselves!
2 Likes
Michael,
Amazing work - and as far as the facial features - just wow!!
David
1 Like
Thanks!
Oils are probably the most intutive figure painting medium there is, and I highly encourage anyone to give them a try. Once you figure out that very (very!) small amounts of paint are all that’s needed so you don’t build up thick layers, and that blending is really done most often with a light “stippling” motion (and not usually by brushing back and forth along the demarcation between tones), the rest just makes sense. The learning curve to a good foundation is very shallow, and good early skills build quickly.
The transistion to oils from hobby enamels is especially very natural, so anyone who has been painting figures with a paint like Model Master will find oils to be second nature, really.
Unfortunately, the transistion from hobby acrylics to oils is not so natural since many of the acrylic techniques don’t lend themselves to basic oil techniques. However, a lot of what many beginning acrylic painters try to do intutively and unsuccessfully with acrylics are natural techniques with oils. If someone’s been painting with acrylics for a long time, they may have to “unlearn” some methods and techniques. On the other hand, for someone who’s already an accomplished acrylic painter, the nuts and bolts of oils will make perfect sense with a little study.
I think oils have an undererved reputation for difficulty, and they’re the “traditional” miniatures painting medium, so too many modlers consider them “old fashion” and passé. I believe they’re incredibly versitle and very easy to use, though.
5 Likes
Outstanding finish on those figures, and the m10! I for one would love to see you do a step by step on how you go about the figure painting. The faces are just excellent, but I’m really impressed with the leather finish you achieved too. Thanks for sharing!
Cheers,J.
2 Likes
I second the mention.
The figures look great. I do have a question about the gunners helmet. I thought the straps across the helmet and ear covers where leather not green?
1 Like
@Tank_1812
Thanks!
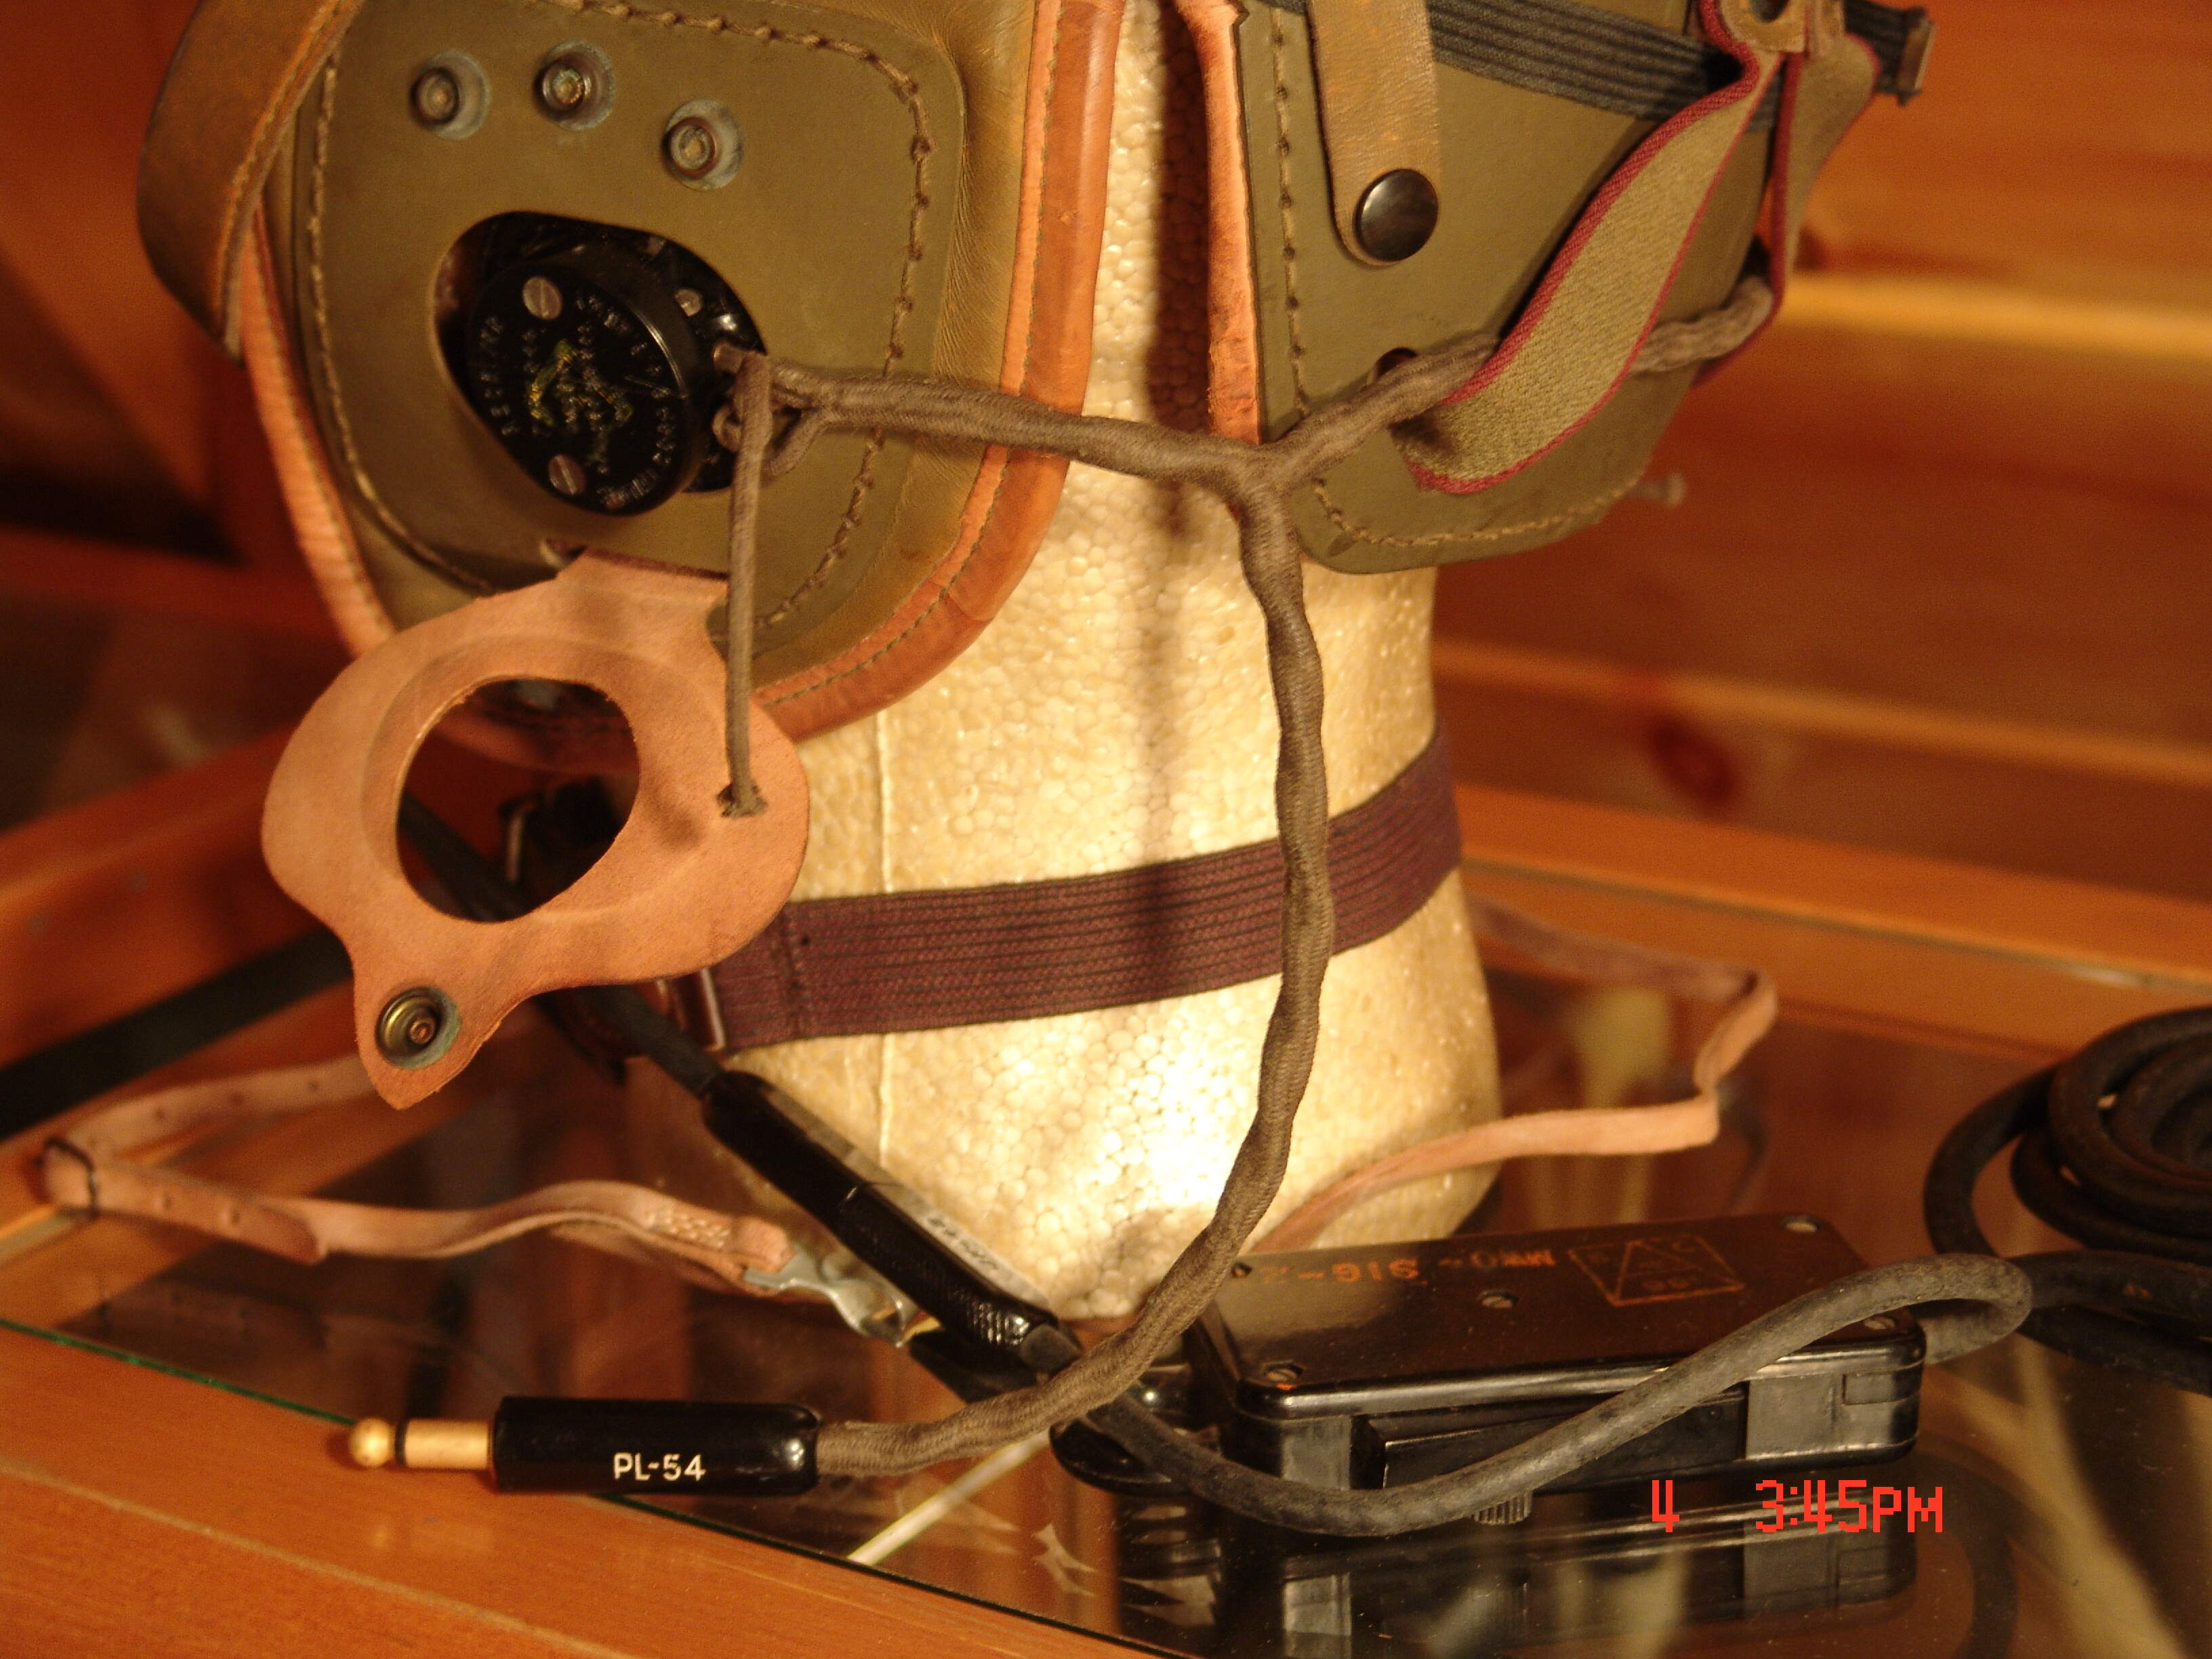
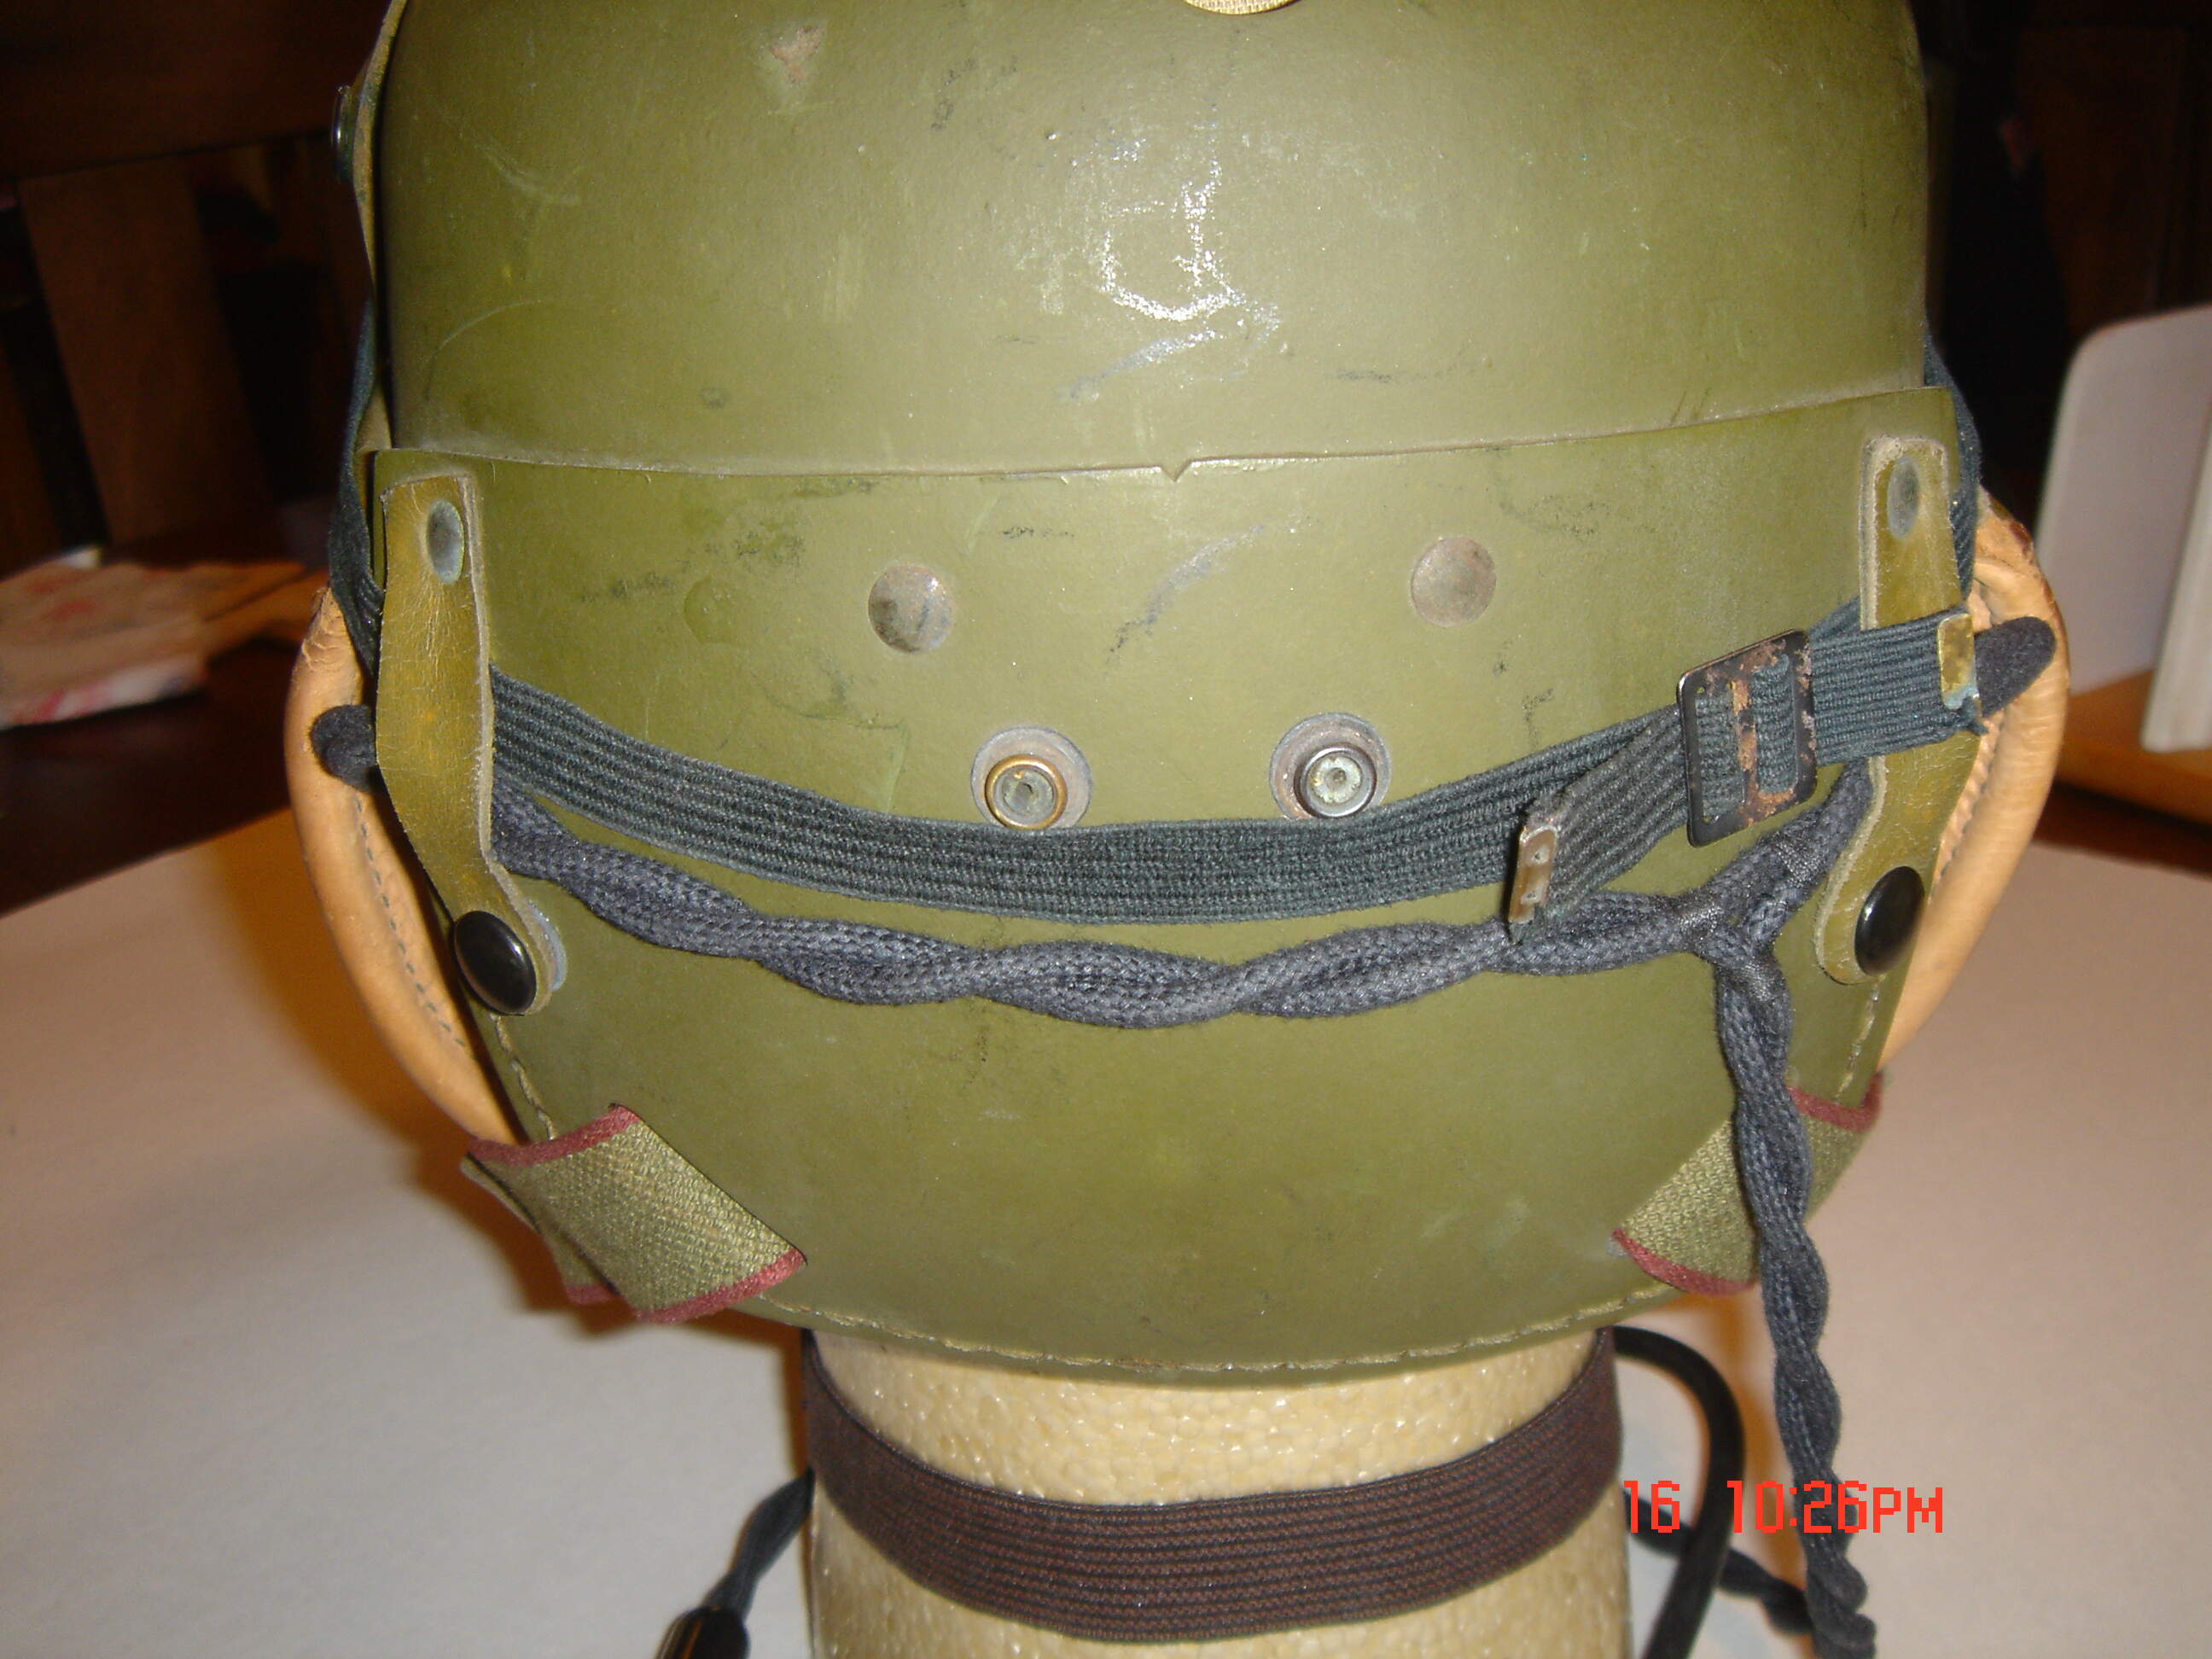
The straps are green dyed leather. The one that crossses the crown from side to side is intended to snap onto the ear flaps to hold them up from the sides of the head. When that is done, the two horn-shaped straps that go down over the ear flaps are swung up to point either to the front or rear. These two straps are not actually straps at all, but rather two pieces of curved spring steel covered with green dyed leather that hold the ear flaps and ear phones snug to the wearer’s ears.
In the rear, the two short leather straps are intended to hold the goggle strap and ofter also have the headphone cord secured under them as well. The other two straps are green elastic and button forward to the ear flaps to also help conform the helmet (side / ear and rear / neck flaps) to the wearer’s head. You might also note the leather flaps which secure the headphones in place. They have three snaps on the ear flap to position the headphones forward or to the rear (sliding in the oval shaped hole) to better fit the individual.
2 Likes
@iwatajim & @Tank_1812
Here’s a YouTube video of a figure painting seminar that I presented at one of the AMPS International Conventions some years ago:
Figure Painting with Oils
I’ll be happy to answer any questions you might have.
2 Likes
Thanks for the explanation and photos. I will try to remember that on my next figure as I had made mine leather.
Thanks for the video link. I remember seeing it a few years ago when I wasn’t ready for the information.
1 Like
Thank for the link to the tutorial. Very comprehensive and informative. And thanks for sharing again!
Cheers, jim.
1 Like
A few more reference photos for you (had to dig deep in the vault!):
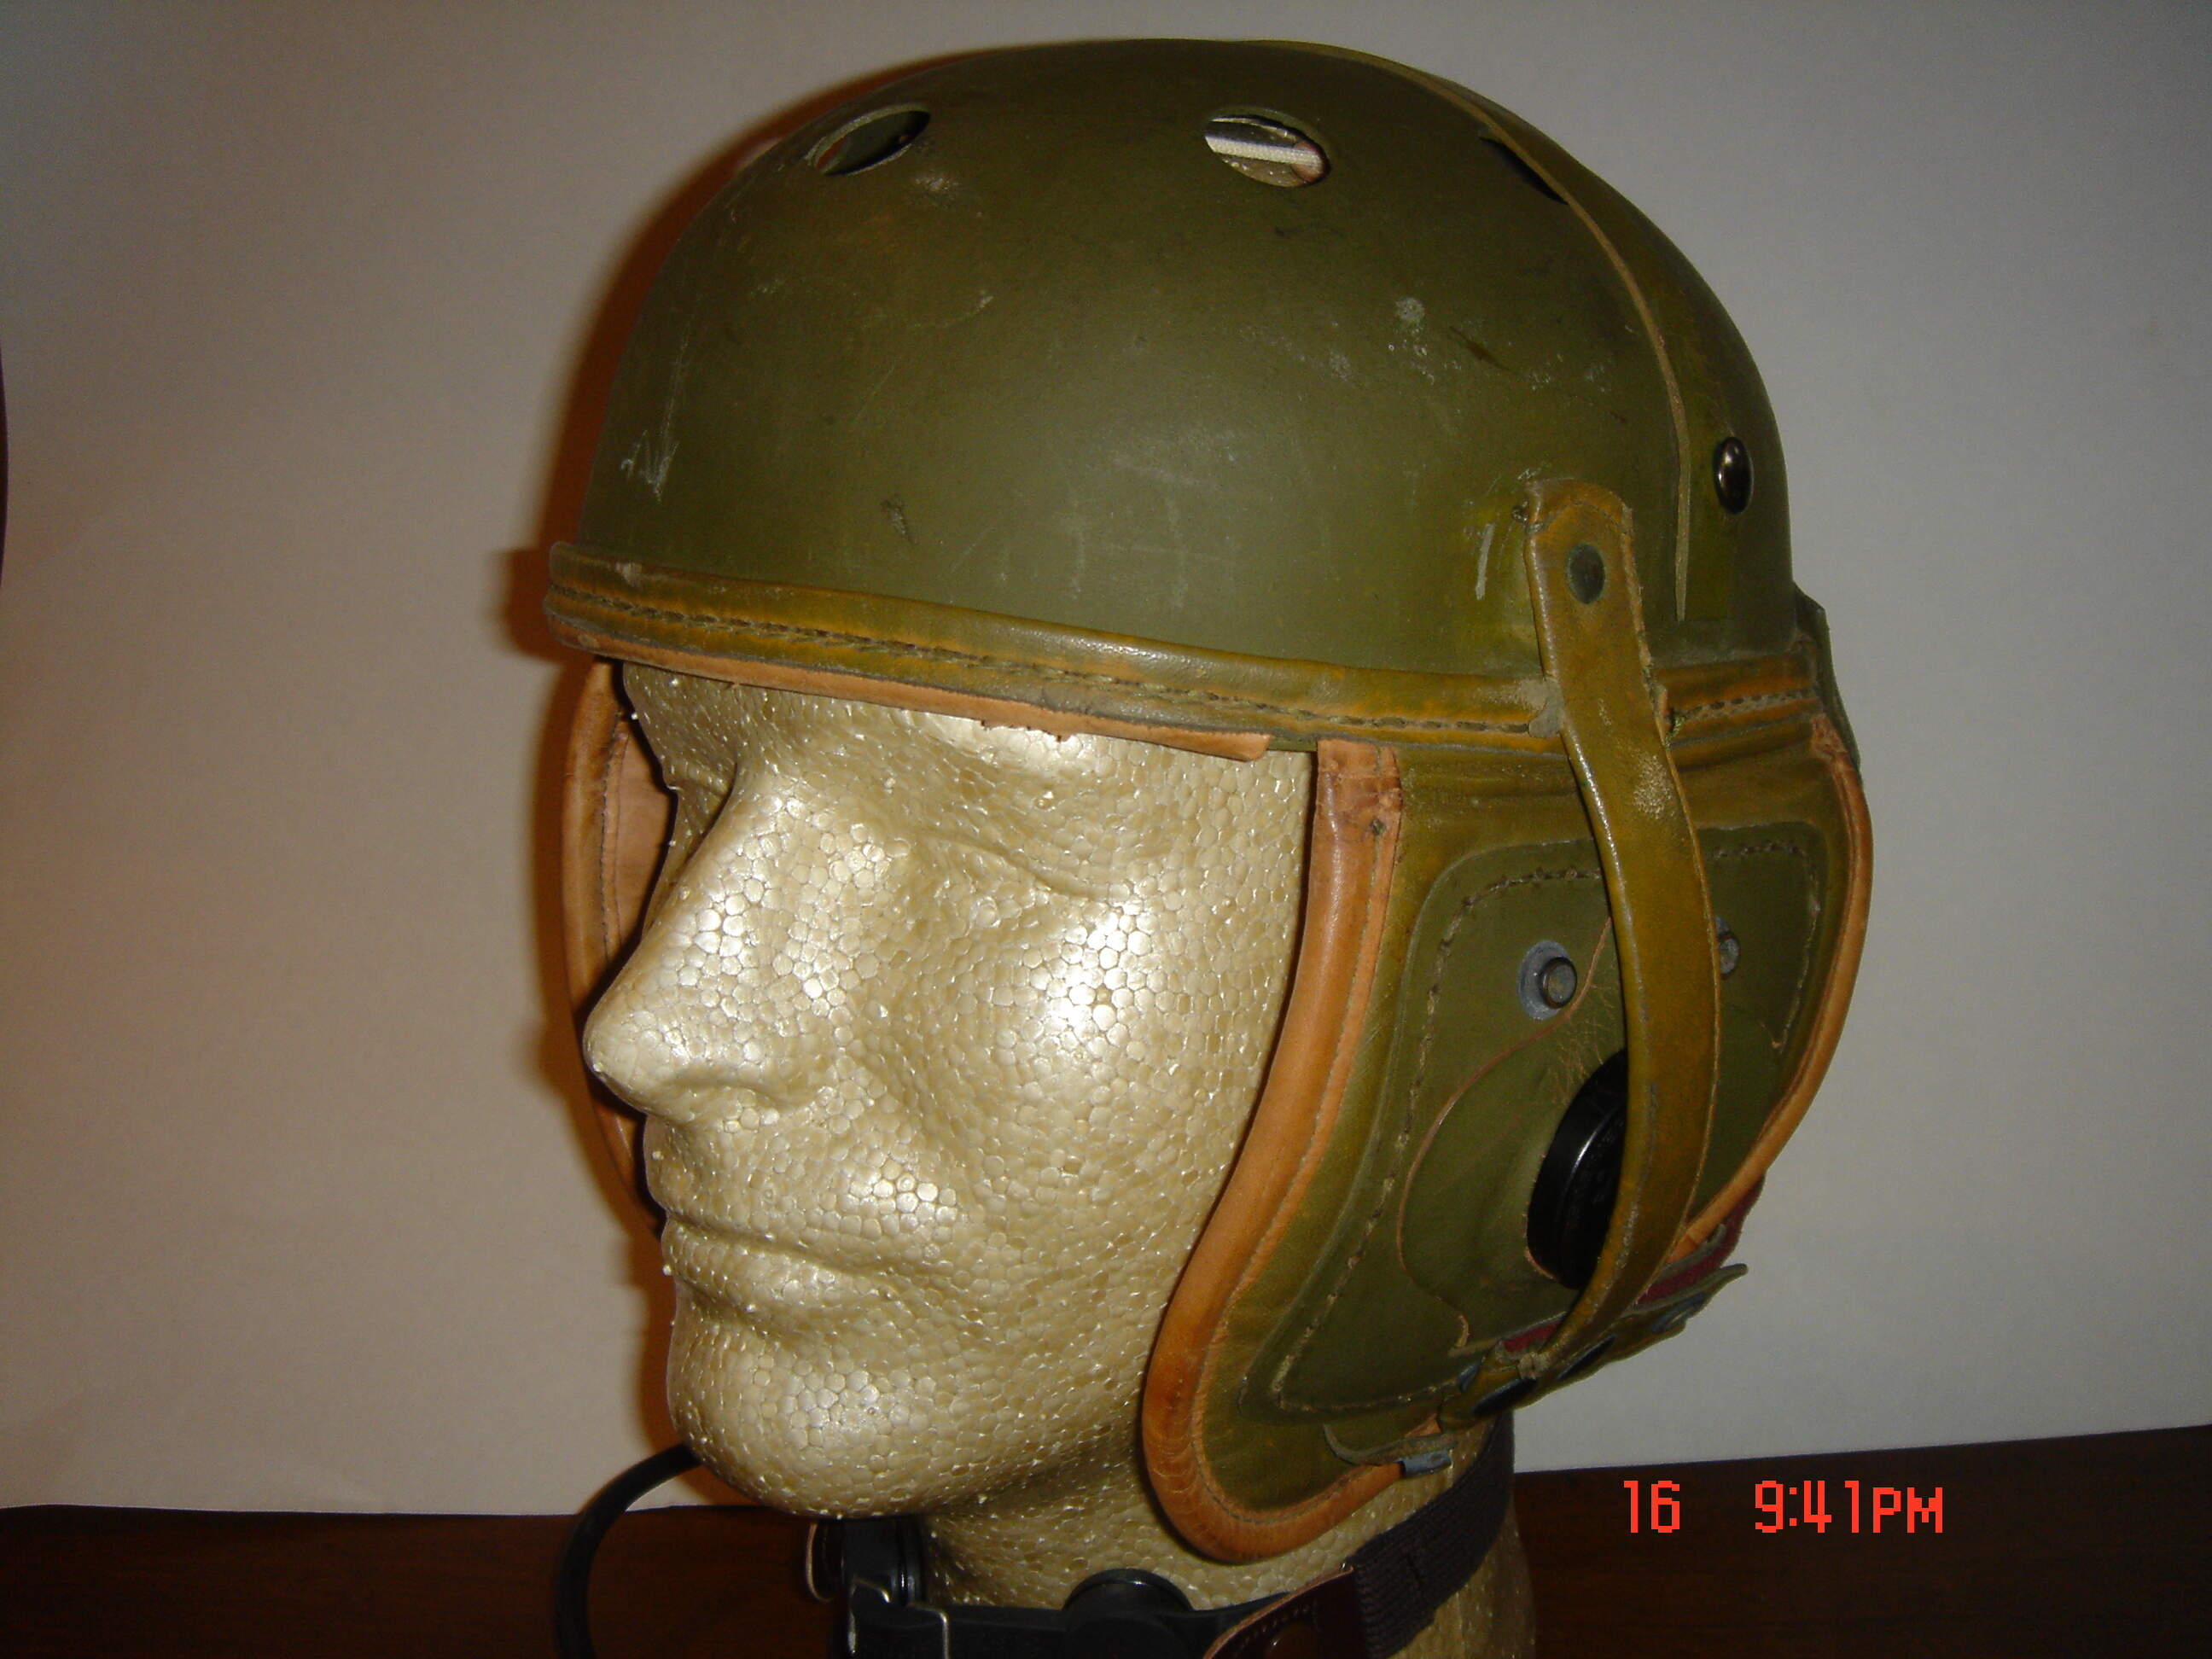
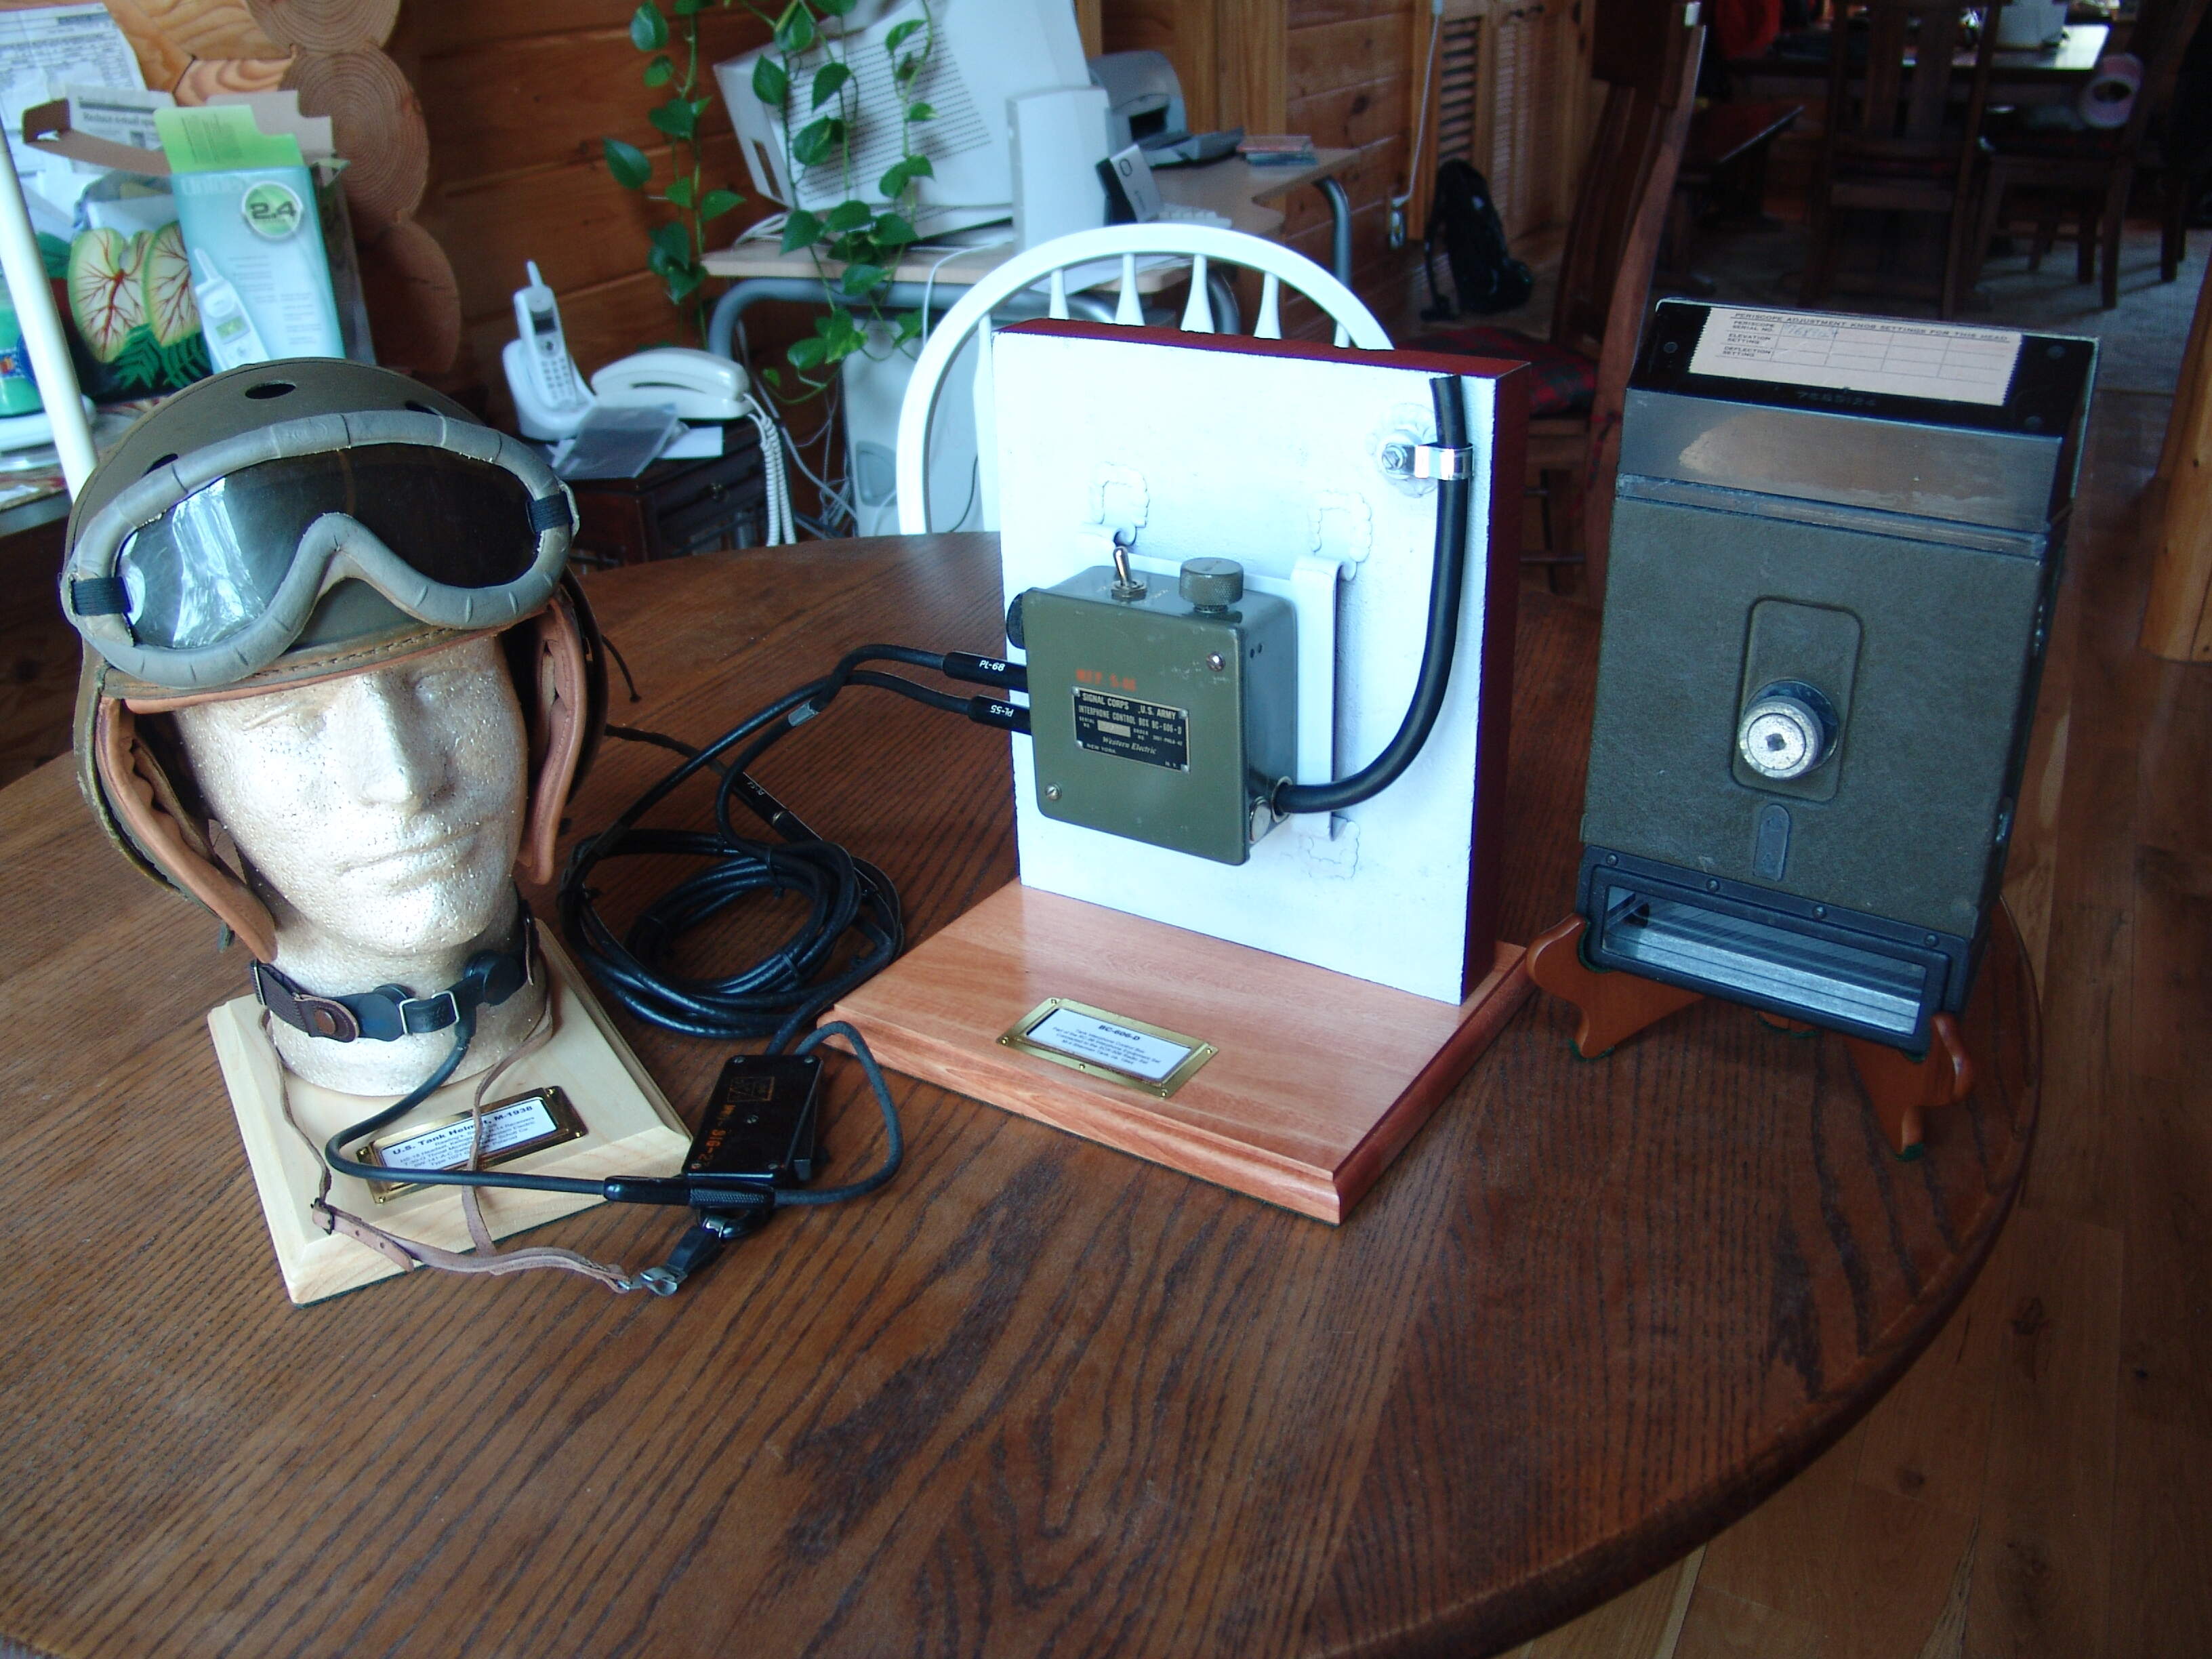
The M1938 Tank Helmet - These show some more detail on the colors and how the straps were intended to be used. Note that the green leather dye did wear off to expose the edges of the underlying leather. However, the two elastic straps might fade, but they were green through and through. Also, the color of the leather for the liner and the edging ranged from a very pale cream to a light brown (as here) when new, but darkened with use. The shell material is made of a pressed fiber material impregnated with a heat cured plastic.
This photo shows all of the headphone and throat microphone components and their associated cordage and plugs.
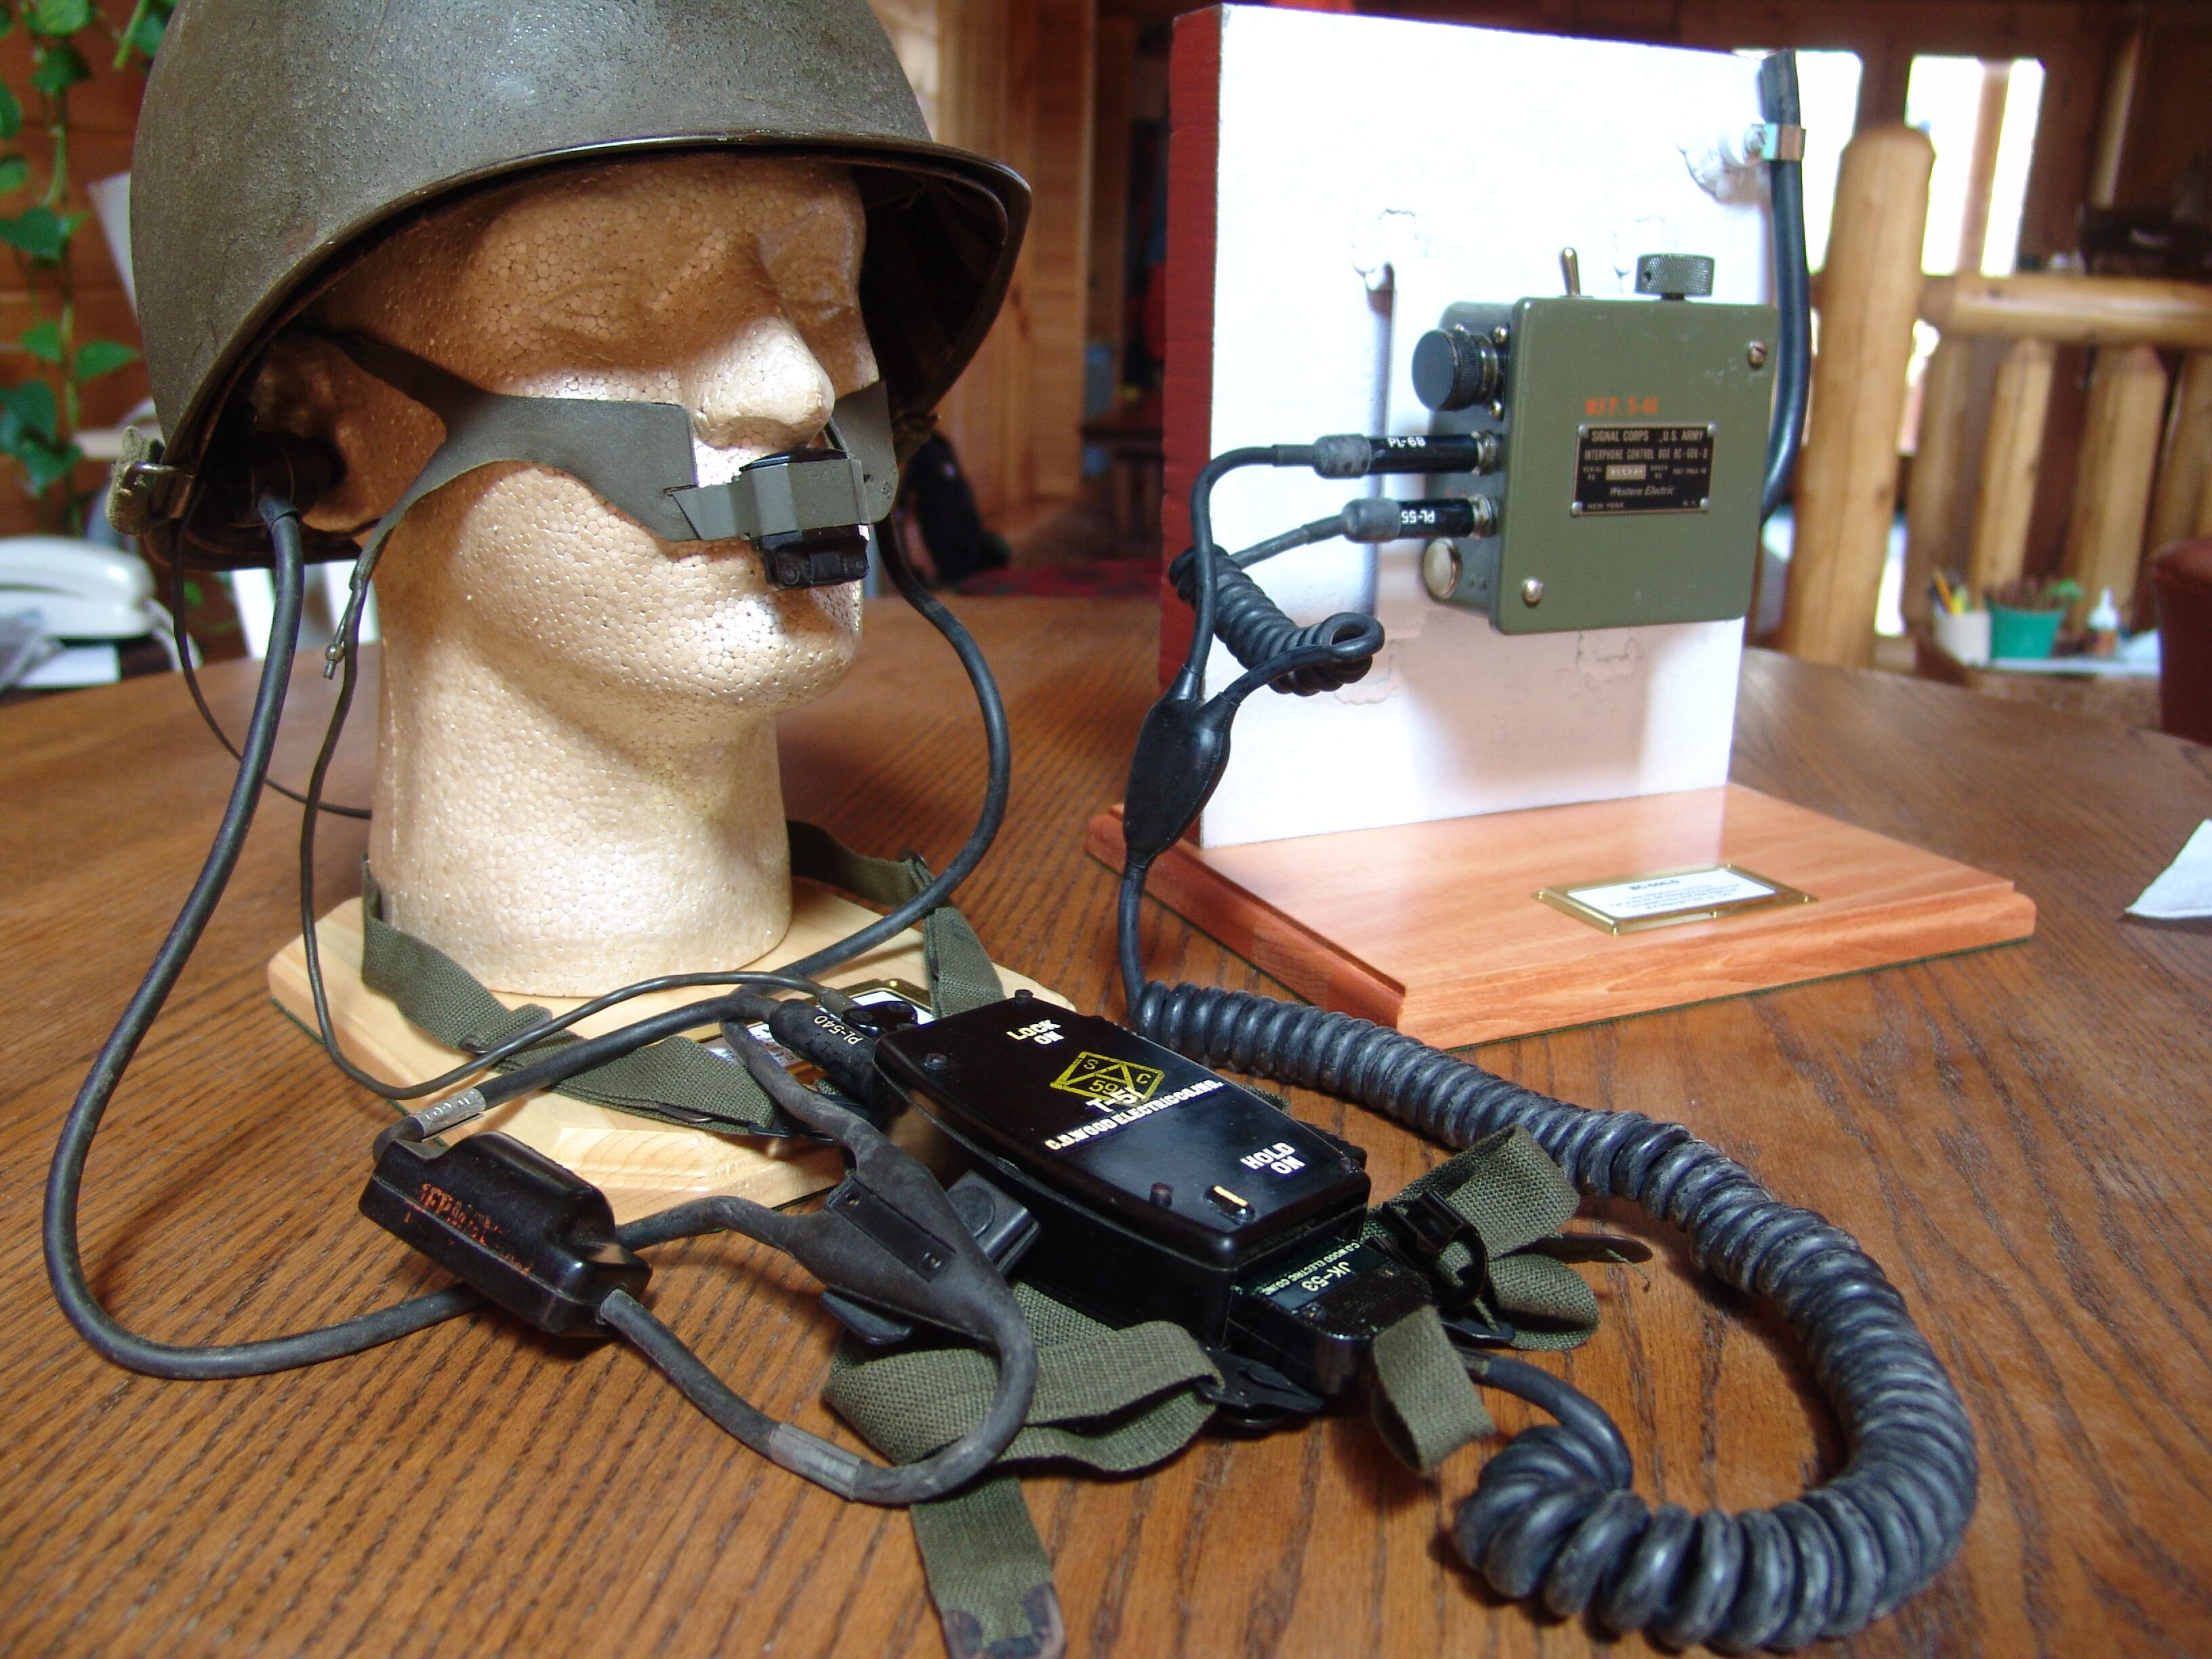
Later, after D-day, the HS-18 headset (two earphones attached together by wires)shown here in the M1938 Tank Helmet was supplemented with the HS-30 headset and the throat microphone with the T-45 lip mic (both of which could also be used with the infantry’s SCR-300 “walkie talkie” and the final versions of the SCR-536 “handy talkie” radios). Finally, the T-51 Chest Group replaced the SW-141 push to talk switch. However, all of the earlier items continued in use to the end of the war and eventually into Korea. With close examination of very late war photos, you can find US tank crews using a mix of all of these items.
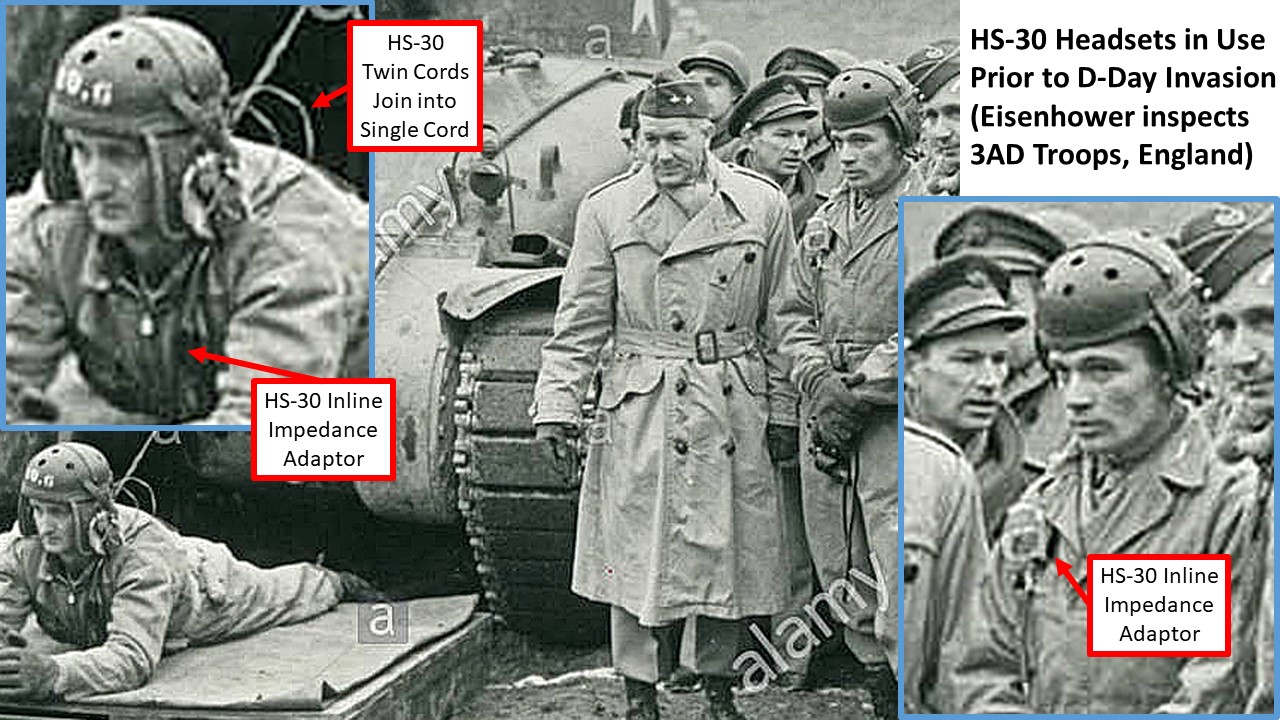
It’s also possible to find photos of the HS-30 headset used with the M1938 Tank Helmet. IIRC, there’s a pretty famous photo of Eisenhower talking to some troops in England before the invasion and one of the tankers (an LT, I think) that has the HS-30 headset installed in his M1938 Tank Helmet. A clue to which headset is being used is the small, black box with a spring clip that is wired inline on the HS-30. A lot of times you can’t see the spring band head piece, but the black, inline adaptor box is visible in the cables.
A final note is that the liner could be removed from the M1 steel helmet and the helmet shell with its attached chin strap could be worn on top of the M1938 Tank Helmet. This is a pretty common thing to see with, especially, tank commanders fighting their tanks with their heads out of the cupola. Again, IIRC, some of the crew of the famous Flat Foot Floogie are wearing the T-45 lip mic.
Edit: Found a poor copy of the Eisenhower photo on Almey…
2 Likes
Great information, thanks.
1 Like
Some excellent paintwork and details.