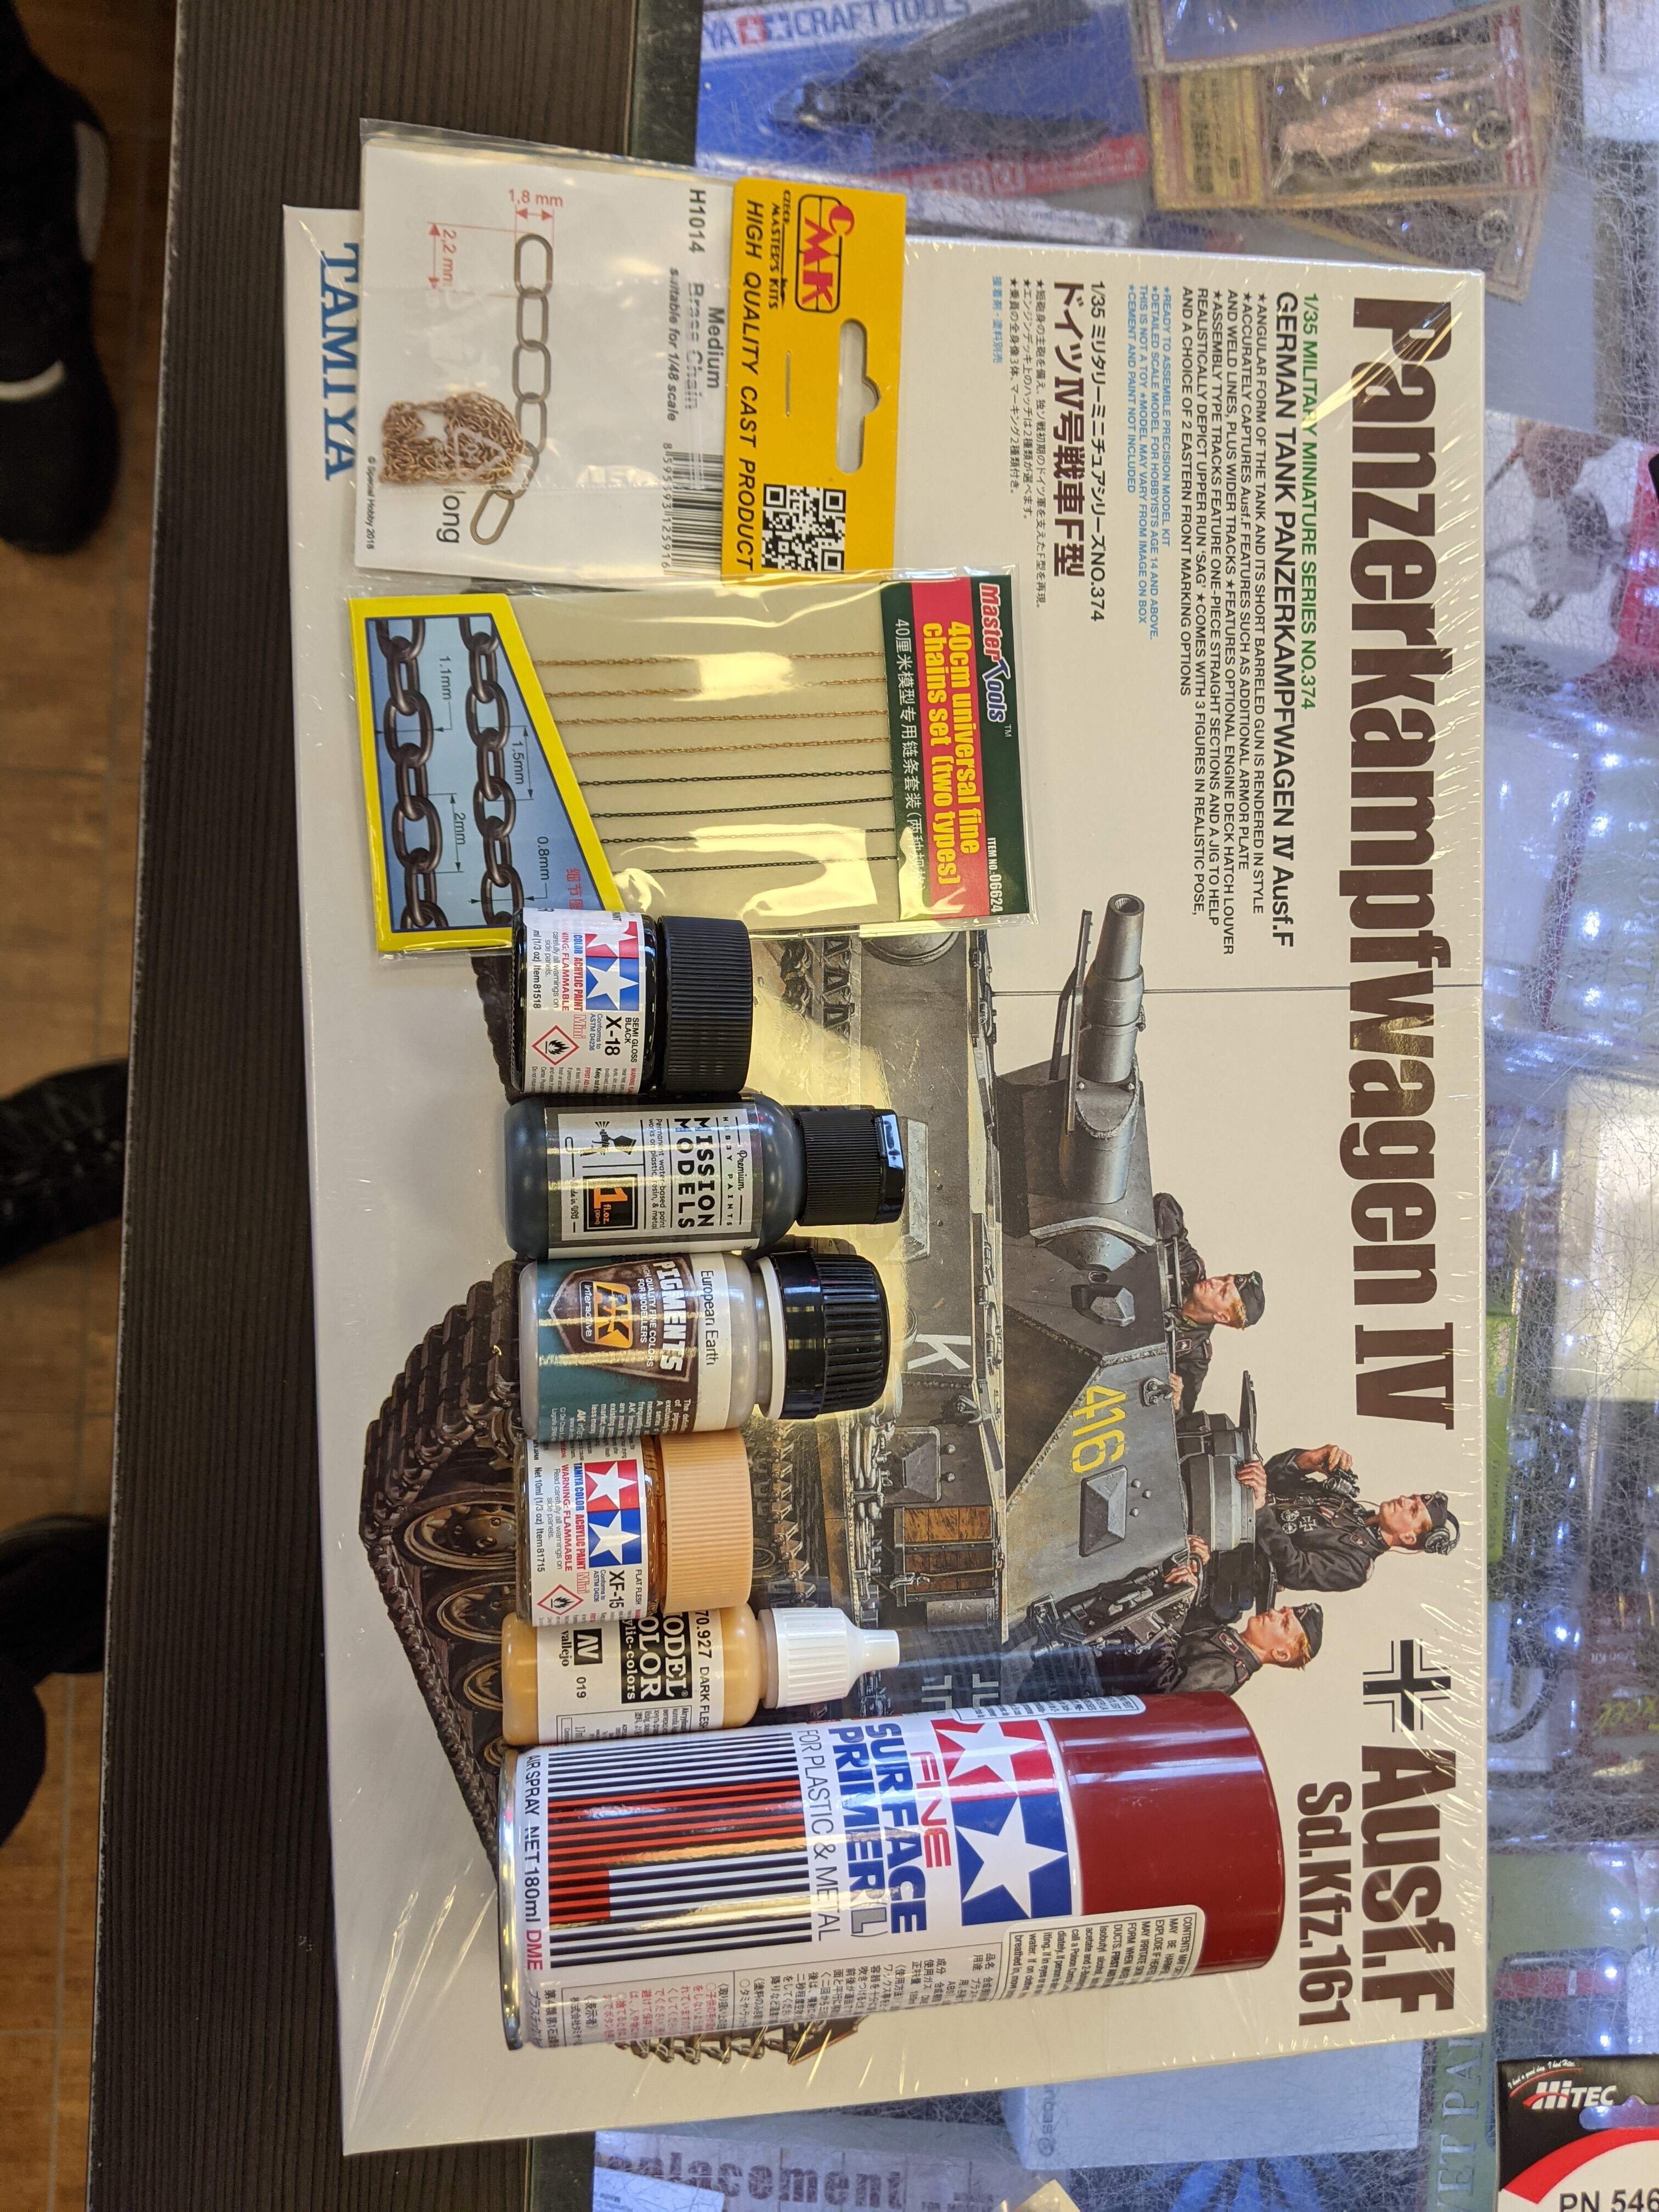
Morning all! As I’m beginning to finish up my 1/12 Fireblade, it’s time to begin thinking of what’s next. School’s just let out for spring break, a fresh new lockdown just hit, and the forecast for the next week is rain. The conditions could not be better set for my glorious return to the world of armour modelling, after far too long spent in exile with shiny things. So I thought I’d return with Tamiya’s latest and greatest, the Panzer IV F. This is an uncommon kit for me to build, as I generally try to avoid making anything associated with the Third Reich but I’m making an exception for this kit, as it looks fantastic. (That said, you guys probably would have seen me make a Canadian tank but for the fact I’m not allowed to until July 1st - see the Canadian Army campaign for details.) So, why not begin the build by showing off the haul!
I’ll finish up the Fireblade and get right to building this!
-Dennis
5 Likes
Sweet haul! The Tamiya Pz. IV kits are a joy to build and you should throughly enjoy building it!
Funny you are about to start this build, I was about to start my Tristar Pz. IV D today. But I’ll switch it to the Border Pz. IV G so there isnt 2 almost identical blogs at the same time! 
1 Like
Sweet! Looking forward to see it come together.
1 Like
To kick things off, I went straight not to my bench, but my computer.
It was time to fire up Post Scriptum.
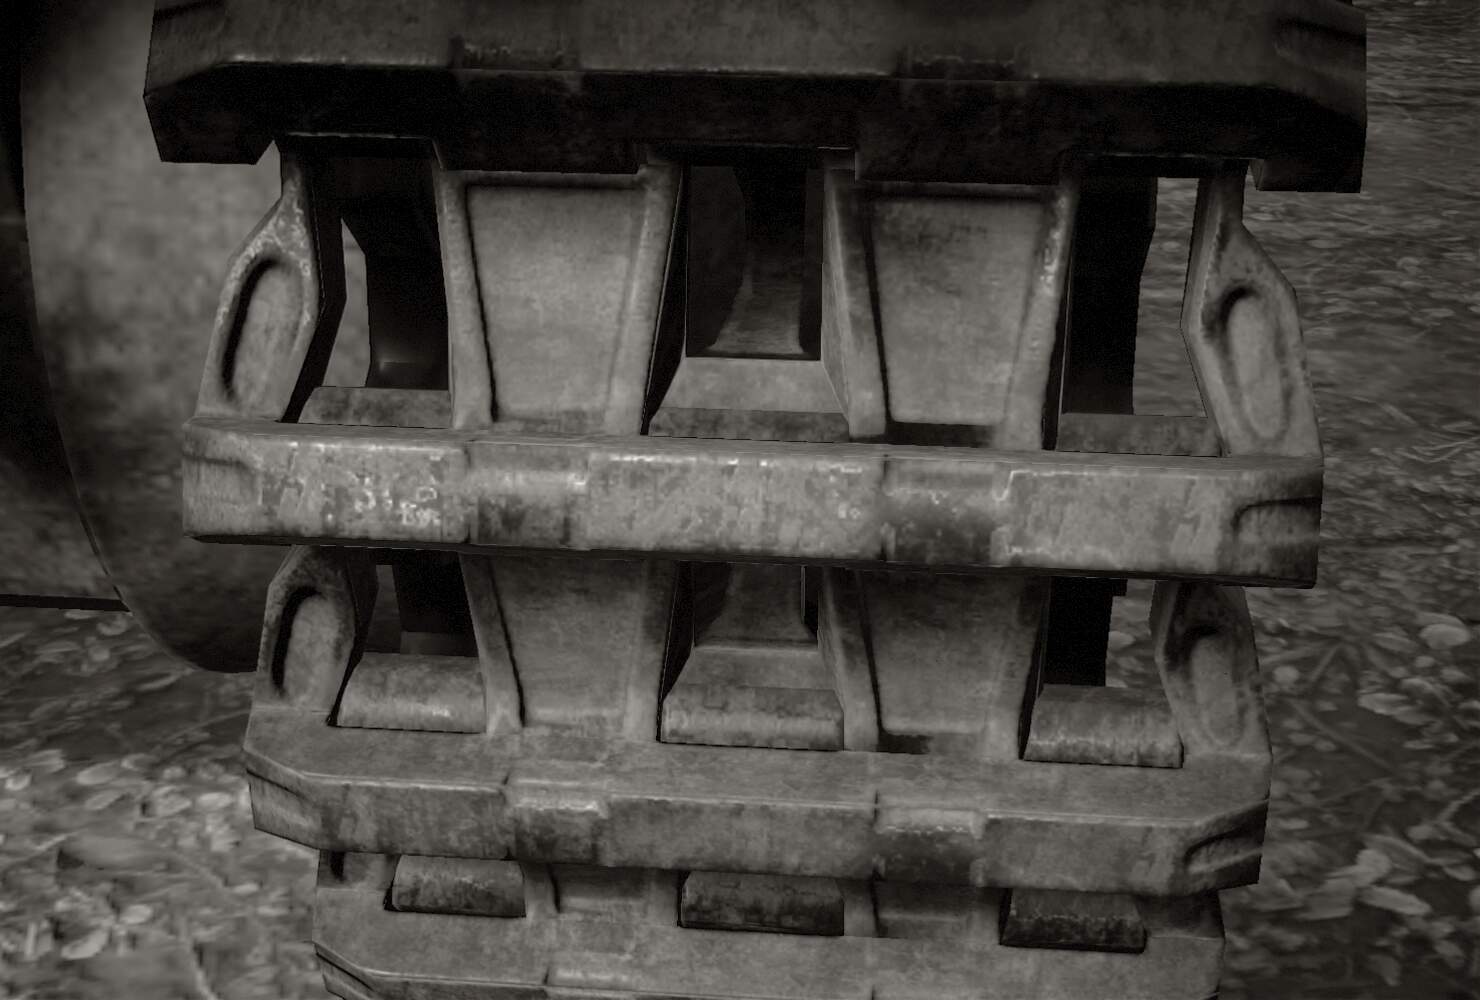
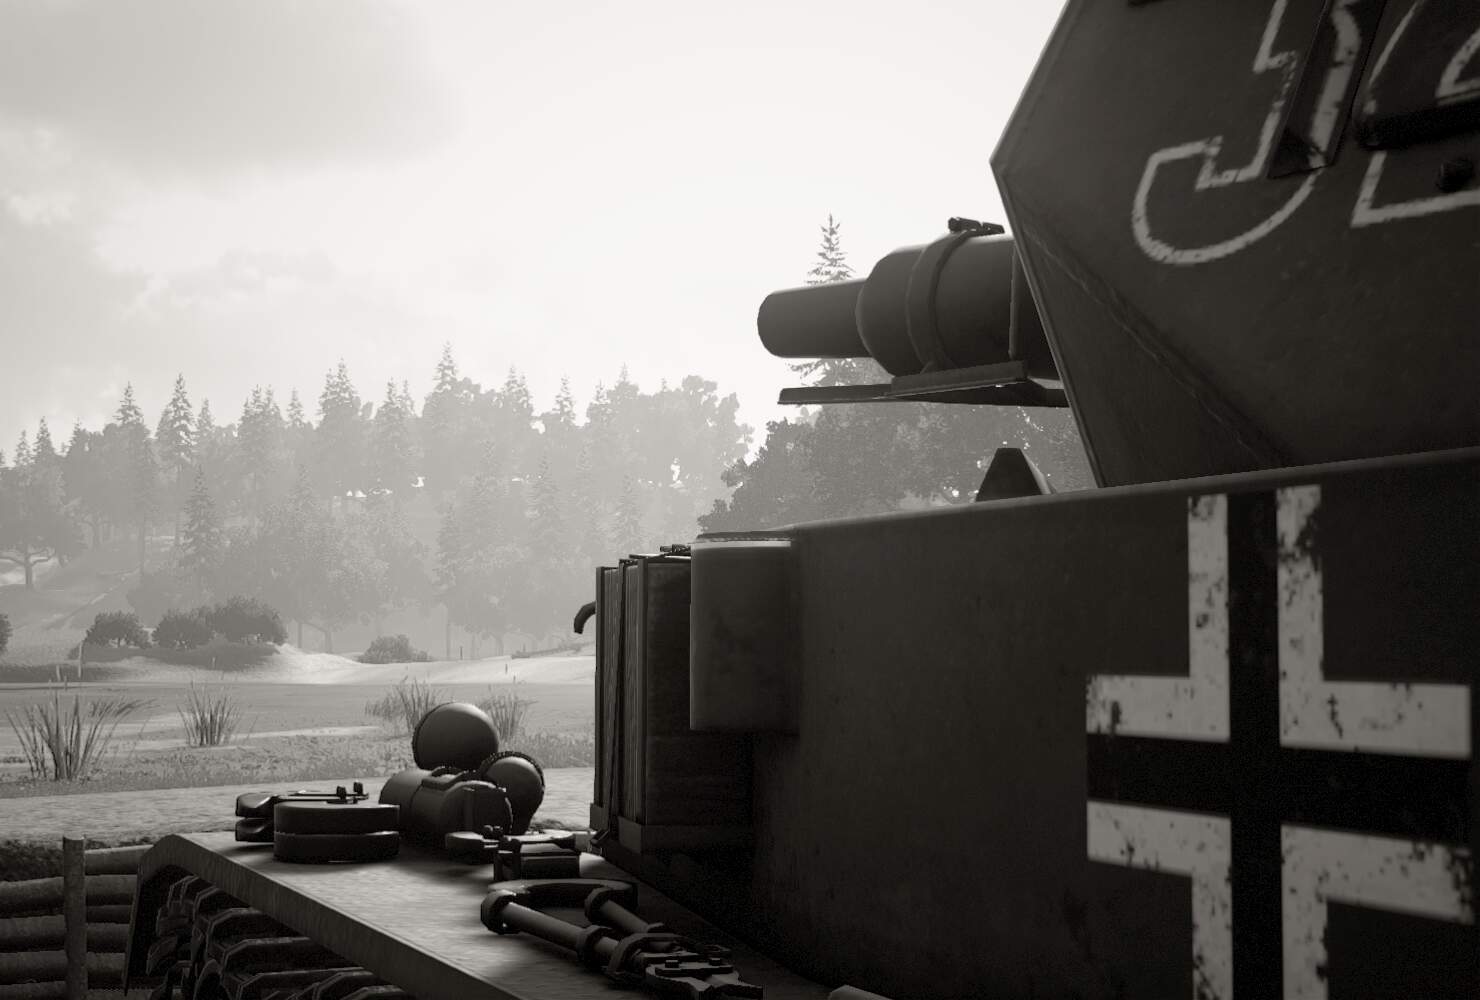
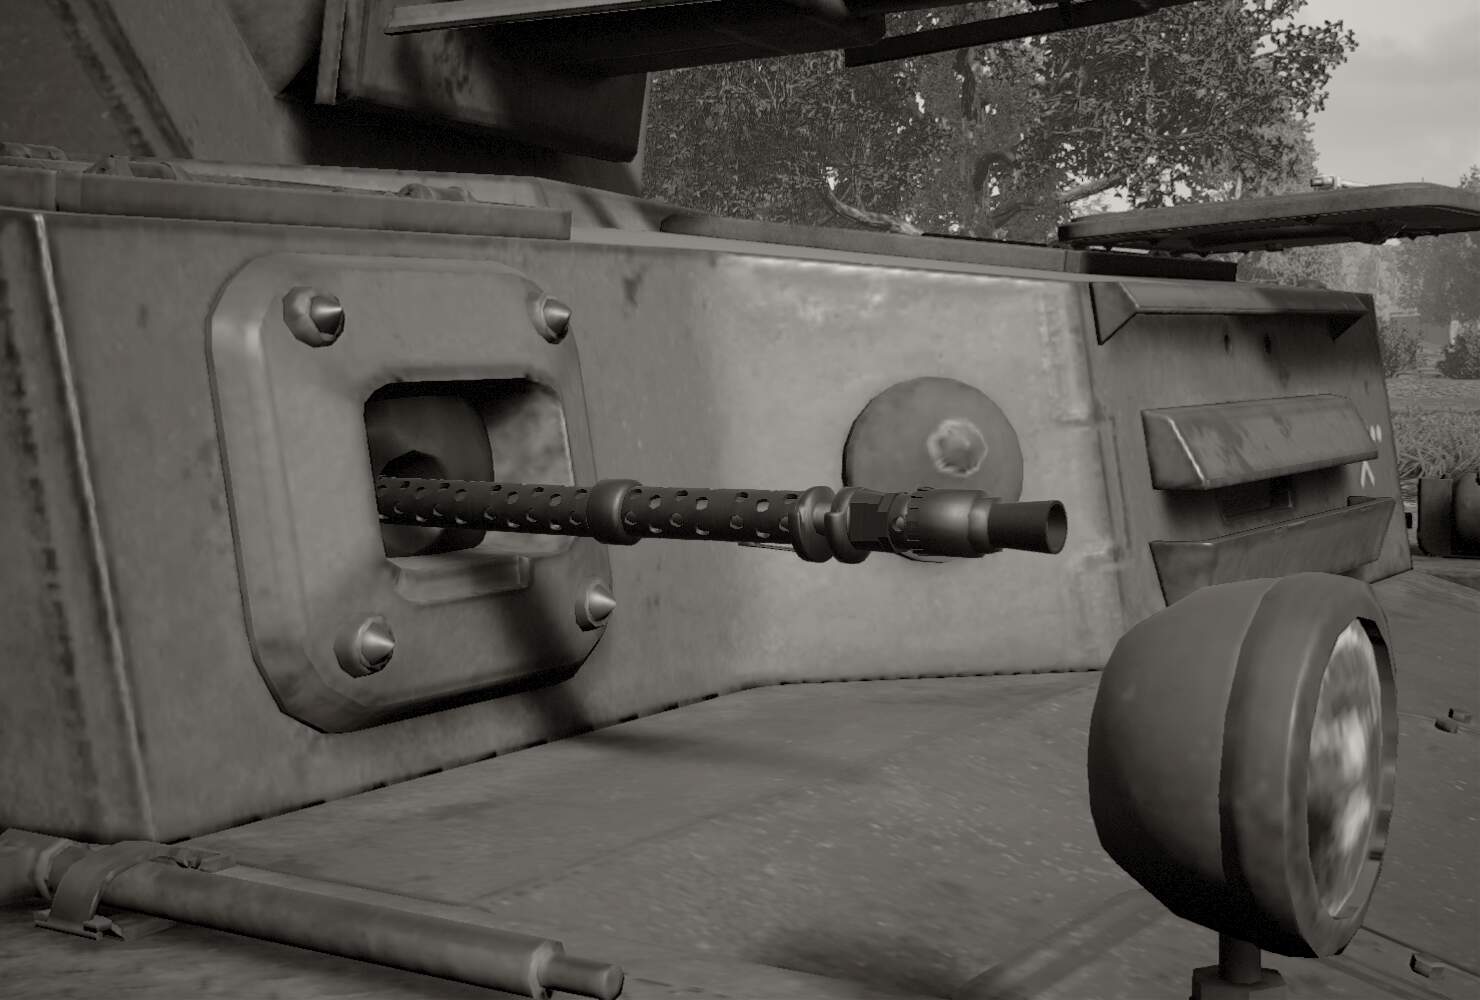
For those of you who are unaware, PS is an indie video game from Montreal developers which takes place during the events of the Battle for France, the invasion of Normandy, and Operation Market Garden. It has pretty realistic terrains, uniforms, and vehicles so I now use it quite a bit to get a general feel for my model subject. It helps me develop an understanding of how the tank interacted with the environment around it. I also wanted to see what the 75 on the Panzer IV was capable of, and how it was used.
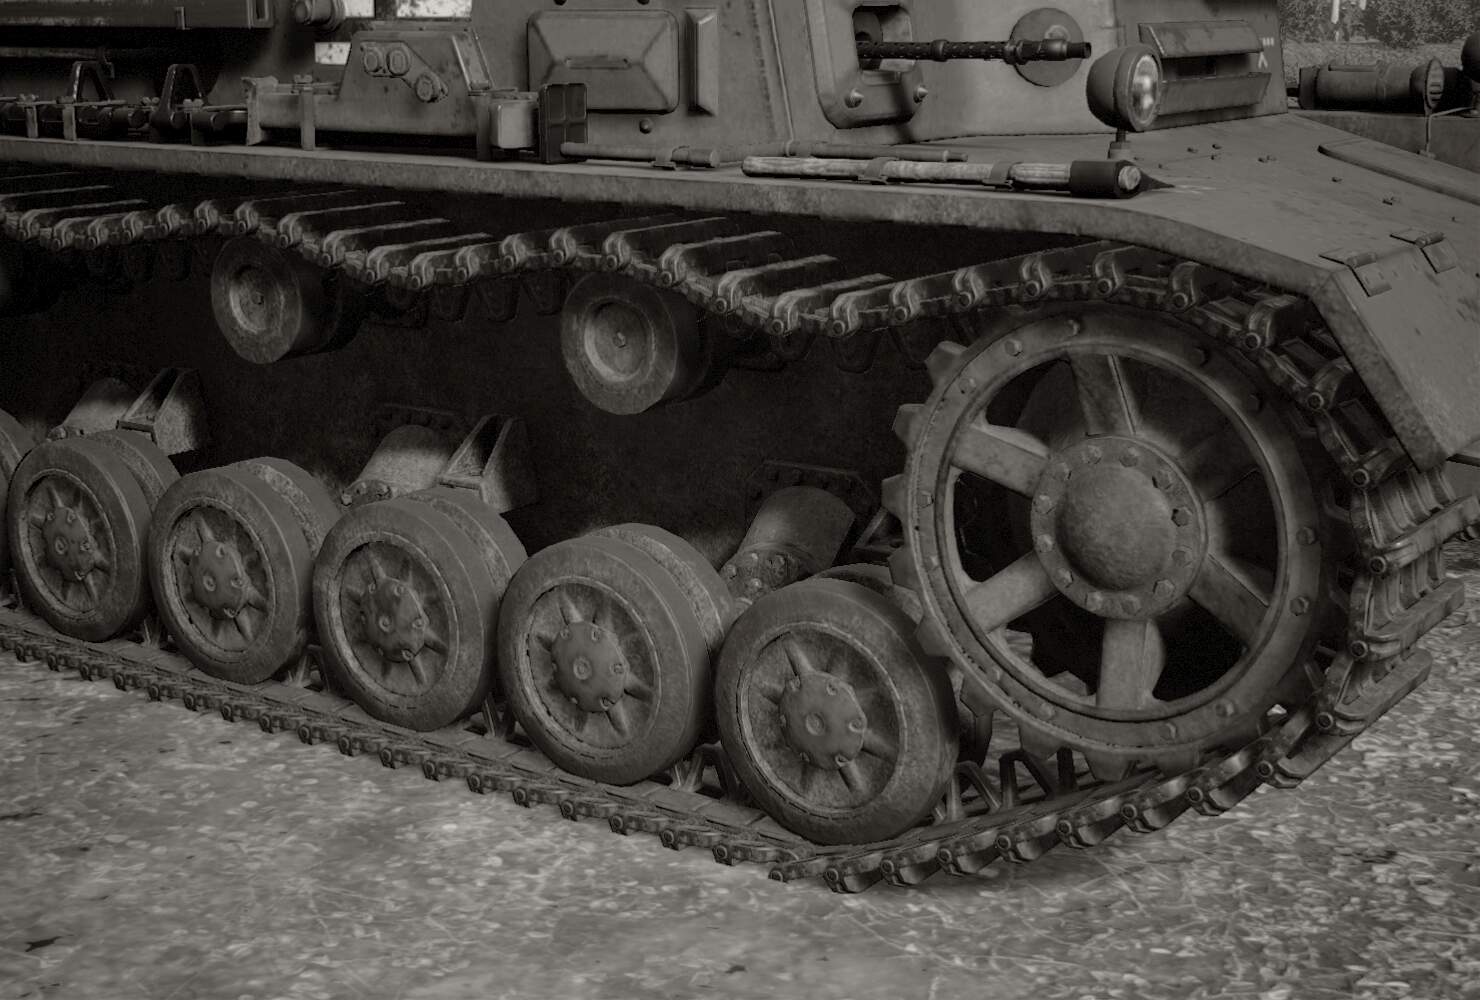
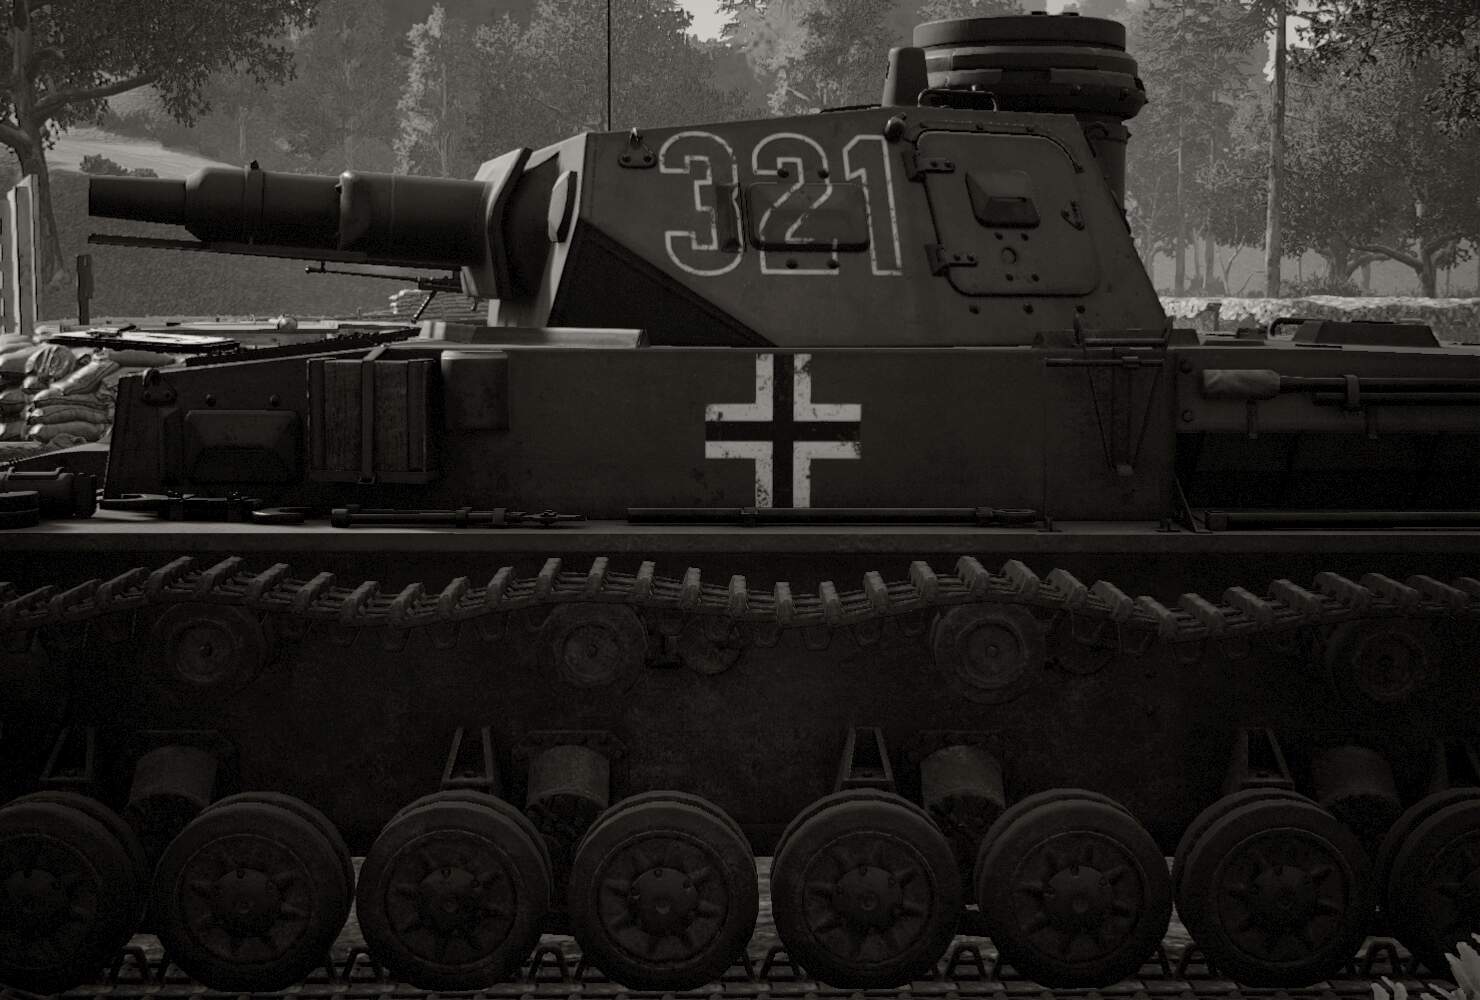
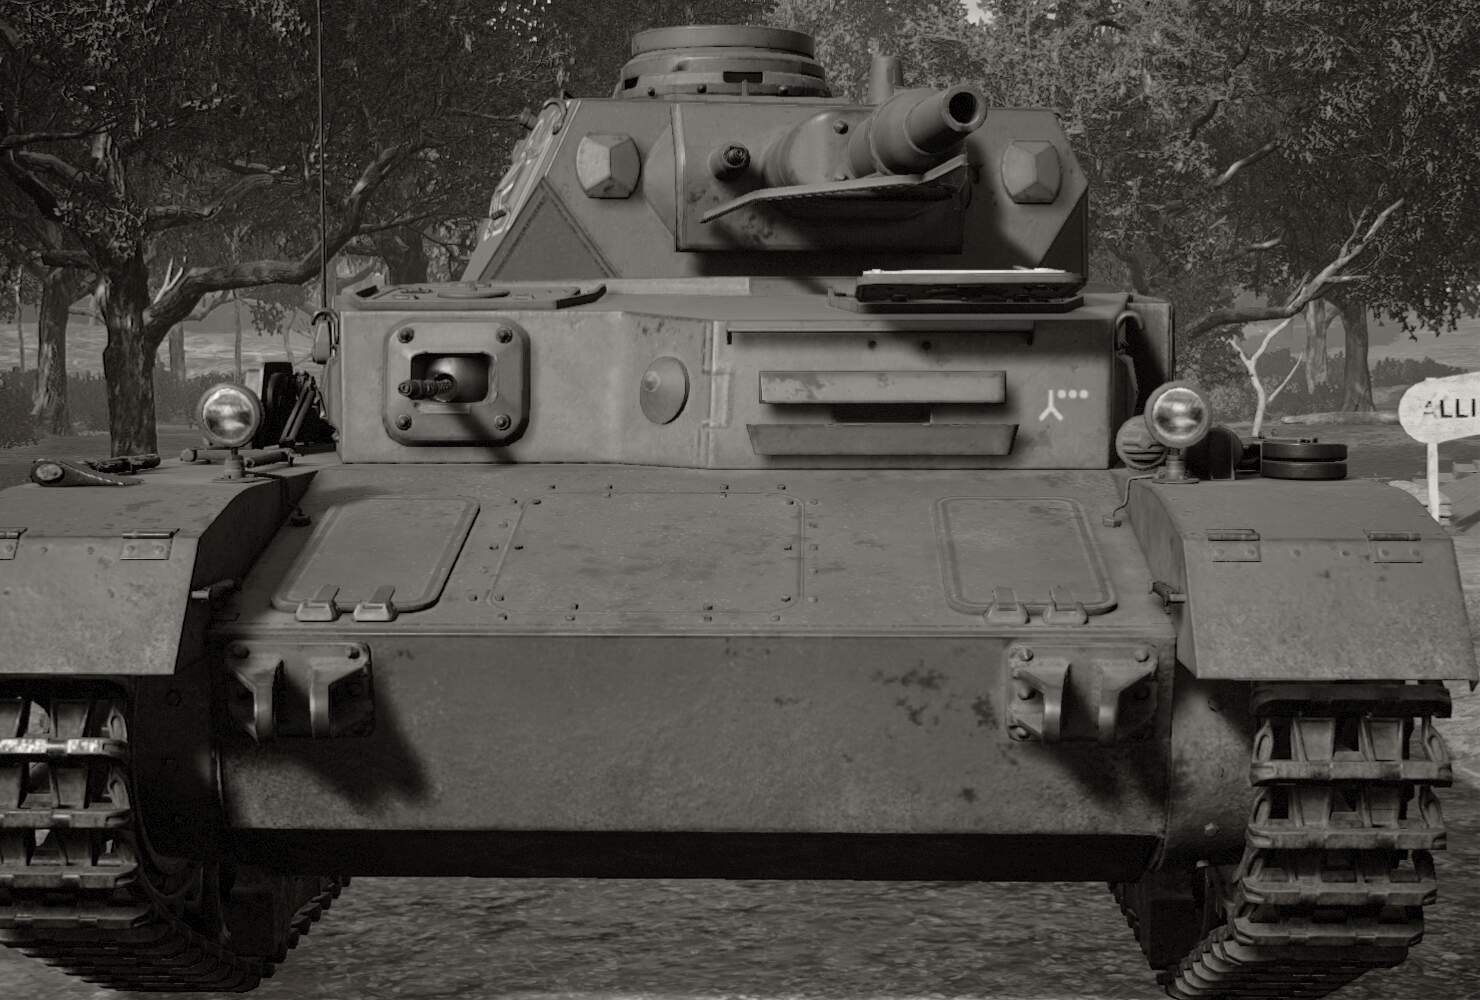
These are “reference photos” taken of an Ausf D with the in-game film camera. While track sag and some other elements are unrealistic, spending five minutes in this simulator has given me some diorama and weathering ideas already. Now, off to the bench!
3 Likes
Time for an update. While @Panzer_modeler has been hard at work on his Border kit, I’ve been tooling along up here in the fine English weather we’re having. So far, the tank is actually 90% built, save for the tracks and some of the tools I have to glue on.
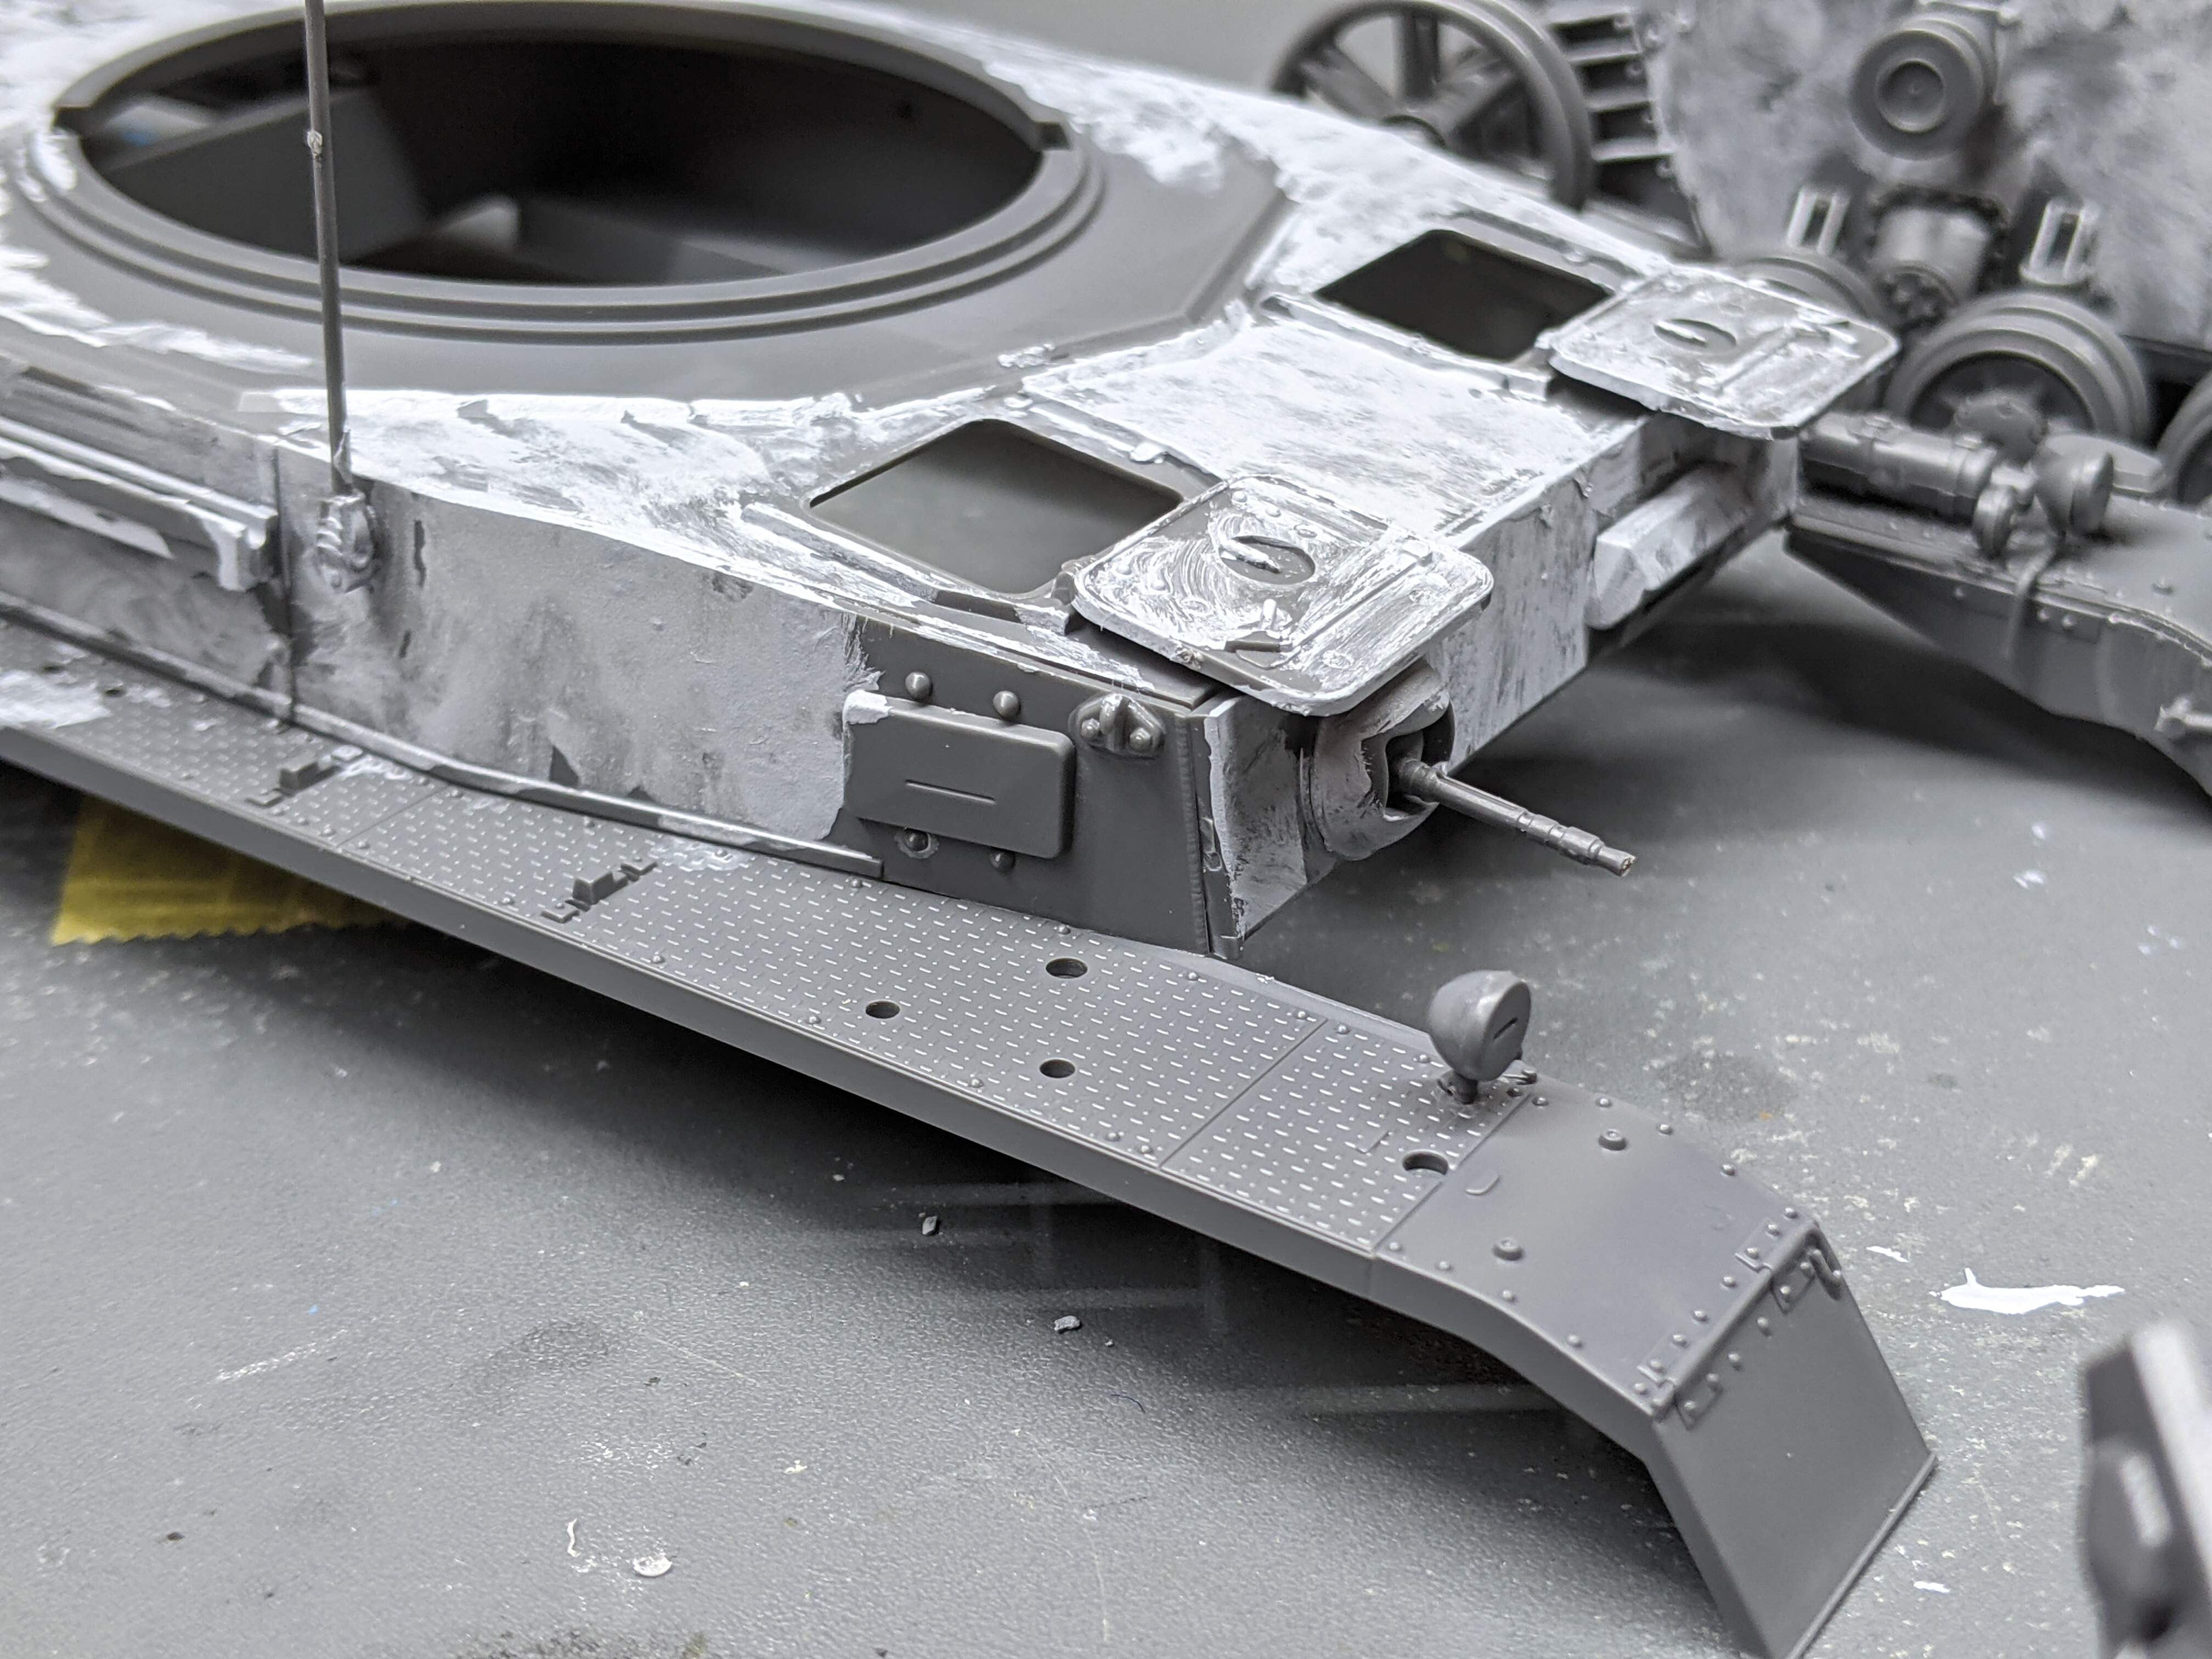
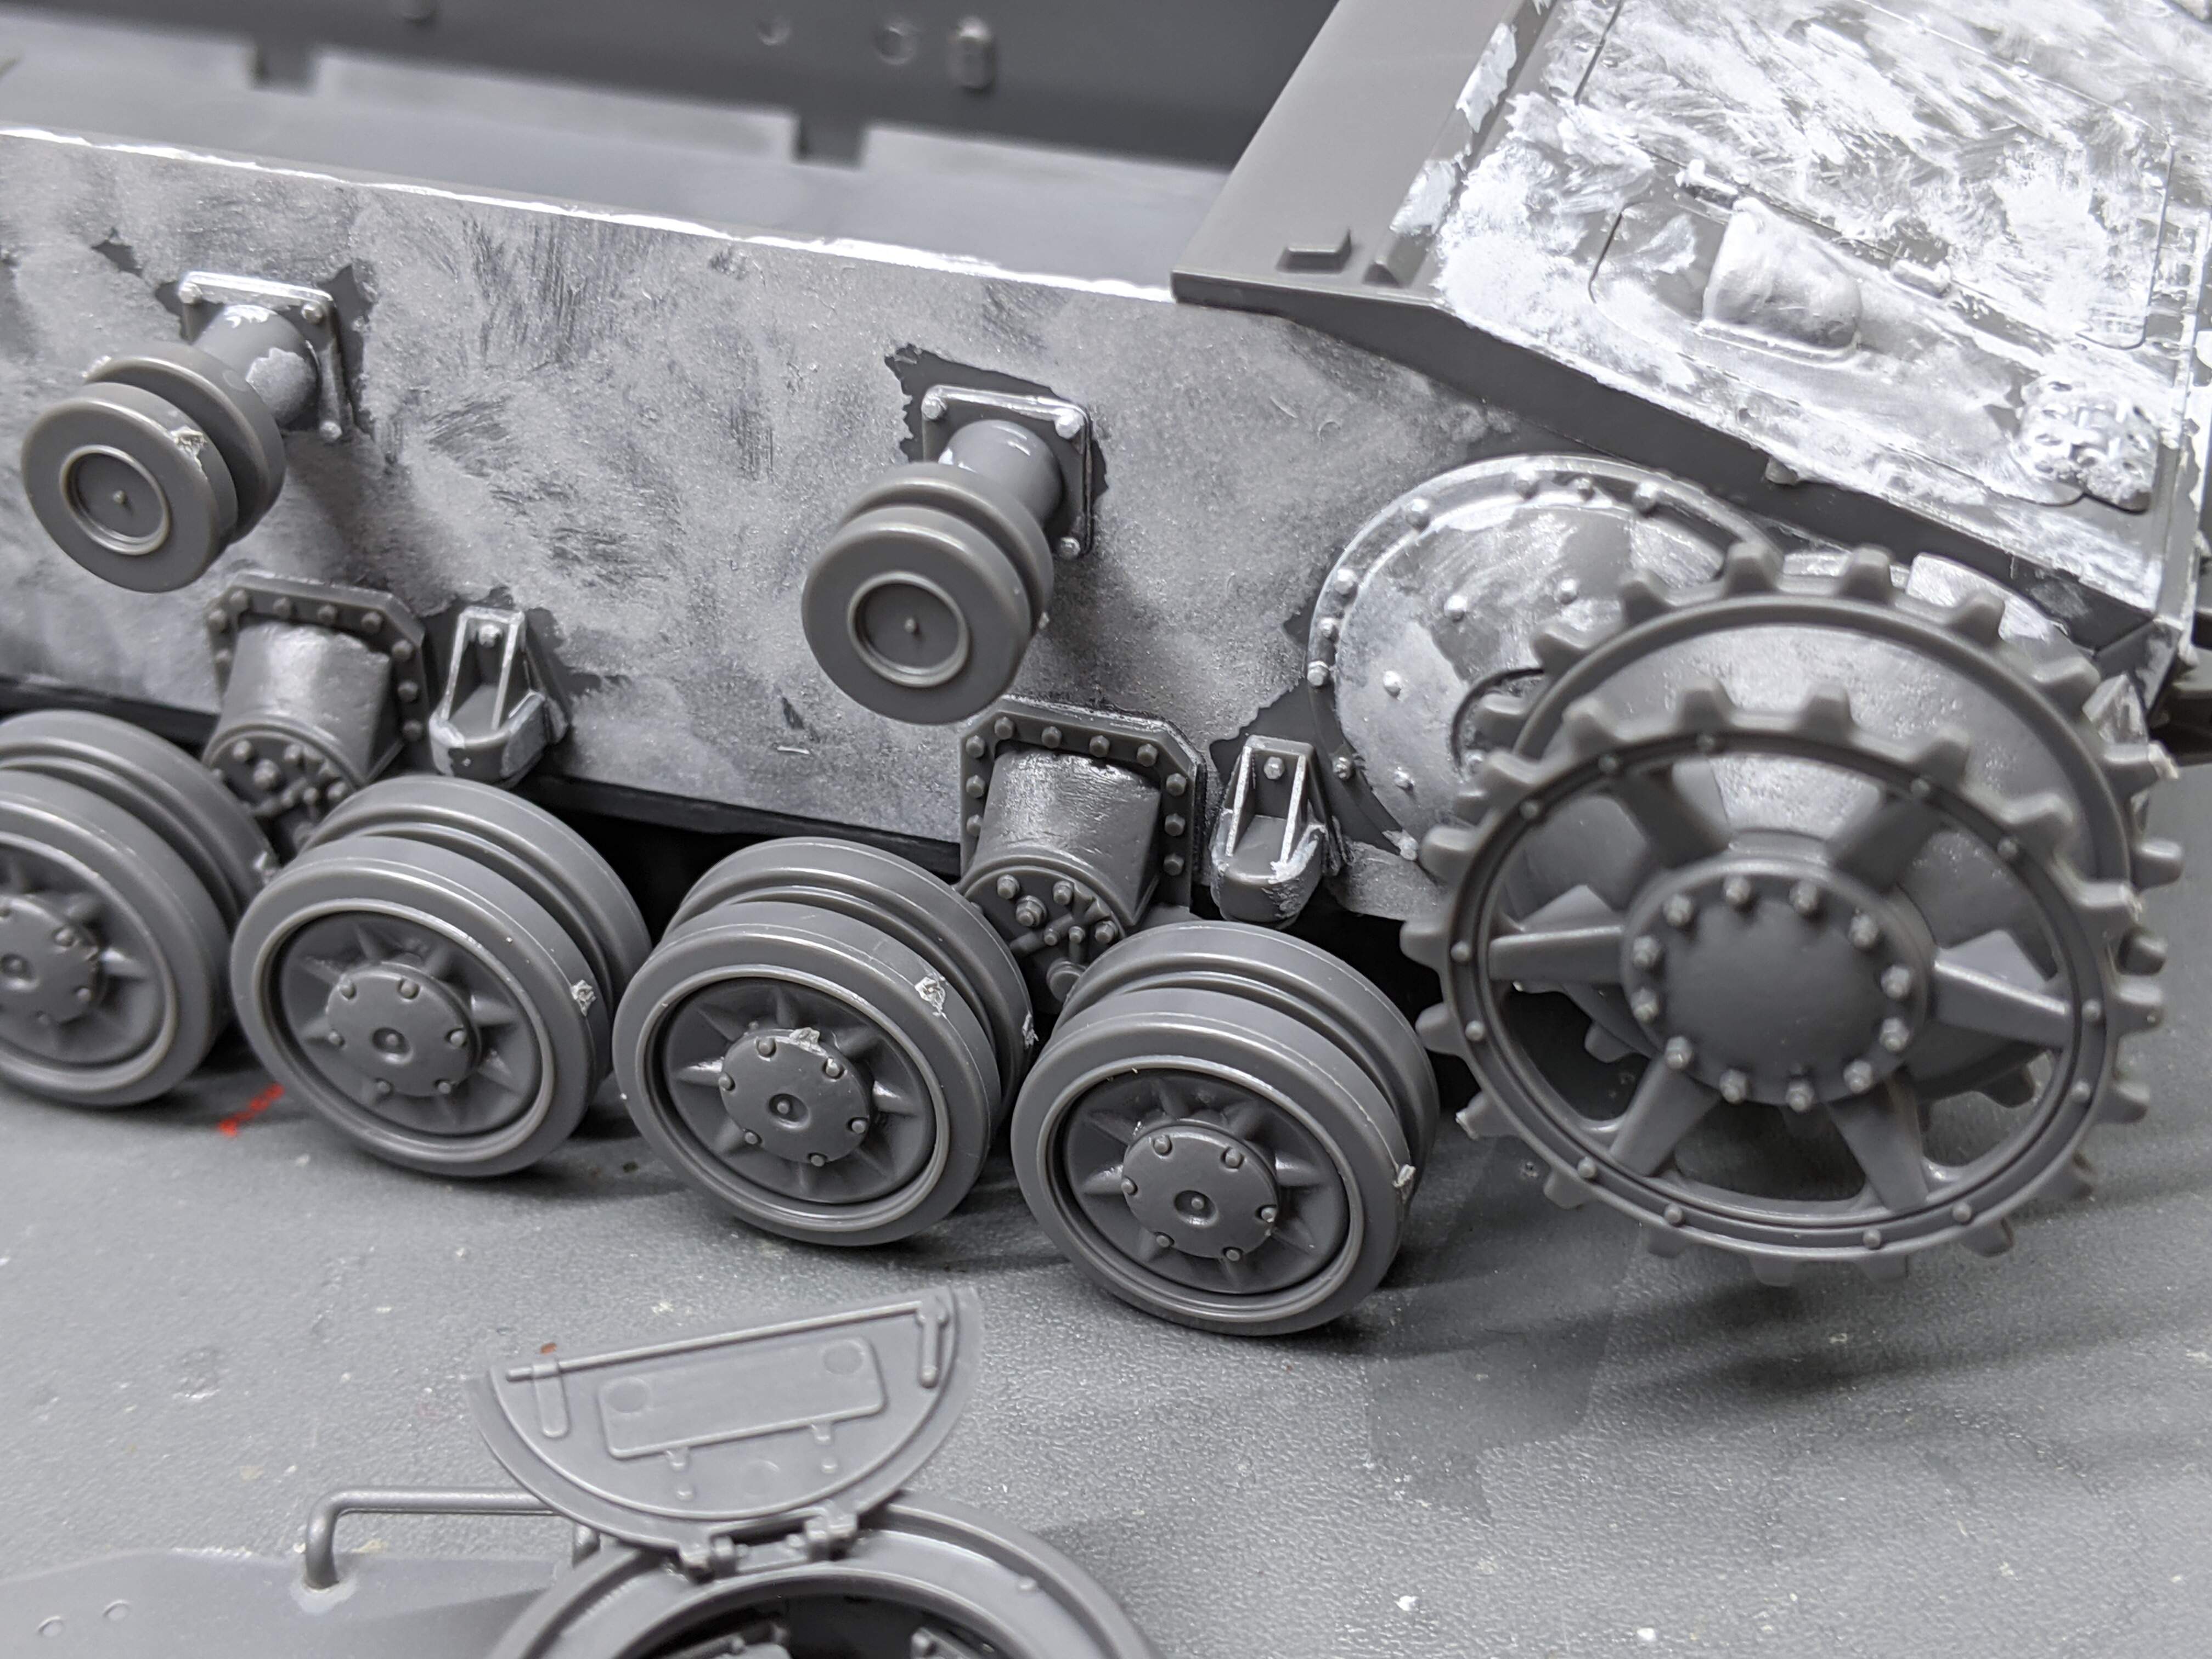
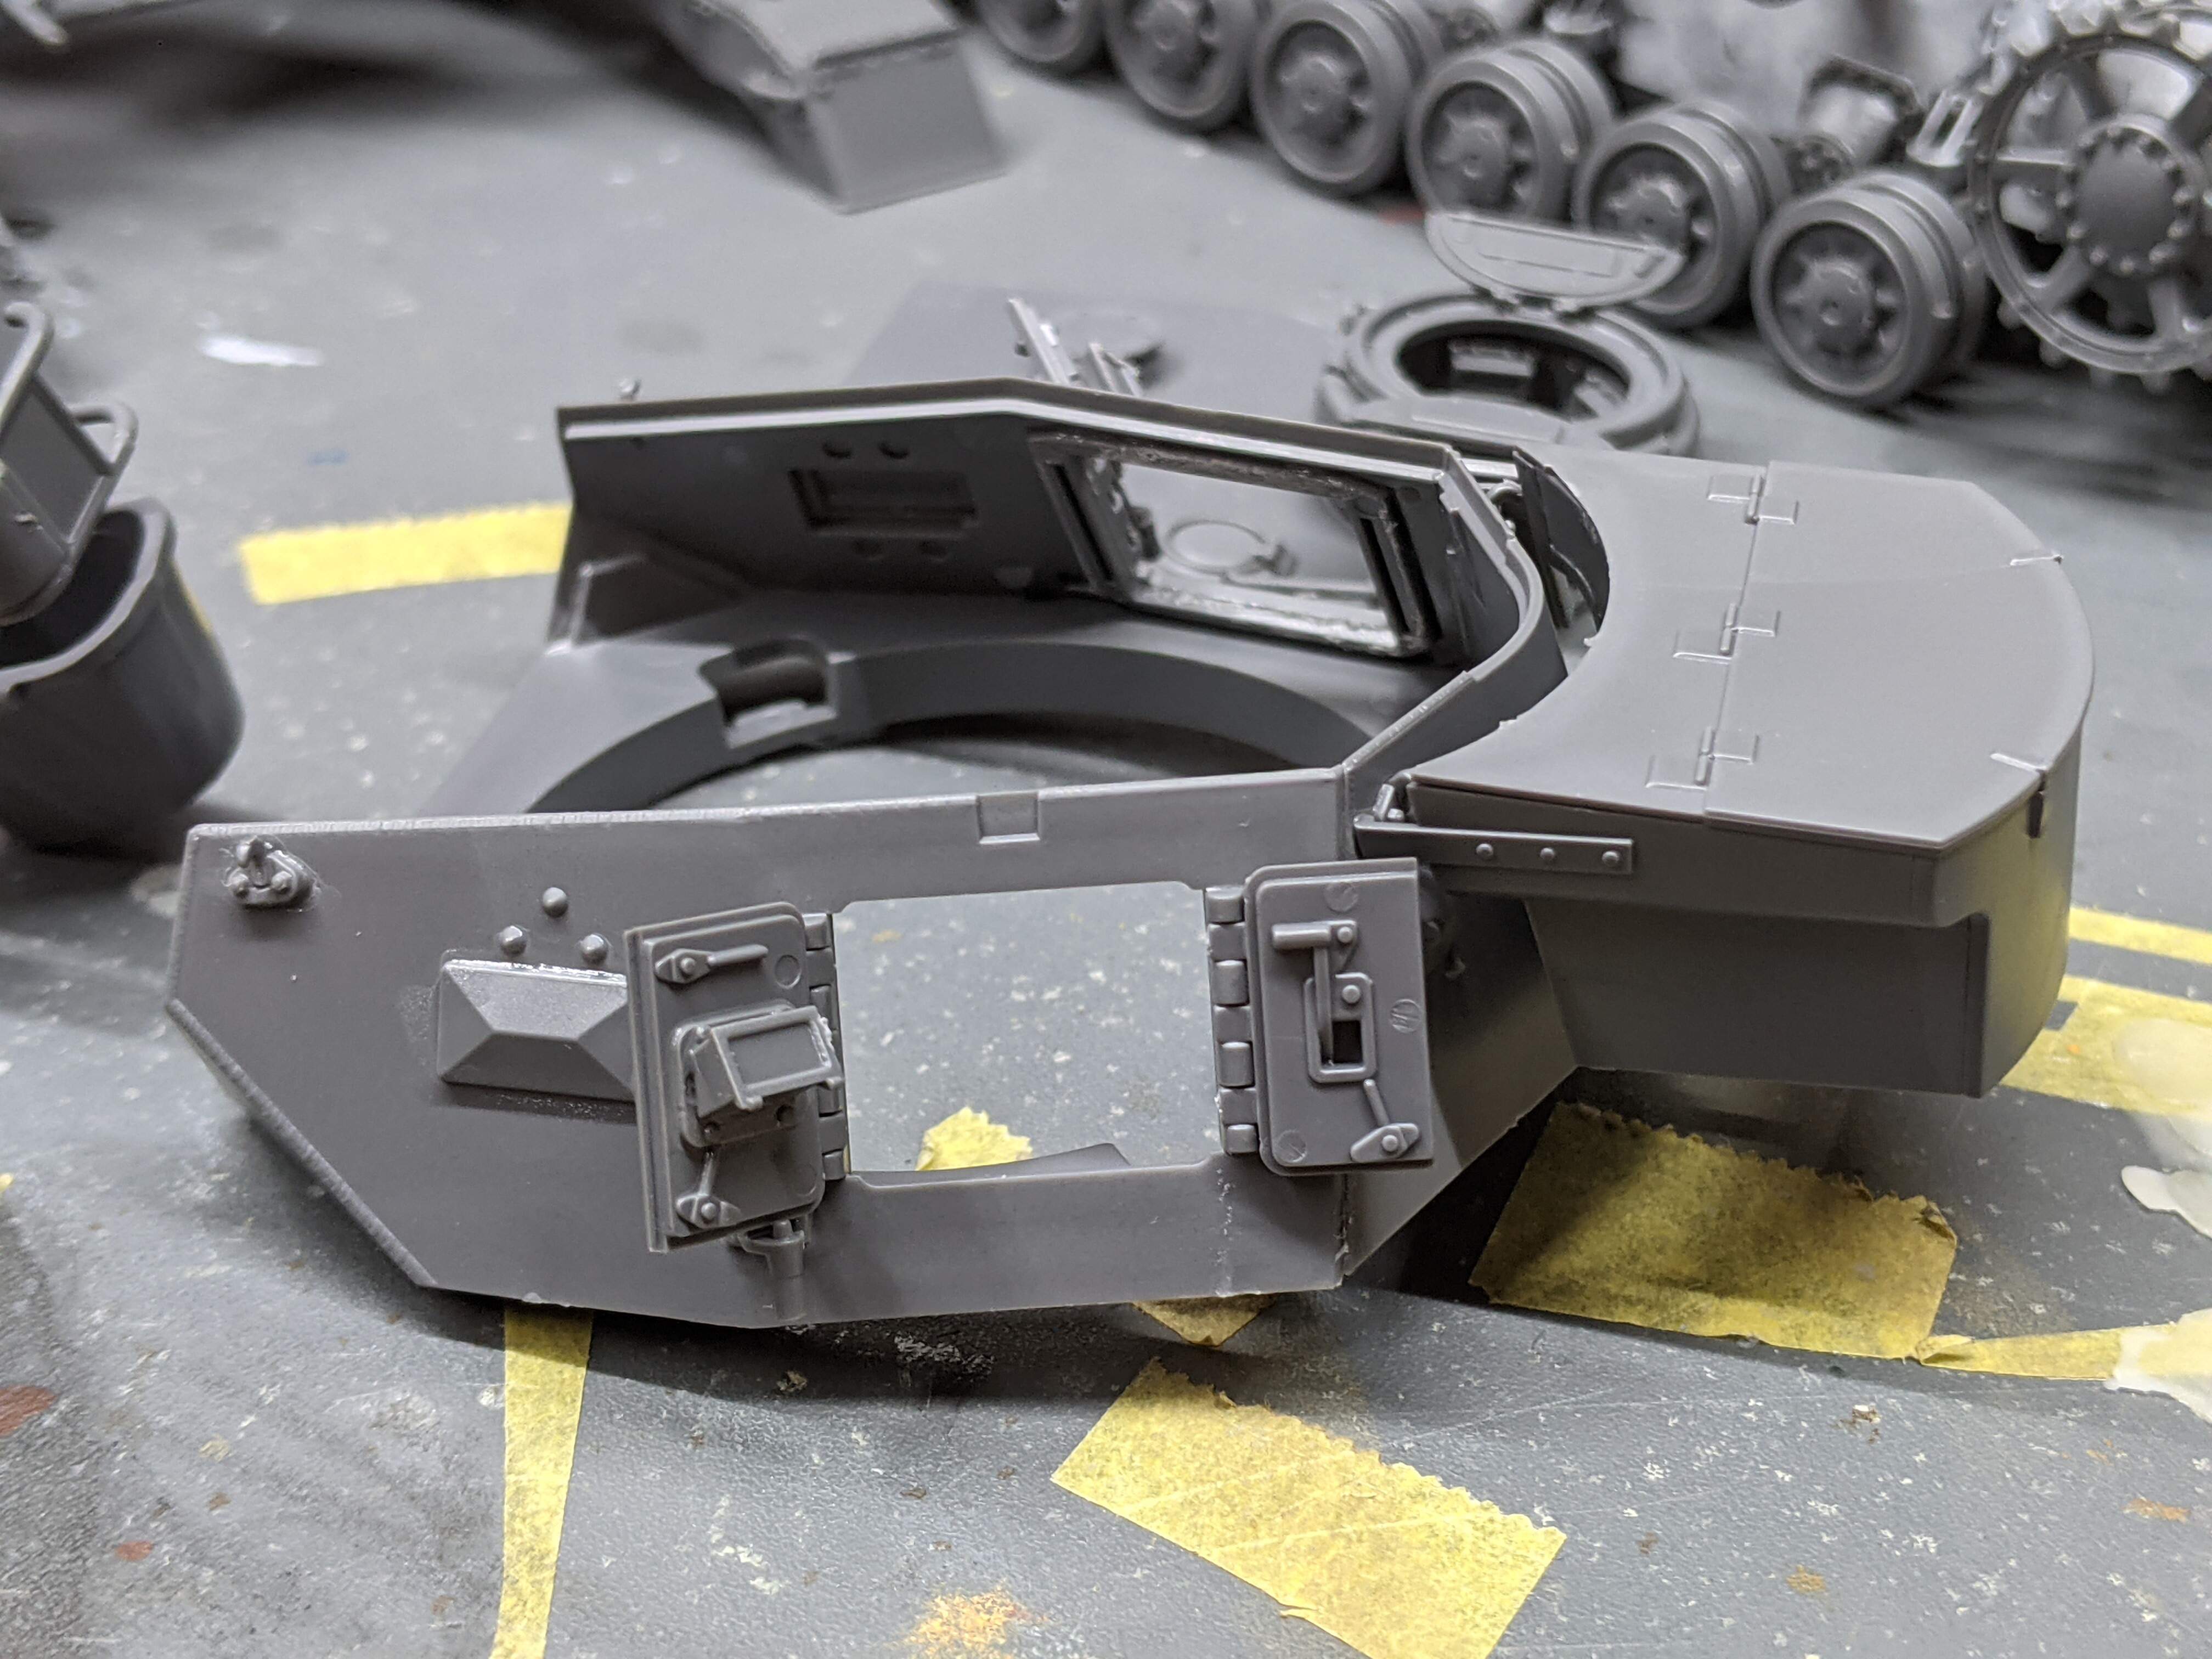
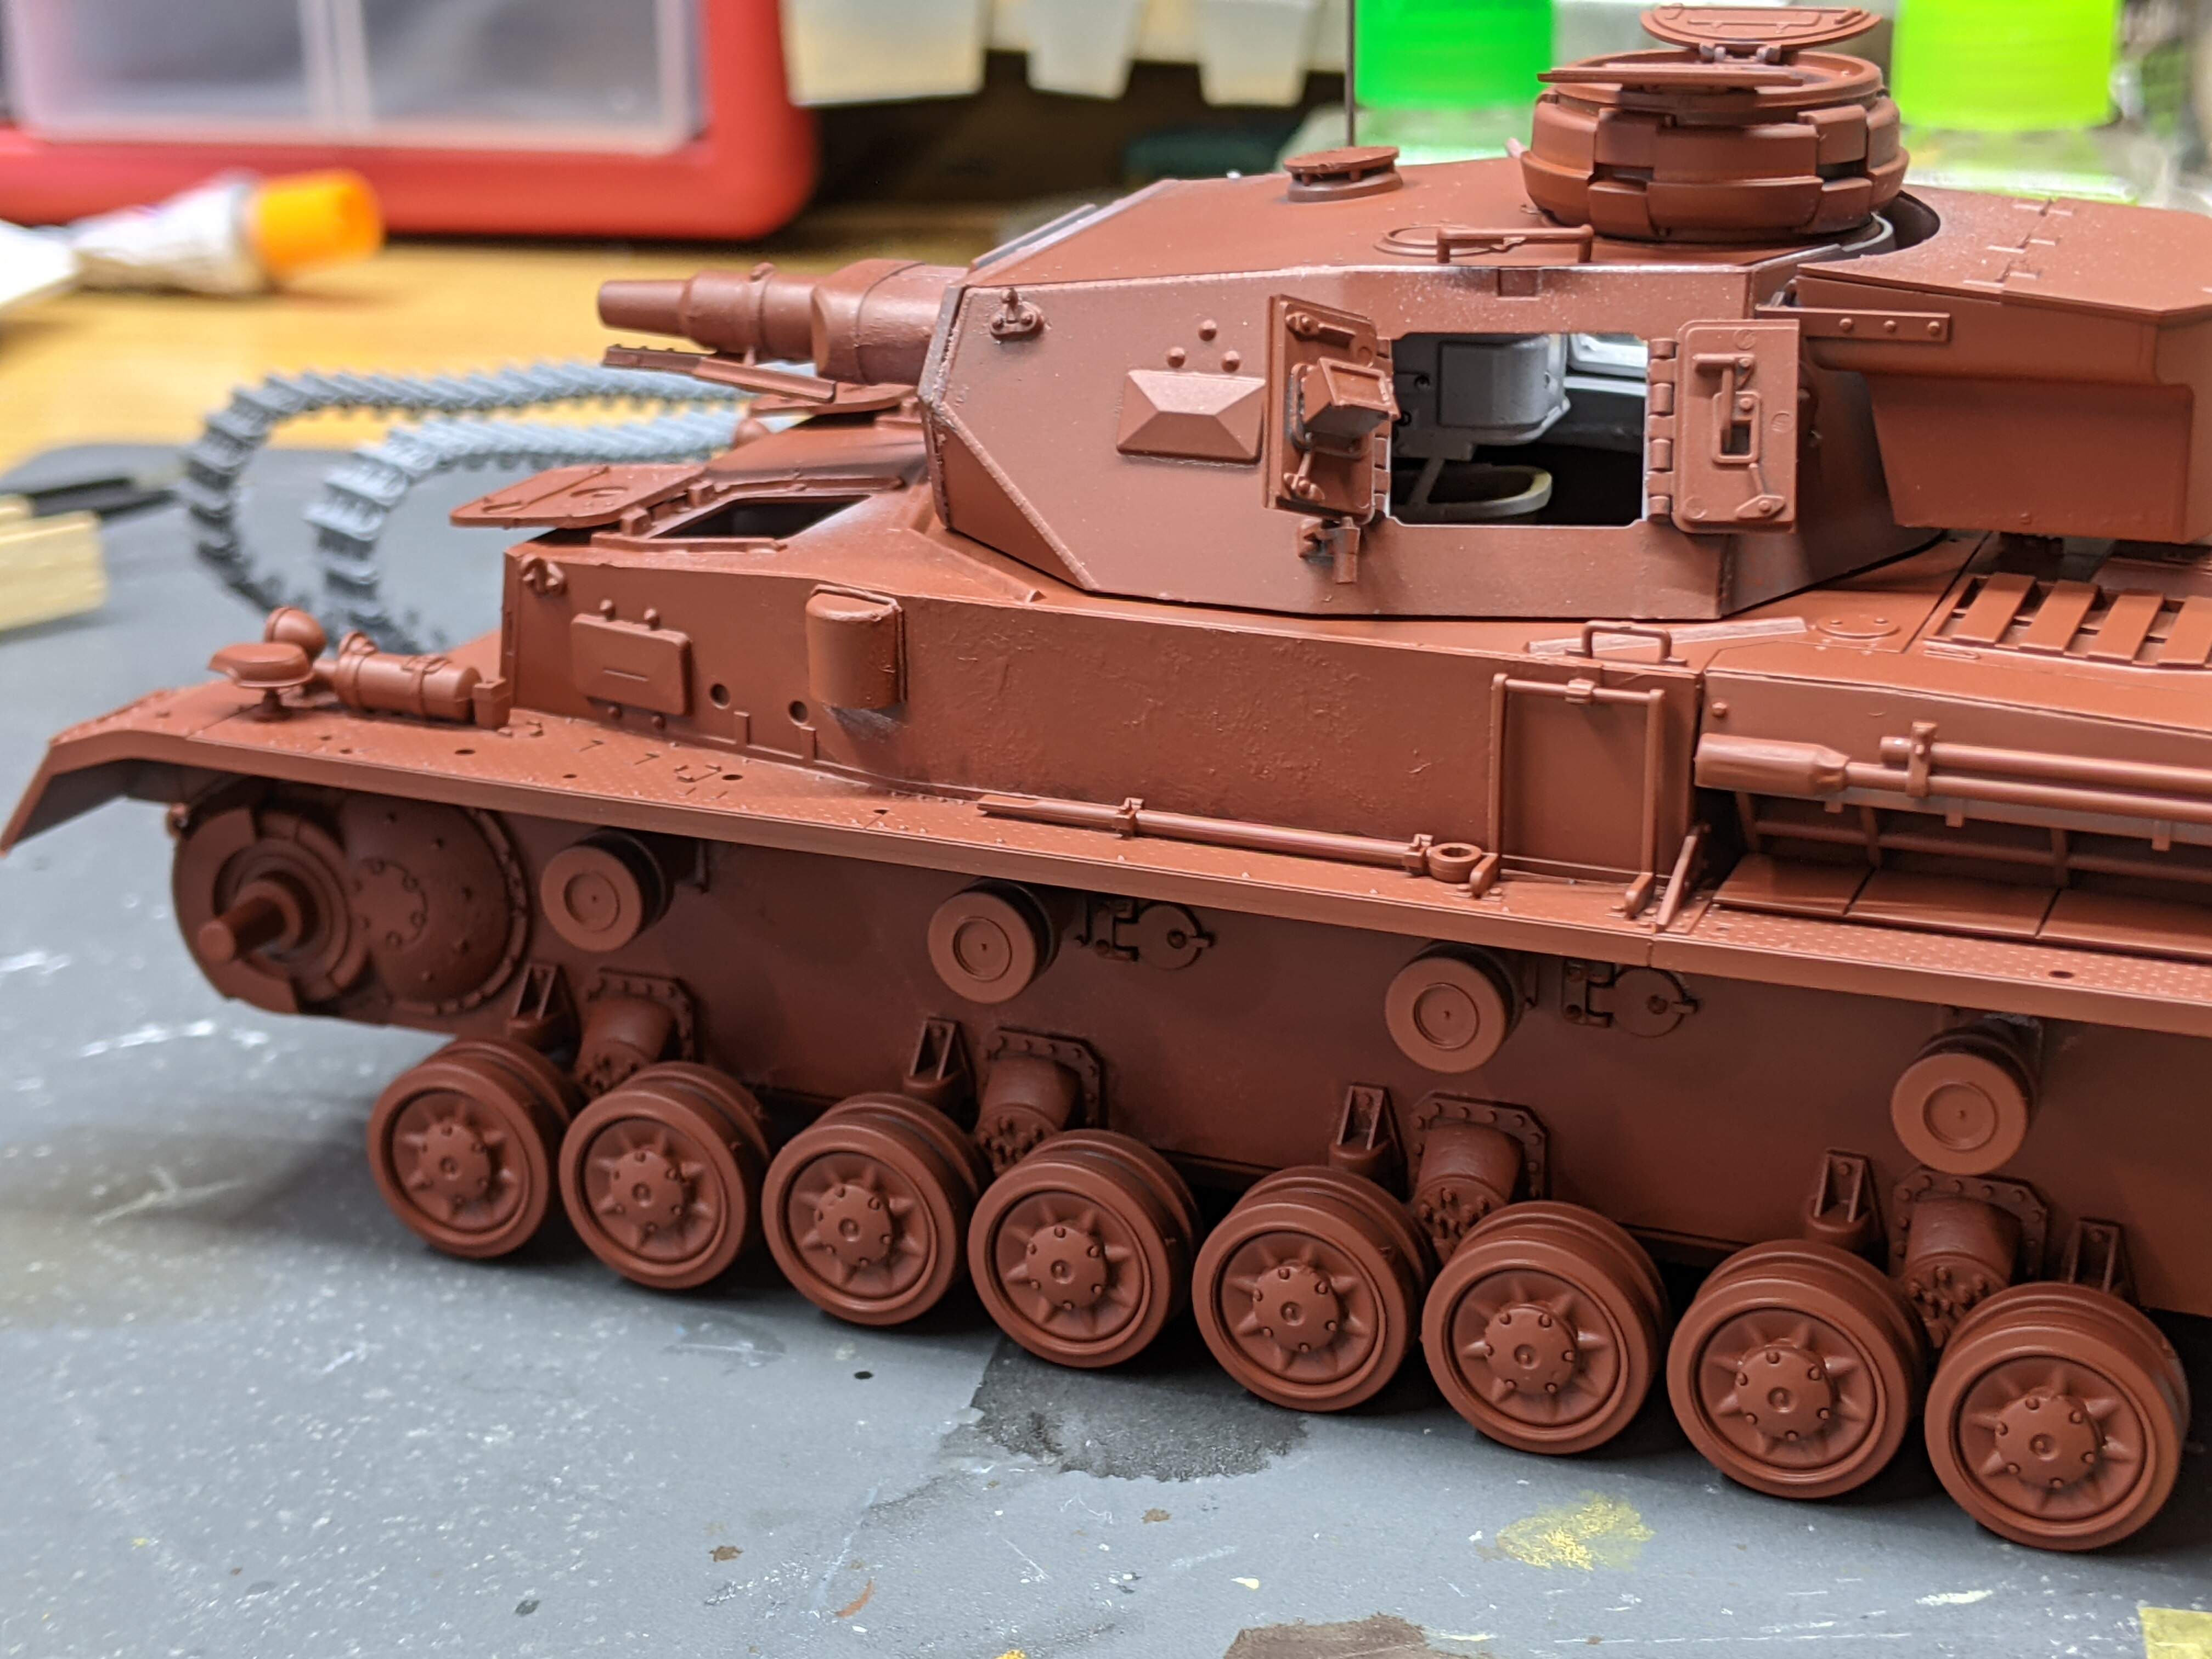
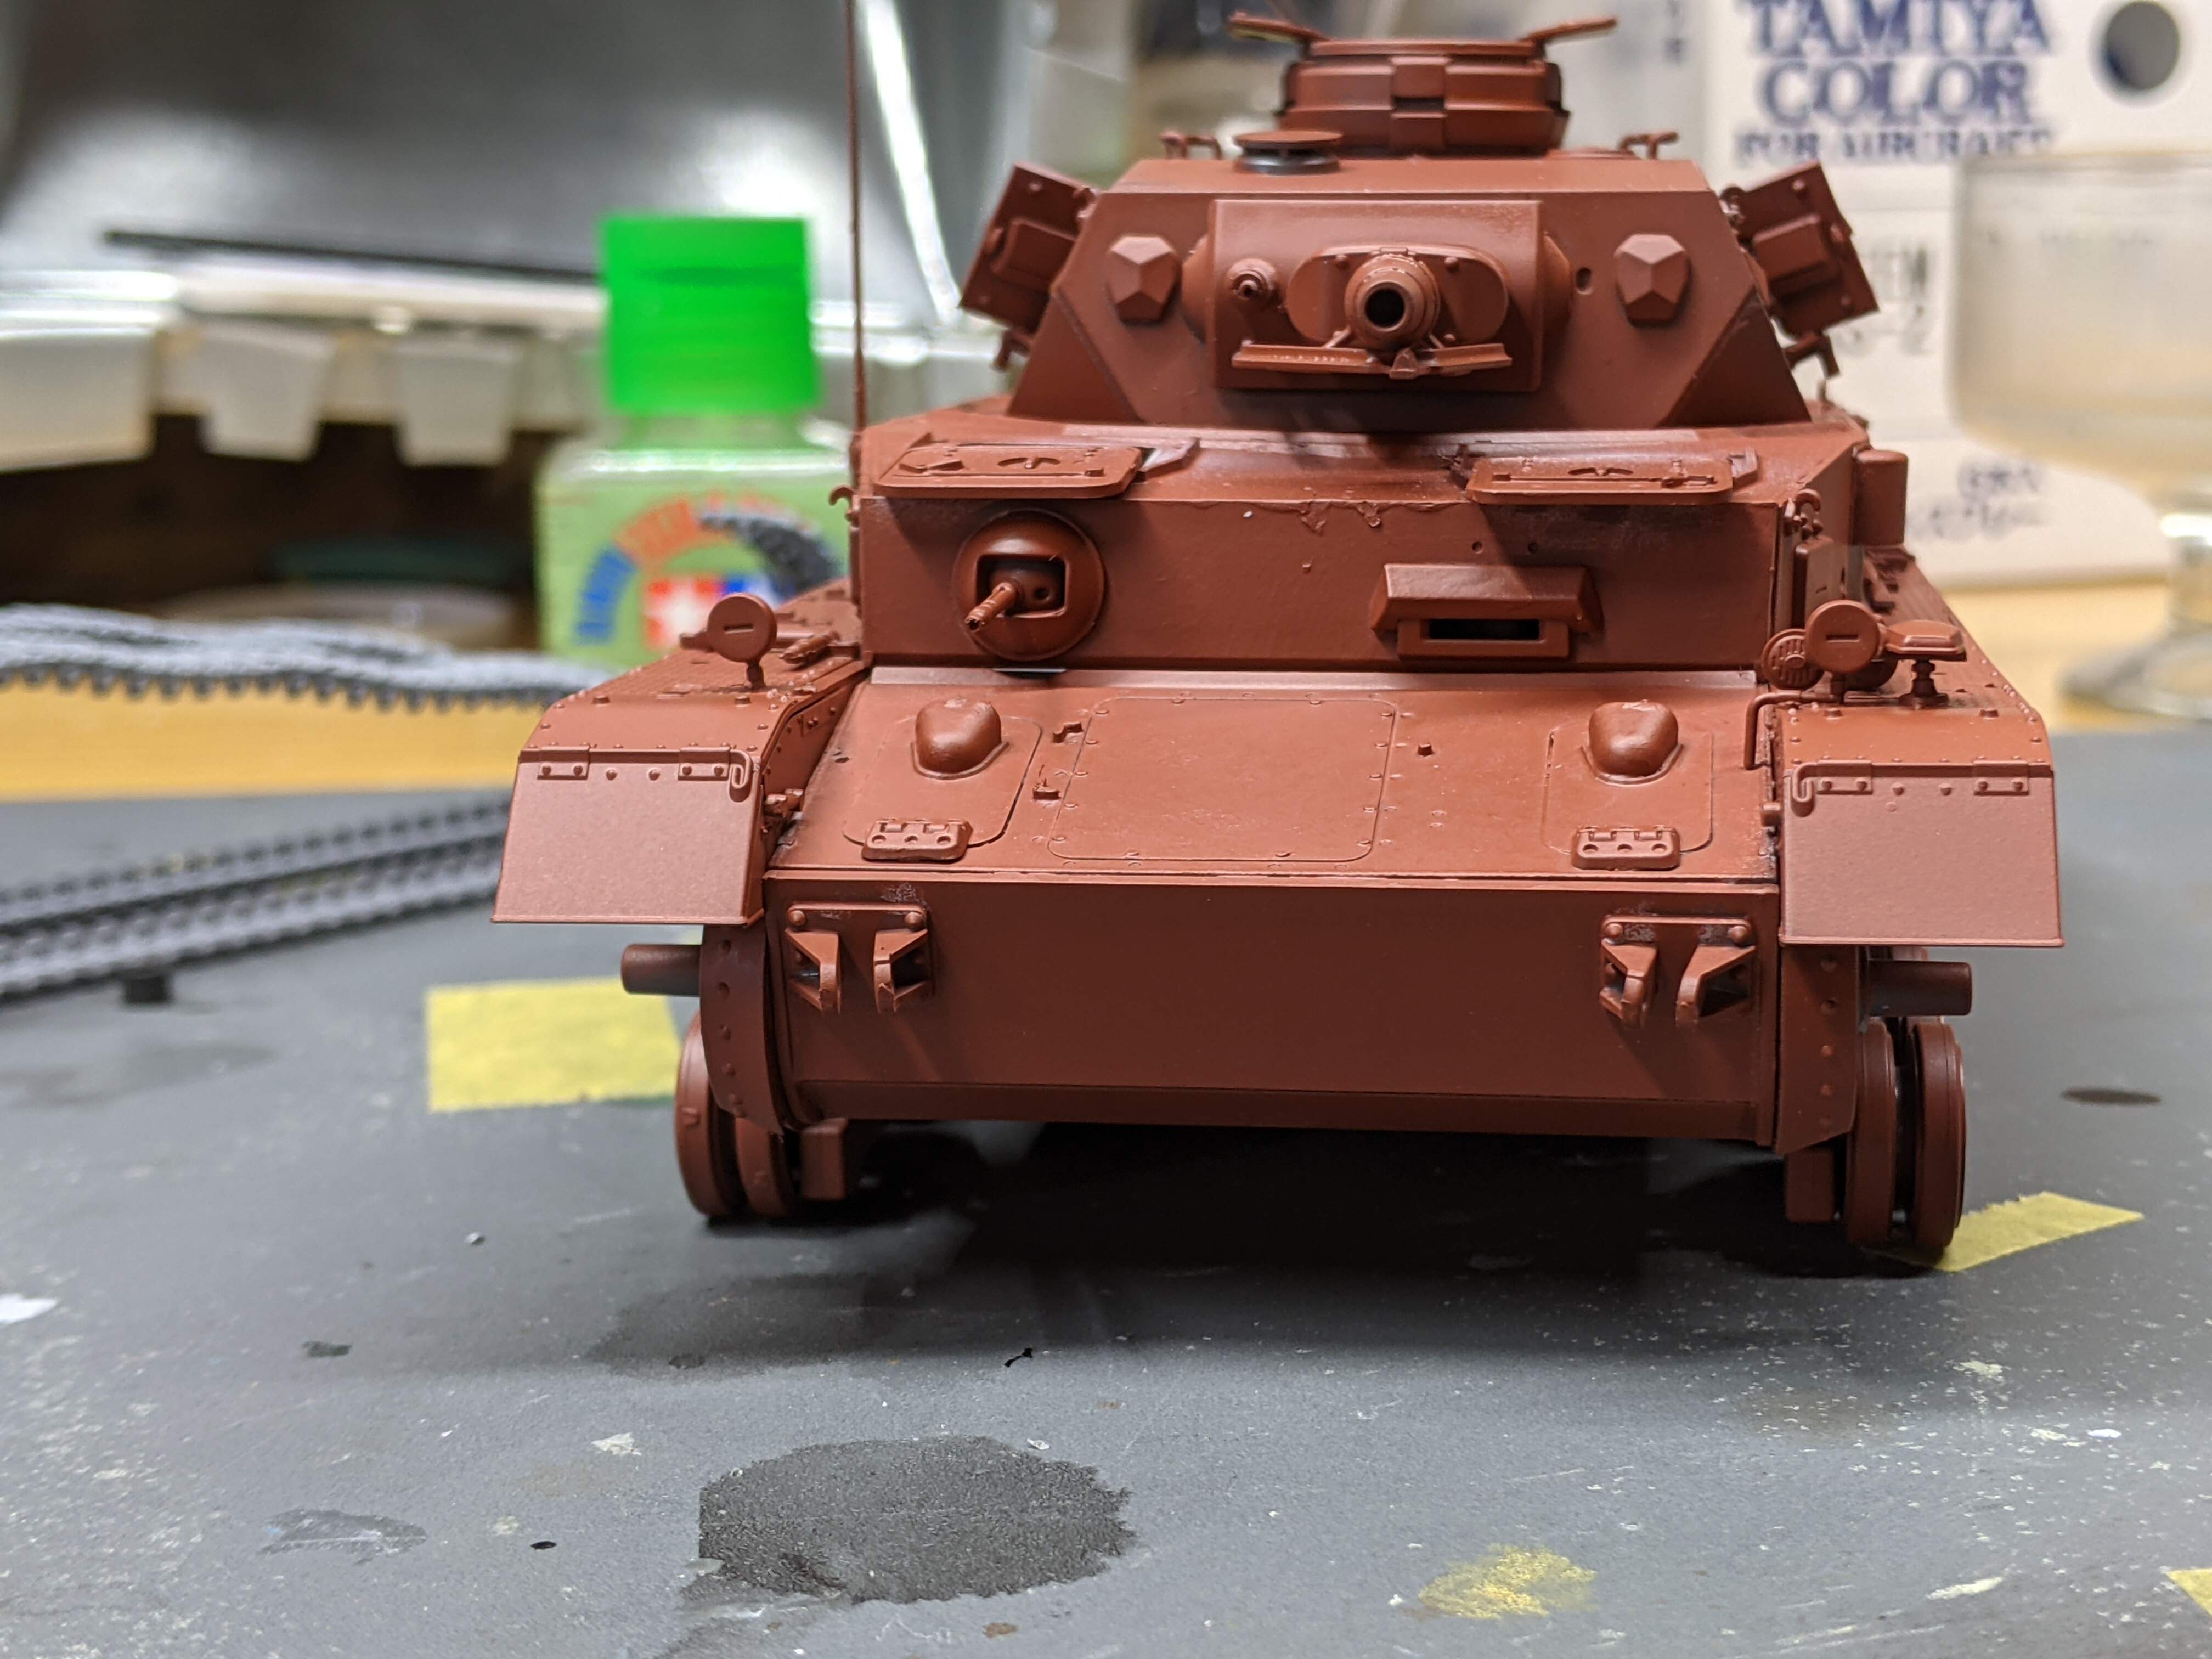
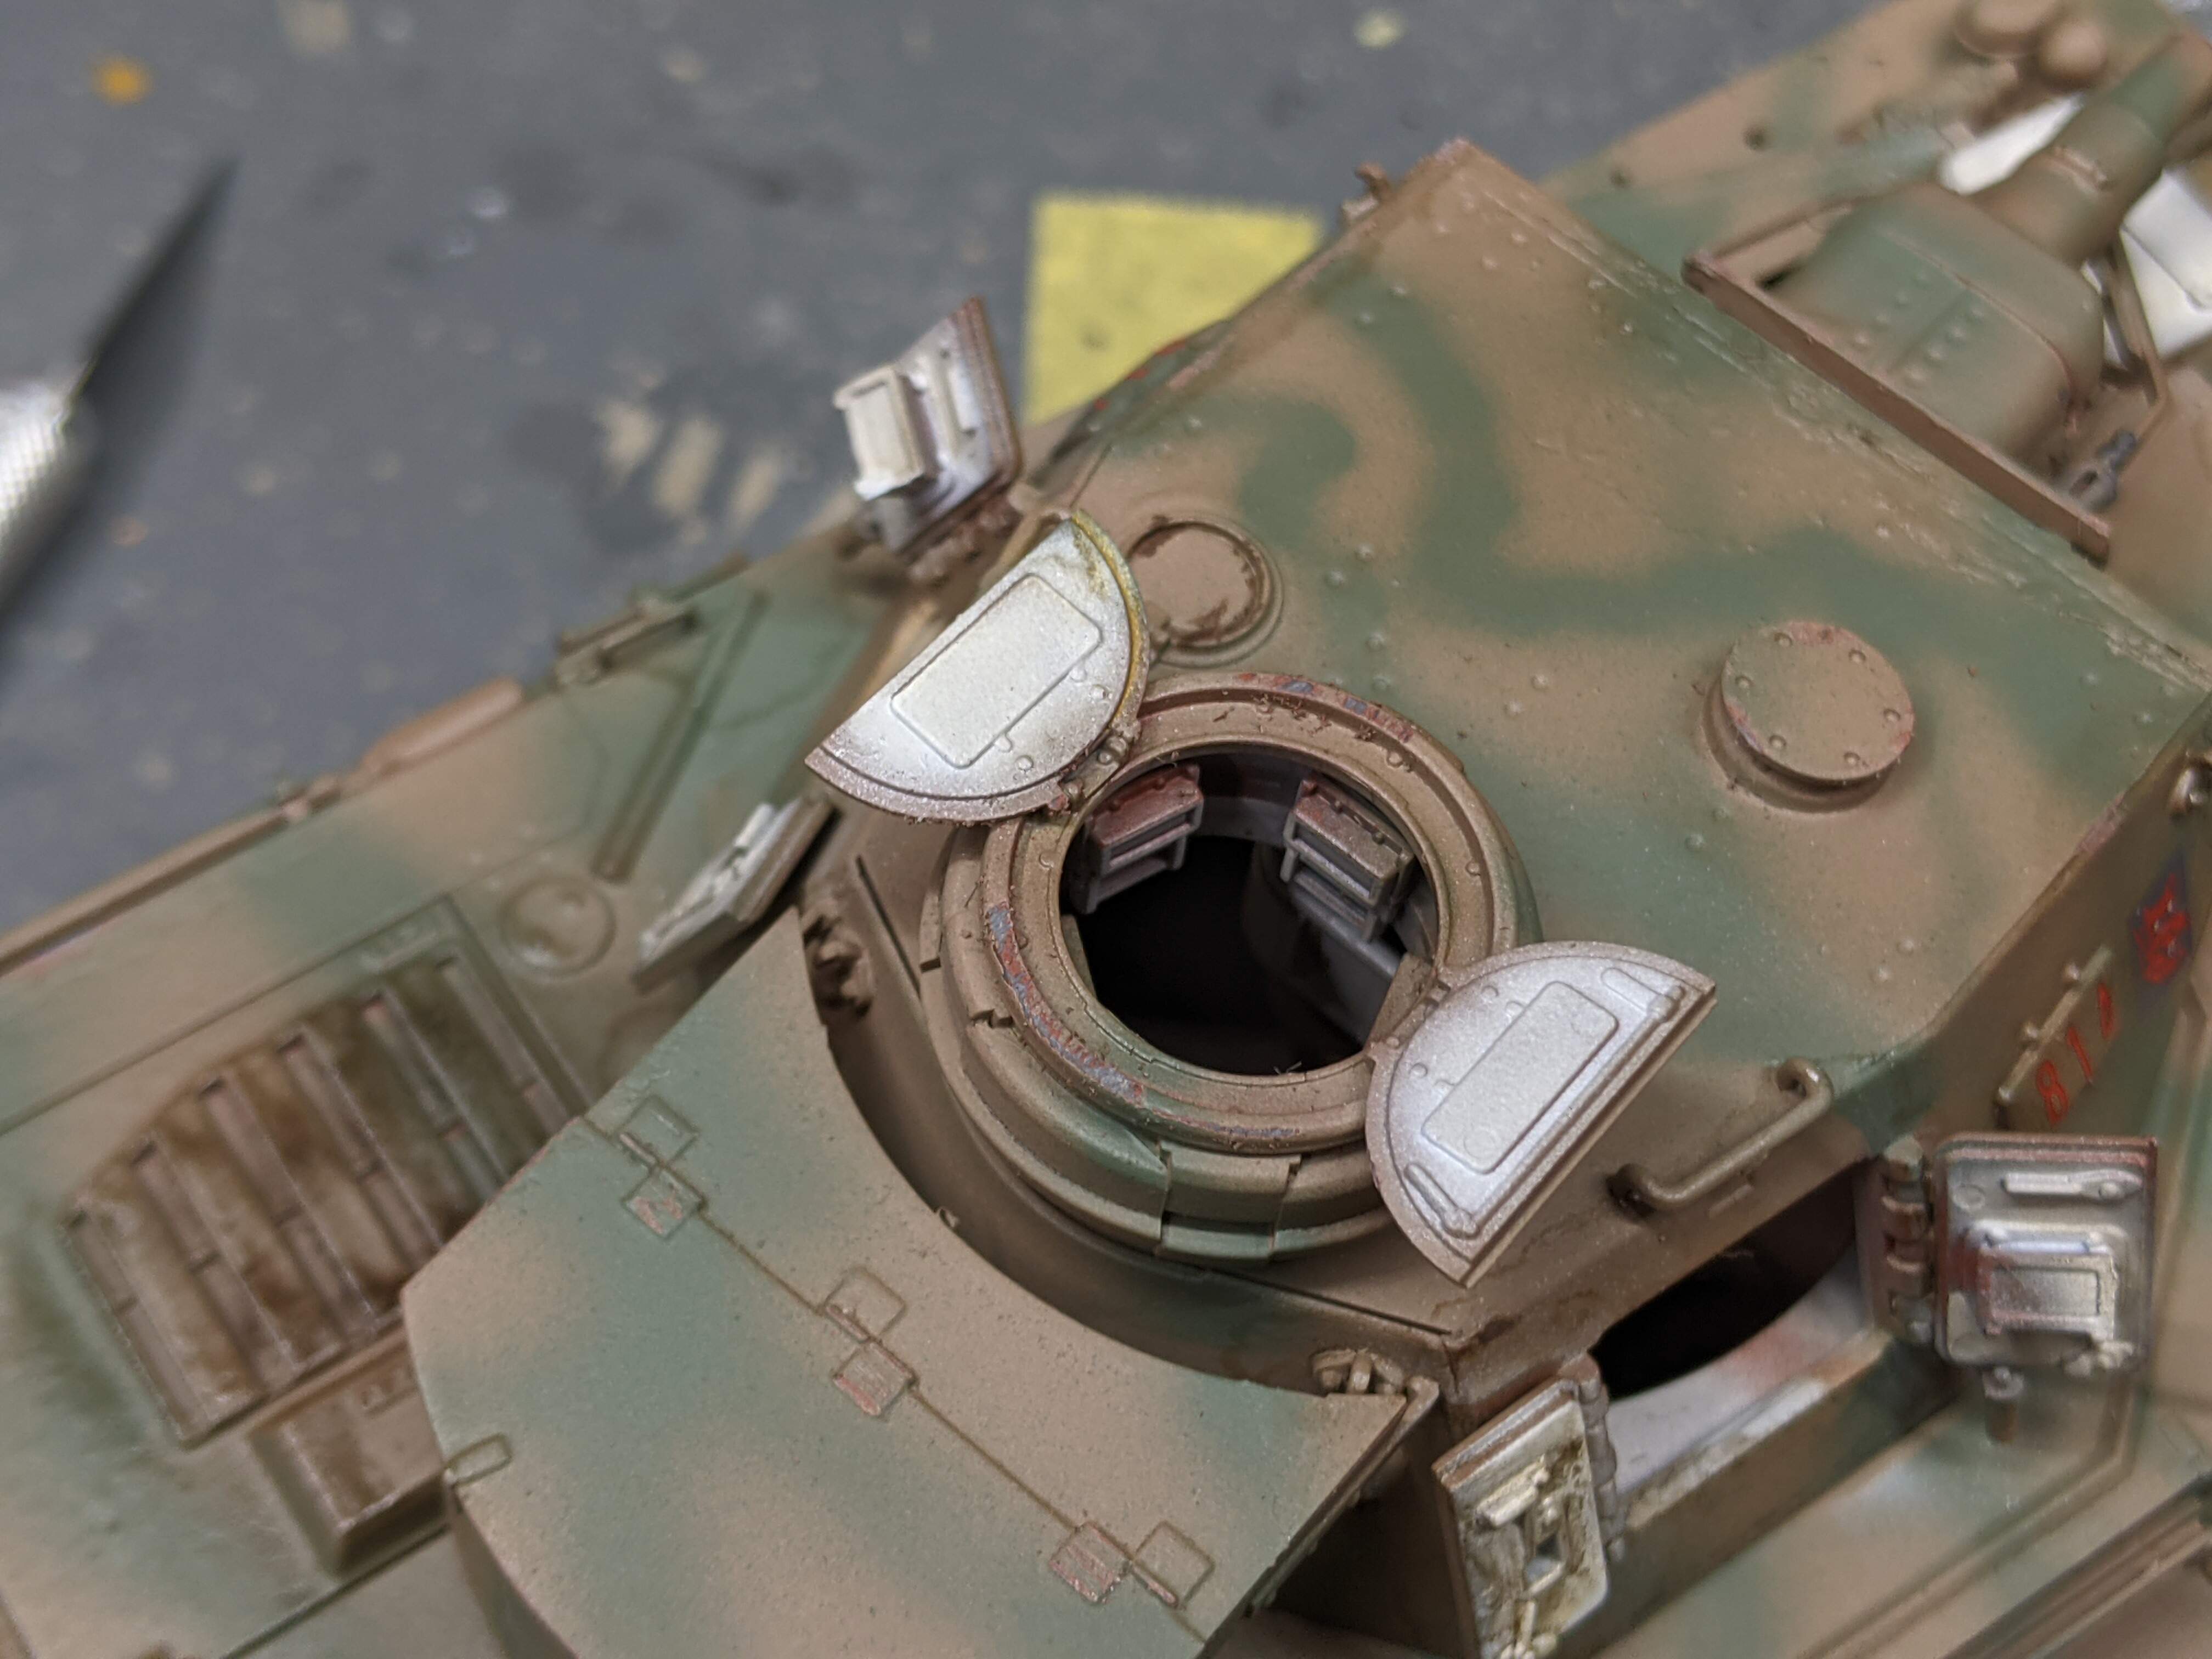
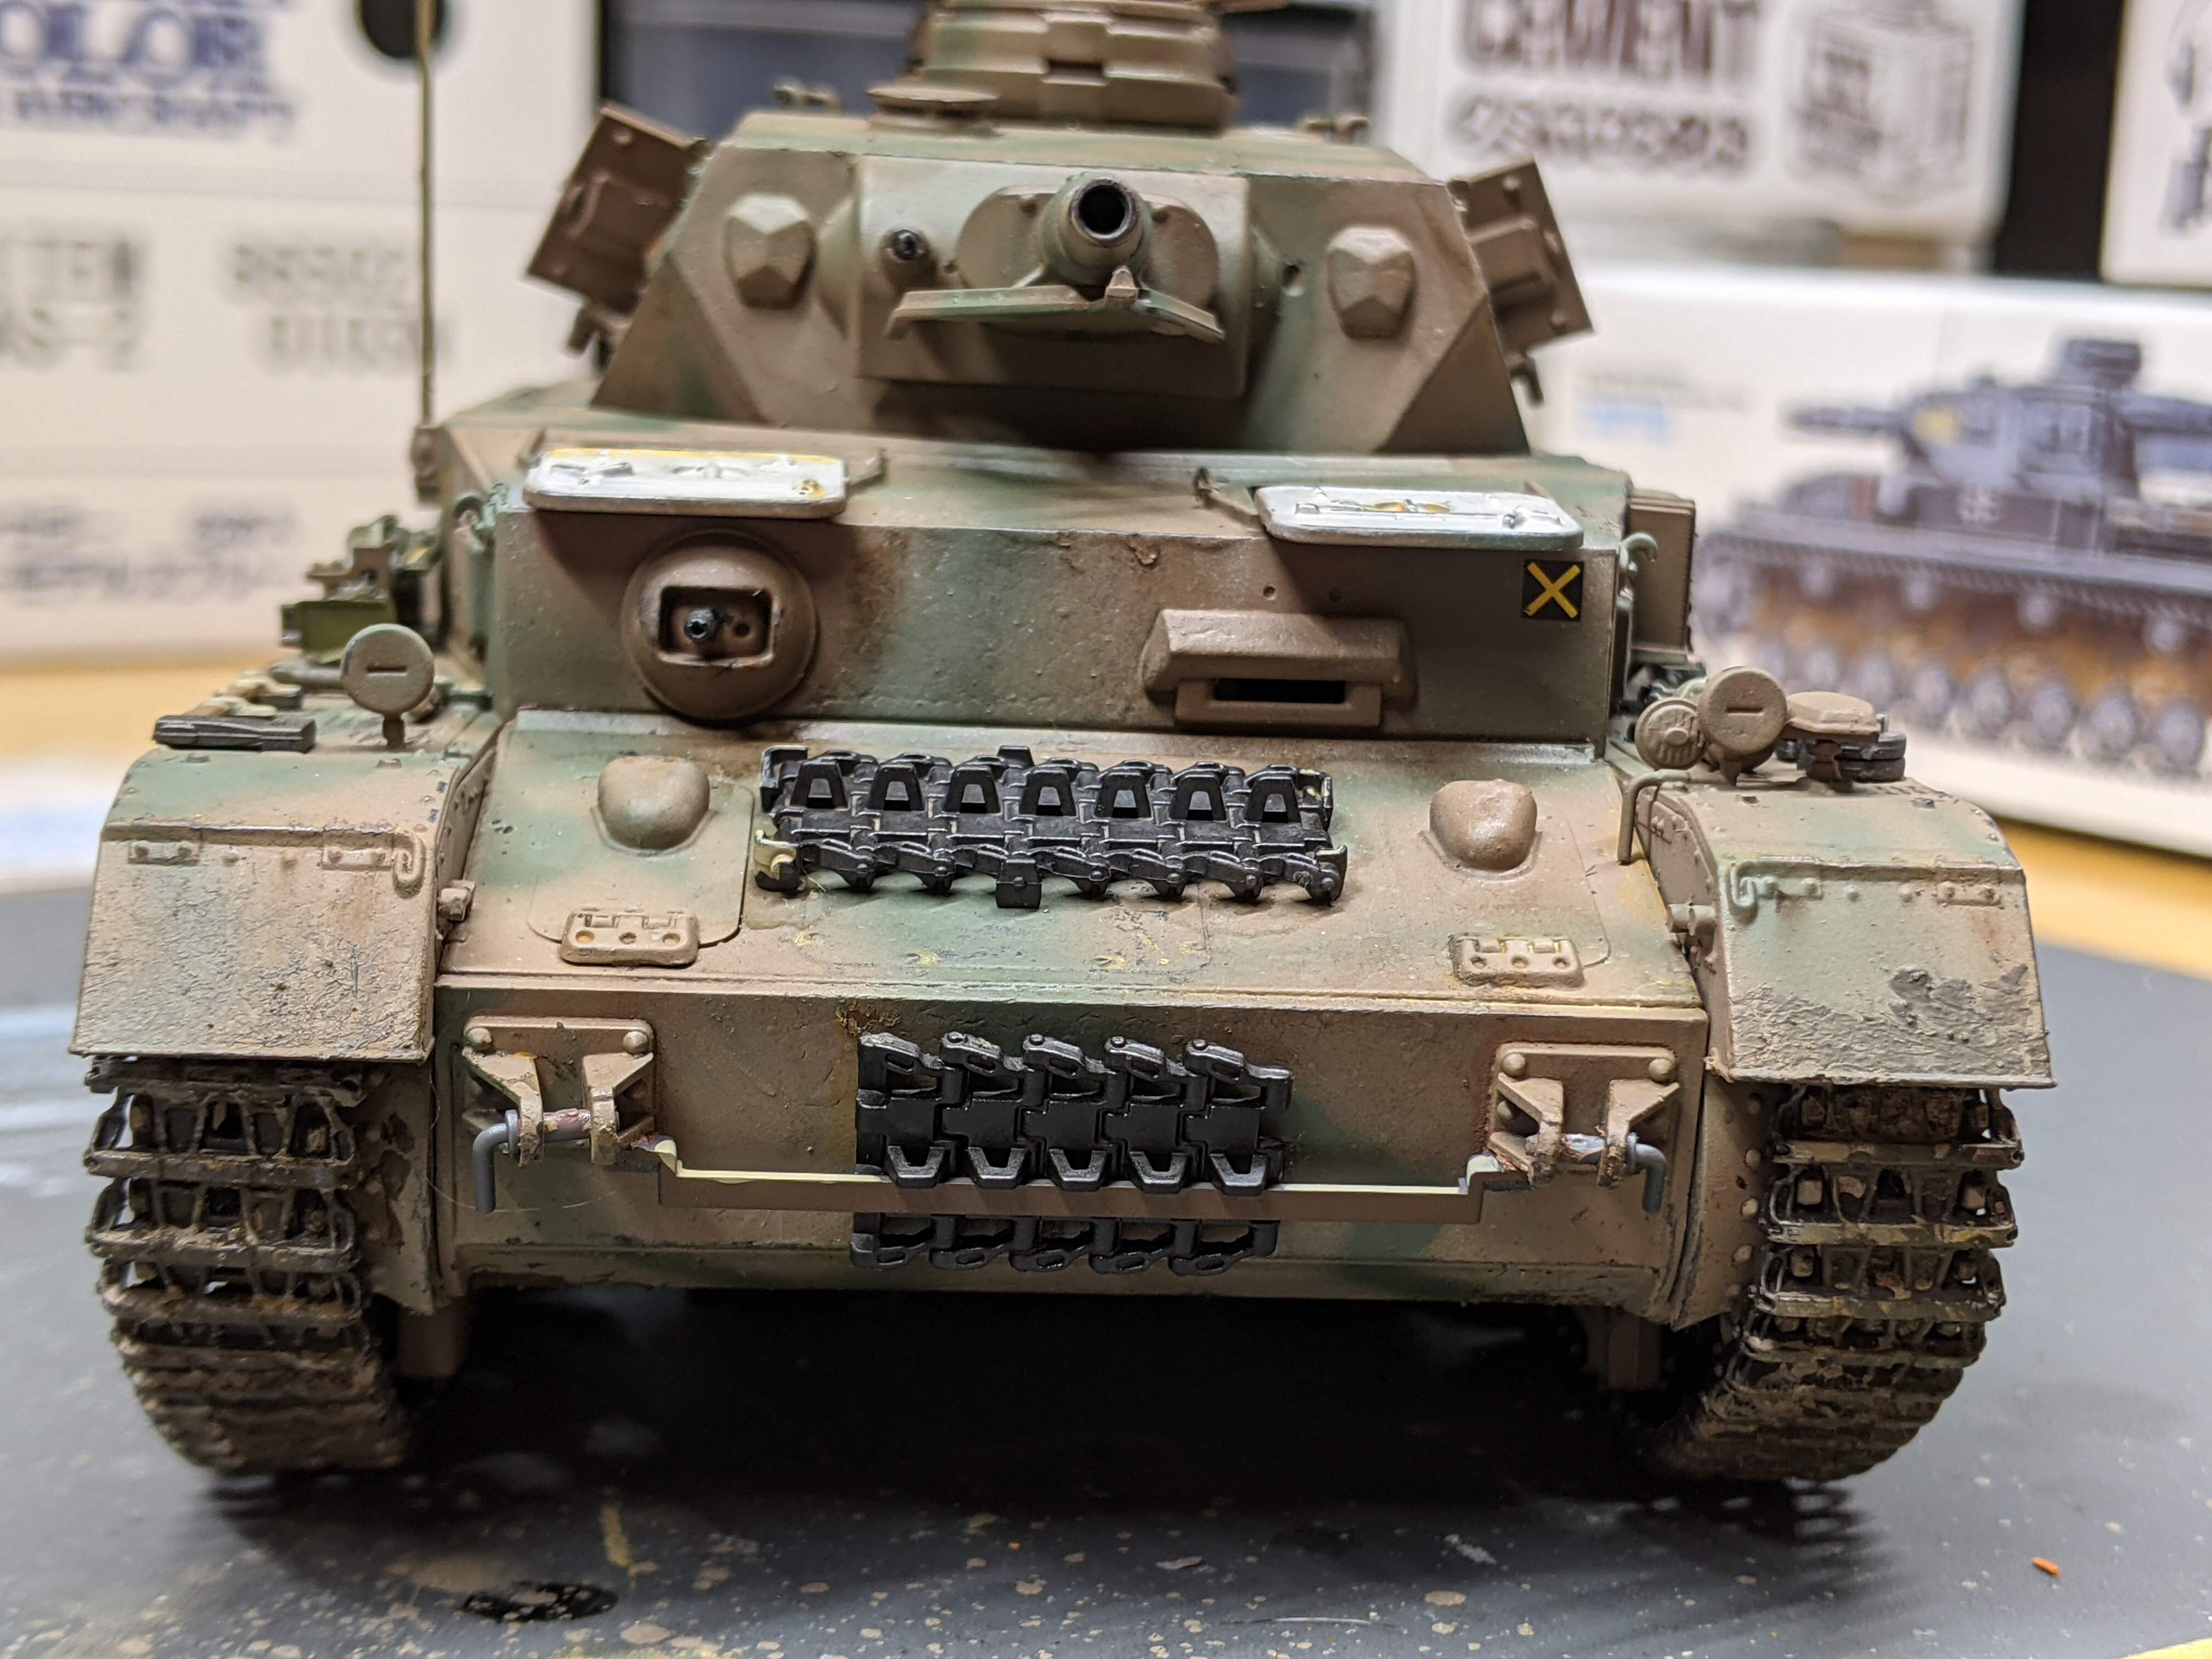
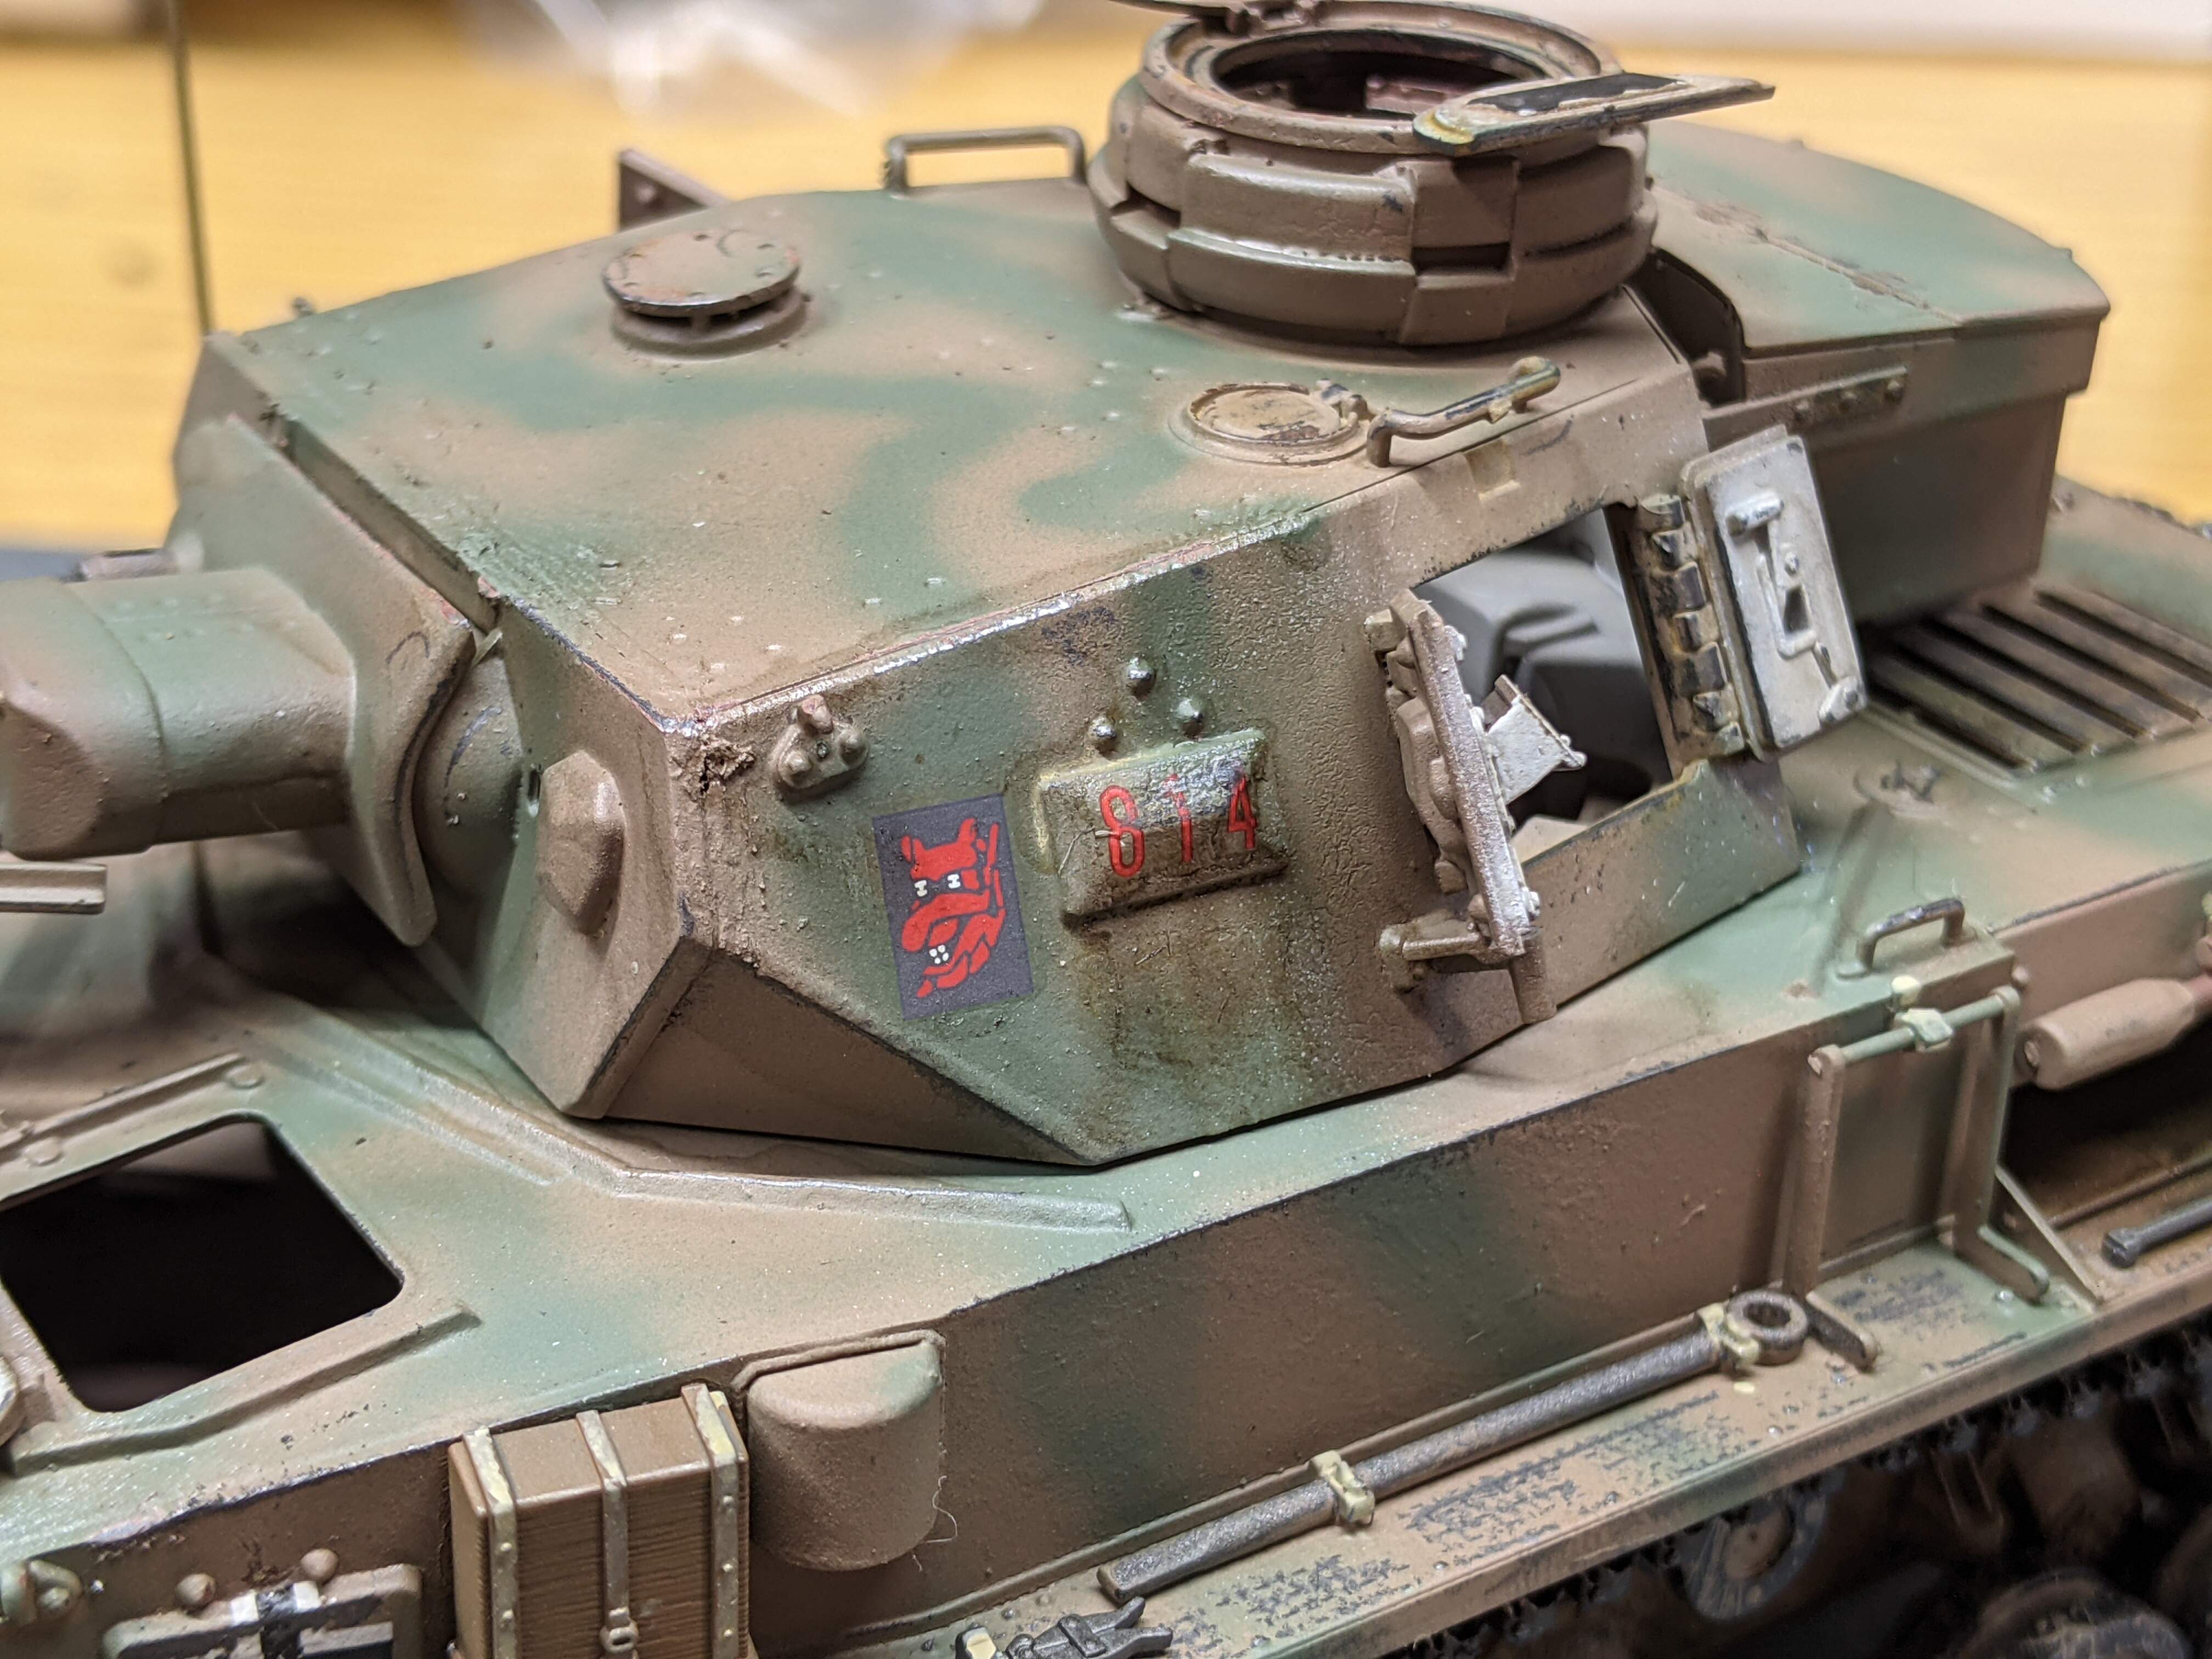
The Tamiya kit is very fine, very refined. It’s a fairly simple assembly, with subtle details like weld beads, such that the only major improvement I’ve taken on has been to stipple on some rough metal texture with diluted lacquer putty. I’m going to be making a vehicle from the 5th Panzer Division in Russia, 1942. Although the interior detail is only the cannon breach, this is more than enough as I plan to fill the hatches with the excellent figures that were provided. Hopefully tonight I can get the first coat of primer down!
Dennis
4 Likes
Looks really good so far Dennis!
Not trying to be a rivet counter here but, there shouldnt be a rolled steel texure on the inside on the inside of the drivers and bow gunners hatch. ( Can be removed with some IPA) Also there is a small seam line on the muffler.
Other then that looks great!
1 Like
Dennis, It’s looking great!
I agree about the texture on the hatches,
but it all looks easy to fix.
Cheers!
L
1 Like
Thanks guys! In actuality, this isn’t a rolled steel texture as the putty was so diluted. It’s hard to explain, perhaps I’d better bring the model to you guys to make it easier to show  this is actually just filler for the ejector pin marks. Thanks for pointing out the seam as well!
Ooh that makes much more sence! Cant wait to see it with primer.
Yeah I think it’ll make more sense once the primer is on, in reality I don’t even know if I added any specific texture to anything but the exhaust. I really like this kit, but someone at Tamiya should have scuffed up the molds a bit!
1 Like
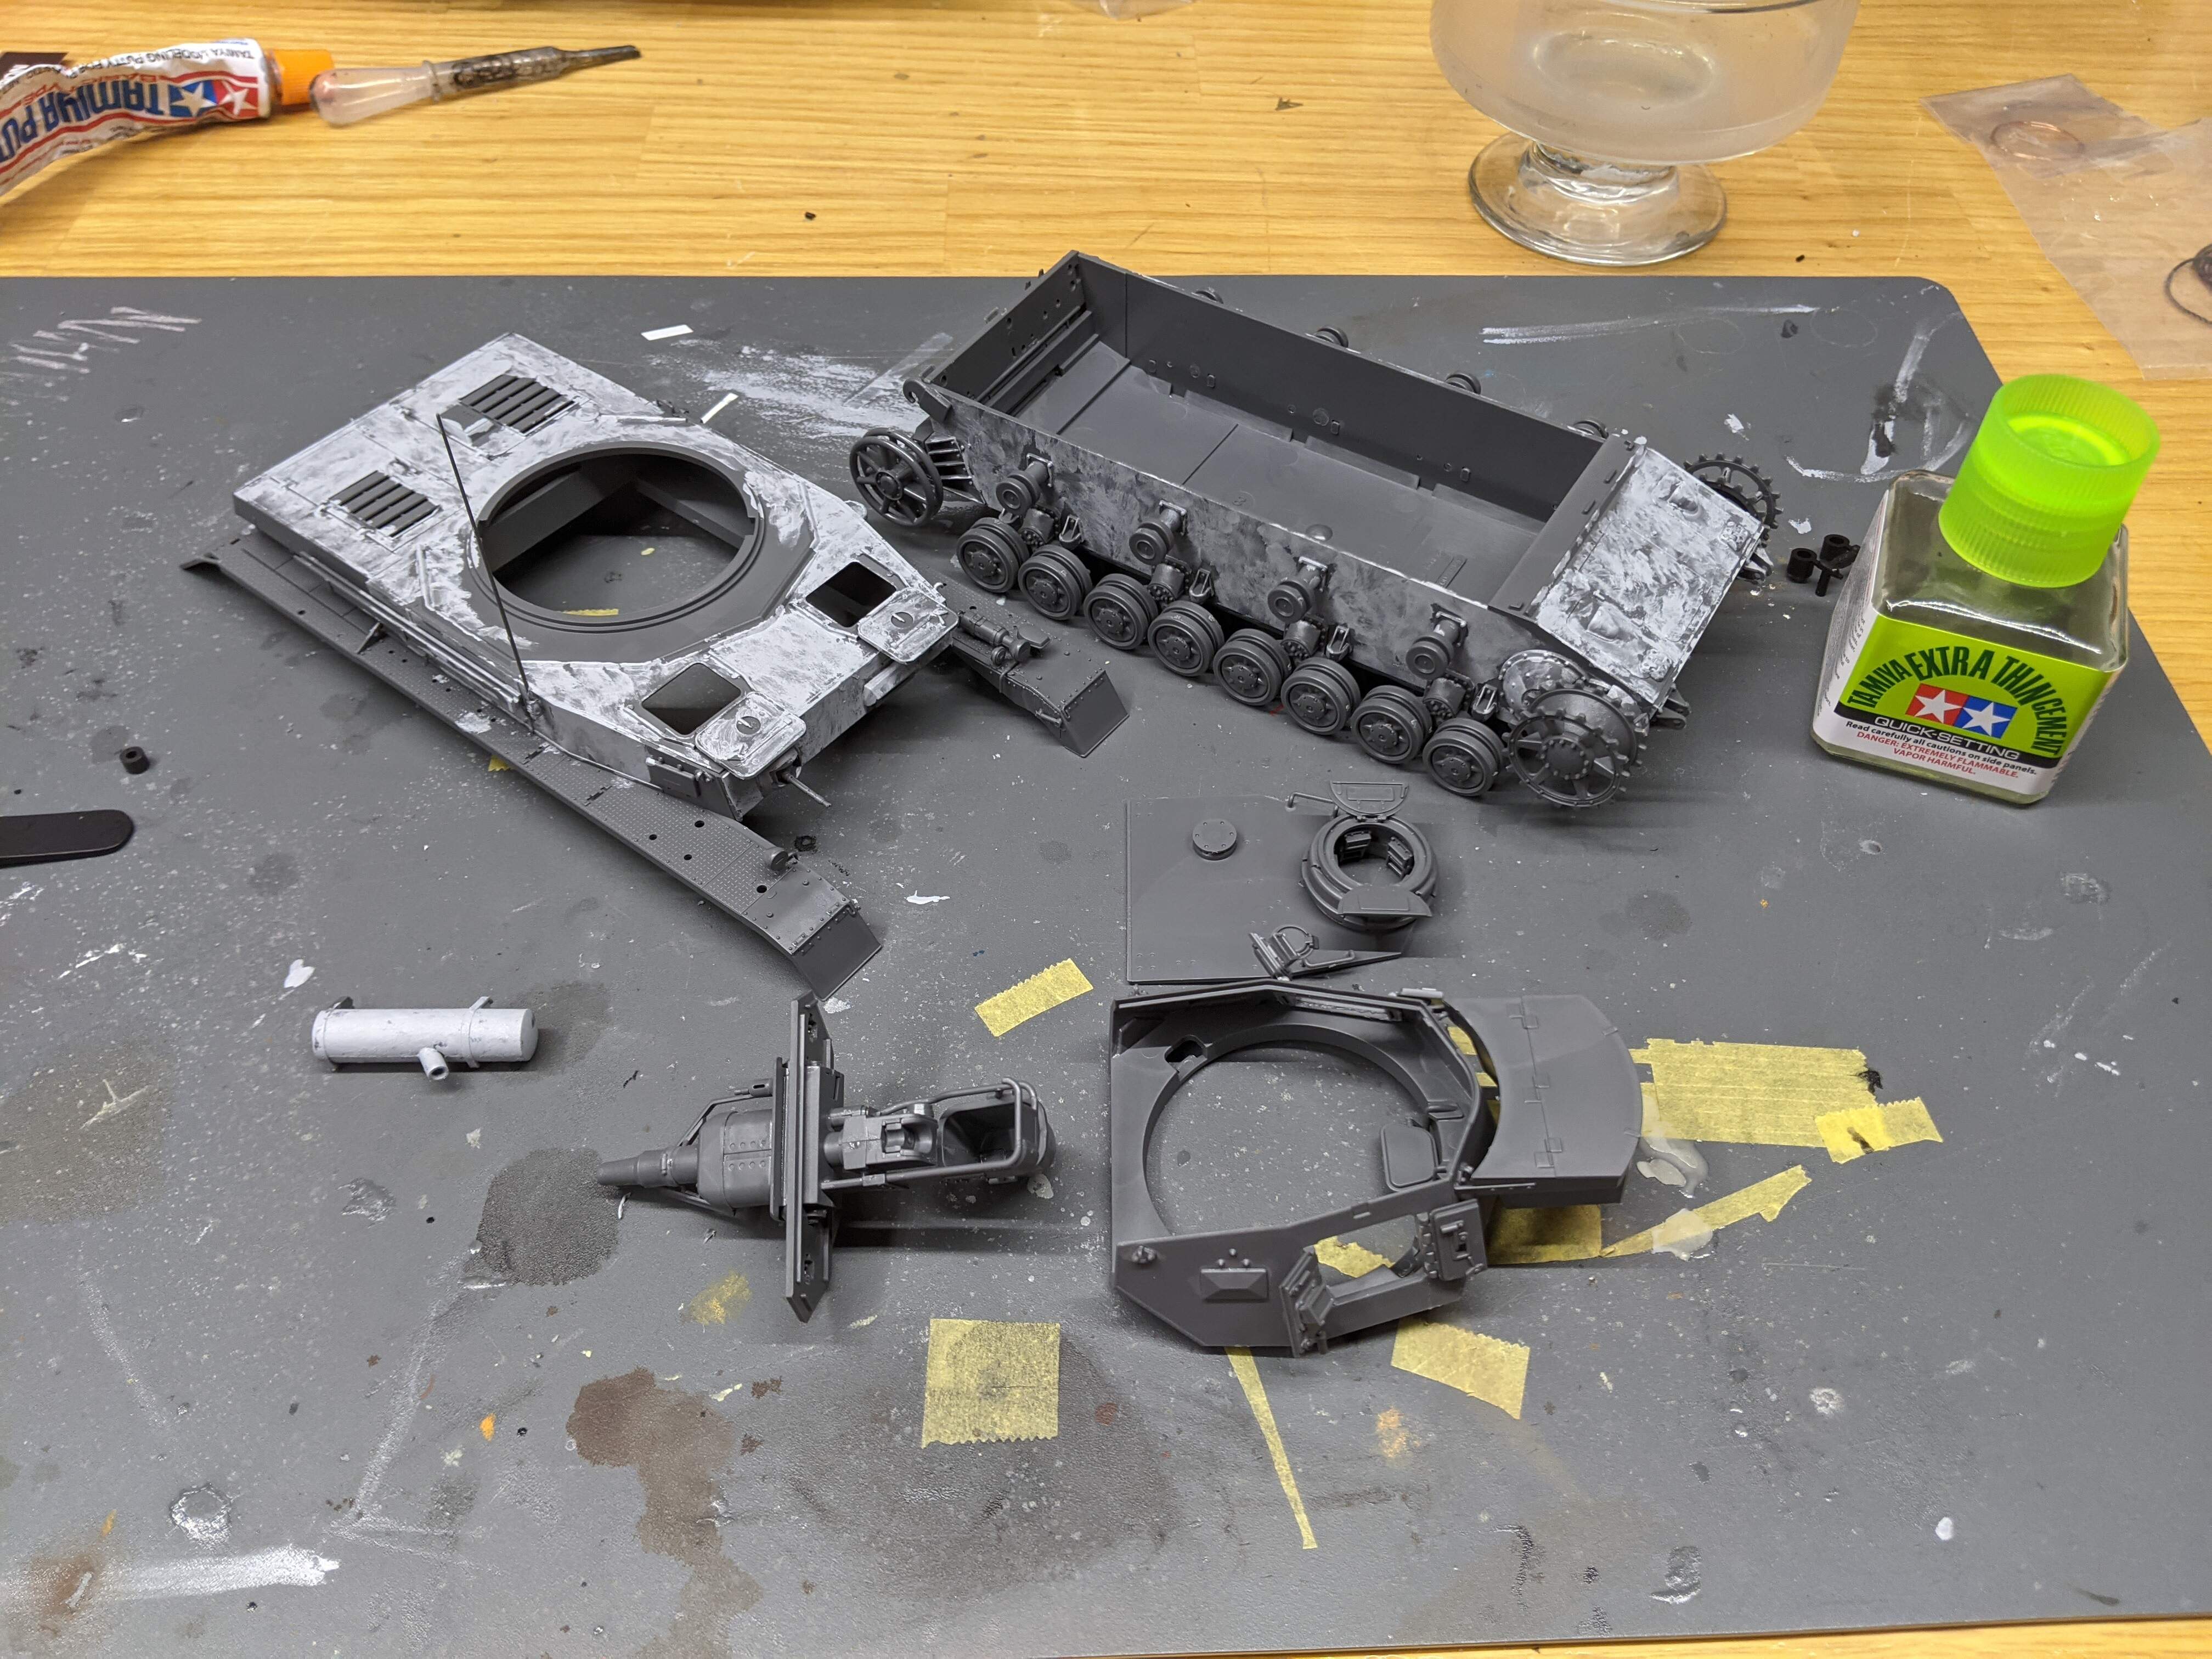
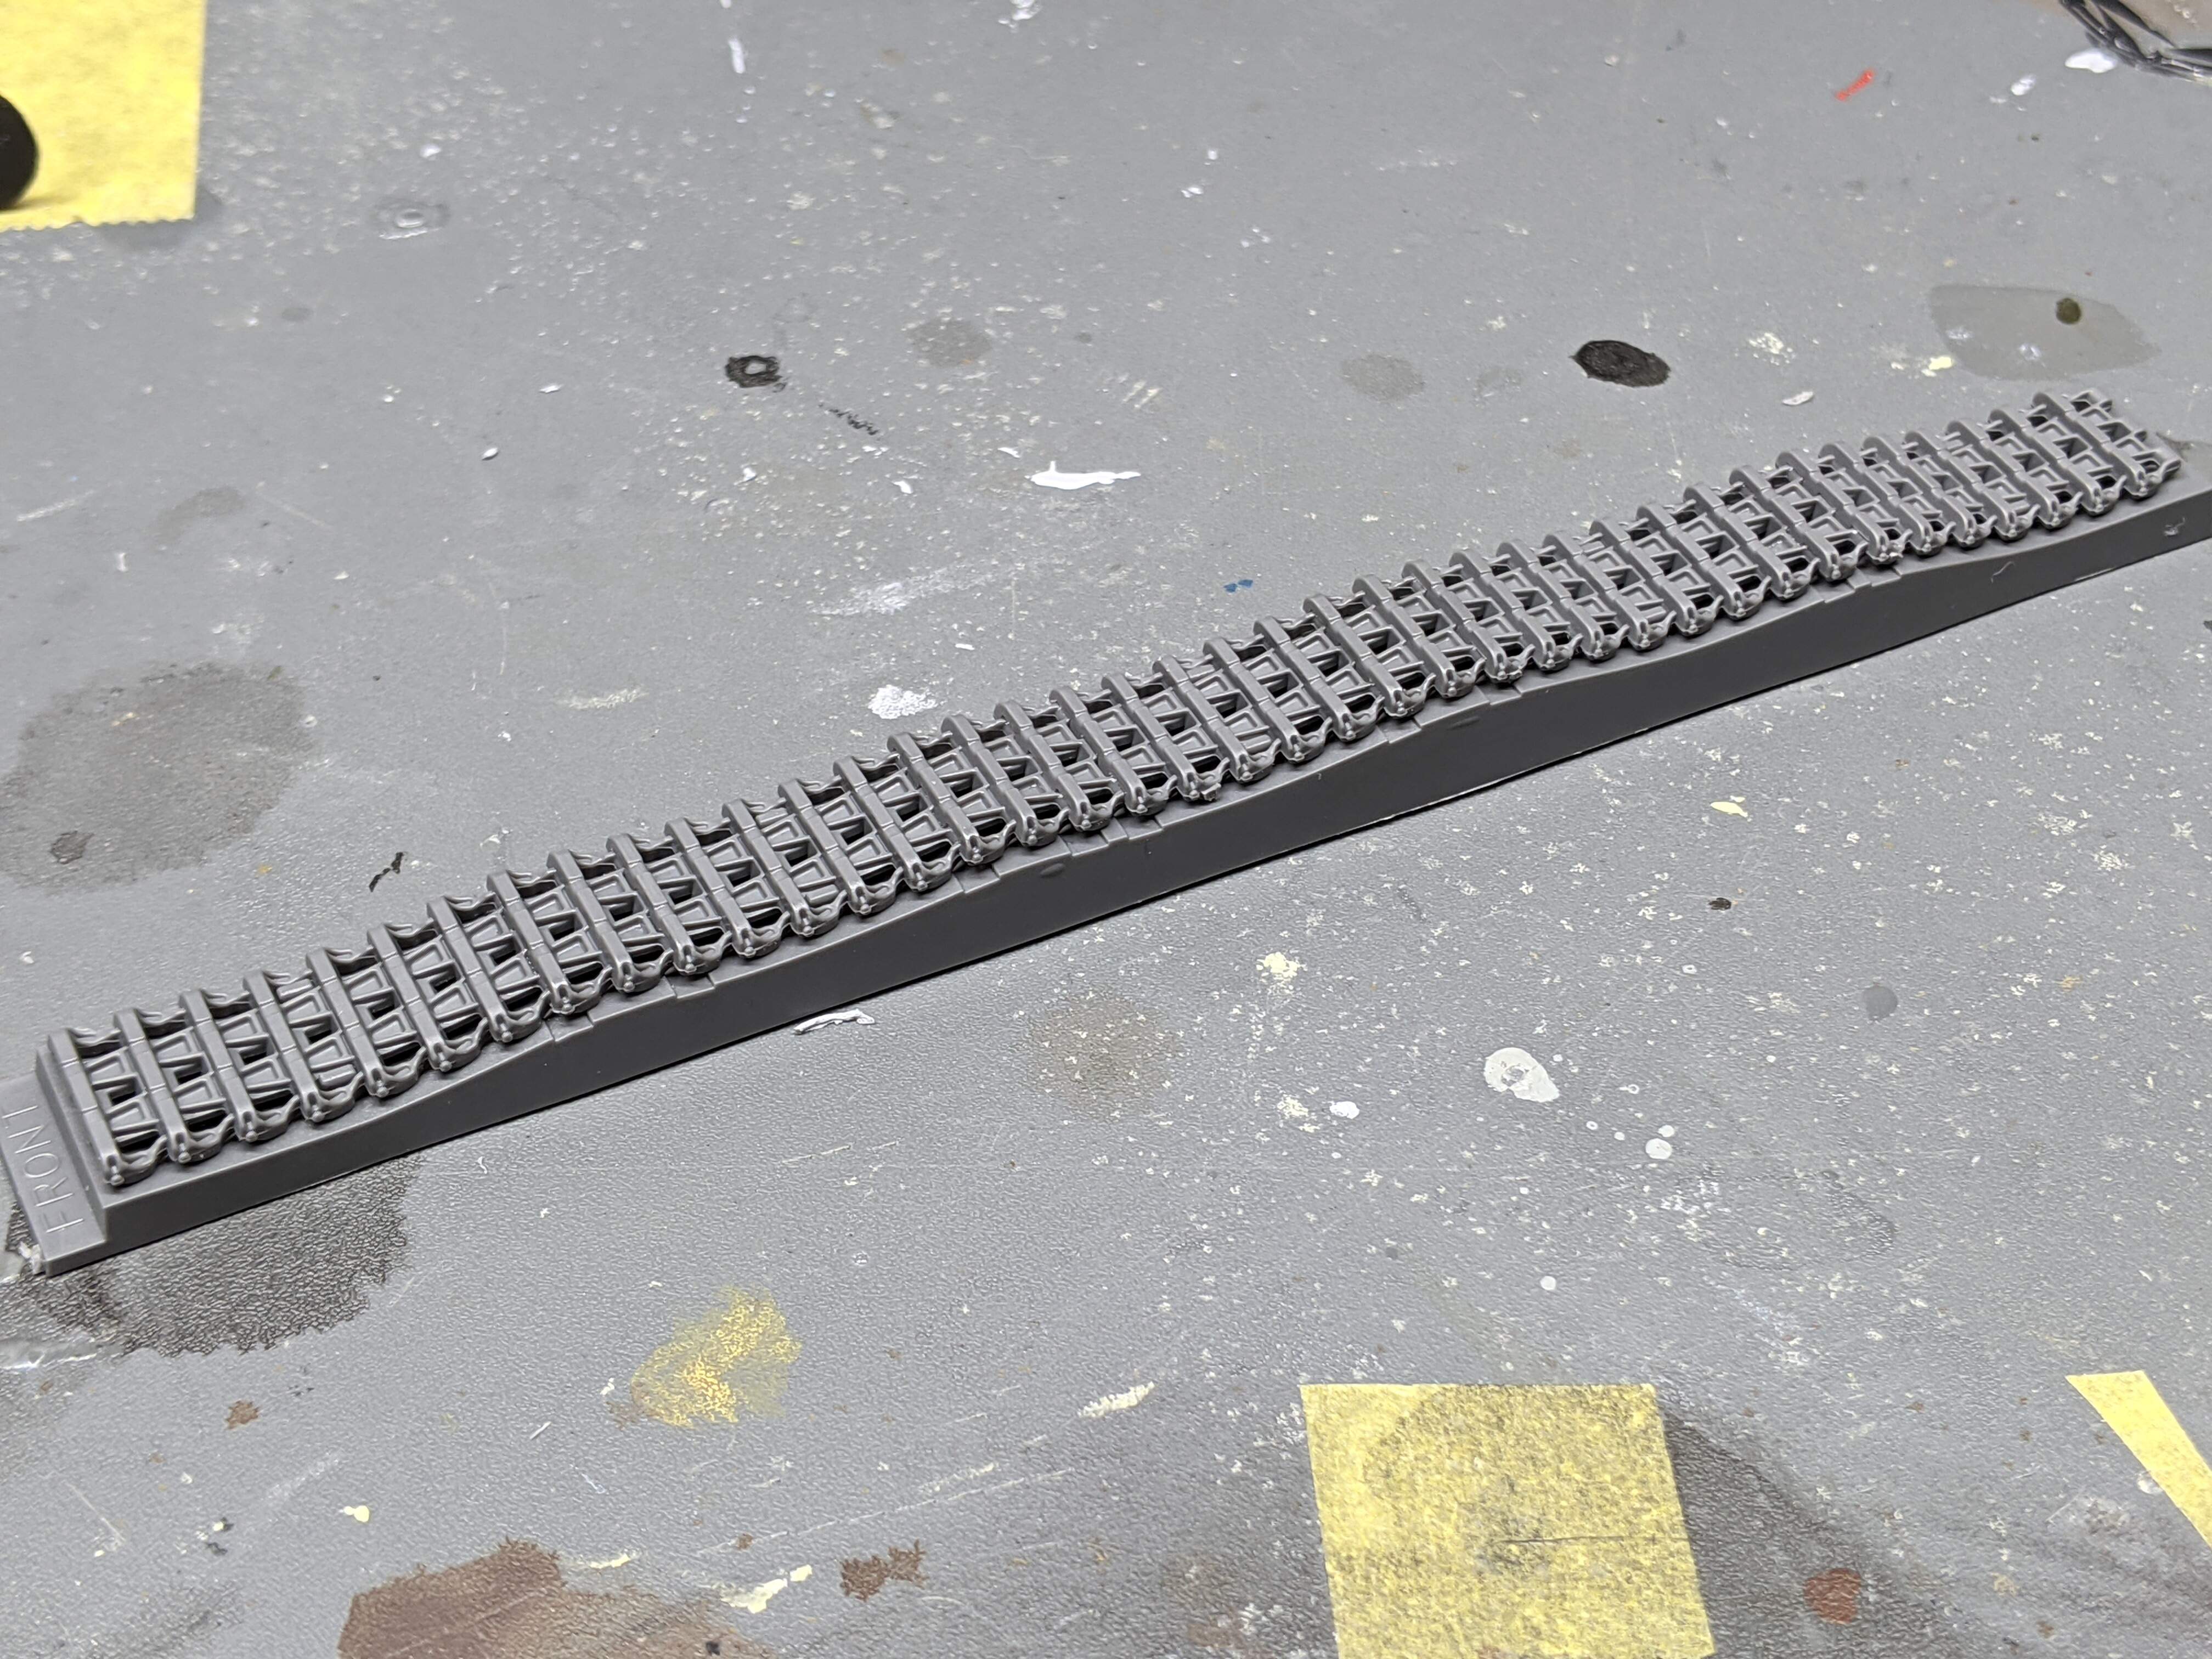
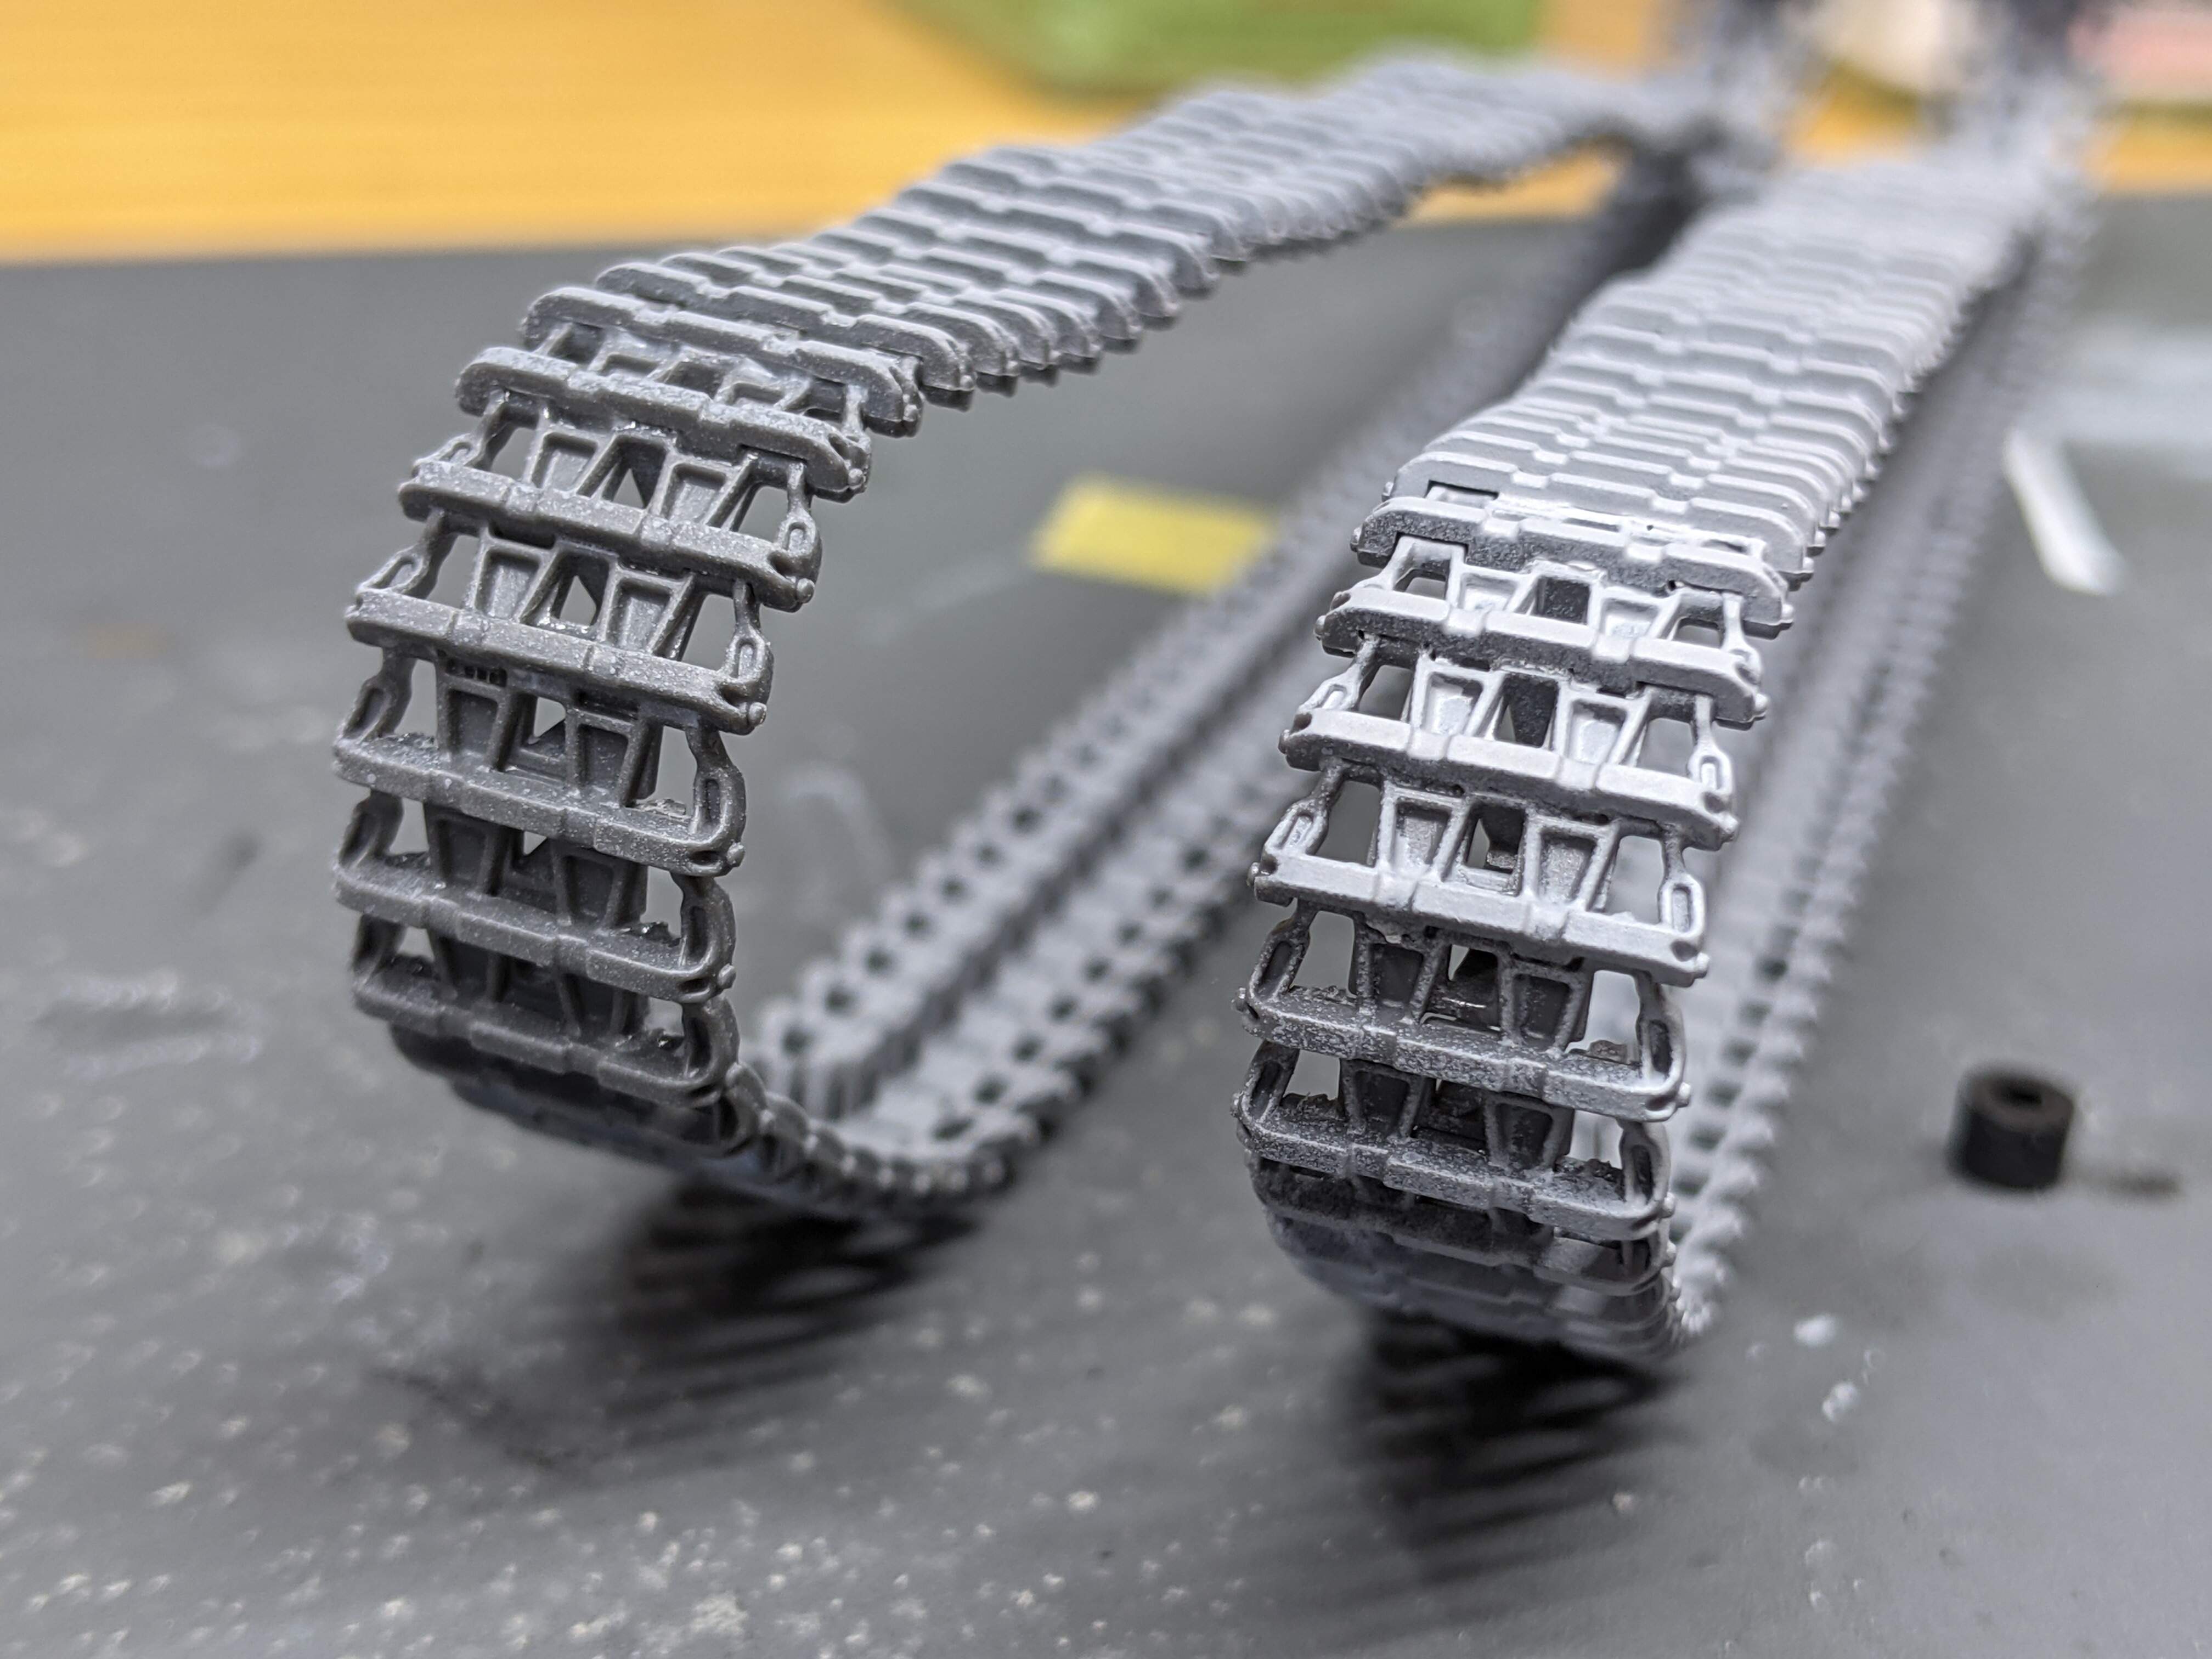
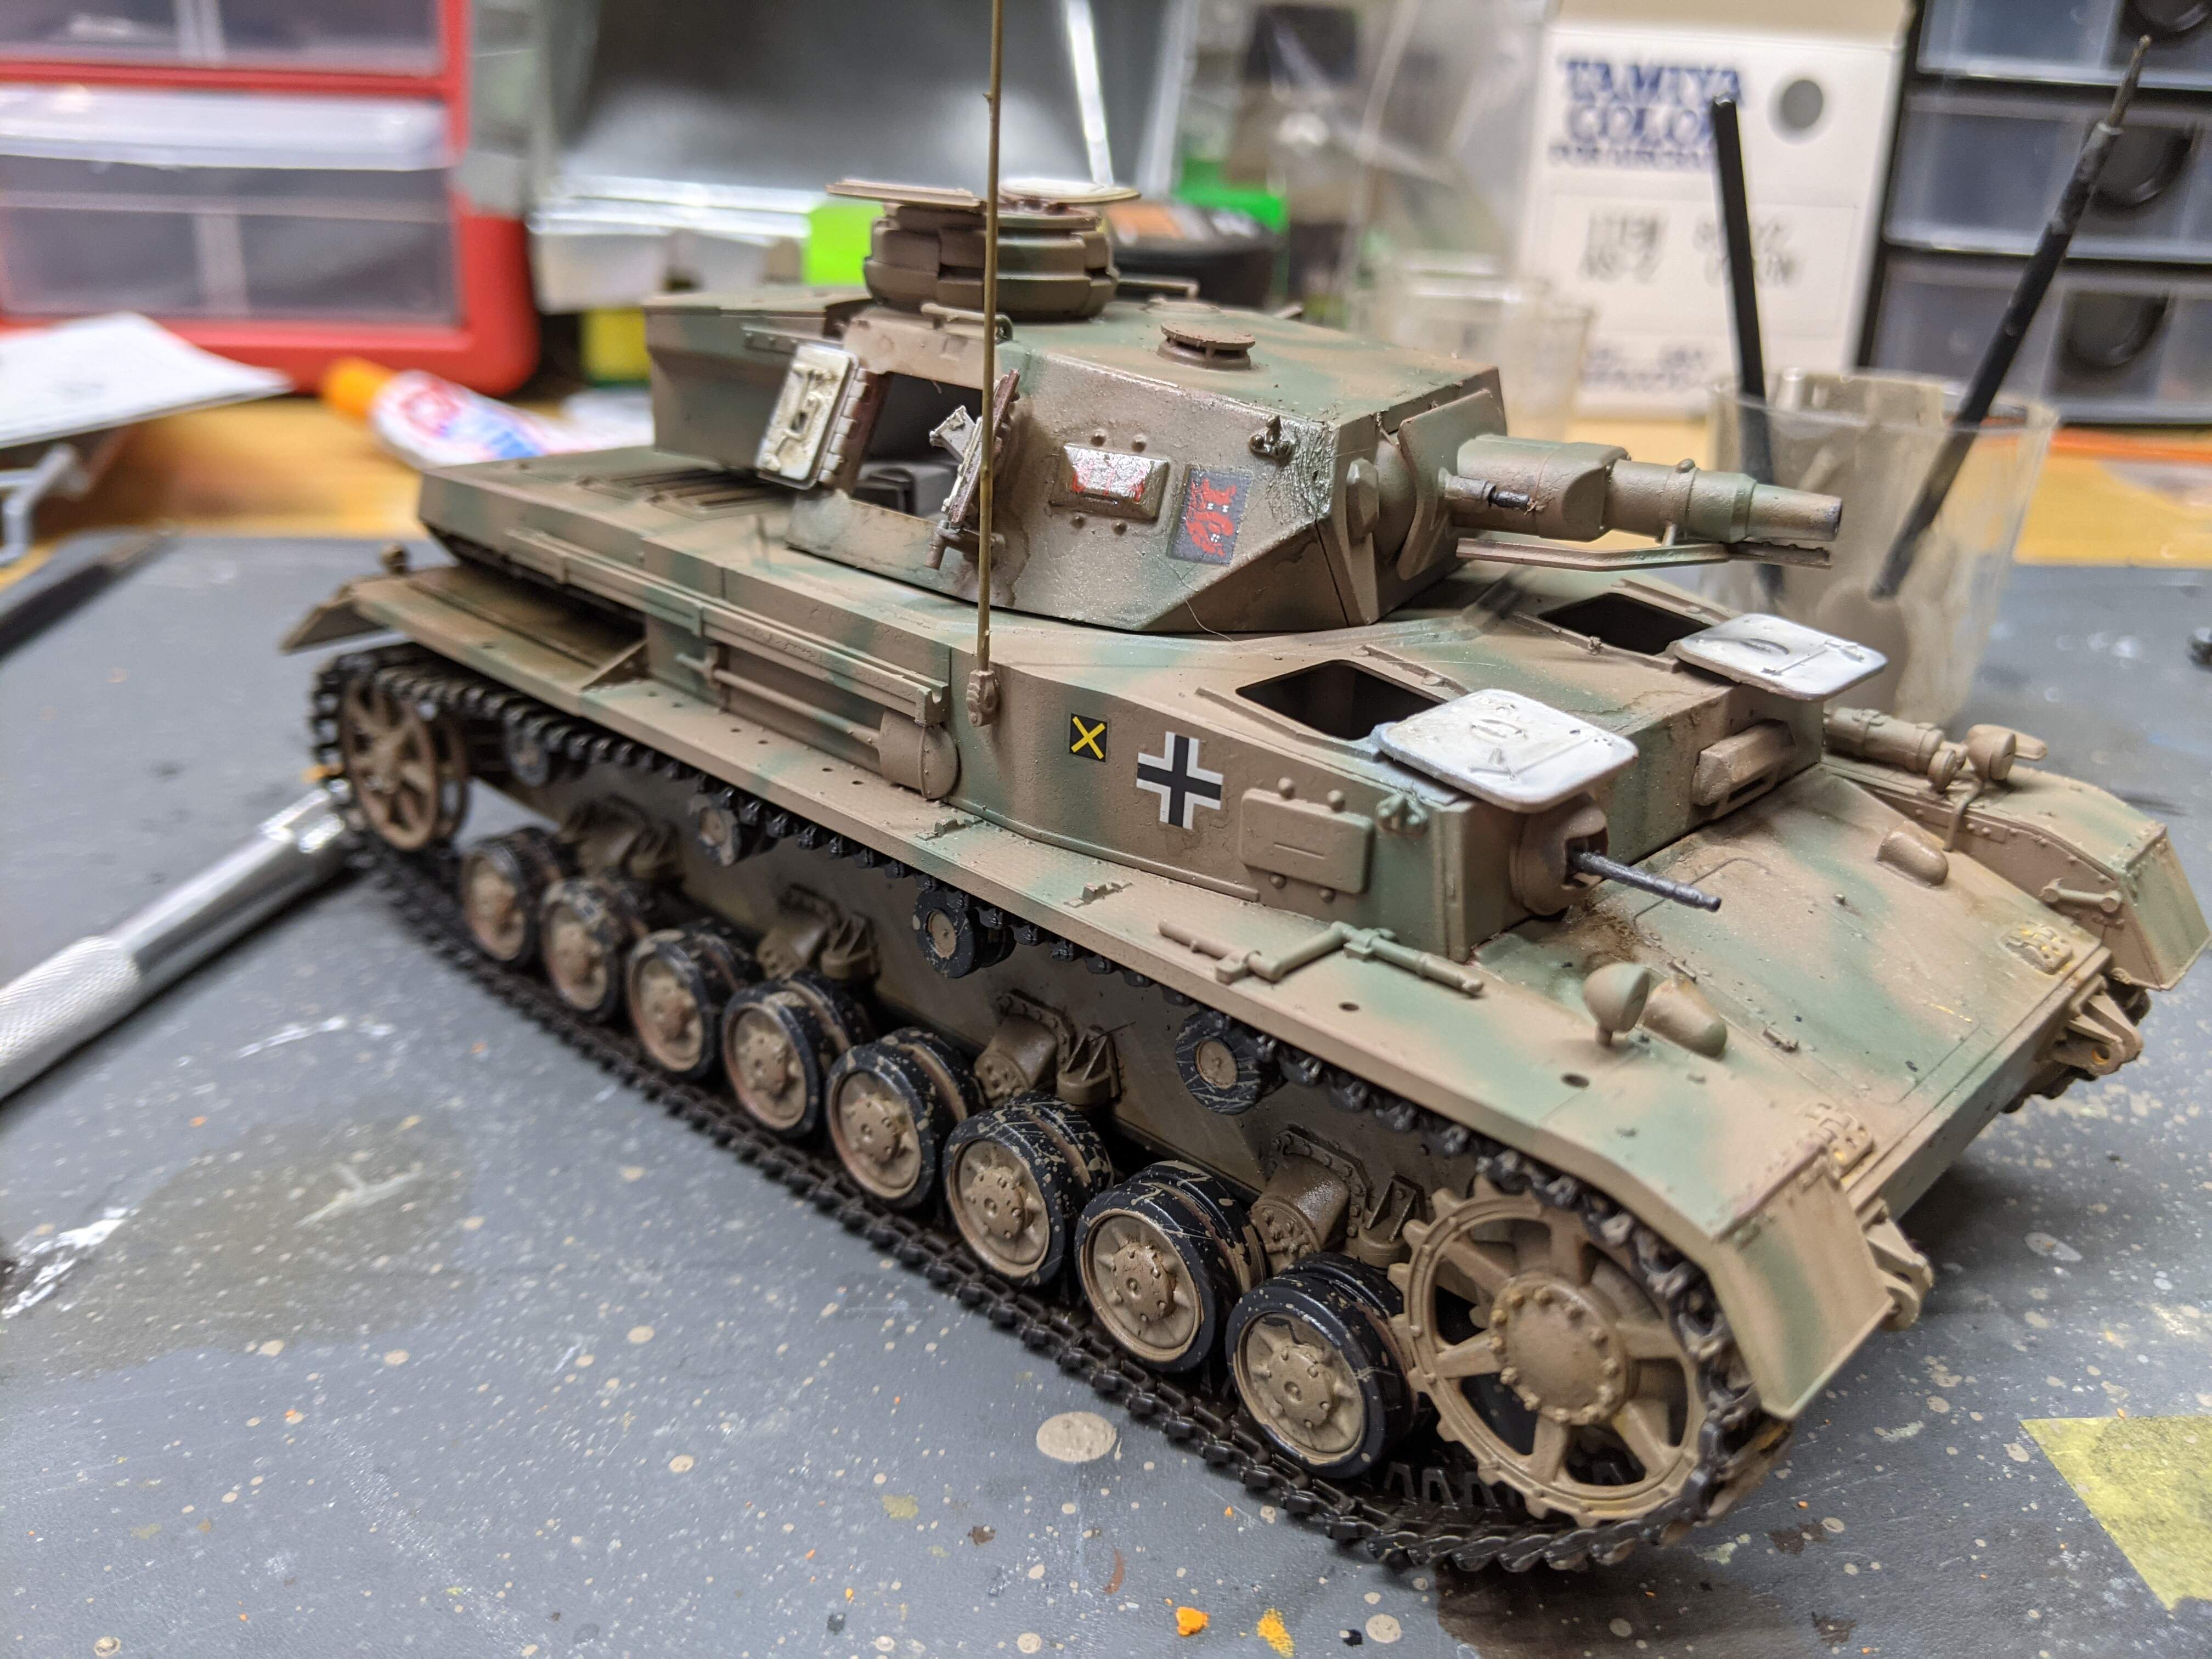
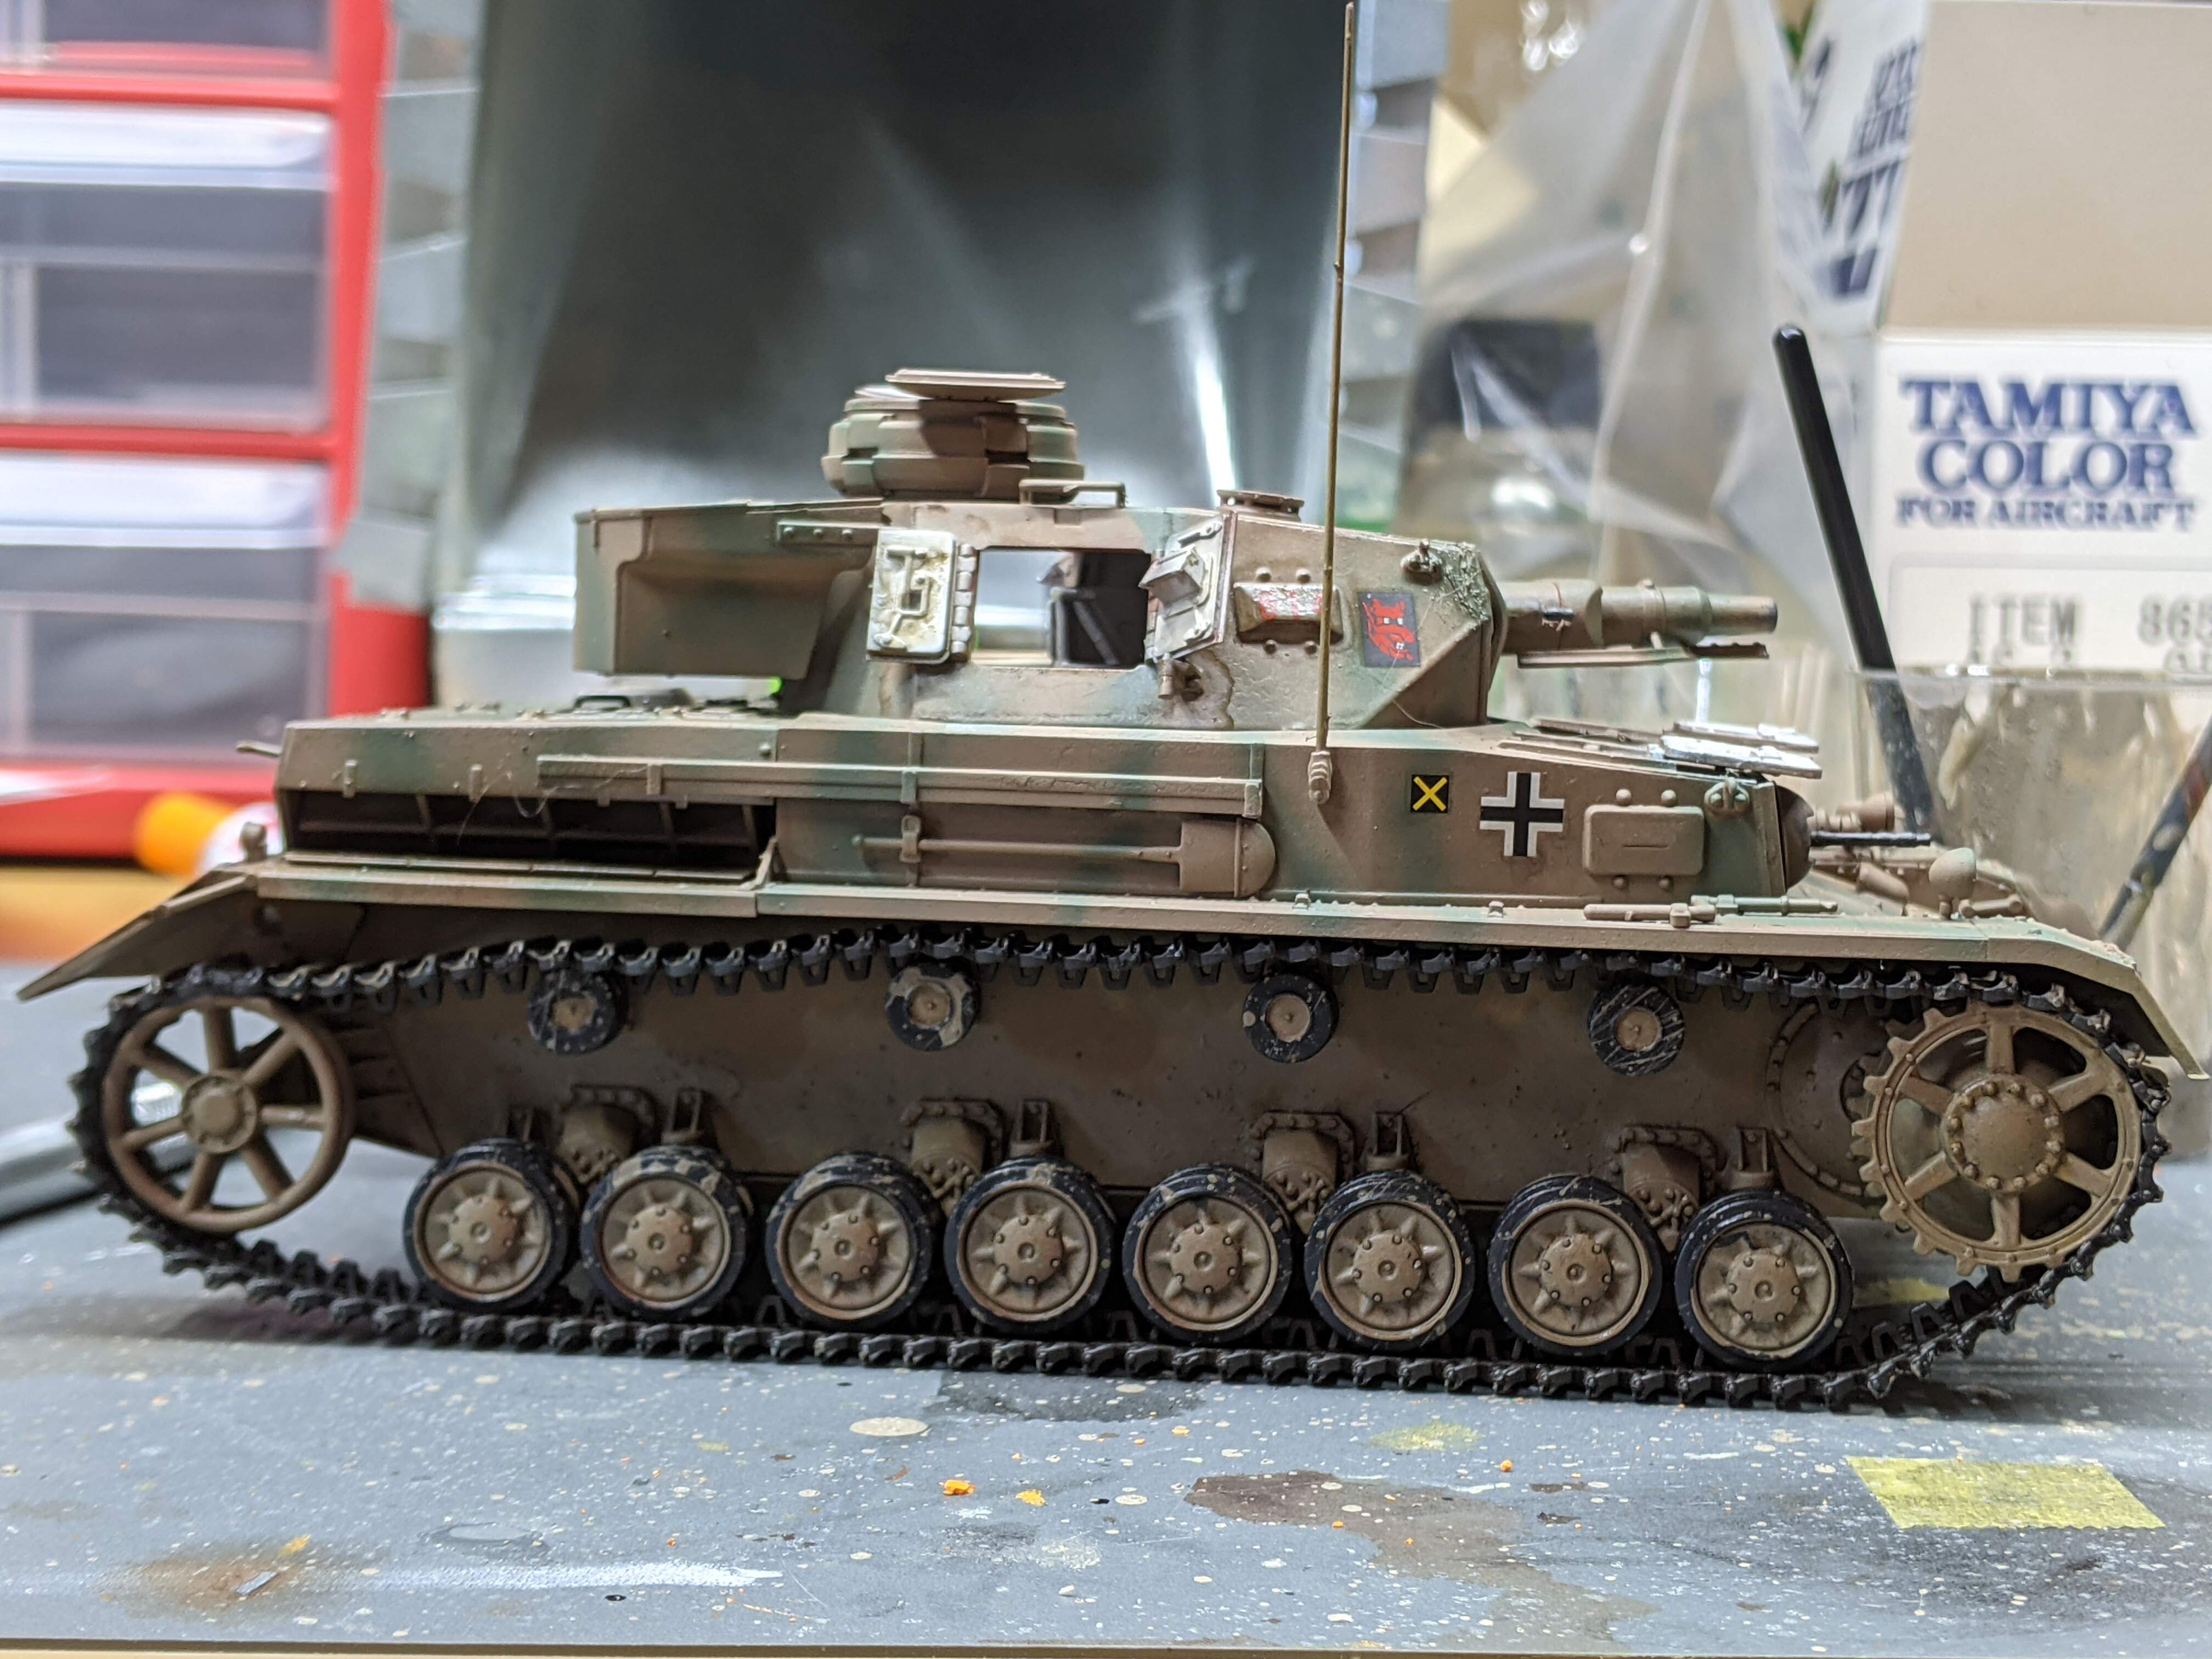
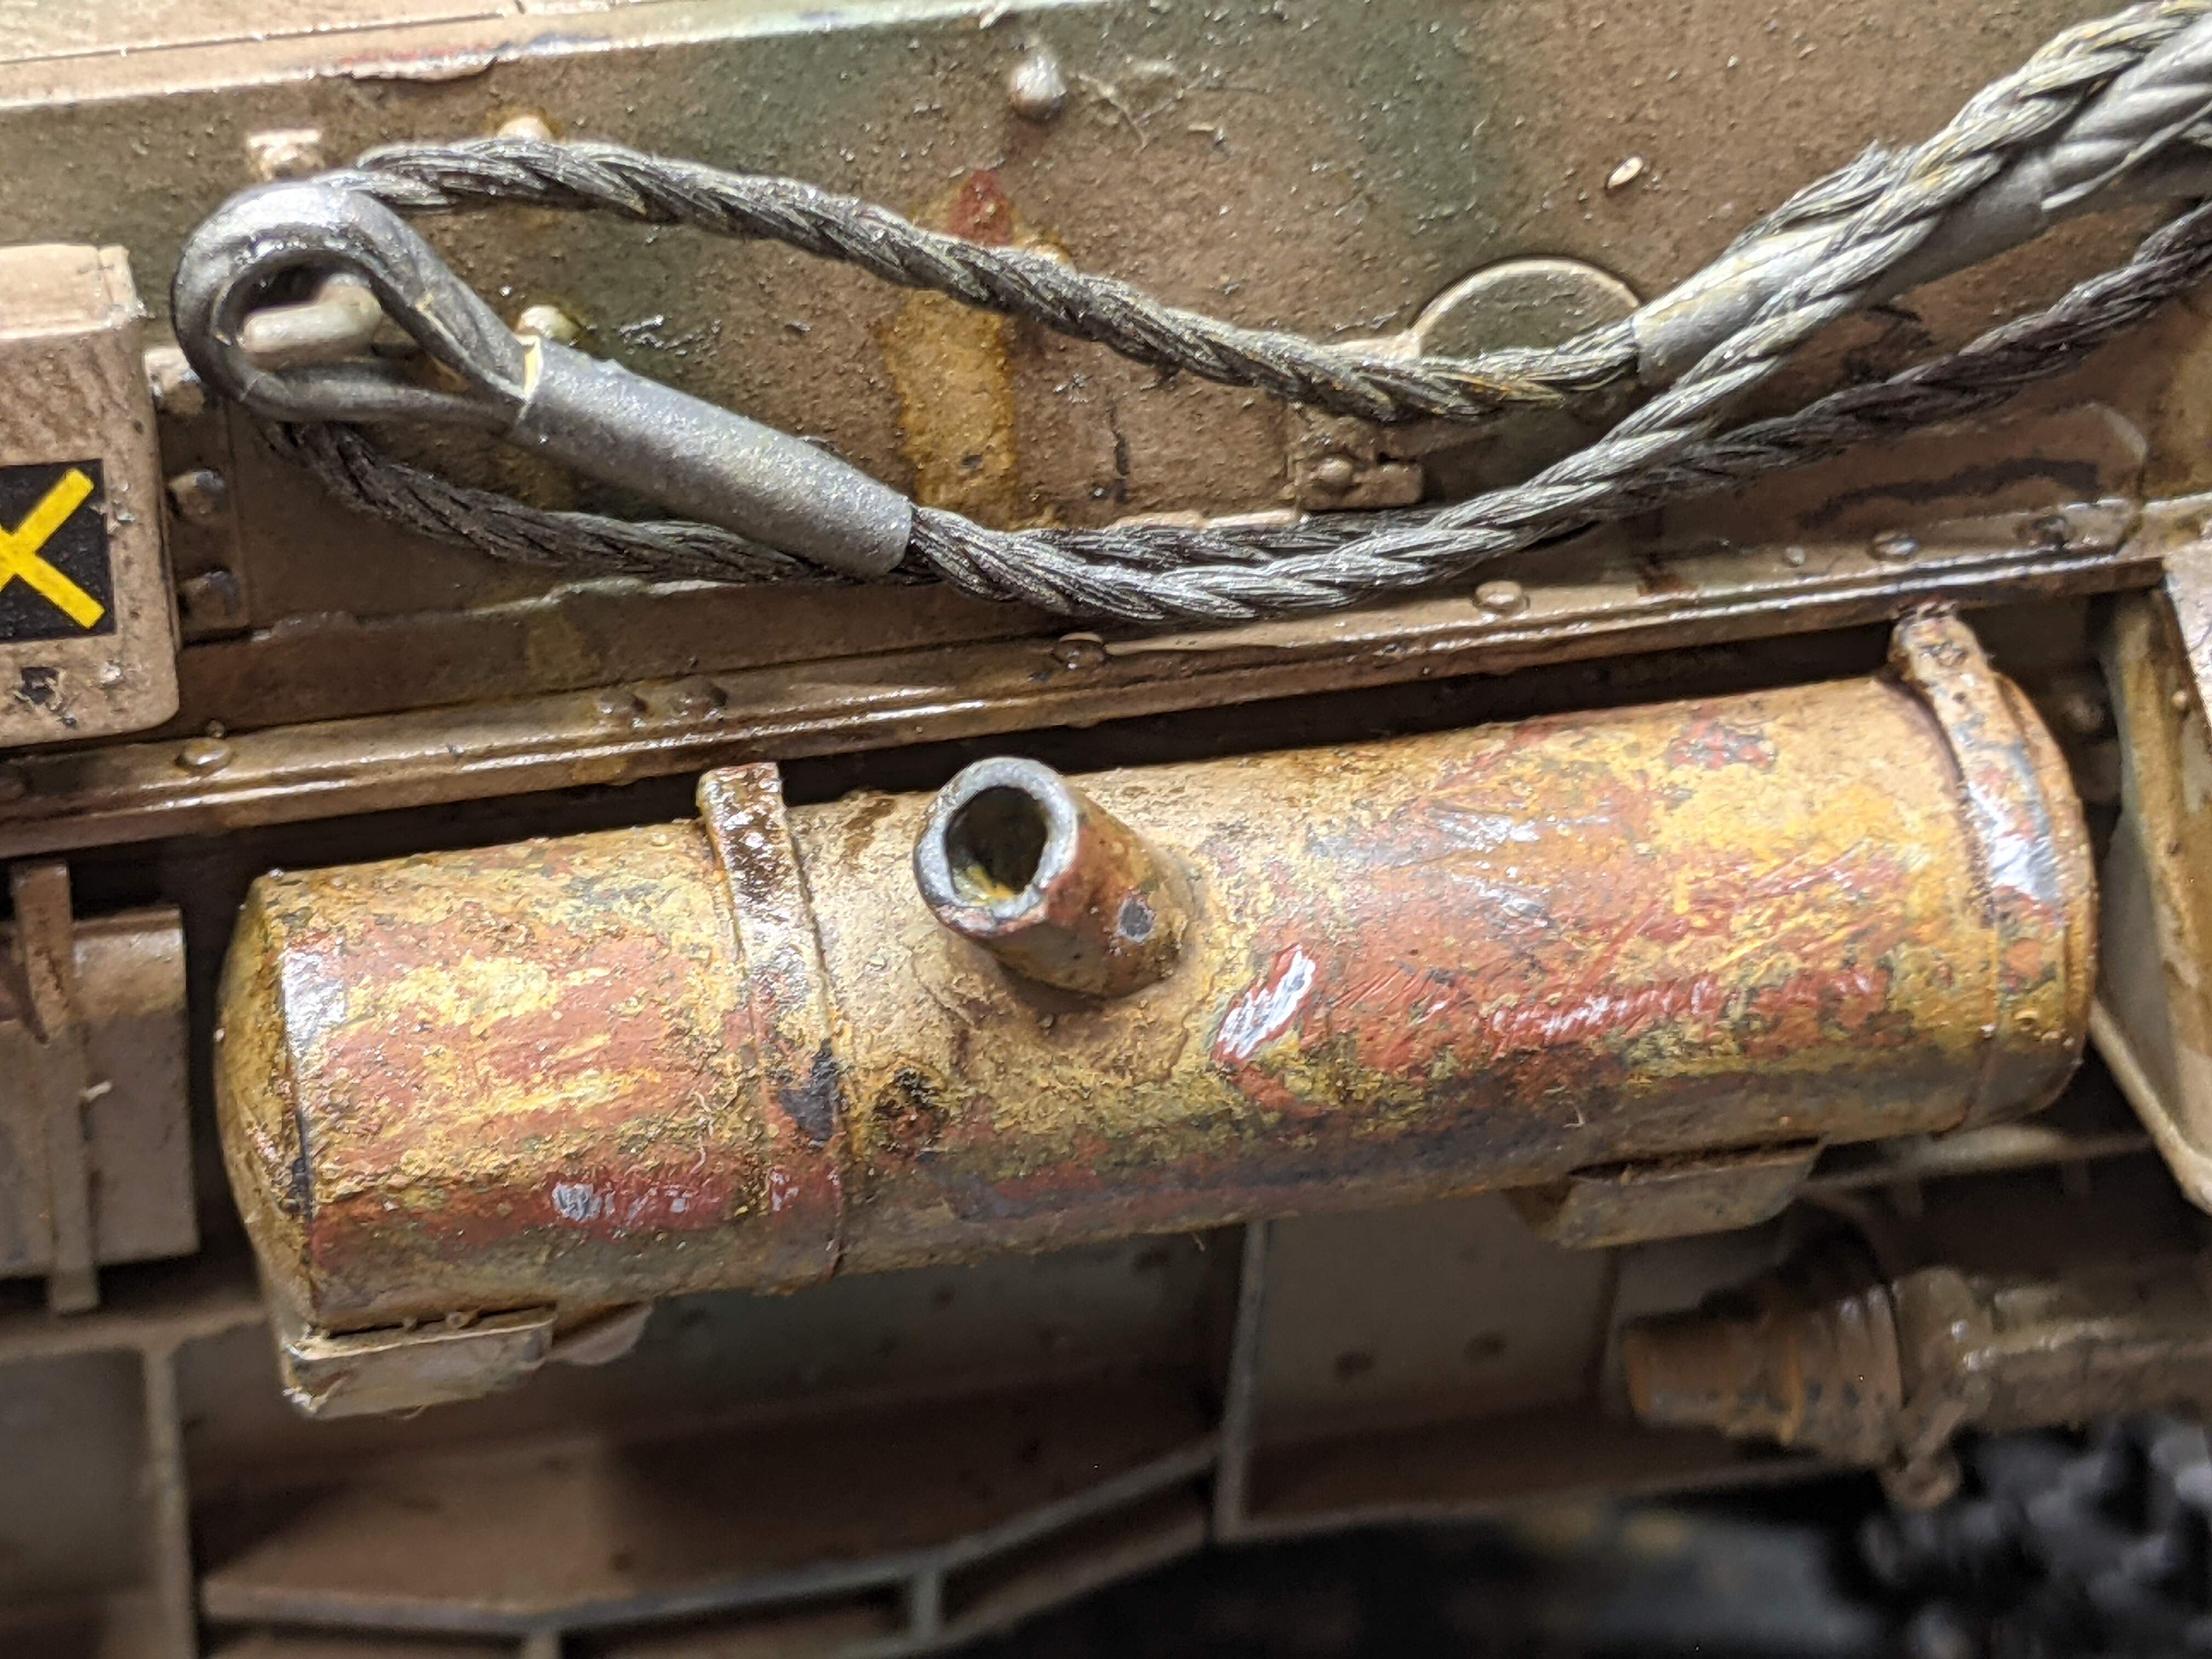
So I’ve finished the main construction and put the subassemblies together. The interior was painted Insignia White, I haven’t included any pictures because it was just the breach of the cannon. You guys aren’t missing anything . I’ve built up Tamiya’s link/length tracks, and they went together quite easily! It probably took about an hour in total for both tracks to be assembled, which is pretty convenient considering the good detail. The jig provided for doing the sag of the tracks was a nice touch. I then primed the whole tank in Red Oxide Fine primer. I’m not sure if the F1 model Panzer IVs actually had red oxide primer in real life, but I chose to use it regardless because the primer captures detail better than standard Tamiya primer does, and because it would work well as an undercoat for rust effects. That’s all for tonight, see you guys tomorrow!
Dennis
3 Likes
Wow really fast good work!
Ive only just started the hull on my Pz. IV F.2! 
1 Like
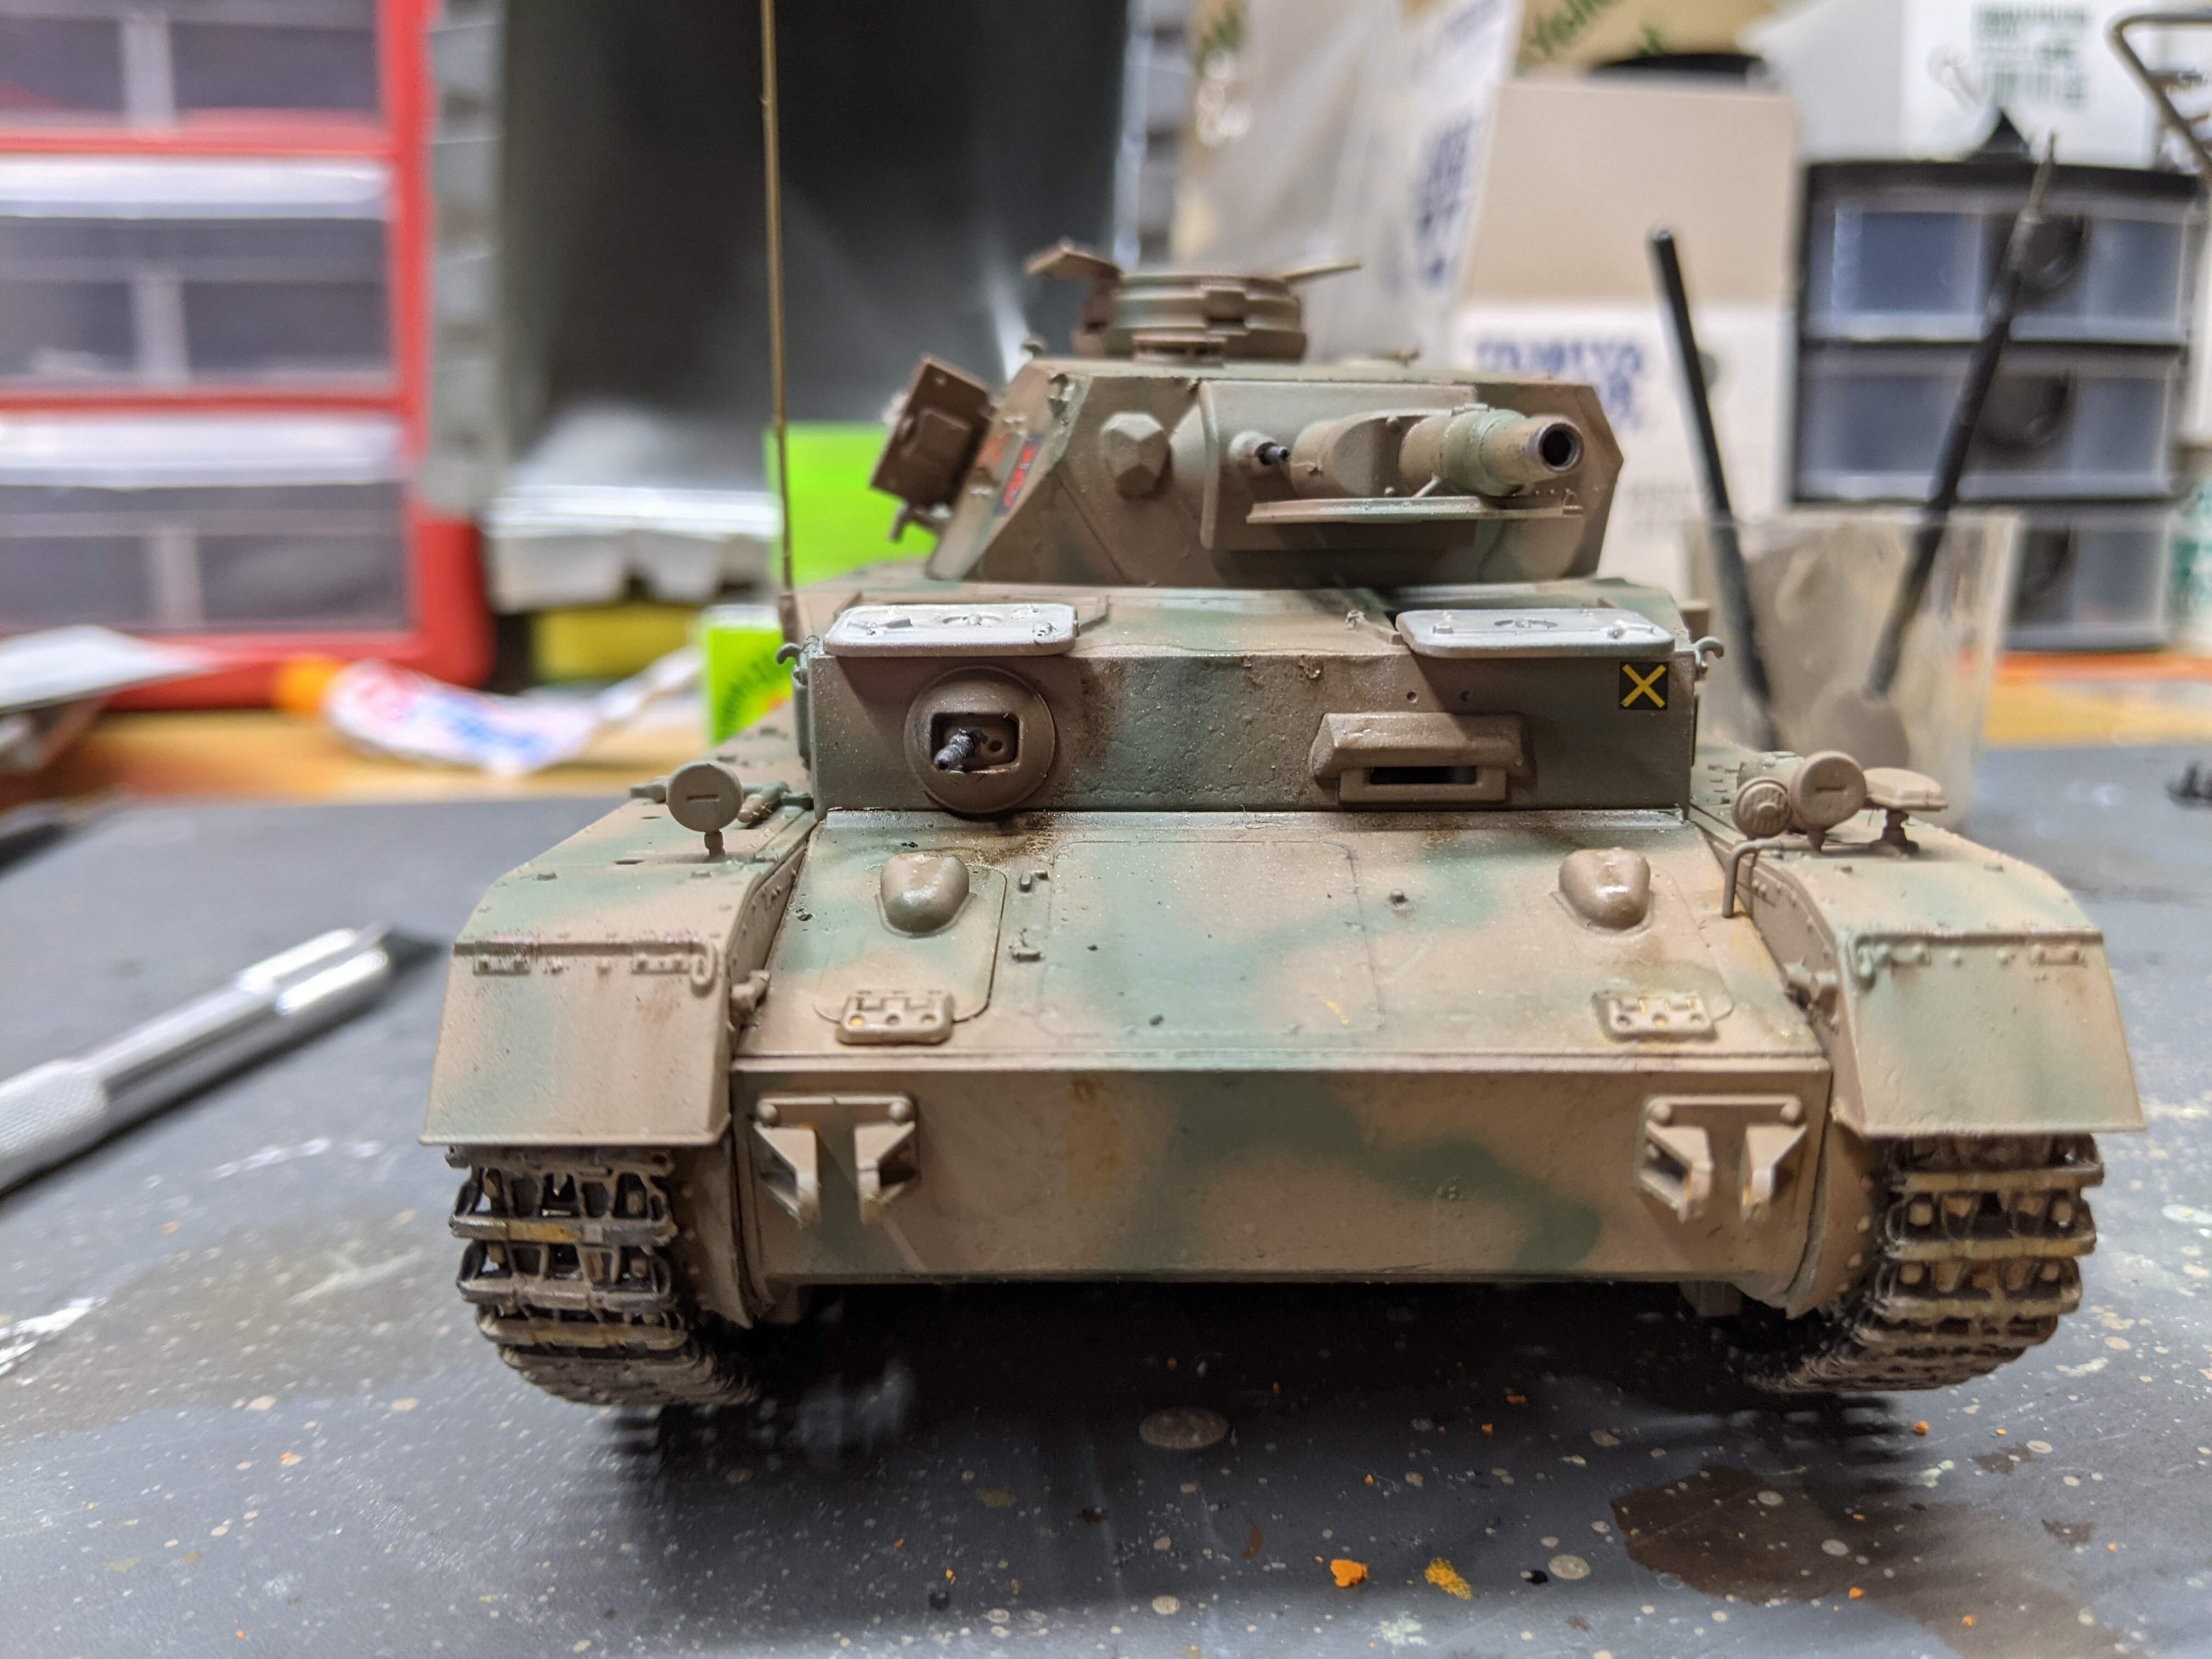
So today has been a day of painting! I’ve returned to using Mission Models acrylics because I wanted to try hairspray chipping. I first laid down a coat of hairspray over the primer, then hit it with acrylic steel colour. All was going well until I hit the paint with a coat of hairspray, and the steel and primer coats appeared to chip into each other! (In hindsight it actually looked really cool and probably was even better for my chipping because it made a very convincing pre-chipped basecoat.) To resolve the error, I just re-primed the hull. Live and learn. I painted the tracks with lacquers and dry-brushed flat aluminum colour over the links. I then painted an approximation of DAK yellow brown with the mission acrylics, and free-handed the green curves using my airbrush on the lowest setting and lacquer JGSDF Dark Green. To finish everything off, I applied the decals, clear coated the tank, sanded some edges to get chips, and wacked the whole tank with heavily reduced engine grime.
6 Likes
WHATTT!?!.. you started this kit 4 days ago and its already awesomely painted and decaled?
Great job, cant wait to see it finished!
2 Likes
hey, I could do that too…
just wouldn’t look as good!
nice job!
Cheers!
L
1 Like
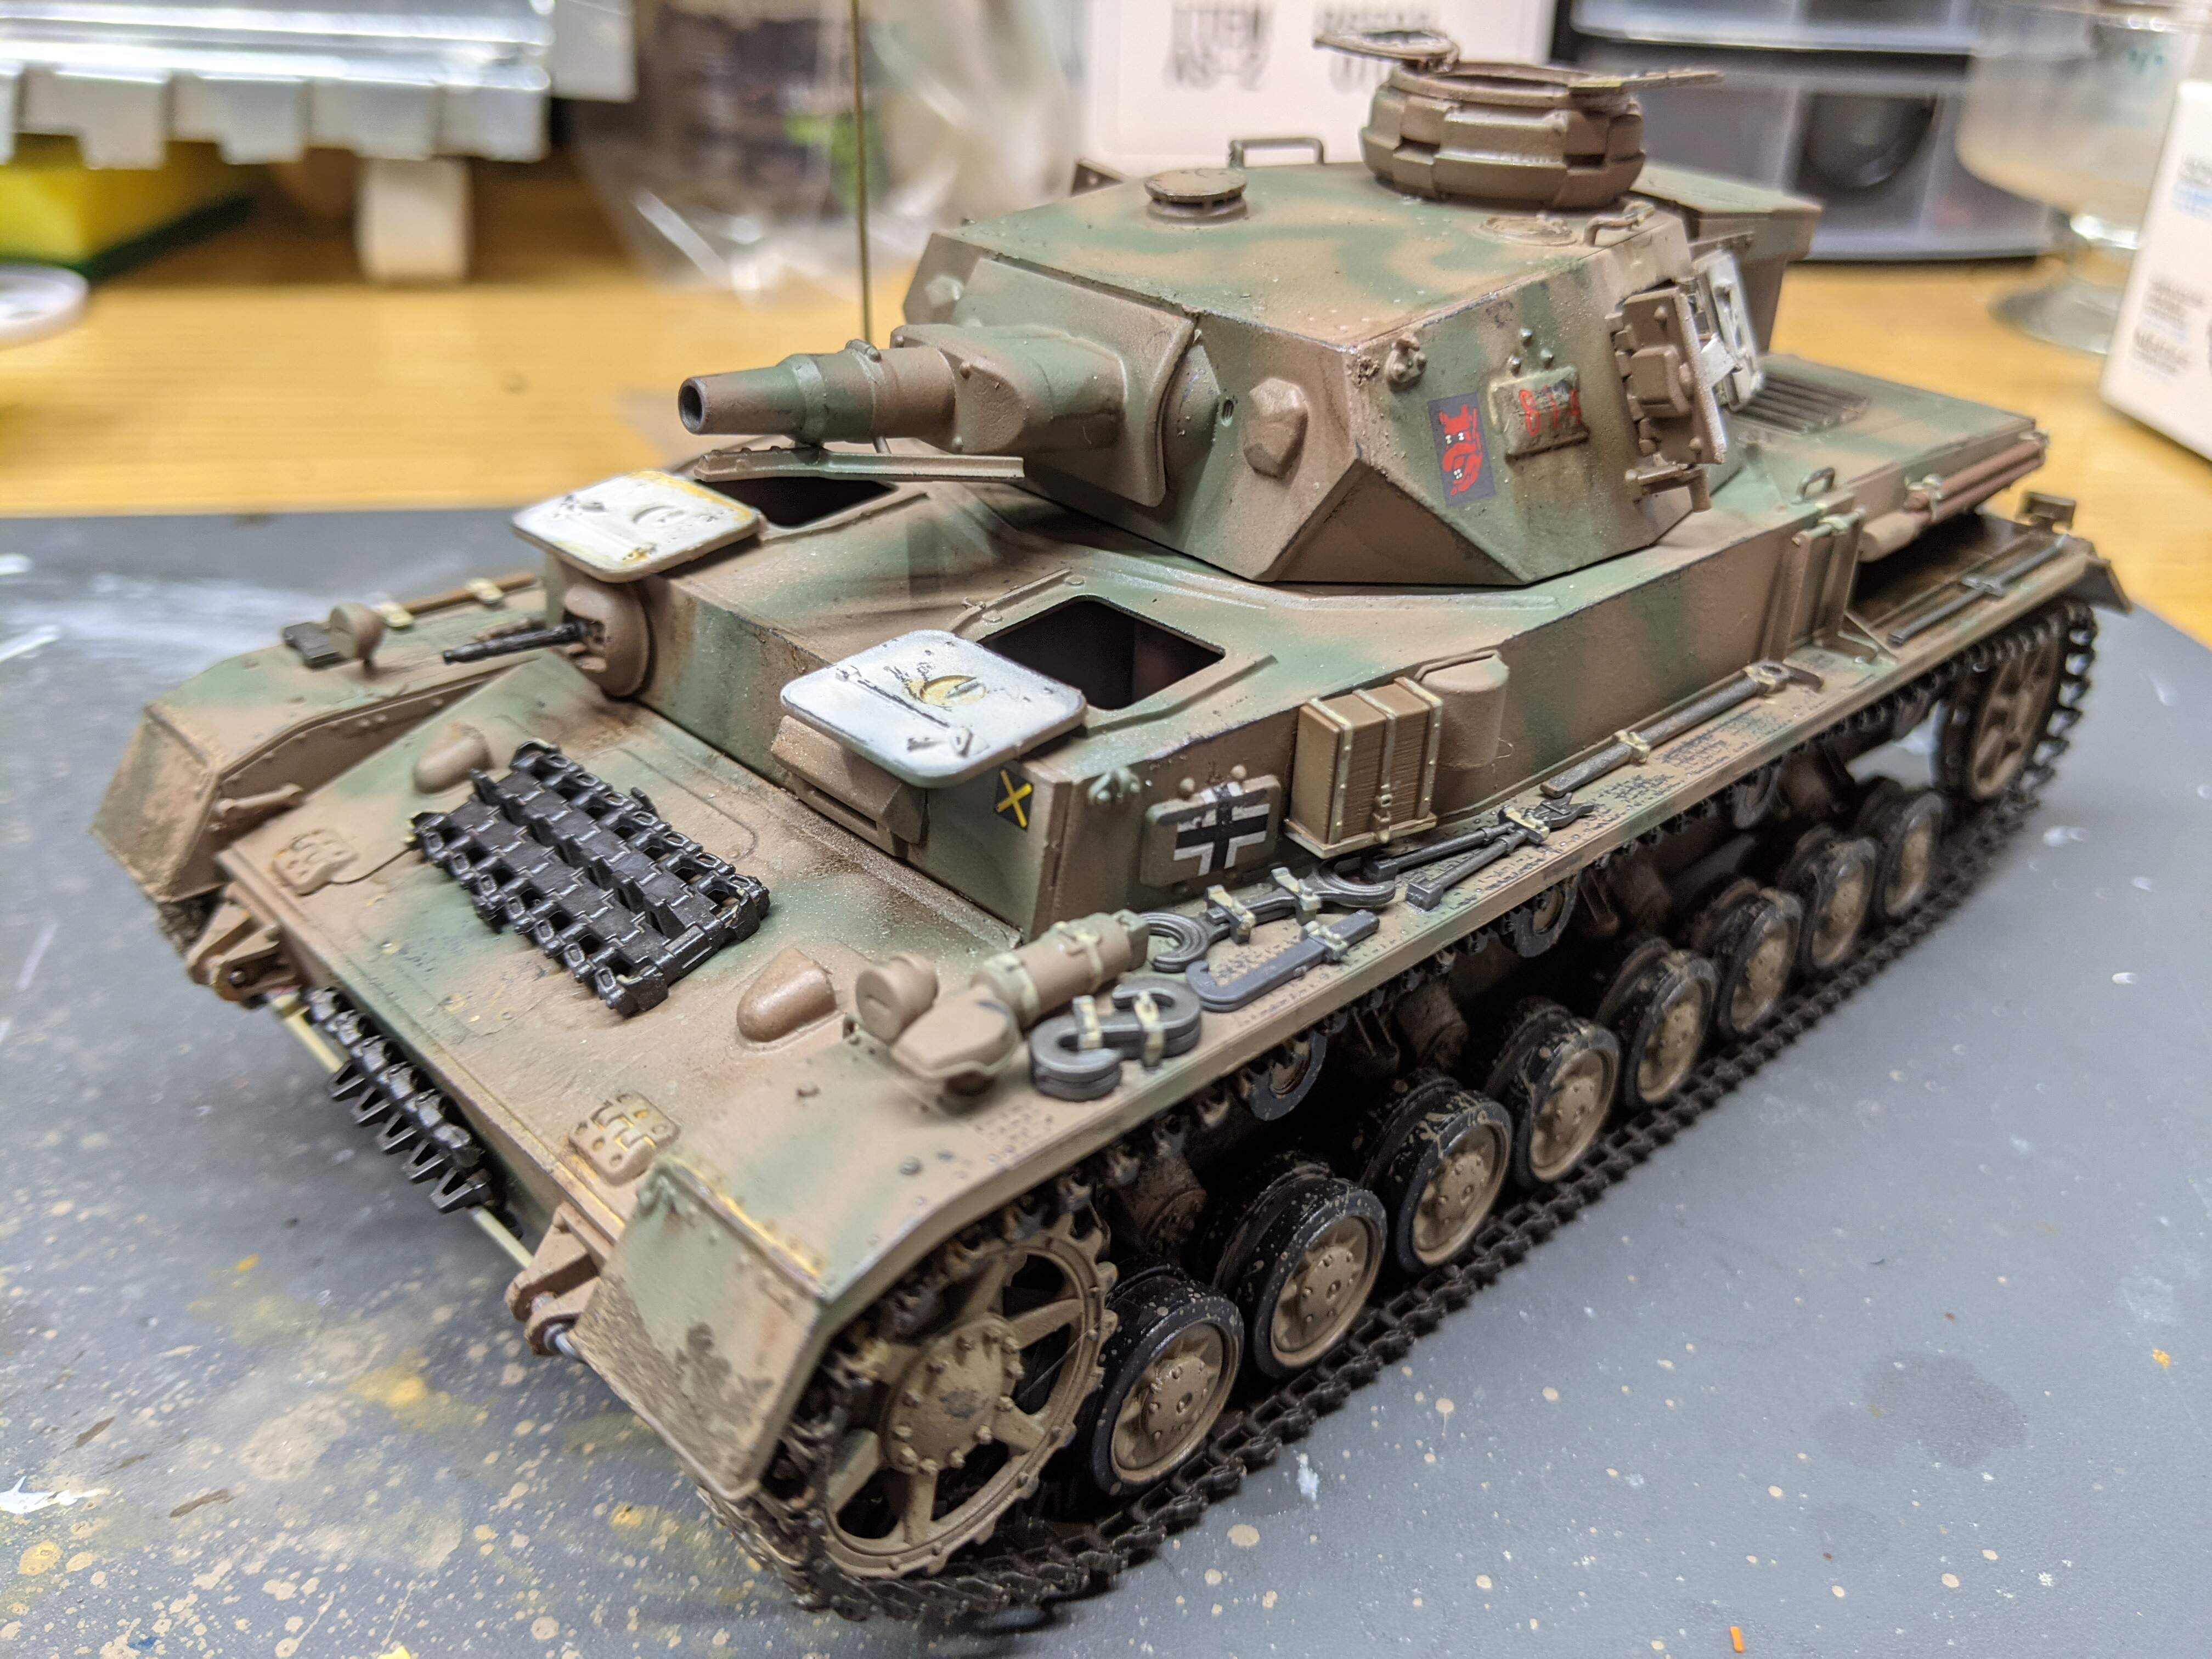
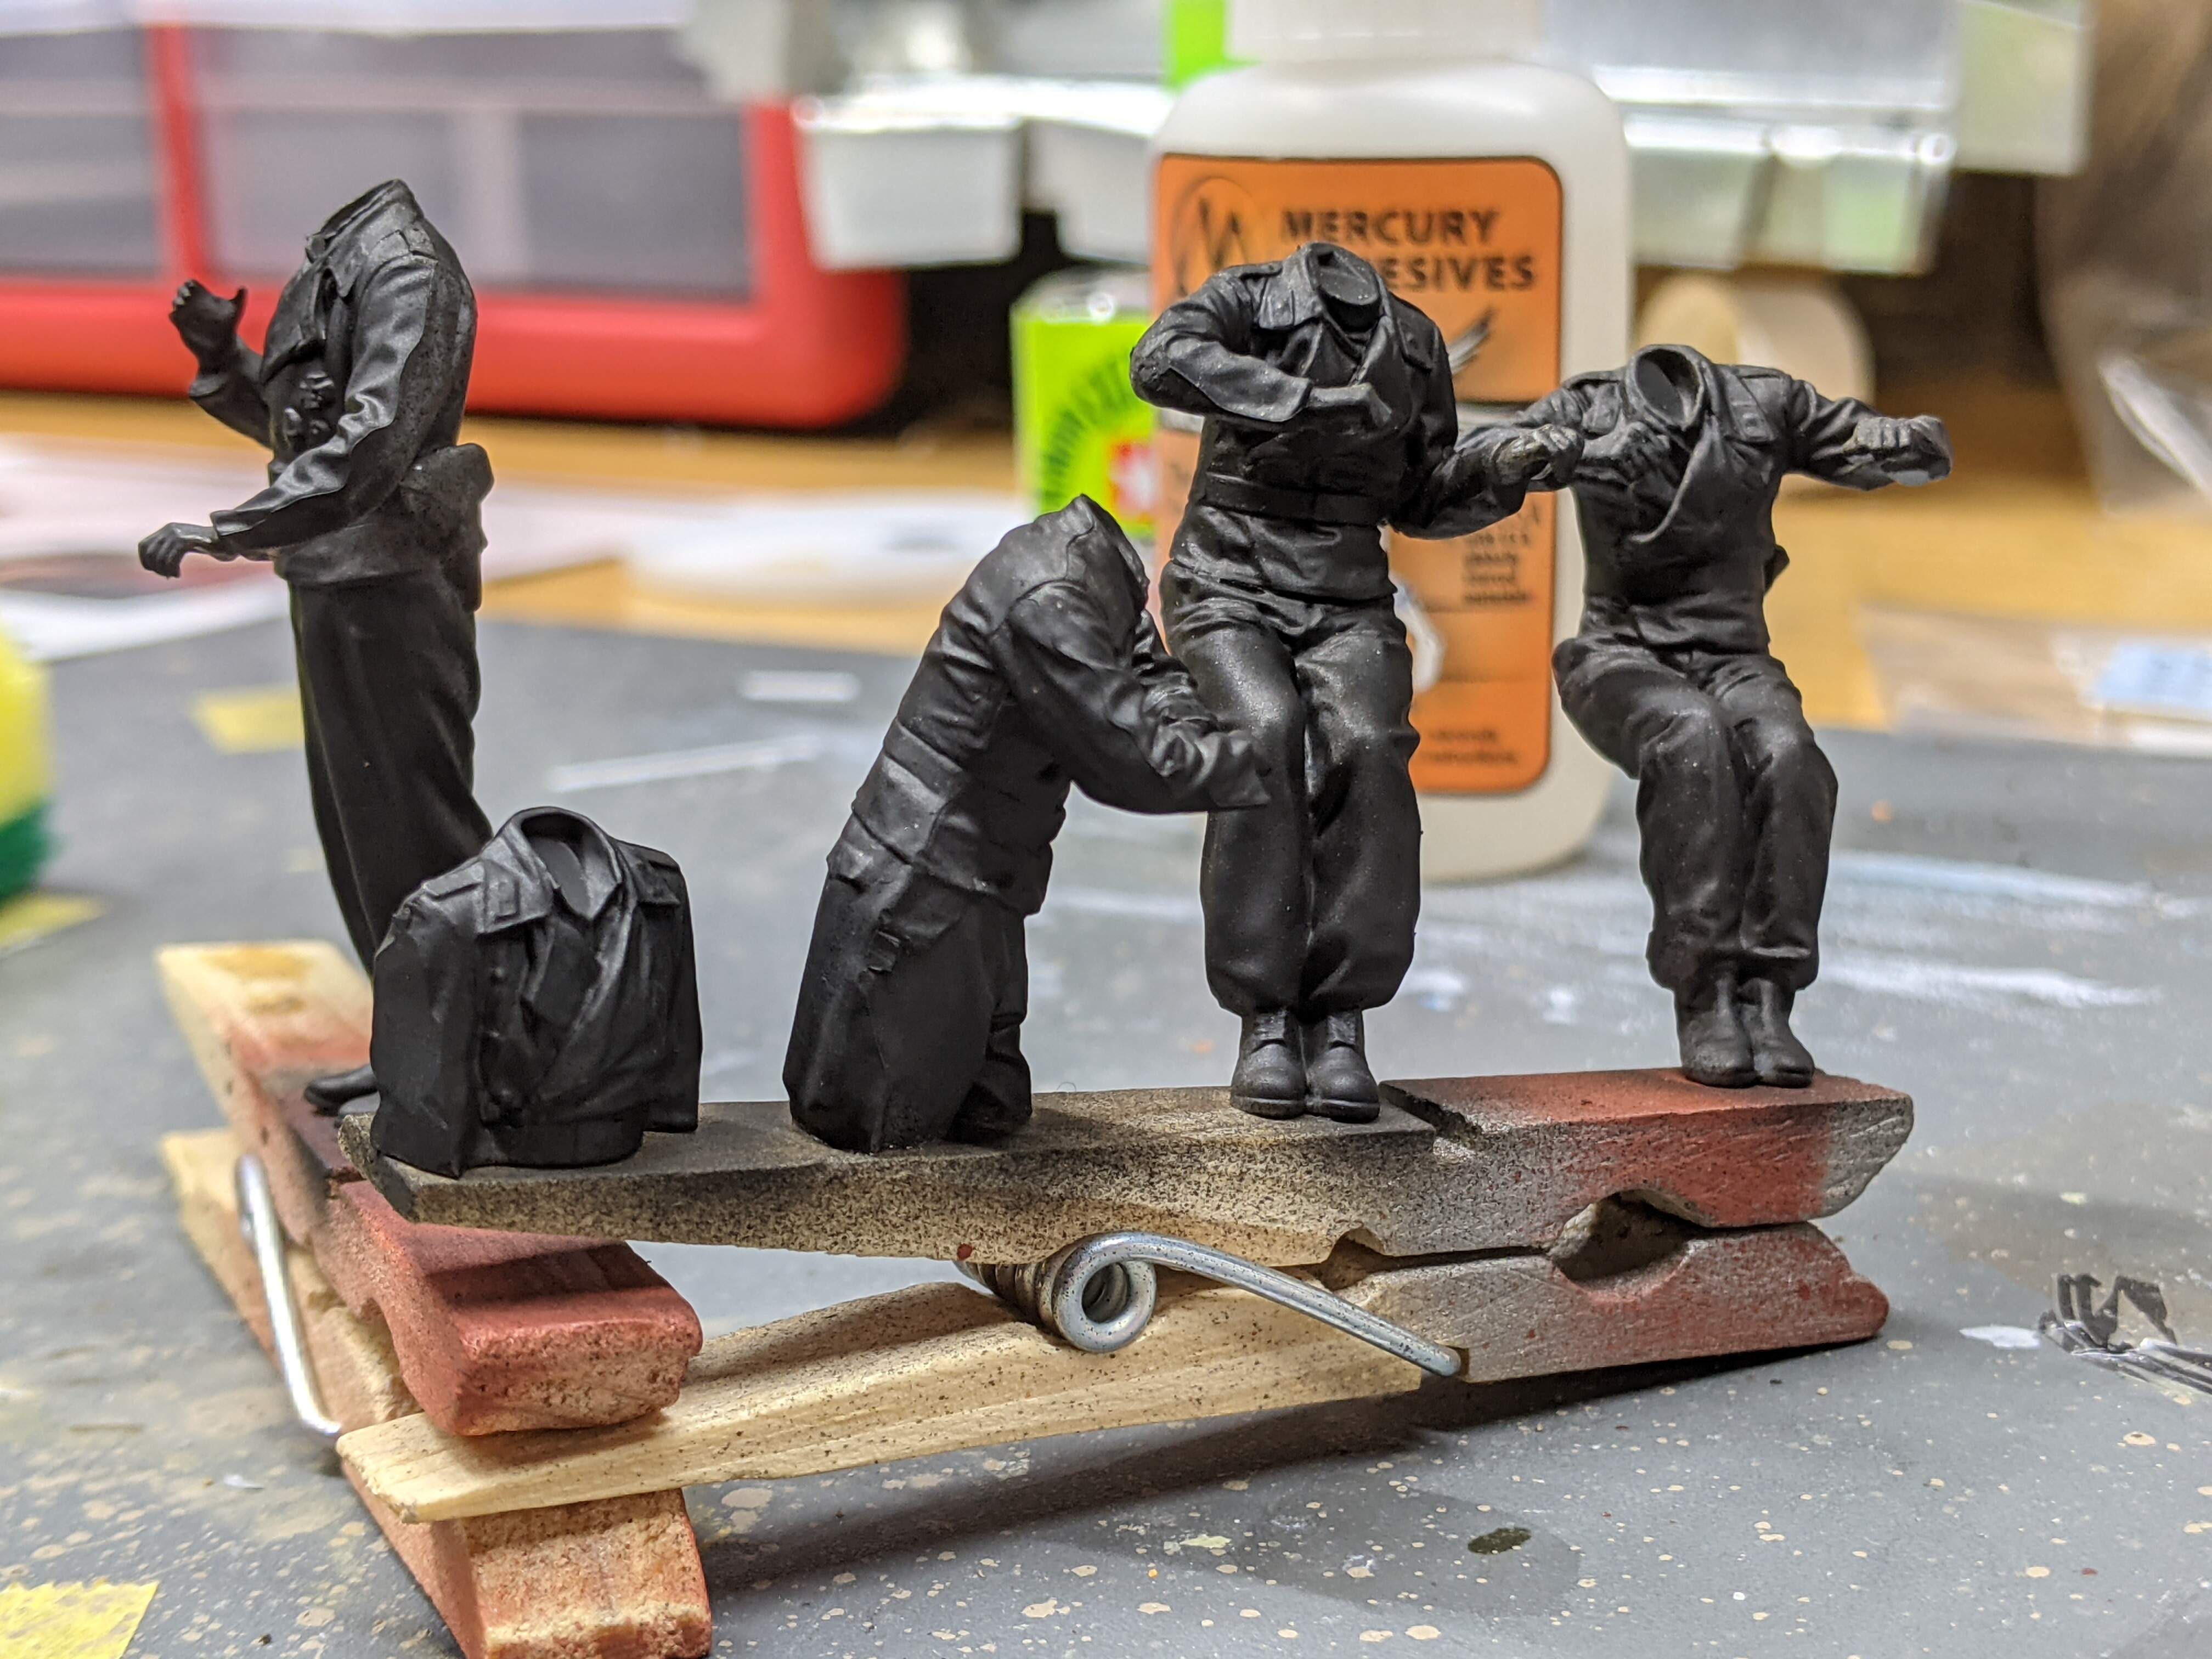
Today was a bit slower - the main focus was finishing up the tank, and I just assembled the figures, which I’ll paint completely tomorrow morning. Here’s some pictures of the finished Panzer:
And here’s a couple photo’s of the figures, the face painting will be a nightmare!
This tank has been an absolute joy to build, and was a great opportunity to get rid of lots of German stuff in the spares bin. Hopefully I won’t be doing any more of these Panzers, I always feel icky after making one
Dennis
3 Likes
Looks great Dennis! The figs will top it of nicely!
Next you’ll need a good old Canadian tank to clean the system …
1 Like
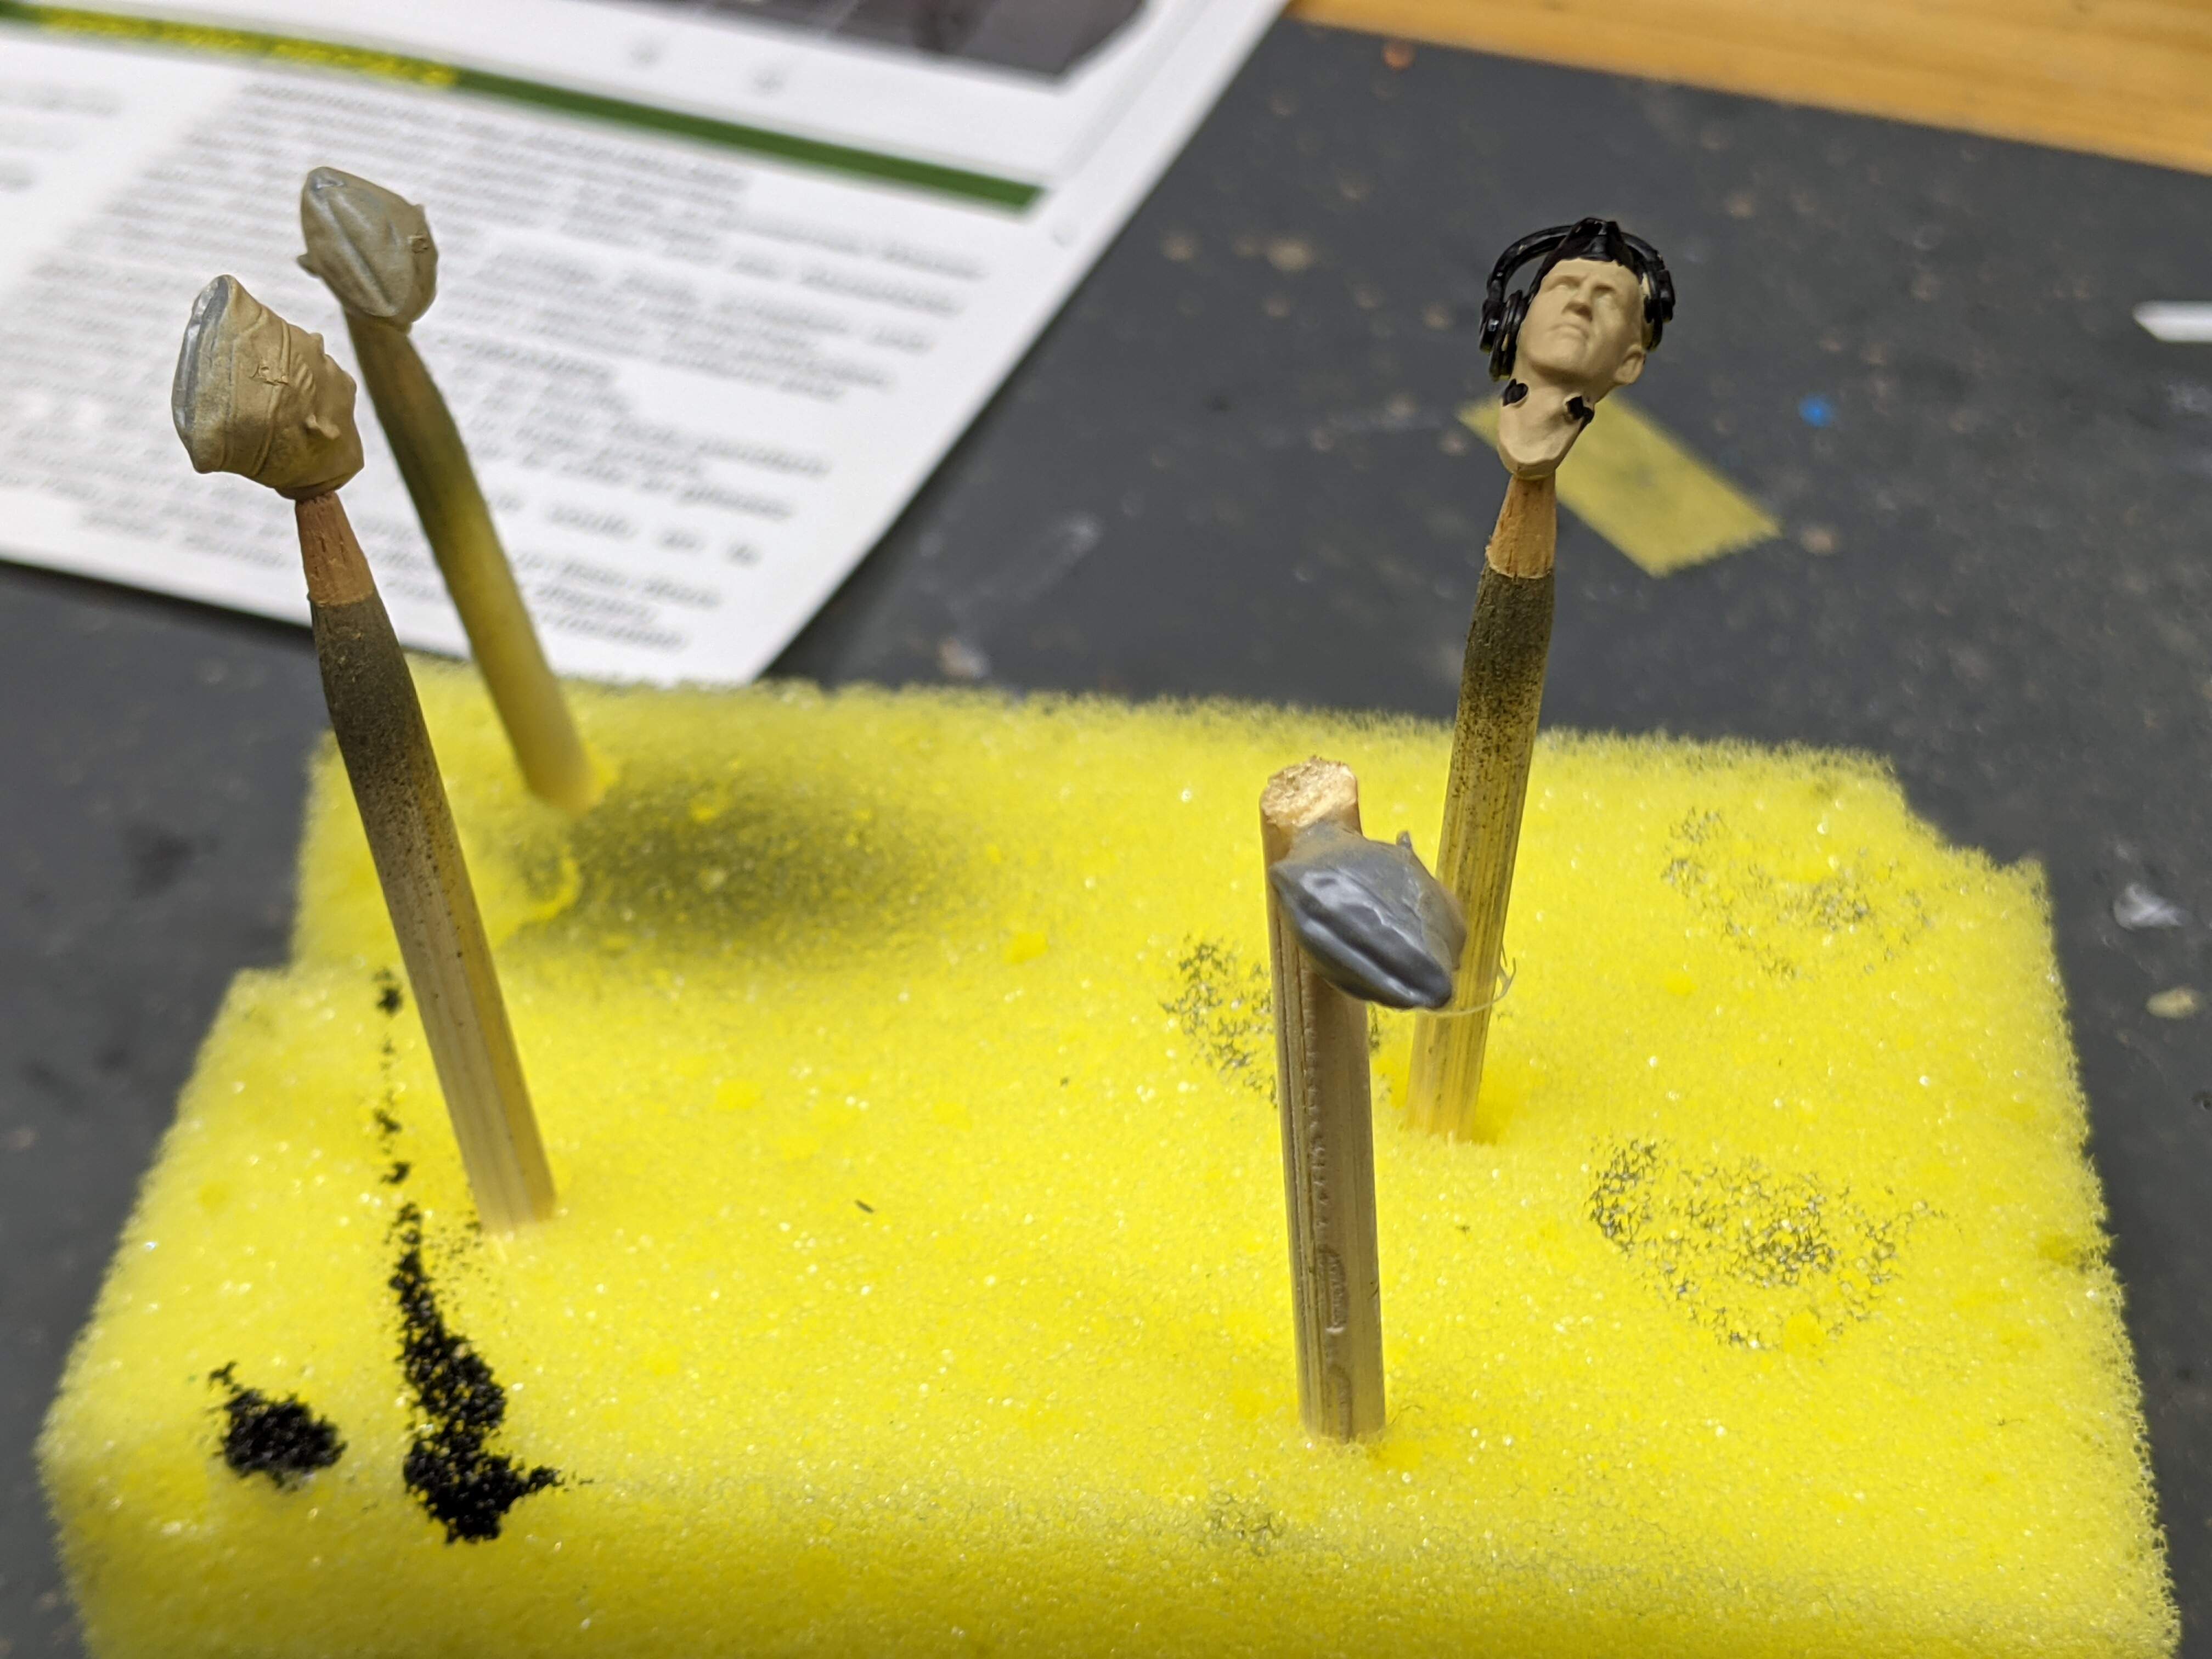
Figures are done, now I just have to let the paint dry.
2 Likes
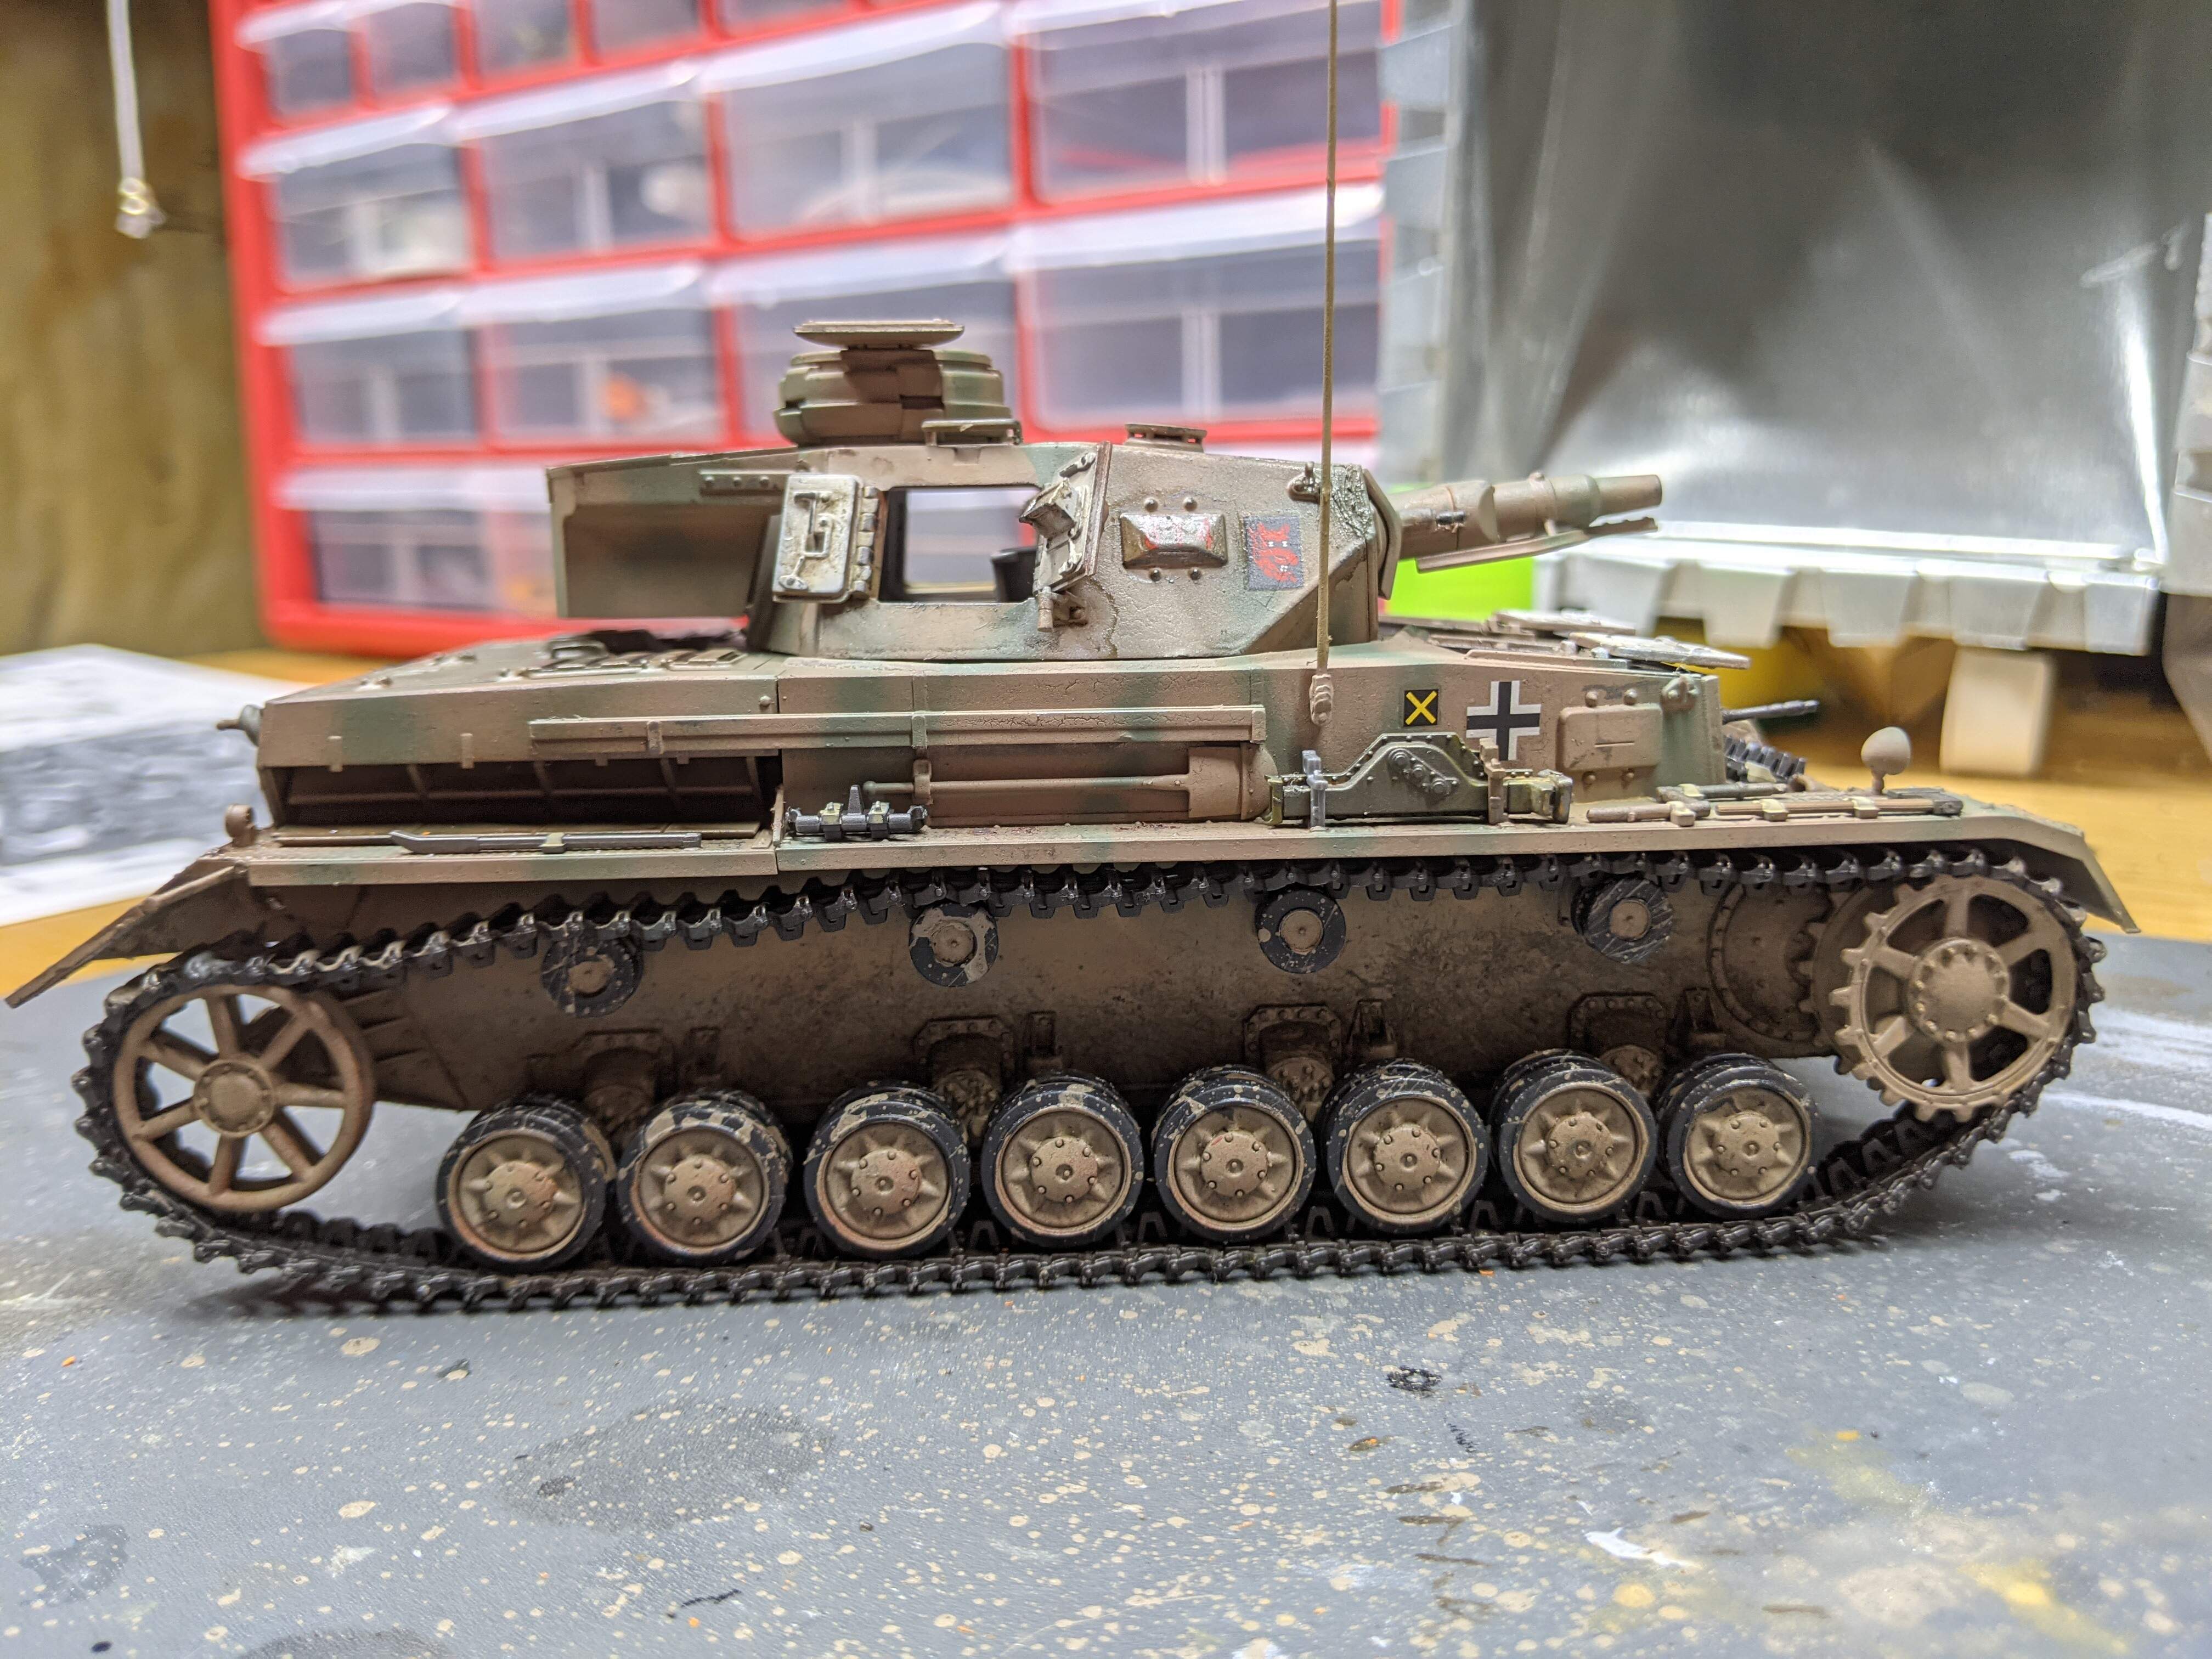
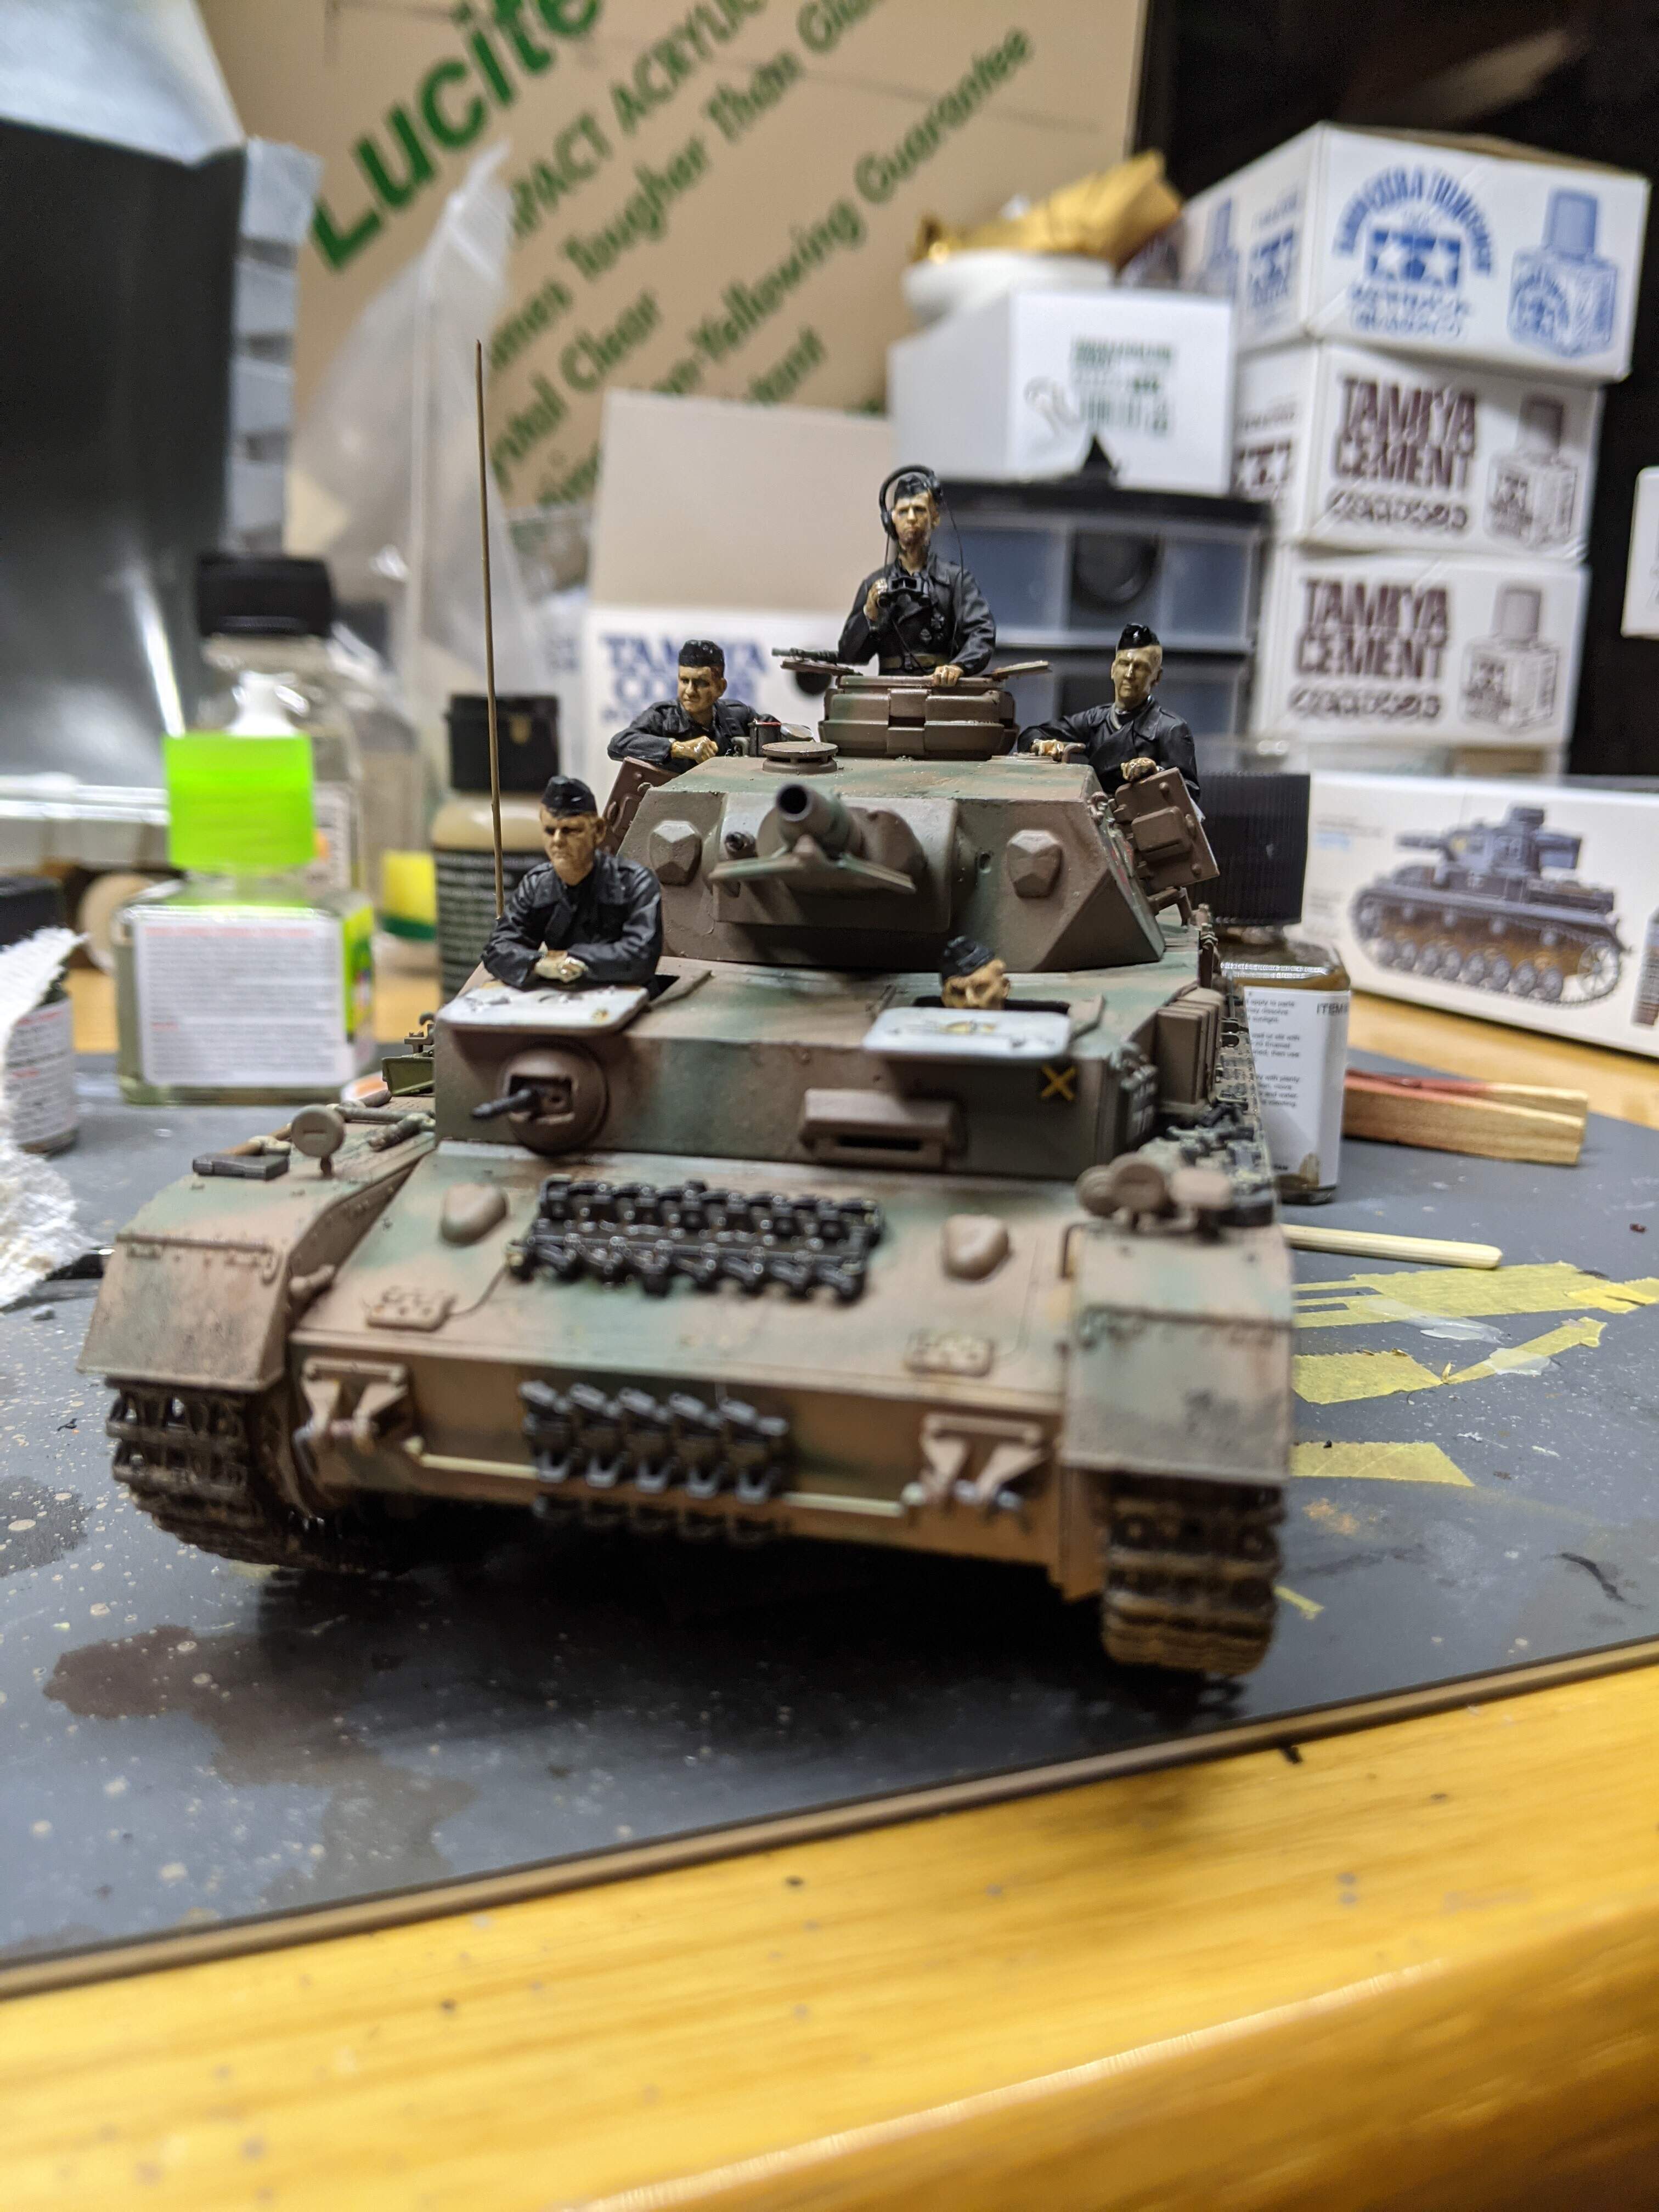
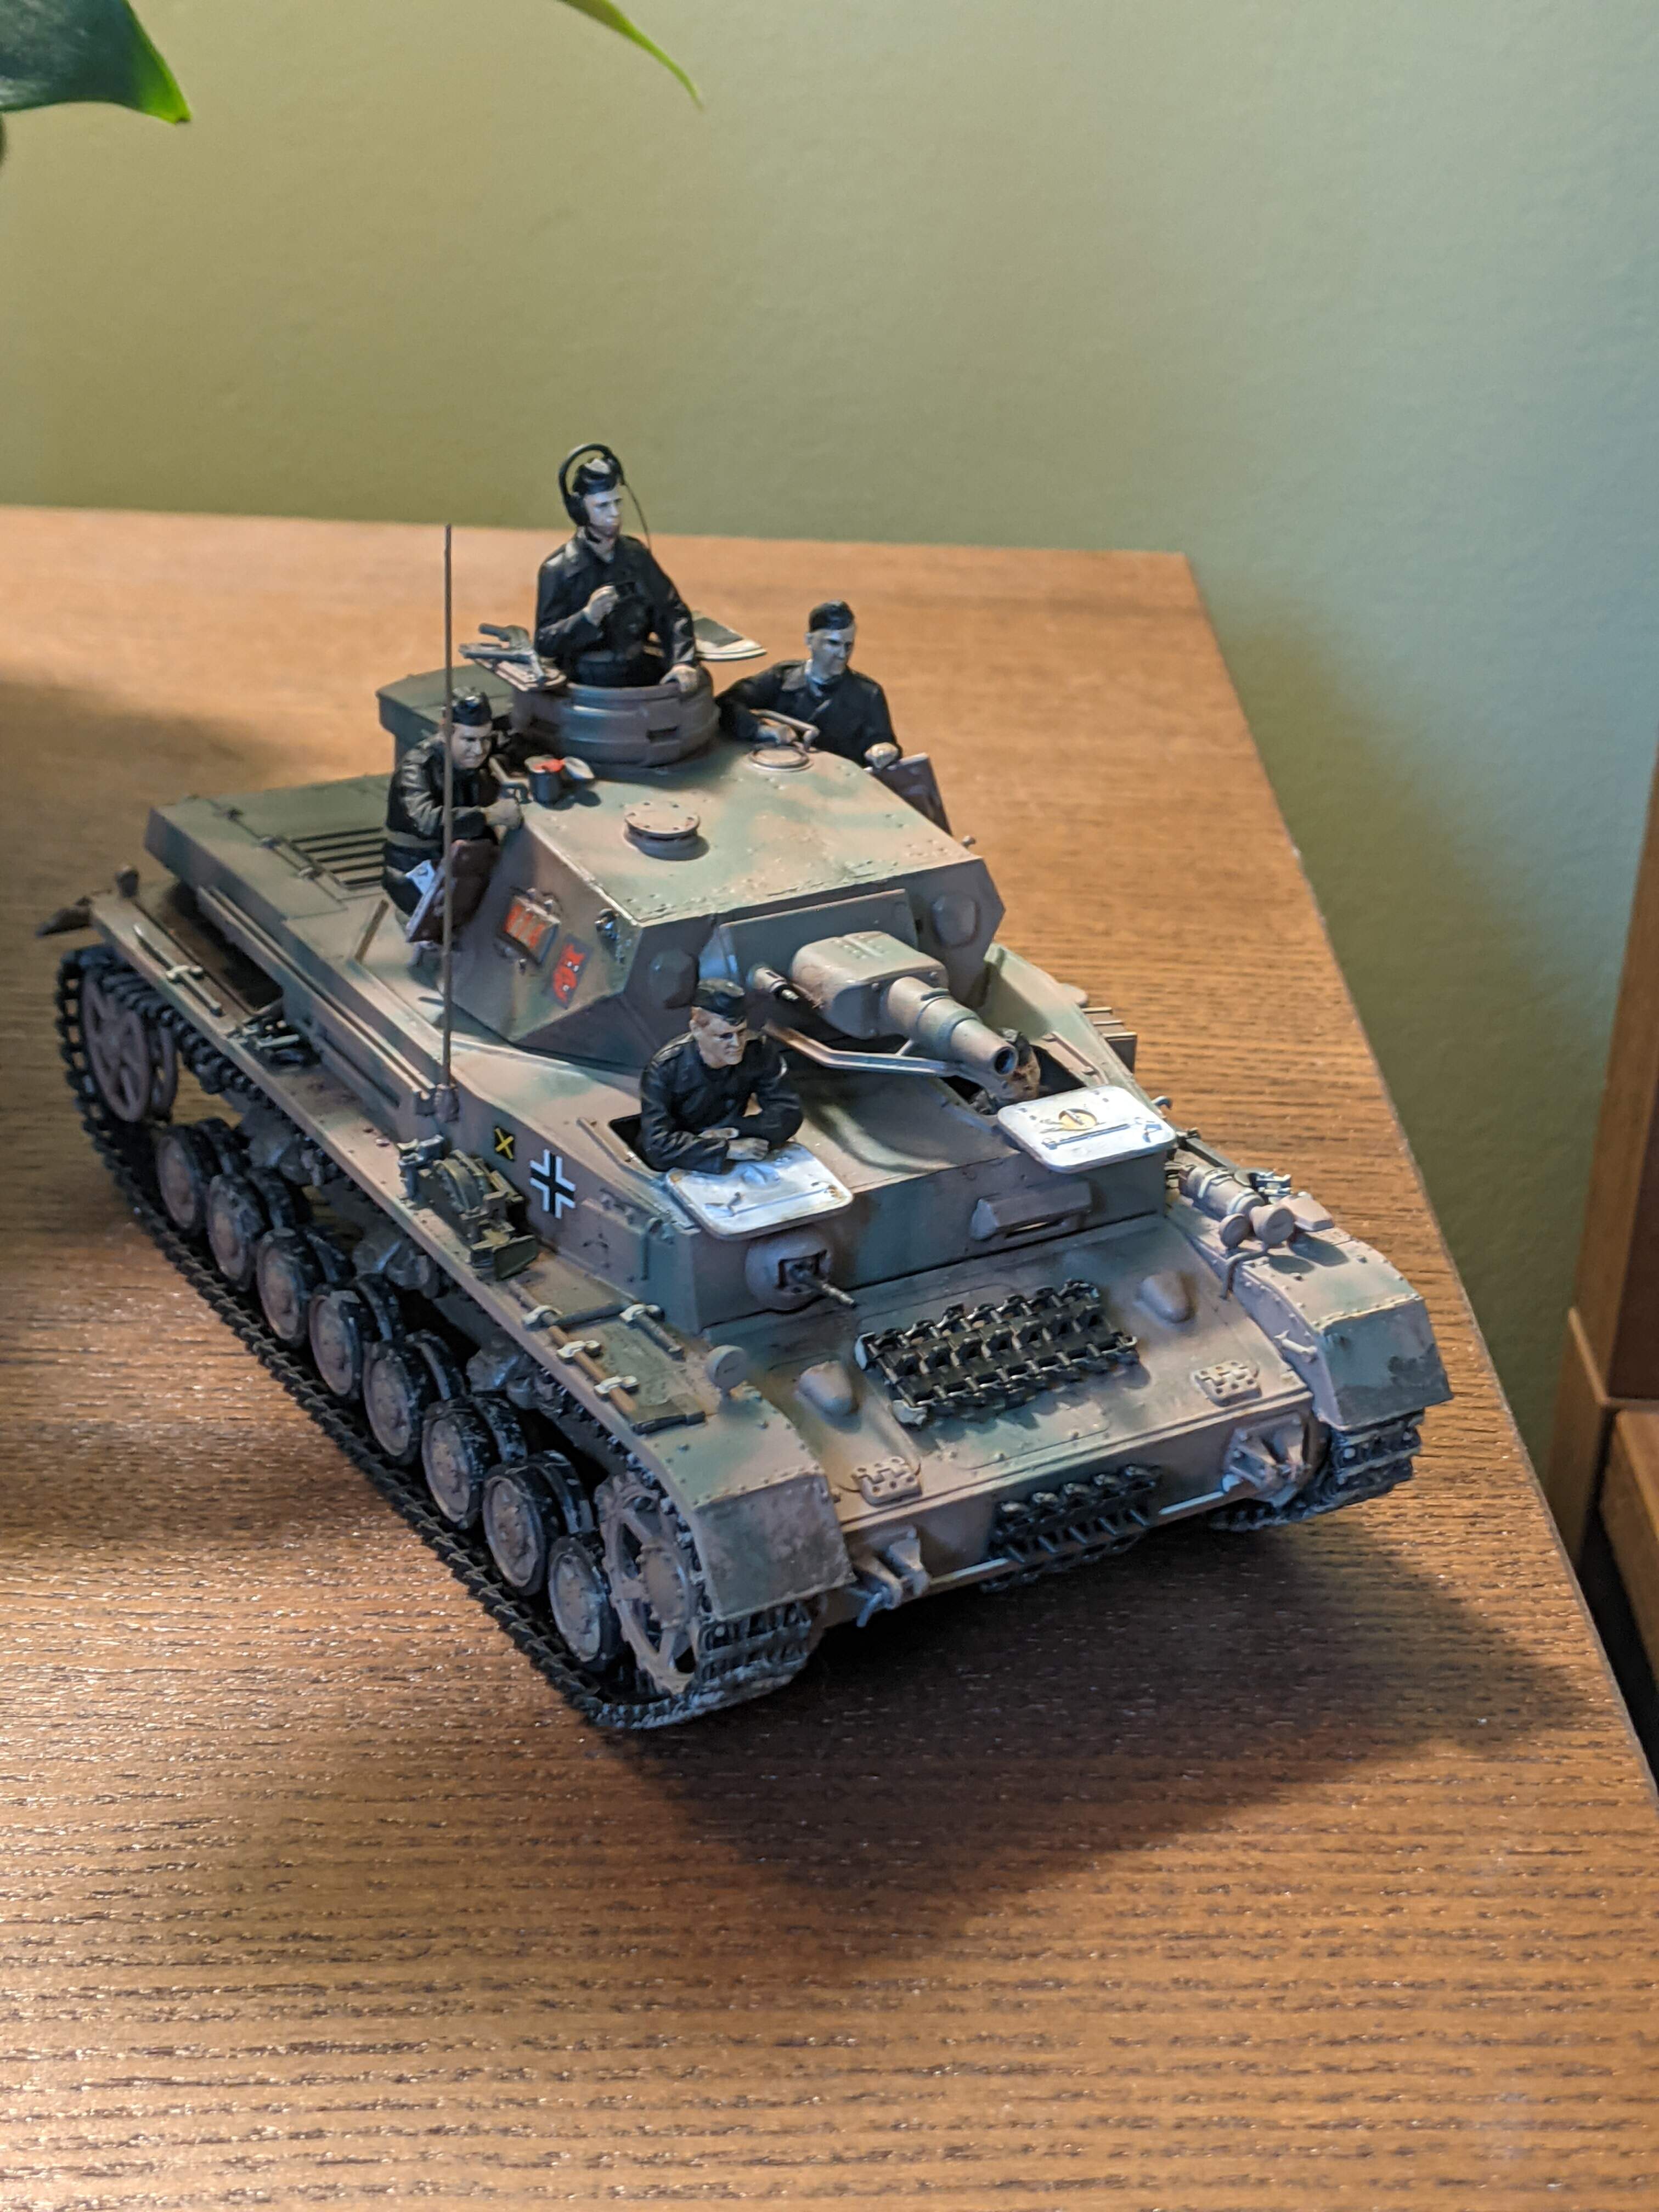
And here’s the finished tank!
I bought a base for this build but I think I’m going to set this aside for now and use it for practice with diorama making in the future. Overall, this was a fun week’s build. I wanted to use this kit to get back into doing armour models, improving my weathering techniques while doing so. Was it perfect? No, but I like to think that this will be yet another build where I can see reasonable improvement and learning! So now, my plan is that I won’t actually be doing a huge amount of work on the bench until May 1 (the much-fabled day when the Canadian Campaign begins ). Then I’ll be in overdrive, superdetailing, resin figure casting, decal manufacturing, and extolling the virtues of the double-v hull. I’ll write a blog post about this build as well, so I’ll post that here when it’s done. Thanks to everyone who came by and watched my progress, and to those who offered much-appreciated advice!
Dennis
6 Likes
Been awhile since I’ve done a WWII German tank. Might just have to give this one a try. It would be a nice decompression build after doing a MiniArt T55. Very nicely done and you gotta love that the Big T includes some very nice figures. 
1 Like