Congratulations on finishing. He looks great!
1 Like
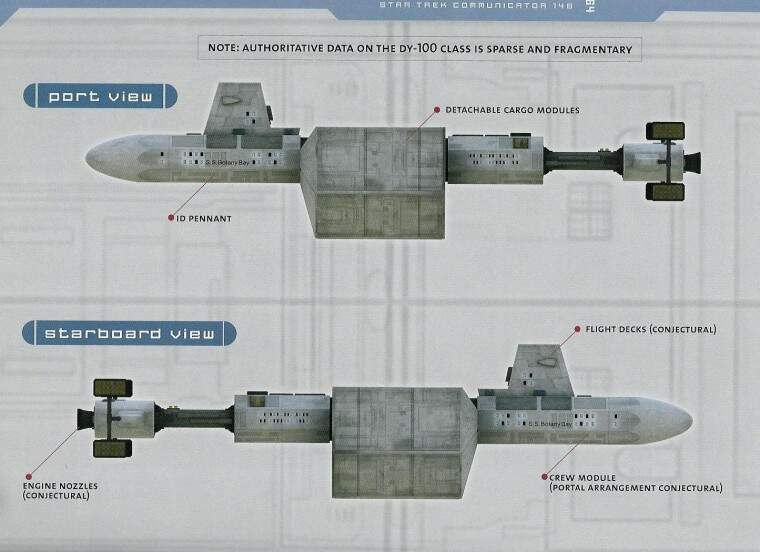
Little more progress on the Botany Bay.
The joins on the cargo pods needed some filling. Some were so big I had glue in thin strips of plastic.
4 Likes
Building up nice though, and another hardly seen ship ![]()
1 Like
Thanks John. Models of the Botany Bay are definitely thin on the ground. There was the diecast from the Star Trek Ships magazine collection a few years ago and I seen a resin in the past. But that’s about it.
Part two of the Eugenics Wars books explains how the Botany Bay fits into the timeline. I don’t want to give away any spoilers, but can recommend the series. The first two detail the Eugenics Wars, while the third takes place immediately after the episode Space Seed.
3 Likes
Colin,
How goes the build of the Alexander?
I recently found my JTGraphics sheet for this conversion so currently have another Enterprise kit winging it’s way to me to build one. Might go for the early fit. Big deflector on the bottom of the saucer, big bridge dome and early nacelle.
1 Like
Apologies for the slow reply.
Modelling time has been very scarce of late and what there has been hasn’t produced much. I started by dropping the 3D printed neck and took a chunk out of the deflector mount ![]() .
.

Putty and sandpaper and I’m pretty well back where I was.
I then got it into my head that I should have something to replace the spine that runs out to the impulse engines on the upper hull. This bit:
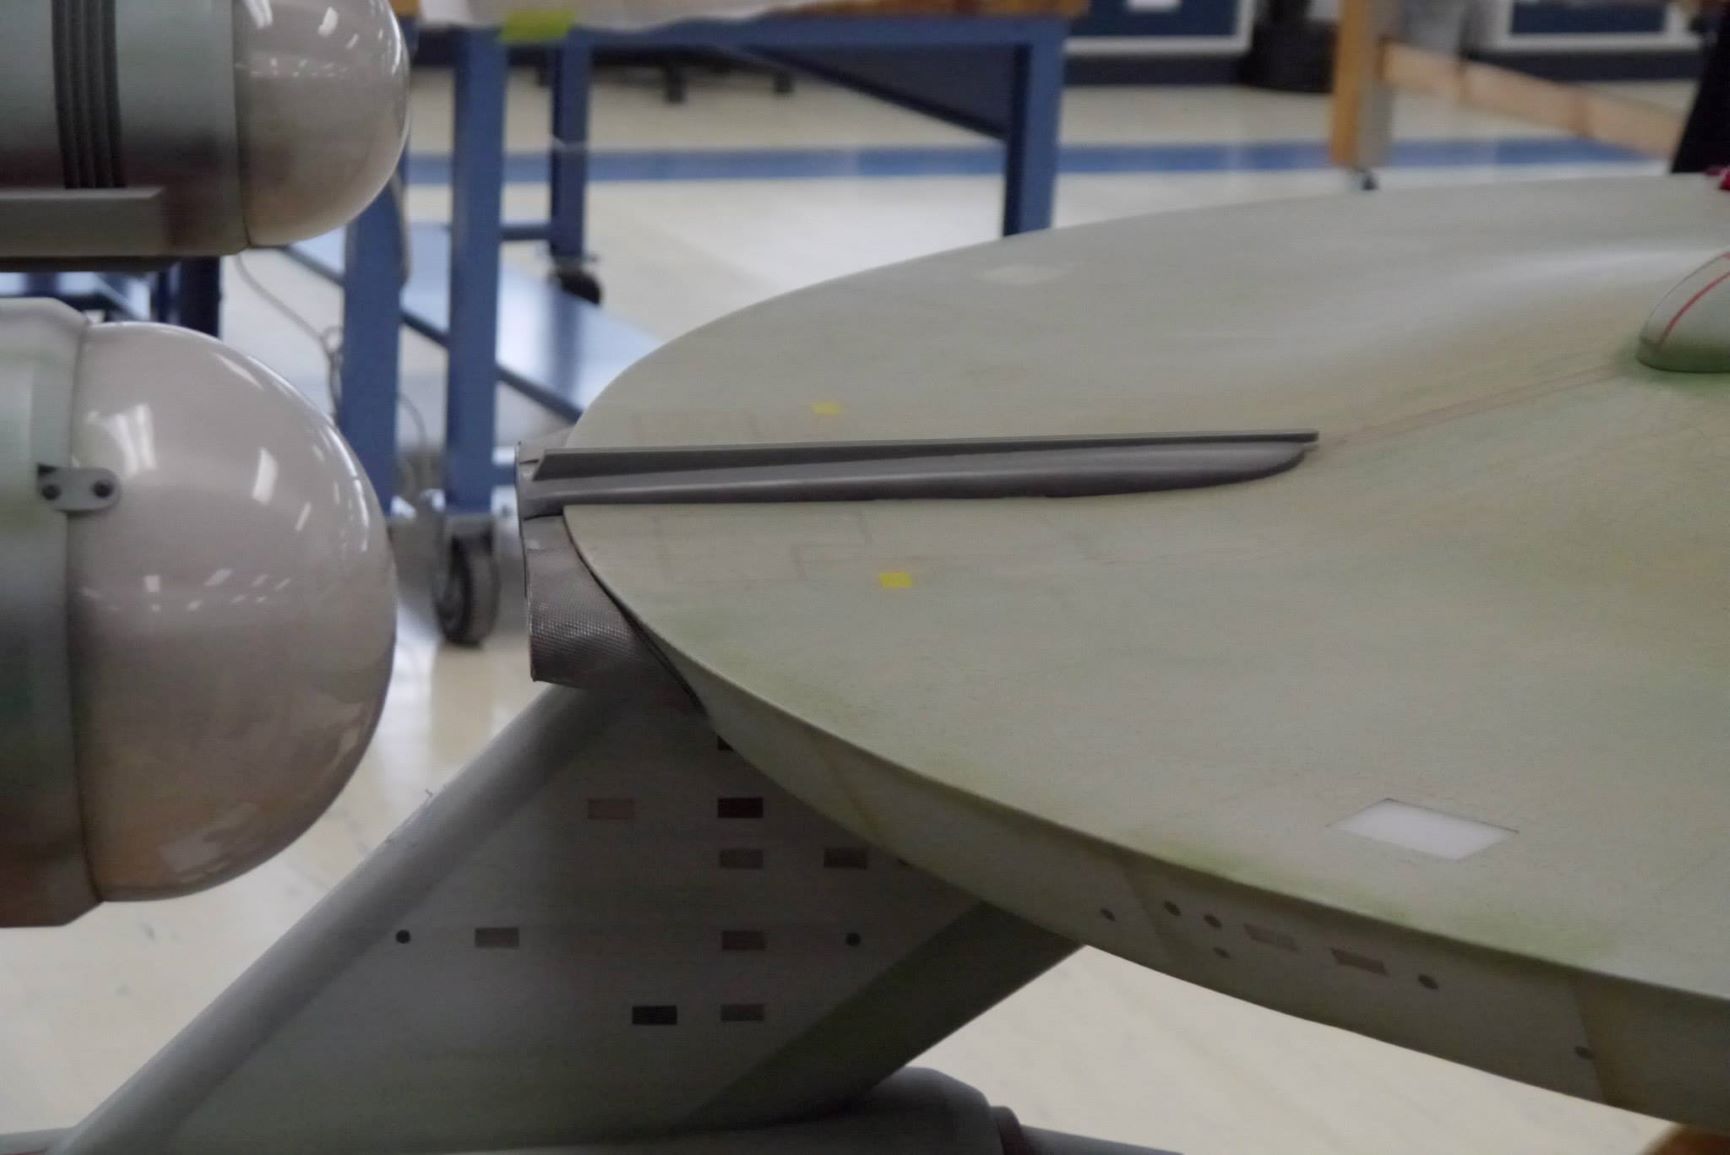
I was aiming for something between the original spine and the refit Enterprise’s glowing indoor swimming pool.
I made up a couple of options. I’ll see which one is a better casting and add a pair of them to the upper hull. One leading to each side of the impulse engine and recessed into the deck so pilots returning from shore leave can’t cause too much damage. ![]() Here’s the samples (they’re about 5mm wide).
Here’s the samples (they’re about 5mm wide).
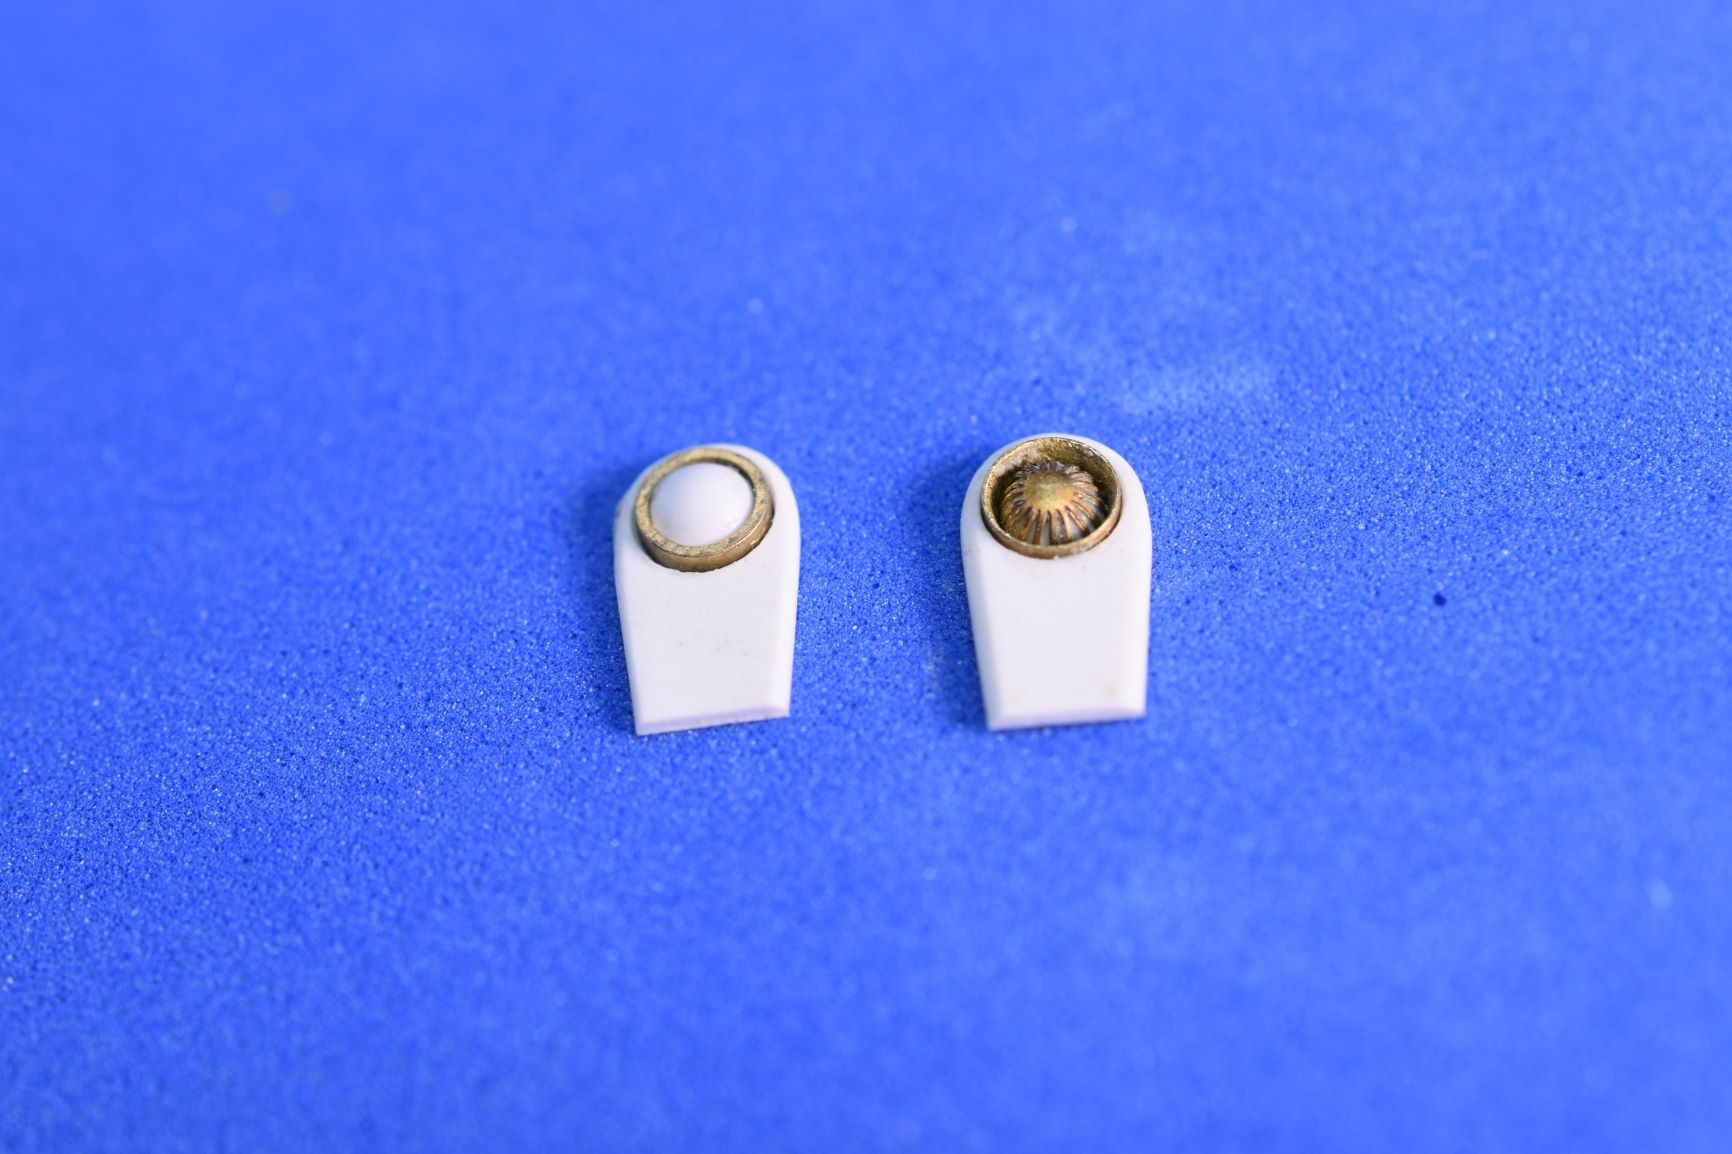
No idea how they’re going to work out.
Lastly, I’ve been trying to paint the glowing end caps on the engine nacelles and had a stunning lack of success.

No turnips, I promise.
I poured some resin into the outer, clear nacelle cap and made a plug, painted it silver, added the ribs (grey painted decal sheet) and stuck it back inside the clear (now metallic brown) dome to get an idea of how bright the underlying colours needed to be. (Previously posted photo)
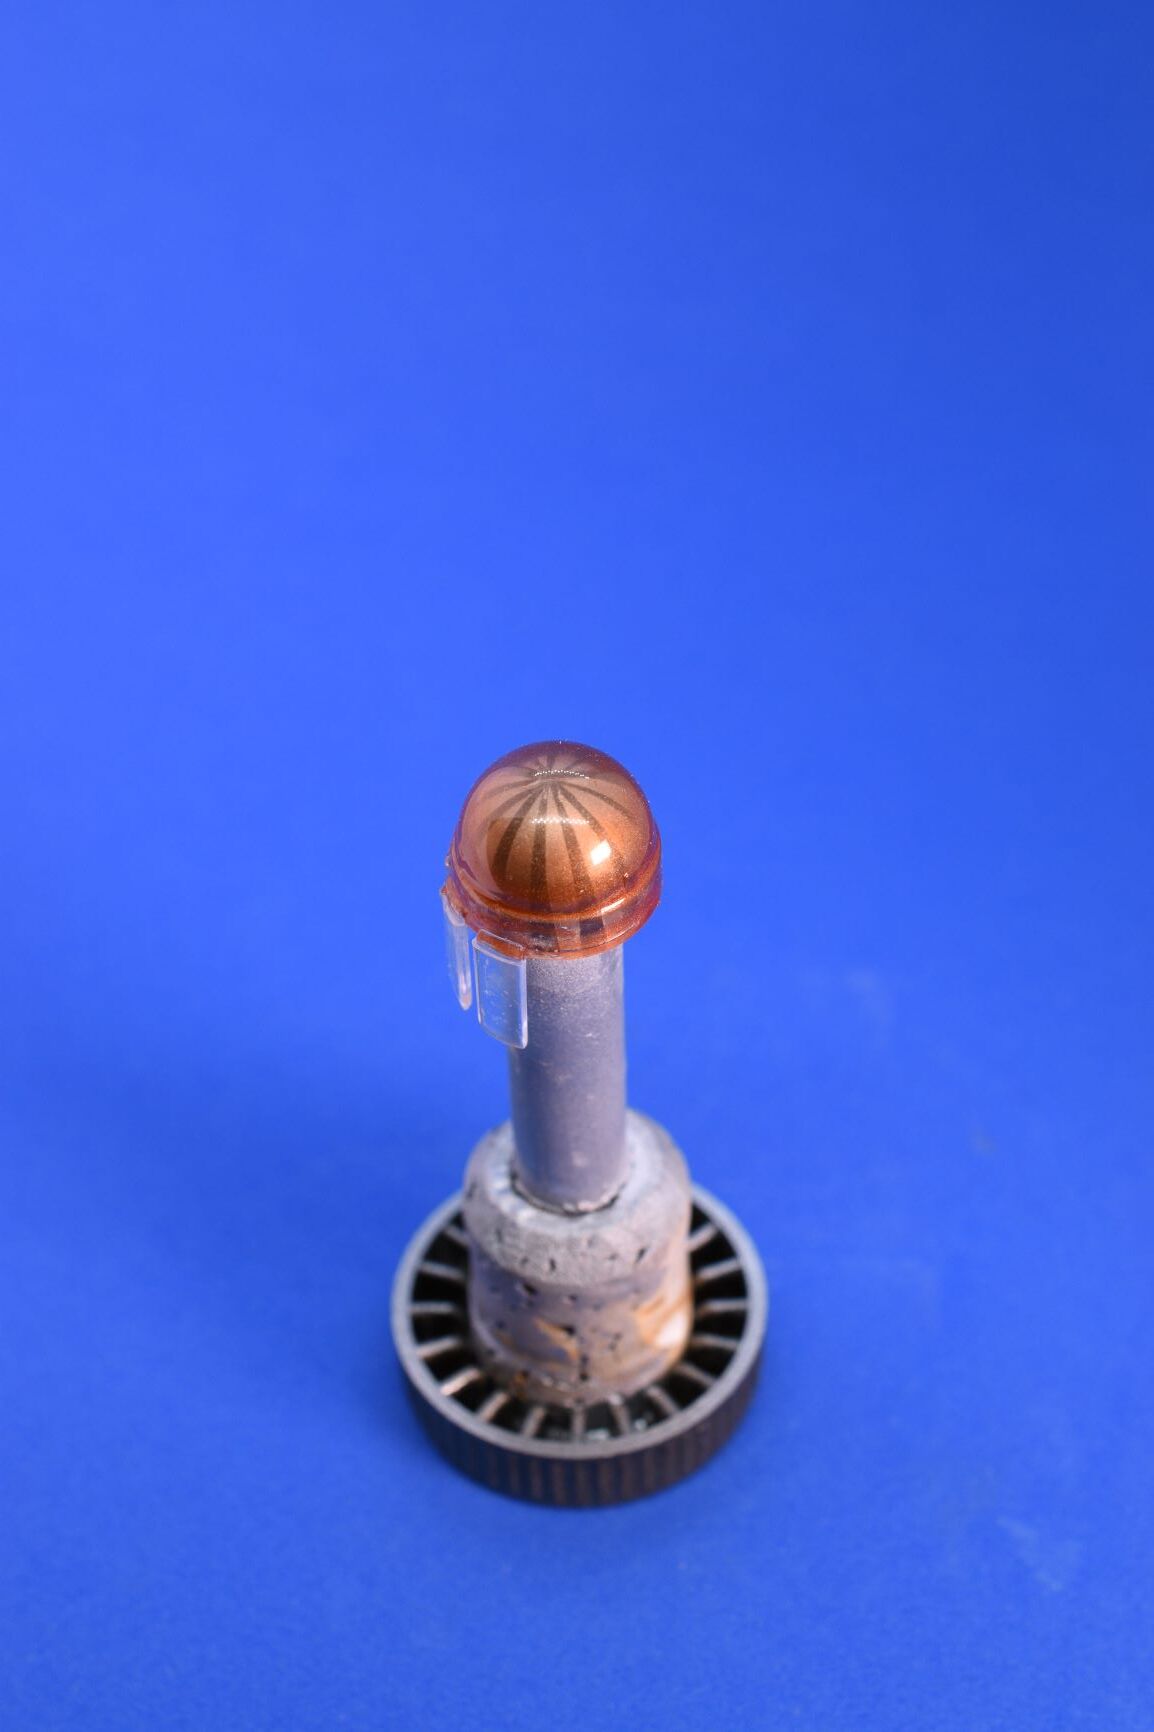
Oddly enough, the perfectly fitted plug didn’t want to come back out of the dome without leaving bits of paint and decal behind. Round two - skipped the test fit and started painting.
At last count I’ve had six attempts at painting the glowy bits and have decided I need a new plan - see previous Blackadder quote.
Using another plug I vacuformed a small sheet of plastic over it and then a second sheet over the first. Here’s a picture of my last painting attempt - which looks like a circus tent owned by a particularly disreputable group of carnies and the new plug and vacuformed domes.
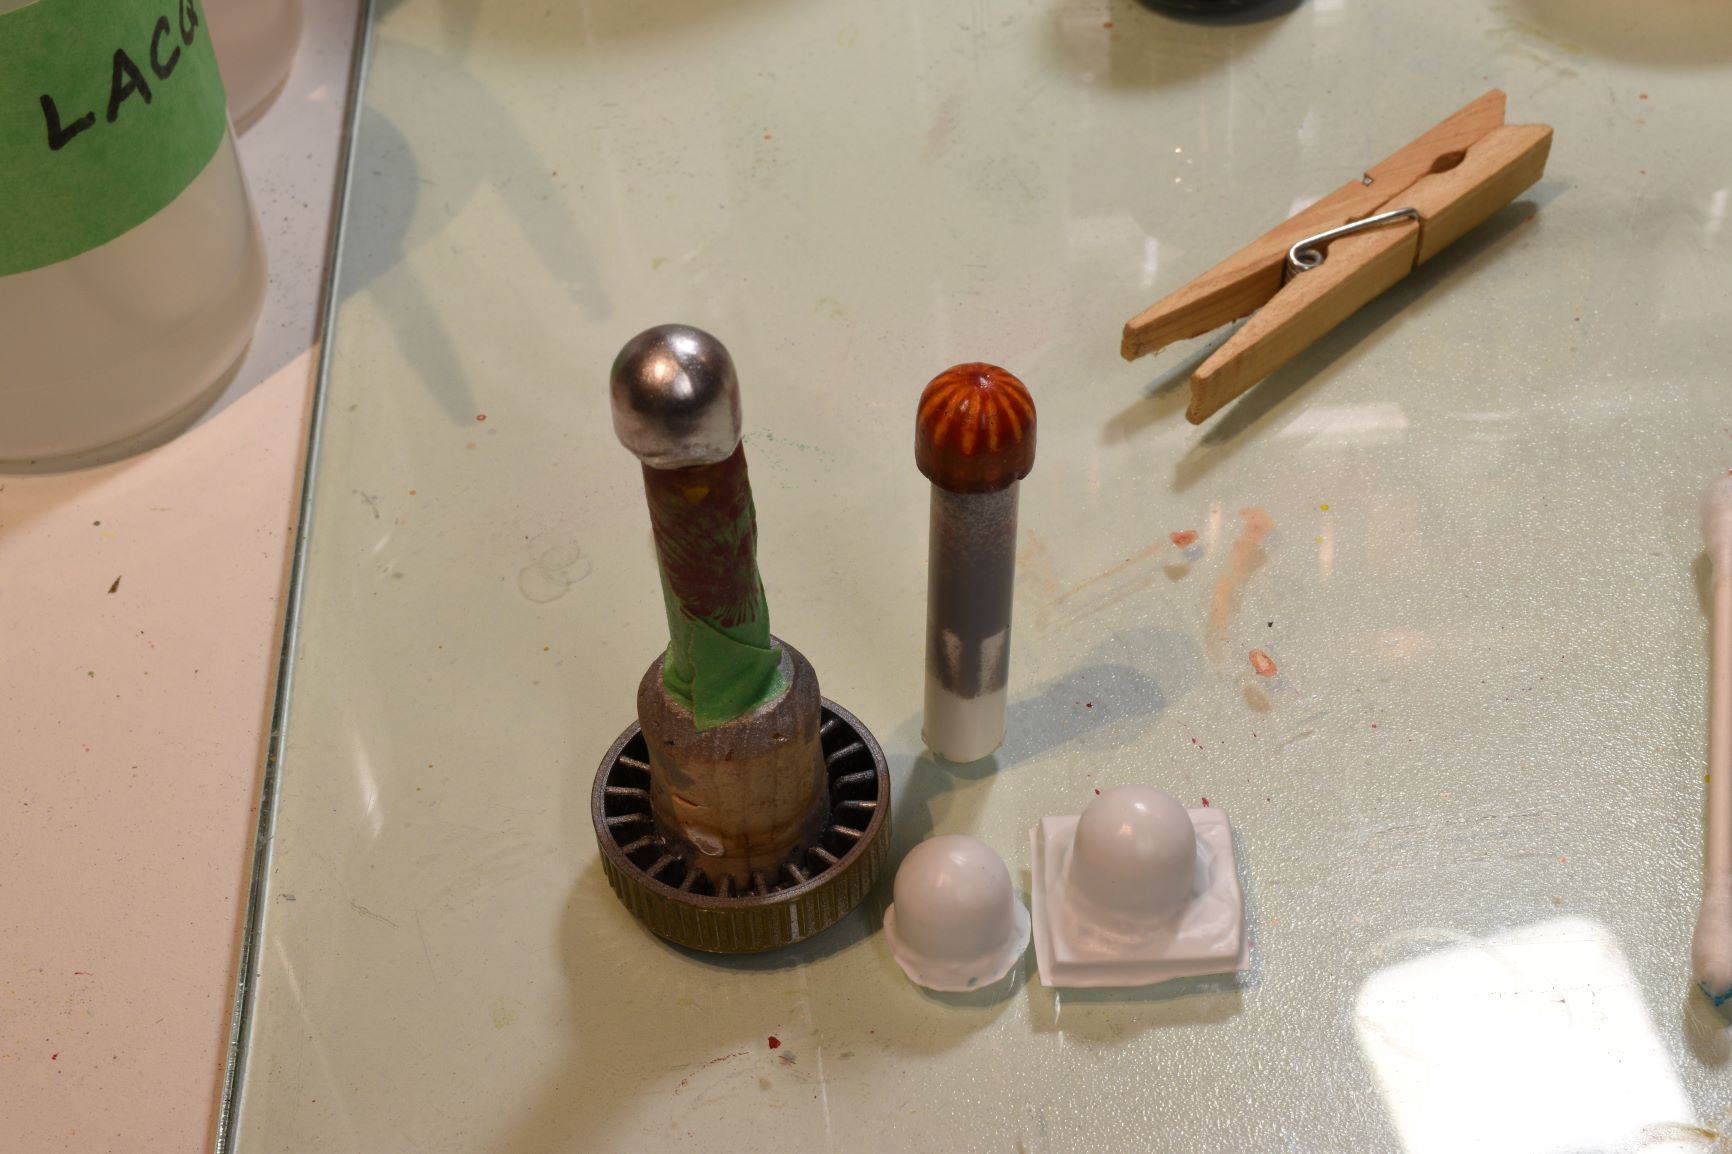
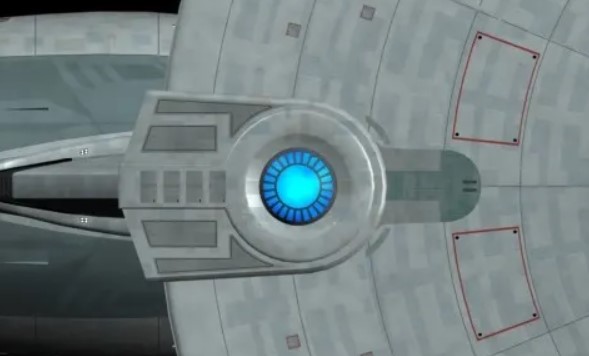
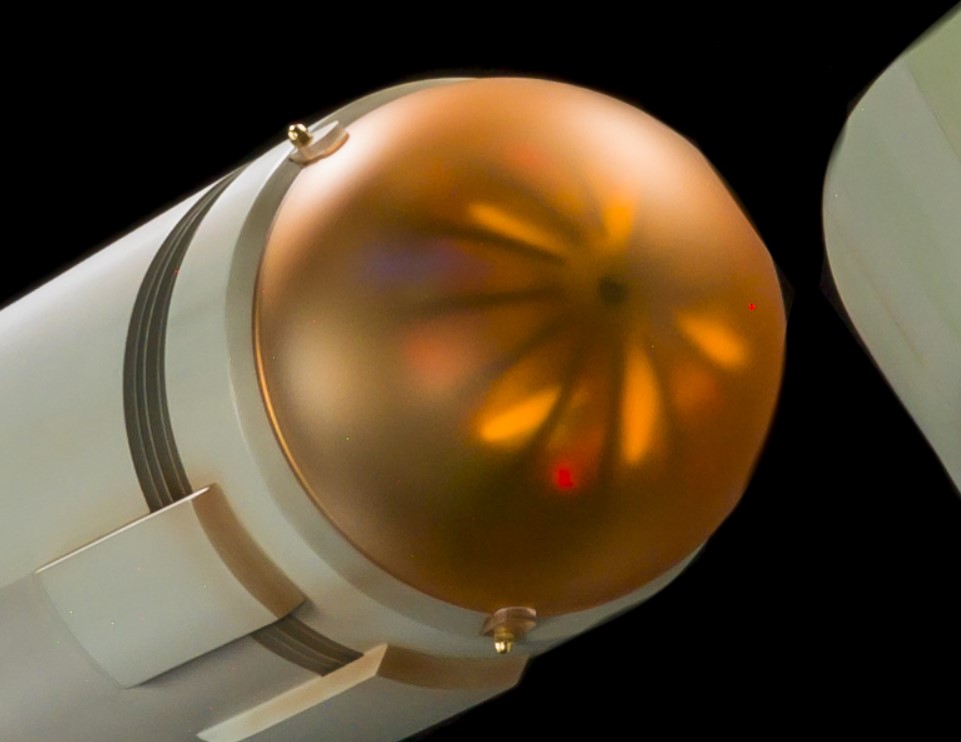
The inner dome was only to provide a spacer and will be discarded. I’m hoping to cut the pattern for each colour in the larger dome (a mask) and end up with an airbrushed feathered edge which might just look like a glow. I’d really like to end up with something like this:
![]()
![]()
![]() Hope spring eternal.
Hope spring eternal.
So now you know how the build is going. Swimmingly, thank-you for asking. ![]()
I’m sure it will all come together in the end.
Another Enterprise kit on the way you say. Only one? By the time you build a pilot version, a production version (early), a production version (late) and realize their are still two ship names on the decal sheet that would complete the collection…just sayin’. ![]()
You might want to keep your builds on the down low or Peter (@petbat ) will get wind of it and cause you no end of grief.

Cheers,
Colin
7 Likes
Also remember that in the episode “The Ultimate Computer” the Lexington, Potemkin, Excalibur, and Hood were portrayed by the original AMT kit, as may have been the USS Constellation in “The Doomsday Machine”.
![]()
Cheers,
M
lovely work Colin. The additions and extra work is paying off mate ![]()
1 Like
Looking great. Bad news on the deflector, glad you were to fix it. I like the addition of the impulse crystal. Bridges the gap in design between TOS and TMP nicely. Think that bussard collector will look good painted like that.
When this kit lands this will be three of those in the stash. One will be done as the pilot episode version, one to convert to a scout and the other as a Kelvin type. That leaves me with a bunch of nacelles and two engineering hulls to play around with. One of those is left over from a previous project. Got a couple of ideas for those.
1 Like
Lots of nice work, straight kit building and scratch building to make fixes or improve the looks going on here. Still looking at getting a Star Wars platform to add to the build …
1 Like
The funny thing is I do plan to build something that intentionally looks like a frying pan called the USS Skillet of the Starfleet Catering Corps. Just for laughs. Somewhere I’ve got a wrecked old AMT Enterprise that would be perfect for that.
3 Likes
And it’s goodbye to that horrid orange-brown plastic.

Just got to figure out what colour to paint it.
4 Likes
I went with an overall medium gray with some off-shade here and there for contrast and then made some smears of space dust. I didn’t like the plastic color either.
1 Like
I think that might work. I’ve got a couple of sheets of printable decal paper somewhere. I’ll print out a name, probably some radiation warning emblems to add to the drive section too. Might not be 100% accurate, but it’s a bit bland with no markings.
1 Like
Amazing change with that kit colour gone… … Will look nice with some tone variations and a few spare decals… ![]()
1 Like
I should have some spare wing walk way stripes that would make a good warning stripe around the engines.
3 Likes
Lots of fan concept art out there. The schem I like is this one:
Cut some little rectangles from a strip of decal and apply as windows. At the scale, that is all you would see.
2 Likes
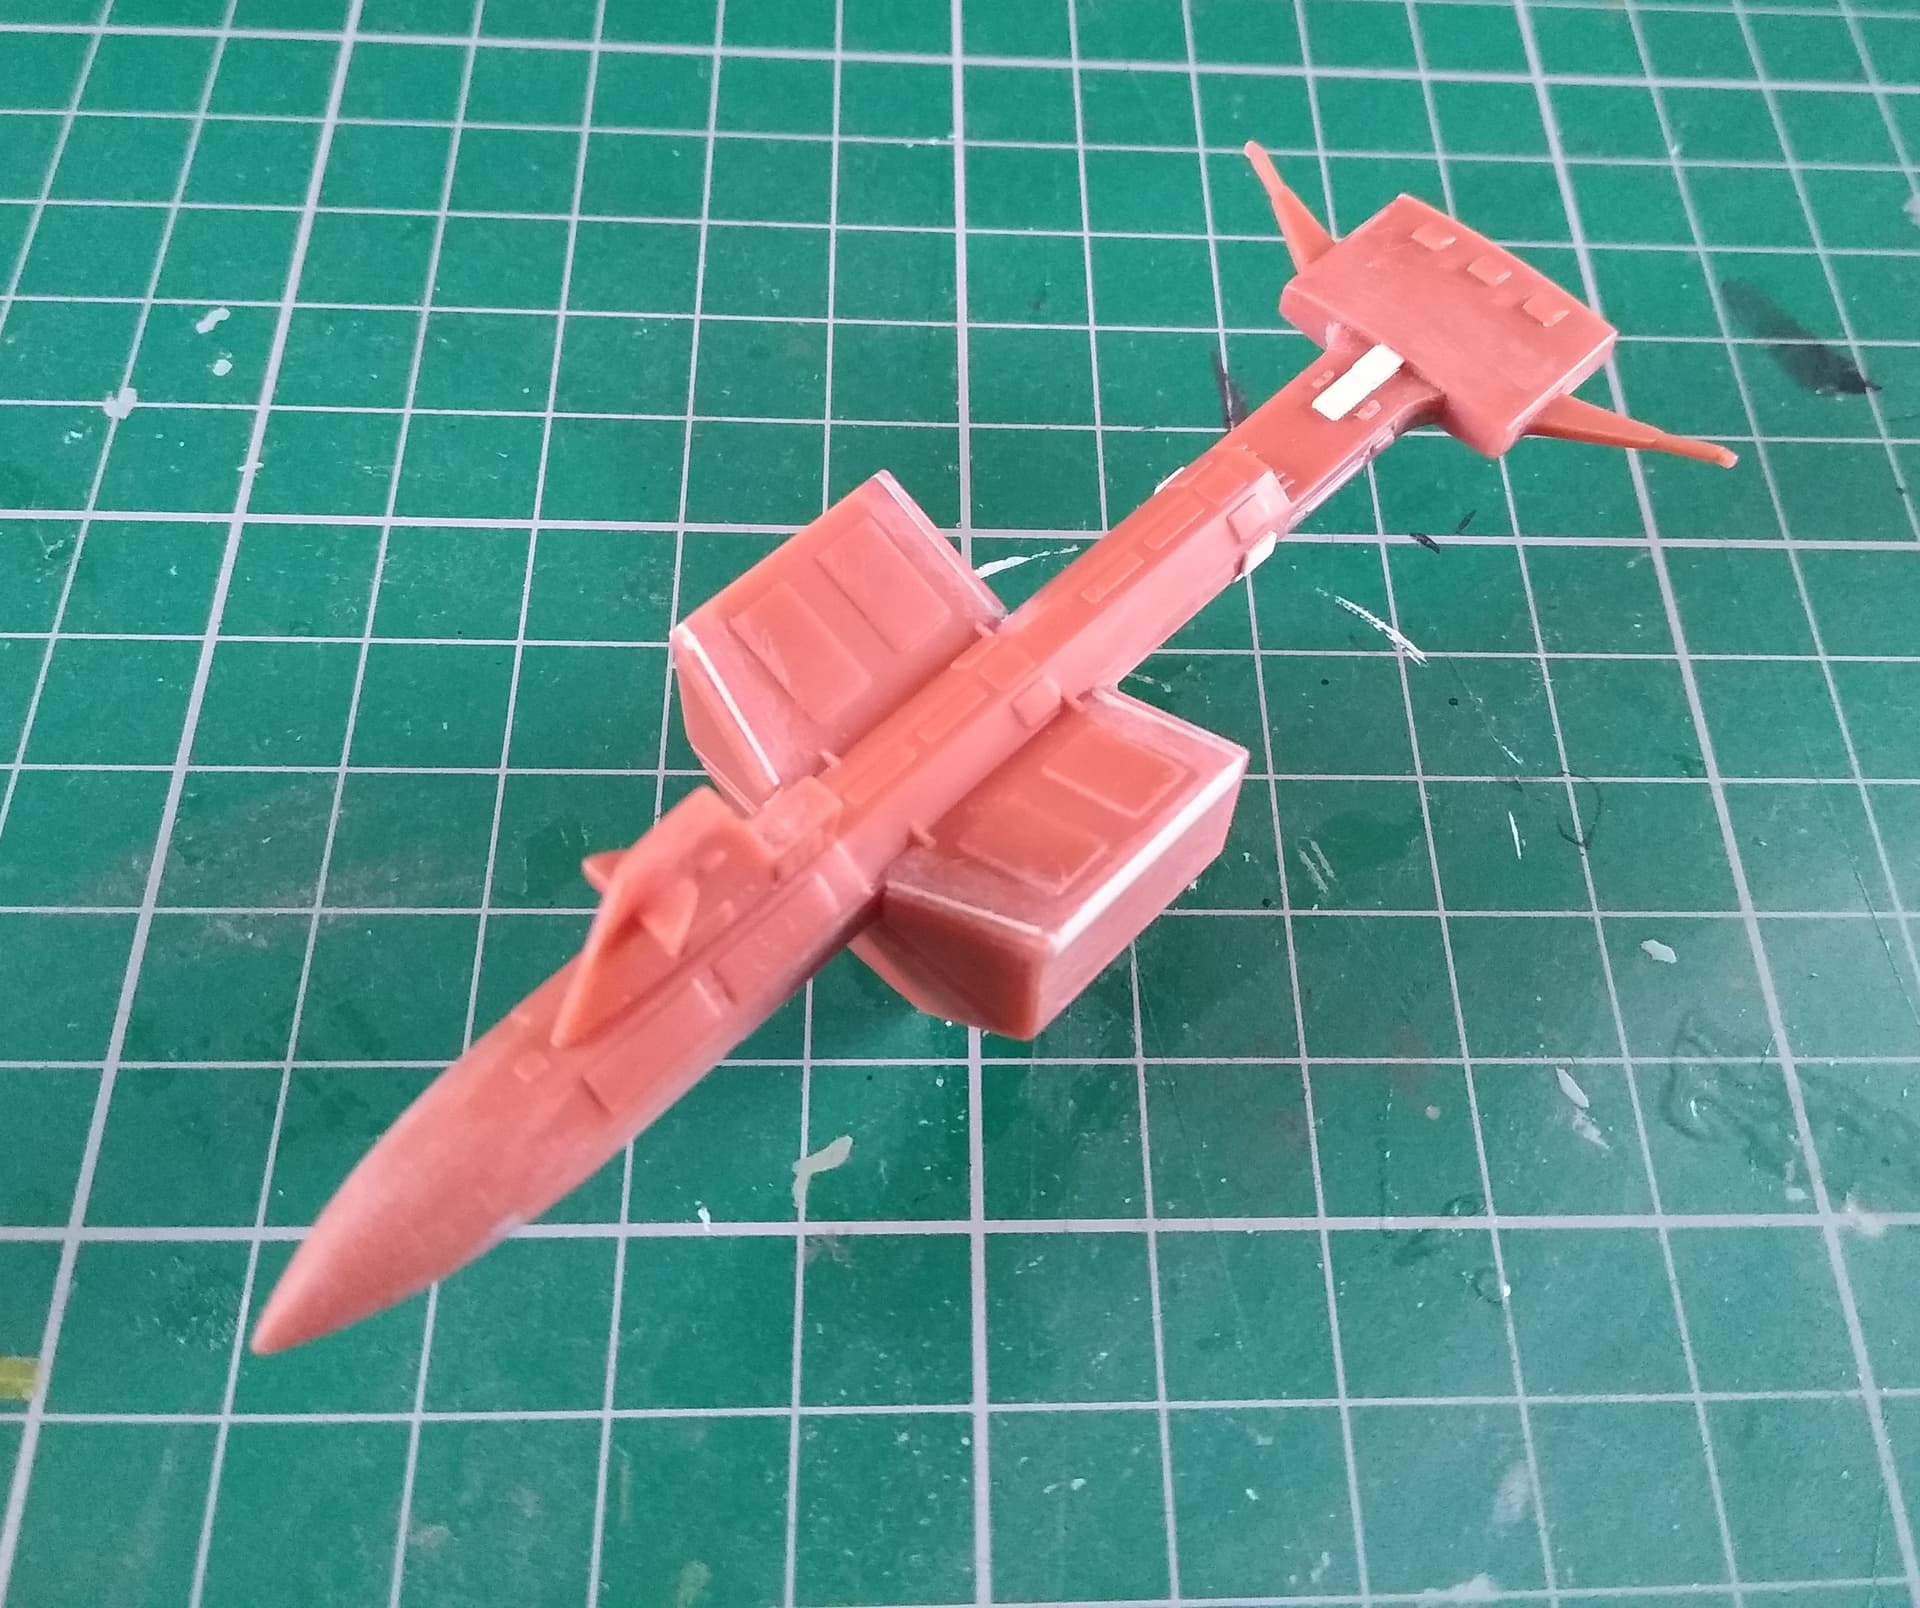
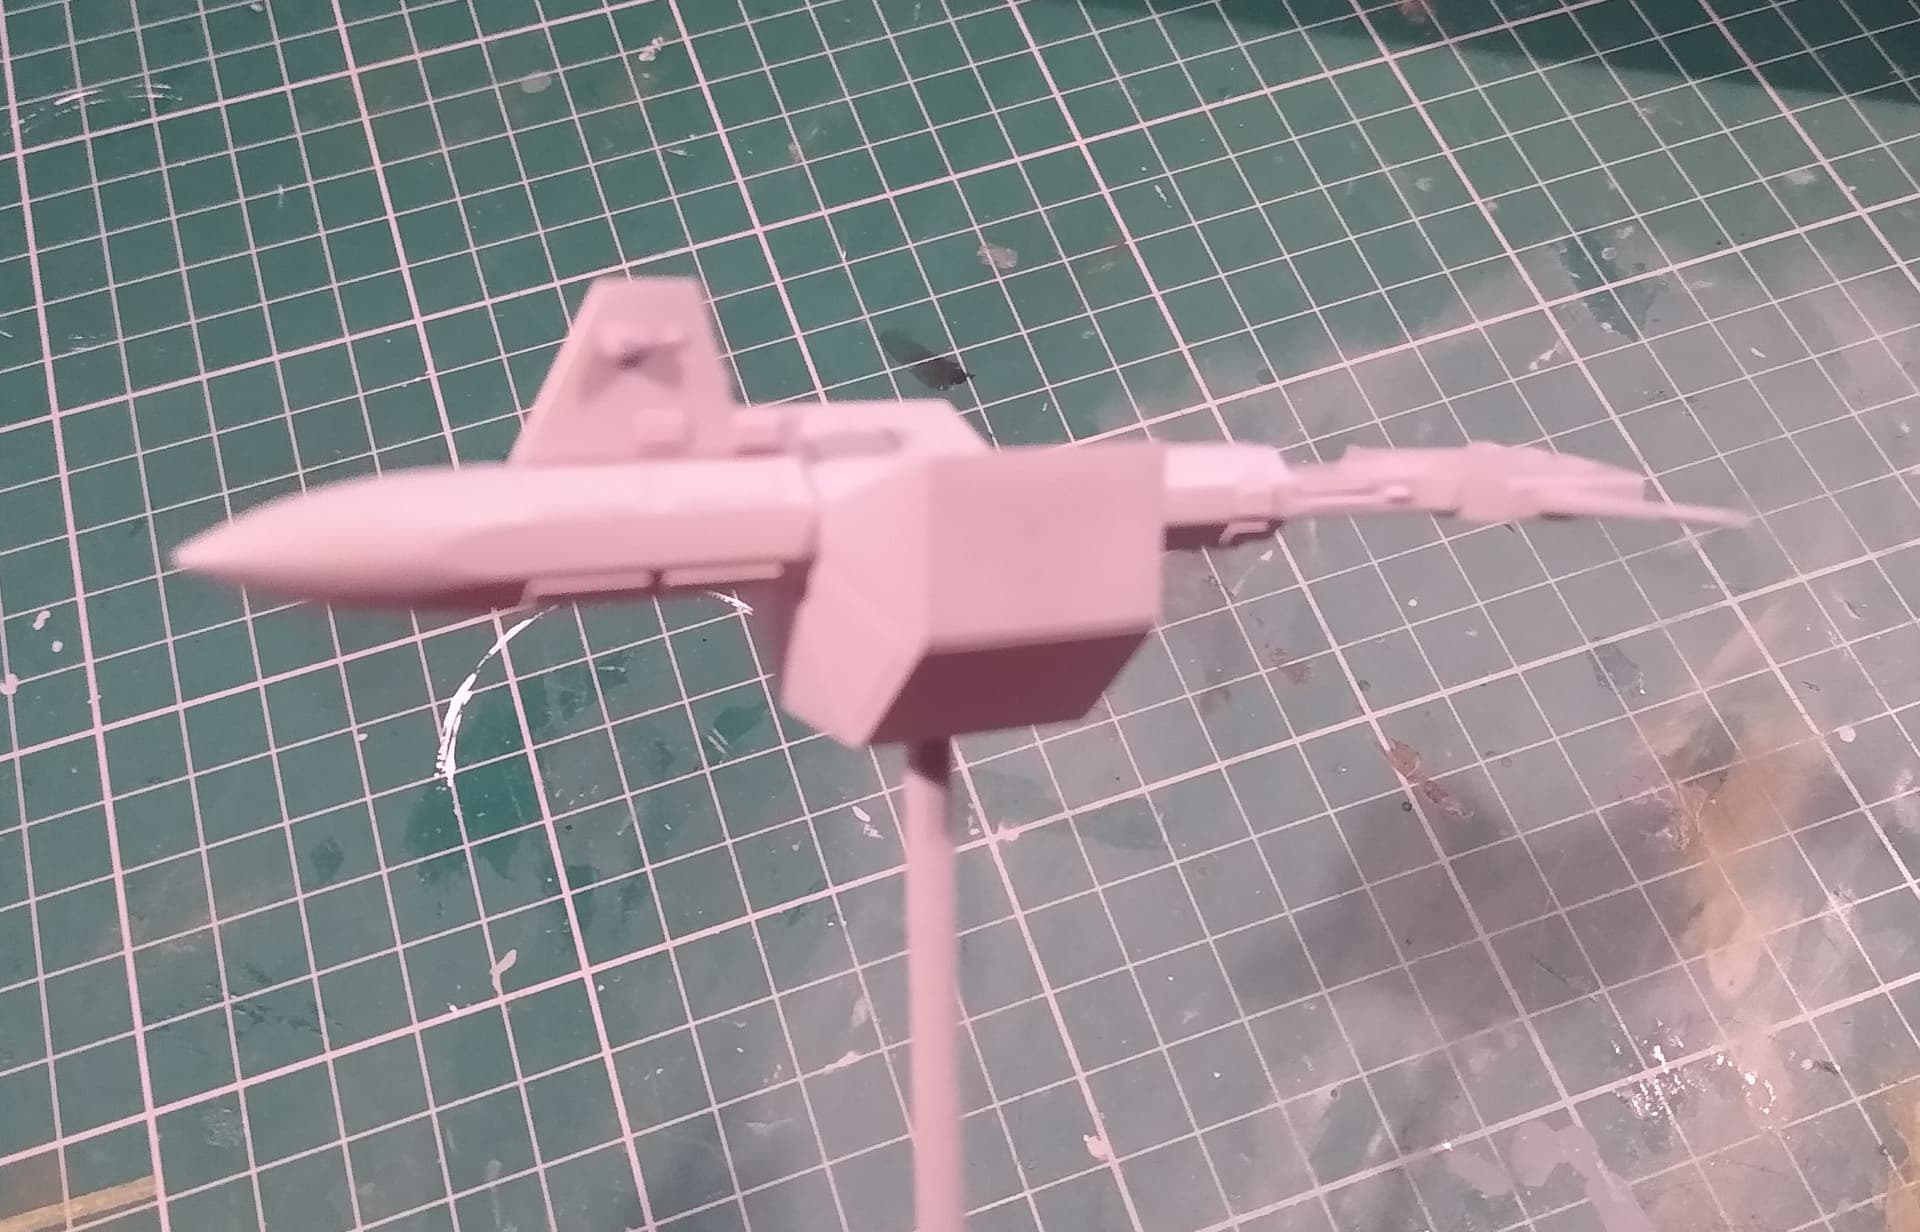
Okay, some more time on the x-wing. The kit (and studio models) is a bit bare around the powerplant. I decided a bit more gizmology would spruce it up. A comparison, the original and the finished version:
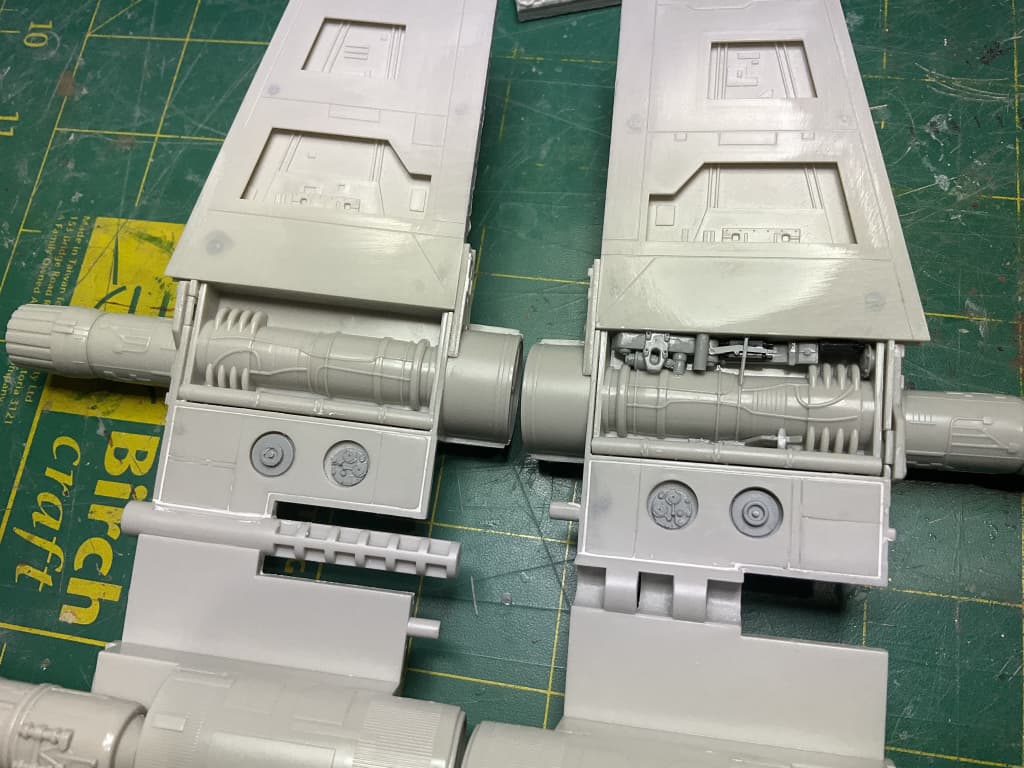
Note that each wing section has a panel with two holes. These do not exist on the studio models. I have no idea where Finemolds got that from. I originally intended to just leave them off and plate over the void, but after deciding the bay areas needed something to lift them, I added them and scribbed some panel lines. I also filled them with some tech…
All finished:
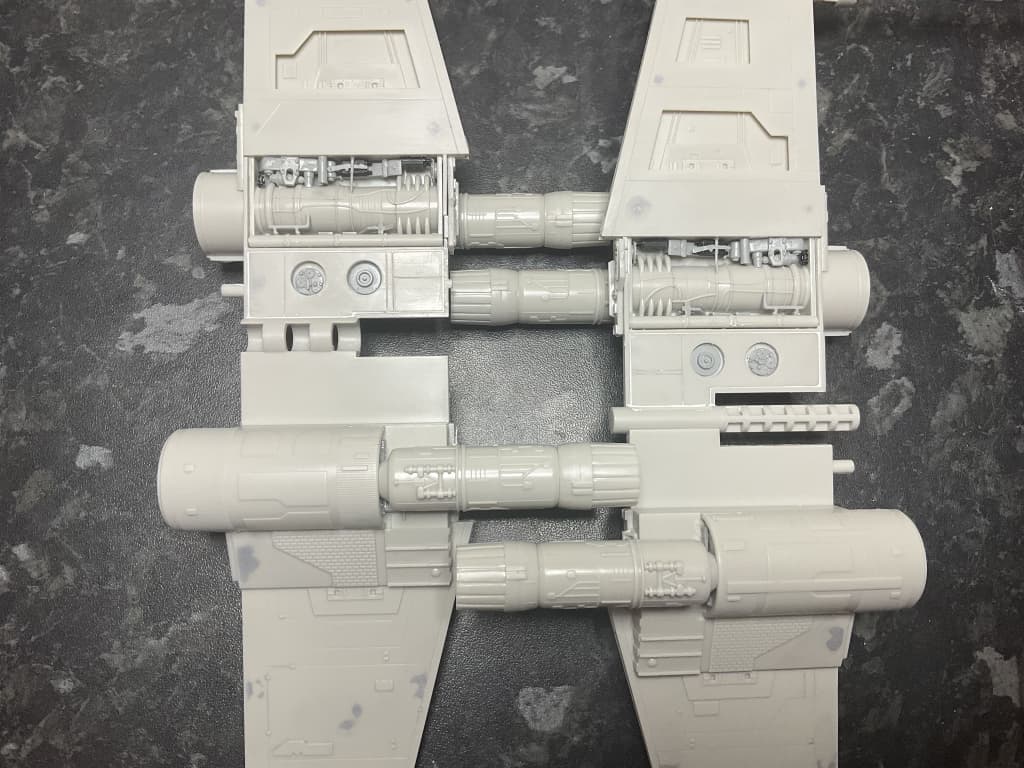
What is looks like on the dry fit model:


You can also see more filled sink marks in these pics.
I was going to add some extra bits in the holes in the wings, but I think I’ll keep that original.
A shot of the overall bird. All press fit and apart from the end of the fuselage, all fairly tight.
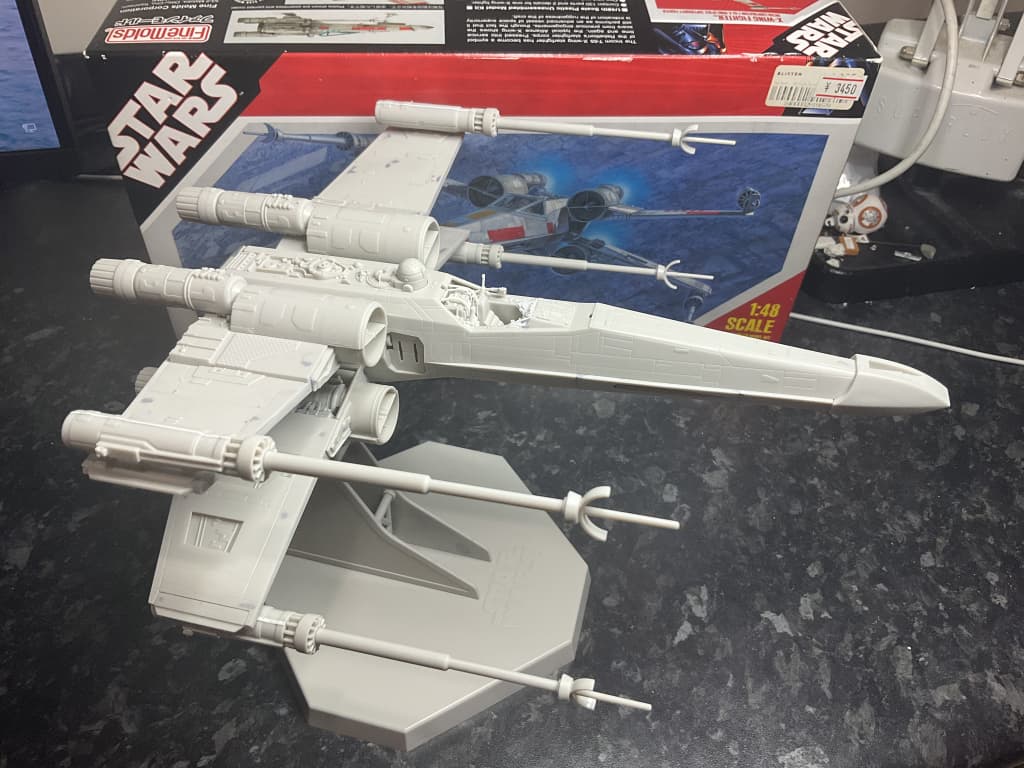
9 Likes
Excellent additions Peter. Those simple bits from the spares box total change the look and make it look more authentic. Very cool ![]()
![]()
3 Likes
That X-Wing looks bloody amazing! Going look great under some paint.
Well I was hoping to get some paint on the Botany Bay this weekend, but the weather had other ideas. Snow for two days, drizzle today and sub-zero temperatures. Not great for airbrushing. Unfortunately until I get a quieter compressor and spray booth, doing paint jobs outside is my only option.
So, today I decided to make a start on the USS Shenzhou which arrived earlier this week.

First impressions are good. It’s well moulded, if a little small for the high asking price. I would have preferred 1/1000 over 1/2500.


The decals though are really nice. A few builds I’ve seen around the internet report no issues, so hopefully Round 2 have finally improved the decals. As a precaution, I will give them a coat of clear gloss first.
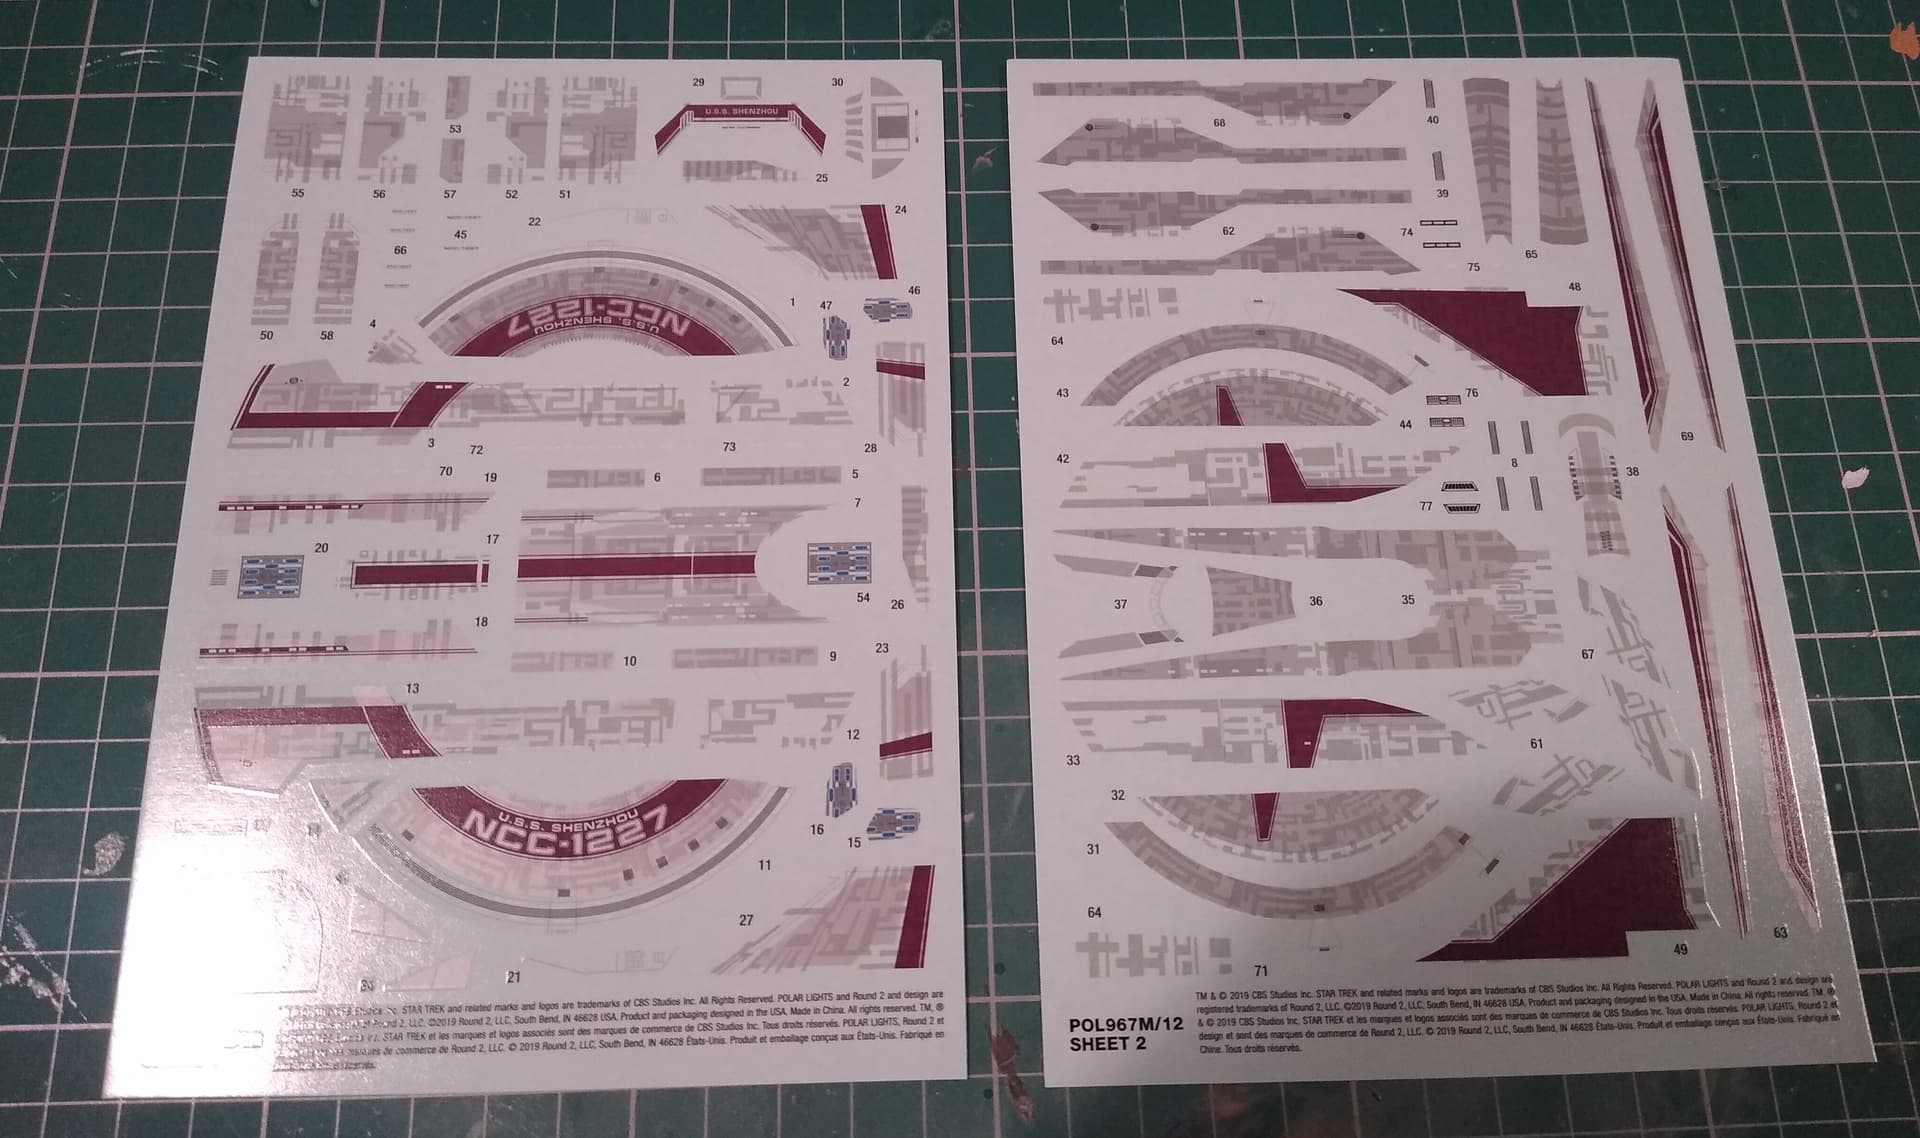
I’m not sure about the red trim. I would’ve preferred the pale blue-grey we usually see on Starfleet ships. It might grow on me though.
Painting and decal instructions are the box sides as is common with R2’s recent kits. Not a big fan of this.

For the paint scheme, I’m going to try a mix of Vallejo Steel and Gun Metal. Maybe a 2/3 to 1/3 ratio might give me the colour I want.

First job this afternoon is tidy up the upper and lower hull. Some big sprue gates to here and you have to be careful not to sand in flat spots around the saucer.

4 Likes