Hi folks, here’s my latest (for your viewing enjoyment). It took a while, as I had to wait for the M-18, and the damaged Panther involved a lot of work, and experimentation.
I had two goals for this project. Depict a Panther, burned-out and displaying its interior, as well as provide a home for the new Tamiya M-18 TD.
So, here’s what I came up with…
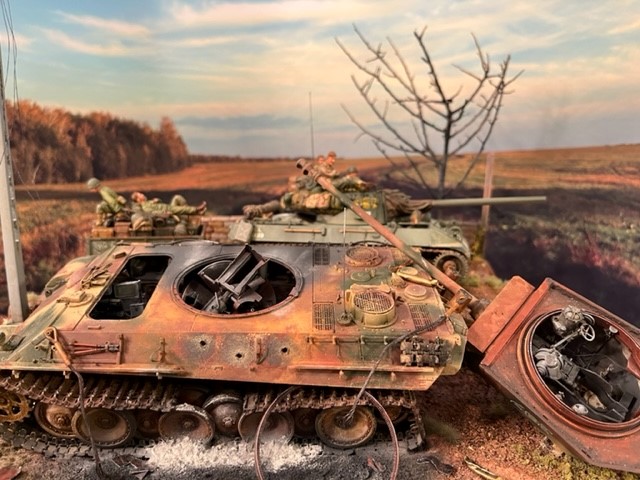
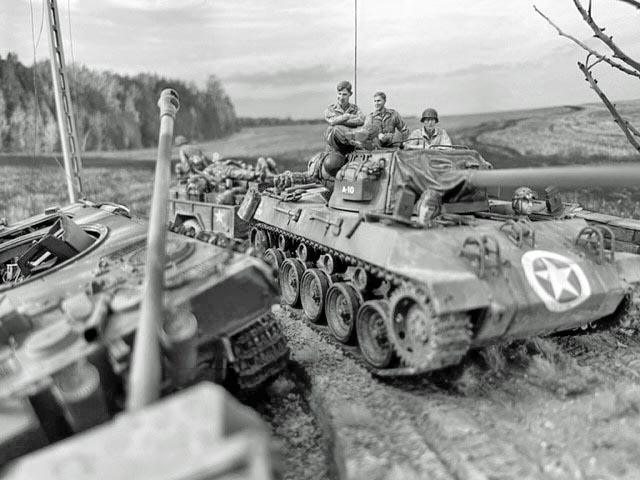
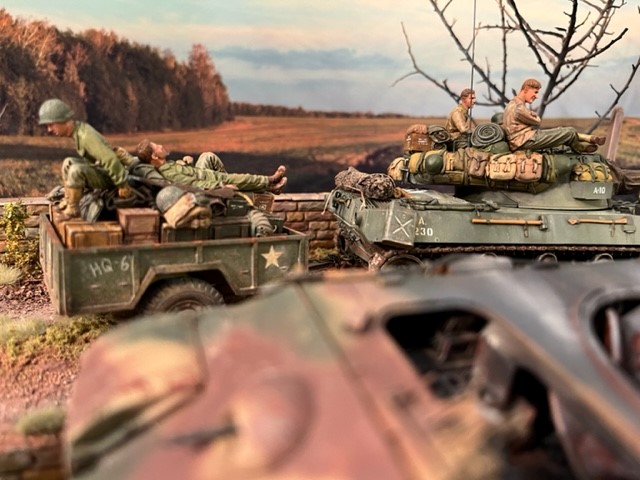
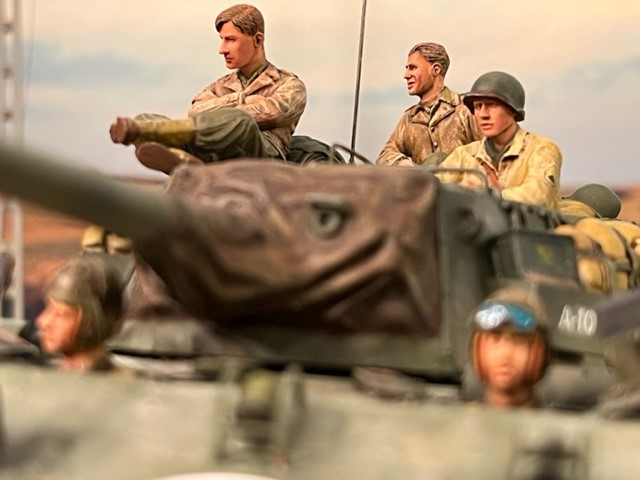
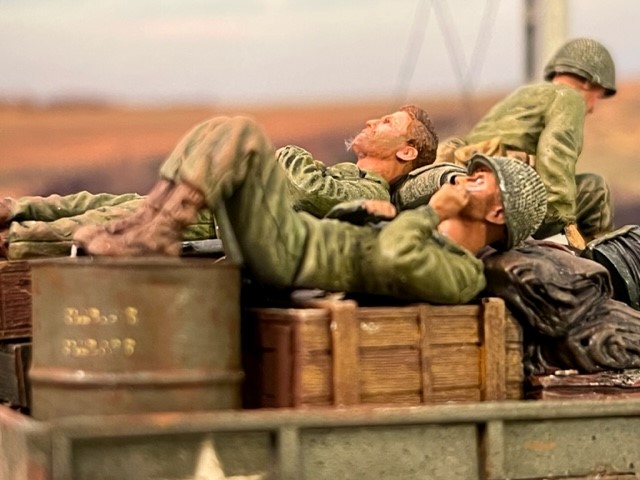
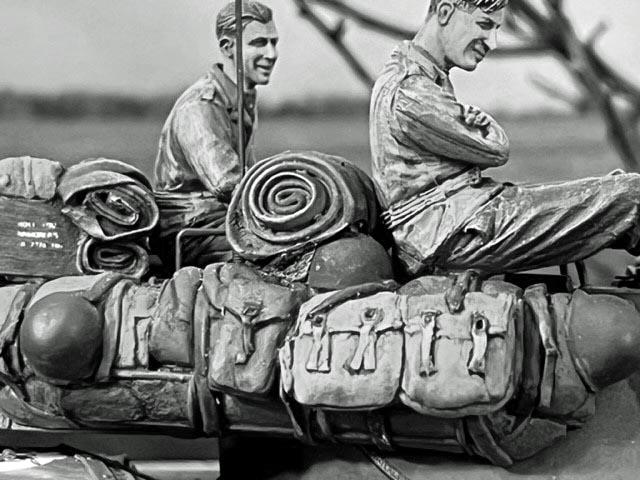
It’s late war, and the crew of the M-18 is casually passing a small part of the destroyed Panzer arm. They’re dragging a trailer from their headquarters company, with some of those troops, riding along.
The TD is fairly new and in good shape, while the Panther is a burned-out wreck.
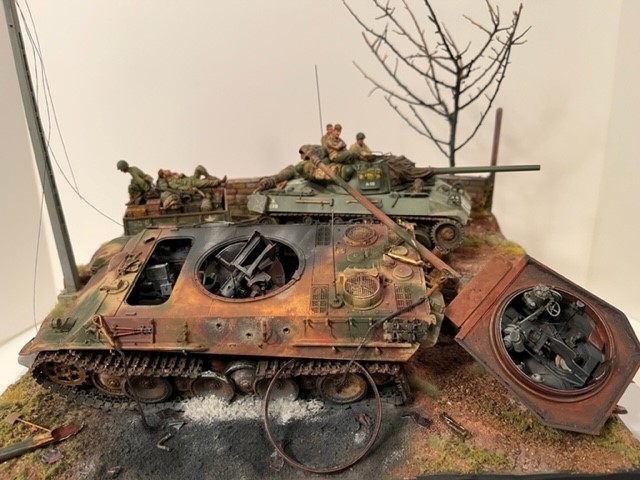
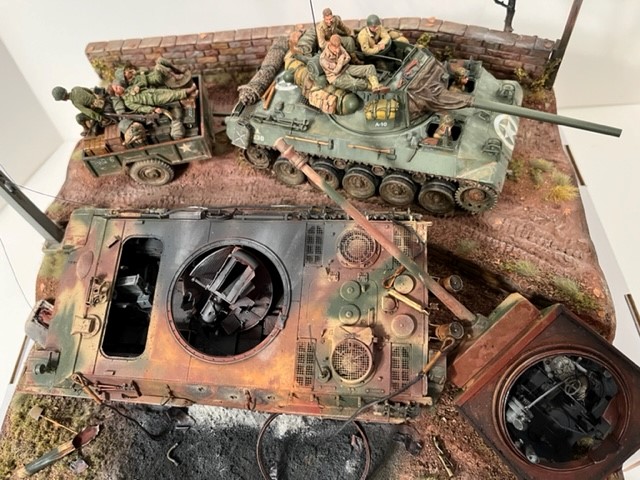
It’s a little crowded, with the multiple levels, and the Panther hides the M-18, so I’m not sure I like the staging, but I’m still trying to work within my self-imposed 30cm size restriction.
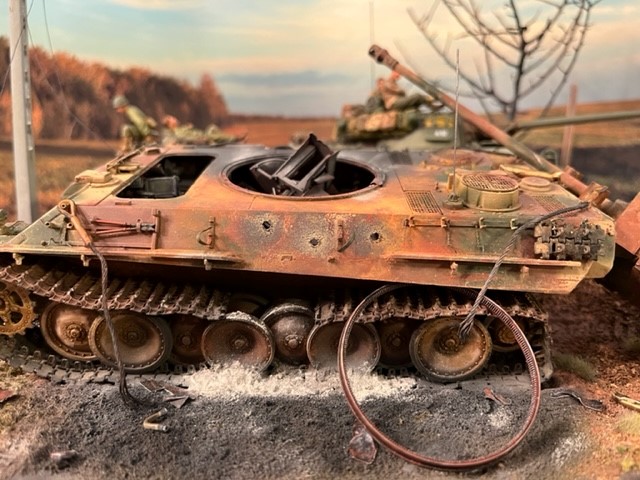
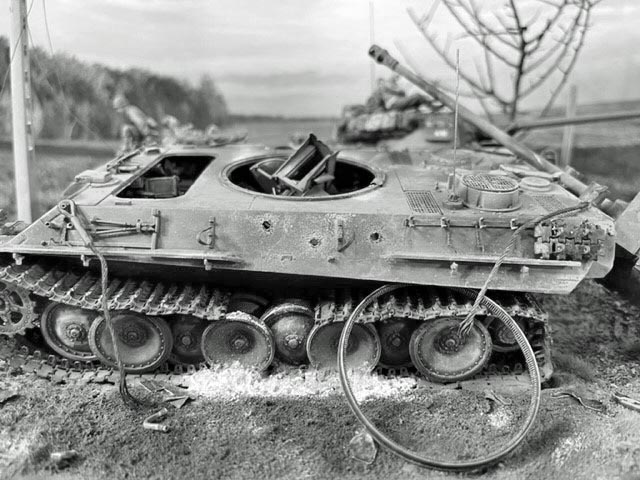
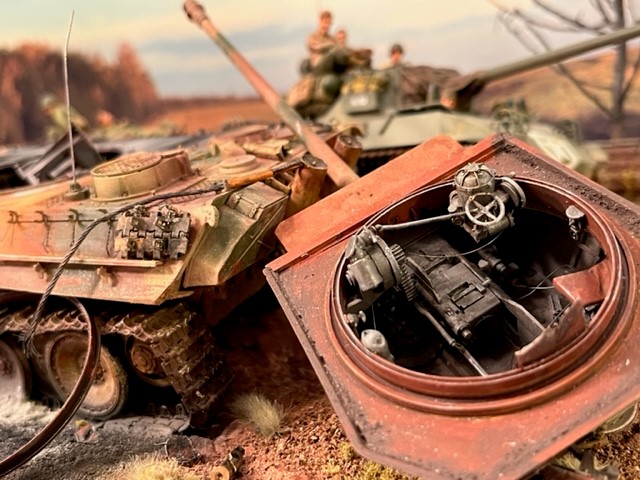
I had concluded that one way to show off (at least some of) the interior, laboriously assembled in tanks that include that plastic, is to build a destroyed Panther with the turret blown off.
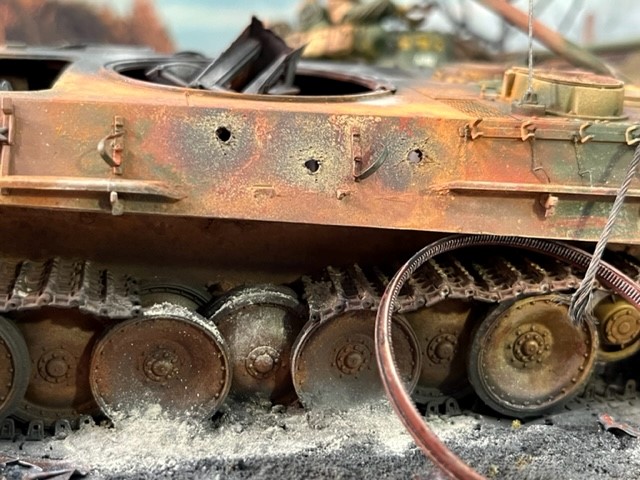
It happened on occasion when the ammo was ignited by a shell hit, or by the fire caused by a hit.
Determining how to depict the damaged and burned tank was a challenge. I researched in my library and on the Internet, and found many period, black and white photos, but of course they didn’t provide info on the colors involved. Black and burned? Oxidized/rusted?
Photos from recent wars, do show a lot of oxidized (red/orange) metal where the paint burned off and the steal beneath quickly rusted, so that became an important aspect of the color scheme.
I found some YouTube videos and assorted articles on modeling sites, but very little that described ‘how to model a destroyed & burned tank.’
So, here’s what I did, after deciding the level of destruction, and the viewpoint (when placed in a diorama).
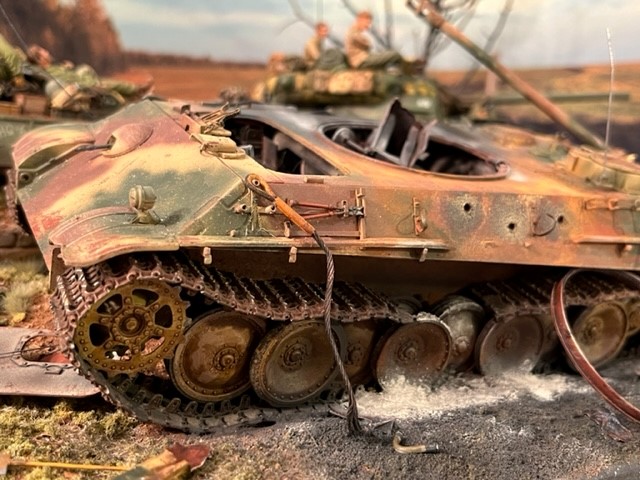
I decided that the turret would be burned, inside but not on the outside as it departed the hull, early in the fiery process. The turret would have been blown off, and then the body sat and burned thereafter. I didn’t, however want the hull to be a total burned-out hulk. Perhaps it burned itself out, quickly, or a passing rain storm put it out…
In the event that you like my depiction, here are the basic painting steps, I used for exterior:
Primed in typical German oxide red.
Dark (steel) grey in the seriously damaged side, indicative of the underlying steal, and as a base color for most seriously burned area – around the three shell hits.
It was a common practice: keep hitting that enemy tank until it burns.
Apply some texture paint (Citadel dark brown mud) where the areas transition from bare steel to red primer, and where red primer would transition to cammo paint. (to represent bubbling paint & rust). This had little visual effect, though.
Hairspray applied where greatest fire damage
More red primer around damaged area.
Remove said primer from those areas to be most burned, leaving a lot of bare grey metal
Typical Panther paintjob, Dunkelgelb, Olivegruen, Rotbraun
Massive paint removal on all burnt areas, revealing both dark grey and red primer paints, as well as general chipping over the rest of the tank.
Dry-brushing to highlight edges
Washes
Rust pigments added around the burned areas.
Black and grey smoke sprayed around the burned areas
Light grey pigments for ash.
And then, of course dust and dirt – I prefer artist’s oils for that…
The M-18 was easier…
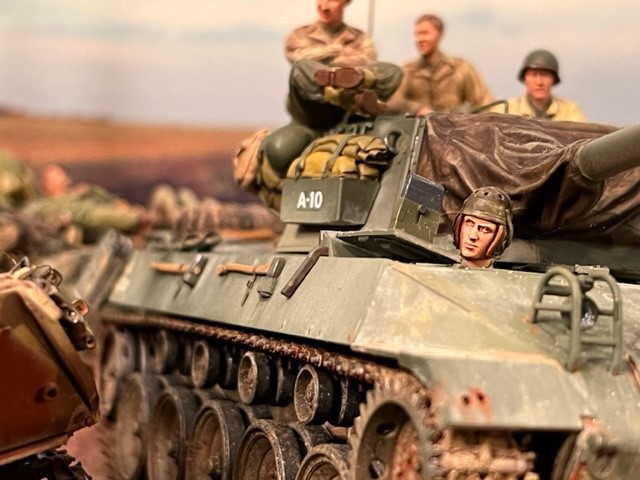
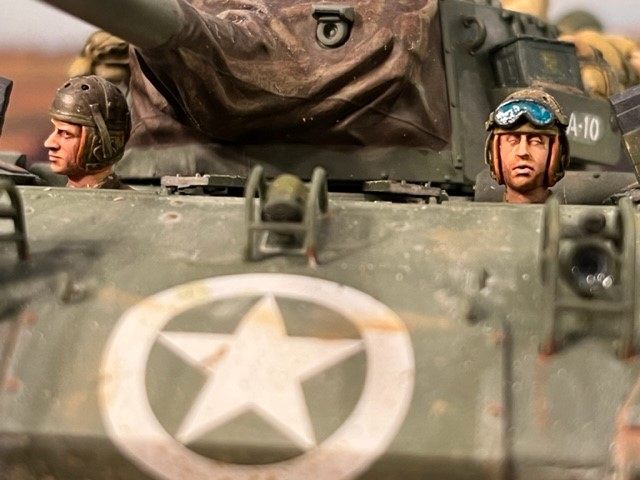
The M-18 is Tamiya’s new kit. It’s a good kit, but it didn’t seem to include all of the gory detail we’re seeing in Takom or Meng kits these days.
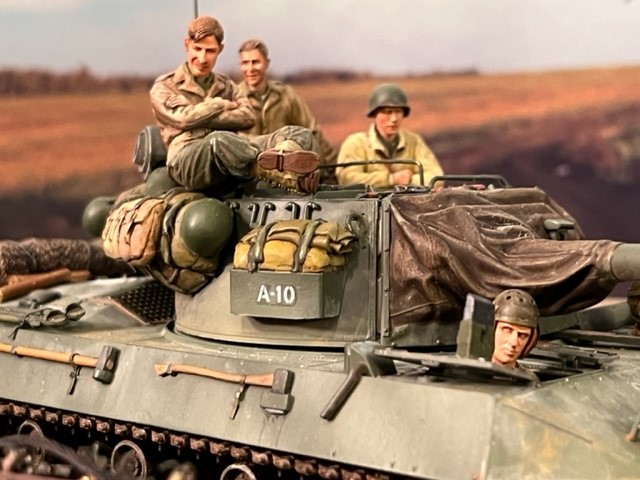
I added the Value Gear stowage set, and figures from Tamiya, Bronco and MiniArt with Hornet heads.
The M101 Trailer is from Itraleri, with a Value Gear cargo load.
The Panther G is the Takom kit. With appropriate painting and damage. In the photos I’ve seen the interiors of destroyed tanks look like a scrap heap, with the contents almost unidentifiable. I tried to replicate that, as much as I could. Metal after-market Panther tracks, ordered from Amazon (‘Sector35’). Not bad…
I prefer Sculpt-a-Mold, paper mâché, for my groundwork. The stonework are cut from panels from MBS (Model Builders Supply) – I use them a lot, in lieu of carving foam.
So, what do you think? As always, all feedback welcome.
Ralph (Bravo36)
Sorry for the long post…