ooooh - shiny… ![]()
3 Likes
Awesome P51s
1 Like
Thanks Peter and Fred! ![]()
Great photo of the original plane. Thanks for posting! I nearly forgot about the bombs though they are already assembled. Just need some paint. Sat the last 2 hours or so over the stencils. Got about half of them on KH716 now. More stencils on Thursday … ![]()
Surprisingly I found Osprey’s “RAF Mustang and Thunderbolt Aces” (Aces No. 93) in my library. Didn’t know I have it, so I’ll check if I find infos and/or photos of No. 3 Sqn RAAF. Of course now that the build is finished … ![]()
![]()
2 Likes
Torsten,
I’d say that one outstanding teaser for sure.
joel
2 Likes
While the Aussie-Mustang is waiting for the final small touch ups - I forgot the landing lights on both ![]() -, I want to show you my next project. The Land of the Rising Sun Campaign recently started and I noticed that I haven’t built a IJN/IJA aircraft for a long time. So this is a good chance to dig out a long time resident of my stash. It’s the Nakajima C6N1-S “Saiun” Night Fighter from Hasegawa …
-, I want to show you my next project. The Land of the Rising Sun Campaign recently started and I noticed that I haven’t built a IJN/IJA aircraft for a long time. So this is a good chance to dig out a long time resident of my stash. It’s the Nakajima C6N1-S “Saiun” Night Fighter from Hasegawa …
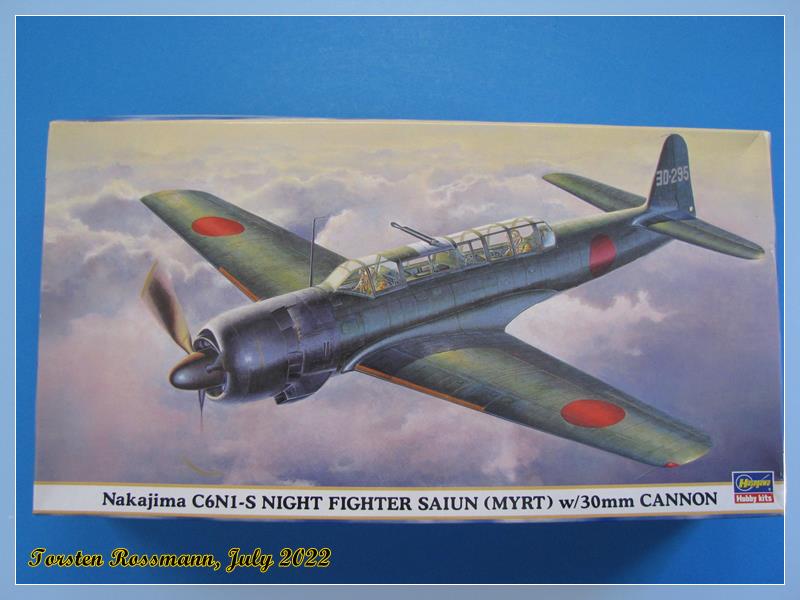
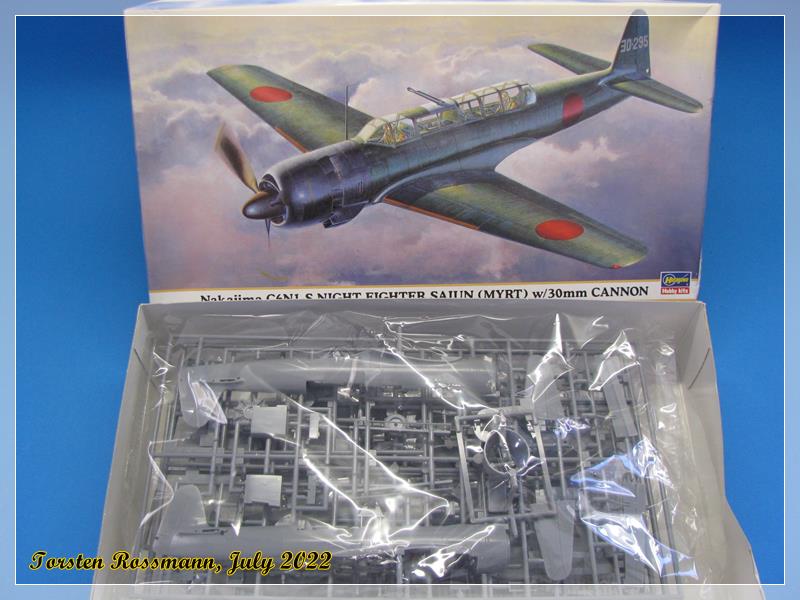
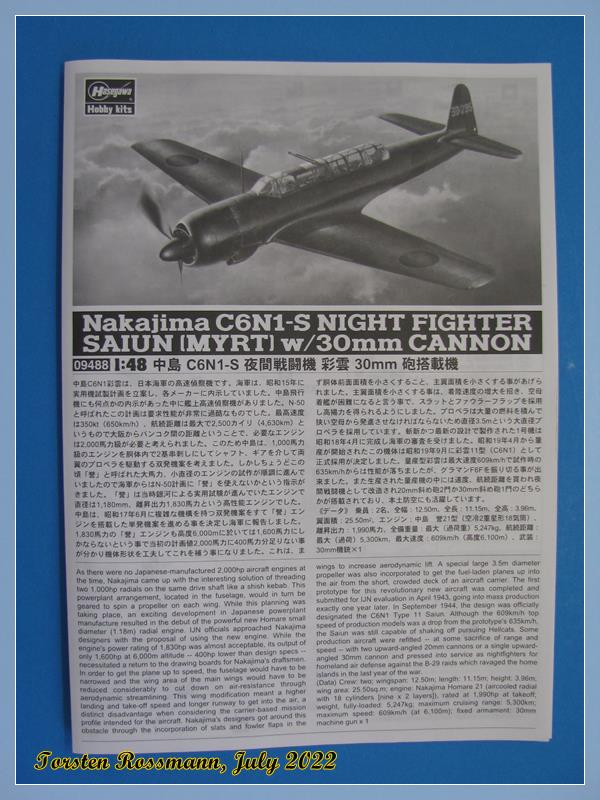
… Hasegawa came out with this limited edition in 2003, so it had enough time to ripen in my stash. The instruction is nothing more than the usual leaflet …
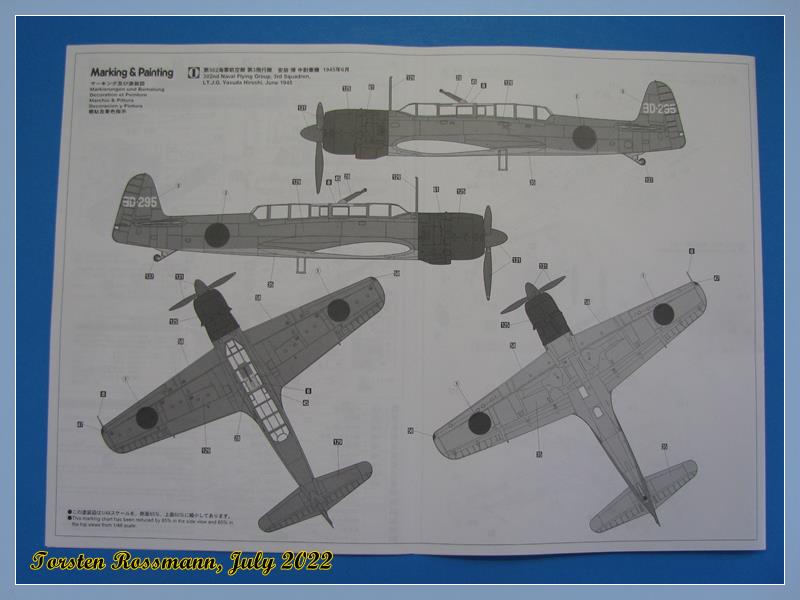
… with only one decal option from the 302. Kokutai in 1945. Simply because there existed only one aircraft in this configuration with a 30 mm cannon as “Schräge Musik” …
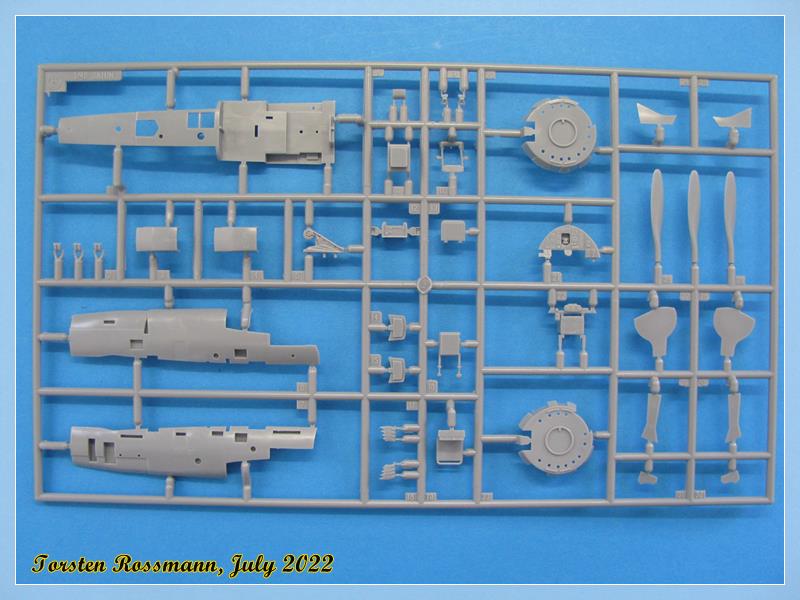
… let’s now have a look at the sprues. Sprue A holds the fuselage halves and parts of the elevators …

… Sprue B has the upper wing parts and the external fuel tank, which is not needed for this build …
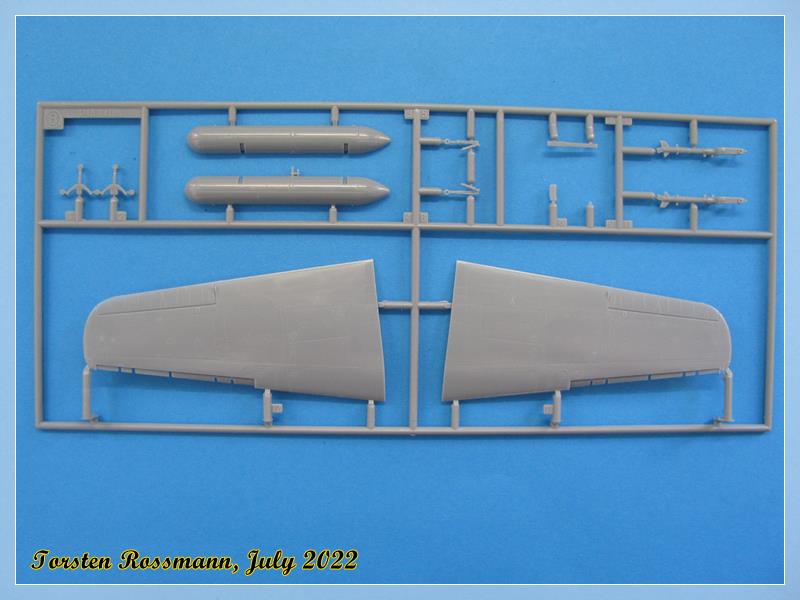
… Sprue C holds the underwing part only. The cowling you can see here is on sprue D …

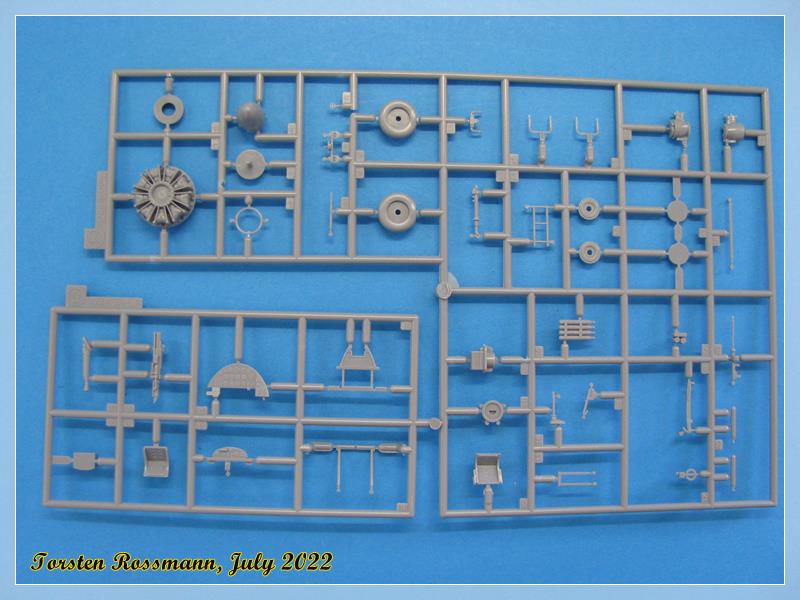
… Sprue E has various parts for cockpit, engine and landing gear …
… Sprues F and G come with more various small parts …
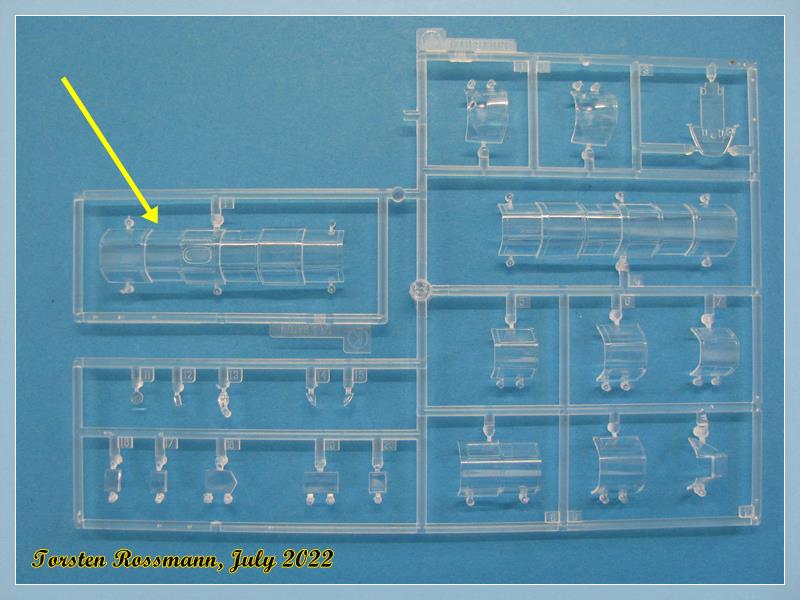
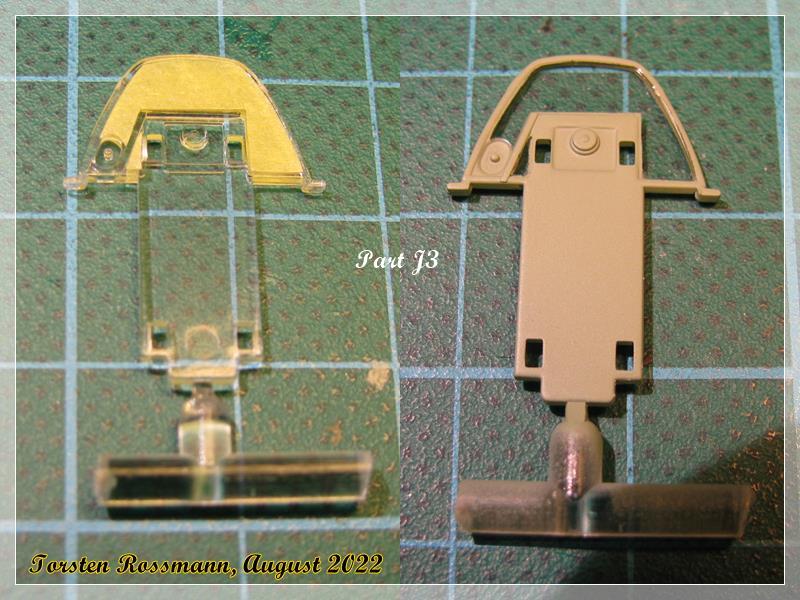
… Sprues J and K have all clear parts. The canopy I need for this night fighter version is on sprue K (yellow arrow) …
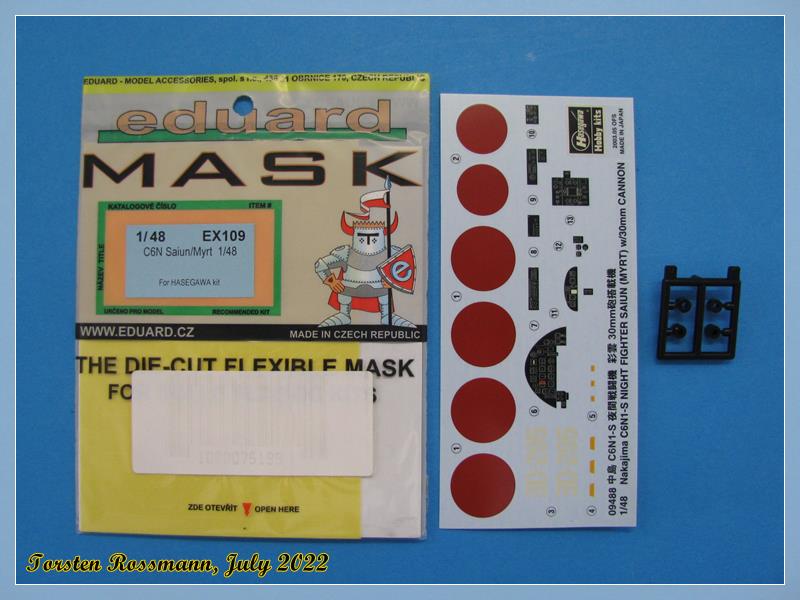
… finally here’s the small decal sheet with no stencils (opposite to Eduard …) and the Eduard mask EX109, which is indispensable for this canopy, plus some poly caps for the propeller …
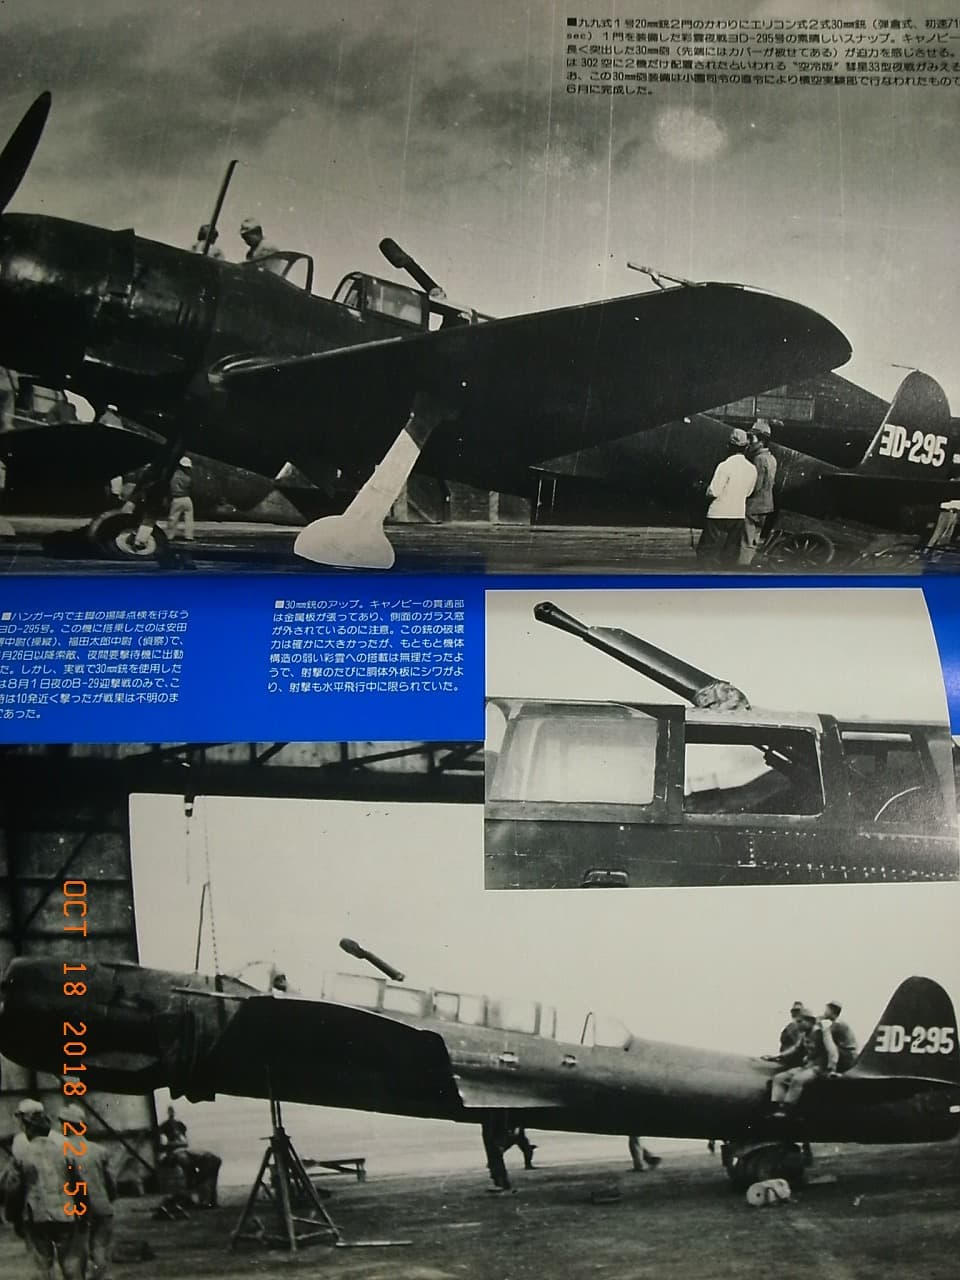
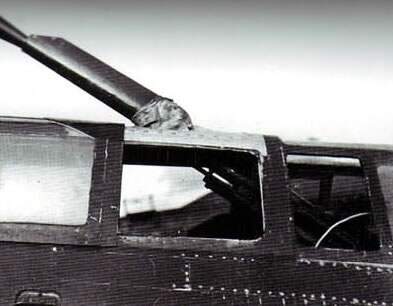
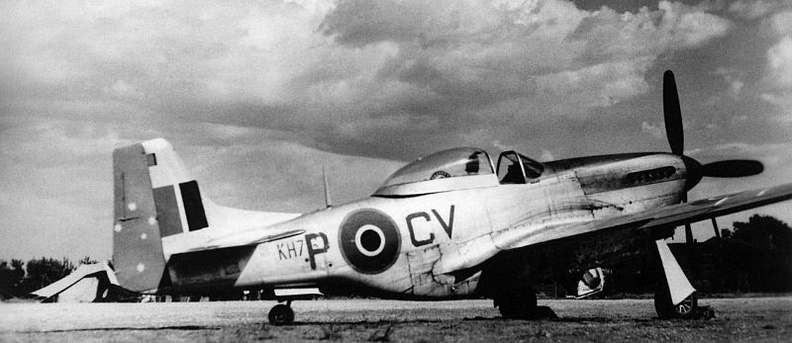
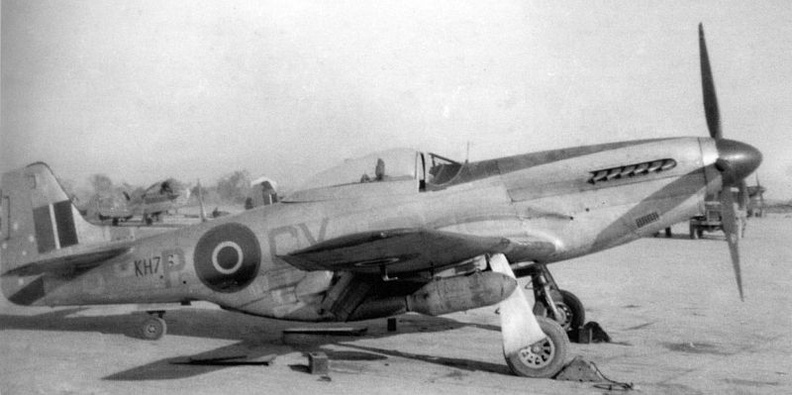
I already made some research on the aircraft and found these photos of the original aircraft. Maybe the only ones existing …
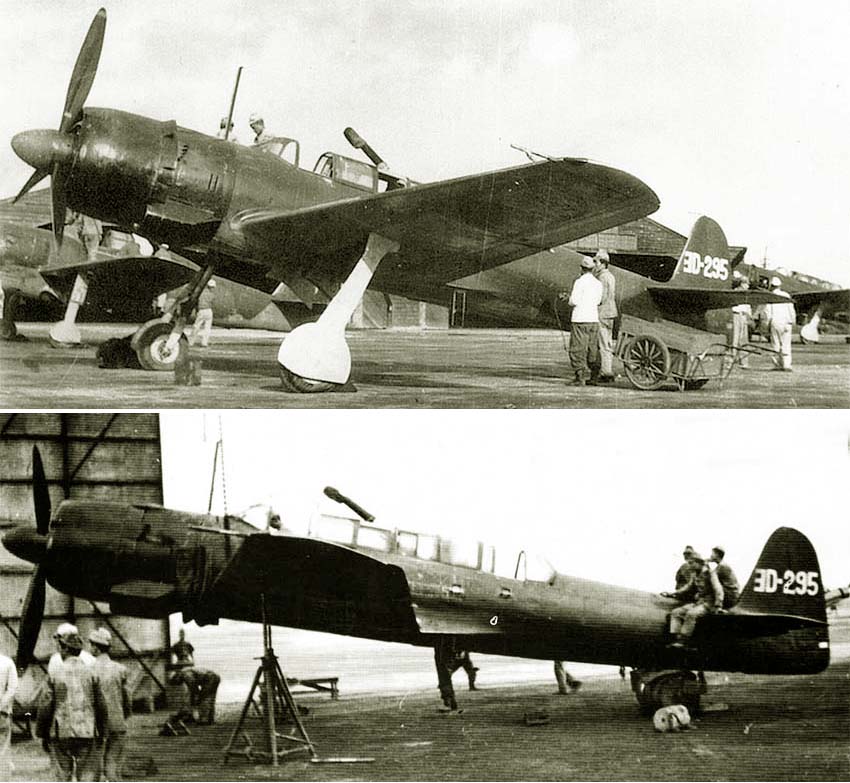
At least from the decals this should be an easier build than my Mustangs. As I have “a good flow” at the moment, I’ll start with the Nakajima in the next days, just when my Mustangs are finished. Hope some of you will join me here again.
The Mustangs should be done tomorrow … ![]()
Happy modelling!
Torsten ![]()
![]()
9 Likes
Torsten,
That’s some change of pace. Looking forward to following your build.
BTW, I’m sure that Richard will love this build, as he’s extremely knowledgeable when it comes to aircraft of the Rising Sun.
joel
2 Likes
You’re right, Joel, Richard has a great favour for japanese aircraft and I’m always amazed by his knowledge. He’s always welcomed here.
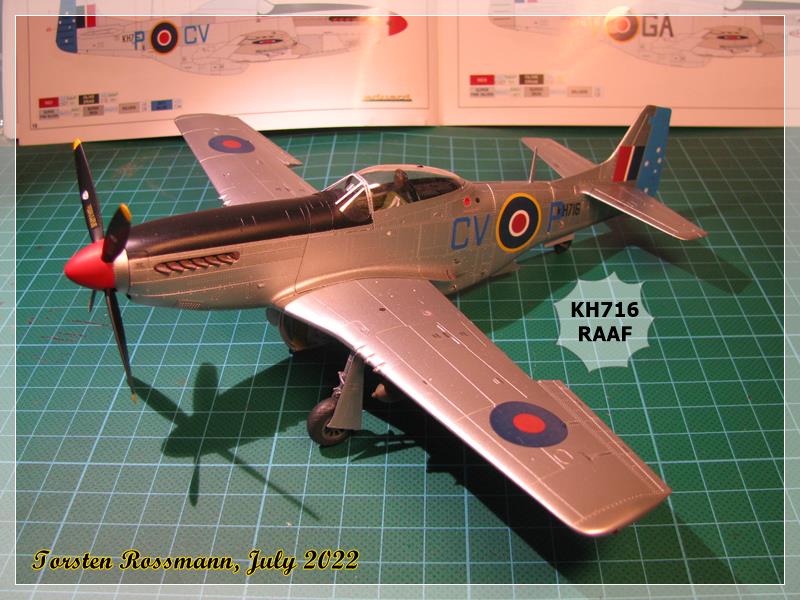
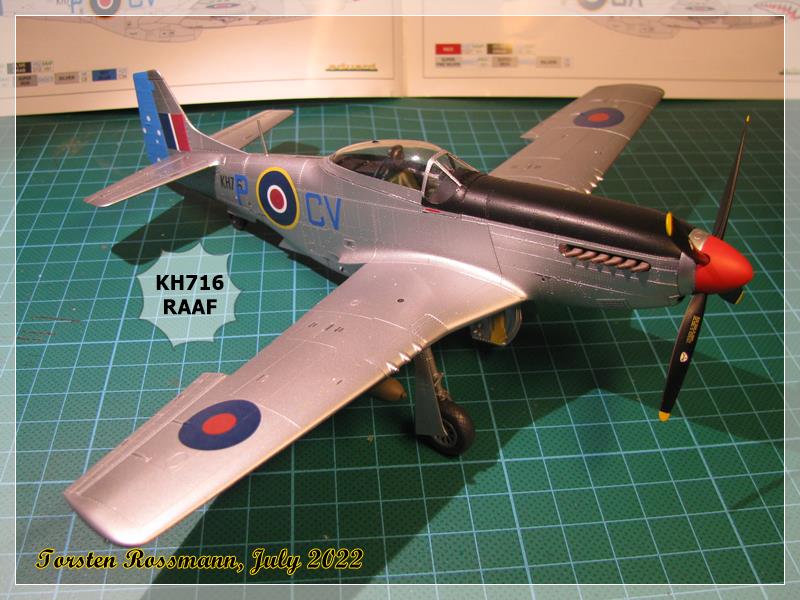
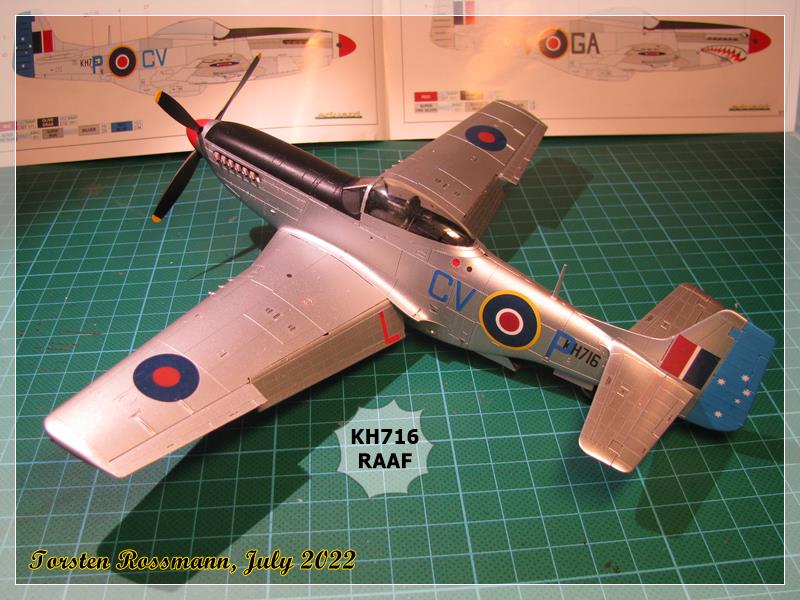
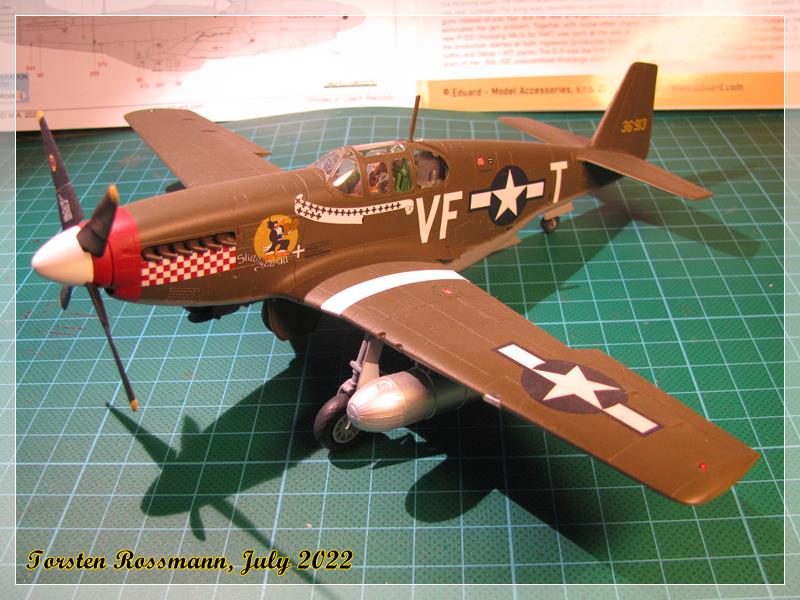
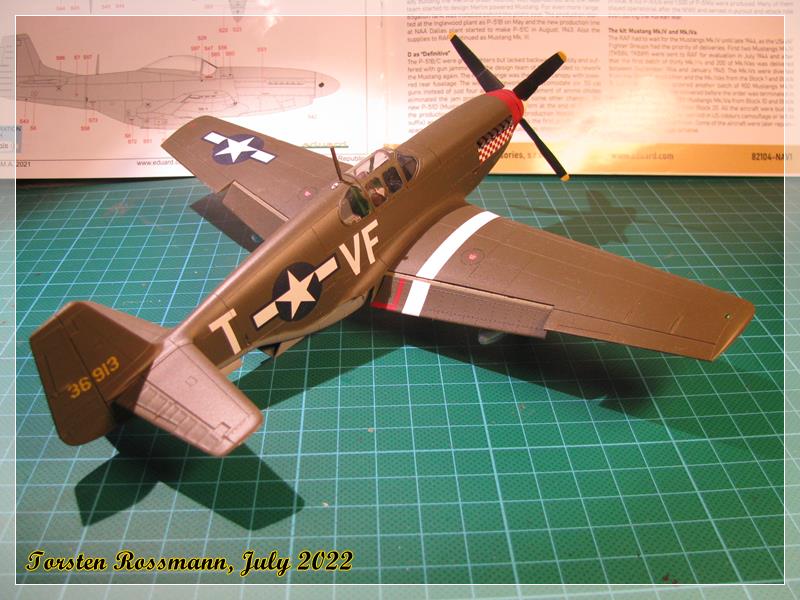
Well guys, this is the end of my Mustang Dual Build and I call the Flying Wombat also done …
Mustang Mk. IV, KH716
No. 3 Sqn., Royal Australian Air Force
Fano, Italy, January 1945
Pilot: SqnLdr Murray Nash
Kit: Eduard 1/48
Paint and decals are not sealed with Bodenglänzer to keep the metallic shine. Therefore the model is also not weathered as usual. Most decals come from an extra Eduard sheet which I bought seperately. Only the special decals to make the Mustang CV-P/KH716 are taken from the same ProfiPack sheet as KH680. I left the transfer film over decals here because they are not visible now. Only a little shine on the upper wings roundels is slightly visible. First model show for both new members of my collection will be at the end of August in Andelfingen/Switzerland.
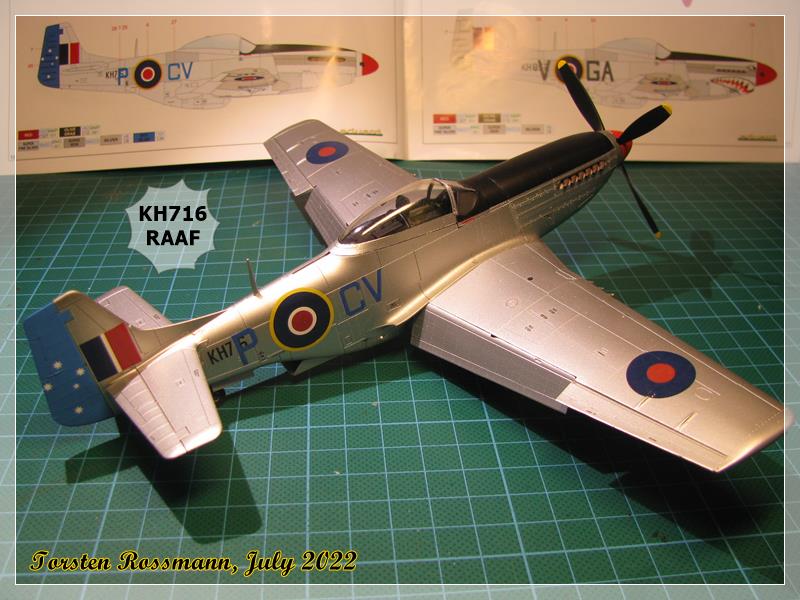
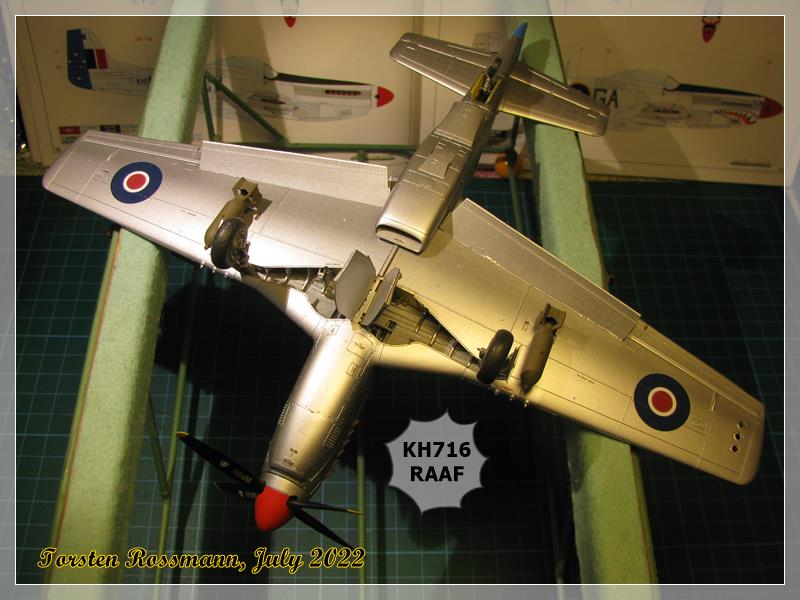
… with bombs and landing light …
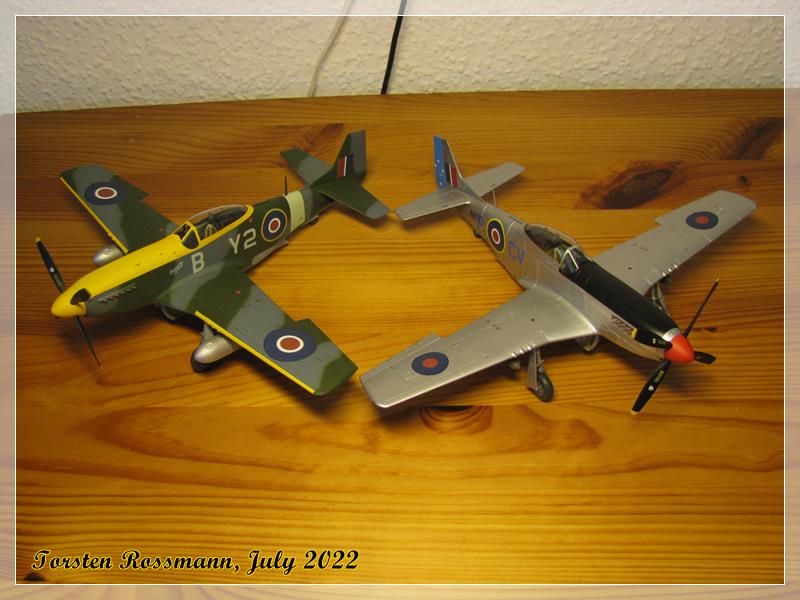
… and both Mustangs side by side …
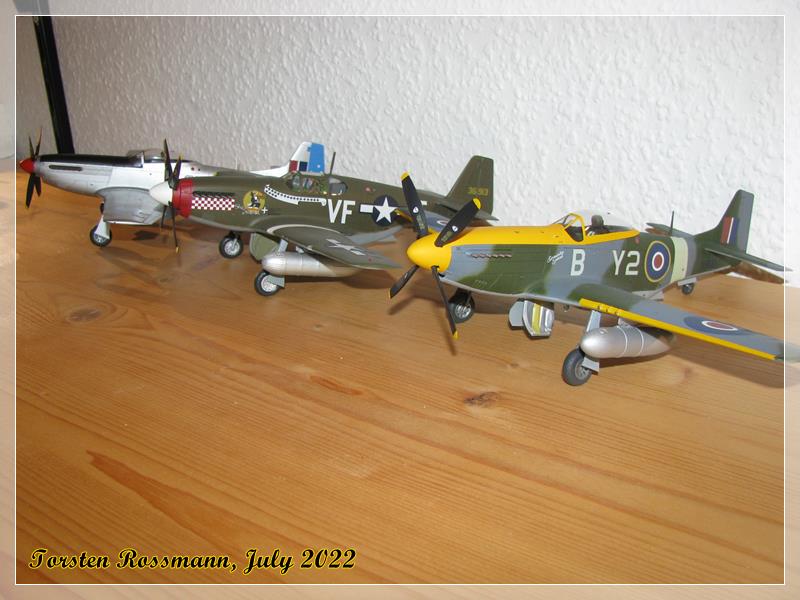
… oh, this seems to be a Fly In! Don Gentile comes around for a welcome beer … ![]()
Again I want to thank everybody for his comments, support and likes during this build ![]() It’s always a pleasure for me. The Mustangs are my No. 3 and 4 finished builds this year and No. 11 and 12 finished builds since I started this build blog. Amazing! Hope, you’ll join me also for my next build. I think, I can start with the Nakajima in the next days. Just have to check, if I have all needed paint aboard.
It’s always a pleasure for me. The Mustangs are my No. 3 and 4 finished builds this year and No. 11 and 12 finished builds since I started this build blog. Amazing! Hope, you’ll join me also for my next build. I think, I can start with the Nakajima in the next days. Just have to check, if I have all needed paint aboard.
Have a nice Sunday!
Torsten ![]()
![]()
11 Likes
Torsten,
The Brothers 3 really looks great seating there on the ready line. I must confess that I’ve always had a sweet spot for the P-51B especially in those markings.
As for not sealing the decals on a NMF, most paint companies that make metallic finishes have in their clean line, a clear finish that hardly changes the look and appearance of the NMF but protects the decals from yellowing and damage from handling over time.
Now back to work on the Porsche 917K.
joel
2 Likes
Wonderful addition to the line up. Really loved watching these builds, but then again, I always enjoy your builds.
Looking forward to the Nakajima build now.
2 Likes
Thanks for your feedback, Joel and Peter! Glad you like what you see here. ![]()
Joel, could you name a company which has this kind of clear sealer in their program? On KH716 I have used Silver from Revell Aqua and they don’t have such a thing. At least not over here in Germany. Oh, and this is for you … ![]()
This is the old Tamiya kit and I just took 2 quick shots of “Shangri La”. Have built it in September 2013 but can’t find the original photos. A bit dusty already from years on the shelf of pride but still okay for a model show every now and then.
Cheers! ![]()
Torsten
7 Likes
Brilliant additions to the display, Torsten! Builds 3 and 4 for the year are true beauties! ![]()
“The flying Wombat!” Priceless! Definitely will be chuckling about that all day today ![]()
2 Likes
Thanks for your kind words, Russell! Glad to hear you like my efforts on these two. I’m also quite happy how they came out in the end.
Concerning the Flying Wombat I refer to postings 407 and 410 in this thread. It’s not originally my idea, I just borrowed it and laughed tears of joy when I first heard it … ![]()
And now back to the bench!
2 Likes
Torsten,
Two companies that have clear sealers are Alcad 2, and Scalefinishes which is local USA one man paint company.
Alcad 2 has several clear finishes, so make sure that you get one that’s designed as a sealer.
joel
2 Likes
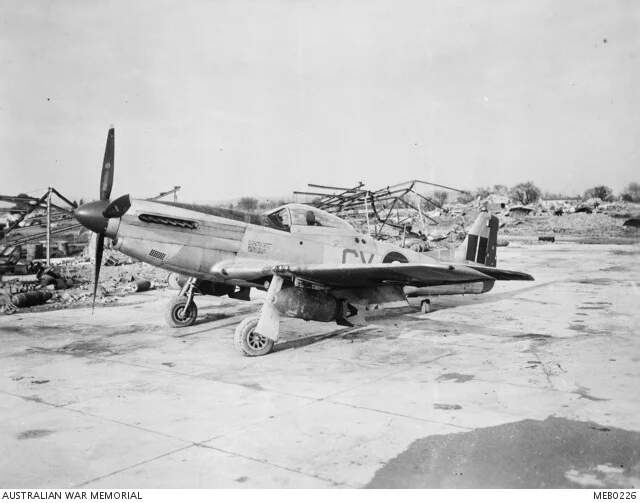
Beautiful work Torsten, great to see this pair of P-51s join their stable-mate and especially good to see an RAAF subject in the mix!
Looking forward to your Myrt build now, an aircraft that I haven’t seen built up yet.
Cheers, D
4 Likes
Thanks for your appreciation of my work, D! Very kind! ![]() And thanks for posting another few pics of KH716. I save them for my collection.
And thanks for posting another few pics of KH716. I save them for my collection.
The Nakajima is already on the bench. Cockpit is mostly painted and ready for assembly. I hope I can show some first progress in the next days.
Have a great Sunday!
Torsten ![]()
1 Like
Hi gang!
First small update of the C6N1 ![]() Most of the cockpit is done now and at first I had to mask a clear part inside the cockpit …
Most of the cockpit is done now and at first I had to mask a clear part inside the cockpit … ![]() So the Eduard mask EX109 was well spent money from the first moment on …
So the Eduard mask EX109 was well spent money from the first moment on …
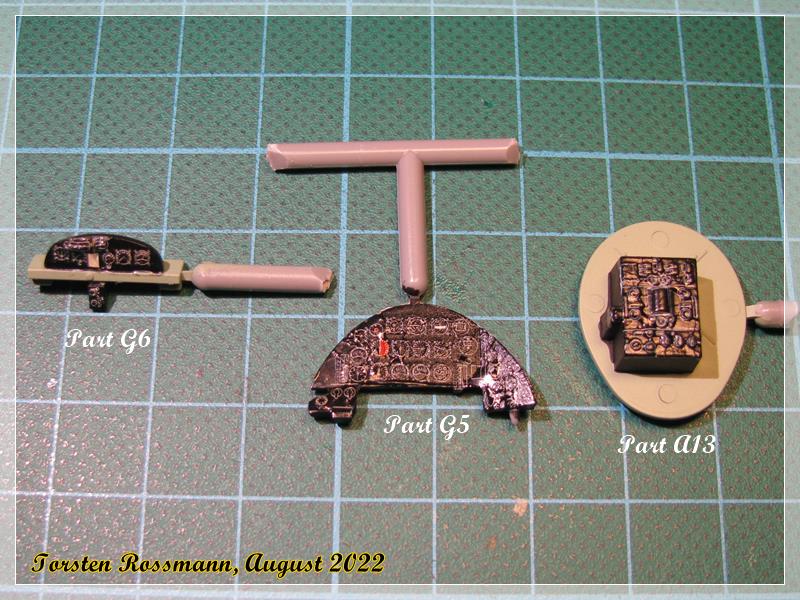
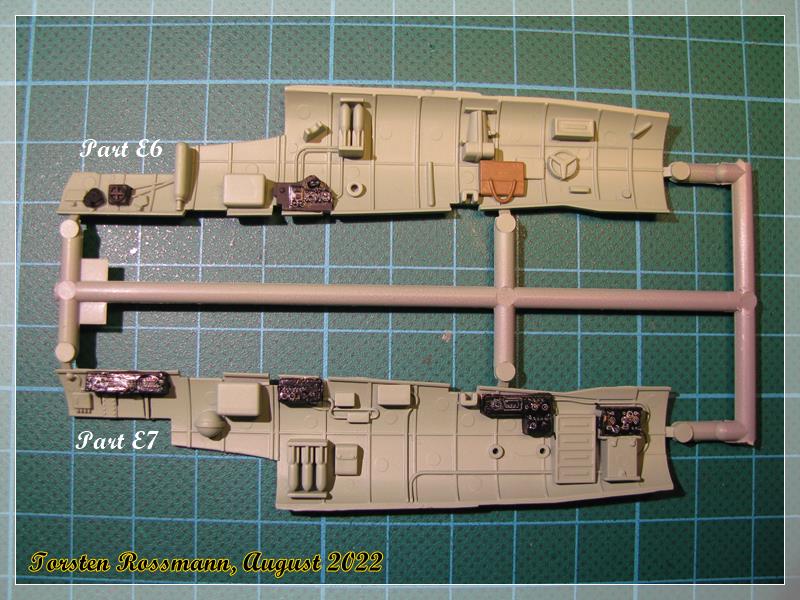
… more cockpit parts painted. The decals for the instruments are a bit mulish after all these years in the box, but my “persuasion” was Agama Hypersol, which is originally a softener but in fact it can easily knock out and destroy a decal. So, don’t touch it for hours … On parts E6 and E7 are about 10 ejector pin marks per side but who wants to erase them? I guess, not much will be seen inside the cockpit in the end as the canopy has only the closed option.
… the cockpit walls are now inside the fuselage parts …
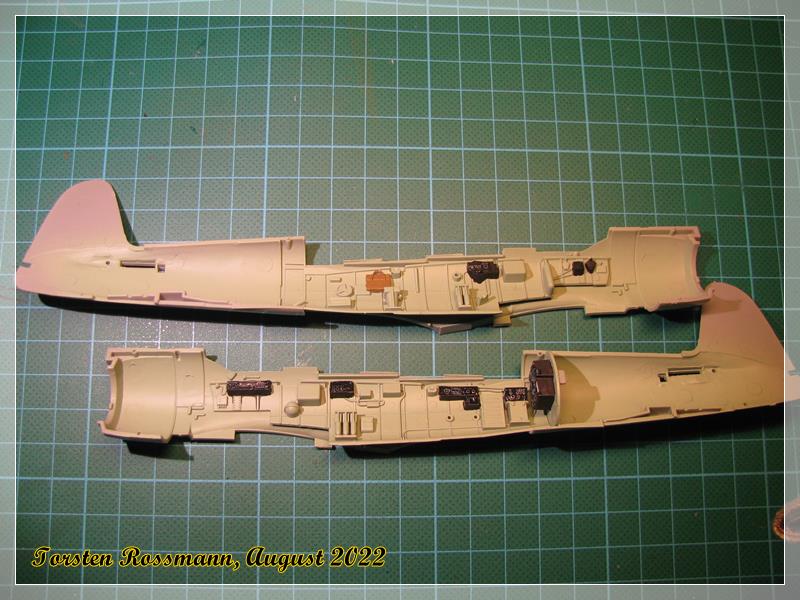
… and first test fitting isn’t bad …

… finally the cockpit floor. The seatbelts are simply made of Tamiya Tape. So far no fitting problems …
… of course Hasegawa wants me to use their own paints and I should use Nakajima Cockpit Color for the inside. Of course I don’t have it so I checked an alternative from Vallejo and think 71305 Interior Grey Green is a close match …

Next step will be getting all these parts inside the fuselage halves without problems. I’ll see tomorrow. Wish me luck! ![]()
Torsten ![]()
8 Likes
Drove a Skoda, lived in Czechoslovakia and am now in Edmonton Alberta Canada… hmmmm. Terrific work on all Air Craft. Thank you for posting!
2 Likes
Thanks for your kind comment, HG! Very generous! Never had a Skoda, but they are quite popular here in Germany since their transfer to the Volkswagen Group. Since 2007 I drive a Ford Focus. Great car, love it!
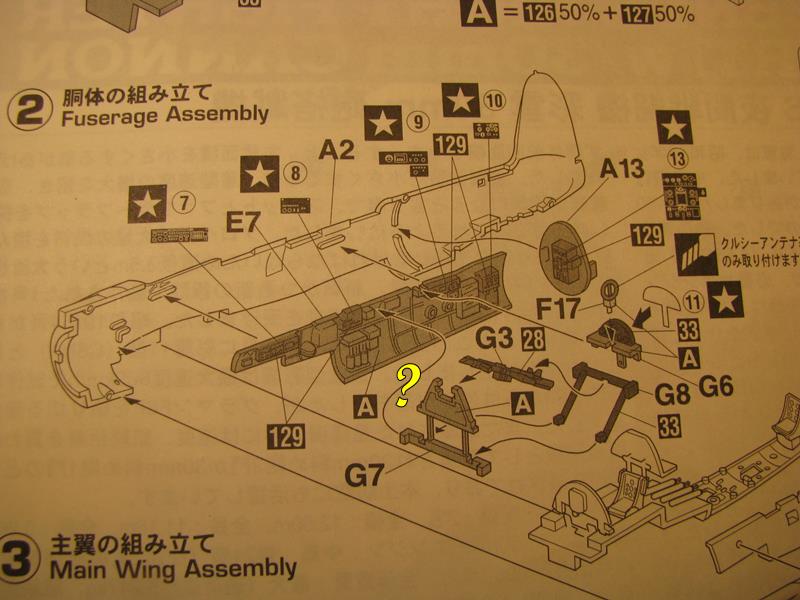
Another update from the Nightfighter. Cockpit assembly is done so far but I had some problems. Not with the fitting but with understanding the construction plan.
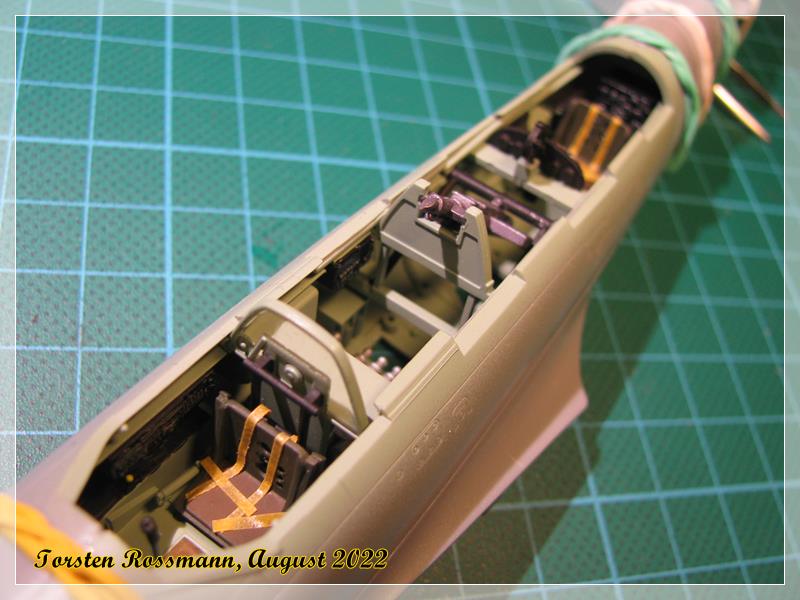
Cockpit floor is glued to the right cockpit side …
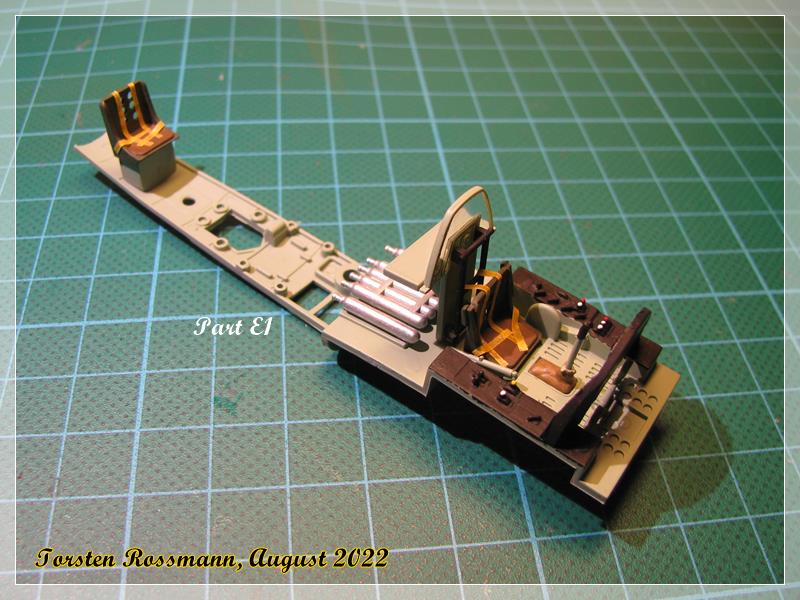
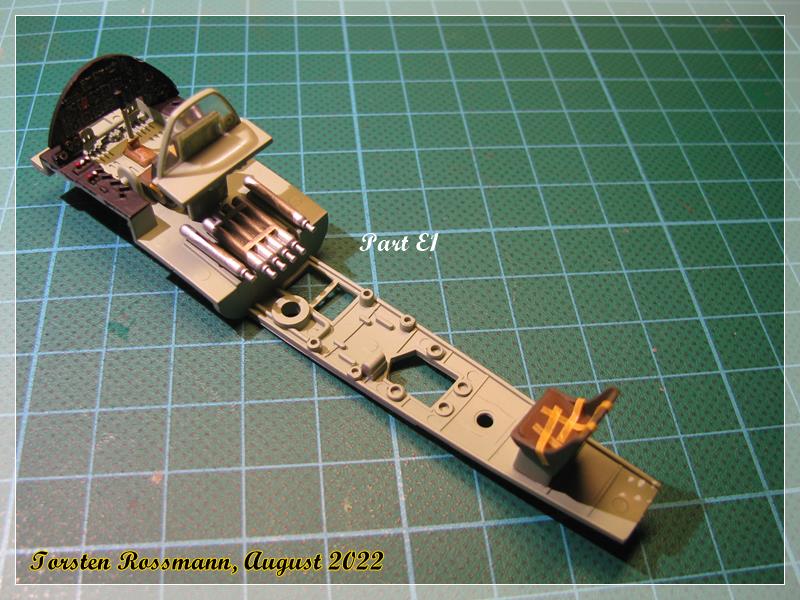
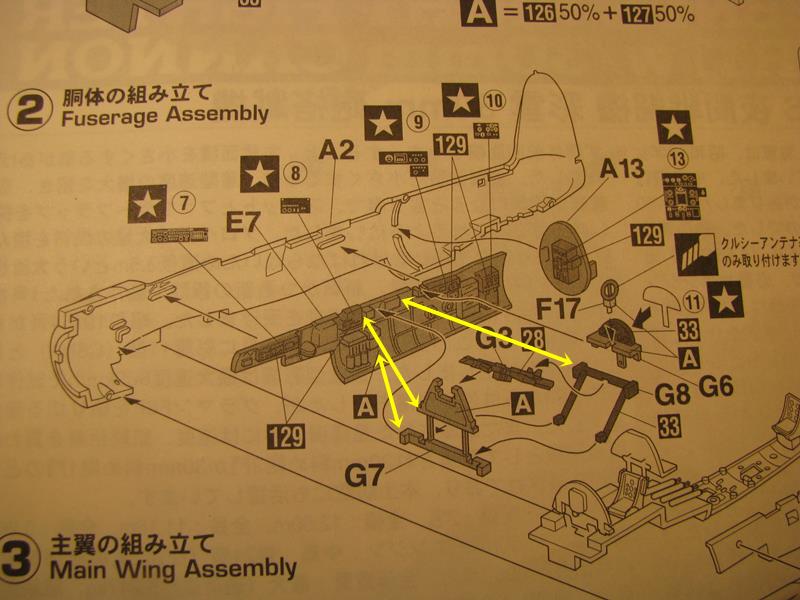
… when I came to attaching the 30 mm cannon “Schräge Musik”, parts G7, G3 and G8, to the cockpit I noticed that there must be something wrong in the plan because it just didn’t fit. The frame would come to high over the canopy this way … ![]()
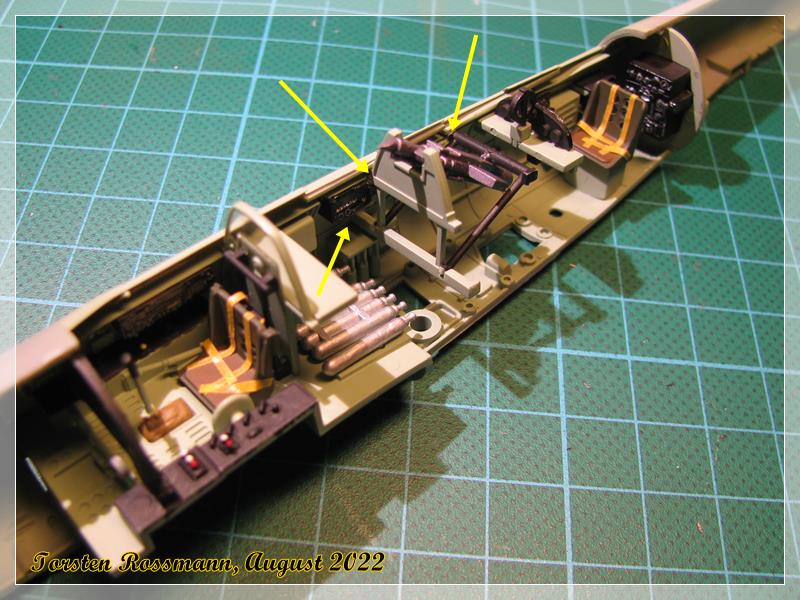
… so I did some research in the internet about a built C6N1 Nightfighter and found … nothing. Only a build of the Saiun recon plane, which is not helpful here. So I test fit the canopy part K1 to the fuselage with the cannon inside and came to the conclusion that this is more likely the correct fitting … ![]()
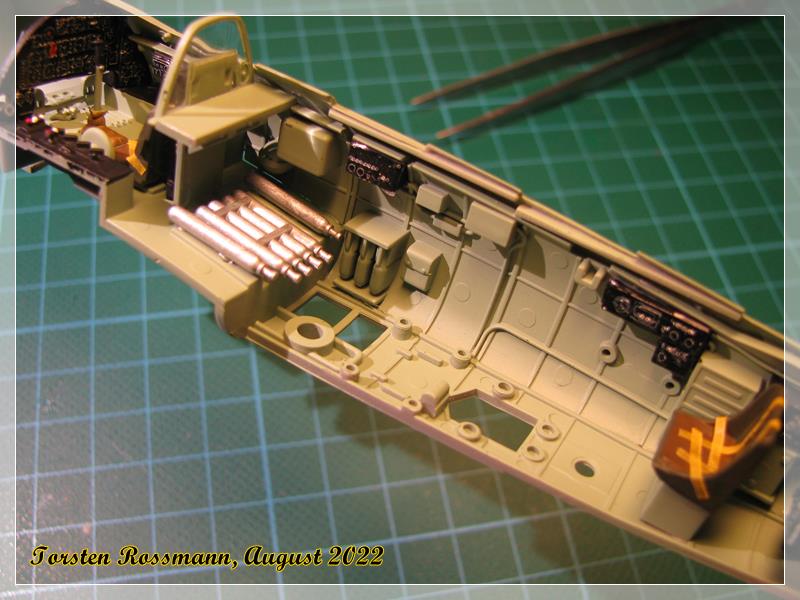
… and this is how I assembled the cannon now into the cockpit. Hope I did it the right way. The fitting of the canopy will tell me later … ![]()

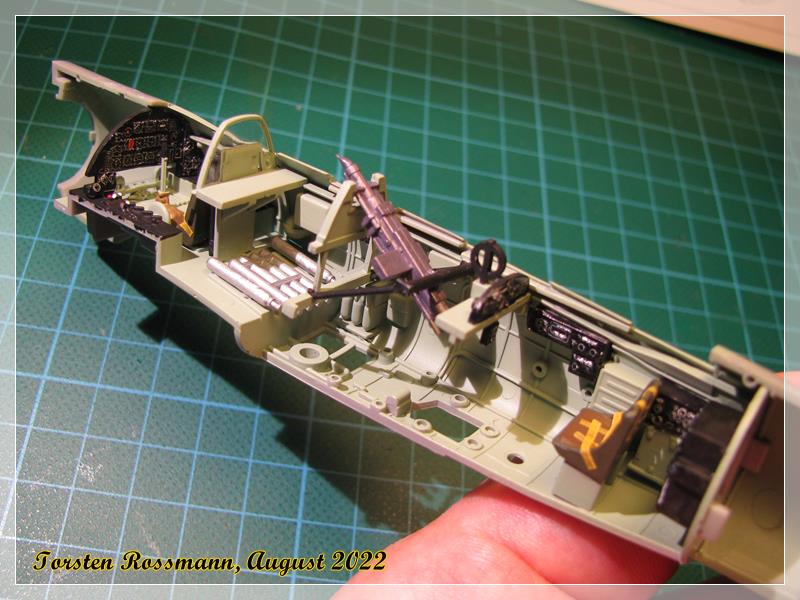
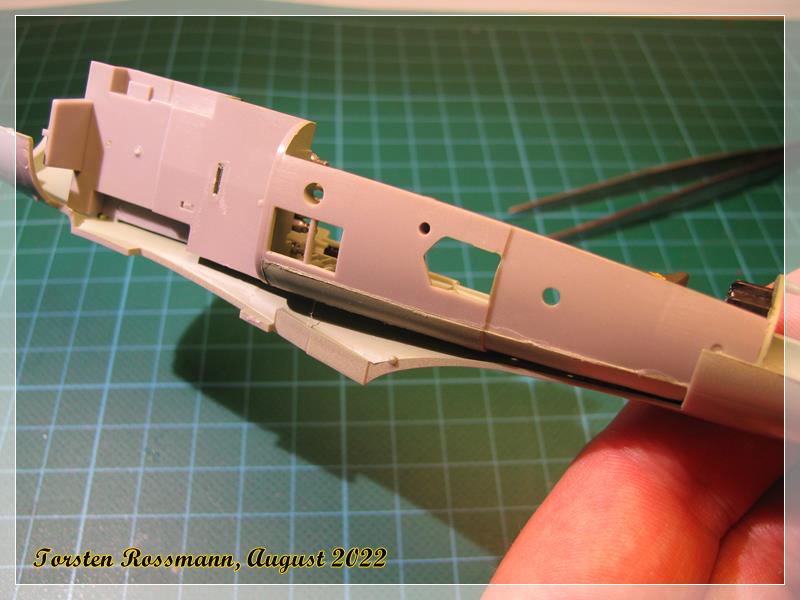
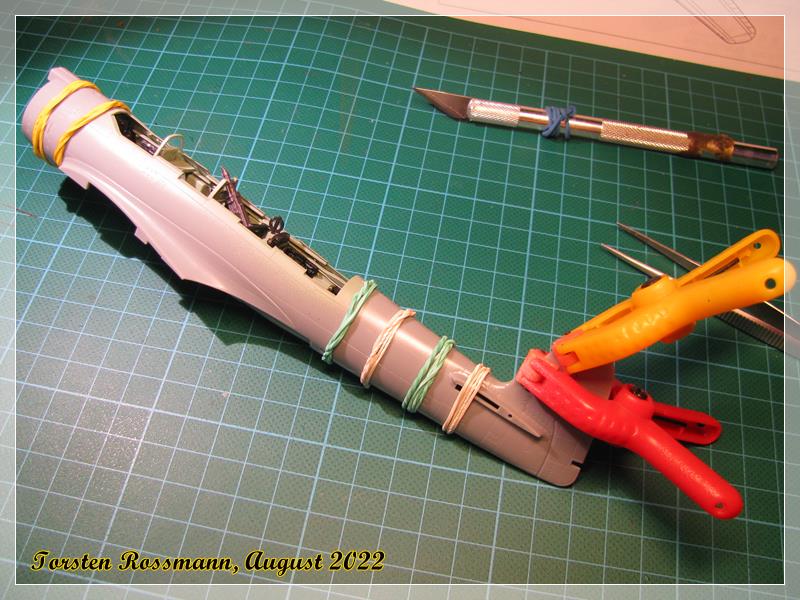
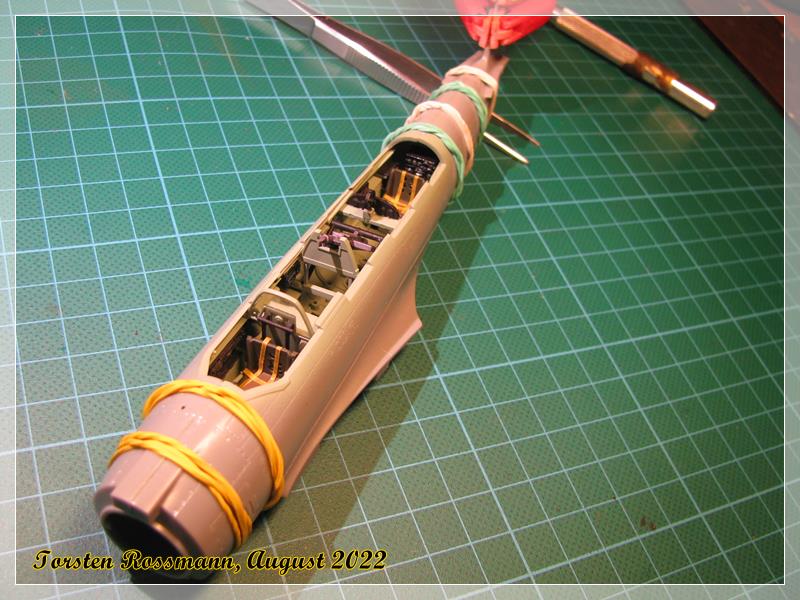
… I just closed the fuselage and will leave everything until tomorrow. The fitting is good and gives no troubles so far. There will be some sanding though.
Have a nice Sunday, folks!
Torsten ![]()
10 Likes
Moving along nicely Torsten. I look forward to the next update to confirm your modifications to be correct!
Cheers, D
2 Likes