Before i get stuck in I just wanted to wish everyone a Happy New Year!
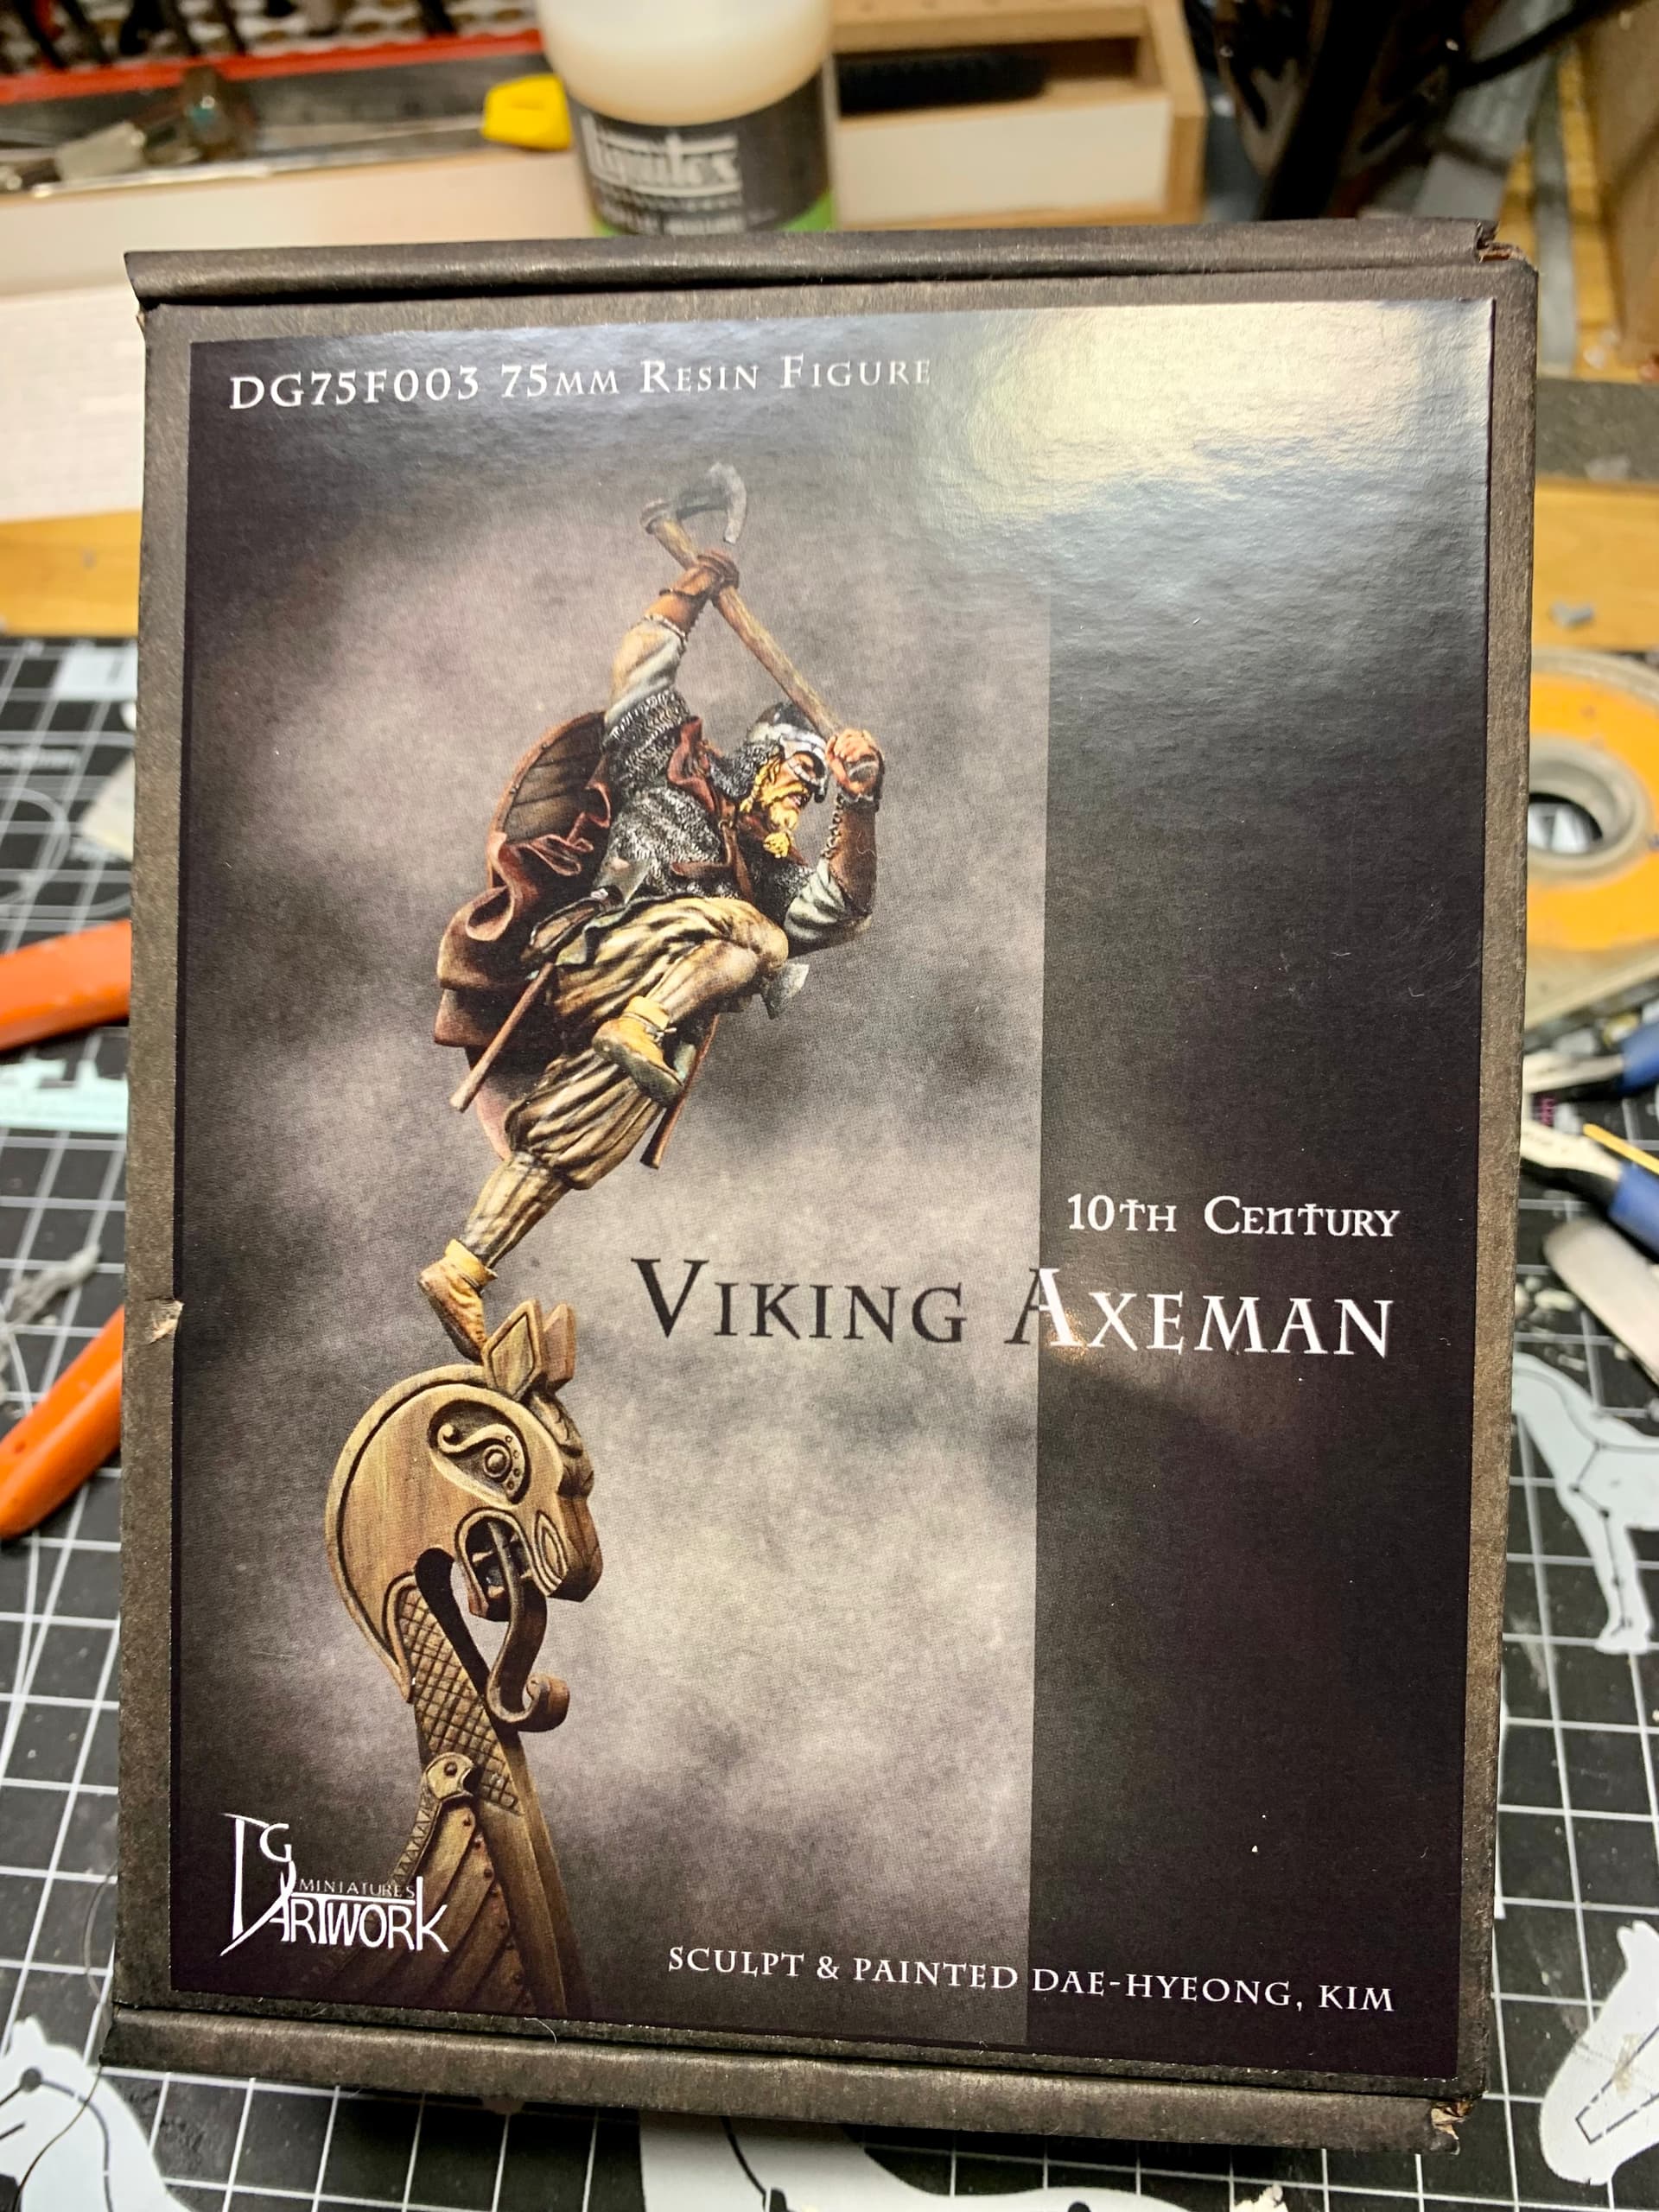
Well as the title suggests i’ve got a kit of a Viking here.
DG Artwork make some interesting pieces and this is, I think you’ll agree, a striking one. You can near imagine this fella jumping off a longboat on Lindisfarne!
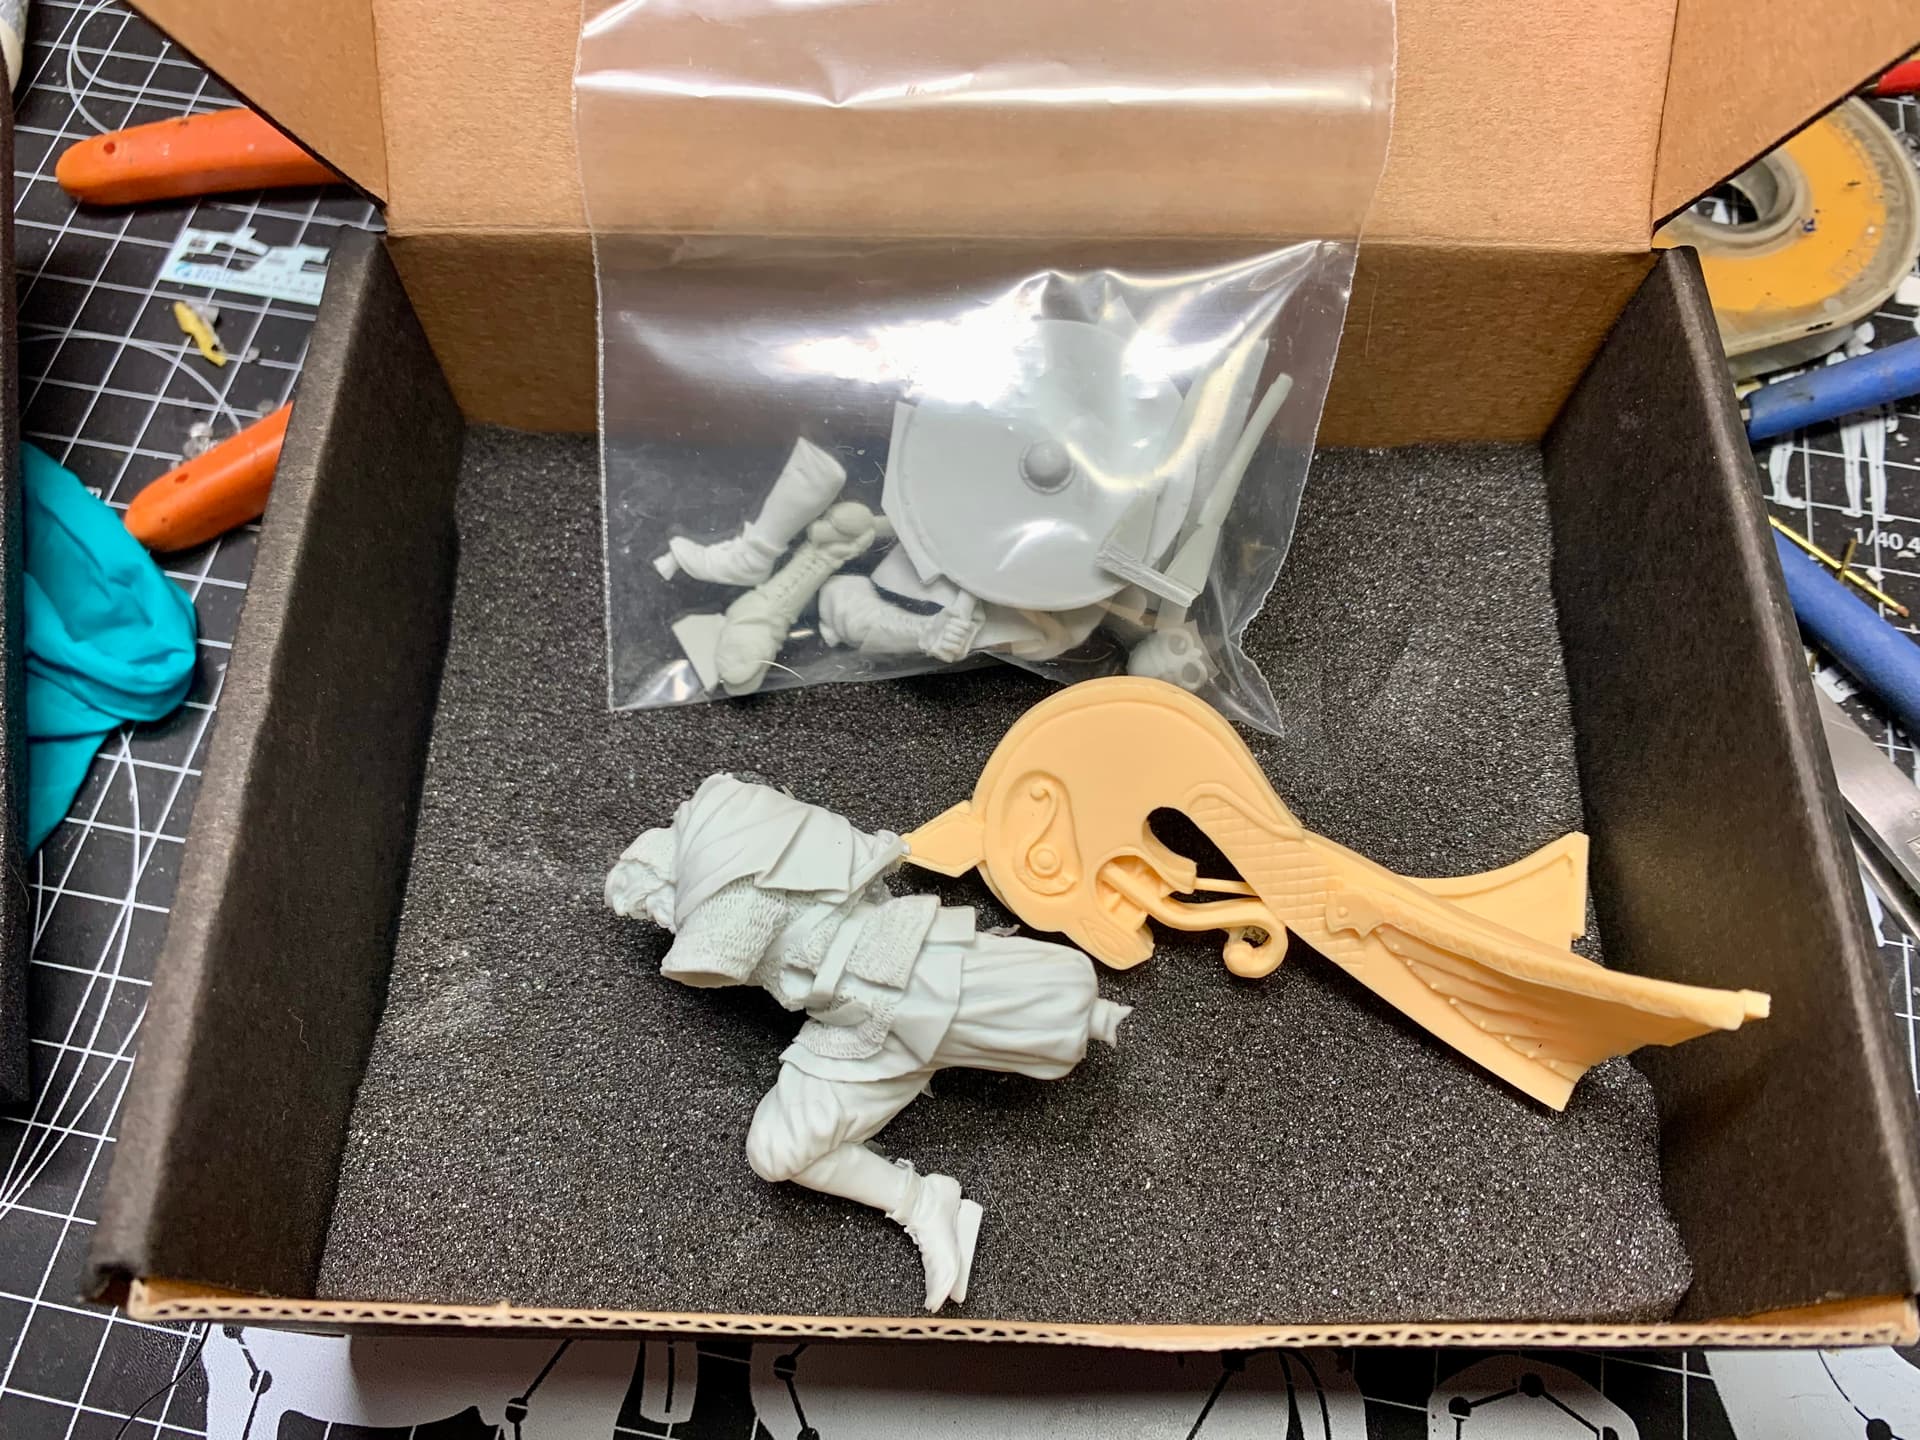
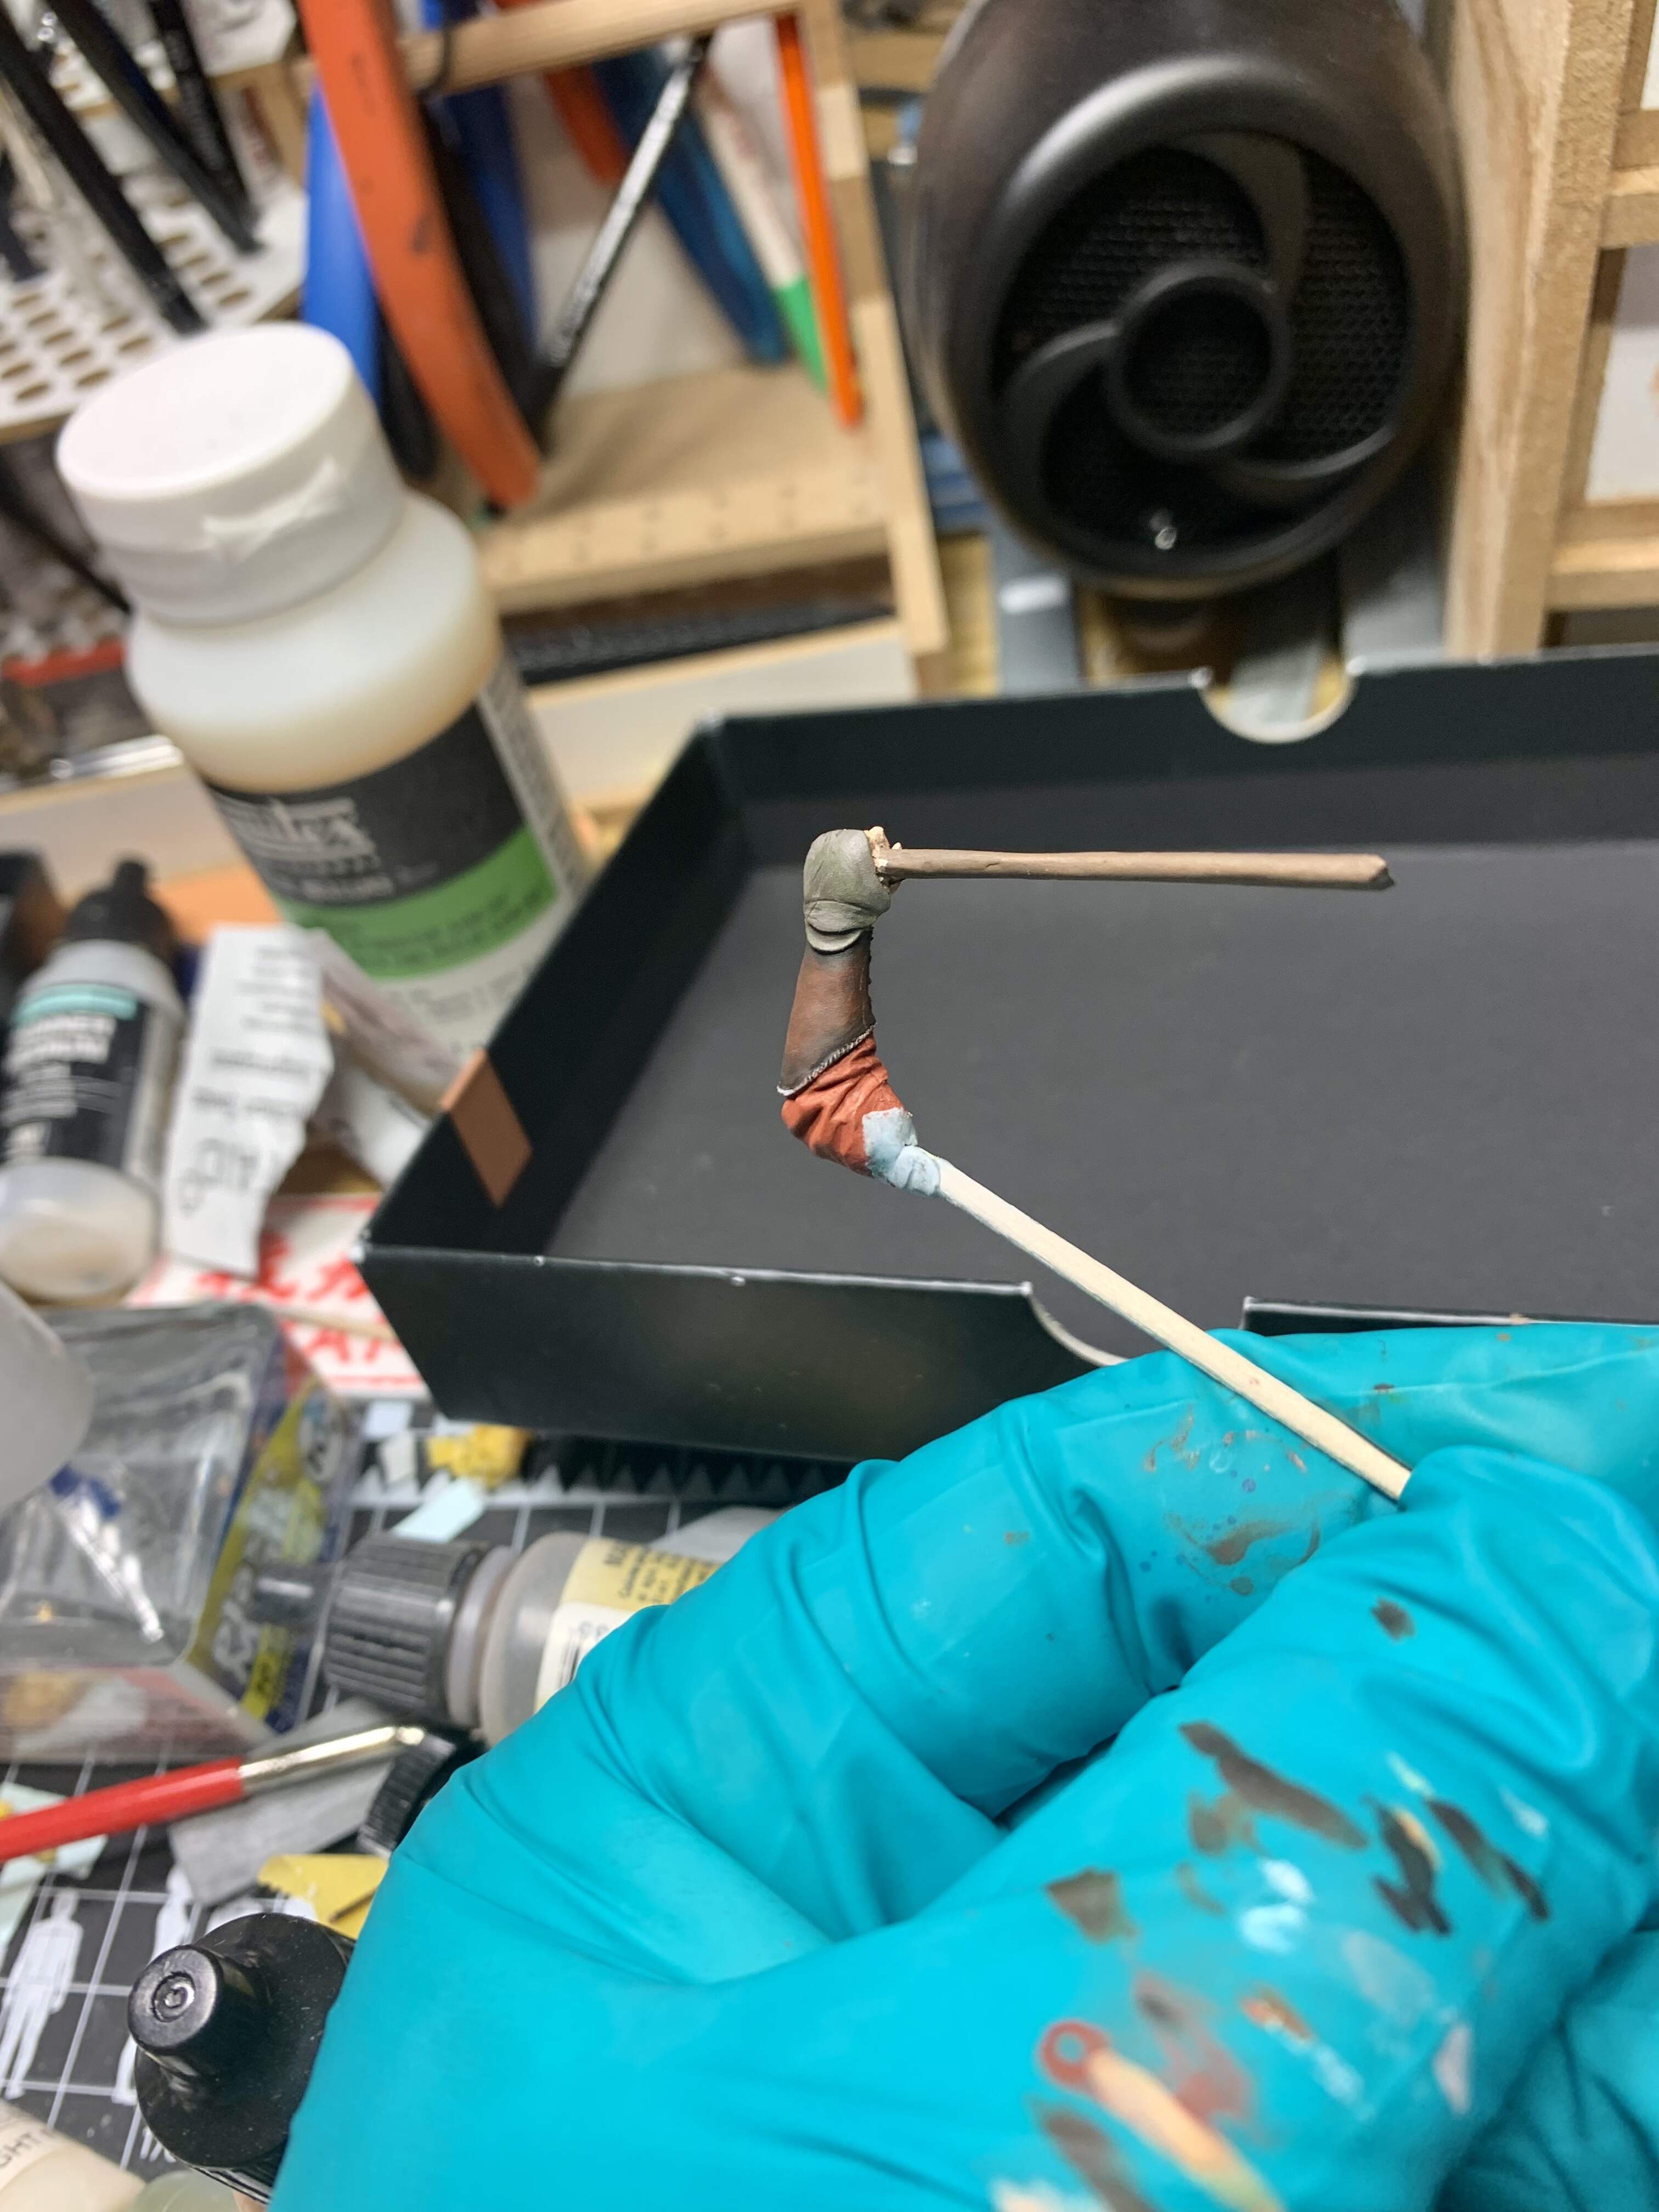
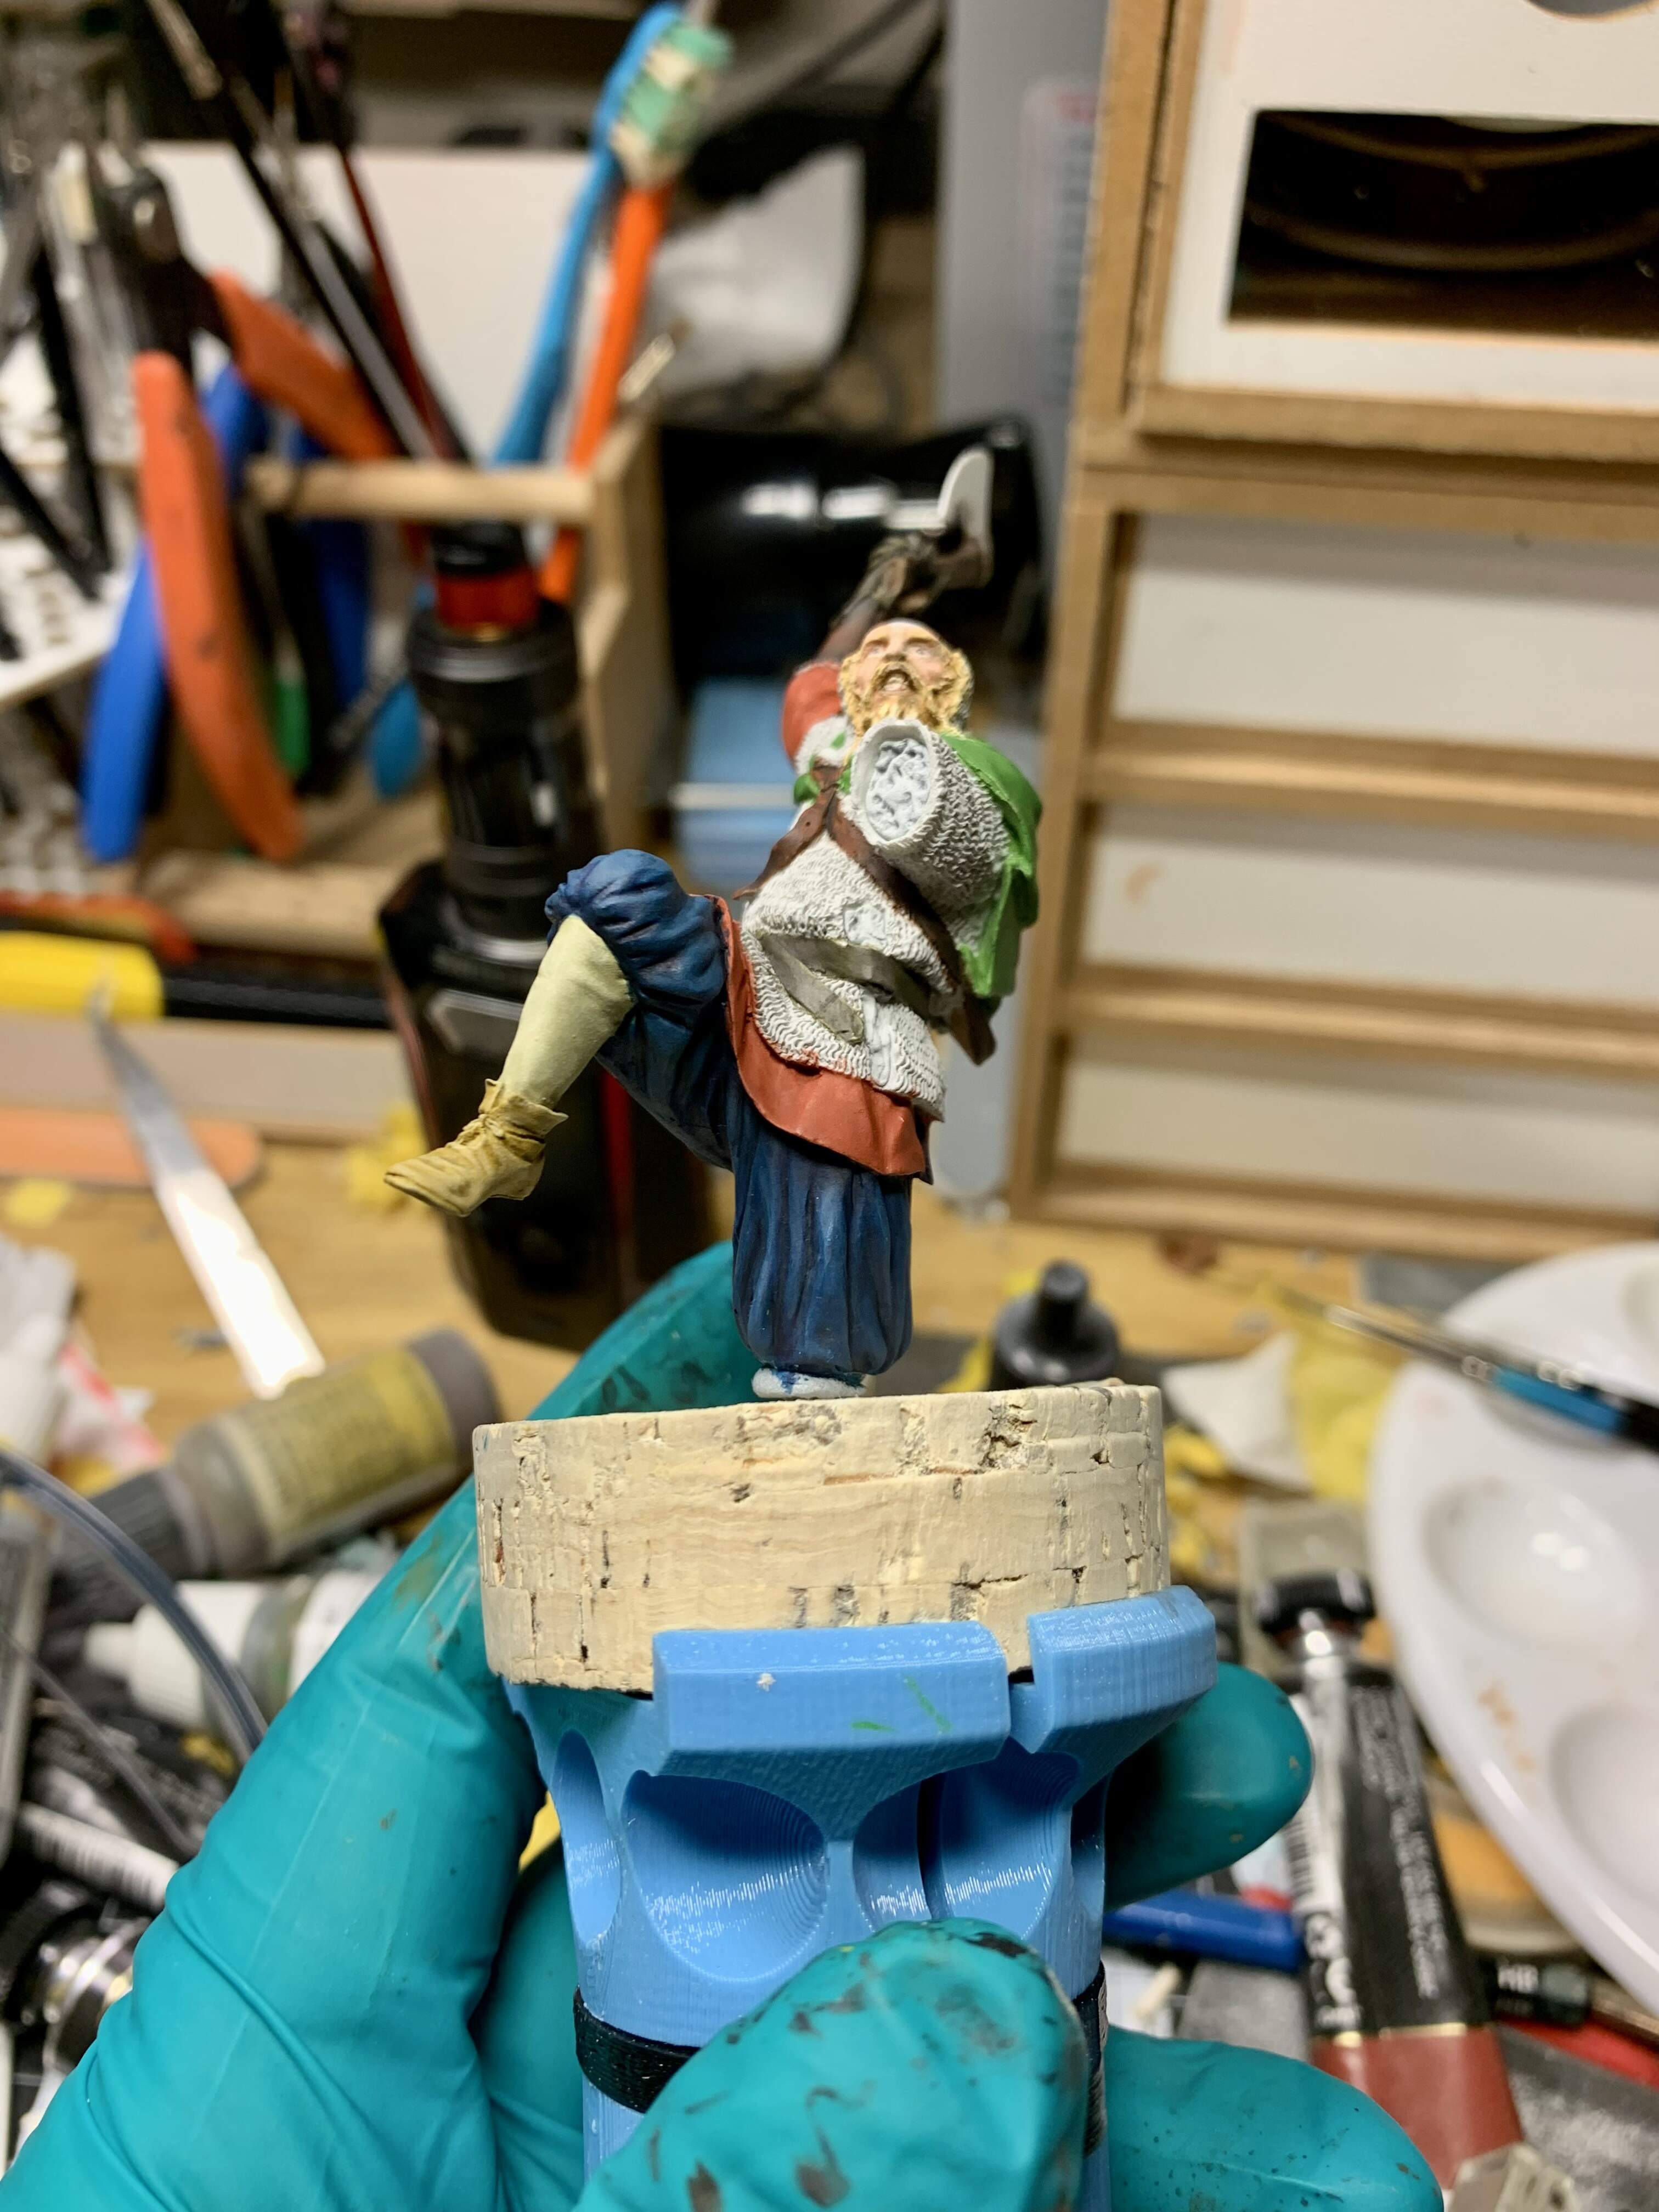
The sculpt is nicely done with the chain mail probably being the highlight of the whole thing. There are not one but three axes- one on each side in addition to the long handled one- not messing about this dude! The helmet is okay but a bit undersized around the rear where the fit is a bit so-so.
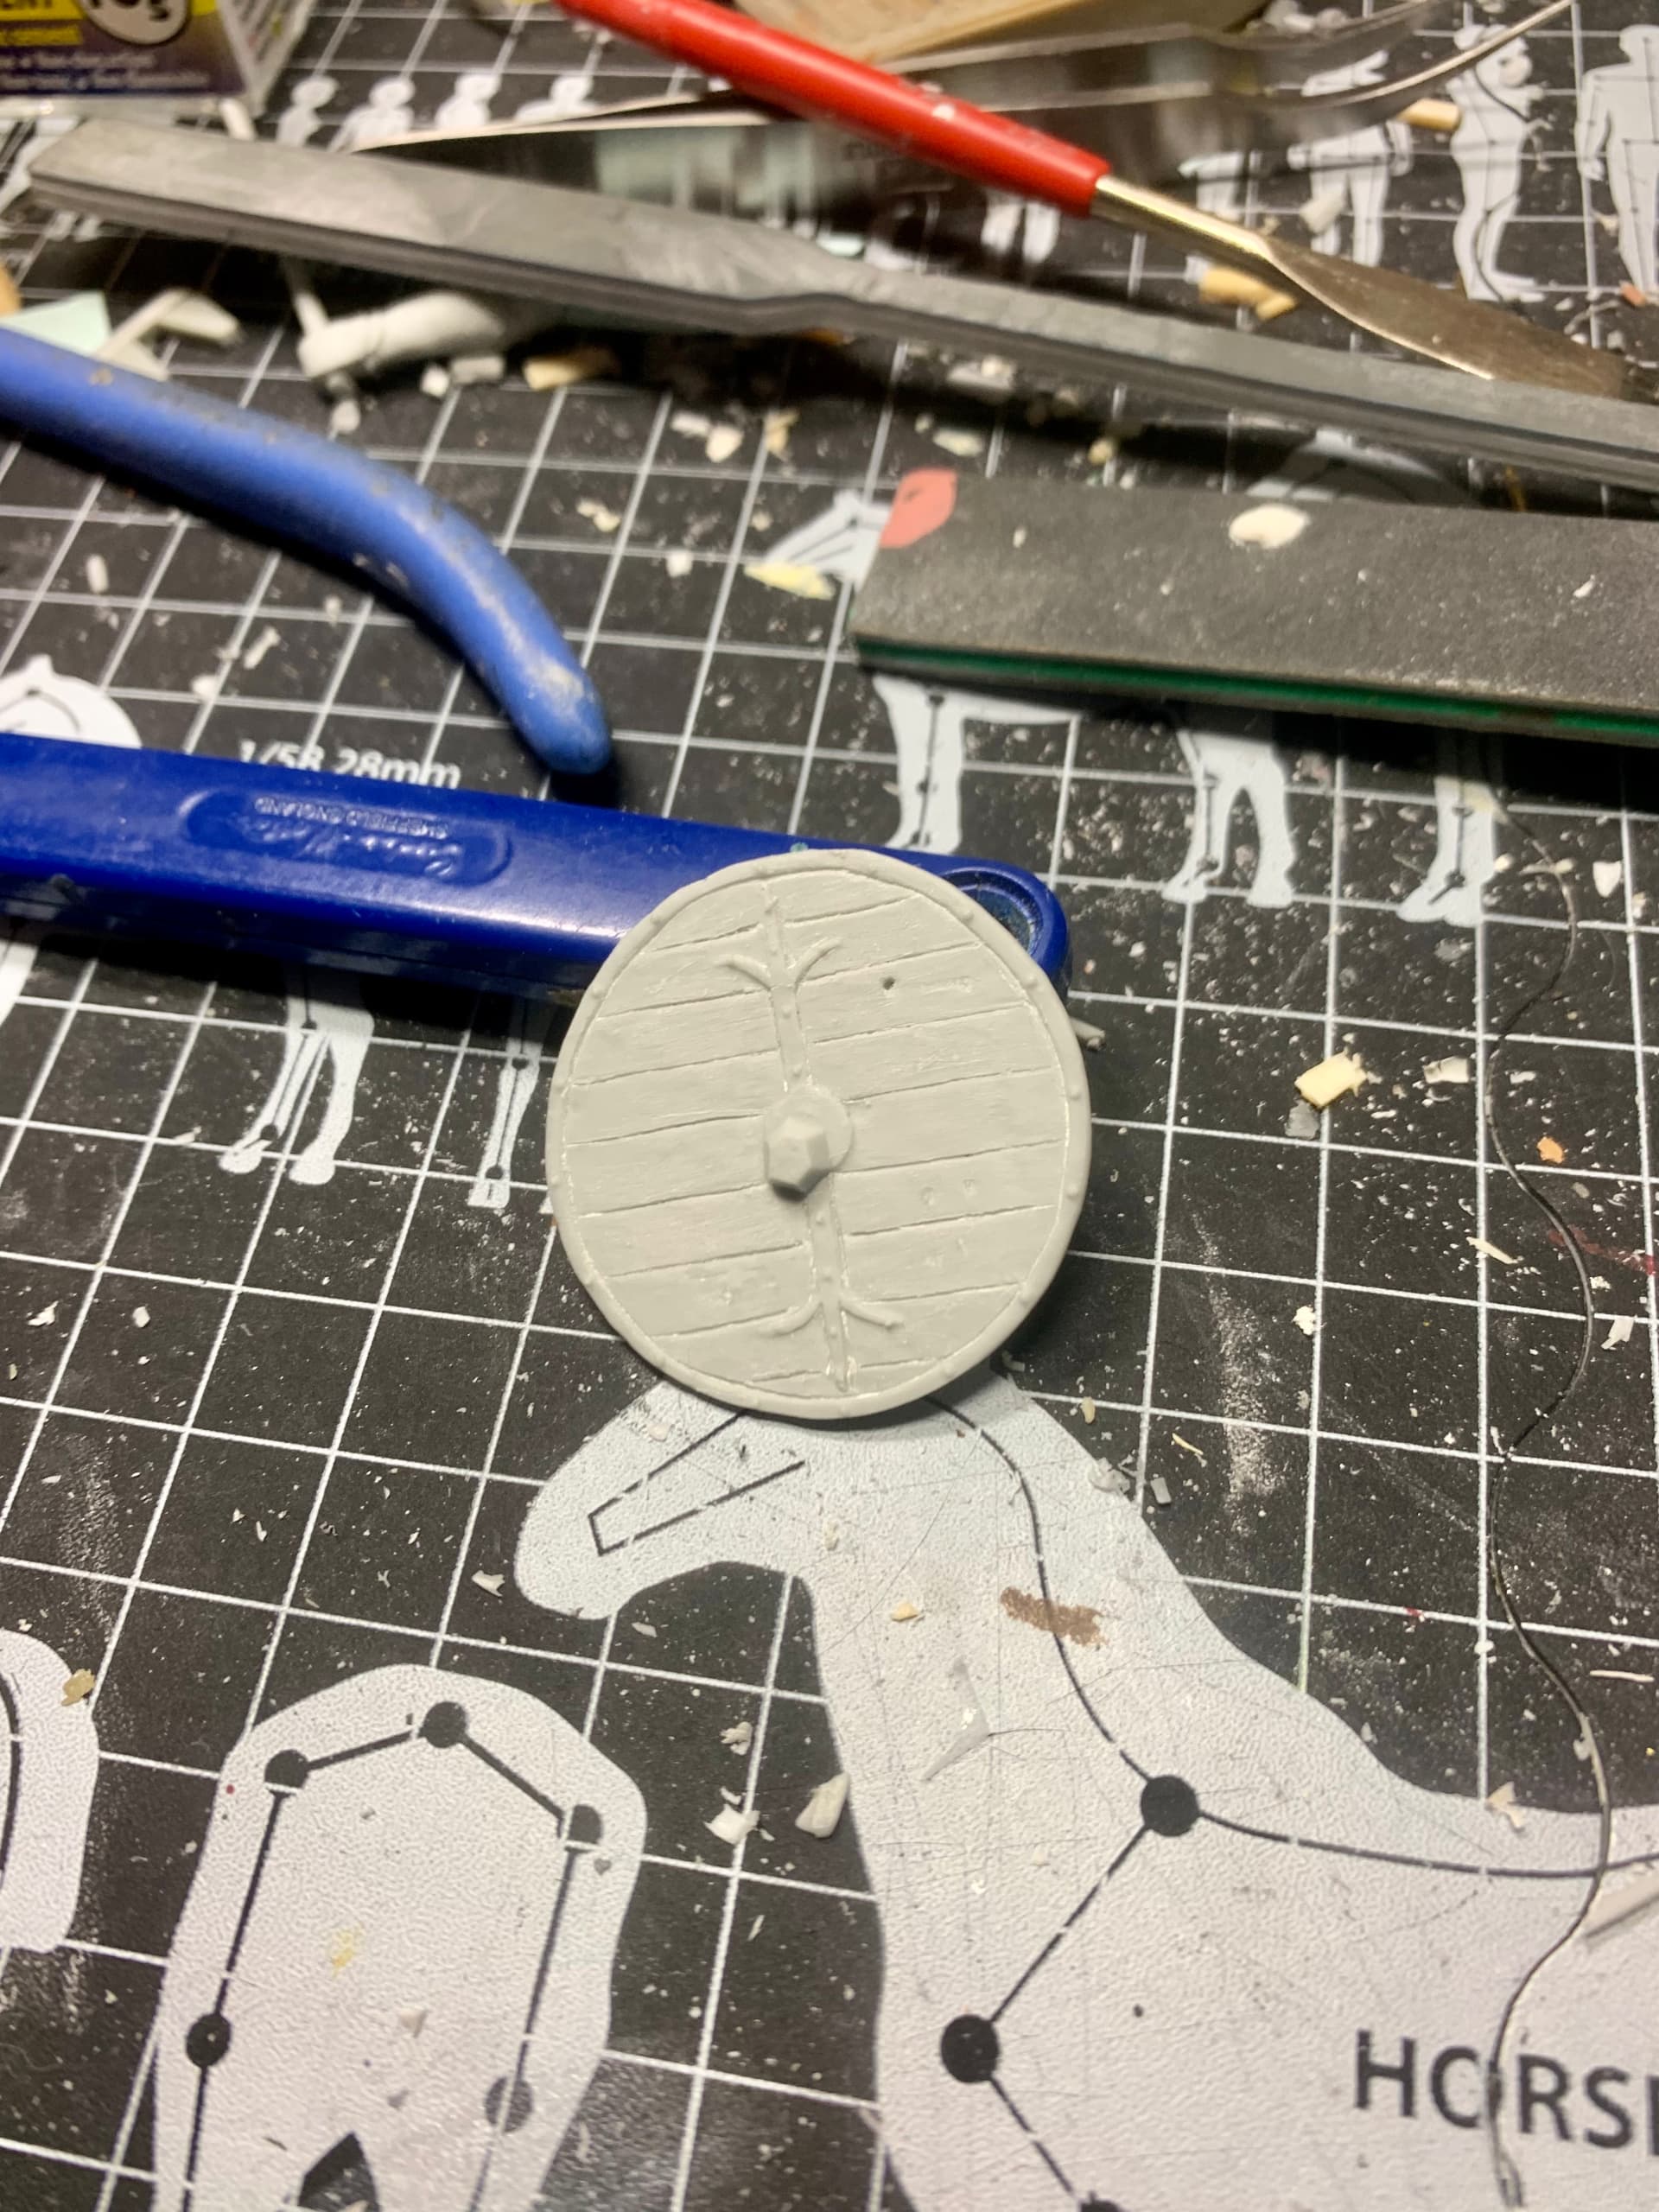
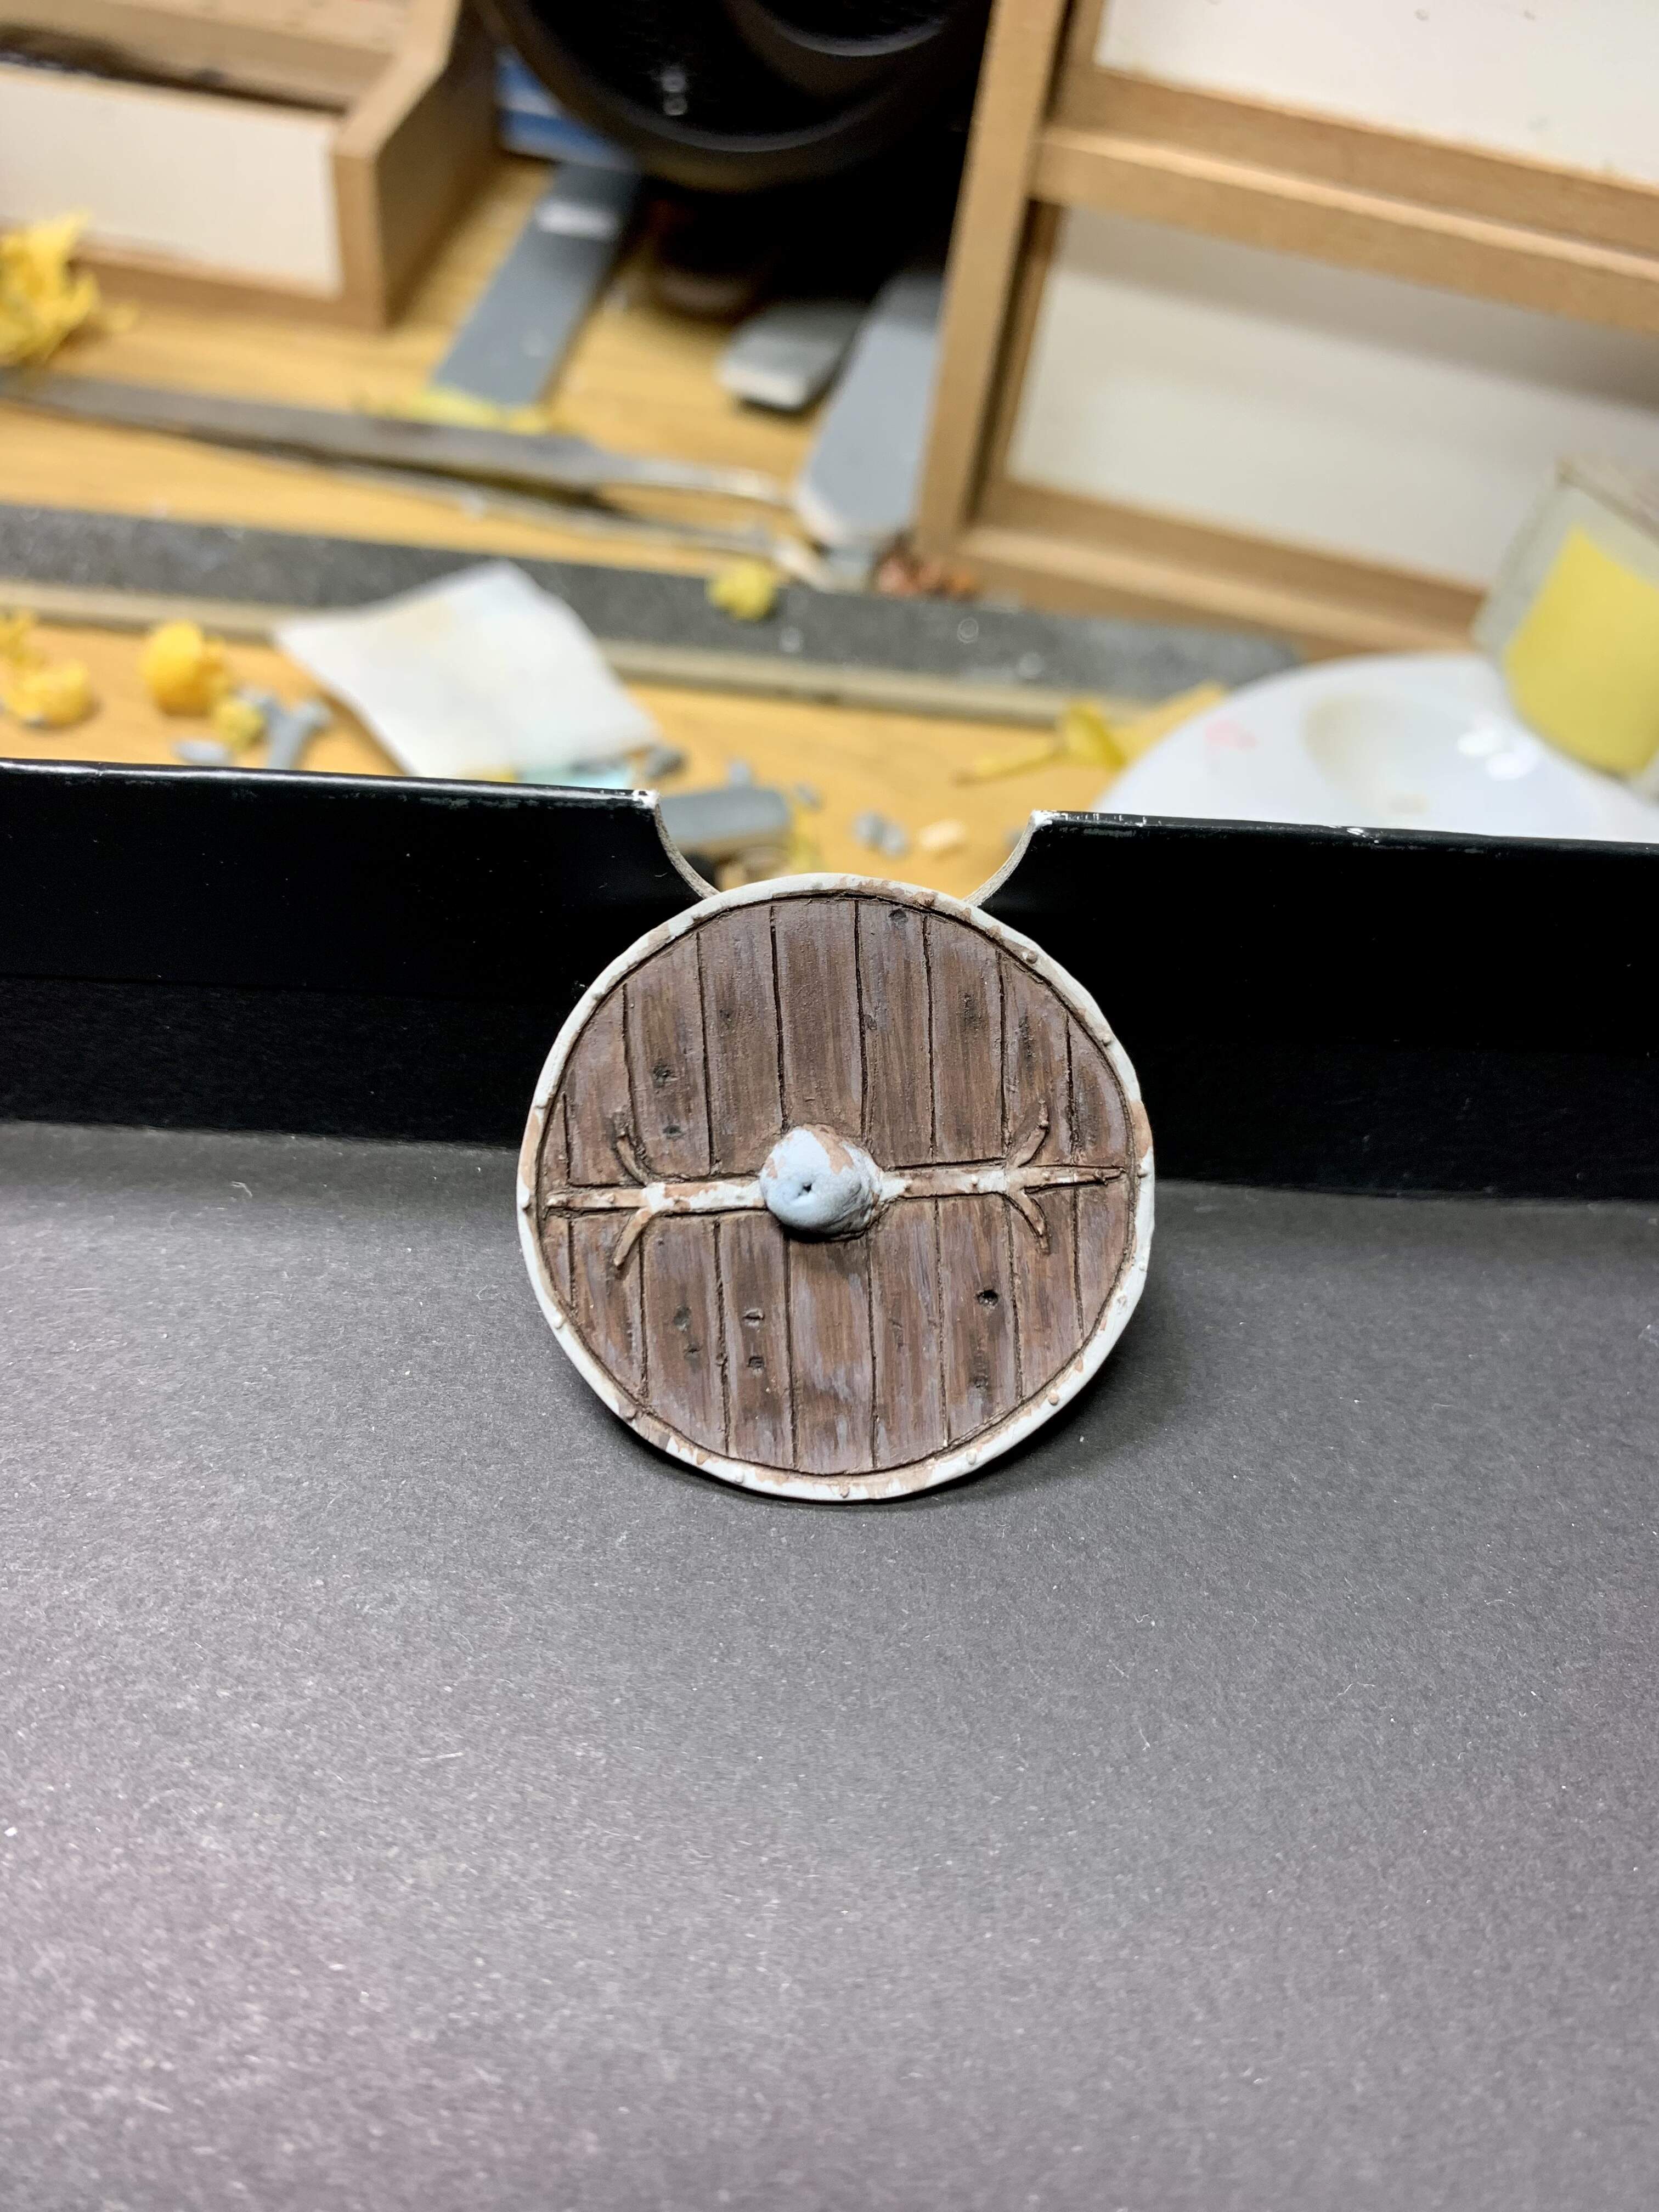
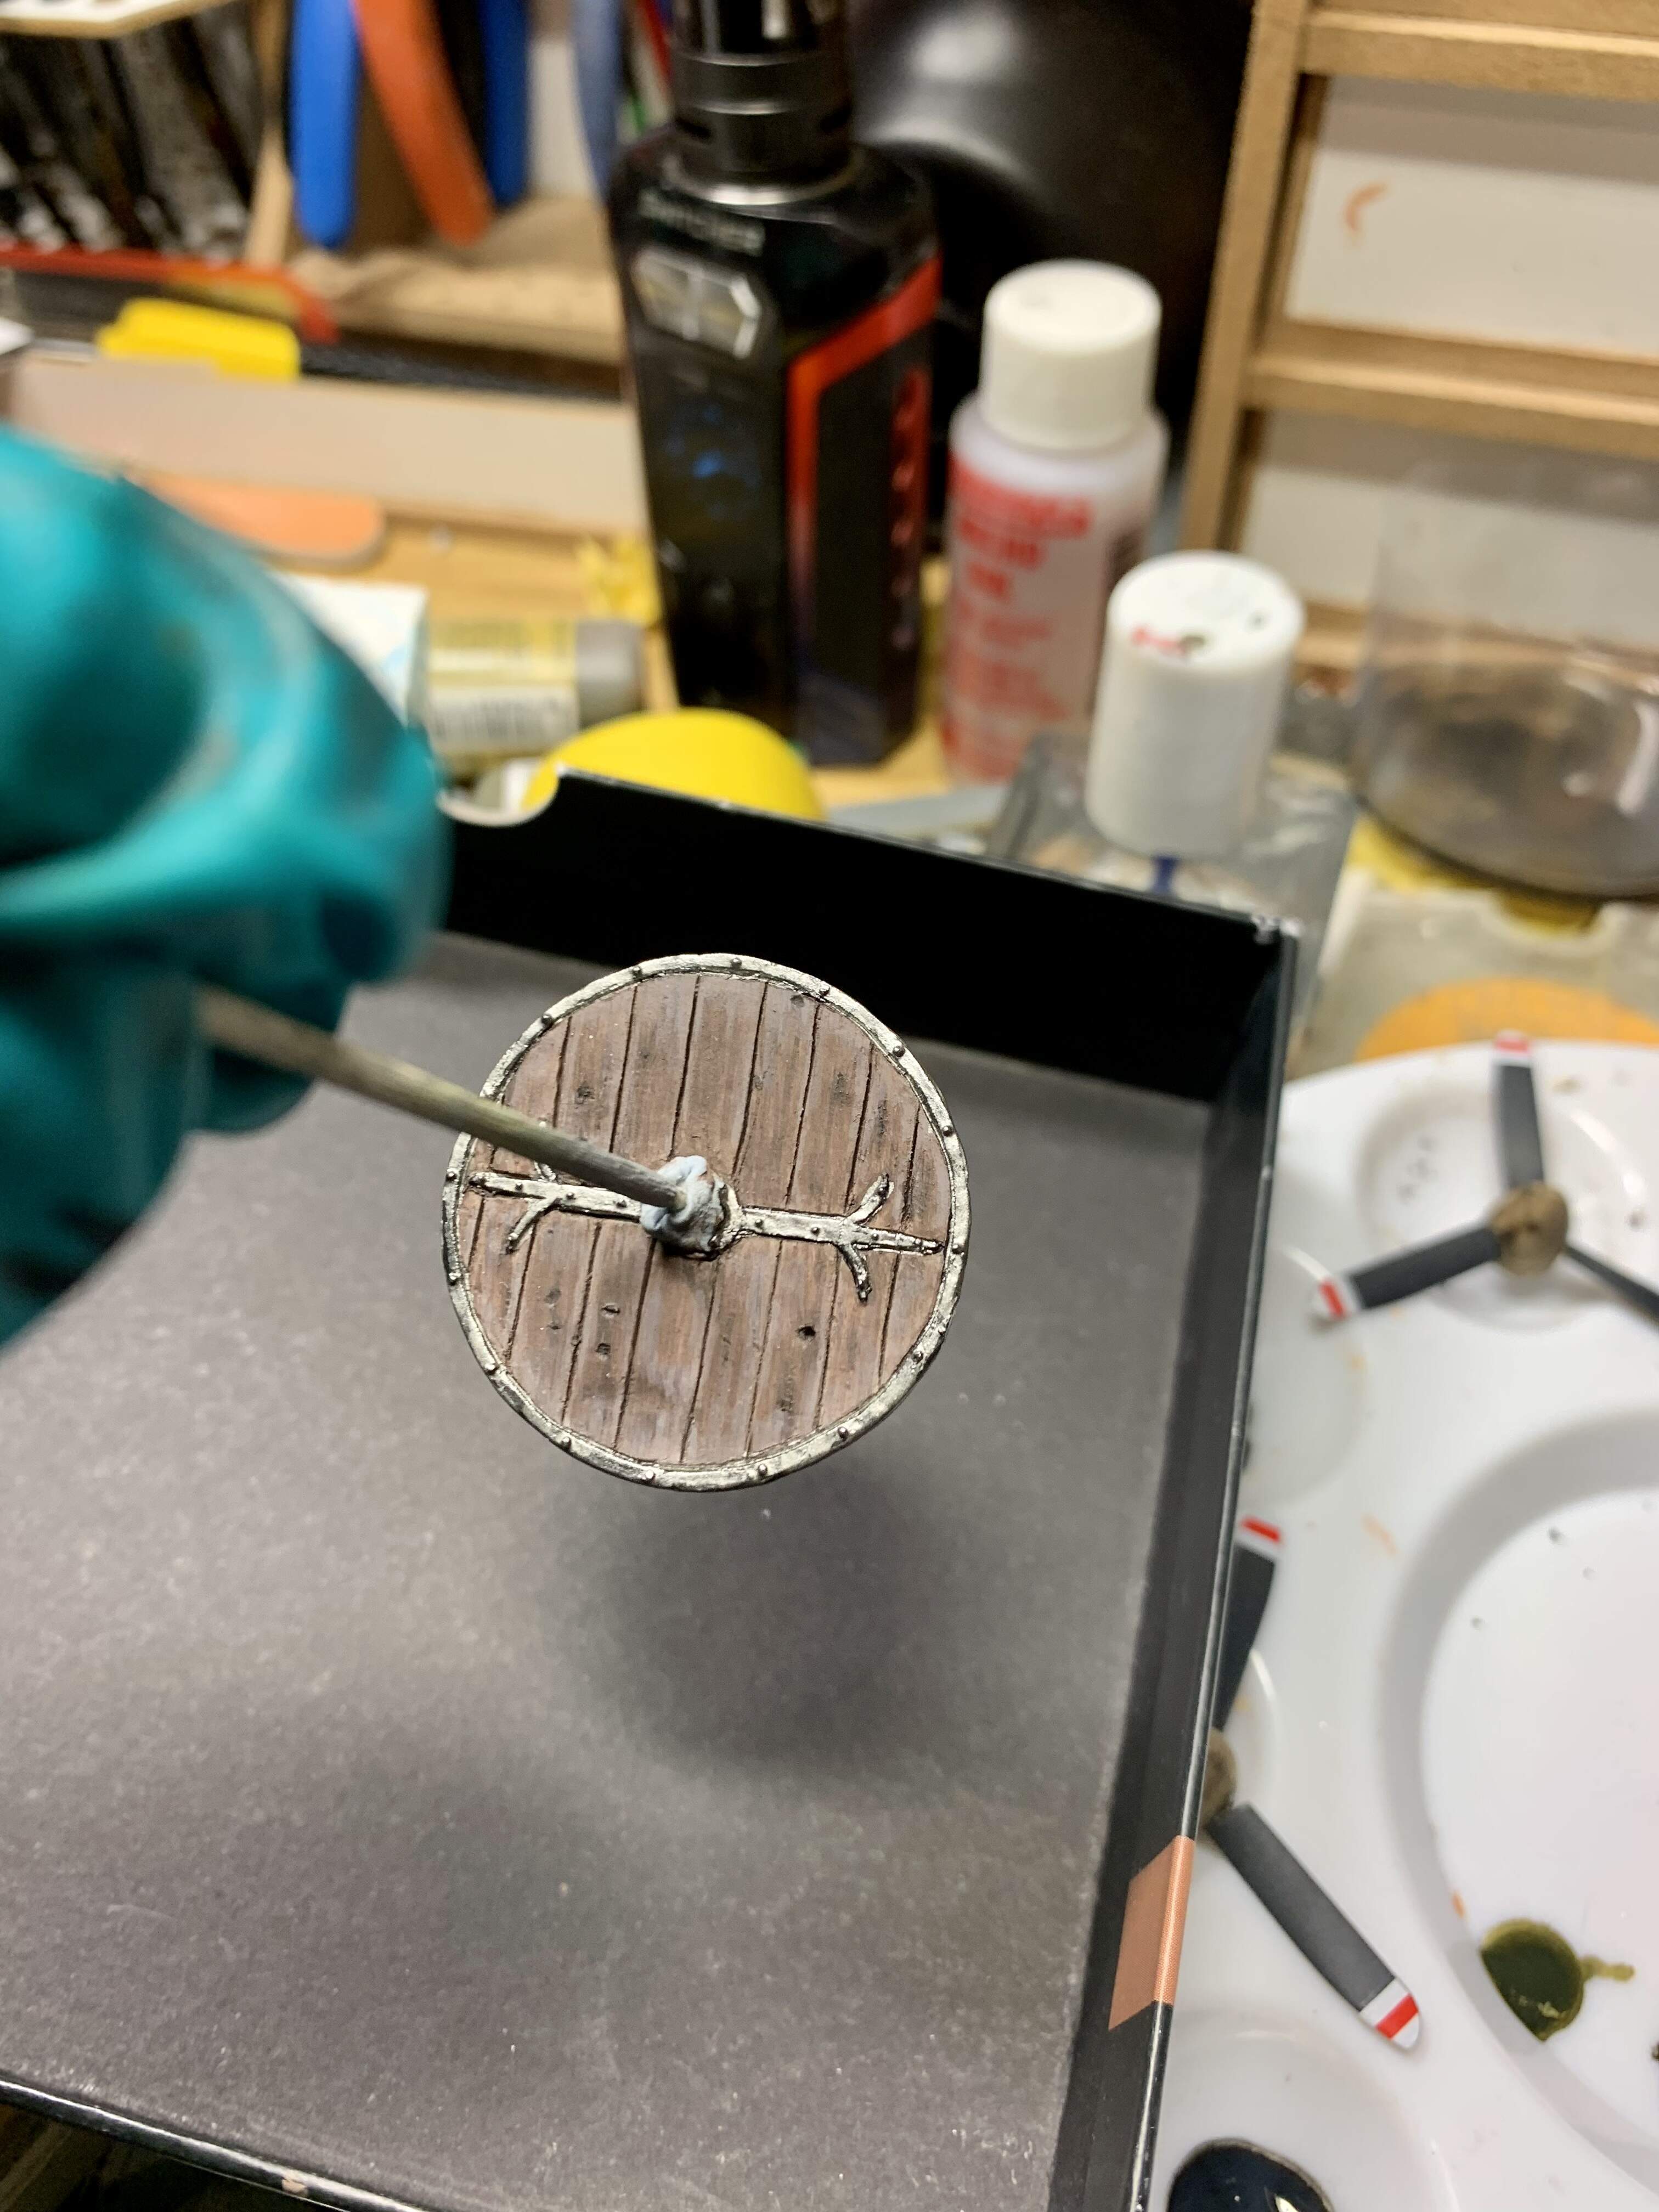
My only other gripe was the shield- the cast was not as crisp as the other parts so I embellished the details a bit with a micro-chisel and roughed up the inner face wood with a file and gave it a bit of blade and arrow damage on the front.
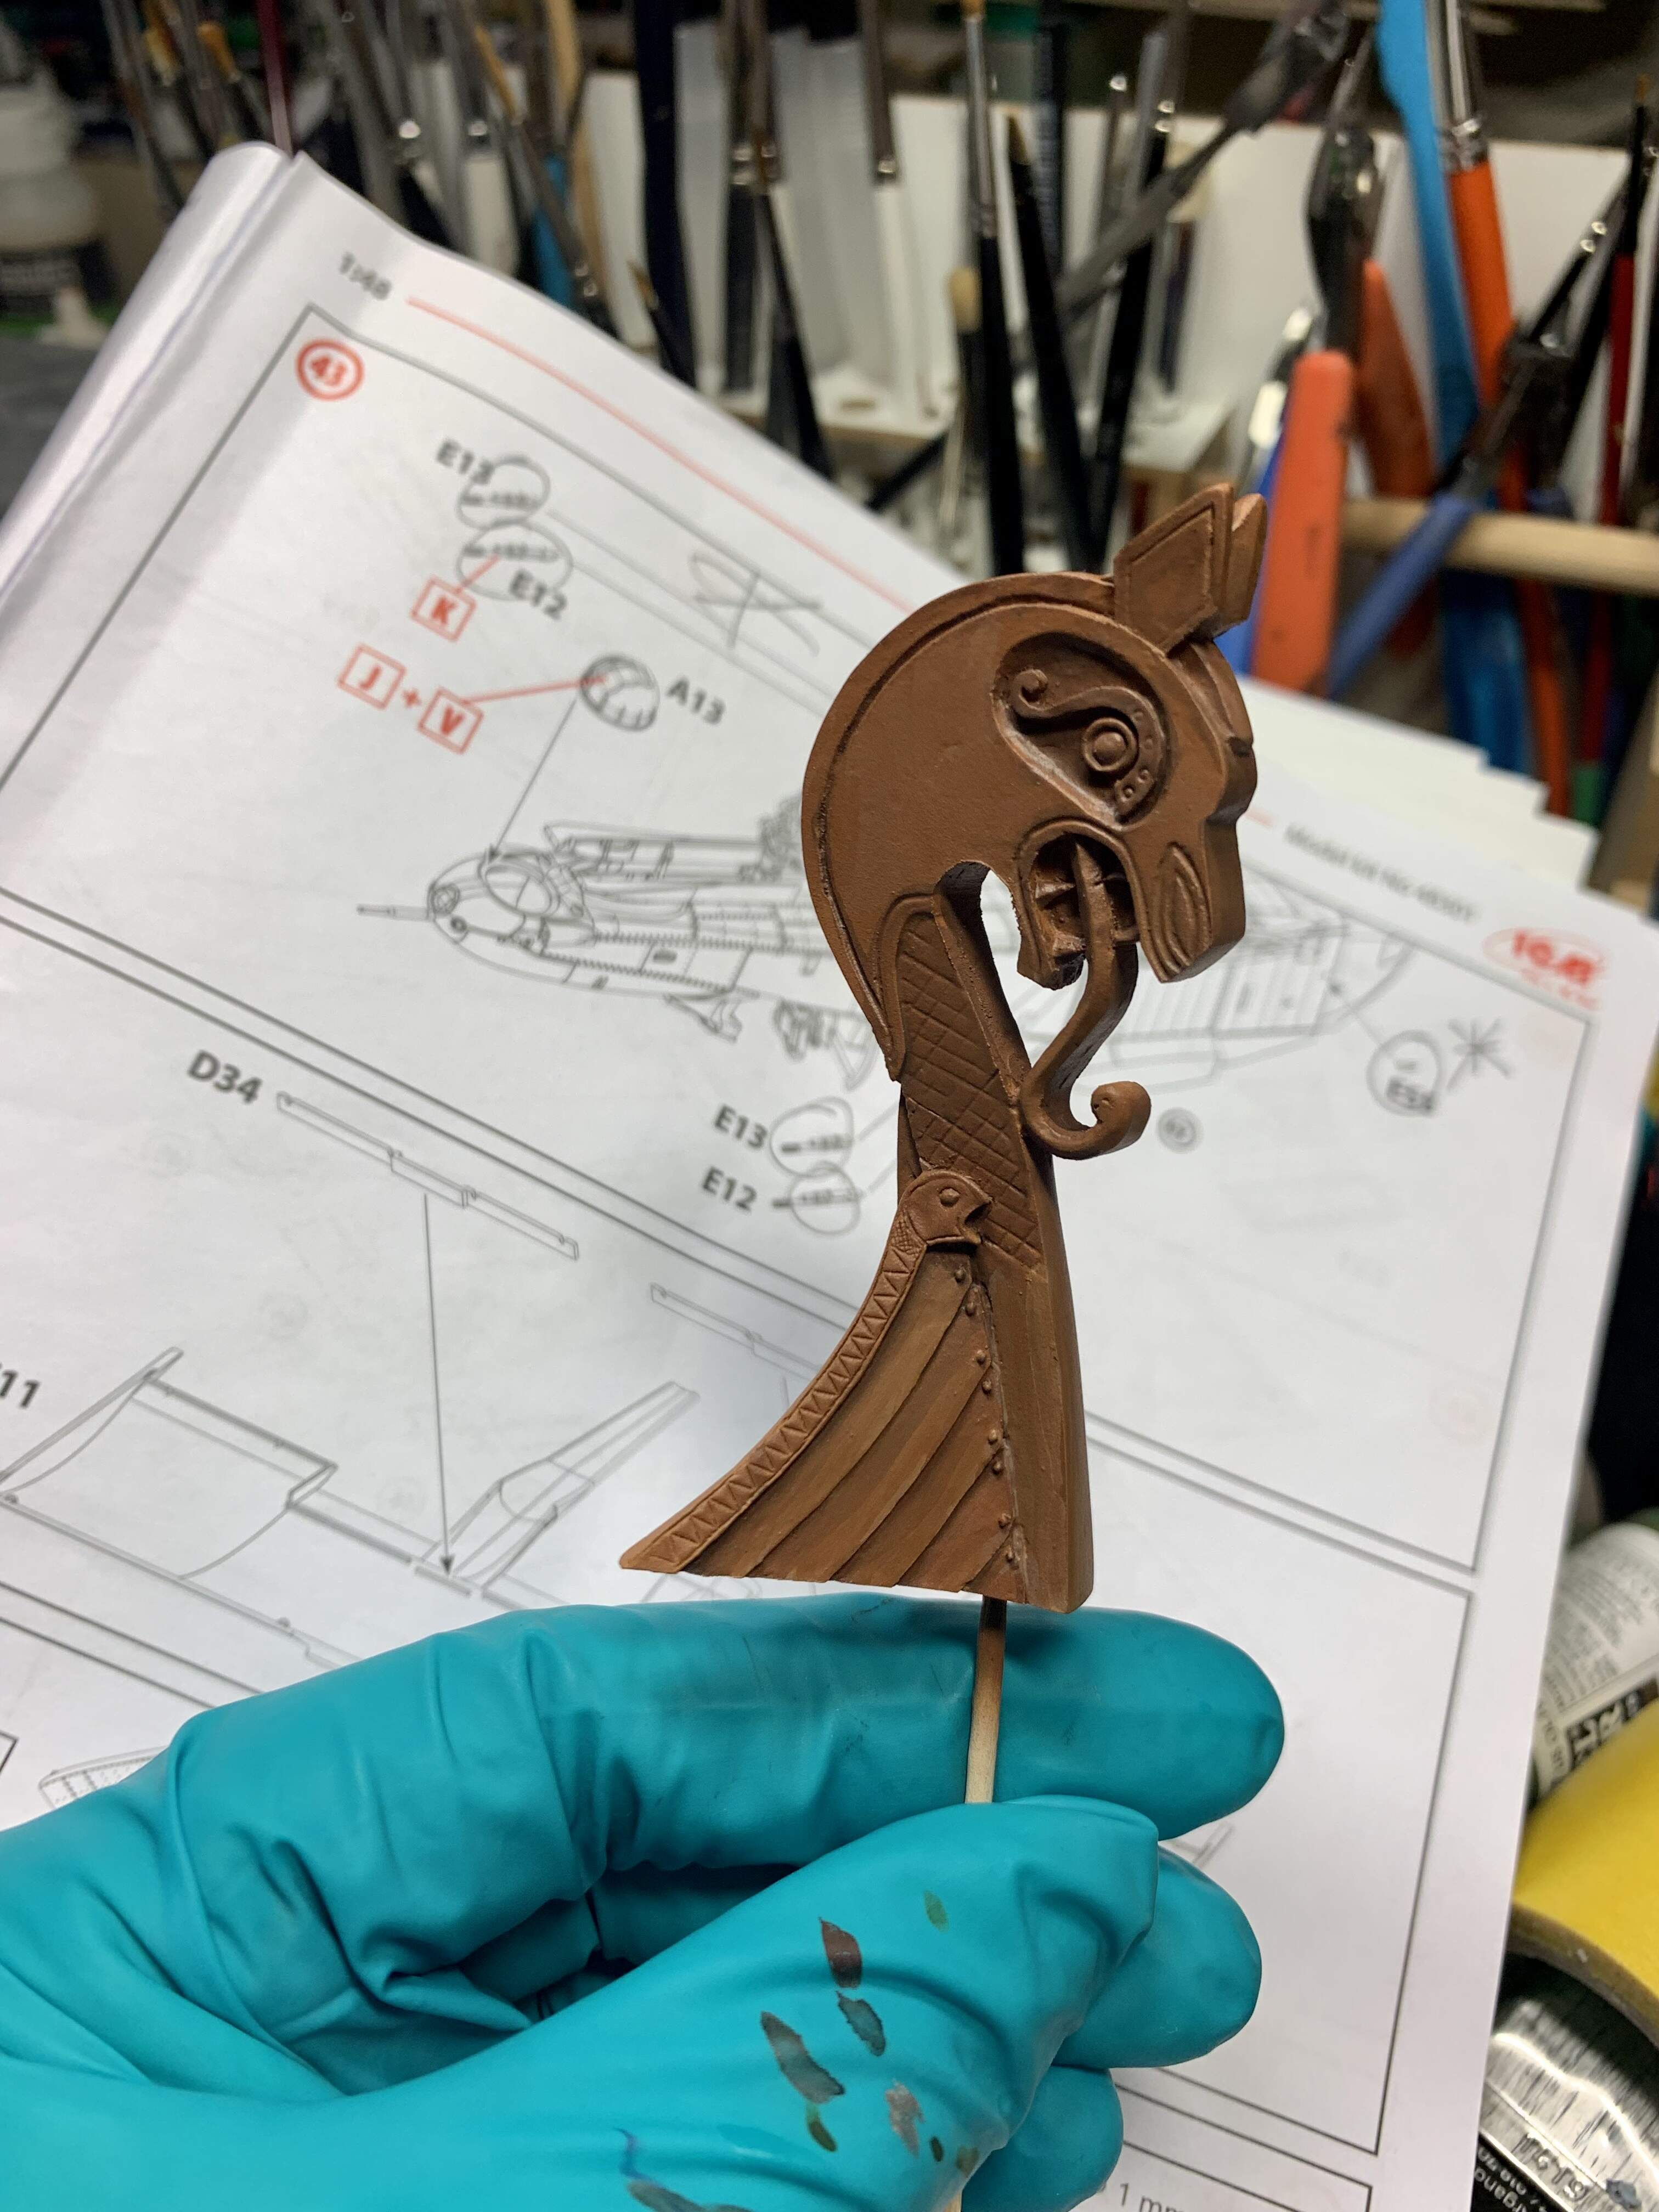
I was really impressed with the prow of the longboat which is a single piece and just awesome looking!
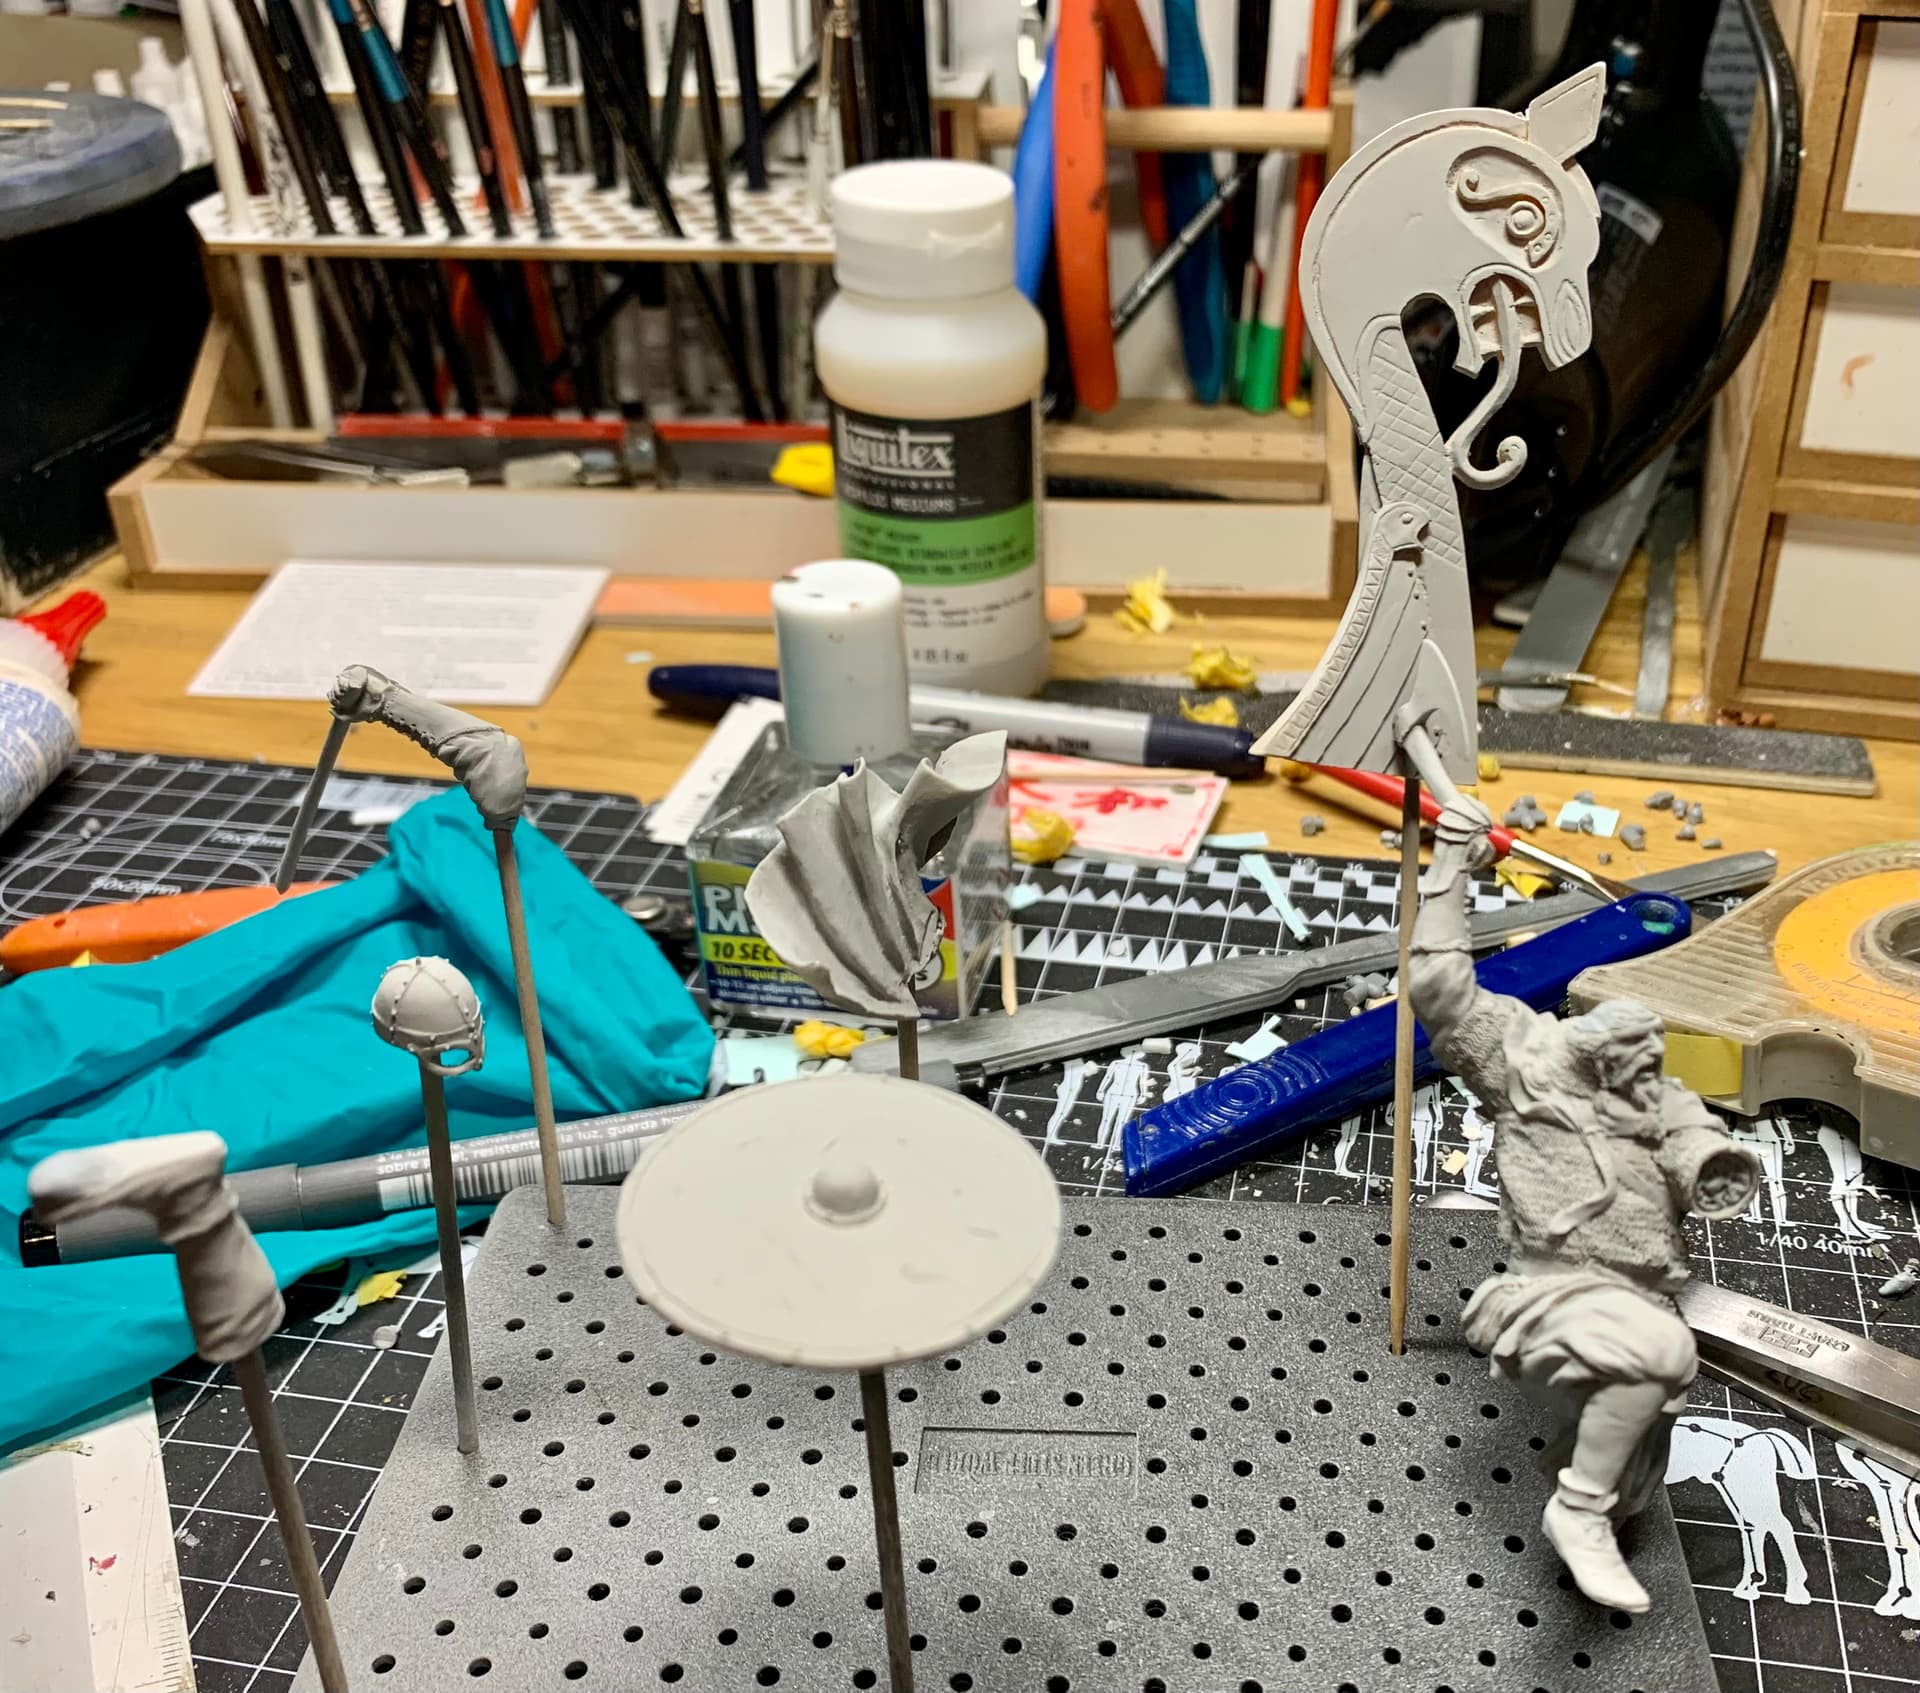
Now as you can see all the parts have been primed and I’ve started painting so I’ll have some pics of that soon.
Thanks for reading.
6 Likes
Maybe he can chop up the legend that Columbus discovered North America since he and his kin were there long before…
1 Like
Looks like a great project. 
1 Like
In the box art of this figure you can see the colors are quite muted and they exhibit a dirty, perhaps even damp sort of look. I quite like the muted and dark look myself but, seeing some Viking clothing references, there appeared to be garments in all sorts of colors so I decided to add some more color to my version.
These are just basic coats right now- still a way to go on them- I will likely make the trousers lighter and worn looking while I will probably tone down the green cape.
The chain mail will be left to last as it needs a satin black undercoat which will help the metal colors to be nice and vibrant.
Right now I’m working on the shield and the prow of the longboat. I hope to get an update on those sorted soon.
Thanks for reading.
1 Like
He is certainly (if a tad implausibly) dynamically posed! I wonder if the original idea was to have him standing with one foot on the deck of a longship and the raised foot on the gunwale? Or indeed leaping but with the lower foot on the gunwale? If the former, it would be a good depiction of Onund “Treefoot” Ofeigsson at the Battle of Hafrsfjord against King Harald “Fairhair”, first King of Norway and father of Eric “Bloodaxe”. This picture attempts to illustrate the moment immediately prior to Onund’s amputation:
Cheers,
M
:
1 Like
That’s a neat piece of art and history there Tom. I have to say I agree with you about the pose in terms of plausibility. But it looks cool though, and sometimes that’s all a figure needs for it to make it into my stash  !
!
1 Like
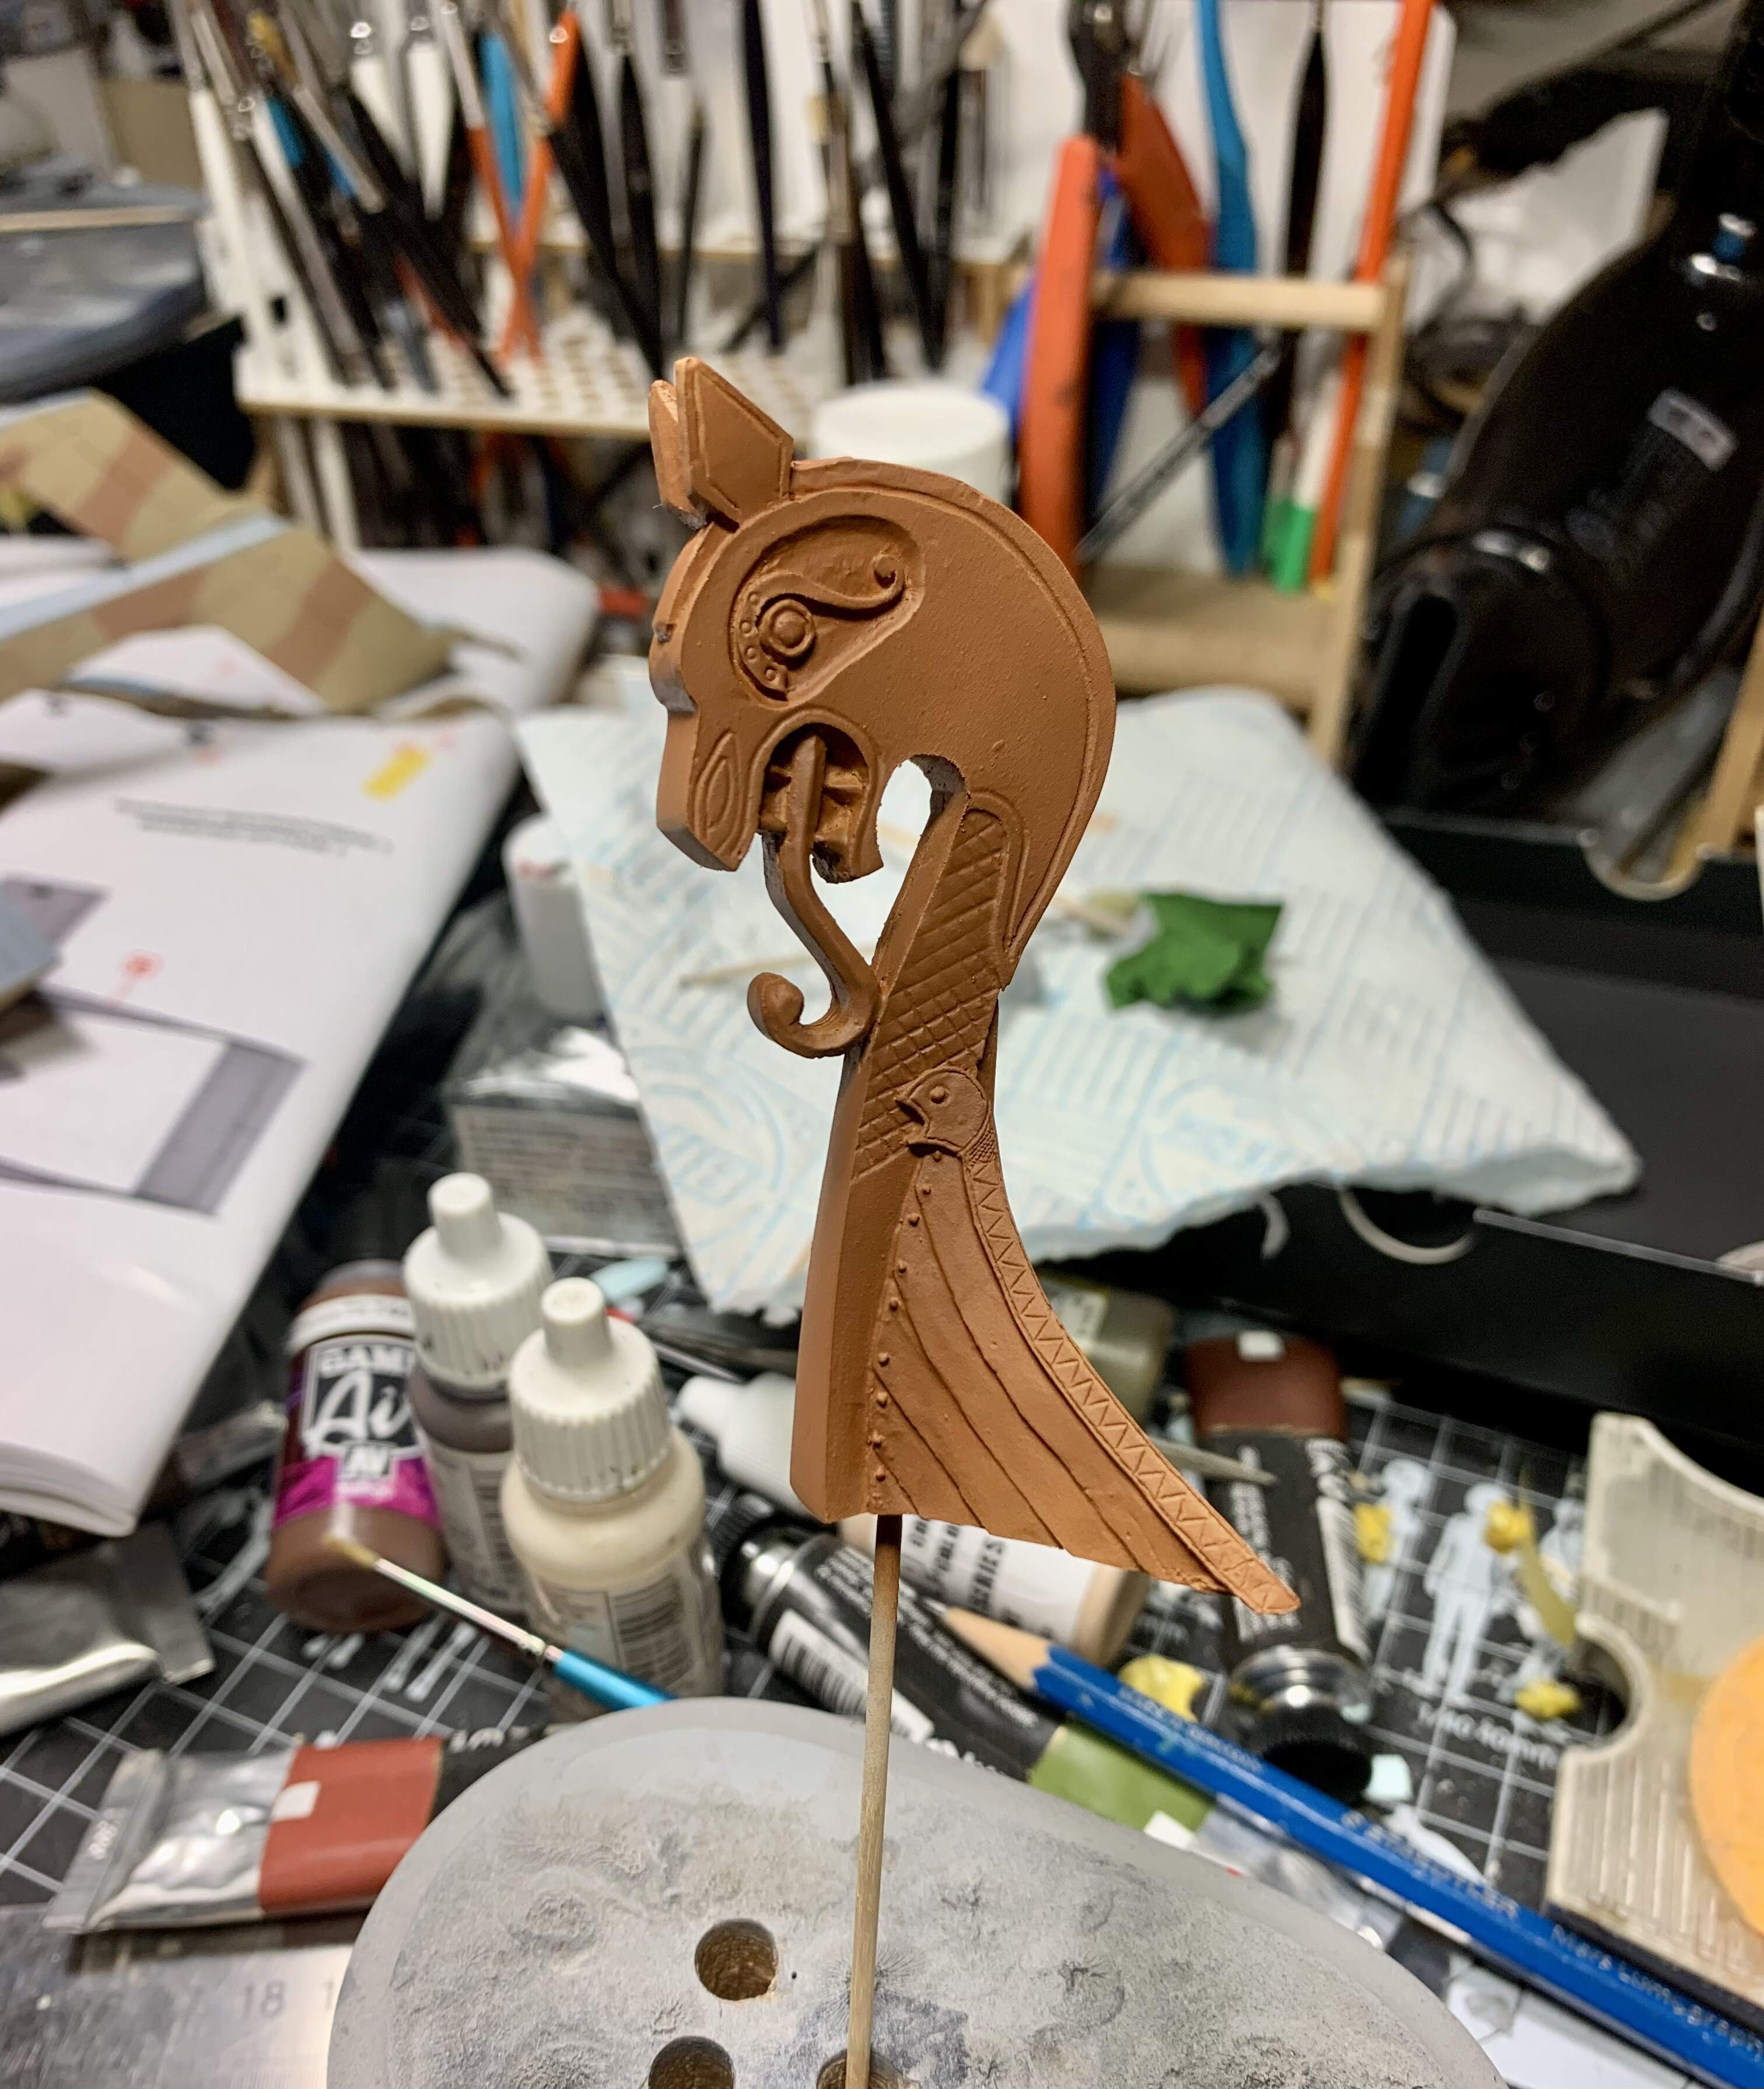
The Longboat prow is a wonderfully sculpted base for the figure. I’ve started it by airbrushing a wood tone.
I haven’t decided yet how to tackle it from this point but I am leaning towards oil paint rendering.
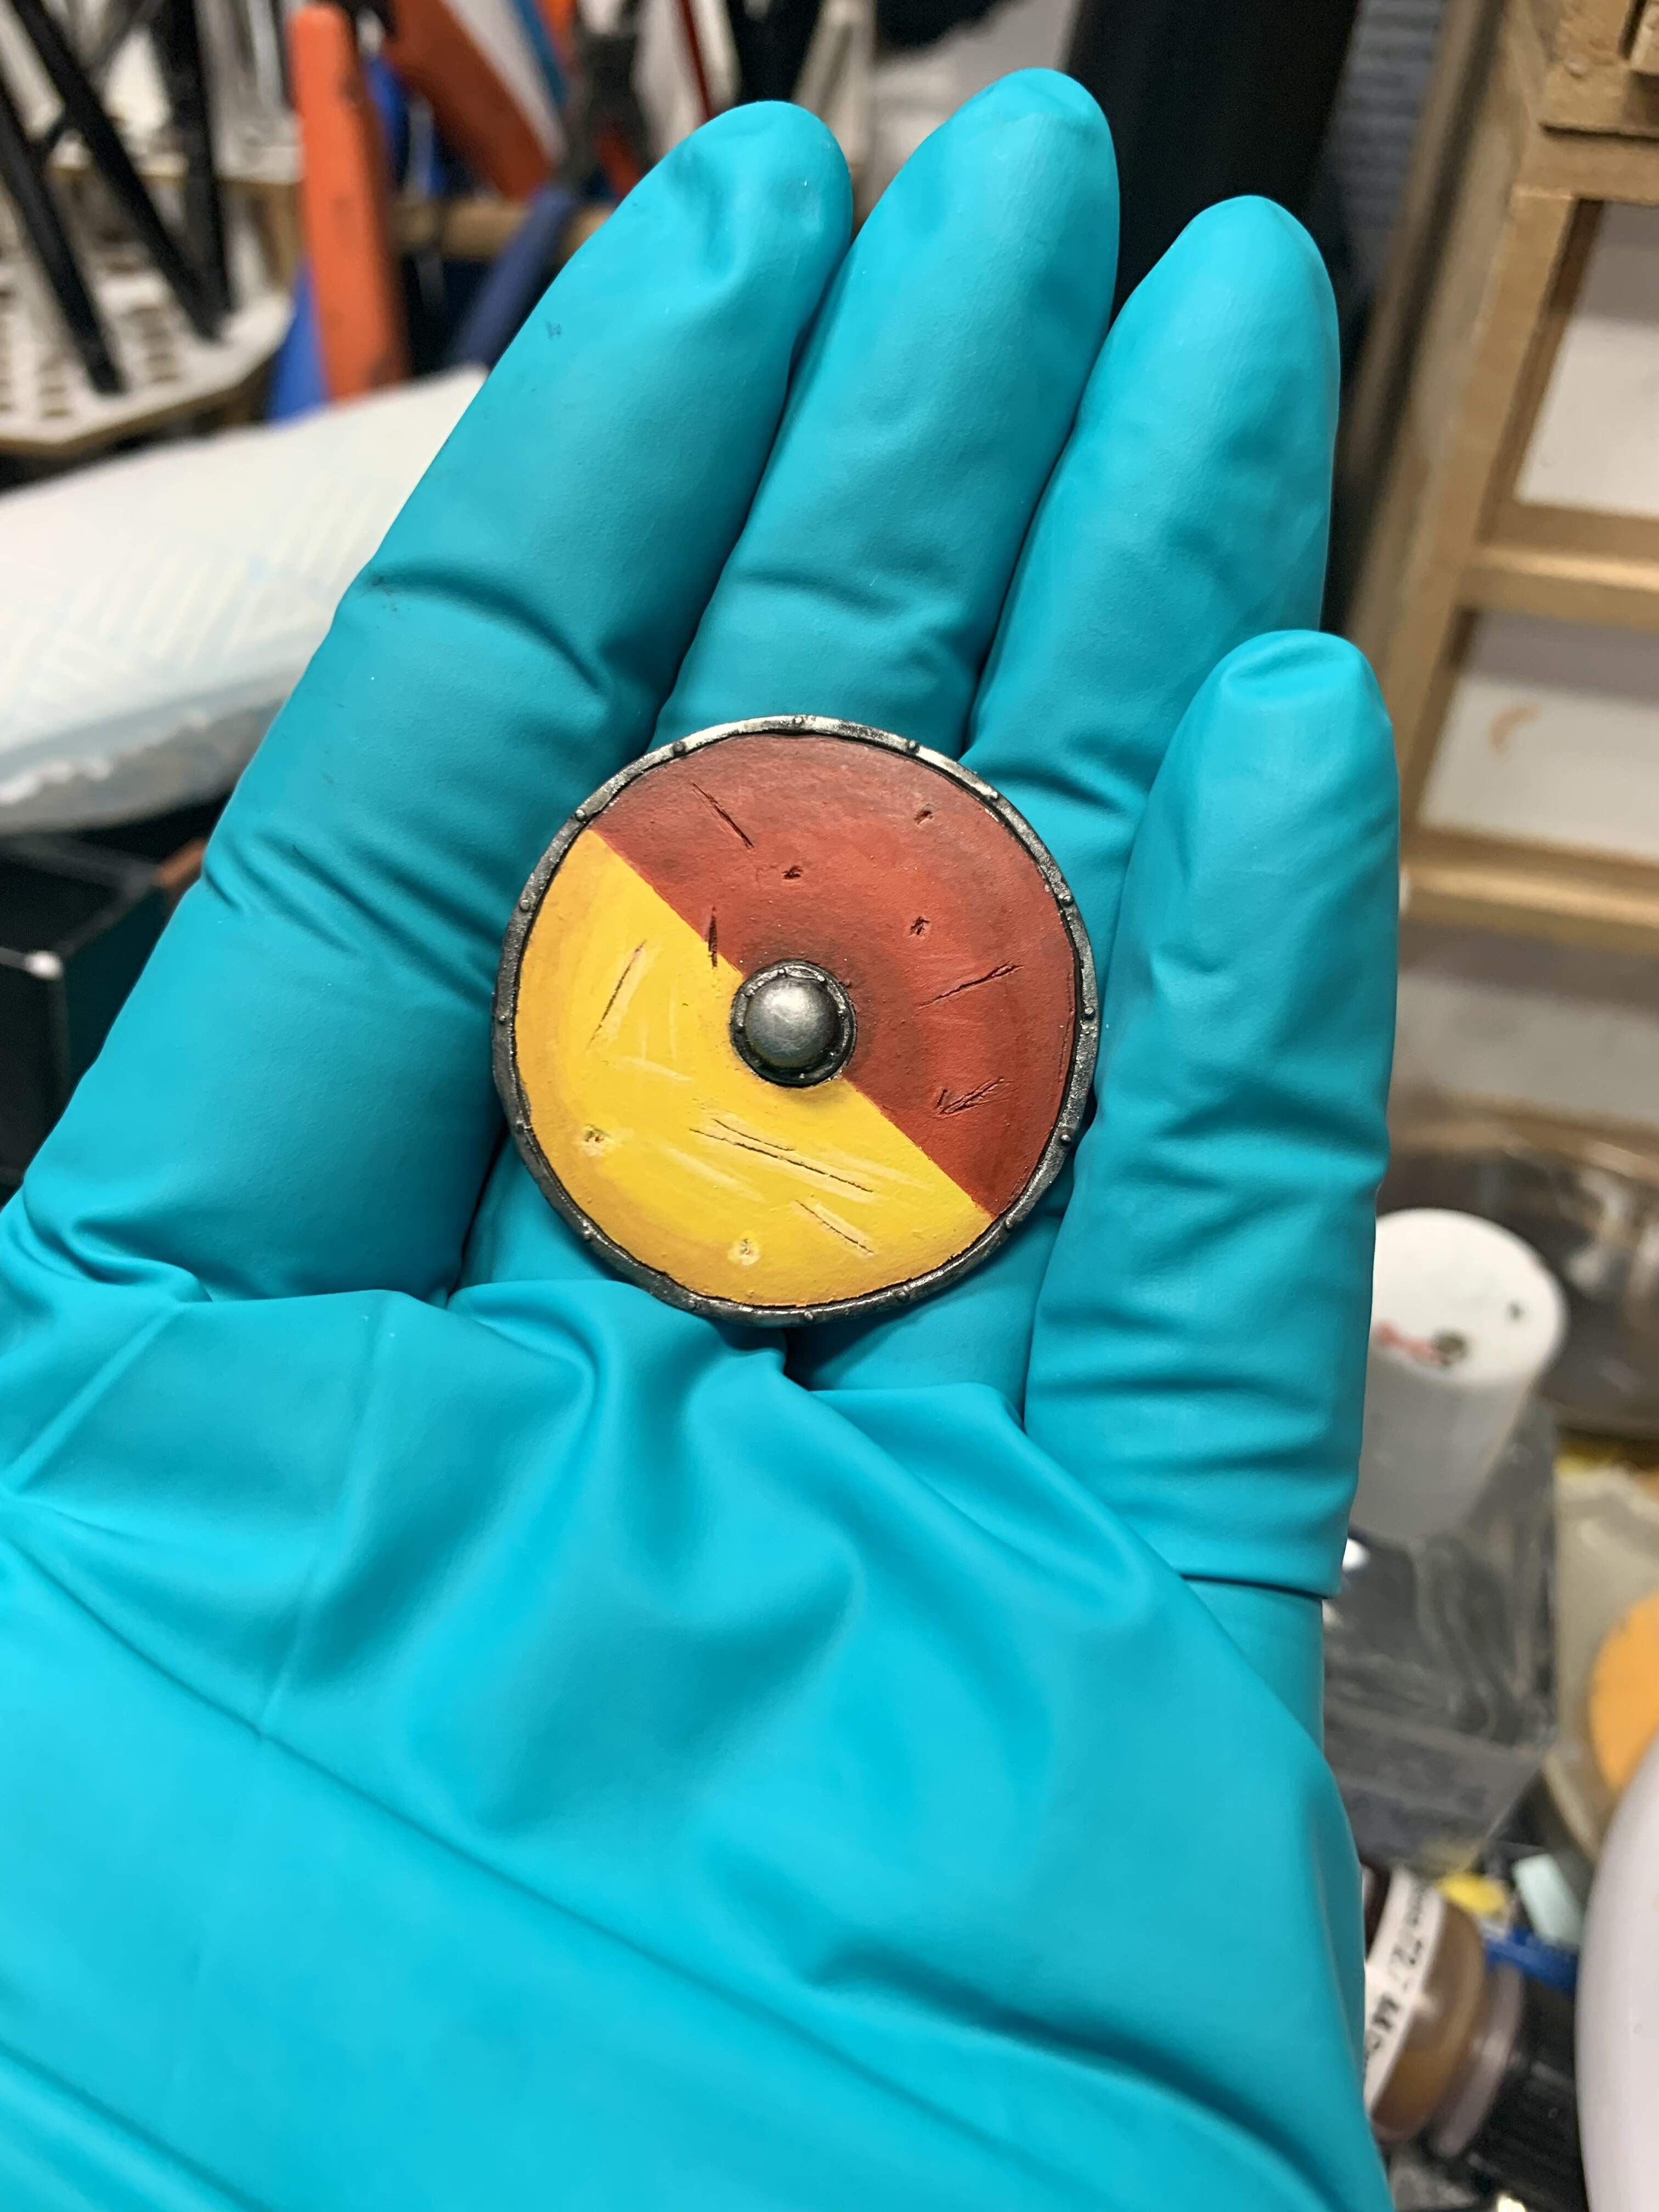
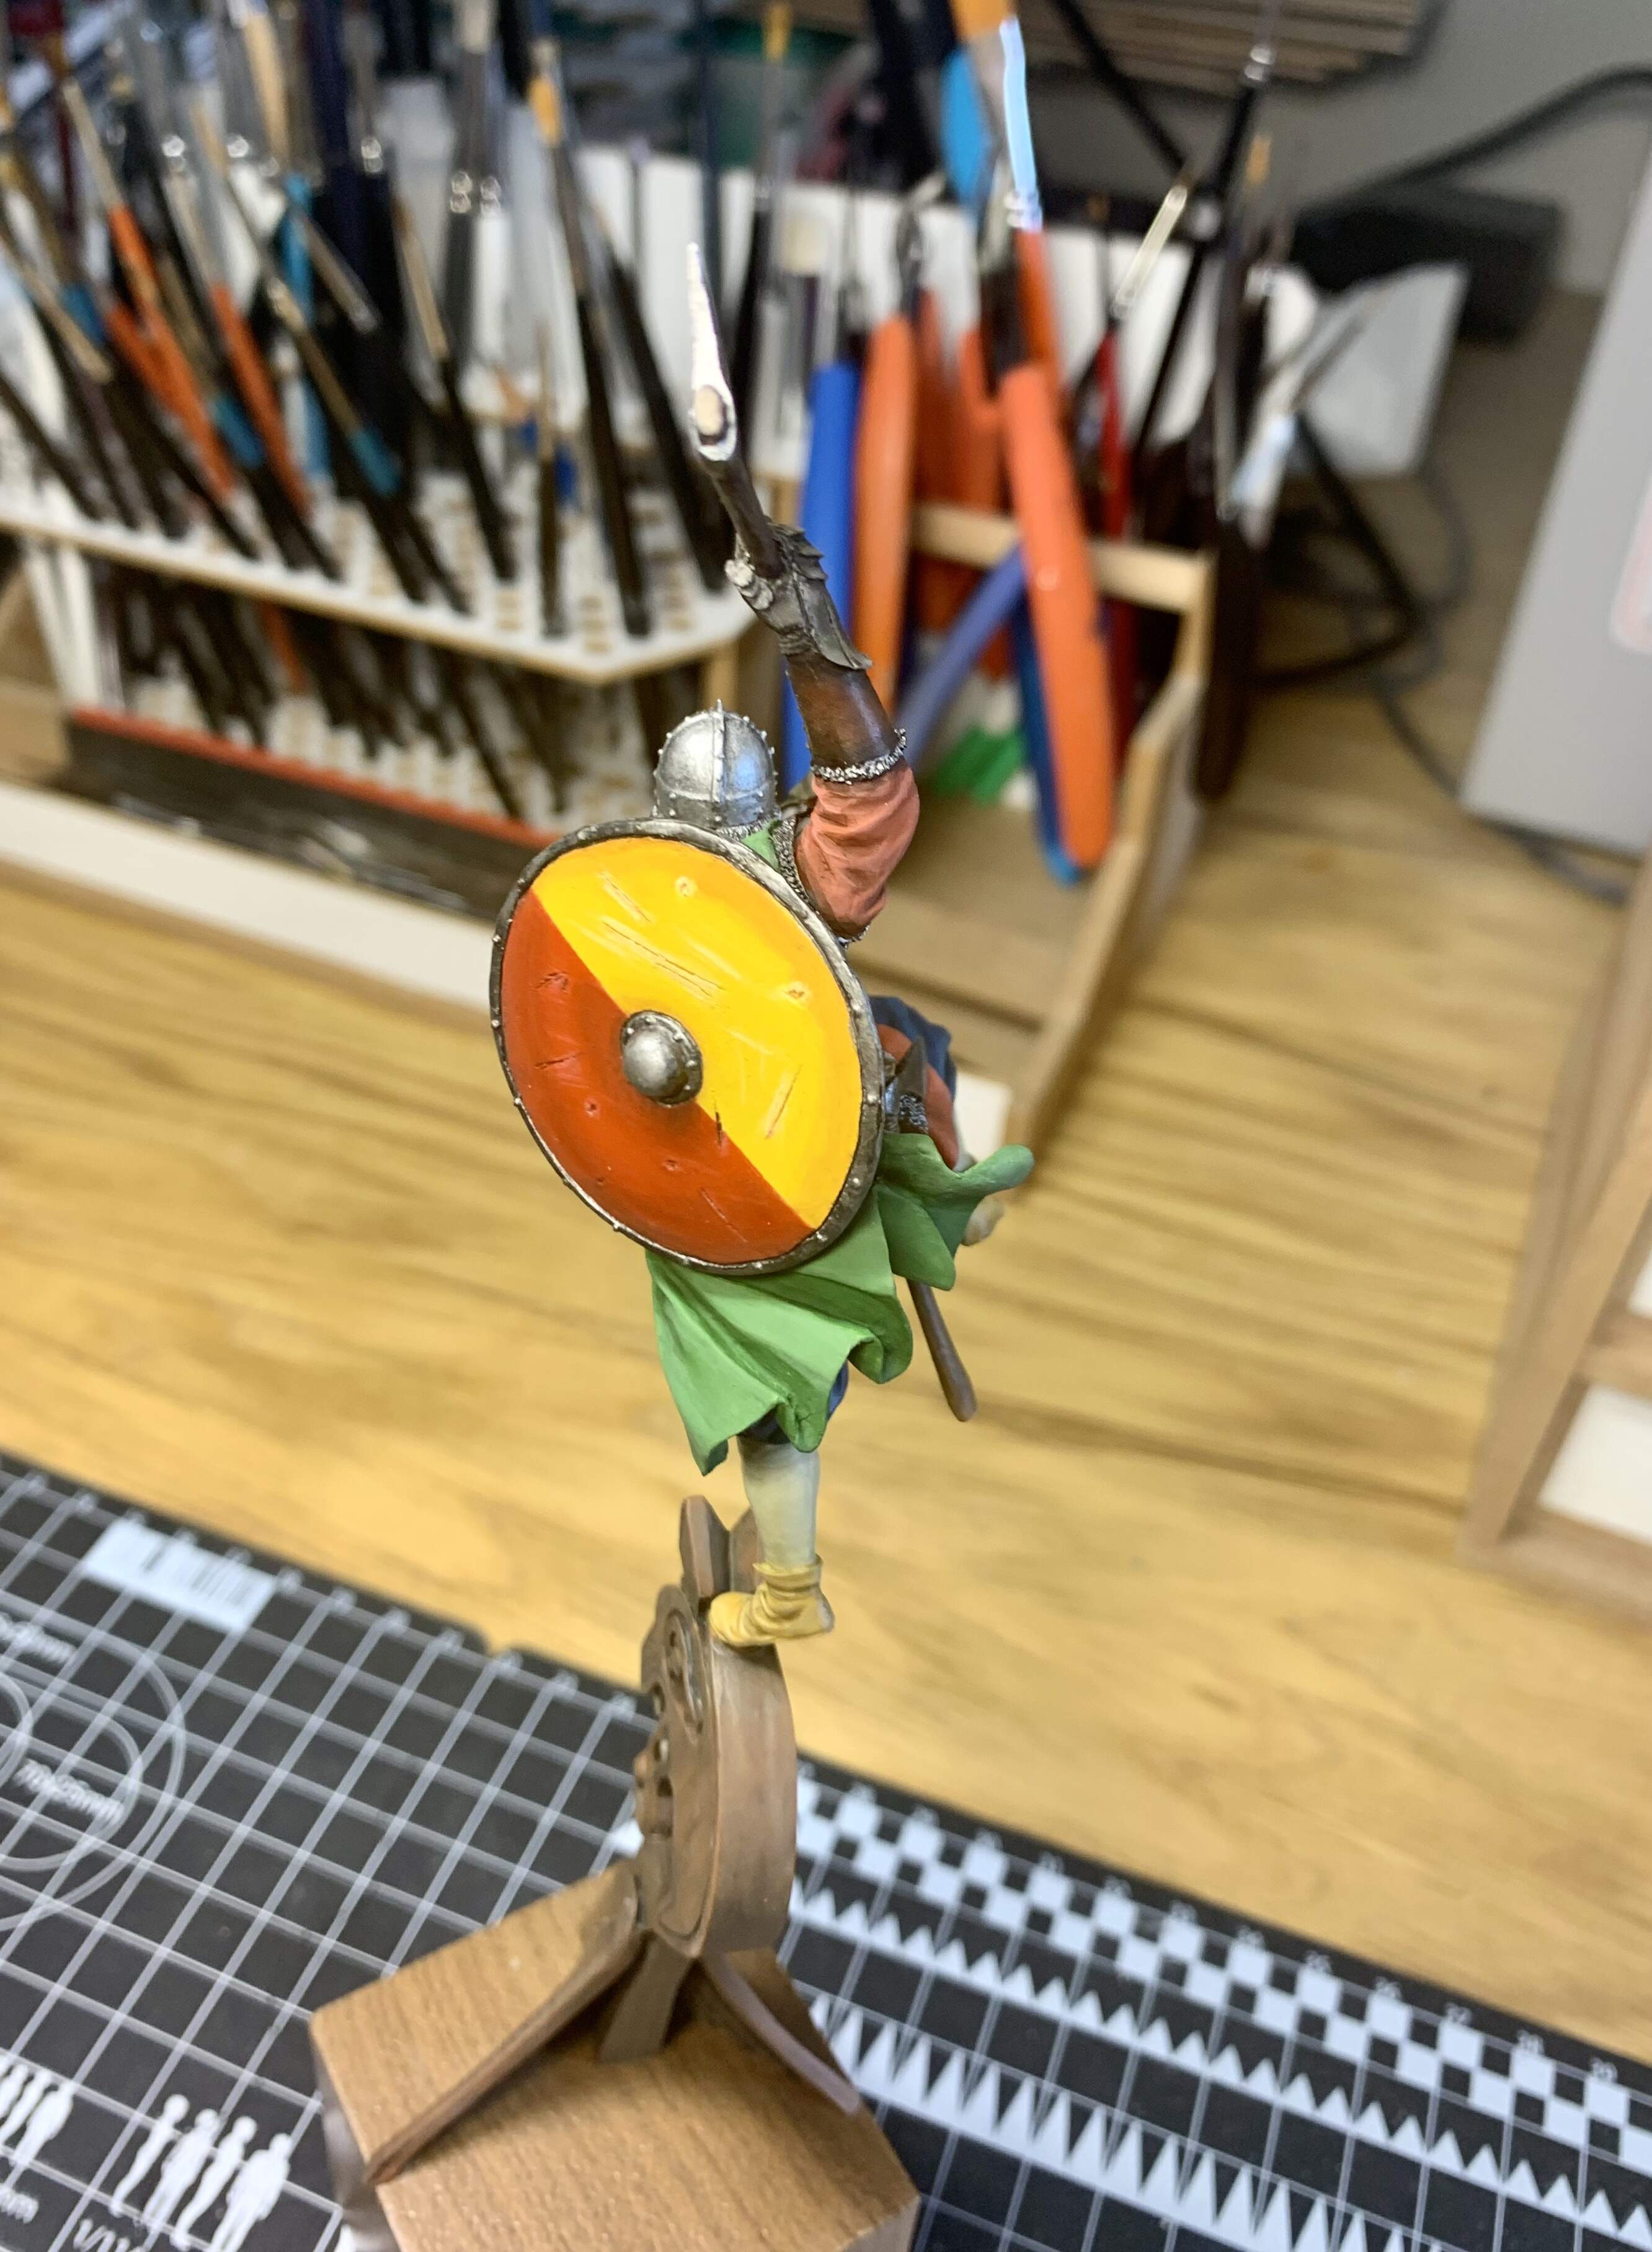
Next up for the airbrush was the shield. I decided on a two color design split down the middle.
Next it was back to the figure and I started to detail the skin colors. For the skin I’m using Reaper Minis ‘Fair Skin’ 3 Pack as the main colors (the 3 Pack has a Base, Shadow and Highlight color).The picture below was taken after some shadow work.
After this I blended the tones a little with some glazing and then added some highlights. With these I felt the face was a little too light- some bits seemed too close to white to me. Adding some red ochre to the base paint and using a few glazed coats brought the color back to a more natural tone.
This is where I’m at now. I will move on to the beard as well as detailing the mouth before deciding if the skin needs any more work.
Thanks for reading.
1 Like
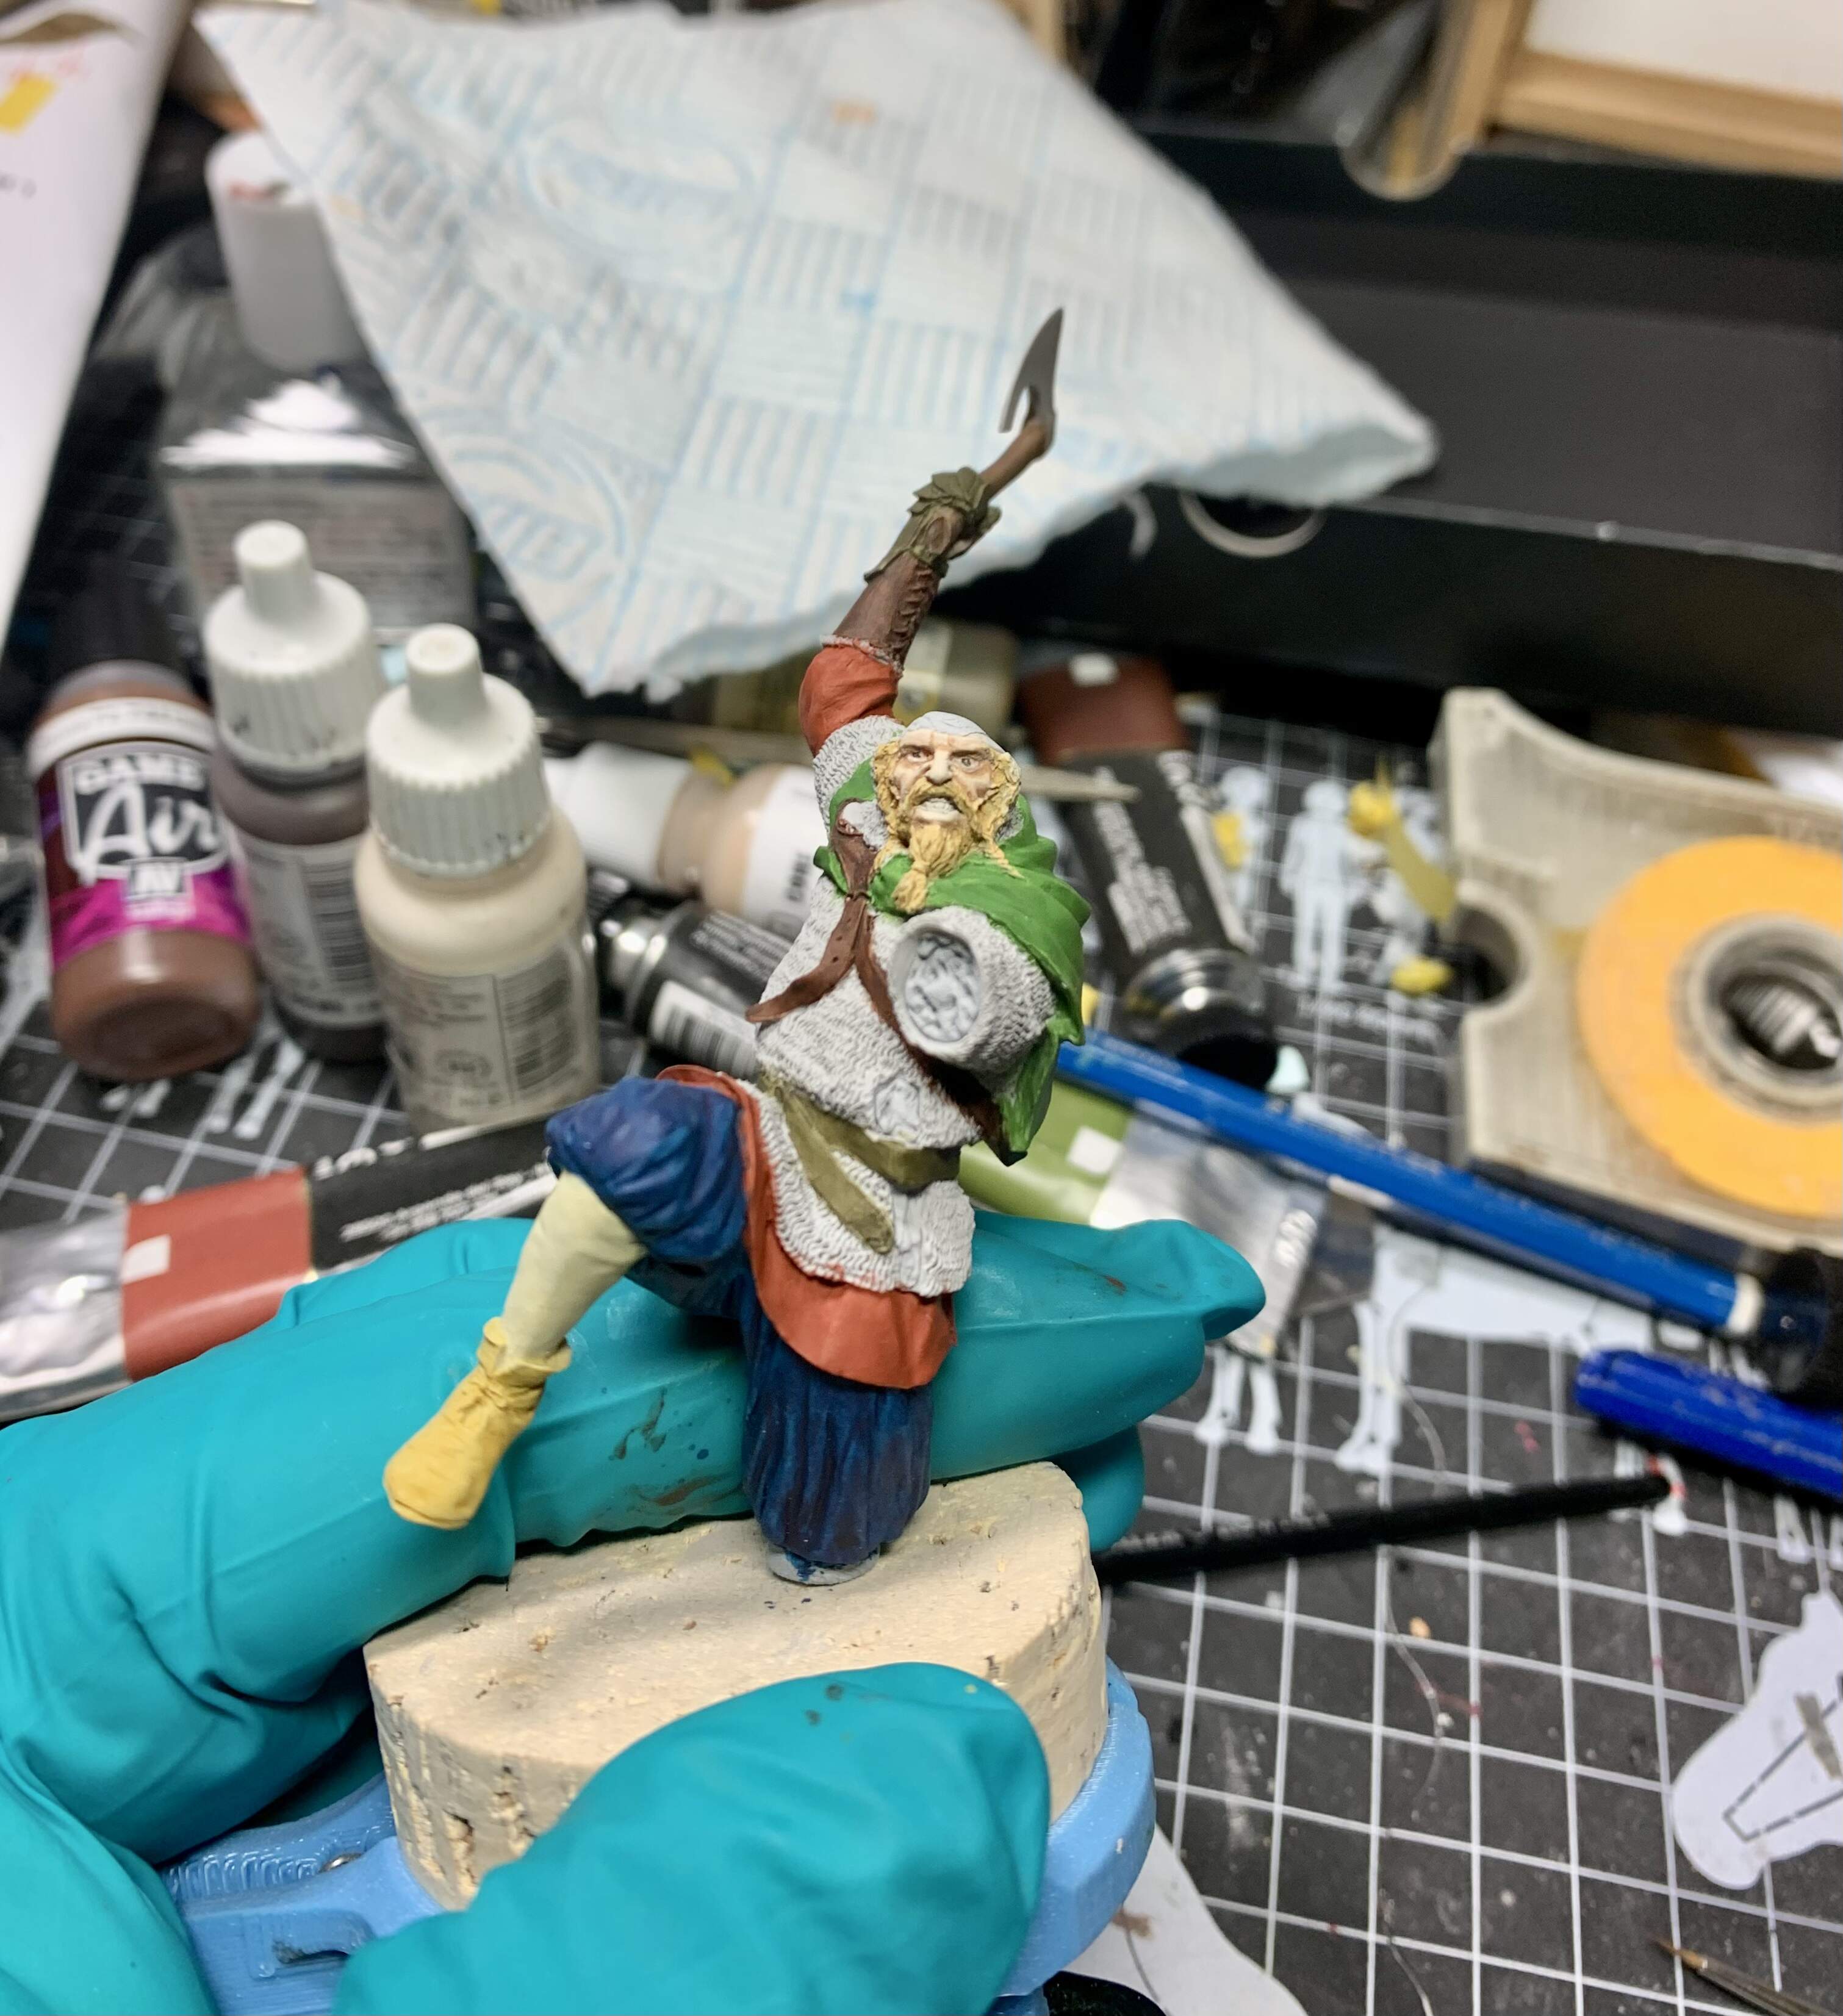
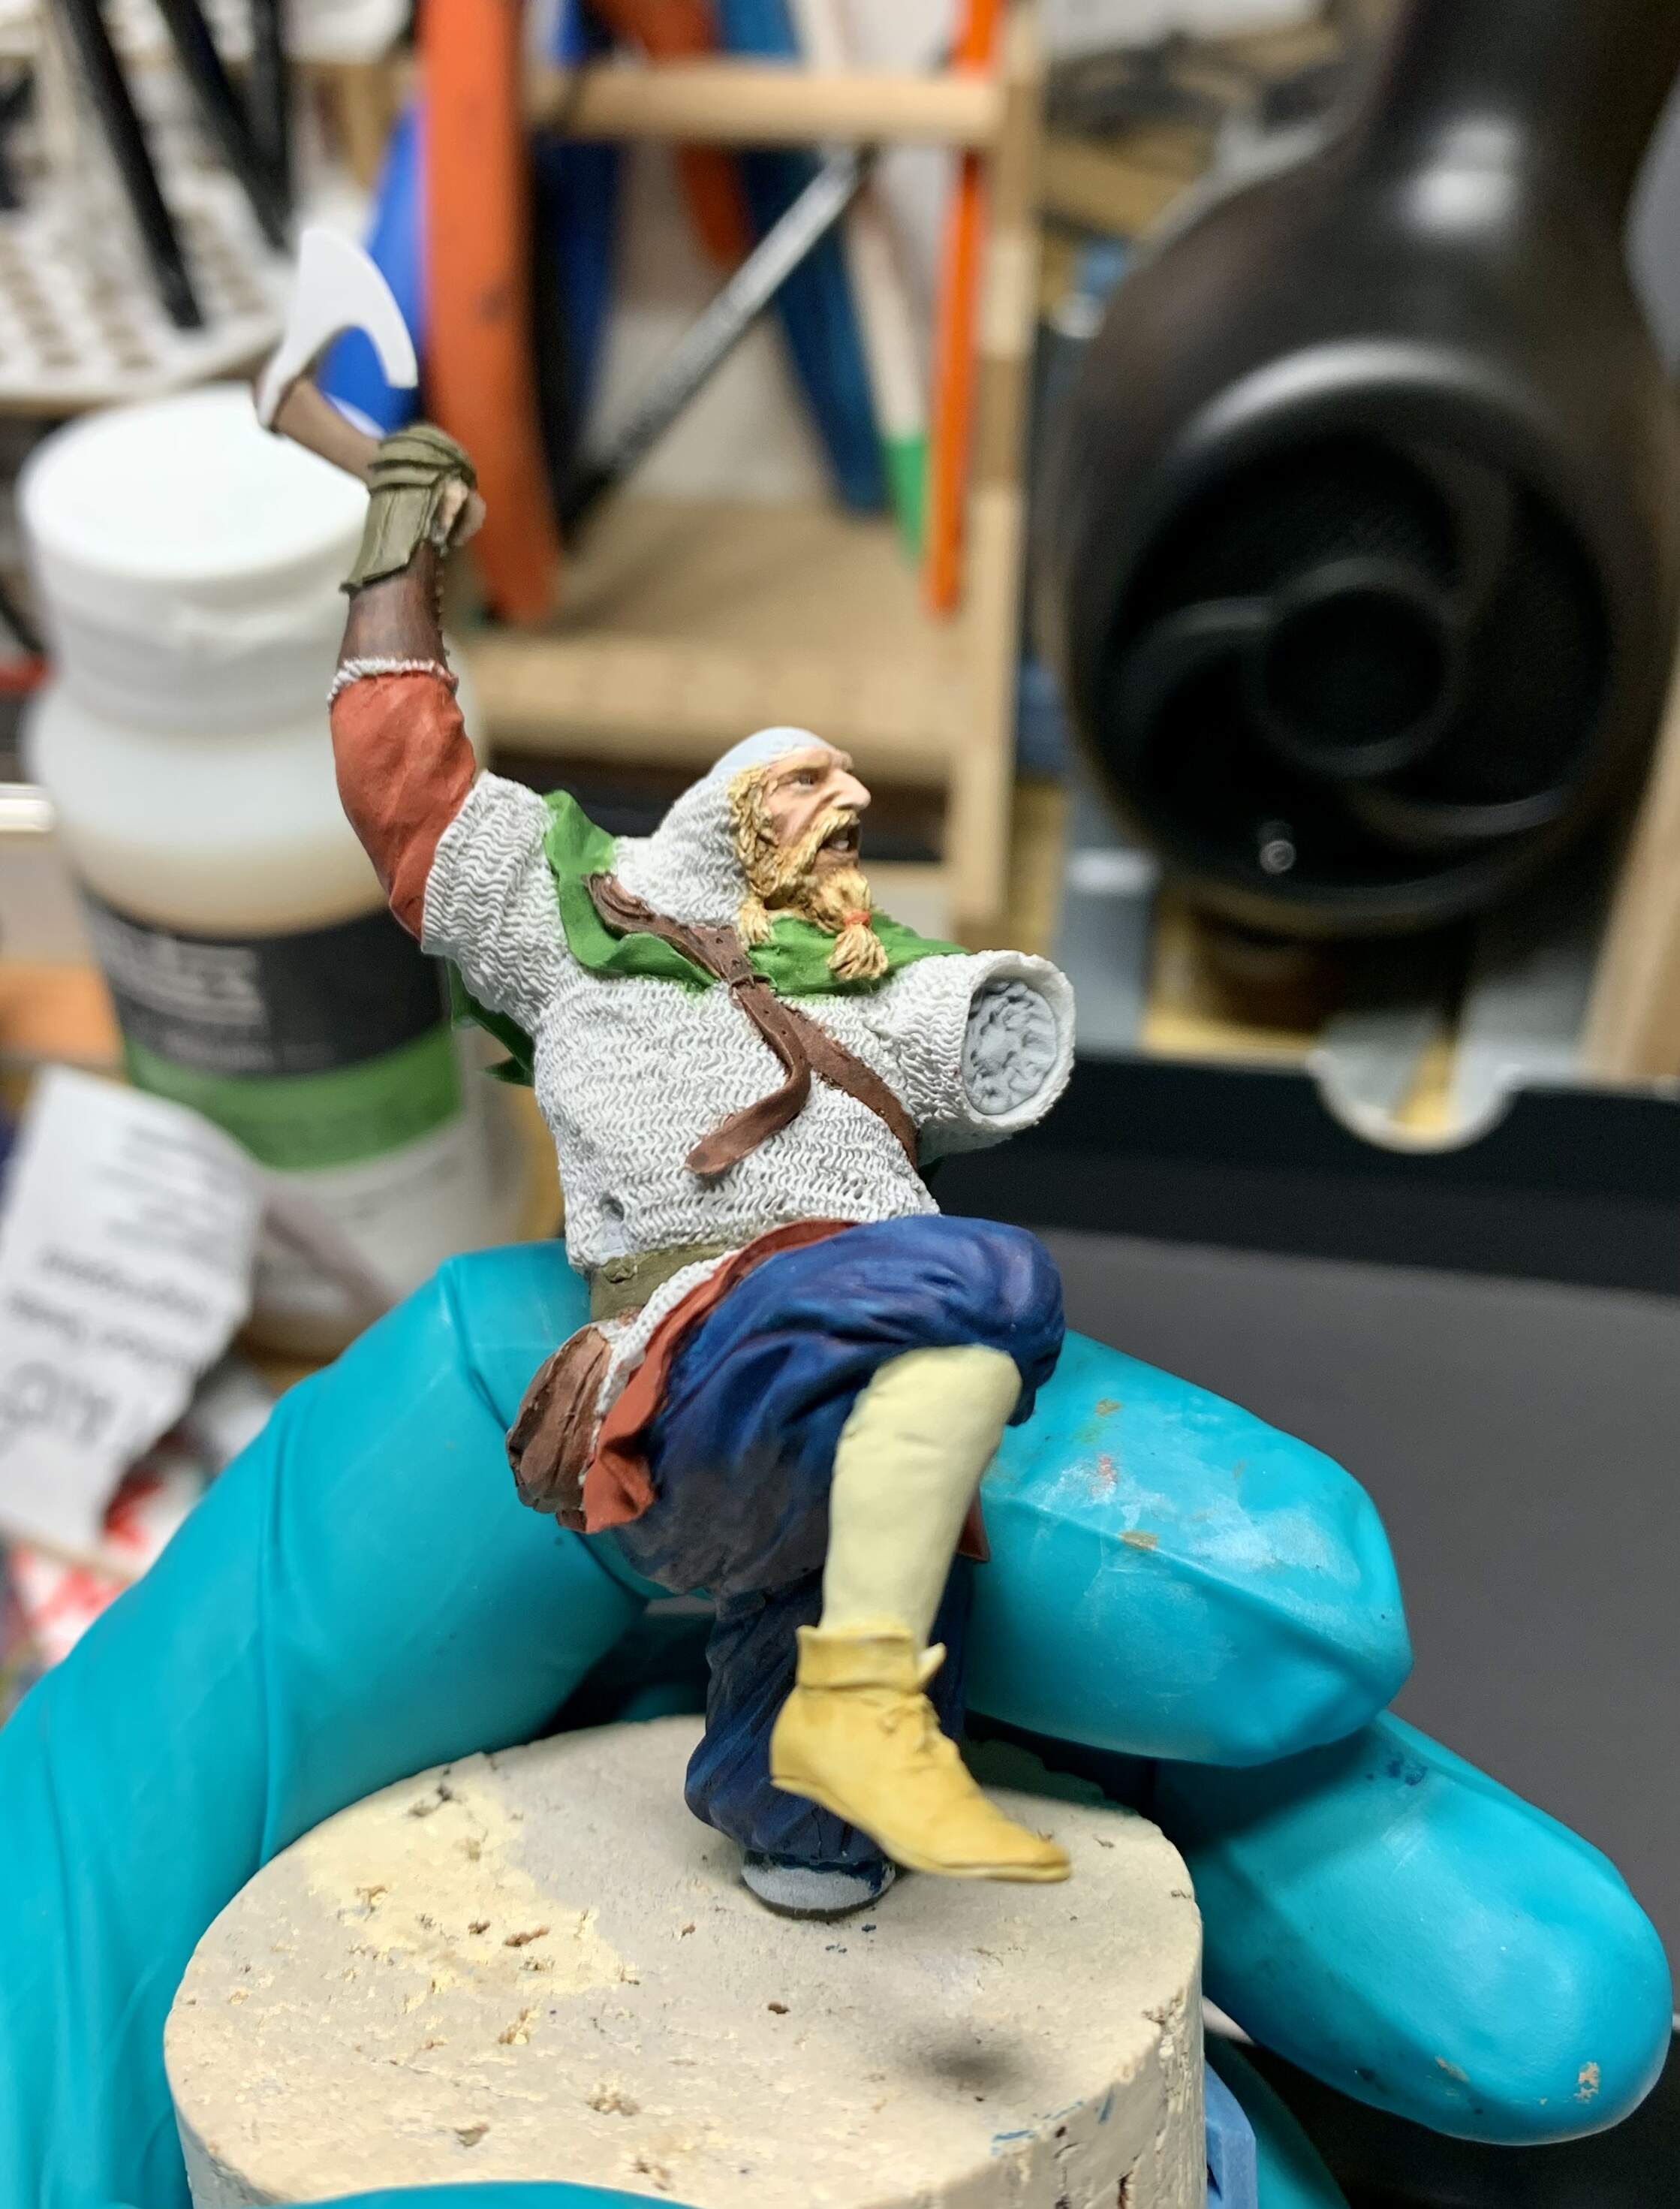
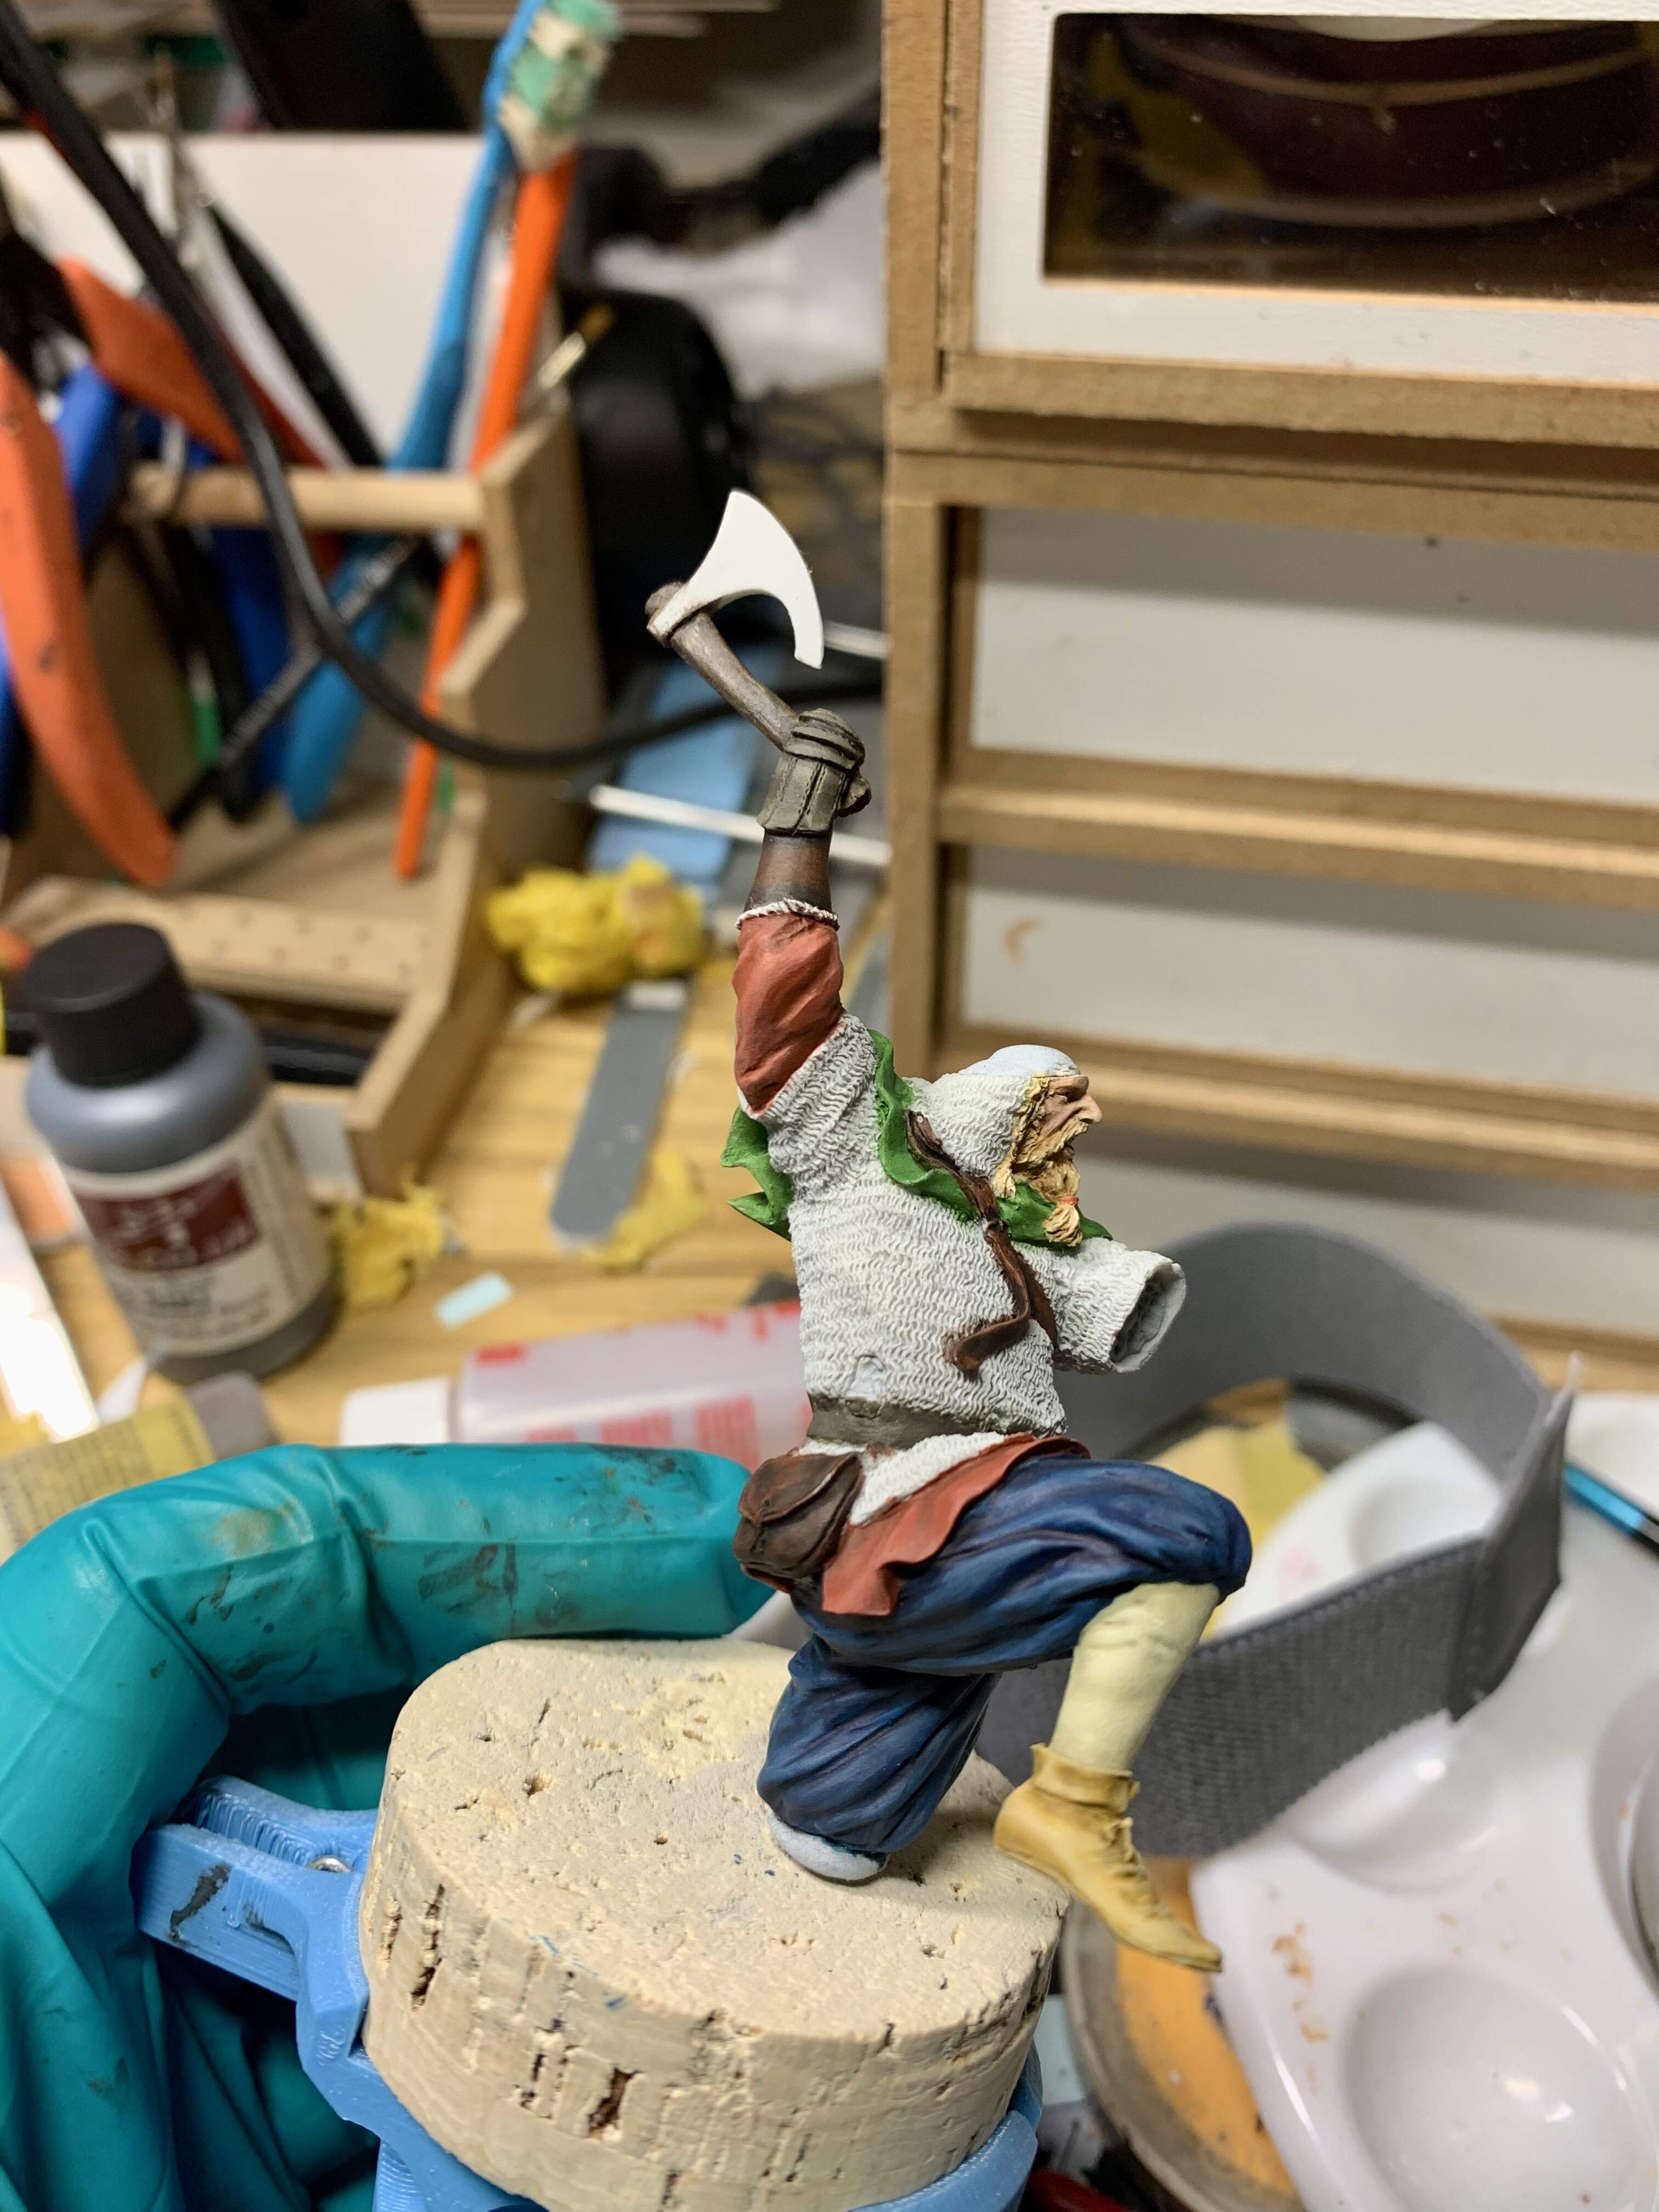
The hair and beard on this figure is pretty cool and sculpted so well that it makes painting it rather enjoyable. I picked fair blonde hair and also detailed the mouth and lips. Once done I added some very subtle extra shadow and highlight to finish off the face.
I think a choice of heads for this fig would have been nice so you could show off a little more of the face as it is very characterful.
Next up was the leather.
These parts will get a coat of satin varnish later to impart that slight sheen that leather has compared to the other fabrics.
The wood on the inside of the shield
was next. My attempt to add some texture and definition to the rather thin moulding here made painting it a bit easier.
Next up will be the shoes and then it will be on to the other bits of clothing.
Thanks for reading.
2 Likes
This is looking great so far. I like the pose and prop, great dynamics. Ruck On.
1 Like
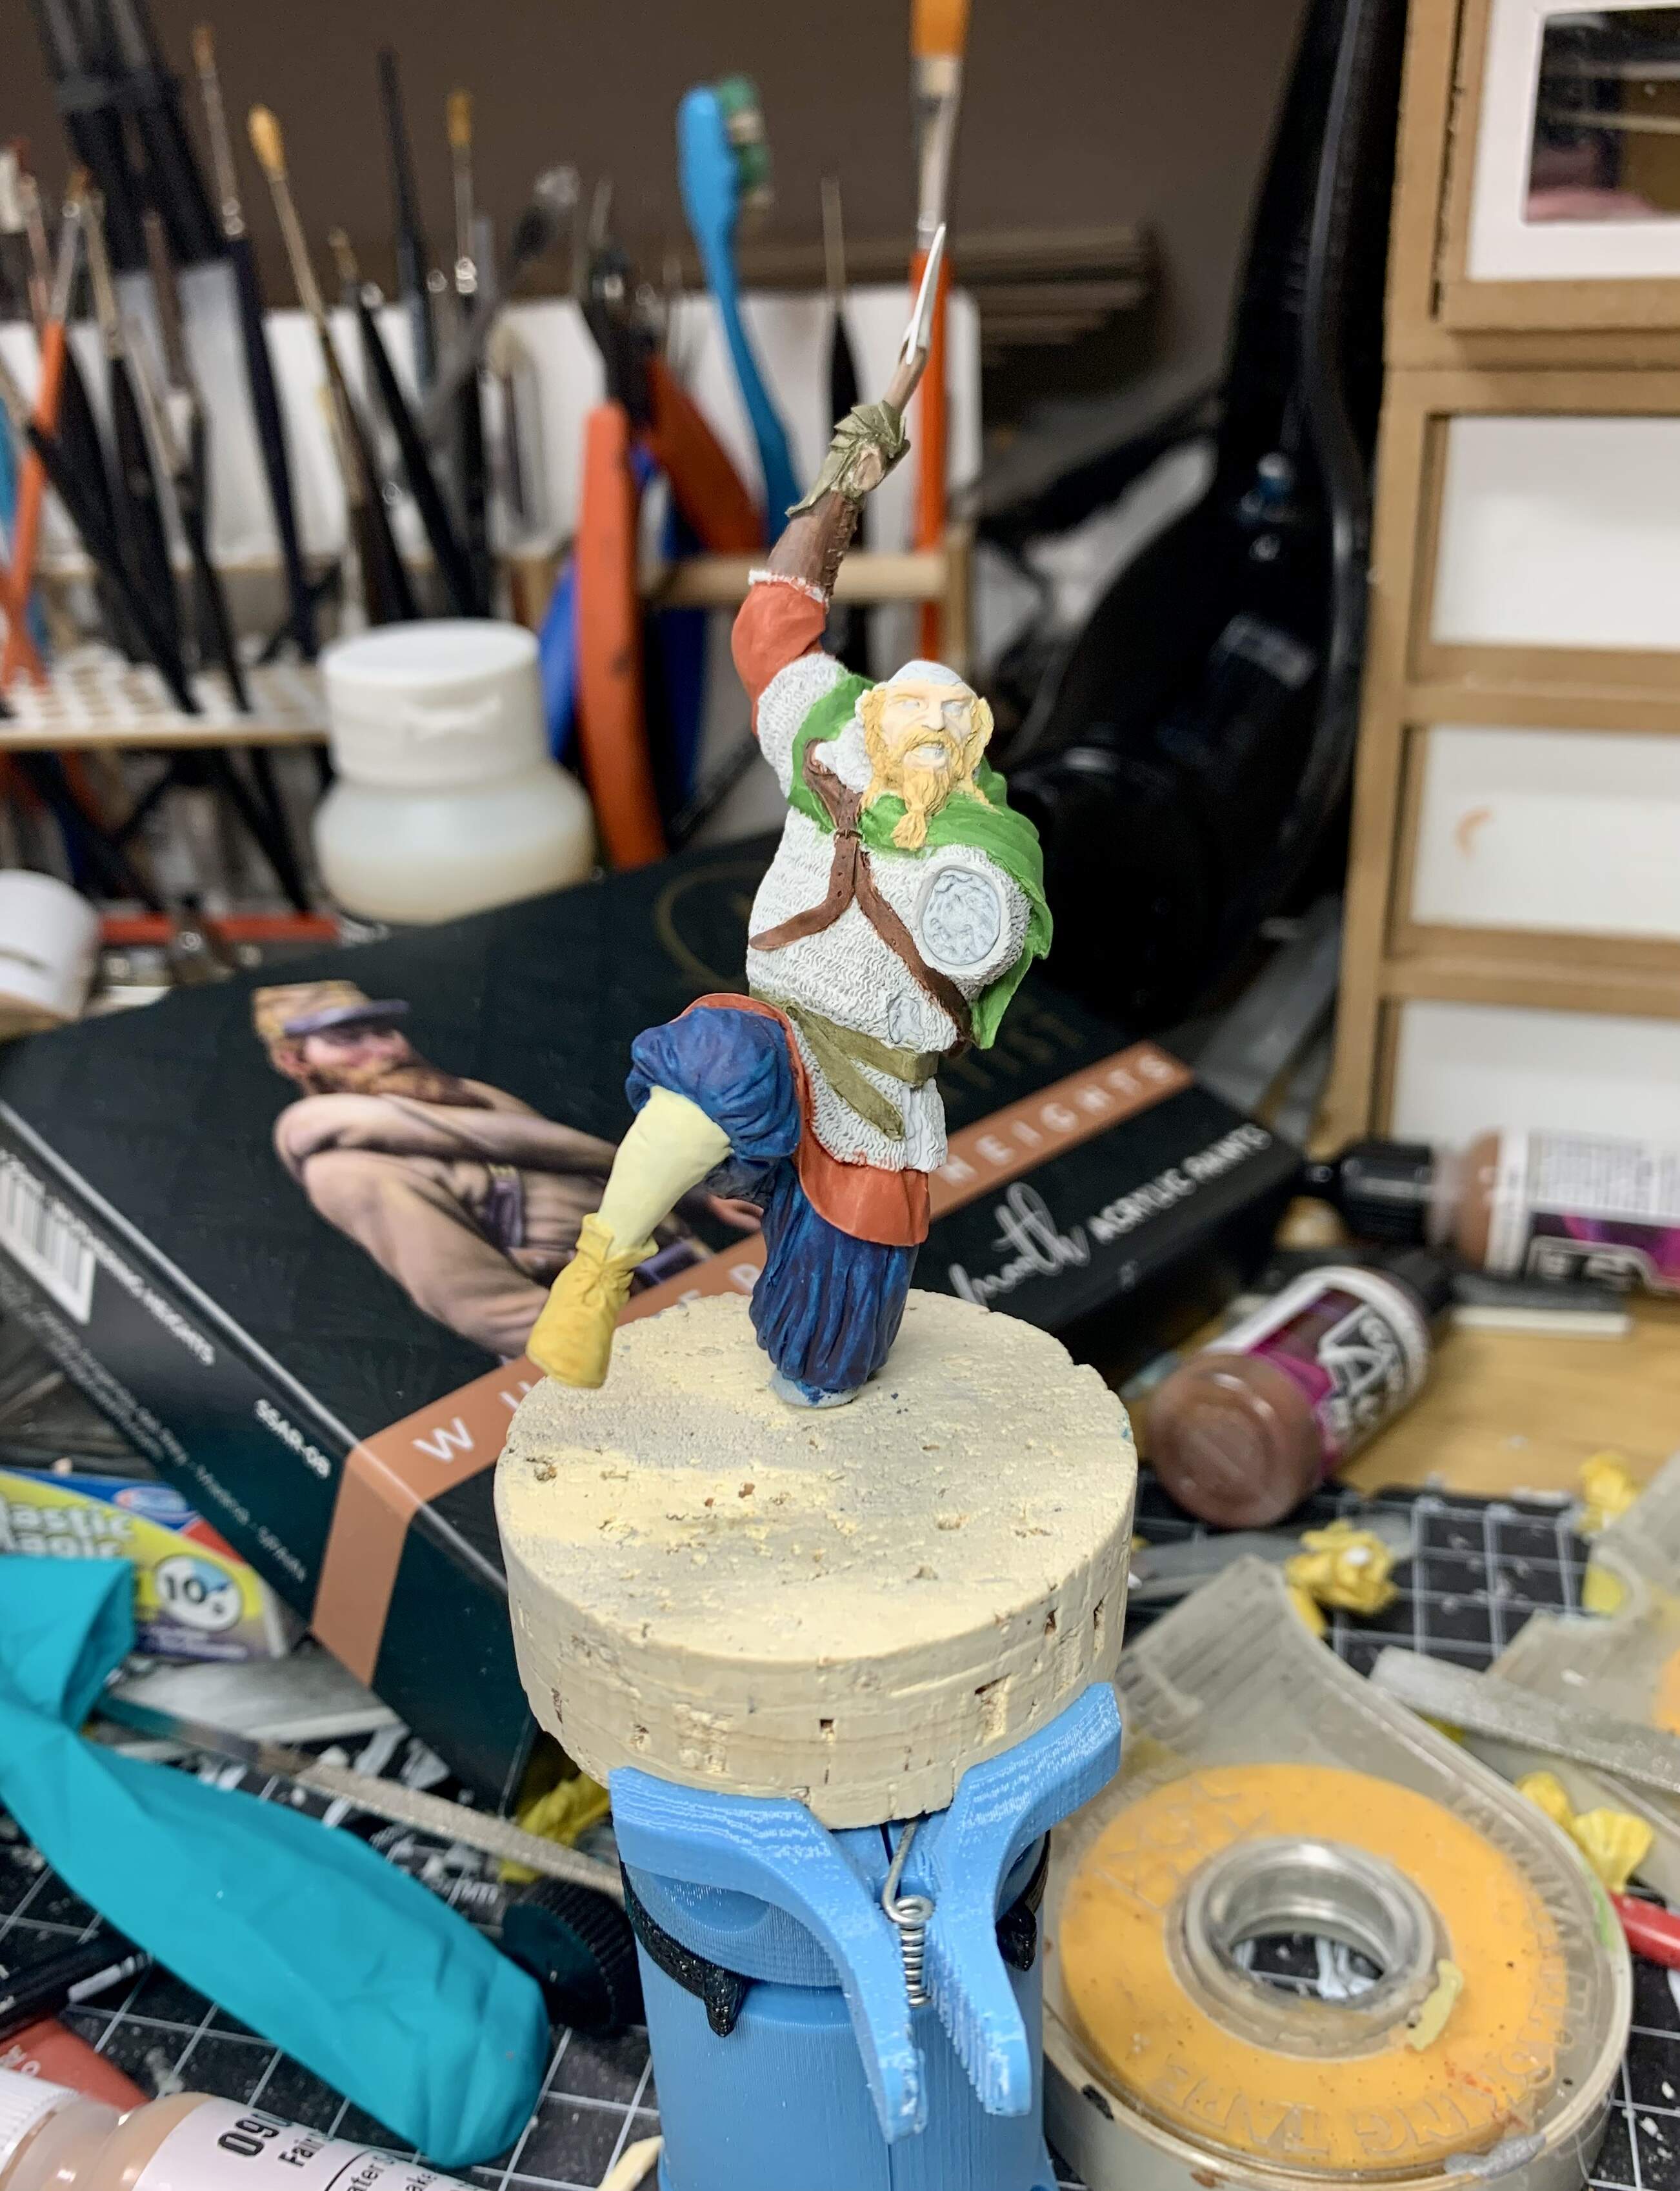
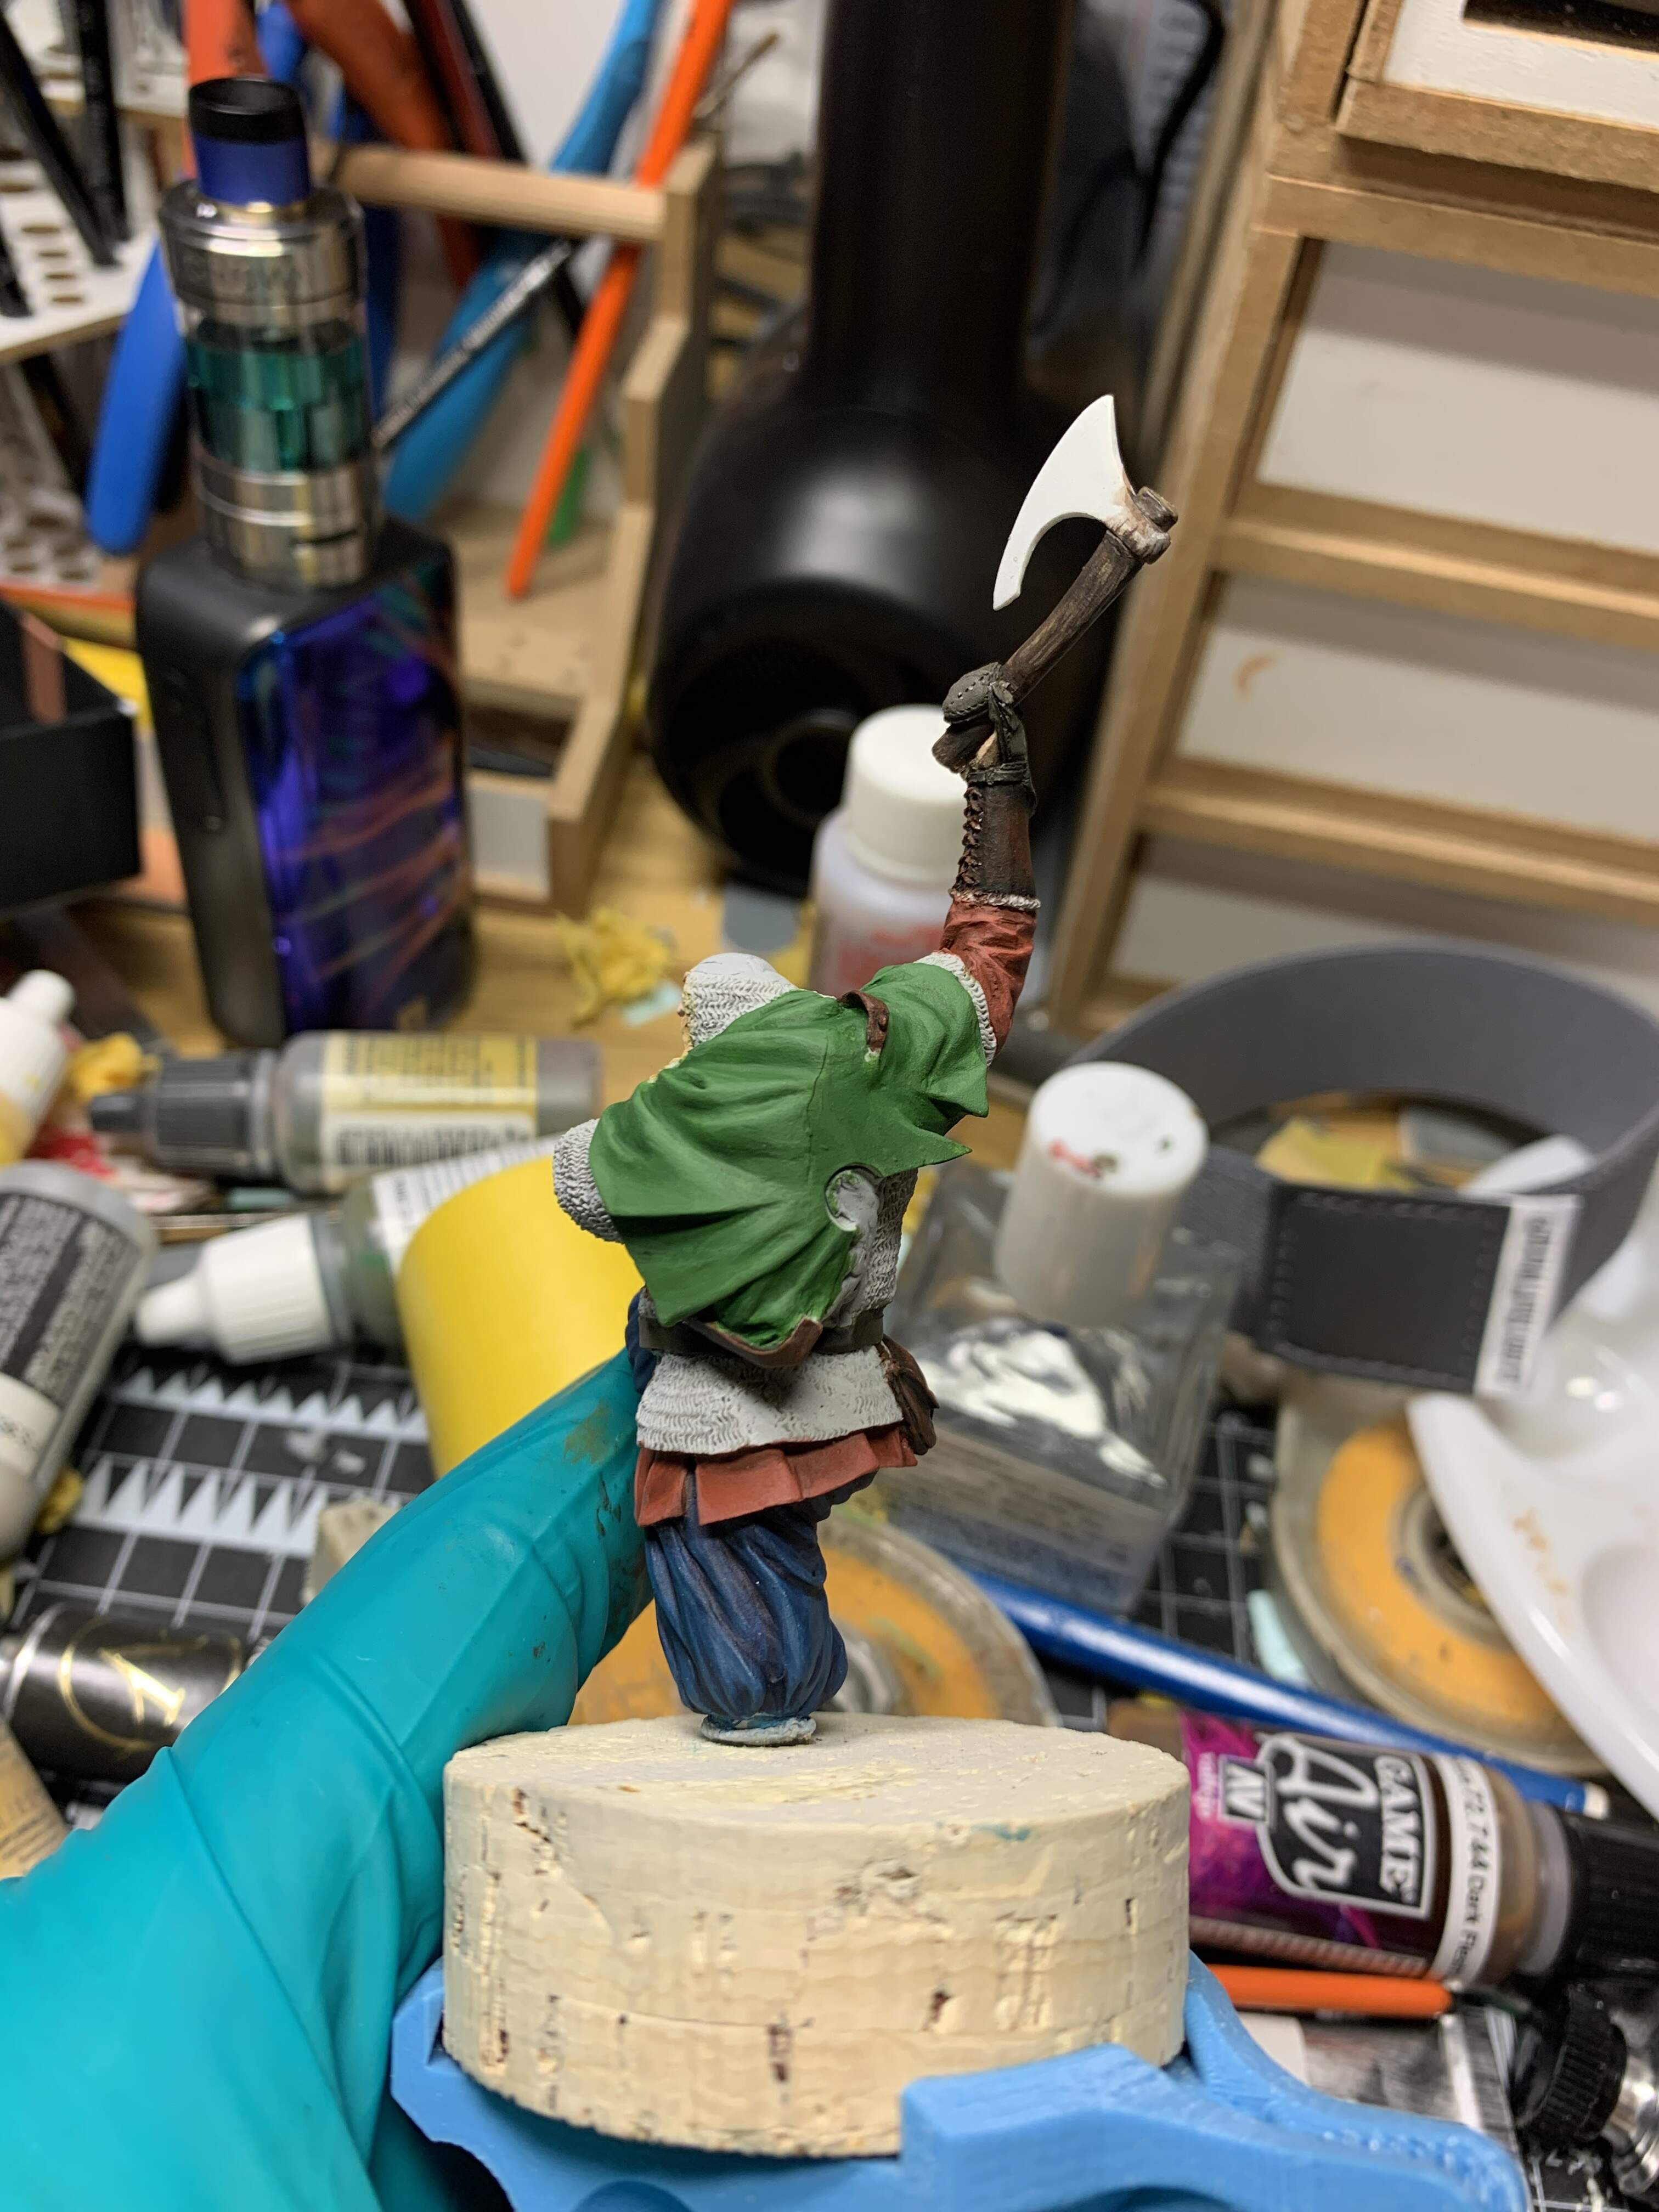
So the three areas of clothing were up next. I started with the blue pants.
The shirt was tackled next.
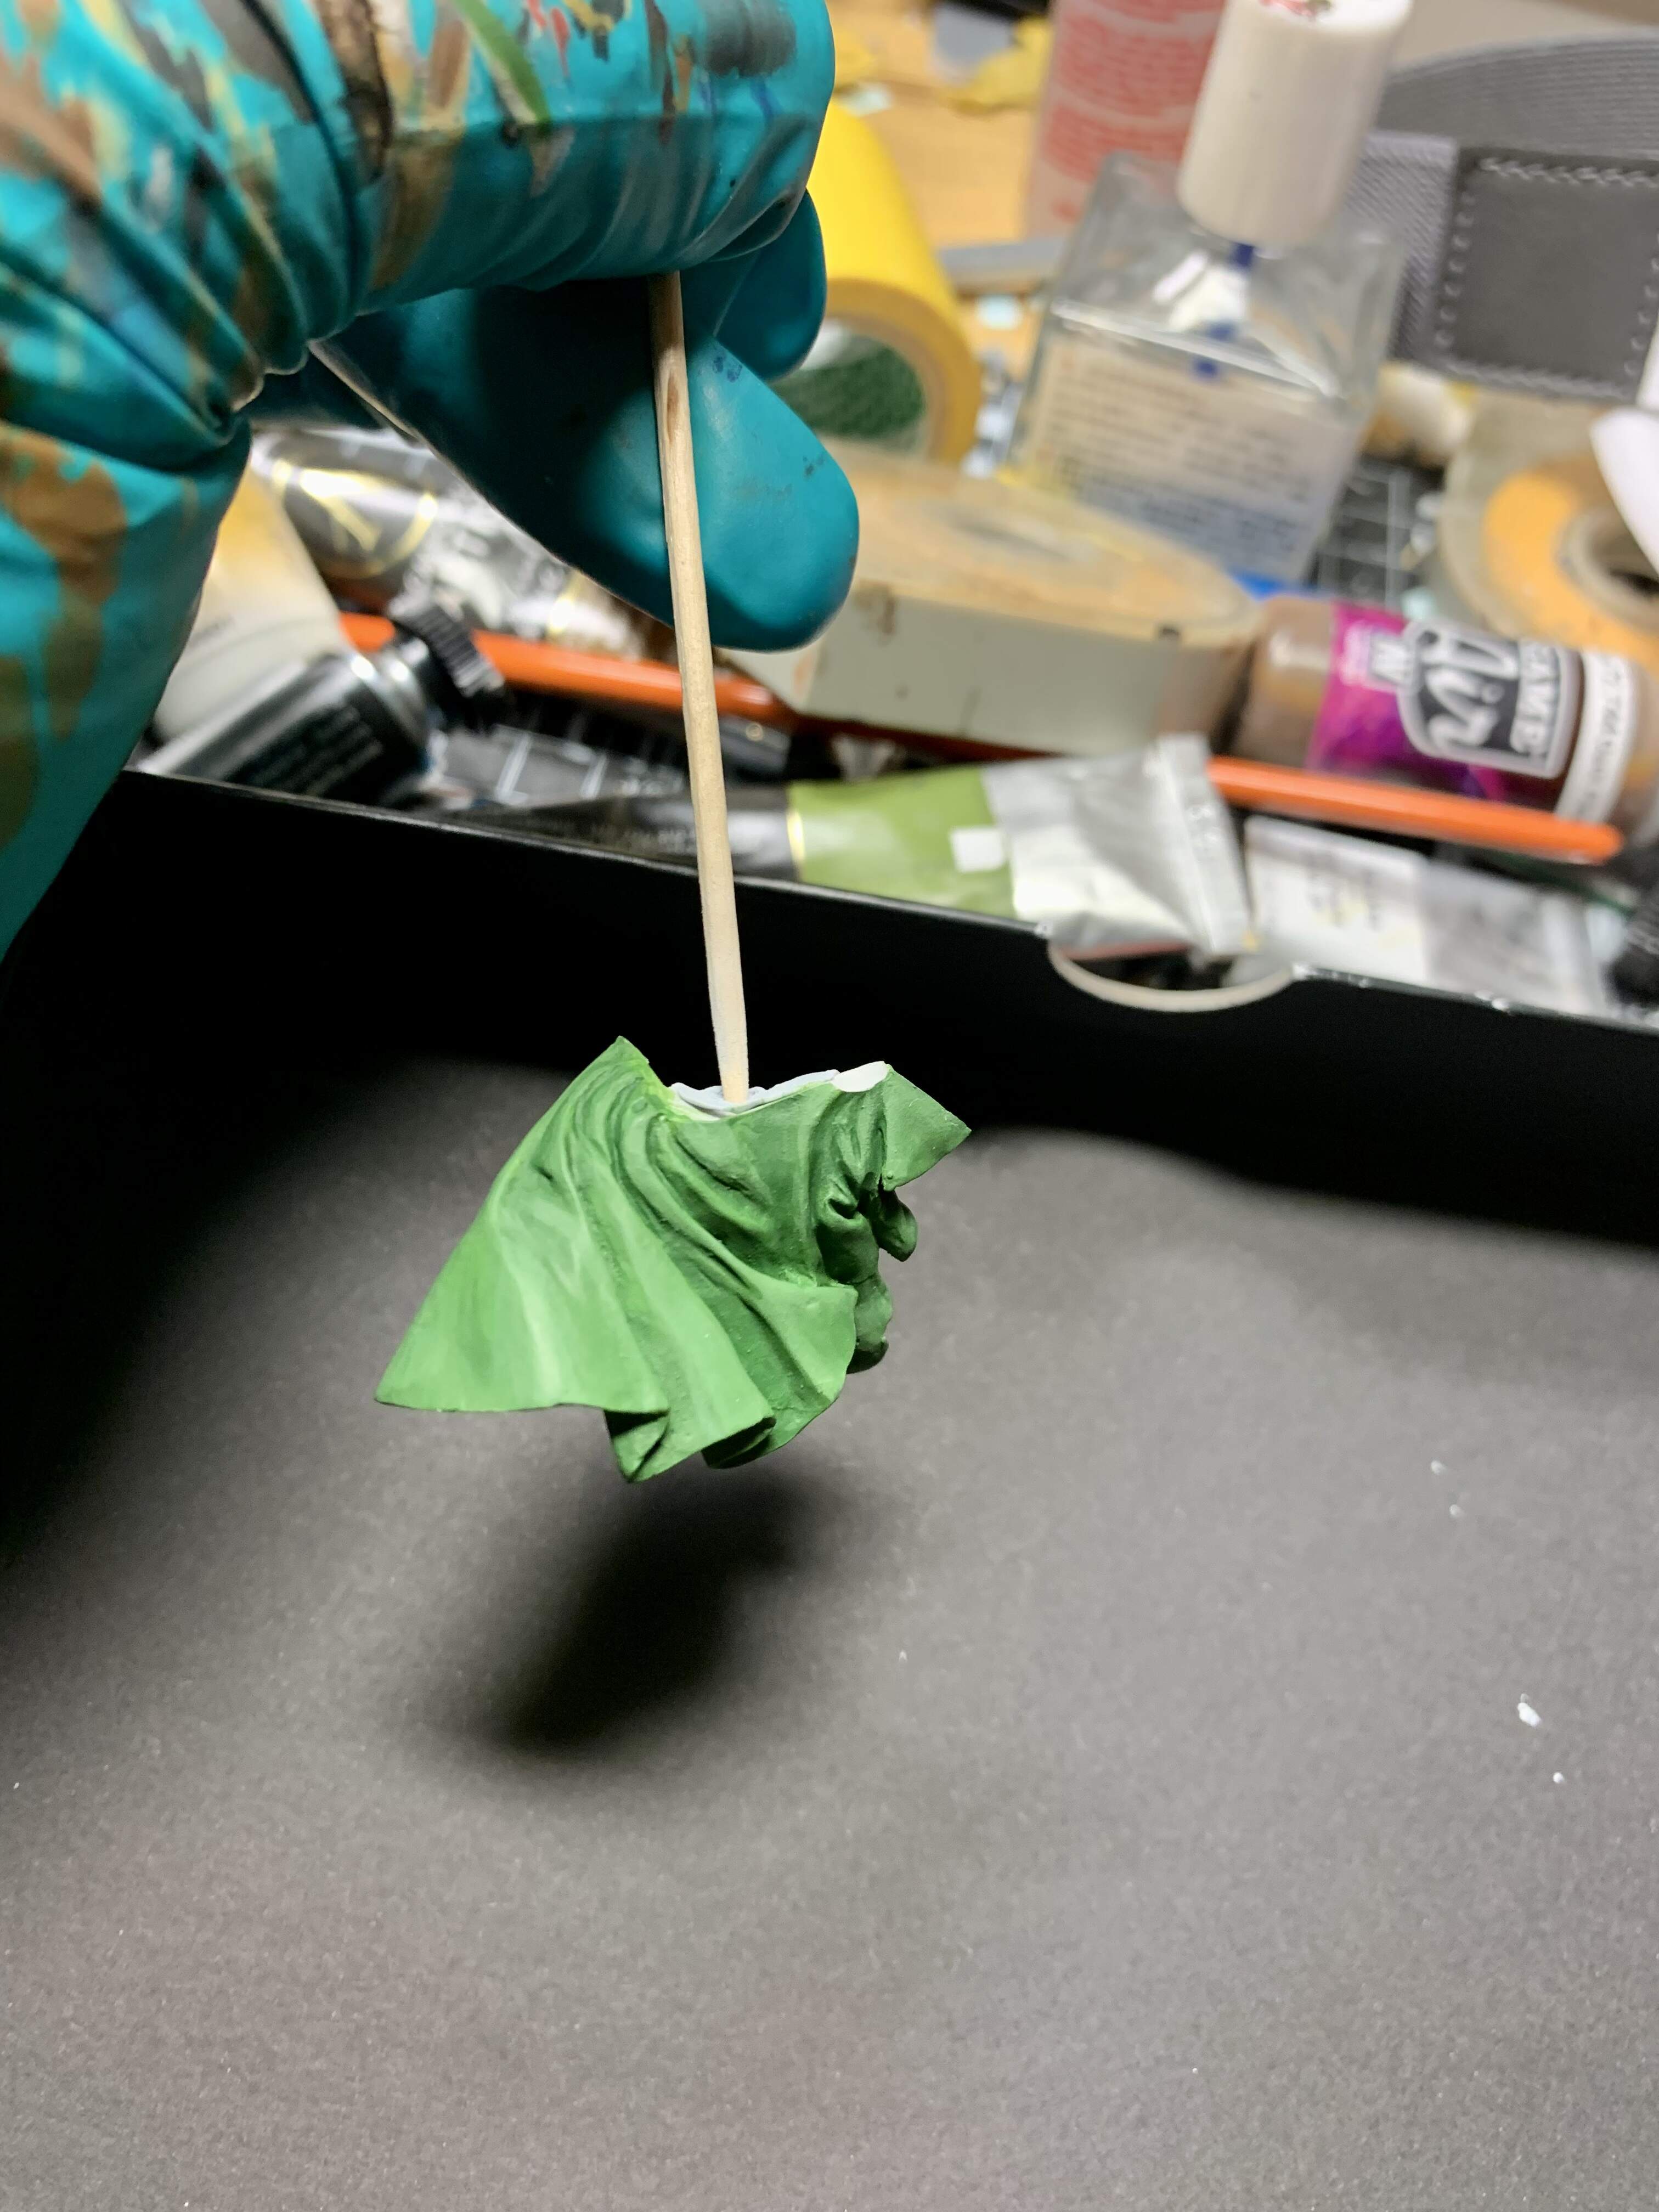
Followed by the cloak in two parts. You can really appreciate the top class sculpting here.
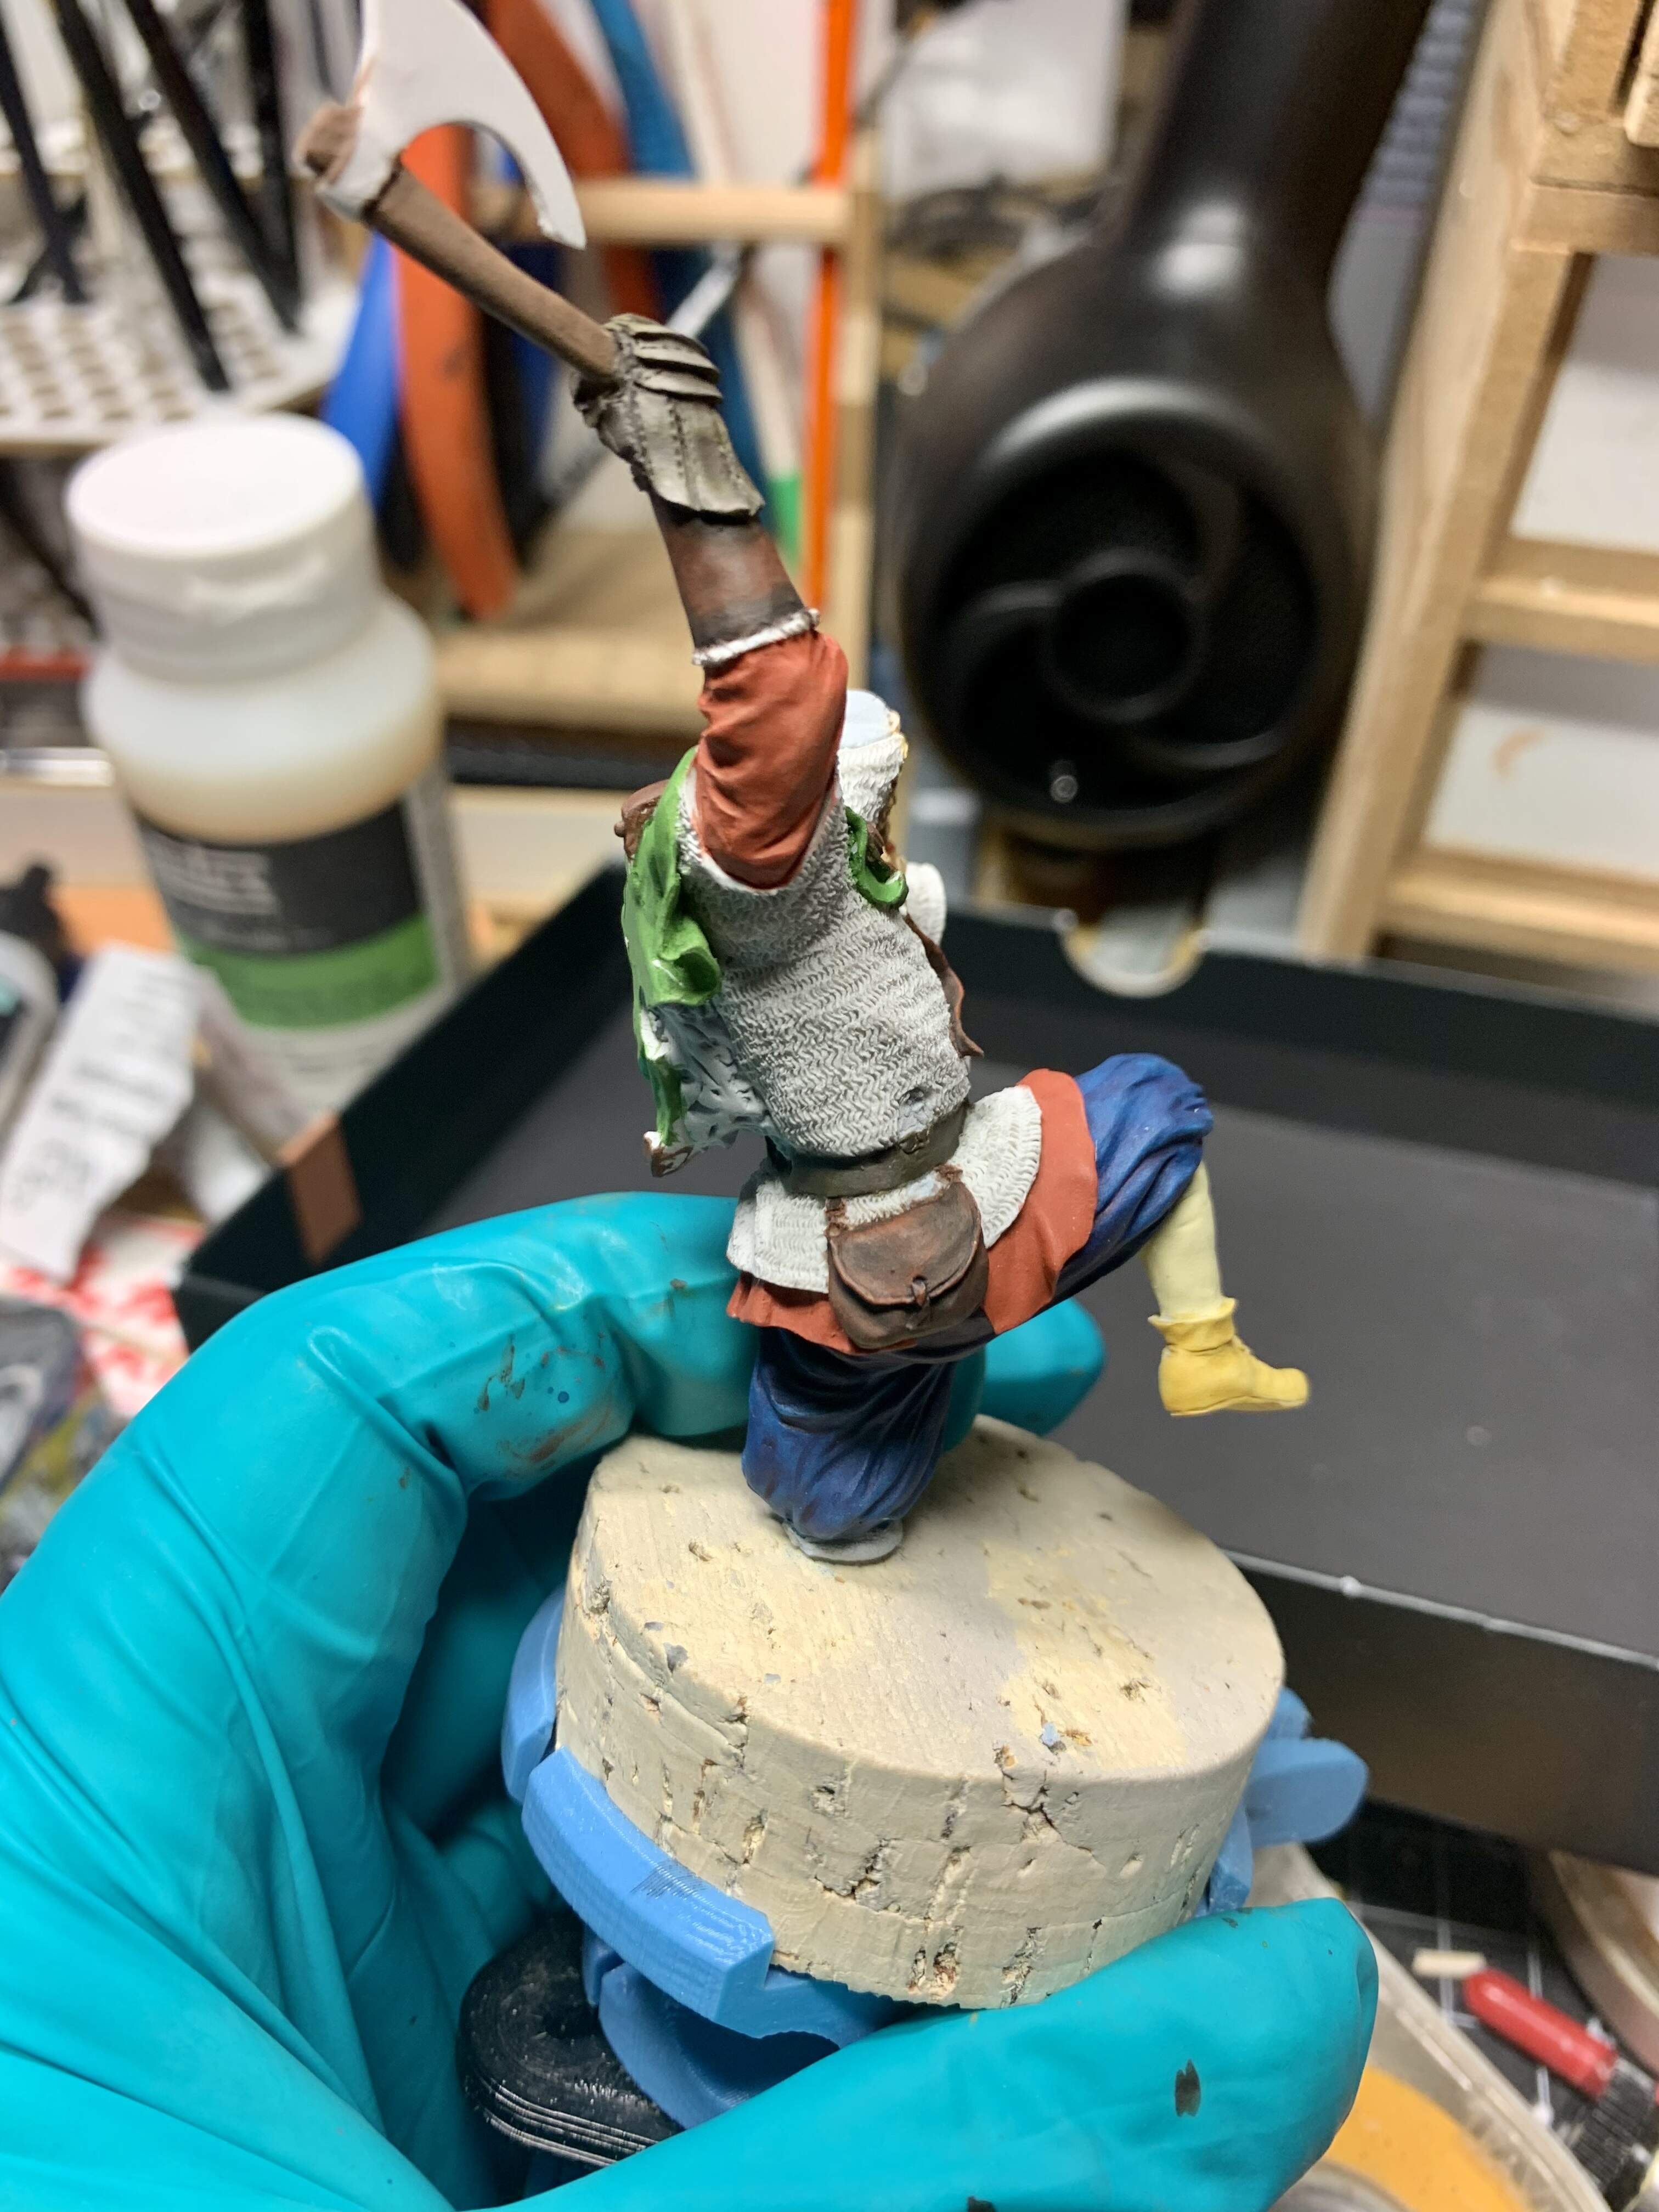
Now it’s on to the chain mail and metal parts which I am busy giving a satin black undercoat.
2 Likes
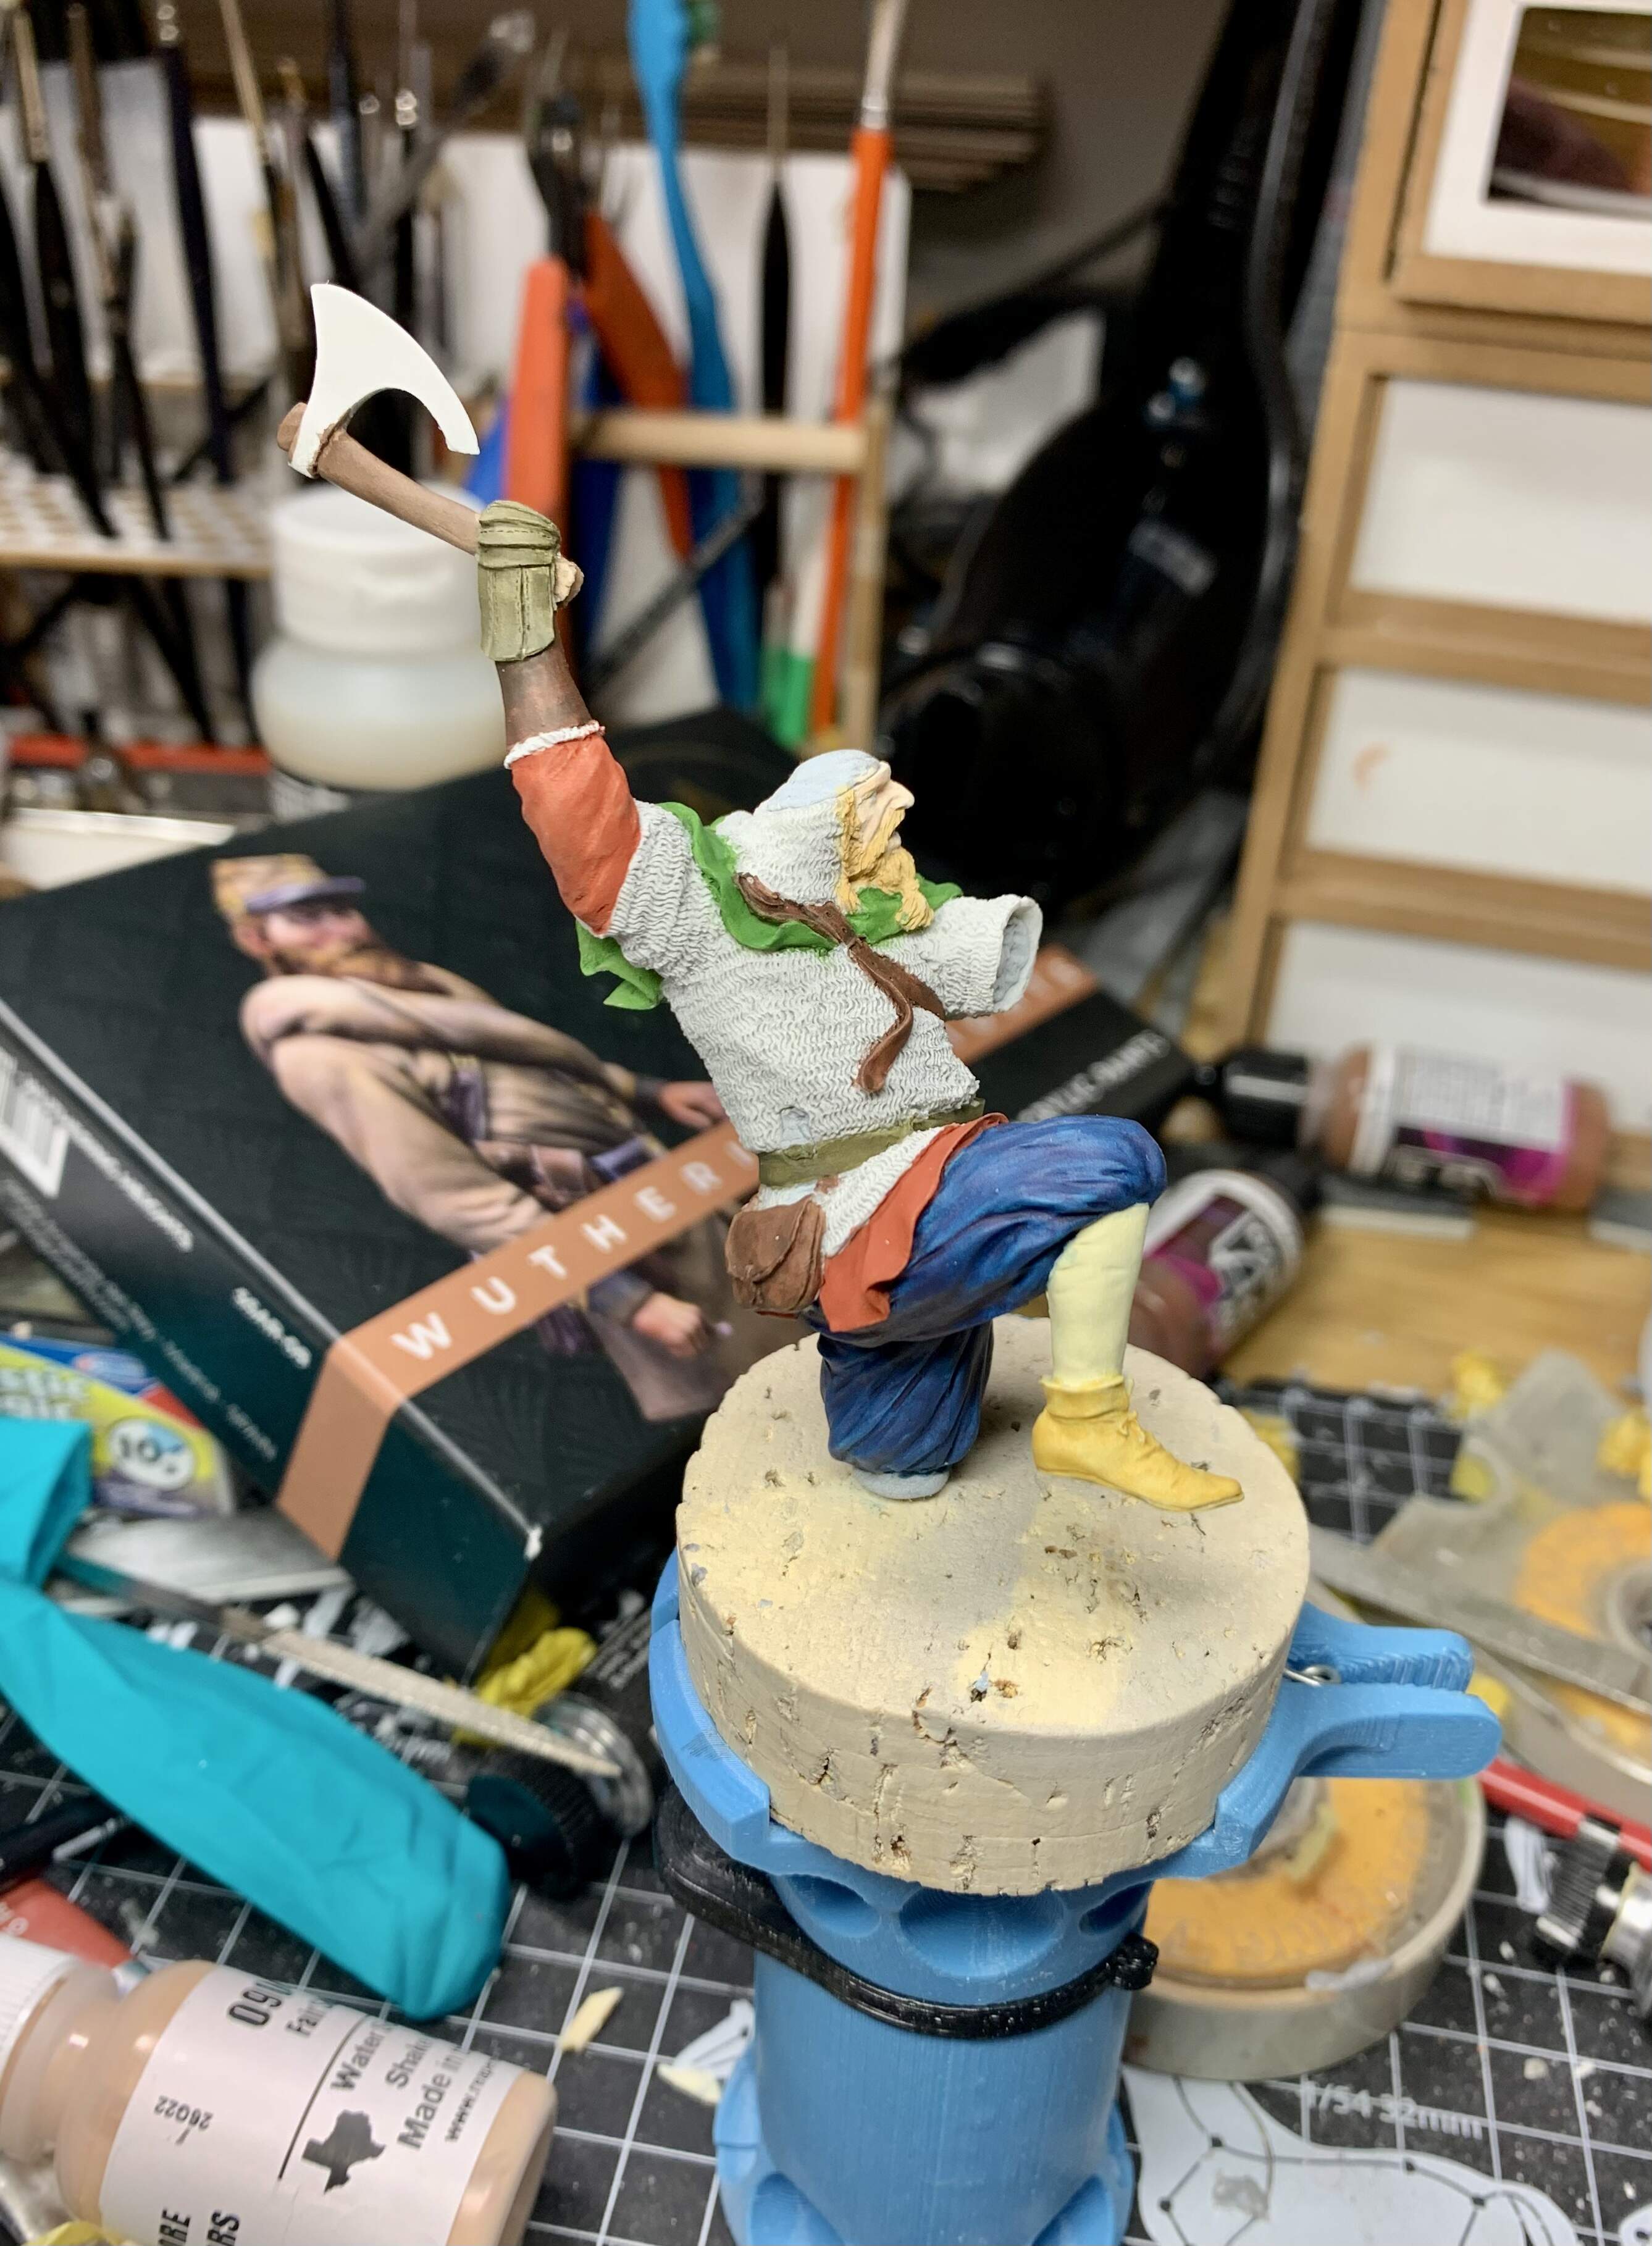
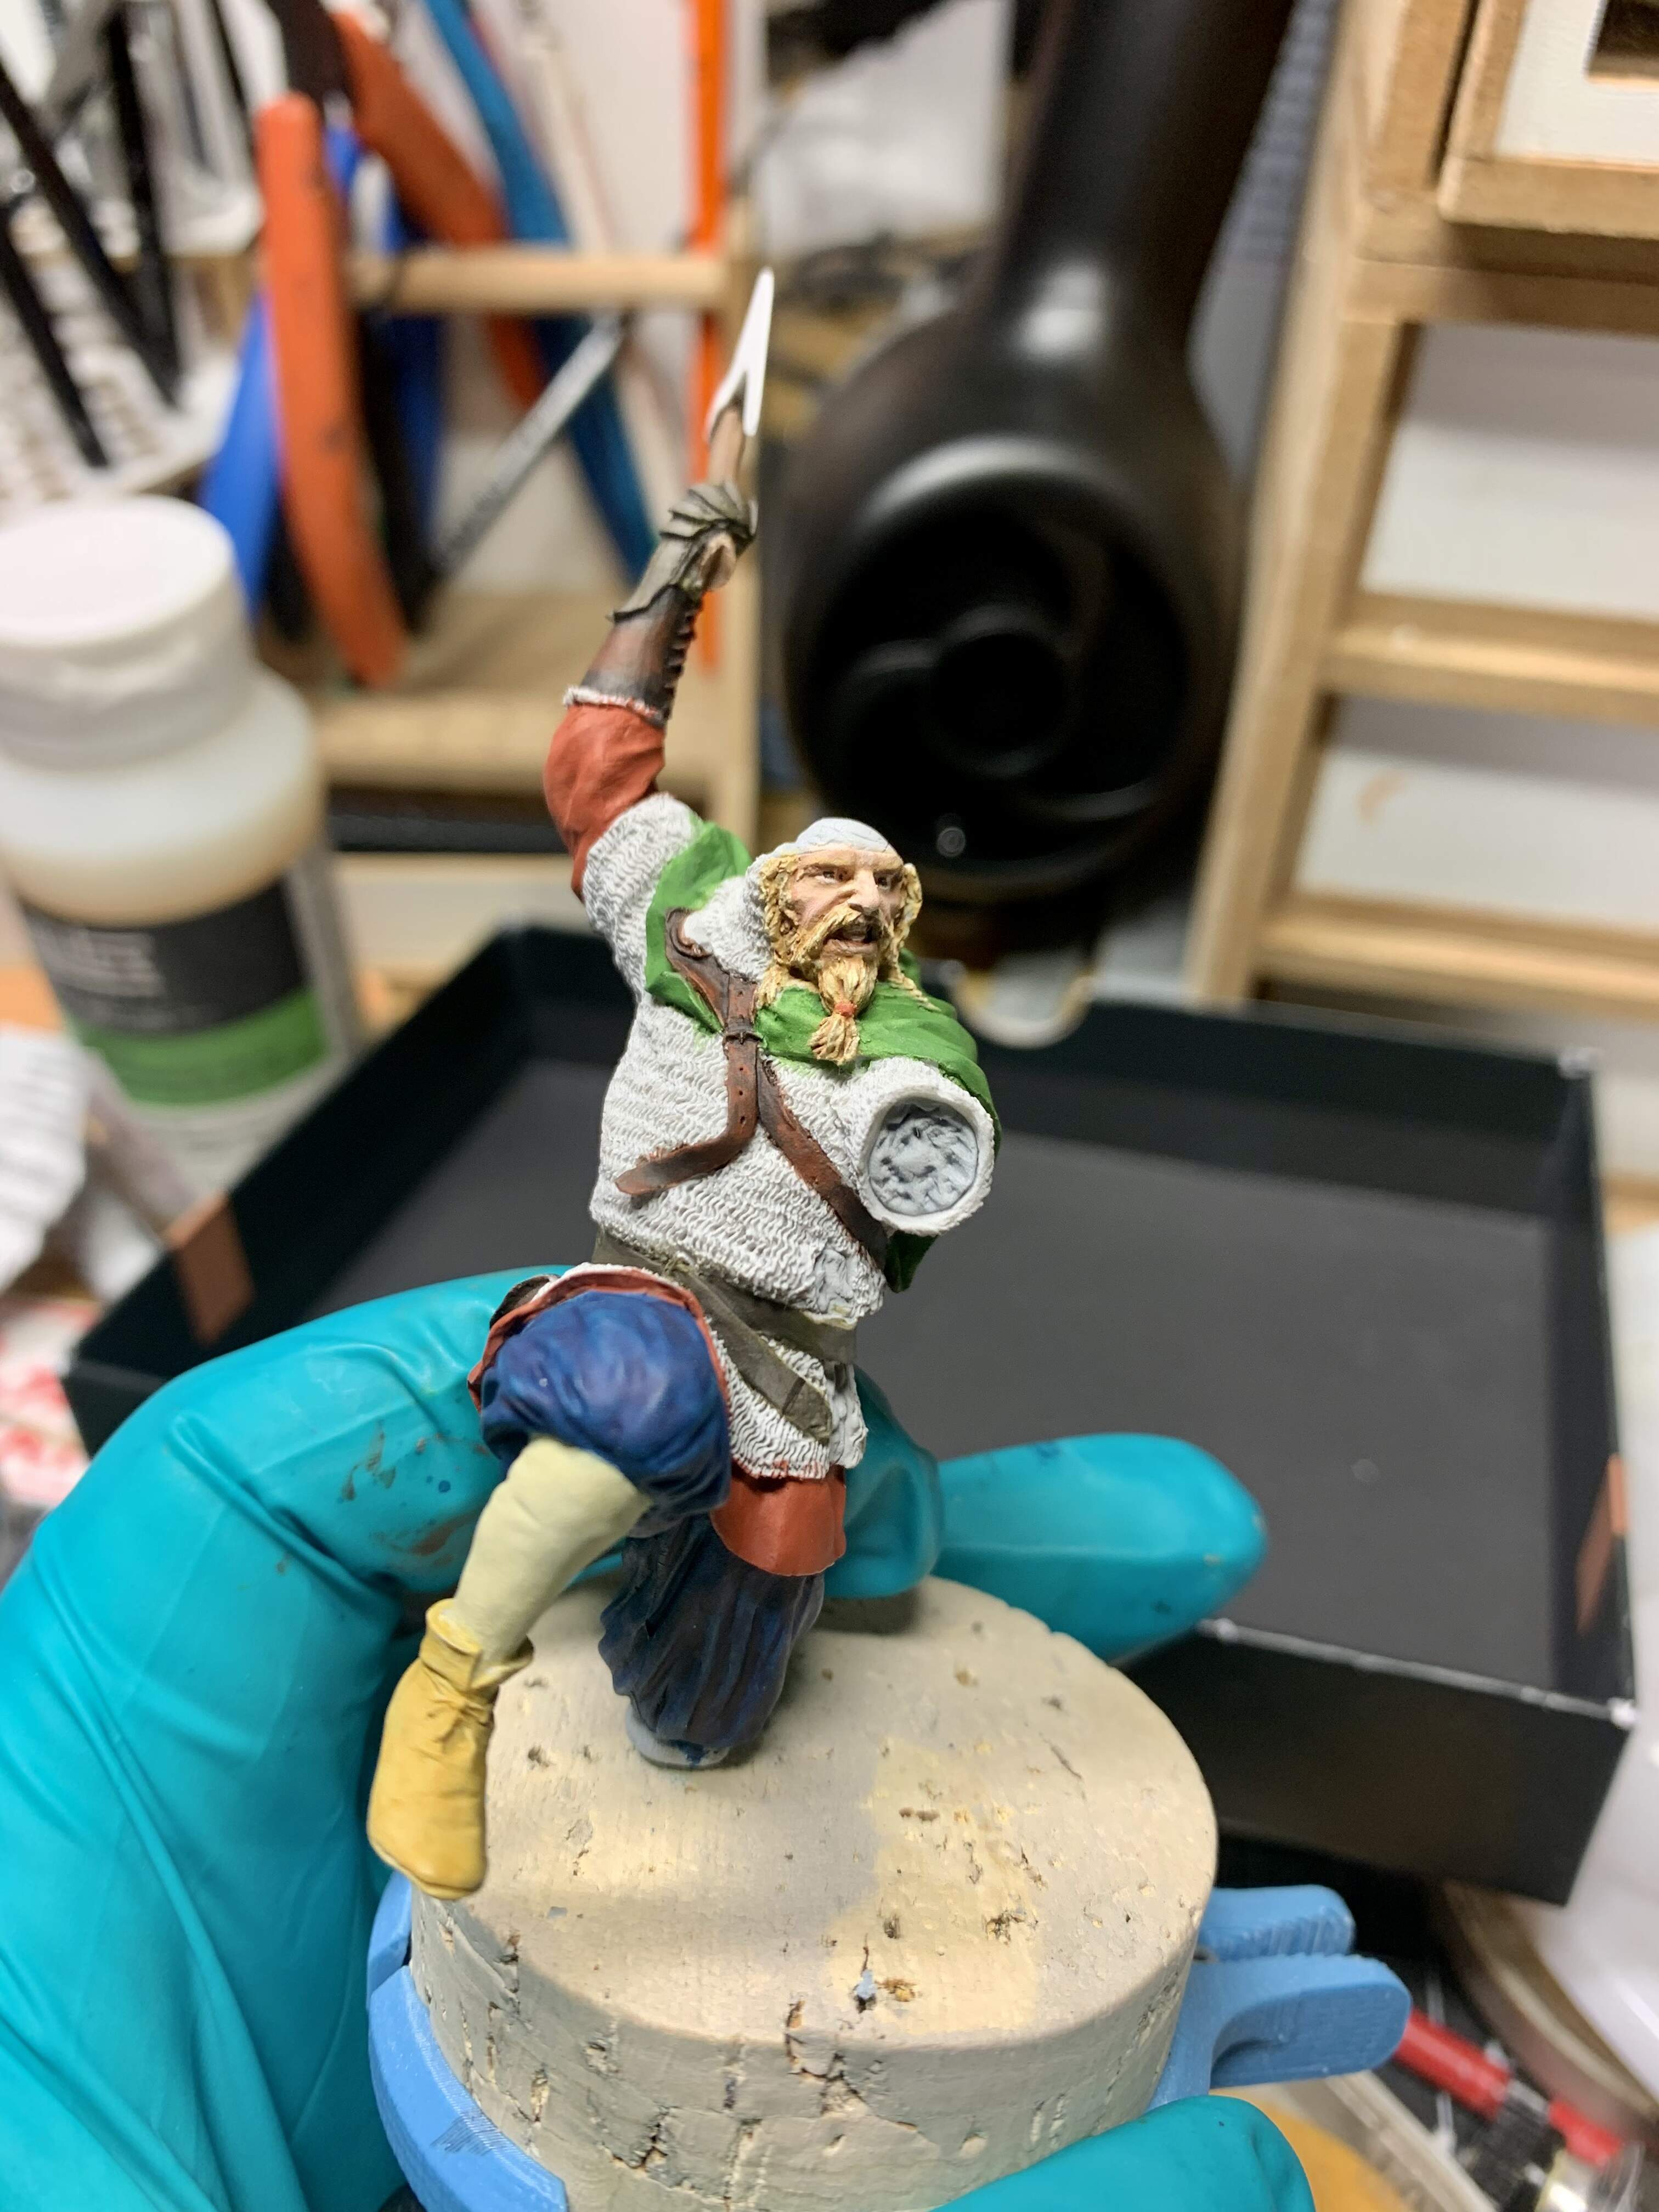
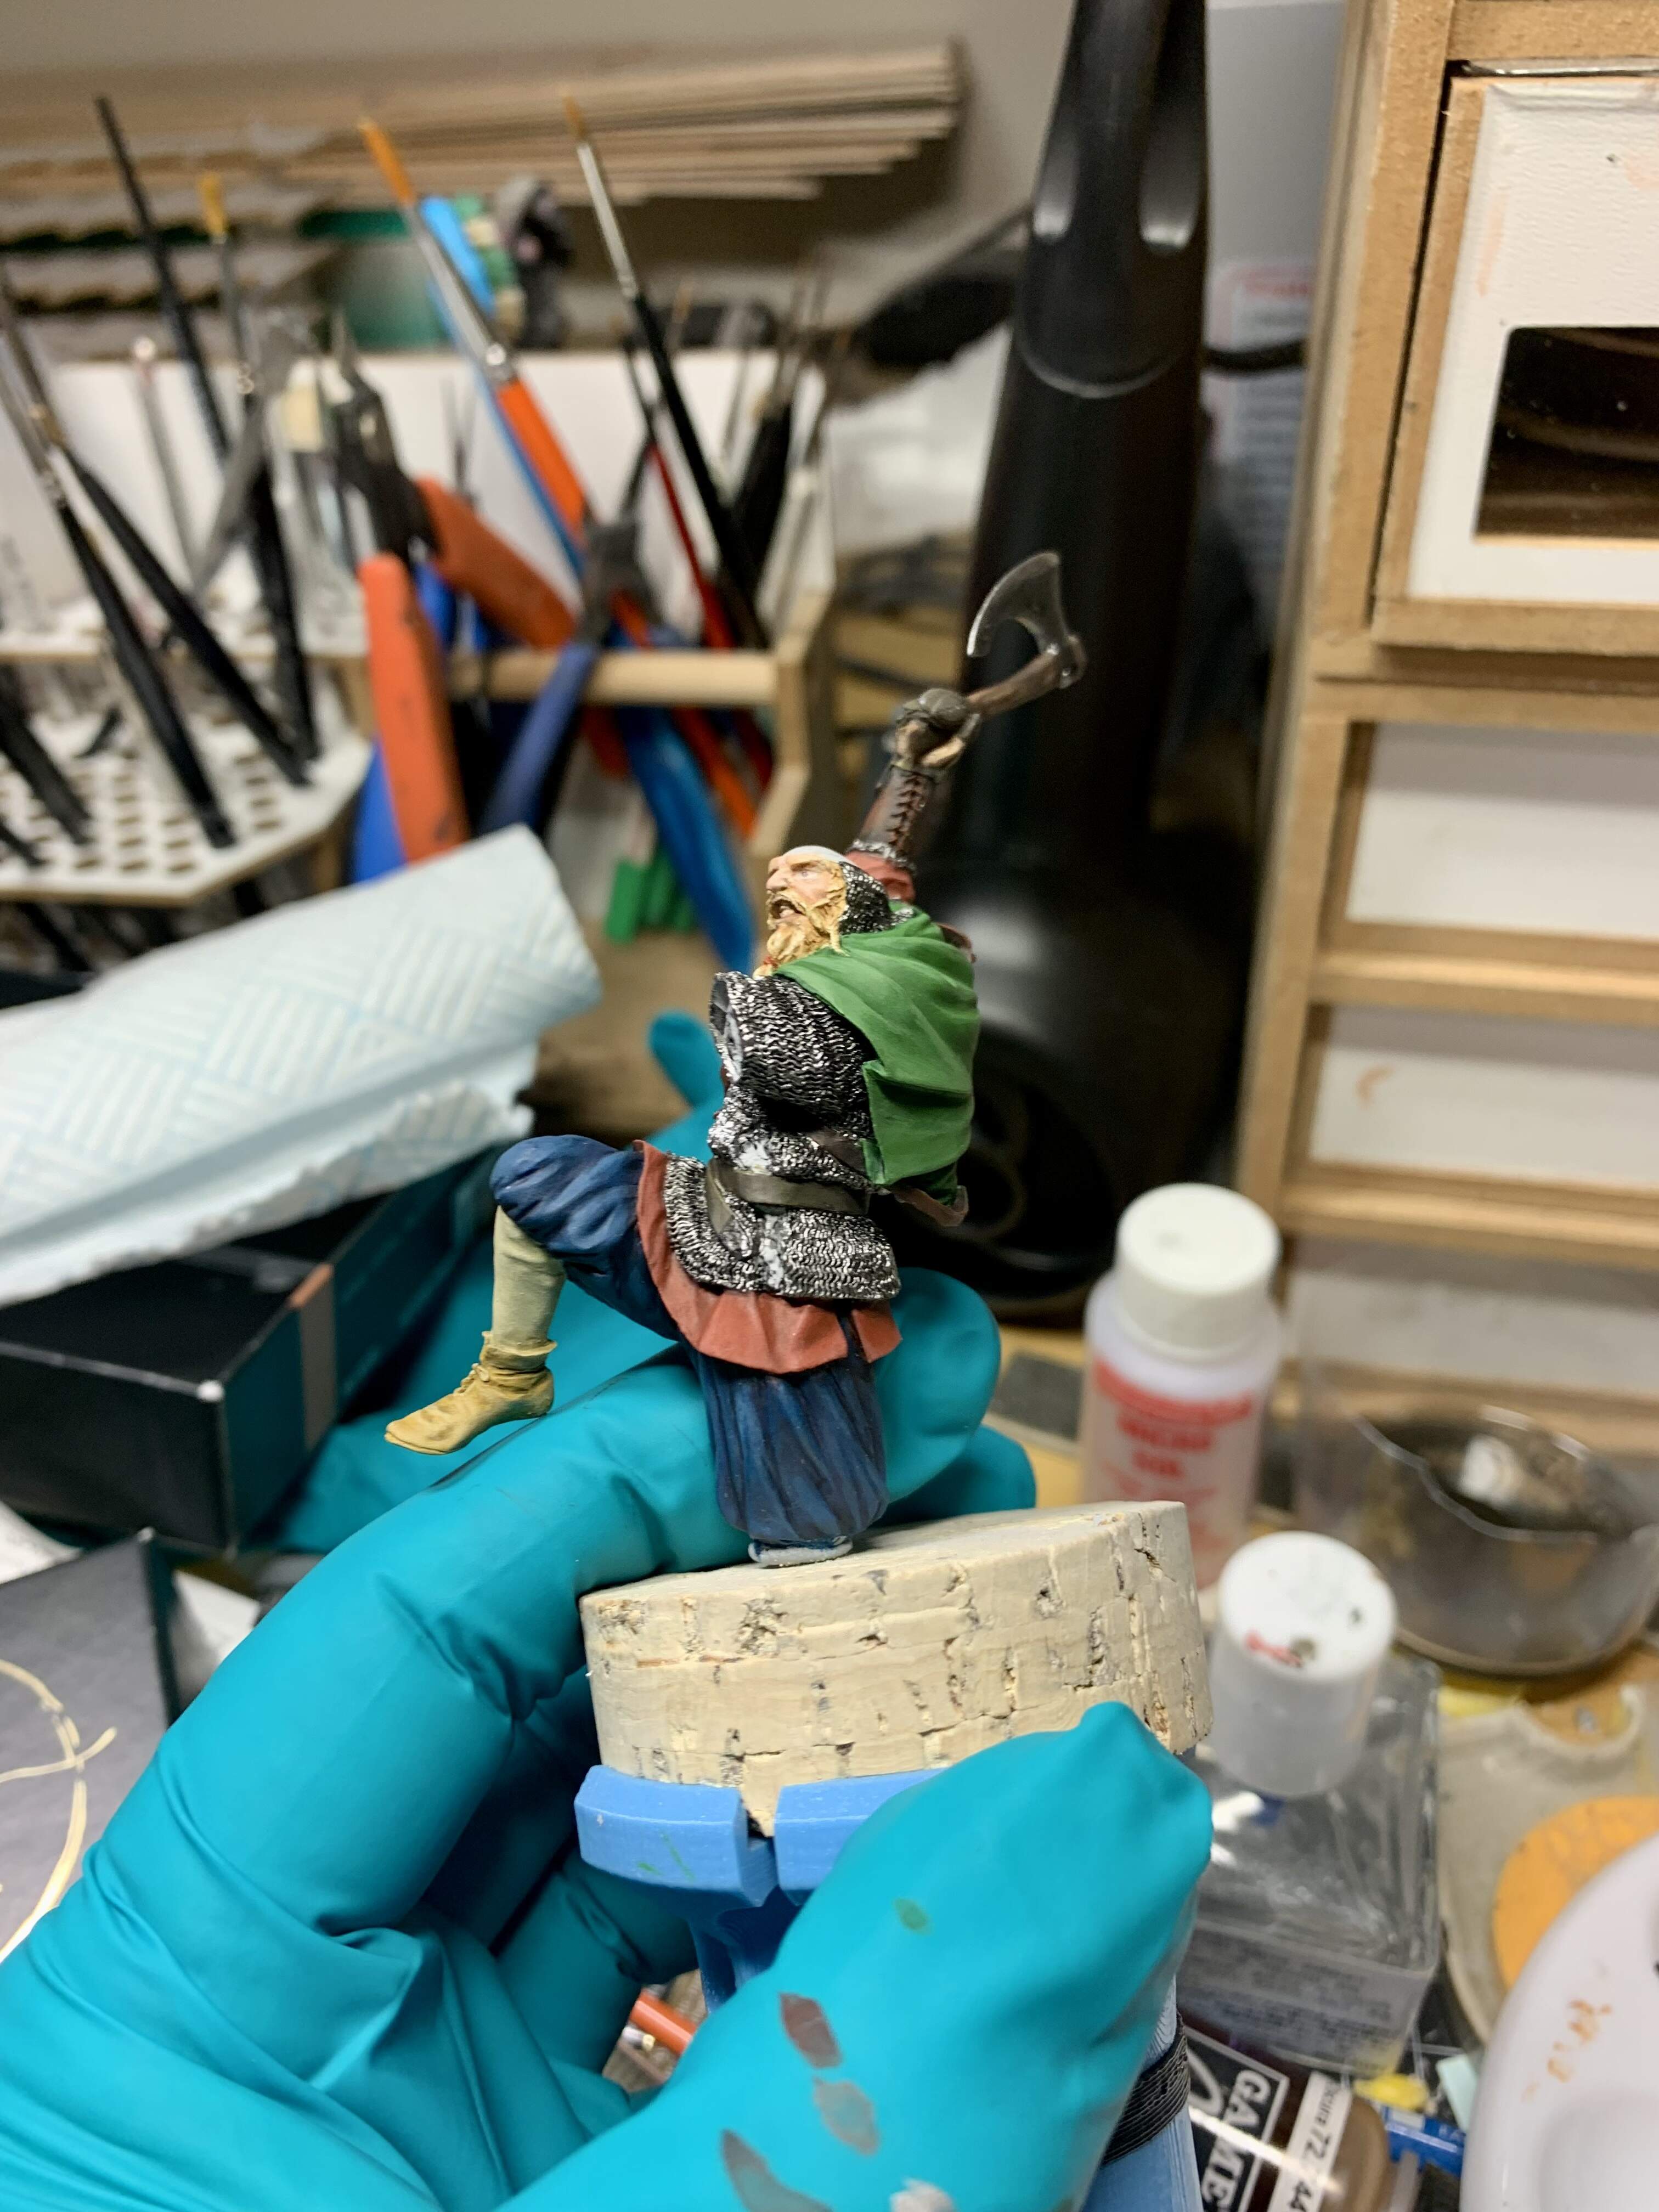
Doing the chain mail and various other metal parts was really the last big painting job on the figure.
I have a few things left to finish on the fig before assembly. I will also be starting to work on the long boat prow next.
Thanks for reading.
2 Likes
Progress is looking great!
1 Like
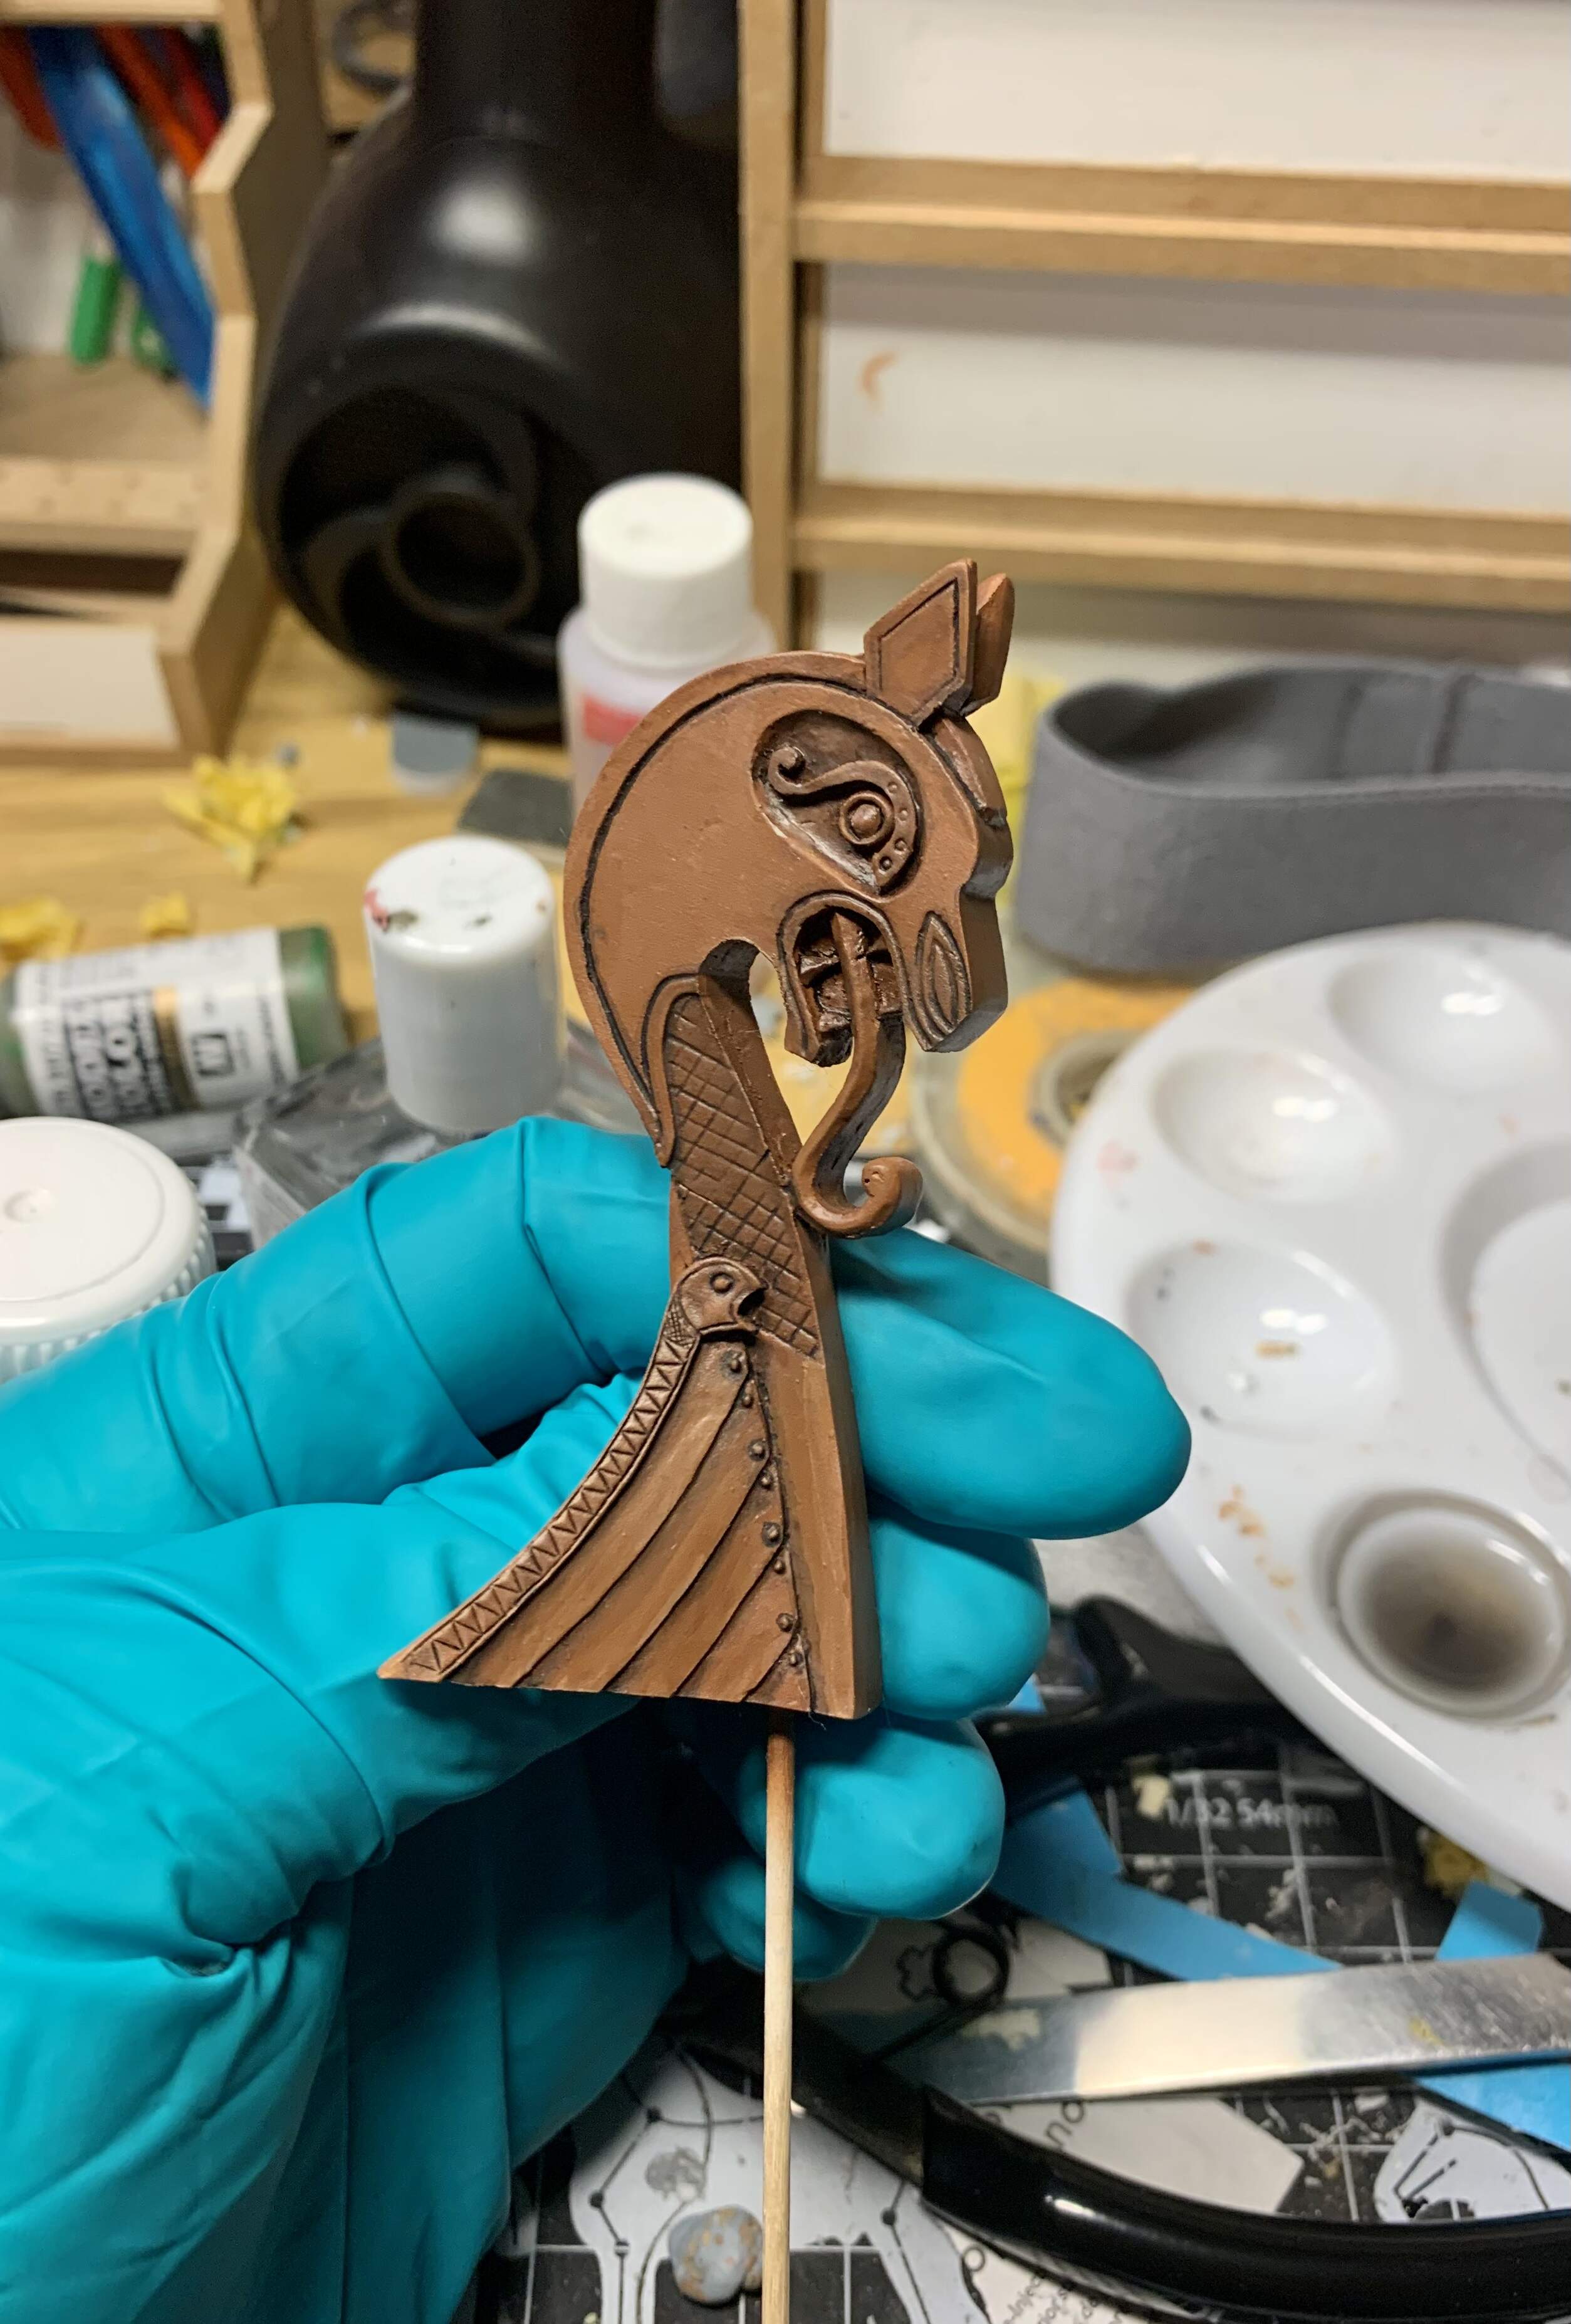
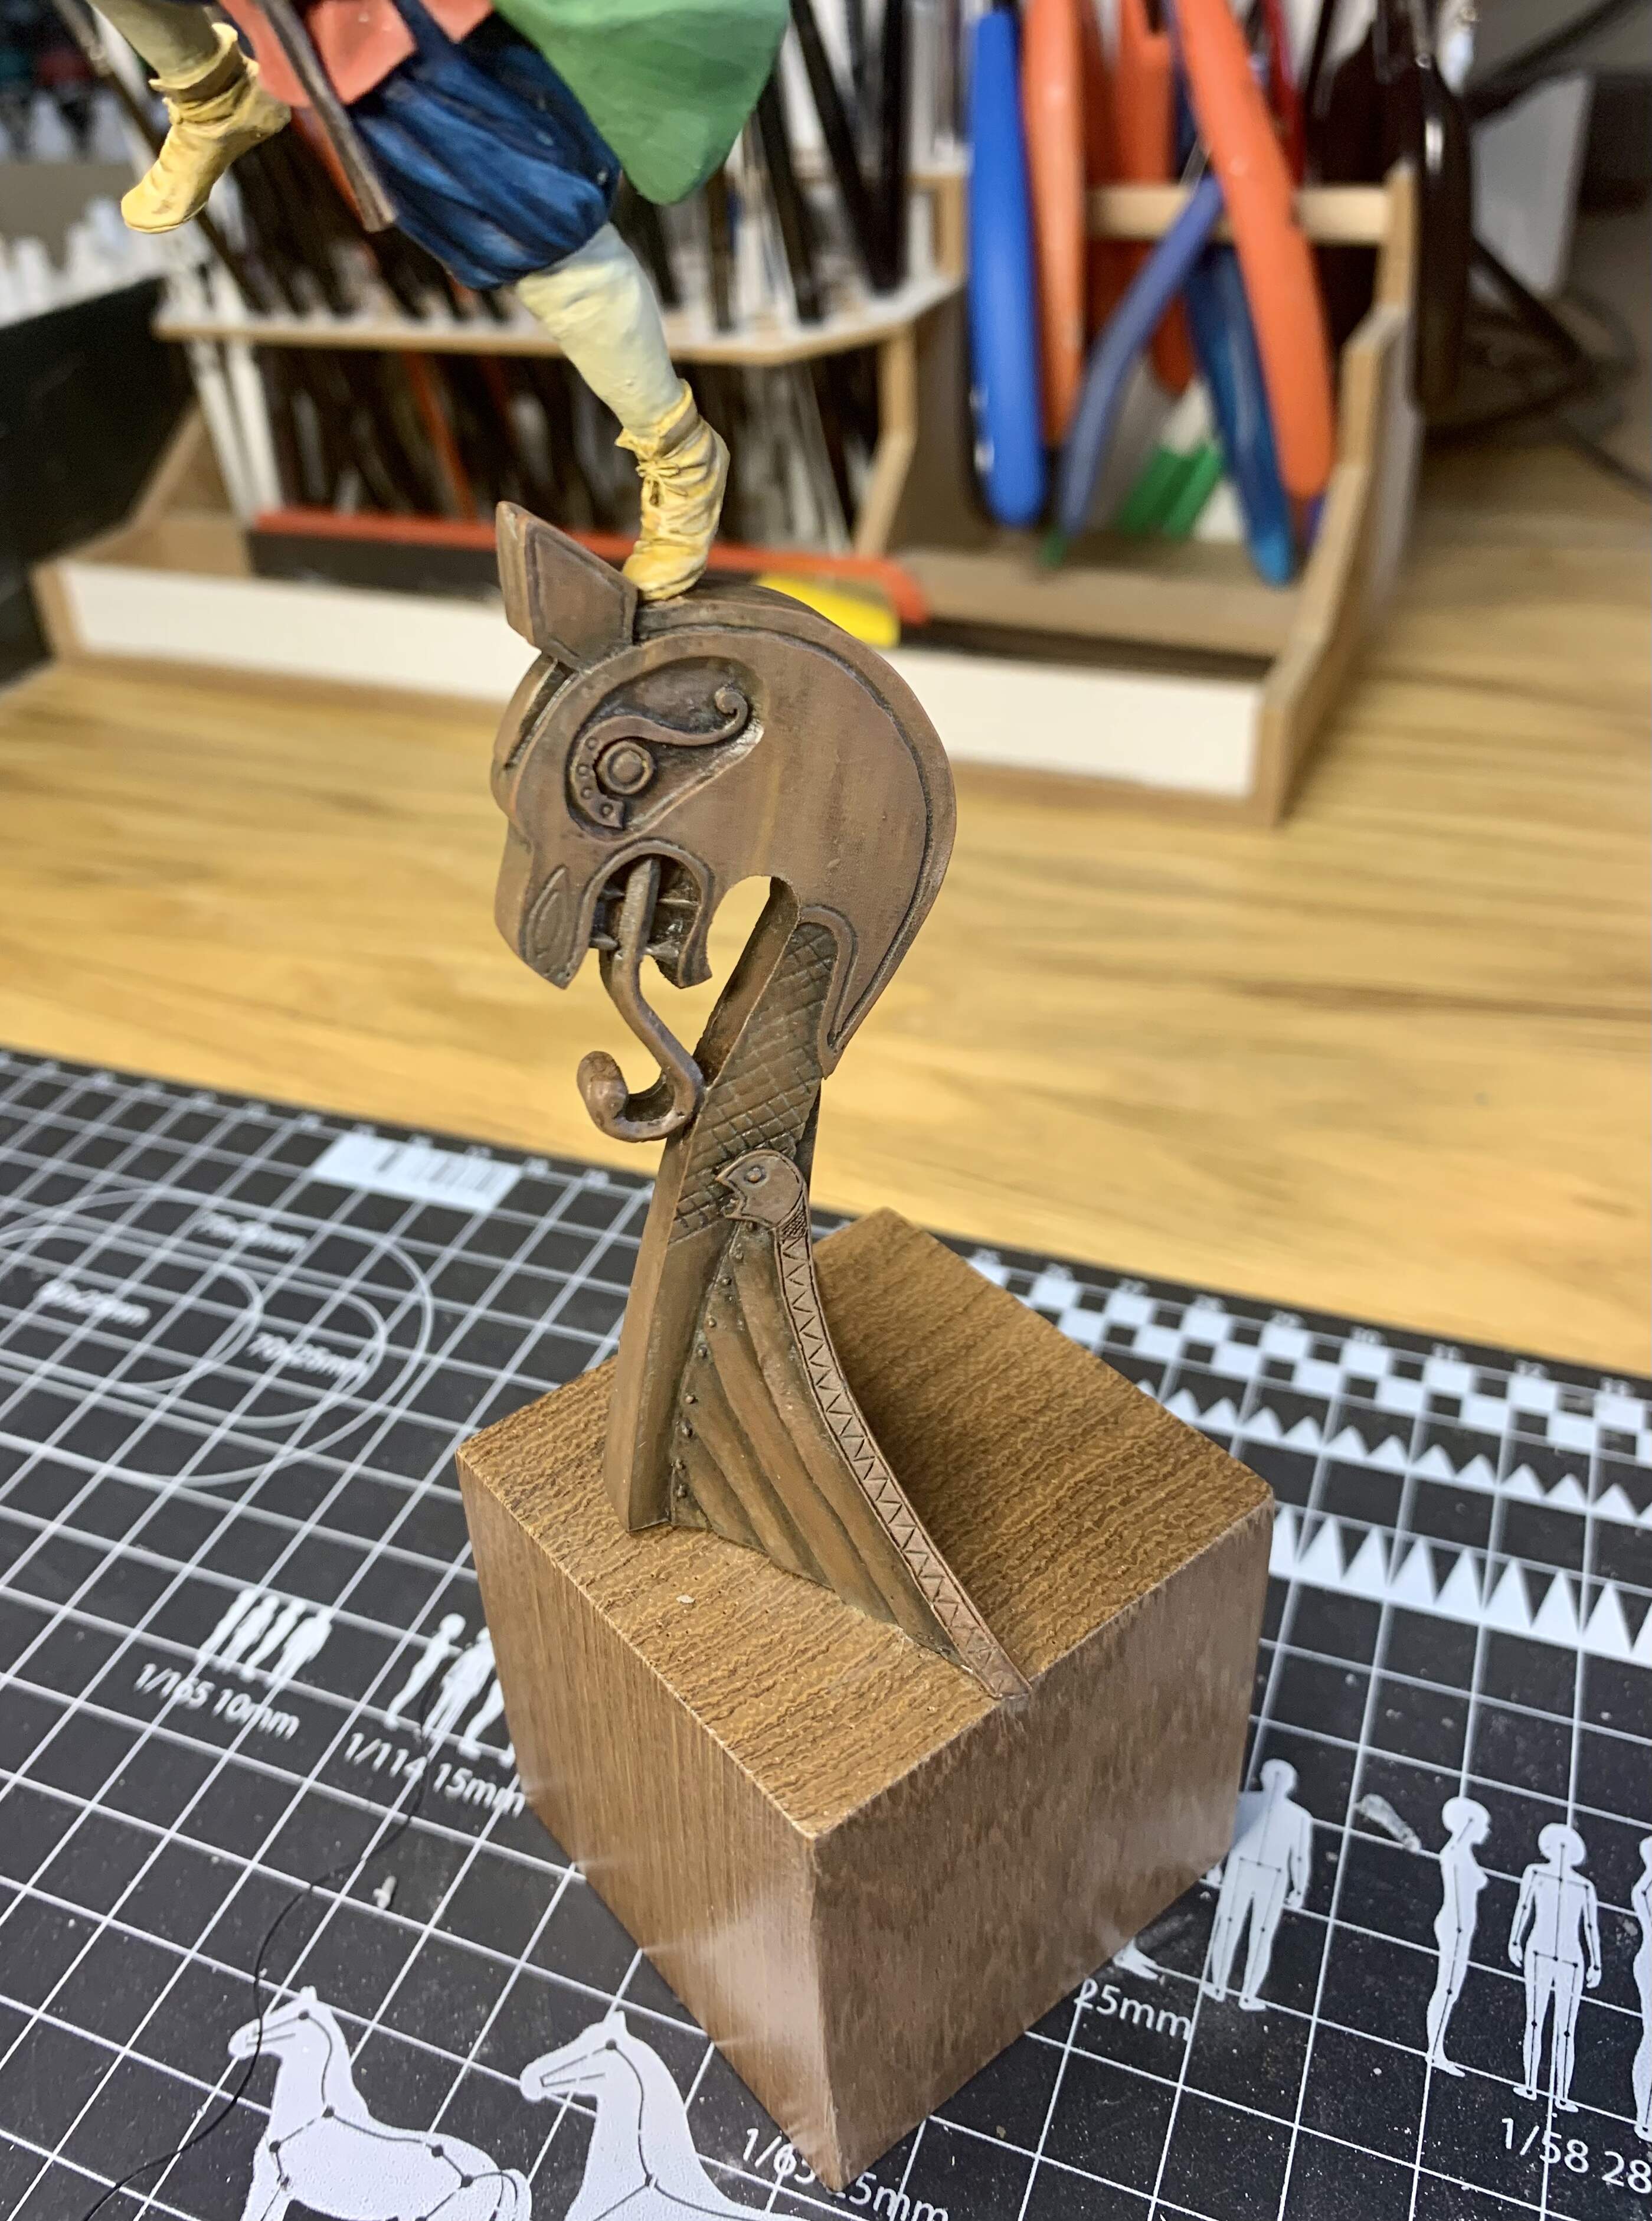
So after getting all the bits of the figure painted I got cracking on the prow of the longboat.
This is how it looked with a satin varnish.
First job was to give it a black enamel wash.
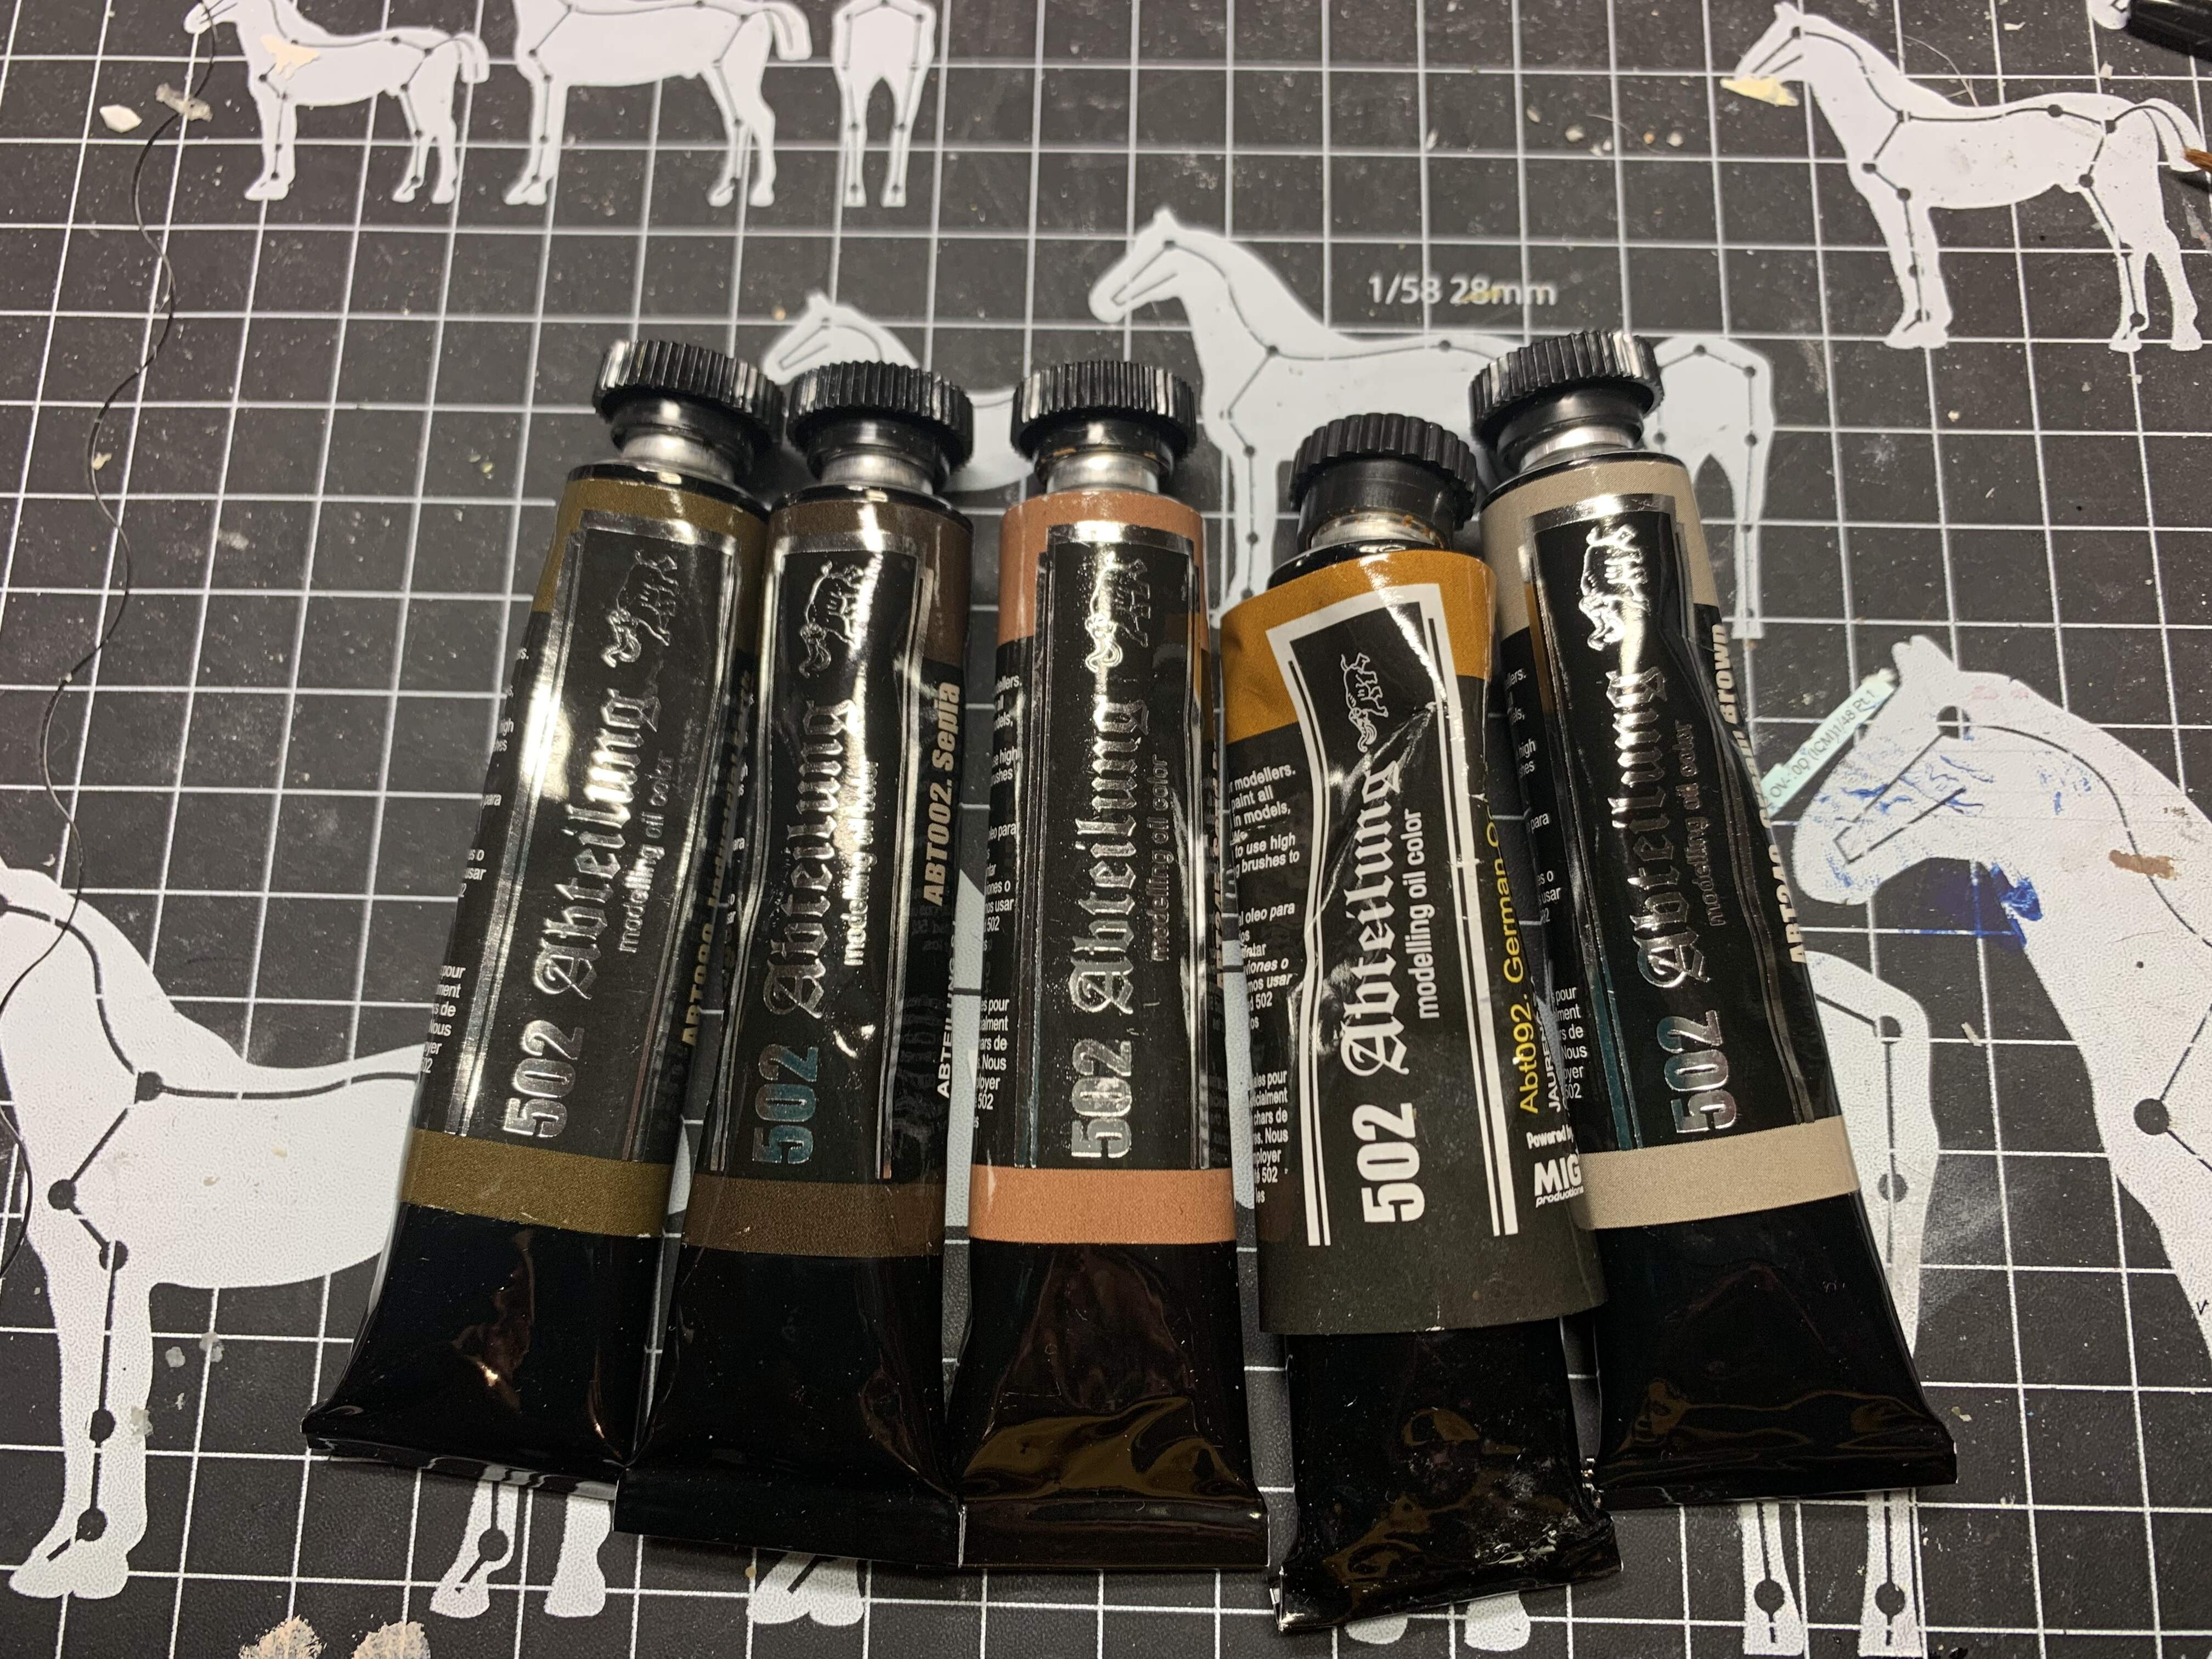
For the oils I chose these colors which were quite complimentary to the brown I’d chosen for the prow.
The initial stage of the oil work was adding shadows with the two darkest colors. Then I proceeded to add two mid tones to give a bit of variety to the wood. Finally, highlights were added with the lightest color.
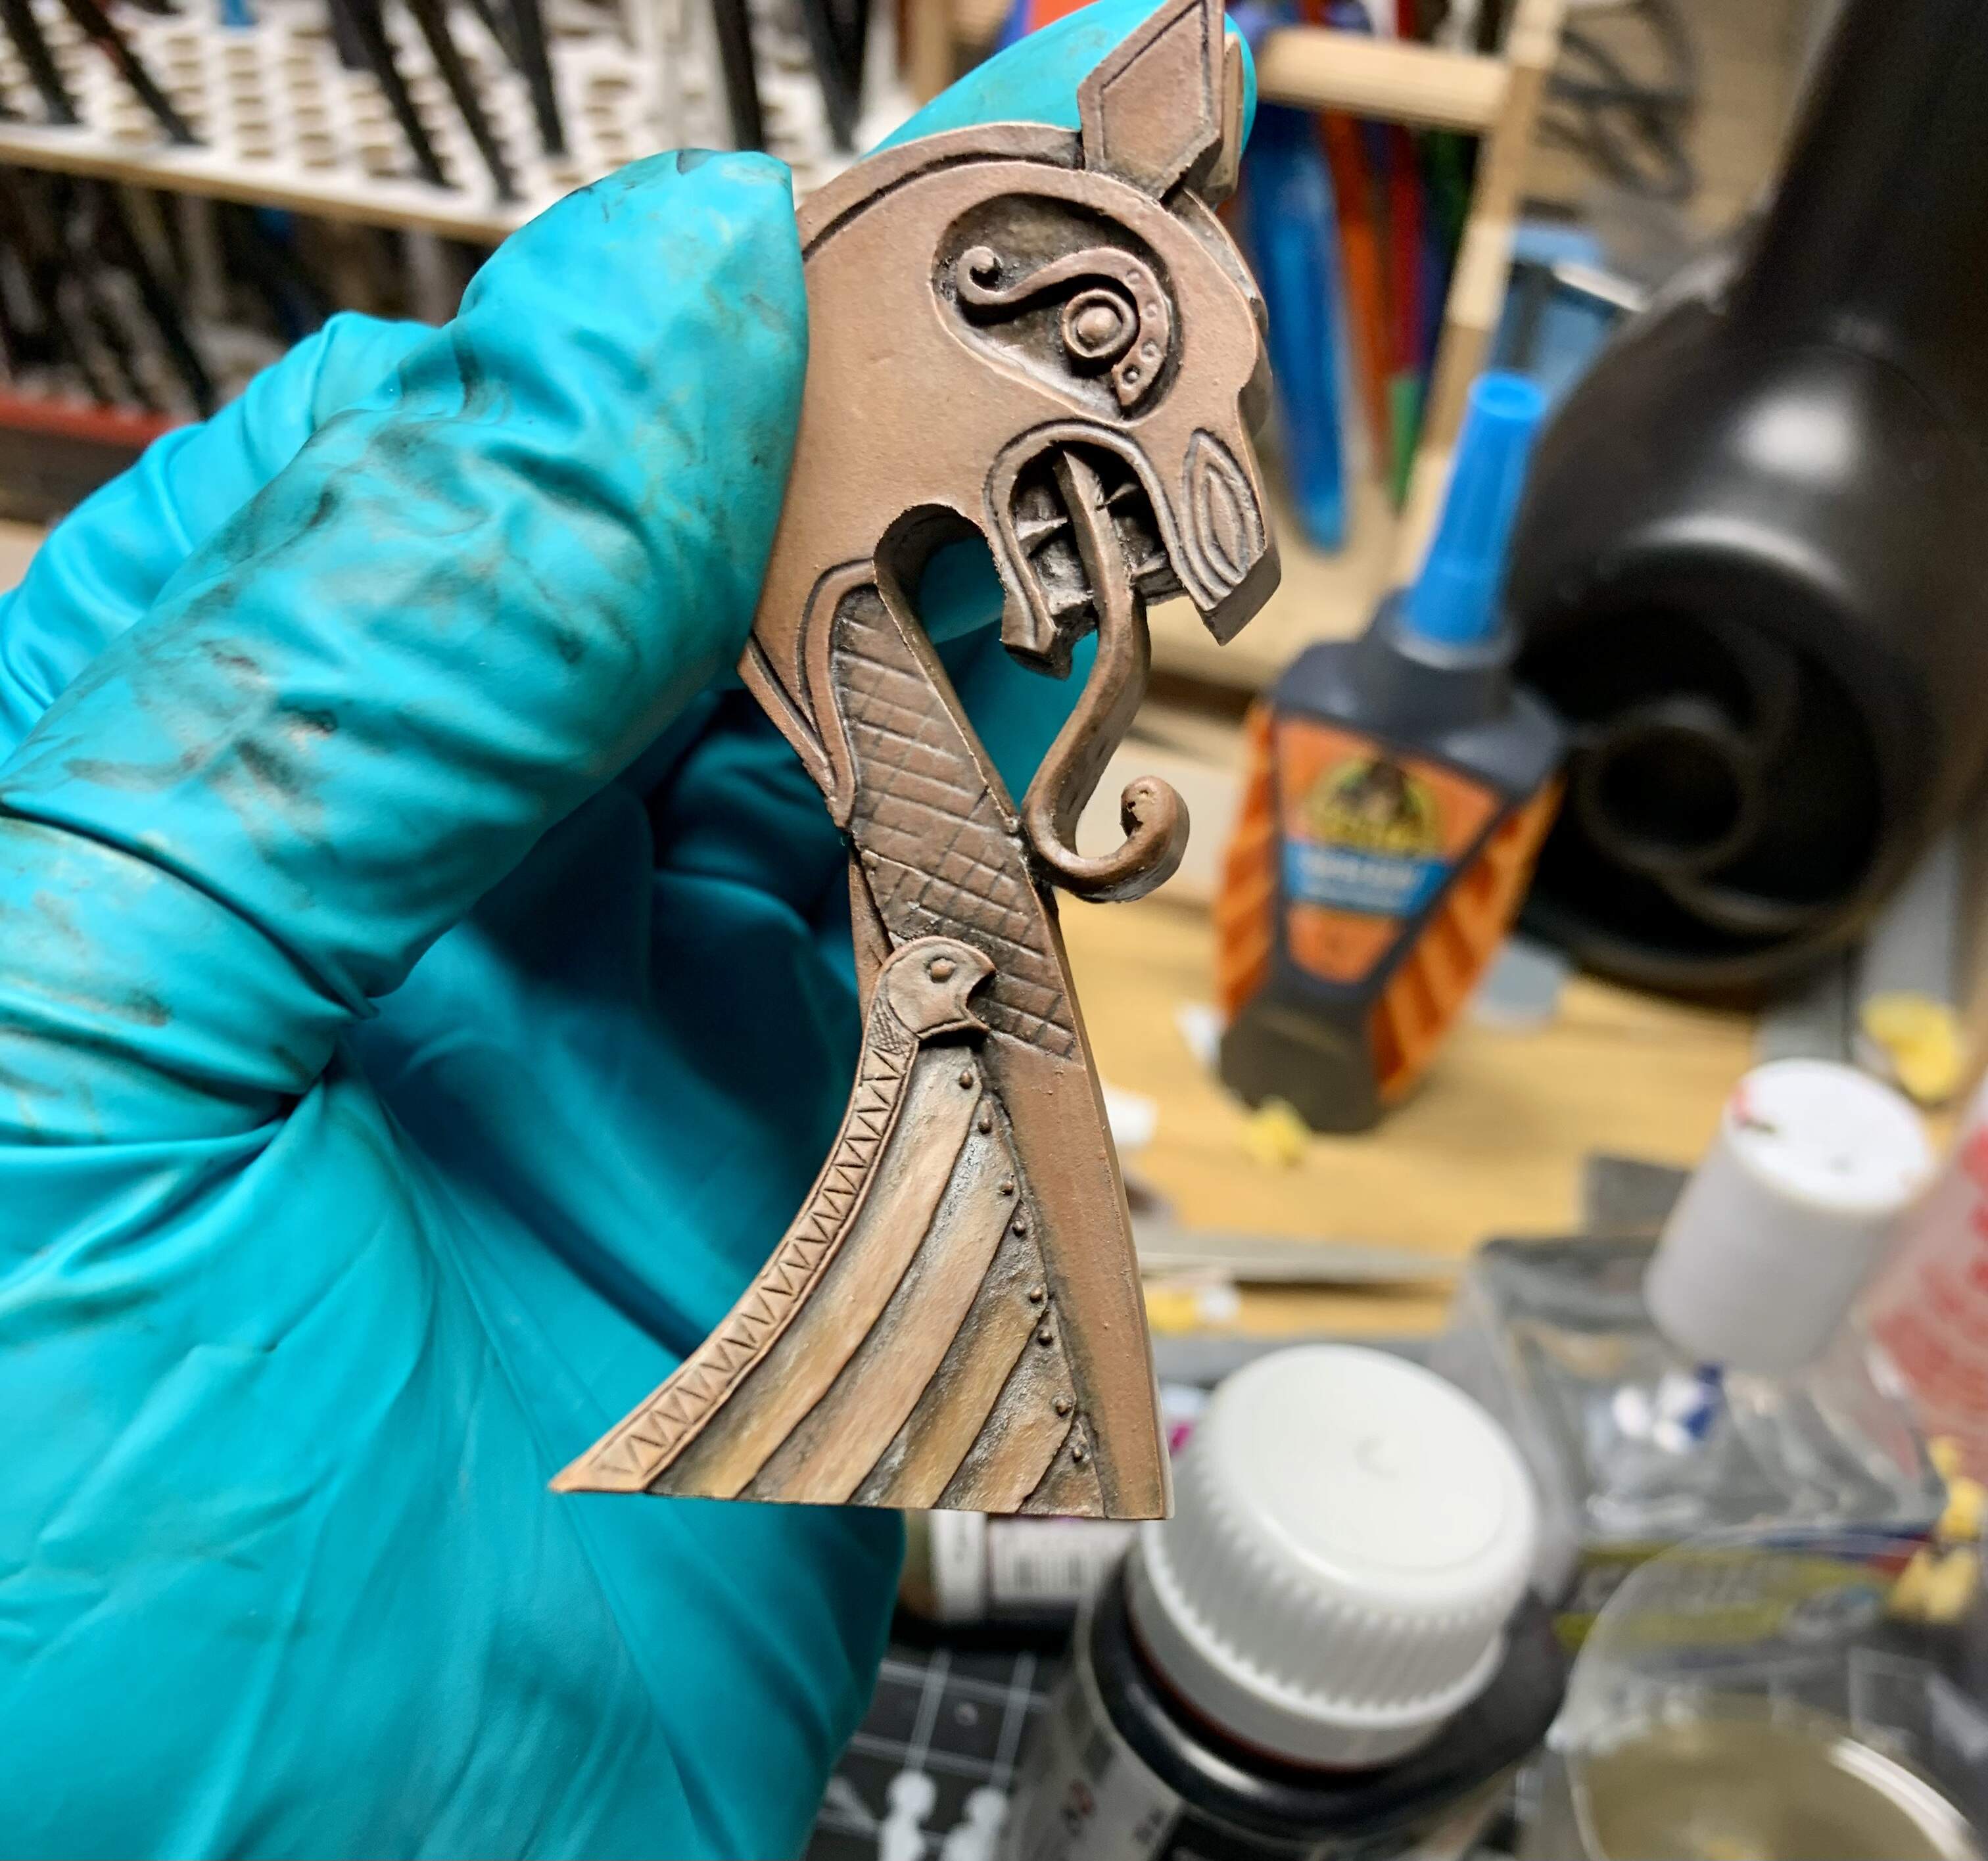
I gave the prow a chance to dry overnight and also gave it a blast with a hairdryer for good measure. The reason being was I wanted to add more of these colors to simulate wood grain.
In these previous stages I had used a flat brush in a stippling motion to blend the paint. In order to do the wood grain I added tiny dots of all five colors and then blended them directionally with a soft flat brush. If an area needed more dark or light paint to give the idea of grain I would add more in a streaking motion before blending it in using the flat brush.
In the pic below you can see this on the hull sides.
For some reason I forgot to take pics of the finished prow before I added the figure. However, my next update will be with pics of the finished piece and you will be able to see the finished prow in them.
Thanks for reading.
2 Likes
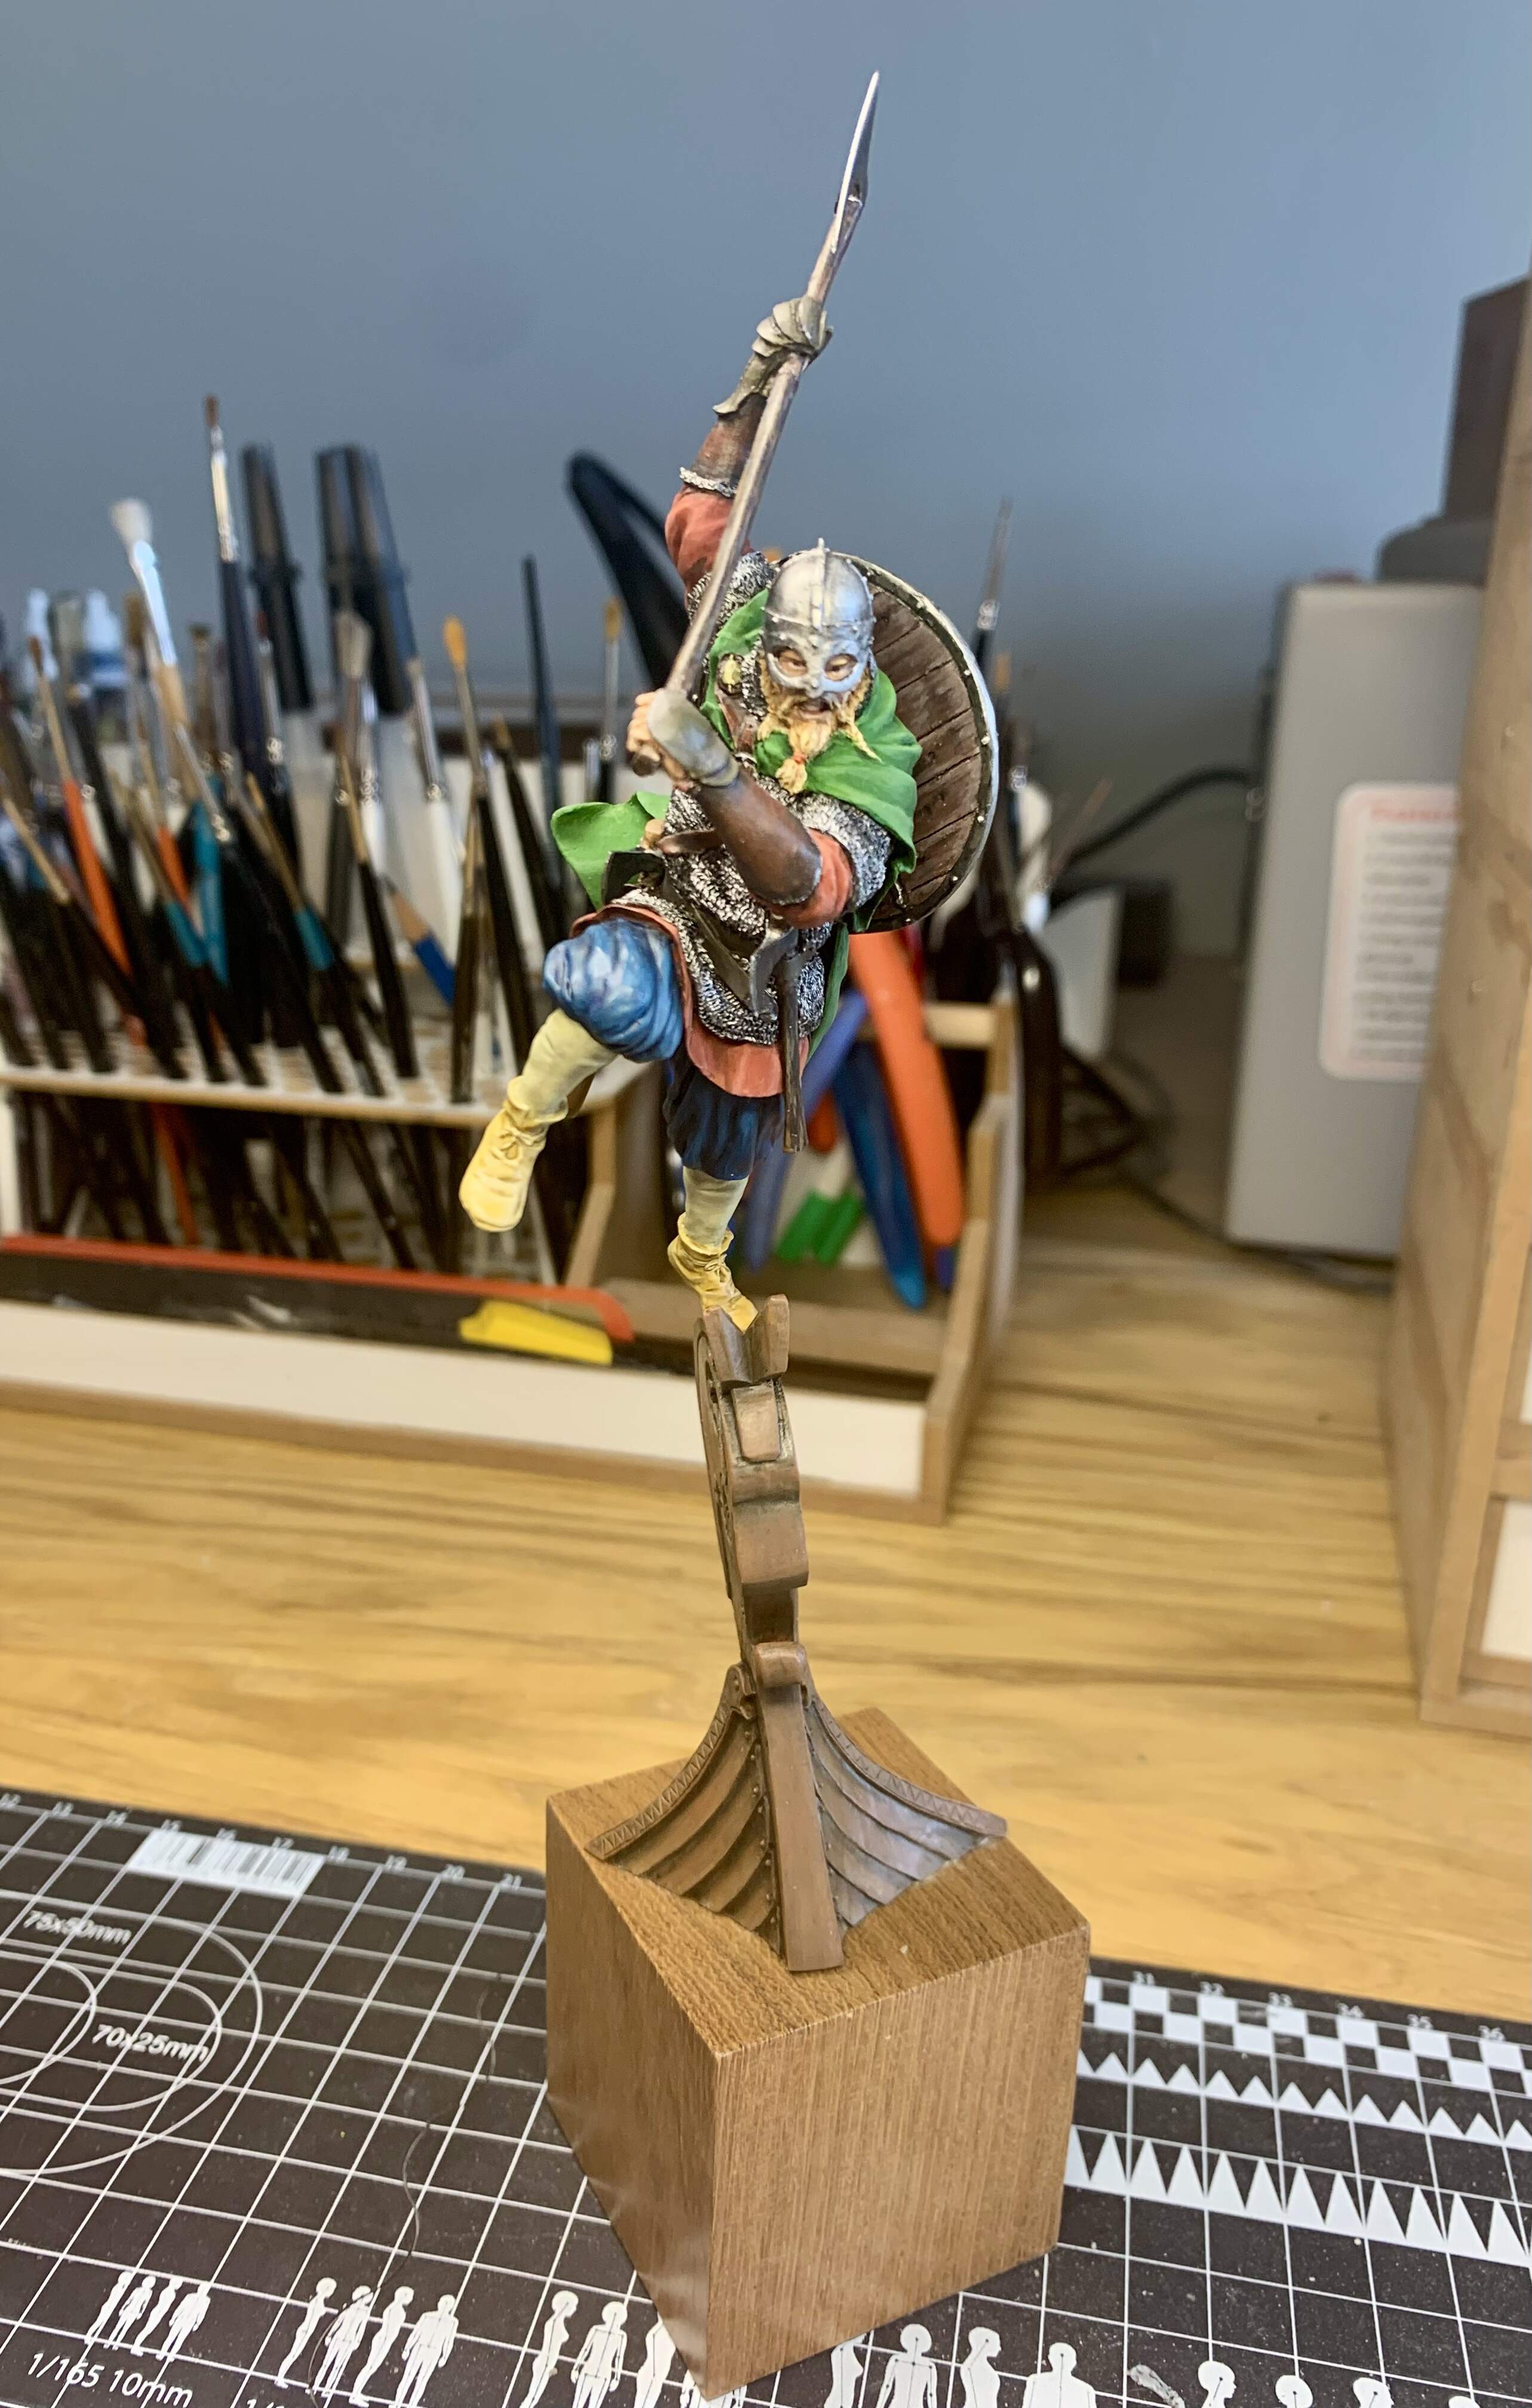
Have to say I was nervous when it came time to fit this fig together. I knew the cloak, the shield, helmet and the axes in the belt were decent fits but the leg, the main axe and the join at the boat prow were my areas of concern.
I’d rather have had the axe join located in his upper hand than just below it. The left foot and leg I would have preferred moulded to the figure for strength. But the worst bit was the small (5mm or so) piece of resin that would slot the foot into the top of the prow- it really needed to be much longer for stability.
Thankfully the axe went together nicely, as did the left leg. But the figure would not sit on the prow without me holding both firmly together so that’s exactly what I did for two minutes or so until the glue set.
Once I was certain the prow and figure were secure I then glued it to the base, again firmly holding it for two minutes and then gradually releasing my grip to make sure the glue was holding. Phew! I was sure glad when that was done!
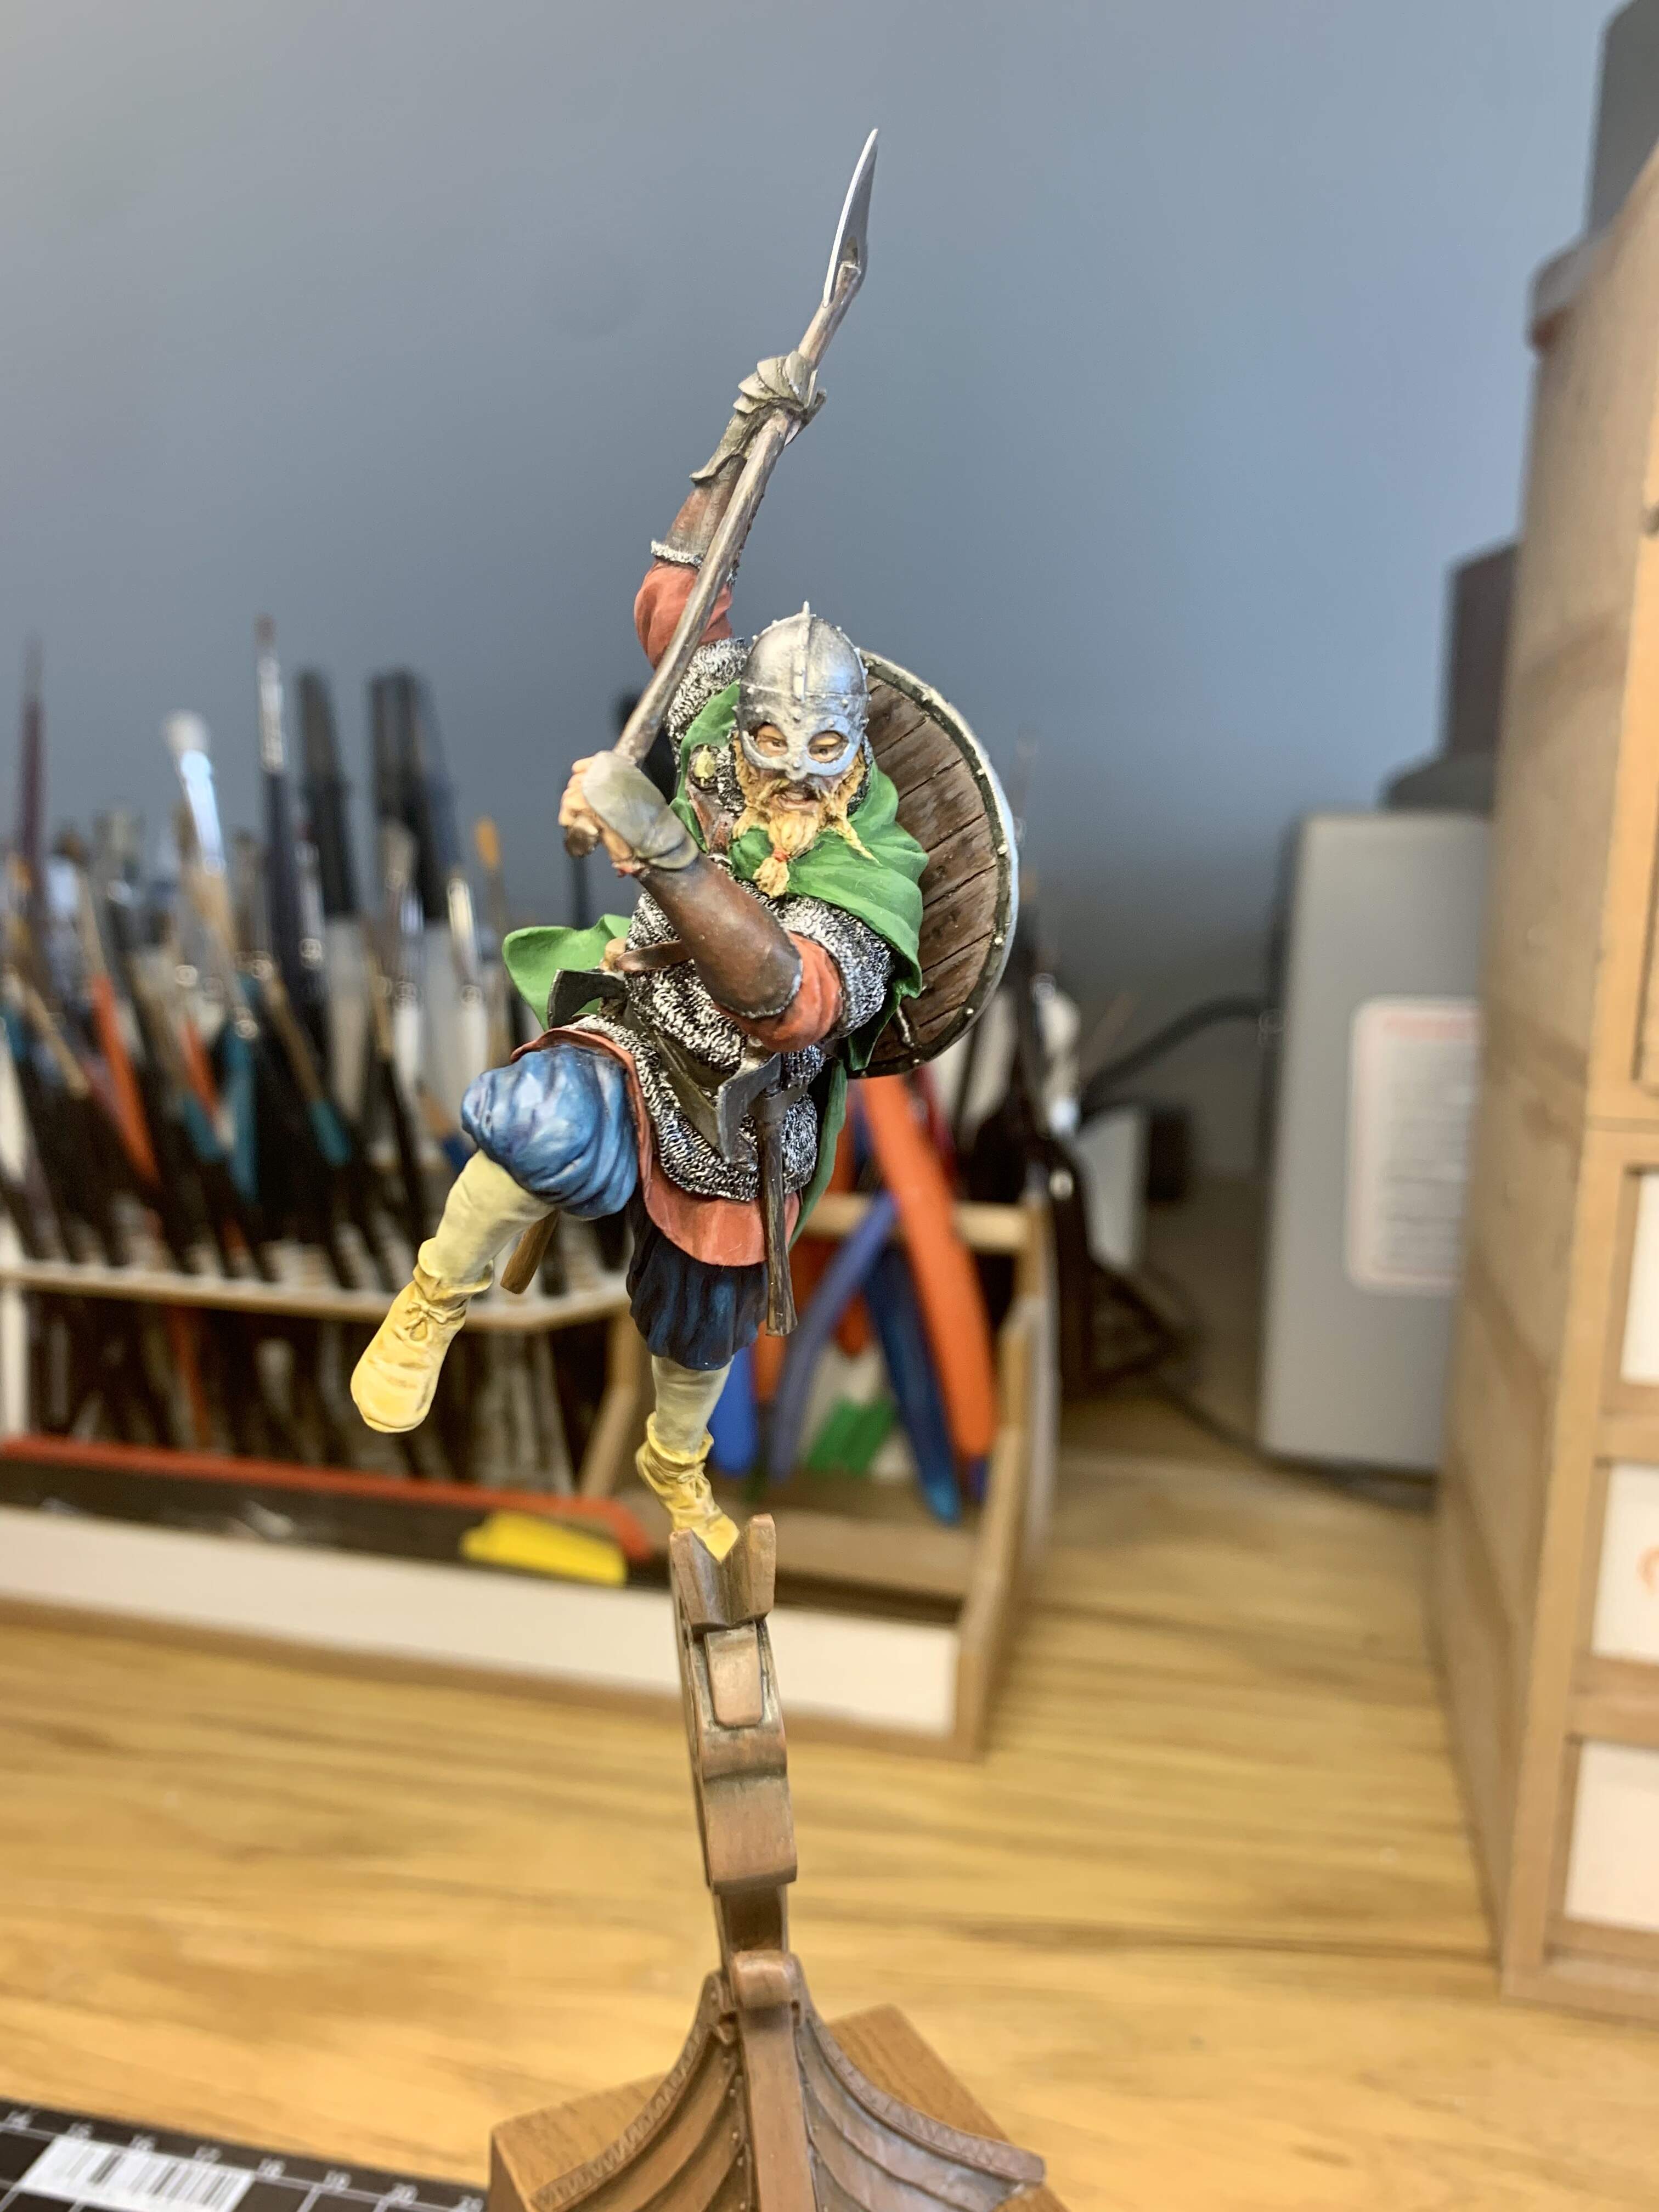
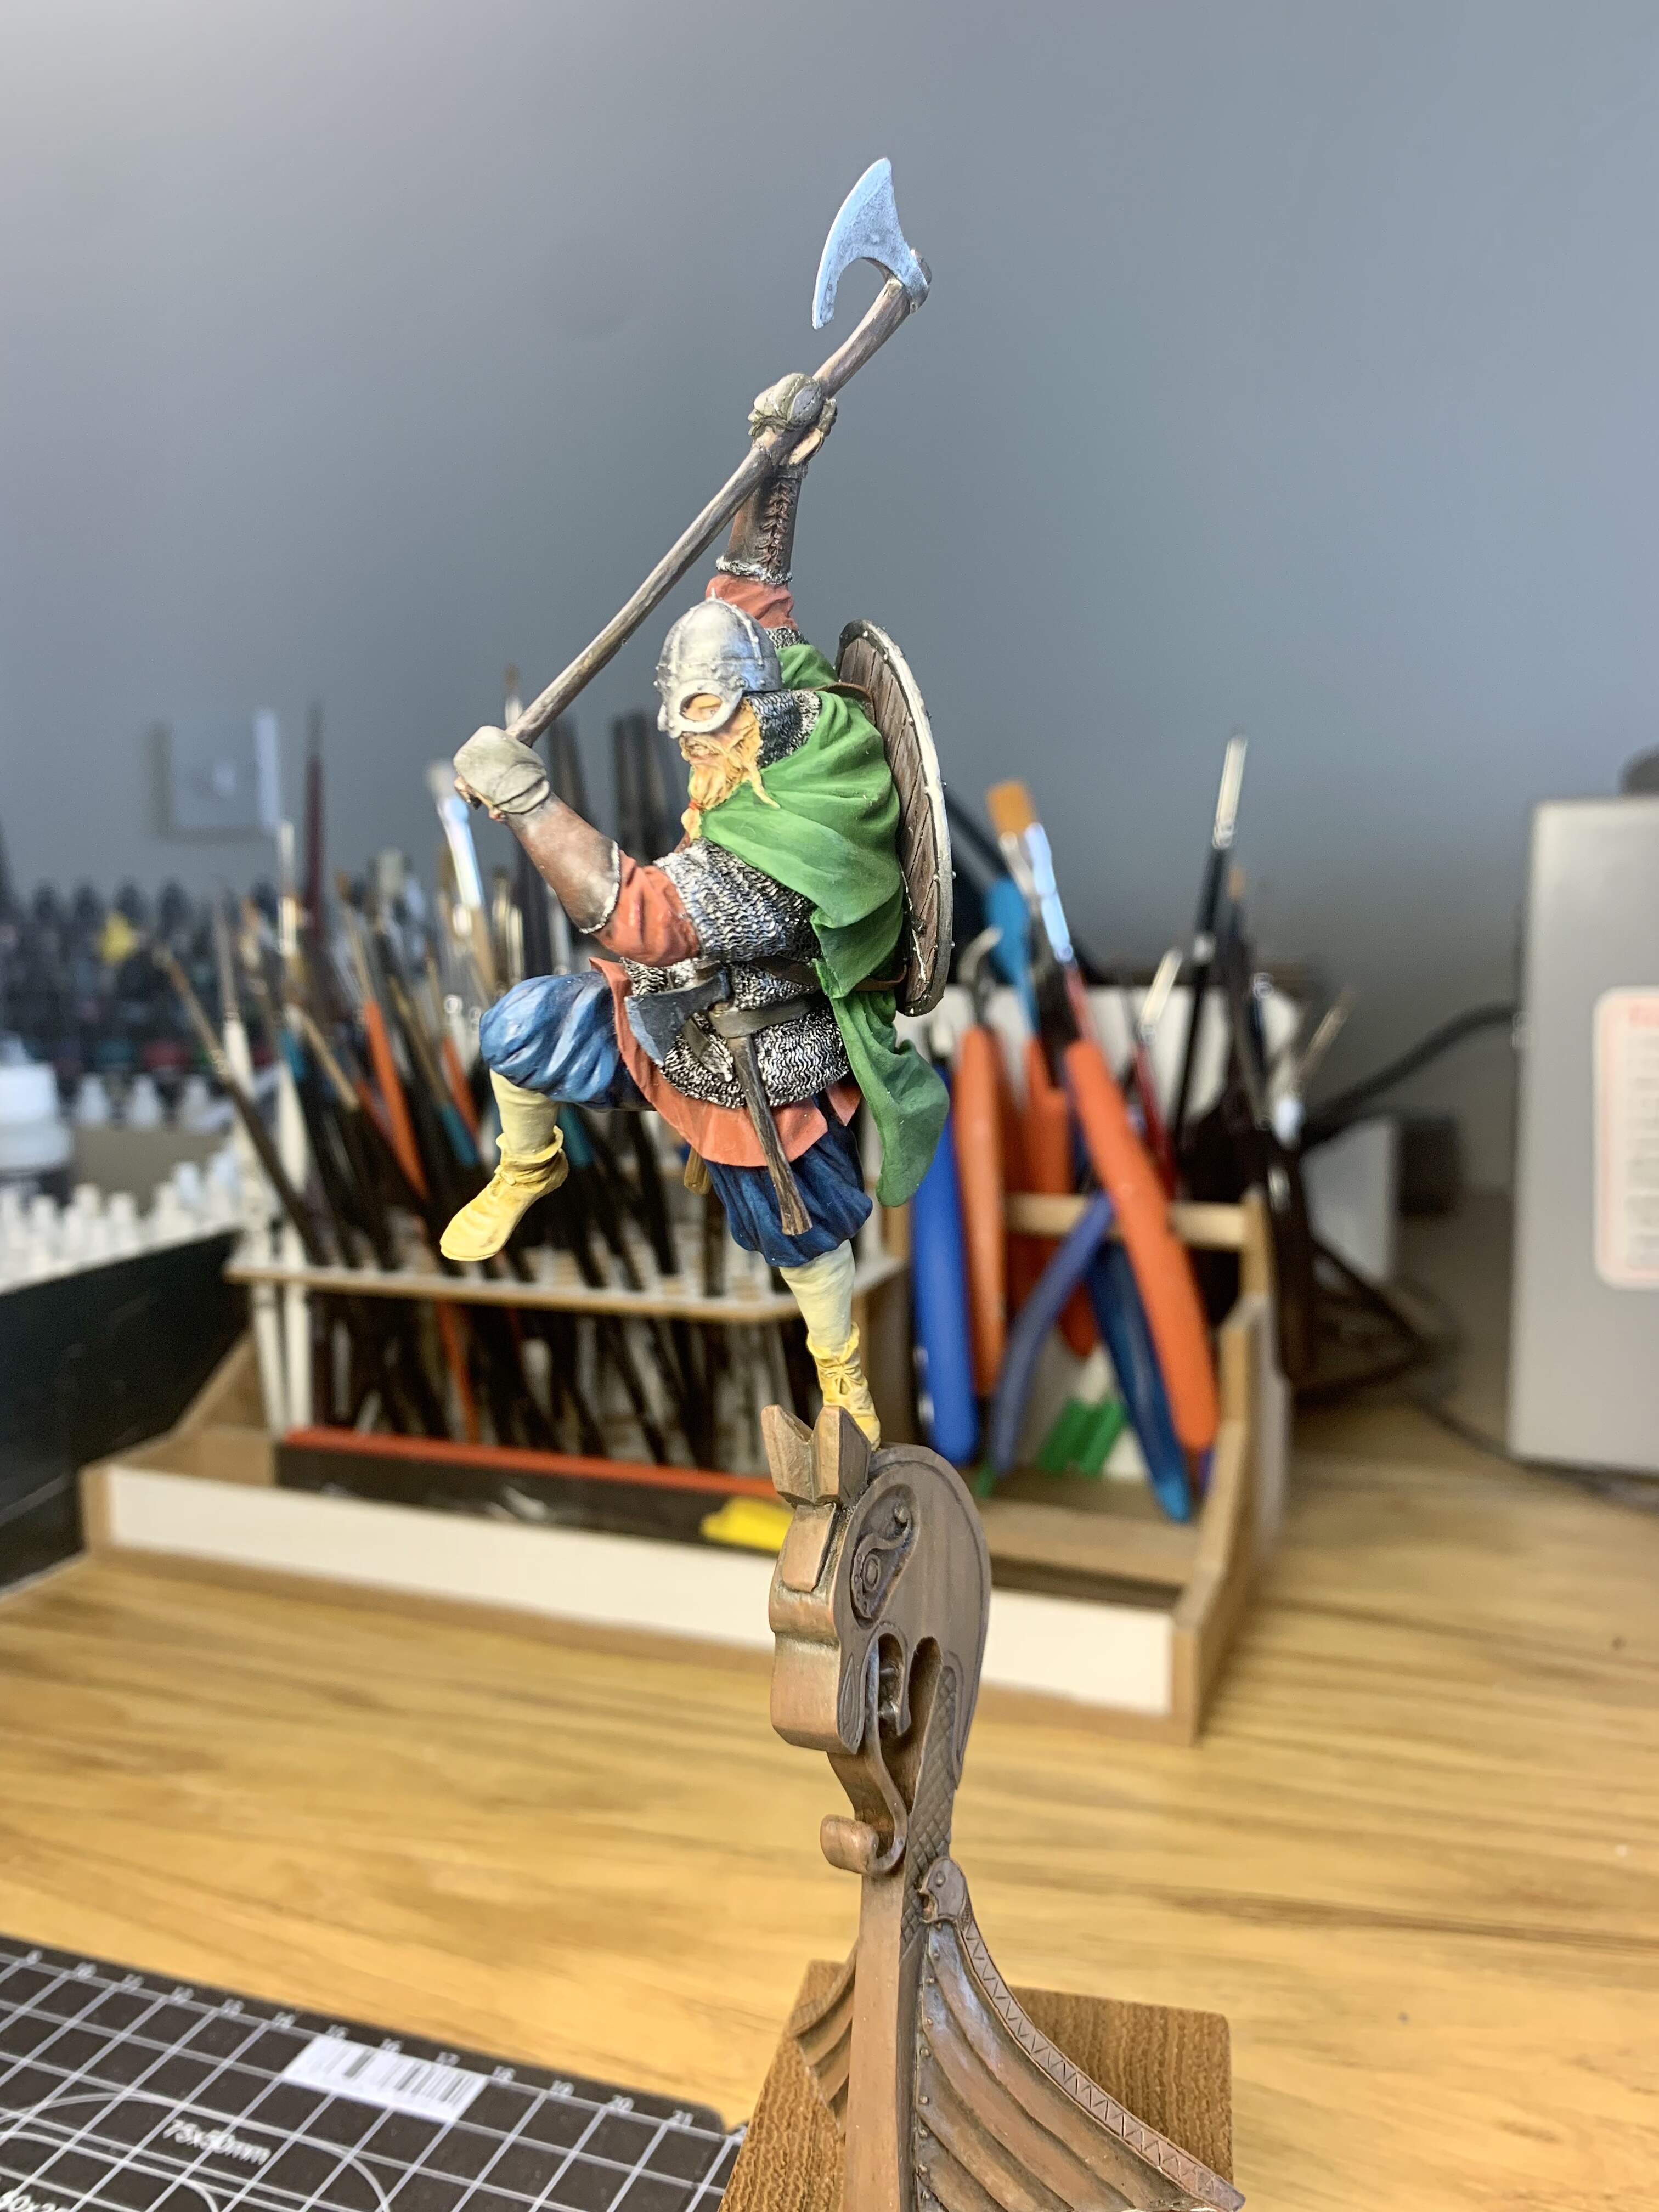
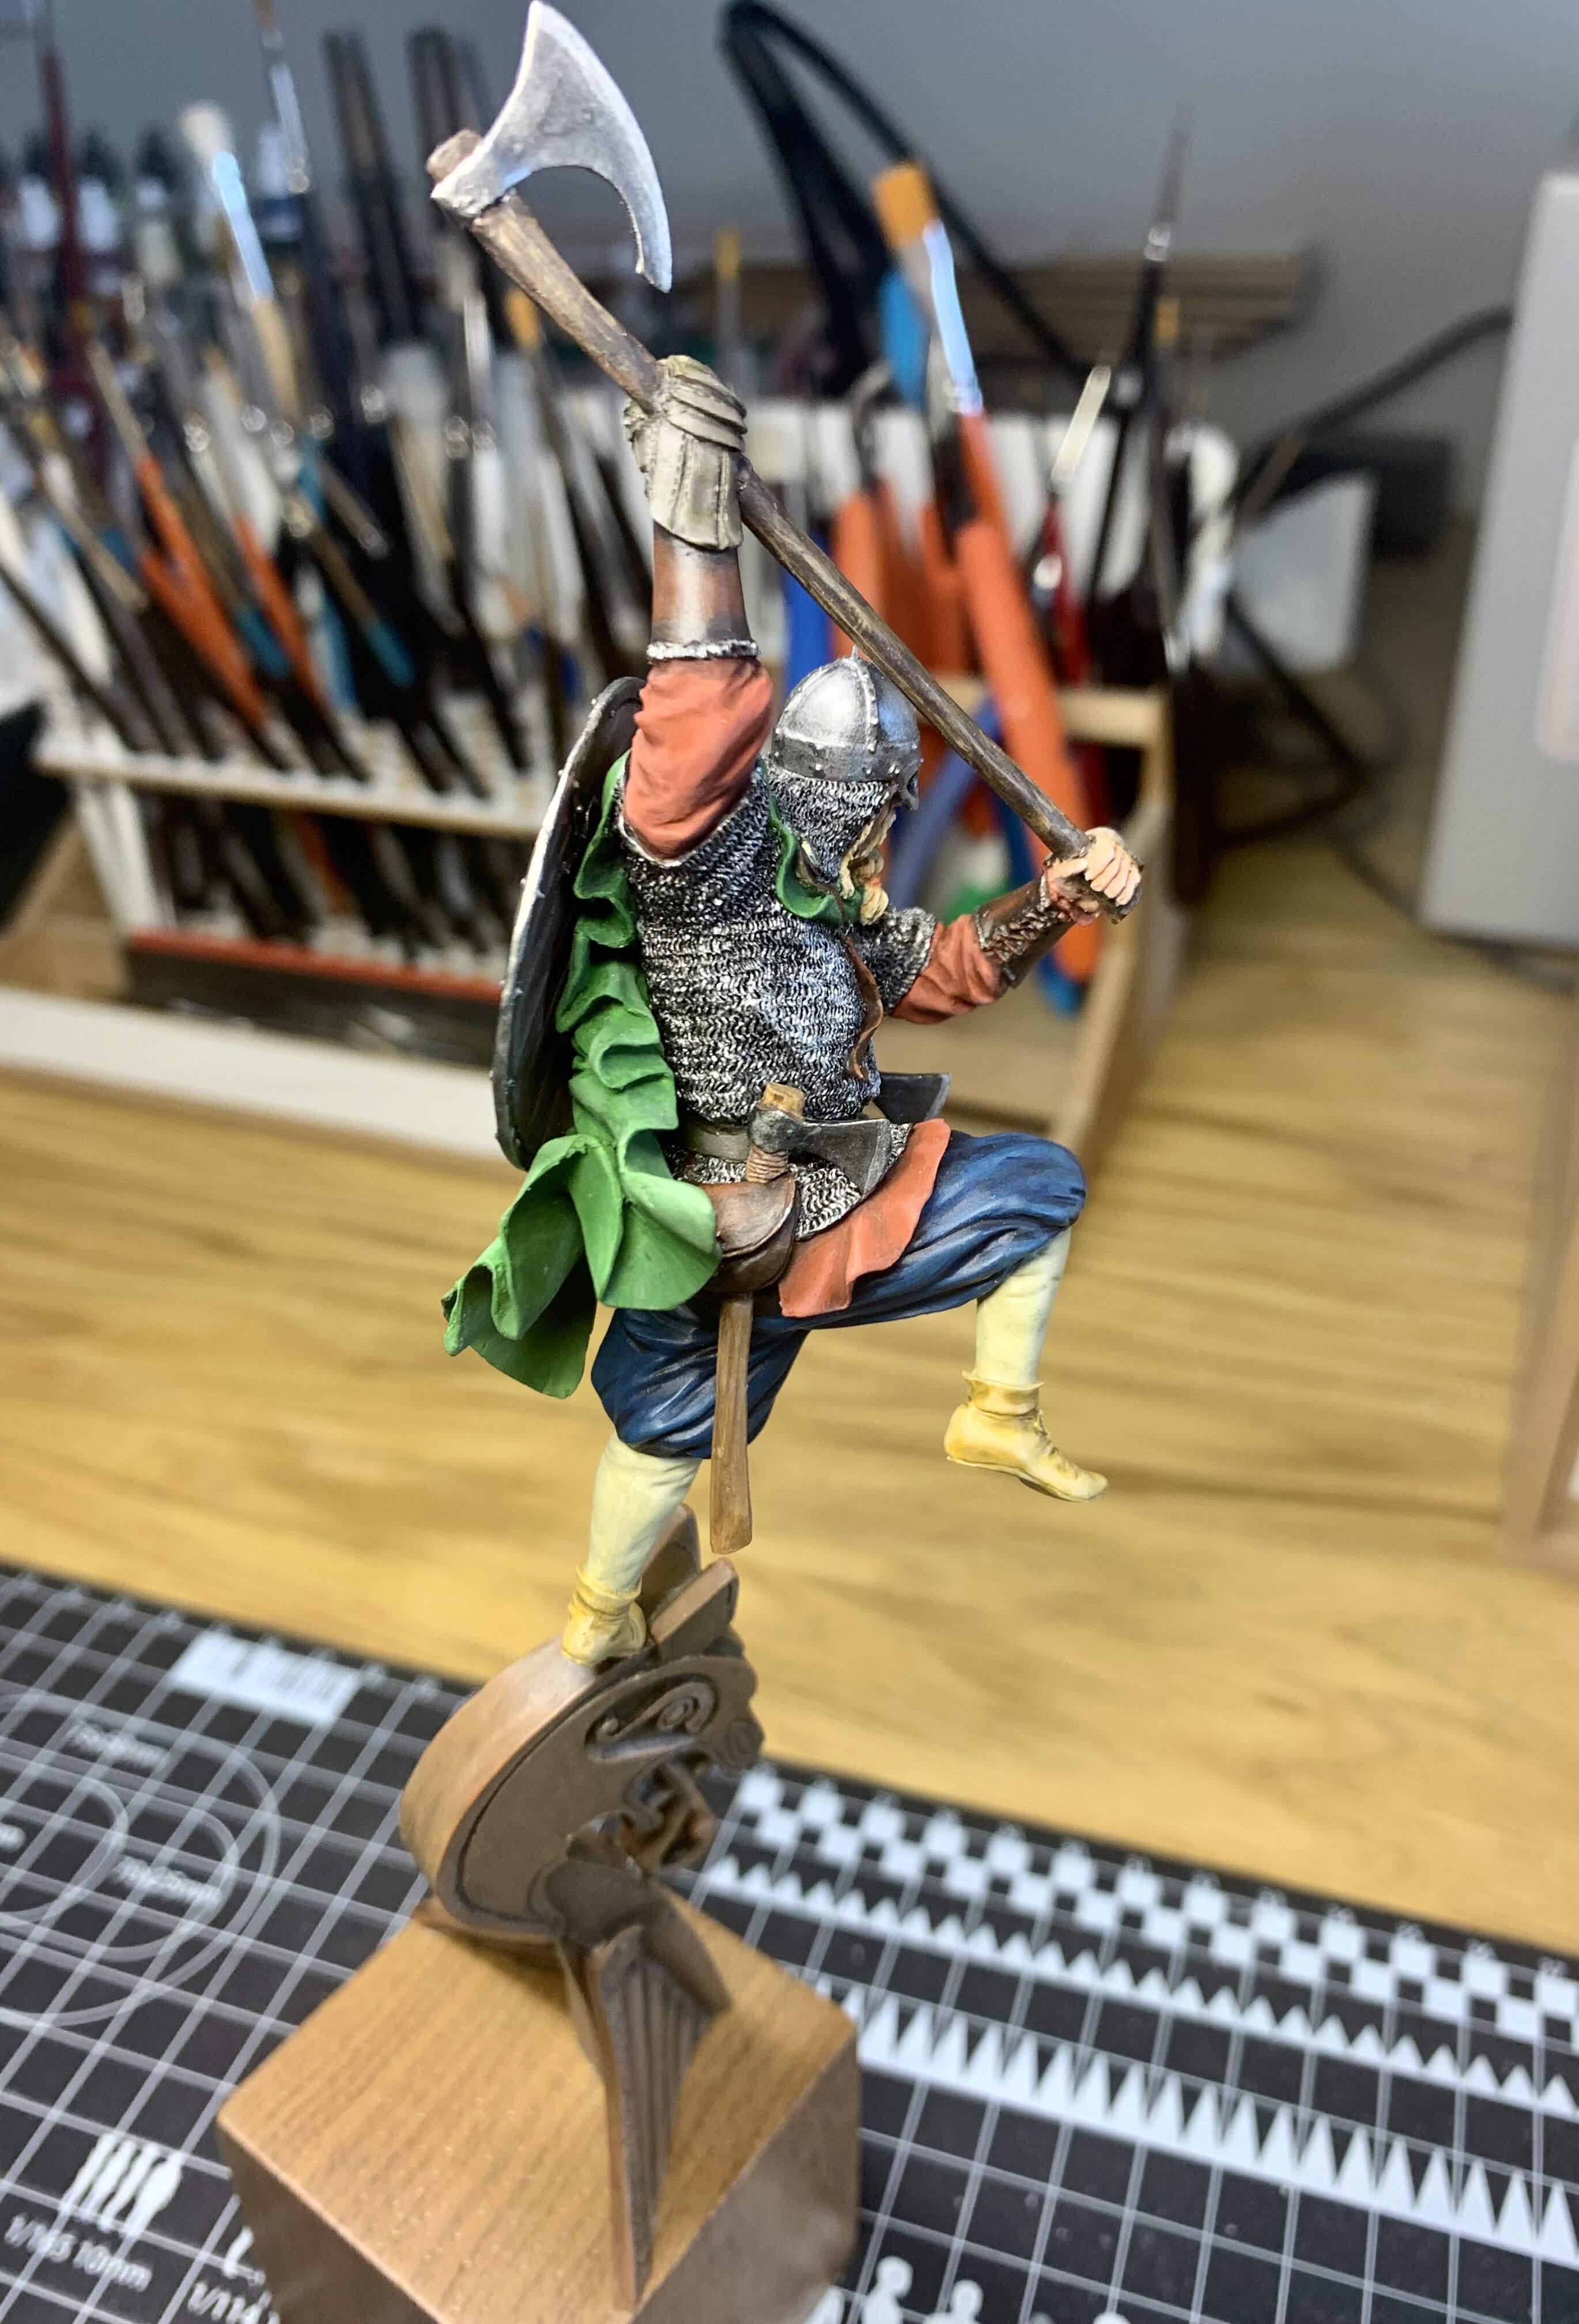
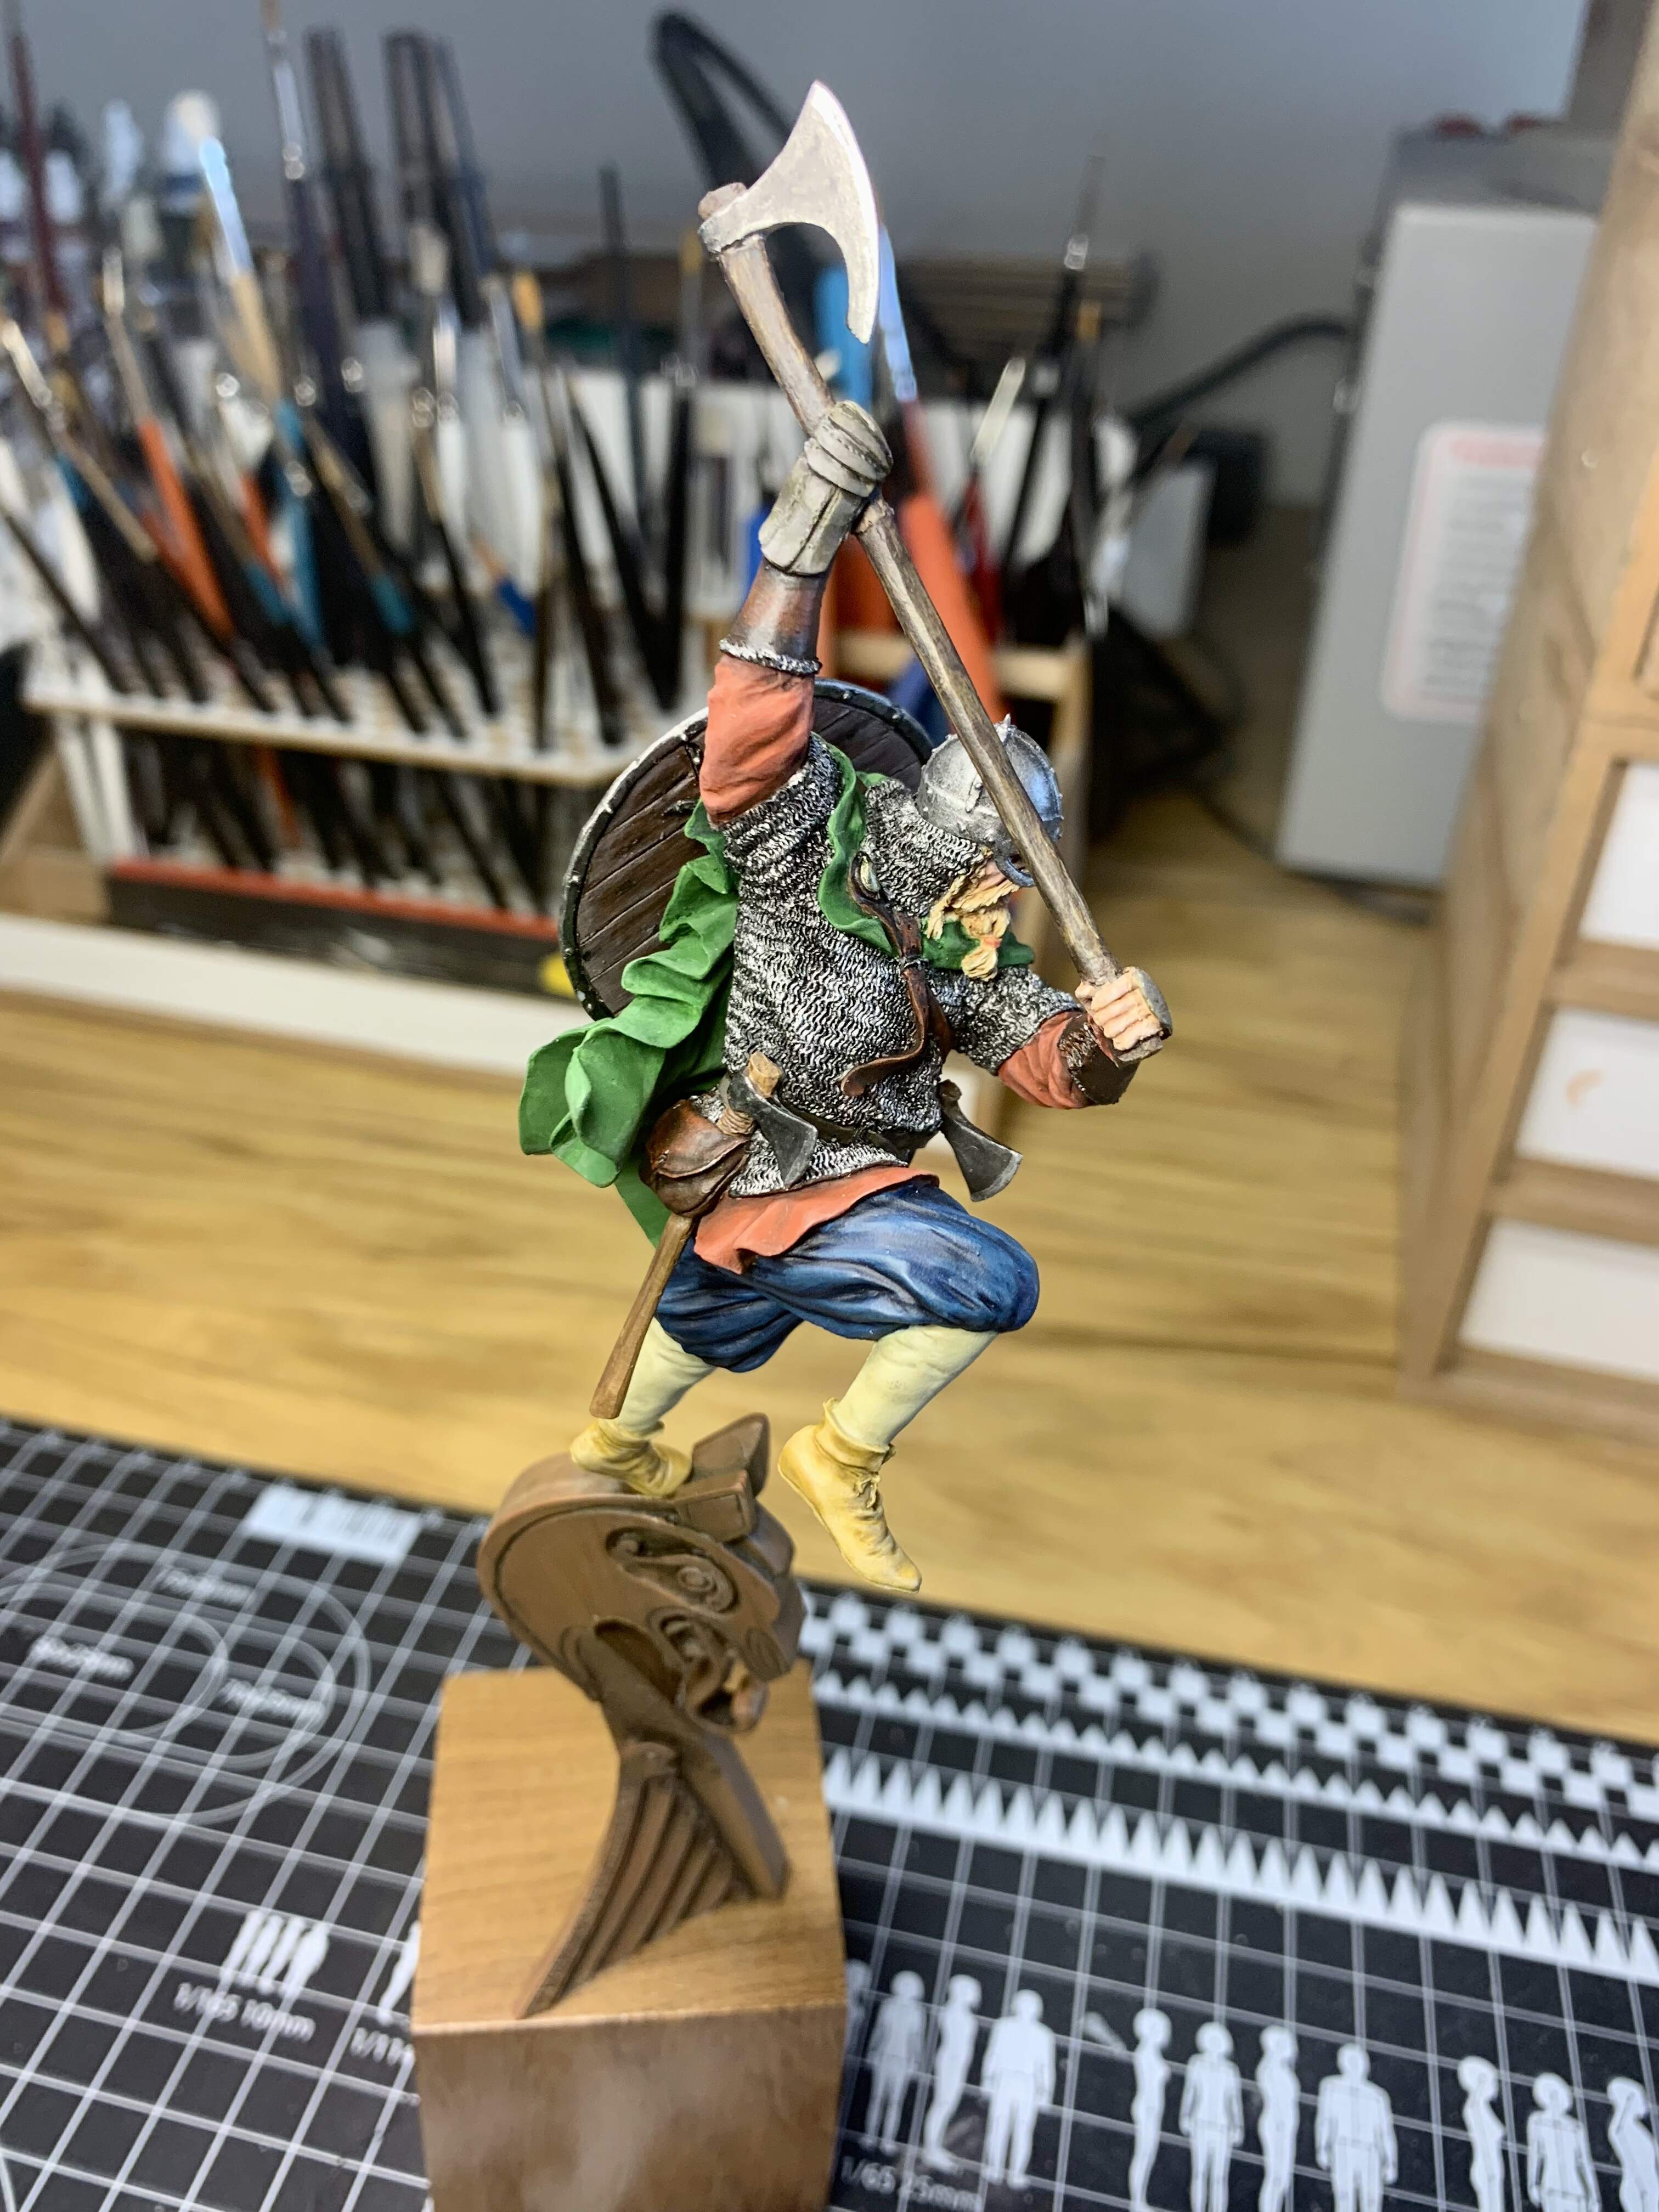
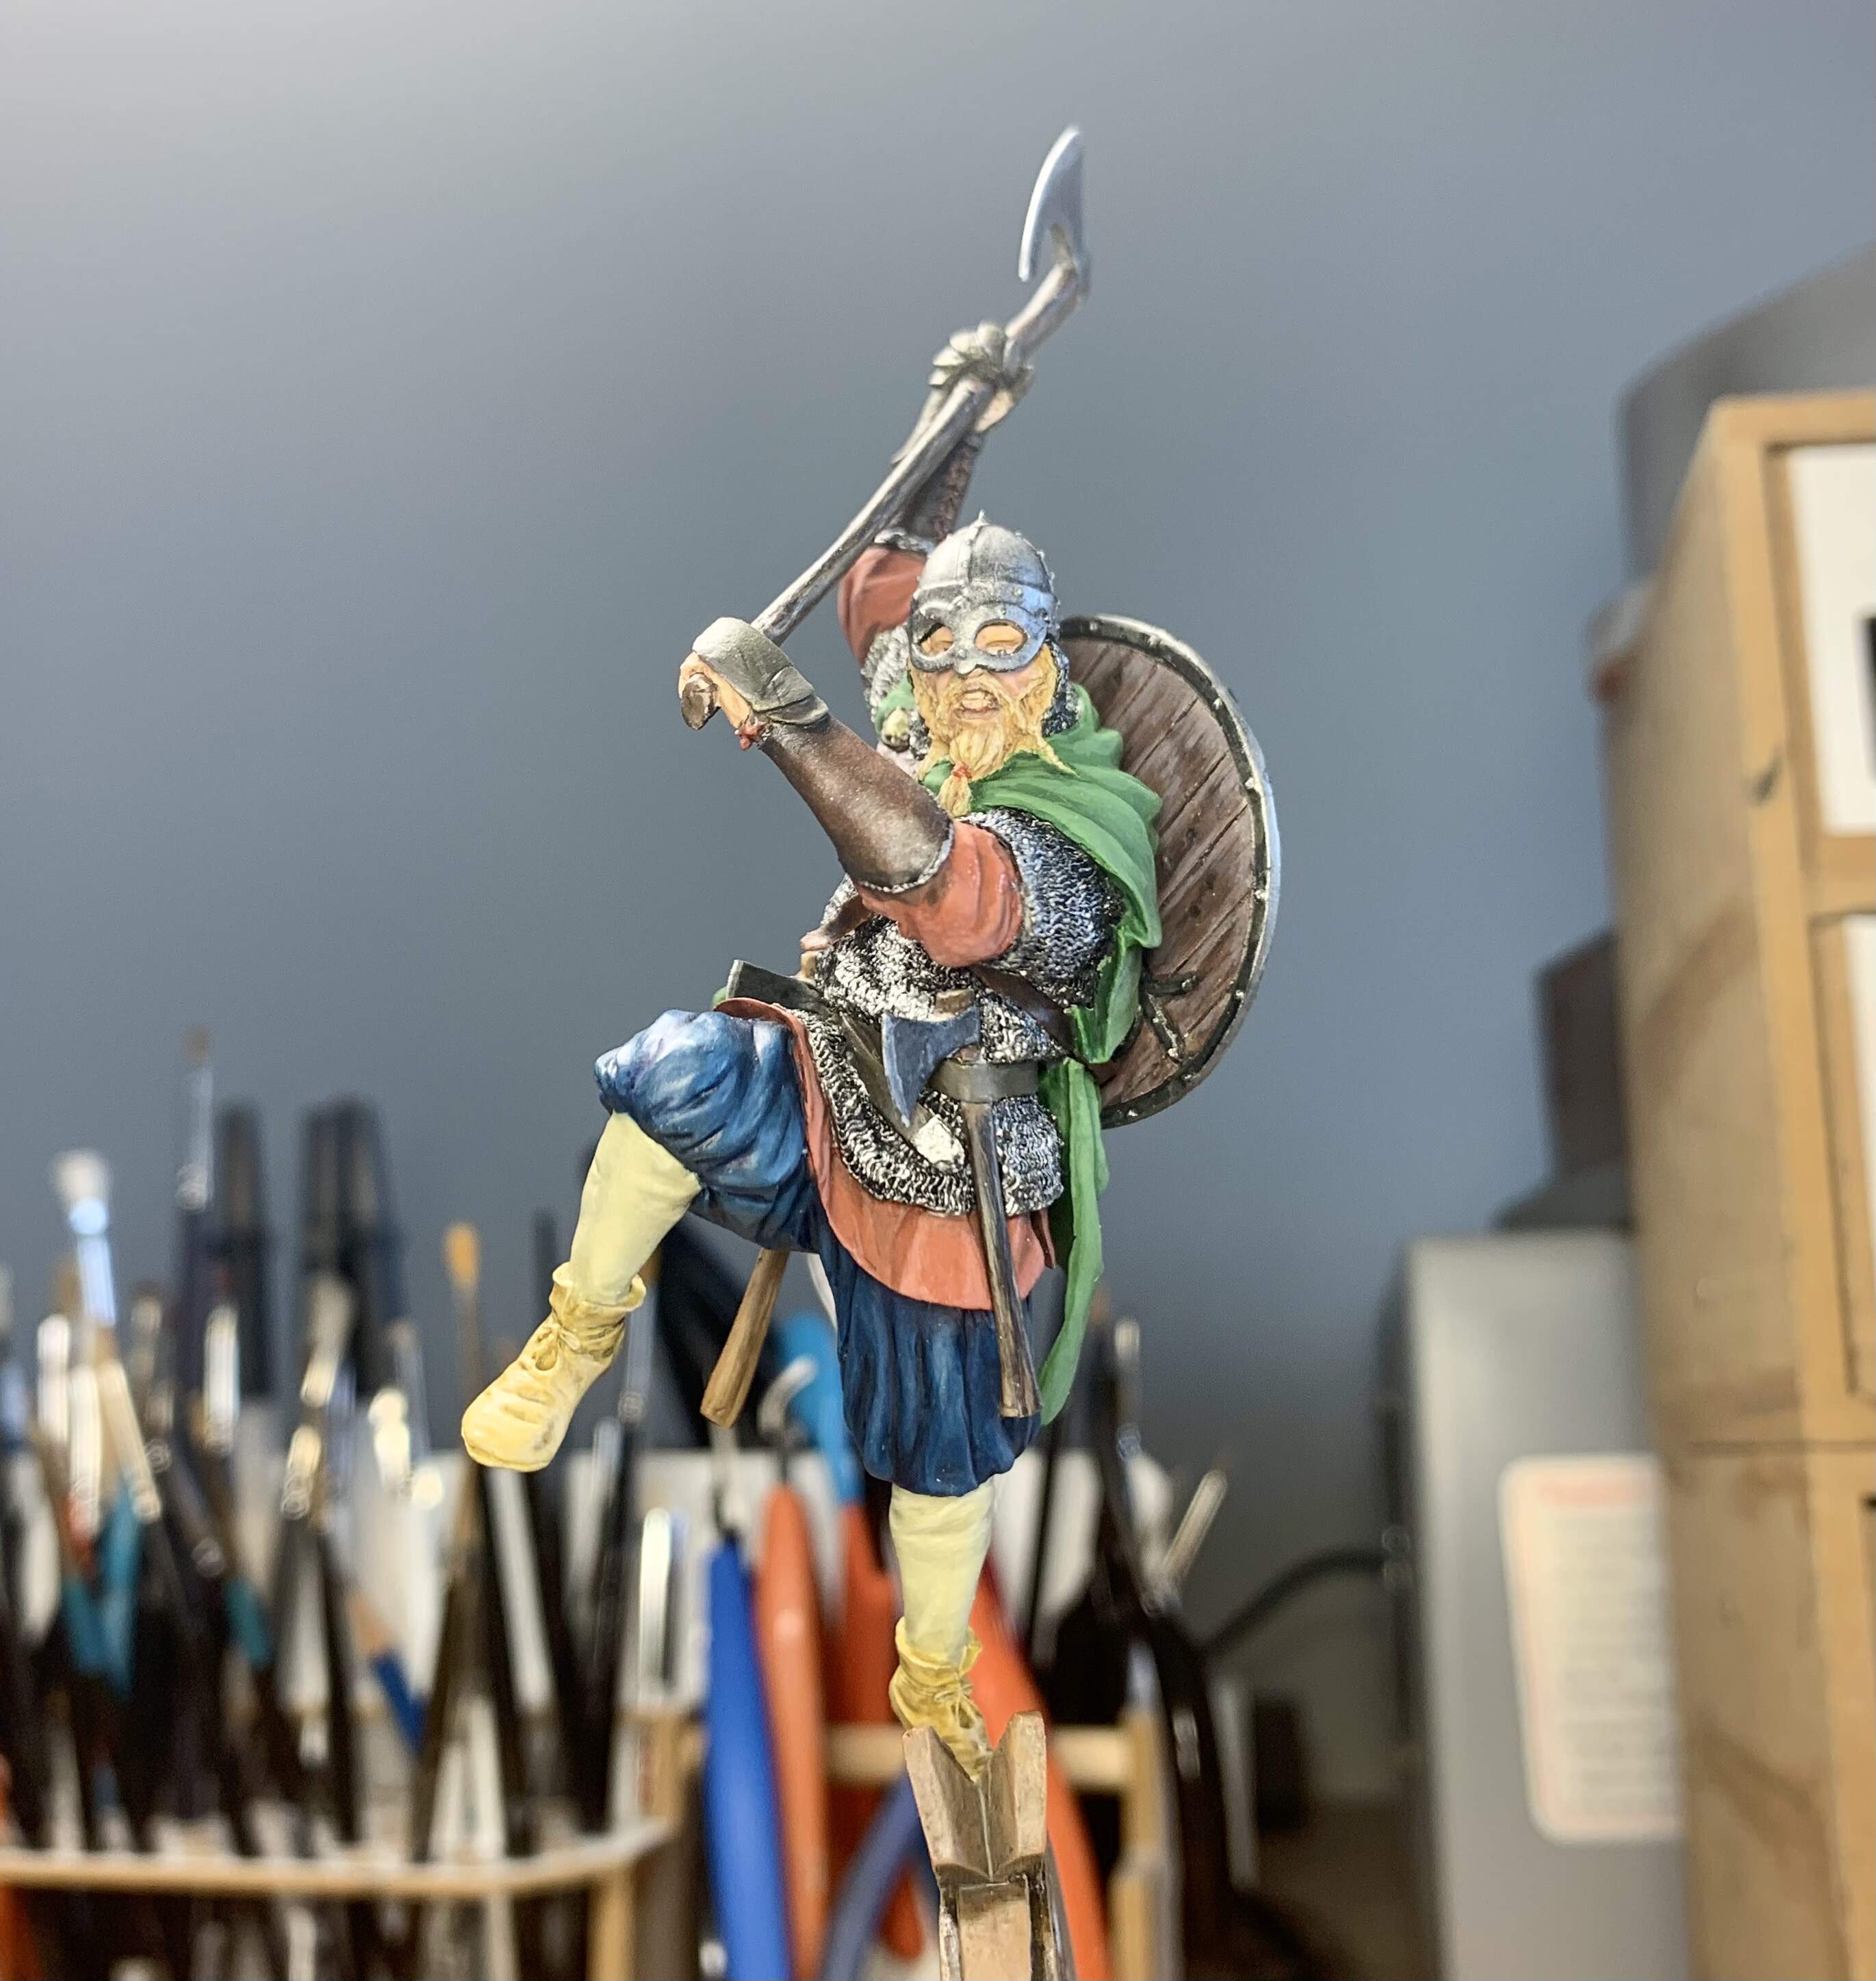
Well that’s this one all done. Despite the slightly awkward parts casting I thoroughly enjoyed this figure- it has lots of character and was a real joy to paint and finish. Usually I do figures from about WW1 onwards so this was a nice change and I will certainly be doing more historical pieces like this in the future.
Thank you for stopping by to have a look, leave a like and the nice comments. The support is very much appreciated.
5 Likes
I would leave a like but the system has a dumb you can only like so much. 
It’s great looking build and paint Karl.
1 Like
Thank you Ryan- I appreciate it !
Very nice job! Really enjoyed reading how you finished the prow.
1 Like
Thank you Gary- the prow was one of those pieces that is so beautifully sculpted and cast that painting and detailing it is very satisfying. I’m glad you like it.