Ordered both bottles from amazon, had to get them from UK as none sells those here.
13 € for one bottle, I really hope those last for long ![]()
Well, I suppose it depends on how much you decal… i’ve had mine for literally years and i’ve still got plenty left. You don’t need that much per application.
They last forever! I’ve had two bottles for well over 5 years probably closer to 10
Also, for what it’s worth, the blue bottle (I think micro set) smells suspiciously like vinegar
1 Like
Yes, i’ve always thought that.
Basically it is, but it is diluted down some. I am not sure how much, but straight vinegar can destroy your decals.
Ken
1 Like
That’s good to know!
Microset just arrived, Microsol for some reason got packaged by its own and Amazon lost track of it, just great.
And another setback:
I wanted to glue some of the smaller parts which I had retouched by brush and silly me didn’t noticed that now these part are much darker than the hull because they weren’t sprayed so paint wasn’t as diluted.
I suppose that spraying over with the same mix I used for the hull should fix this, right?
Thats a pity, because out of the two, this is the one you really need.
Yeah, that’s a bummer, they were sold by the same store and apparently DHL is handling the delivery from UK. Wonder how this could happen.
About the color “correction”, do you think it’s ok to just spray over the darker paint or should I try to scrub the pieces first?
Spraying over the brush marks should be fine! One thing you do next time for touch up is dry brush you only get a very small amount of paint on the touch up
Yes, just spray over them
Microsol has arrived, I hope I’ll find the time to apply the decals this Sunday.
So far, I watched several videos and obviously read the labels on the bottles.
I see that everyone has his method but generally I found that most people do this:
-soak the decal in water for about 20 seconds.
-while it stands soaking on a plate, apply microset on the surface of the model in the decal’s position.
-slide the decal and set it correctly
-gently damp it with some more microset
-carefully wash away the excess leftover with a water soaked brush and then gently dry with a towel applying pressure on the decal.
About the decals that go on irregular surfaces, I see that the process is the same, except that in the end you put Microsol on the decal after it’s been set. I think it just needs to be applied on the uneven parts of the decal, I see no reason to soften the entire piece as I read it makes them really frail.
Do you think all this is correct?
I got one shot at this and I am still very clumsy.
I applied other decals in the past , but just using water, and it mostly ended up fine save for some bubbles I had to pop.
Sounds like a good plan to me. You should do just fine.
Ken
1 Like
The crucial bit here is that when you’re pressing down on the decal (I use kitchen towell for this) be careful because if you apply pressure at a less than perpendicular angle, the decal can move out of position.
If this happens, don’t worry, simply re-soak the decal with water and re-position it.
1 Like
I take a q-tip just damp (nearly dry) with micro set and roll it over the deal a couple times to press it on the surface. Nearly guarantees no bubbles. But as @Khouli states don’t apply too much pressure at a non perpendicular angle or the decal will slide.
Do not touch the decal for a good while after Microsol, it will be soft long after it looks dry
1 Like
Thanks everybody, useful tips.
I think “marrying” the lower and upper hull it’s going to be painful, for some reason there’s very little wiggle room and it’s hard to make it stick perfectly. Really didn’t expected that, I just hope I didn’t made some build mistake.
Had a similar issue with the Tamiya Panzer II but it fell into place with some gentle brute forcing (with an audible “clack!”).
Had to stop trying with this one because I was too tired and had couple of bits literally shooting to the other side of the room.
Anyway, I noticed that I can put the decals without gluing the hull pieces, so I’ll go on with the decals and the pinwash, then another light gloss coat and finally matte coat and some light weathering.
Then I’ll try the “marriage” again, hopefully the additional varnish coats will ensure more protection during the rough handling.
On the negative side, the very tiny headlights clear parts, unlike other kits I made, had a no clearly printed “base” to sit on, so getting them in the right position was hell and unfortunately they had some cement smearing them because they kept sinking in the hole.
Not very bad because they are so tiny, but still very annoying.
A little late to the party but I have found with the Microset to just put a little on the decal with a brush so it’s covered and then just let it soak. Don’t take the excess off. After it dries repeat 3 or 4 more times. You have to be very gentle when applying it because it’s very easy to accidently move the decal. I just barely touch the brush to the decal and let it flow across.
1 Like
The decal session went ALMOST well, I even managed too use the microsol with decent results:
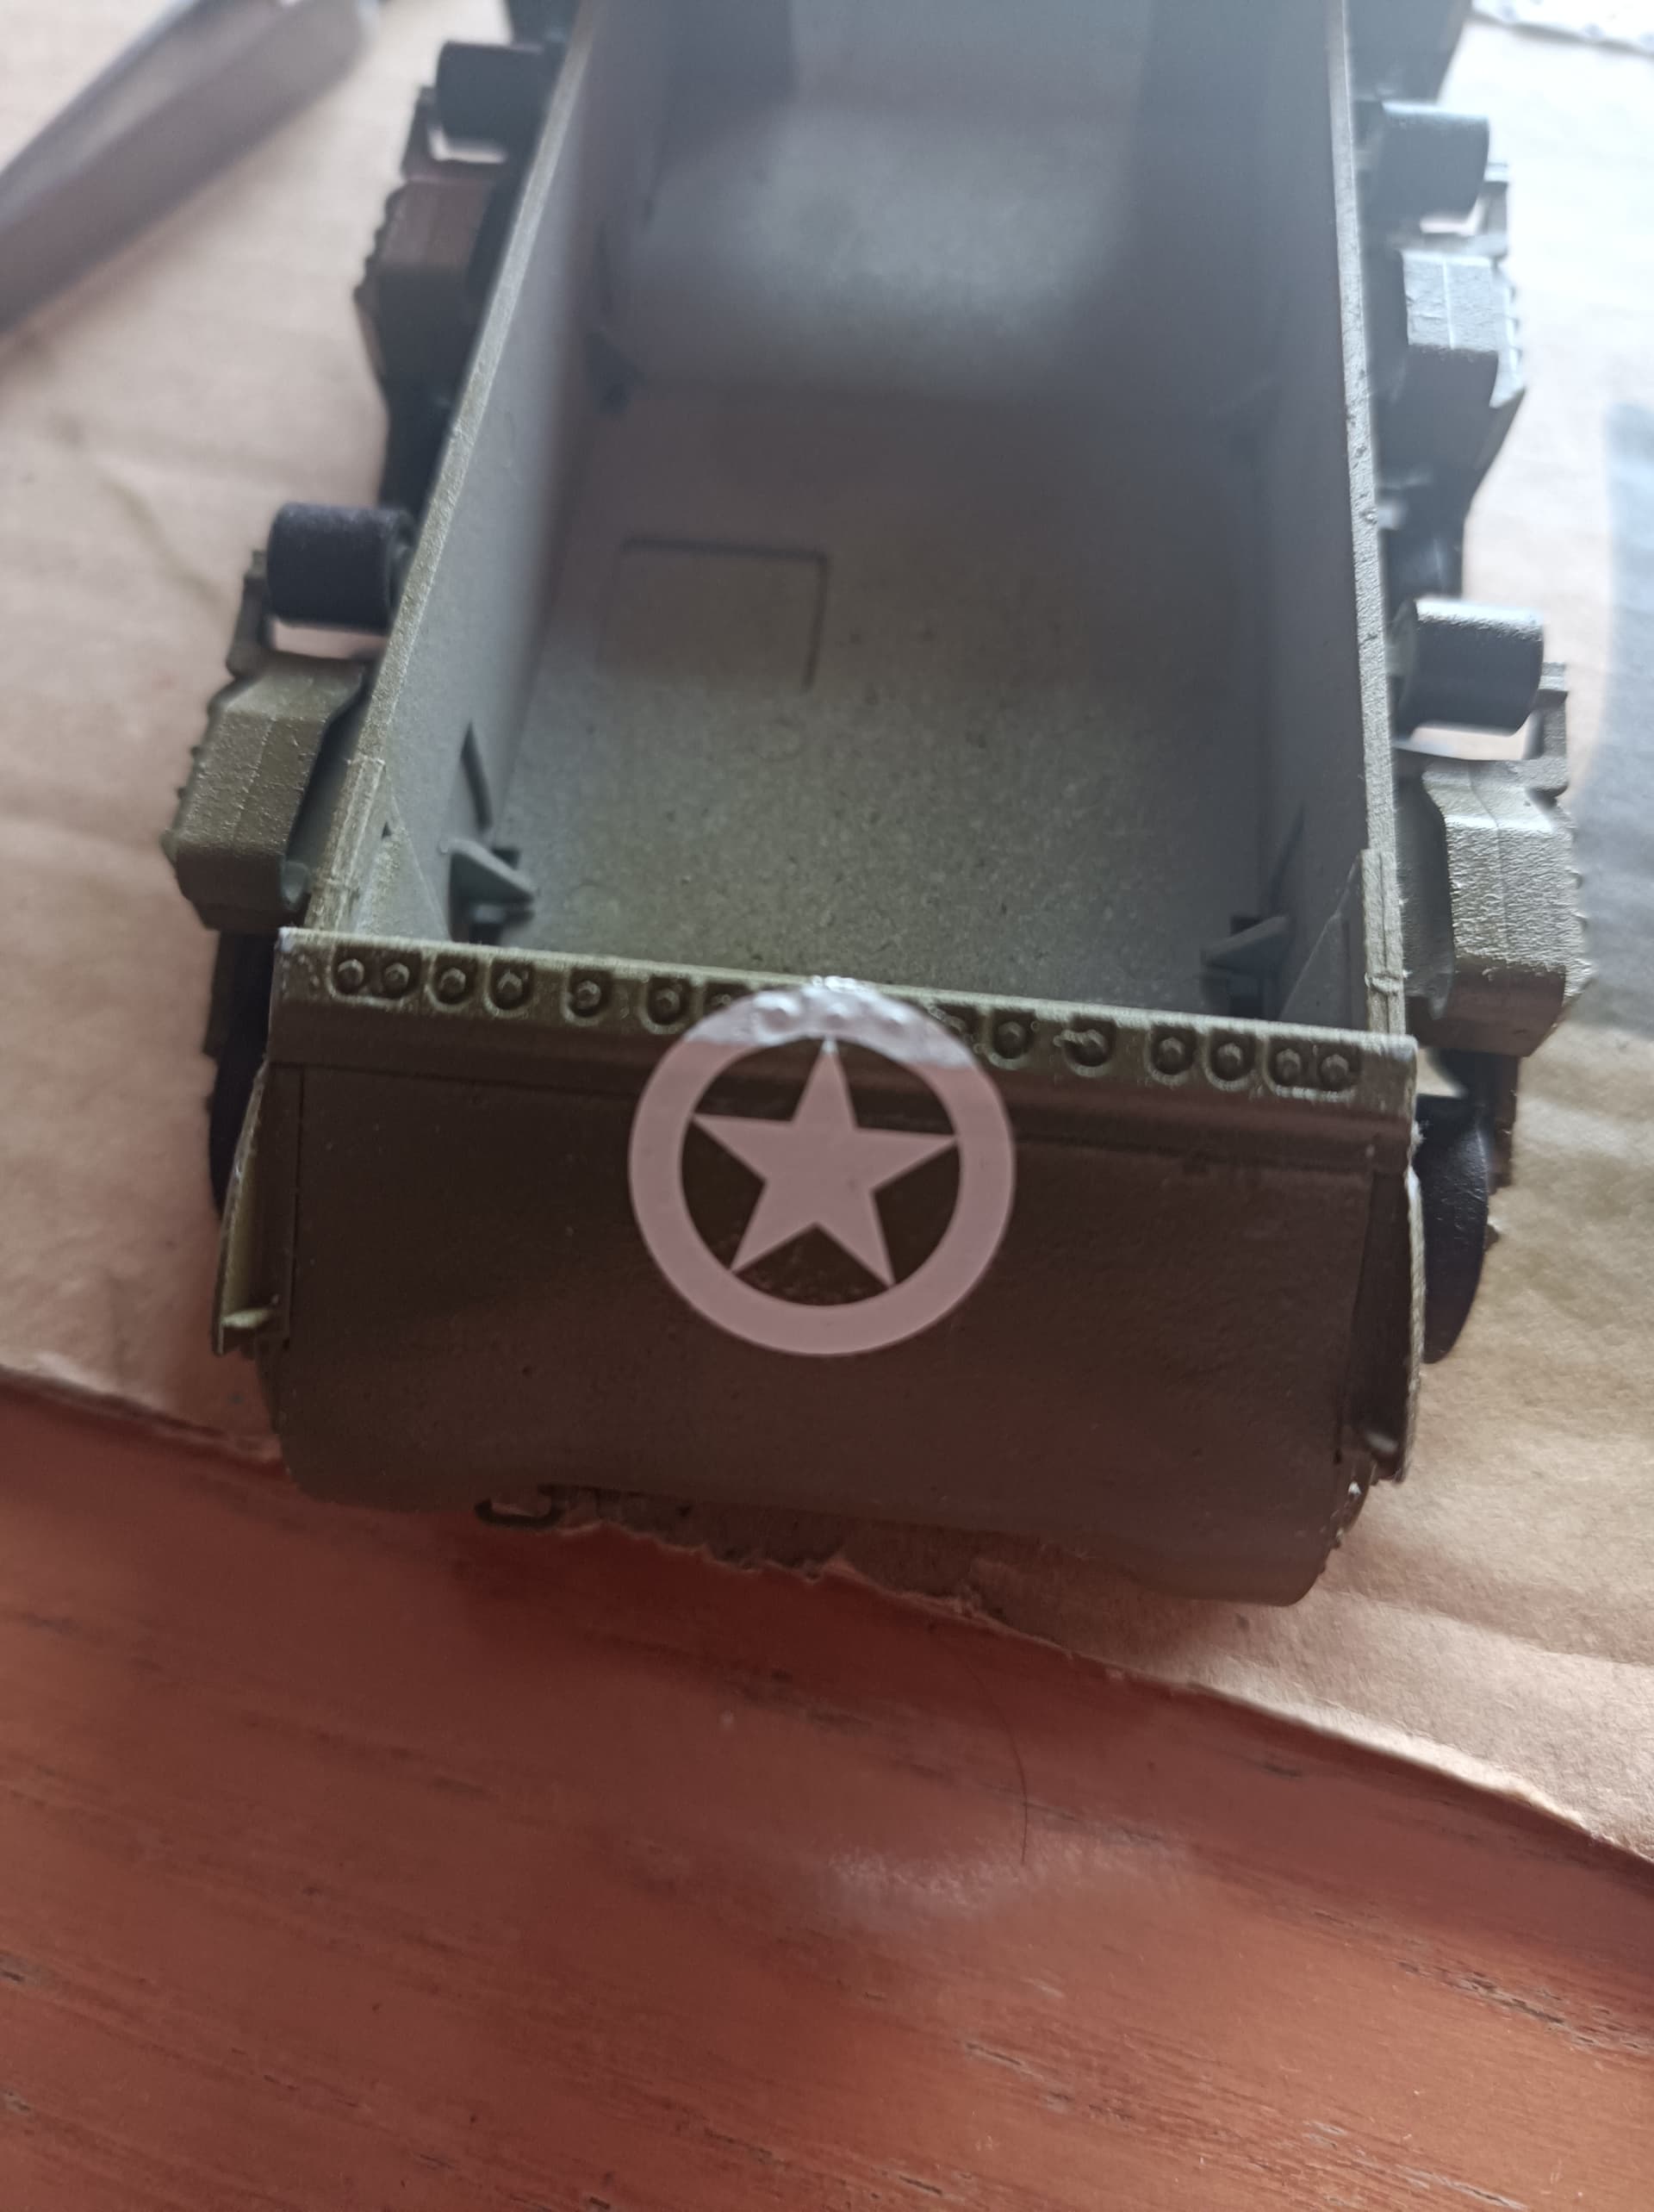
I bet further application would have yielded even better results, but frankly I am too afraid to trash the decal and I’ll leave it be, it’s fine to me.
The problem is that one of the hull side star decals suffered a critical existence failure while applying it.
I don’t know what I did wrong, it was the last one I applied and maybe the soaking water had cooled down but it was a nightmare to remove from the sheet and once applied on the microset-ed surface, it refused to move until it came completely apart with zero chance of recovery, its completely trashed.
Now, I need some advice, I could:
-
Buy a new decal. Amazon Italy only has German decal sheets so I have no idea where to get it at reasonable prices (considering delivery costs).
-
I have a spare smaller star with a round frame like the one I applied on the lower plate. Would applying it there look completely unhistorical? I am not going to bring this model to competitions, but I’d like to avoid excessive unhistoricality.
-
Paint it on it. I got zero experience with this and the botching chance is astronomical.
-
Remove the other hull star. Would be sad because I like it.
If you haven’t placed the other trace the outline on some Tamiya tape, the very thin kind. Then grab a one of those clear front report sleeves you might have used in school. Lay the Tamiya tape on it. Score it out carefully and now you have a mask that you can use for both sides. Just paint it on. But if you omit, no harm no foul. Alot of times they were covered over and obscured. Somehow a big white star just screamed “Aim here” so you’ll see alot of pictures where the stars are covered, removed or painted black. Yes, You’ll see many pictures where they exist but as a practice crews didn’t maintain those painted stars like one would think. Plus from above they relied on air recognition panels since a P47 hunting tanks wouldn’t necessarily see the stars on the hull at altitude anyways but a fluorescent panel on the deck worked wonders.
1 Like