Had this kit sitting on a shelf partly built for far too many years now.
The body was painted gloss white and then left as i lost the decals and couldn’t find any matching after market ones available.
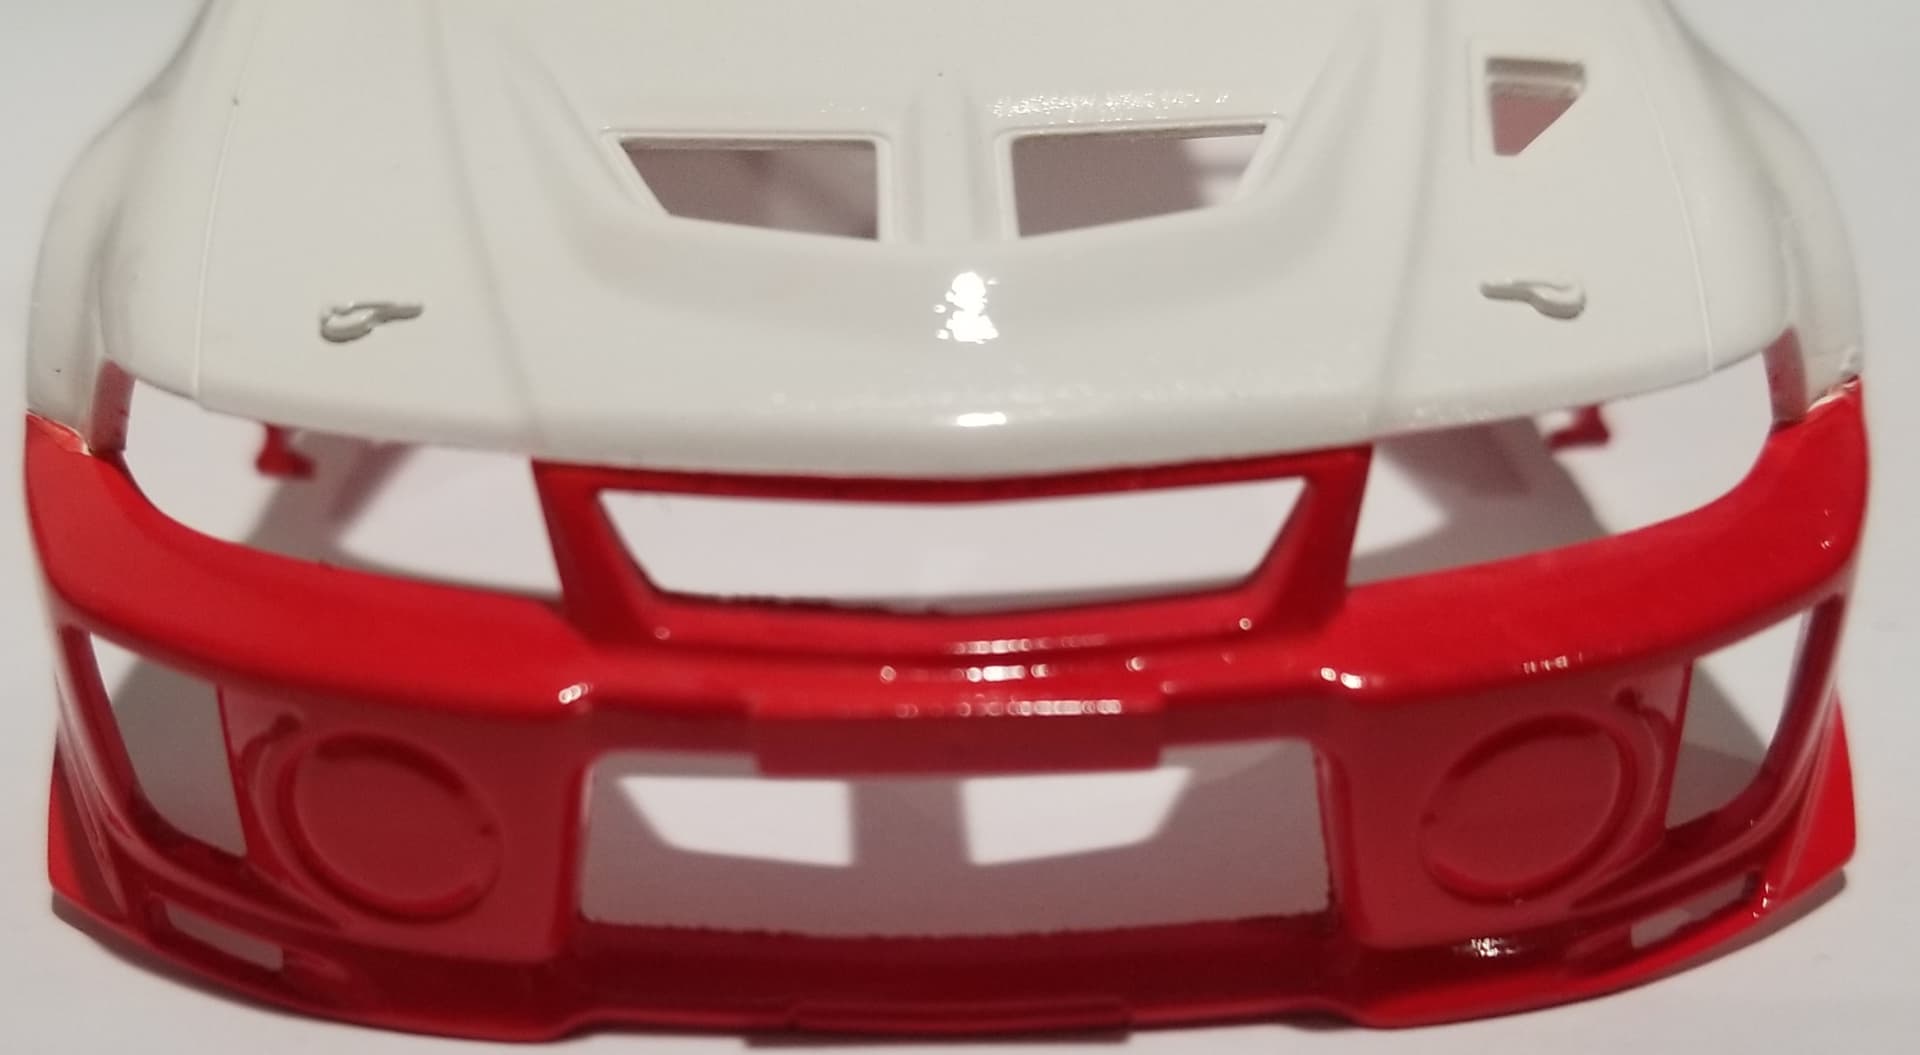
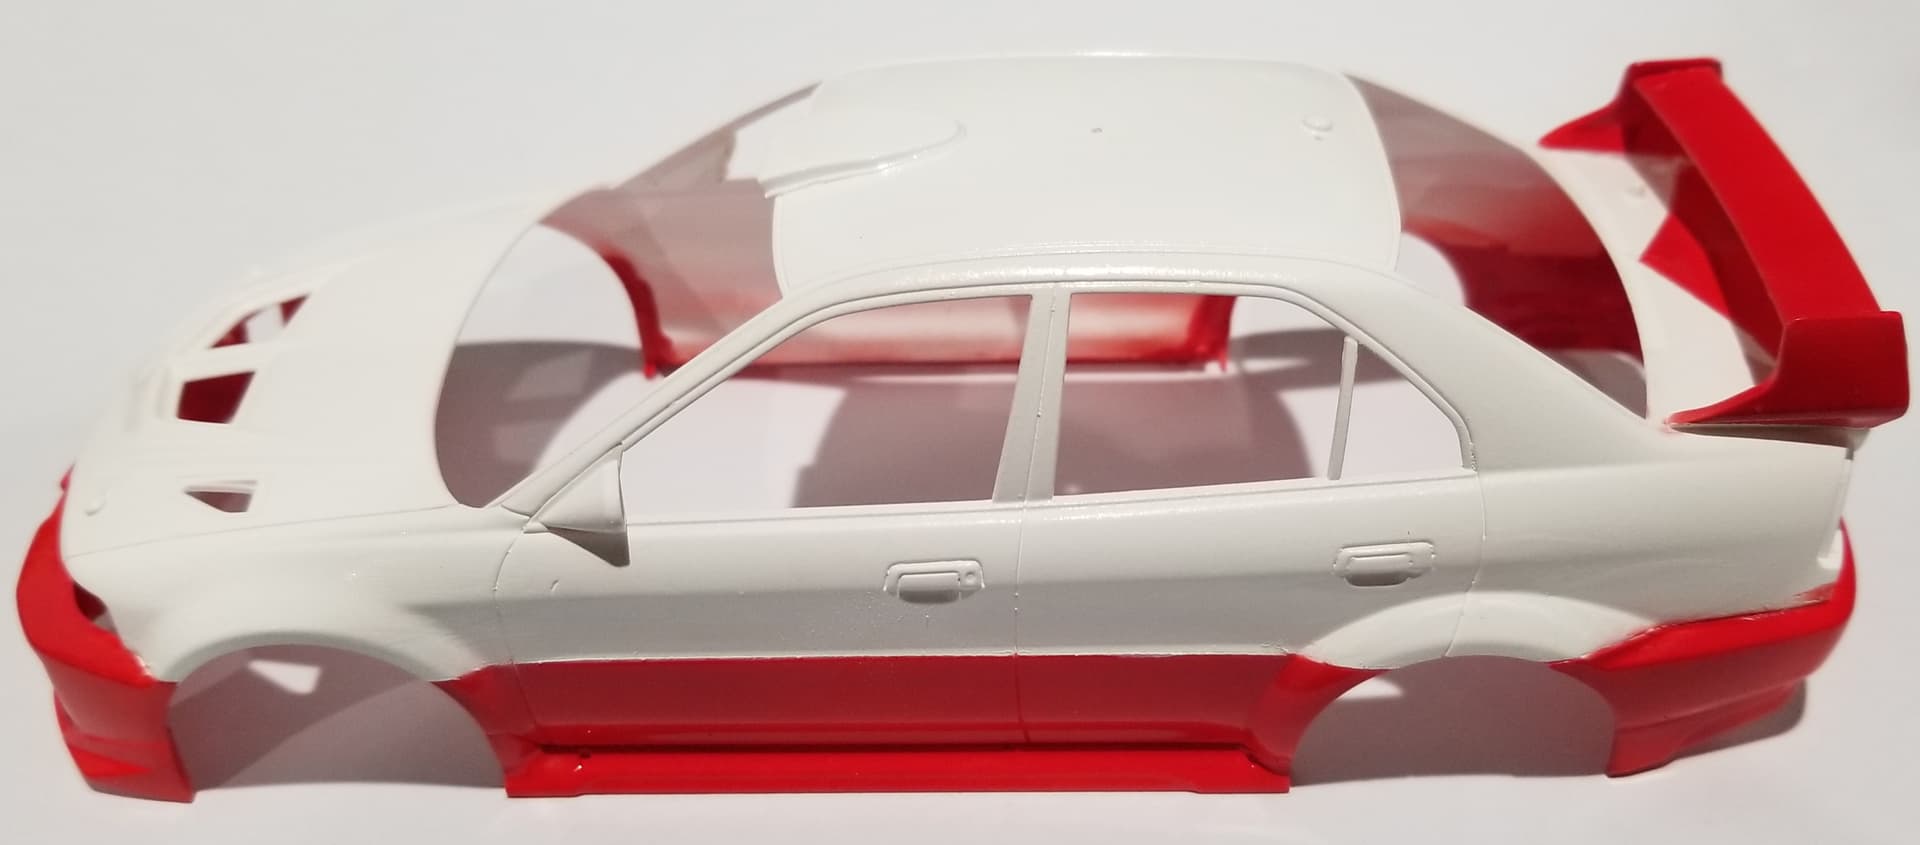
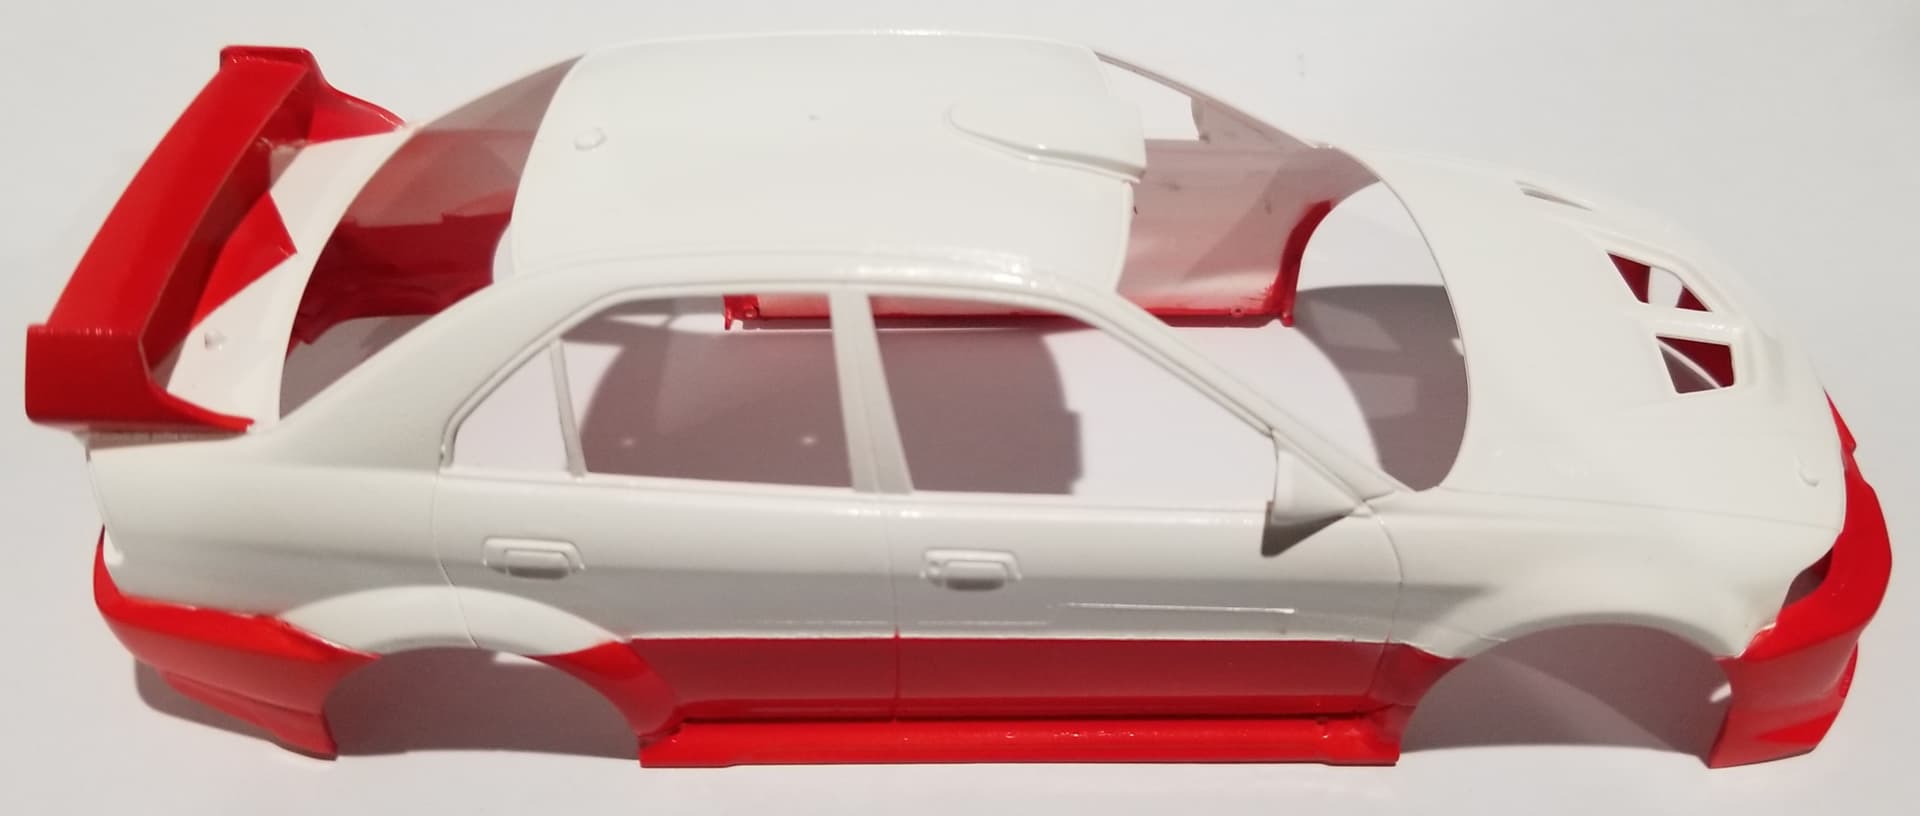
Eventually i did find the decals again so while i had the spray brush o out decided to mask up and paint the red.
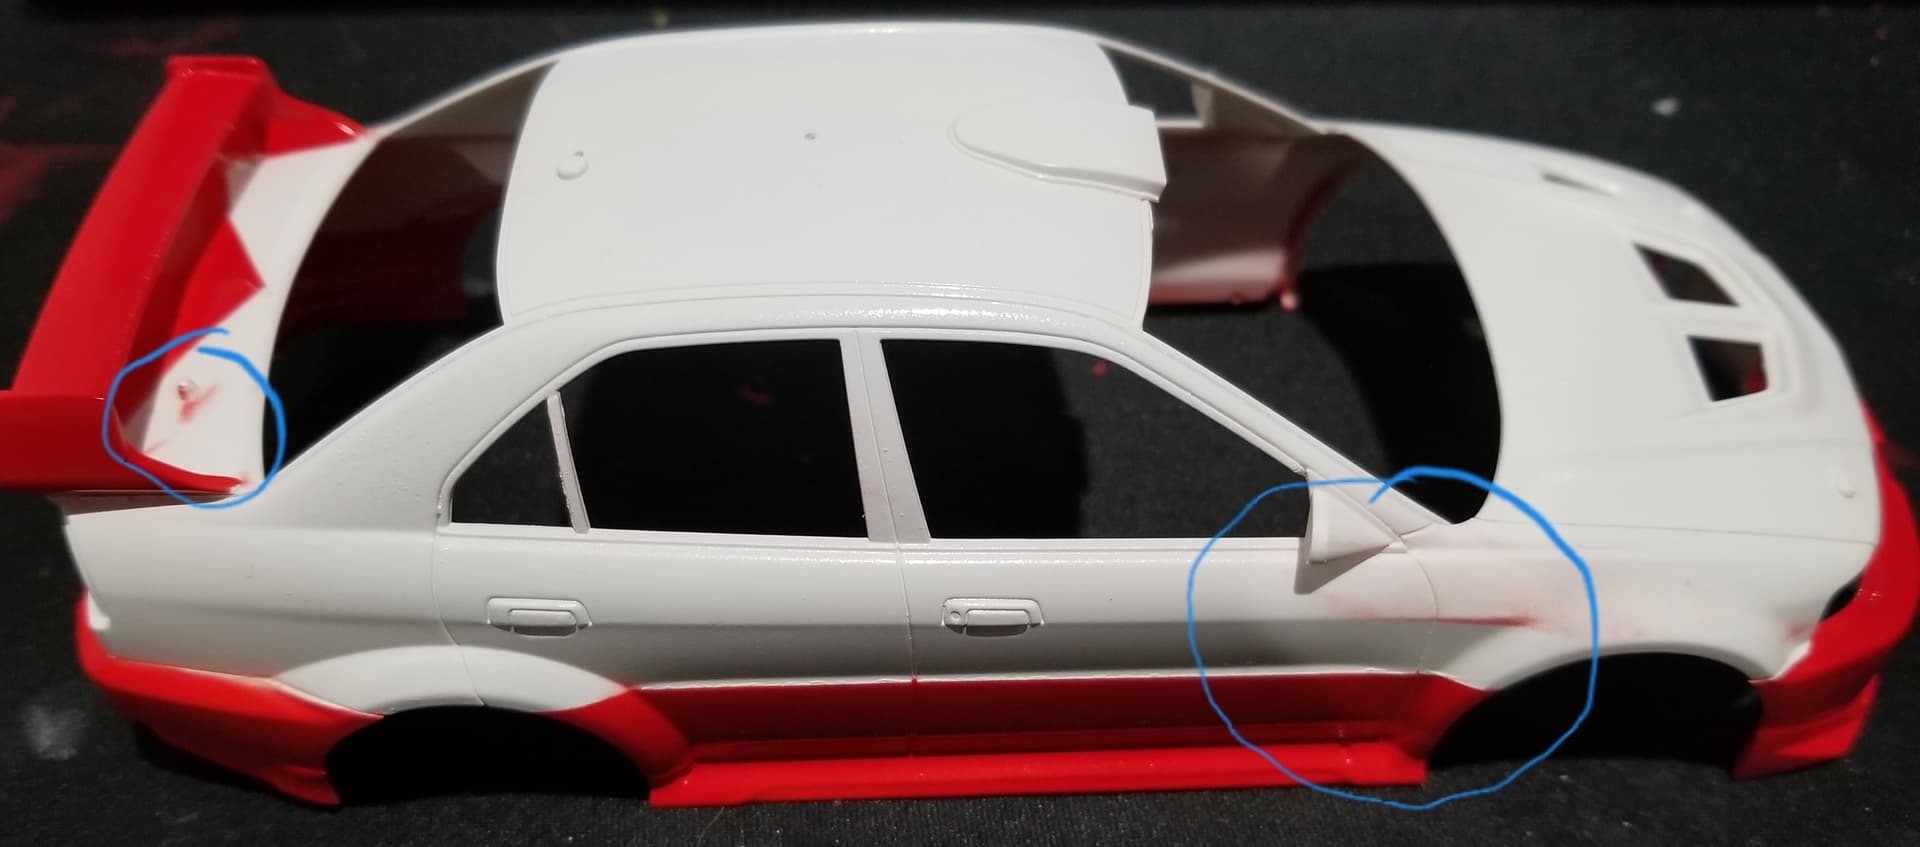
Masking wasn’t quite as good as i hoped and got some spray underneath in a few spots, couple can be seen here.
Once the red had dried for a couple of days i did a rough mask and resprayed the contaminated areas.
The interior is mostly built so will get some photos of that later today.
4 Likes
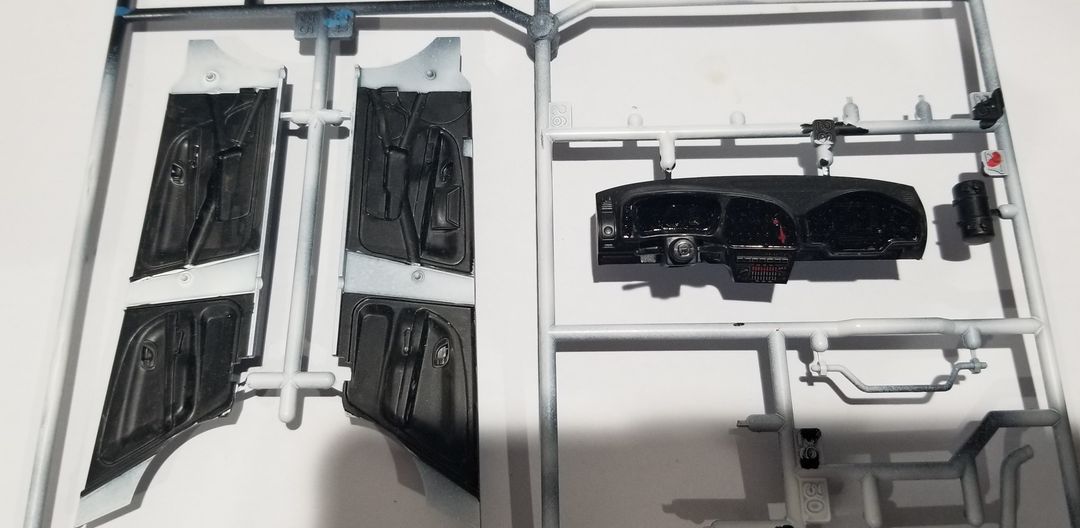
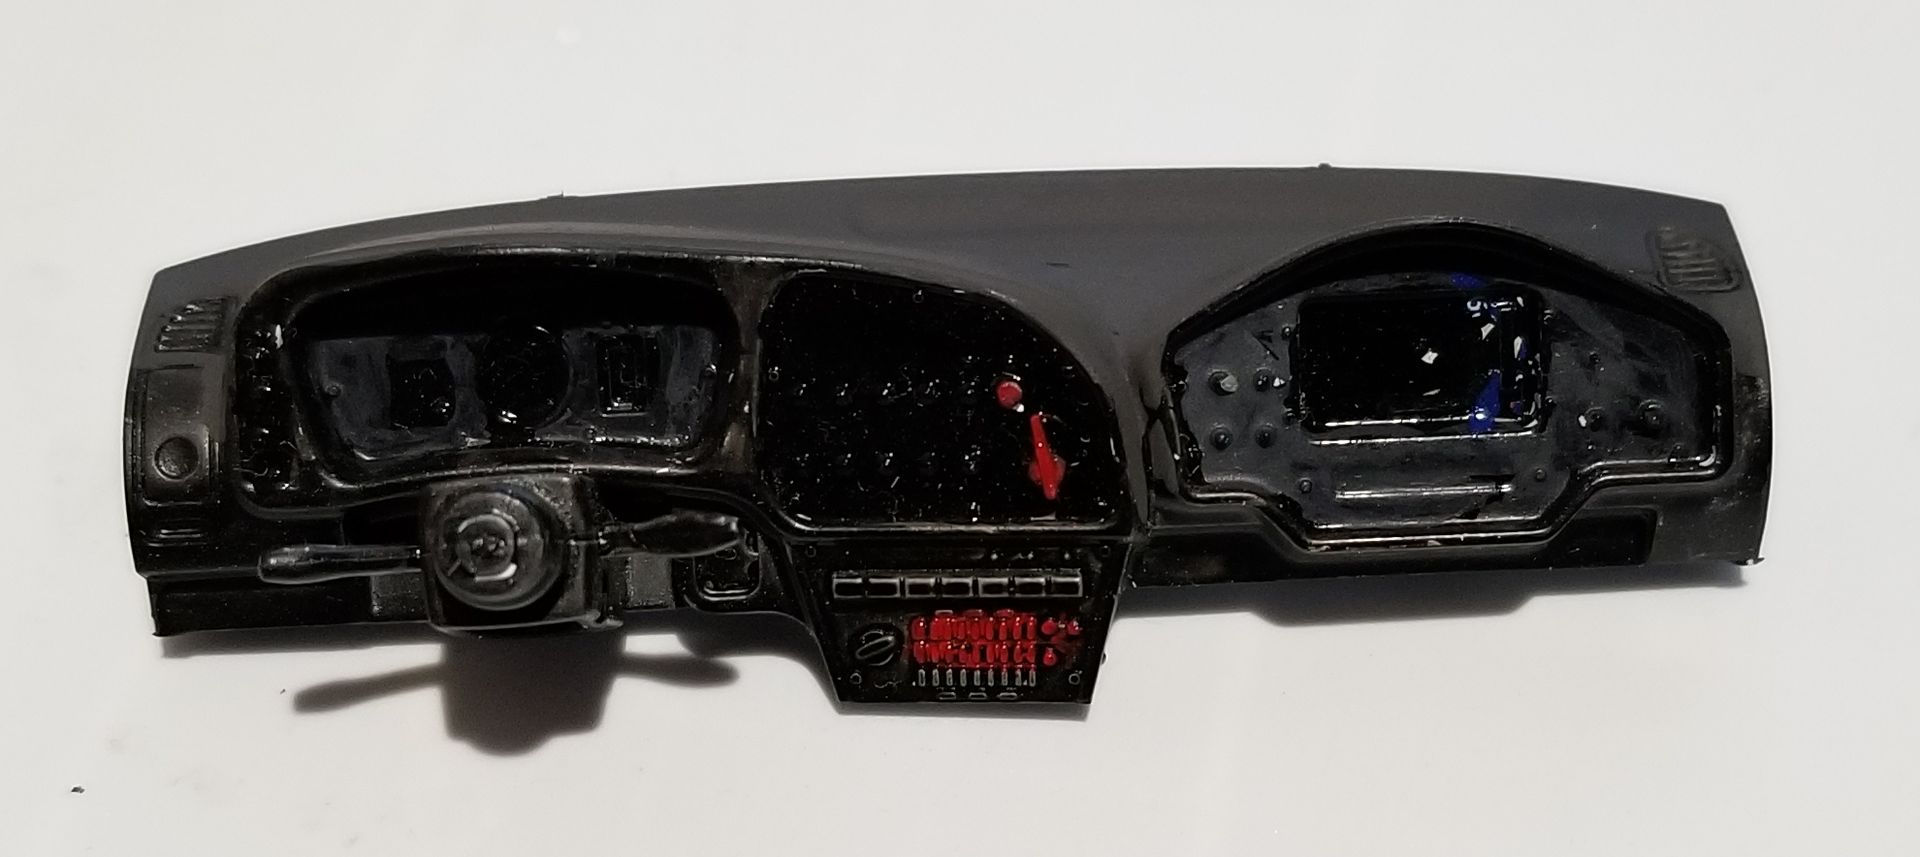
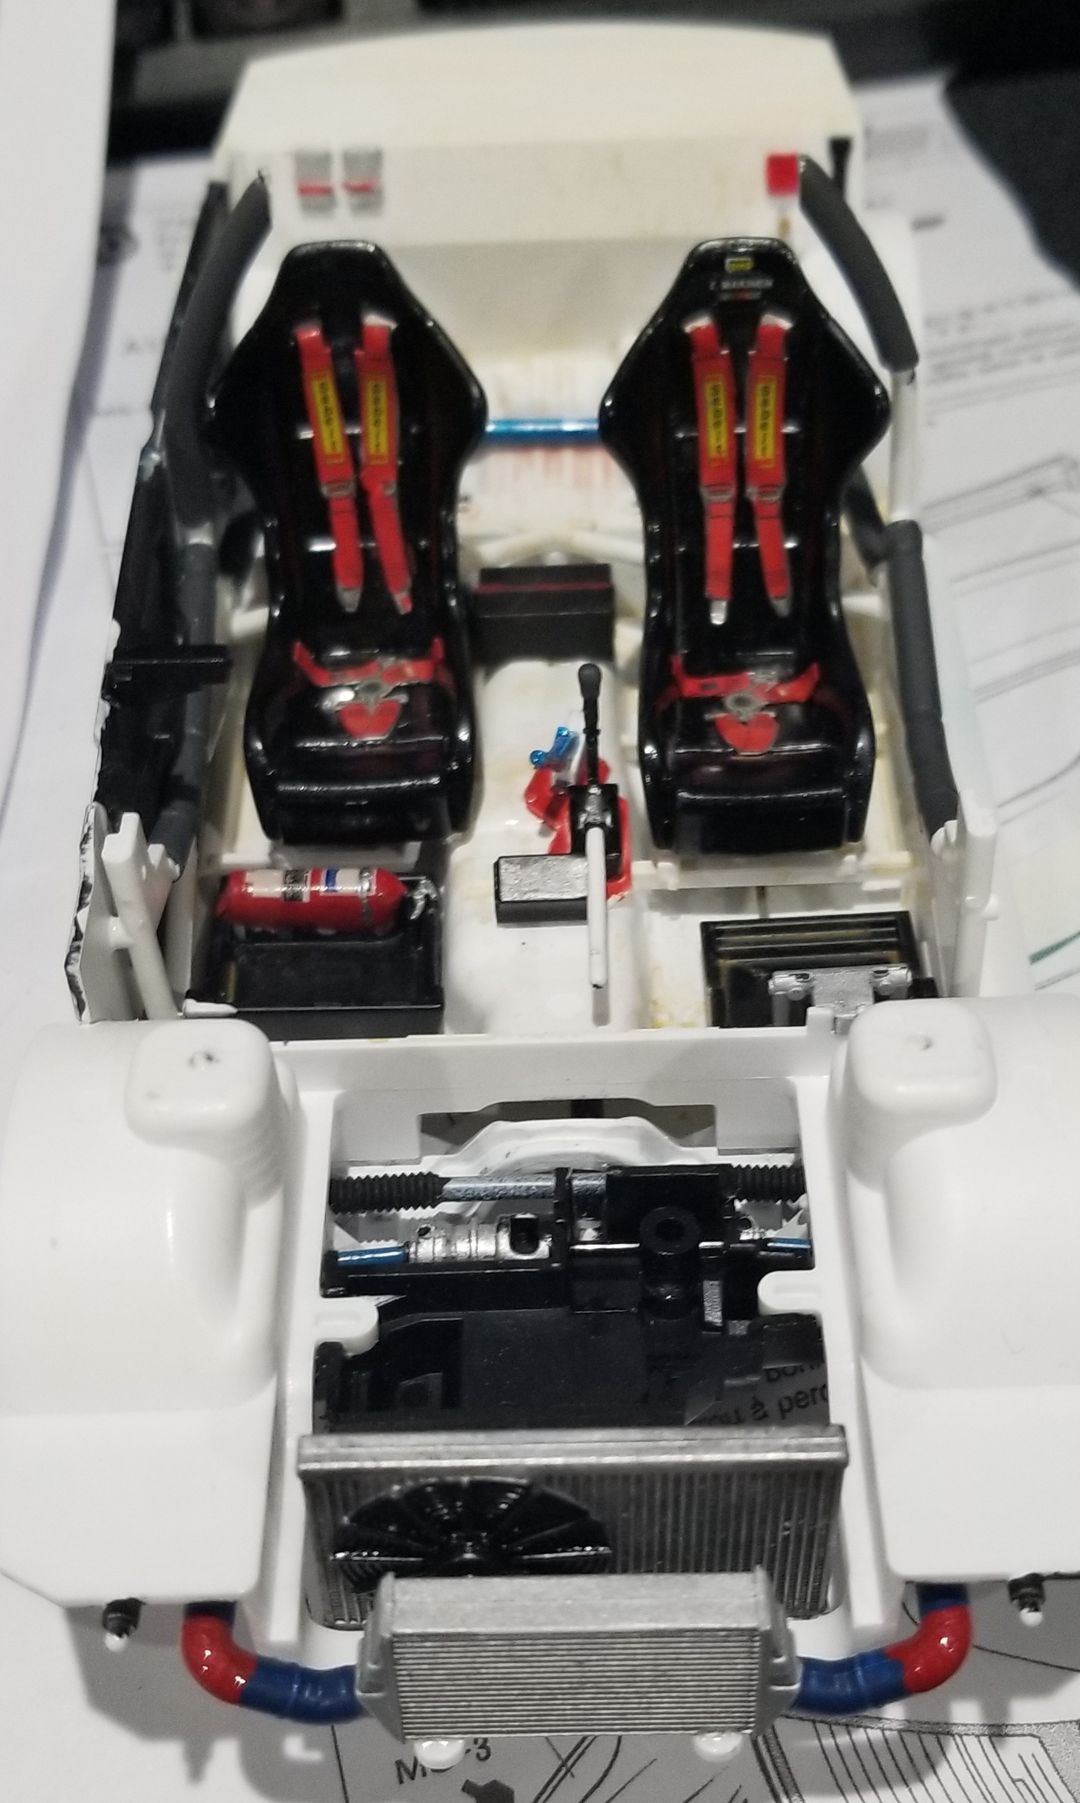
Door cards and dash. Want to add a bit more detail to the dash but not sure how to go about it yet. Need to see if I can find some decent (or even any) photos of the real car dash.
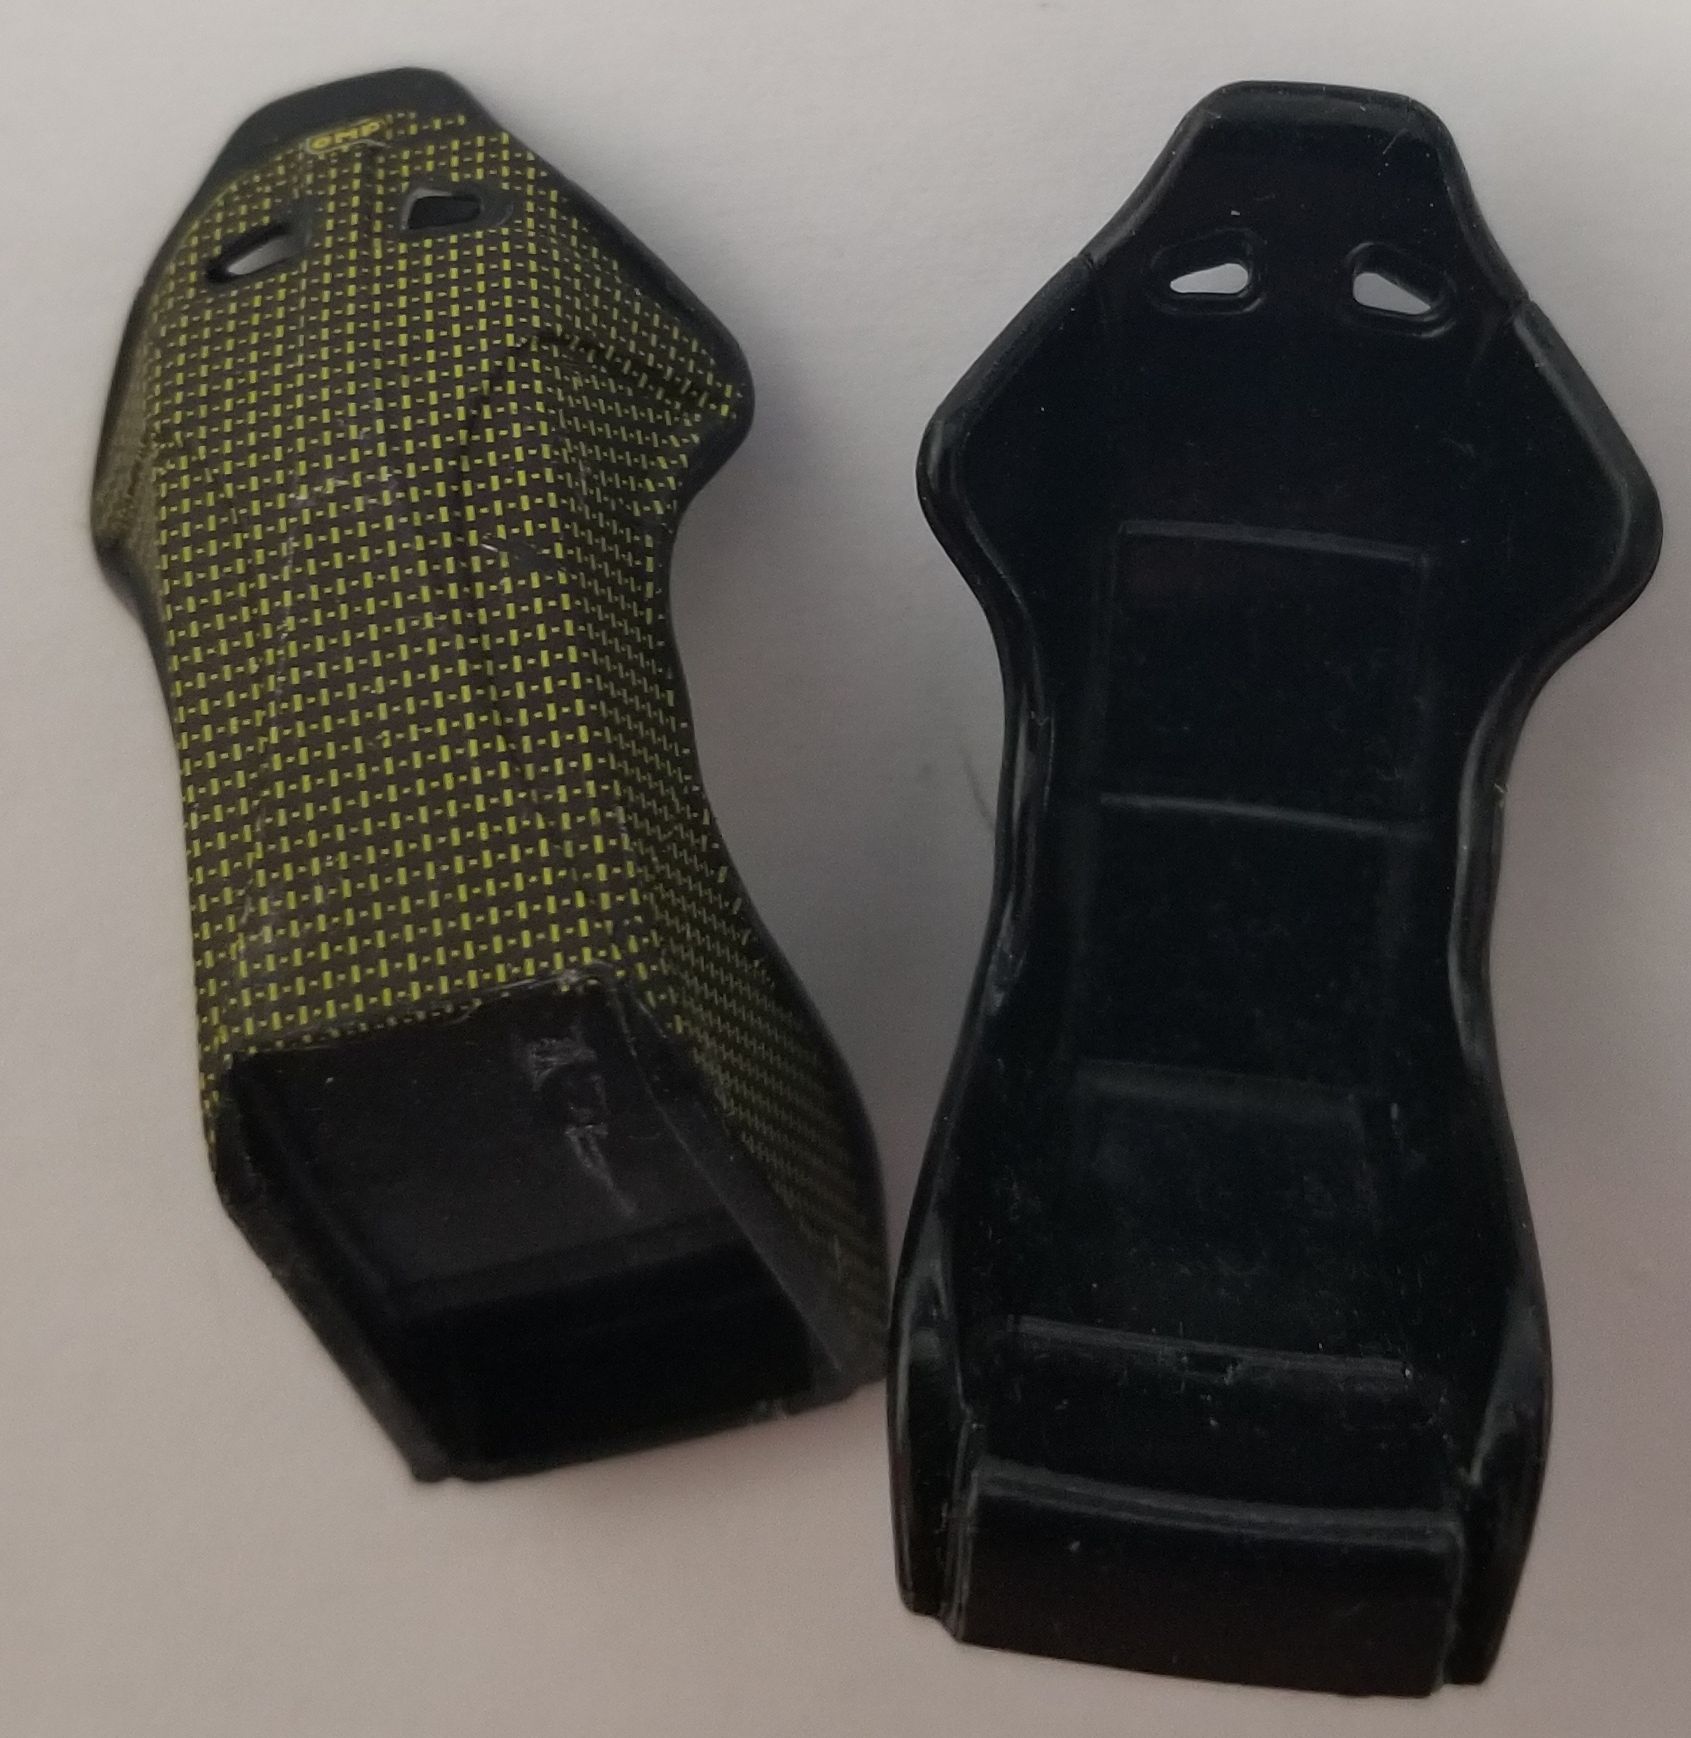
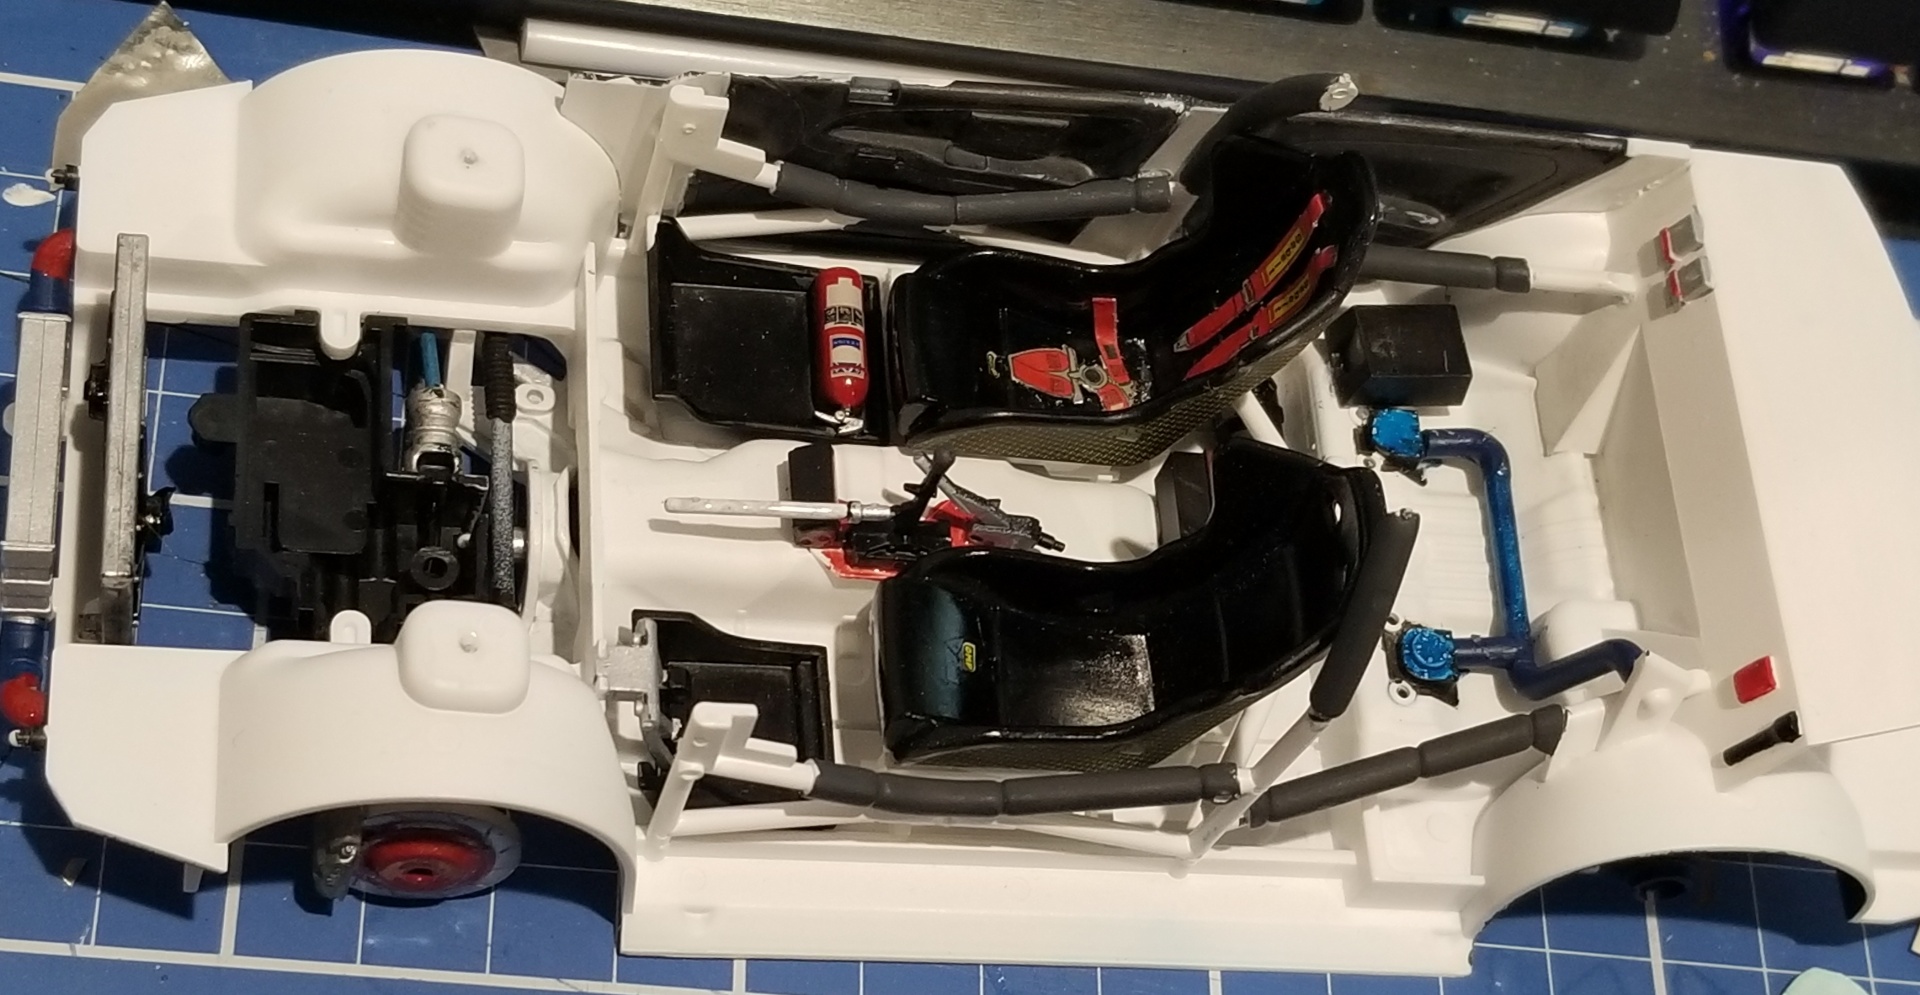
Seats. Rear side texture/colour is a decal on both.
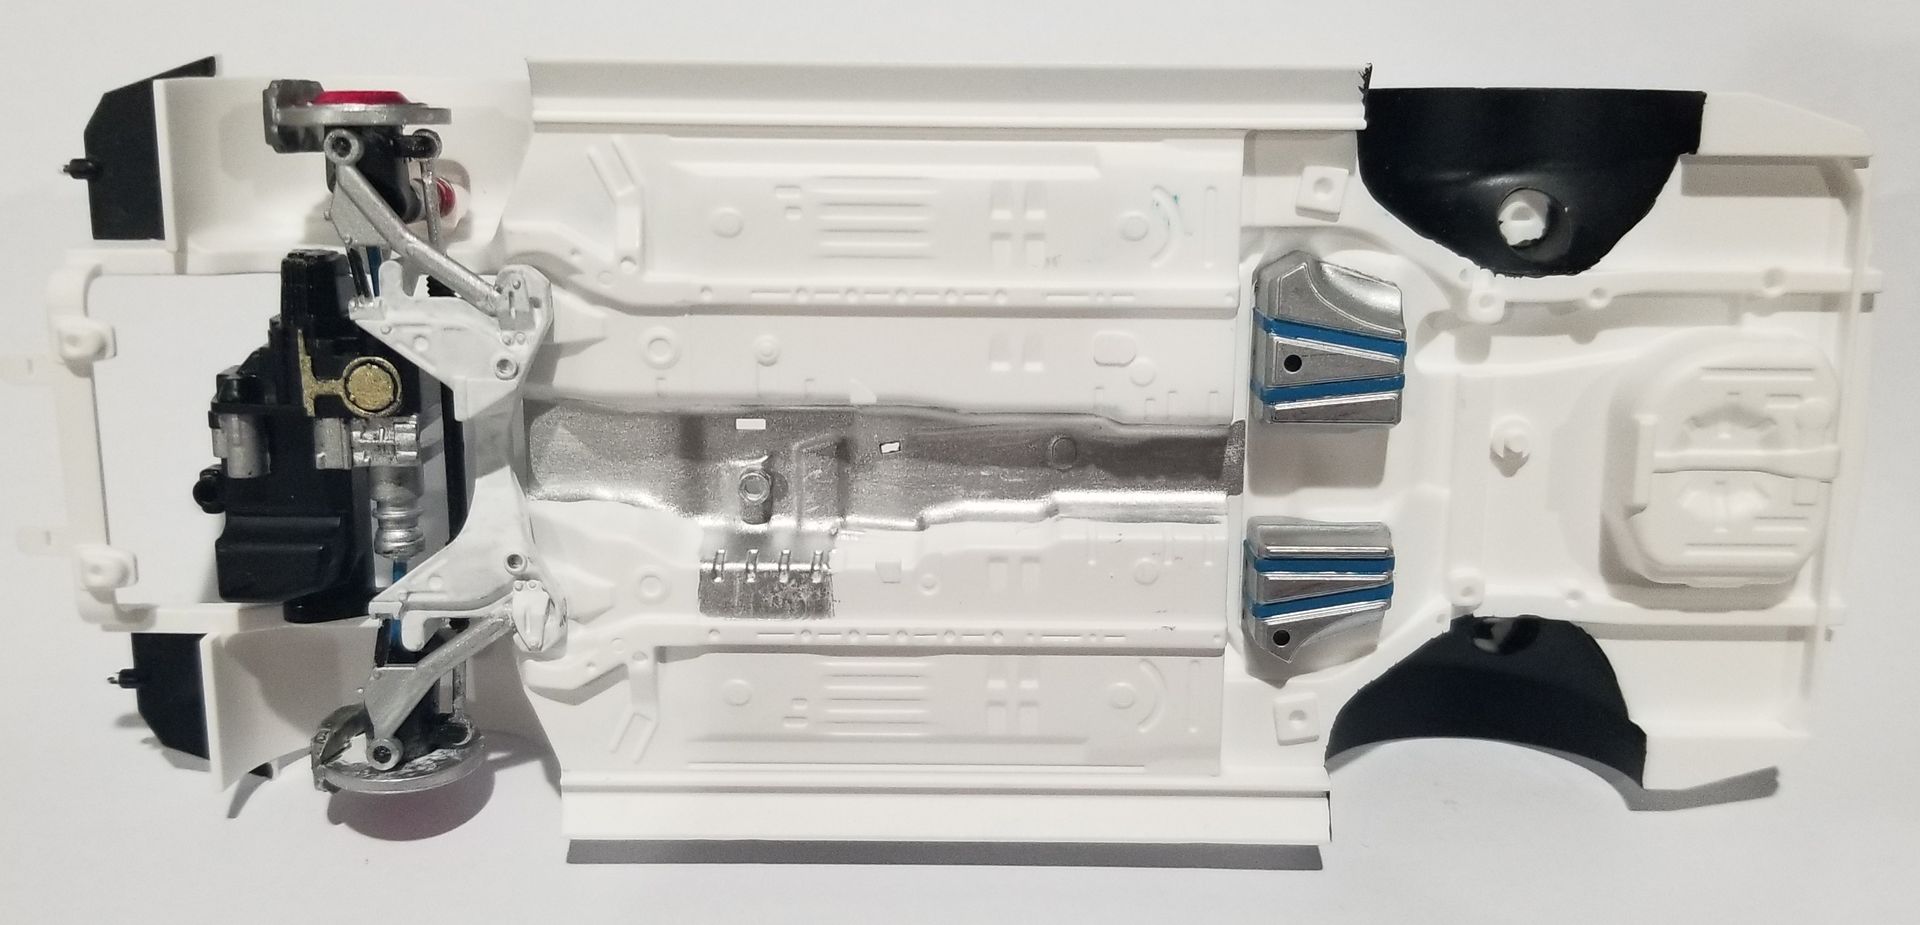
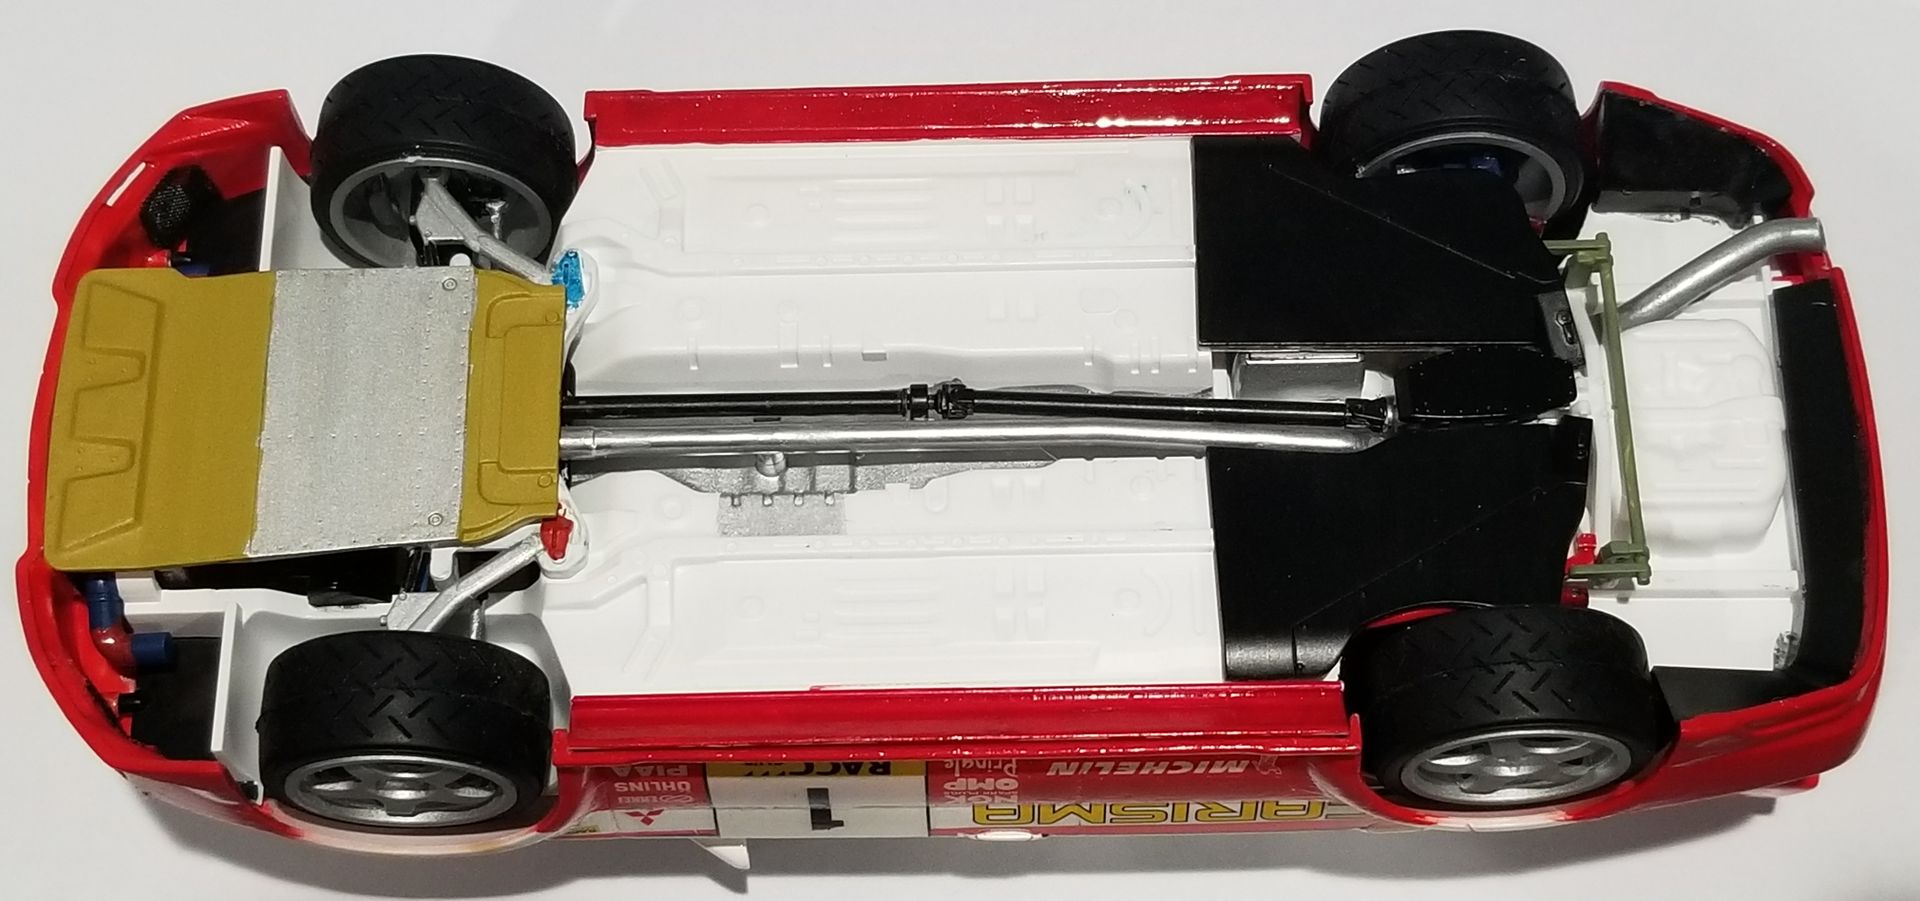
Chassis undersides
Chassis upper with some interior detail.
3 Likes
Keep going with it, interested to see your progress.
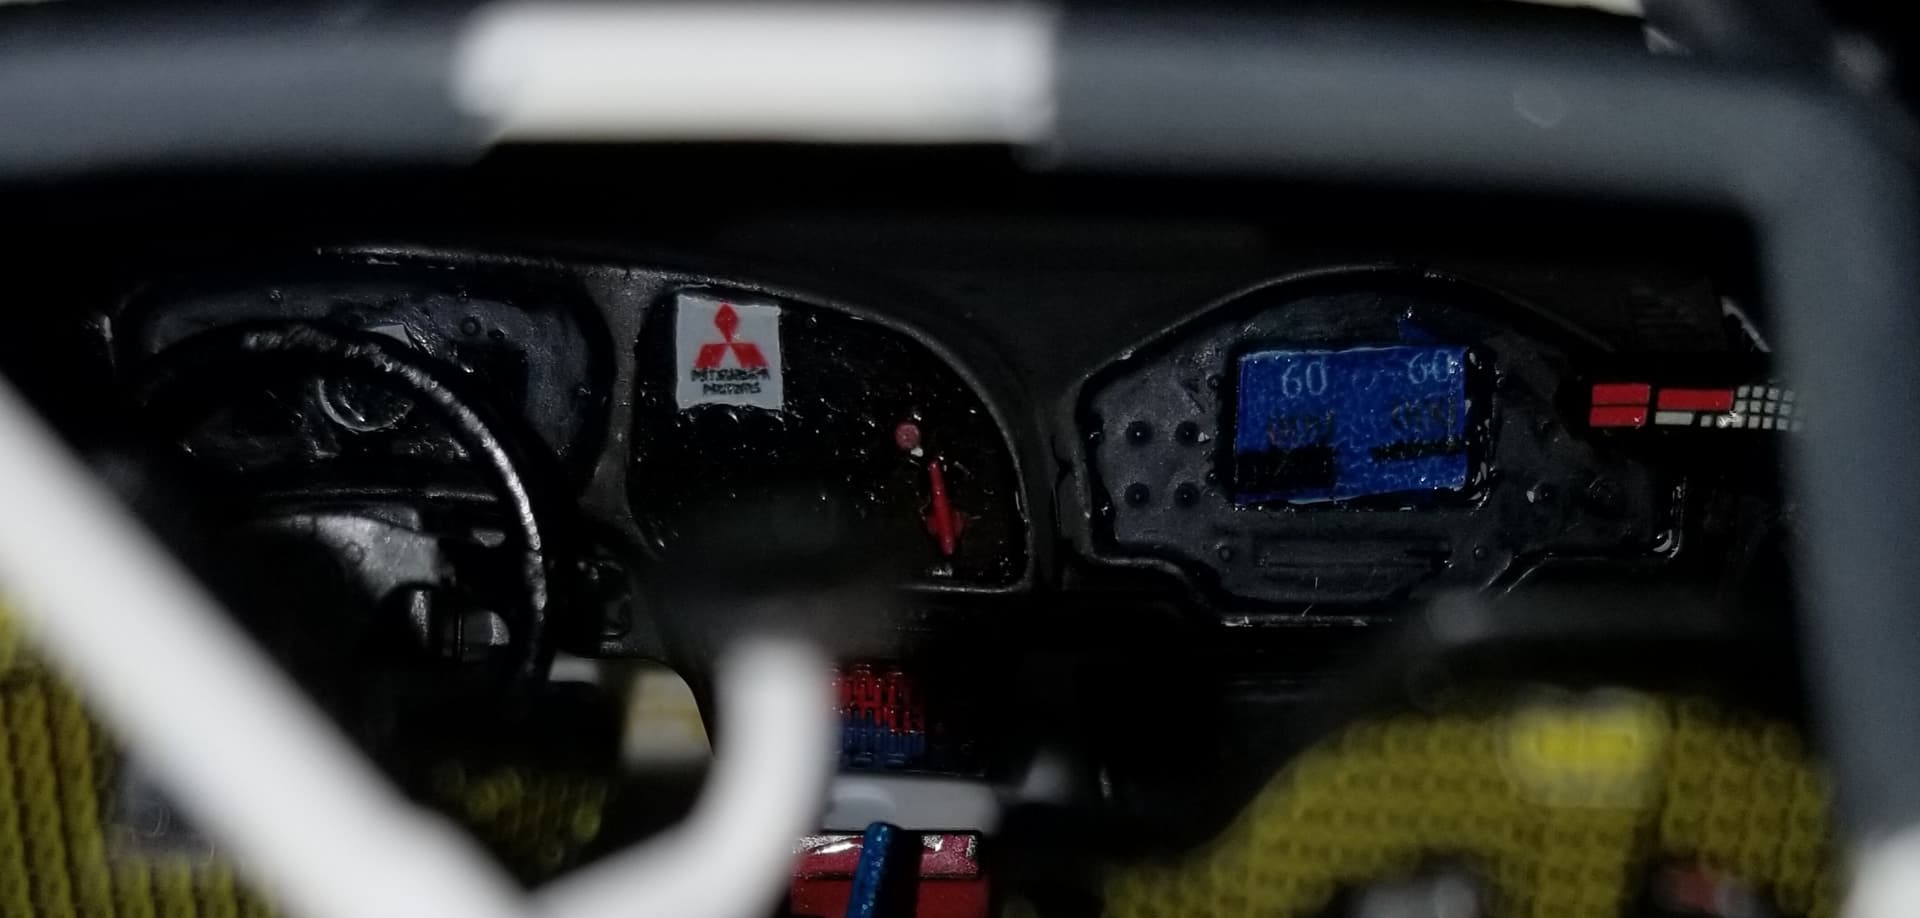
Repainted the dash so it wasn’t just pure black.
Used Lifecolors “Shades of black” set or whatever it is actually called, with deep cockpit, dirty black, and burned black.
Areas where decals were going were left gloss black. When I went to apply the three dash decals, the speedo, Mitsubishi logo , and what I assume is some kind of timer screen, they disintegrated. So now I have to try and come up with replacements. Fortunately I have decal printer film, both inkkjet and laser compatible versions, I just need to create the artwork.
In the meantime the remaining decals have received a coat of Testors spray decal bonder and appear none the worse for wear after it.
I have also scanned them in the highest resolution I could in the event they still fall apart. The only issue I would have printing from the scan is the fact the backing paper is blue, which means a lot of editing to get rid of the background colour first.
3 Likes
The different shades of black is a great idea. Brings more depth and realism to it.
First experiment with the coated decals.
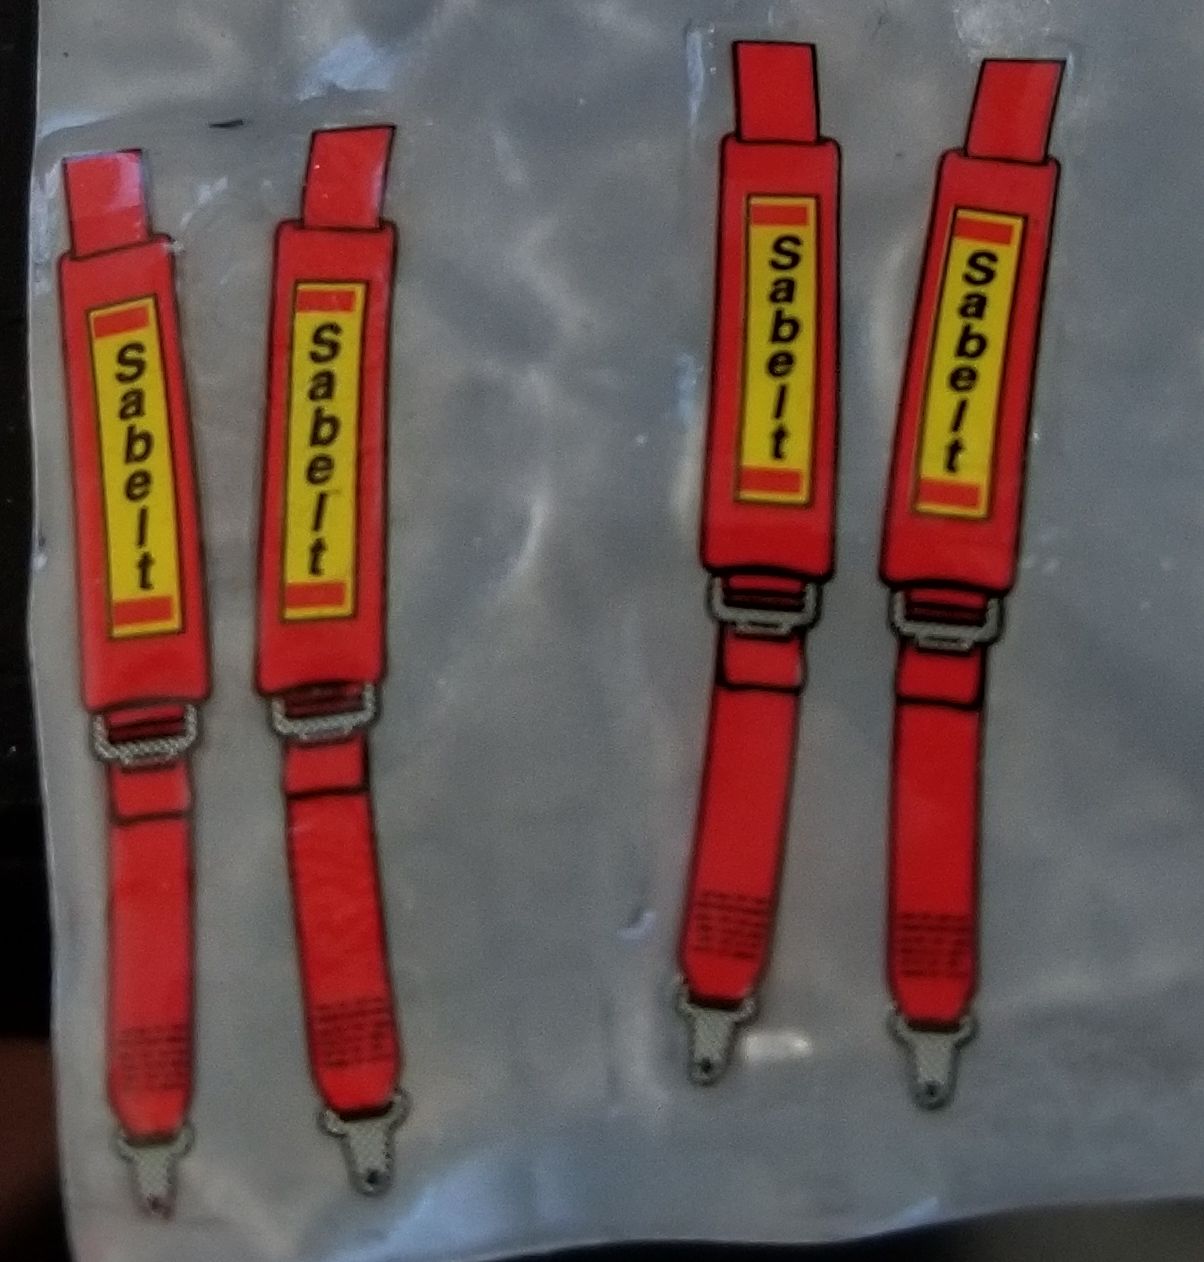
I used the seatbelts and applied them to some thick aluminium foil that had been primed and clear gloss coated.
The pair on the left split in to top and bottom halves and had to be realigned, the ones on the right came off in one piece. Still a far better result than the complete disintegration of the dash decals I first tried.
They took an extra long soaking before they even began to come off the backing paper, so I added some Gunze Mr Mark Setter before laying them on the foil.
It took careful application of force to get them to slide off and I pushed from the top then as it bunched up ,slid the bottom part down a bit, then repeated. Tried pulling straight from the bottom on the first one hence the breakage.
I will cut them close and paint the back of the foil red before I add them to the the seats, and then do the lower harness sections.
It does give me some hope that the larger exterior decals may still be useable, though the additional work to get them to release from the backing paper will require extra care to avoid breakage.
1 Like
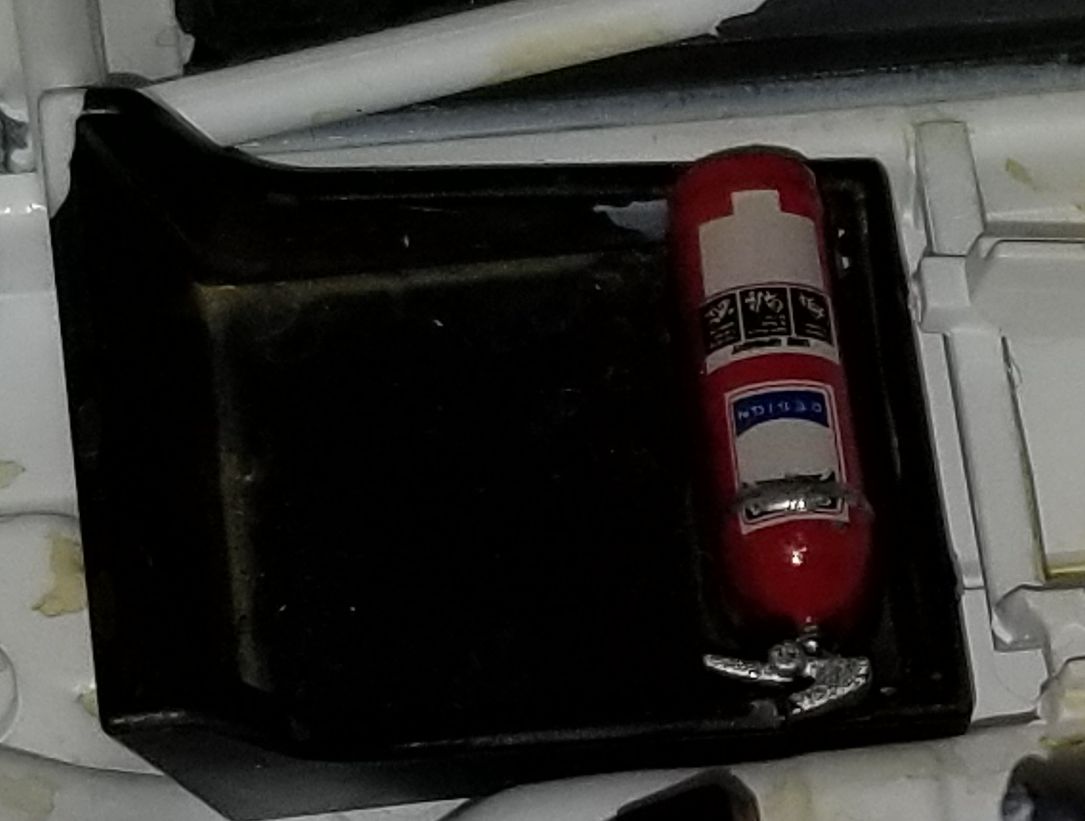
Interior is coming along. Got the fire extinguisher decal on without too much trouble. Even with the extra thickness of the testors decal coating they settled down ok with some decal solvent.
One of the seats has the belts on now. They just disappear to nowhere. Not sure where the ends would be secured in the real thing. Seats are only dry fitted at the moment.
2 Likes
Interior is mostly done. Still need to replace the dash decals and install the dash.
Seats are installed. Seatbelts went ok but the decals did come of fin several places as I tried to cut the foil backing down to size. Some touch up in spots is still required.
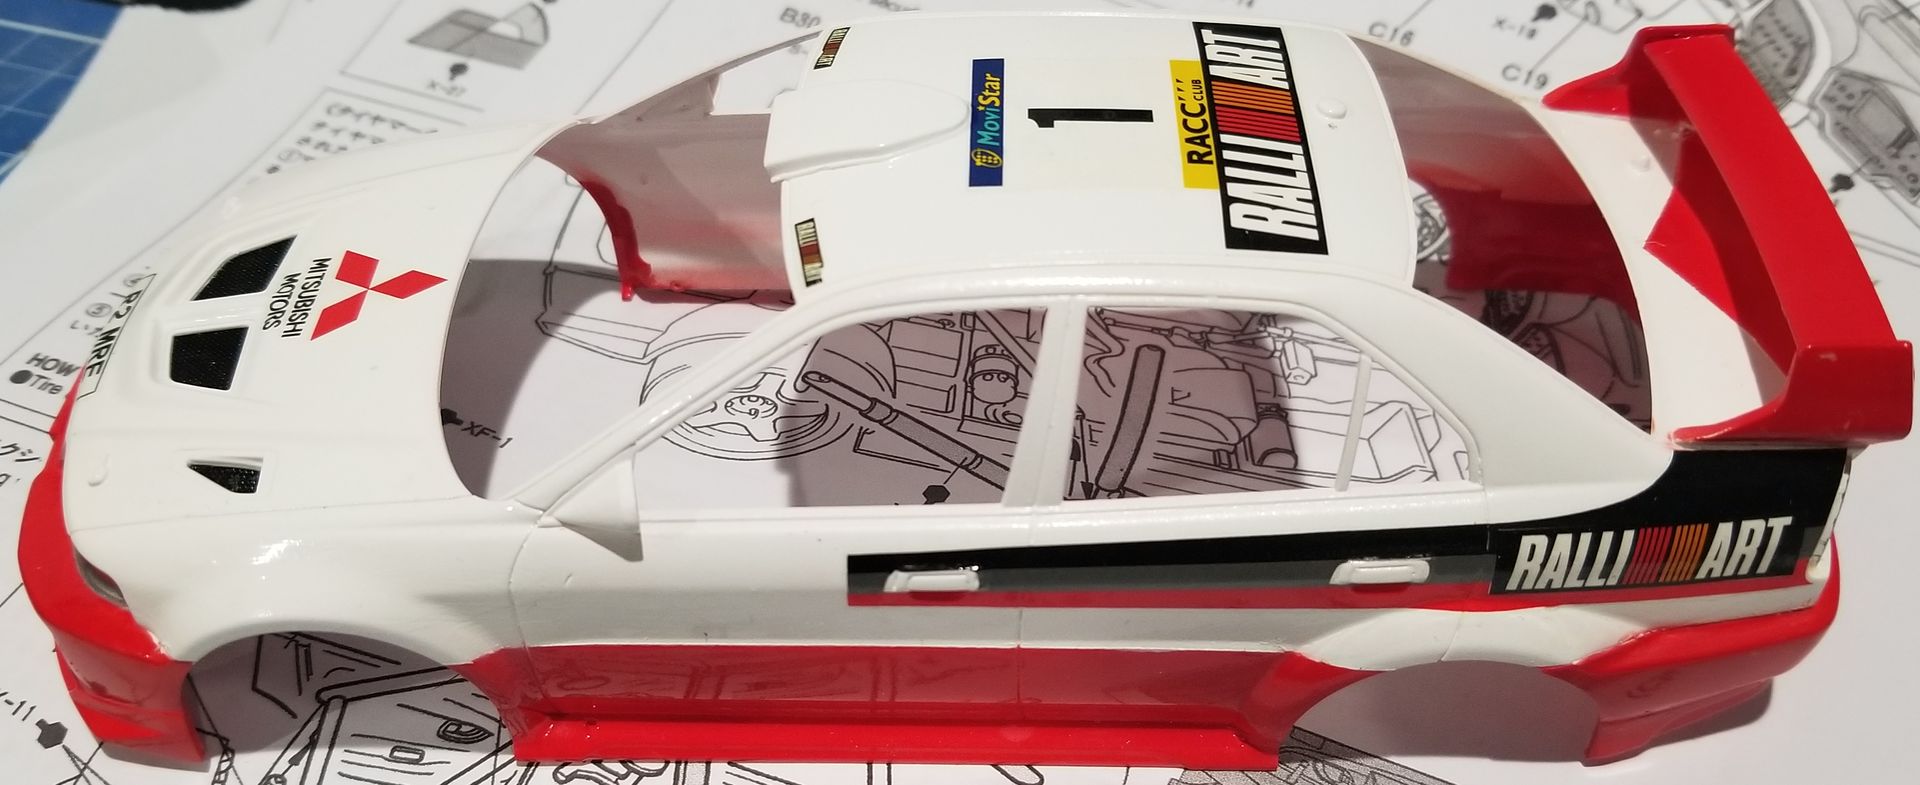
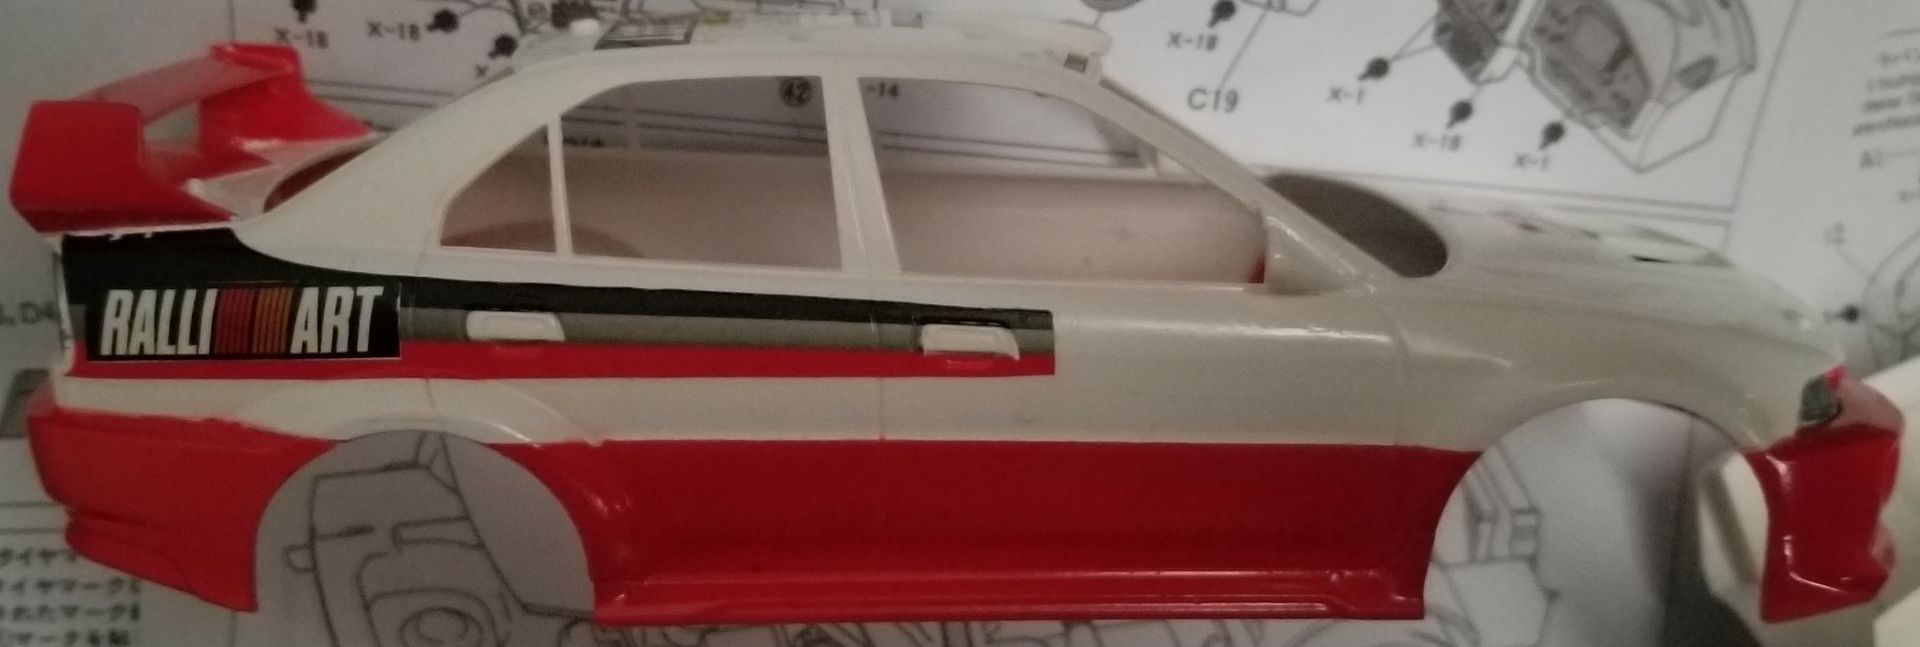
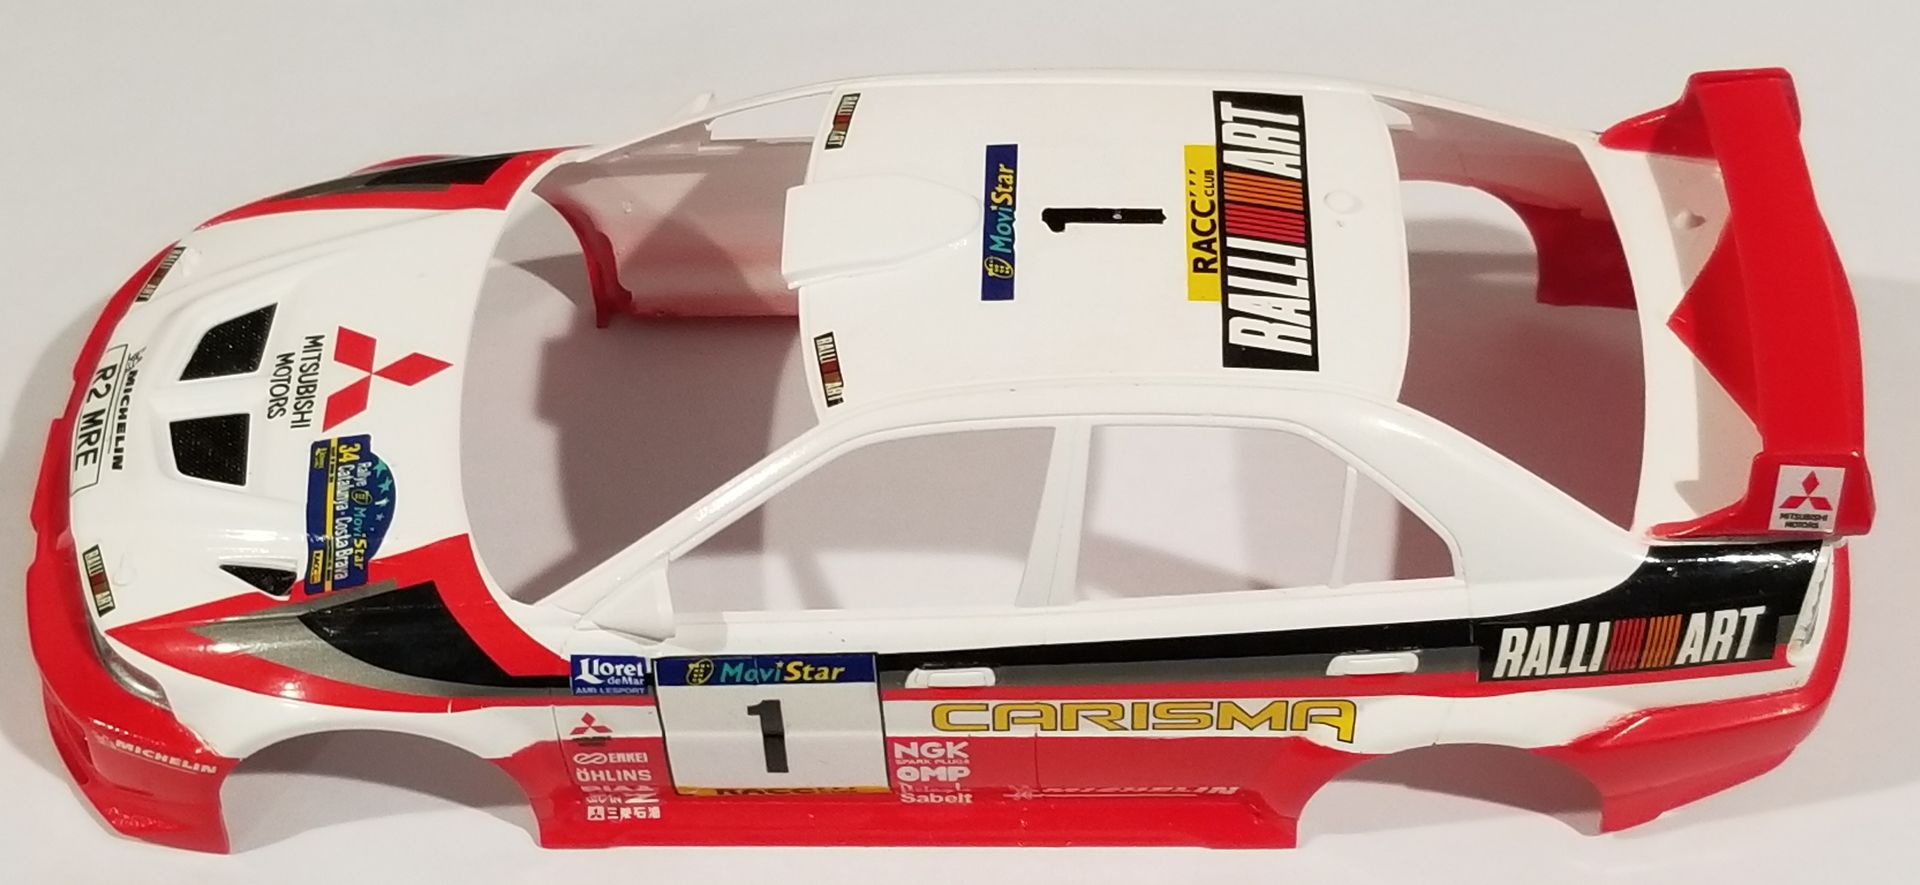
Started working on the exterior decals while the body was off. That wayy if there were any big screw ups I could respray without too much hassle.
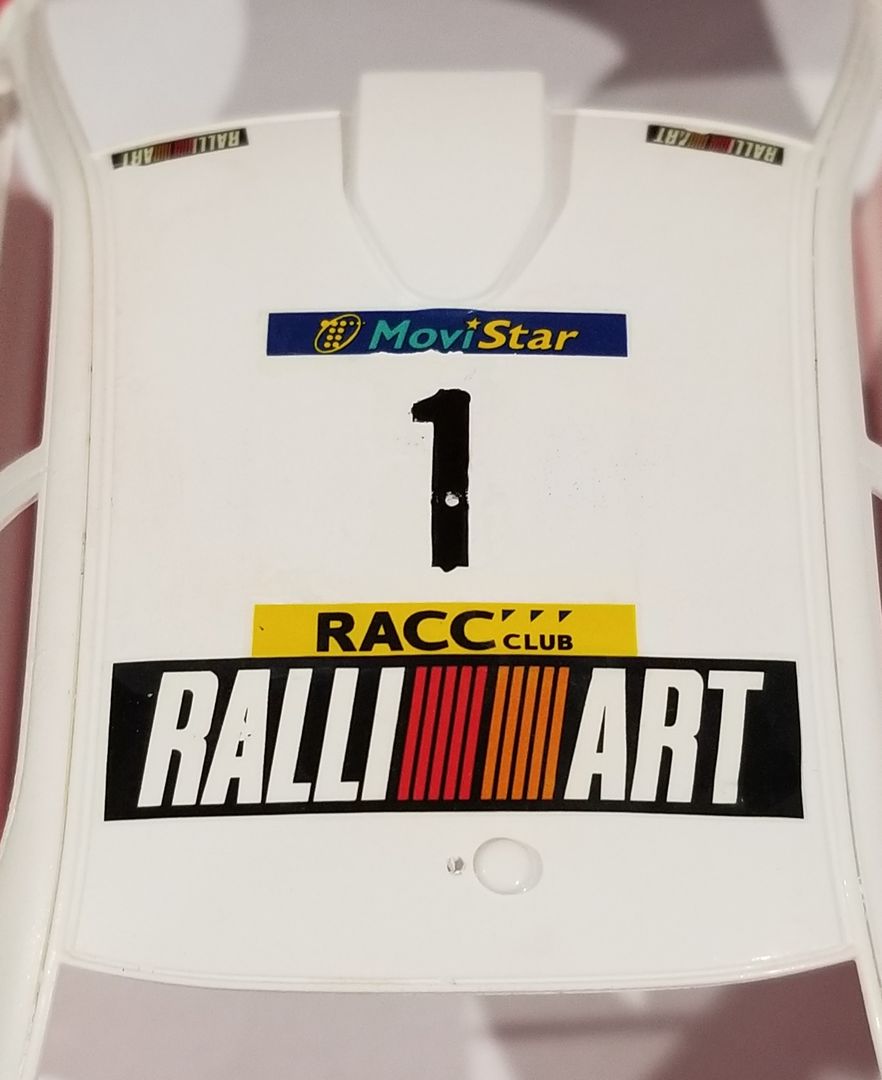
They have gone on pretty well after their coat of spray bonder, the biggest issue so far is the roof Number 1 decal which has a large amount of decal film around it that has noticeably yellowed. Doesn’t show up as strongly on camera but is quite distinct in person.
3 Likes
You’re getting a fair degree of push-back from this shelf-queen Iain, great effort to keep it rolling and find some alternative solutions! I’ve had a whole year this year just trying to reduce the WIP list and it’s a great feeling to get them in the display cabinet, this one will be no exception. It’s looking very nice.
Cheers, D
1 Like
I printed some replacement dash decals. The Mitsubishi logo came out a little larger than required but it does the job, the Speedo/tacho, and timer screen are about right. Resolution isn’t as good as the originals, but once it’s buttoned up they won’t be super visible anyway.
Body decals progress slowly as each decal requires a really long soak before it even starts to come free, and there are little bits of the decal paper that don’t absorb water so they tear quite easily at those points even with the coats of bonder.
1 Like
Decals are nearly done, just a few small ones on the body left.
I spent some time with some cotton buds and novus polish working on the roof decal to try and deal with the yellowed film around the number 1, looks a lot better than it did.
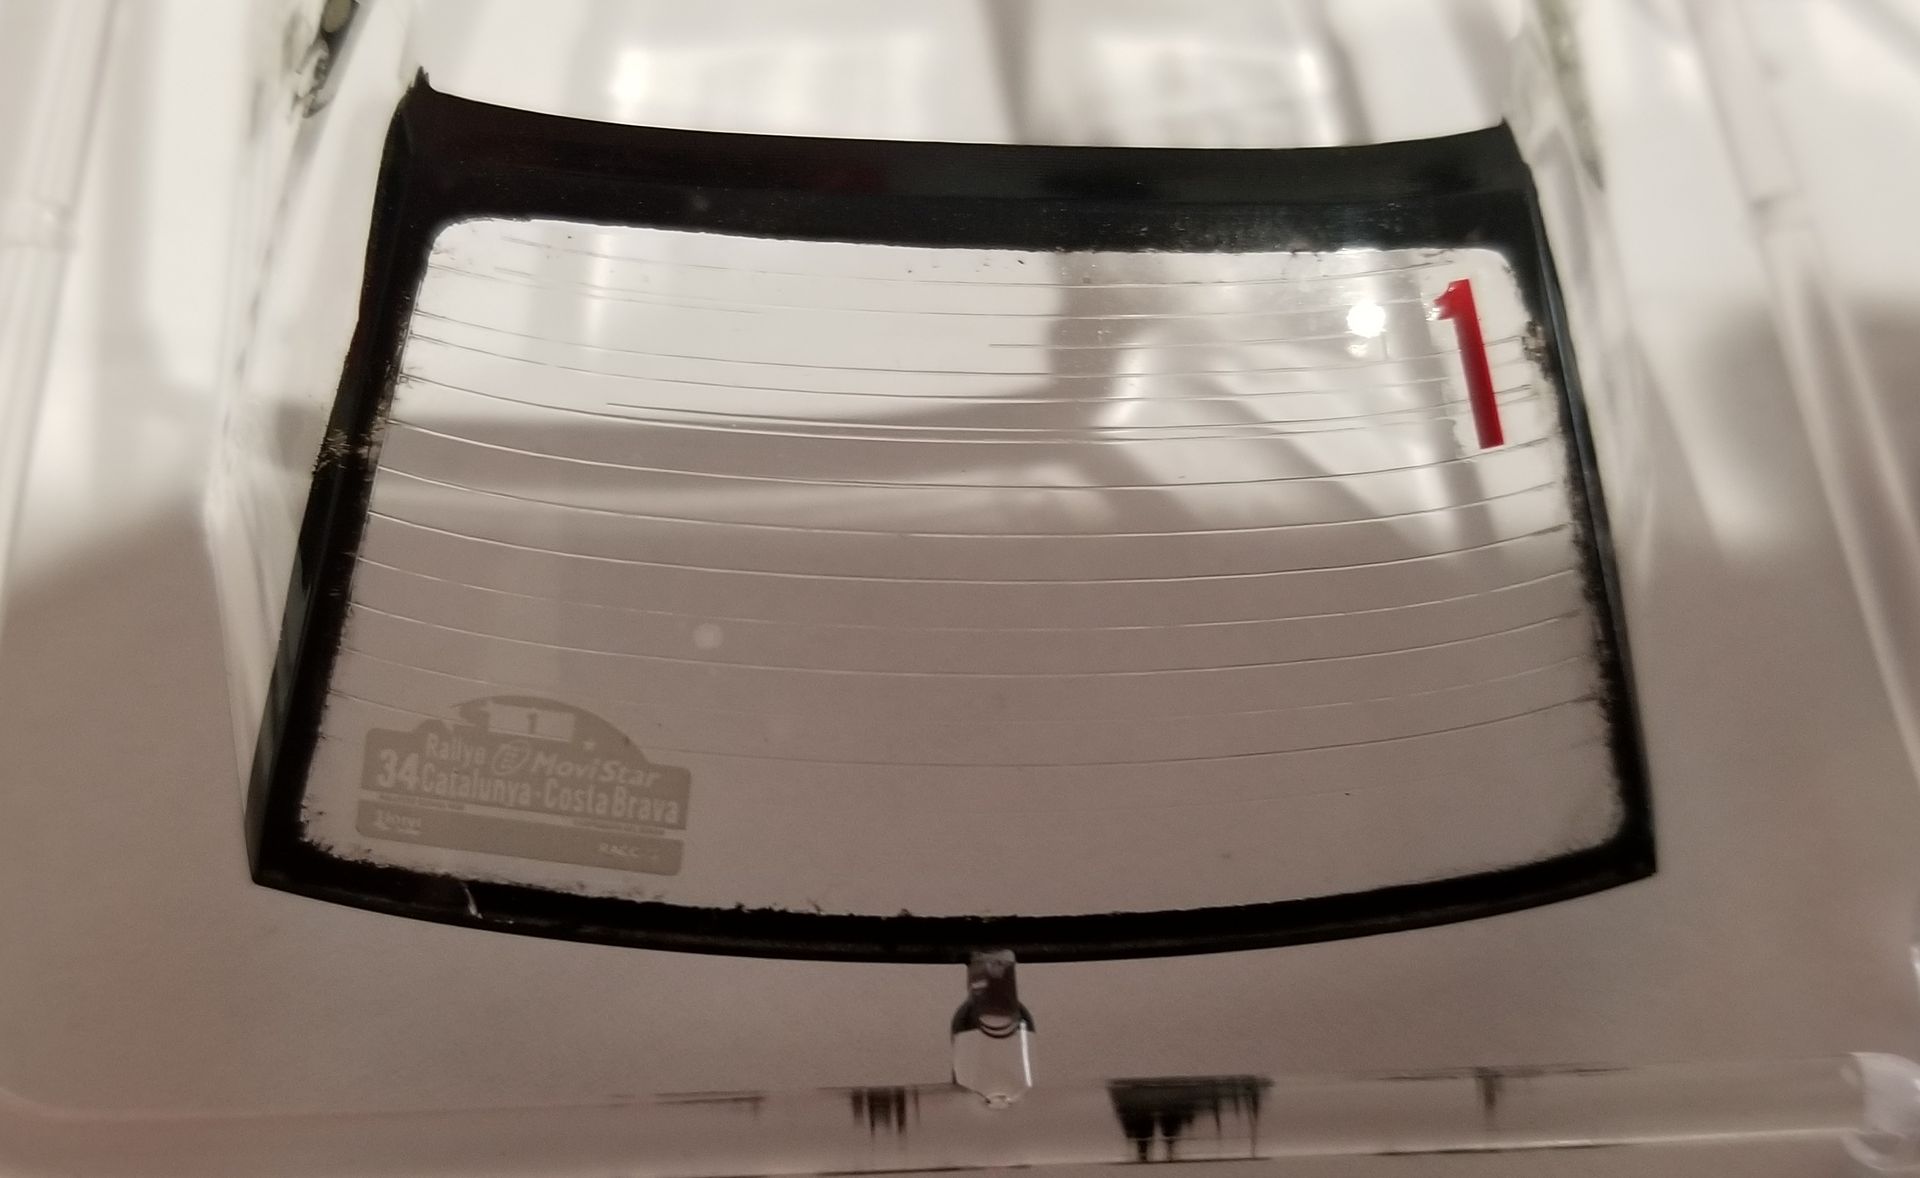
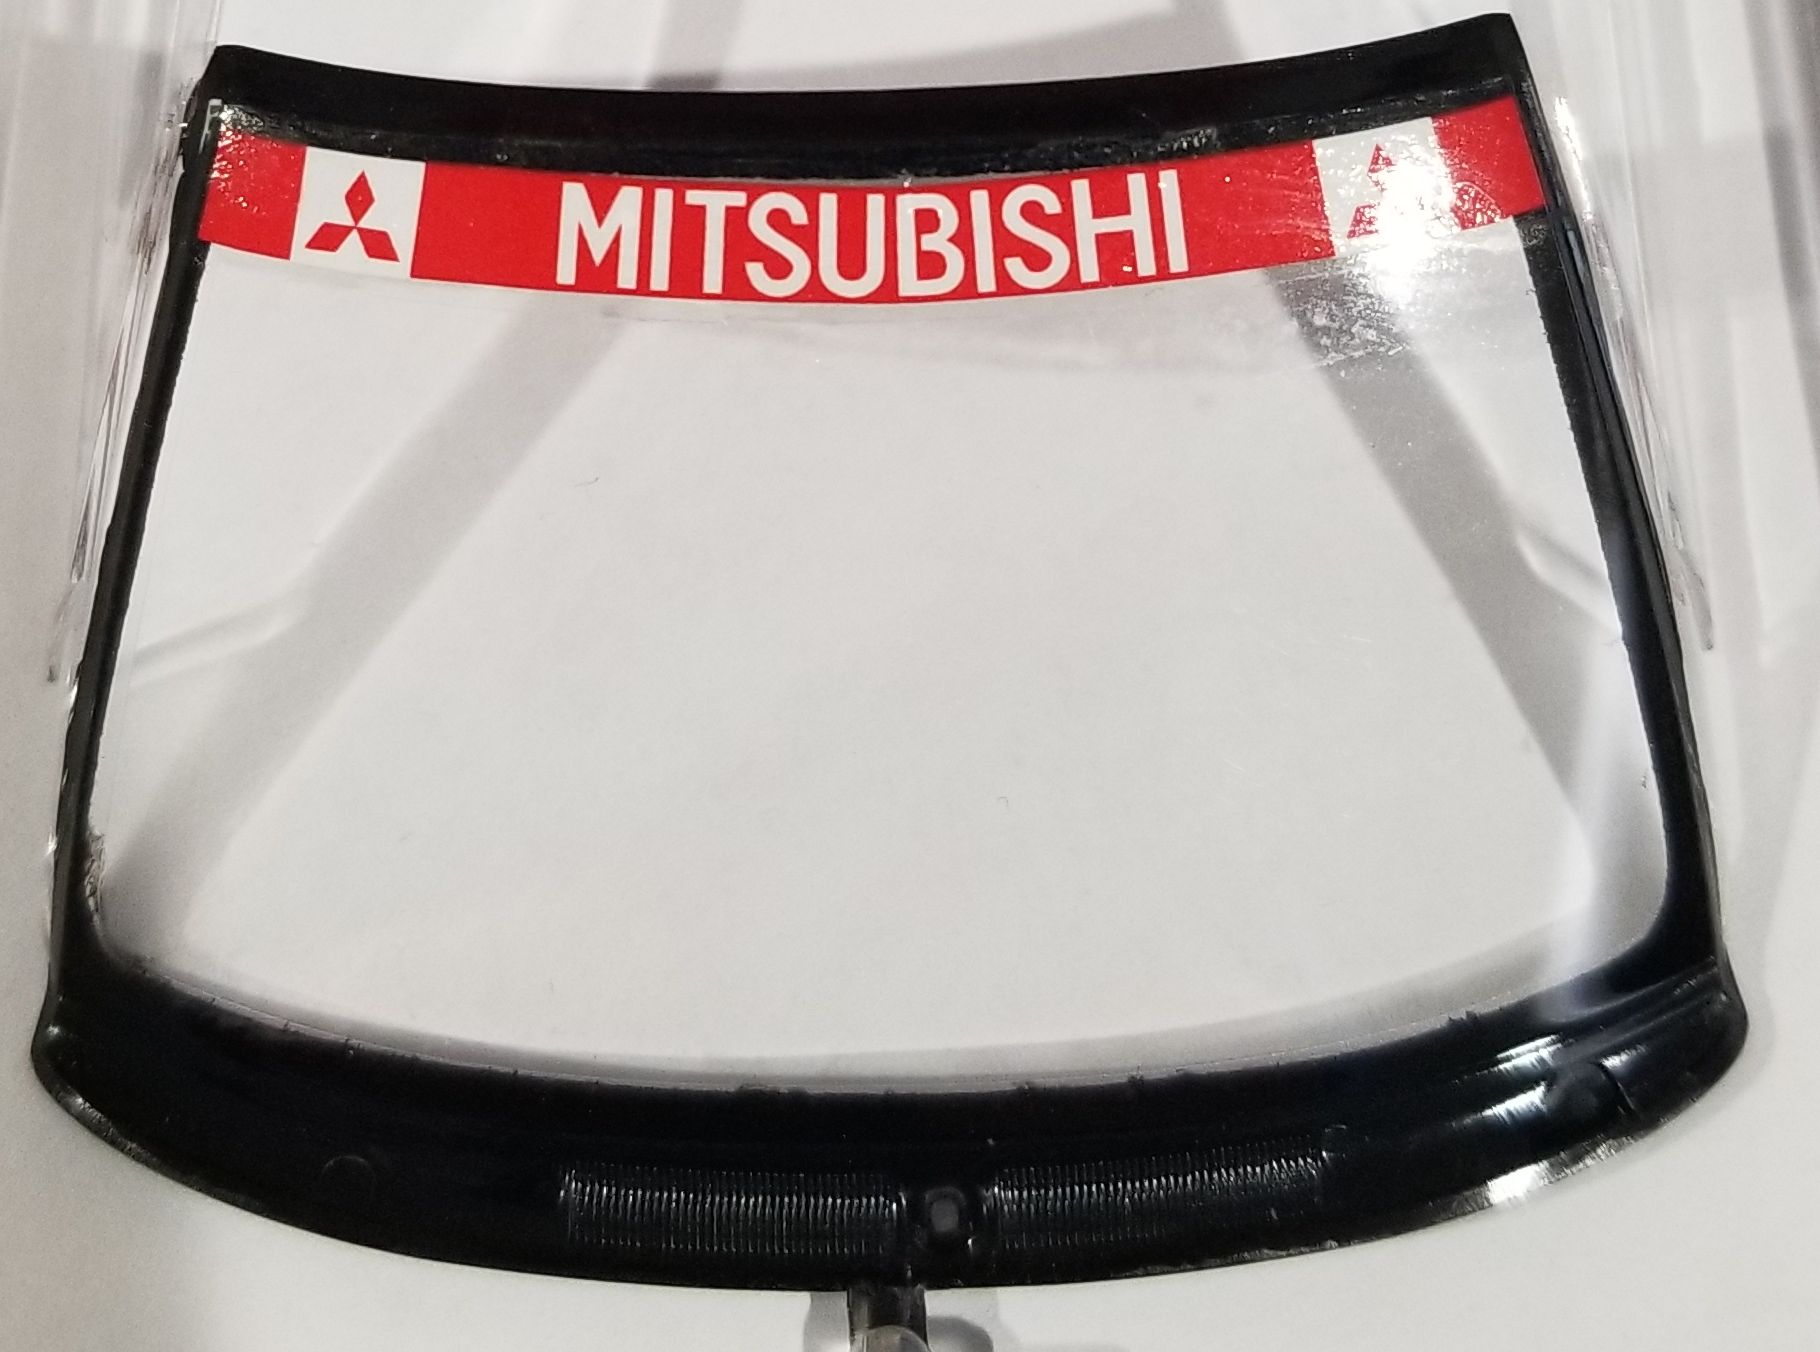
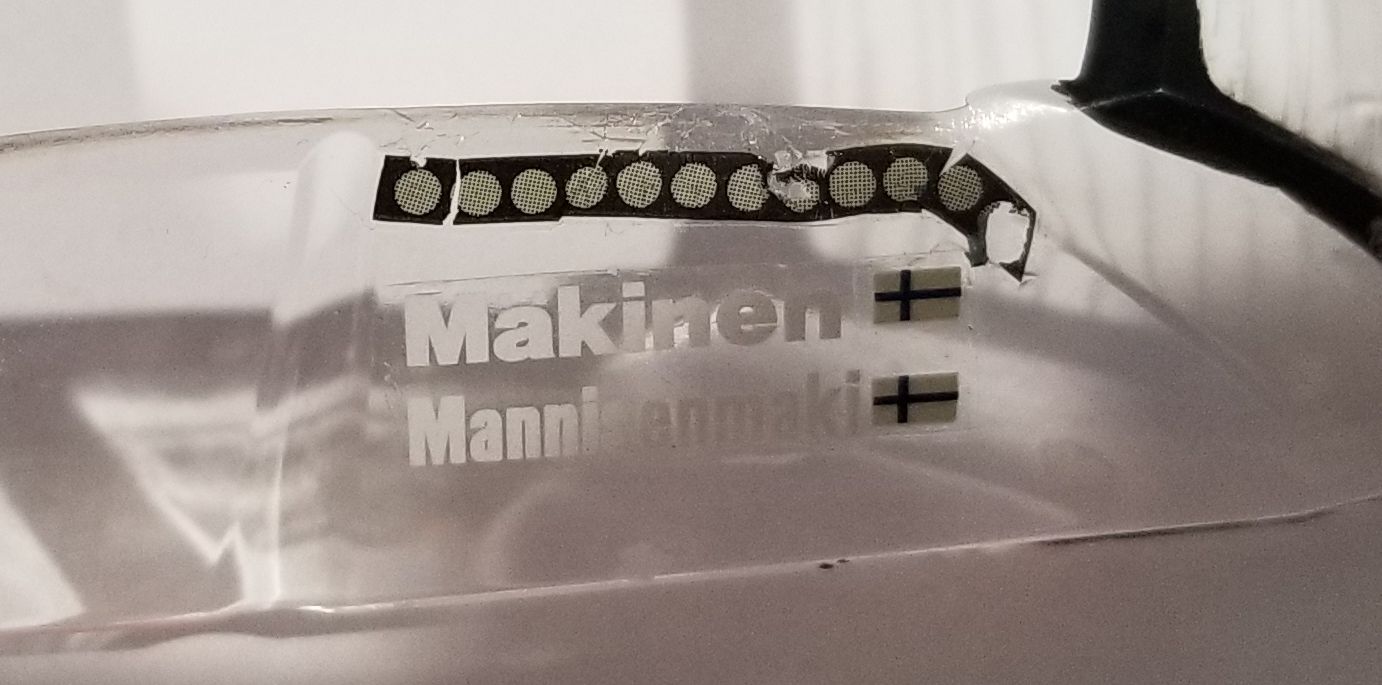
Decals on the windows
Didn’t go entirely smoothly, and there was some breakage and crumpling that I couldn’t fix without complete destruction.
1 Like
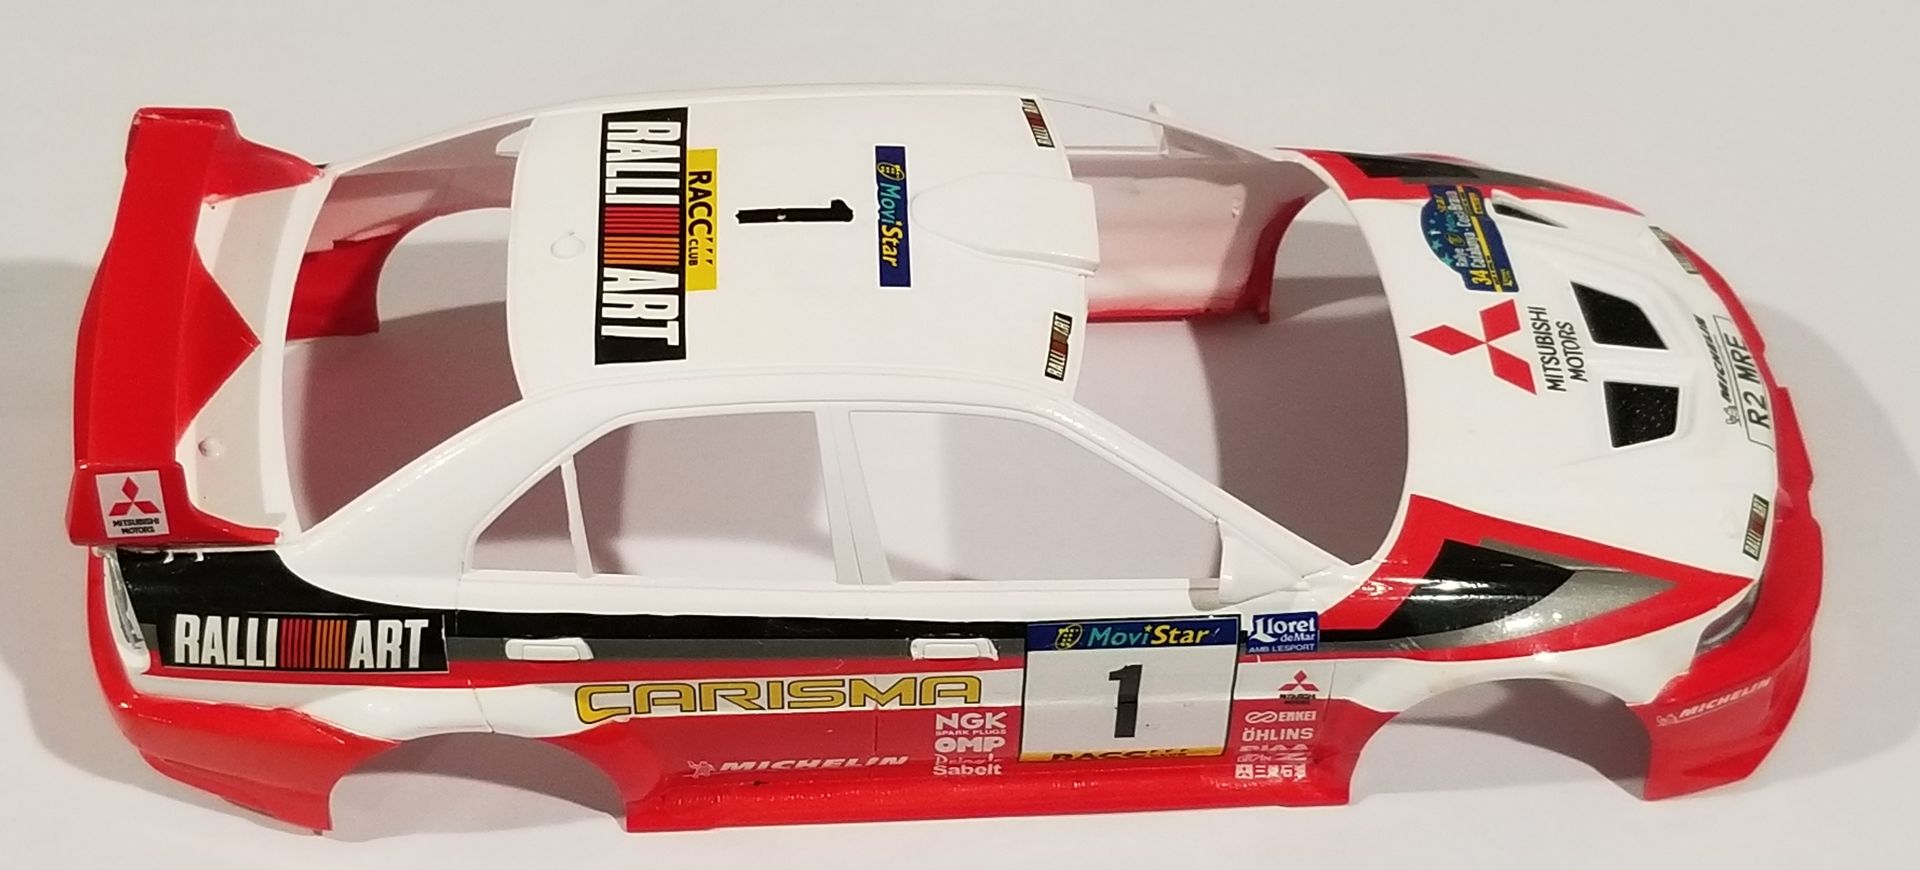
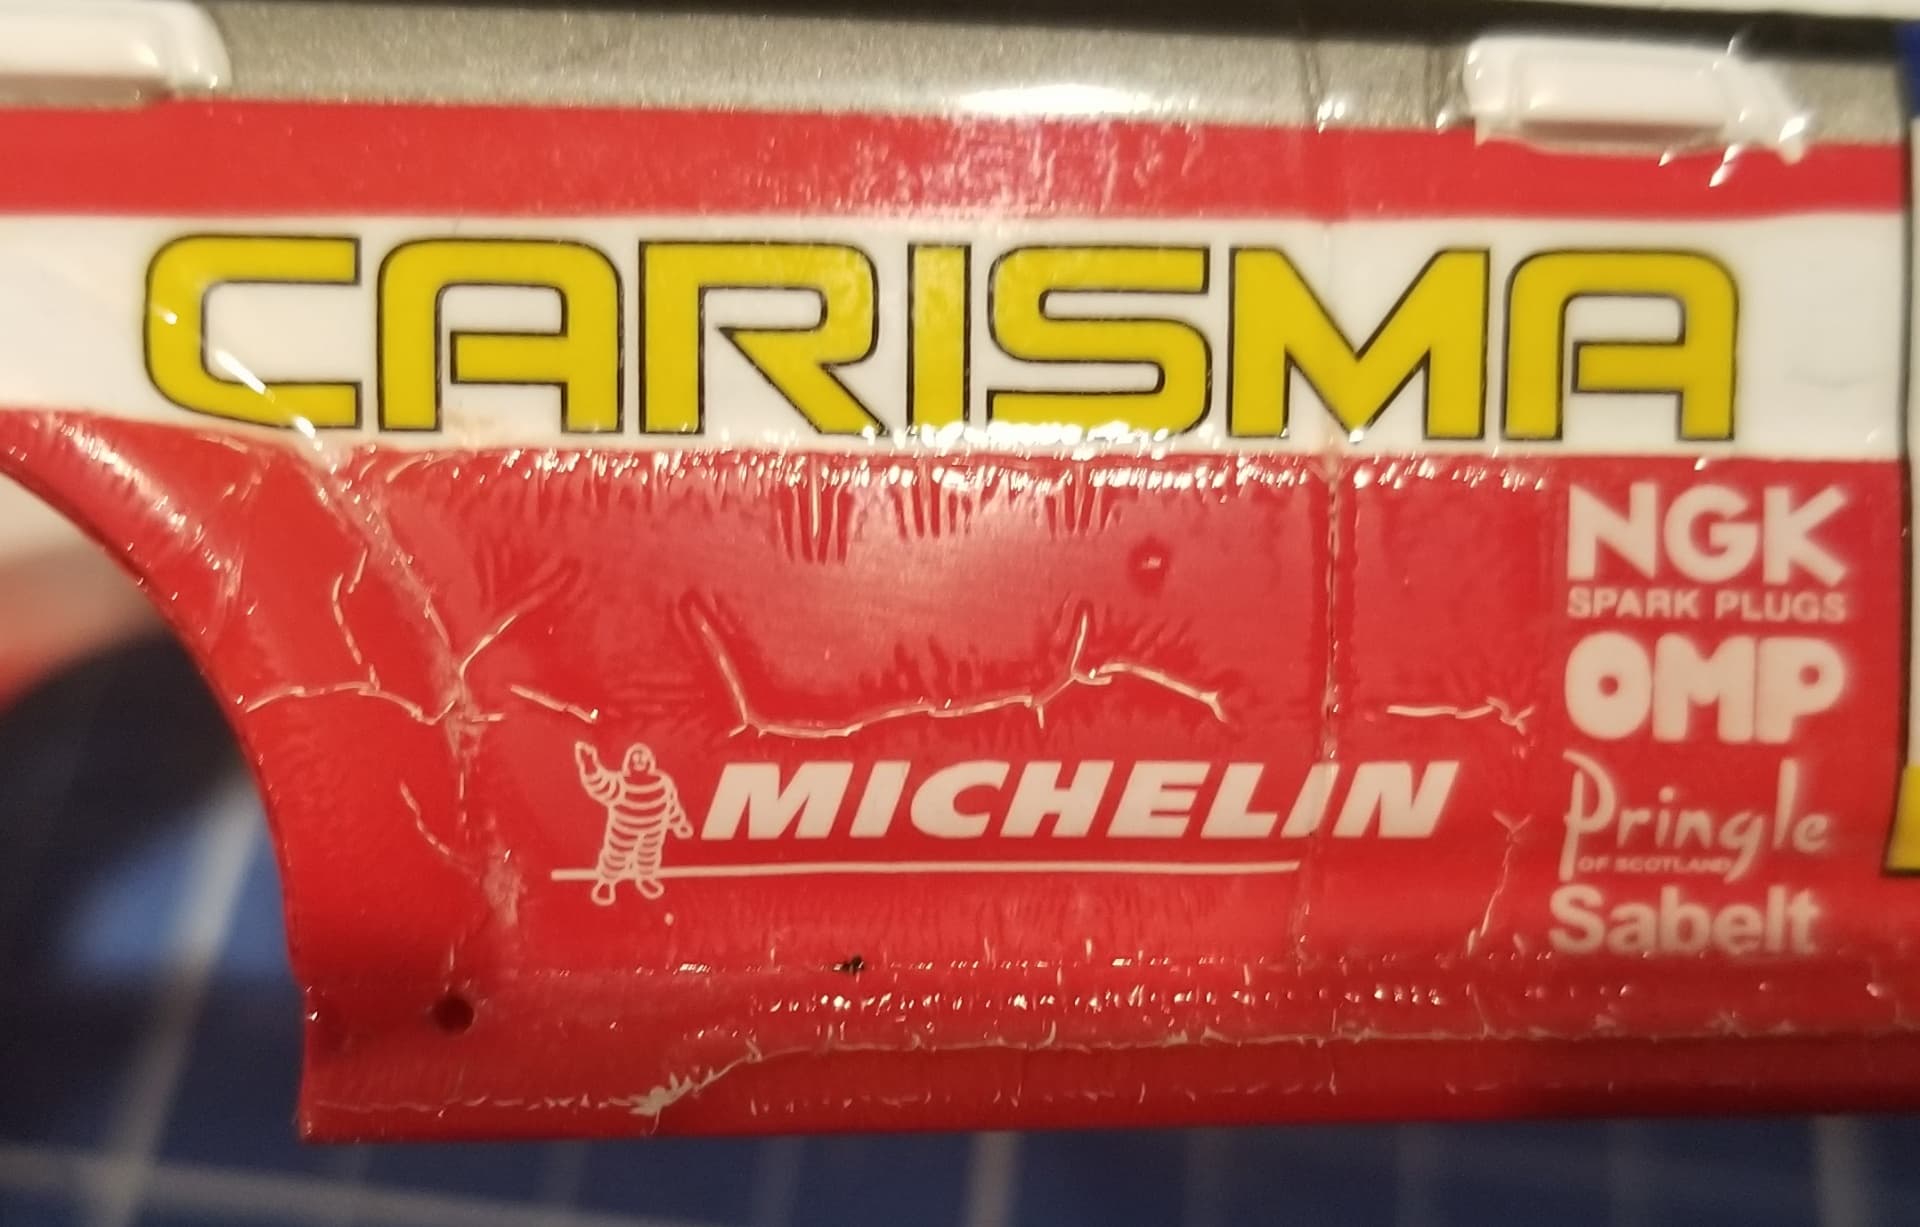
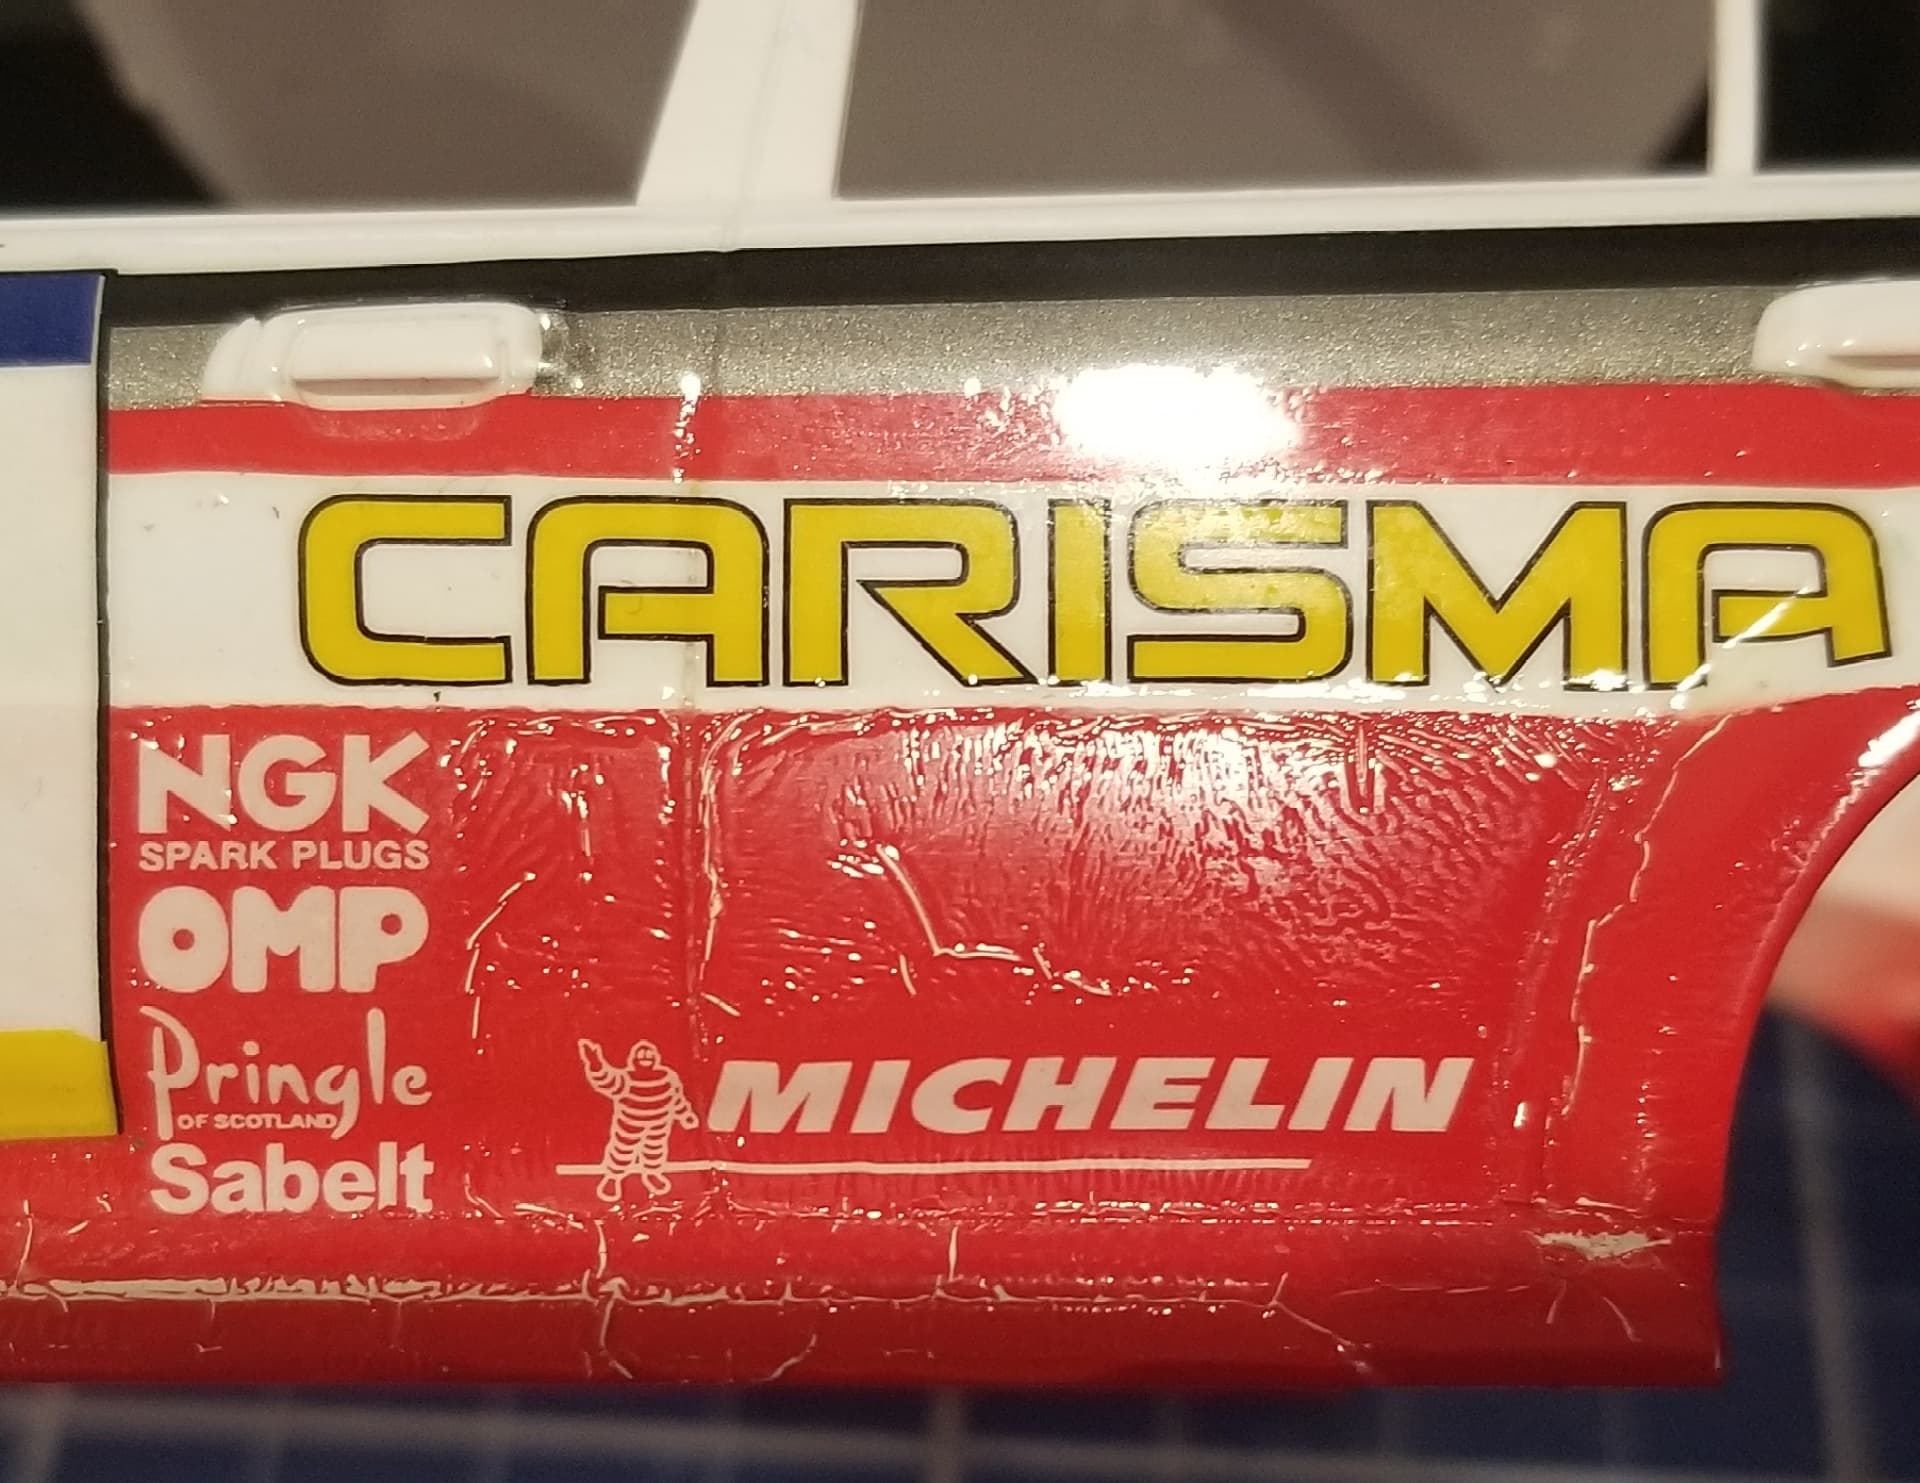
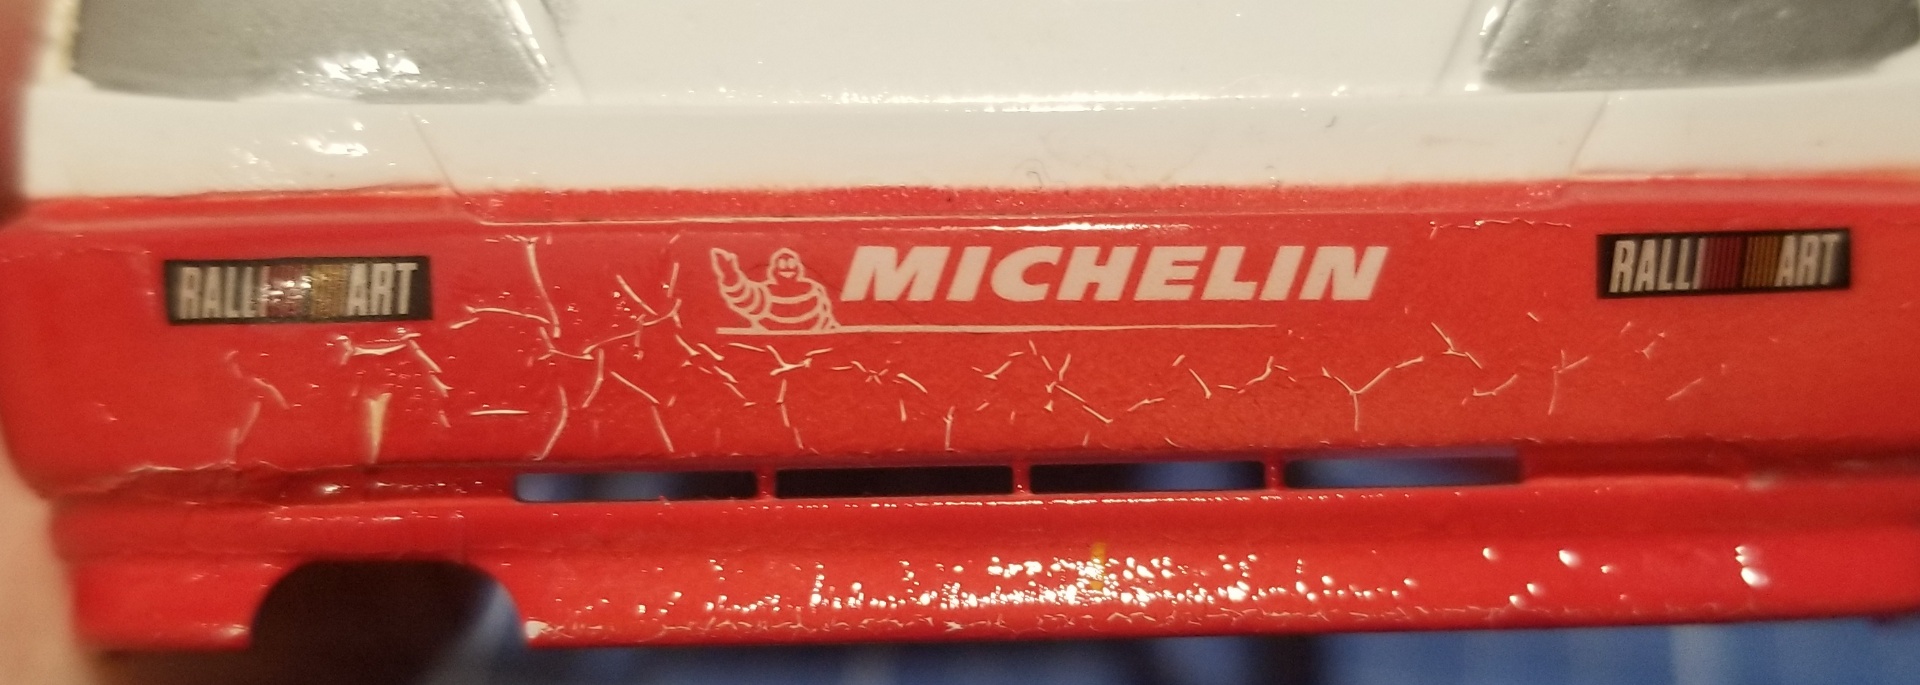
And disaster with the clear coat.
The red did not react well with the Mr colour uv cut gloss.
The white is absolutely fine, and more annoyingly is the exact same brand of generic enamel as the red paint.
The photos are after i added several extra coats of clear to protect the hard work spent on the decals, and then knocked back the wrinkles with some fine micromesh pads.
Well damn Iain, that’s disappointing!
How did you apply the clear? I’m thinking you might have gone in a bit heavy. Clear lacquers can easily reactivate the paint layers underneath because they are so “hot” with solvents, so I always start with a couple of light mist coats and let them properly cure before I go heavier.
Have you got a plan to fix this? Might be a strip and re-paint job.
Cheers, D
I have had zero success airbrushing gloss coats so i used a rattle can, with the lightest coat i could. Being a can that was still a fairly heavy coat.
Going to try and hand paint the damaged areas then try an even it out with some polishing.
Don’t really want to strip the whole thing back as that means i either have to try and get replacement decals, or do image editing on the decals i scanned that i don’t have time or talent for to print my own.
1 Like
So hand painted the damaged areas , and of course the red was darker hand painted than when airbrushed. So I applied a few coats and then polished it back and covered with an acrylic gloss coat.
It looks ok, but I am still disappointed after all the hard work that went into the original painting and the decals.
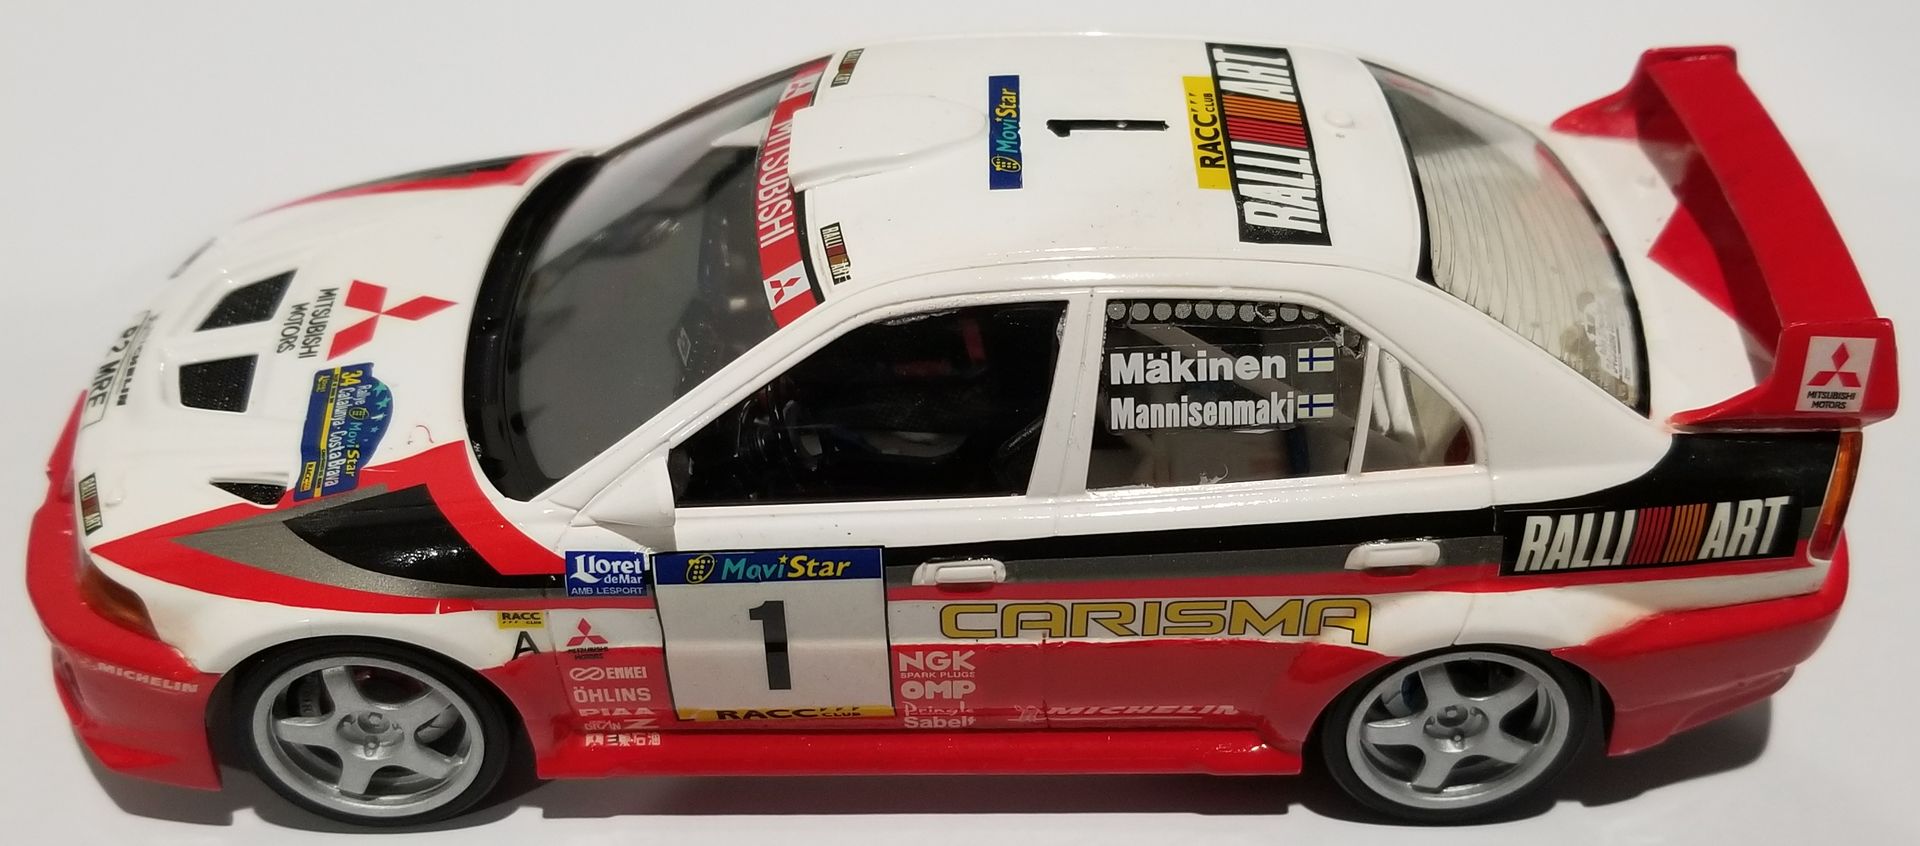
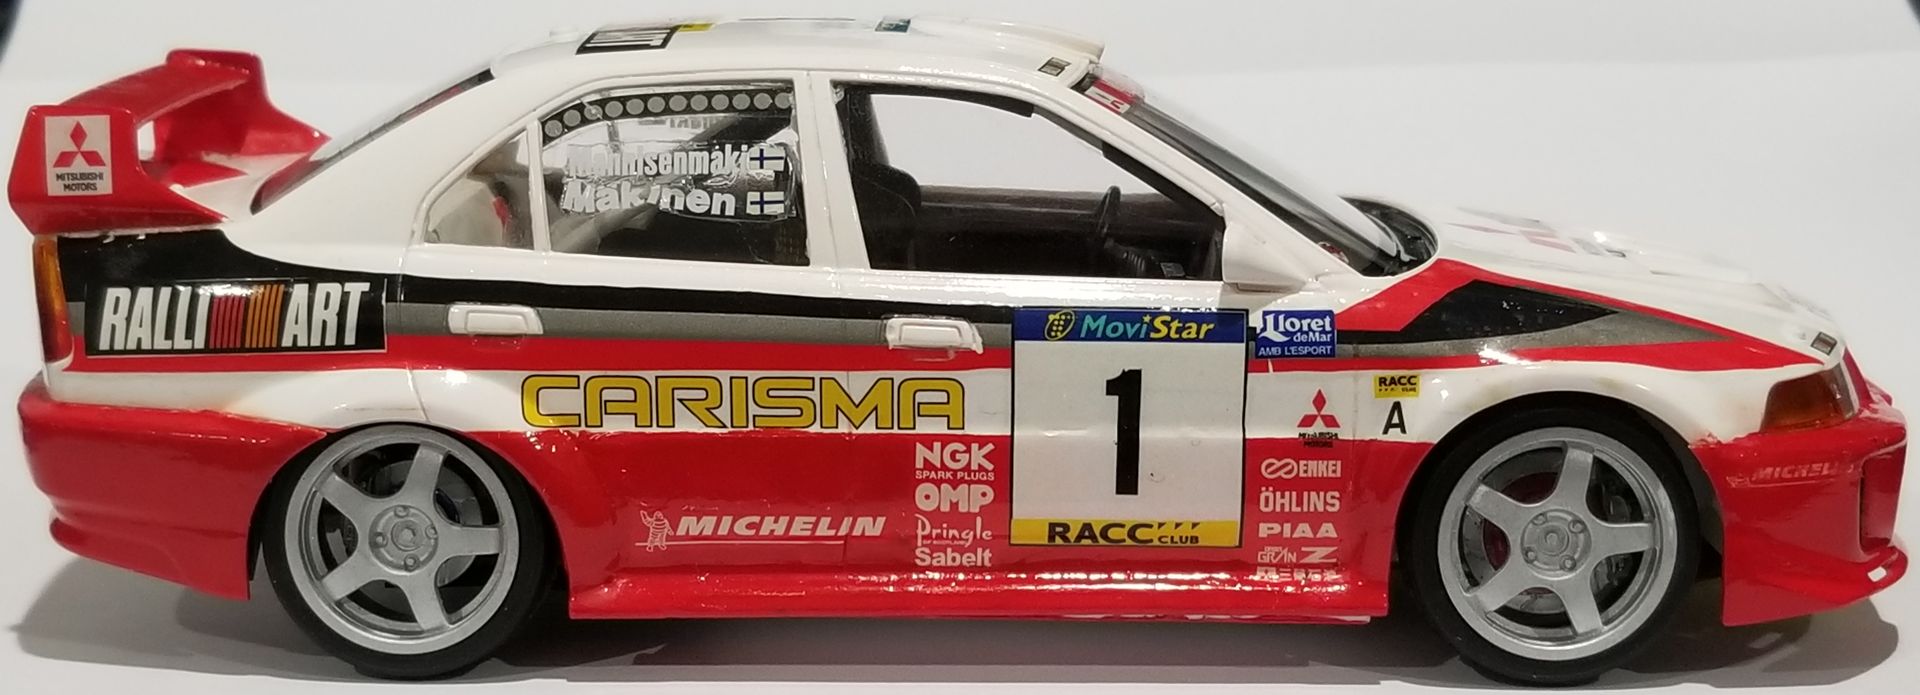
It mostly finished, but currently missing the antennas and the wing mirrors.
We are planning on moving house in the next few months so I will leave the antennas off to prevent damage, and I have a sneaking suspicion that the wing mirrors may already have ended up in a box ready for storage.
2 Likes